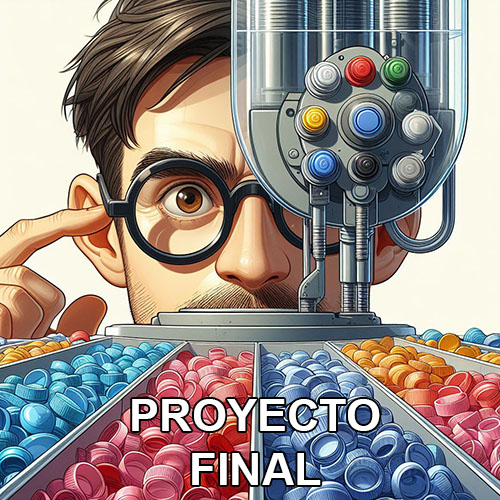
"The Color Sorter"
What does it do?
The color sorter main function is to sort the plastic bottle caps by color, the second function is to help recycling.
Who's done what beforehand?
Many people made some color sorter but only for candies. Some people within the Fab Academy and many on Youtube.
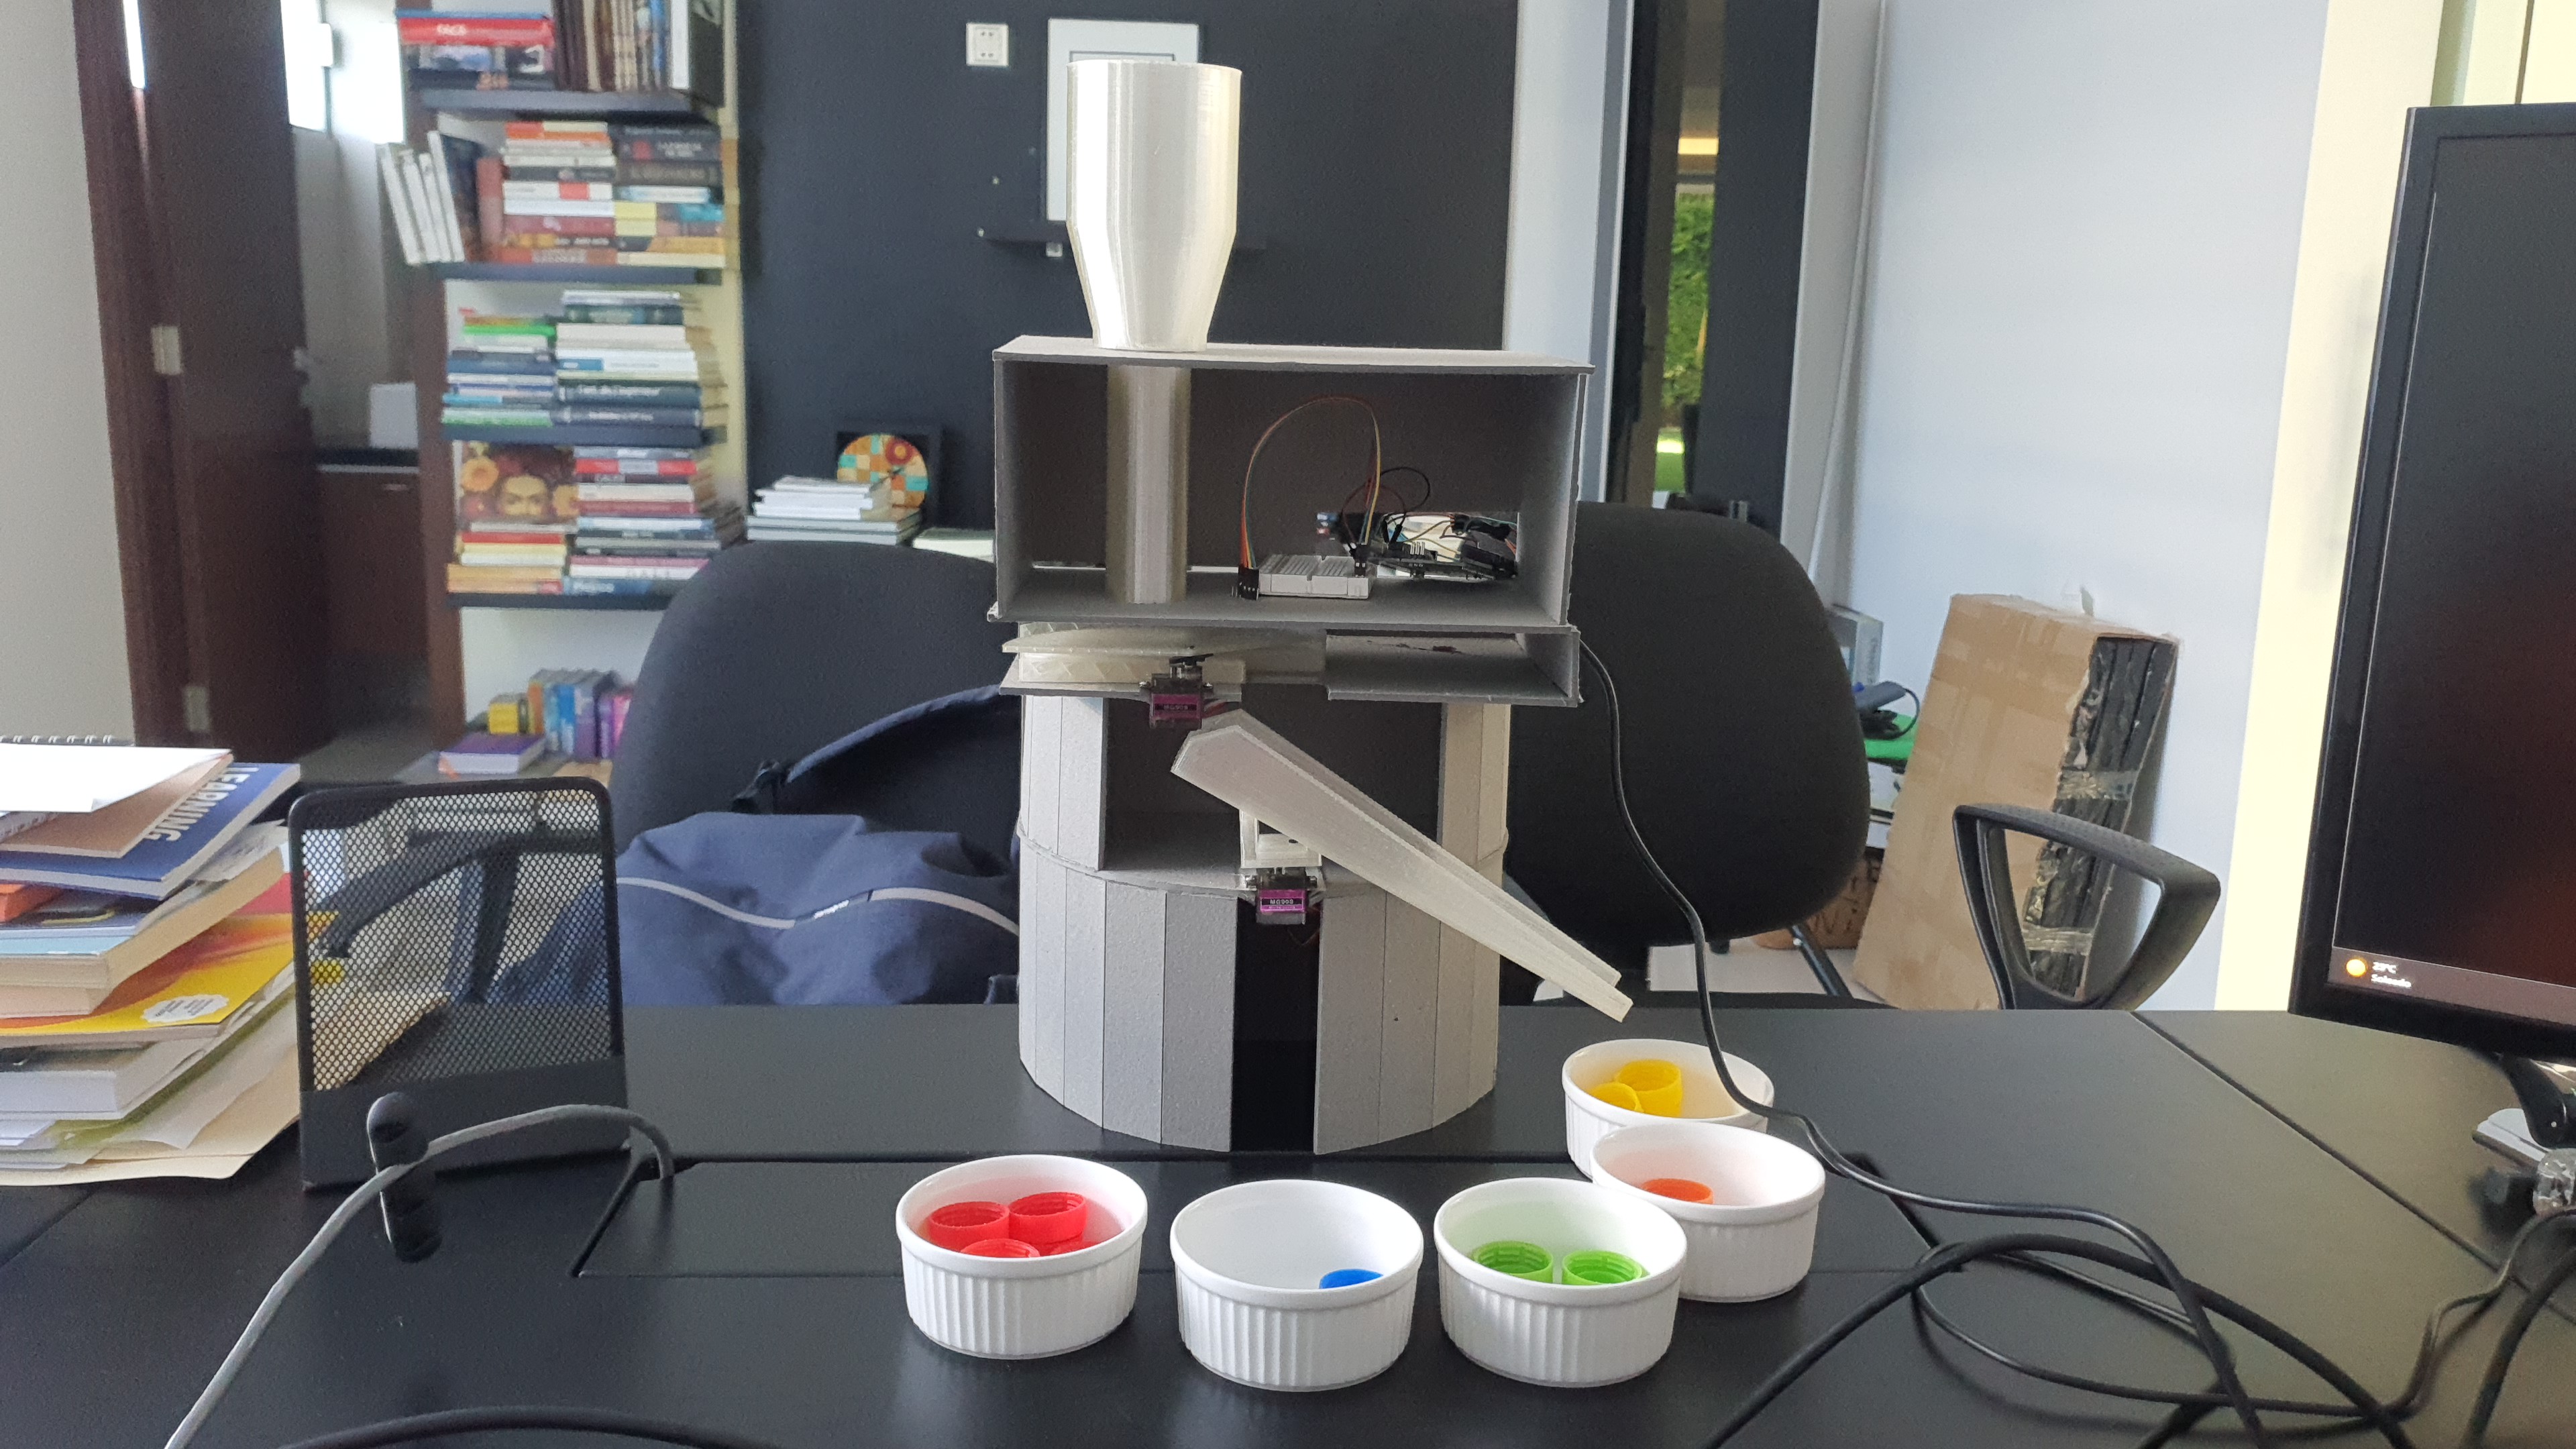
During the Machine Week the group (Grace, Jesus and myself) designed the machine

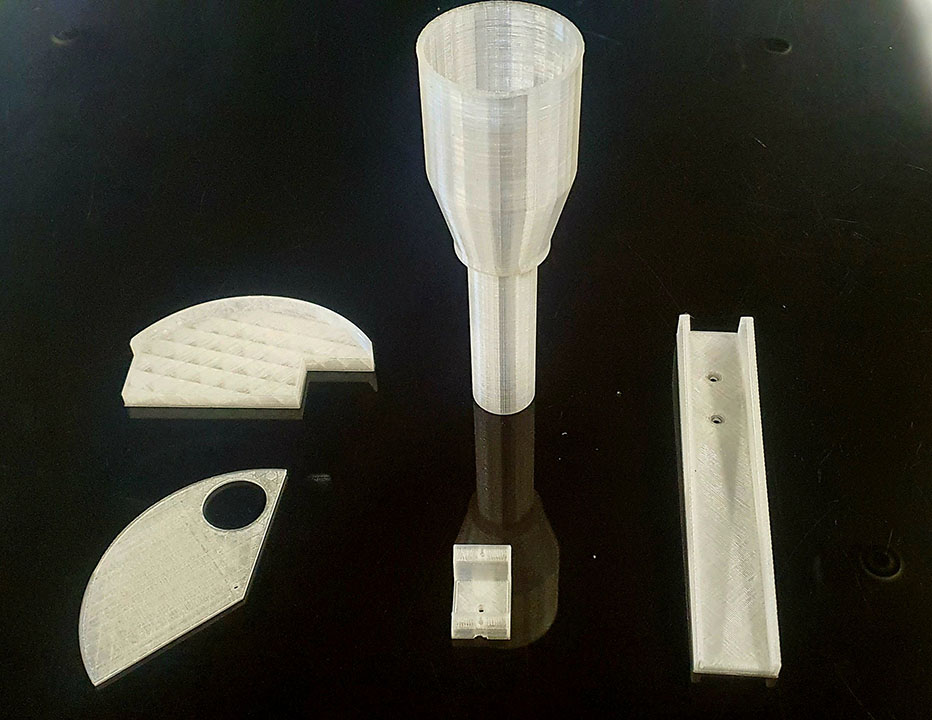
The 3D printed parts and used Arduino Uno as mainboard.
What did you design?
I changed some 3D printed parts, changed the design and material of the body and used the Xiao RP2040 for the electronics.
I added an OLED screen to see the count of the bottle caps.
Materials and components used.
| Qty | Description | Price | From |
|---|---|---|---|
| 1 | Crystal PLA | 5$ (300g) | Savin Shop in Santa Cruz (Bolivia) |
| 1 | Acrylic Board of 2mm | 5$ | Mundo Insumos Shop in Santa Cruz (Bolivia) |
| 1 | Acrylic Board of 3mm | 5$ | Mundo Insumos Shop in Santa Cruz (Bolivia) |
| 1 | Xiao RP2040 | 30$ | Amazon Online Store |
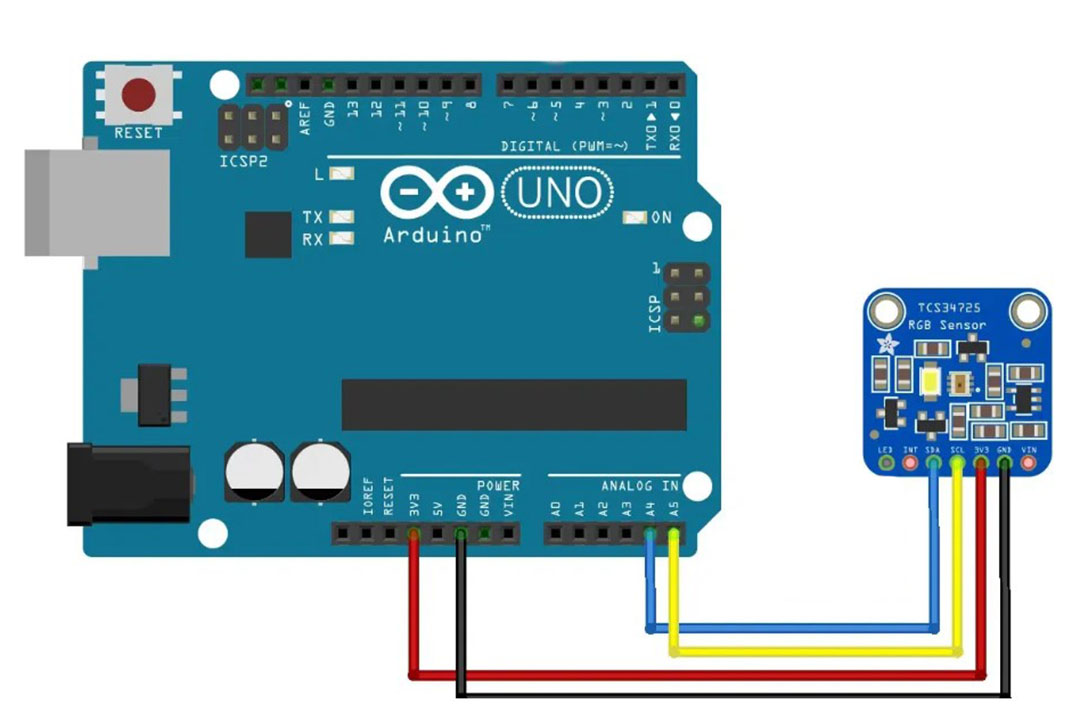
| 1 | TCS34275 RGB Sensor | 8$ | Sawers Shop in Cochabamba (Bolivia) |
| 2 | Servo Motors | 8$ | Sawers Shop in Cochabamba (Bolivia) |
| 1 | Oled Screen I2C | 6$ | Sawers SDhop in Cochabamba (Bolivia) |
| 1 | PCB | 3$ | Sawers Shop in Cochabamba (Bolivia) |
| TOTAL | 70$ |
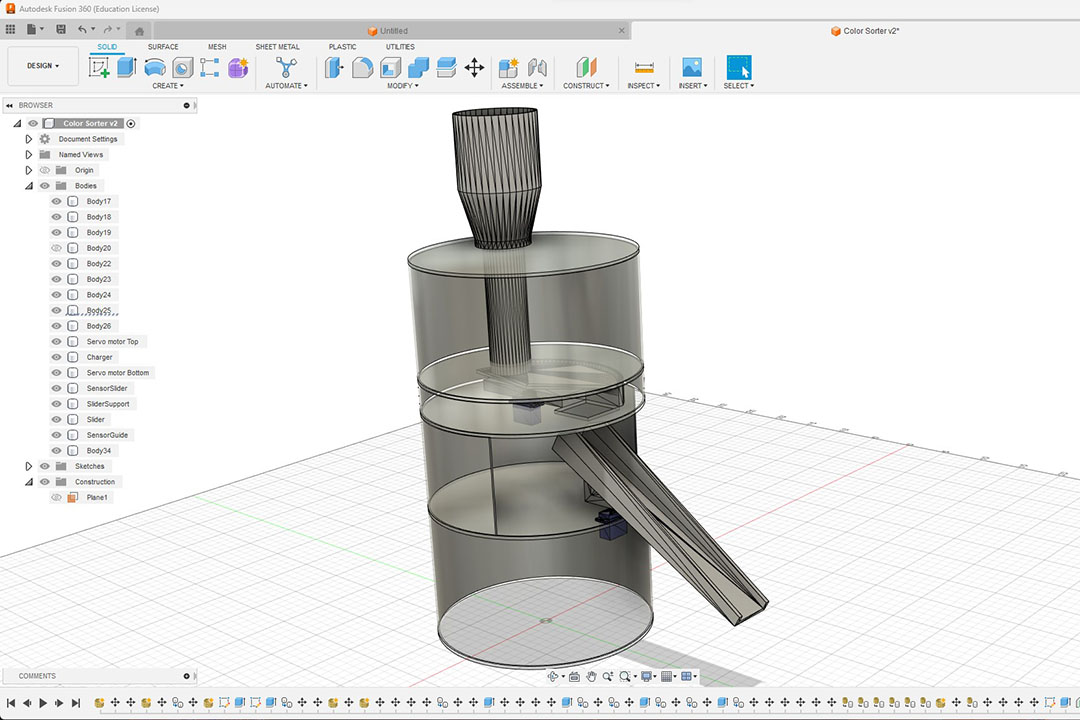
What parts and systems were made?
All the 3D parts and body where made from scratch on Autodesk Fusion 360.
Here is the dxf file for the CNC.
3D Parts: Charger SensorGuide SensorSlider Slider SliderSupportWhat processes were used?
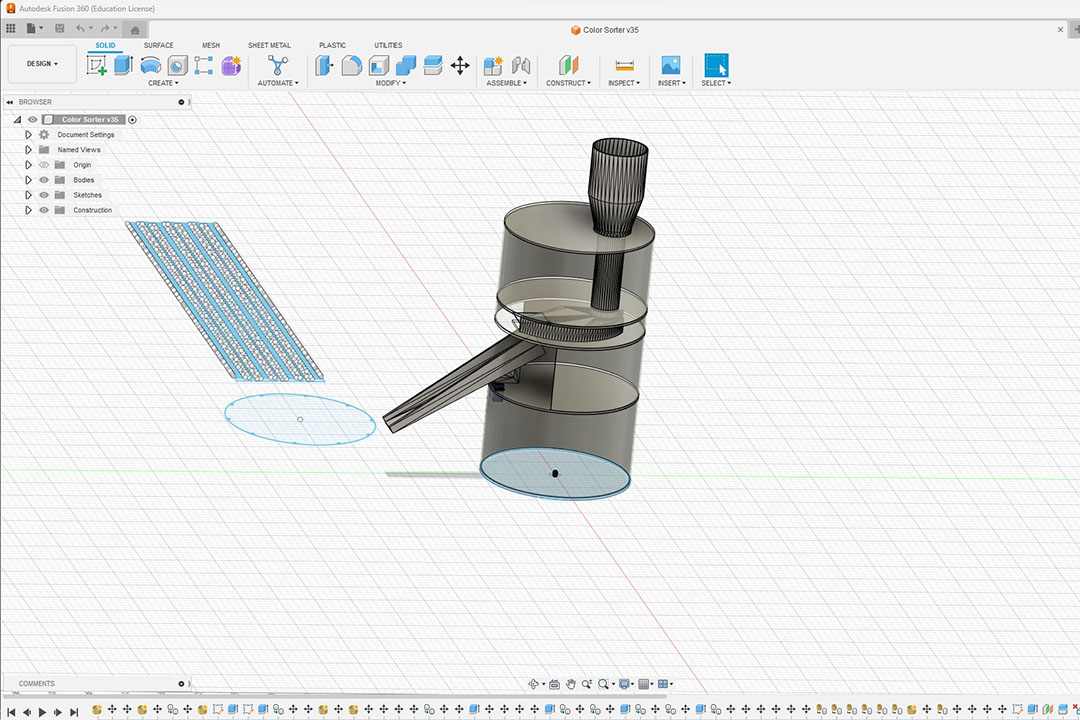
2D Design for the CNC Cutting.
3D Design for the 3D Printed parts.
Additive process with the 3d printed parts.
Subtractive process with the laser cutting.
Electronic design and production with the embedded microcontroller.
        Here is the code:
         #include "Wire.h"
         #include "Adafruit_TCS34725.h"
         #include "Servo.h"

         Servo bottomServo;
         Servo topServo;

         int color=0;

         byte gammatable[256];

         Adafruit_TCS34725 tcs = Adafruit_TCS34725(TCS34725_INTEGRATIONTIME_50MS, TCS34725_GAIN_4X);

         void setup() {

         bottomServo.attach(7);
         topServo.attach(8);
         Serial.begin(9600);

         for (int i=0; i < 256; i++) {
         float x = i;
         x /= 255;
         x = pow(x, 2.5);
         x *= 255;

         gammatable[i] = x;

         }
         }

         void loop() {

         topServo.write(110);
         delay(800);

         for (int i=110;i>50;i--){
         topServo.write(i);
         delay(2);
         }
         delay(800);

         color=readColor();
         delay(100);

         switch (color) {

         case 1:
         bottomServo.write(30);
         break;

         case 2:
         bottomServo.write(65);
         break;

         case 3:
         bottomServo.write(100);
         break;

         case 4:
         bottomServo.write(135);
         break;

         case 5:
         bottomServo.write(170);
         break;

         case 0:
         break;

         }
         delay(300);

         for(int i=50;i>0;i--){
         topServo.write(i);
         delay(2);
         }
         delay(300);

         for(int i=0;i < 110;i++){
         topServo.write(i);
         delay(2);
         }
         color=0;
         }

         int readColor(){

         float red, green, blue;

         tcs.setInterrupt(false);  // turn on LED

         delay(1000);

         tcs.getRGB(&red, &green, &blue);

         tcs.setInterrupt(true);  // turn off LED

         Serial.print("R:\t"); Serial.print(int(red));
         Serial.print("\tG:\t"); Serial.print(int(green));
         Serial.print("\tB:\t"); Serial.print(int(blue));

         Serial.print("\n");

         Serial.print("Color:\t"); Serial.print(color) ;
         Serial.print("\n");
         if(red>160 & green<60){ color=1; // Red
                                 }
                                 else if(blue>110){
         color = 2; // Blue
         }
         else if(green>105){
         color = 3; // Green
         }
         else if(red>140 & green>60){
         color = 4; // Orange
         }
         else{
         color = 5; // Others
         }

         return color;
         }
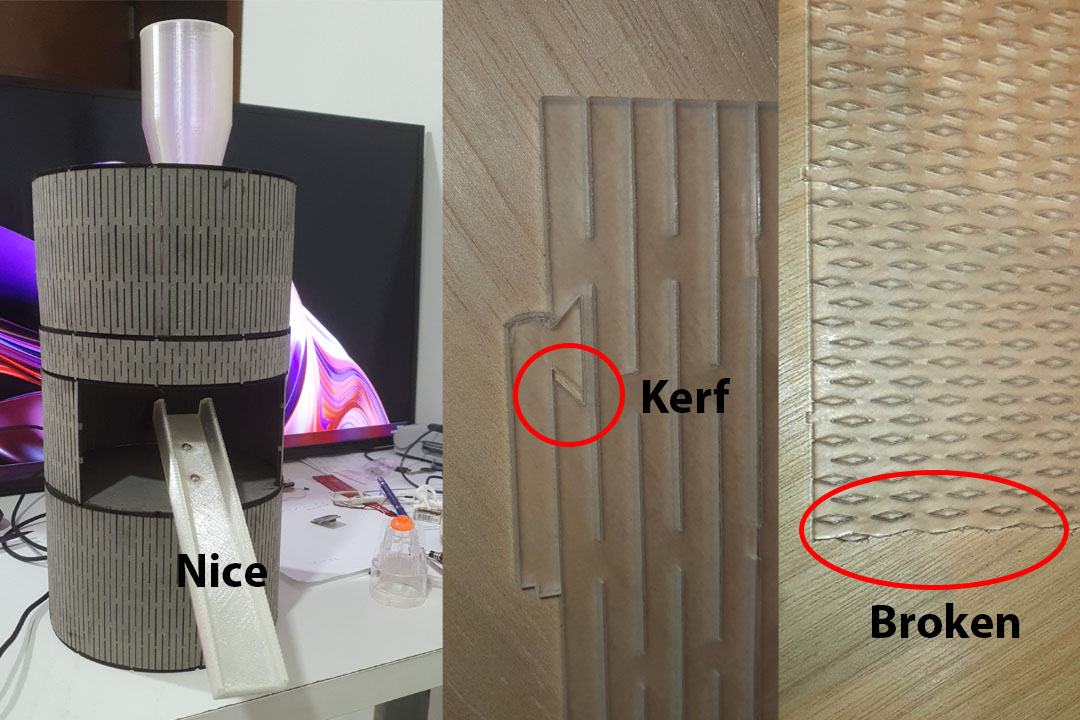
What worked? What didn't?
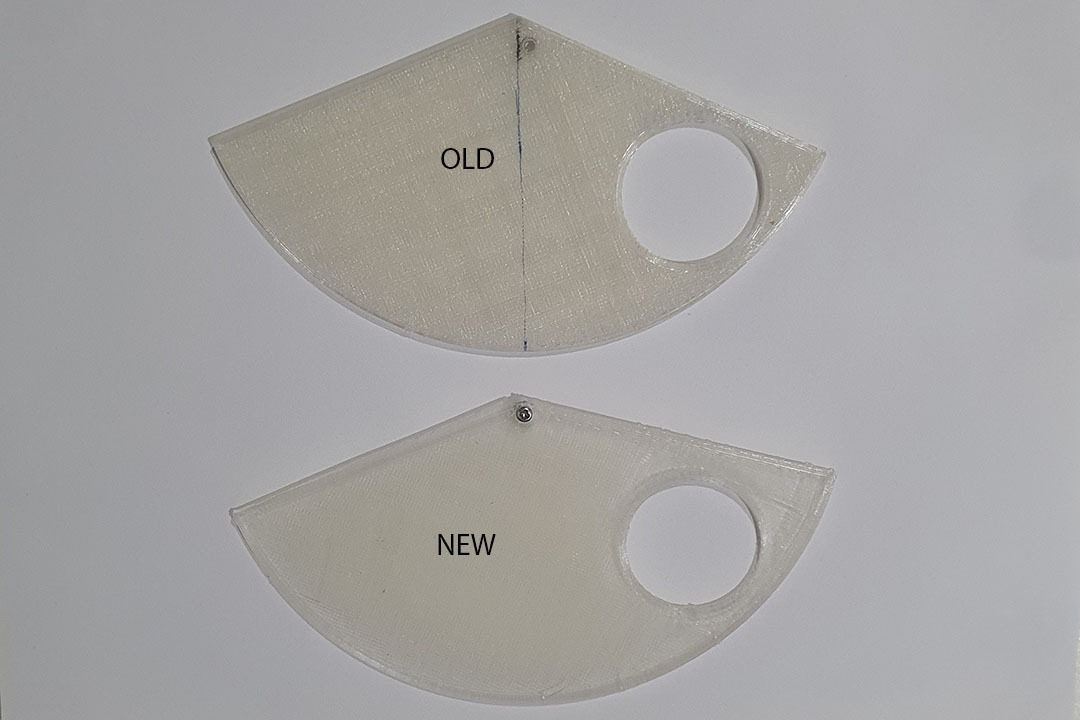
The bending of cardboard of 3mm with laser worked very well, no so much with the acrilic of 3mm.
Even changing the cutting pattern.

The Xiao RP2040 never worked and I had to go back to Arduino Uno.
------ Fab Academy 2024 Updates ------
The new version of the machine will use the XIAO RP2040, a 360 servo motor, a smaller slider and 6 drawers made in PLAThe machine will be an all in one without external pieces.
Here is the planification for the final project:
Xiao RP2040.
Last year I couldn't manage to integrate the Xiao PR2040 with the TCS RGB Color sensor,
I even talked with Adrian from Fab Lab Leon and it seemed that the libraries for Arduino IDE wasn't working.
A new volunteer, named Yuco, from the Public University arrived at the Fablab Santa Cruz and he was a little electronic genius,
he managed to make it work.
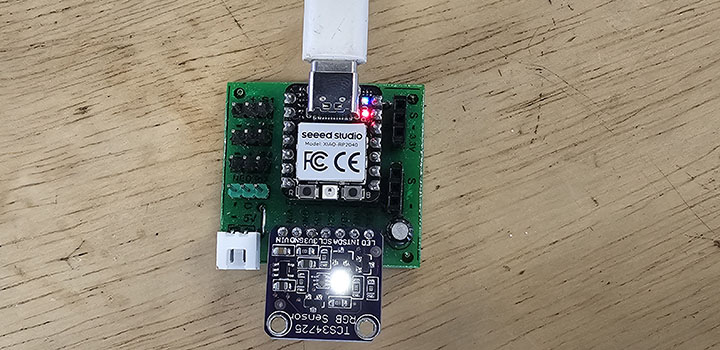
I tested with the TCS RGB Sensor and this code.
        #include "Wire.h"
        #include "Adafruit_TCS34725.h"

        Adafruit_TCS34725 tcs = Adafruit_TCS34725(TCS34725_INTEGRATIONTIME_50MS, TCS34725_GAIN_1X);
        float r, g, b;

        int R = 0;
        int G = 0;
        int B = 0;

        void setup(){

        Serial.begin(9600);
        if (!tcs.begin()){
        Serial.println("Can't find TCS34725");
        while (1) delay(1000);
        }

        delay(1000);

        }

        void loop(){
        readColor();
        color();

        }

        void readColor(){
        uint16_t clear, red, green, blue;

        tcs.setInterrupt(false);
        delay(1000);
        tcs.getRawData(&red, &green, &blue, &clear);
        tcs.setInterrupt(true);

        uint32_t sum = clear;
        r = red; r /= sum;
        g = green; g /= sum;
        b = blue; b /= sum;

        r *= 256;
        g *= 256;
        b *= 256;


        }


        void color(){

        String color = "";

        if((r-g > 135)&(r-b > 140)){
        color = "Red";
        R = 255;
        G = 0;
        B = 0;
        }
        else if((r-g > 115)&(r-b > 120)){
        color = "Orange";
        R = 255;
        G = 20;
        B = 0;
        }

        else if((r-g > 65)&(r-b > 65)){
        color = "Pink";
        R = 250;
        G = 80;
        B = 80;
        }
        else if((g-r > 25)&(g-b > 60)){
        color = "Light Green";
        R = 100;
        G = 150;
        B = 0;
        }
        else if((g-r > 38)&(g-b > 50)){
        color = "Dark Green";
        R = 0;
        G = 255;
        B = 0;
        }
        else if((b-r > 50)&(b-g > 50)){
        color = "Blue";
        R = 0;
        G = 0;
        B = 255;
        }

        else{
        color = "Not registred";
        R = 0;
        G = 0;
        B = 0;
        }


        Serial.print("  R: " + String(int(r)));
        Serial.print("  G: " + String(int(g)));
        Serial.print("  B: " + String(int(b)));
        Serial.println("    Color: " + color);
        }
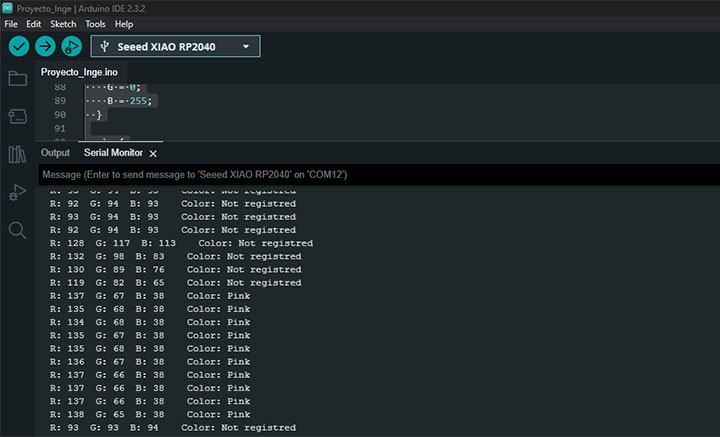
And here are the results, it worked.
PCB Design.
On week 08 I made the Goku PCB wich will be part of the final project.
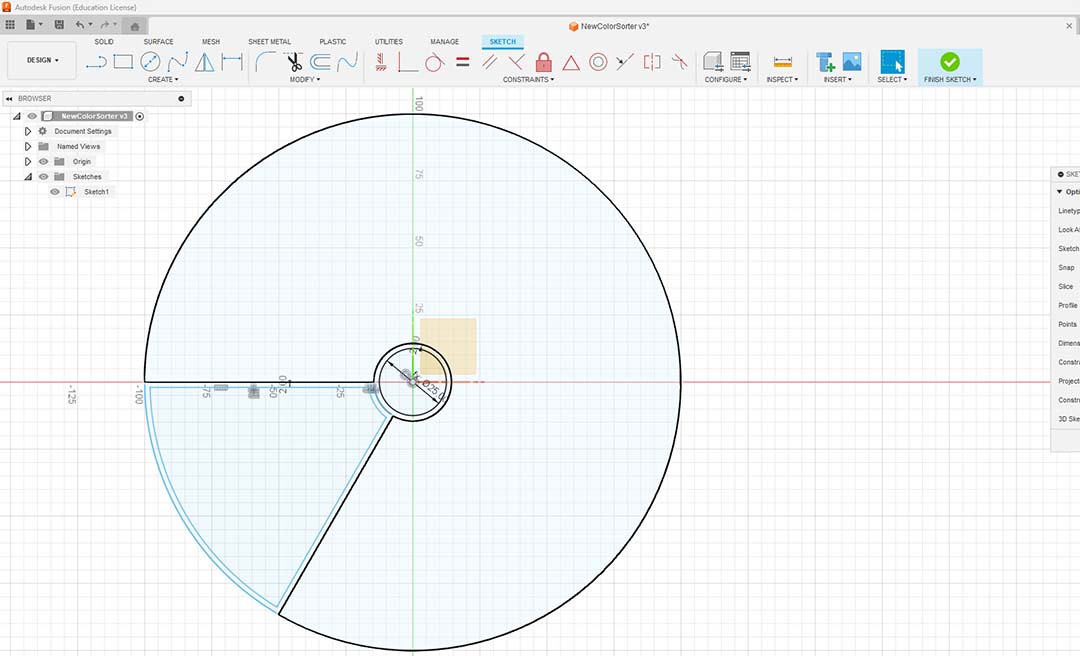
3D Modeling and printing.
I need to create a column in the middle so it can supports the top of the machine.
The servo motor needs to fit into the column so I made it of 25mm of diameter.
Then I divided in 6 the circle to create the drawers.
I extruded the walls of the drawer and added a hole to remove the drawer from the base.
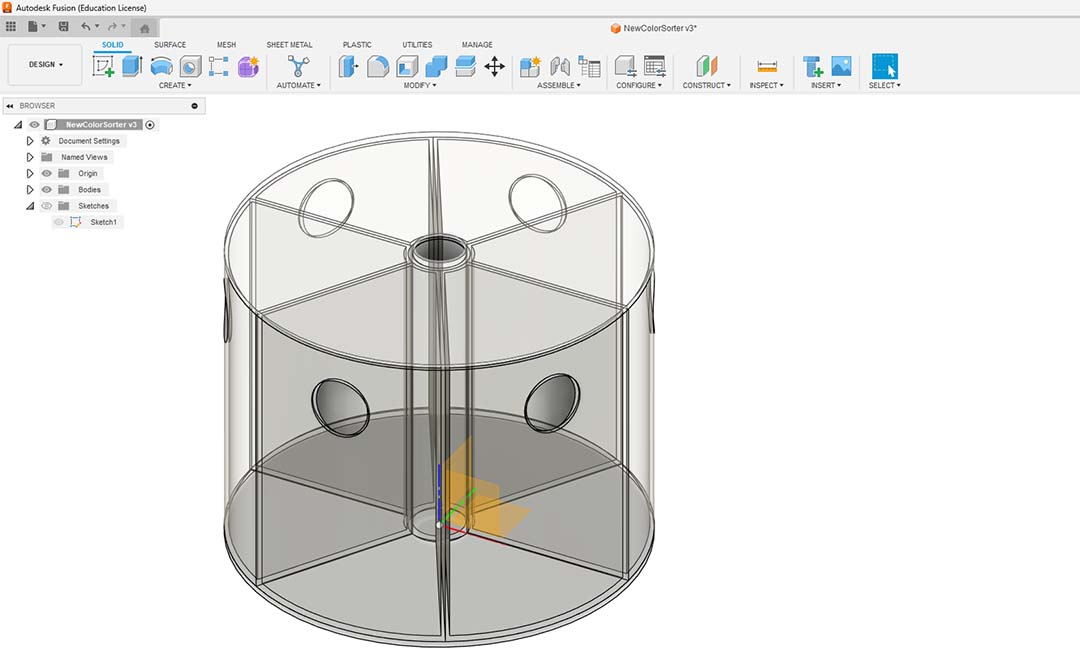
I made a square hole so the cap will fall onto the drawer.
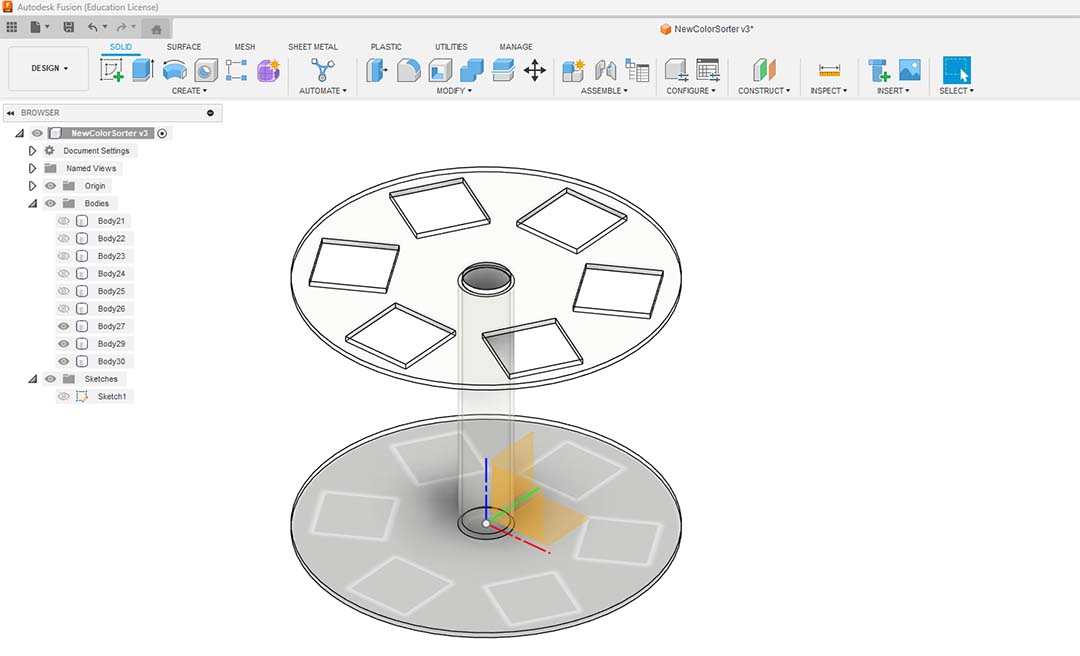
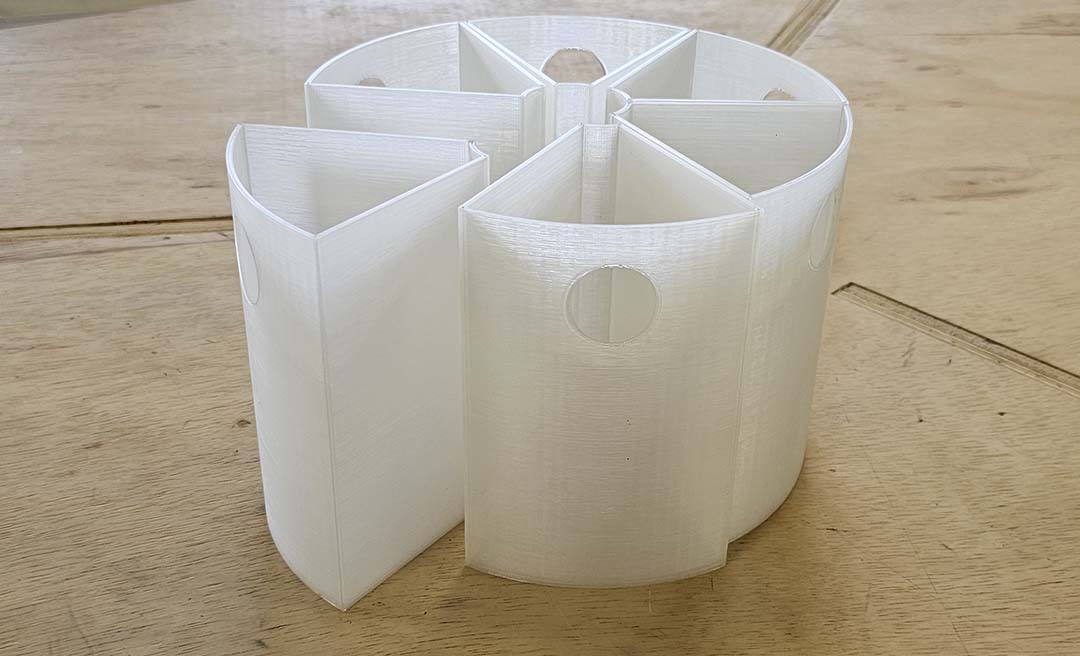
Here are the 3D printed drawers.

Servo Motors and coding.
There is two models of servo motors, stationary and continuous.
With the stationary motor, the degrees define a position from 0 to 180 degrees.
With the continuous motor, the degrees define the speed and the sense:
0 will be full speed clockwise.
90 will stop the motor.
180 will be full speed counterclockwise.
I want the motor to be able to stop every 60 degrees so I will use the continuous servo motor.
I made a 360 degrees wheel to test how to stop on the specific angles.
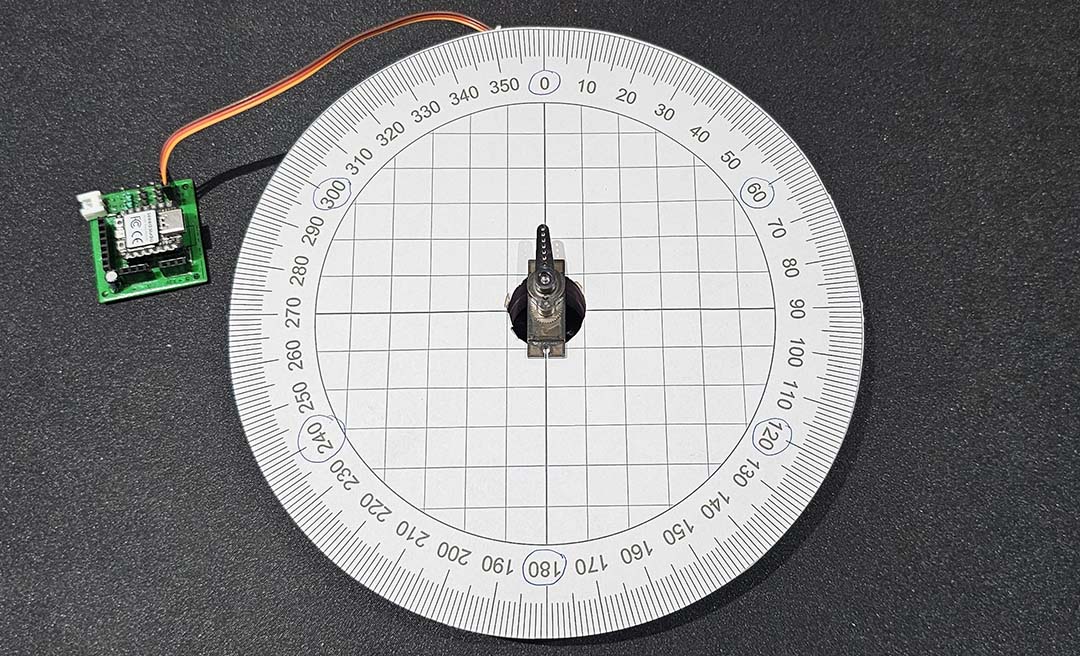
I will use the Servo.write and delay functions to achieve it.
I just need to set the correct speed and time.
        #include "Servo.h"

        Servo topServo;
        void setup() {
        topServo.attach(26);
        Serial.begin(9600);

        topServo.write(0);
        delay(550);
        topServo.write(90);

        }

        void loop() {
        }
To make a 360 turn at full speed clockwise it takes 550ms.

To make a 360 turn at full speed counterclockwise it takes 519ms.
The speed is not the same so it makes it very dificult to go front and back to the same spot.
I tried to make a 180 degrees turn and it wasn't half the time. Plus continuous servo motor doesn't have a home.
So I added a end stop limit switch to set the home.
        void pos_home(){

        while(true){
        Servo2.write(97);  // the servo motors goes slowly counterclockwise until it reaches the switch
        if(digitalRead(FC) == 0){
        break;
        }
        }
Here is the bottom servo motor and the slidder.

I noticed that my drawers could move and not get under the hole, so I added guides and I also will use them to carry on my wires.

I modified the guides to fit better the wires and I can carry now all the wires.

The Electronics will go under the machine, wires will go into the center for a servo motor and the others from the tubes on the walls.

The slider will hit the end stop limit to set the home.

Here is the first prototype, I'll check if everything fits.

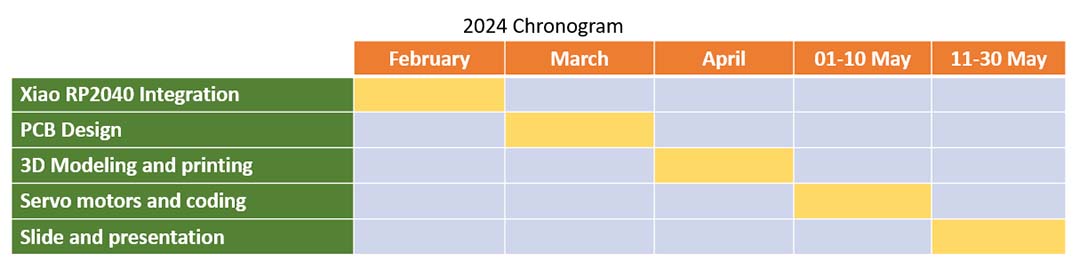
------ Fab Academy 2025 Updates ------
Gantt Chart
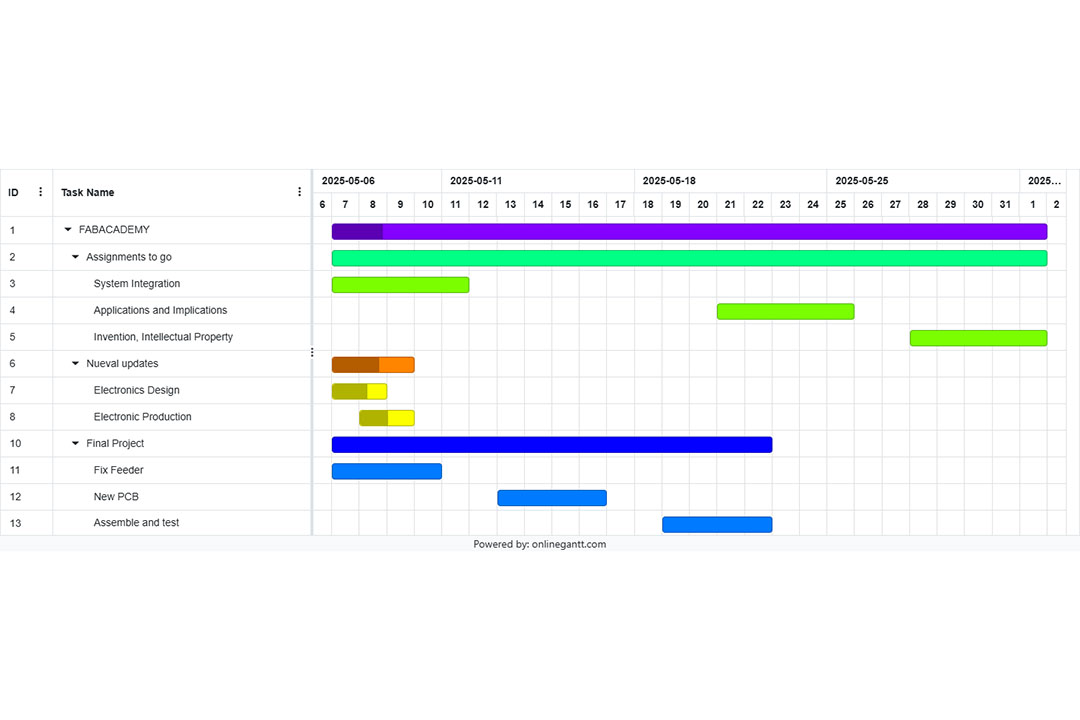
Here is the system integration of the project.
------ Fab Academy 2026 Updates ------
The 360 servo motor never could do the stops needed by the machine so I changed to a setp by step motor.
Changing the motor also made changes on the machines from physical changes to connexion and electronics changes.
Slide and Presentation.
How was it evaluated?
.