19.0 Project Development
After my meeting last week with Dr. Adam Harris, we decided that my project will include or provide the following:
1) a wifi module that will scrub RocketLaunch.Live– a free API– for rocket launch data;
2) a programmer (a Satshakit that will trigger a model rocket to emulate an actual launch (vertically);
3) an LCD screen that will communicate when the next SpaceX rocket launch will be; and
4) a PIR (or Doppler) sensor in conjunction with an RGB LED that will detect when someone is in the room.
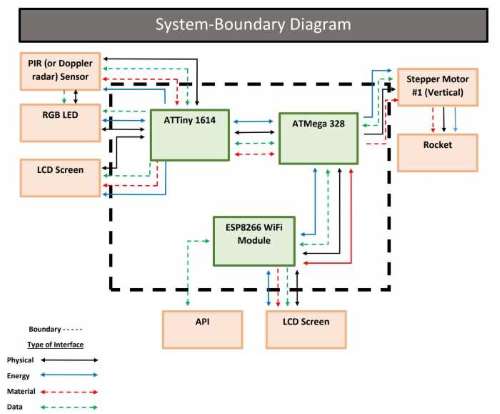
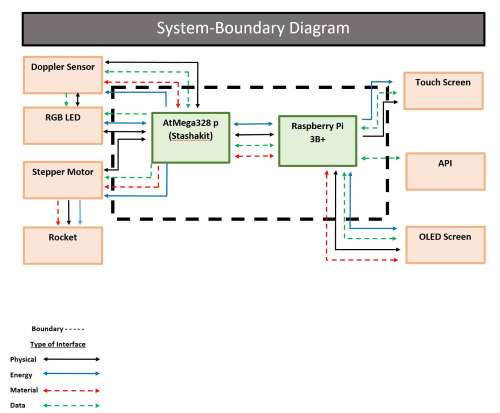
The following images show the changes in my project as the final weeks progressed. This was important for me to see and understand the main aspects of each part of my designs.
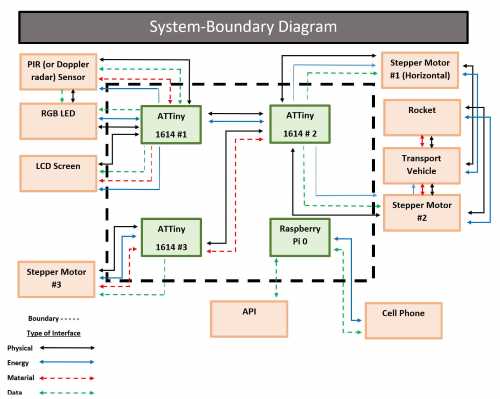
When the device is plugged in, within the first 15 seconds, the ESP8266 (wifi module) will “ping” RocketLaunch.Live and print the results of that data on the LCD screen. While the RocketLaunch.live website reports the next five launches, the data (in the form of a JSON file) will need to be “deciphered”. The ESP8266 only has enough data on it to report the next three launches. If a SpaceX rocket launch is found amongst the three, the launch data will be displayed on the screen. Of there is no SpaceX launch occurring in the next three launches, the response “Sorry, no SpaceX launch for a while; stay tuned!”. The ESP8266 will check the RocketLaunch.Live website for the first 15 seconds of every hour after it is plugged in. If wifi is out, a the message “No Wifi” will appear on the LCD screen.
Additionally, the RGB LED will flash white when someone (my grandson) is detected in the room by the Doppler sensor. When not in the room, the RGB LED will flash through the colors of the rainbow.
Out of the scope, an interactive aspect could be included in later versions. In this interaction, when someone is detected in the room, the device could ask “Is that you ___?”, and a Y/N option could be selected. Rocket launch data could be reported on the screen, and the user could be asked “Will you be able to watch this televised rocket launch?”. Again, a Y/N option could be selected, and then a reminder to add the date to a calendar could be flashed on the screen.
Also, in future iterations of this device, I would like to include the slow crawl horizontally to the launch site, a vertical lift into launch position, and a culminating launch at the time of the actual launch. Time was the biggest constraint for including these aspects into the “Minimally Viable Product”. I plan to continue to modify and revise this project after the June 15 deadline.
This week, I decided to make a Gantt chart of the things that still need to be done with 18 days I had left until I present my project on June 15.

I had begun working setting up a device to connect to the Internet (first the Raspberry Pi Zero W, then the ESP8266, and finally settling on a Raspberry Pi 3B+). This wound up being an arduous task that had many difficulties. I also had begun, but not finished designing the rocket for 3D printing. Although I have done a lot of research on actuators, I still need to design the rocket lift system. There are a lot of intersections that need to be worked out.
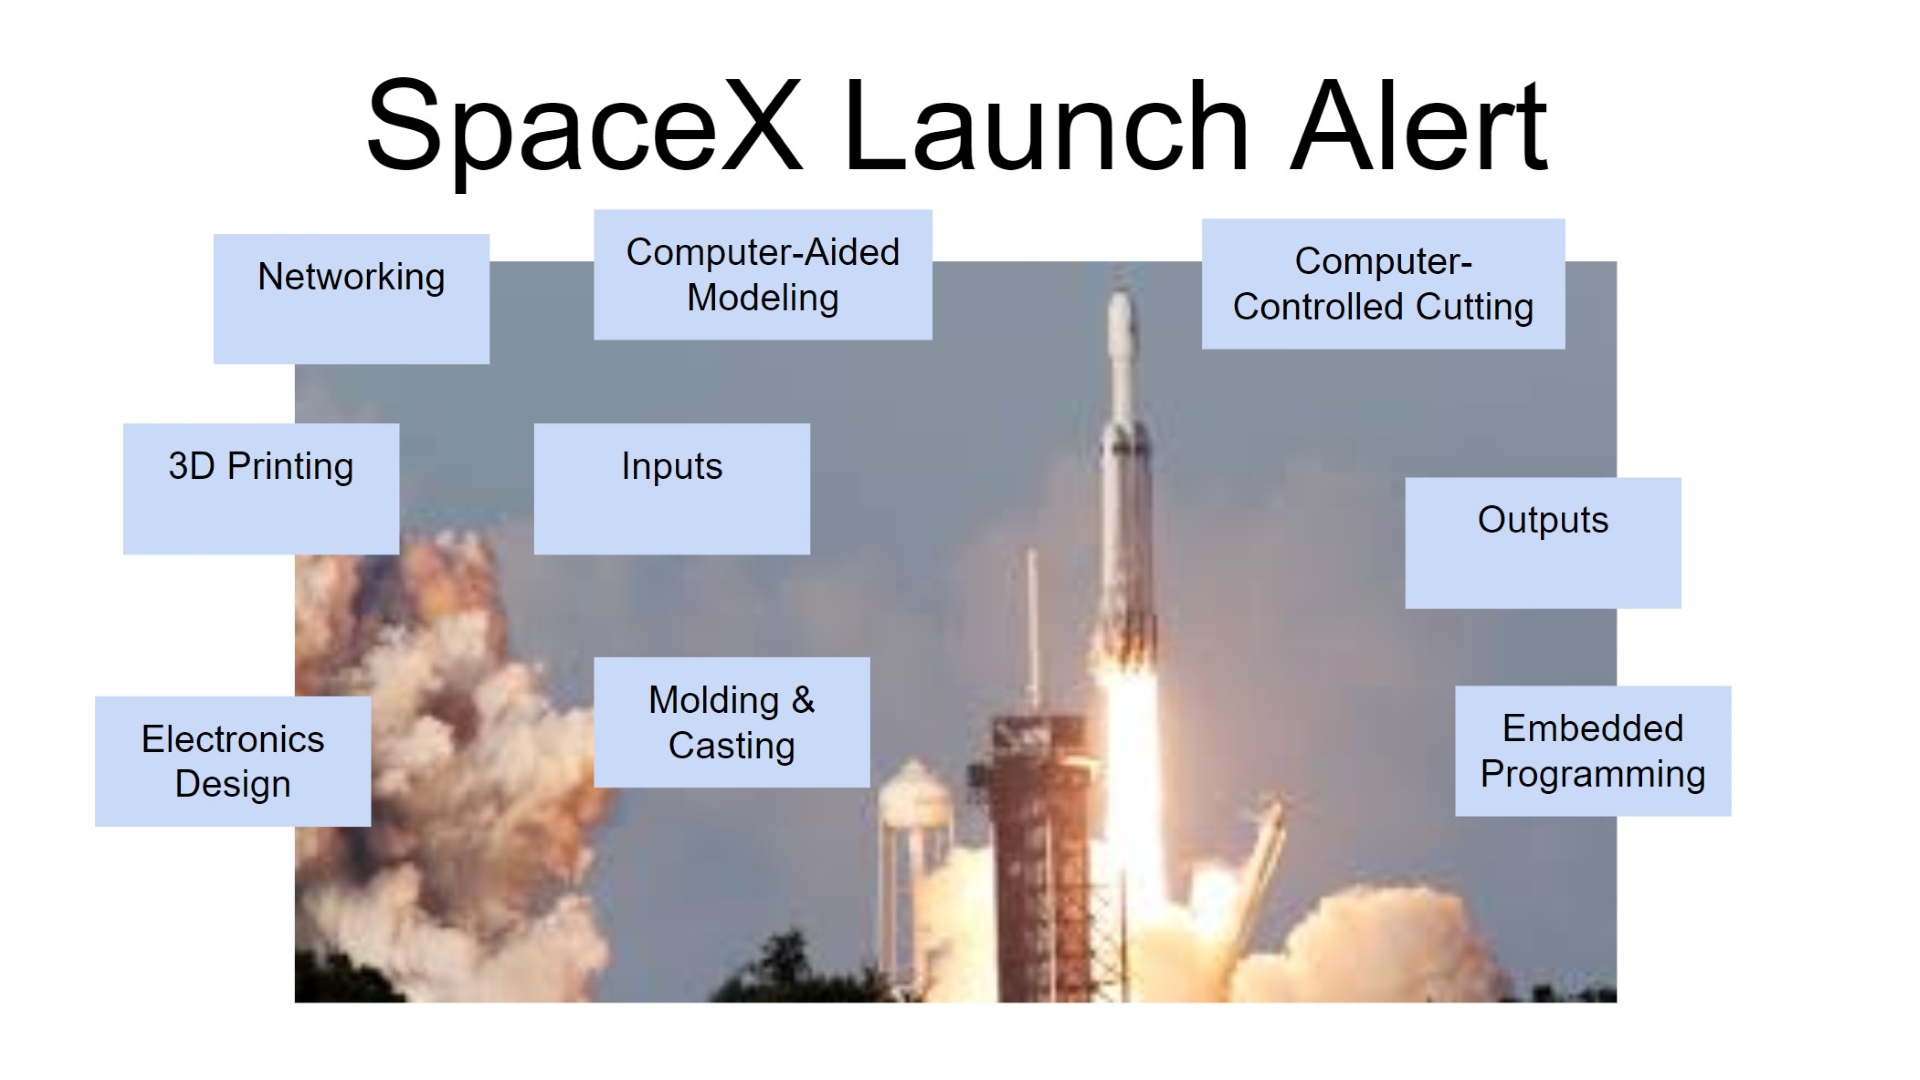
Draft of my Summary Slide:
Draft of my final project video:
I have learned a lot about the mechanics of my project– how actuators work, and how a threaded rod with a coupling nut can be used to generate movement. I have also learned about Raspberry Pi’s. I have never used them before, and I literally was learning a new operating system. It will be a long time before I feel I am an expert in using a Raspberry Pi, but I am looking forward to more exposure to them. Using the Raspberry Pi also made me have to understand python command lines and using the terminal in the Raspberry Pi to navigate and initiate key features.