Senior Project: Wireless Bluetooth Clock
Idea
With it being my last year at Charlotte Latin I wanted to make a small scale project that I would use everyday to help me remember my time here. Similarly to my glasses cleaner, I wanted to create a project that is practical and has a clear use. I was inicially thinking about improving the chess board but honeslty I was burned out from that project from last year. Another idea I had was that I optimized my glasses cleaner but I was also burned out from that. Then I realized that a 7-segment clock was a great idea for this. I don’t have a clock in my room and I’m always using my phone to check time. So this helps decrease my screen time while also being a nice dorm piece for college. Though I looked on the internet and saw too many products that do exactly the same thing. So I decided to add something extra: Bluetooth speakers. For the longest time I’ve been wanting bluetooth speakers so I can listen to music and do my assignments. With this project, I can check all those boxes.
Speakers
First thing I looked for was how to get the bluetooth speakers working. I was that the speakers I was gifted were rated at 3W and 4Ω. I wasn’t exactly sure what those ratings meant so I did some research to figure that out first.
I came accross the following links and videos
Next I had to figure out the bluetooth connection. This required a little more research. Speakers require an amp that has a similar rating to the speaker. The amp is what actually provides the audio to the speaker. Next I would need a bluetooth audio board to connect my phone to the amp. Their are two possible ways to do this and the video below explained everything.
- Get a board that has both bluetooth and amp functionality at the same rating of the speaker
- Get two seperate boards one bluetooth and another as the amp. Then use an aux cable to connect the bluetooth board to the amp.
I decided to go with the second option becasue from researching different boards I realized a seperate amp would create better sound from the speakers. Next I did some digging and found these two boards off of amazon
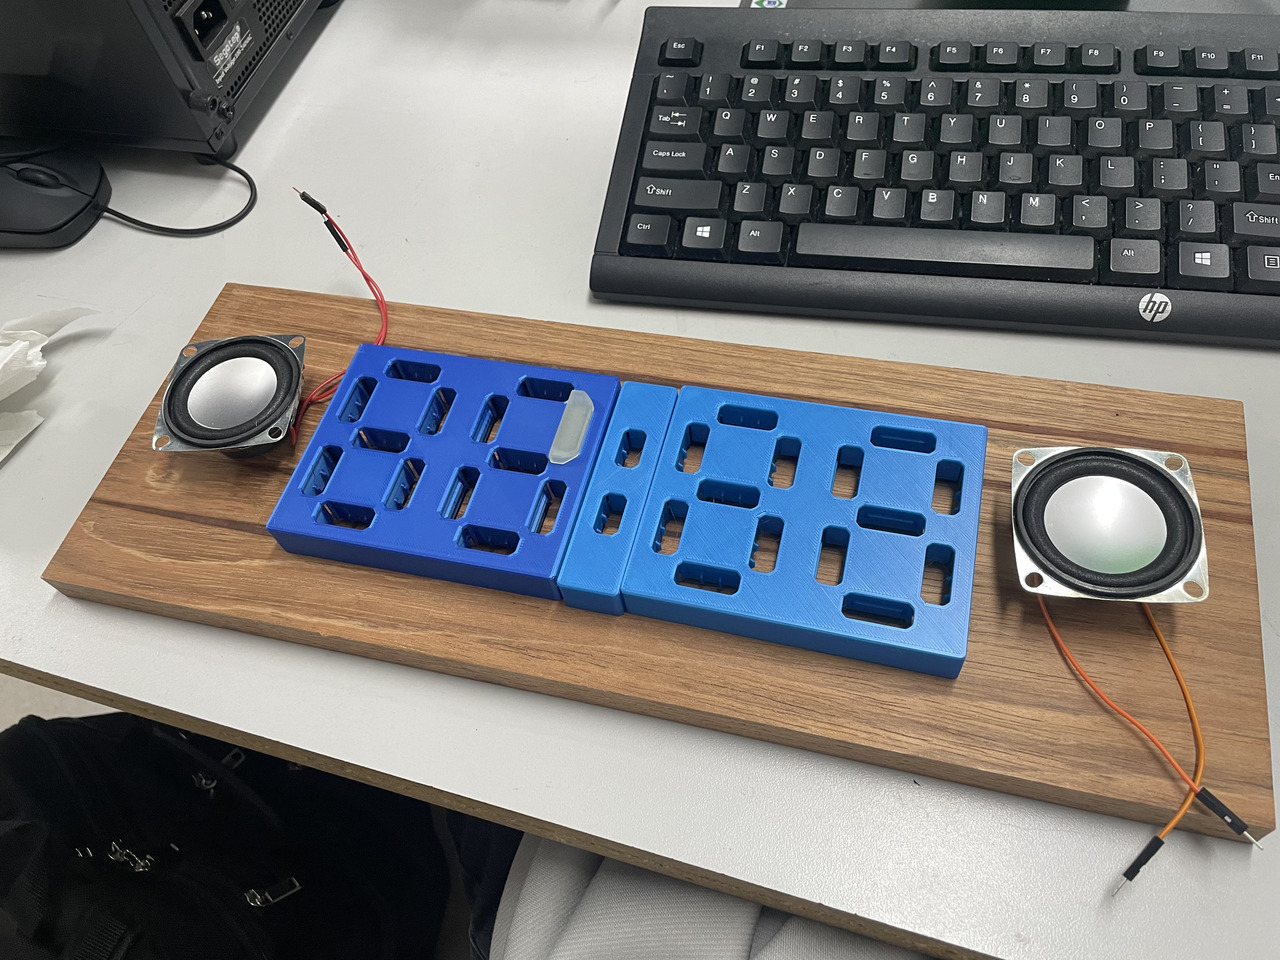
After getting both of the boards I soldered some wires onto the speakers. I then hooked up the wires to the amp while connecting the bluetooth board with an aux cable I found in the lab. I made sure board boards shared a common ground using a breadboard. I provided power turned on the amp, my phone connected to the bluetooth board, and I played a song and music came out of the speakers. It was great but I realized why the speakers were cheap when I looked them up. The sound quality could be improved and that has to do with the resistance of the speakers and the amp. Either way the speakers work and I’m proud of that.
Clock
Outer Shell
I was looking for different digital clocks to use online. I had only a few parameters, it had to be 7-segment and I had to be able to manually set the time on the clock cause I like my clocks to be 10 minutes fast. After searching through the internet I found this instructables project by Parallyze.
The plan was to integrate this 3D design with a wooden outer shell and that was the most difficult part of the project. I 3D printed the design from the instructables website and started laying out all of the pieces before I started CAD.
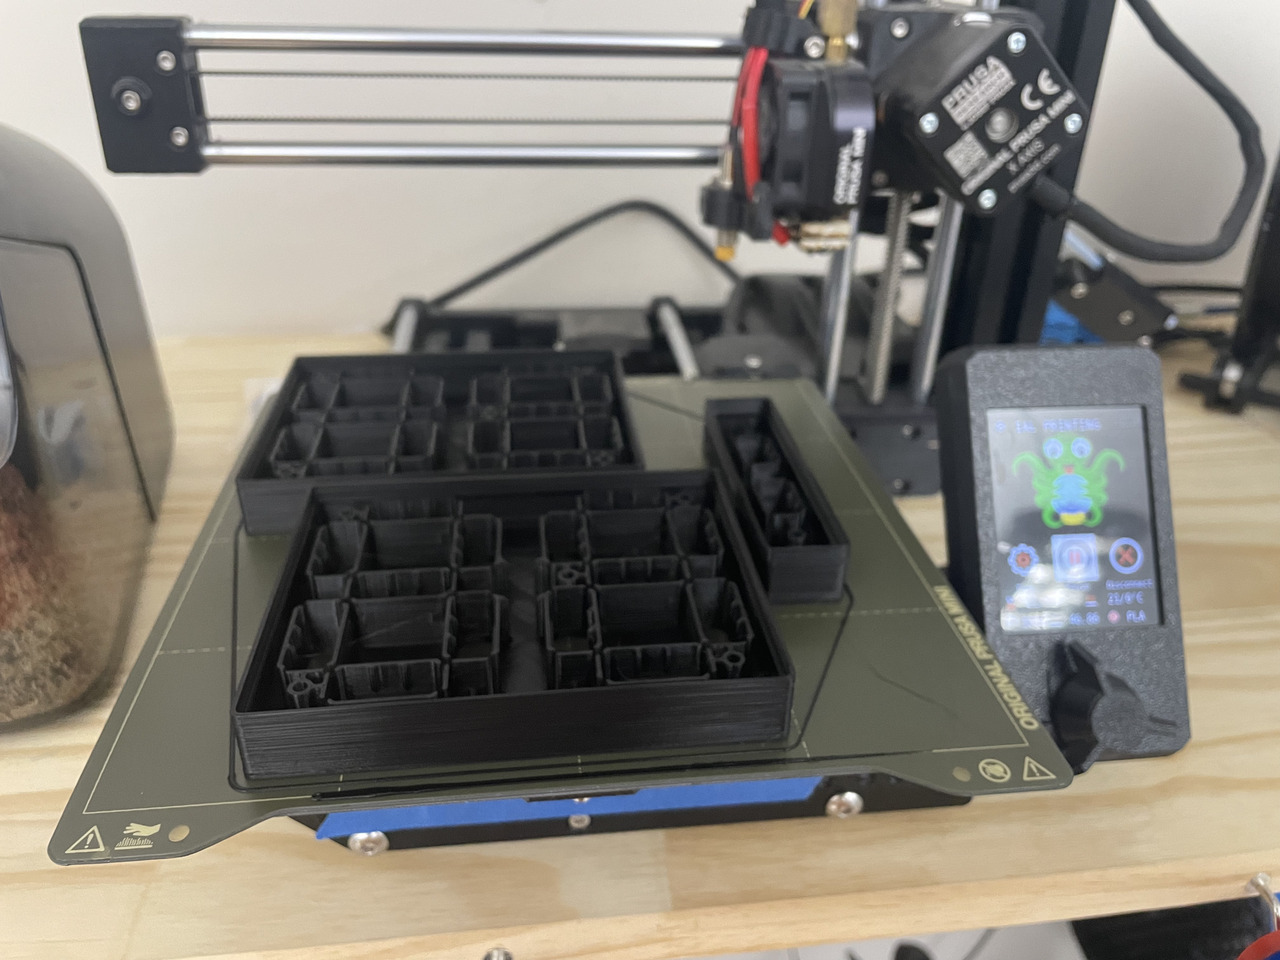
I put in the neopixels using the holes and slots layed out in the design and overall it came out pretty well.
![]()
Once I had the components layed out I went into Fusion360 and started to design the diffusers(or the digits that will be placed in the holes). First I had to edit the diffusers that Parallyze had already made but I didn’t know how to do that so I went to YouTube to find a video and thankfully Kevin Kenedy is always there when you need him most.
I also found another video by Adam James to help solidify the concept.
I went through multiple designs for the diffusers and a lot of them failed more a multitide of reasons. The first was that I needed the light to be as visible as possible yet when I printed it out using the normal FFF printers I couldn’t get those results. So I moved on to the SLA Resin printers in the lab.
Even with those printers I spent nearly two months editing and redesigning the diffusers. I had about 30 versions of the file once I was finished. I ran into multiple problems such as the resin not being clear enough, the supports within the diffusers would be impossible to get out, or the print would snap as I tried to remove the supports. There was a lot of trial and error but I finally got the right design and most of the CAD for the 3D printing was complete.
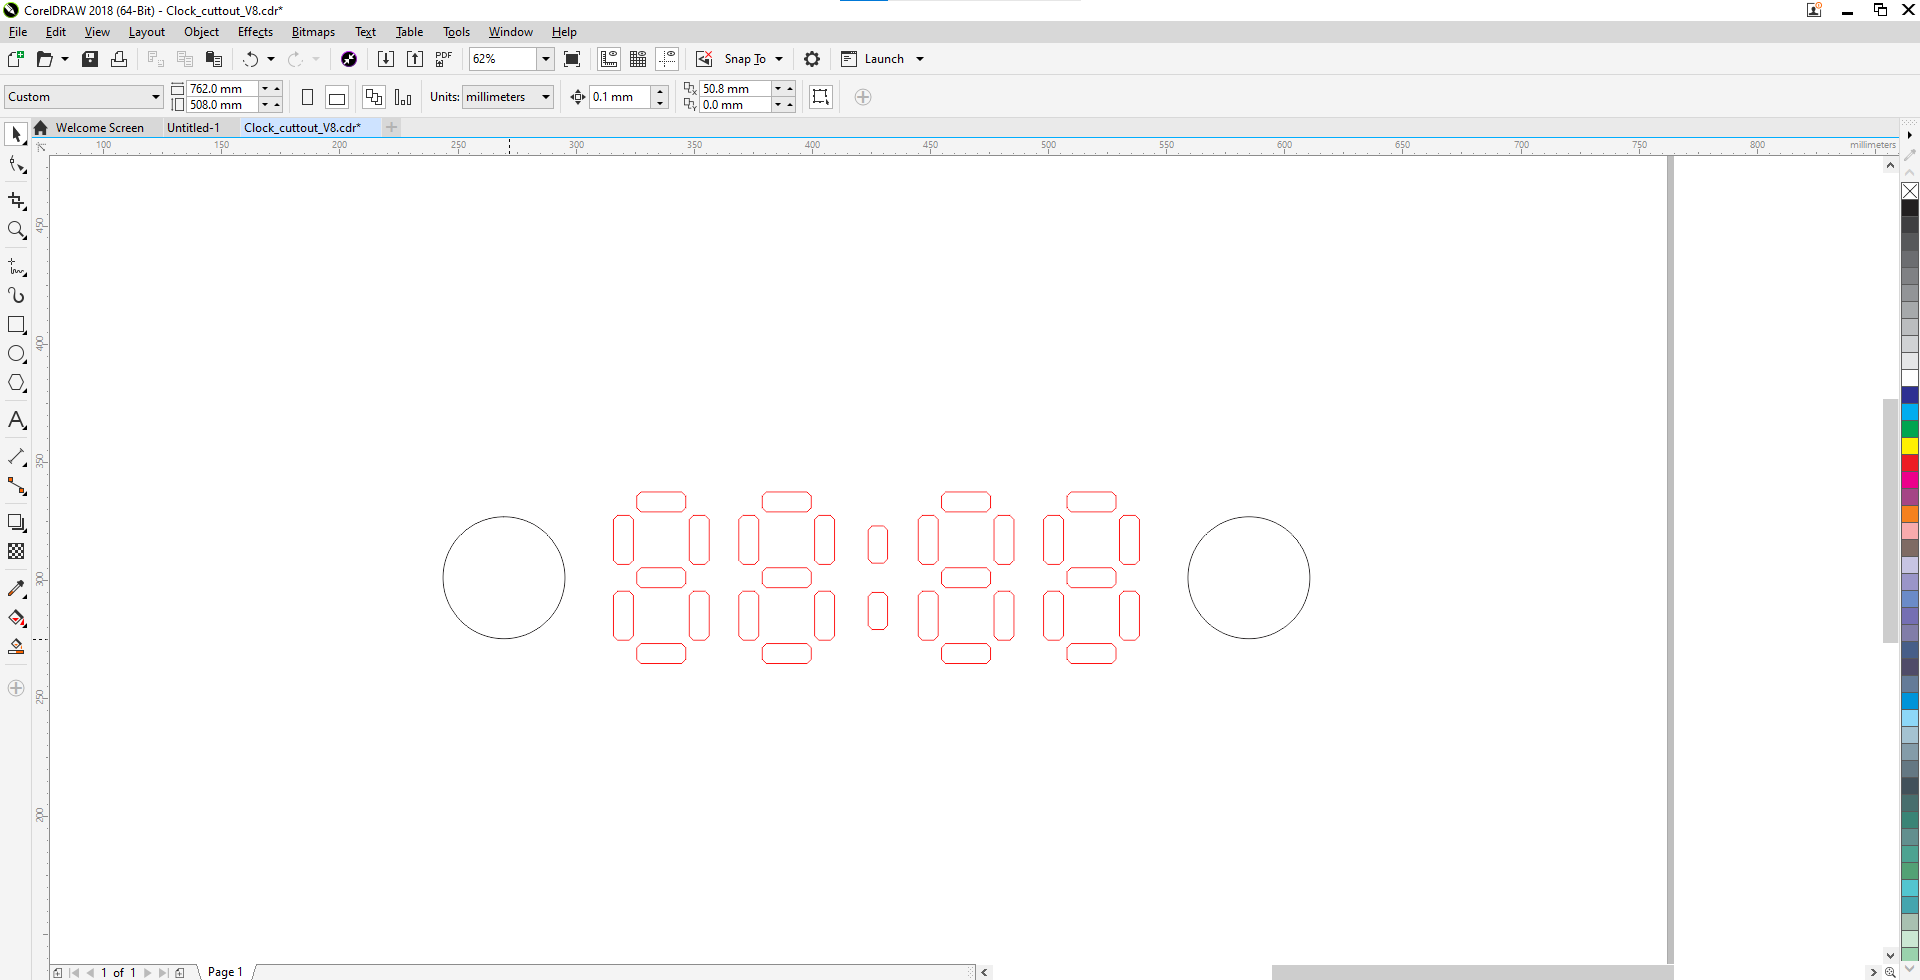
Next I had to work on the .SVG file for the CNC machine. This part was harder then expected as well. First I extracted the holes from file from Fusion 360 and imported it into Corel Draw as a .DXF file. From there I worked on editing the vectors. I had to take into account the size, kerf, shape, alignment, etc.
I used the laser cutter multiple times throughout the process but I finally got the holes aligning and fitting pretty well on the 3D print.
Coding
Next I thought it was appropriate to get the code up and running. I found the code for the clock on the instructables page and one would think that keeping all of the same components and not changing the code at all, everything should work. Well it didn’t. I ran into an error with one of the libraries and the datatype it was expecting from one of the functions. I spent a couple of days trying a few work aronds but it led to no success. I had to talk to Alaric Pan about troubleshooting and all he did was change one word and the entire clocked worked with the RTC…typical.
Anyways once I finished up the code on an Arduino I decided to make my own board but I ran into a LOT of issues. One the library that the code uses the “FastLED” library only works with an AtMega328p or very specific microcontorlers. I tried using an ATTiny1614 and the new SEEED Boards that the Fab Academy students are using this year, but the library wouldn’t compile. So I decided to optimize the code using the adafruitNeopixel library so it would be compatible with a wide varity of boards. After nearly 2 days trying to optimize the code I ran into a lot of issues and with the deadline of the project nearing soon I decided to just make a satshakit. I went to designing and edited the .gbr file in KiCad. Through this I had to learn how to make a double sided board and I documented that expereince on the PCB Production
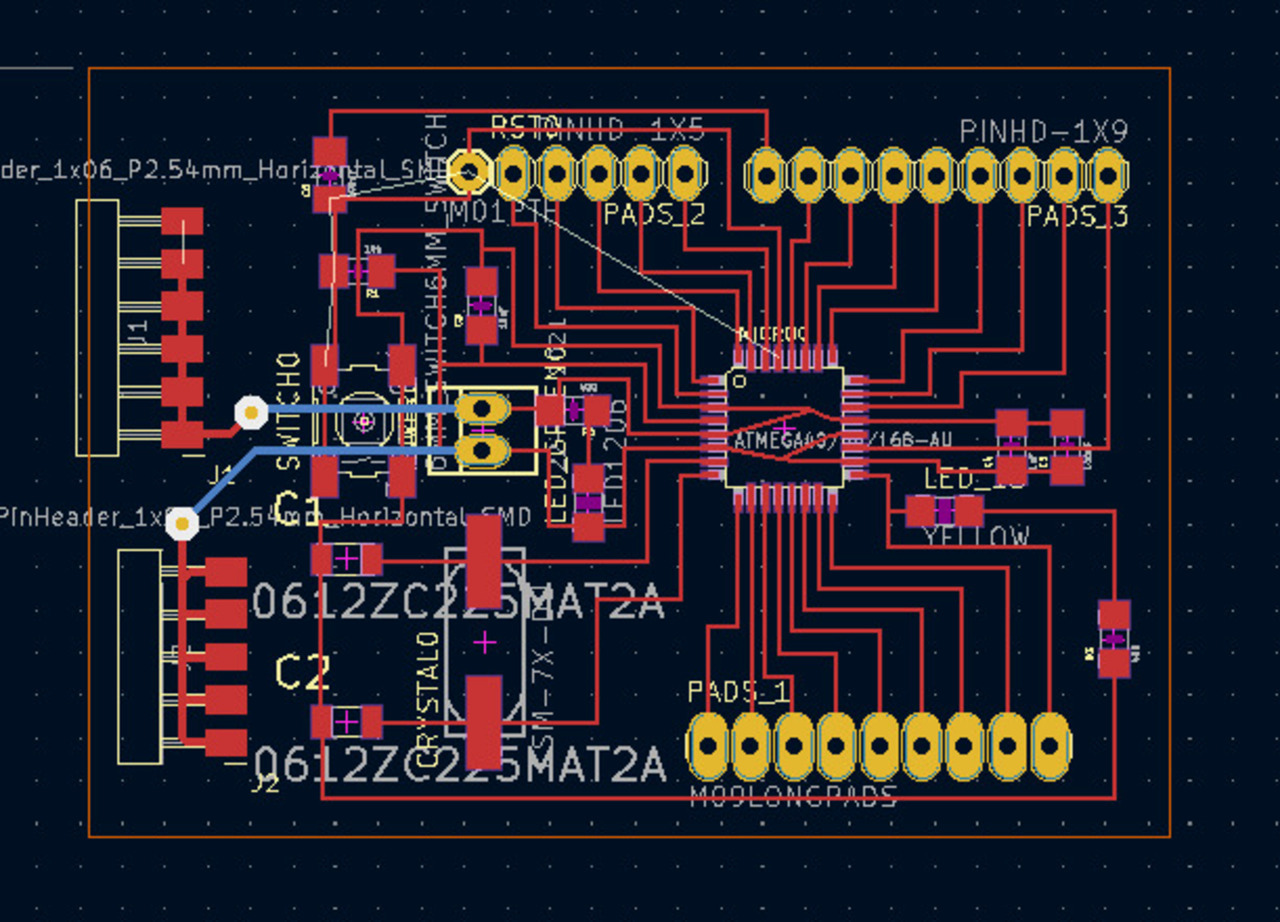
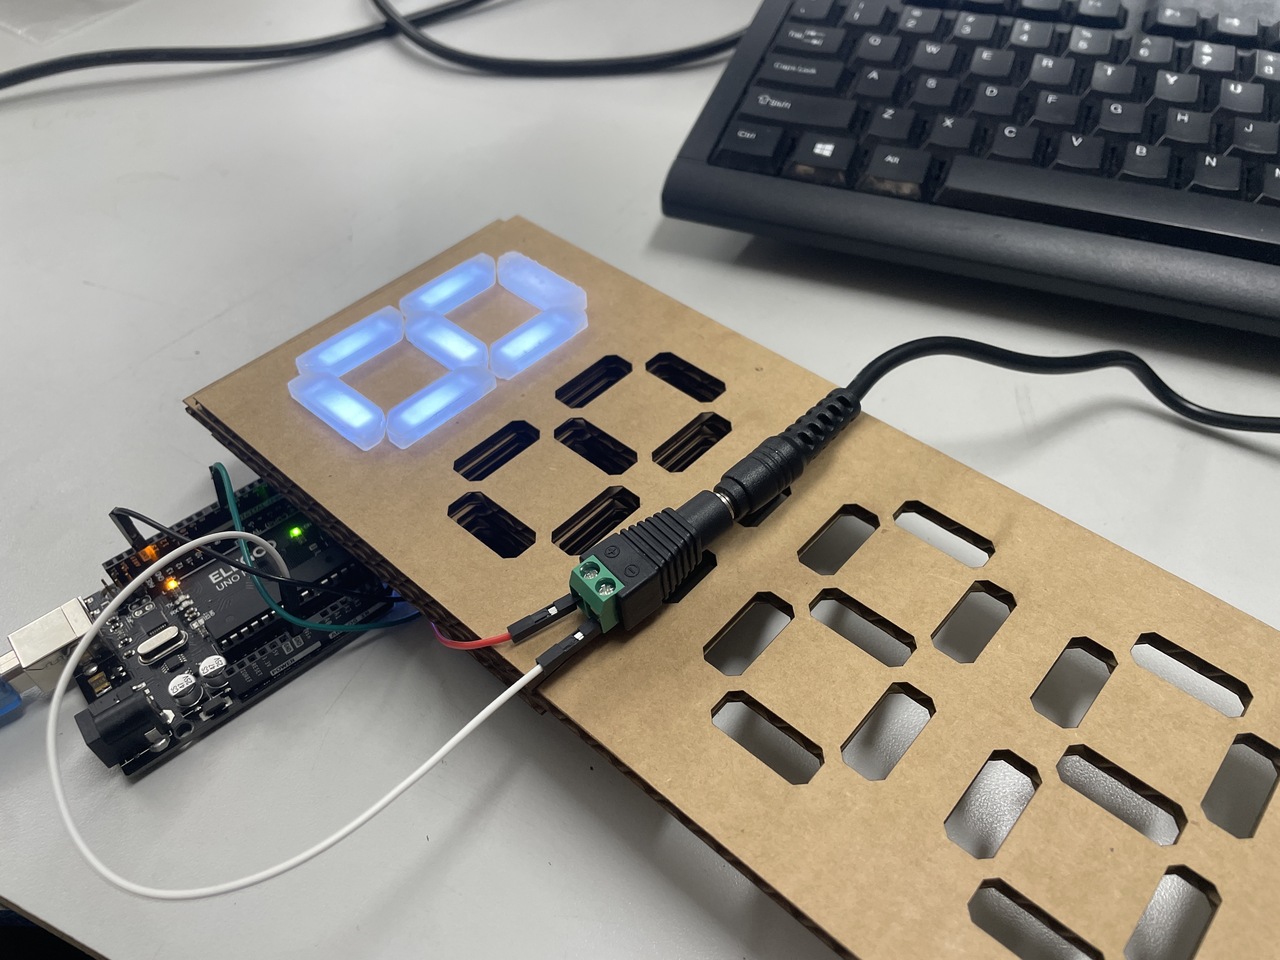
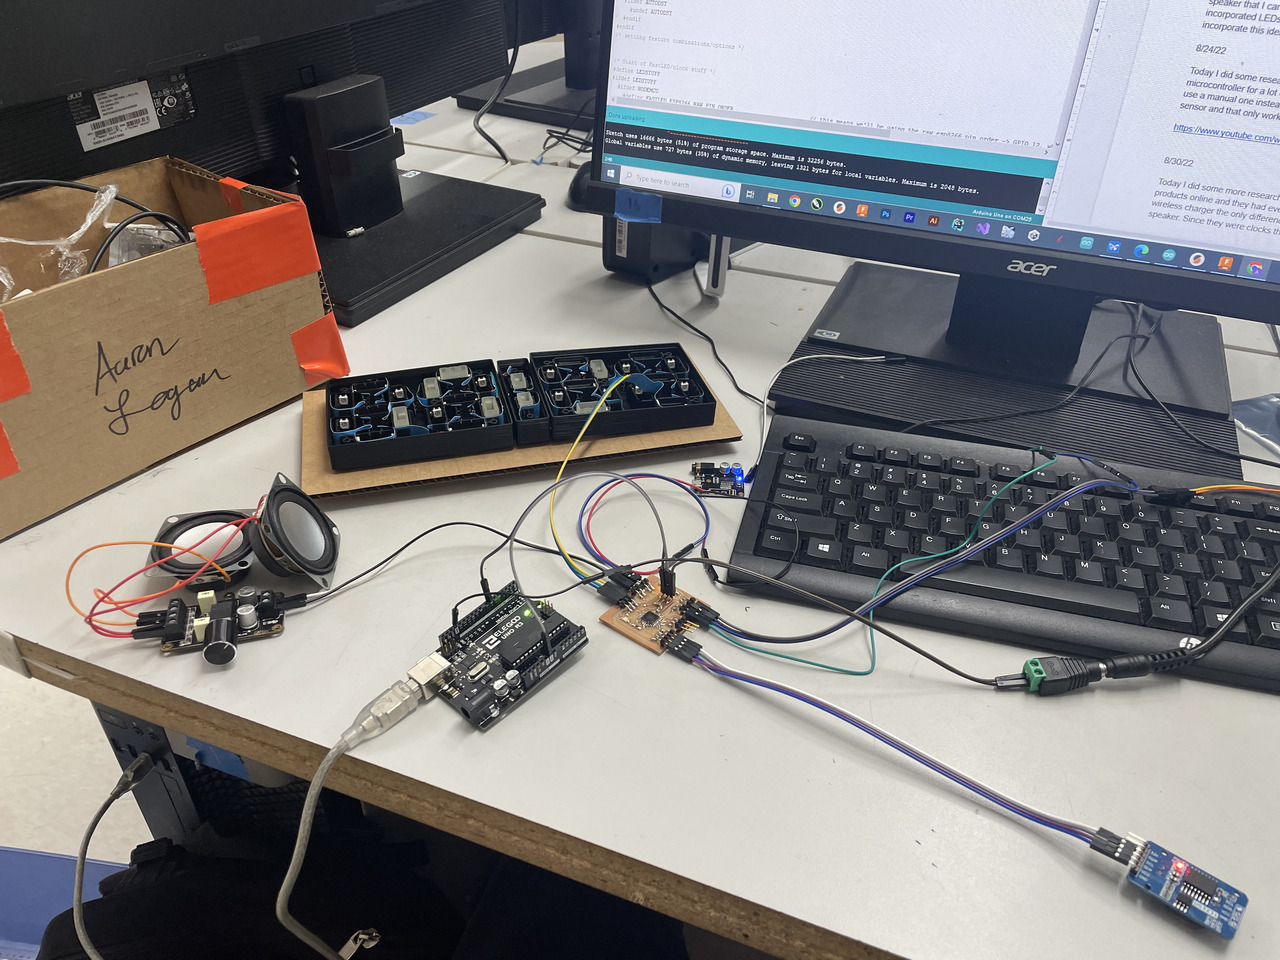
After milling the board I went to programming and I came across every known error imaginable. When trying to burn the bootloader I saw an error saying avrdude: Yikes! Invalid device signature. I looked through multiple forums and couldn’t find anything to fix it. Then I saw one post saying that the invalid device signature means that clock isn’t able to set correctly. Knowing this I switched for a different clock but I still kept seeing the error. Then I saw another post saying that it is a buggy chip and their was nothing I could do to fix it. So I made another one and recieved the same error. I eventually made six of them trying to burn the bootloader but nothing good came until the last one. I finally got the bootloader to burn and tried to upload code but I couldn’t. I couldn’t find the COMs port in the Arduino IDE. I used the FTDI adapter like the documentation said but I couldn’t find a way to program it. Now with only two days left on the project I decided to scrap that idea and just use an Arduino until later.
Here is an image of me trying to troubleshoot everything but failed
Finishing Touches
On the final day I realized that there was no time for the wood base so I gave back the wood Dr. T gave to me and decided that I would make the entire clock out of mahogany wood. So for the time being I laser cut a tabed box with the SVG image out making sure to include holes for the buttons, speakers, and power. Here was one of the SVG files I designed for the time being.
Once I cut everything out I put the pieces together making sure the power and ground were conneced for each component and my prototype clock was finished until I could get better wood and speakers