1. Principles and practices, & Project Management
Tasks in hand
- Principles and Practices
- plan and sketch a potential final project.
- write a story for your project.
- read the student agreement carefully, sign it and upload in your personal website.
- Project Management
- understand more about Git through a git tutorial.
- build a personal site in the class archive describing you and your final project.
- document about how you bulit your website.
- share your experiences(failure and successes) while creating your website.
What I did this week
My Final Projec Sketch
For now my idea for my final project is to make a fountain which I would like to name as, ‘the serenity fountain’ and it’s all to make the user feel serene whenever he/she sees it. My project sketch draft of my Serenity fountain is something the like sketch that I have given below;
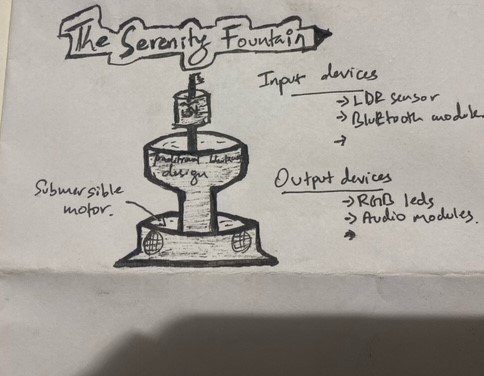
You see, I am from Bhutan(Asia), a Buddhist country and to incorporate something original and something so Bhutanese, I decided to make a serenity fountain which will help people be reminded about their religion and Karma accordingly. One of the inspiration for choosing this idea is because my Dad is so into religionn and started prostrating and praying as he grows older and it really inspires me to follow his path and take care of my Karma(action). I want to gift the Serenity Fountain to my Dad to thank him for always reminding me that kindness can do lots more than anger.
To explain how my serenity fountain will work, well I will be incorporating some really interesting and traditional Bhutanese designs to my project and a prayer wheel on the top which will keep on rotating and help one accumulate more of good karma as we believe that the rotation of prayer wheels is as same as chanting them.
I will be inputting one LDR sensor, and audio module and some fancy lightings which will be blinking in the manner the Bhutanese prayers will be sounding. We usually offer water, fruits and flowers early in the morning when the dawn starts breaking so the LDR sensors will trigger the lighting and prayers at dawn and it will give a serene feeling to the one who uses it.
So for now, that’s just a draft plan. I’m looking forward to getting more ideas to be incorporated to my serenity fountain as I progress with the course.
Understanding Git
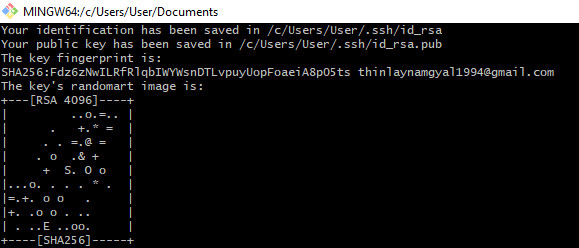
Download Git from Google and choose for which OS you want the Git installed into. Once you are done installing Git, you have to generate one SSH(Secured Shell) key. To do so, first open Git Bash and use the following command;
ssh-keygen -t rsa -C “yourmailID” -b 4096
Press enter and the following will be displayed;
Generating public/private ed25519 key pair. Enter file in which to save the key (/home/user/.ssh/id_ed25519):
Next you have to enter one passphrase for your SSH key
Enter passphrase (empty for no passphrase): Enter same passphrase again:
Once you’re done the following will be displayed, that is your SSH key;
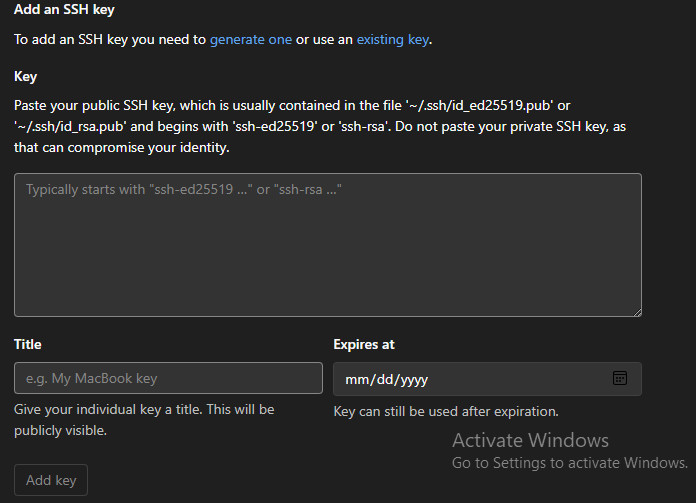
Next up copy your SSH key and go to your Gitlab account and paste the key in the following bracket;
Next you have to check whether the SSH key has been linked to your Gitlab account and you can do so by using the following command;
ssh -T git@gitlab.fabcloud.org
Next up you have to configure your username and email id and you can do so by using the following commands;
- git config –global user.name “USER NAME”
- git config –global user.email “your mail id”
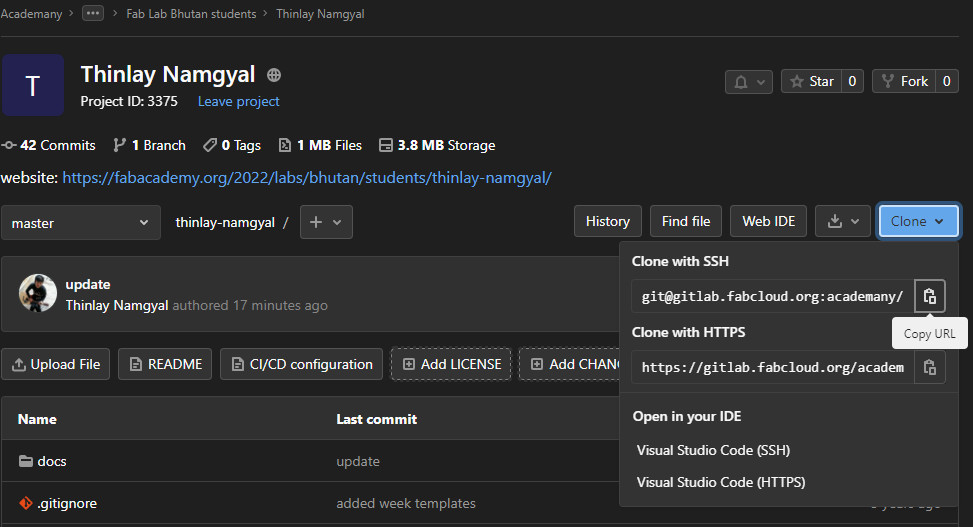
Once you are done with the configuration, it’s time for you to clone your gitlab repository to your local repository and you can do so by using the following commands;
- cd Documents
- git clone
To copy the link you have to go to your gitlab account and copy the following SSH key link and paste it in the above mentioned link.
Now go in your cloned repository folder with
cd folder_ name
And to pull and push files in your gitlab repository use the following commands;
- git pull
- git add –all (check size)
- git commit -m”message”
- git push
Thats how you use your SSH key to push and pull files from your local repository to your gitlab repository.
How I created my website
During my prefab classes last year I used html to develop my website where I downloaded a html5 template and documented about everything I learned about web development through W3school website. Mk docs is a new thing, though simple since I am not used to the sytaxes, its taking time for me to get used to it.
So web design was an interesting thing that I got to learn. At first I used Notepad++ editor and after sometime my coursemates suggested me to use.
For Fab Academy web designing we are allowed to use either Notepad++ editor or Visual Studio Code. At first I downloaded Notepad++ from here and started customizing my website with the help of Notepad++. Next I downloaded Dimensions html5 template from here and started customizing it. Since I am a newbie when it comes to web design I got help from w3school where they have given tutorials using html. Now for documentation I have to share the screenshots of my learning process so I had to download a screenshot software. The software I downloaded was Greenshot which you can download from here.
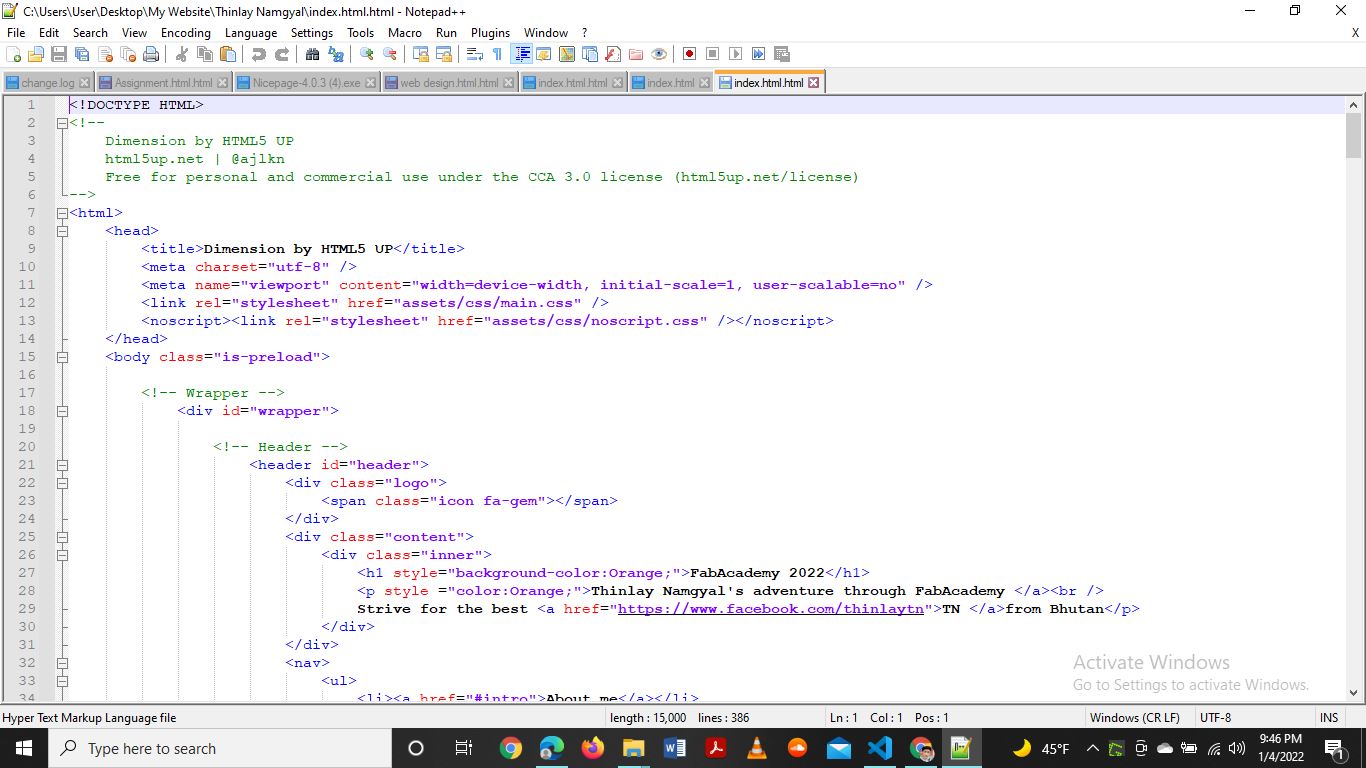
The following image shows me opening the index(home) page with the help of Notepad++;
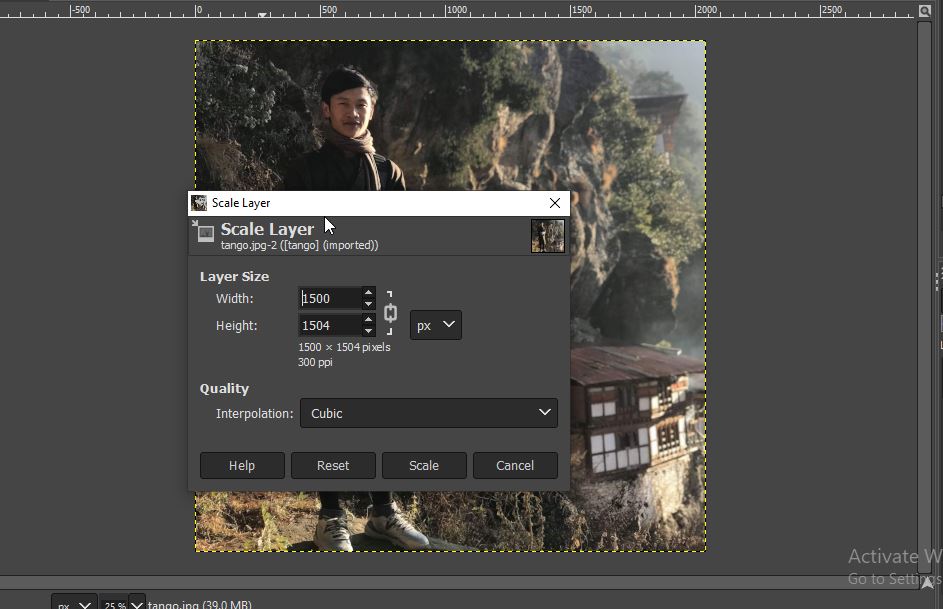
So I removed the default syntaxes that were not needed for my website and again with the help of W3school tutorials I customized my website. We were told not to use image sizes exceeding 1mb but to use images with kb sizes. So to scale down the images I downloaded Gimp from here and used it to scale down the large size images just like as shown in the image below;
Failures experienced
I downloaded almost 5 different templates in total trying out and picking the best template for my website. As for the failures I experienced during my web designing was linking pages. No matter how much I tried to look for tutorials and tried applying it, I just couldnt link the pages. And later on the mistake I had committed was with regards to wrong path I entered.
Solution
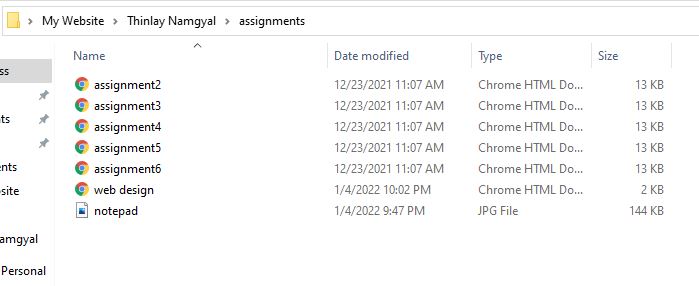
Now after knowing my mistakes I first created a folder named,’Assignments’ and copied the index page and put around six of it in the assignments folder for my assignments. The following image shows all those assignment pages I created and put in the assignments folder.
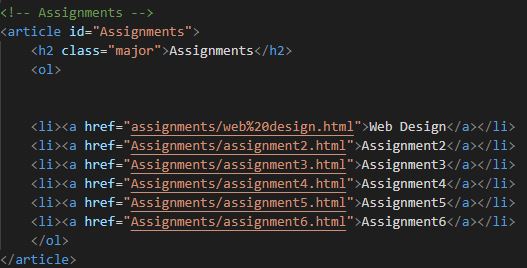
As I moved on with my web design my mentor recommended me to use Visual Studio Code editor instead of the notepad++ so I downloaded it from here. Visual Studio Code was more comfortable compared to Notepad++. I used the linking syntax for my assignments and put those syntaxes in my index.html page with the help of Visual Studio Code and the successful linking syntaxes are given in the following image;
So far this is how I progressed with my web designing where I tried to keep my website as simple as I could. For Fab Academy we were given a ready made template which has all the assignment pages and project pages made to make it easier for us to document. So knowing that MKdocs was easier to use compared to html I decided to use the Mkdocs ready made template for the whole course. For the Mkdocs syntaxes I used this website for reference which helped me alot with Mkdocs. So this is how I learned about web designing using a template.
The html website I made using the dimensions template for prefab academy documentation is given below. You can check it out following the given link below.
html5 template customized website.