Week11- Mechanical design, Machine design
Introduction
Finally the week to make a machine came. I am most excited about this week.
Assignment
group project for Mechanical design:
- design a machine that includes mechanism+actuation+automation+application
- build the mechanical parts and operate it manually
- document the group project and your individual contribution
group assignment for Machine design:
- actuate and automate your machine
- document the group project and your individual contribution
Group assignment
The group assignment is here
The video link is here
B positive!
The group B from Fablab Mandela are also working with Fran and Sibu to set up 4 fablabs in Bhutan and attending the fabzero course as well. We went to set up the fablab in College of Natural Resources during the output week but when we reached back to Thimphu, the very next day, all the members of Group B along with Fran and sibu tested positive for Covid19. So we were advised to home quarantine for 1 week. Hence the name of the group was formed: "B-positive" - Group B of the fablab mandela who were all tested positive for covid 19. We are the B-positive group
For this week, we first discussed on the which machine we want to make and brainstormed and we all agreed with the Pet-bottle filament. Although our country is a carbon-negative, we have a lot of Pet-bottle waste in the country. So this machine was something we all wanted to make because it will help with the waste management in the country. After deciding on the machine, next we elected a group leader (Zina choden) and then started with researching. We then divided the works among ourselves. We found this Petbot machine from Precious Plastics that does something similar. Unfortunately, it is not open source so we had to work from scratch.
DIVIDING THE WORK: Team members and responsibilities:
-
Zina Choden Yonten
- Team Lead
- 3D design
- Documentation
-
Sonam Paldon Dorji
- Programming
- Hall Effect sensor team
- Documentation
-
Anith Ghalley
- Hall Effect Sensor team (mechanism)
- Programming
-
Kencho wangdi
- Extruder modification
- Assemble components
- Prototyping
- Wood works
Working in group:
It is definitely not easy working in a group of four. The main and the only problem we faced was time management. When I am working alone, I can work anytime (sometimes really early in the morning or at times very late at night). But this week I had to arrange my schedule according to 3 other people's schedule. Moreover, getting covid on top of that did not help. Everyone was sick and not in their best game. So, we met after a week of home quarantine and resumed our works.
To end on a good note, what I loved the most about working in a group is that when working in group with more people, we had more ideas. If I had some problems, one member would be able to troubleshoot and while some other faced problems, I could troubleshoot.
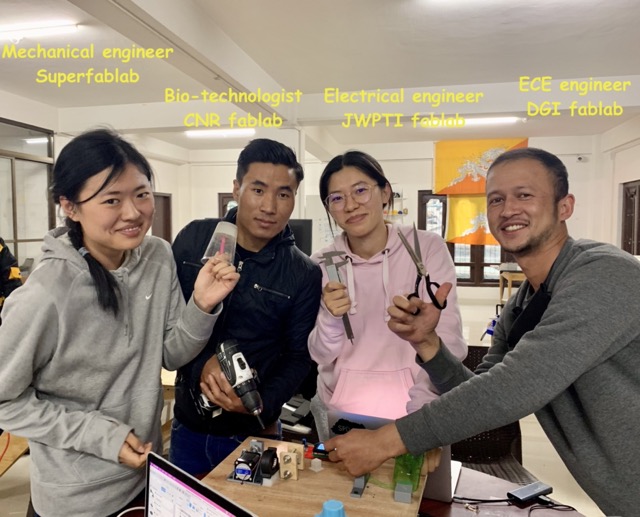
The main advantage: we are a group with diverse backgrounds working in different fablabs in Bhutan.
What I did:
I was assigned to work on programming, designing board for hall effect and documentation.
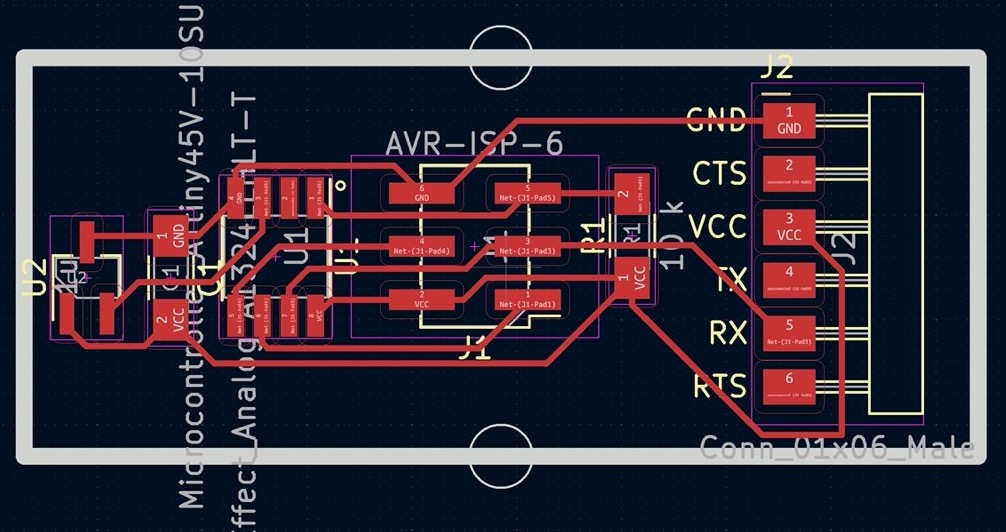
Hall effect sensor
I modified the Neil’s hall effect board. For convenience reason, I made some changes in the placement of the components. I placed the hall effect sensor and the ISP 2X3 male header and the FTDI in the 2 extreme ends as I wanted the hall effect sensor to sense the magnetic field from one end while the board is connected to the supply at the other end.
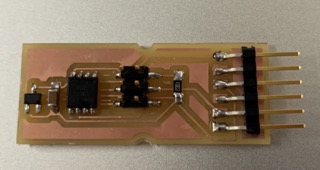
I milled the board in the Roland SRM20 and soldered the components
To test the hall effect board:
Since the hall effect board does not have any LEDs. To test whether the board is working or not, I uploaded the blink program to the ISP board and the LED blinked.
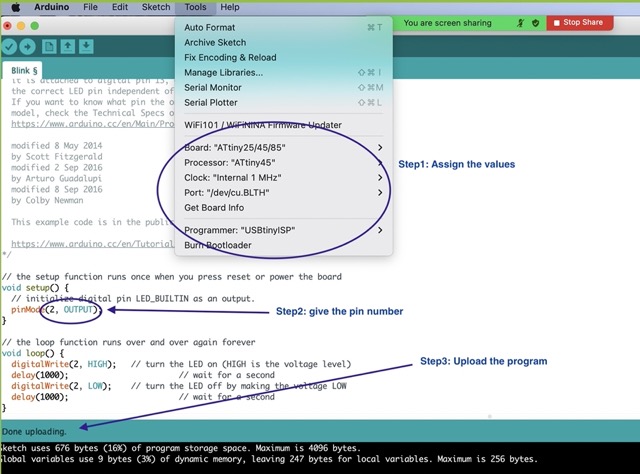
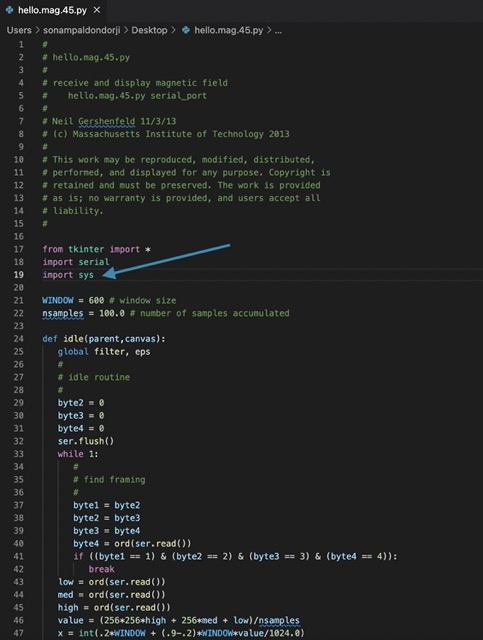
To open the hello.mag.py
-
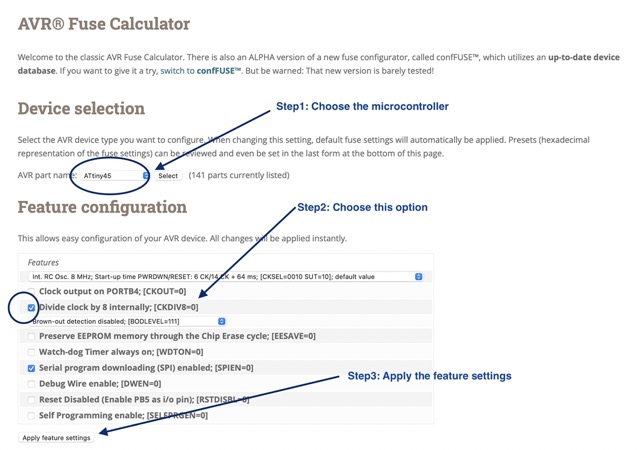
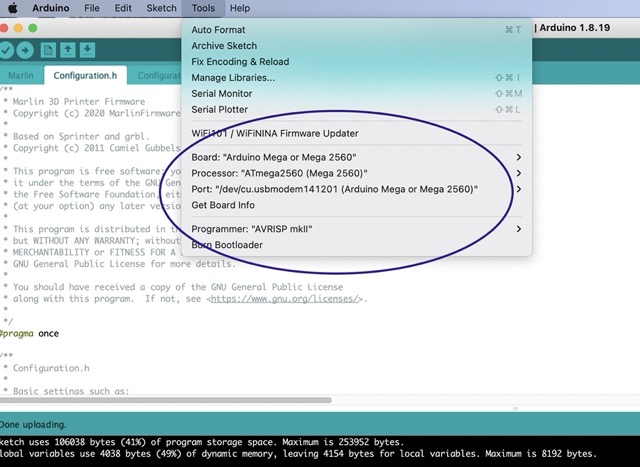
The internal frequency of the ATtiny45 is 1MHz but the Neil’s program is for 8MHz. To change the setting, calculate the fuse (to manipulate the ATtiny45 to our requirement) We have the run in the terminal the program circled below, after making some changes to the fuse setting:

To calculate the fuse settings:
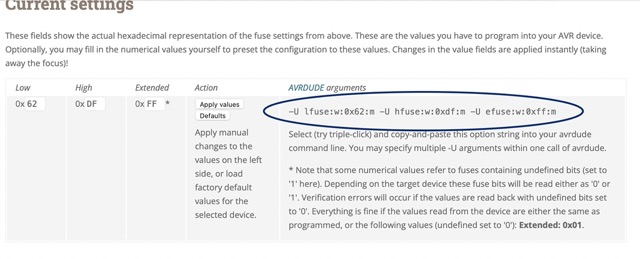
Copy the circled fuse setting:
-
Download the hello.mag.45.py from here . Make changes to the hello.mag.45.py file and keep the file in your desktop.
In the terminal:
cd desktop
avrdude -p t45 -P usb -c usbtiny -U lfuse:w:0xe2:m -U hfuse:w:0xdf:m -U efuse:w:0xff:m
ls /dev/tty*
python3 hello.mag.45.py /dev/tty.usbserial-A50285BI
Arduino Mega and Ramps
We are using Arduino Mega to program our machine and using ramps to control the motors.
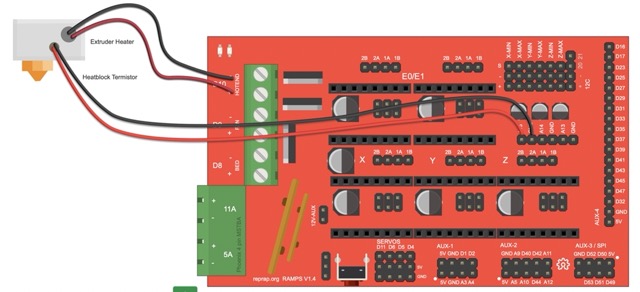
Connections:
-
Power supply(12 V)- input of 230V is given to the power supply and output is 12V
-
From the power supply, 12V is given to the arduino Mega
-
Motor- connected to the E0 with a motor driver
-
Extruder connected to D10 for power supply and connected to T0 for temperature sensing.
-
Fan connected to 12V aux
-
LCD is connected to AUX-4 pins
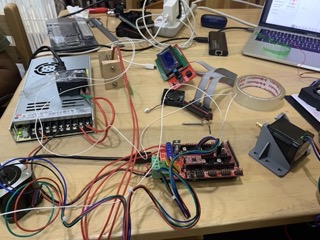
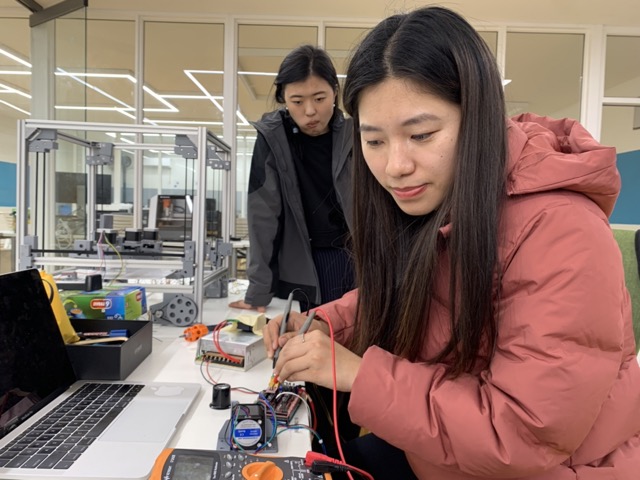
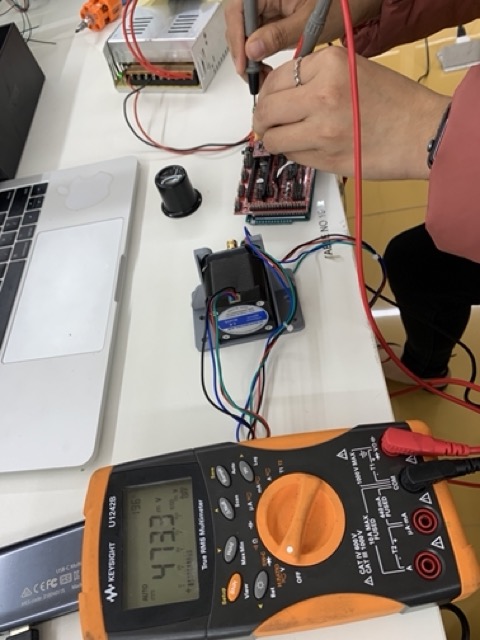
What wiring connections really looks like:
To control the motor :
-
I downloaded the marlin firmware
-
Then, I tried the repetier software to control the motor but it did not work. Next, I downloaded the Cncjs software
-
Since I am using a stepper motor, I connected the motor to E0 of the ramps and to run the motor using the ramp, we connected a motor drive on the ramps.
-
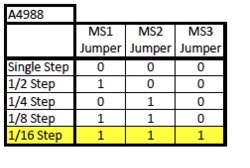
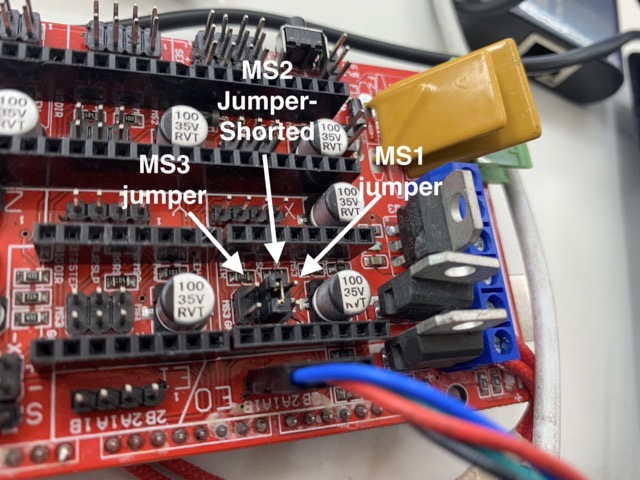
To increase the resolution of the motor (initially 200 steps), I shorted the MS1 and MS2 jumper, now it has 1600 steps.
-
Setting the limit current for the RAMPS motor driver to 0.47V,
-
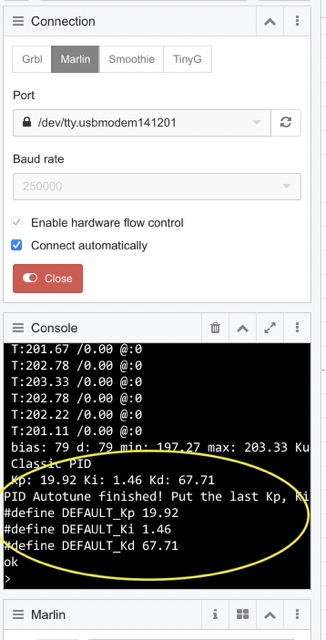
The temperature was not setting to an accurate value in the extruder, so I auto-tuned the PID
To auto-tune the PID, run the command in the CNCjs software. search
Uploading the Marlin program in the ArduinoMega
-
Since the stepper motor is connected to E0, set the value

-
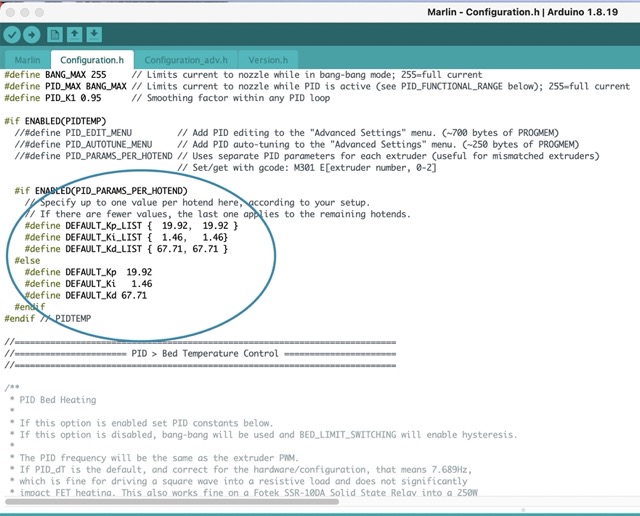
Set the values of PID after auto-tuning:
-
Assign the microcontroller values and then upload the program:
Result:
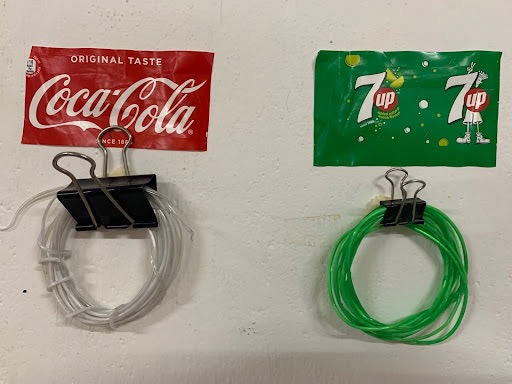
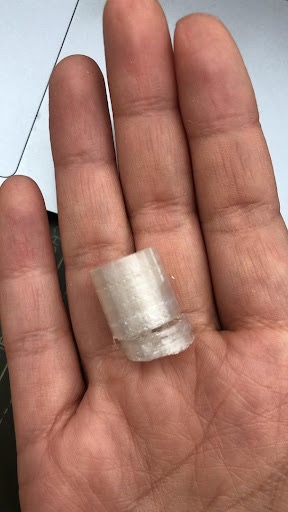
The filaments:
We printed a yoda from mineral water bottle waste:

Problems faced:
The filament produced from the coke bottles contains air bubbles and is too thick, so while 3D printing the extruder could not print at all due to uneven diameter. 2. So next we tried a mineral water bottle (the plastics were thinner). We could print using the filaments produced from the mineral water bottle waste. The filament was flexible.
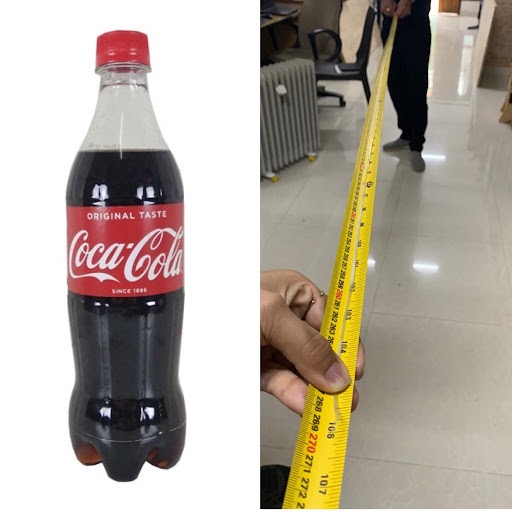
Measurements:
A 600ml bottle can produce 500 cm filament.
Future works
- Design enhancement of the amplifying mechanism so the problems related to uneven diameters are solved.
- Make the machine even more user-friendly while operating.
- Reduce the size of the machine, so it is portable.
- Incorporate spool holder so that filament produced can be automatically stored
- Incorporate the output from the hall effect board to control the speed of the motor
- Design a better holder for the extruder.
- Improve the overall aesthetic of the machine.