2. Computer Aided Design
Assignment:
Assignment:
Model (raster, vector, 2D, 3D, render, animate, simulate, …) a possible final project, compress your images and videos, and post a description with your design files on your class page
Assessment:
Have you answered these questions:
1) Modelled experimental objects/part of a possible project in 2D and 3D software
2) Shown how you did it with words/images/screenshots
3) Included your original design files
Overview and discussion of this week
This week I learned about CAD (computer aided design) and CAM (computer aided manufacturing) software and continued to refine and develop my website. We had classes on Blender (open source), Rhino/Grasshopper and Autodesk 360. We were exposed to a number of other programs including Freecad (open source). I was a little surprised that we didn’t address 2-d design software much, I had been using open-source Librecad and Inkscape for designing things for laser cutting. Gimp and Inkscape were discussed but they are more image manipulation and graphic design programs than programs for designing things. Seems like 3d software has 2-d capabilities but perhaps at the cost of some complexity in use for 2-d. The work flow with most 3-d software is to draw a 2-d object and then use a process like extrusion or lofting to turn it into 3-d.
Really enjoyed Eduardo’s explanation of the representation of digital images on computers - raster (bit map) vs vector, the representation of 3-d images, rendering of 3-d images, and representation of color digitally - it made it really easy to understand all this. I knew a little about it before but his talk put all the pieces into a more complete whole for me.
Victor Barberan’s talk on Blender was especially interesting to me. Rather than simply demo the software he used Blender as a way to discuss open source software and the differences between the intent behind open source vs commercial software. Brought to my mind the limits of market only based approaches to anything in life. One thing that sticks in my mind from last week is the quote from one fo the presenters on the history of the development of Git - people work on Linux because they believe that humanity needs an operating system that is not constrained by strictly economic interests.
As Victor explained, commercial software is developed with sales in mind, and therefore tends to focus on features that will be attractive to new users, as they provide the bulk fo the revenue. Experienced users are often not provided with new features they need. In contrast, Blender used a crowd funded Open Movie project to bring artists and developers together to think about how Blender could evolve to best meet the needs of artists. I’ve been wanting to switch to open source versions of everything I use for a while, or at least give them a try. I already use Librecad, Openoffice, gimp and inkscape. I tried to set up an old mac to run only on linux, but I couldn’t get it to be reliable. I am currently looking for a cheap pc to use as a linux machine but haven’t found anything for less than $100. New and used computers are more expensive in Spain than in the US.
Editing Image and Video Size
This week I worked on further developing my ability to resize images and video. I had a hard time figuring out how to reliably remove white space around jpeg images after I cropped them. Have been trying to use Mac Preview on images but removing white space on cropped images wasn’t working. Used Gimp, cut just the image and then used Preview to create a new image from the clipboard. That worked great. Later found out that same process also works in Preview.
Learning to Use 3d Software
I designed a number of things in the process of exploring the software. I focussed on Fusion 360, as the presentation that Josef gave was easiest for me to understand. He started with very simple objects, a bolt and a nut, and I was able to grasp the workflow. As time allows I will try Blender and Freecad versions of simple designs and see which open source program might work for me. I am a little bit afraid of knowing how to make a box in a bunch of different cad programs but not knowing much beyond that. So for now I am focussing on Fusion.
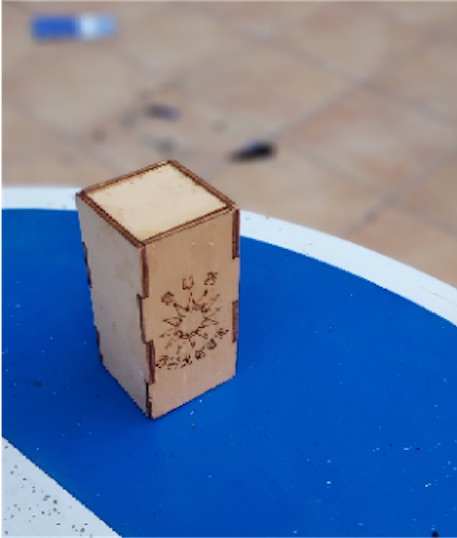
I started with a simple finger joint box that I had built previously - a musical percussion instrument called a shaker. I need a second one anyway.
I was a bit confused on whether to model the shaker as a complete 3-d object or just the six sides of the cube. I decided to model the six sides of the cube first. I started with a simple rectangle and then drew construction lines to assist in making the finger joints.
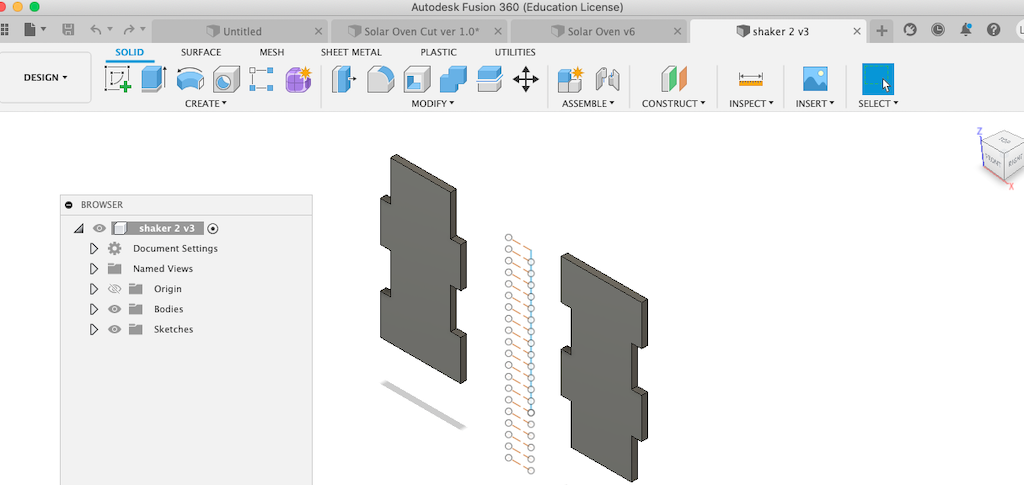
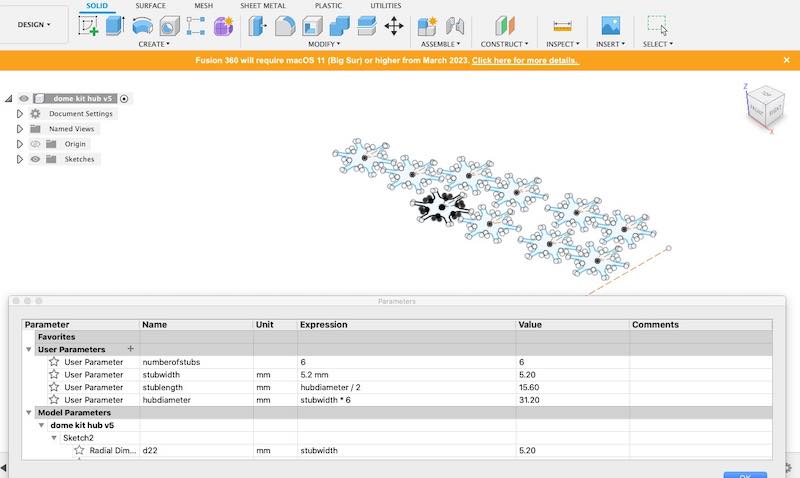
I decided to make the finger joints by making multiple copies of construction lines at the spacing of the joints. I had a hard time figuring out how to make multiple copies of something at regular intervals, looked on-line and then asked Josef. When I built it before I had to change everything when the material thickness changed. So I decided to learn to use parameters and set the thickness of the material as a variable and then used that to define the dimensions of the lines that depend on material thickness.
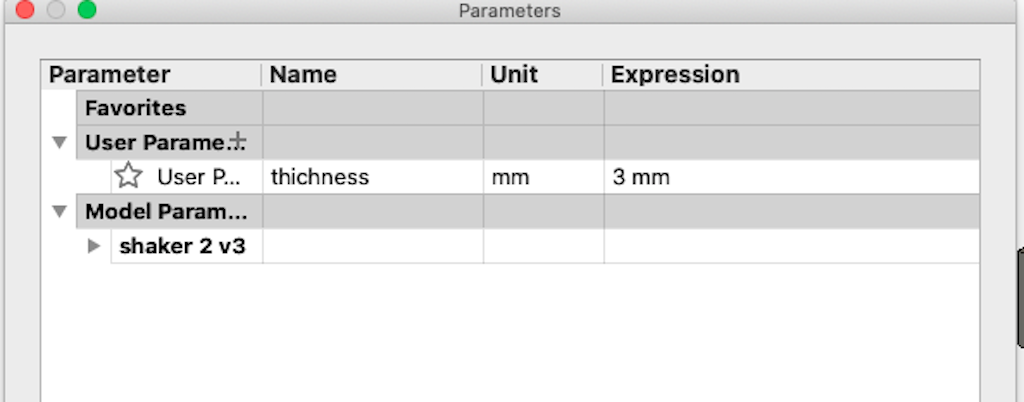
It worked great and was easy to use and set up. Before doing this exercise, the whole business of “parametric design’ was pretty obscure but it is actually quite straight forward. Most of the descriptions I found on the internet were way too complicated - it is simply setting up a table of variables in a sort of spreadsheet that the program provides. You can then use the name of the variable as a dimension instead of actually entering the dimension in the drawing. I found that it is was easier to think through what variables you need and set them up in the spreadsheet before doing the drawing.
Test Flange Made Before FabAcademy
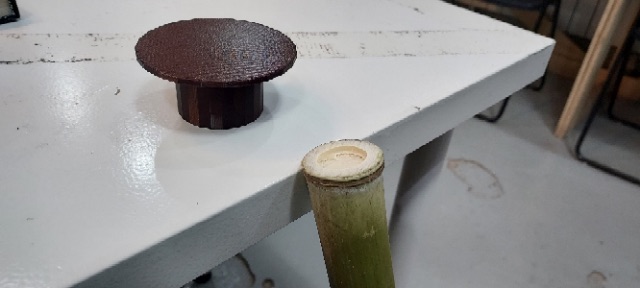
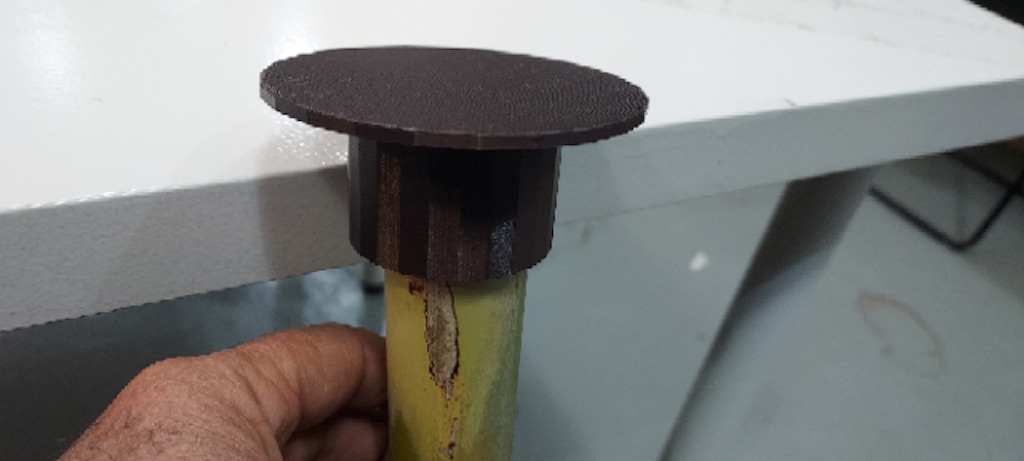
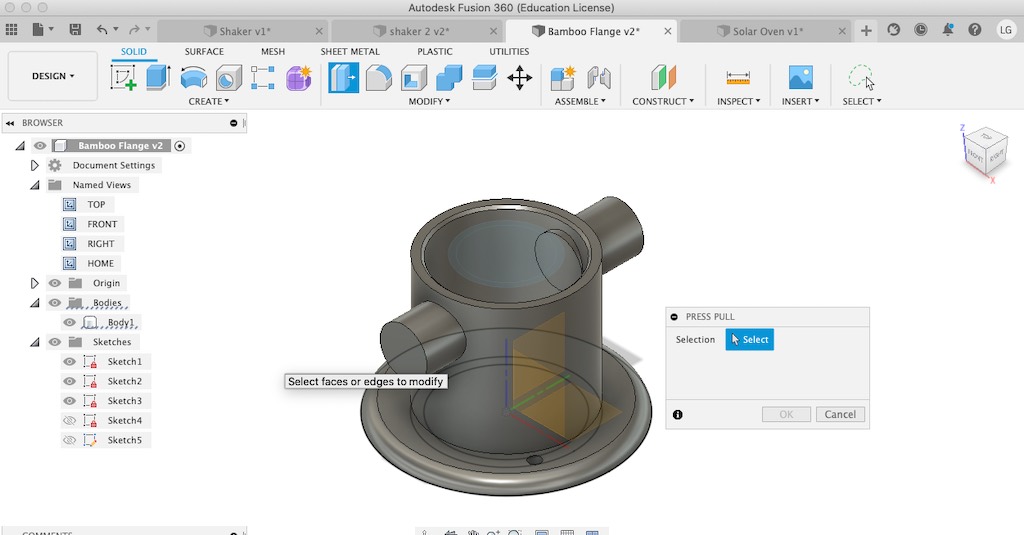
I then moved on to a design for a flange to use when making things from bamboo. Round bamboo splits easily when using bolts, screws, or nails. I designed a flange that can be attached with elastic bands. I am going to use one for table legs in my home lab/office. This design is great for paramters because each piece of bamboo is a different diameter. I am also using one to make a floor lamp., with bamboo as the pole that supports the lamp.
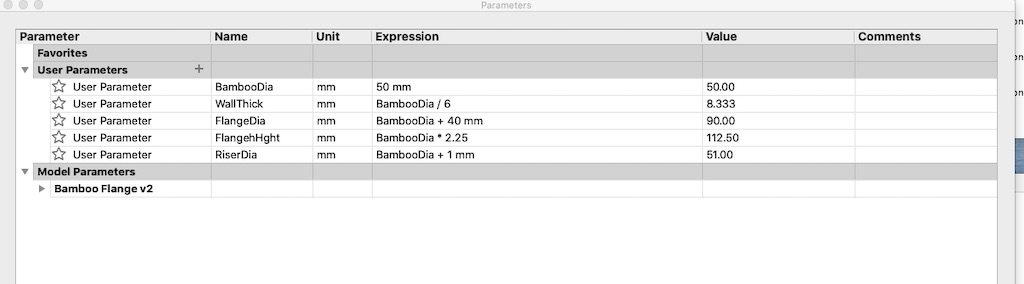
The flange dimenions were defined in relation to the bamboo diameter. Input the diameter and Fusion modifies the drawing to fit the bamboo. Looking forward to making some of these. I also want to use flanges for bamboo to make a sail rig for my skateboard.
 I also want to use flanges for bamboo to make a sail rig for my skateboard.
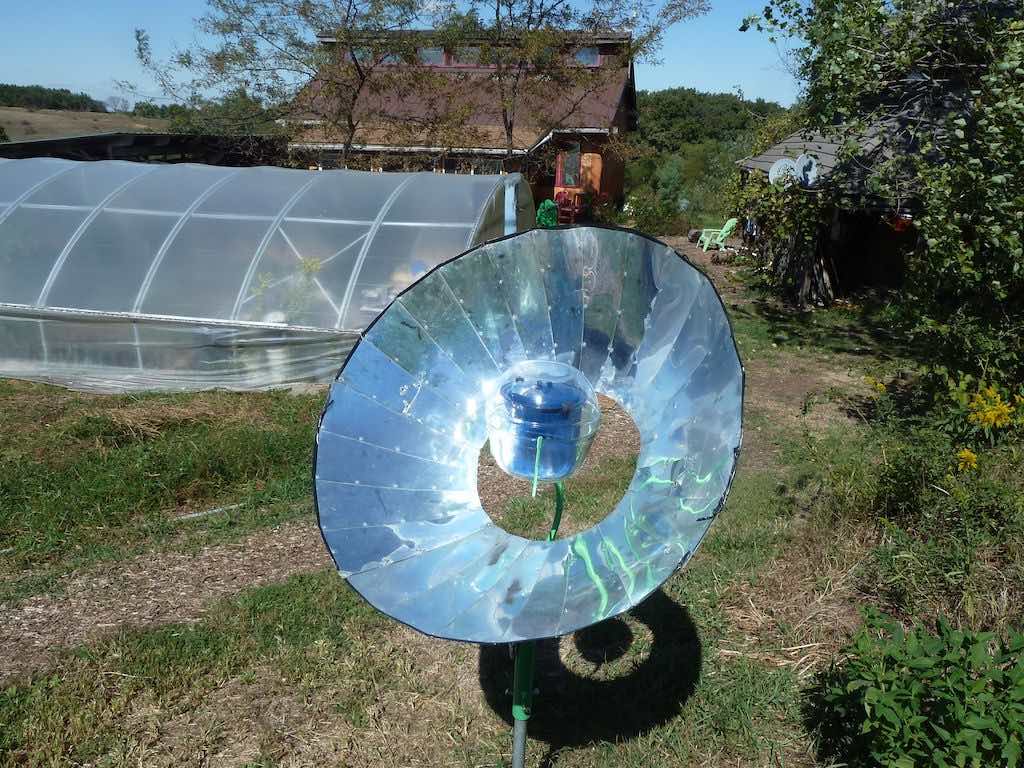
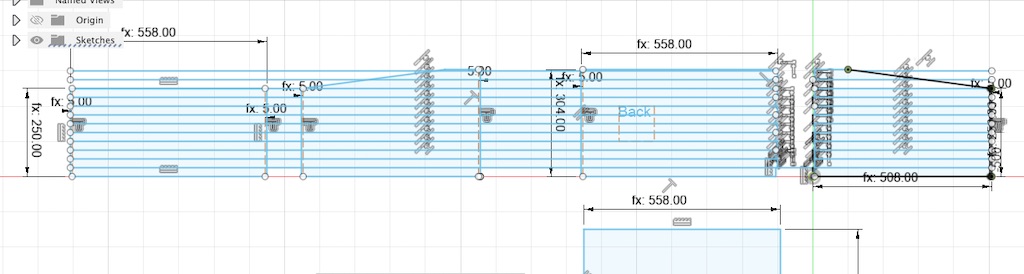
My final project is related to solar ovens. I drew a solar oven that I hope to build next week on the laser cutter.
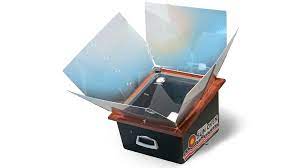
Previous attempt at a laser cut solar oven based on the design above
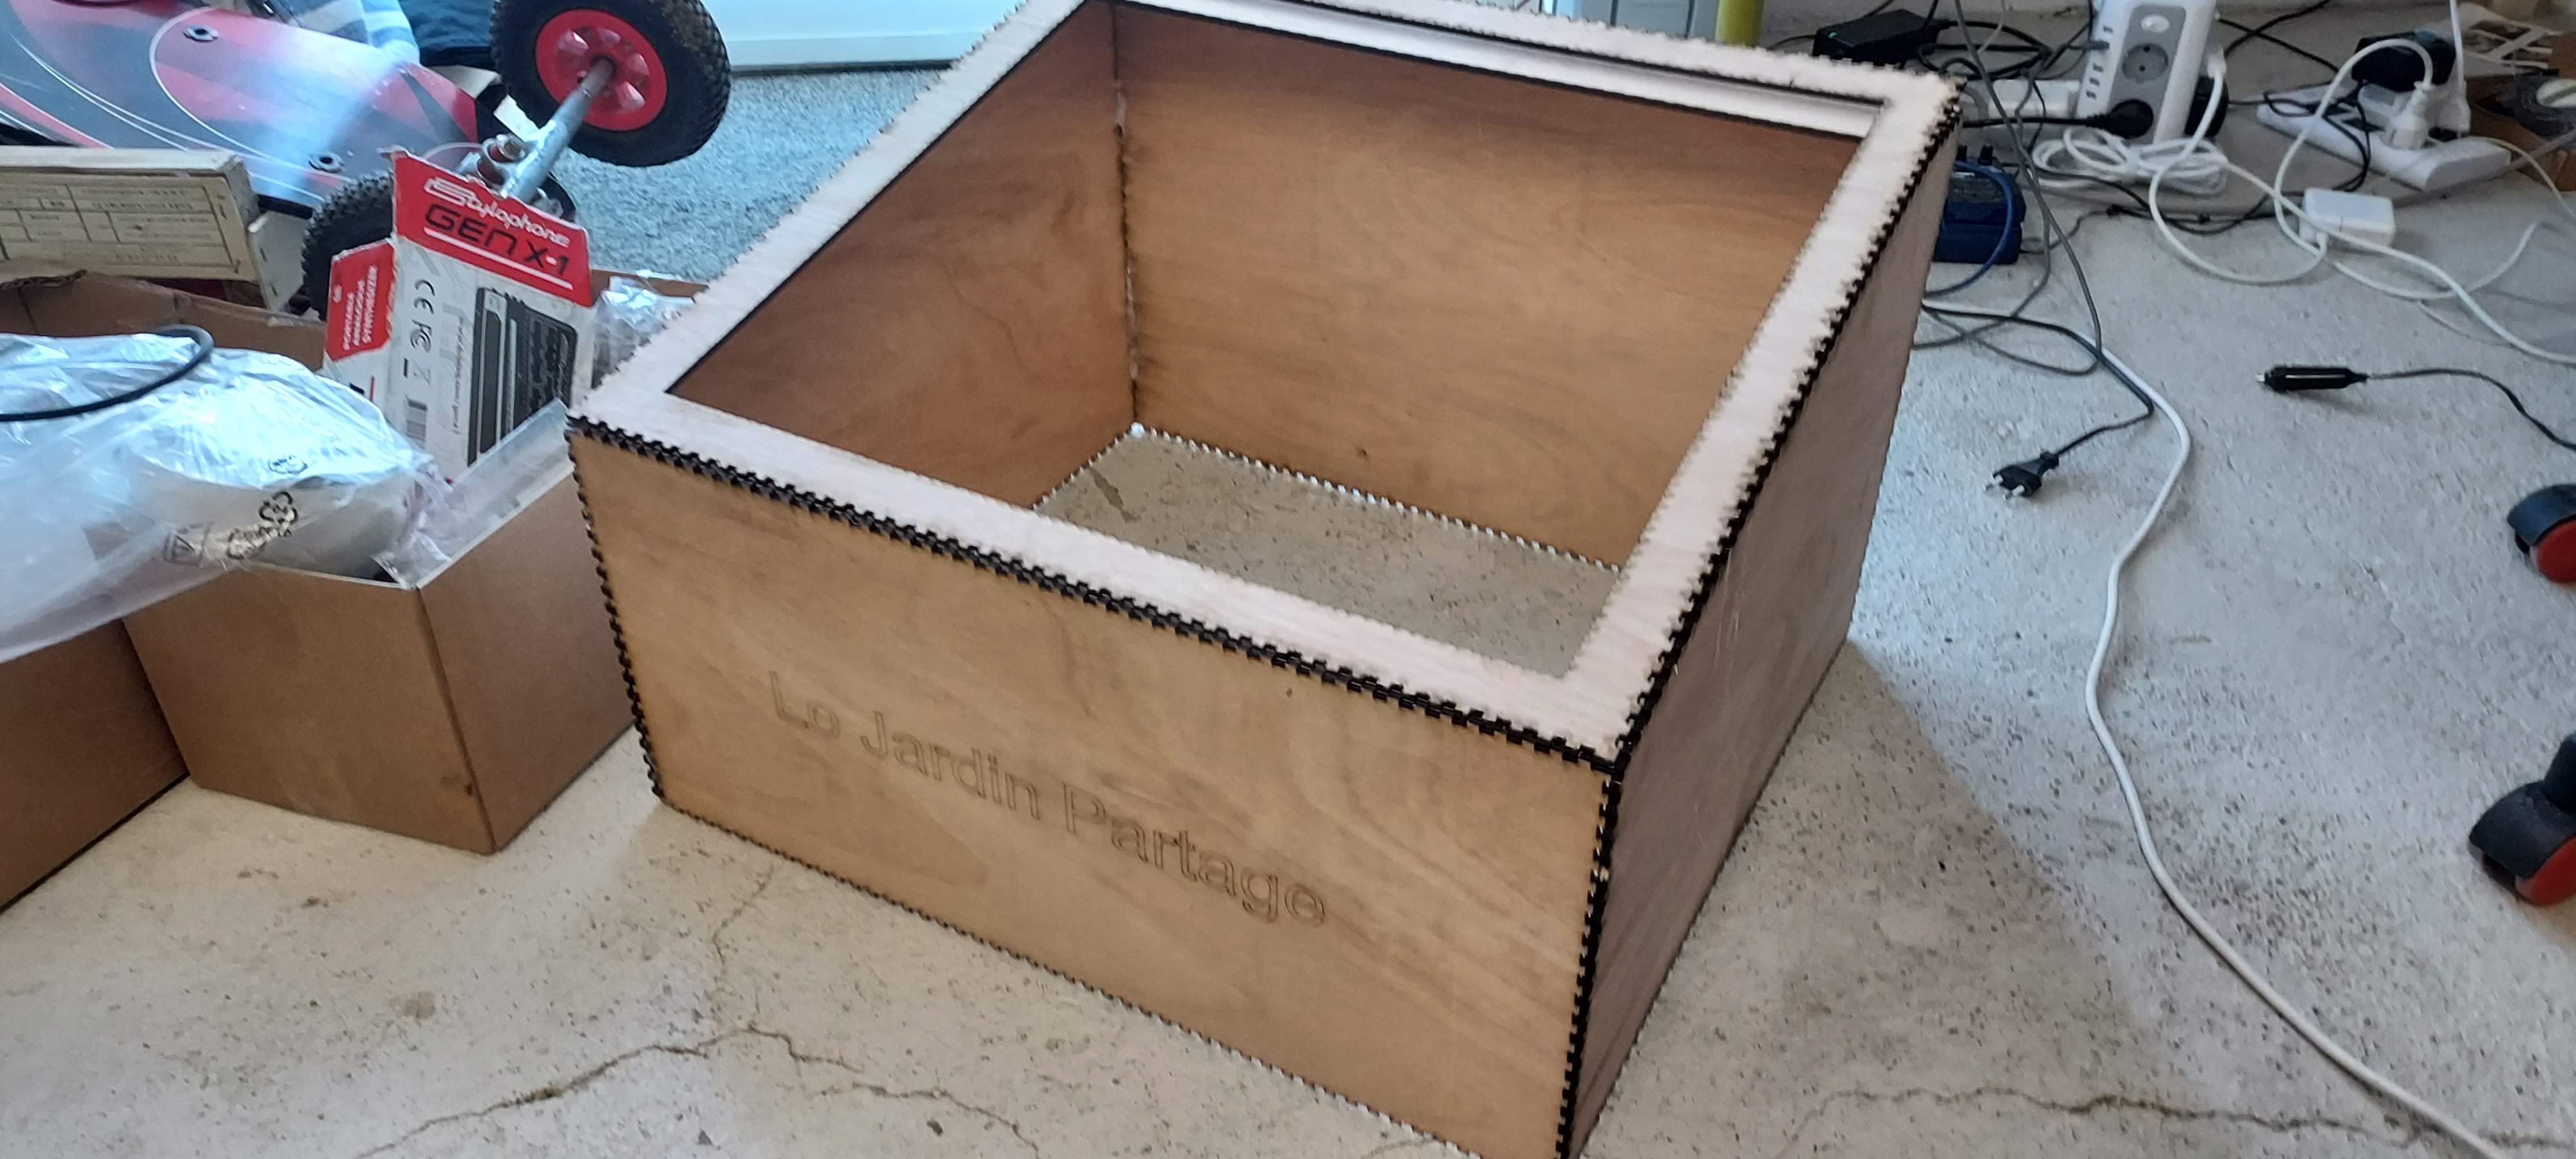
This is a pretty big piece with lots of fiddling to get the finger joints right. boxes.py does all this for you but I haven’t figured out how to import the STL or DFX files that boxes.py makes into Fusion for further editing. When I tried nothing imported.
I am using parallel construction lines to help draw the finger joints. Used parameters for box dimensions and material thickness so it is easy to change size depending on what scrap maerial is avalable.
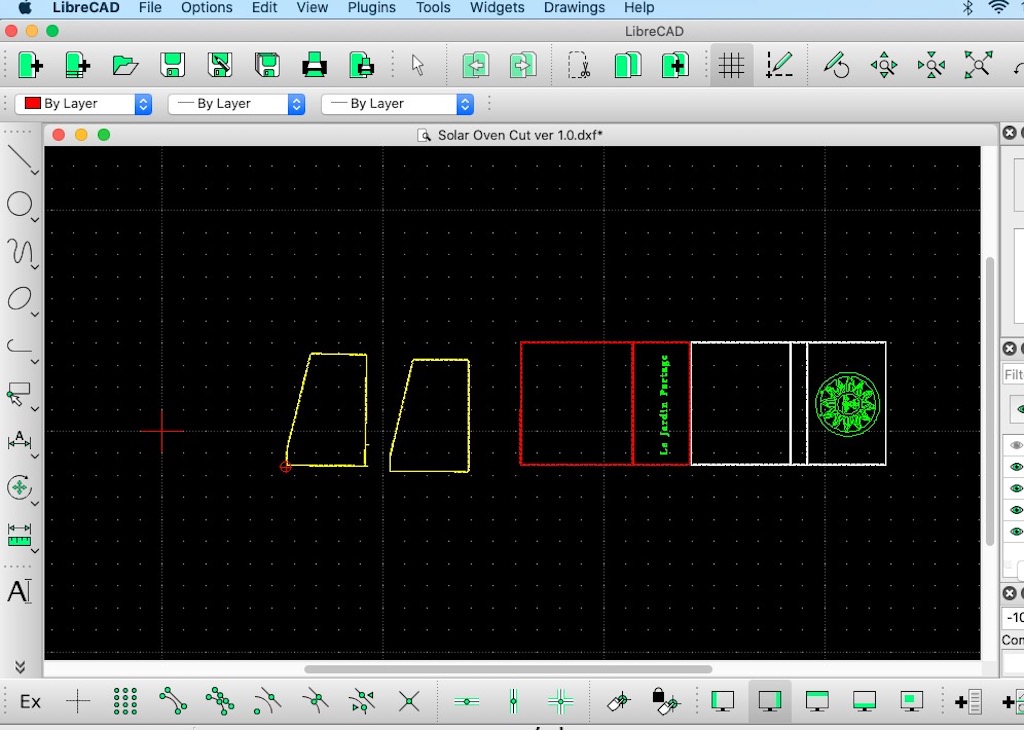
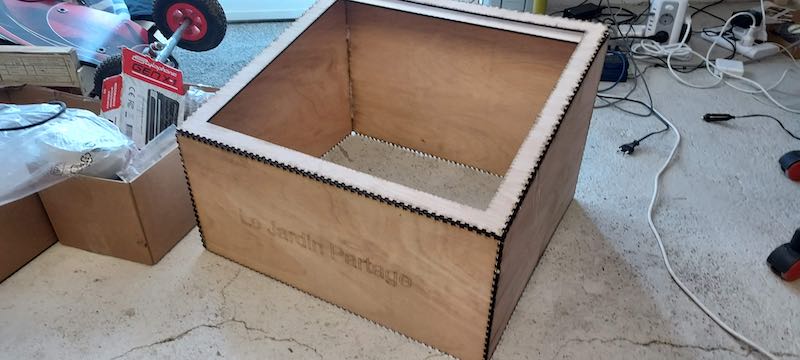
The screenshot above is a solar oven I designed using librecad. The oven is for a community garden (Le Jardin Partager) in Gaillac, France where I live.
Ferdie, my global evaluator, asked me to add a few words about my 2d design process. I used the mouse not the command line in librecad. For almost all cases, I am an anti-command line kind of guy - machines and software should be designed to adapt to the cognitive capabilities of humans, which are considerable, and not force humans to adapt to machines (see Norman, Don The Design of Everyday Things and Rose, David Enchanted Objects: Innovation, Design, and the Future of Technology). I find the emphasis and merit given in Fabacademy to complex ways to do simple things offensive and against the spirit of the democratization of technology.
I use gimp for raster based design work and librecad and inkscape for vector based design work although each program is able to do a bit of what the other can do.
Here’s what I do if I find a raster graphic (jpeg etc) that I want to add to a librecad (vector) design for cutting on a laser cutter.
- I find a graphic I like on line or design one with inkscape.
- If it is a raster based image I import it into Inkscape and convert it to a vector file.
- I export it as an SVG or DXF file, both vector based images.
- I import the vector file made by inkscape into librecad.
- I then move and resize the image as needed in librecad
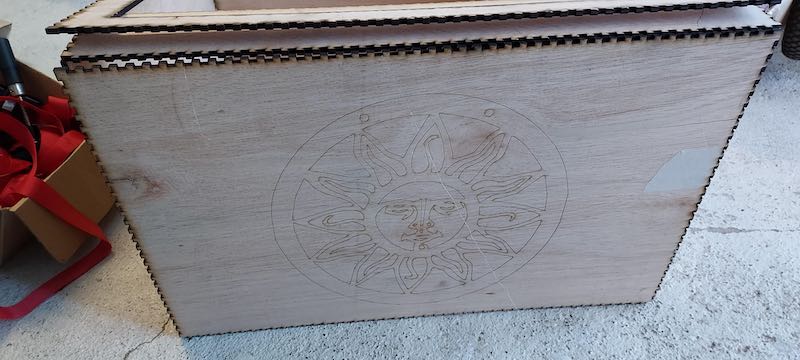
I found the sun image on the internet and used the process above to convert it to a vector file for import into librecad.
I used the text capabilities of librecad to create the text.
Could have used multiple passes, more power, or slower speed to make the graphics and letters darker.
This is the kind of thing I hoped to do more during fabacademy - build things like solar ovens and musical instruments. Sadly most of fabacademy, probably 70% for me, was spent wrestling with unreliable hardware and software to design and build microprocessor boards that are readily and inexpensively available commercially.
Useful links
My favorite finger joint box web site - boxes.py
Video on using the rectangular pattern tool in Fusion - drawing multiple lines or other objects at regualr intervals.
Files
Fusion 360
1) Shaker Fusion file
3) Solar Oven Fusion file
4) Solar Oven DXF file
4) Bamboo Flange fusion file - with parameters
5) Bamboo Flange STL file