Task to be Perform for this week
Group assignment:
1) Review the safety data sheets for each of your molding and casting materials.
2) Make and compare test casts with each of them.
Indivisusal Assignment:
1) ReDesign a 3D mould around the stock and tooling that you'll be using, mill it (rough cut + (at least) three-axis finish cut), and use it to cast parts.
Learning outcomes
1) Design appropriate objects within the limitations of 3 axis machining
2) Demonstrate workflows used in mould design, construction and casting
Introduction about molding and casting
What is molding
Molding is the process of manufacturing by shaping liquid or pliable raw material using a rigid frame called a mold or matrix. This itself may have been made using a pattern or model of the final object.The liquid hardens or sets inside the mold, adopting its shape. A mold or mould is a hollowed-out block that is filled with a liquid or pliable material such as plastic, glass, metal, or ceramic raw material. A mold is the counterpart to a cast.
Molding is a technique through which a material, often plastic, but also metal, rubber, or powder mixtures is shaped on the outline of a die or mold. There are many different techniques for molding materials, just as there are many different applications for each process.
Moulding Boxes:- Special purpose boxes are designed for use in moulding systems where the demand of high pressure moulding and high production rates (from a fully automated system) require a box designed and machined to exacting tolerances.
These are some old processes for moulding and Cating
The followings are some moulding flasks from Dandong Foundry in China.
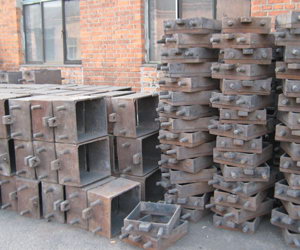
Sand boxes for manual green sand casting process
Large moulding flask for resin sand casting process
Special moulding flask for green sand casting process
What is casting
Casting is a manufacturing process in which a liquid material is usually poured into mold, which contains a hollow cavity of the desired shape, and then allowed to solidify. The solidified part is also known as a casting, which is ejected or broken out of the mold to complete the process.
Both the processes involves pouring of molten metal into a mold/die which will take the shape of cavity mold or die on solidification. The basic difference between moulding and casting is the method by which molten metal is poured. .Casting use a one time mold but molding can use molds on repetition too.
Among the most commonly used mold materials are liquid latex, silicone rubber, urethane rubber, and alginates. Common cast making materials include Plaster-of-Paris and Gypsum cement, concrete, plastics (resins and epoxies), waxes, metals.
Difference between Molding and Casting
molding:-molding is the preferred process for manufacturing plastic parts. Injection molding is used to create many things such as electronic housings, containers, bottle caps, automotive interiors, combs, and most other plastic products available today. It is ideal for producing high volumes of plastic parts due to the fact that several parts can be produced in each cycle by using multi-cavity injection molds. Some advantages of injection molding are high tolerance precision, repeatability, large material selection, low labor cost, minimal scrap losses, and little need to finish parts after molding. Some disadvantages of this process are expensive upfront tooling investment and process limitations.
Casting:- casting involves pouring liquid metal into a mold, which contains a hollow cavity of the desired shape, and then allowing it to cool and solidify. The solidified part is also known as a casting, which is ejected or broken out of the mold to complete the process. Casting is most often used for making complex shapes that would be difficult or uneconomical to make by other methods
Pattern material:- Following Some basic material is available in market for this process.
1. Wood.
2. Metal (CI, Brass, Al, White metal ).
3.Plastics.
4. Rubbers.
5. Plasters.
6. Waxes.
Group Assignment
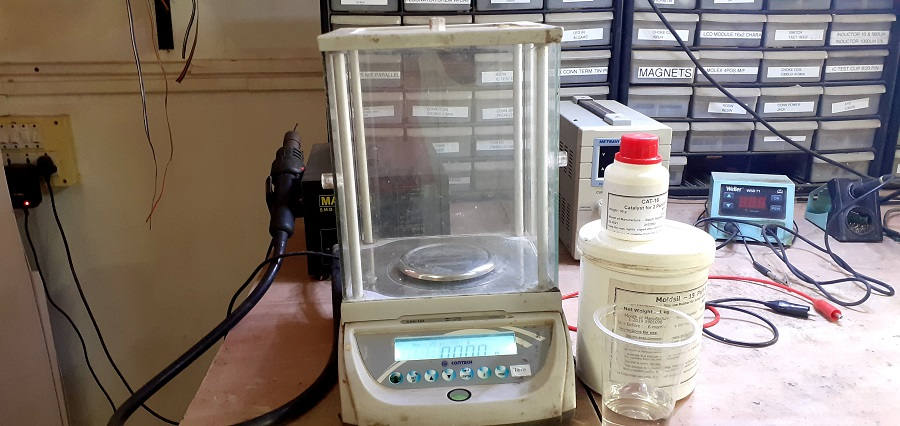
The group task for the week is to review the safety data sheets for each of our molding and casting materials,then make and compare test casts with each of them. In Vigyan Ashram we have different material like Hydrostone,Instamold,Epoxy resin ,machine wax,Moldsil for molding and casting. So we study this material one by one.
In group assignment we decided to test the different available material for molding as well as casting. I have taken the epoxy resin mateial for testing perpose and have tried to test it.
I have tride to this material for molding also but due to its hardness its not possible to develope the mould using epoxy resin material
The Details of group Assignment is here Group Assignment
We all have reffered the the sefety datasheet of respective material and by following this we have perform the various test.
About Epoxy resine Material.
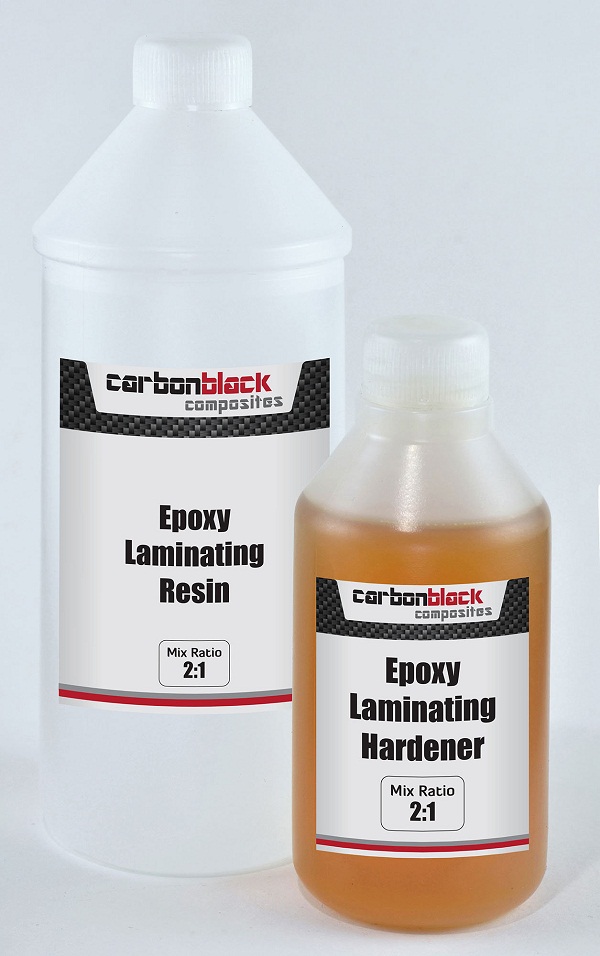
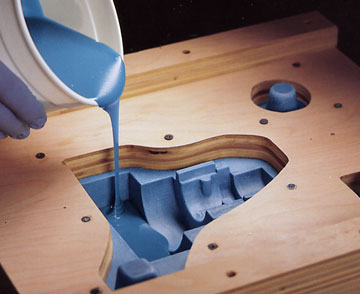
Casting resin is a low-viscosity epoxy resin, which consists of two components: the actual resin and the matching hardener. When these two components are mixed, a chemical reaction occurs, which causes the mass to harden for some time.
The epoxy resin will take 2 to 3 hr for curing and around 24 hour for complete hard. The epoxy resin and hardner is taken with the praportion of 2:1 resp.
Mixing Ratio is 2:1
First i have read the datasheet of expoxy resin material DATASHHET
Casting resin molds are used for making a specific mold of an object you’d like to replicate or display. Resin is then poured into the mold in order to replicate the mold’s exact shape. This then makes a 3D object you can display wherever you choose.
Resin casting is a method of plastic casting where a mold is filled with a liquid synthetic resin, which then hardens. It is primarily used for small-scale production like industrial prototypes and dentistry. It can be done by amateur hobbyists with little initial investment, and is used in the production of collectible toys, models and figures, as well as small-scale jewellery production.
This is video shows how we can used this Epoxy resin material.
Properties of Epoxy Resin
1. The primary reason for epoxy’s popularity is its superb mechanical strength. Welding is often the only alternative. Epoxy is nearly always cheaper and faster than welding.
2. Epoxy also has excellent resistance to chemicals. After setting, there is no worry of a chemical reaction that will weaken the seal. It also resists heat. That resistance makes it ideal for electronics and electrical systems and other industrial applications.
3. Those who use epoxy are aware of the superb mechanical strength and low curing contraction. They also know the epoxy resins are well-balanced industrial materials and suited to a broad range of applications.
Performance Properties of resin
1. it has Biocompatibility.
2. it is Environmentally friendly.
3. Flame resistant.
4. Food Safe
KEY PROPERTIES OF EPOXY RESIN MATERIAL
1. High Mechanical strength.
2. Low Shrinkage.
3. Excellent adhesion to various substrates.
4. Effective electrical insulation.
5. Chemical and solvent resistance, and.
6. Low cost and low toxicity.
7. The tensile strength ranges from 90 to 120 MPa
8. A tensile modulus ranging from 3100 to 3800 MPa
9. Glass transition temperatures (Tg) that range from 150 to 220 ◦C
How To Measure And Mix Resin And Hardener
Epoxy resin comes in two parts: a resin and a hardener. Mixing the resin and hardener together prompts a chemical reaction between the two, transforming them from a liquid into a solid. Measuring accurately and mixing thoroughly is essential to making sure your epoxy resin cures properly.
1. There are 3 simple steps when measuring and mixing epoxy resin to ensure a perfect pour.
2. Determine how much epoxy resin you'll need
Accurately measure both resin and hardener
3. Mix thoroughly for 3 minutes, scraping the sides and bottom as you stir:
Note:-Measure accurately! Adding too much of either resin or hardener will alter the chemical reaction and the mixture will not cure properly.
How To Pour And Spread Epoxy Resin
Follow a few easy steps for a perfect, thick, glossy, professional looking epoxy resin finish! After making sure your piece is clean, dry and level, thoroughly mix equal parts resin and hardener. Pour the resin over your work, spread as desired, torch out air bubbles, cover and let it dry overnight!

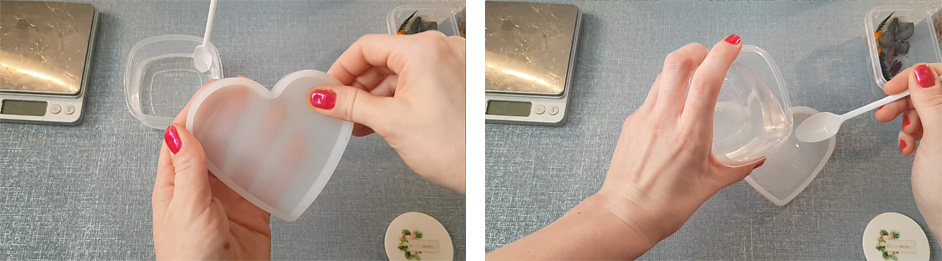
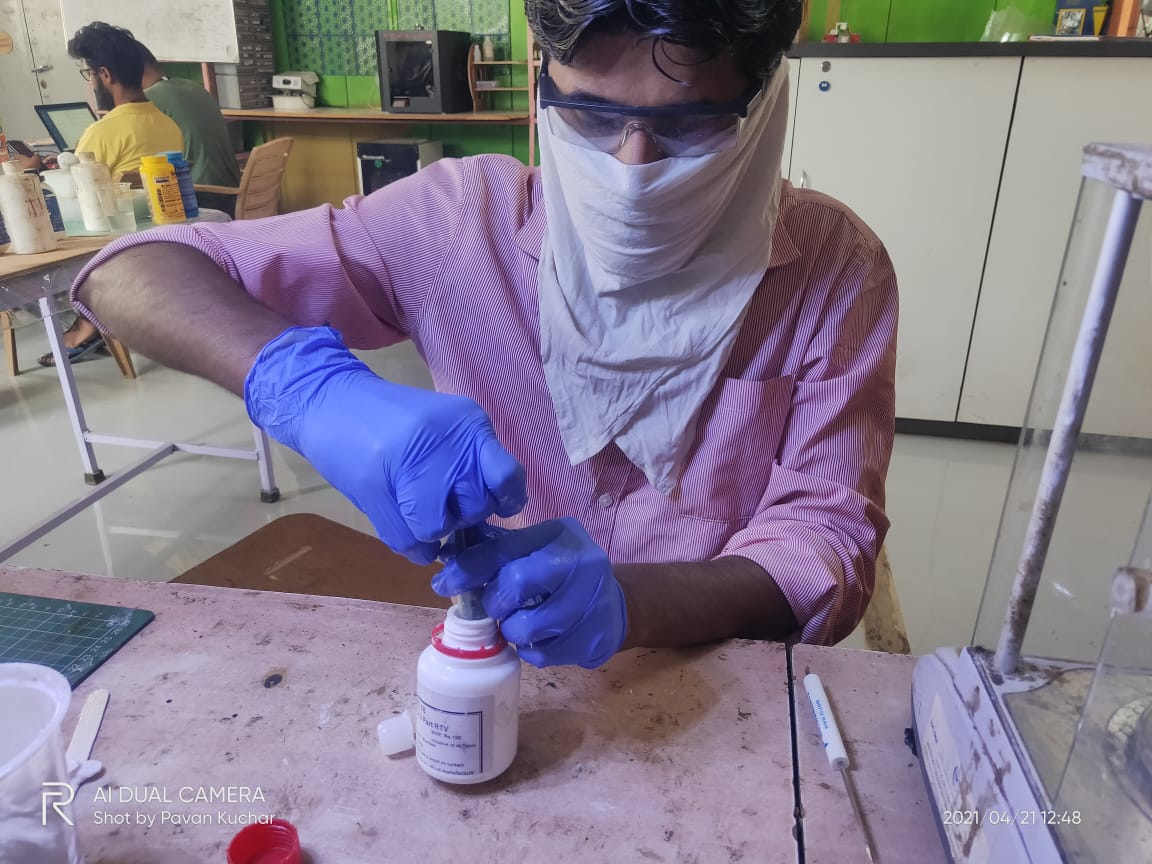
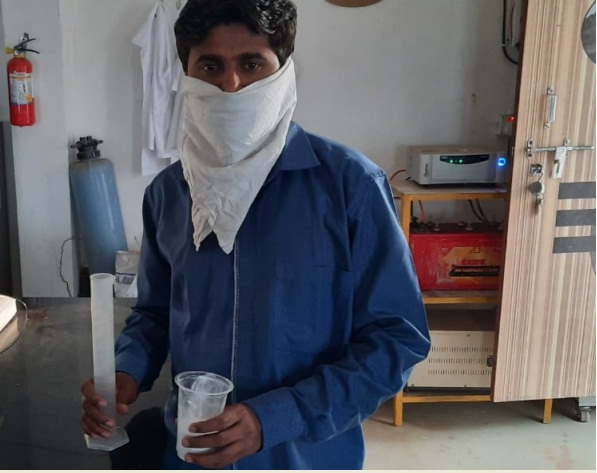
Here, i was pouring the resin material on 5rs coin for making it as mould .
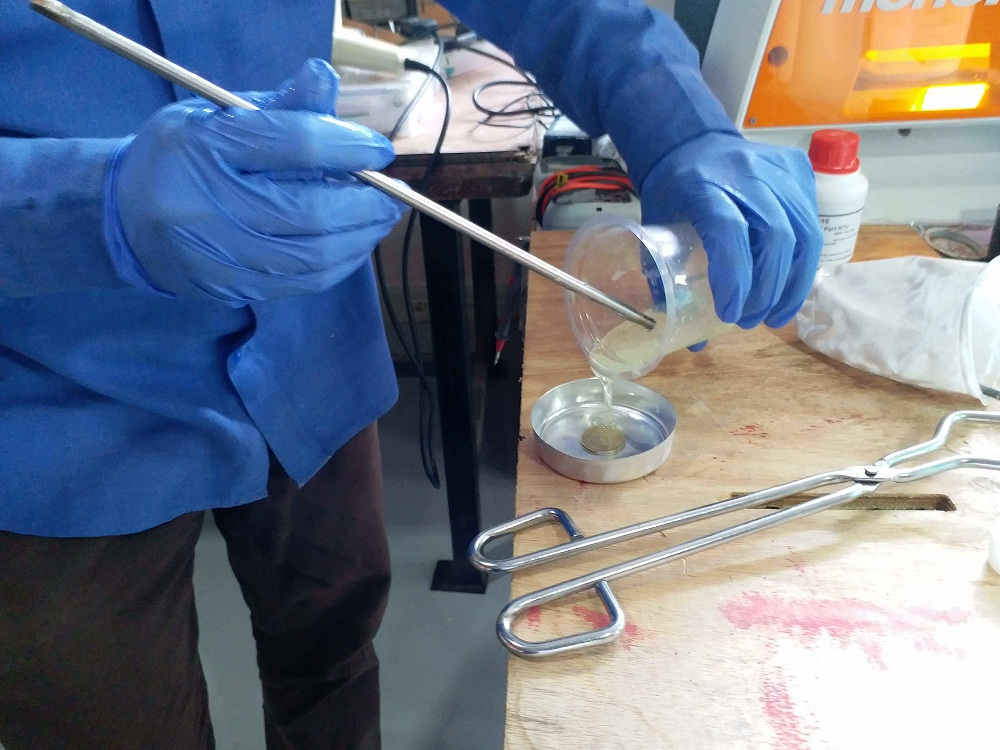
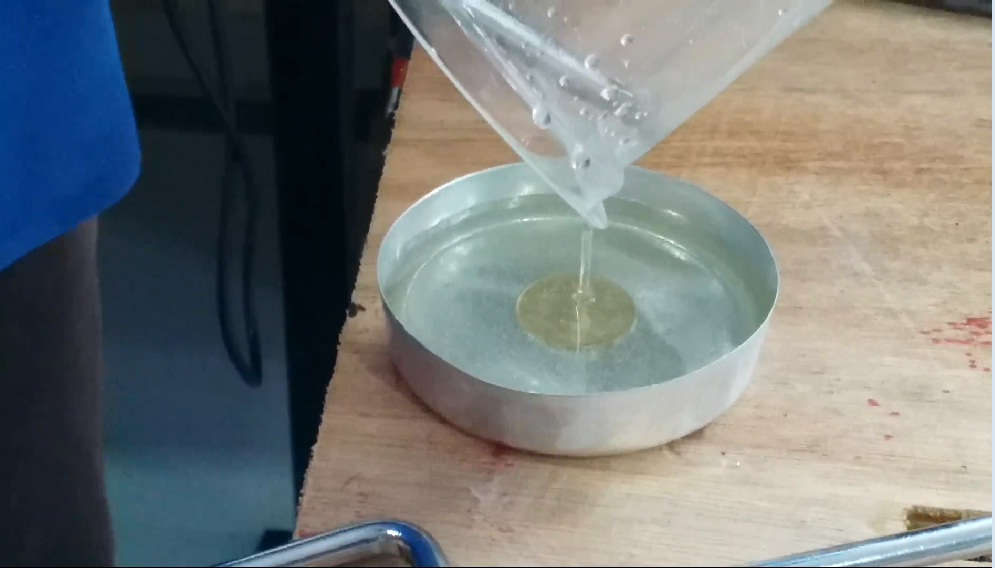
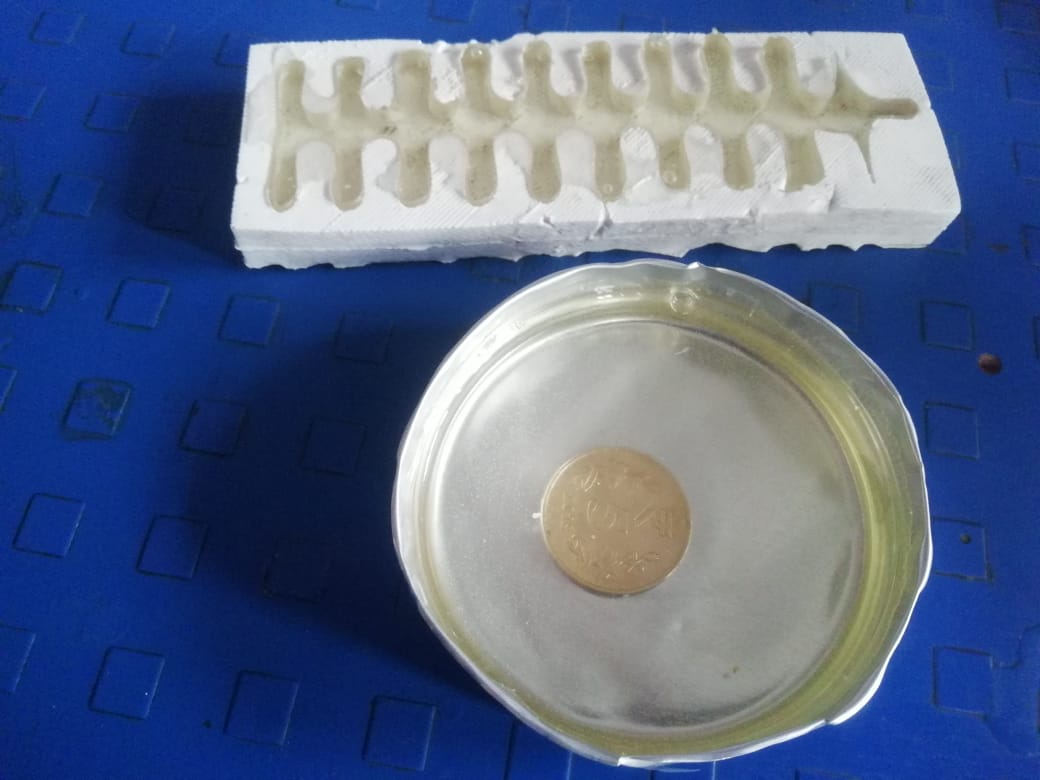
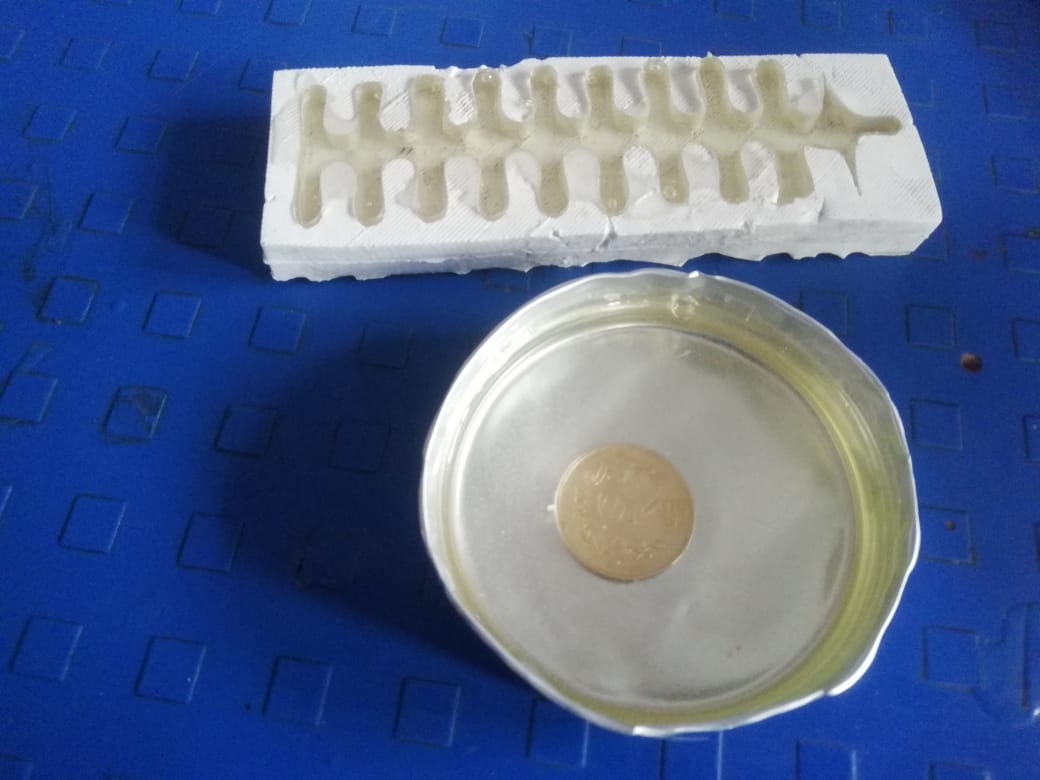

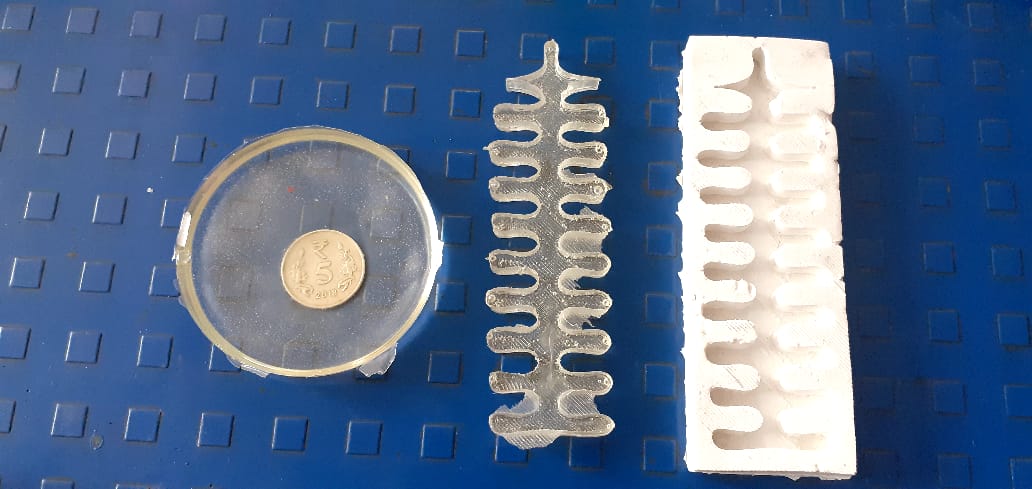
Observations:- From testing the resign material , It is observed that we can not create the mould of epoxy resin material because of this hardness.
Summary
1. From testing ,I can summerized that Epoxy resin is good material for casting the mould.
2. Sefety precaurtion is importent while handling this material.
3. Time required for curing is appox. 24 hours.
Individual Assignment:-
Flow of Individual Assignment
1) Designing the 3D Object using FreeCAD software as per tools and machine operations.
2) Designing Mould box as per required size( size of wax box).
3) Set the parameter of milling machine
3) Milling the two Positive mould using SRM-20 Milling Machine.
4) Casting the mould
5) Creation of an positive Object
In this assignment we have to design a 3D molud,mill it using SRM milling machine available in our fablab and used it for casting from various material .we have to design positive mould cast using parafine wax material.then to create negative moluld using given material to create positive object of required material.
Here one things again is if you have to cast flexible material used hard material for moulding also if you have to cast hard material used flexible material for moulding.
So, for this week firstly i have to select the 3D design for moulding and casting Purpose.
I have started with reffering the fab academy websites of previous year students websites what they have done and from that i have decide to design the 3d object. it was quite difficult to me to select the proper design for moulding and casting.
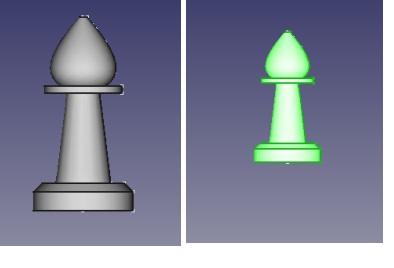
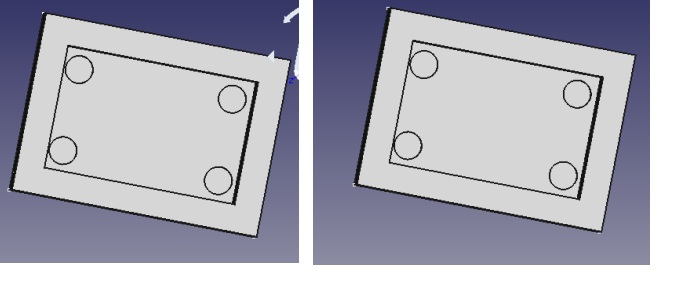
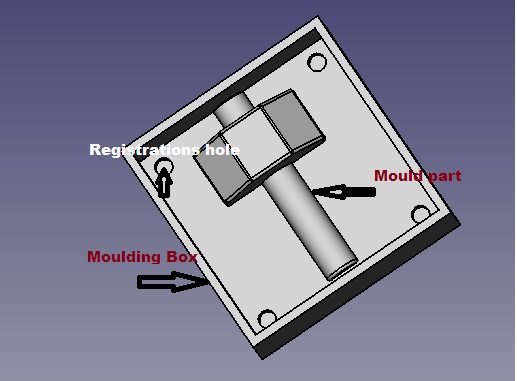
Chess Piece with moulding Boxes
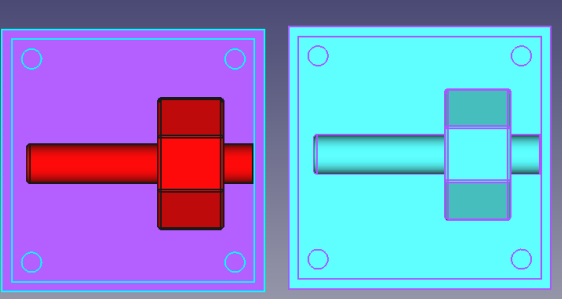
First, i have designed the chess Piece in free cad software but to create a possitive mold we required to design the object in two part with male and female part to create its negative mould.
After that i moulding something that can be used for my final project .
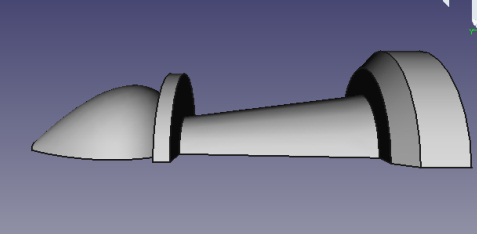
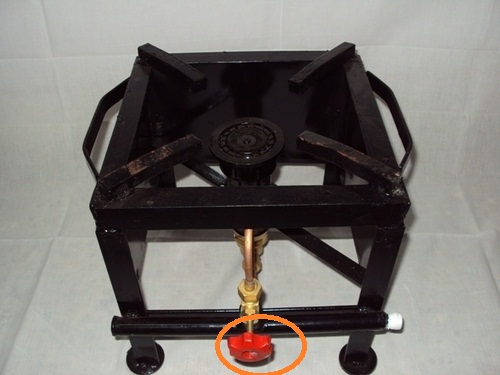
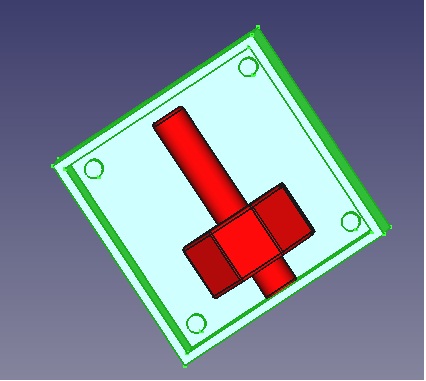
As i am persuing the project of edible oil tempreture controller by controlling the flame of LPG gas, so i decided to design the Rotary knob of LPG gas controller. and second side of knob i want to attached the Stepper motor for automatic controlling.
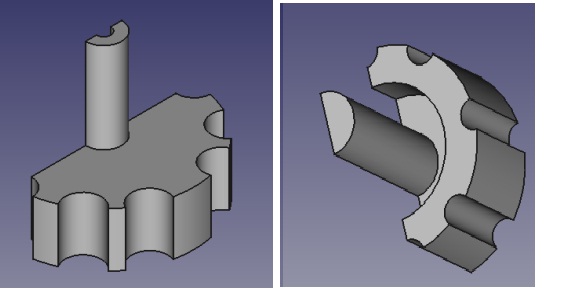
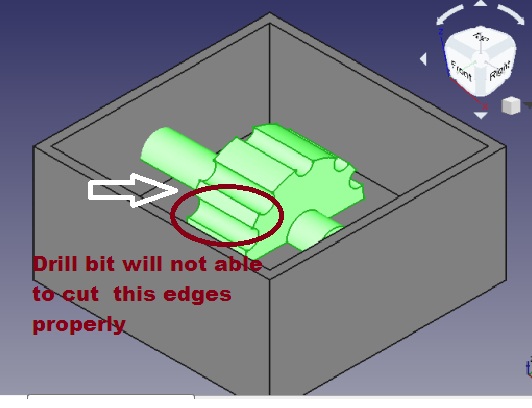
So i have started to design this object using free cad software, first i have measure the dimessions of this rotary knob and by following that i have design it But when after completing this design i have dicussed with my colleagues they have suggest me due to its curving edges the drill but will not cut correctly so i need to change my design. After i have design the male and female parts of my object like this.
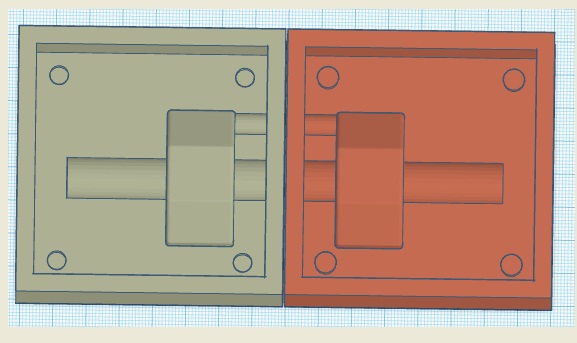
i have designed the separate object of designed and then assembled it using assembly workbench.
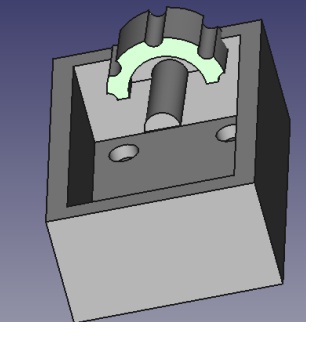
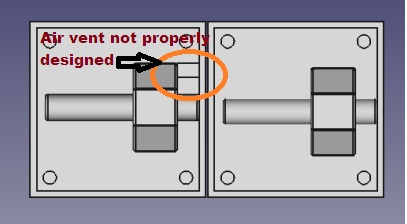
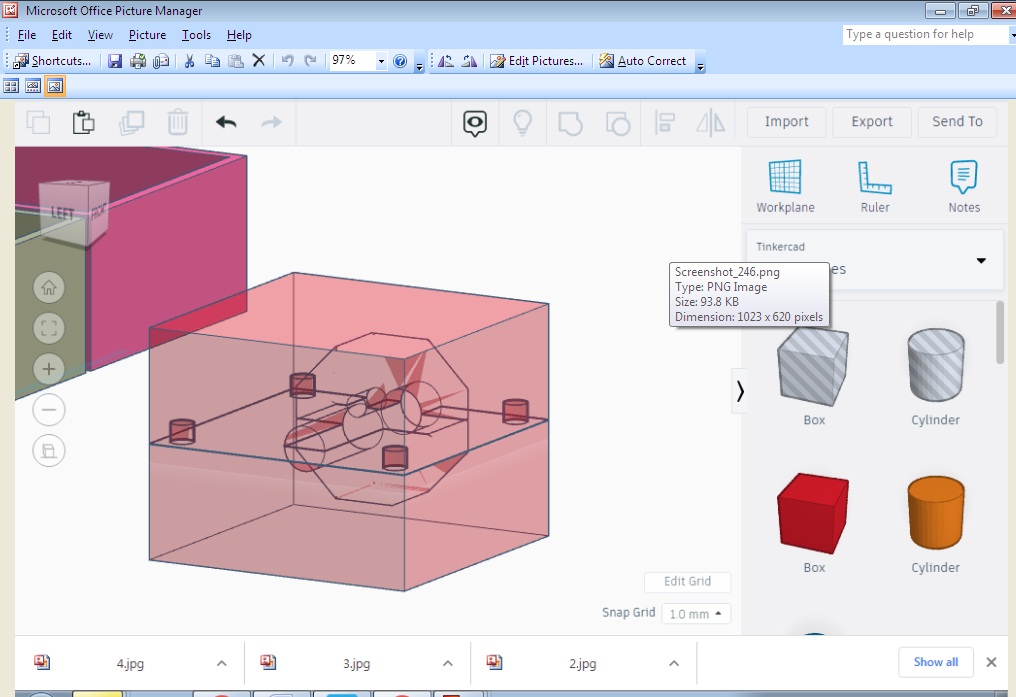
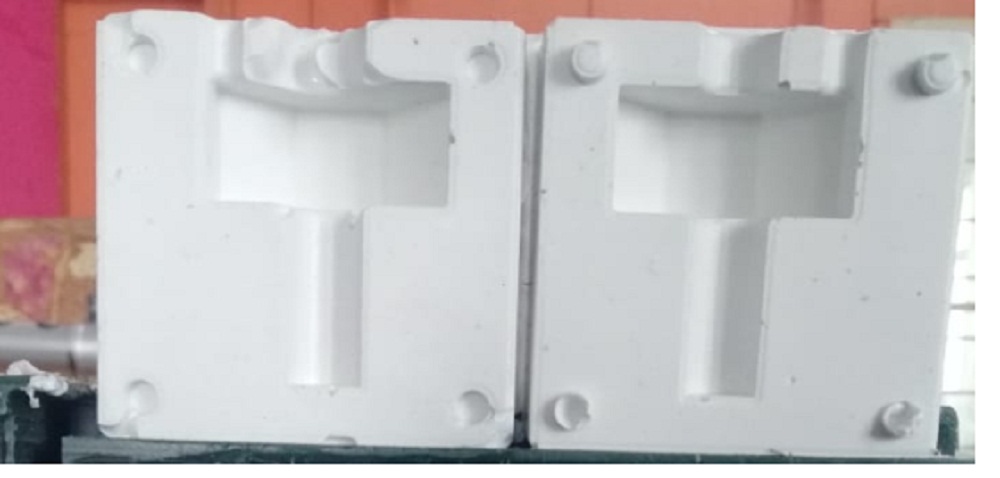
Then, i have to attched the Air vent to this object, I tried to designed it but it was not proper. Then it was quite difficult for me to attached the Air vent in freecad. so first i have save this files as .stl then import it in Tinker cad software for designing the Air vent. Then, i have tried to develope the virtual negative mould of this object in tinker itself for this my collegue Mohit help me how to make a virtual mould Creating the virtual mould in Tinker Cad Software For Creating the mould block consist of three Steps.
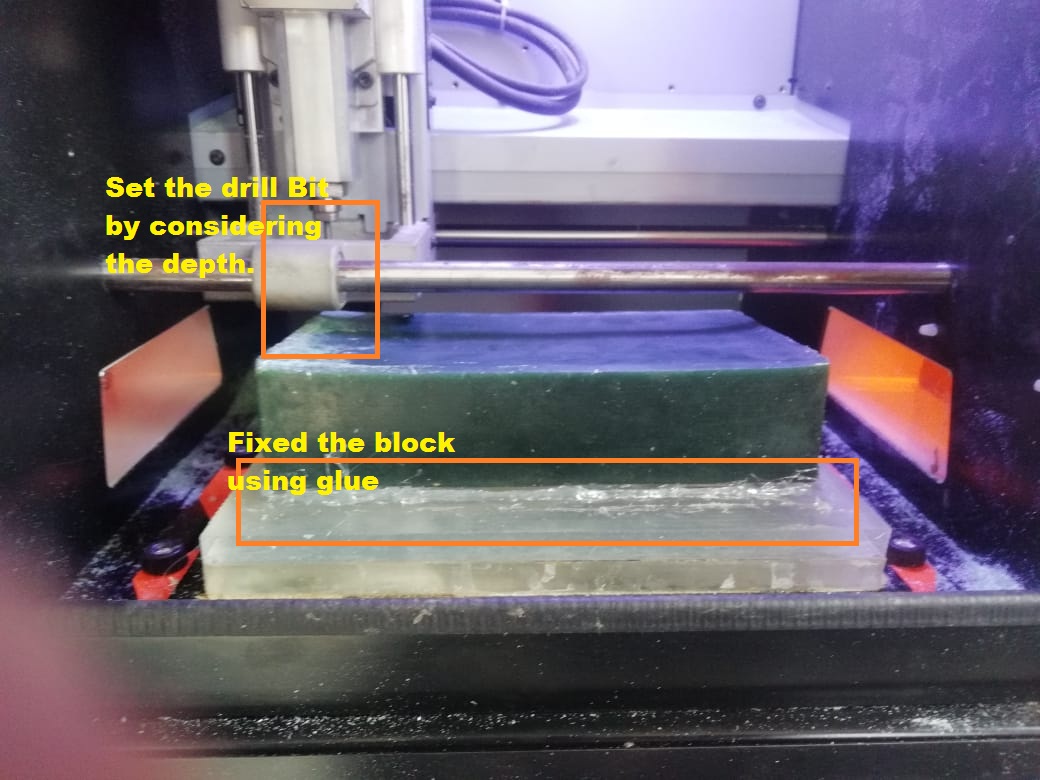
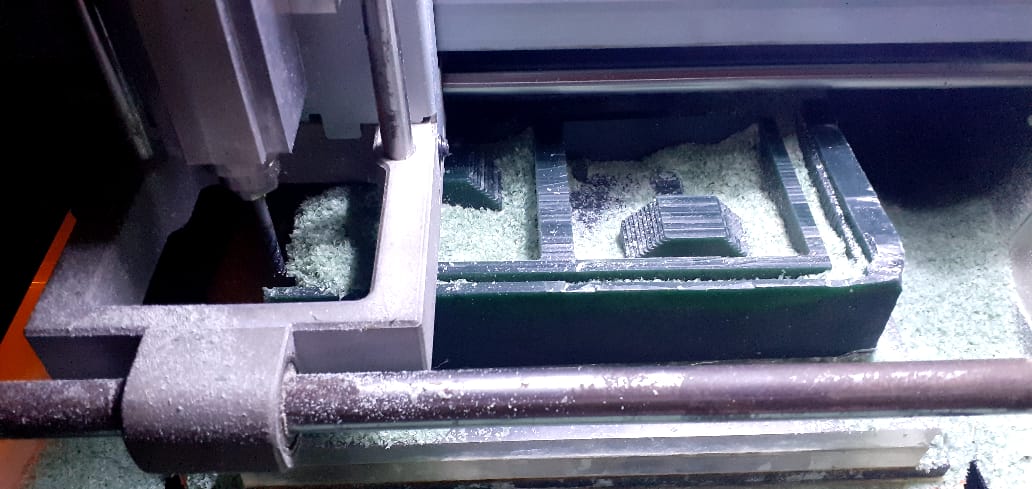
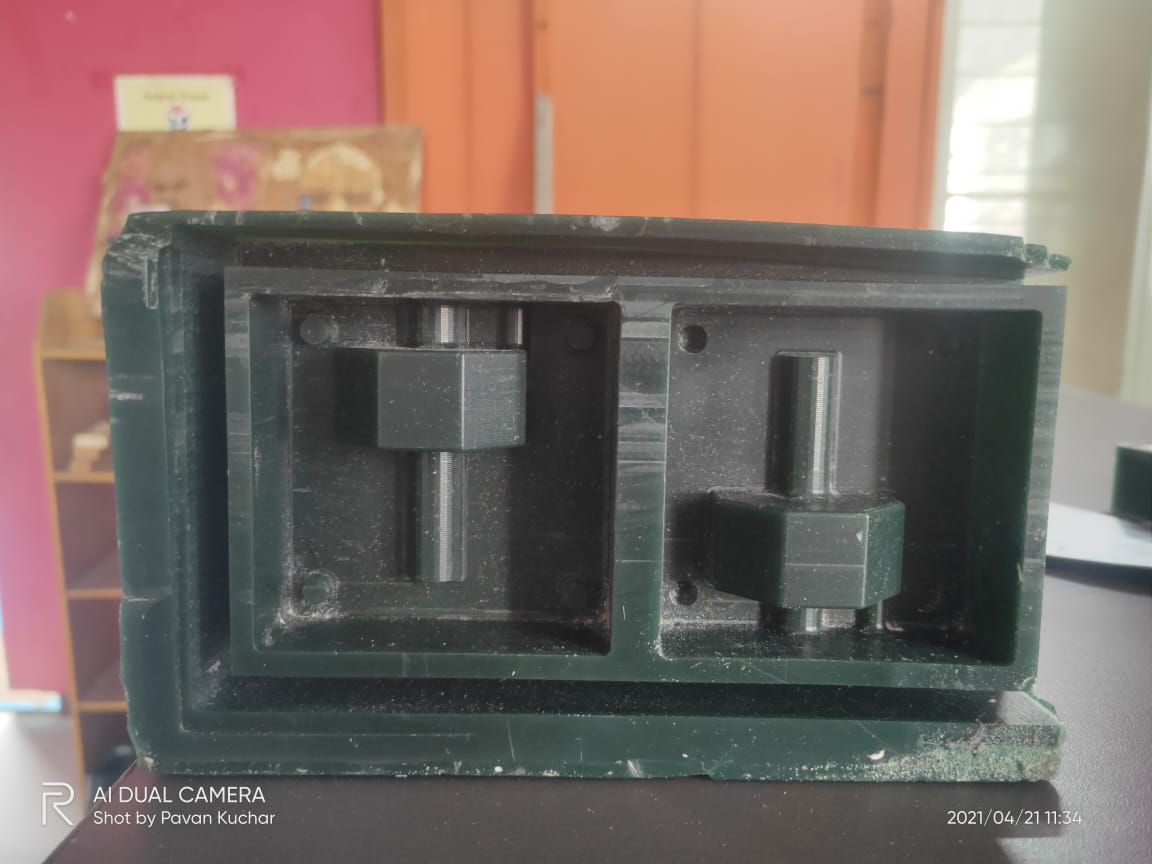
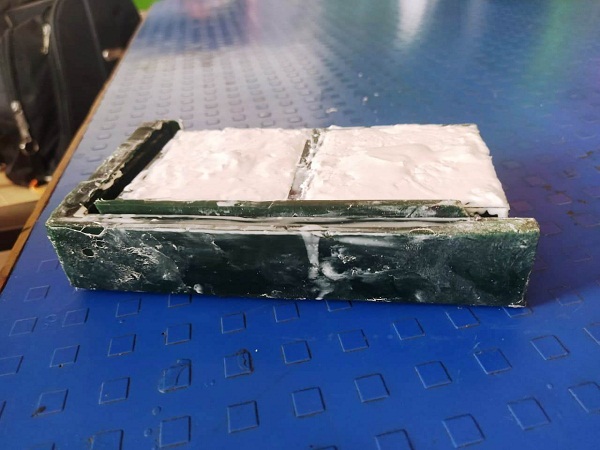
But here one things we should remember that your design size as per provided machinable wax. The machinable wax provided with its dimenssions 17cm*10cm*3cm (l*b*h) Respectivelly.
Note:- Set your drilling bit by considering the depth of your design. Before seting the provided wax box i need to do manual surfacing it, Because the box is somewhat uneven in size. In case of block is very Uneven in surface we need to do manual surfacing other wise not. Then the wax block is somewhat even i have to go for operation with machine. After setting all this I started to prepare the design for milling on SRM-20 Milling machine. Now this design is exported as a .stl file from the design software. For Creating the toolpath I have used Moddela 4. Software. Once machinable wax box is milled properly then the positive mould is ready ,now i need to go for creating the negative mould for that i have used silicon Rubber material 1. Wear eye protection.
Now the negative mould is ready for casting, I have used different material for casting Like Hydrostone, Epoxy resin and Wax.
The hydrostone availble in powder form for pouring the hydrostone into the mould as per data sheet we need to mix the hydrostone with water by keep the ration of 100:32. For 100gm of hydrostone power need to take 32gm of water, so by maitaining this ratio, I have mixed the powder with water. Then the next material i had used for the casting i.e. epoxy resin As per the data sheet we have reffered the mixing ratio of epoxy resin with harderner is 1:2.
Commercial Gas Stoves
Two separate parts of knob
Assembling in freeCAD
Place the object on the bottom surface of mulding box using wireframe menu.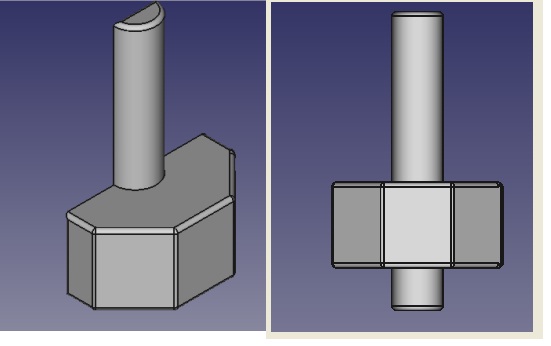
wireframe
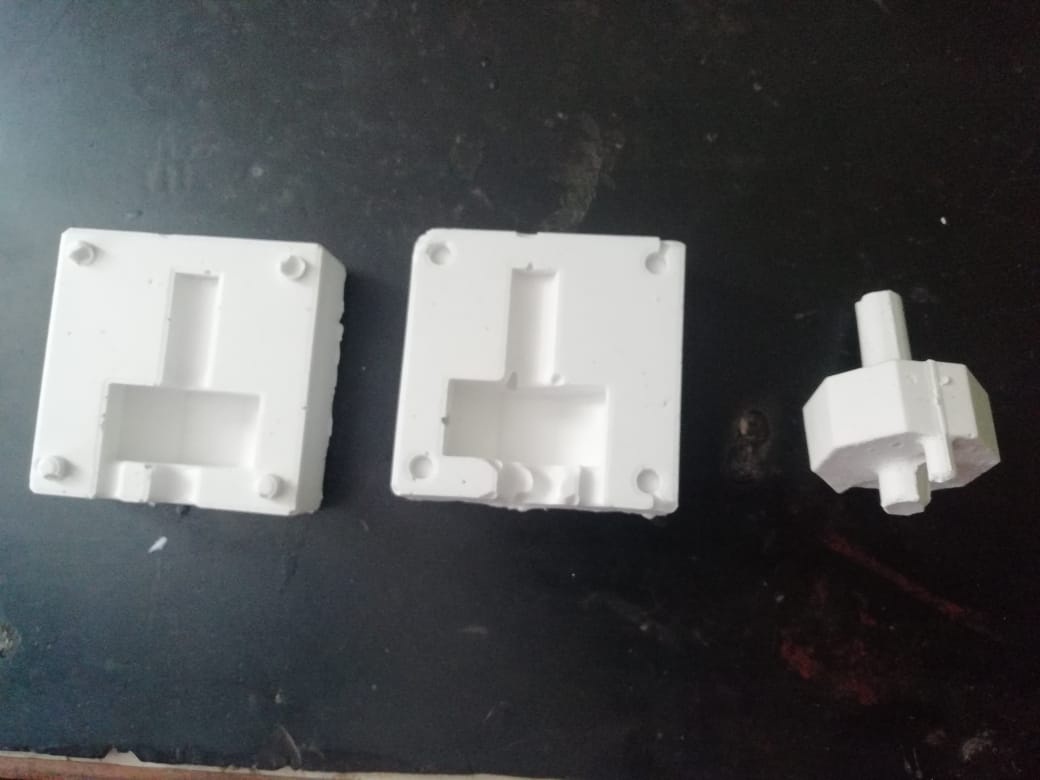
Female part
Male part
Object with an Air vent.
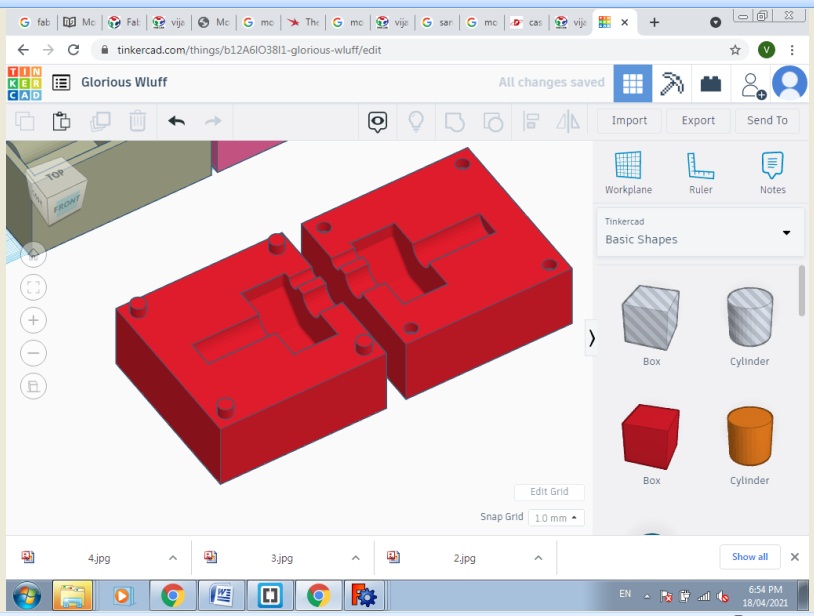
Vertual Mould
Creating The Mould of 3D design from Machinable Wax
1. Surfacing.
2. Roughing.
3. Finishing
For milling i have used three softwares MODELA-4 Player for the genaration of G-code, V-Panel for communication with SRM-20 machine, Virtual Player for MODELA.
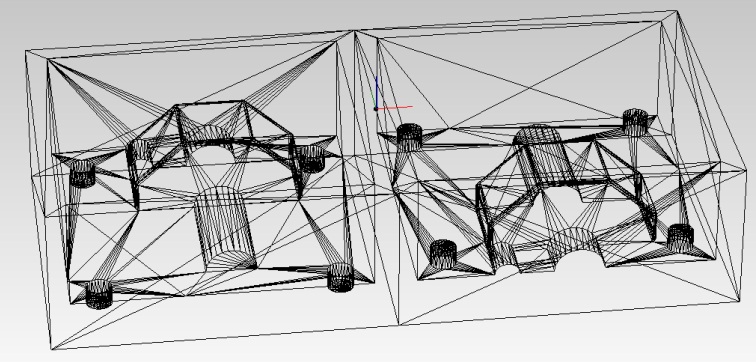
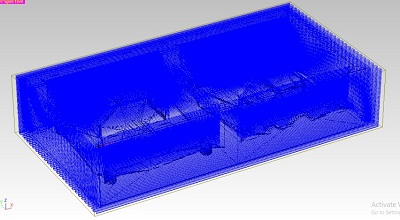
I have used freeCad software for designed my 3D object then export the design file as .STL format and save it.
So here, I need to resize my design as per provided box. 
Manual Surfacing

Wax block after Manual Surfacing
leveling of wax block using glue gun
Steps Wise Procedure.
1. Open the software and open the saved .stl file.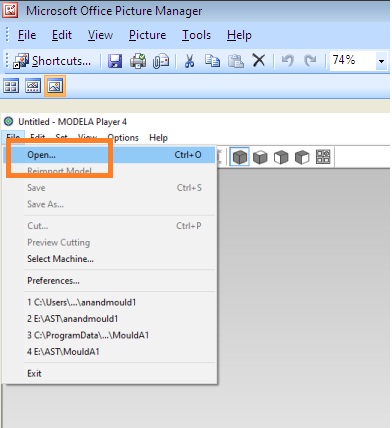
Open the software and open the saved .stl file.
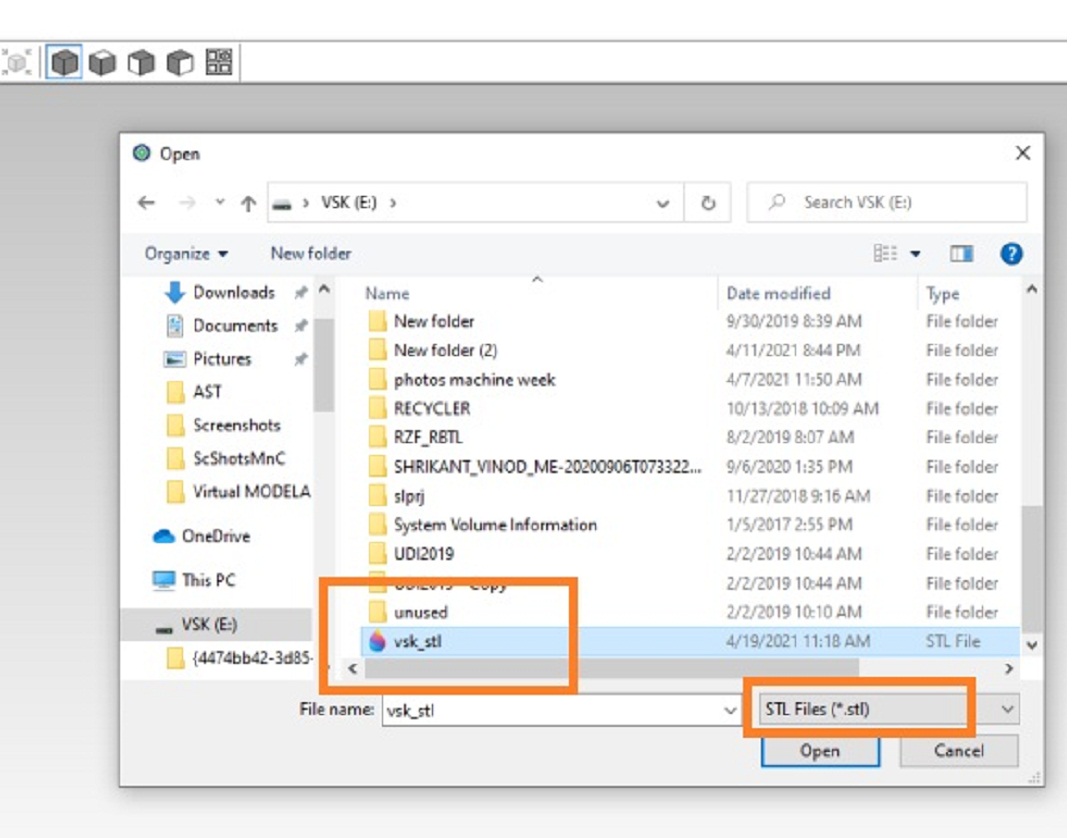
Selecting .STL file to open
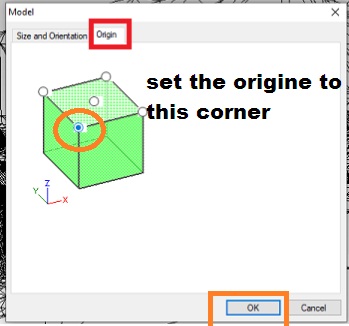
2. Select material from top right corner and compass for setting the origine
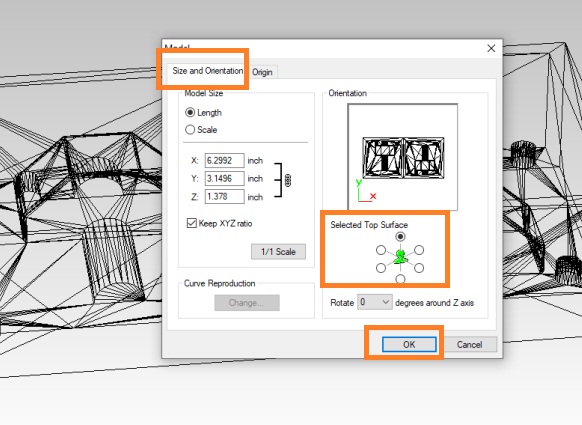
3. From Compass setting you can set surface of object
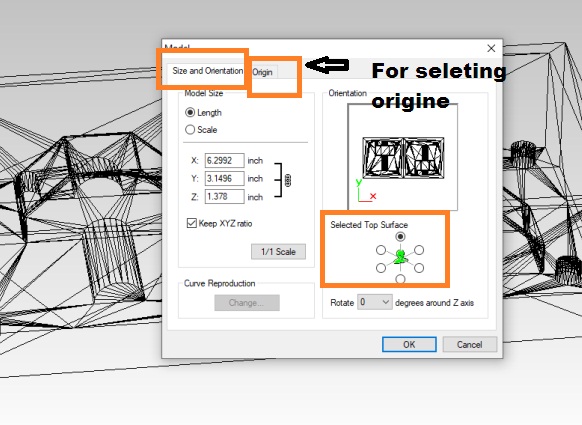
4. Then you can set the origine by clicking on here, i have set the origine here
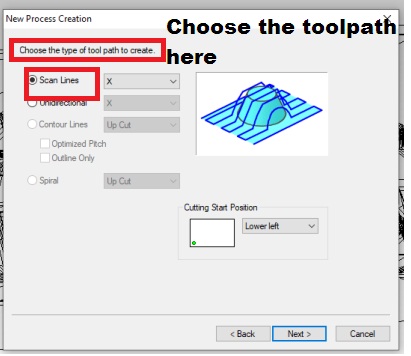
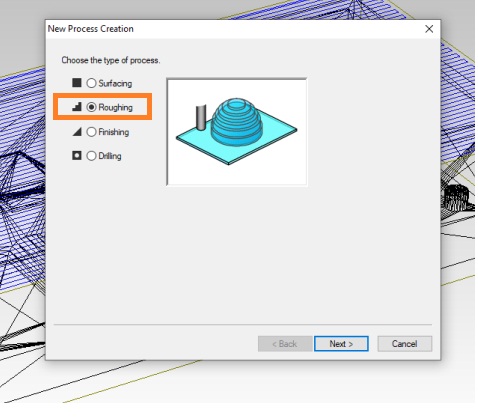
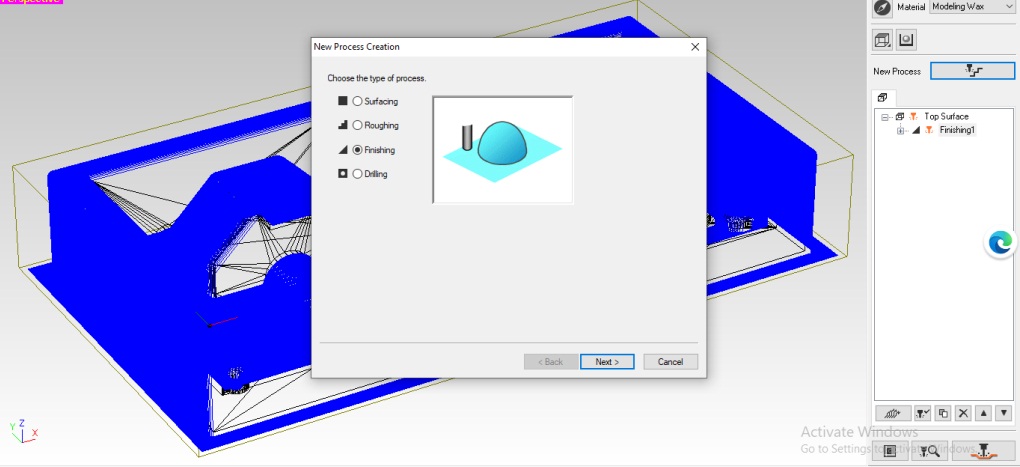
4. Then go to new process,select the first operation i.e. surfacing and click on next.
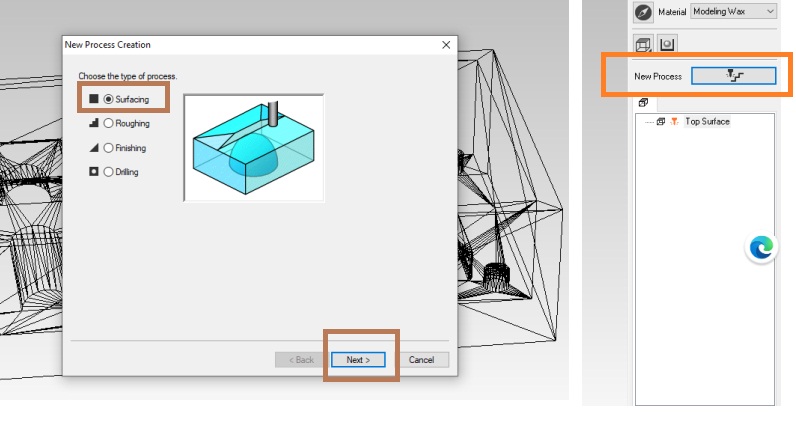
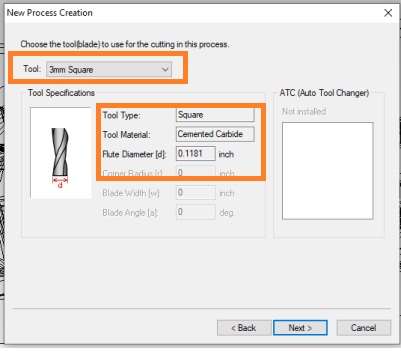
5. Then Select the proper bit, i have selected 3mm.in diameter and click on next
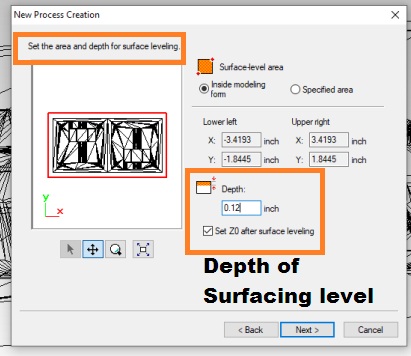
6. here,you can set the depth of surfacing level as per unevenness of your wax box.
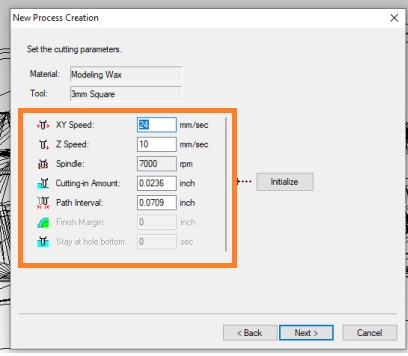
7. Then you can set the cutting parameter as per requirement from here, and click on next
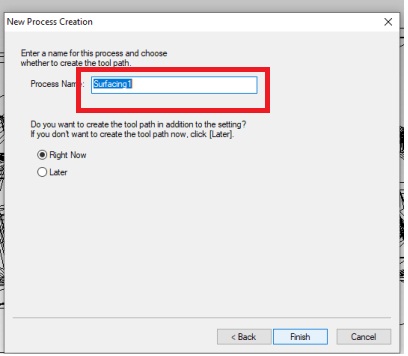
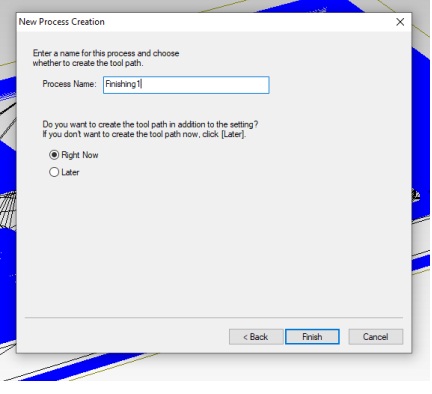
8. Finally,Enter the name of process, Here i have seleted surfacing1 and click on finish button
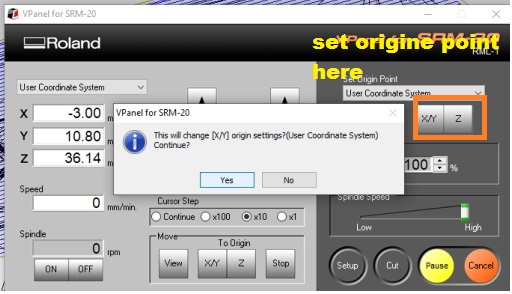
Now go to V-Panel for seting the origine. so open V-panel software.
Adjust the X,Y and Z axis as per your box area and set it as a origin. This is an initial position of machine.
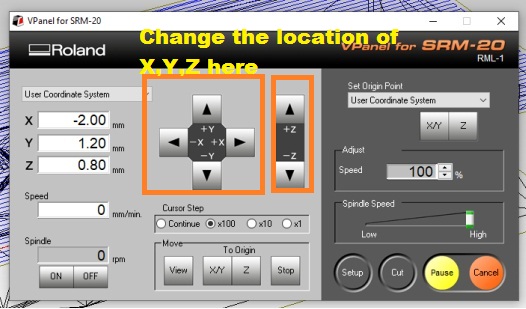
I have set the X,Y axis as per need.
I have set the z axis as per need.

Then Go to modela 4 software and click on start cutting, click on ok and continue, it will shows the cutting lines are on your object
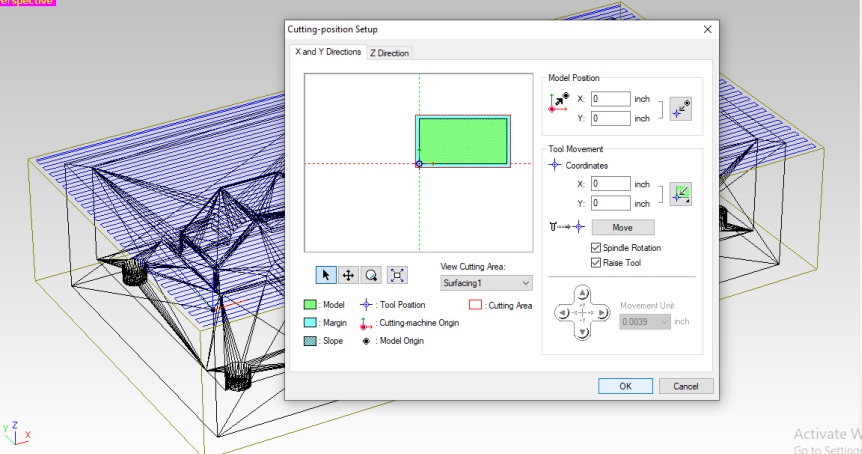
This is to set the cutting position
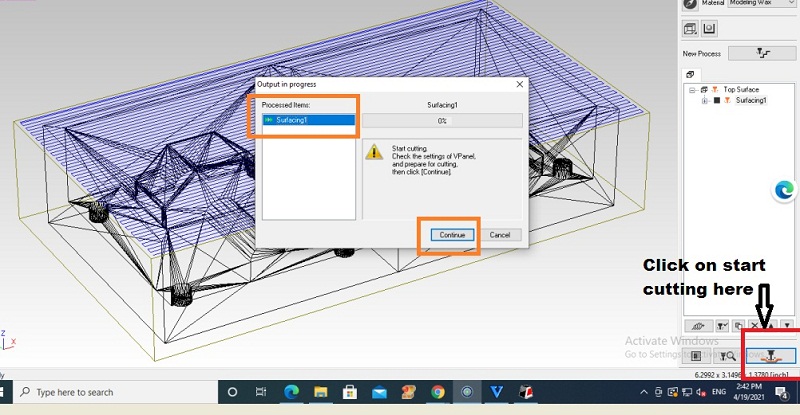
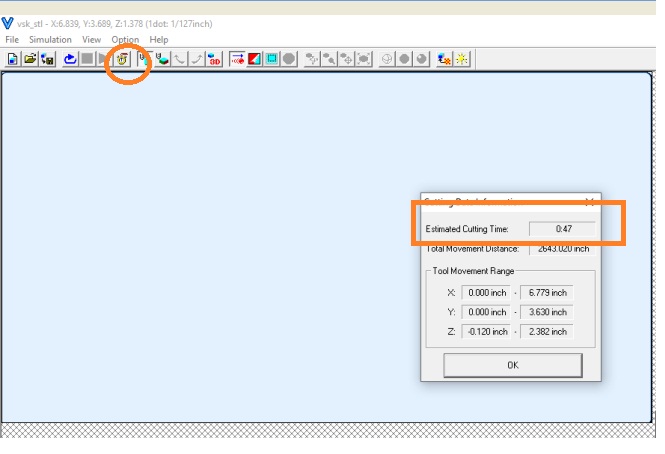
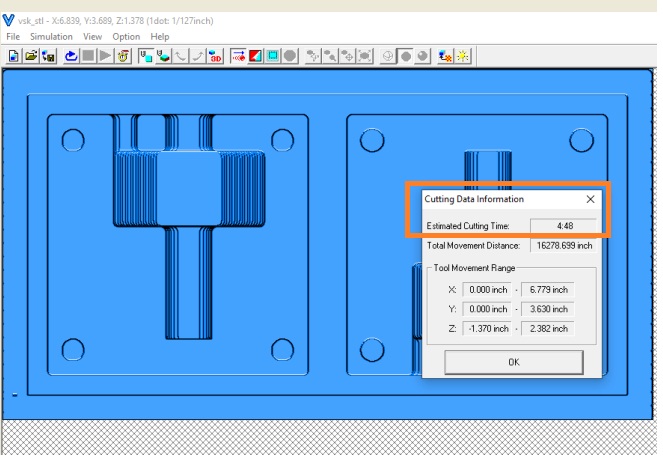
Then go to virtual player checked the Estimated time require
After completing the surface cutting, we need to change the process name i.e. Roughing and rest of the steps are same as mentioned.
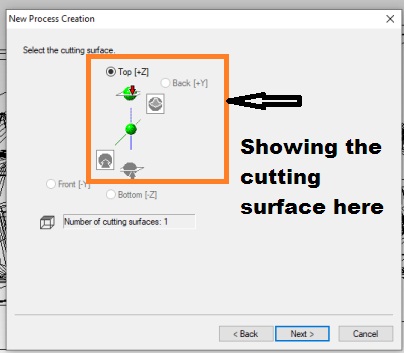
This is for selecting the cutting surface
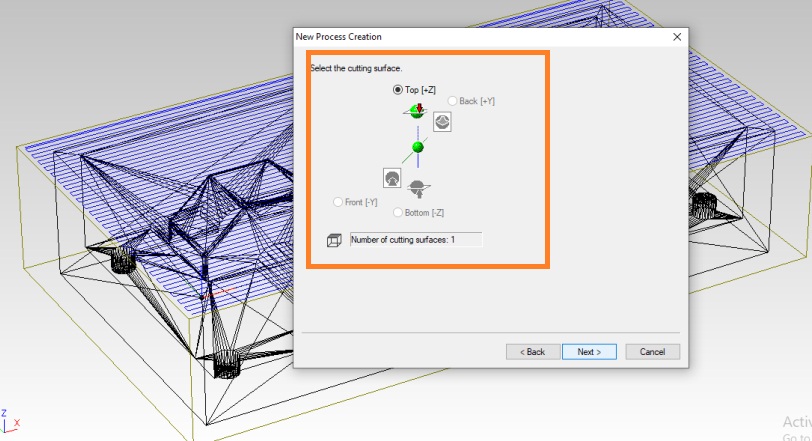
Surface to be roughing of an object
Then by clicking start roughing, the process will start
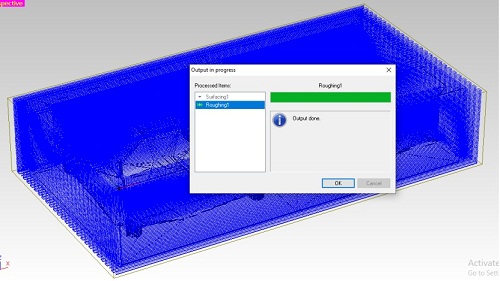
Then i have checked the estimated time required by virtual player software
So In my case, after some time it was showing some error and machine have stoped this processed, This is becuase of communication had been loss with srm-20 Machine, I have cliked on Resume but processed was not continue
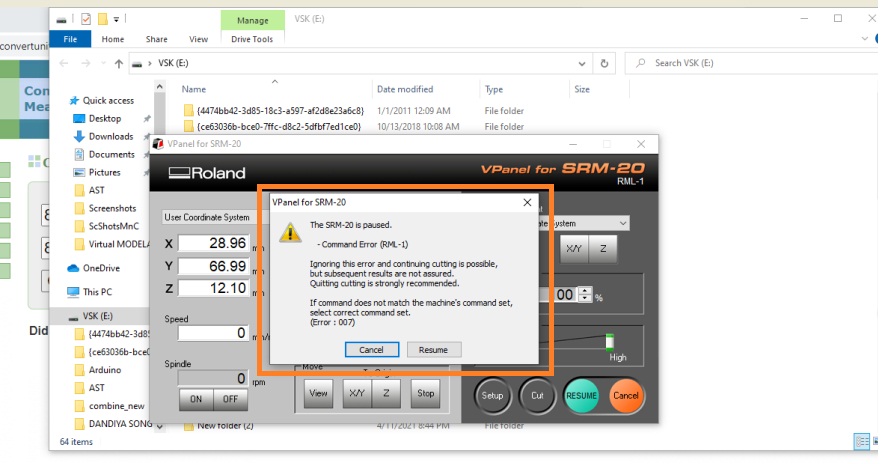
Here, my Mistake was i don't have note down the set origin, so i can't set the same origine again.
So, I had to recreate the Wax block and Processed it again

So I have recreate the block and processed it again i.e. Surfacing,roughing and finishing .
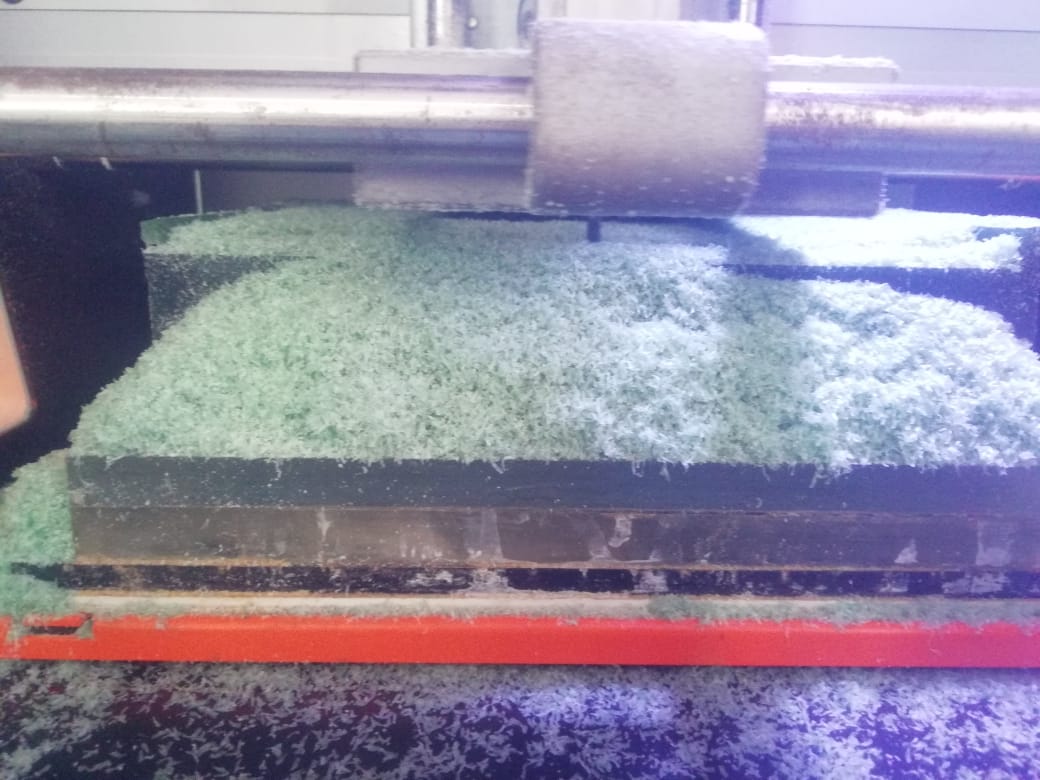
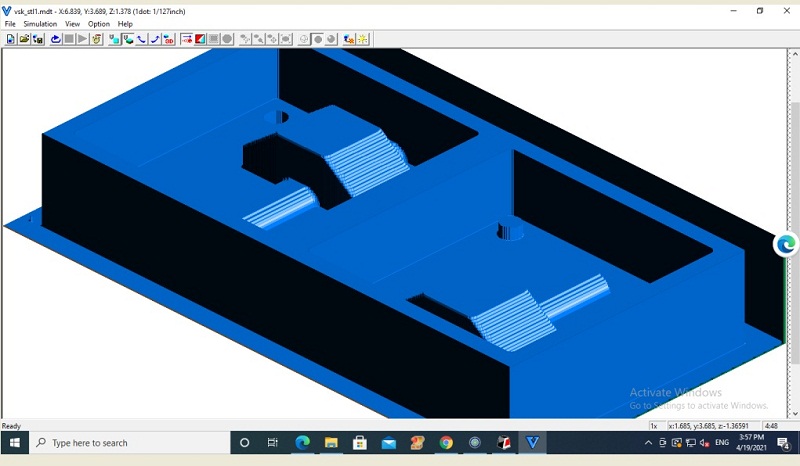
Object after Roughing.
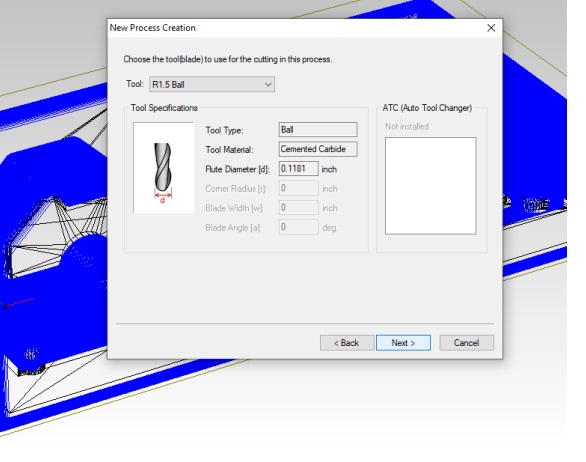
Then, In same way i need to select the process of finishing
Here, for finishing processed we need to select the drill bit of R 1.5 ball type.
Then start finishing processed.
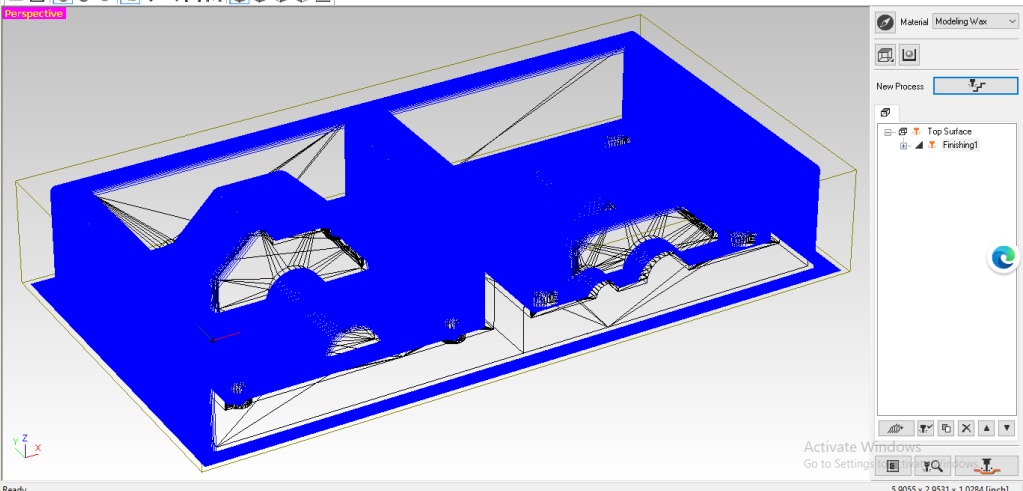
This is virtual player view of finishing
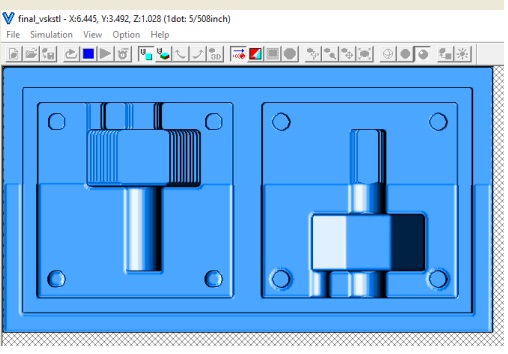
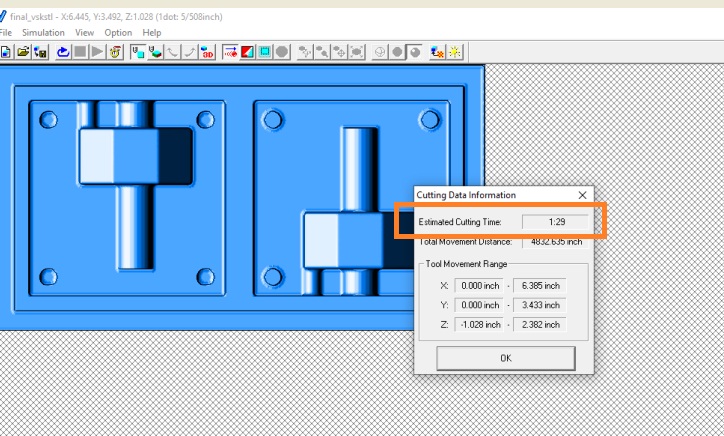
This is estimated time required for finishing
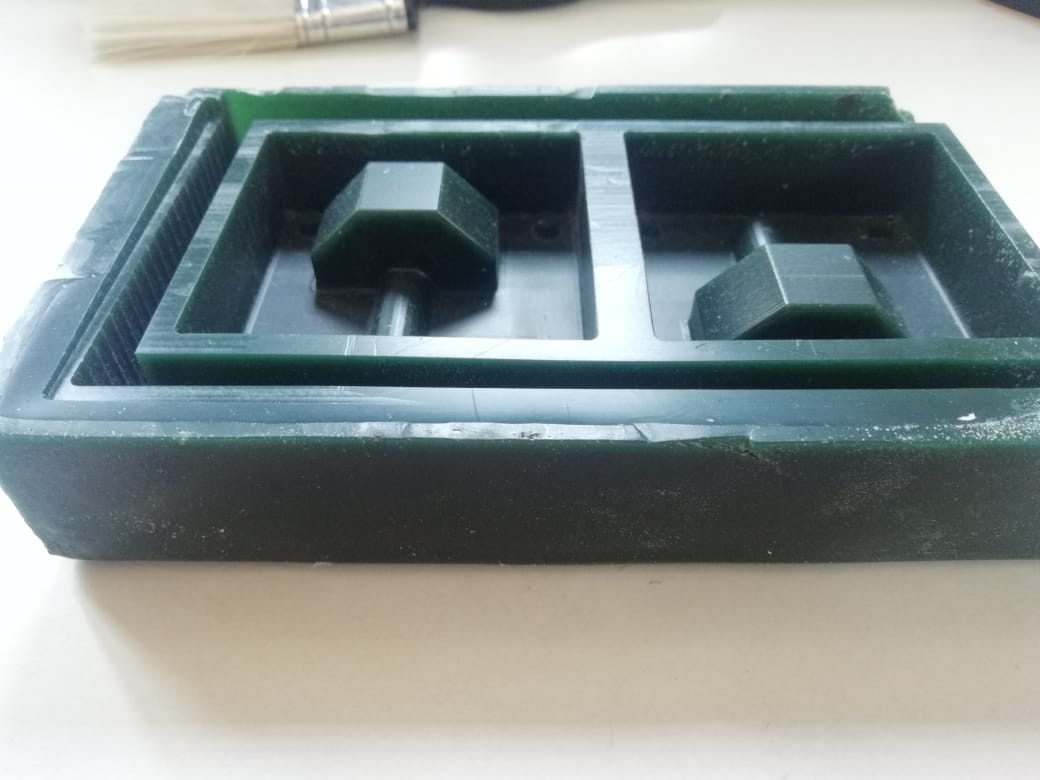
Making the negative mould:-
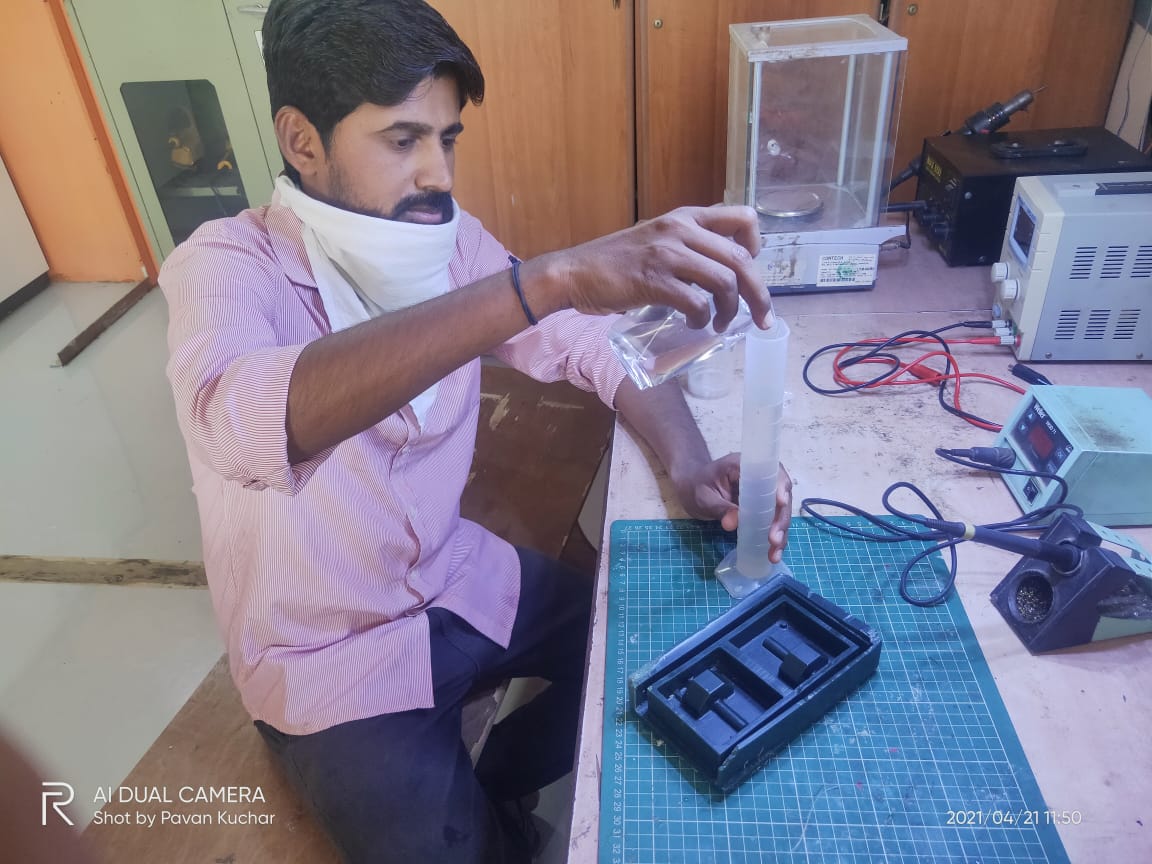
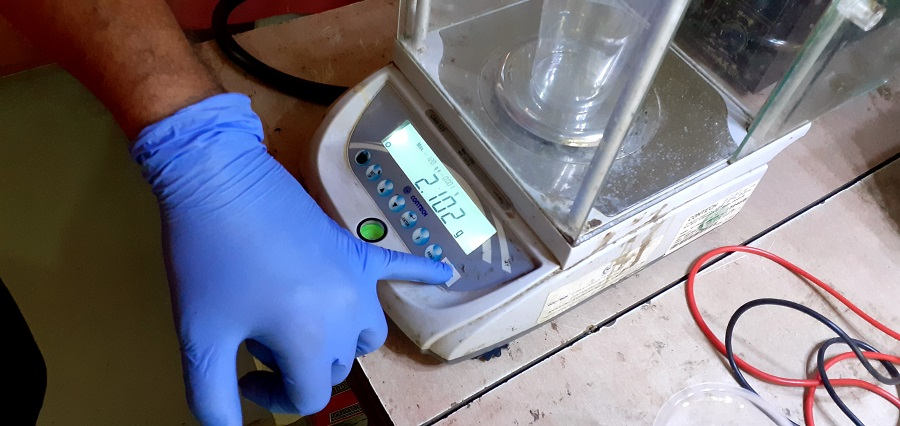
Measuring the volume water required so it is approxymetely 180 ml.
Mould filled with water
For that i required to calculate how much silicon material is required for creating the negative moulding.for i have filled the water in wax mould and by measuring the volume of water, i have caluclated the material requirement of silicon.
Desity of water is 1. for ml and gram So, as per datasheet it is given that silicon (Part-A) and the Catalyst (Part-B) are to be used in the proportion of 100:5 resp. i.e If you take 100 parts of Silicon, 5 parts of Catalyst are to be added.
So, it is required to multiply the volume of water with density of silicon material and by considering the ration mixed with harderner.
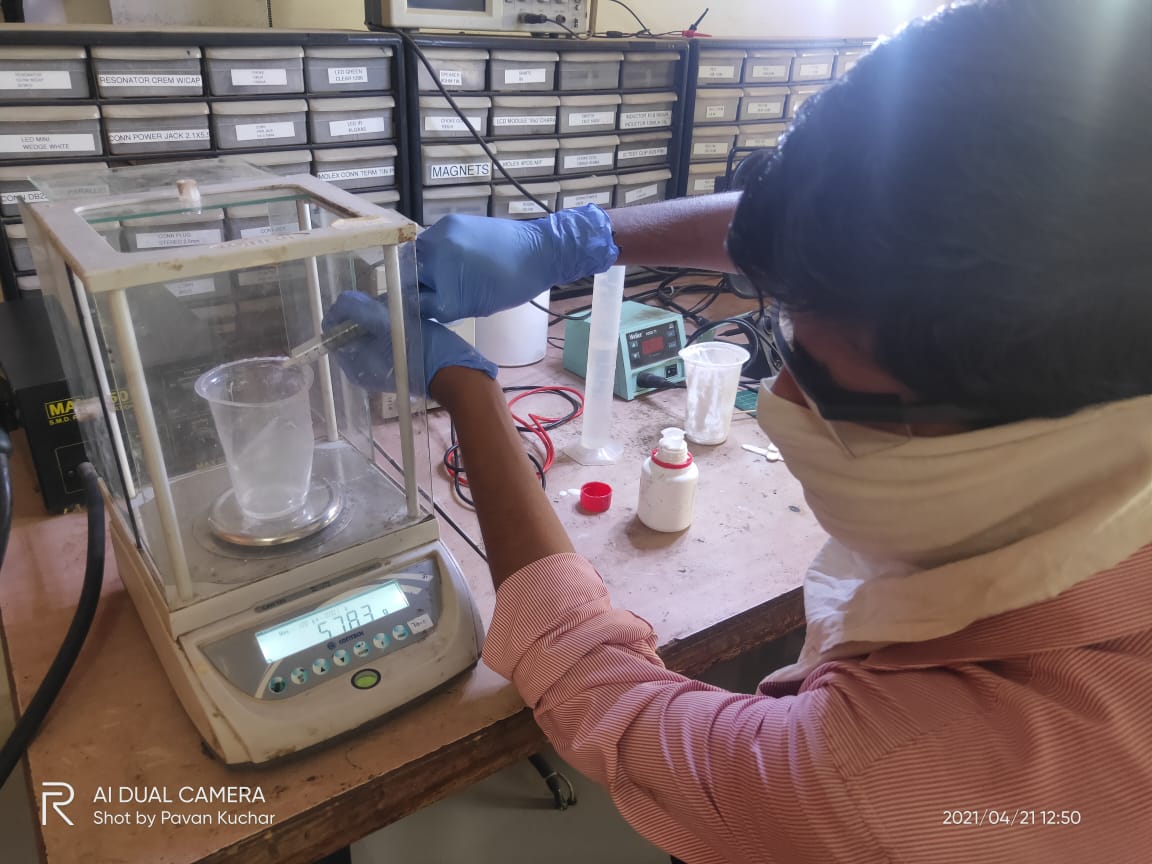
The density of silicon material is 1.15 gm/cu.cm, and the catalyst is 0.95 gm/cu.cm So as per my requirement i decided to make the mixture of 220 ml.
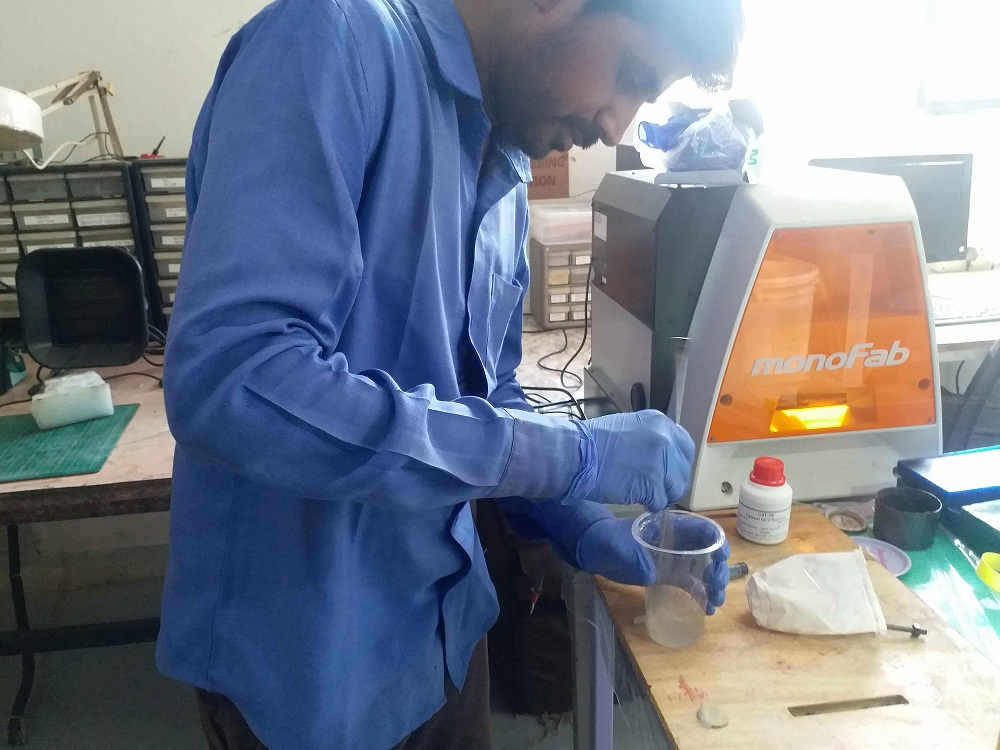
Then,I have processed the Silicon material for Weighing.
Weighing balance,Moldsil-15 and Catalyst
Tare the plasting glass weight
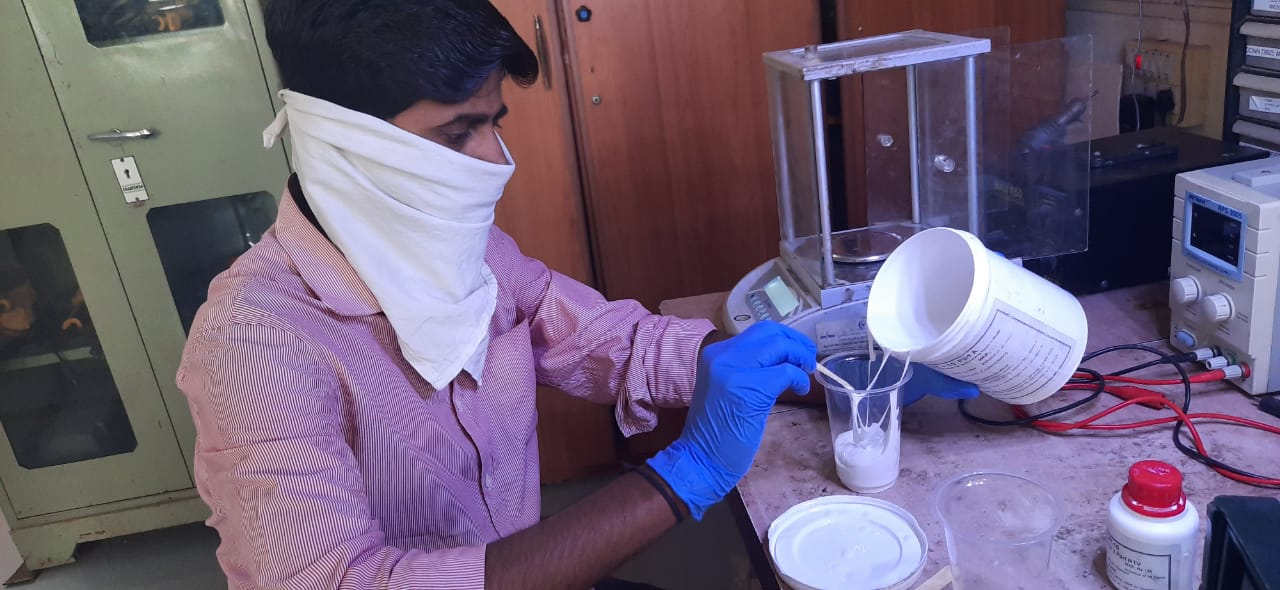
Pouring the silicon material in glass
Adding and weighing the Silicon material.
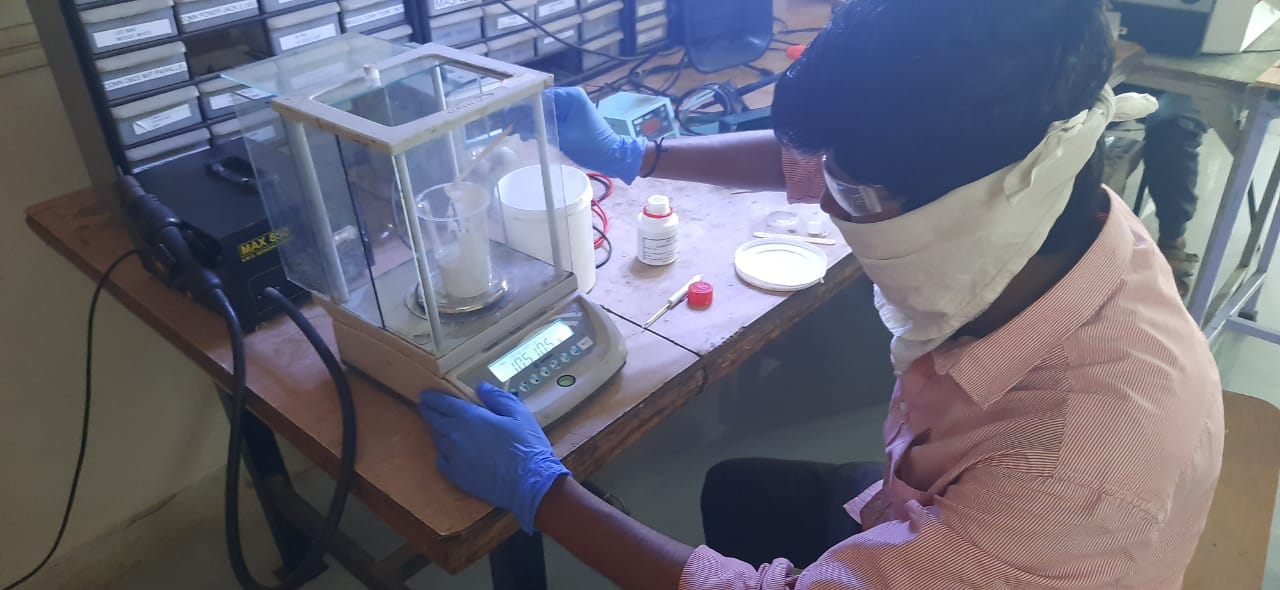
Taking the catalyst for measuring.
measuring the catalyst
Mixing the silicon and catalyst and sheer it properly such a way that aviod the air bubbles
Sheering the material
Pouring material on the mould
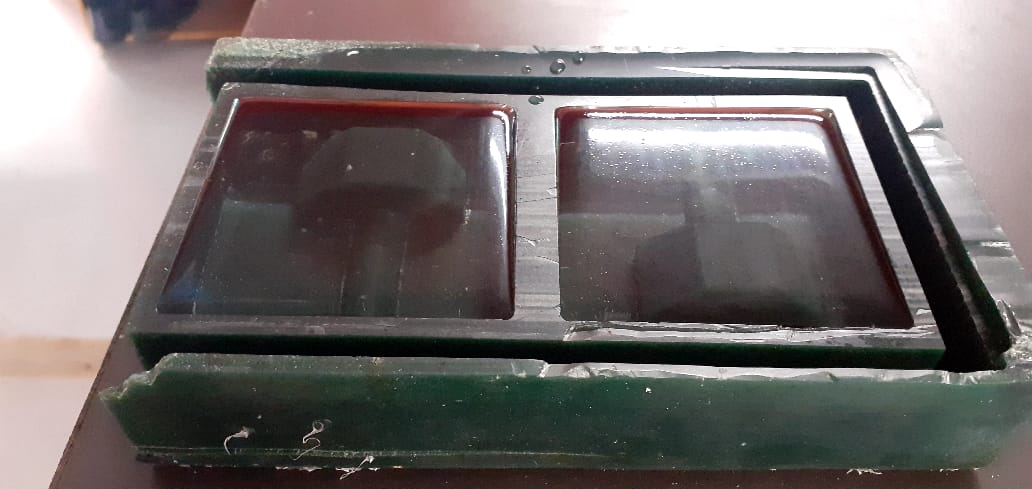
Silicon is poured in the mould, As per datasheet it will take minimum 16 hours to cure completely.
Then After the required time i have revoved the silicon from mould
This is Silicon Negative mould is ready.
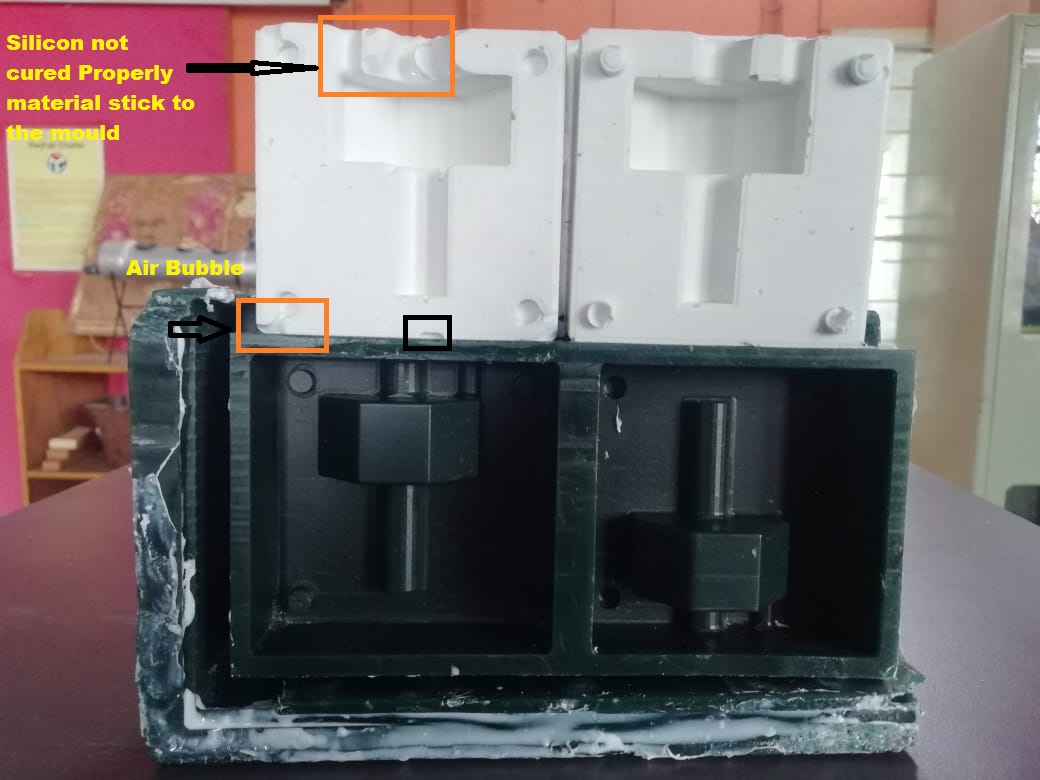
This shows due to some air bubbles mould is having some problems
Here I observed that, one mould is completely as it is and other having some problems of air bubbles
This problems in the mould might be because of follwing reason.
1. Mixing of Silicon and catalyst not proper.
2. Silicon and catalyst prapotions ratio might be not proper.
3. Due to stirring has not proper. Some Safety Measure during the casting Processes we required follow.
2. Wear gloves.
3.Clamp or weight up molds that require it.
4.Move Slowly while removing crucible from furnace and moving to mold.- Casting of Hydrostone Material.
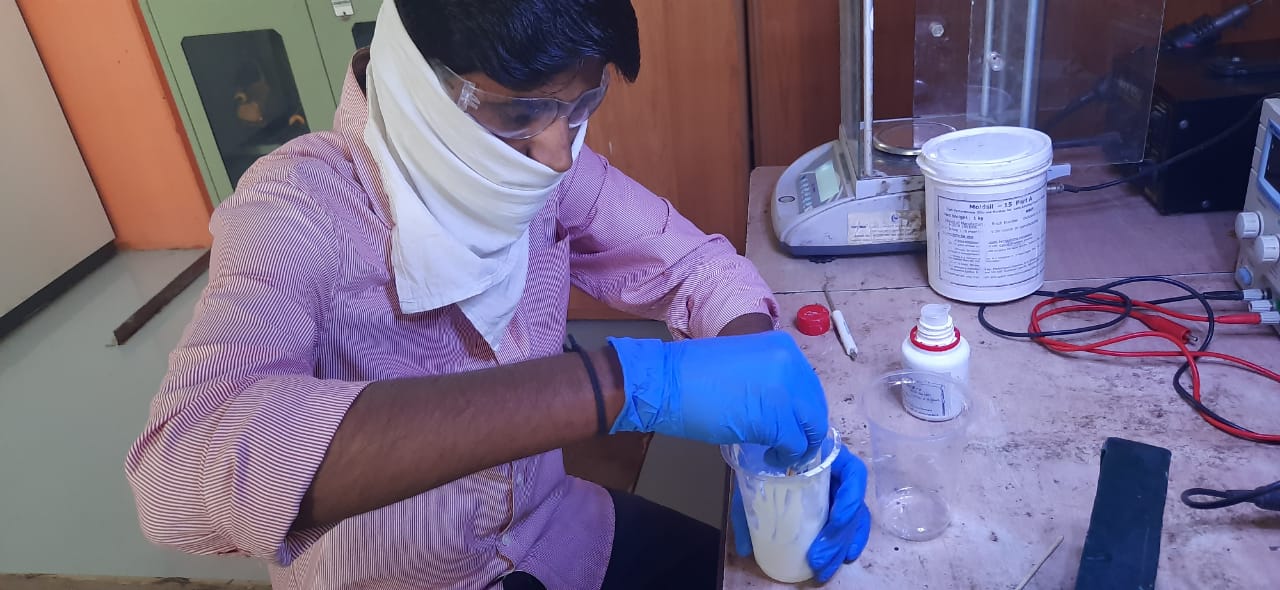
First I have used the hydrostone for casting.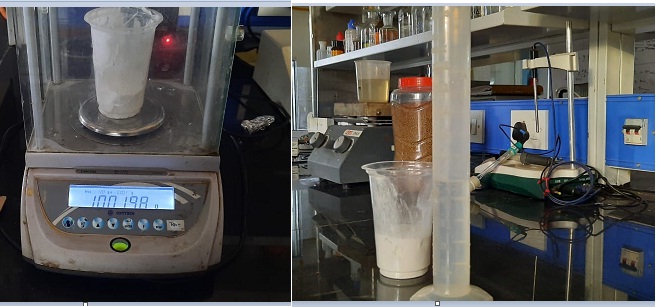
Measuring the hydrostone and Water in proper ratio
Pouring the hydrostone into the mould
After that we need to Wait for 3 to 4 hour to hard it, then remove the pattern the casting is ready. If some extra material on the side of casting, with the help of sand paper remove it.
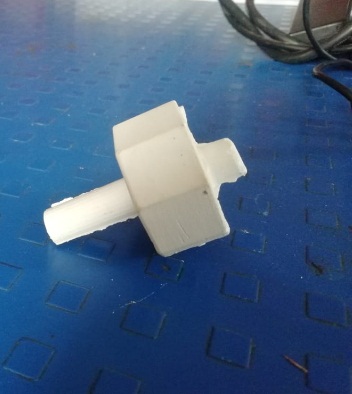
The hydrostone Rotary Knob is ready.
Cating of Epoxy Resin
Casting resin is a low-viscosity epoxy resin, which consists of two components: the actual resin and the matching hardener. When these two components are mixed, a chemical reaction occurs, which causes the mass to harden for some time. The epoxy resin will take 2 to 3 hr for curing and around 16 hour for complete hard as per datasheet we have read.
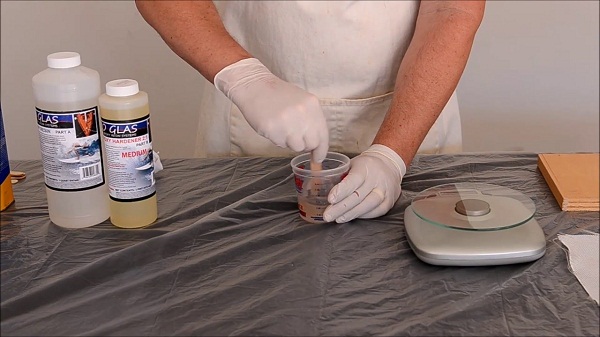
Here, for my mould I have consider the 40gm Epoxy resin material and 20gm its hardner.
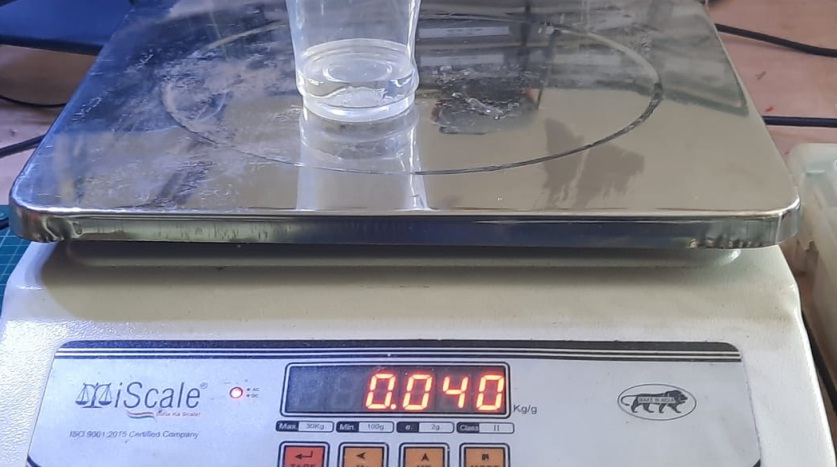
Measuring Epoxy resin and maintaing the ratio with Hardner.

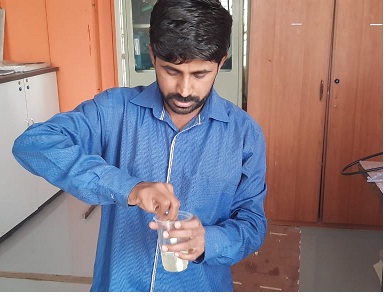
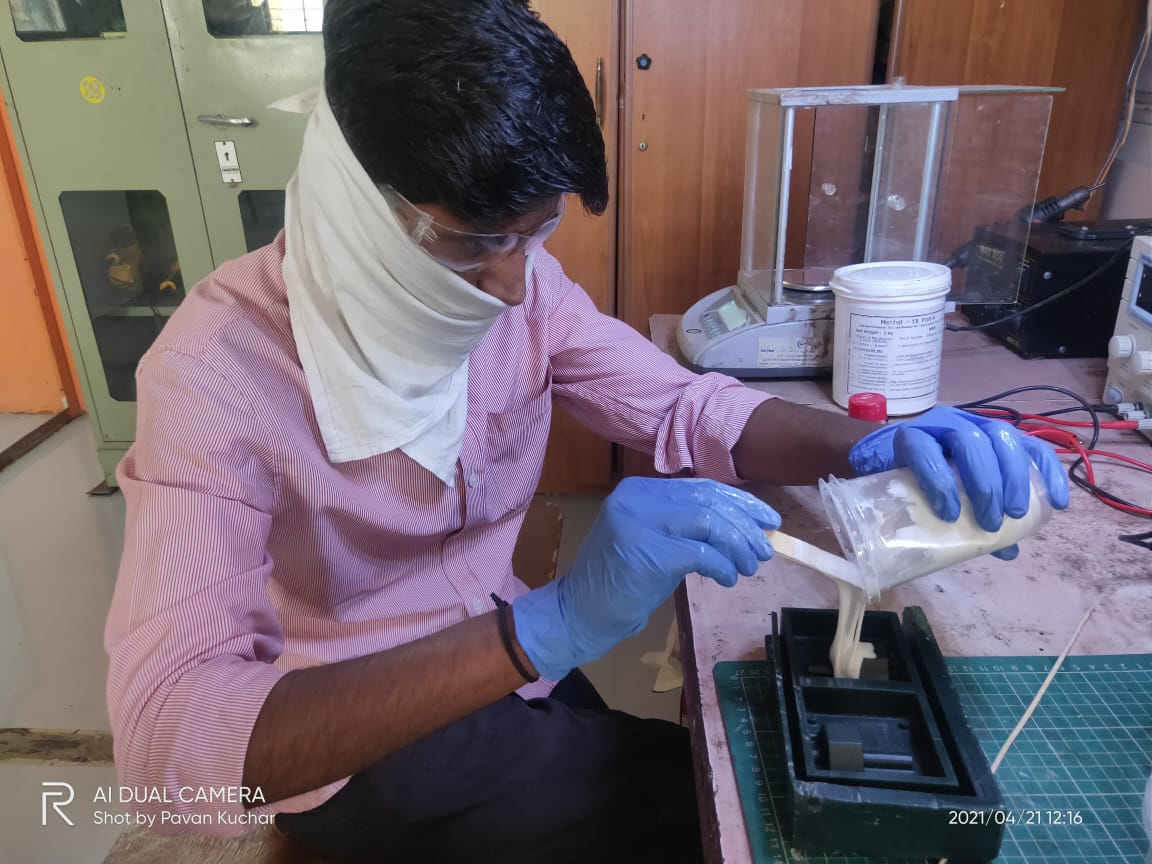
Mixing the material
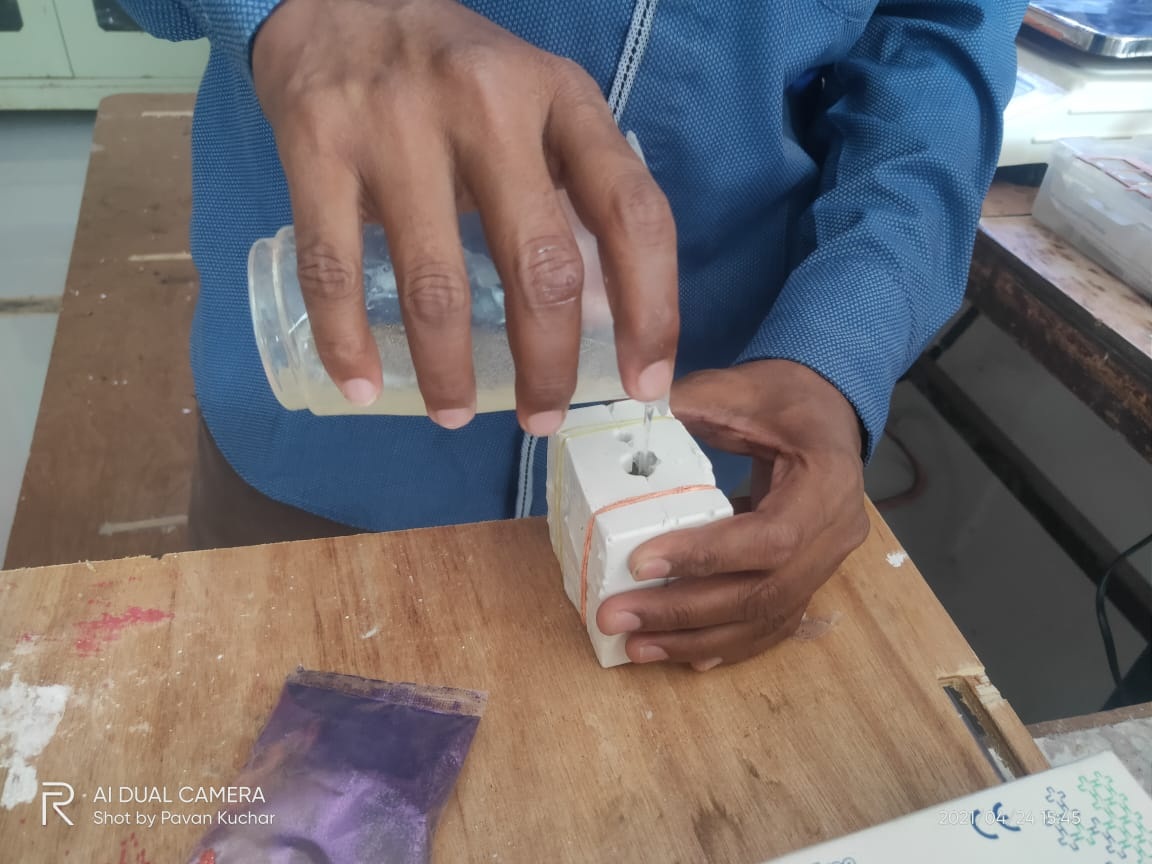
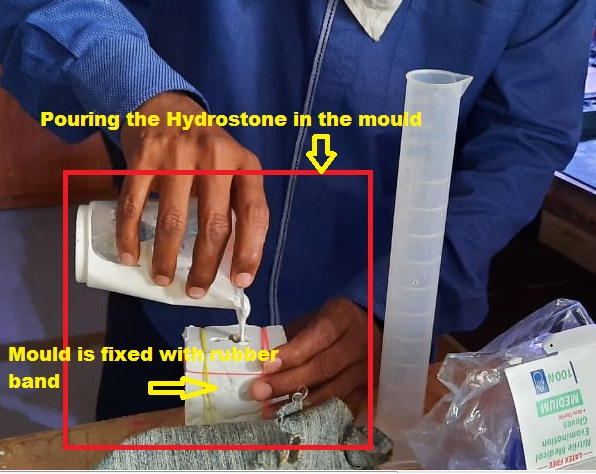
Pouring the material into the mould
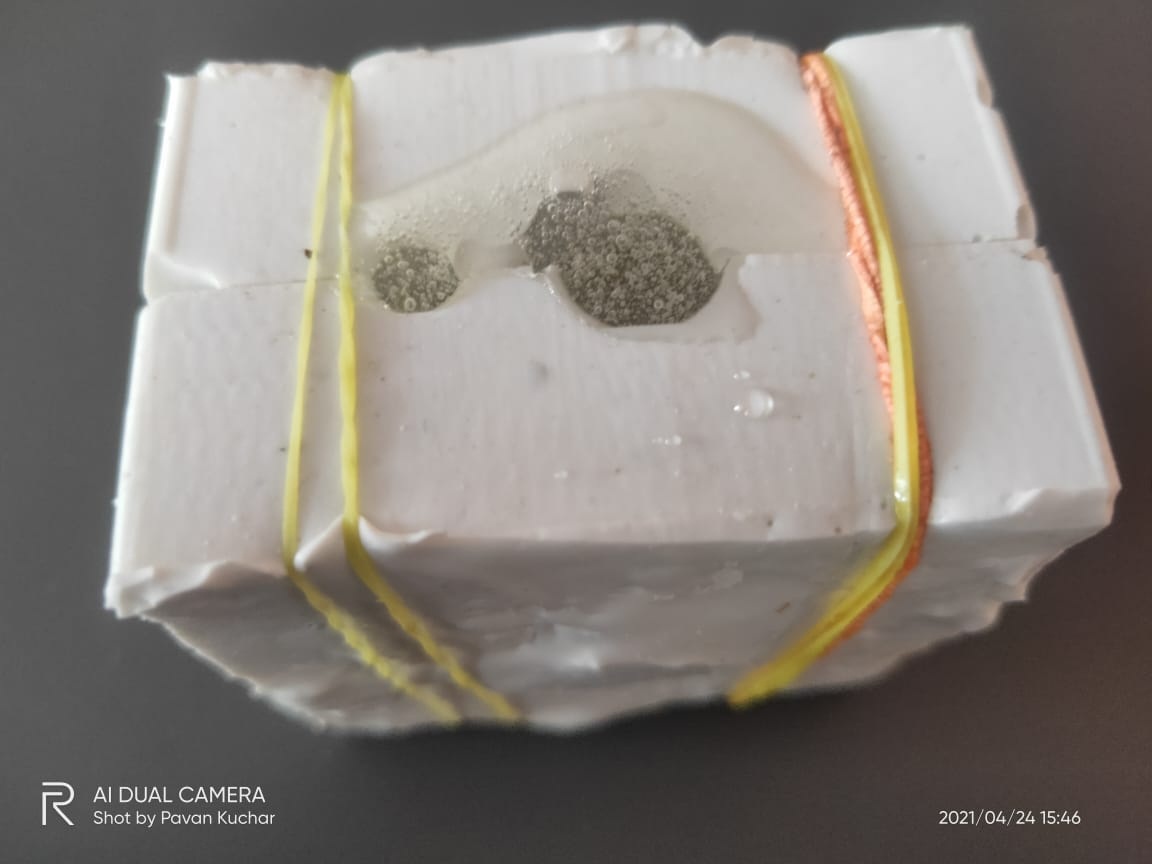
Mould is properly fixed with rubber band.
Now wait for 16hr to hard the mixture and then remove the cast. The cast is ready now.
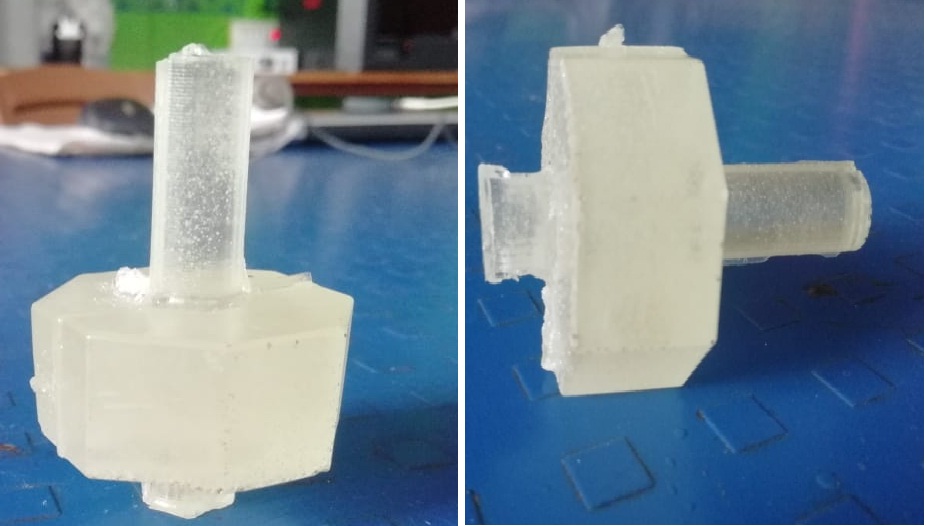
This is the rotary knob ready.
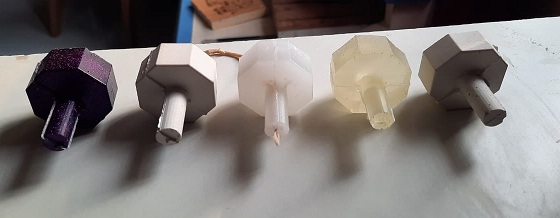
Then I have tried to create the casting of epoxy resin with gliter and Parafin wax also.
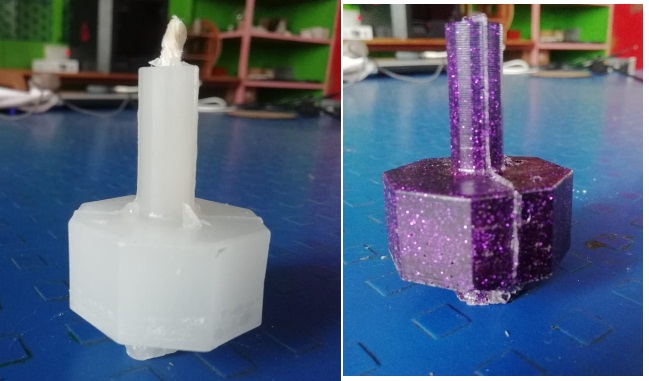
This is tried for different material
What I have learnt from this week of assignment.
1. I have understood the different material and its characterstics use for moulding and casting.
2. I have understood the different pattern, various material and its allowance for molding and casting.
3. I have understood the designing of mould in freecad software.
4. I have learnt about the creation of mould using machine wax material with SRM-20 Milling machine.
5. I have learnT how to communicate with SRM-20 milling machine by using Model-4 with virtual modela software.
6. I Understood the pattern making using silicon rubber.
7. Then casting usign epoxy resin , Hydrostone , Parafin Wax Material.DOWNLOAD's
Download my original file here