This Week our task is to Model (raster, vector, 2D, 3D, render, animate, simulate, ...) a possible final project, compress your images and videos, and post it on your class page
1) We have to work on some designing Software Which can be used to desing some object related to 2D and 3D.
2) Means Model (raster, vector, 2D, 3D, render, animate, simulate ) a possible final project, compress your images and videos.
Actually this is chalanged to me to learn this software so At Vigyan Asharam when We discussed with our instructor and they have arranged session solid wokrs and freeCAD.
We have also experienced to work on 3D Designing software like Rhino, Blender and Tinker cad. Our colleagues Mohit and Rahul took some on session's of this software.
LEARNING OUTCOMES:-
1) Evaluate and select 2D and 3D software
2) Demonstrate and describe processes used in modelling with 2D and 3D software
Brief introduction of CAD software.
What is CAD Design i.e. Computer Aided Design ?
Basically CAD (computer Aided Design) software is used for to design the documents products designing. Generally to draw the Engineering sketch like graphical symbols line, various plane and shapes also means its gives the detail information of any component in graphical form.
CAD is basically gives the preliminary design and layouts, design details and calculations, creating 3-D models, creating and releasing drawings, as well as interfacing with analysis, marketing, manufacturing, and end-user personnel.
CAD software enables
Various Types of CAD Designing Software and tools
1) Raster 2D design
2) Vector 2D Design
3) Animations, 3D Design, simulation and rendering
What is raster 2D Design
A raster graphic basically is made up of a collection of microscopic sized pixels, which are arranged in a two-dimensional grid made up of columns and rows.
The number of bits stored in each pixel is known as the color depth. The number of pixels, called resolution, affects how much detail can be depicted in an image., So when I started to learn above software for the week 2 assignment first i have experience to work in paint only for editing images and changed the size of any image in pixel (wikipidia).
I have little heart about software like paint, Photoshop,krita, Gimp but initially I don't any experience to work on this kind of software so i started to learn this software from basic concepts.
1) GIMP Software
Initially I have referred the GIMP Tutorial before work on it Gimp Tutorial To manipulation of image.
First I started to work on Gimp basically it is GNU image manipulation program. It is used to photo retouching, image compression, and image authoring.
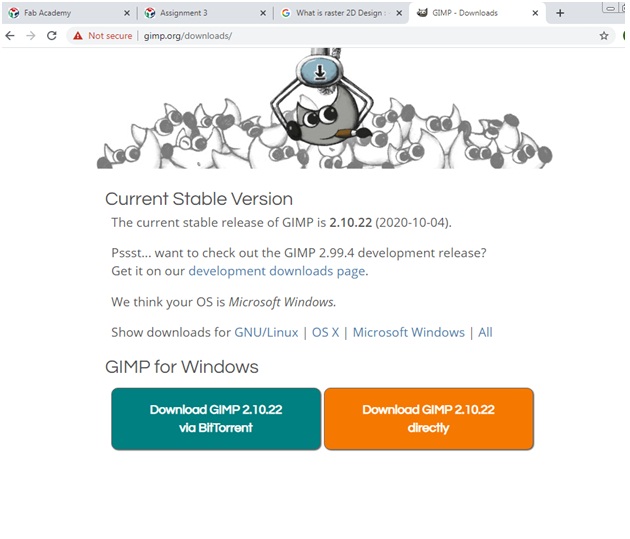
In first step to learn this software I have to install this software in my laptop. I have searched in Google Download GIMP free this type of window will open and then first I have down loaded this and installed it.
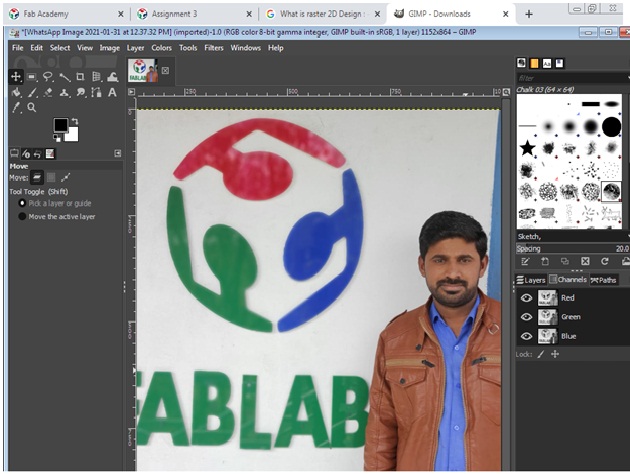
After that I have started work on that first I edited my own picture here for that I have to go for file menu and by dropdown it open file where my image is stored in my laptop so this kind of window may appear on my screen. After that I started editing means I have experience that we can resize the image, change the pixel size or we can also change the color of images
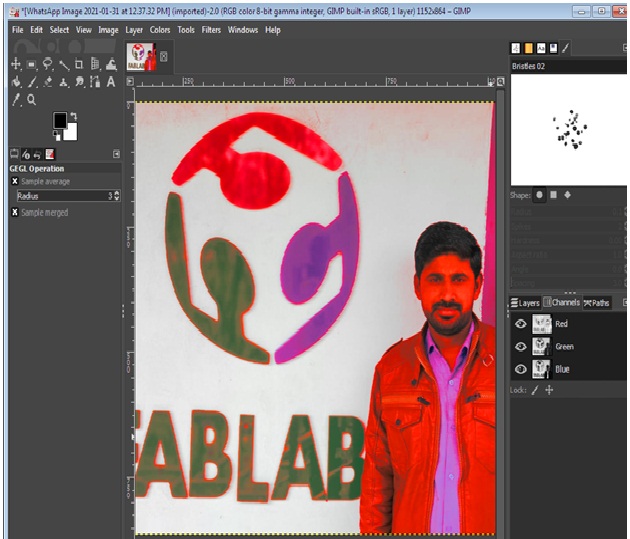
So after doing some kind of operation I experience that image color and size we can edit in this gimp application.
After editing my image looks like below picture. We can do such many operation on any image which we have stored in your laptop files so this kind of things we have been taught in one of the member Miss Pooja Jadhav work in FABLAB-0 at Vigyan Ashram.
If i put on any browser Shotcuts keys to oprate Gimp i will get all opertaions which we can done with Gimp software
Using GIMP Software i experinced first if we want to reduce the size of image in pixel so it can be done easily by follong below steps 1) With GIMP open, go to File > Open and select an image.
2) Go to Image > Scale Image.
3) A Scale Image dialog box will appear like the one pictured below.
4) Enter new Image Size and Resolution values
3) Select Interpolation method.
4) Click the "Scale" button to accept the changes.
Its quite difficut when i have experinced it but finally i was able to reduce the size of any image in gimp
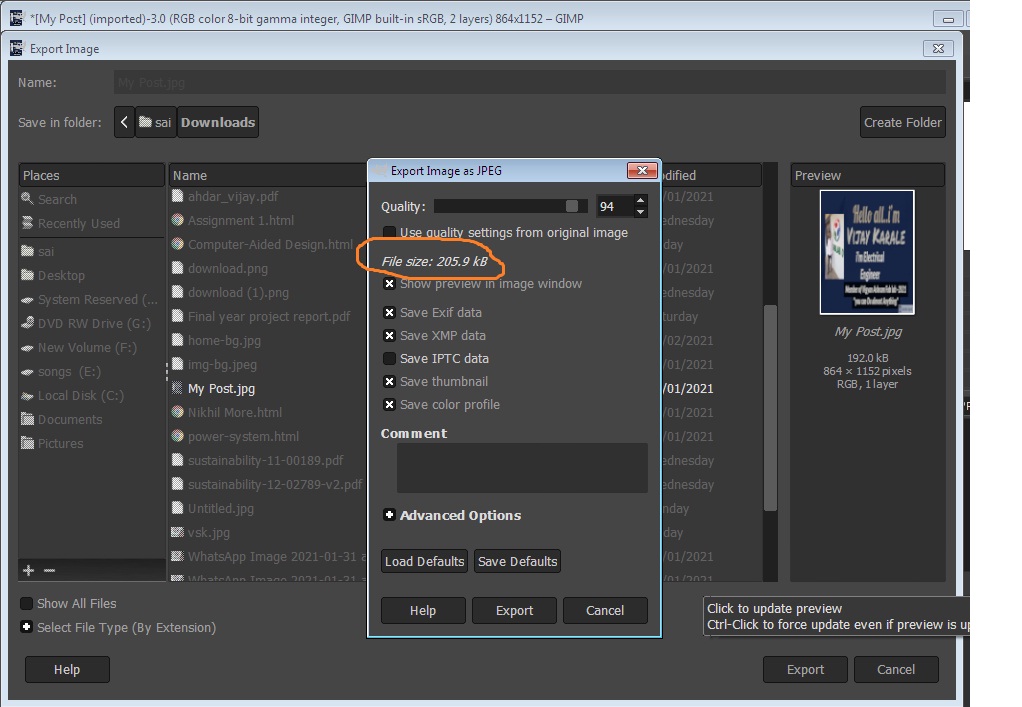
The size of my image before editing is 205kb
After that this kind of window will appear on my screen
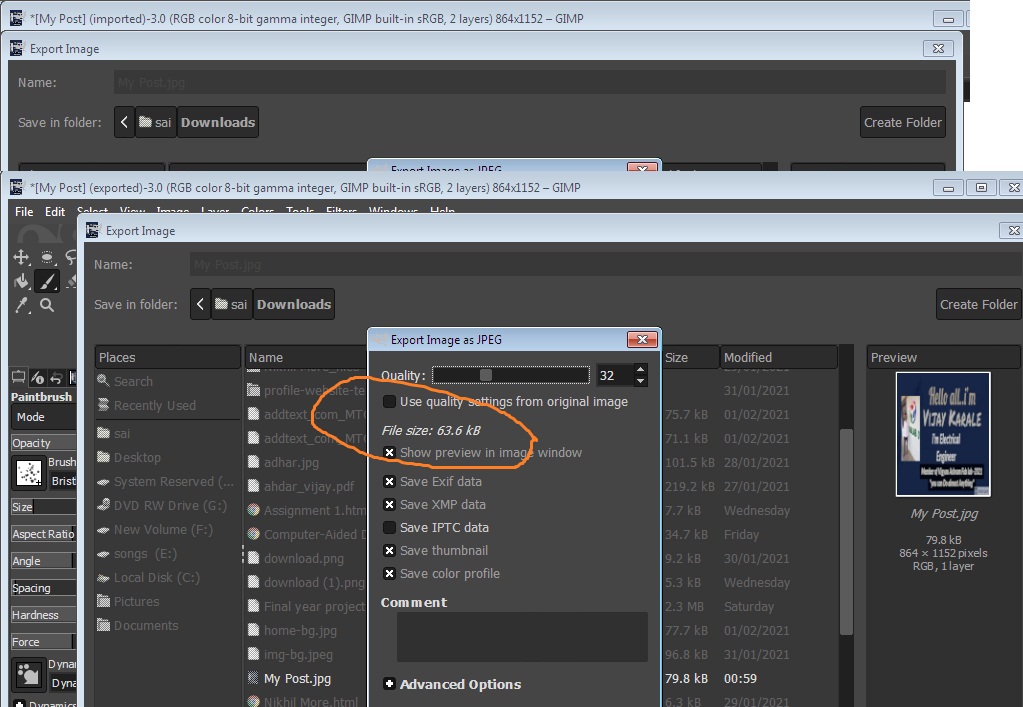
> After editing the image reduce to 65kb
We can reduce the size of photo in Gimp software file reducing the pixel and save this file in JPEG format so it can be reduce in pixels that I have also experience
I Have used GIMP and BIMP for image reduction,The image size used to increase as I am not able to define the format to which the image is to be exported. it used to save in PNG Format
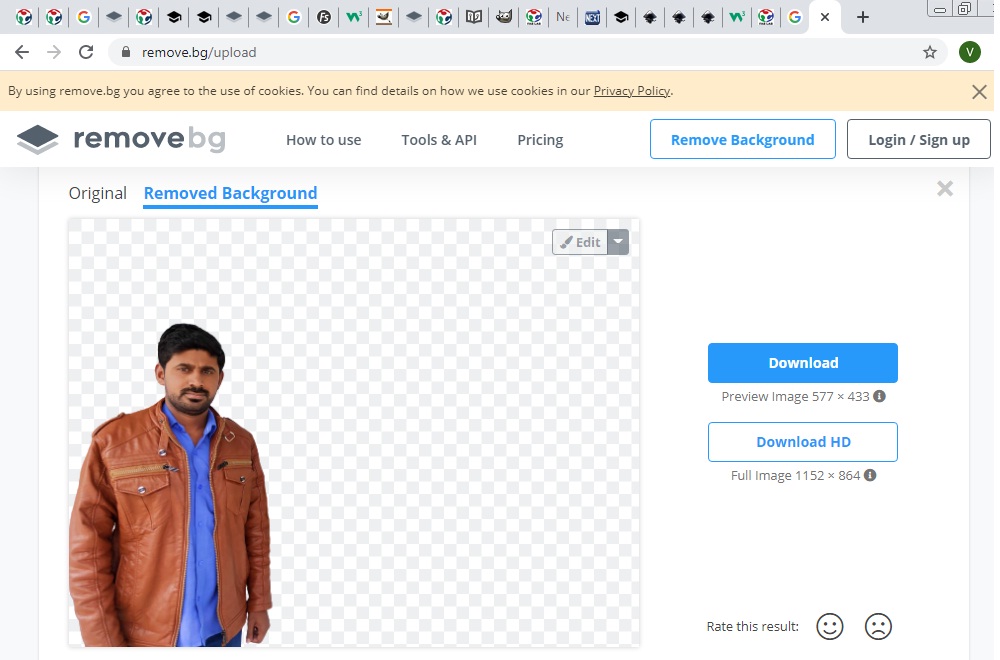
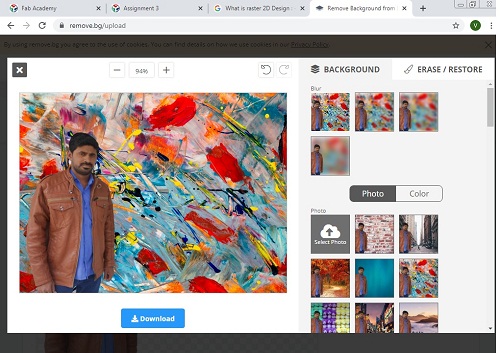
One of the interesting fact is that while working on raster designing that I have experinced that if you want to change the background of any image so go to remove.bg by cliking on this site so you can put any kind of background to your image I have experience this while learning Raster Design.
I have to upload my image by clicking the upload image tab and select my image from stored files its looks like this.
In this way I can change my image background
by using this interesting tools called as remove.bg
2) Vector 2D Design
What is basically the vector 2D Design?
It is defined in terms of 2D points, which are connected by lines and curves to form polygons and other shapes. Each point has a defined position on x axis and y axis of the work plane.Coreldraw, Inkscape,FreeCAD such software is used for vector 2D design. so for this assignment i have tried to all this operation in vector Design software
About Inkscape Software:-
When I started leaning the Inkscape software gone through the link Inkscape Tutorial It is a professional vector graphics editor. Inkscape is free and open source software. It is generally used for illustrations, icons, logos, diagrams,maps and web graphics.
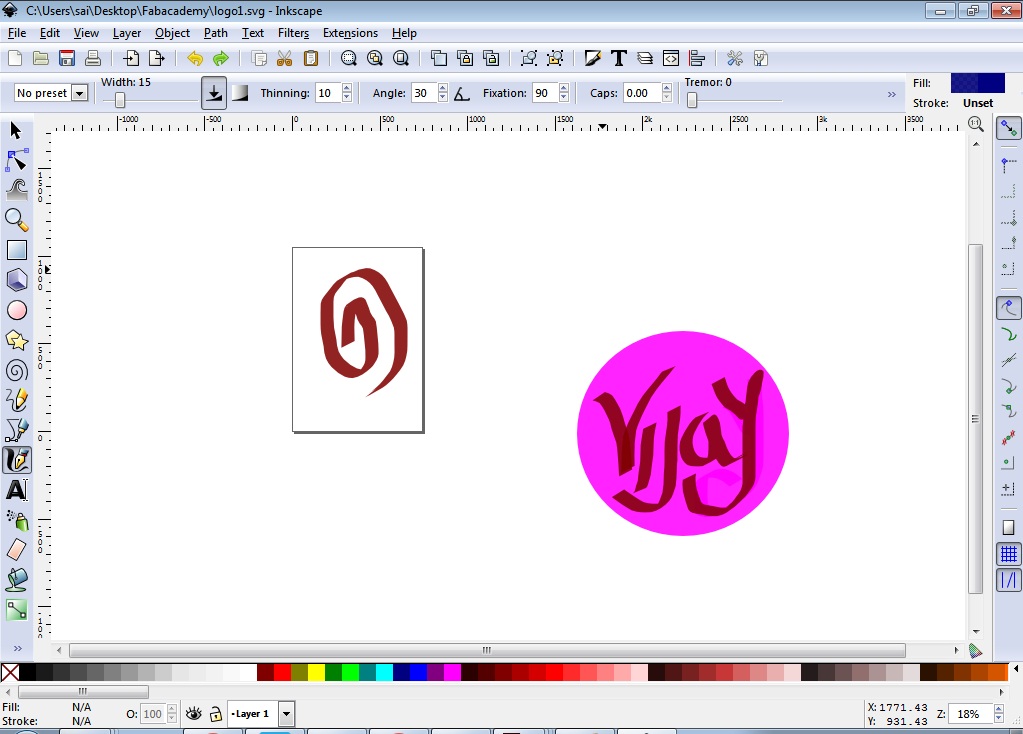
Here first I have created logo of my name
Select New document>select View>Zoom>different zoom option are given, according to our requirement, we will select it
LOGO of my name looks like:-
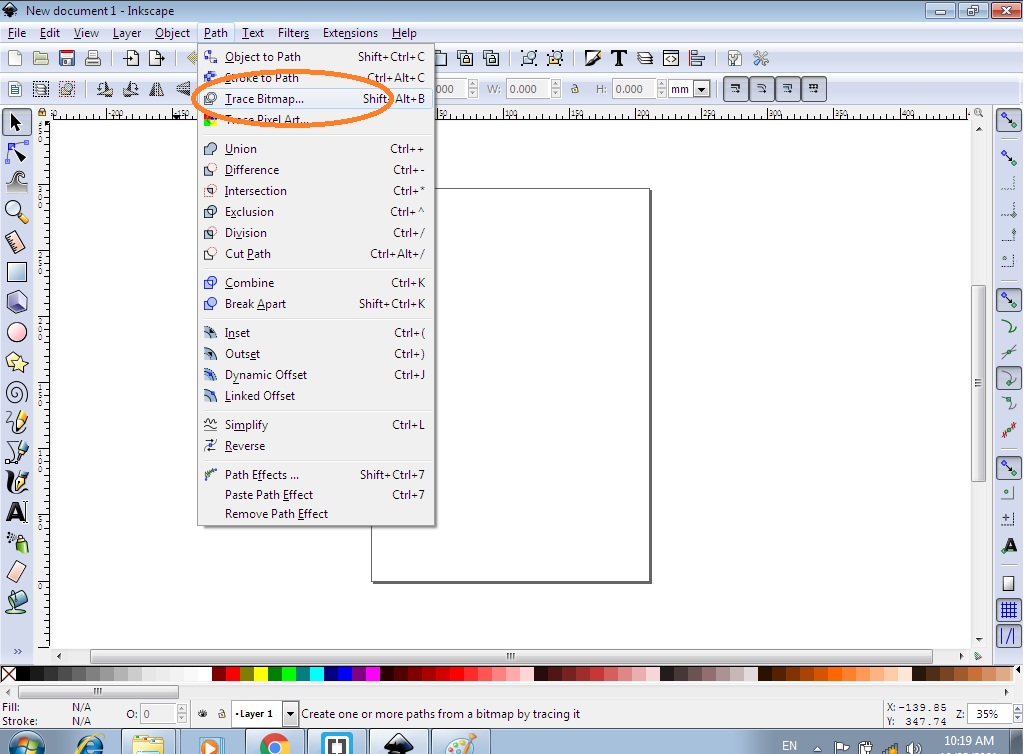
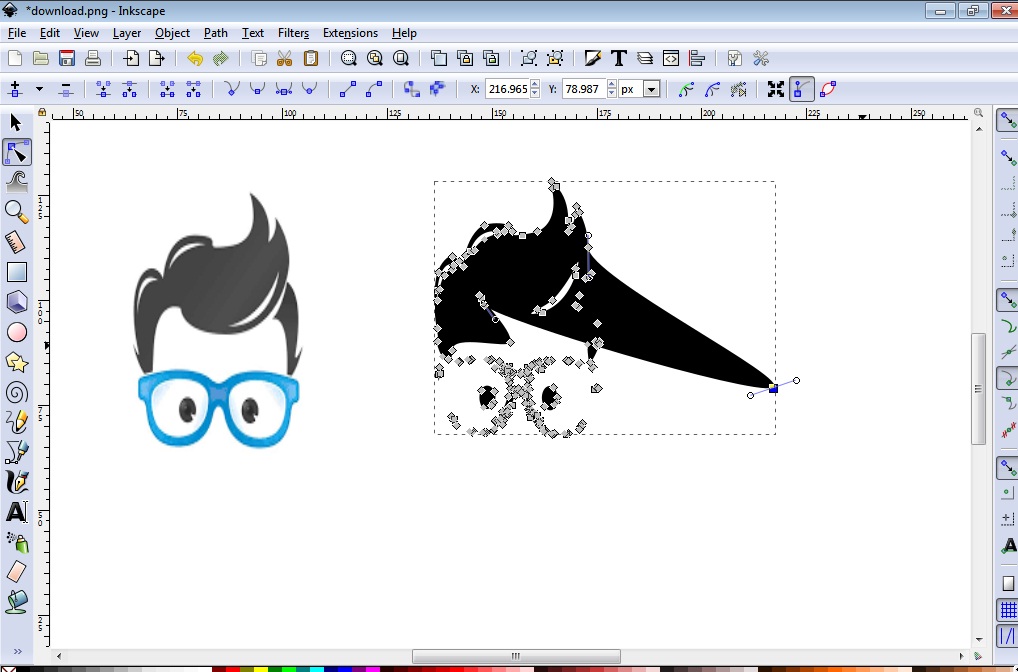
Tracing Bit mapping in INKSCAPE:
I have tried One of the features in Inkscape is a tool for tracing a bitmap image into a path element for your SVG drawing.
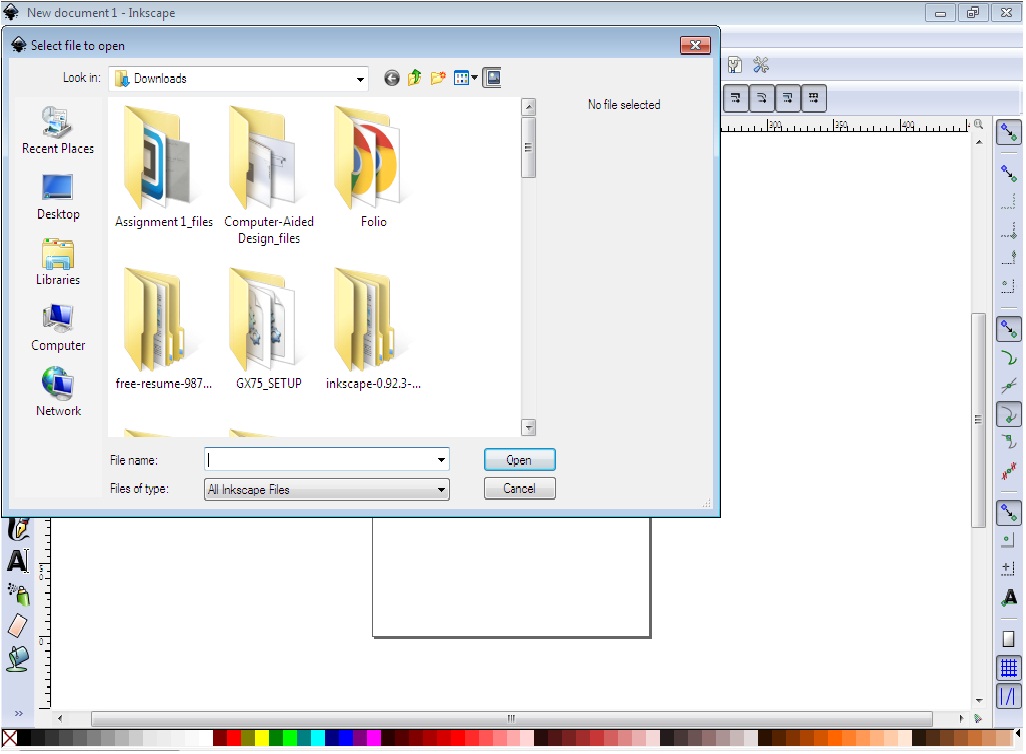
1) First we need to go file menu select the image that you want to trace the bit map.
2 )After that we need Select the image goto the path menu select the bitmap features.
3) Select the mapping image and separate it from original one
3D Design Softwares
1) Free CAD
2) Blender
3) Rhino 6
4) TinkerCAD
Free CAD Software
What is free CAD Software ?
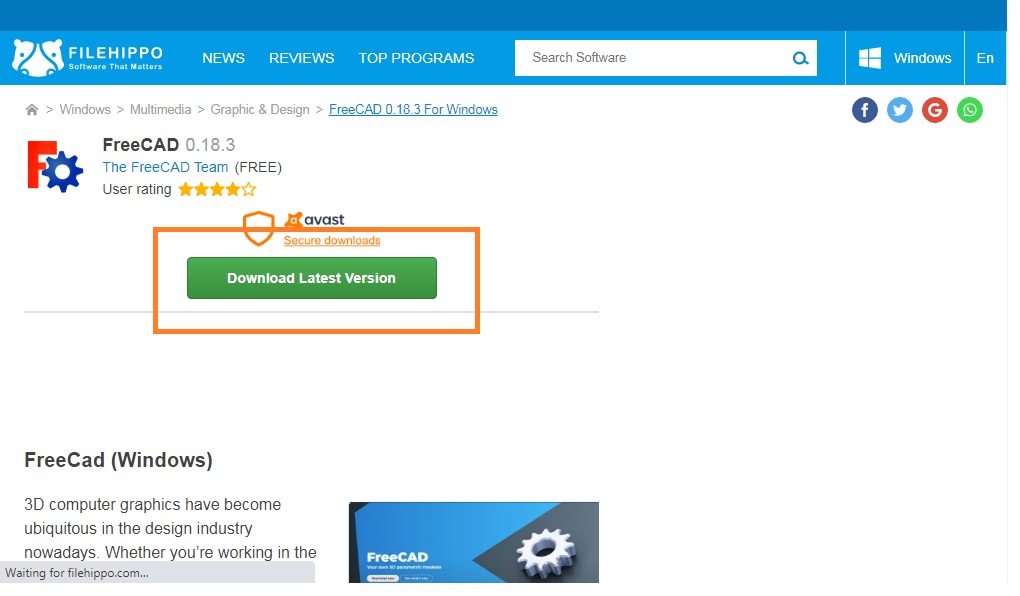
Free CAD Software is open source software which is use for 2D and 3D Desing which i have downloaded in my laptop and then.
Downloaded this software from this websites and installed it in my laptop.
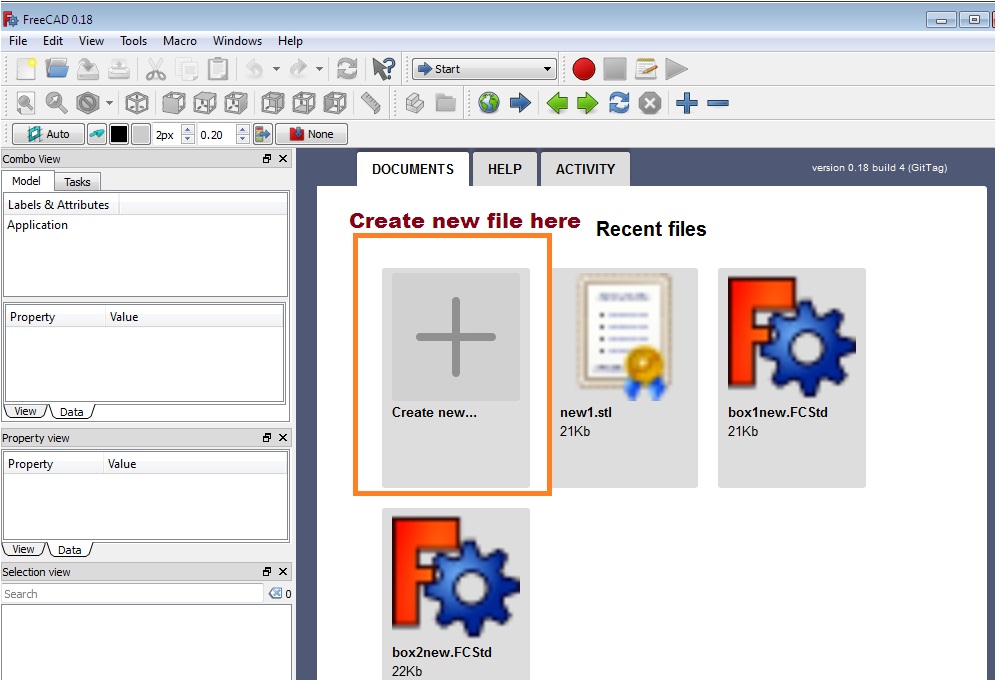
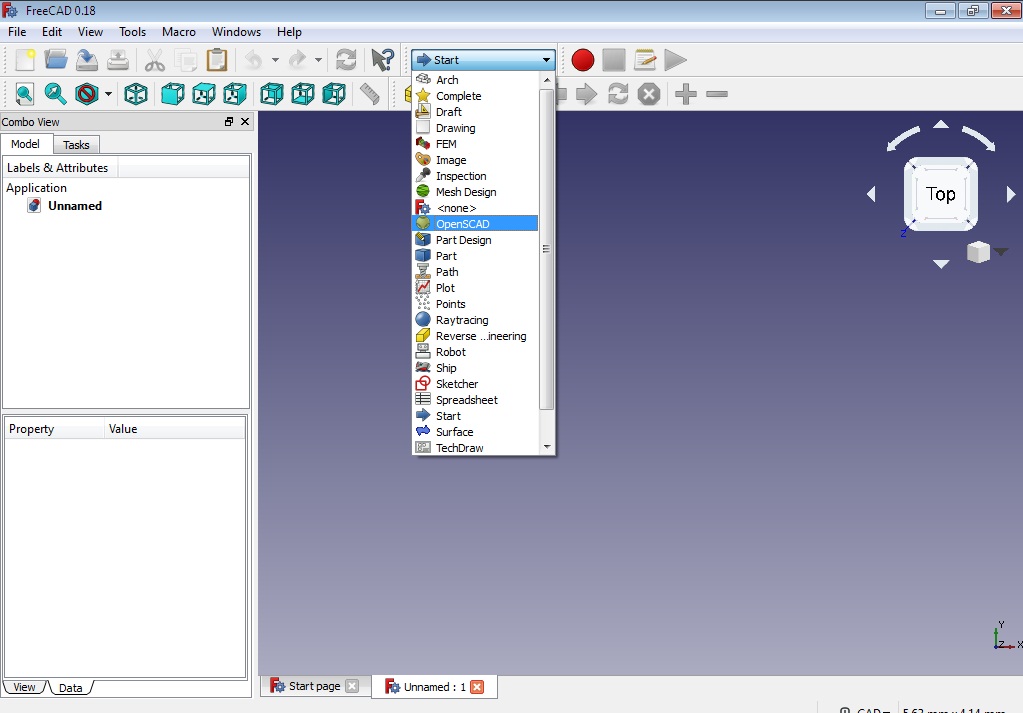
When I open the free CAD Software this kind of window appear on my screen.
So here we can create your new file first and save it.
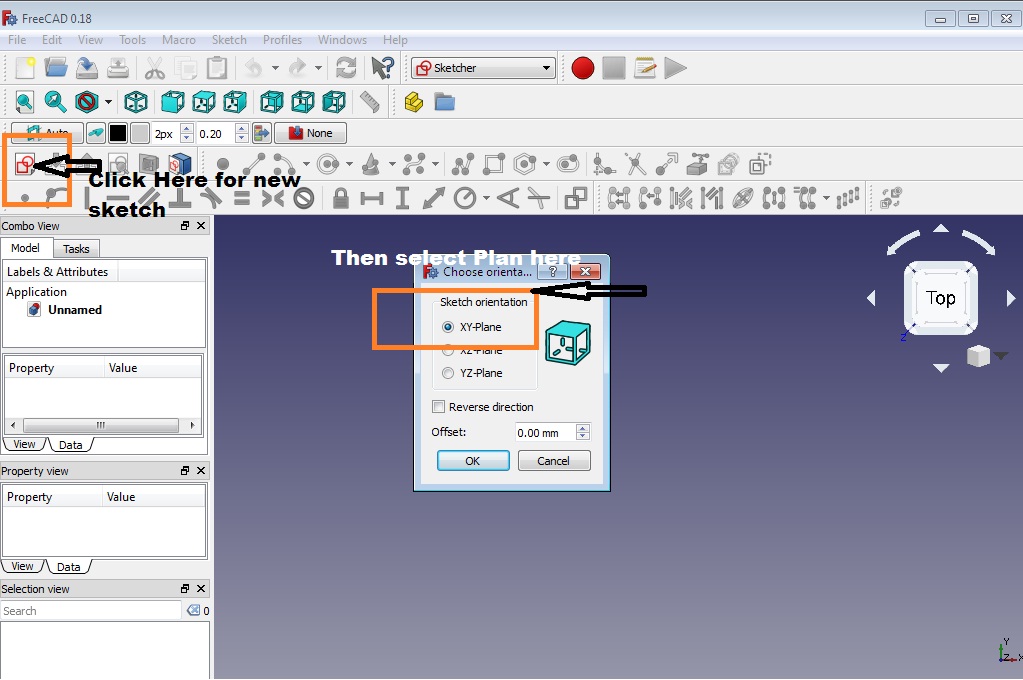
Now go to skecher workbench from workbench menu, Middle top of windows
Then, Click on new sketch and select the plane where, you want to design your object
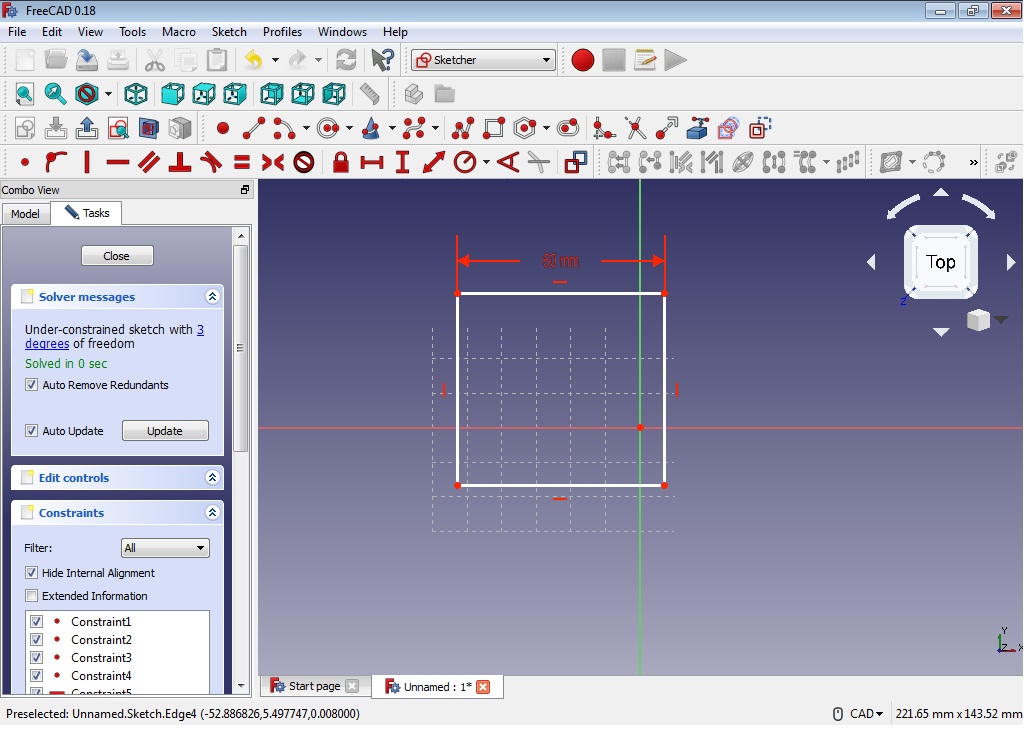
Initially I started my design in this software with basic shapes like square , rectrangle and circle by following steps
1) Open the software
2) select sketcher workbench in dropdown menu
3) here I have drawn Square with constraints
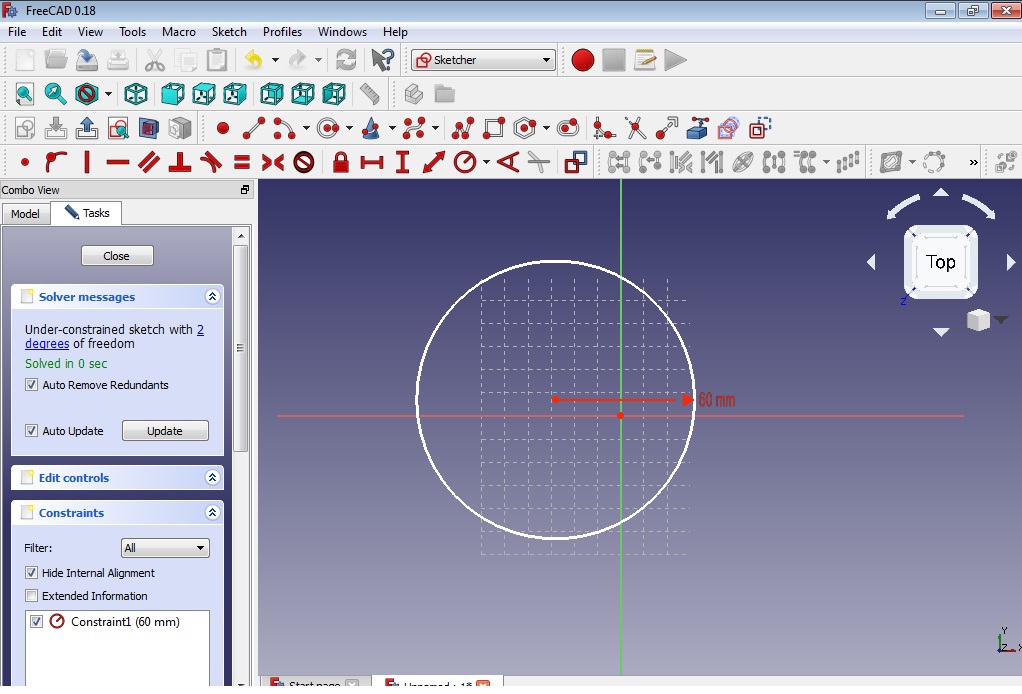
Then i have tried to drawn the circle
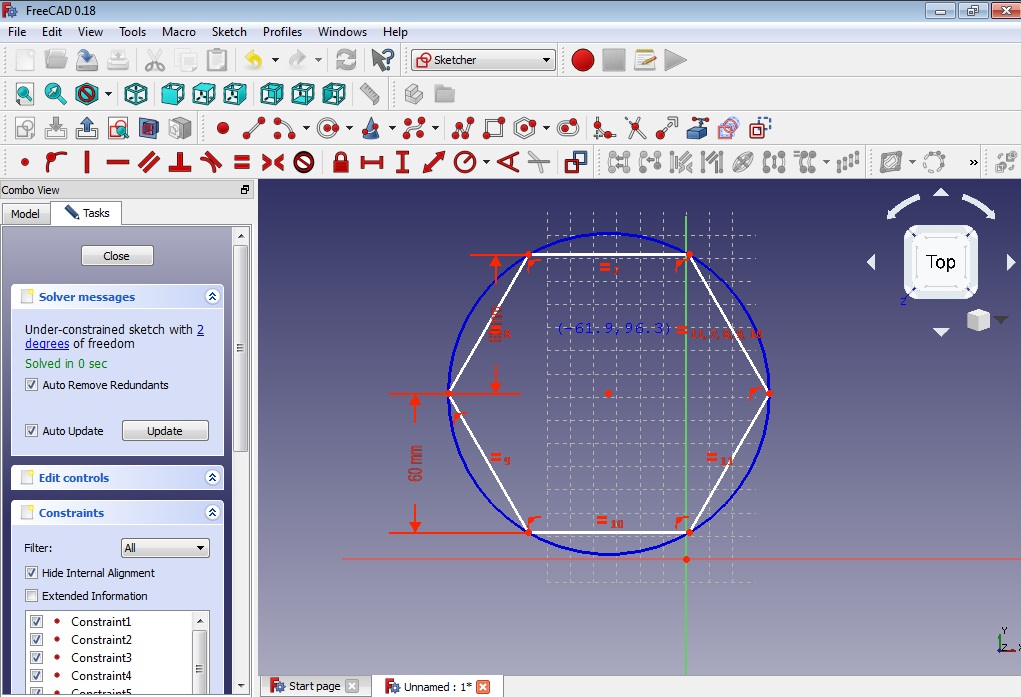
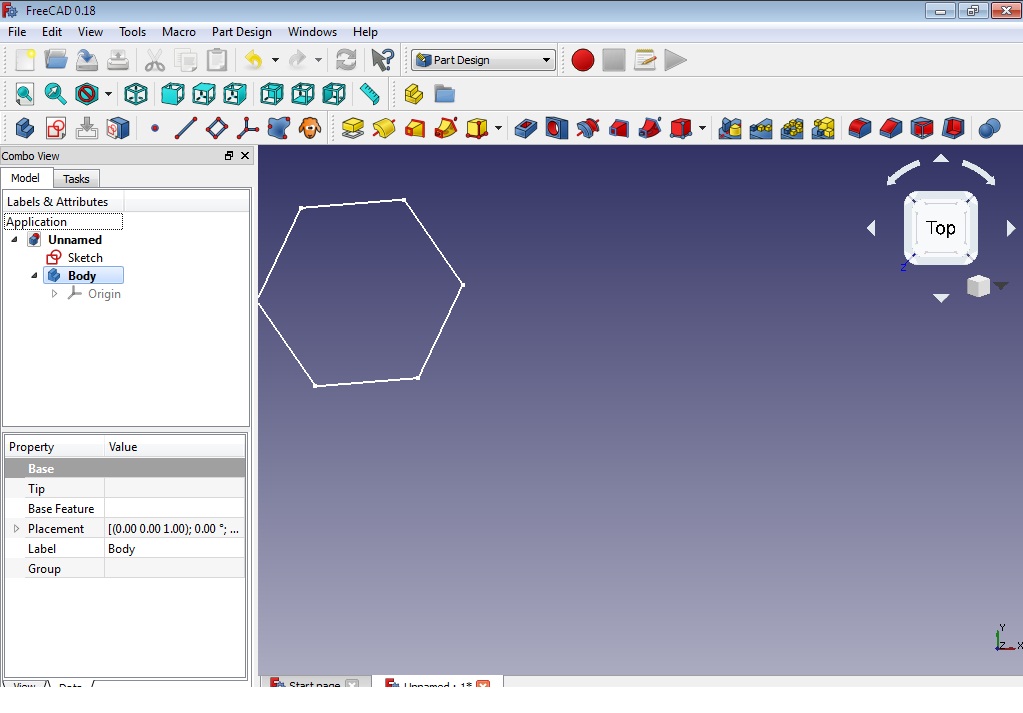
Then by same process i have drawn one hexagonal by giving the dimensions by using menu on top bar
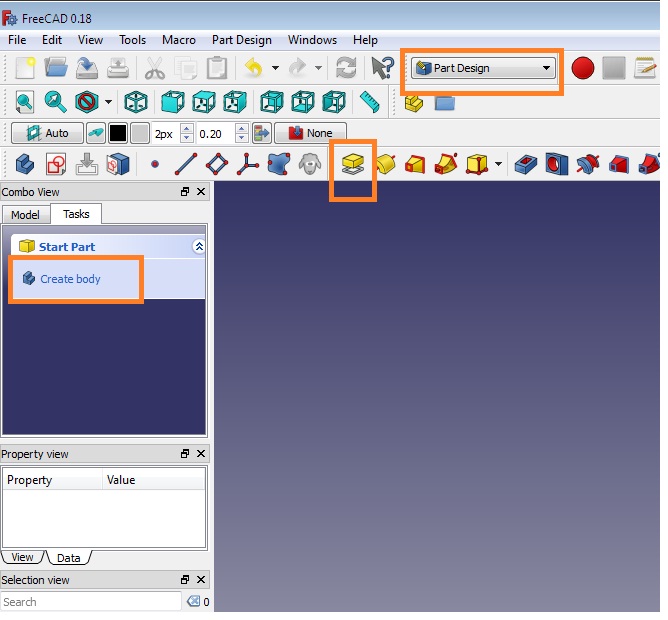
After drawing this 2d part in freeCAD SOFTWARE above same objects i wanted to convert in 3D For that i have to go in part design menu which is availble in menu bar
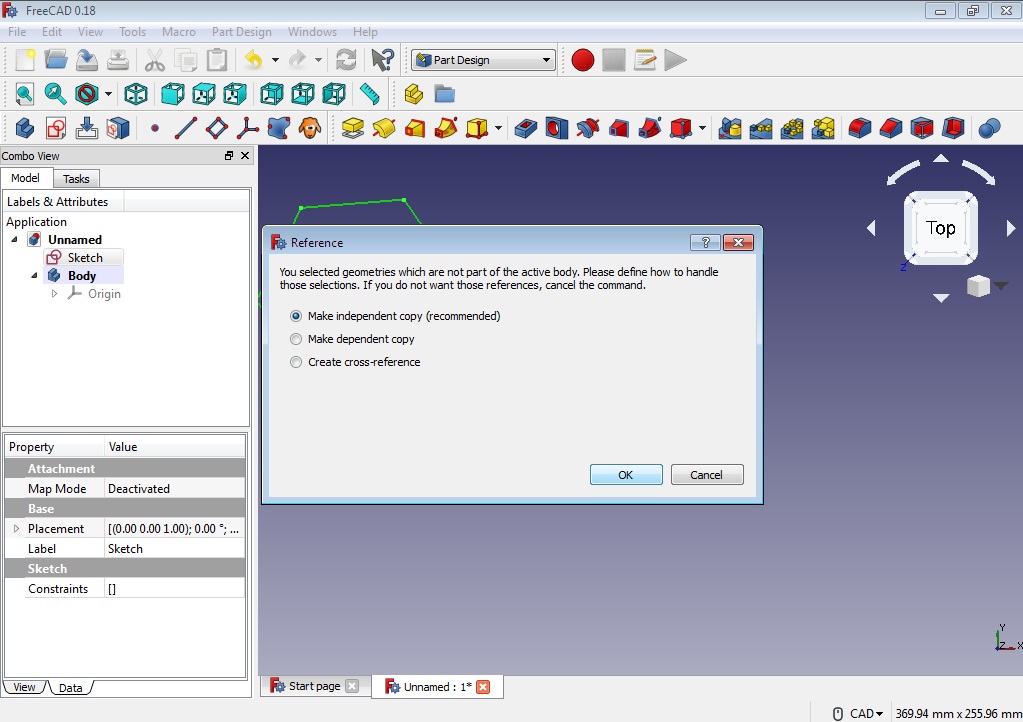
But it was diificult to to convert 2D object into 3D because i tried to covert there was one problem happen when i wanted to convert 2D design into 3D we have to create the body by clicking task menu.
This create body options was not appear on my creen because we have to select the body first which you want to convert into 3D . so by clicking the body and go to task menu which is available in top of left hand side choose create body option then go model menu select your sketch and pad it.
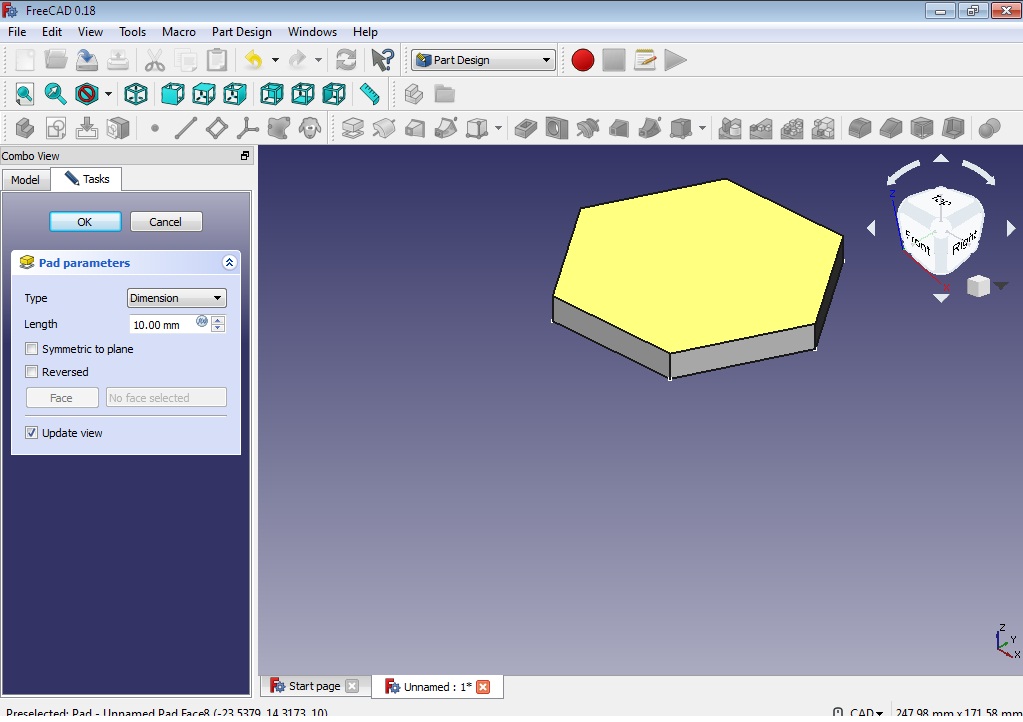
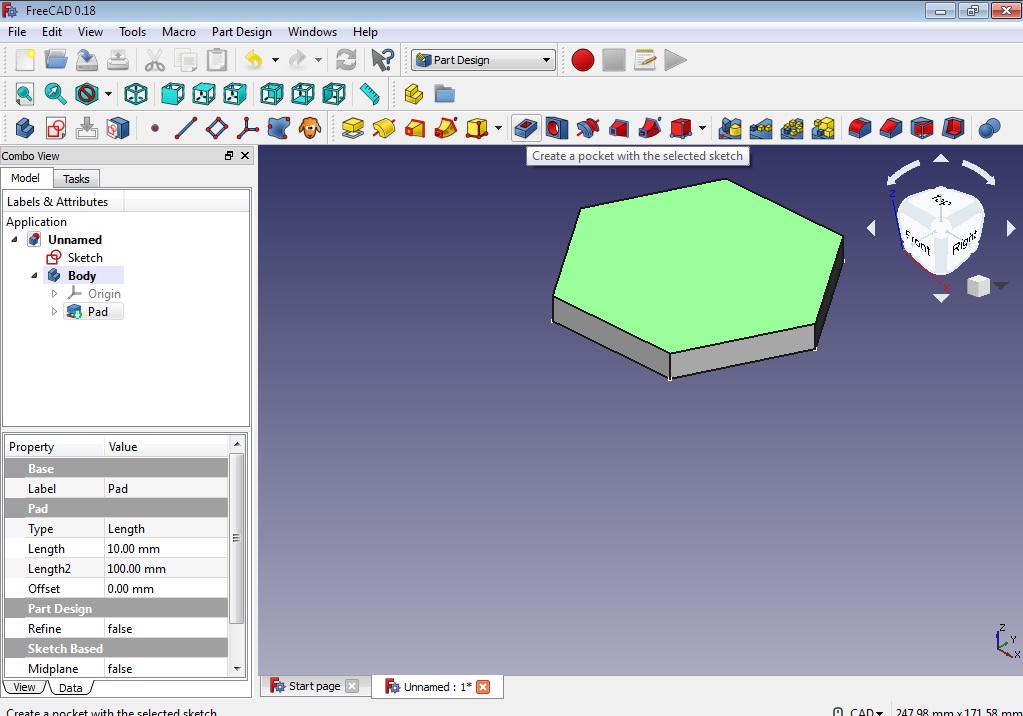
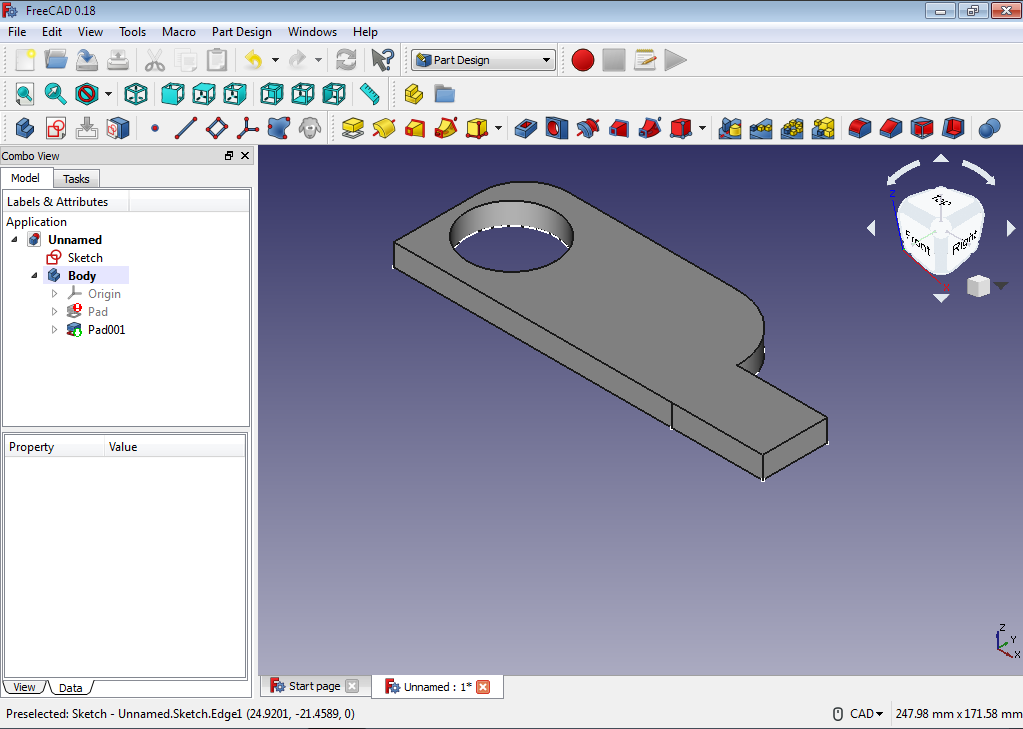
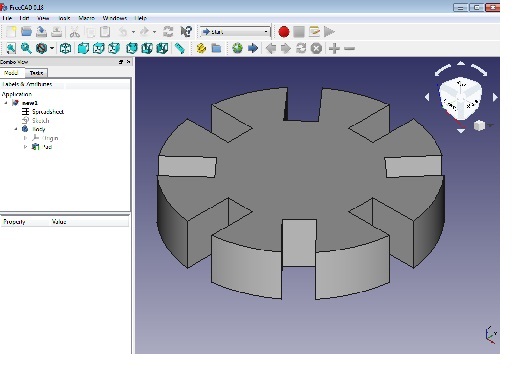
Then my screen looks like below figure.
Then by cliking the ok button my object is coverted to 3D DESIGN
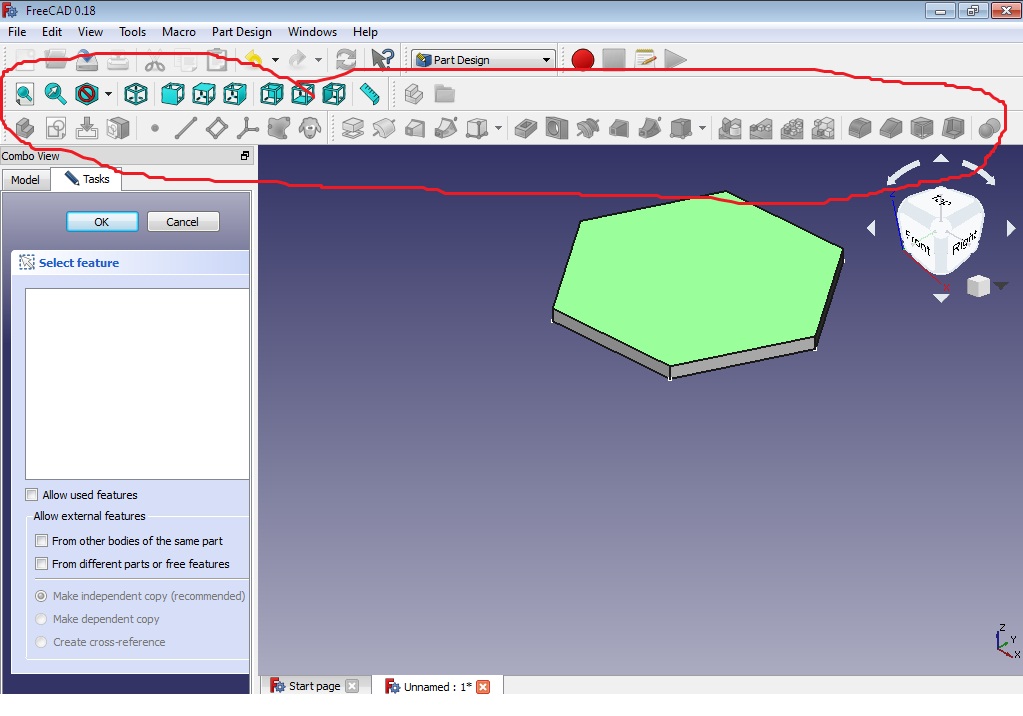
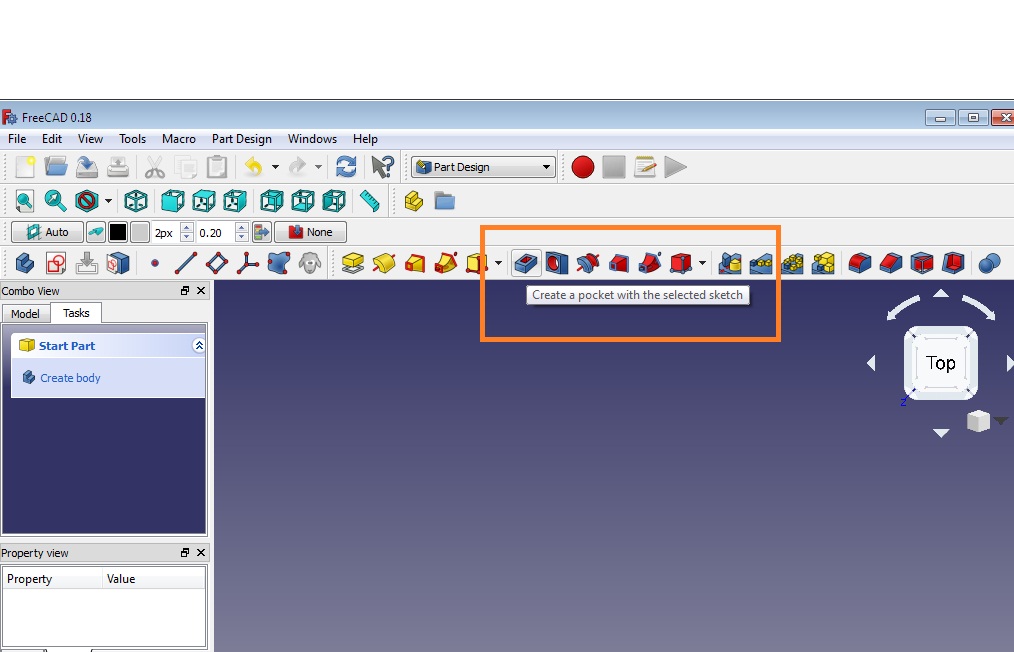
Now i wanted to make one hole on this 3D object for that i have to select the part of body where you want to make hole then go to create the pocket on selected part
Here i have face the difficulty while making the hole on body because the option are disable on my screen
After that i realize this problem occures due not given a proper constrain to the object or some faces are not connected properly.
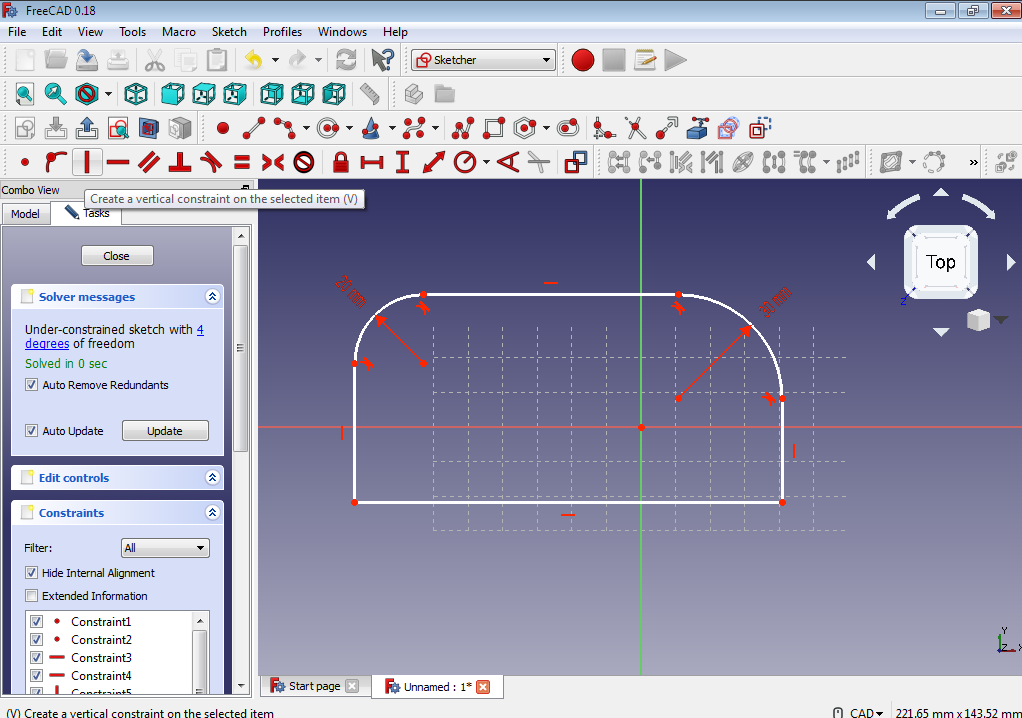
So i have tried to draw different object by giving the constrain
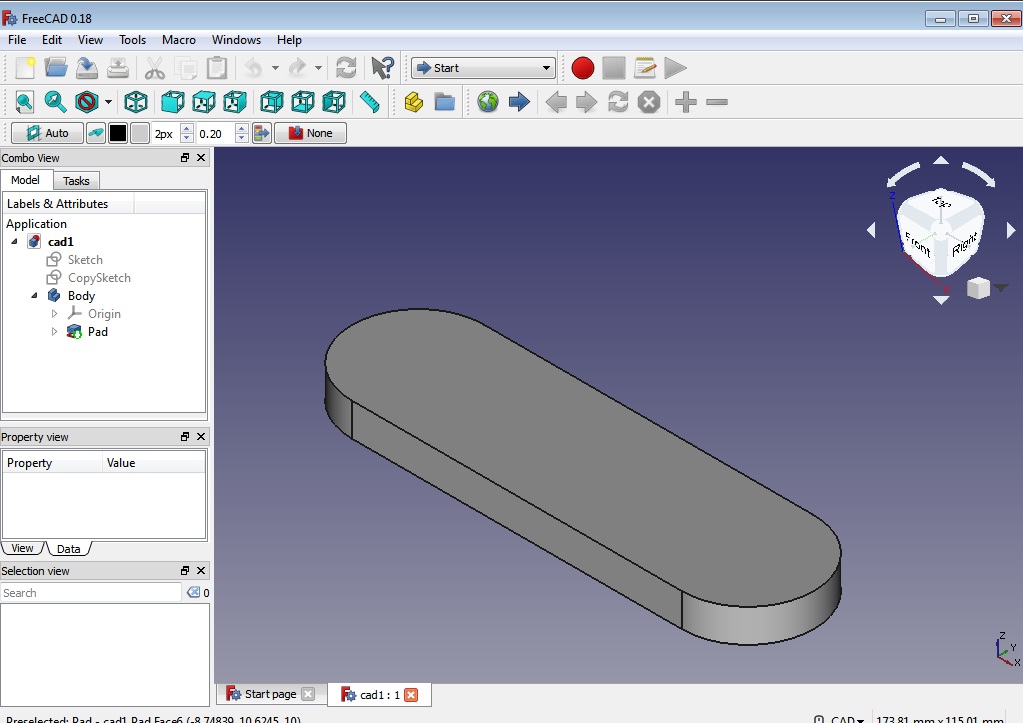
Then, I have tried to draw one circle inside this object and add some lines to corner and also trim the lines using trim command for making some different kind of shape
Then, After completing this shape, I wanted to convert 2D shape into 3D.
So for that i have to go partdesign workbench and click on the object, then on left side of screen the option will appear i.e. create a body click on that option, Then click on pad, your object get converted into 3D object.
This is the 3D object
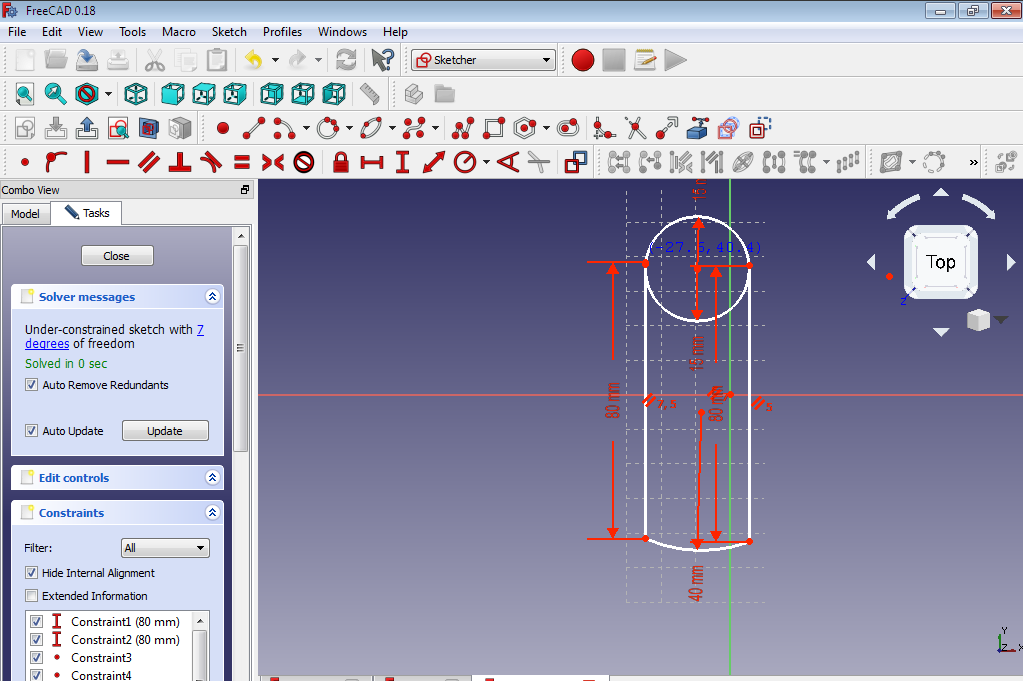
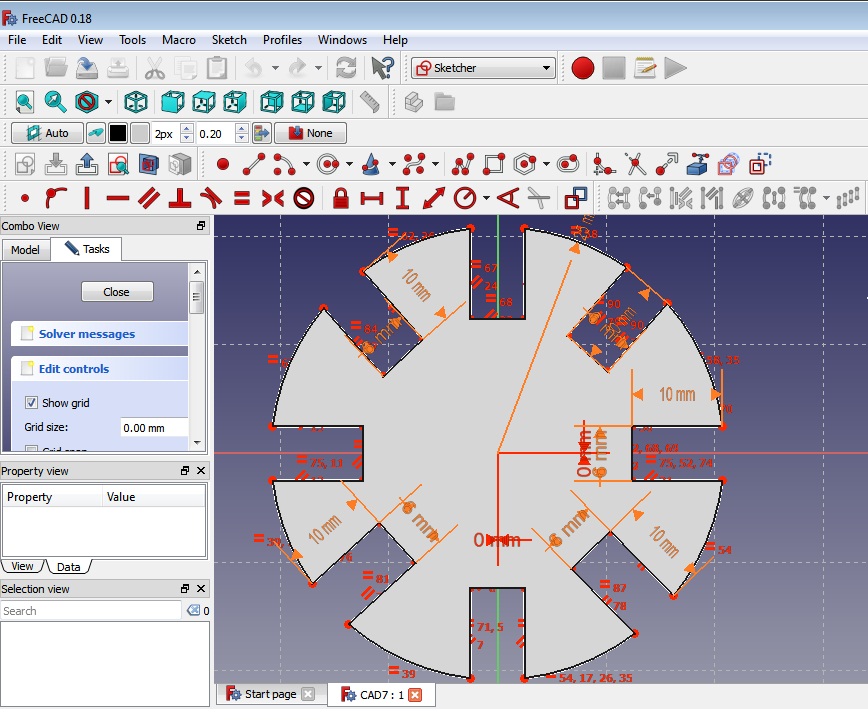
Then, I tried to draw some other kind of shapes in this skecher workbench
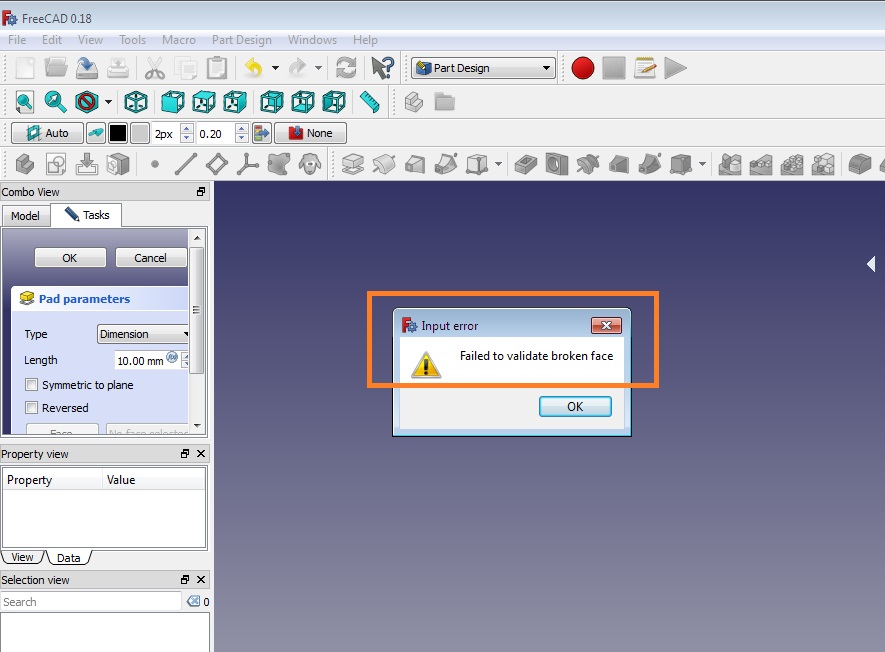
But here, i am not able to convert this 2D object into 3D Object because when i tried to convert there was giving some error like broken faced, I tried to solved it but i was unable to solved, and also the object was invisble from window.
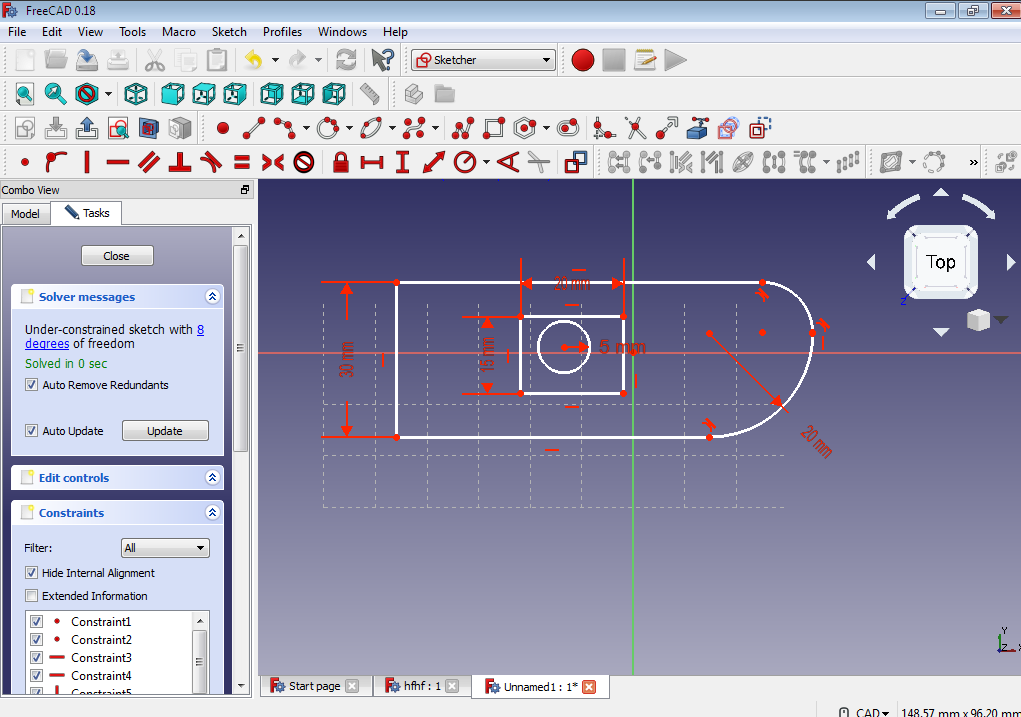
Then, I tried to drawn this kind of shape again it was not able to convert into 3D part due to same issue failed validate broken faces. .
Here, I have tried to draw this kind of shape and its done there is no issue with the error broken faces. as i am exploring this freecad software the solution not found yet for this error ( In some cases it gives the error and some not)
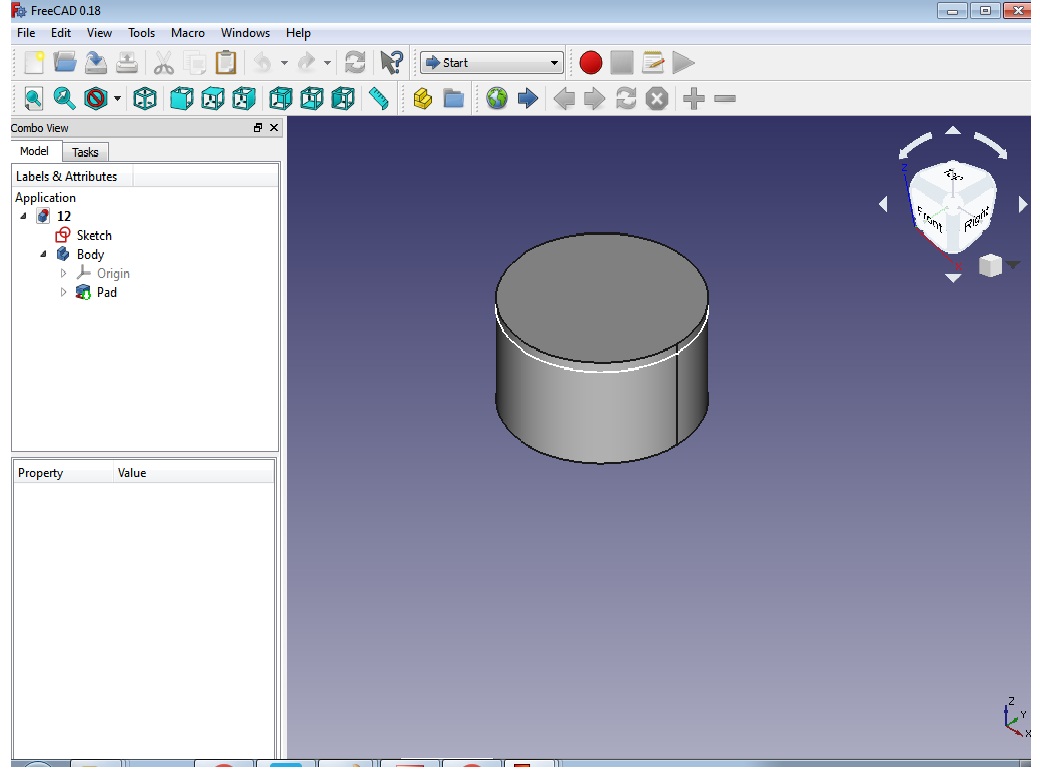
Here by drawing simple circle that could be converted into 3D it was possible.
Then, I have tried to create pockect to circle using this command.
Here, I have tried to drwan one circle and make it body in part desinged work bench and tried to apply some commandwhich are availble in this workbench.
Here I tried the different kind of shape by taking the circle and making it some like this it was created successfully with applying constraints. The 3D view of this shape is looks like.
In this way i have desined some 2d and 3d object using freecad software but it was quite difficult to learned this within a 5-6 days.
Here, i need to do more practice on freecad software to learn the different workbeches for design the2D and 3D objetcs
2) Rhino software
After that i have worked on Rhino Software
This Rhino software taught us one of the member in our fablab class Mr. Mohit Ahuja he tooks the hands on work experinced on this software
While installing Rhino 6.13 software version is not Supported for 32 bit Windows-7 operationg system so i need to change my system and required to installed windows 10 or windows 7 having 64 bit operating system.
When, i discussed this with mohit he suggest me , you can installed rhinoceros 5.0 for my windows operating system
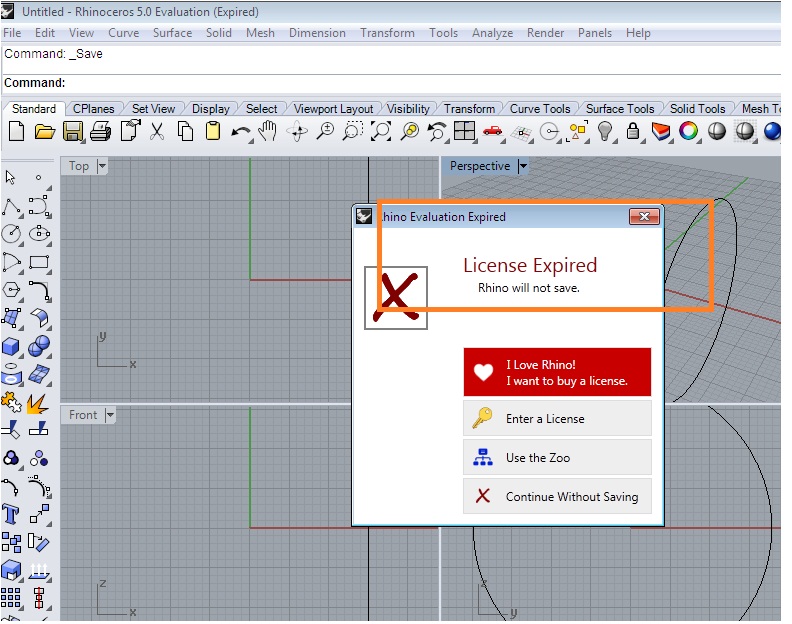
So, I have installed this, but there was an one problme that i have faced that while saving the any file which i have designed its gives the message "license Expired Rhino will not save this file"
So this software i have learned on my colleague laptop and tried to draw the following shapes
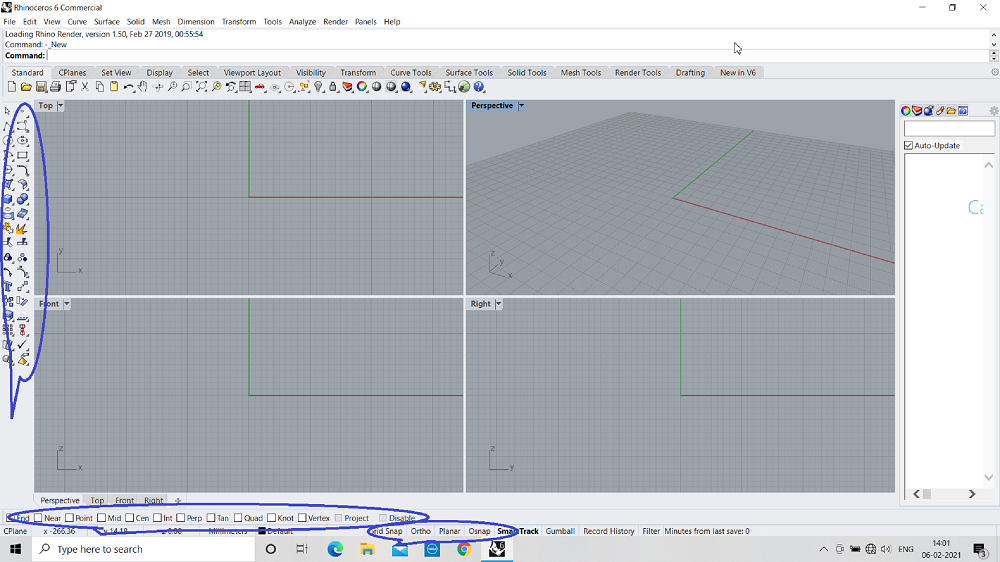
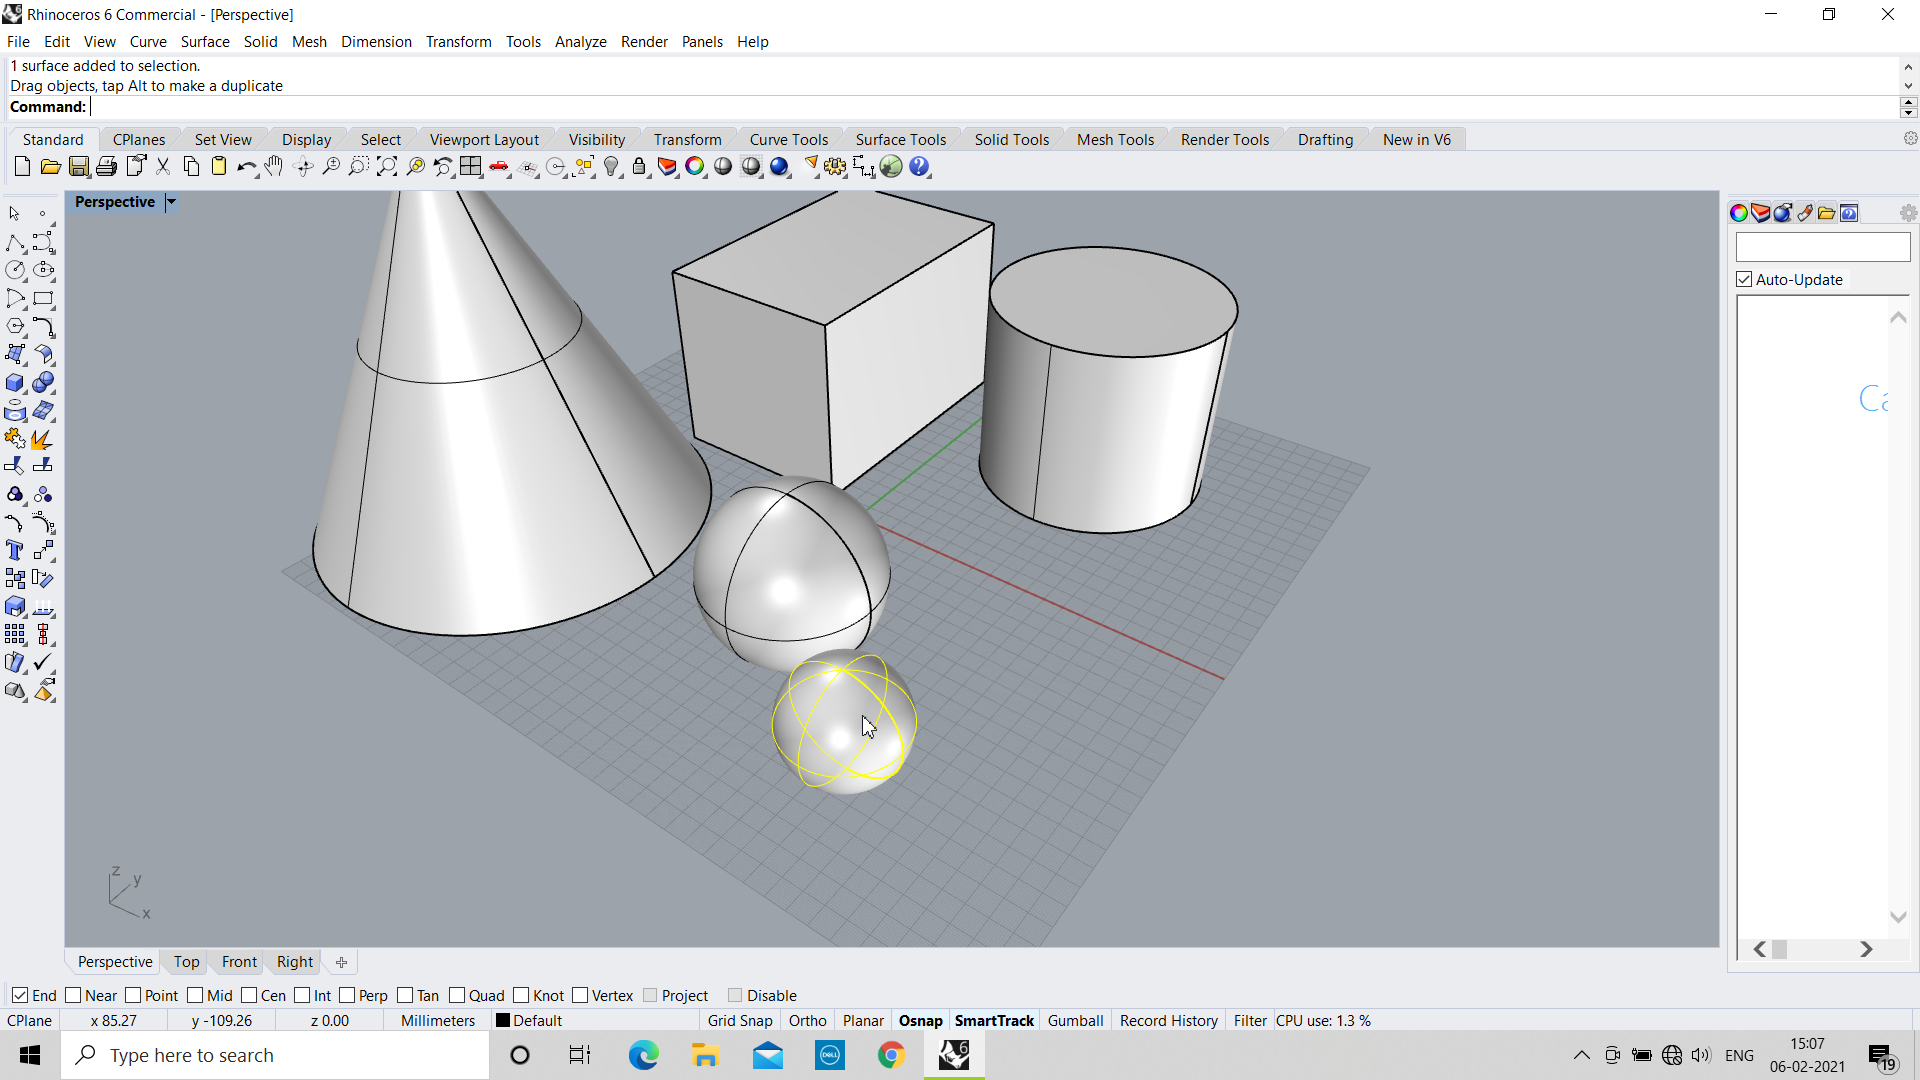
This is the first window of rhino 6 when i have open the software and shows some tools using which can carry out my work on rhino.
So i have tried to draw some kind of shape in Rhino 6
The below image appeared on my screen shows the four view perspective , Top, Front and Right.
Opening of Rahino 6.13 is very user friendly
You can select the all geomatrical shapes 2D and 3D in left side of the screen.
It has some special feature like
a) gridsnap- for precise grid
b) Ortho- for Straight line movement
c) Planer- for 2d drawing
d) Osnap- Perfect sticking of two shaps
e) Smart track- Perfect Alignment
At bottom side of the screen different point possition are given
Rhino is basically used to create, edit, analyze, document, render, animate, and translate NURBS curves, surfaces and solids, subdivision geometry (SubD), point clouds, and polygon meshes. There are no limits on complexity, degree, or size beyond those of hardware.
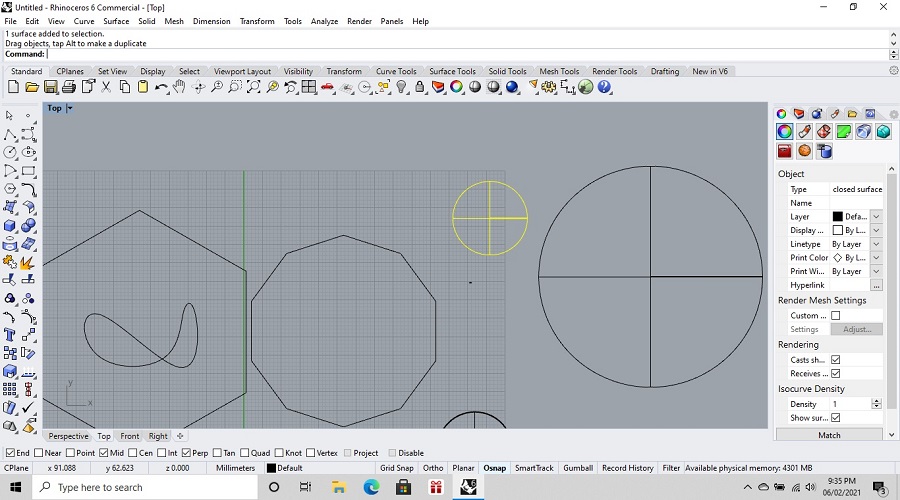
I have tried some Shape which i can able to draw as follow
Shaded Wire frame view of different 3D Shapes
Then again i have tried to drawn this kind of shapes
This is some object that converted into solid form using the tool.
Here, My mistake was as I mentioned, have tried to design some object in Rhino 6 software in my friend software,So I have forgot to save the original files of desined object.
3) Tinker CAD Software
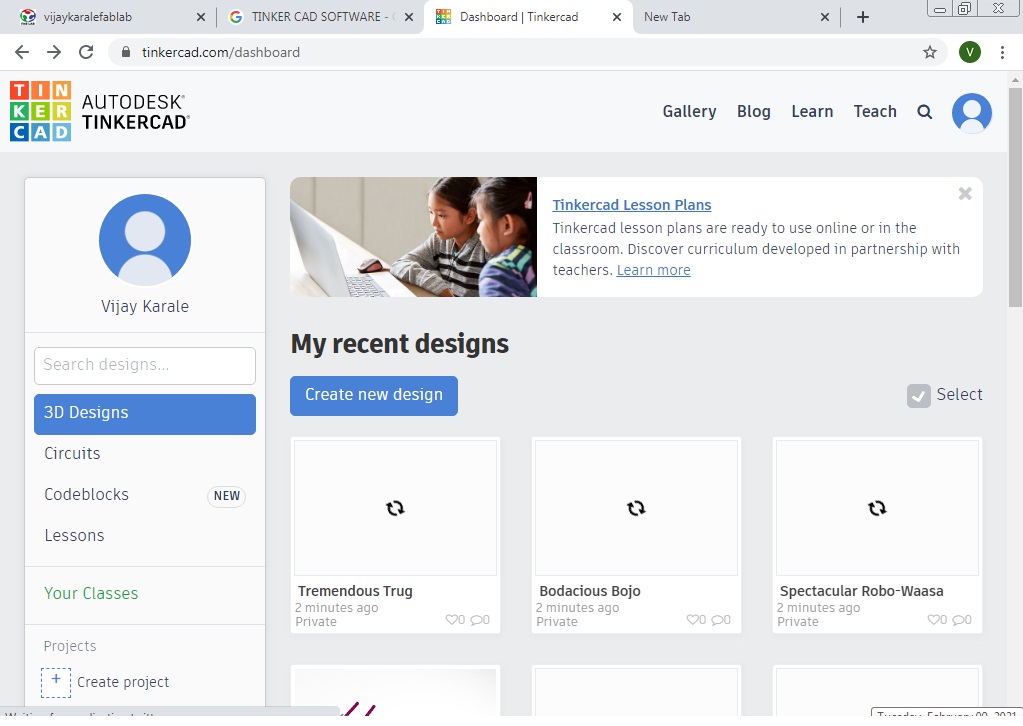
To learn this software We need to signup with our google account because, basically it is the open source software which can directly interface with your browser tinkercad.com TinkerCad.com the main window will open in your browser
This is the first windows of tinker Cad software where you can create your new design.
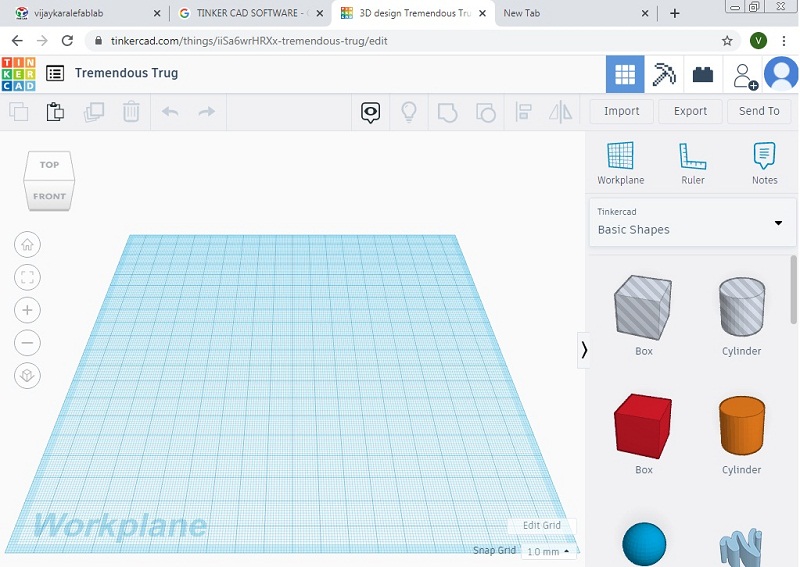
Then go to create design
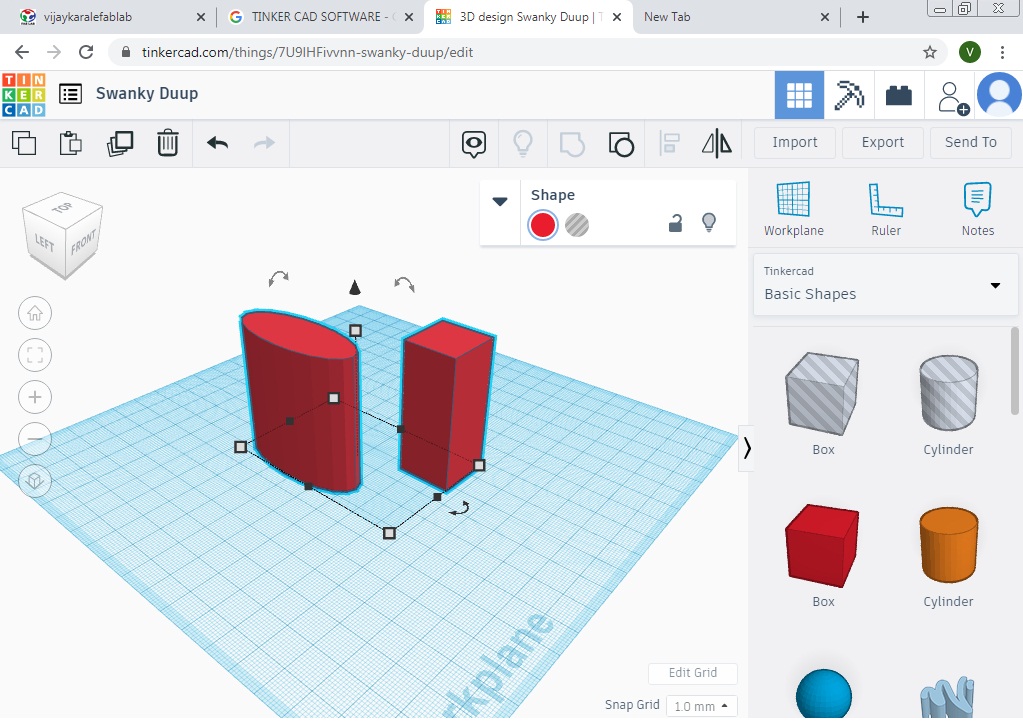
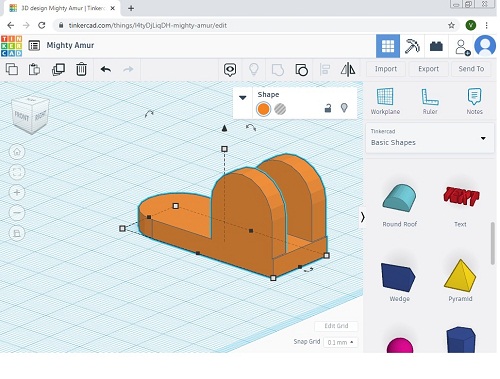
In create design you will see this window. from right side you cans select the different shape that you want to design and also you can give the proper dimenssions to each and every object by cliking the object.
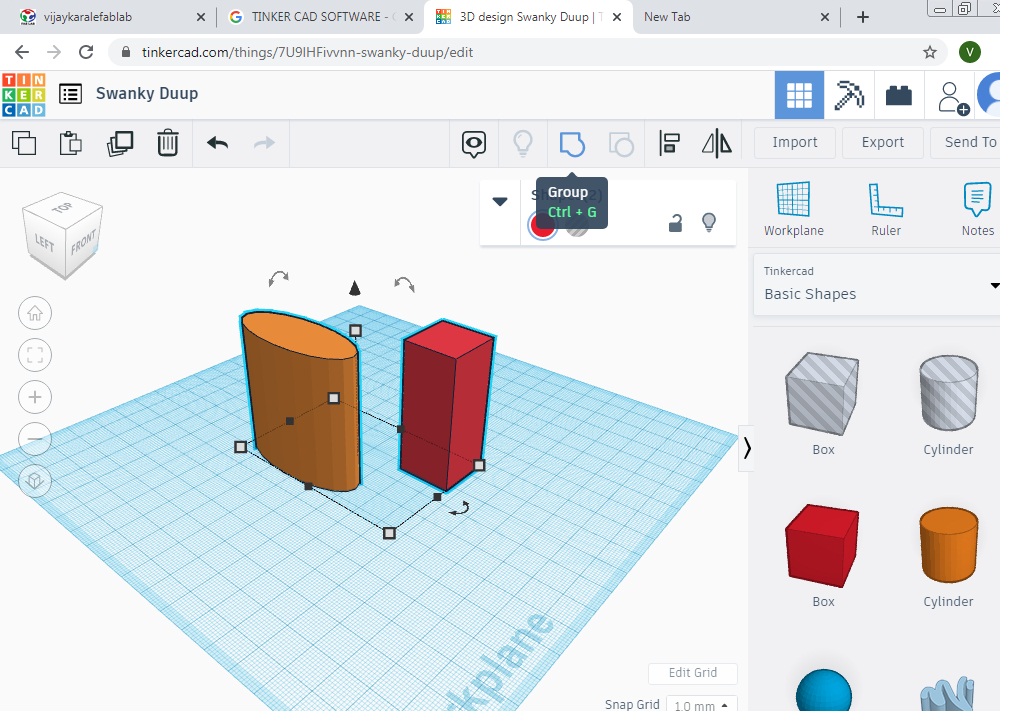
1. Tinker Cad is simple software to design the 3D object we can give the dimensions to any object by cliking on it.
2.first i have taken two shape from right coner and go to group them by cliking grouping option at the top of right side i. e. the objects are merge into one shape also i have changed the dimension of object
Same way by cliking on ungroup button we can able to separate them into two part gain.
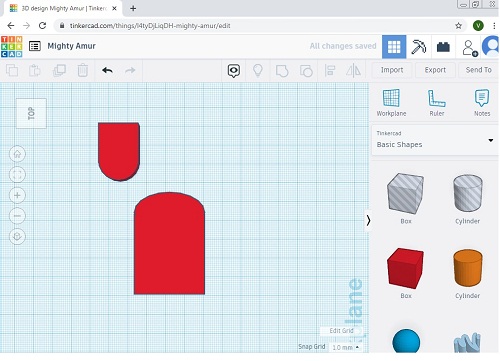
In this way i have design some basic shape and 3D Model by giving the proper dimensions.
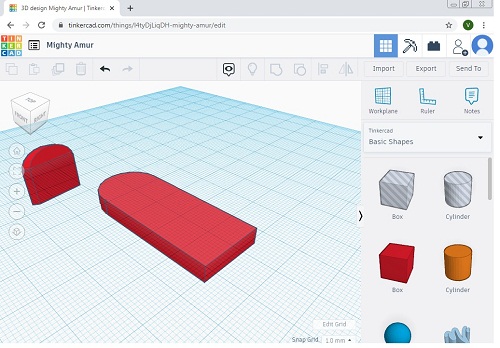
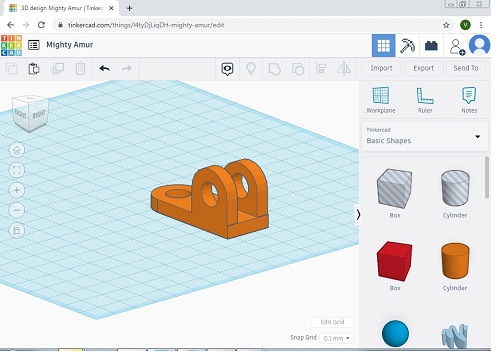
This is I have made this 3D design using the group command.
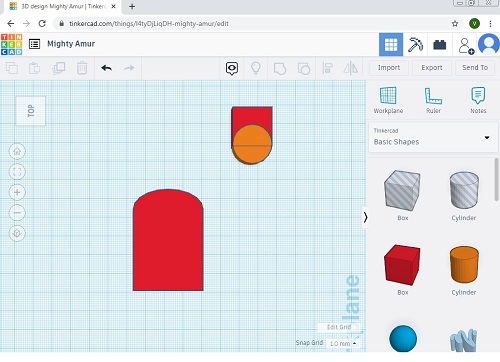
Then I have create a hole to the part proper dimenssions by taking the cylender and make it as hole.
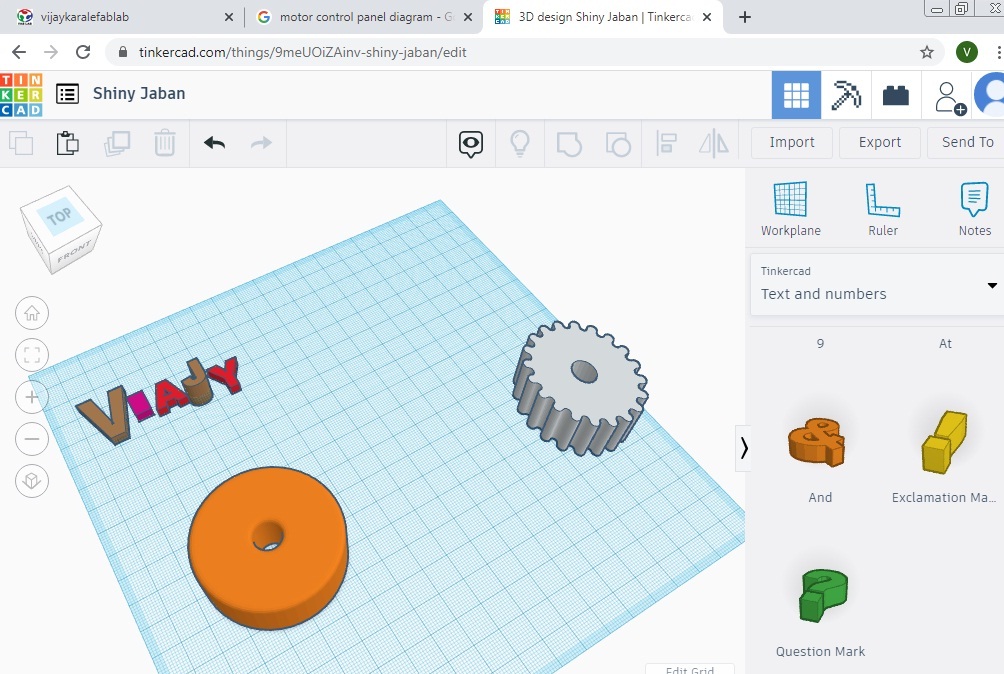
This I have tried to draw my name and the different shape.
4) Blender 2.92 Version
About Blender:- Blender is the free and open source 3D creation Software. It supports the entirety of the 3D pipeline—modeling, rigging, animation, simulation, rendering, compositing and motion tracking, video editing and 2D animation pipeline.
Again one of the our fablab member Mr. Rahul kanojia tooks hands on practice on this software.
Initially i have tried to installed this software in my laptop
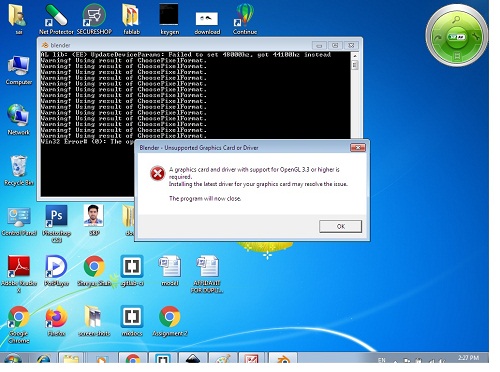
As my windows version is 32 bit processer i am not able to installed this software on my own laptop because this version is not supported to my processor.
It gives some message Graphics driver not supported
I decided to do practice of this software My friend laptop because I need do do more practice on this, So I am currently working on this blender or i need to change my oprrating system.
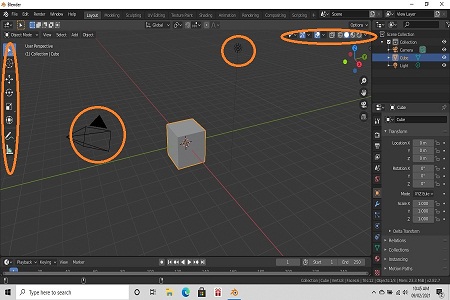
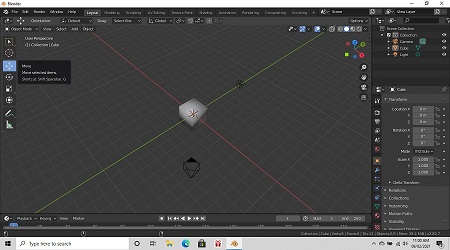
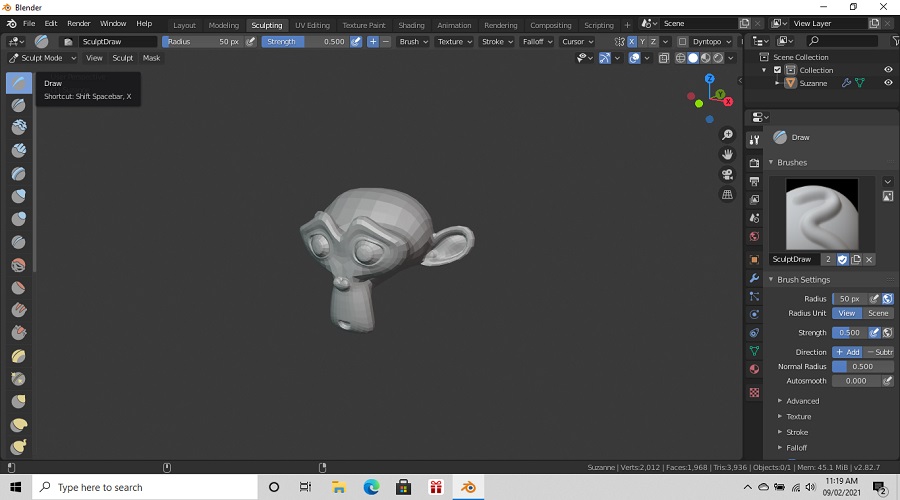
The open window of blender consist of number of tools as shown in image
In blender threre are Some of keys
0 for camera mode,1 for front view, For moving along X axis press G and X,For rotating along X axis press R and X ,For editing given object,Select given object
1) I have tried to learn some feature of blender like ,You can select box, cursor ,move,rotate an object with left hand side tools on the screen.
2) The camera and light source is also on front screen
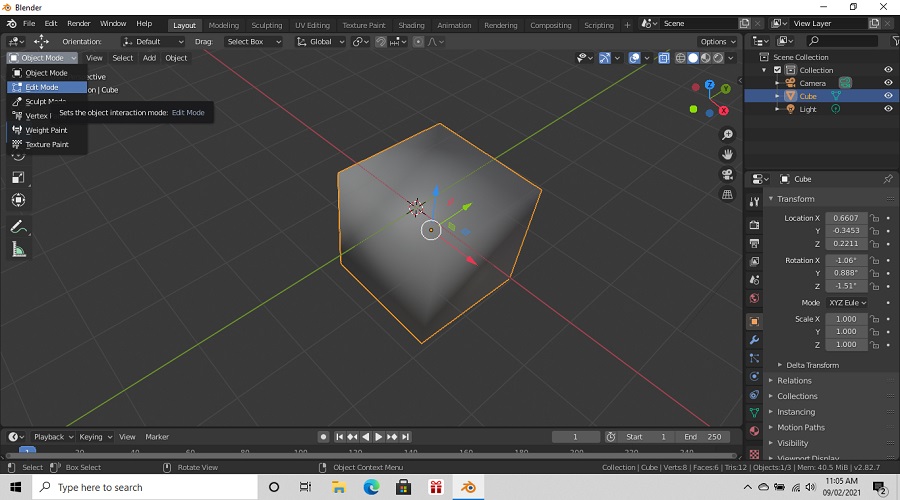
3) You can check type of object,its Xray view,rotating an object along
axis,zoom,toggle the camera ,and chaning the projection from the right corner of the screen.
4) I observed that some shortcuts keys are also there
so I have tried to drew some shape in blender
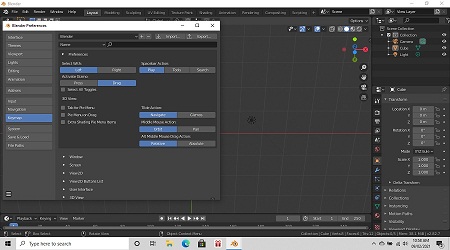
An open window of blender consist of number of tools as shown in image .
Go to the edit menu select Blender Preference and go to the Keymap
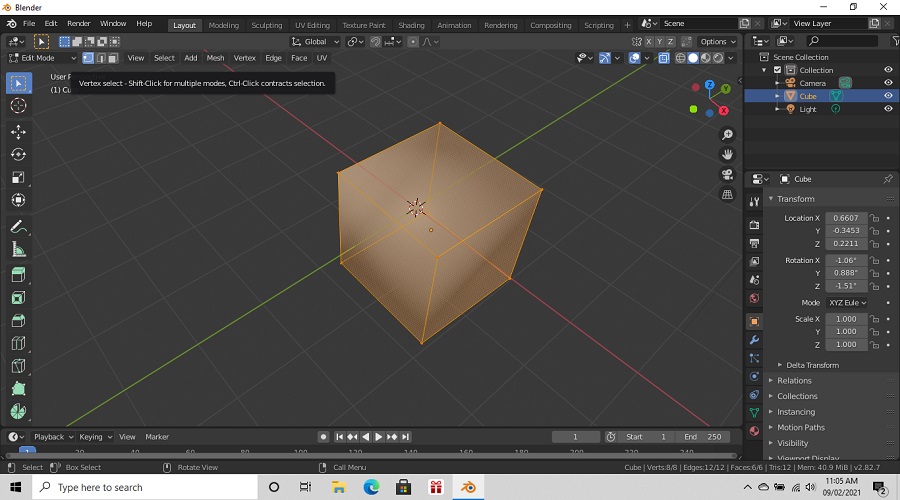
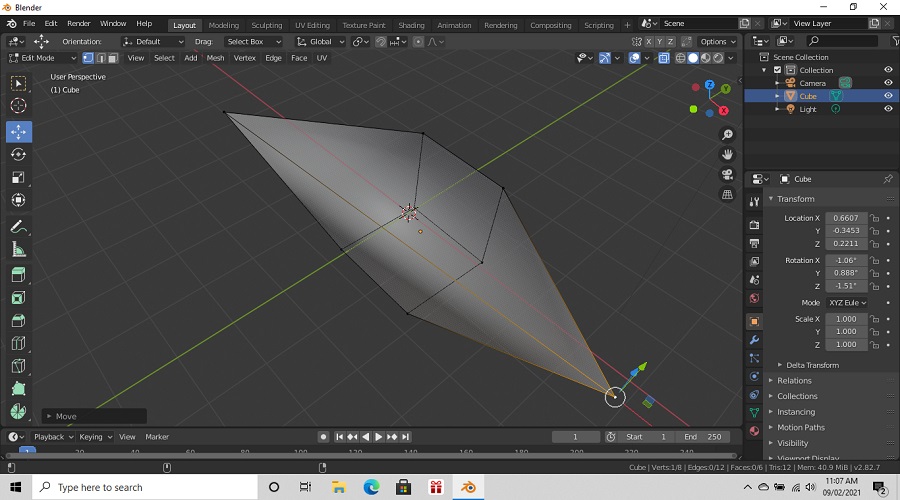
Select vertex point ,press G and move it along X axis as shown in image
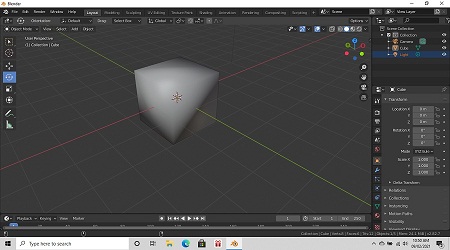
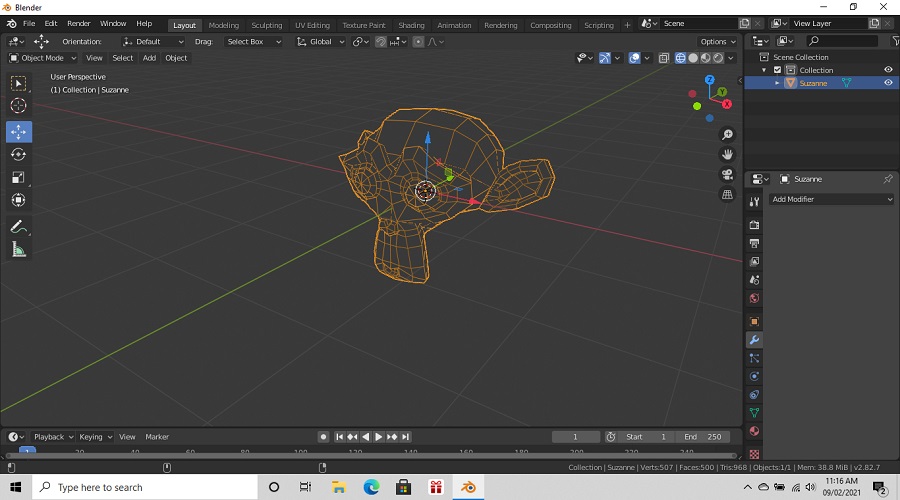
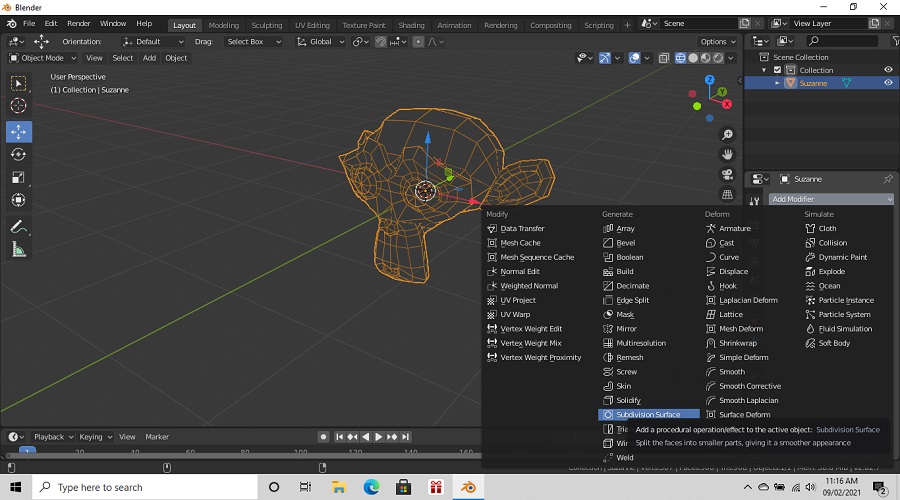
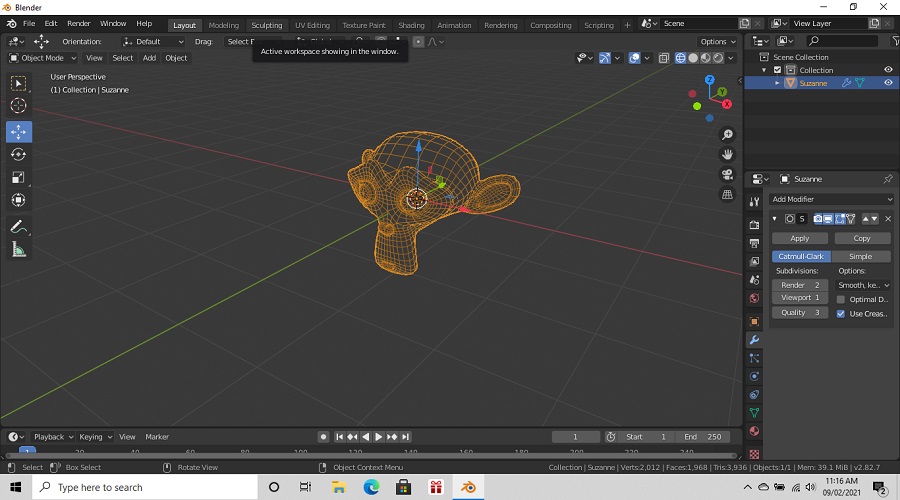
Go to the add modifier select sub division surface
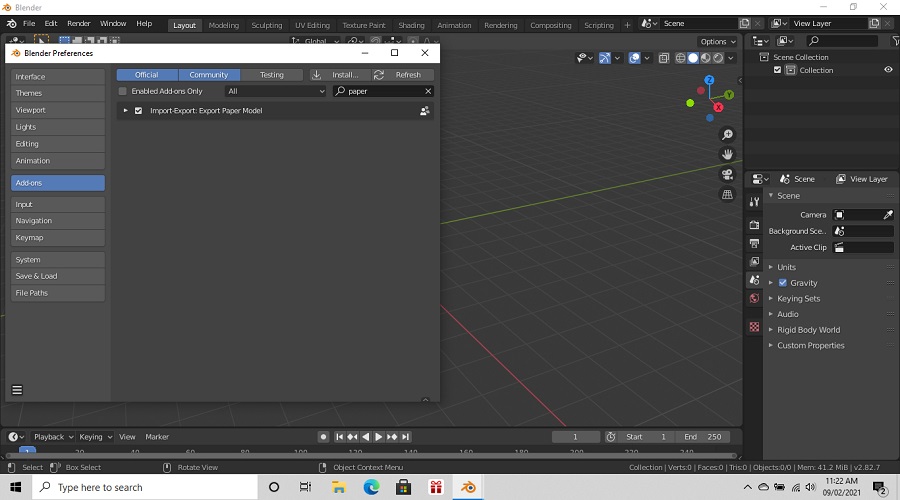
Paper fold through Paper Model.
Select edit, go to the preference mode select Addons select Export Paper model.
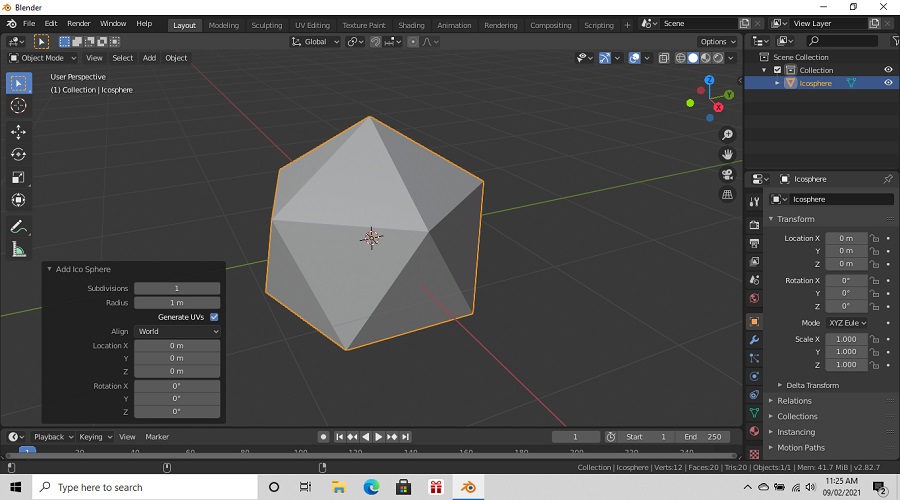
For adding shape select add ,select Mesh and select ico sphere shape.
This is i have tried on blender software but it was quite difficult for me to understand this, for that i need to do more practice on blender.
After that i tried to make one 2D Animated video of my name
I am thinking that need to do more practice on 3D design Softwares like FreeCad, Rhino, tinkercad , Blender.
What I have learned?
1) Now I am able to draw and edit the Raster 2D images by using GIMP and also edit any kind of image by using GIMP Software.
2) I can change the background of any image using remove.bg software
3) For Vector 2D design I have used Inkscape and FreeCAD software. Inkscape is free and open-source vector graphics software in that design such as logo, icon,web graphics.
4) FreeCAD is also the opensource software.For 3D design, I have tried FreeCAD,TinakerCAD ,Rahino, FreeCAD is open source software. i have faced some what difficulties in free CAD but I am trying to work on 3D Design Software .
Download my original file here