
Week 2: Computer Aided Design (CAD)
This week the following activities were carried out
Model (raster, vector, 2D, 3D, render, animate, simulate, ...) a potential final project. Compress your images and videos and post them on your class page. Document the use of 2D and 3D modeling software. Evaluate and select 2D and 3D software. Demonstrate and describe the processes used in modeling with 2D and 3D software. Development of experimental objects modeled/as part of a potential project in 2D and 3D software. Show how you did it with words/images/screenshots. Include your original design files.
For the final project, I developed the threading system for my irrigation system. I began by learning how to create threads in Onshape.
Model something in 2D an 3D
This week I have downloaded more than 8 2D and 3D design programs, of all these softwares I keep 3, Fusion 360, Inkscape and Onshape. The versatility to design and its friendly interface made modeling not so difficult for me. In my final project I will develop straight 3D figures and Onshape is the ideal one. Whereas for the 2D design I have used the Inkscape.
2D Design - Inkscape
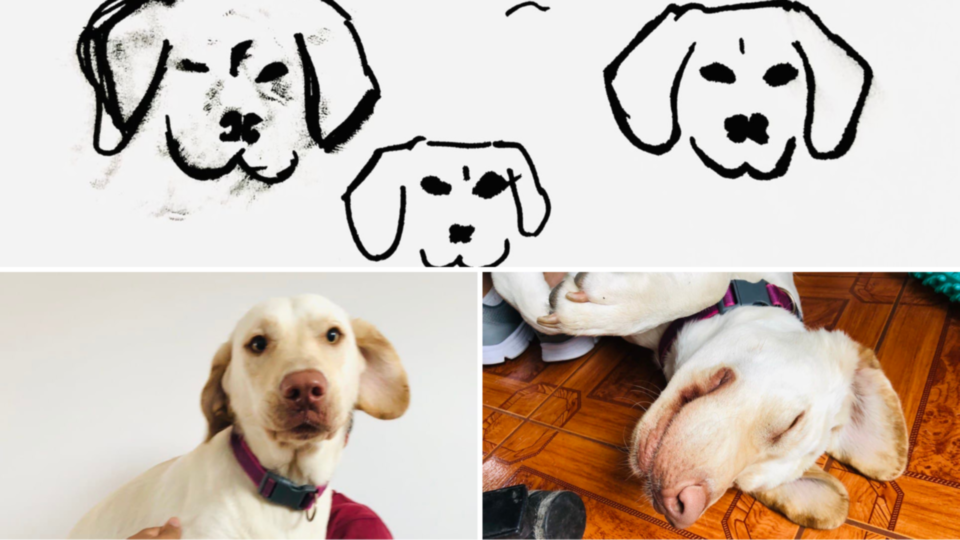
Before starting to vectorize, I drew a freehand character that we will get to know during my Fab Academy, she is Eva, my pet she is a Labrador retriever a little over 1 year old. I drew her while she looked at me eager to go for a walk.
It is the first time that I use Inkscape and despite this I decided not to see any tutorial before starting with the software, you know, to interact and strengthen the DIY. You can download it from this website.
This software was in charge of vectorizing my freehand drawing. I liked the result a lot, it removed the background and the spots from my down. Then it allows you to modify the points, in order to obtain a figure with better lines. You can see a before and after between my drawing and the corrected vectoring.

You may ask yourself, why draw and vectorize a dog's face? Well, during these weeks and the next Eva will accompany me, she puts up with all the noise while she works at dawn, she always looks at me patiently and deep down I think she encourages me. She hasn't learned to code yet but I will use my drawing of her face as my Fab Academy logo.
You can download the Eva logo by clicking here.
3d Modeling with TinkerCAD
In the search for a 3D modeling software, I found an online platform called TINKERCAD, it is quite intuitive and despite not being a downloadable software, it offers very powerful tools. I will use this platform to model the Eva logo and then print it in 3D.You can download the Eva STL by clicking here.
3D Design - Fusion 360
I remember designing in Fusion 360 a few years ago, but definitely now with the new updates wonderful things can be done, this time I did have to resort to many tutorials to remember and learn about the new commands. Thanks to this I began to model and test the distribution of the components and also began to make a first prototype to place the connections and then give it a shape similar to that of a cloud. Inside the design there is a fixed place for the LCD screen and the Arduino board that we will use. I've generated a ventilated compartment for the sensors. The inner wall can be removed for easy mounting of the elements.
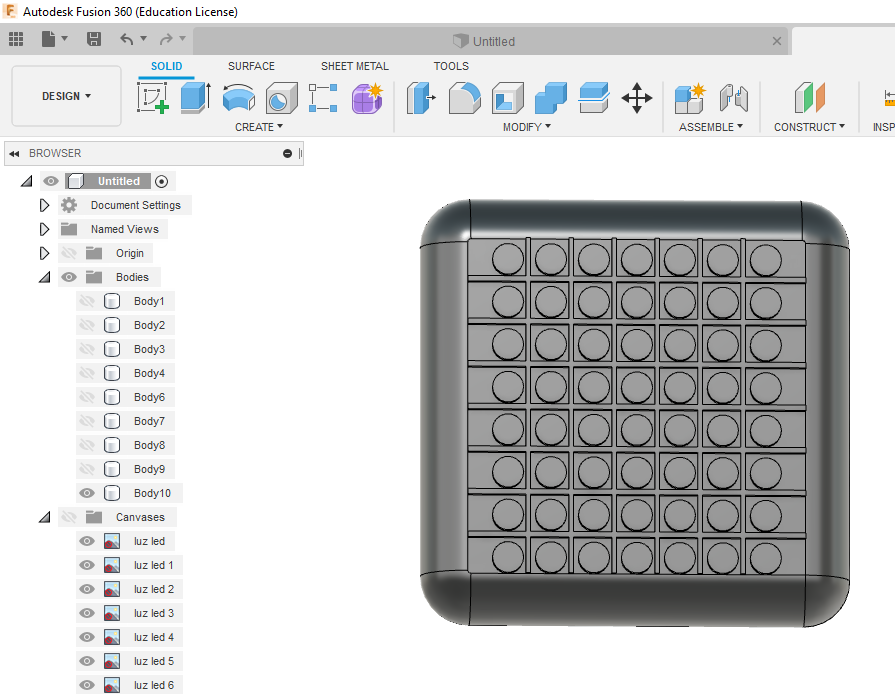
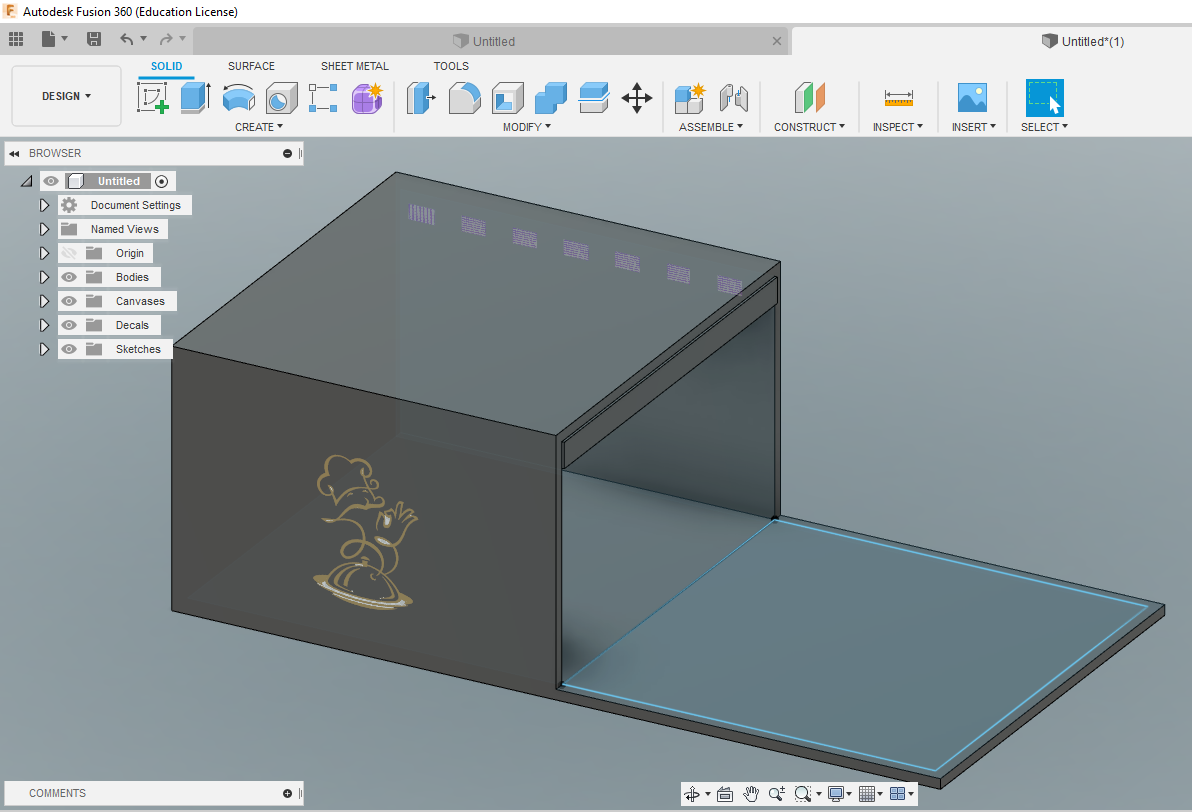
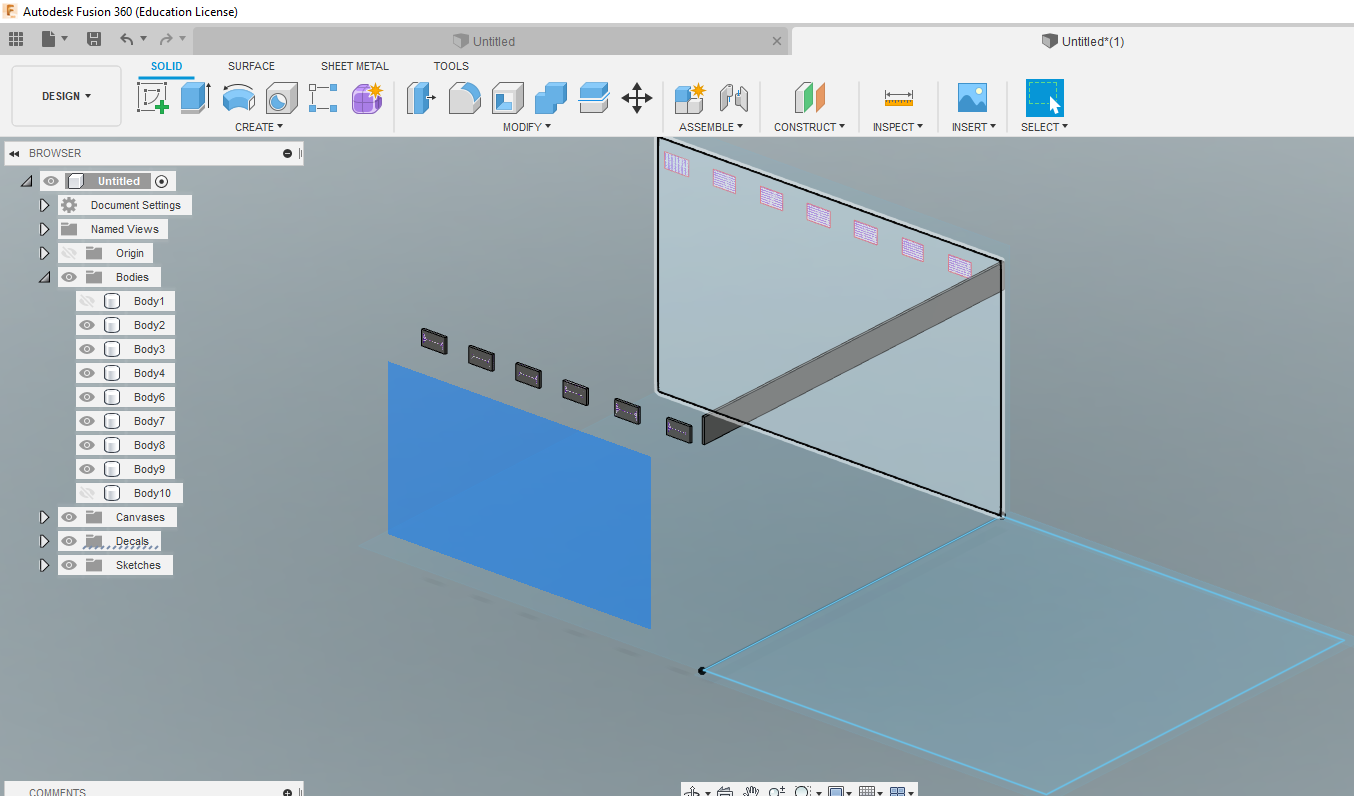
For this part of the design it is very important to have the components that we will use ready, since the exact measurements will give us a better perspective of the size of our design, in my case I was thinking about whether to use the Arduino nano or the Arduino Uno and I am even projecting myself to use RGB lights and all this has to be reflected in the design.
You can download first version files here.Onshape, the online 3D design software
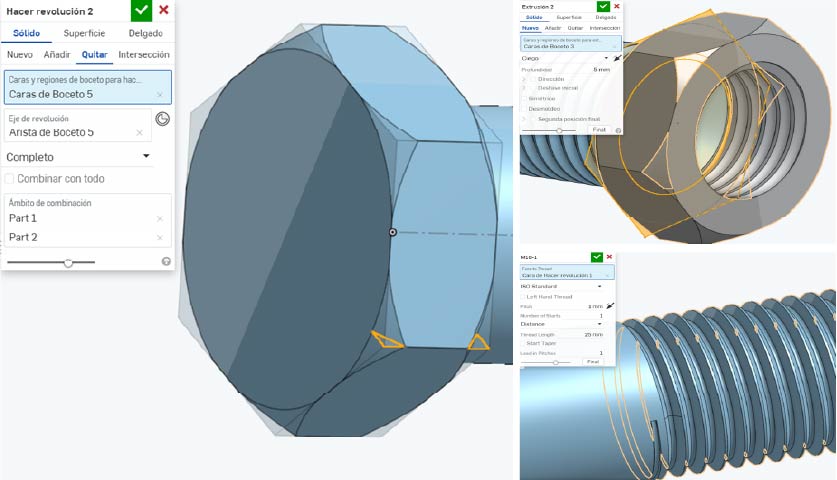
To assess the performance of this platform, I chose to conduct a test with a specific design: a bolt and its nut that I plan to 3D print in the near future. As part of this process, I've also crafted a step-by-step video tutorial.
Onshape has significantly streamlined both the modeling and testing of component distribution in this project. The intuitive interface and accessible tools have empowered me to approach the creation of a design tailored precisely to my needs, even for something as intricate as a bolt and its nut. In the design, I allocated a specific place for the bolt and nut, paying attention to every detail to achieve a seamless connection. The 3D visualization capability has been crucial to ensuring that each component fits correctly. Onshape's flexibility has allowed me to adjust dimensions and make changes with ease, ensuring a precise fit and an aesthetically pleasing look.
 A valuable aspect of Onshape is its online accessibility, meaning I can access my designs from anywhere and any device. This feature has proven particularly beneficial as I can share and collaborate in real-time with other enthusiasts or colleagues, creating a more interactive and dynamic design process.
Furthermore, the option to visualize the design in 3D before printing is an invaluable resource. The ability to make virtual adjustments before transitioning to the physical world streamlines the process and avoids potential complications.
In summary, Onshape not only simplified my design experience in this bolt and nut project but also stands out for its accessibility, collaboration capabilities, and advanced tools for visualizing and adjusting designs. You can explore the tutorial and download the files for the third version here . I hope you find Onshape as useful as I have!