Week9
Mechanical design/Machine design
Group assignment
(Part 1/2)
Design a machine that includes mechanism + actuation + automation
Build the mechanical parts and operate it manuallyDocument the group projectIndividual assignment
Document your individual contribution.
This week, for the machine building assignment, as it is not possible to meet up in person due to the movements limitations (Covid19 pandemic restrictions), we decided to prepare a first draft prototype of our machine which could eventually be replicated in each lab. Once the situation gets better, We hope to meet and mount the final version of the machine together. We are also a man down, Mauro is in the hospital fighting the virus, he is slowly getting better and hopfully we will get to see him soon.
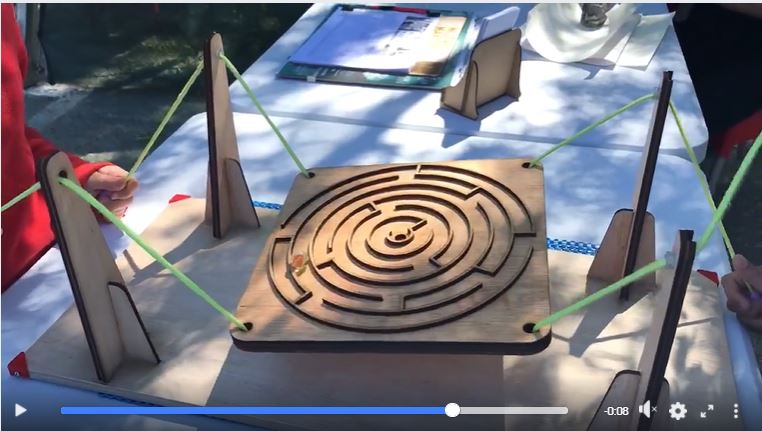
We brainstorm on an idea and investigate the work done in the previous years. We decided to automate an old interactive maze game that I replicated for a local communinity event a few years ago. Here is the sourse of inpiration.
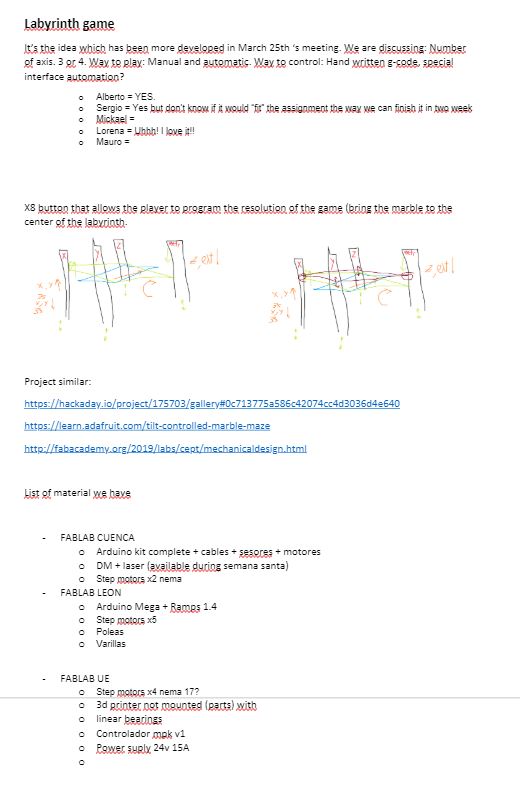
Then we looked at the material we had available and started assigning tasks.
We created a commun document to list the ideas and the material we had.

Here are some similar projects: Mecanical Design, Marble maze (adafruit), DIY Arduino controlled Labyrinth.
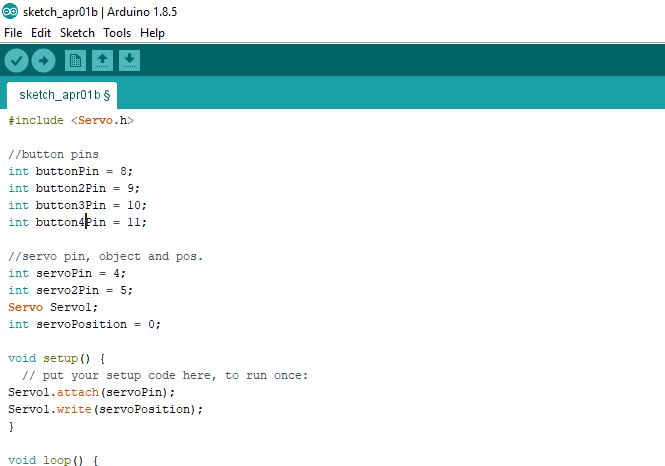
While Alberto and Lorena started on designing the body and maze, I started investigating on the use of servo motor with arduino, I started writing a simple code following this tutorial, trying to add a second motor. I also started to put together on a breadboard the buttons with the resistors and connected them to the arduino.
Datasheet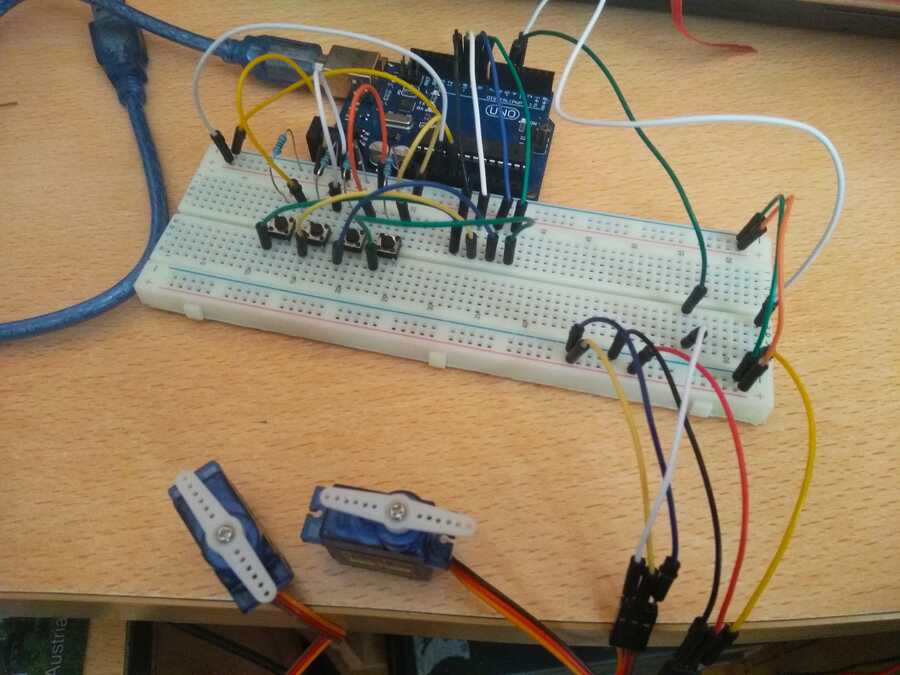
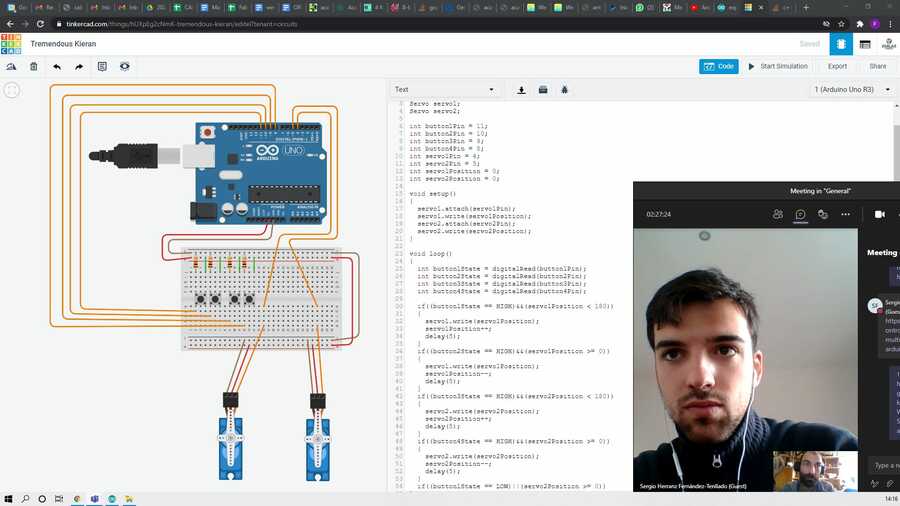
Sergio joined me in the investigation and find more information on this type of set up, he also fixed up the code and we started a shared project in Tinkercad (see below). While he toke care of and wrote the code, I was rebulding the wiring I had done previously virtually, so that everyone gainned access to it.
Intersting/Usefull link1 link2
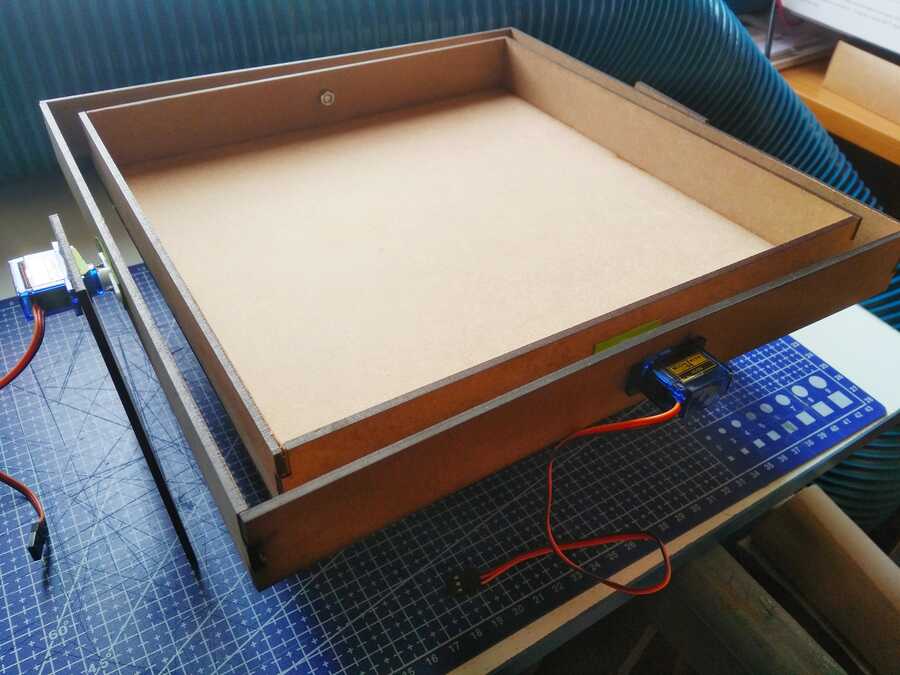
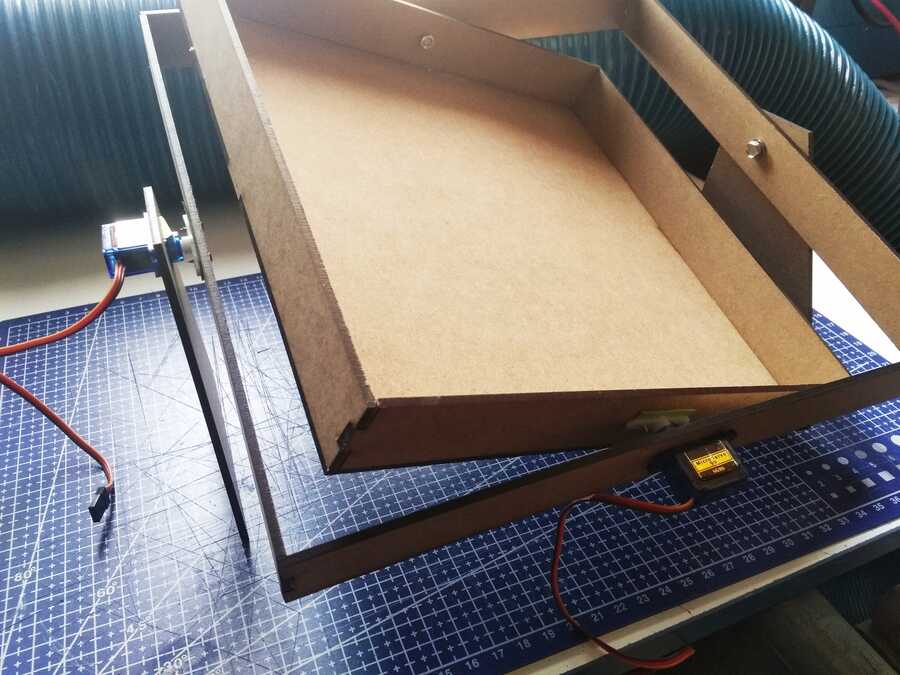
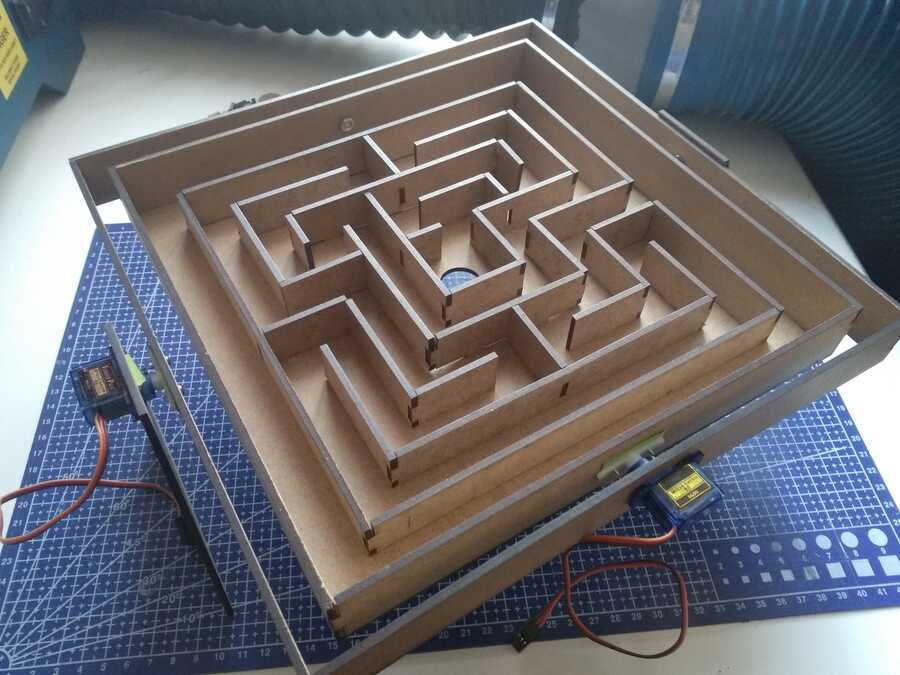
The next meeting was for the body parts designed by Alberto, we talked about the motor´s dimentions that he needed to include in the design and since I had access to a laser machine here at home, he sent me the files and we mounted the parts to check the fittings and evaluate.
We also talked with Lorena about the shape of the maze and dimentions, how dificult should it be and so on...

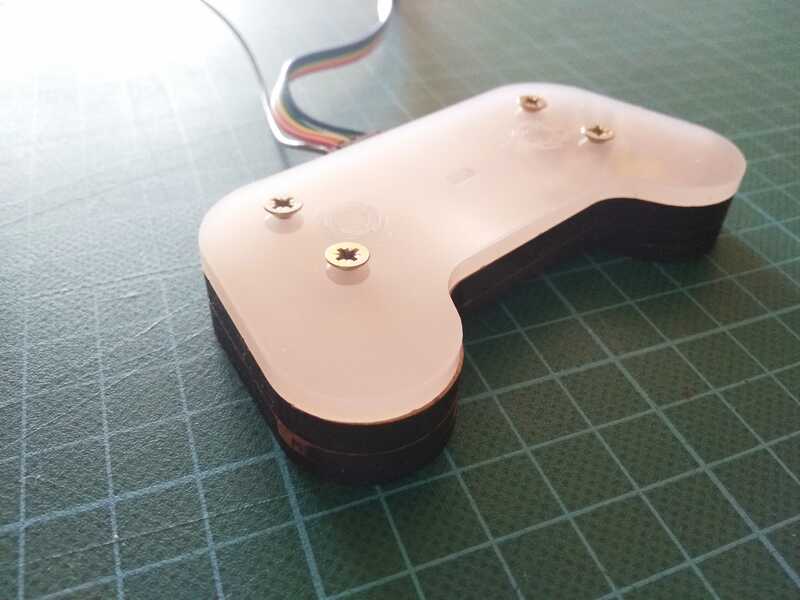
Here you can see Alberto was waiting patiently while I was putting it together on the other side...


Here is the first version put together for testing...

Once connected with the arduino and bread board, I tested the first version of the code...
After that test it was clear that we had to tweak the code to limit the range of movement (I first tried from 60 to 120 degrees, but it was fairly reduced again later) and slowed the pace down by increasing the delay time (25)
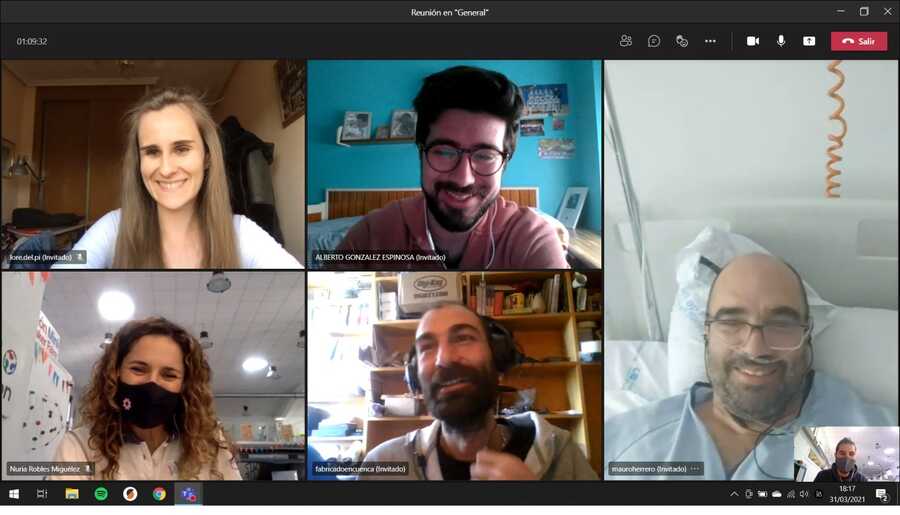
We had another meeting to check if we were on the right track with the instructors, organize the group documentation, and we had a great surprise as Mauro joined us for this meeting...
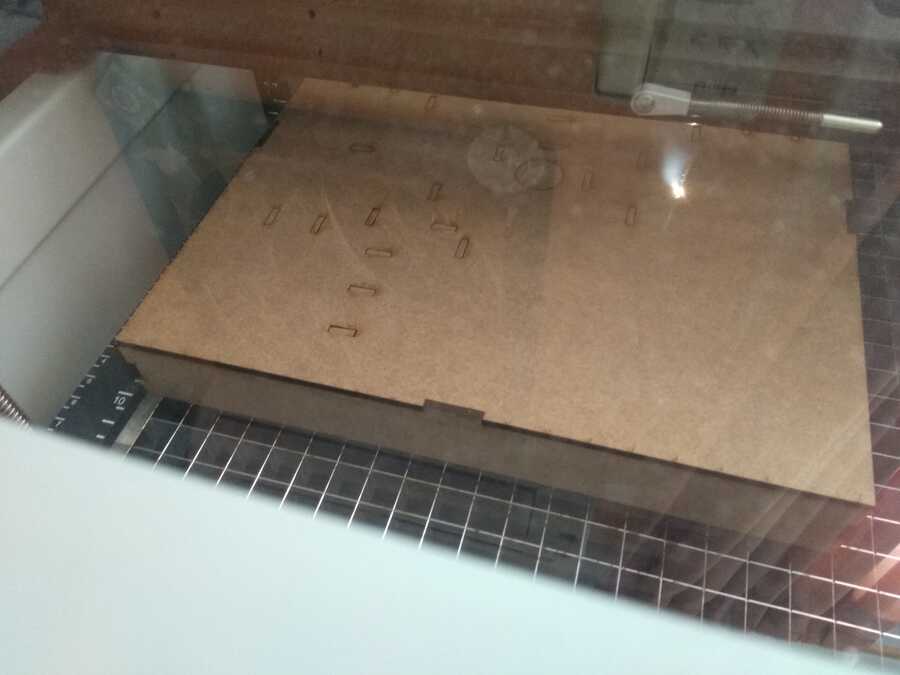
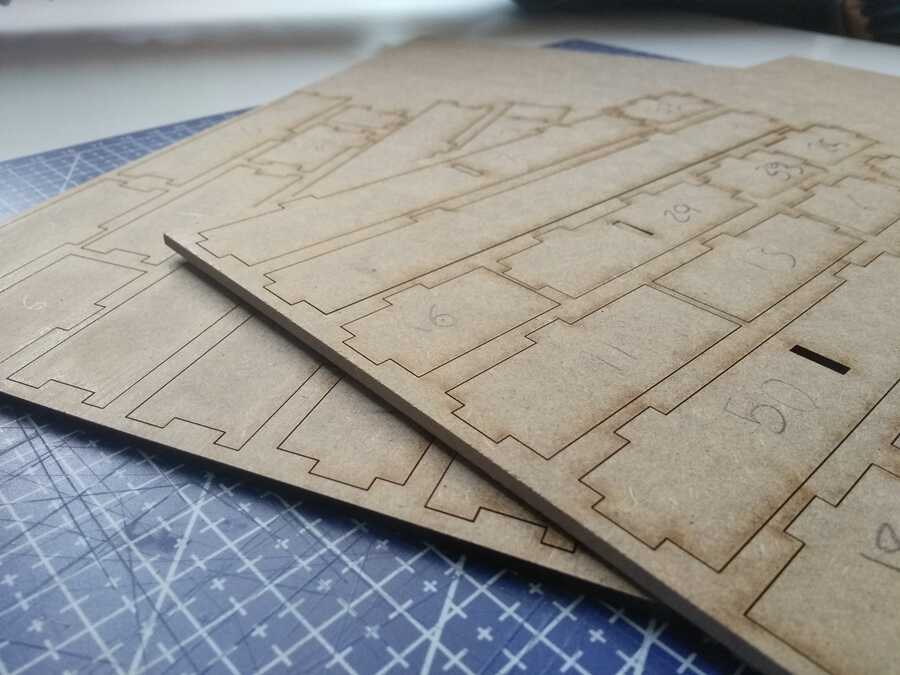
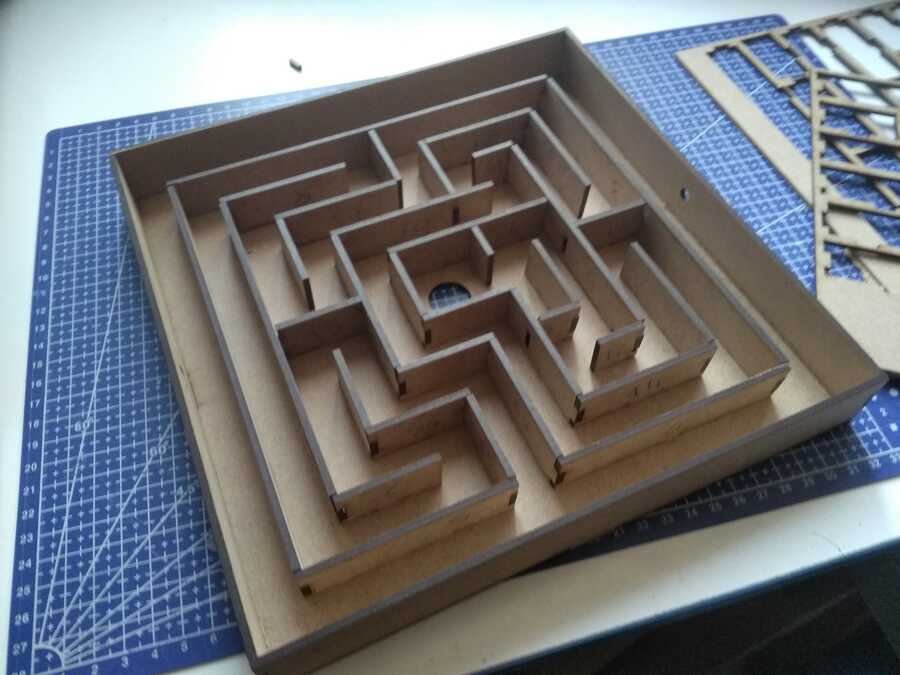
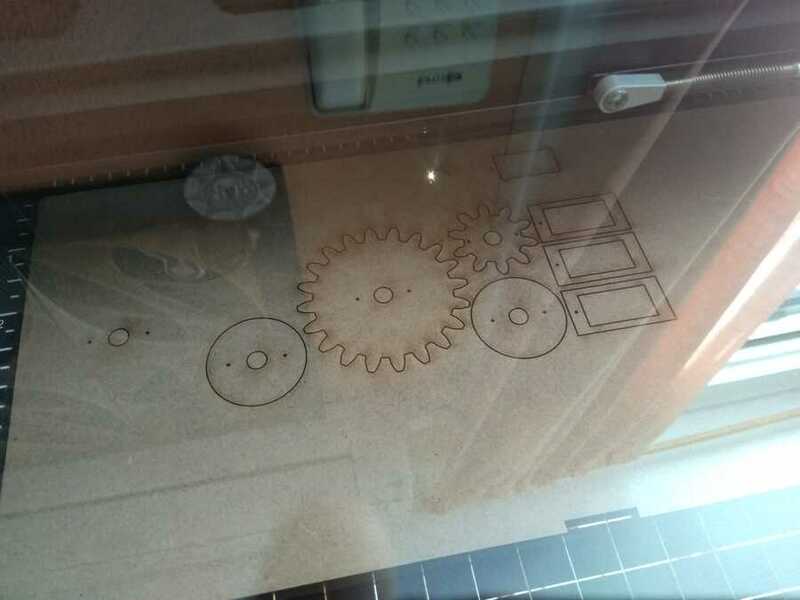
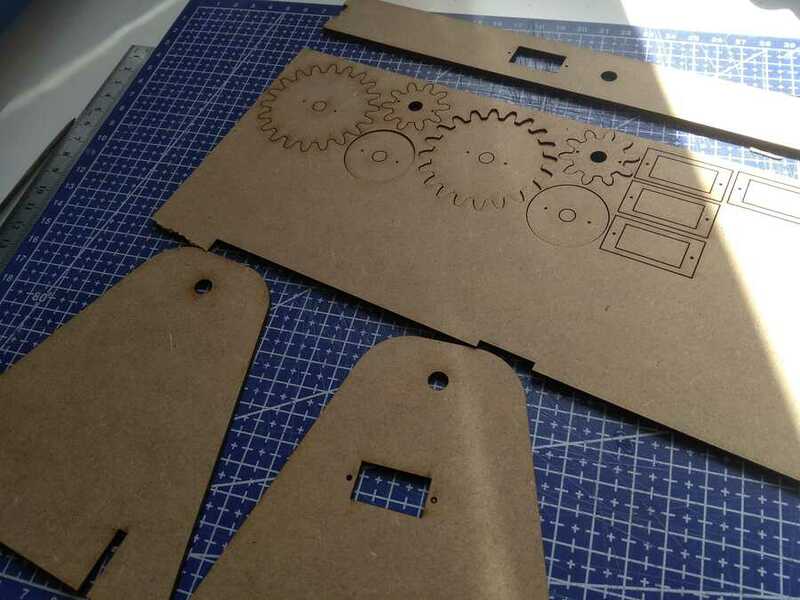
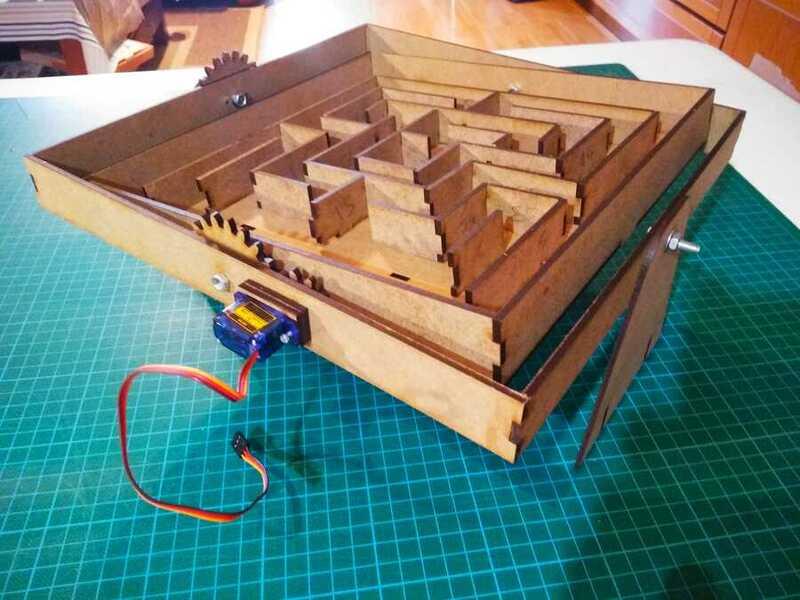
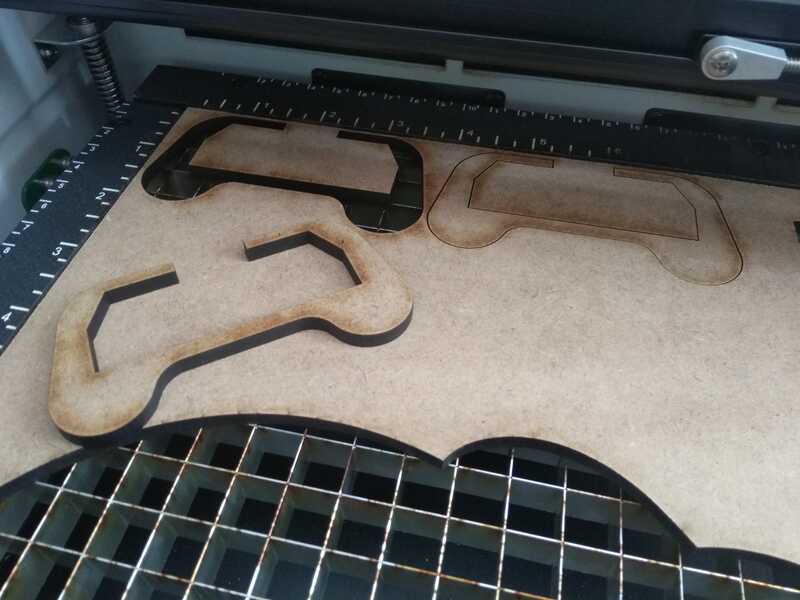
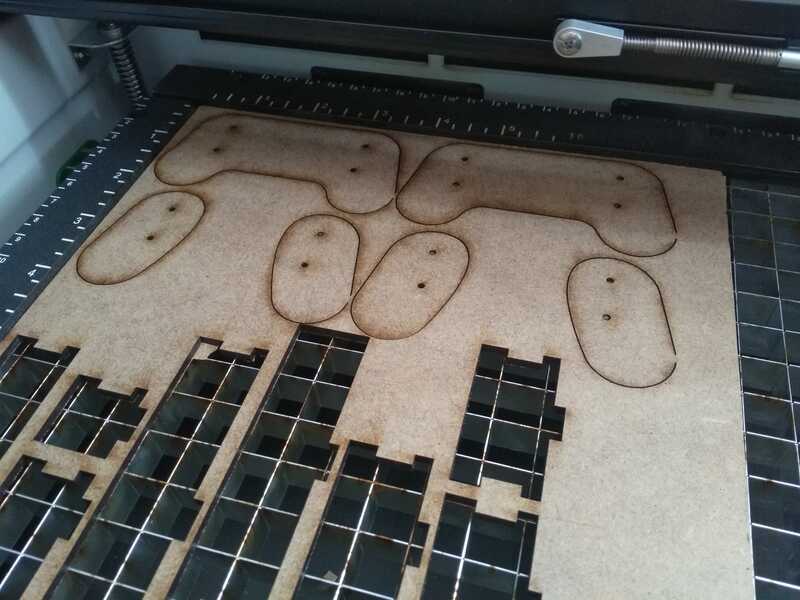
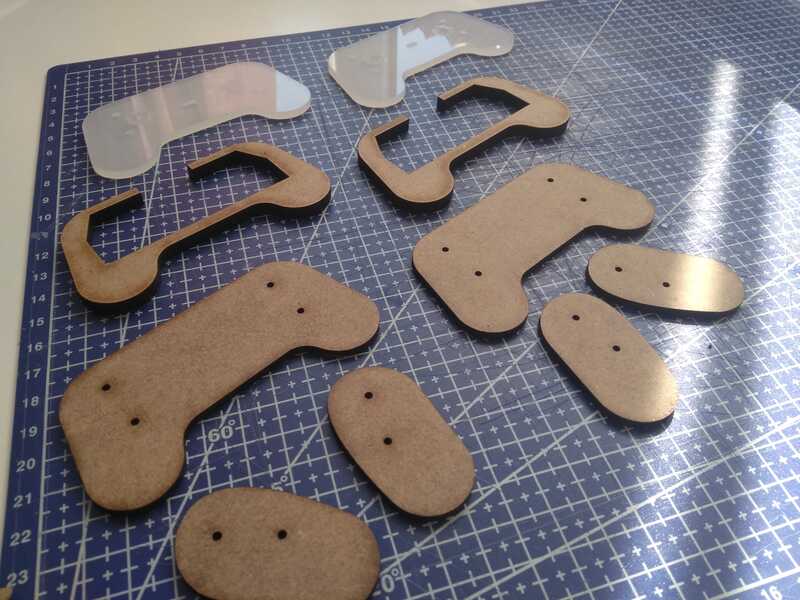
Next I was to cut and mount the maze designed by Lorena...
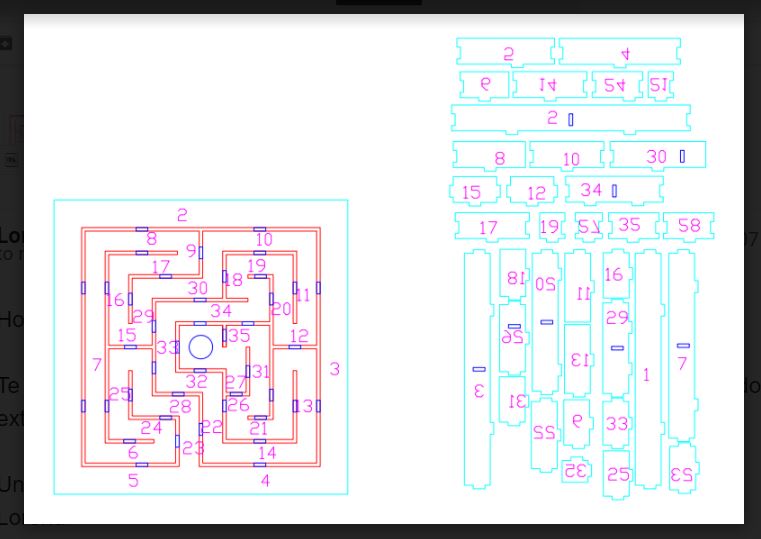
Here is some of the process, laser cutting and mounting it...I ended up not gluing the peices as I did need to access the attachment crews holding the servo and wood together.


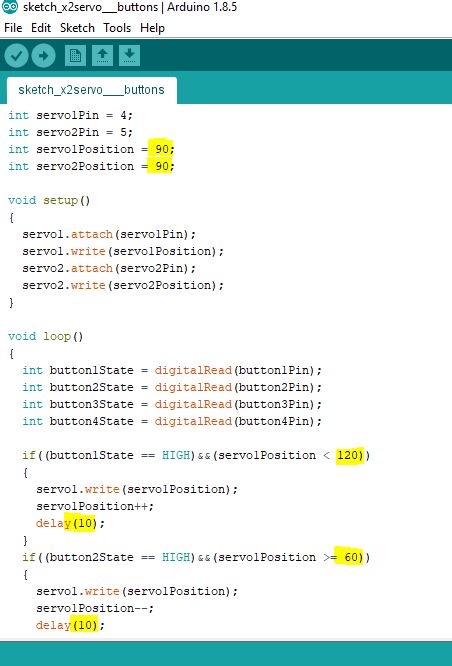
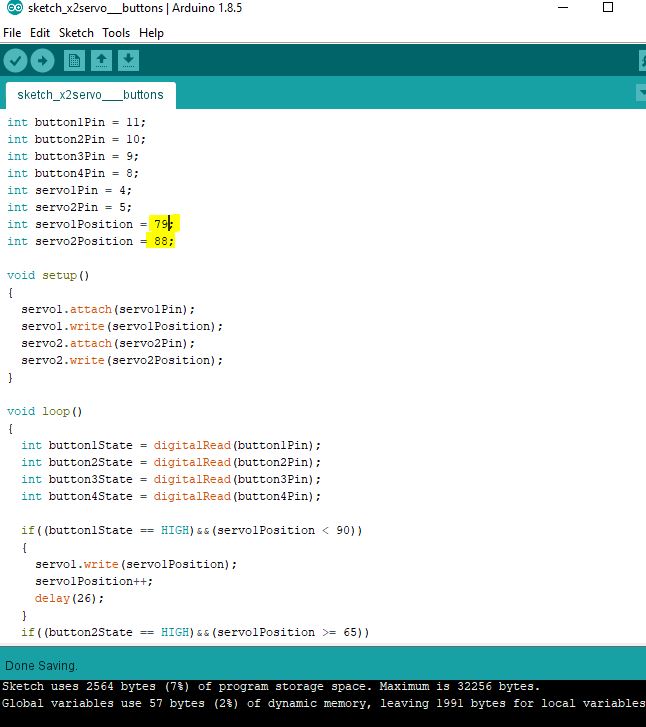
This morning I managed to custumize the code to theses particular motors, since they are not of the greatest quality (not the best precision), I am trying to qualibrate the code a little. For example, in theory, the center point would be 90°, in my case, one of the motors has its center point at 79° and the other at 88°. Taking that in consideration, the range of movements (60 to 120°) also needs to be adjusted. More factors can come into play, for example how the attachment was mounted... but, that´s good enough for now.
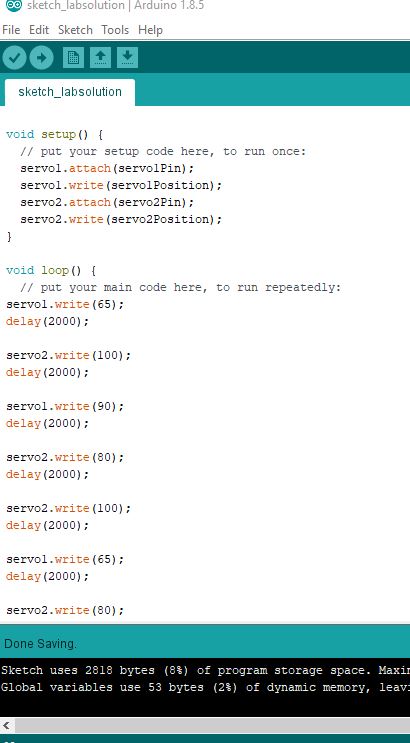
So far I have only managed to have one code for the "play" mode and an other for the "auto-solving" mode, which is really just the step by step solution of the maze, making sure to leave enough time between each move so the marble has the time to fall on the next wall...next to see how to combined them.
"Play" mode
						#include
						Servo servo1;
						Servo servo2;

						int button1Pin = 11;
						int button2Pin = 10;
						int button3Pin = 9;
						int button4Pin = 8;
						int servo1Pin = 4;
						int servo2Pin = 5;
						int servo1Position = 79;
						int servo2Position = 88;

						void setup()
						{
							servo1.attach(servo1Pin);
							servo1.write(servo1Position);
							servo2.attach(servo2Pin);
							servo2.write(servo2Position);
						}

						void loop()
						{
							int button1State = digitalRead(button1Pin);
							int button2State = digitalRead(button2Pin);
							int button3State = digitalRead(button3Pin);
							int button4State = digitalRead(button4Pin);

							if((button1State == HIGH)&&(servo1Position < 90))
						{
							servo1.write(servo1Position);
							servo1Position++;
							delay(26);
						}
							if((button2State == HIGH)&&(servo1Position >= 65))
						{
							servo1.write(servo1Position);
							servo1Position--;
							delay(26);
						}
							if((button3State == HIGH)&&(servo2Position < 100))
						{
							servo2.write(servo2Position);
							servo2Position++;
							delay(25);
						}
							if((button4State == HIGH)&&(servo2Position >= 80))
						{
							servo2.write(servo2Position);
							servo2Position--;
							delay(25);
						}
						}
"Auto-solving" mode
							#include

							Servo servo1;
							Servo servo2;

							int servo1Pin = 4;
							int servo2Pin = 5;
							int servo1Position = 79;
							int servo2Position = 88;

							void setup() {
								// put your setup code here, to run once:
								servo1.attach(servo1Pin);
								servo1.write(servo1Position);
								servo2.attach(servo2Pin);
								servo2.write(servo2Position);
							}

							void loop() {
								// put your main code here, to run repeatedly:
							servo1.write(65);
							delay(2000);

							servo2.write(100);
							delay(2000);

							servo1.write(90);
							delay(2000);

							servo2.write(80);
							delay(2000);

							servo2.write(100);
							delay(2000);

							servo1.write(65);
							delay(2000);

							servo2.write(80);
							delay(2000);

							servo1.write(90);
							delay(2000);

							servo2.write(100);
							delay(2000);

							servo2.write(80);
							delay(2000);

							servo1.write(65);
							delay(2000);

							servo1.write(90);
							delay(2000);

							servo2.write(100);
							delay(2000);

							servo1.write(65);
							delay(2000);

							servo1.write(90);
							delay(2000);

							servo2.write(80);
							delay(2000);

							servo2.write(100);
							delay(2000);

							servo2.write(80);
							delay(2000);

							servo1.write(65);
							delay(2000);

							servo2.write(100);
							delay(2000);

							servo1.write(90);
							delay(2000);

							servo1.write(65);
							delay(2000);

							servo2.write(80);
							delay(2000);

							servo2.write(100);
							delay(2000);

							servo1.write(81);
							delay(20000);

							servo2.write(88);
							delay(20000);
							}
And here is how it works so far...
Although we are already thinking about changing the servos to step motors, with Sergio we are now looking to remove the buzzing, shaking, humming noice coming from the motors. In addition he has also started to emplement the code by adding LEDs and 2 more buttons that will be used to select between "game" and "demoS" mode...
The next version will need to also have gears or some kind of mechanical systhem that connect the maze´s platform to the motors.
The legs needs to be stronger (or re enforced).
Make the mazes detachable and have maybe different levels of difficulties...let´s see how it goes....
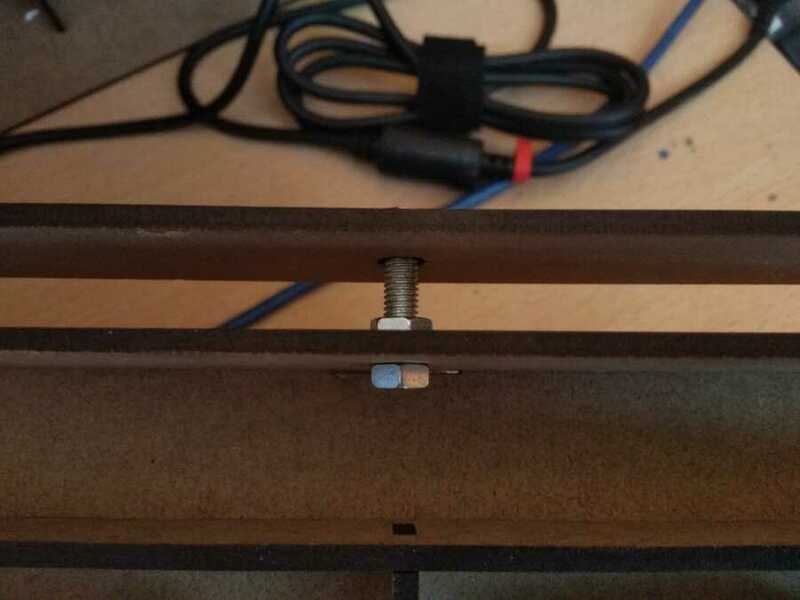
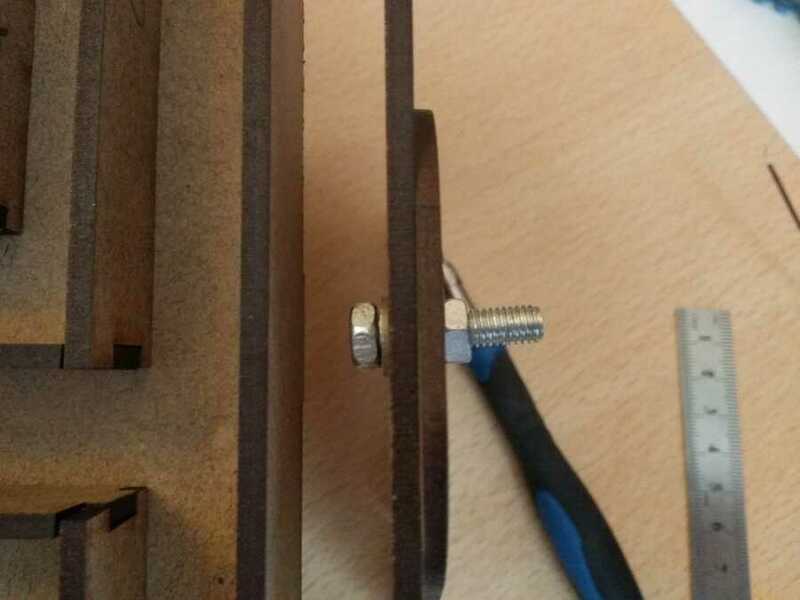
After another meeting, Alberto modified the design to add the gear system and have a separated mechanical and control system. Strengthen the legs by creating a center connecting part that will also be used as a housing for the electronics parts. He sent the modification to me for processing.
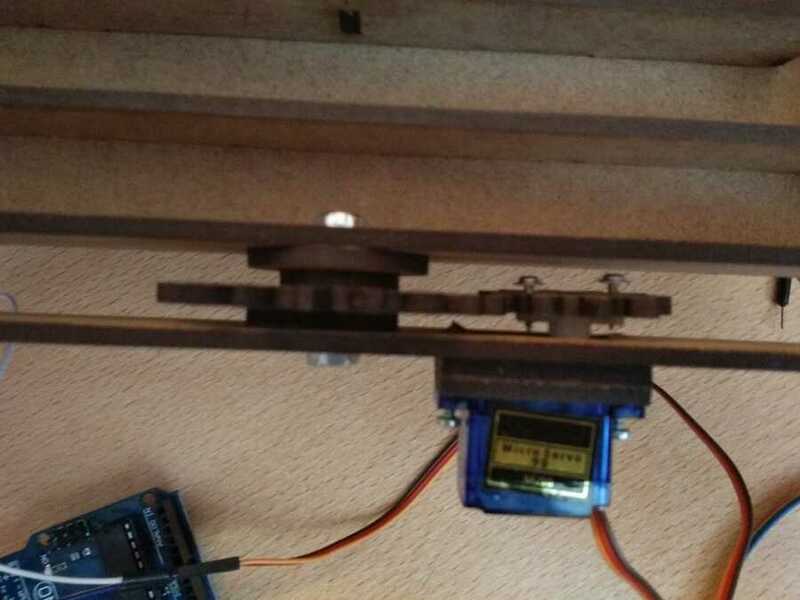
Here is the top view of the axes and how I mounted them with the motors and gears ( I kind of had to go with what I has in hands here ), We added separators that keeps everything in place...
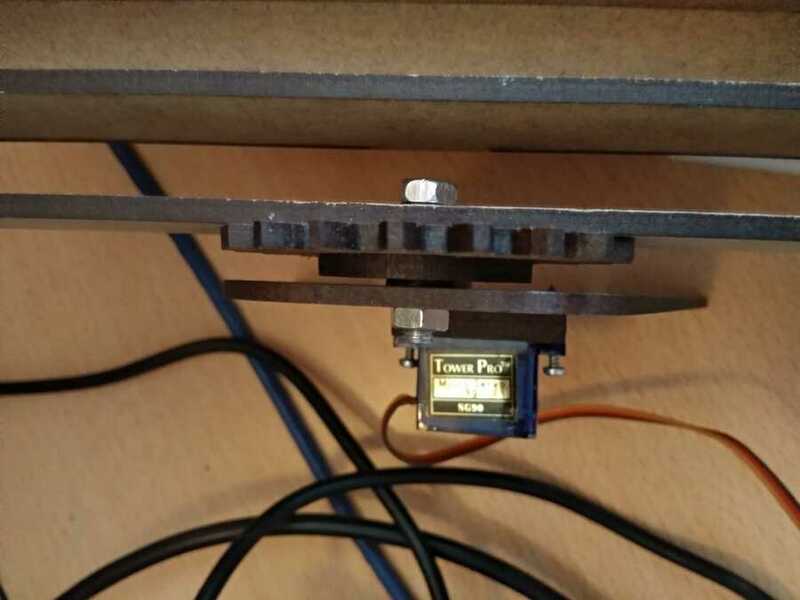
Here it is so far I left out the base for now as I would like to focus on the code and control parts first...
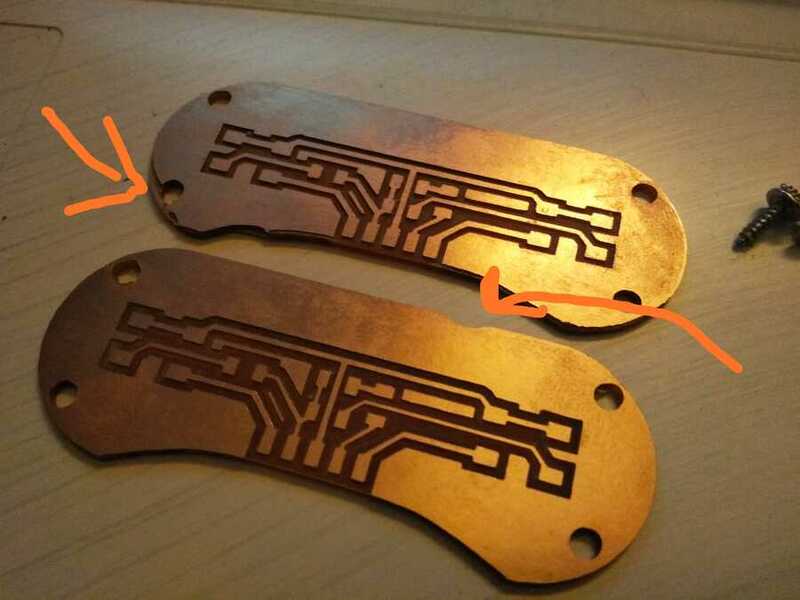
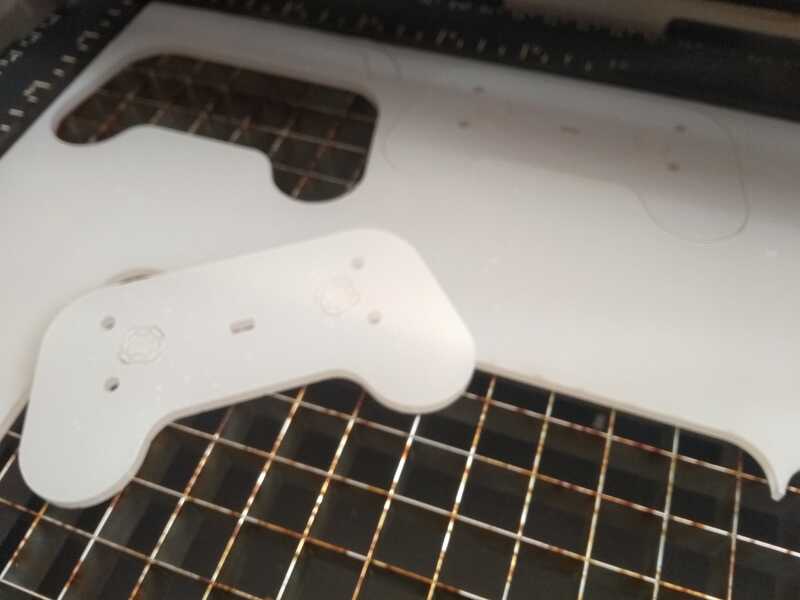
Sergio on his side, had designed the game controller board, that I also milled and soldered...
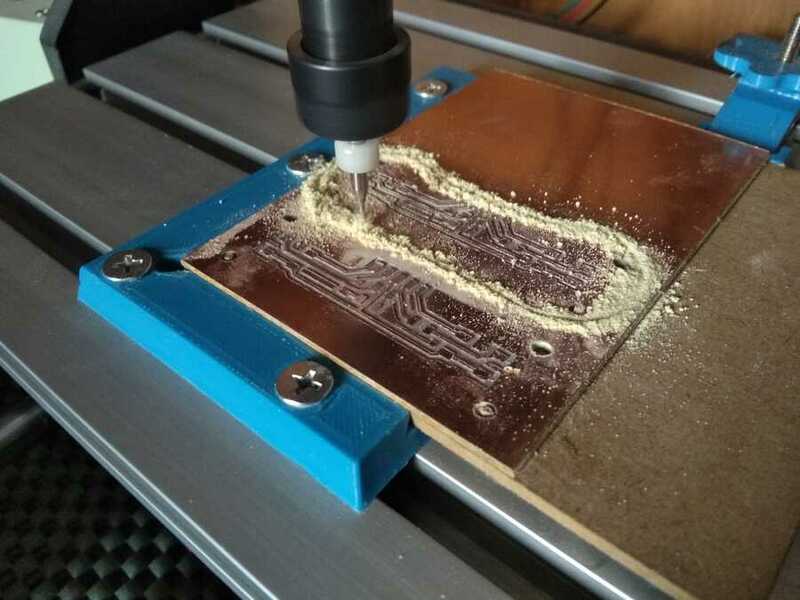

A bit of soldering...
And the controler covers...
Segio also spend more time to modify and combine the 2 codes we previously had in the tinkercad project. He added the "ressolution" mode and an extra button for future development, still more to come with the v2 now in production in the other labs...
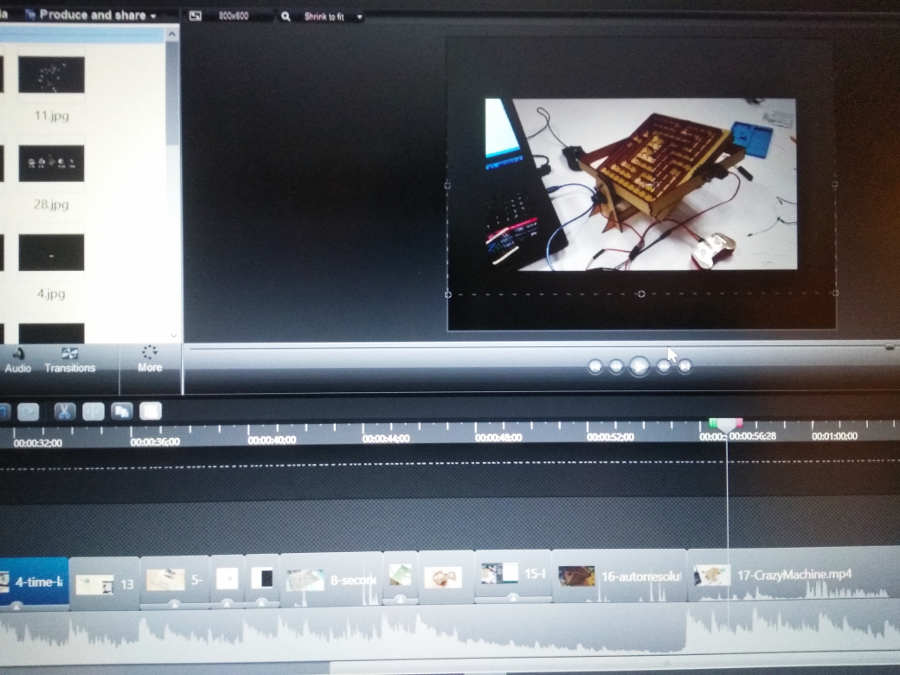
I am now trying to help Lorena with the video that is to going in the group documentation. She had all the storyboard and files ready, my task was to edit it add the audio track and send the last version to be uploaded.
Group assignment
(Part 2/2)
Actuate and automate your machine.Document the group projectDocument the individual contribution
Individual assignment
For this week, I find it a little difficult to separate the 2 parts of the assignment as we were mainly collaborating online and the tasks were developed in parallel (mechanics and automating at the same time) along the week.
Learning outcomes
Work and communicate effectively in a team and independentlyDesign, plan and build a systemAnalyse and solve technical problemsRecognise opportunities for improvements in the design
Have you?
Documented the machine building process to the group pageDocumented your individual contribution to this project on your own websiteLinked to the group page from your individual page as well as from group page to your individual pages
On the group page, has your group:
Shown how your team planned and executed the projectDescribed problems and how the team solved themListed future development opportunities for this projectIncluded your design filesOptionally included an aprox. 1 min video (1920x1080 HTML5 MP4) + slide (1920x1080 PNG)