Project Presentations
For this assignment I'm going to show the final result of the project: the slide and the video.
You can follow the progress of the project here
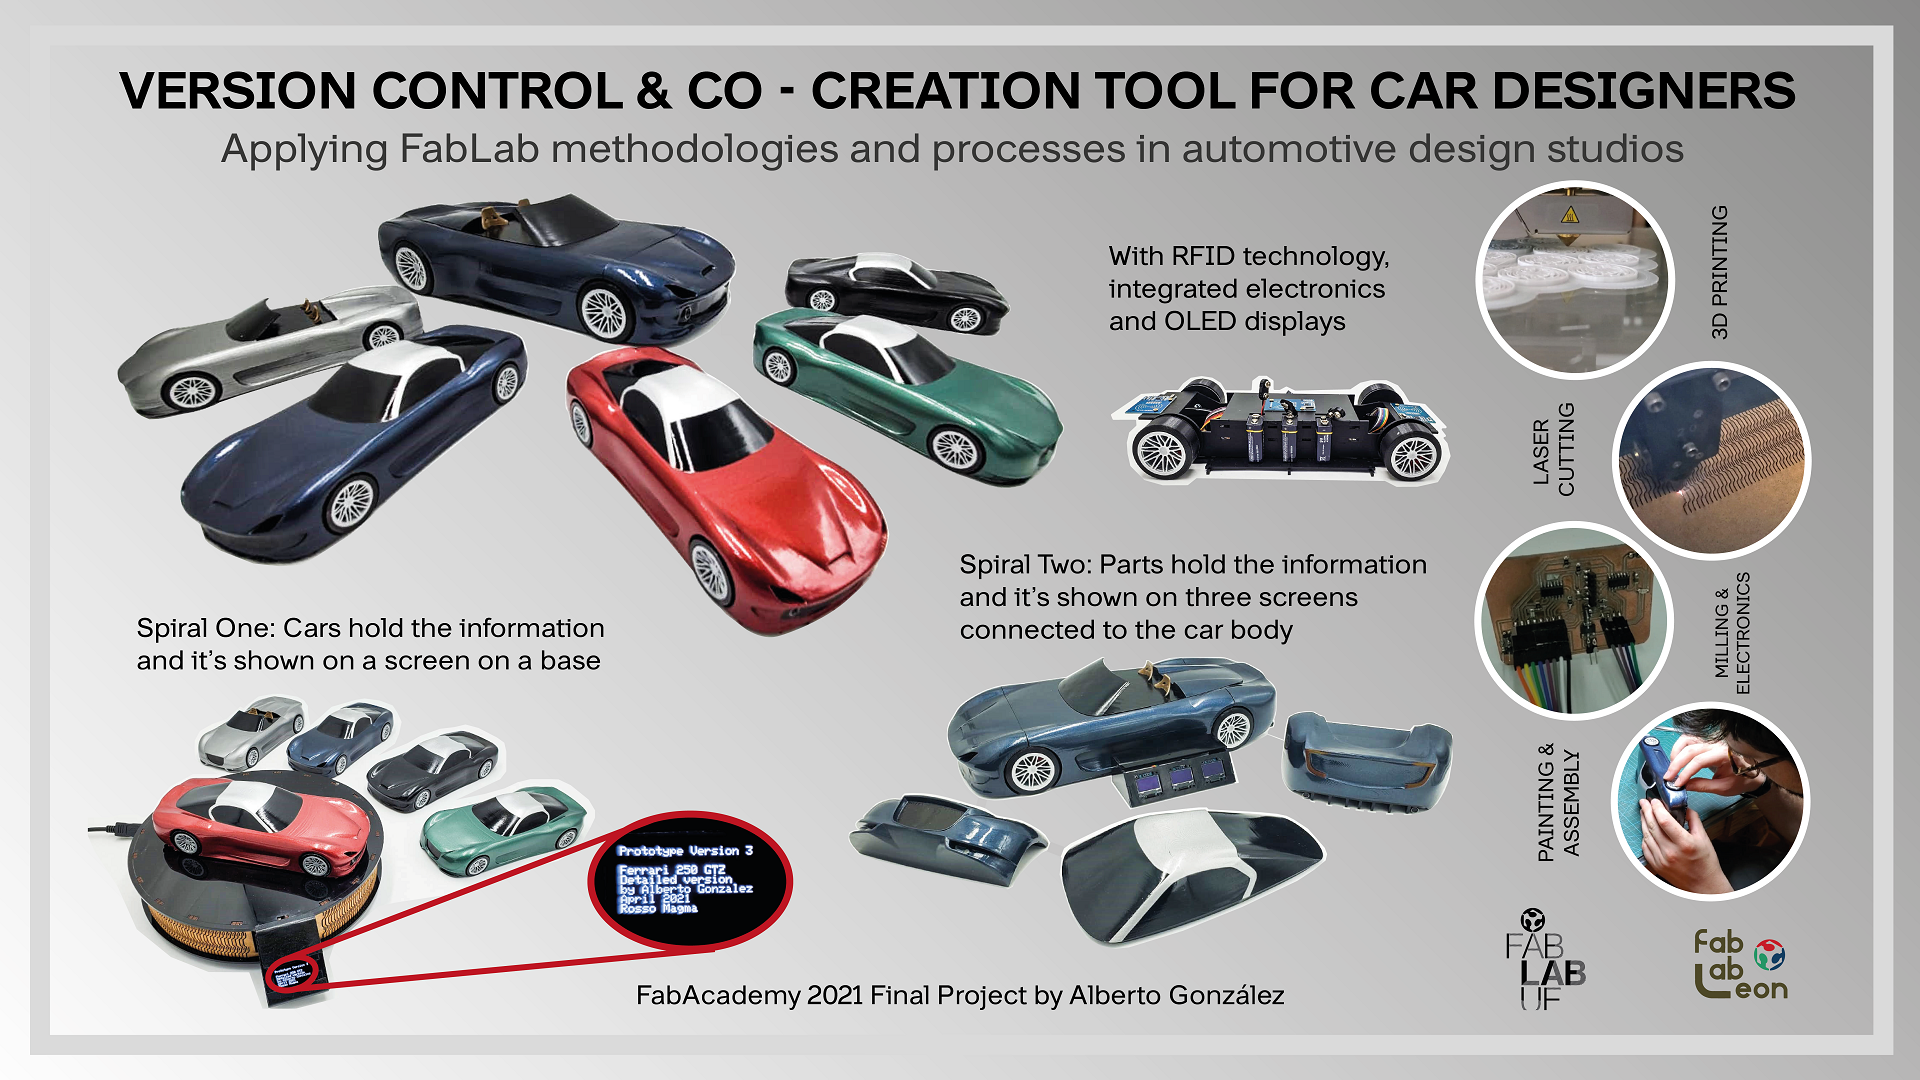
Chapter One: The slide
I created this slide in a very simple and clear way, to highlight the finishing of the models and the functionalities of the two versions.
Chapter two: the video
This video shows the models working, the steps we went through in order to create them.
Chapter three: the questions
What does it do?
I tested a methodology for car designers that allows us to work in a co-creative environment, where the interchangeable parts hold information and it's displayed on screens, so the car knows what parts it's made of. The project shows the part information, kept in RFID tags, on OLED screens.
Who’s done what beforehand?
RFID technology is being used everywhere, from tags on the clothes like Decathlon is doing, to information of food. Some design studios already create models with 3D printers. Some others still work with clay. Creating models with interchangeable parts (done by hand) was done at Pininfarina before. But nobody has done a modular design with information inside the parts. Design studios don't keep information of the models with RFID technology
What did you design?
I designed by hand almost all the variants of the car. Ph.D Alberto Galindo, professor of design in Universidad Europea, designed by hand some other variants. I 3D modeled my variants as well as his variants, and made the connection between them possible. The idea is that the parts that he design and the parts that I design have to be interchangeable. I'll also design the electronics inside (with RFID connectivity and a screen to show the data) and the way to join them together, the base and the integration of the cables, the wheels and the tires.
What materials and components were used?
Down below we have the bill of materials, with the links to the parts:
Where did they come from?
The FabLab covered almost everything. The filaments, the electronics, the acrylic... But I paid for the automotive grade paint.
How much did they cost?
No less than 478€. You can have here the bill of materials:
Spiral One: 1:24 cars and base |
Where to buy? | Amount | Price | Total price | |||||||||||||||||||||||||||||||||||||||||||||||||||||||||||||||||||||||||||
| PLA Plastic | Smartmaterials 3D | 2 rolls | 25,00 €/750g | 50,00 € | |||||||||||||||||||||||||||||||||||||||||||||||||||||||||||||||||||||||||||
| Black Acrylic 3mm | Locally (CEPLASA) | 1 (800 x 450mm) | 20,00 €/unit | 20,00 € | |||||||||||||||||||||||||||||||||||||||||||||||||||||||||||||||||||||||||||
| AtTiny1614 | DigiKey | 2 | 1,00 €/unit | 2,00 € | |||||||||||||||||||||||||||||||||||||||||||||||||||||||||||||||||||||||||||
| Copper boards | Digikey | 1 unit | 2,00 €/unit | 2,00 € | |||||||||||||||||||||||||||||||||||||||||||||||||||||||||||||||||||||||||||
| OLED Screens | AZ Delivery | 1 unit | 4,00 €/unit | 4,00 € | |||||||||||||||||||||||||||||||||||||||||||||||||||||||||||||||||||||||||||
| RFID Modules | AZ Delivery | 1 unit | 4,00 €/unit. | 4,00 € | |||||||||||||||||||||||||||||||||||||||||||||||||||||||||||||||||||||||||||
| Battery 9V | Amazon | 1 | 3,75 € | 3,75 € | |||||||||||||||||||||||||||||||||||||||||||||||||||||||||||||||||||||||||||
| Battery clip | Amazon | 1 | 4,50 €/2 units | 2,25 € | |||||||||||||||||||||||||||||||||||||||||||||||||||||||||||||||||||||||||||
| Resistors, connectors and LEDs | Digikey | 1 | 3,00 €/board | 3,00 € | |||||||||||||||||||||||||||||||||||||||||||||||||||||||||||||||||||||||||||
| Regulator | Digikey | 1 | 1,00 €/unit | 1,00 € | |||||||||||||||||||||||||||||||||||||||||||||||||||||||||||||||||||||||||||
| Automotive grade paint and varnish | Locally (CEPISA) | Different colors | 20 €/can | 120 € | |||||||||||||||||||||||||||||||||||||||||||||||||||||||||||||||||||||||||||
| Others (wood glue, tape, soldering tin, DuPont cables…) | - | - | - | 10,00 € | |||||||||||||||||||||||||||||||||||||||||||||||||||||||||||||||||||||||||||
| Total cost/Spiral One | 222 € |
Spiral Two: Interchangeable parts |
Where to buy? | Amount | Price | Total price |
| PLA Plastic | Smartmaterials 3D | 3 rolls | 25,00 €/750g | 75,00 € |
| Black Acrylic 3mm | Locally (CEPLASA) | 1 (800 x 450mm) | 20,00 €/unit | 20,00 € |
| AtTiny1614 | DigiKey | 6 | 1,00 €/unit | 6,00 € |
| Copper boards | Digikey | 2 unit | 2,00 €/unit | 4,00 € |
| OLED Screens | AZ Delivery | 3 unit | 4,00 €/unit | 12,00 € |
| RFID Modules | AZ Delivery | 3 unit | 4,00 €/unit. | 12,00 € |
| Battery 9V | Amazon | 3 | 3,75 € | 11,25 € |
| Battery clip | Amazon | 3 | 4,50 €/2 units | 6,75 € |
| Magnets | Amazon | 1 | 7,00 €/kit | 7,00 € |
| Resistors, connectors and LEDs | Digikey | 3 | 3,00 €/board | 9,00 € |
| Regulator | Digikey | 3 | 1,00 €/unit | 3,00 € |
| Automotive grade paint and varnish | Locally (CEPISA) | Different colors | 20 €/can | 80 € |
| Others (wood glue, tape, soldering tin, DuPont cables…) | - | - | - | 10,00 € |
| Total cost/Spiral Two | 256 € |
What parts and systems were made?
-The base: Is the core of the car, where all the electronics will be hidden, it's chassis-shaped and it's where the bodywork will be placed
-The body: IS be the central part of the body of the car. It will remain unchanged.
- The front: the front fascias of the car are interchangeable and are able to store information in them. Two variations were made
- The rear: the rear fascias of the car are interchangeable and are able to store information in them. Two variations were made
- The top: the windshield and roof of the car are interchangeable and are able to store information in them. Two variations were made
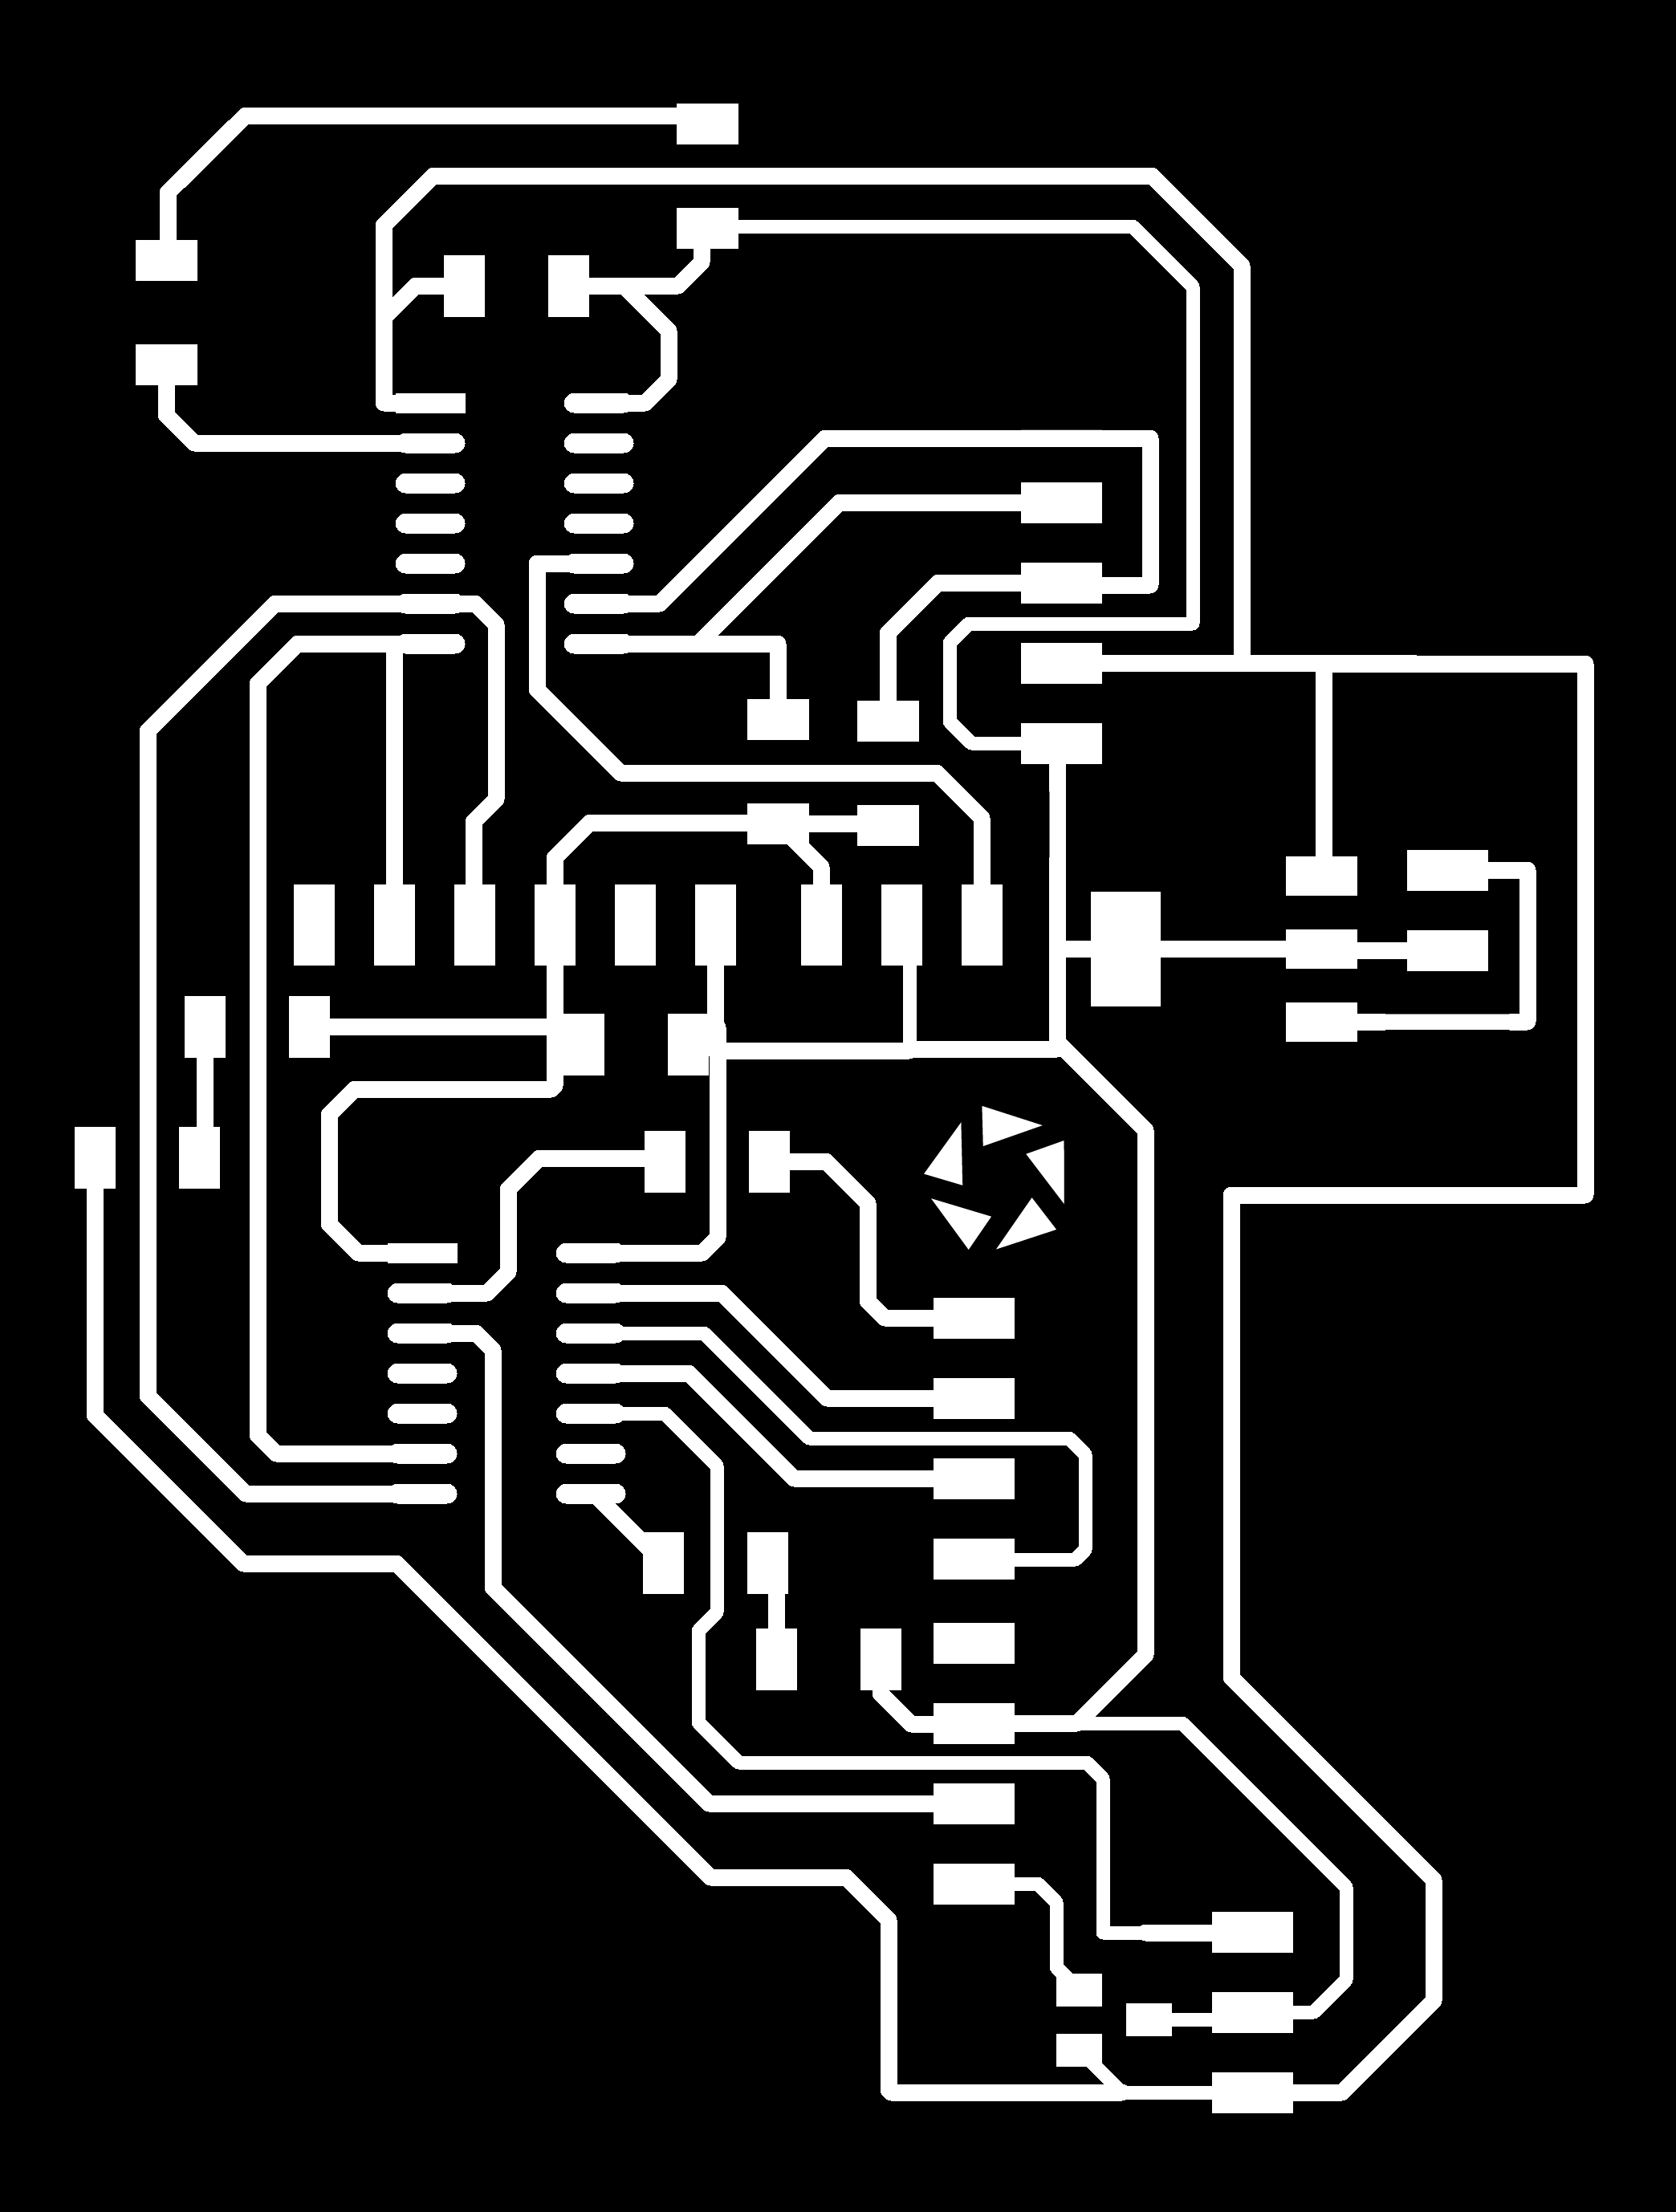
- The electronics: one board powered by USB and three boards powered by 9V batteries with 5V regulators
- The wheels: rims and tires are separated STLs
What processes were used?
In order for this project to be completed, after the CAD design of the model, we used laser cutting for the base, 2D milling for the electronic boards, with electronics design and production with PCB milling and soldering of the components, and the main visible parts were 3D printed in PLA, and then painted with automotive grade primer and metallic paint.
I decided to use Mauro's processes list, so it's easier to read, so hat tip to him!
- Project management; tool used: Excel.
- 2D design, for the circular base and the chassis; tool used: AutoCAD.
- 3D design, for every part of the body, the wheels and the tires; tool used: CATIA V5
- Electronics desing, for the board; tool used: Eagle
- CNC code generation for the PCB boards; tool used: FabModules
- CNC machining, for the PCB boards; with the Roland MDX 40.
- 3d printing code generation for the 3D printed parts; tool used: Ultimaker Cura.
- 3d printing, for the car bodies and the wheels; tool used: Creality Ender 5, 5 Pro and 5 Plus FFF printers.
- PCB production; tool used: soldering iron.
- PCB debugging; tools used: multimeter.
- Embedded programming, tool used: Arduino IDE
- Documenting; tools used: Dreamweaver at the begginning, brackets after week 3, git and gitlab.
What questions were answered?
The main objective of this experiment was if the car companies can adopt FabLabs in their design centers, and if that would be an improvement on the methodology, reduce design times, improve functionalities on their prototypes and will plant a seed on how FabLabs can help in the automtive industry.
Eventhough the people loved the project, I still don't know if it would work in the design center environment. I will know soon.
What worked? What didn’t?
The main problem I had was timing, so I could not make the big, 1/5th scale model. But all the functionalities I wanted remained in the small model as well.
How was it evaluated?
For me it was a success, as it helped me going back to my will to design cars, and even more if I can design in a collaborative way. It also helped me promoting the FabLab around the university, and the students loved the project. It served as an inspiration for the level of finishing they want to get on their prints.
What are the implications?
The goal of this project is continuing the development until it's ready to introduce the FabLab methodology into a car design studio. It's not ready yet. But it will be.
Chapter four: the files
For the Spiral One: 1/24 scale cars and base
You can get the bodies from my SketchFab Account as they are too big for the repository
For the Spiral Two: 1/12 scale car with interchangeable parts
The RFID code (you will have to modify it according to your tags)
As the wheel center is too big, I've uploaded to my sketchfab account
You can get the body parts from my SketchFab Account as they are also too big for the repository
Finally, you can click here to download all the necessary files to print the cars