Wildcard Week
Hello FabAcademy friends and welcome to this week's assignment. For this Wildcard week I wanted to document a process that I don't think many FabLabs do. I wanted to document how we create a carbon fiber wing for a Formula race car. In order to do that, we will have to apply advanced milling techniques as well as some composite material hand lying and vacuum processes. So if you are interested, stay with us!
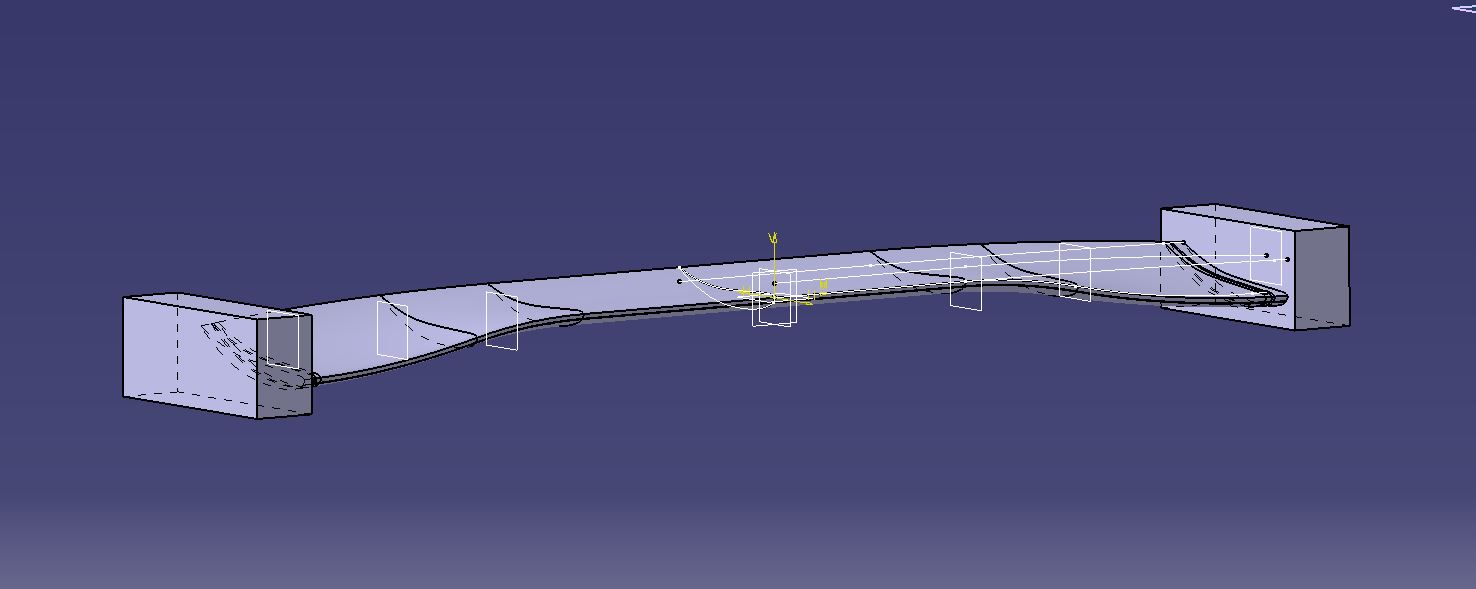
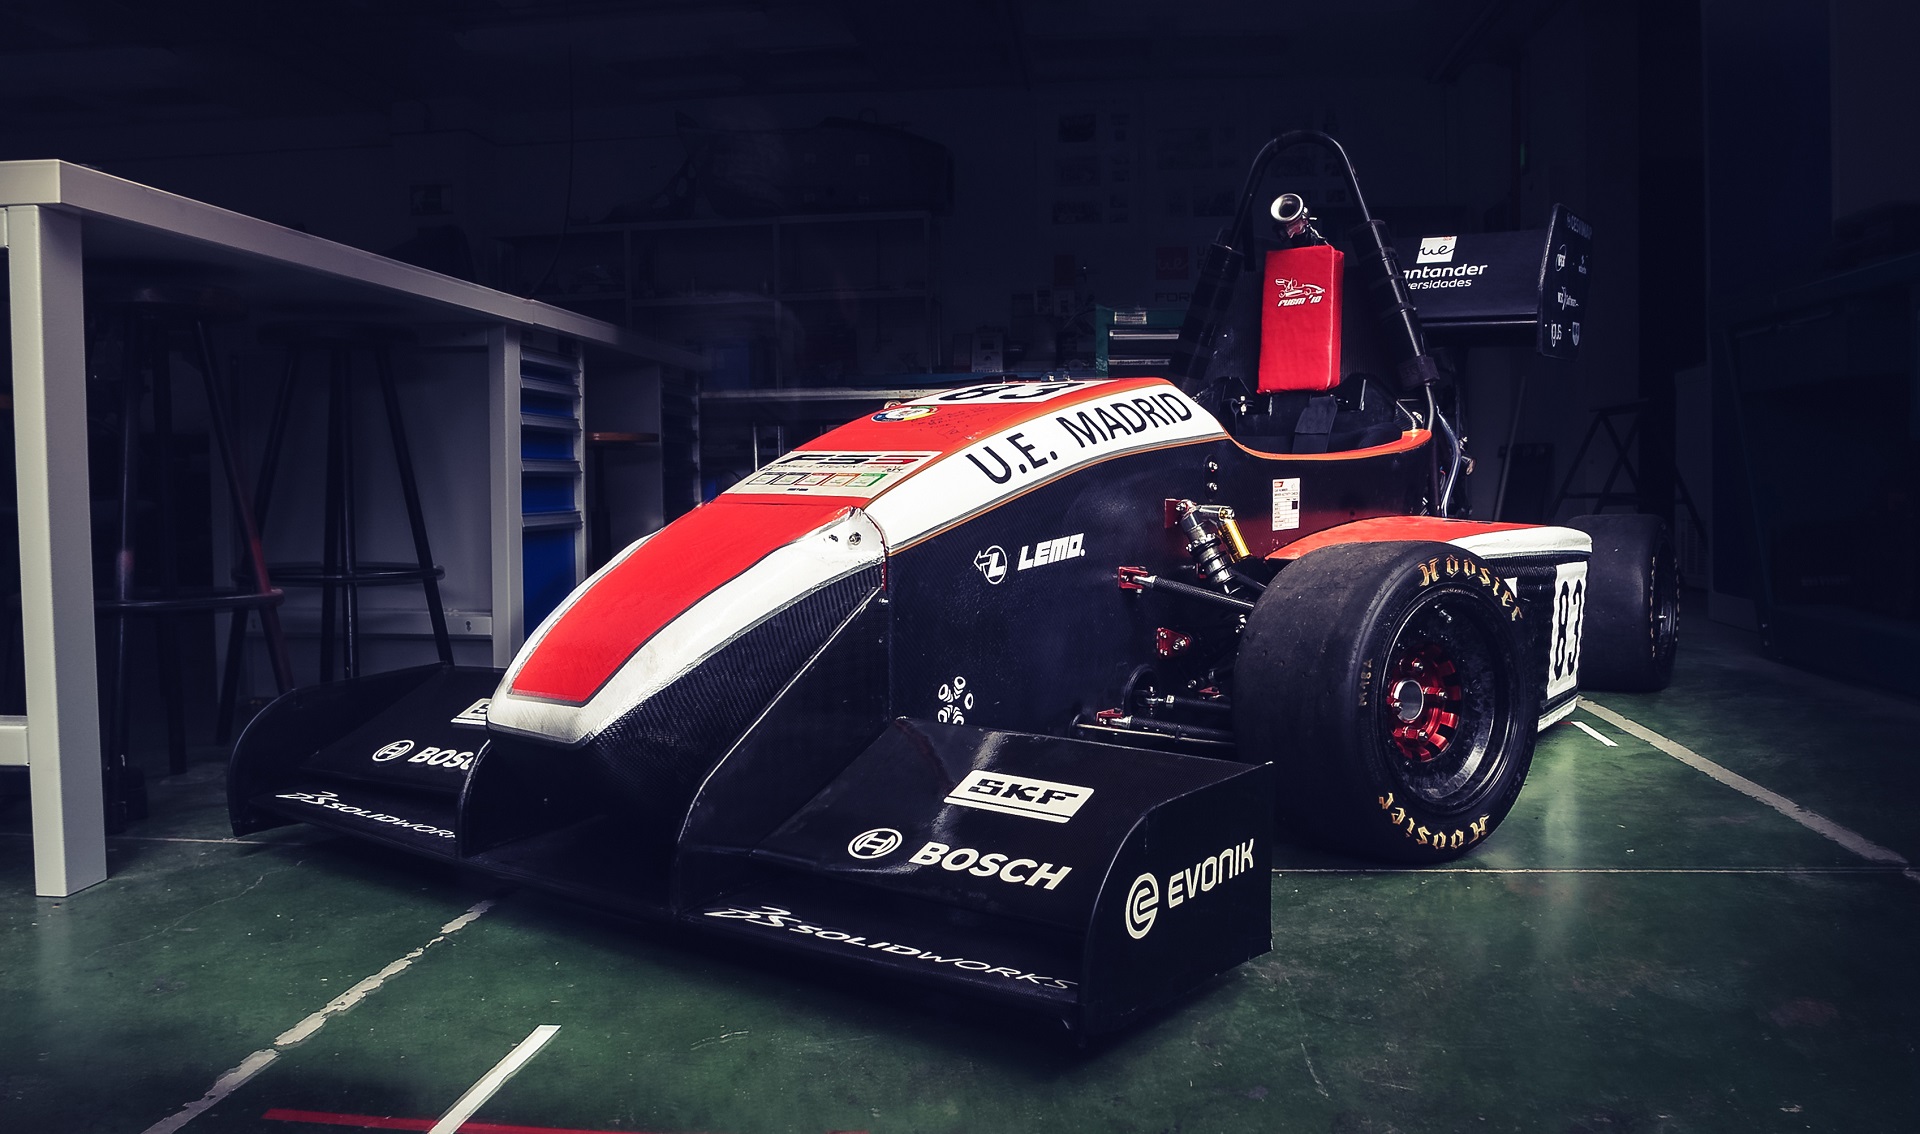
And I'm saying us because this documentation could not have been possible without the help of the Formula Student team in Universidad Europea. They have an amazing Formula SAE race car that is evolving every year, and for 2021 they are working on a carbon fiber monocoque chassis with tubular rear subframe, along with full carbon fiber aerodynamics and bodywork. They also push the FabLab machines to the limit, as the FabLab proudly supports the team and they have full access to our resources, and we have done 3D printing from intake systems to spindles, laser cutting parts in acrylic or milling parts for the bodywork moulds. Today we're going to mill the core of a wing, to be able to lay carbon fiber on top of it The CATIA design you will see now is me following their process, but for milling you will see their actual 2021 front wing profile. Several test were performed so in the pictures there are different variations of the wing itself.
You can get the original file for milling this wing in your lab HERE.
You can get the STL file for milling this wing in your lab HERE.
Chapter One: meet the team
Formula UEM is a team of students from Universidad Europea de Madrid. Most of them are studing different kinds of engineering, but there are also design, architecture, and even law students that have as a common objective to participate in FSAE international competitions
Their cars have been historically some of the best Formula Student single-seater racecars in Spain, and next year's contender is going to be an evolution of last year's carbon monocoque fighter
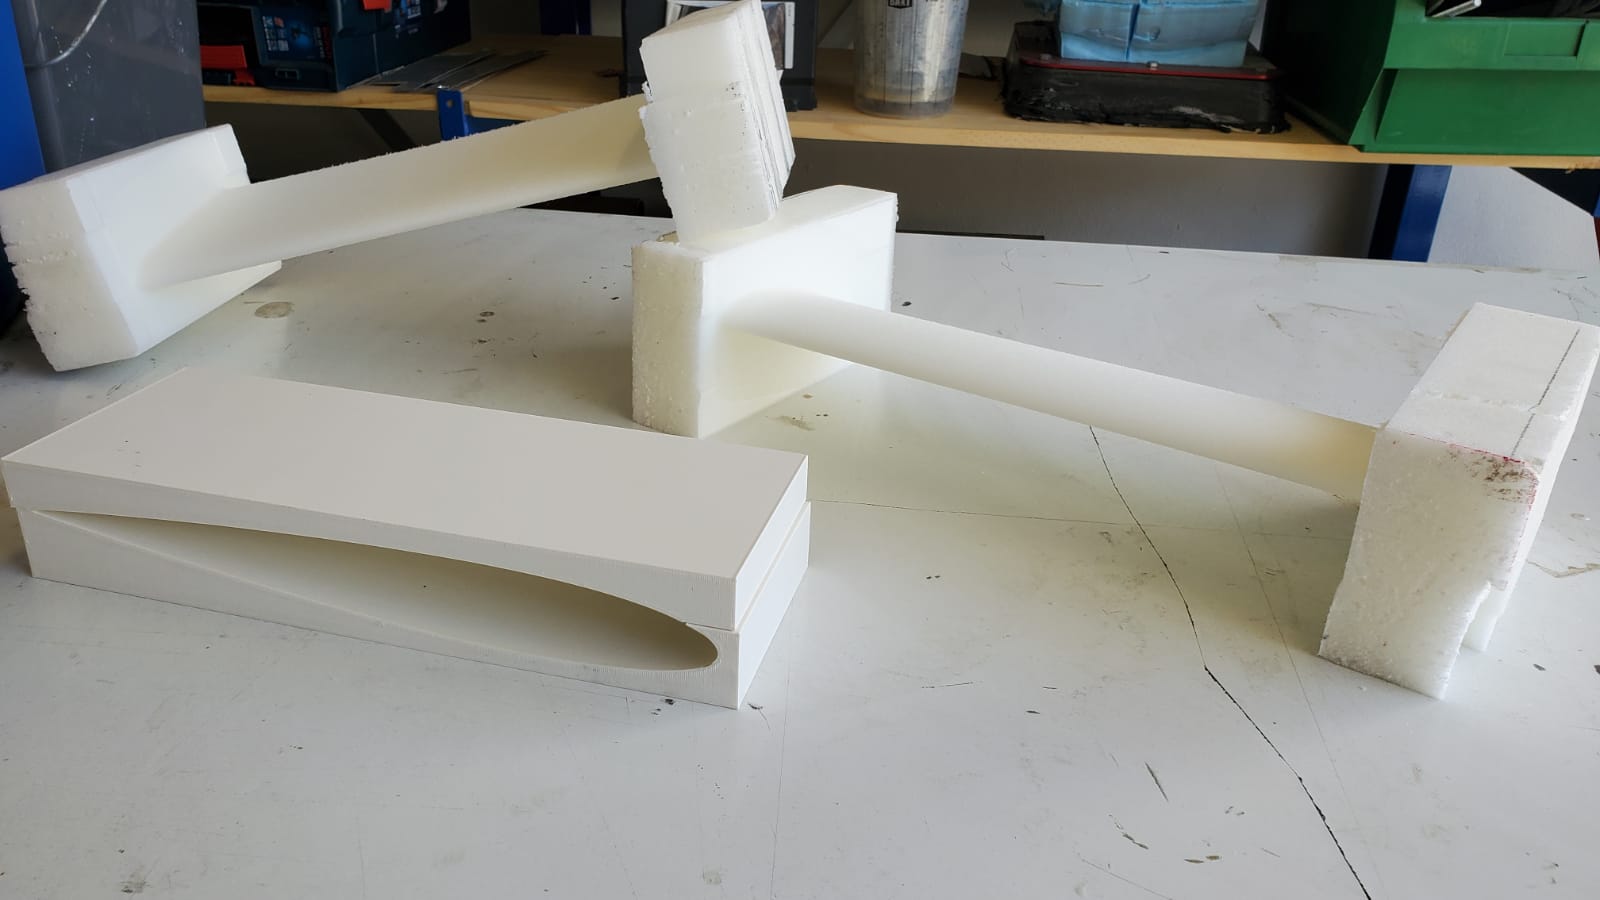
The team provided us with a NACA profile for the wing, that we had to mill. But how do we mill a three dimensional object that has uneven surfaces on every side? We will have to prepare it first. We will modify de CAD of the original wing with very thick endplates, so we can hold the wing from there when we mill it
Chapter two: advanced milling
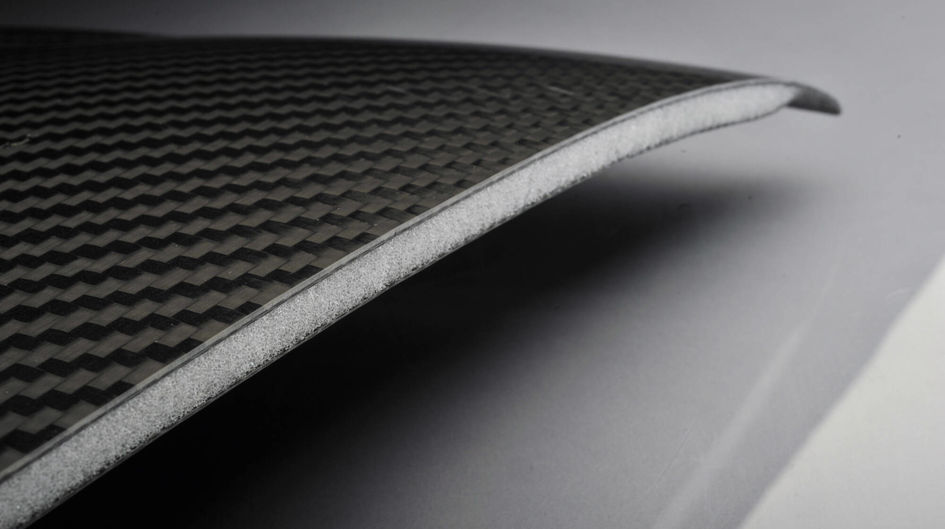
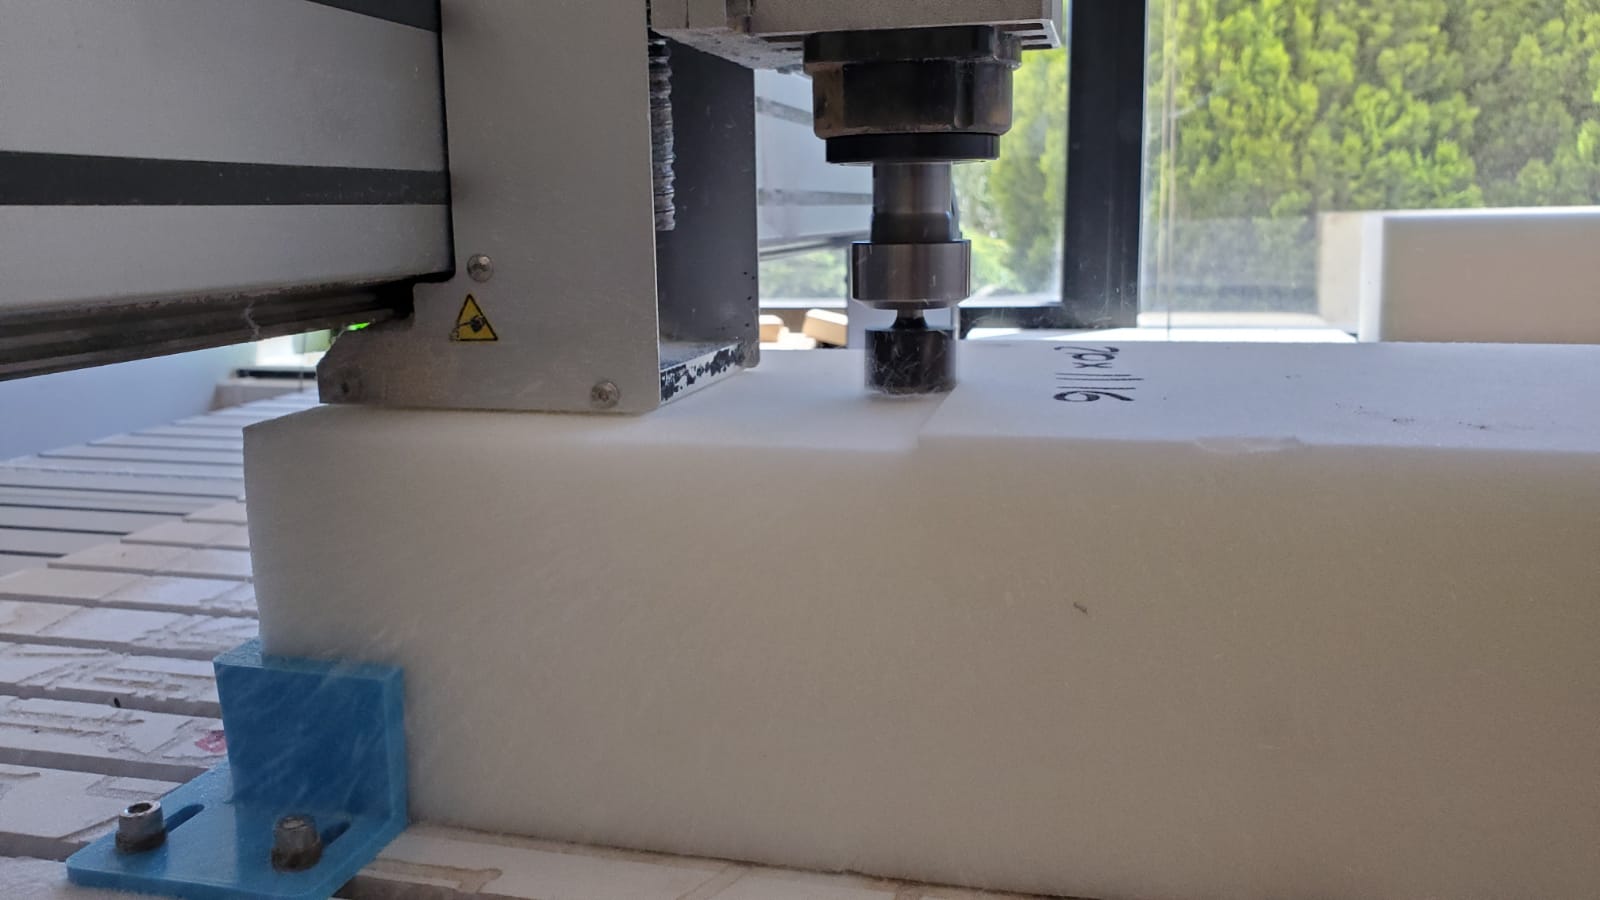
We are going to start with a block of Rohacell. This foam is used as a core for vacuum pressured wet-lay up forming. The Rohacell core will remain forever inside the wing, as pictured below. Rohacell particles created when milling are not absorbed through the skin, respiratory tract or gastrointestinal tract, but if exposed to fire, fumes can be very toxic and dangerous (so please never put Rohacell in your laser cutter!) (following pic is not mine)
The blocks that the Formula Student team could buy were actually a bit taller than what our machine can fit under its bridge, so some facing needed to be done. Note that the mill is actually avoiding the bridge to collide into the part. This time it was so close! Be very careful when trying this technique!
Chapter three: This is (NOT) the way they do it at Ferrari
First of all, a little bit of safety concerns for you all: carbon fiber is not a joke. The body cannot reject the carbon particles and the fibers are as thin as needles, so they can get inside your fingers like wood chips but these will stay there forever. And if that can happen to your fingers, imagine what can happen to your lungs. Always wear gloves, safety googles and full FFP3+ mask when working with carbon fiber.
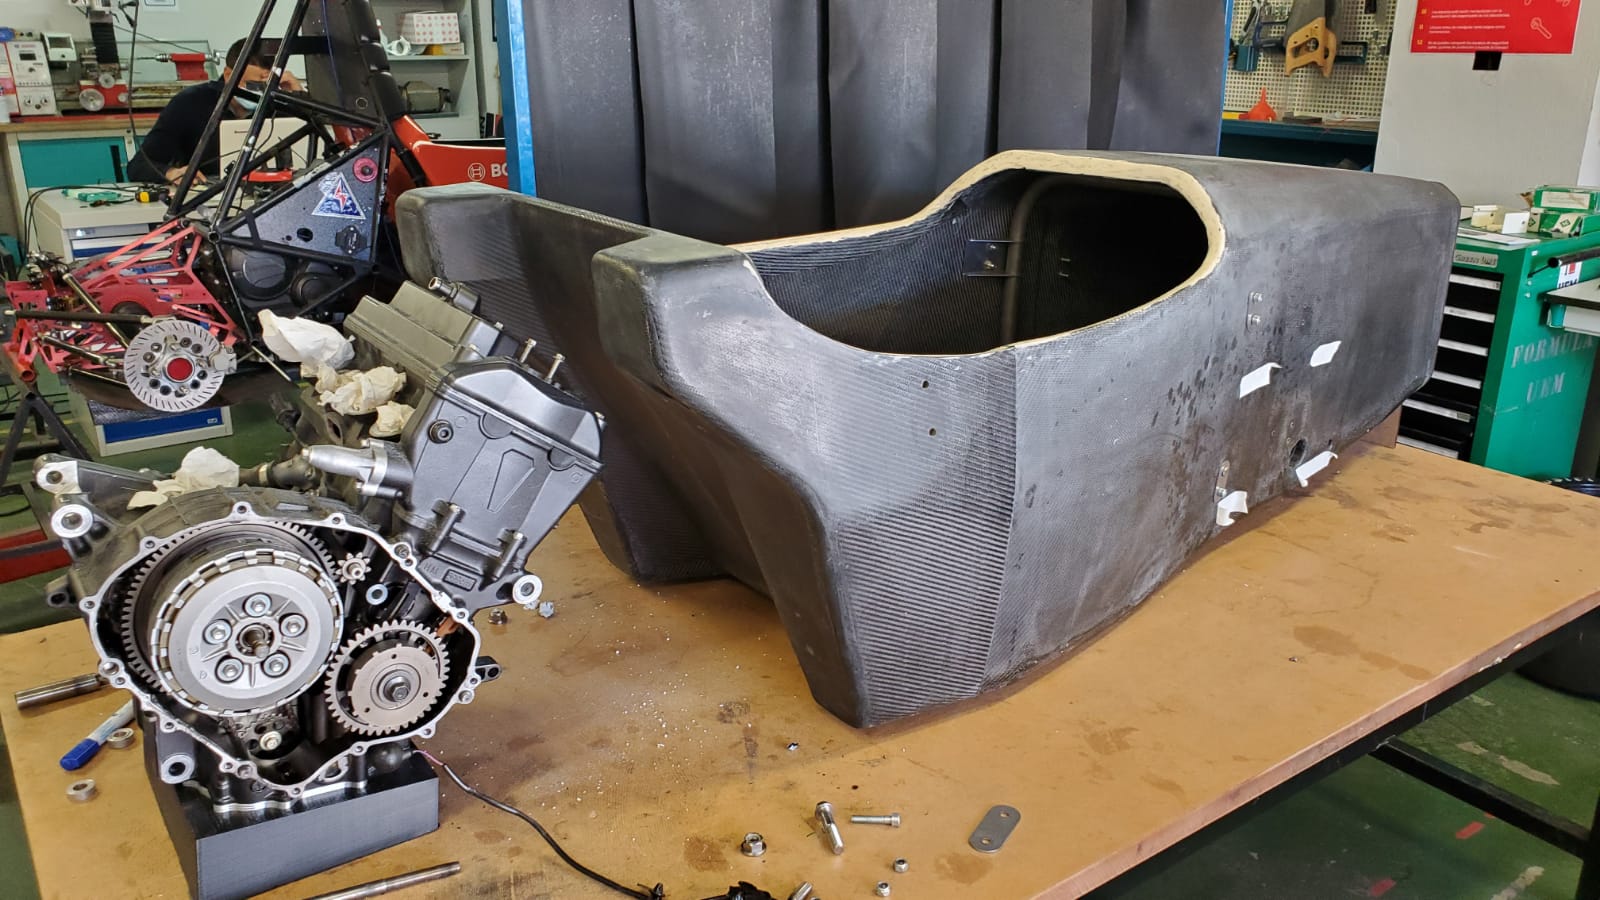
Even if the main core of the car, the monocoque, was done in an autoclave, the team still laminates their own body parts and that's how we are going to do it today.
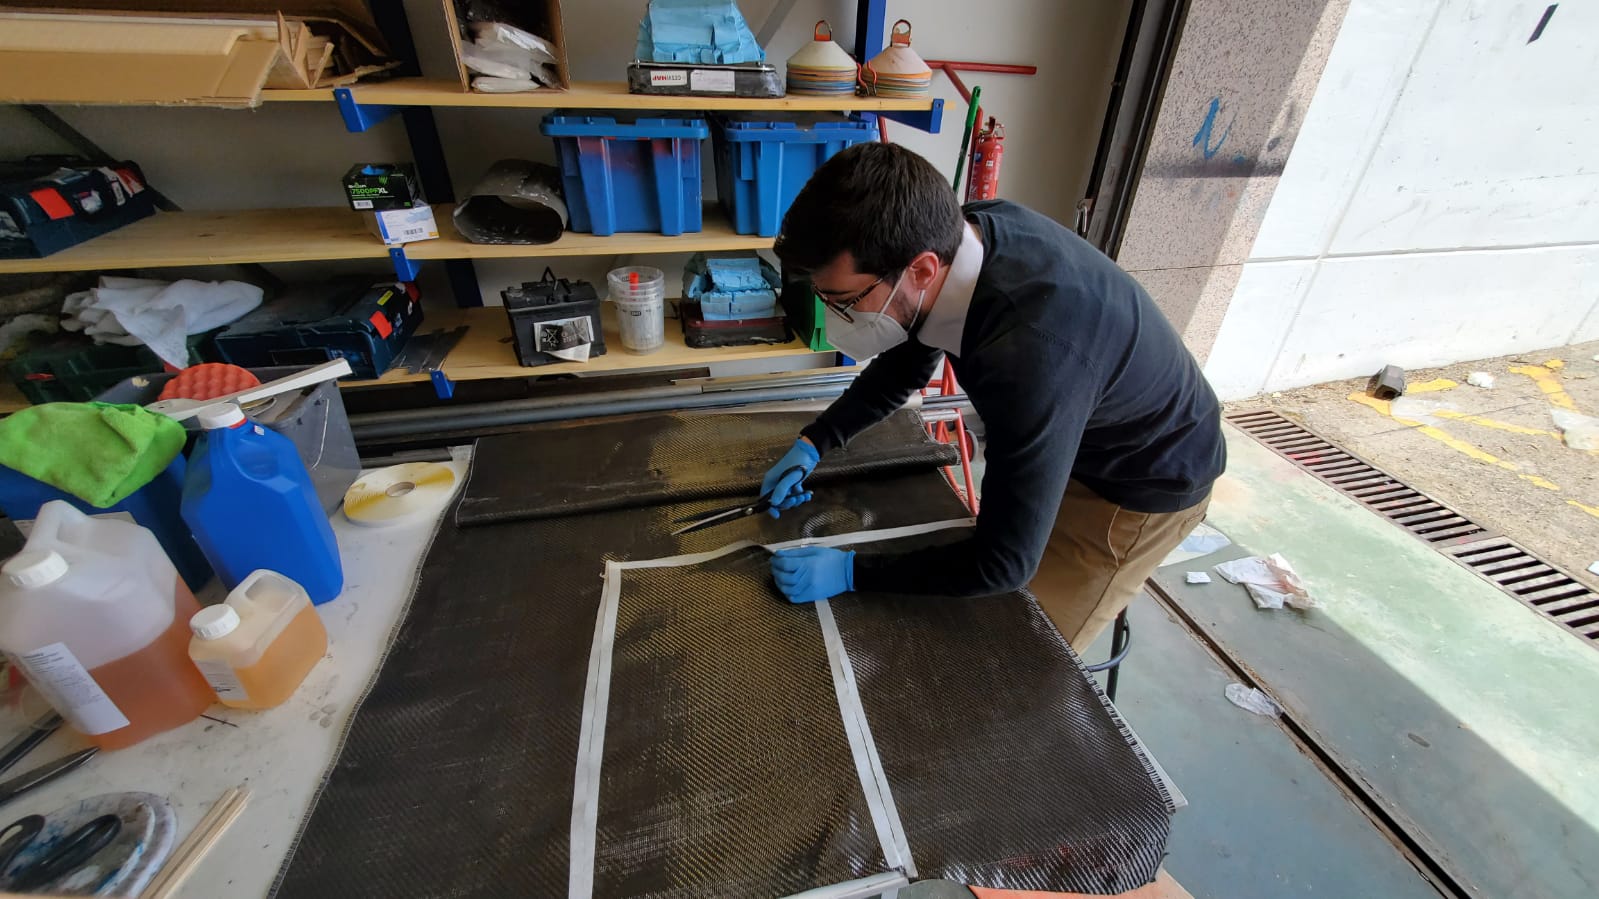
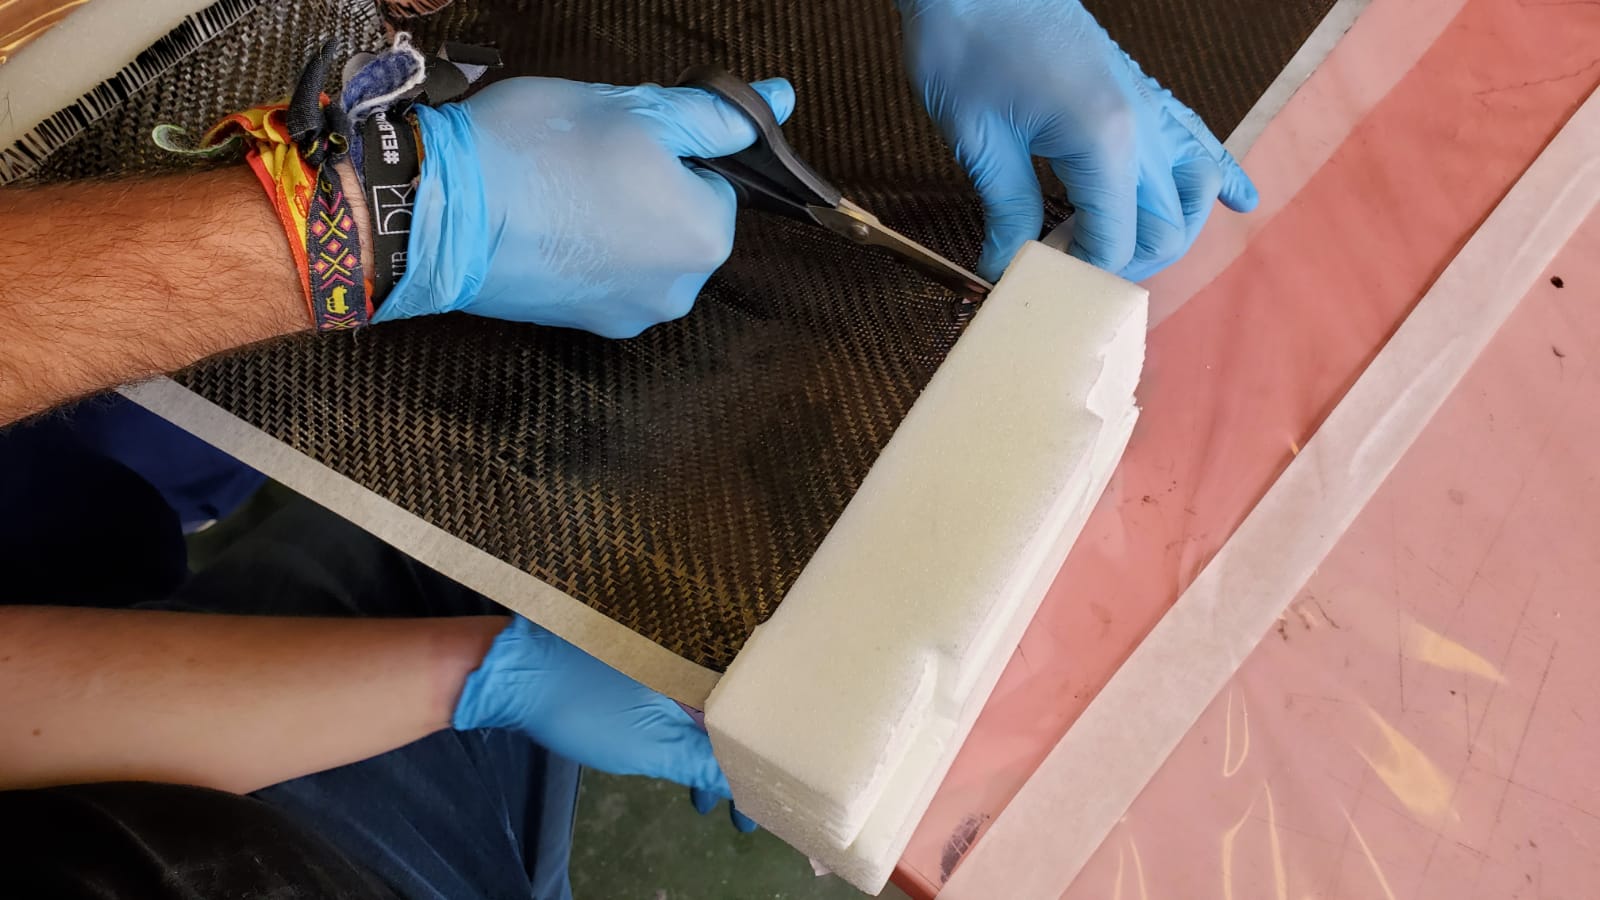
We will have to cut the carbon pieces in the correct size. After measuring, I cut the pieces with specific scissors for carbon fiber
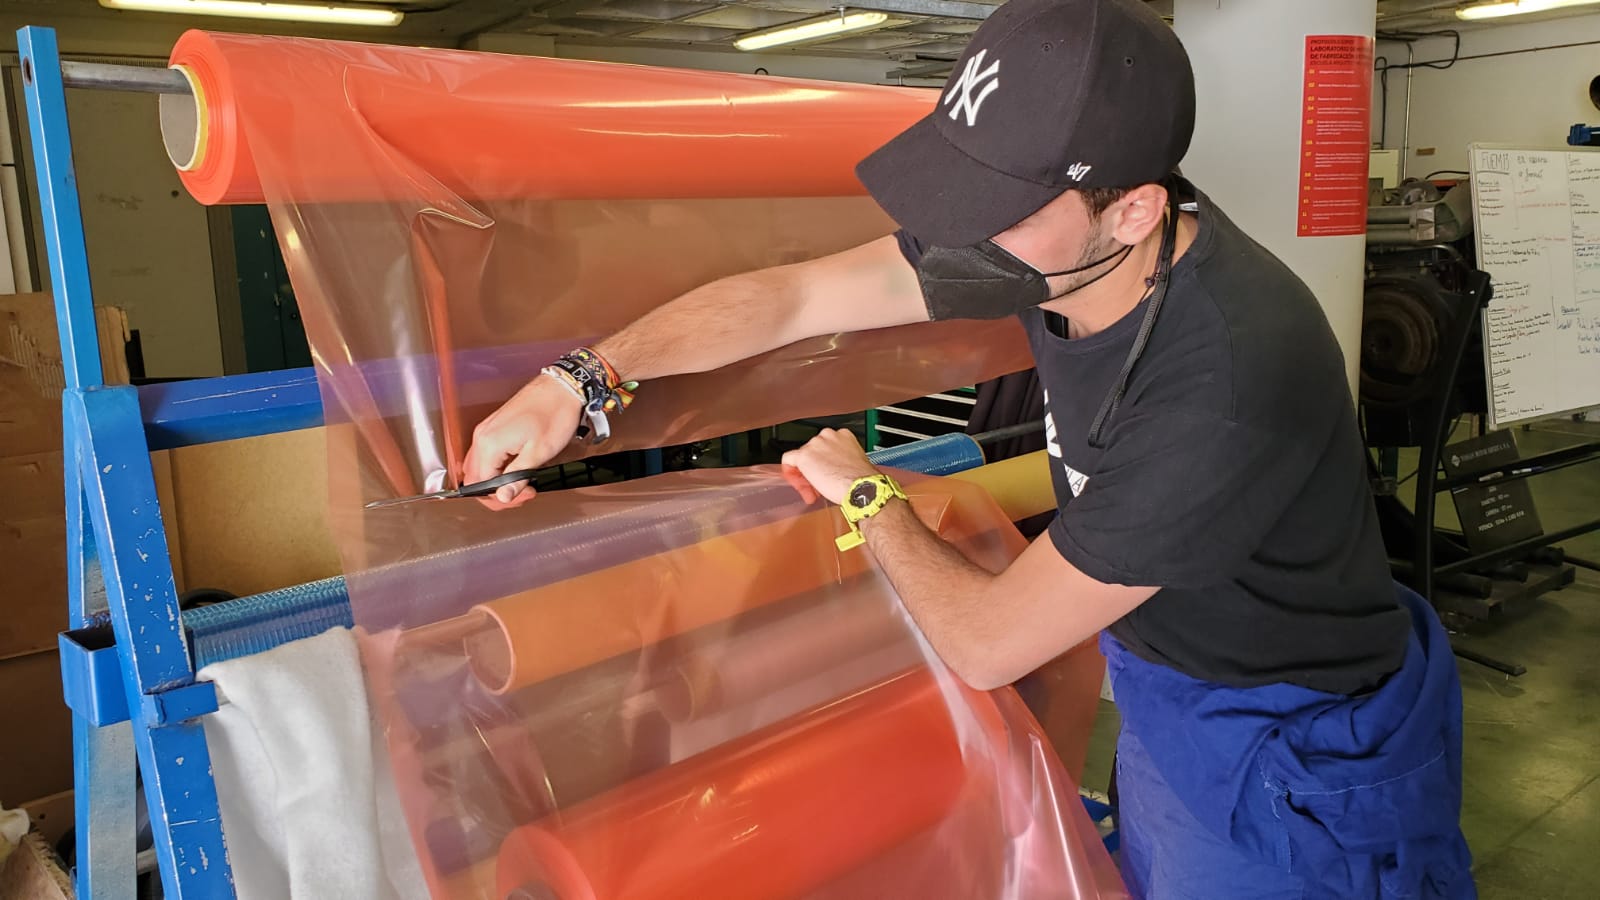
Miguel explained me that we were going to prepare our own vacuum bags and he cut the special plastic for it
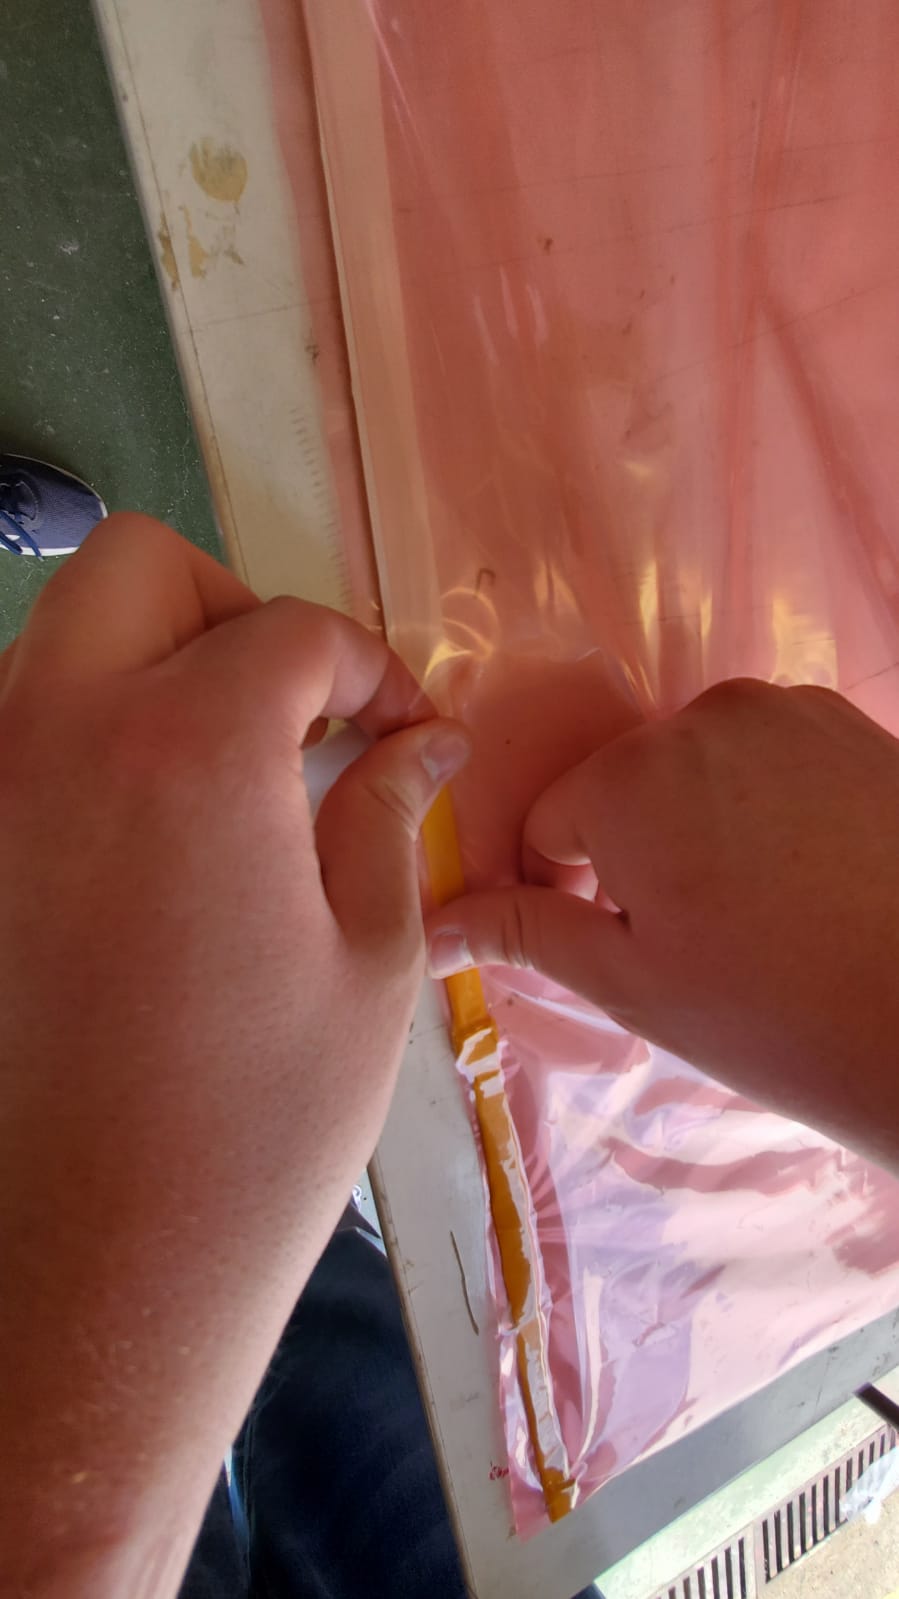
Antonio showed me how to close the bag with "taki", and we closed it together.
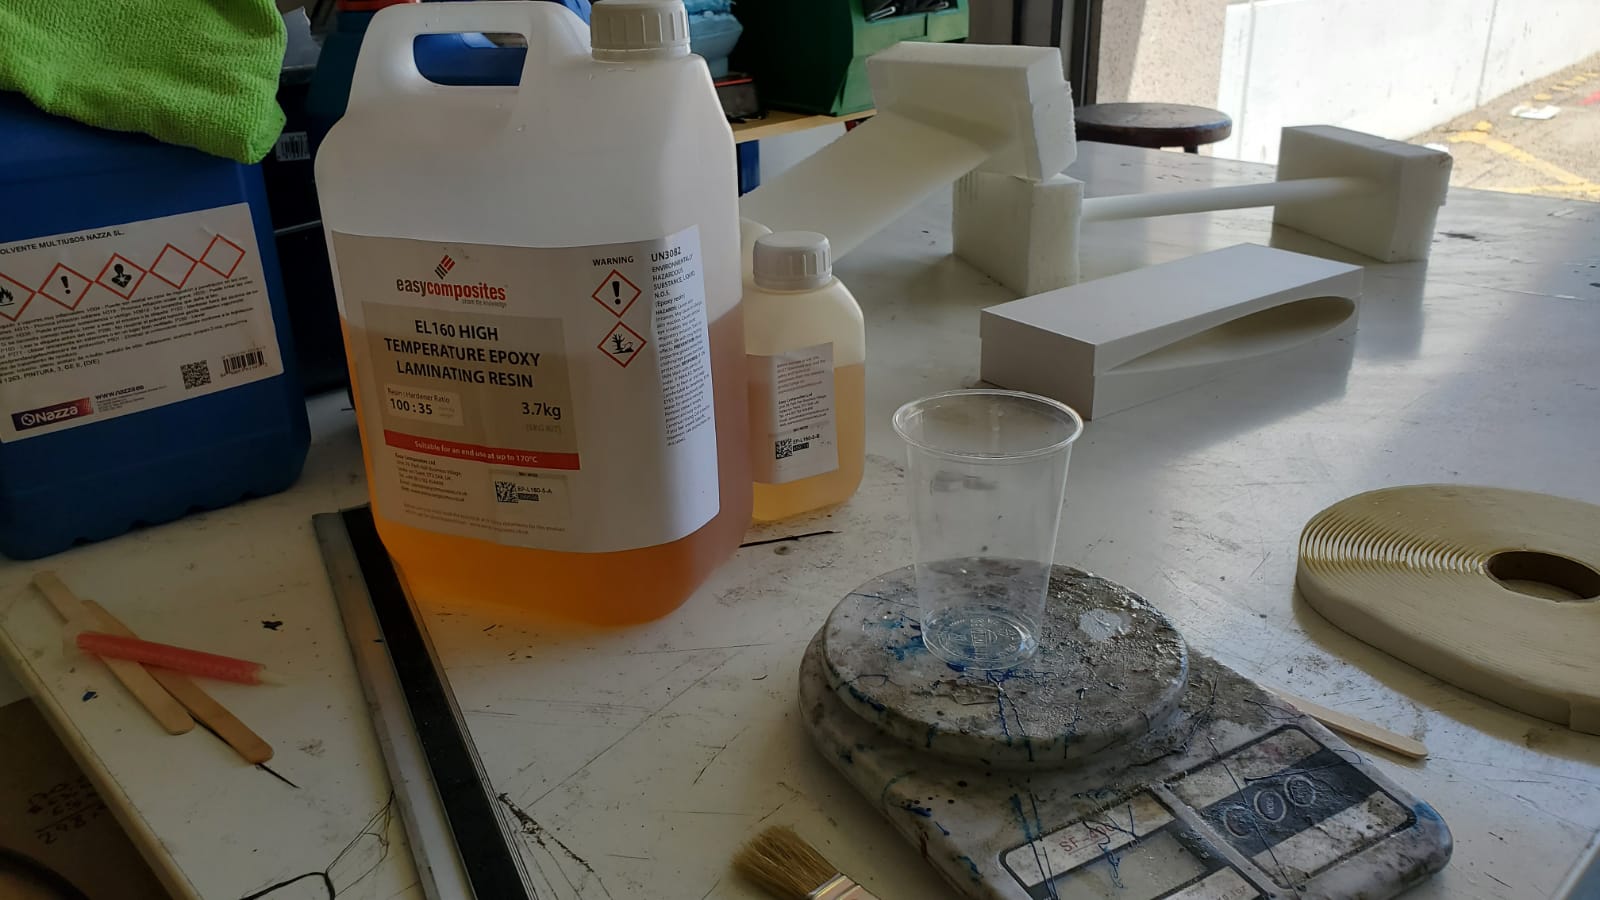
Then we mixed the resin. Specific resins have to be used in order to work with carbon fiber
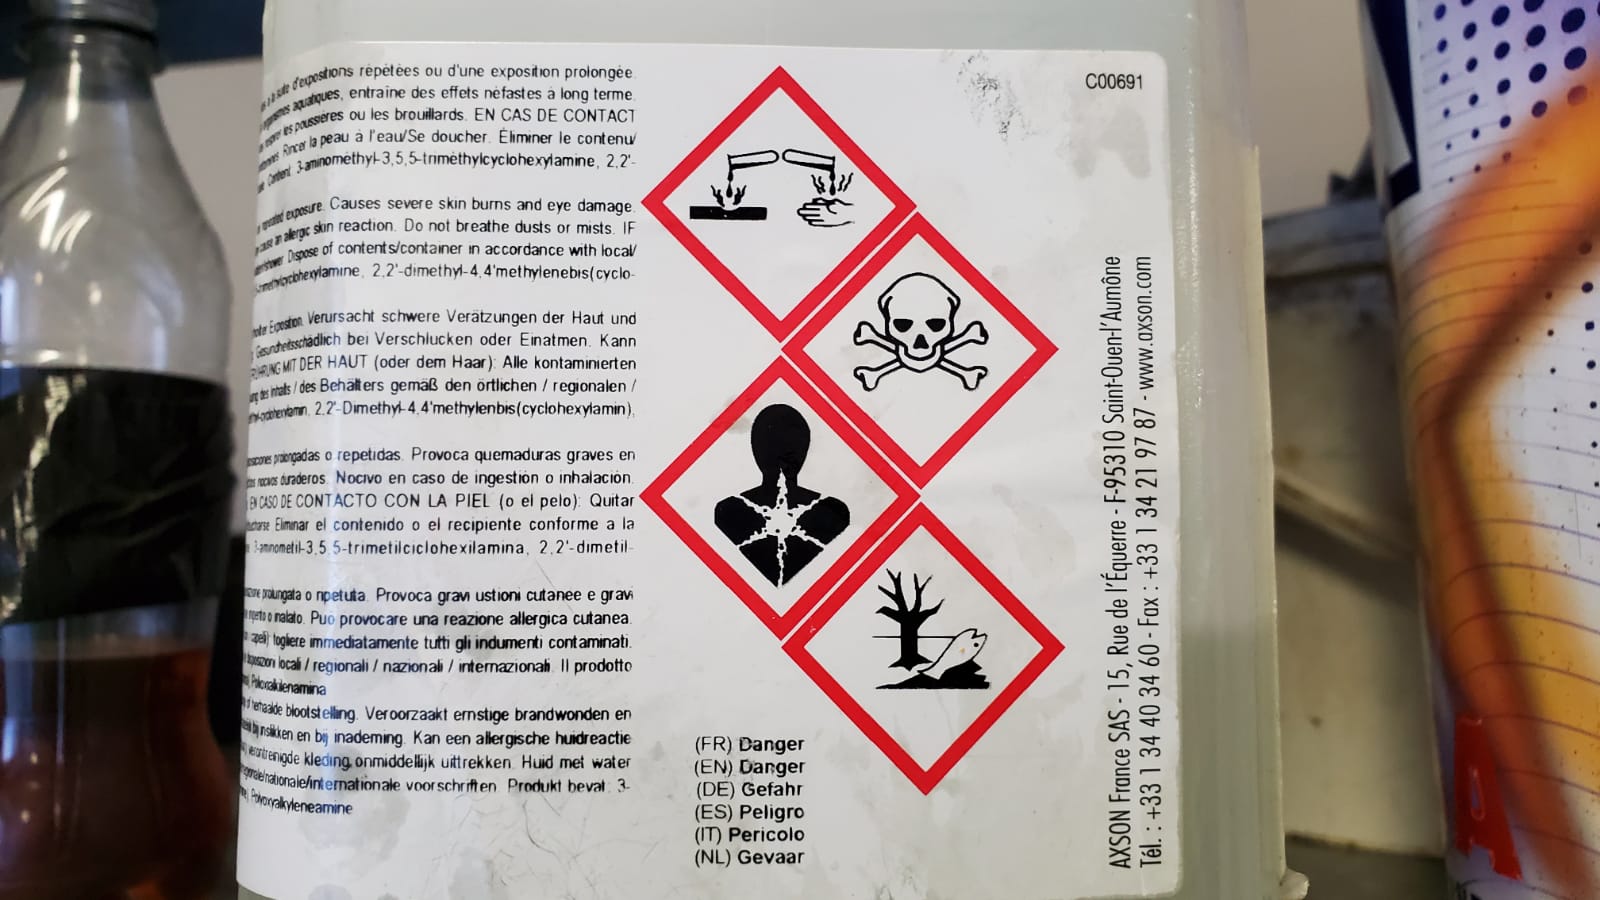
Always read the safety information. These resins are very hazardous.
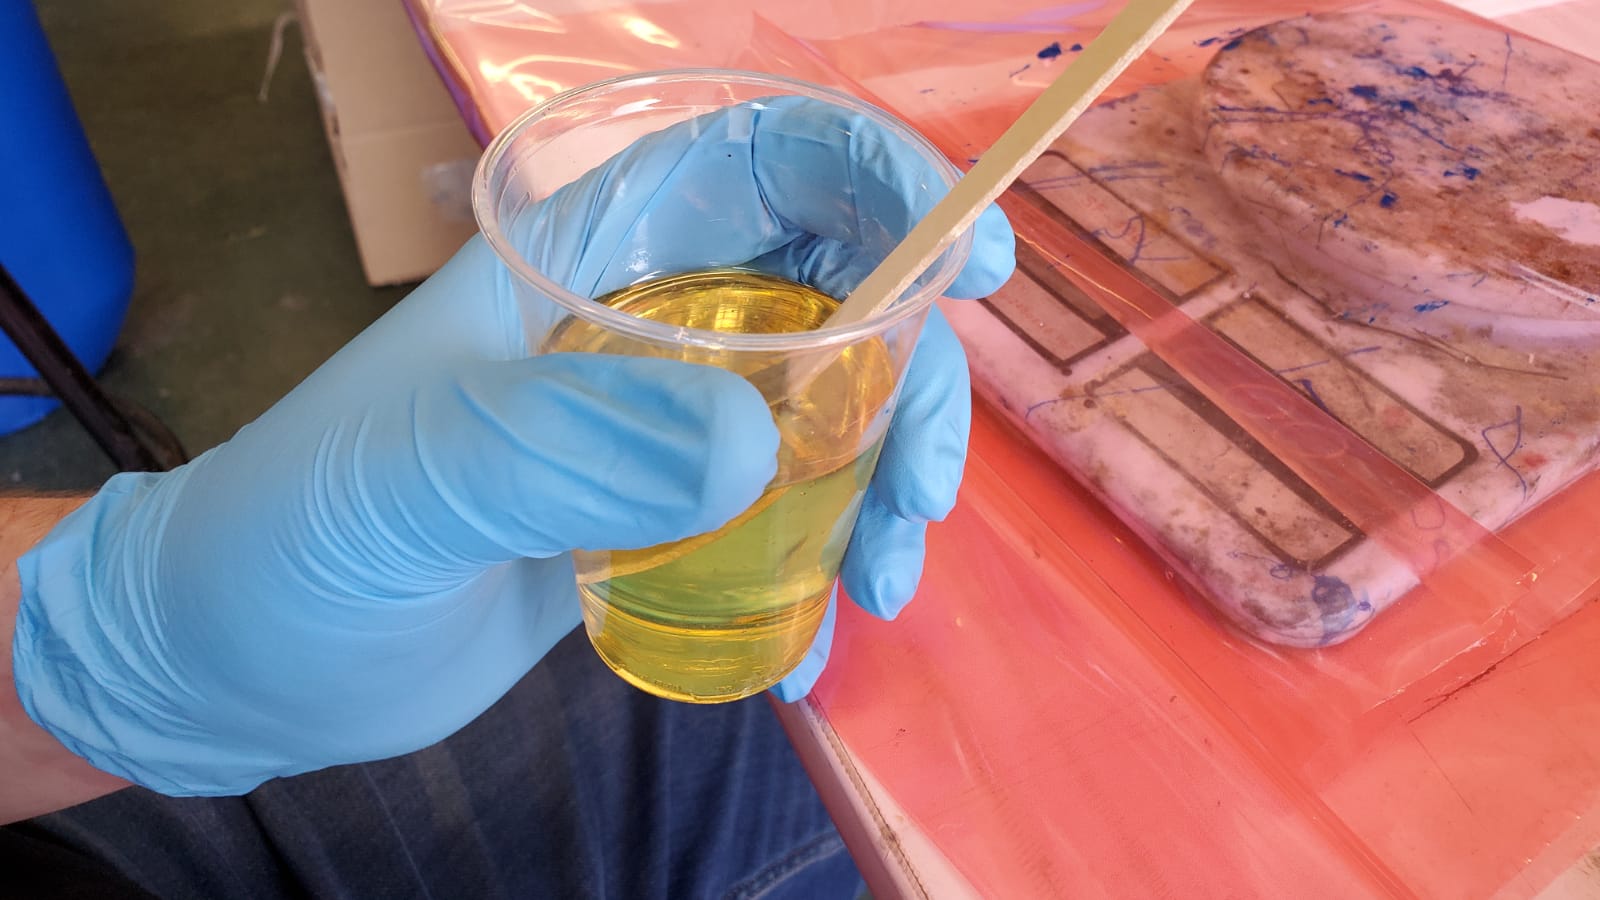
We mixed the resin
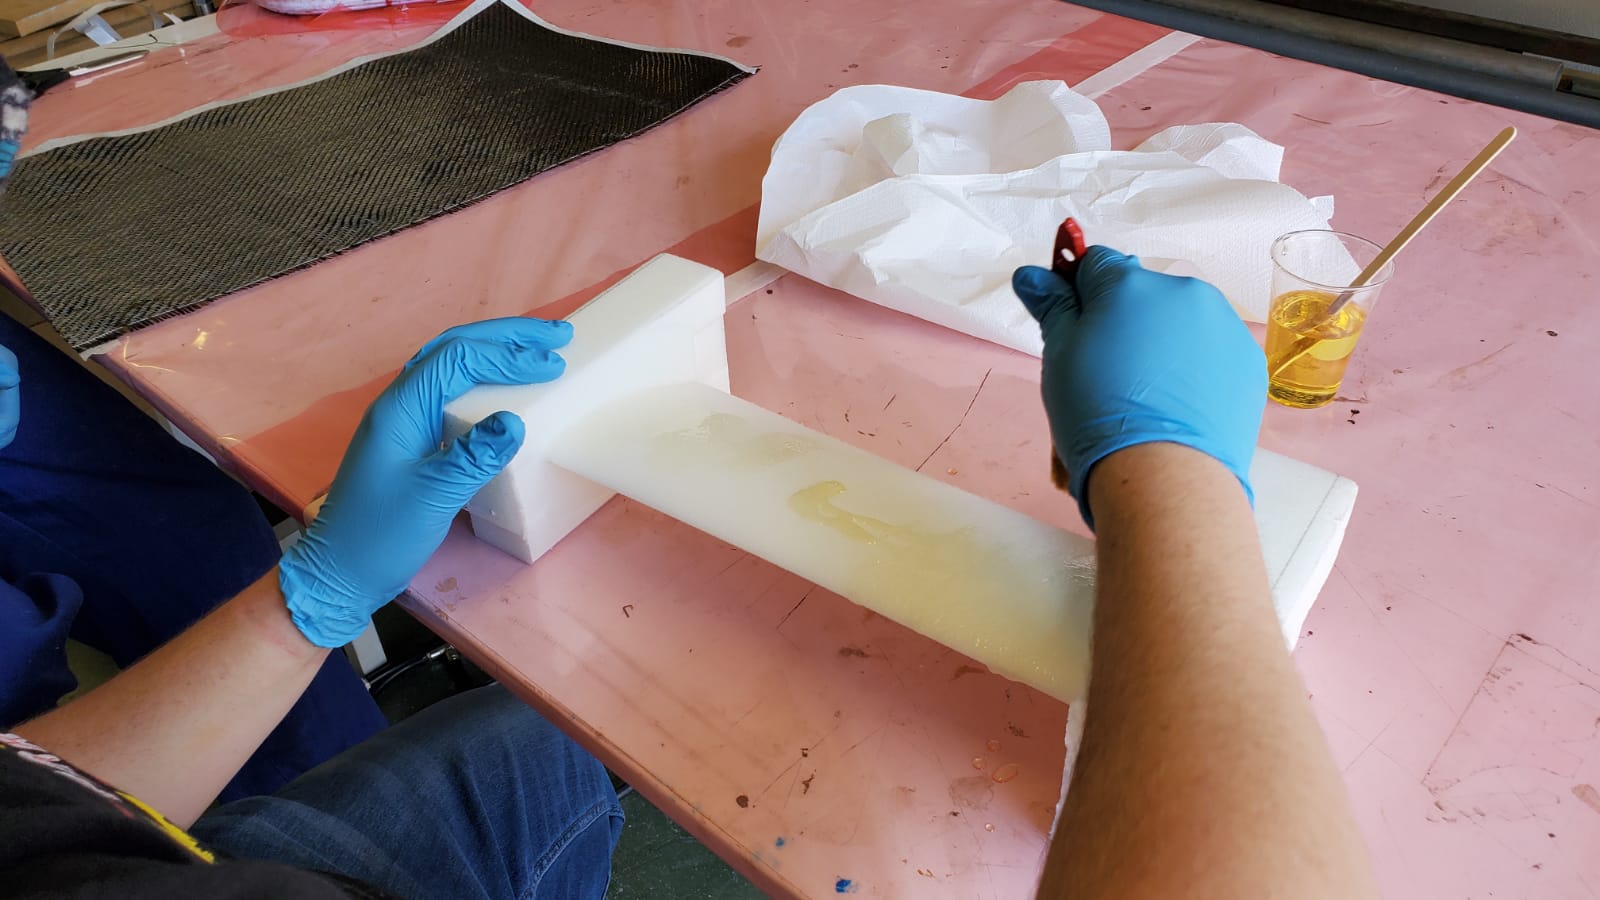
Antonio showed me how to cover the Rohacell core with the resin. Rohacell absorbs some of the resin, so don't be a stingy here
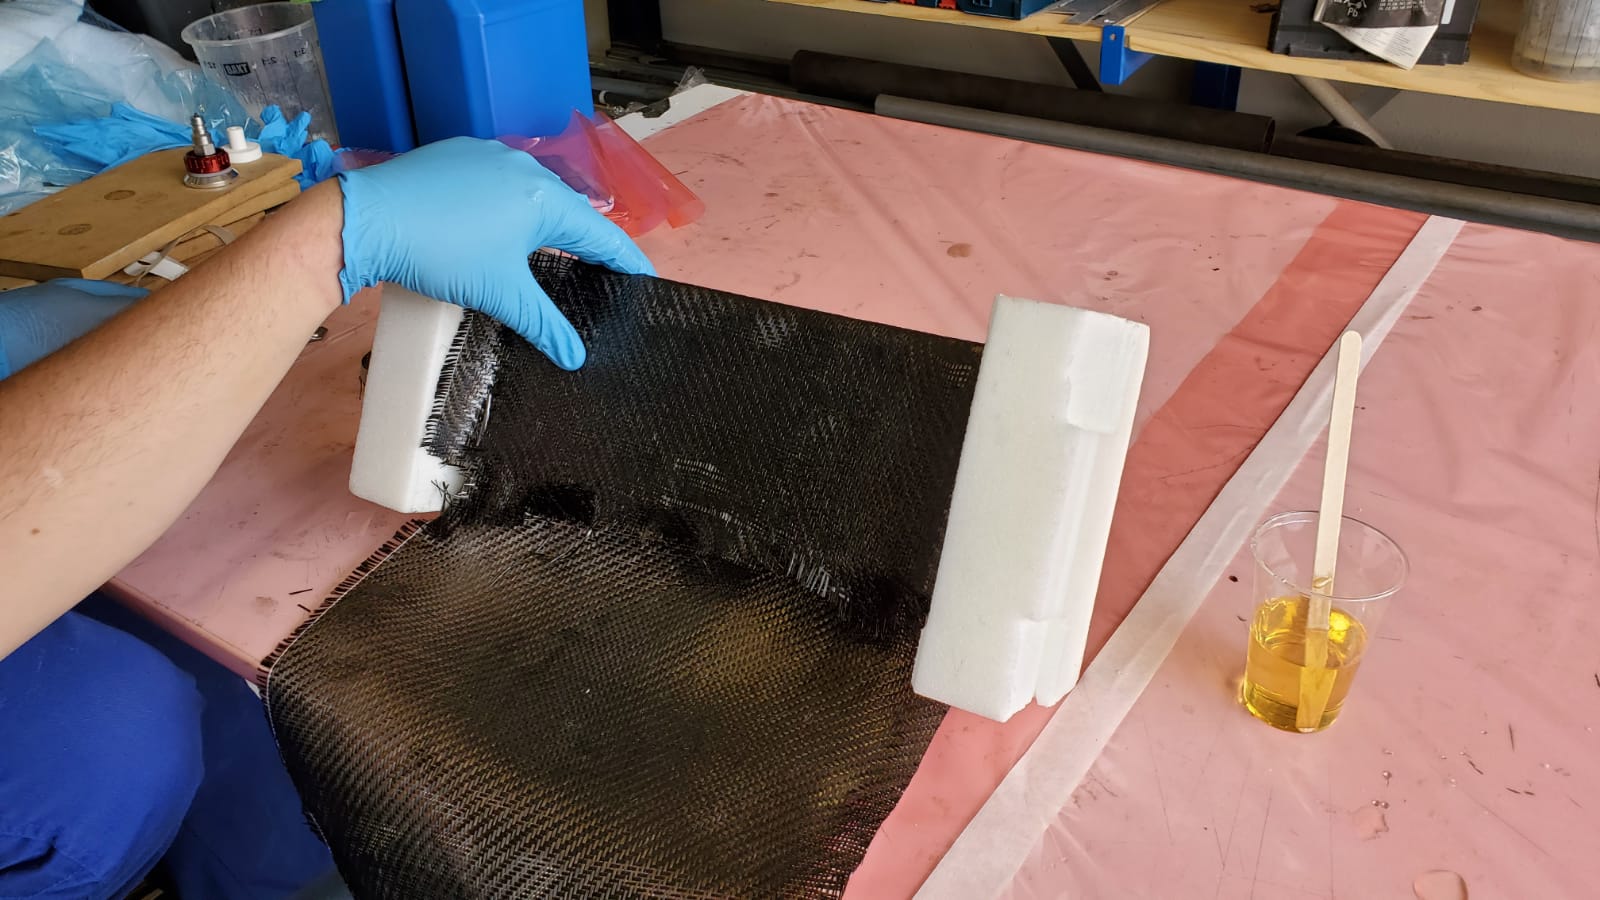
I helped him laying the carbon over the Rohacell
We need a lot of hands to work with the carbon, as it may come a bit loose.

After two layers of carbon + resin, this was the result
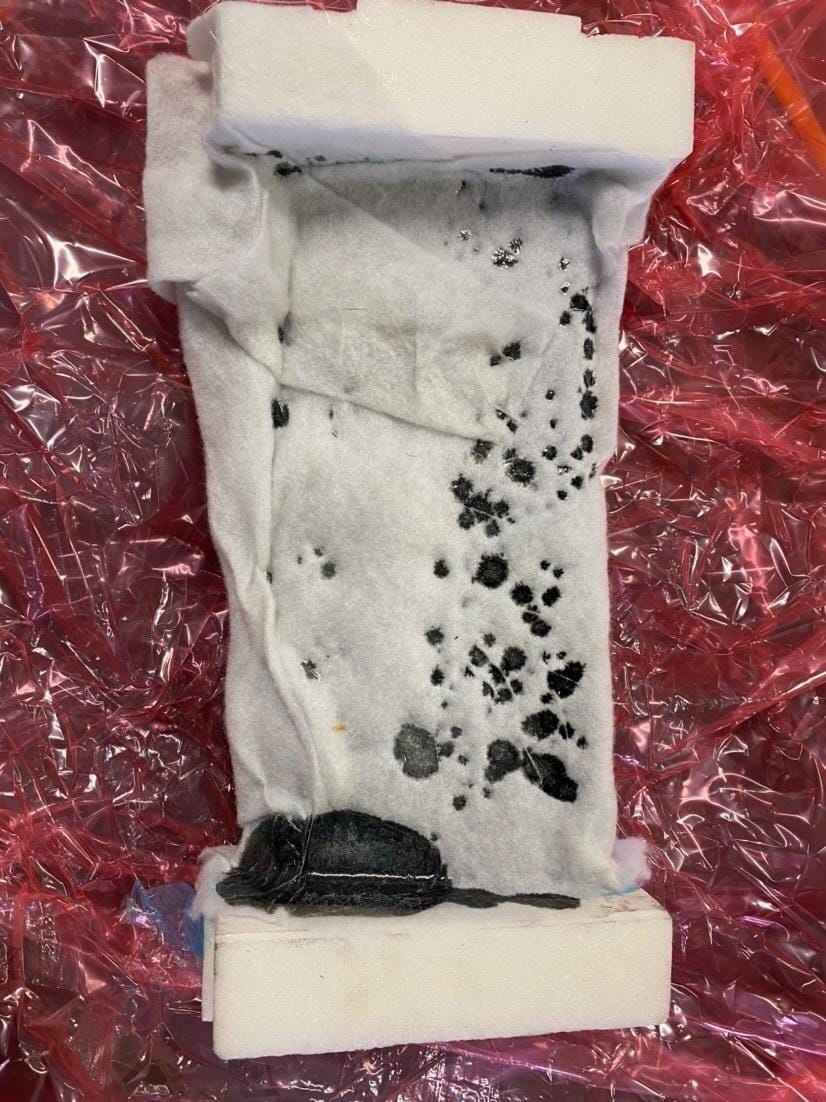
We covered it with the plastic release film and then with the breether, that looks like a white blanket
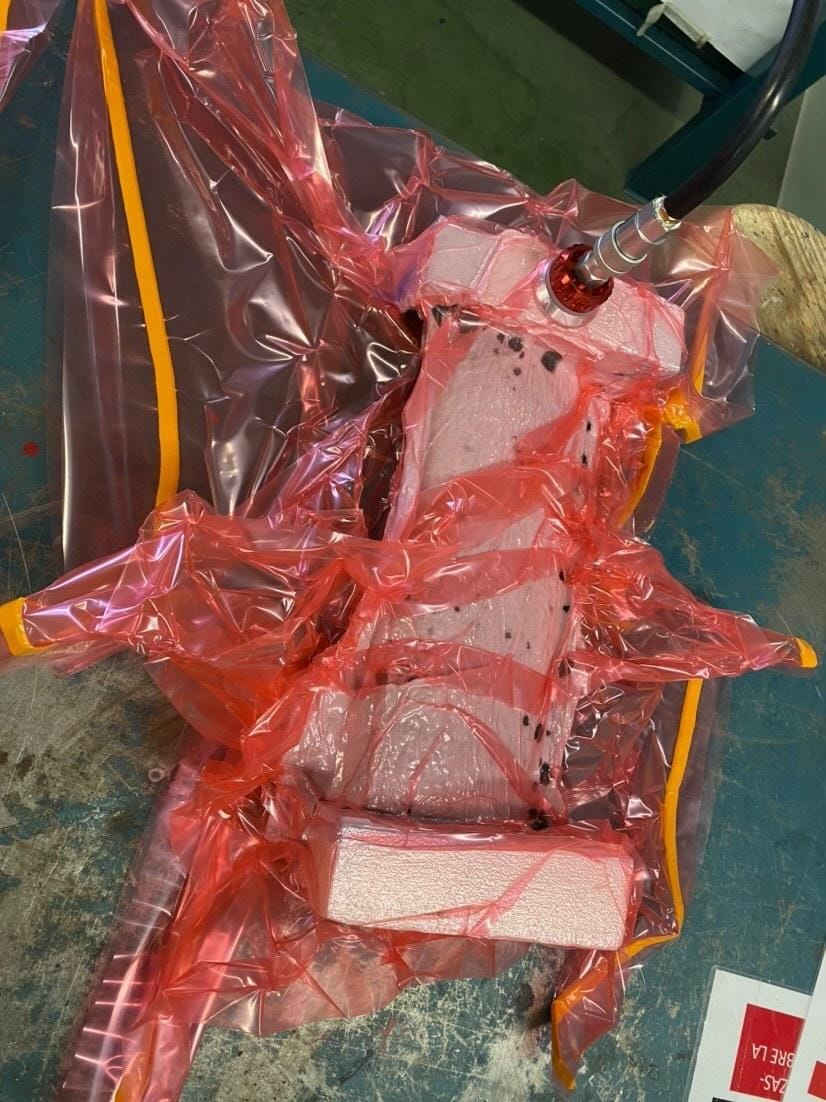
Then we placed in the bag and fully seal it, and after a couple of hours we will get this:
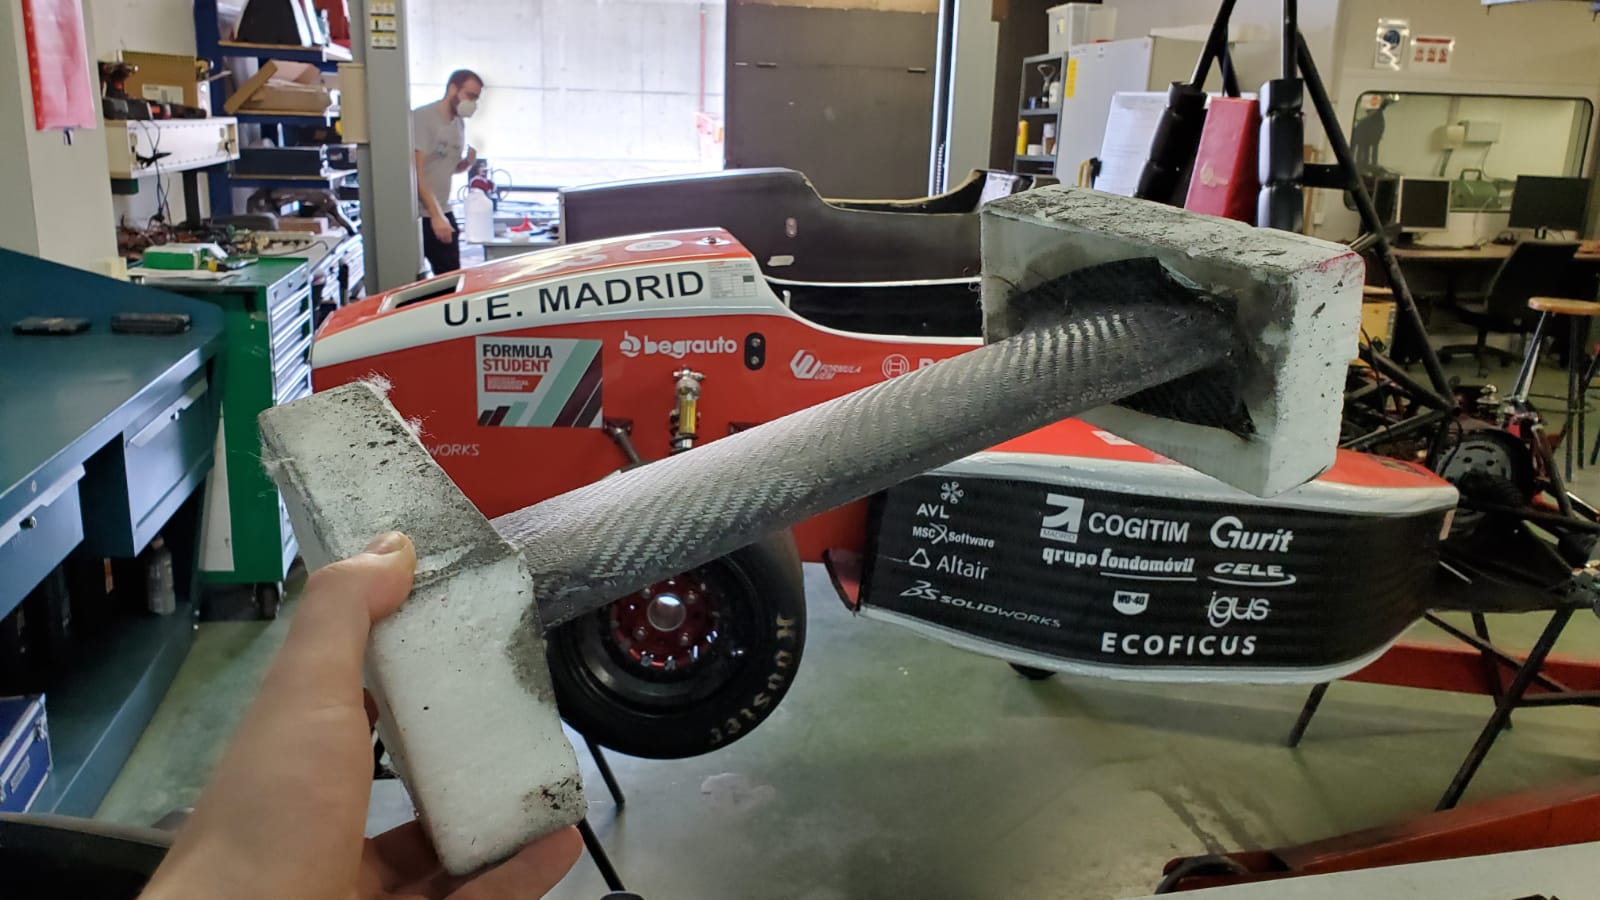
The winglet was ready! Now it's time to cut the rohacell blocks on the sides and it will be placed on the car. When cutting, make sure you use pneumatic tools. Carbon is conductive, so if the carbon dust makes its way to an electric motor, it can short-circuit it!
And that's all for this week. Hope you liked the process as much as I did, and see you in the next week's assignment!