Moulding and Casting
Welcome to this amazing and creative week in FabAcademy! Moulding and castng was a weel I was really looking forward to since the start of the course, as I saw some of the previous work done by friends and I really wanted to learn 3D milling. The fact that We're using that technique to create castings was only one of the things I was excited about. So follow me on this amazing journey of failures and successes.
You can get the original file for milling this car in your lab HERE.
You can get the STL file for milling this car in your lab HERE.
At the beginning of the weel I did not know what to do. I knew I wanted to do something car-related (I always do), but this week was special. I wanted to do something F1 related, as it was time for Formula One in Imola, one of my favorite race tracks and one where I could spend fantastic time when I lived in Italy. My FabAcademy colleagues and I talked a bit about what to do, and after some deliberation with Mauro, I decided that I wanted to cast metal. In the comments of the lecture, people were talking about Zamak, a metal alloy that could be used for molding and casting. That is actually the material Mattel uses to make the Hot Wheels toy cars. I used to play a lot with toy cars when I was a child, so... It was going to be an F1 car made out of metal.
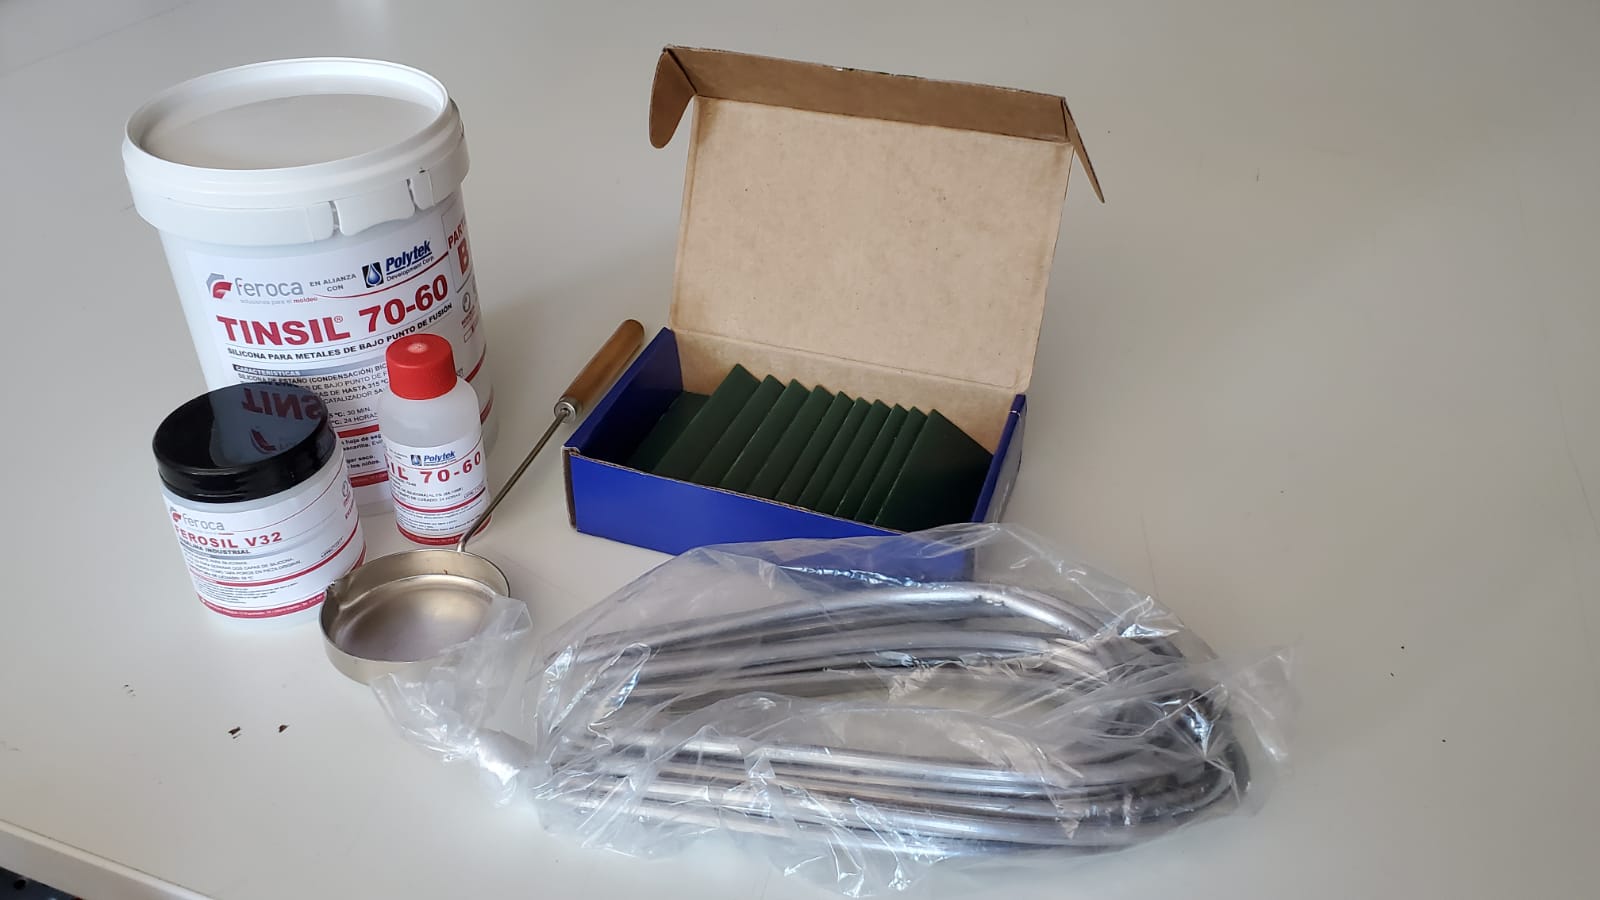
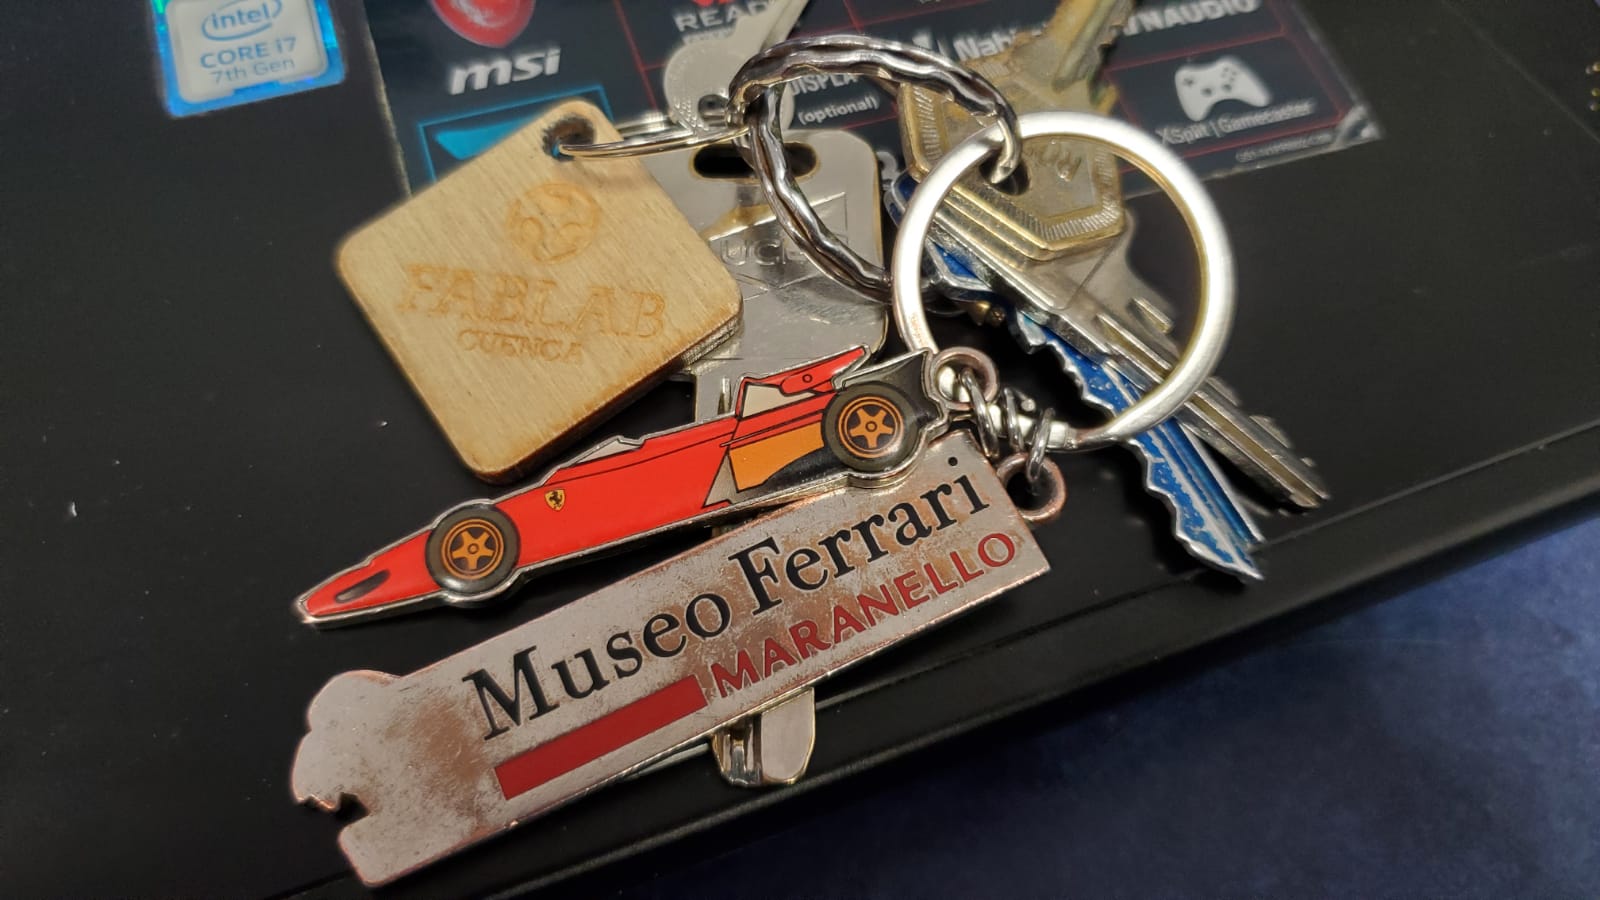
Mauro told me that Feroca makes this metal casting kit with Sn-Pb metal, that is not the best metal ever, but I could use it to make something like a keychain. I used to have a keychain that some friends brought me from Maranello some years ago, but it has been loosing some pieces and maybe it's time for a replacement
Chapter One: Group Assignment, some things should be learnt by doing
However, for this assignment I was lucky to have in my lab some people who already did some molding and casting previously, so I'd like to give them credit and share a bit of their work
In 2020, the medicine department in the Universidad Europea asked us for some materials for one of their lessons. They needed a big number of clitorises to give them to students in a lecture. They wanted them to be soft and flexible like real ones, so we had two choices: print them in flexible filament or producing them with a silicon by using a mold.

FabLab technician Pablo Encinas and Arts lab master Miguel Carmona set to work. We 3D printed the original clitoris in PLA, and Pablo made the mold in clay. Miguel mixed the silicon and they poured it in.
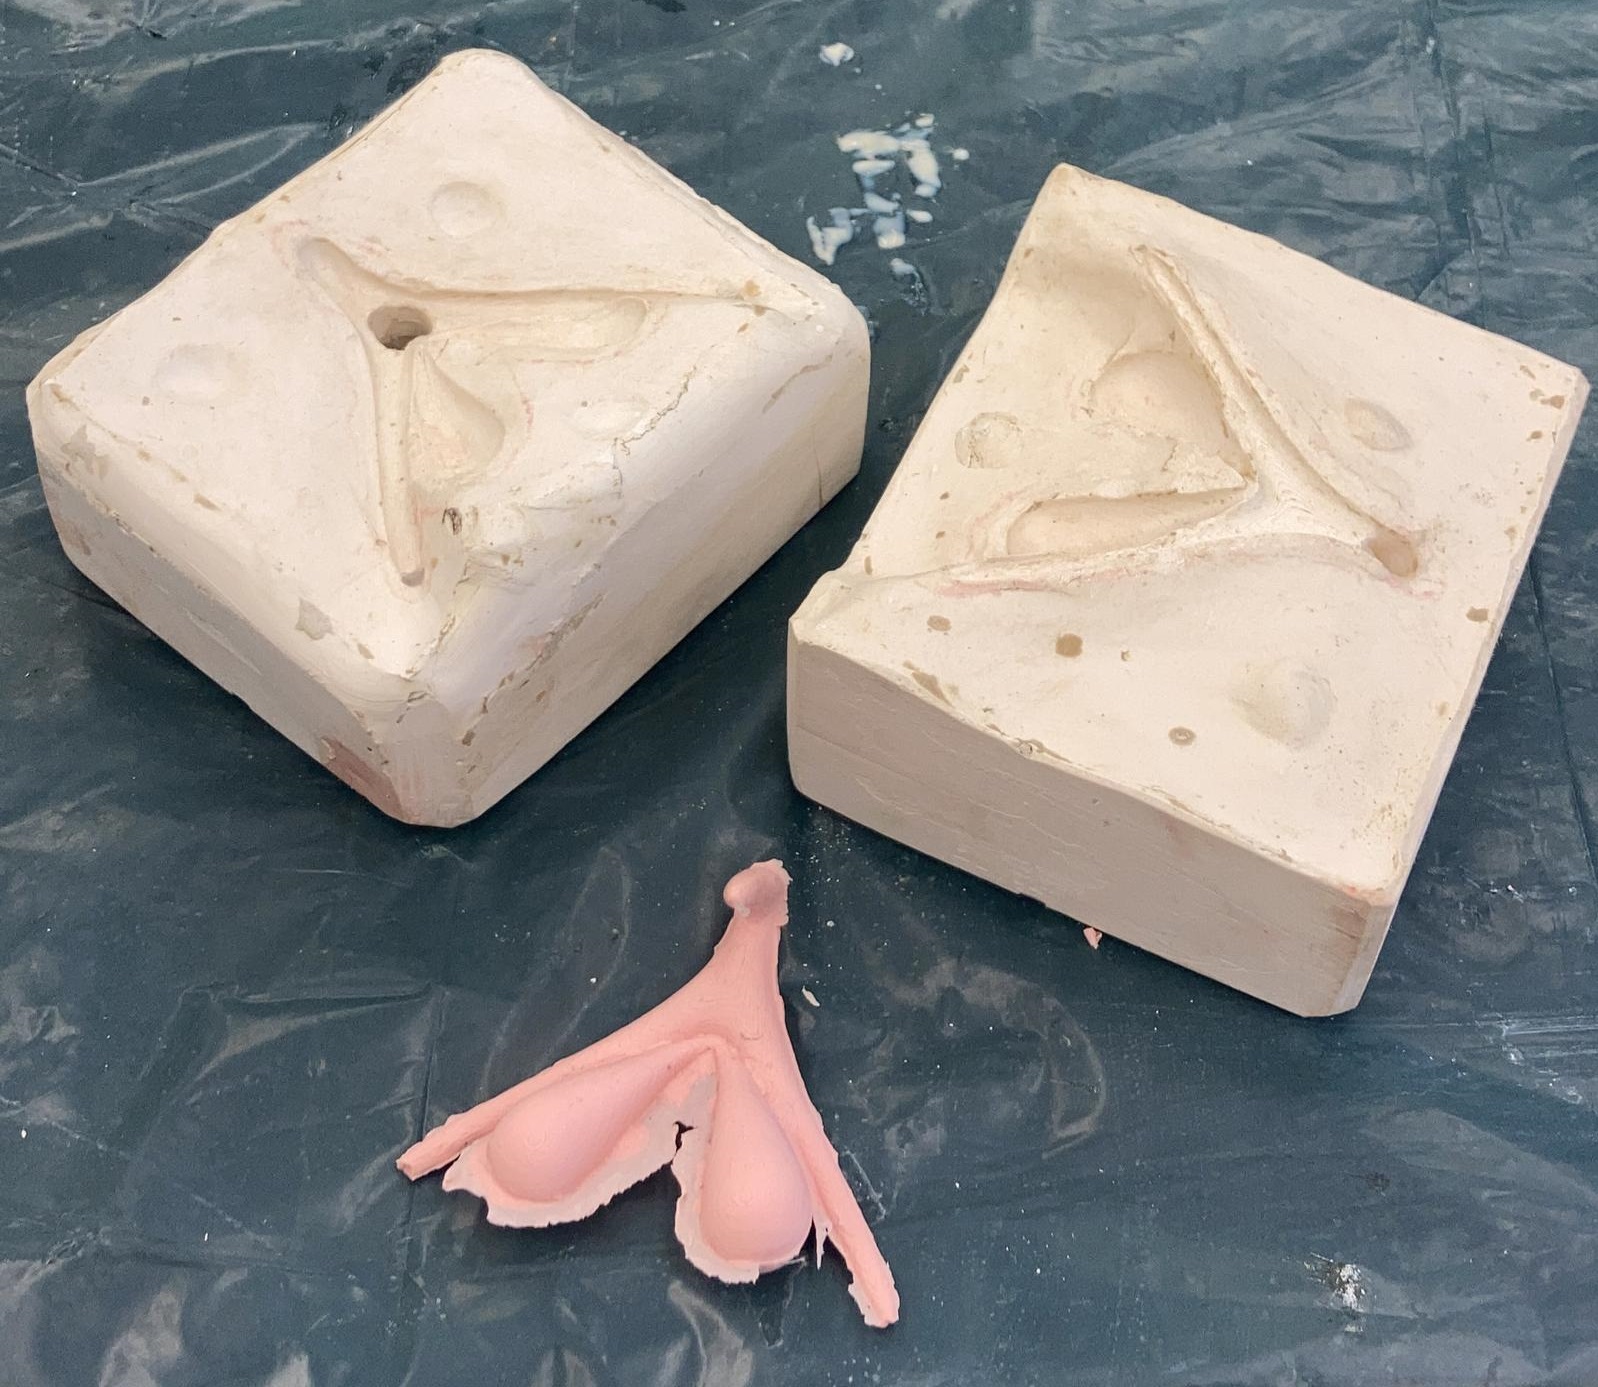
About 10 flexible clitorises have been made with this original mold, that we still keep, and some more of them will be made to order in the future.
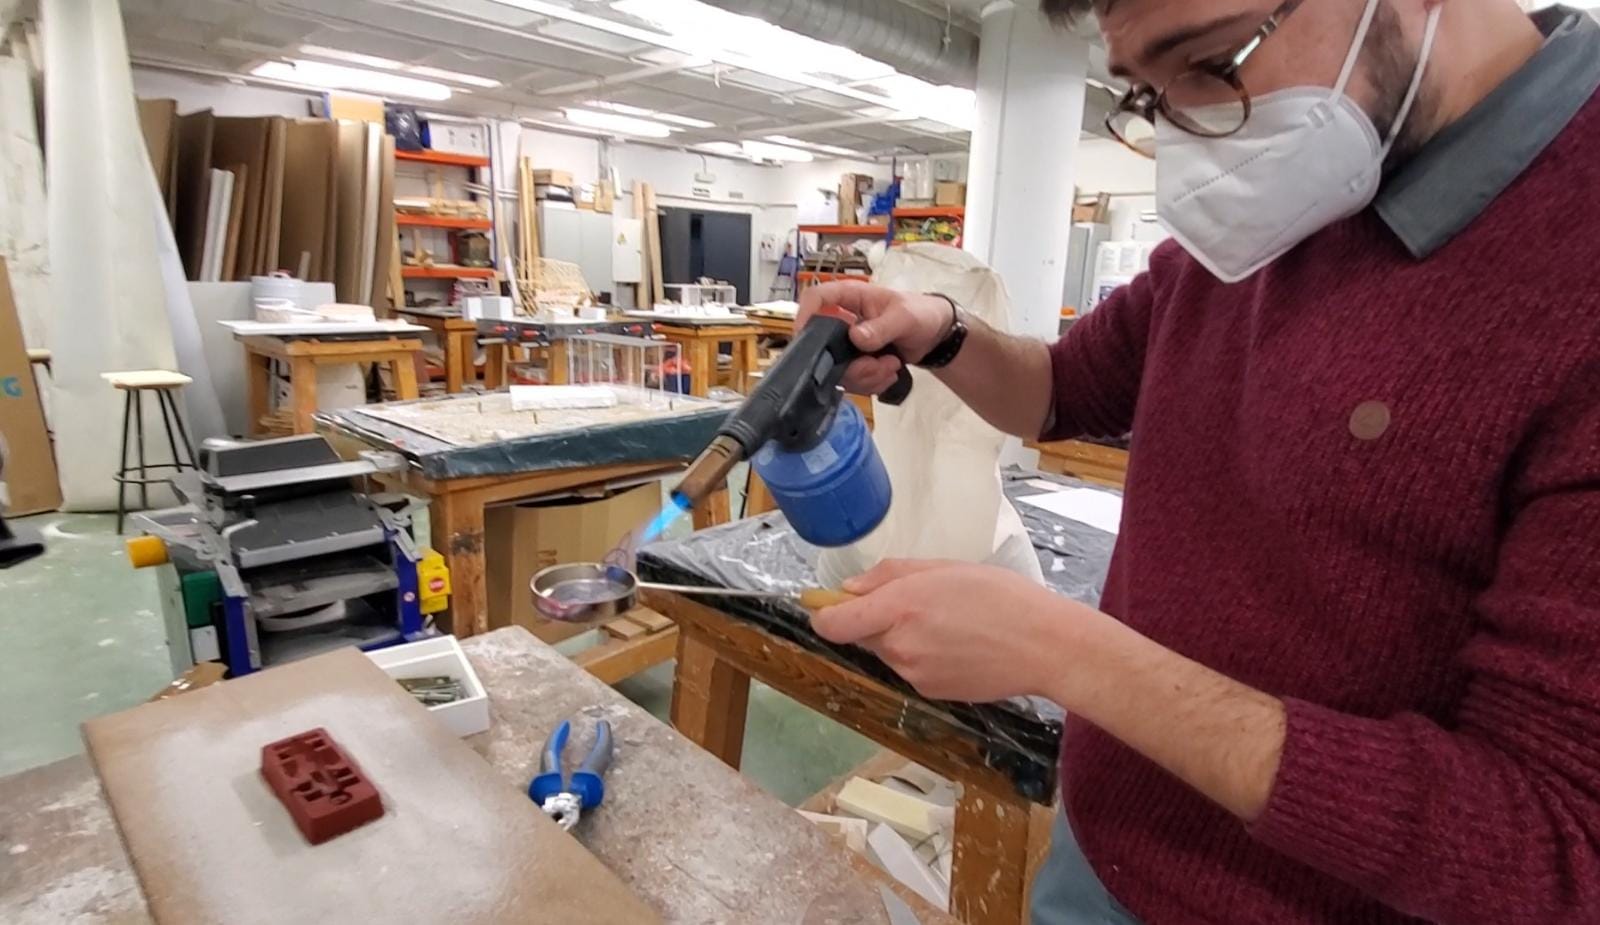
When working with the silicons, make sure you're working on a well ventilated area and wear disposable gloves and mask, but the most dangerous material here is the Sn-Pb alloy. In order to heat it up, gloves are not needed, as the little pot provided has a wooden part and it does not burn your hand, but you really have to be careful in order to not spill the molten metal into your body, or into the lab and create a fire. We covered the wood with sand in order to protect it.
Chapter Two: Fórmula Academy
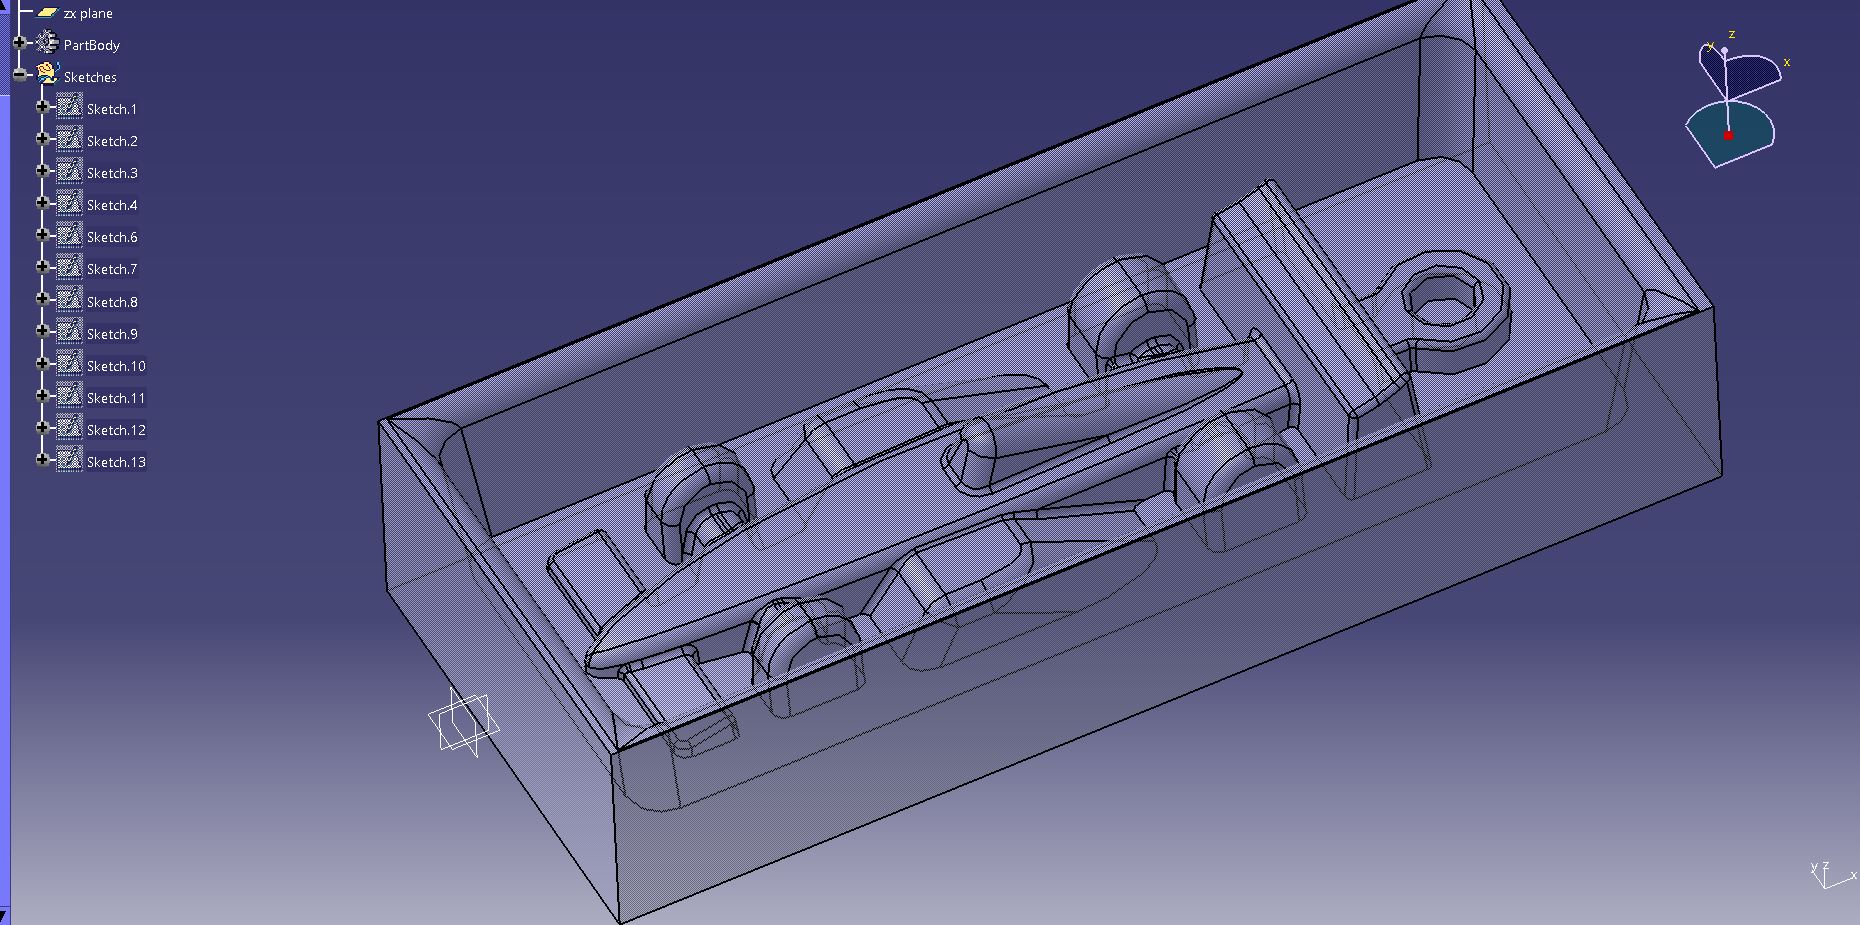
I started to design it on CATIA. I had two milling machines available: I could either use the Roland Modela MDX-40A, that we use to mill the PCB boards, or I could use the Alarsis FR-210 instead. My design requirements, however, was that it had to be milled with a 3 mm endmill, and it had to have some angles (CATIA has a tool called Draft, very useful for that) to be able to demold the silicon from the wax, and then the metal from the silicon.
I had some Roland ZHS endmills to use with it, but as Lorena will probably explain in her assignment, it was impossible for us to find the correct software to create the .rml file of the three dimensional STL (as neither FabModules or Mods could output anything readable)
So plan B, time for the high caliber. The CeNeCe FHOL20 endmill has a 2 mm diameter in the tip, and just 3 mm of shank diameter. I could use it in the Alarsis FR-210 and move it with the RhinoCAM, which is the software I actually wanted to learn how to use this week.
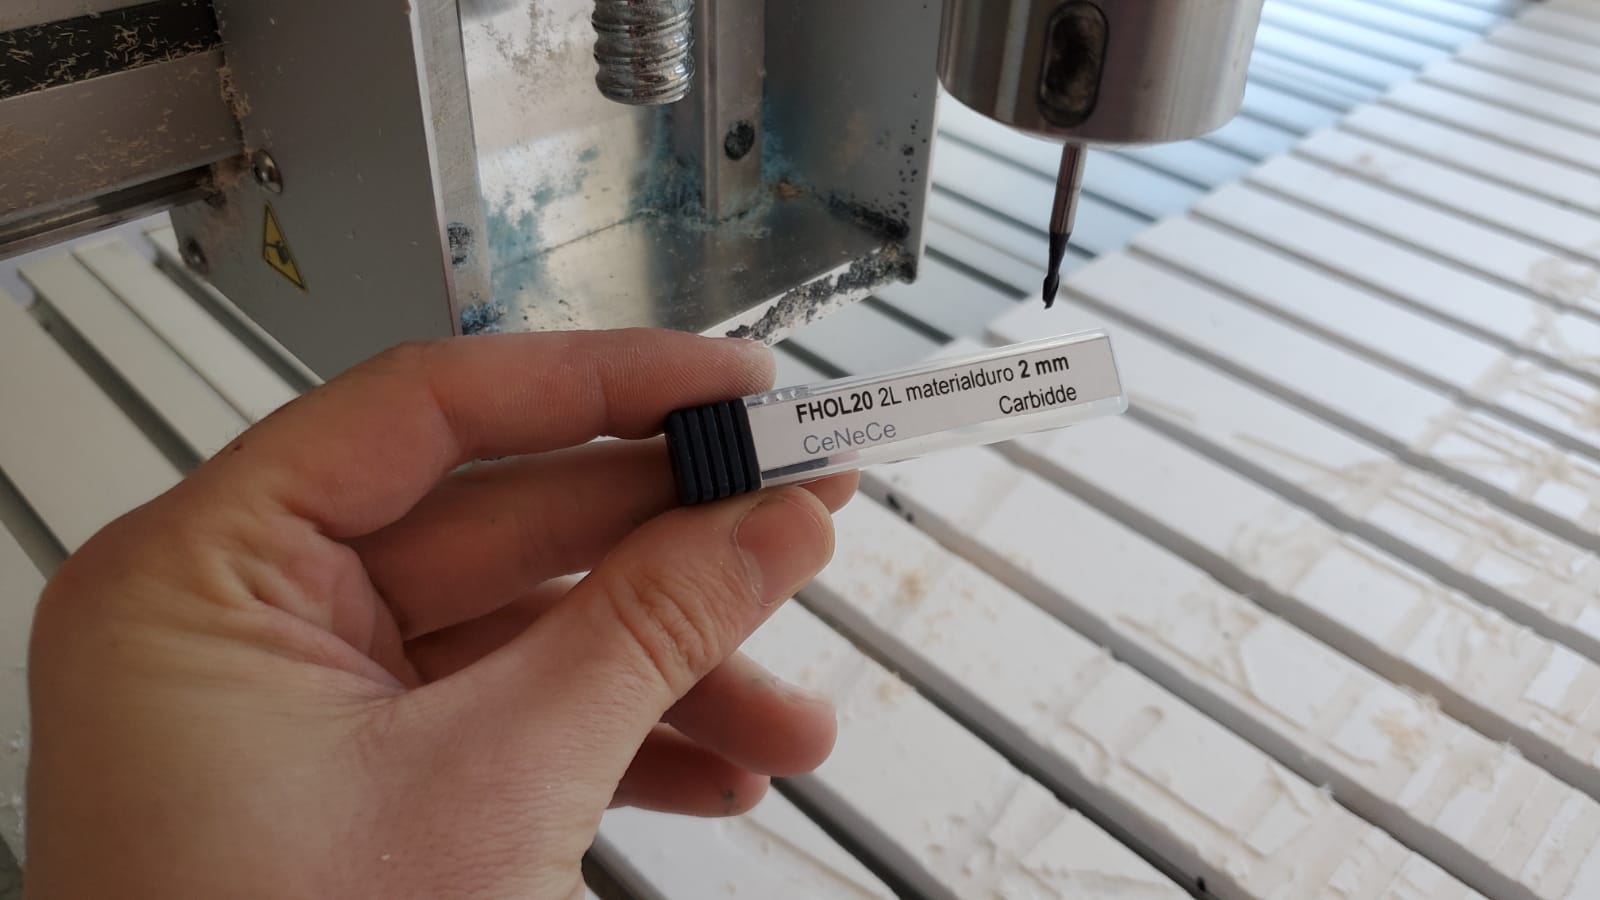
I mounted the smallest endmill I had in the FabLab on the biggest machine that I had in the FabLab. What could possibly go wrong?
Chapter Three: try not to crash
I exported my CATIA design as an STP file and opened it with Rhinoceros. I wanted to do at least two operations: a horizontal roughing and a paralel finishing.
In order to mill with this small endmill, we had to create a new tool on RhinoCAM, as it was the first time this tool was used. This is done measuring the tool in different sections and areas, and the program then calculates it has collisions.
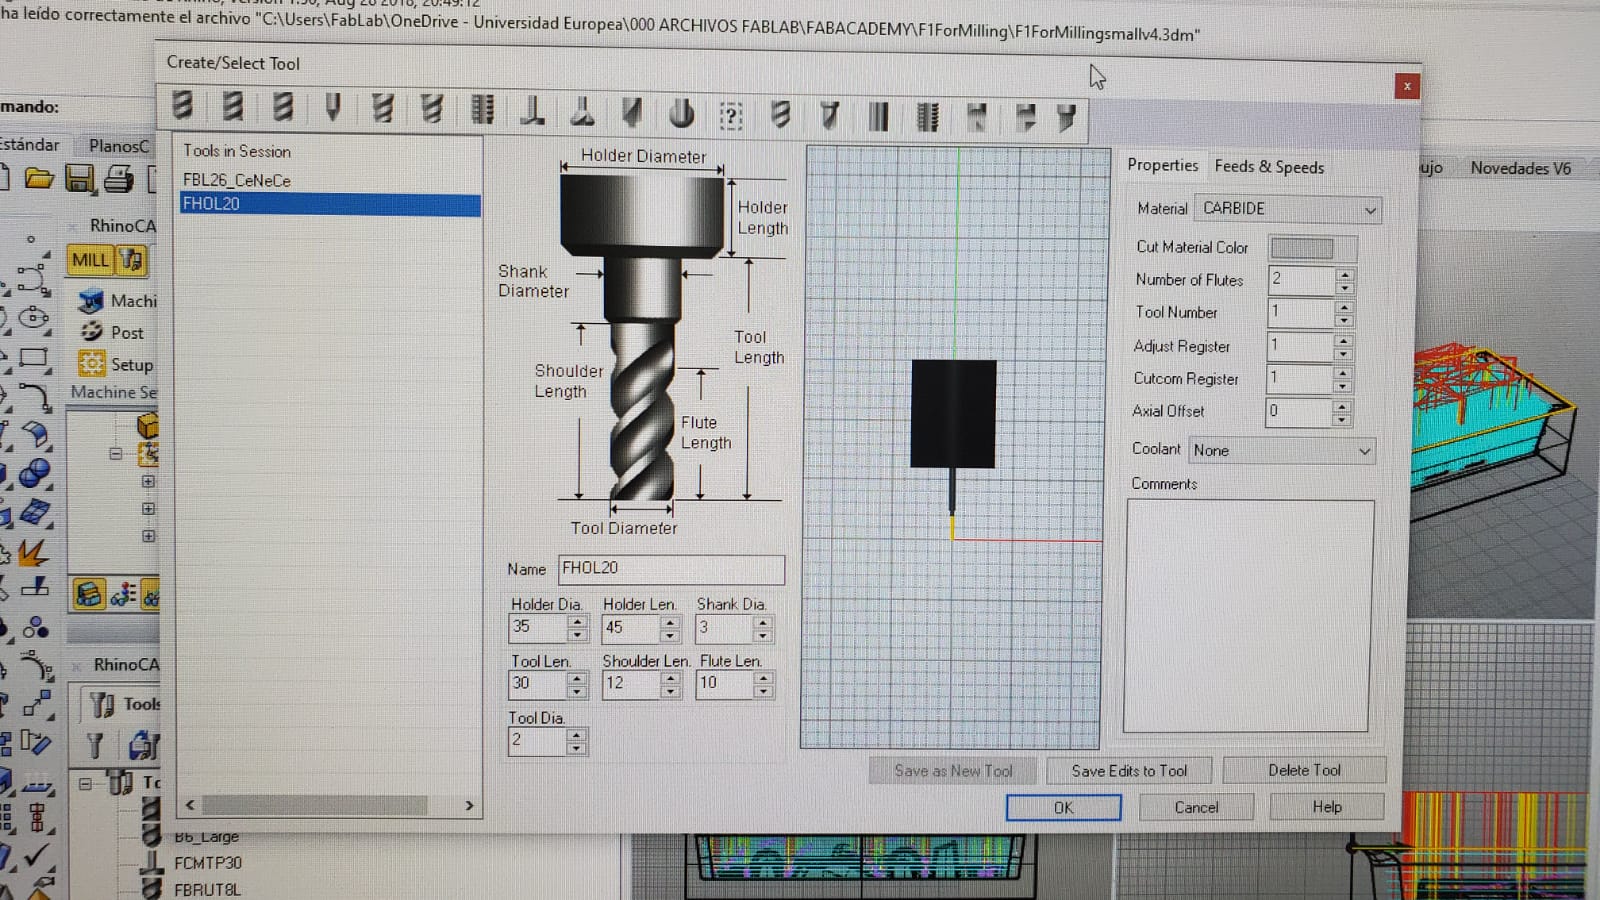
These are the speeds I used with this tool:
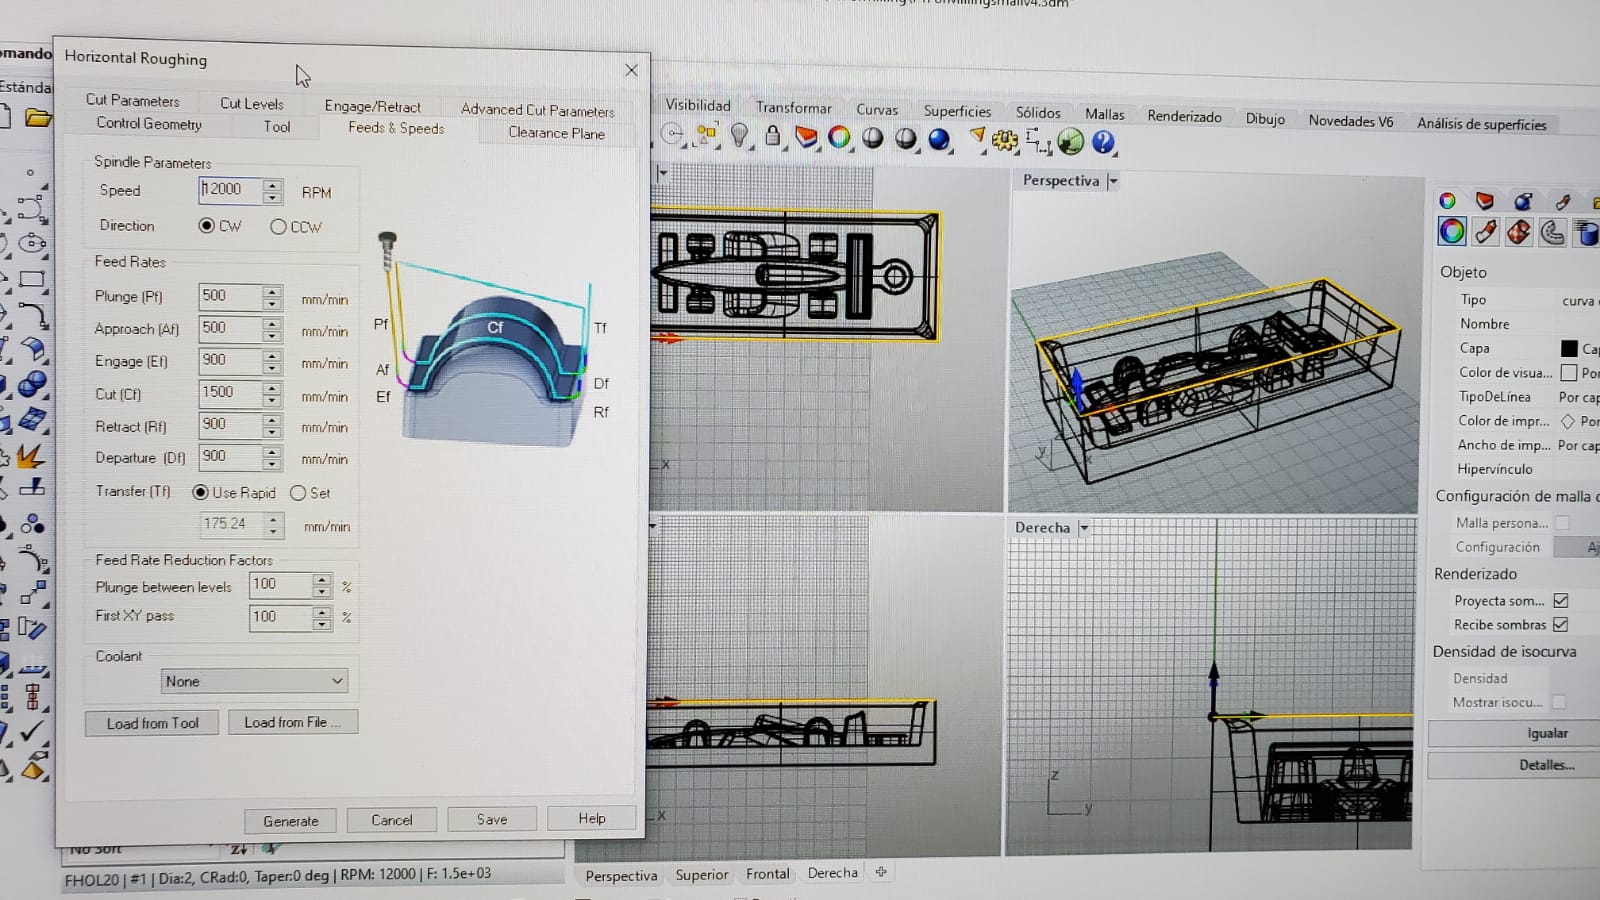
The roughing had no problems at all, but then, on the finishing, I had this problem:
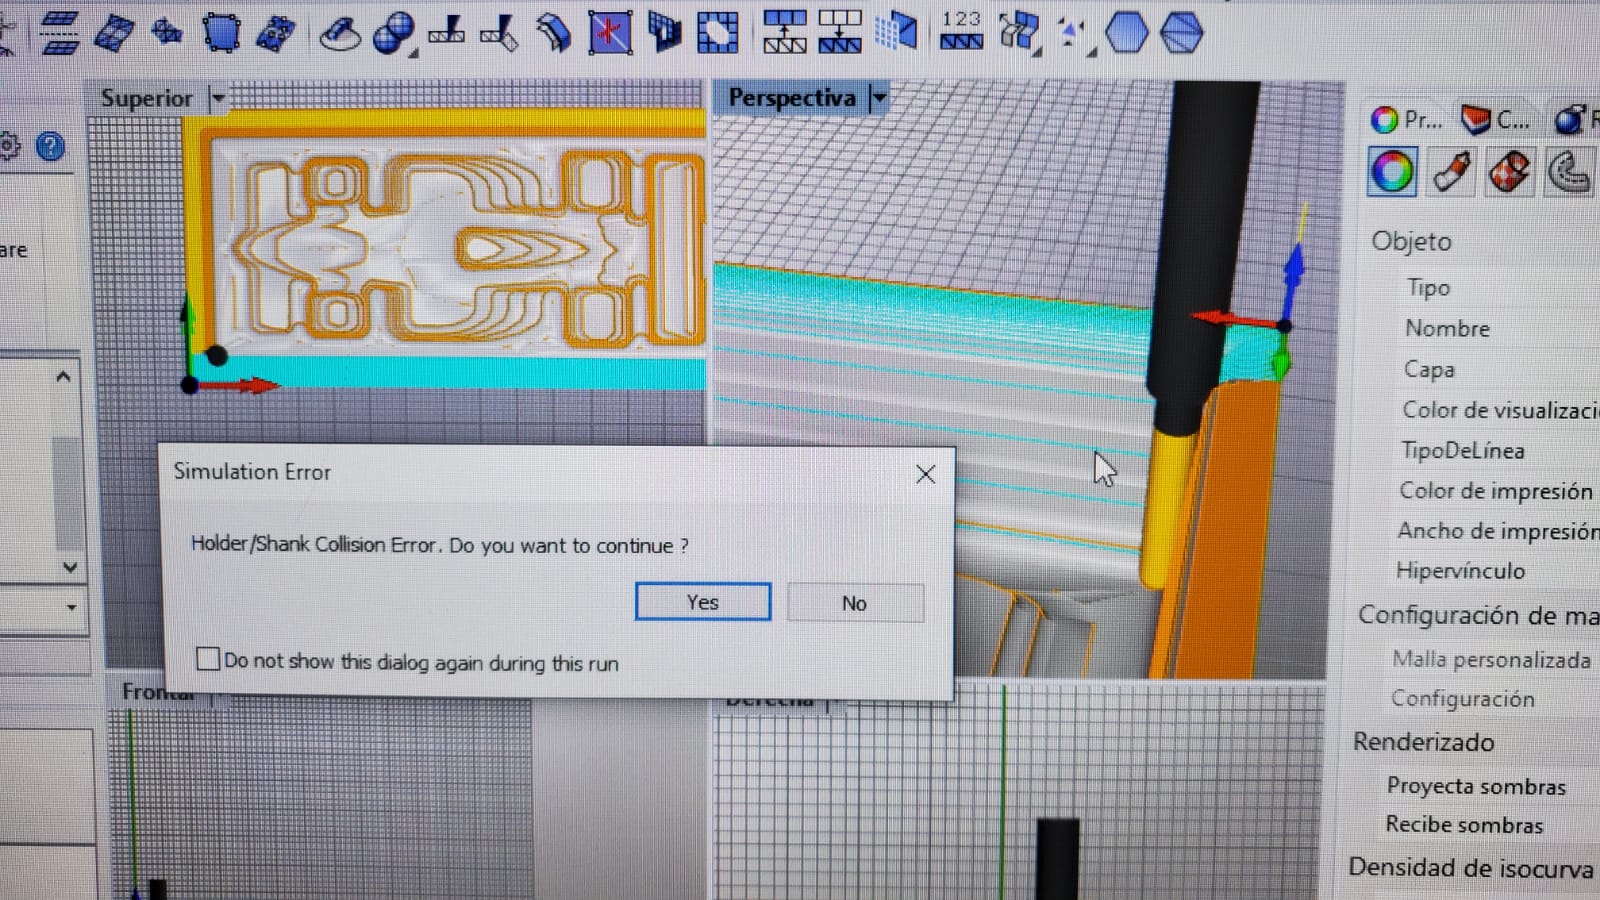
I had to modify the geometry three times, adding more and more angles, in order to avoid the collision. The problem here was that the endmill was very short, and the tip was 2 mm but the shank was 3 mm. That's why it collided. After the modification, we had no problems at all. Furthermore, with this little tool on a soft material like this you can mill at 6000 mm/min or even more!
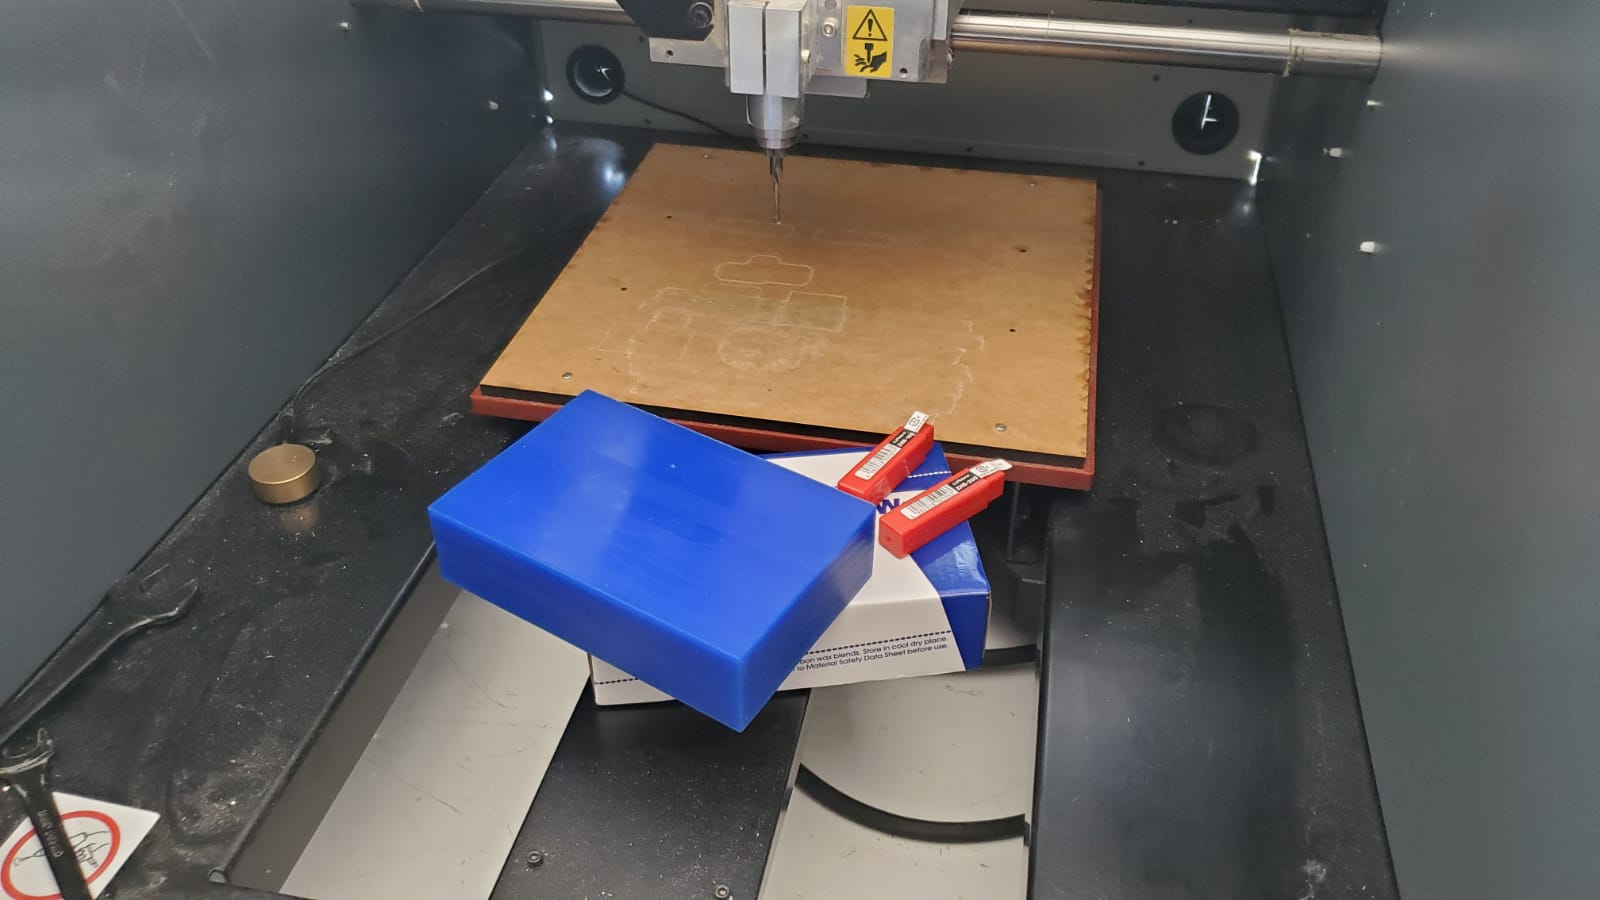
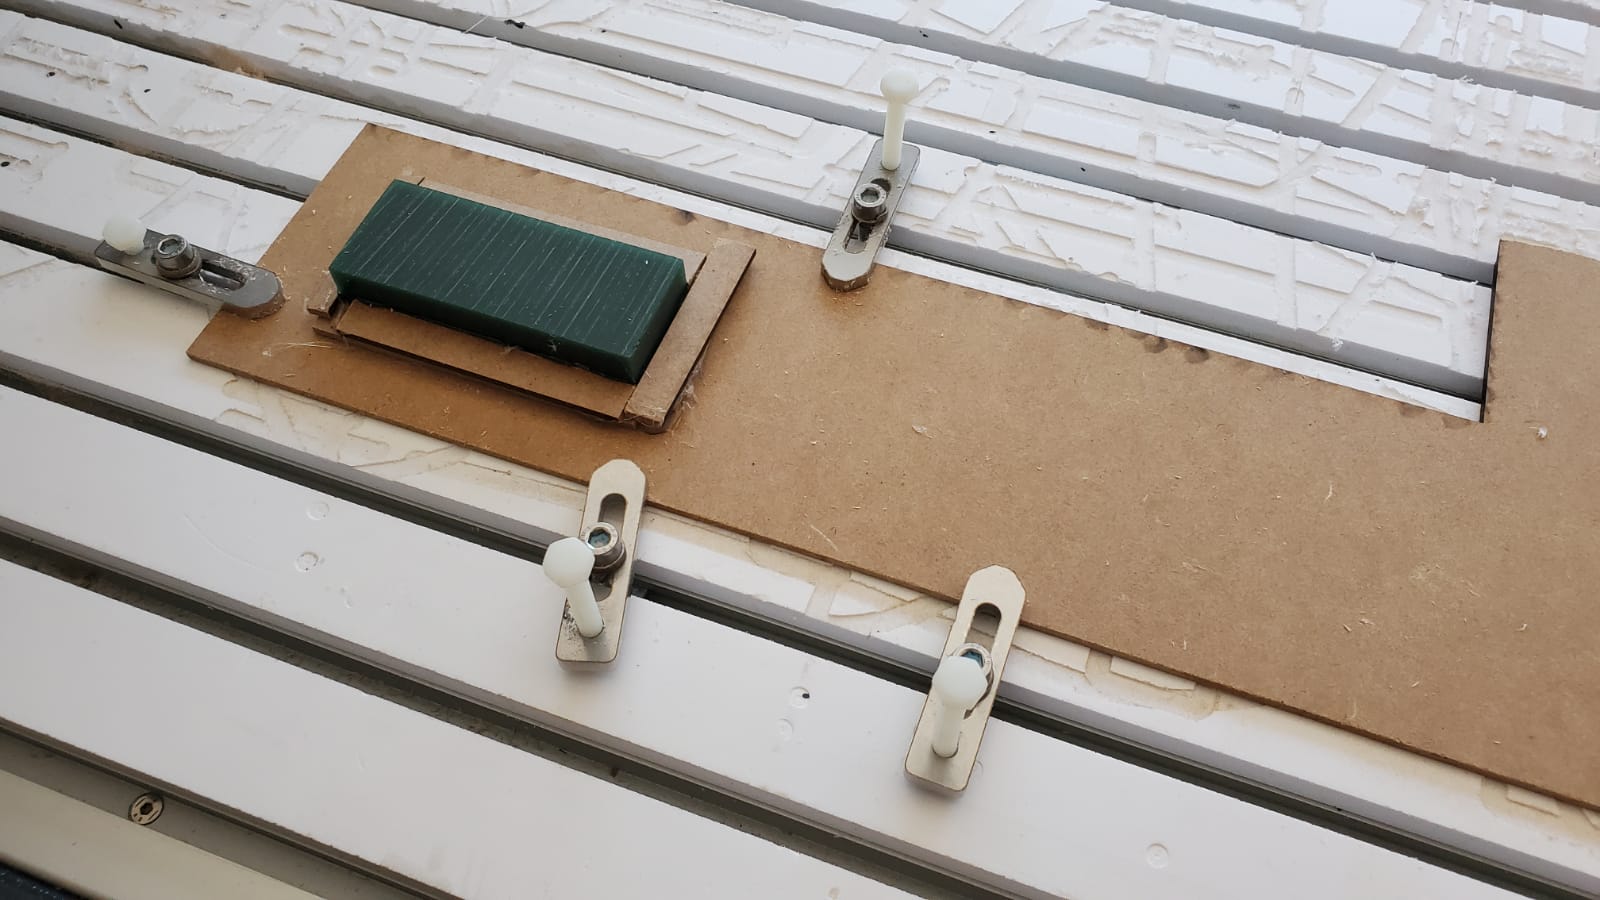
The next problem was how to hold the wax in place. I decided to fix it with double sided tape and hot glue to an MDF board, and I secured the MDF to the milling machine with clamps
The flat endmill let flat surfaces look very good
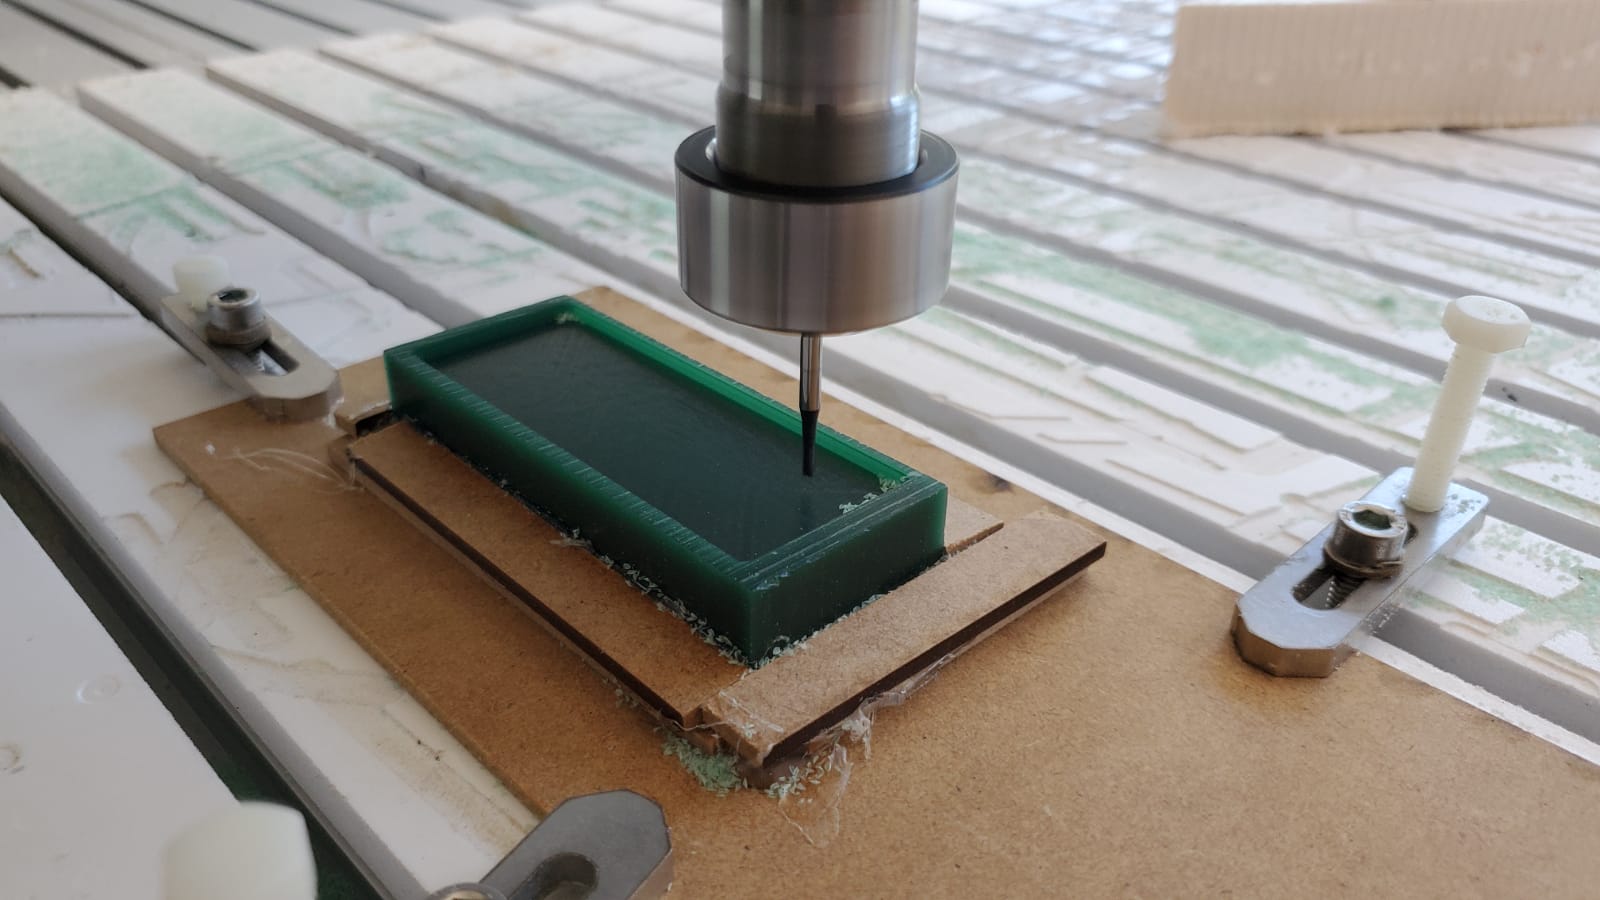
After 45 minutes of roughing, the wax looked like this:
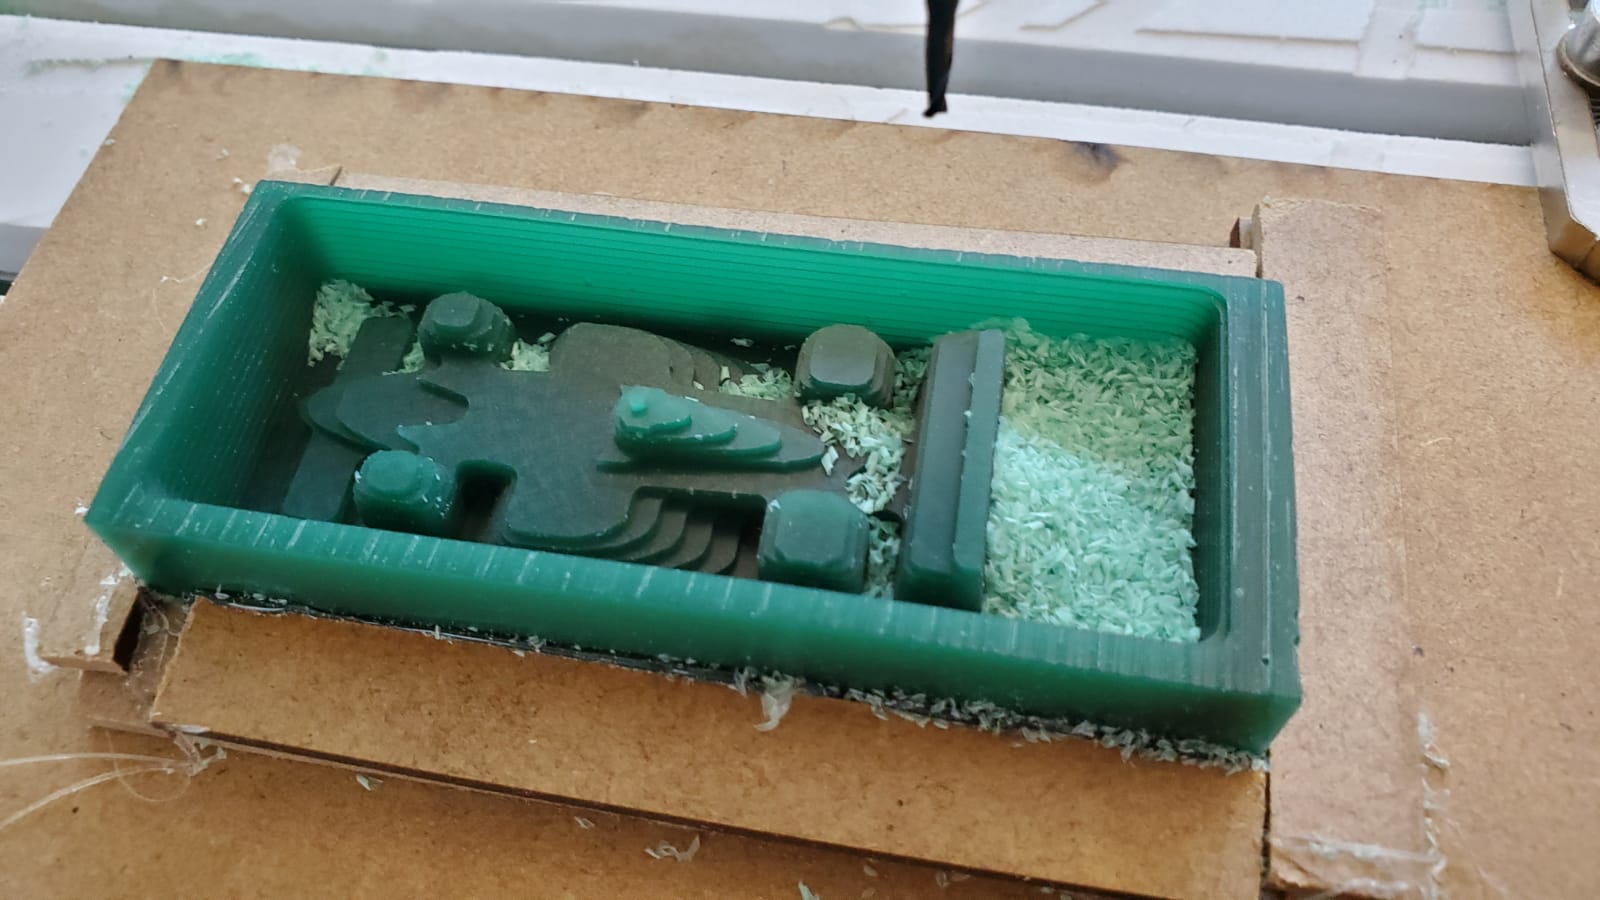
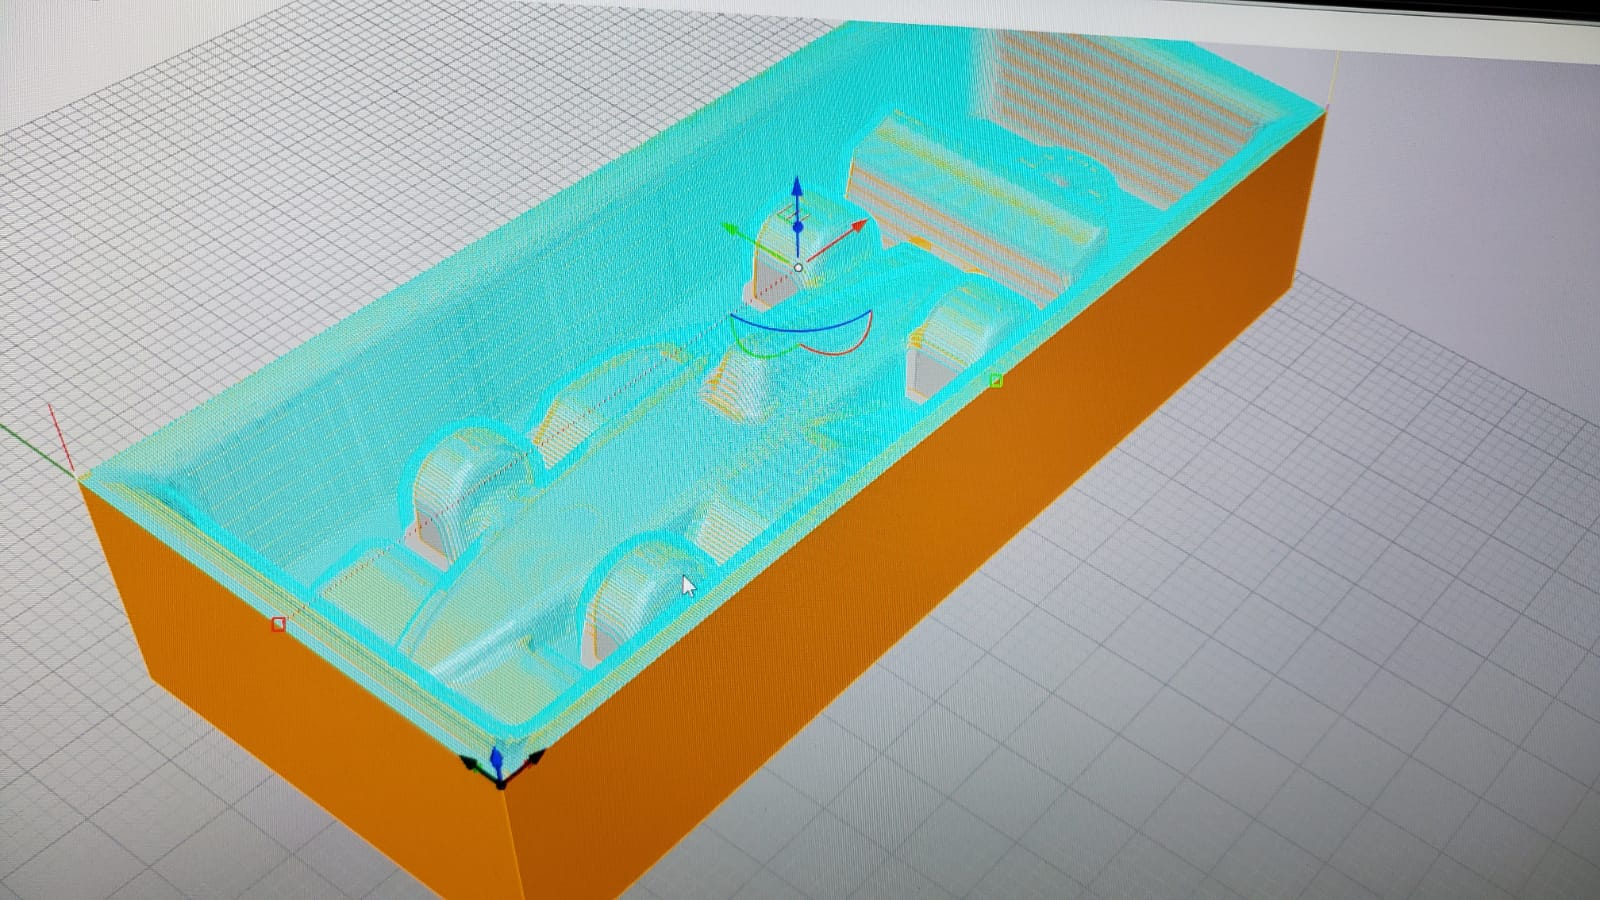
I went then for the firstparalel finishing. I was super happy with the result, but I found that some edges did not look so nice. I could either use a ball endmill, that I did not have, or another paralel finishing at 90 degrees. That's what I did

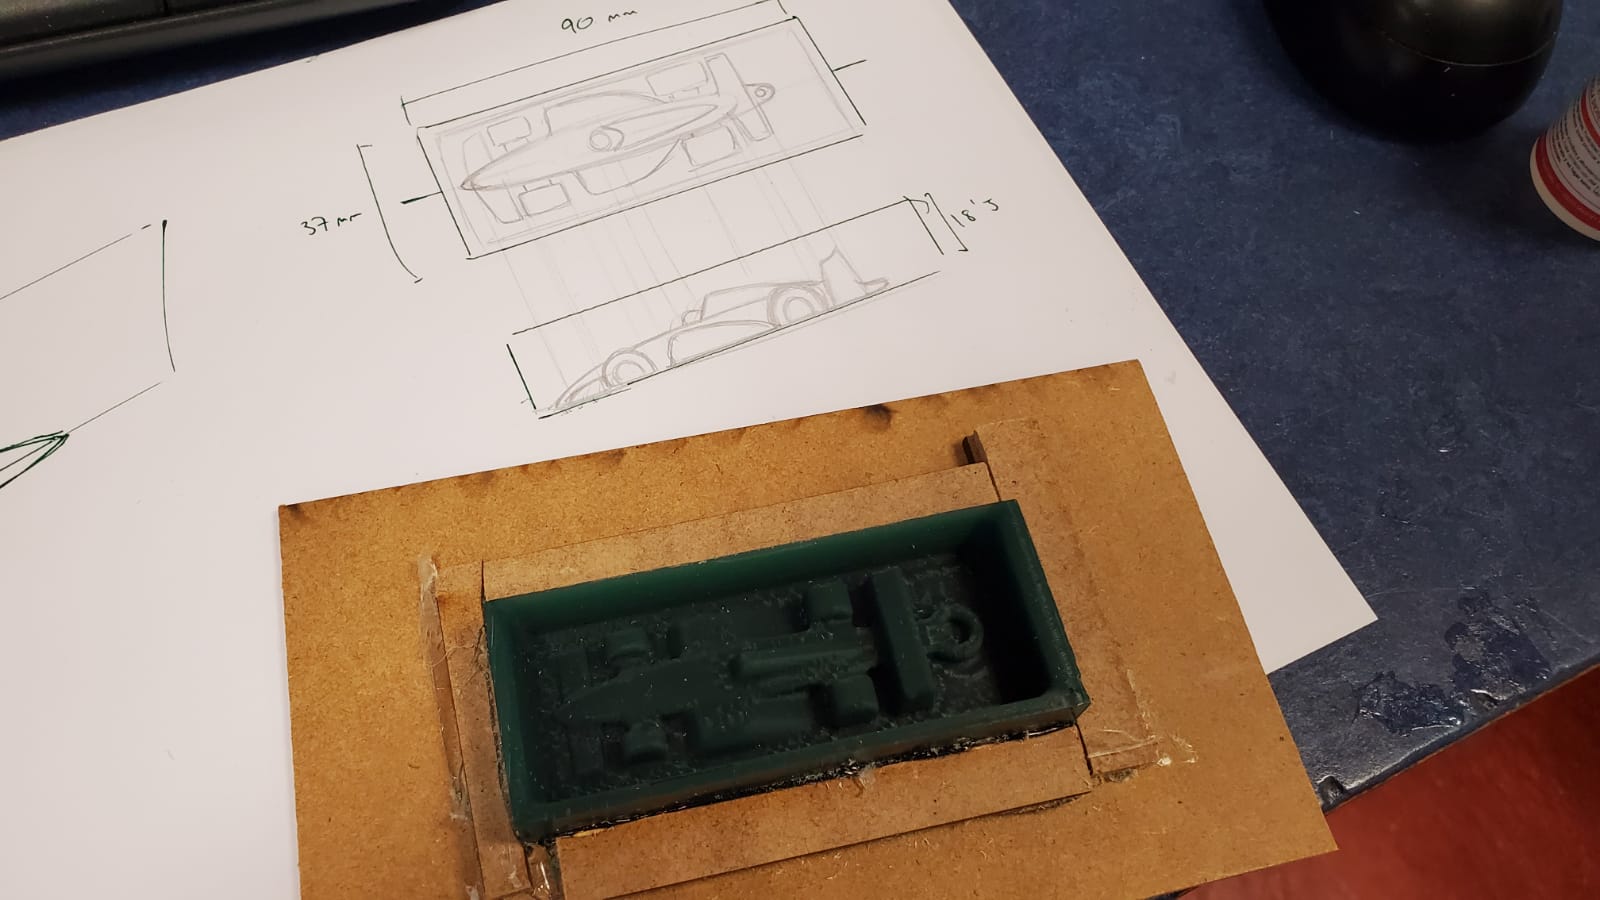
With the last finishing, I did not like the result all that much. The dimensions were nice, but some small chips came out of the wax block. Even if I ended up milling another one, this one was ready for the resin
Chapter four: danger time
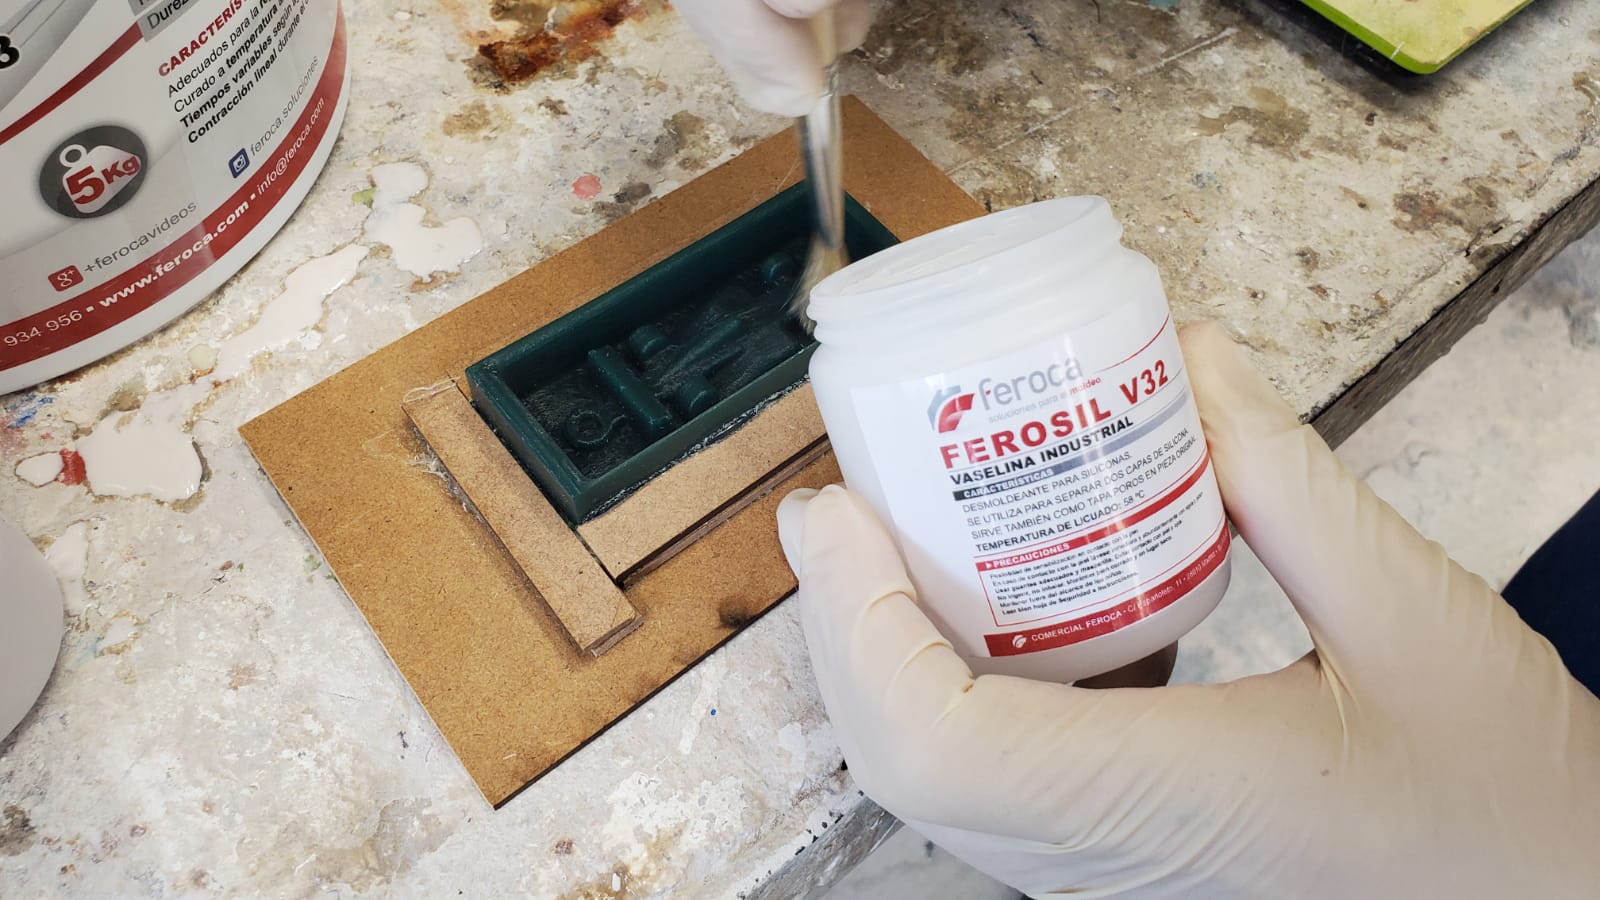
It was now time to do the most complicated bits of the process: mixing the silicons and pouring the hot metal. Arts lab master Miguel Carmona helped me with this process, that we repeated three times. It's also crucial that you read the safety datasheet of the products you're using. You can get the part A of this particular silicon HERE, and part B HERE.. Always follow the safety information!

First, we extend some vaseline on the mould with a brush
Then, we mixed the silicon with the catalyst
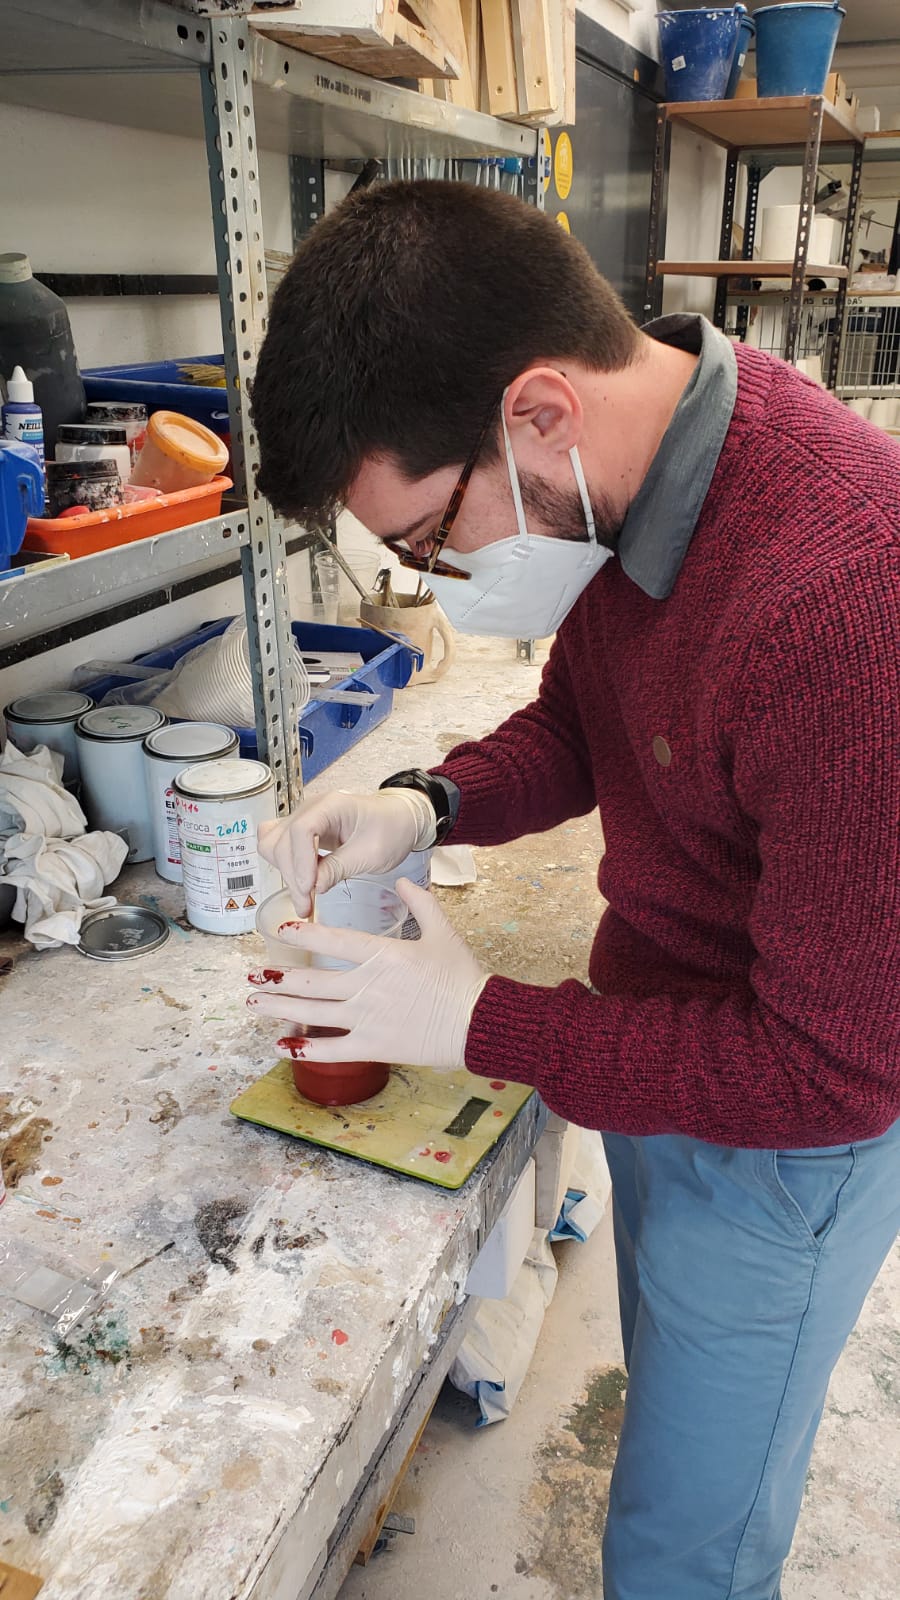
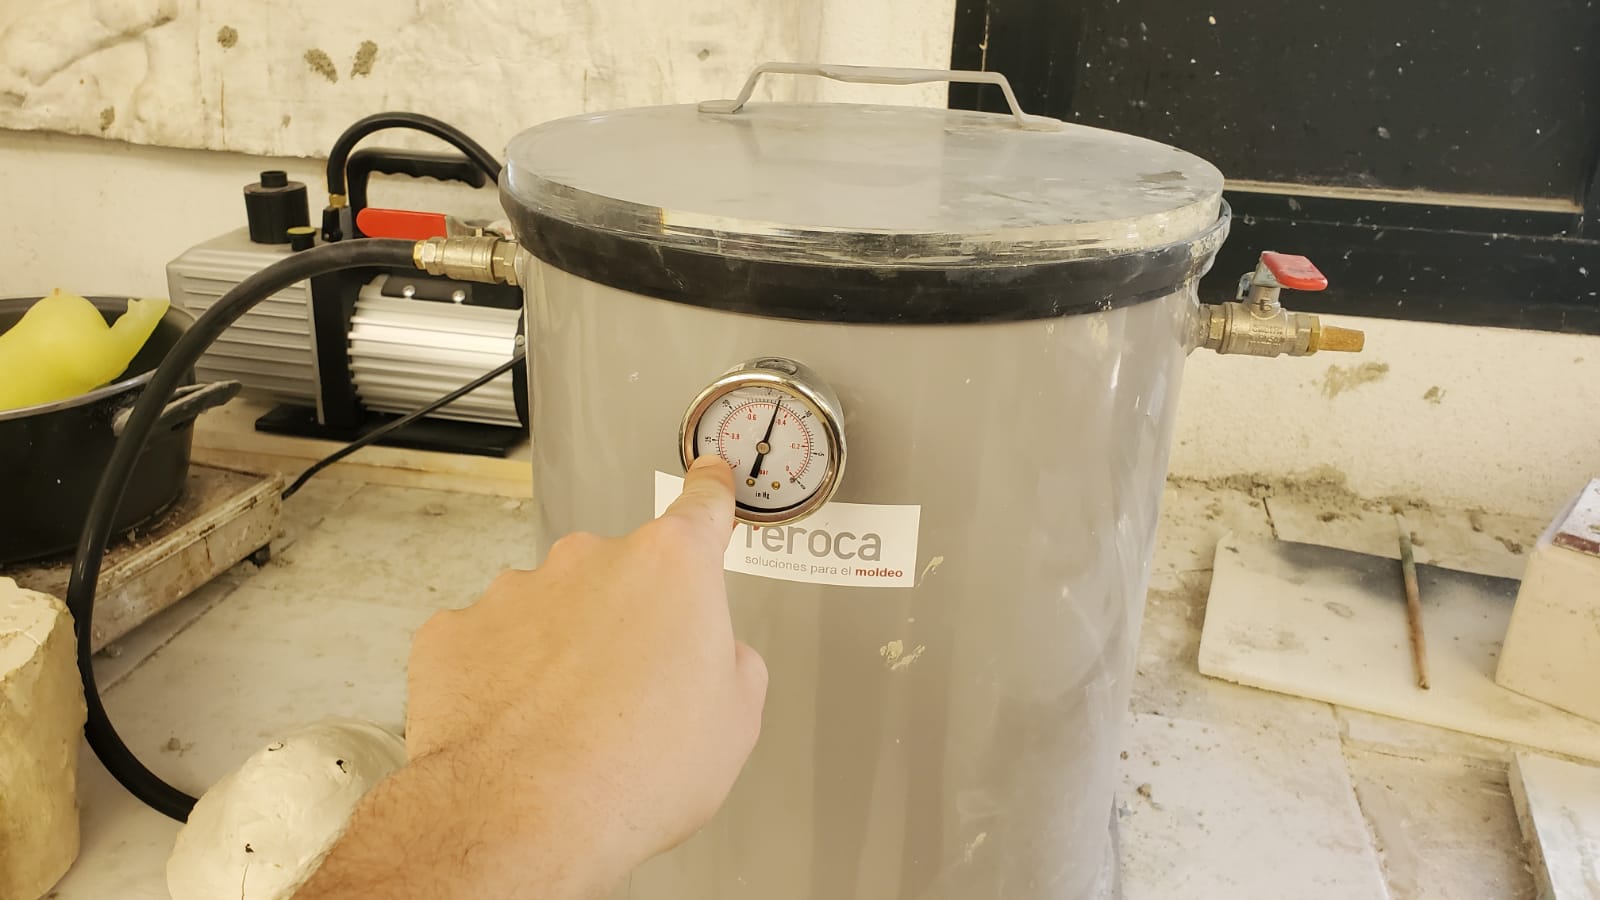
With this special silicon, it's mandatory to use the vacuum chamber to remove all the bubbles generated by the reaction
After 24 hours of curing, it's ready to remove it from the wax

I melt the metal with a blowtorch on the little spoon that came with the kit. Miguel told me not to use gloves, as they can be slippery. The spoon has a wooden part, so you don't burn your hands
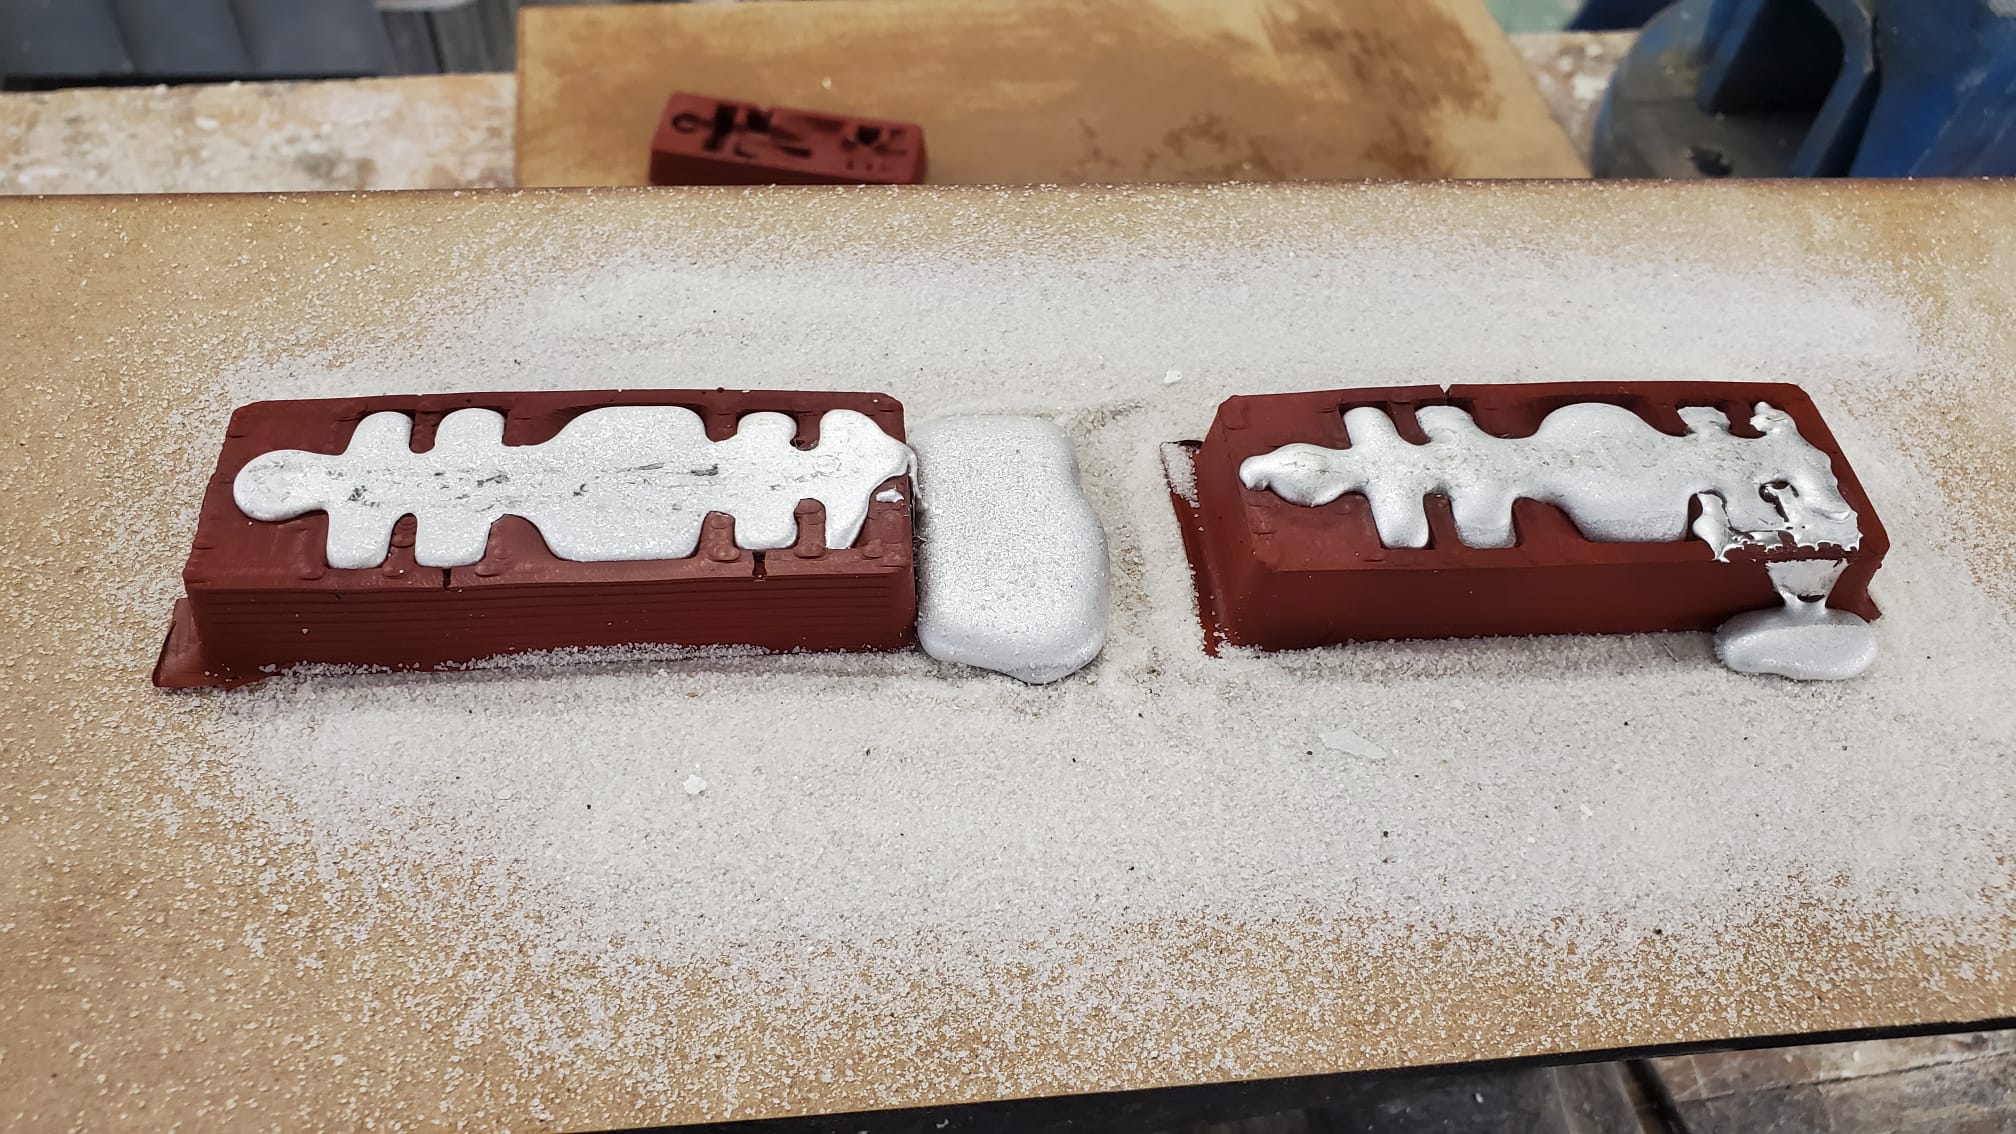
After pouring the metal, it should look like this
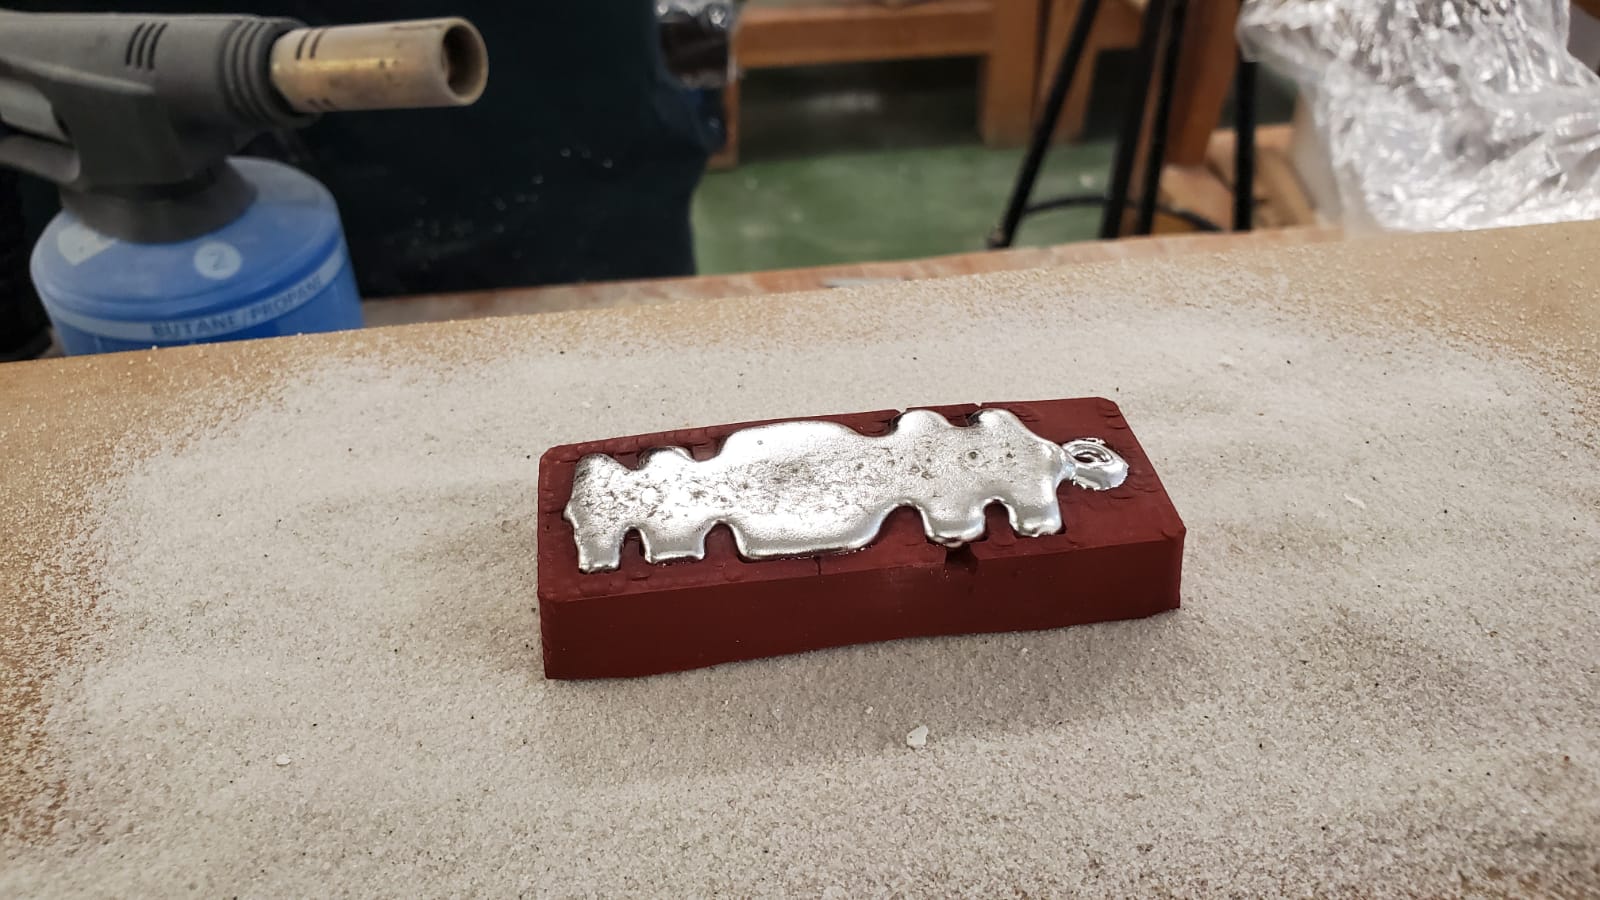
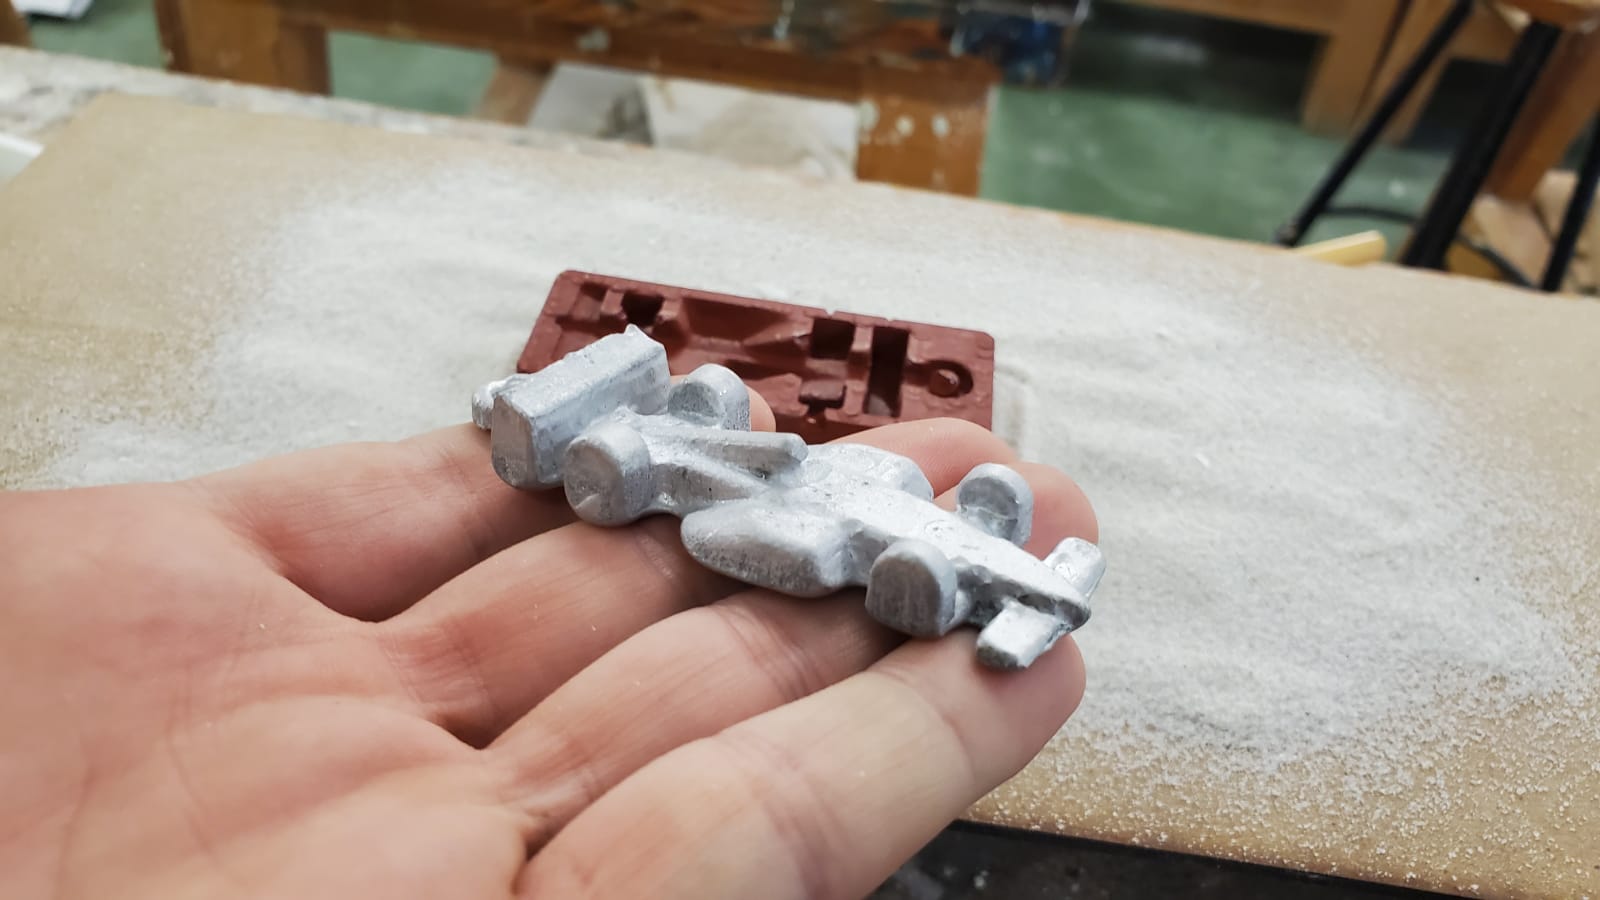
And this is how it does look out of the mould
Chapter five: producing and experimenting
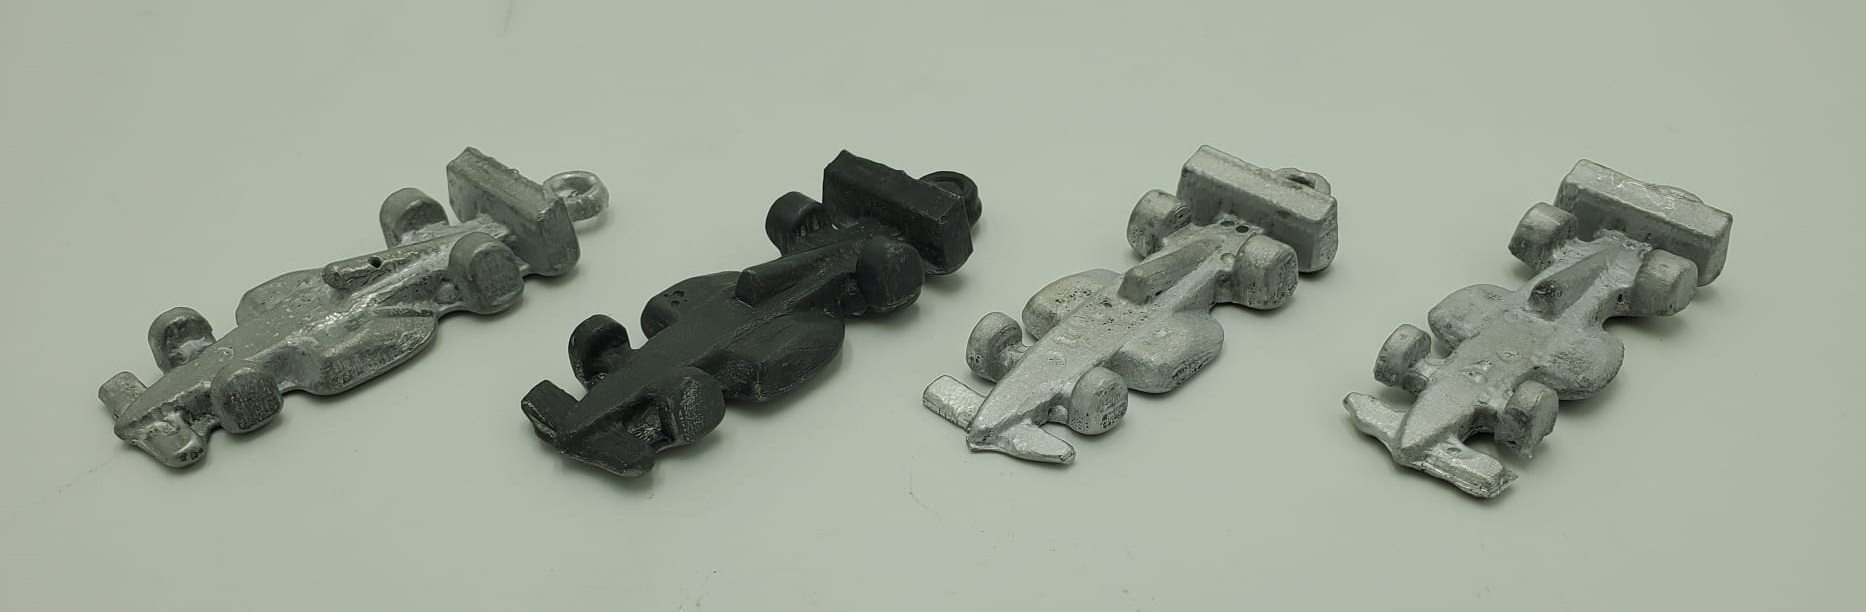
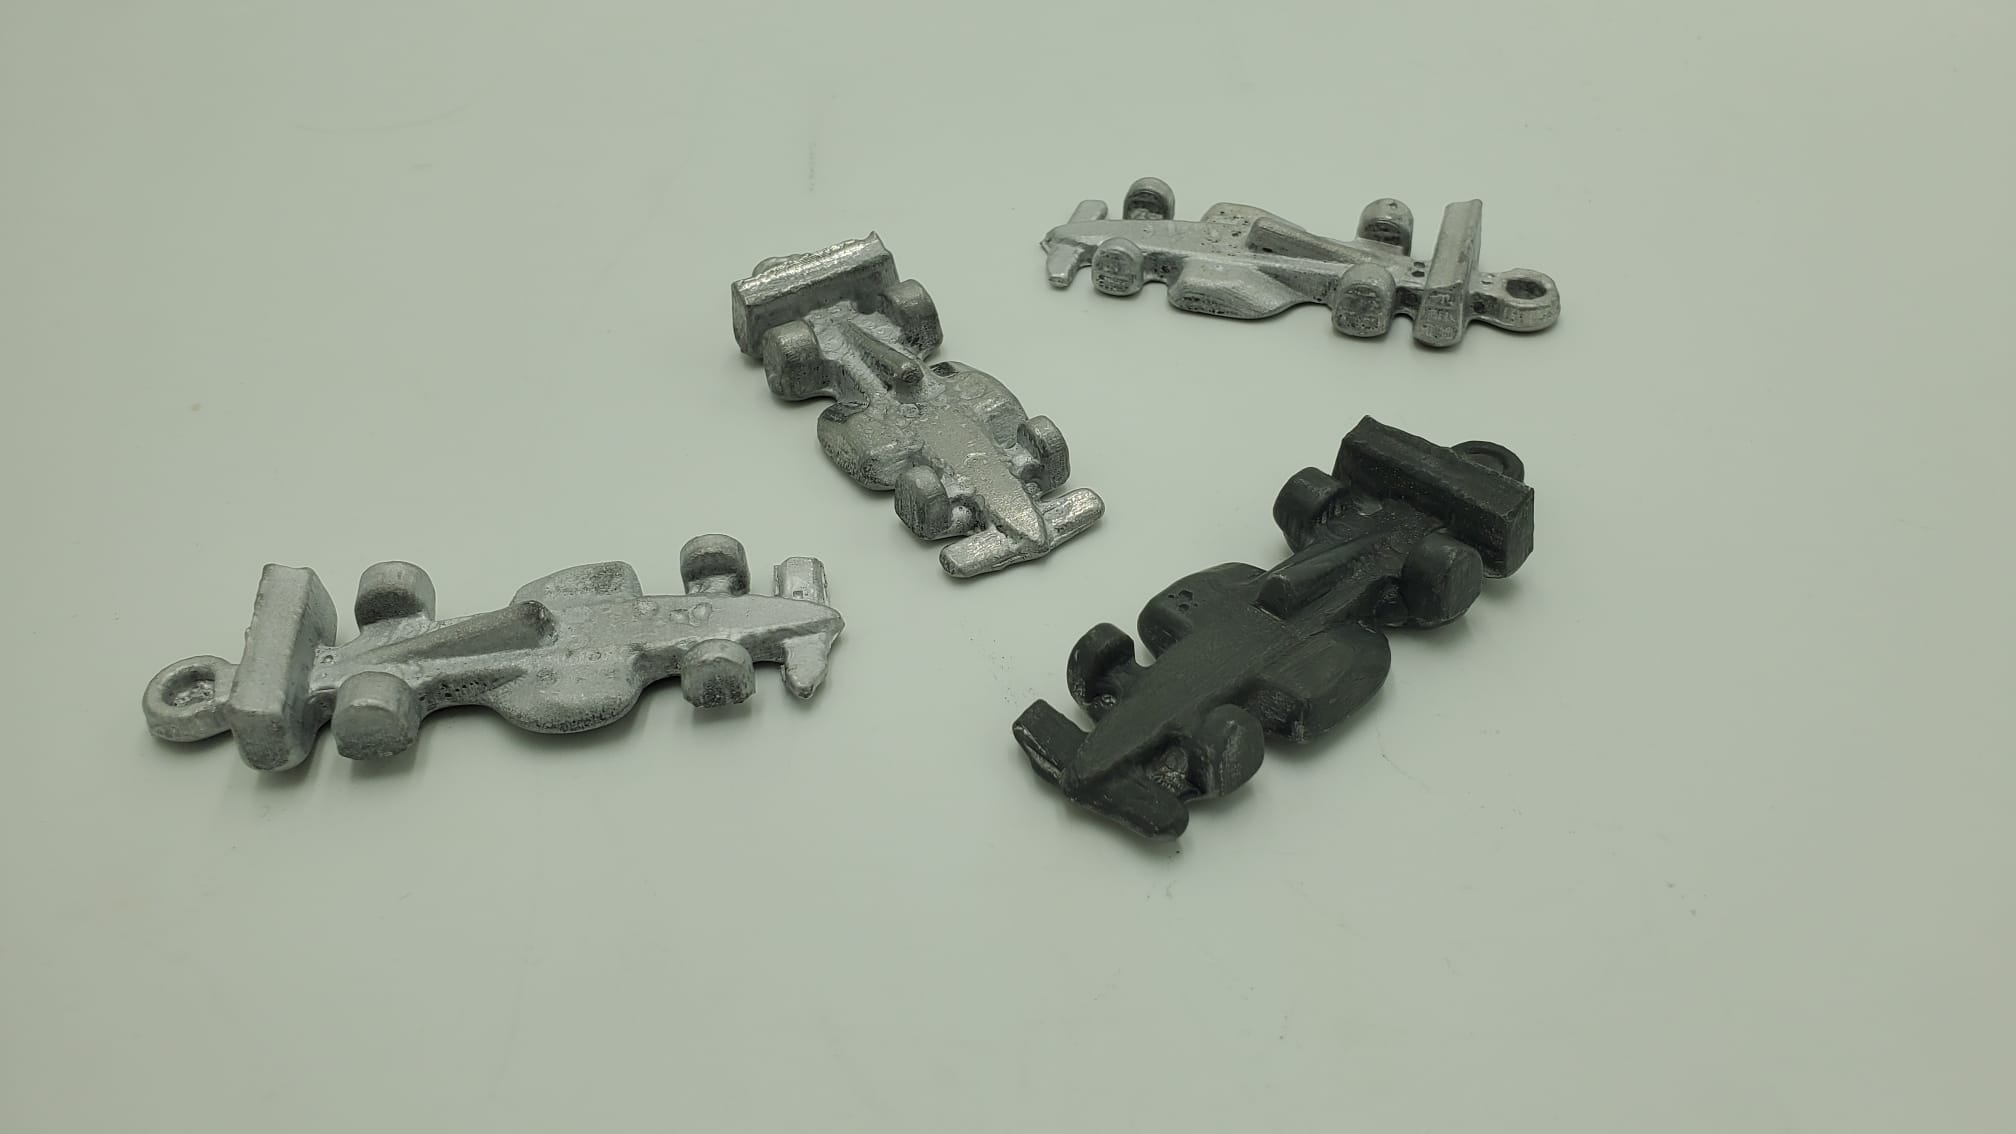
The following day, we had more silicon molds, so we could try to do more keychains and test different finishings of the metal.
Polishing with a Dremel brush gave the car a darker colour, while just scratching the body with the nail, gave the model a shiny look. I could not continue with the experiments as I run out of time, but I'd like to try to heat the mould first, just to see if the result could be a little bit better...
 I guess we will have to find out in the following casts. That's (sadly) all for this week. See you!