Computer Aided Design
Assignment Requirements:
- Model (raster, vector, 2D, 3D, render, animate, simulate, ...) a possible final project.
- Compress your images and videos.
- Post it on your class page.
Learning Outcomes:
- Evaluating and selecting 2D and 3D software.
- Demonstrating and describing processes used in modelling with 2D and 3D software.
Introduction
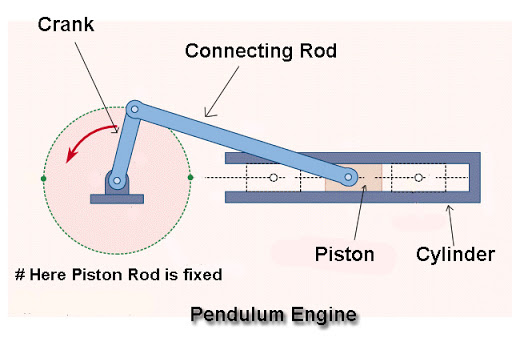
I really love mechanisms and how mechanical systems work, so I decided to design a Crank-Slider Mechanism which transforms the rotating motion into reciprocating/linear motion. The assembly of a piston, cylinder, connecting-rod and crankshaft is the classic form of the slider-crank mechanism where a slider crank transmits motion generated by the linear displacement of the piston by a working fluid to rotational motion of a shaft.
The mechanism consists of 4 elements, a base which is fixed to the ground, link 1 which rotates from 0 to 360 degrees, link 2 which connects link 1 with the slider, a slider which moves along the base generating the linear movement. I will be using GIMP to make a draft for the mechanism, Inkscape for sketching the parts in 2D, XDesign for the 3d modelling and Fusion 360 for assembly, rendering, animating and simulating the mechanism.

Steps in General:
- Step(1): Sketching the mechanism using GIMP
- Step(2): Designing links, base and slider using XDesign
- Step(3): Assembling, rendering, animating and simulating the mechanism using Fusion 360
- Step(4): Sketching the final project using CorelDraw
Steps in Details:
Step(1): Sketching the mechanism on GIMP
- GIMP is an acronym for GNU Image Manipulation Program. It is a freely distributed program for such tasks as photo retouching, image composition and image authoring. It has many capabilities, it can be used as a simple paint program, an expert quality photo retouching program, an online batch processing system, a mass production image renderer, an image format converter, etc.
- Downloaded and installed GIMP
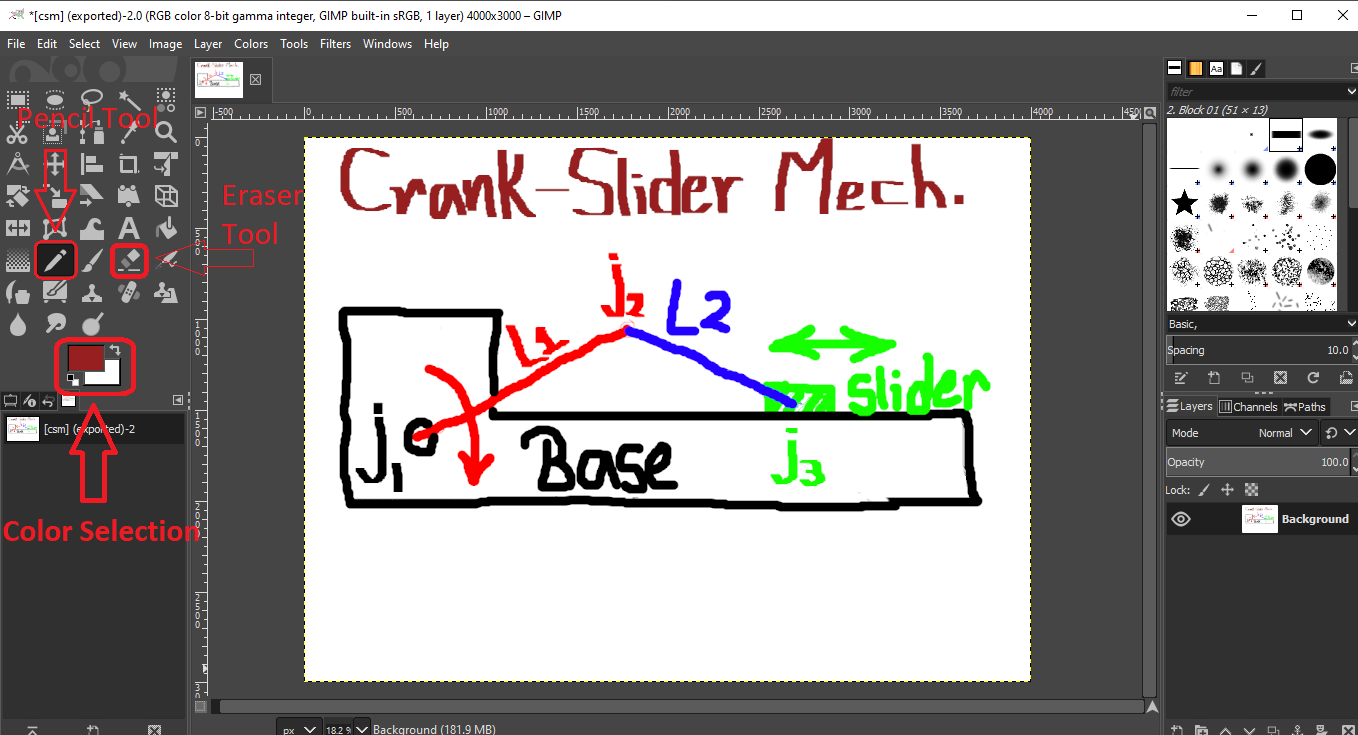
- From the File menu, selected New to create a new image
- Used the Pencil Tool with colors to draw the main parts of the mechanism
- Used the Eraser Tool to erase and delete unwanted lines or curves
Step(2): Designing links, base and slider on XDesign
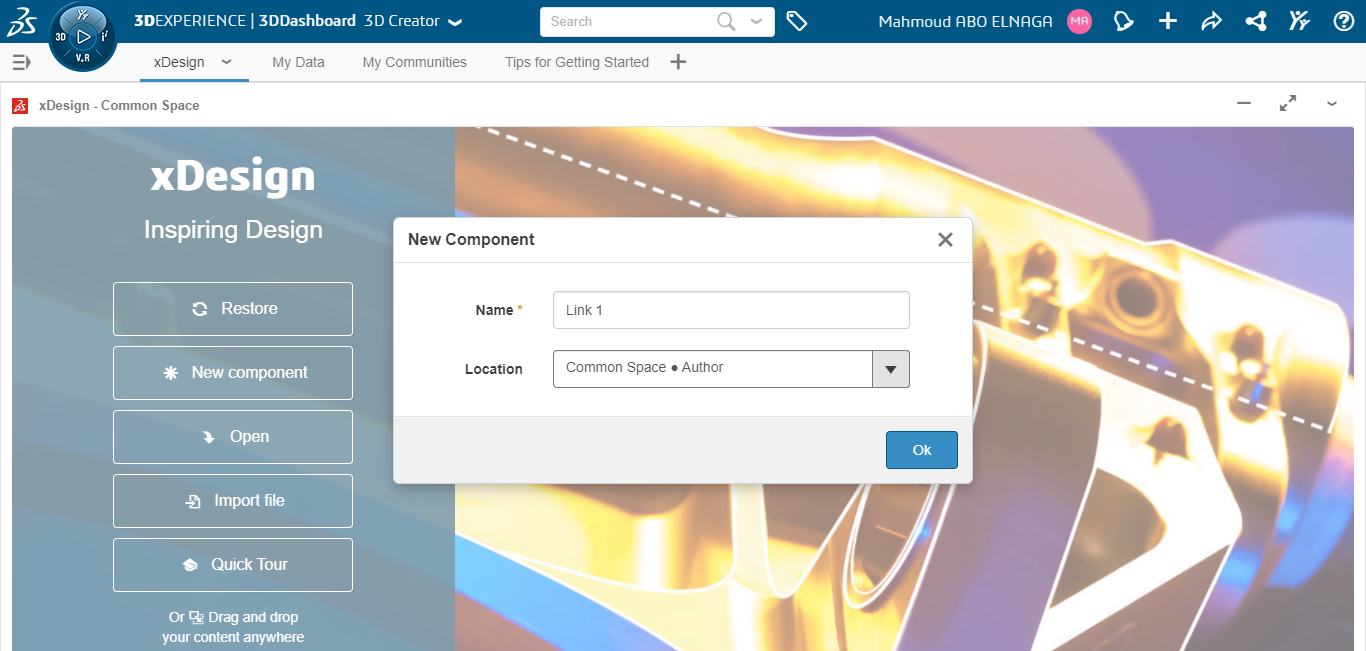
- Opened the XDesign on a browser, created and account and then created a new component called Link 1
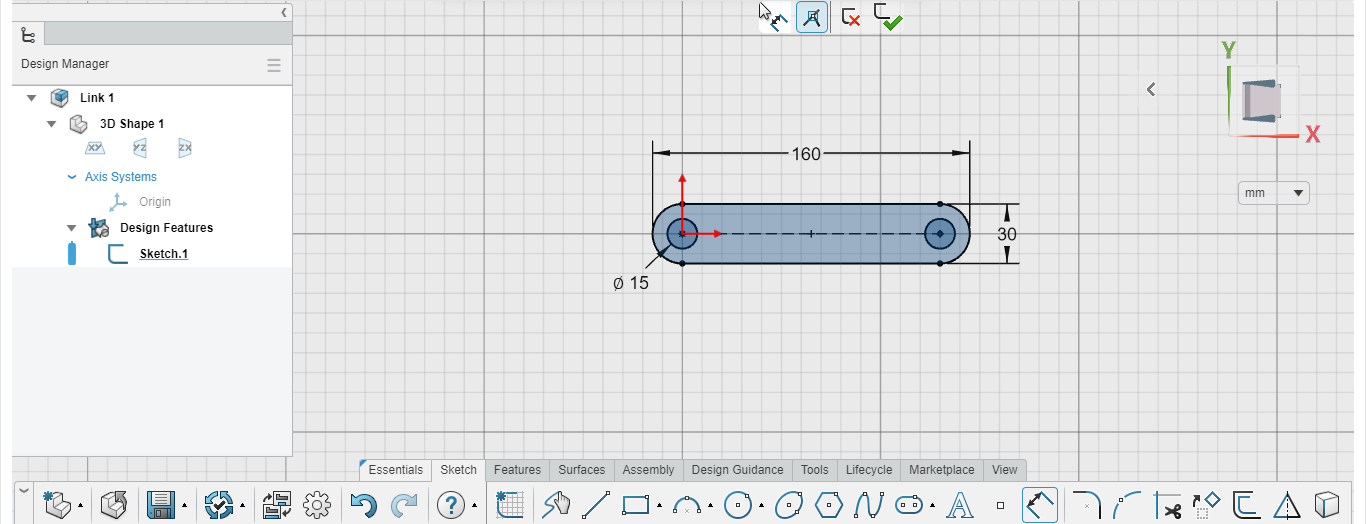
- Drawed a slot with 160 mm length and 30 mm height and made 2 holes of 15 mm diameter as shown
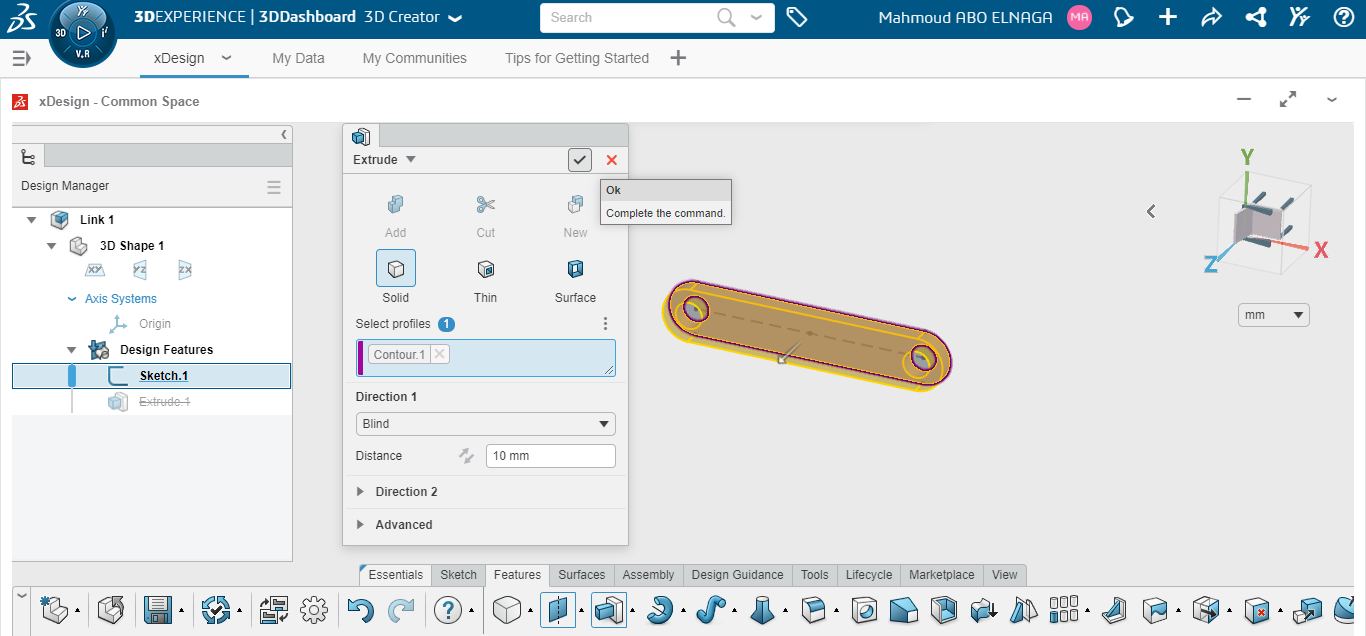
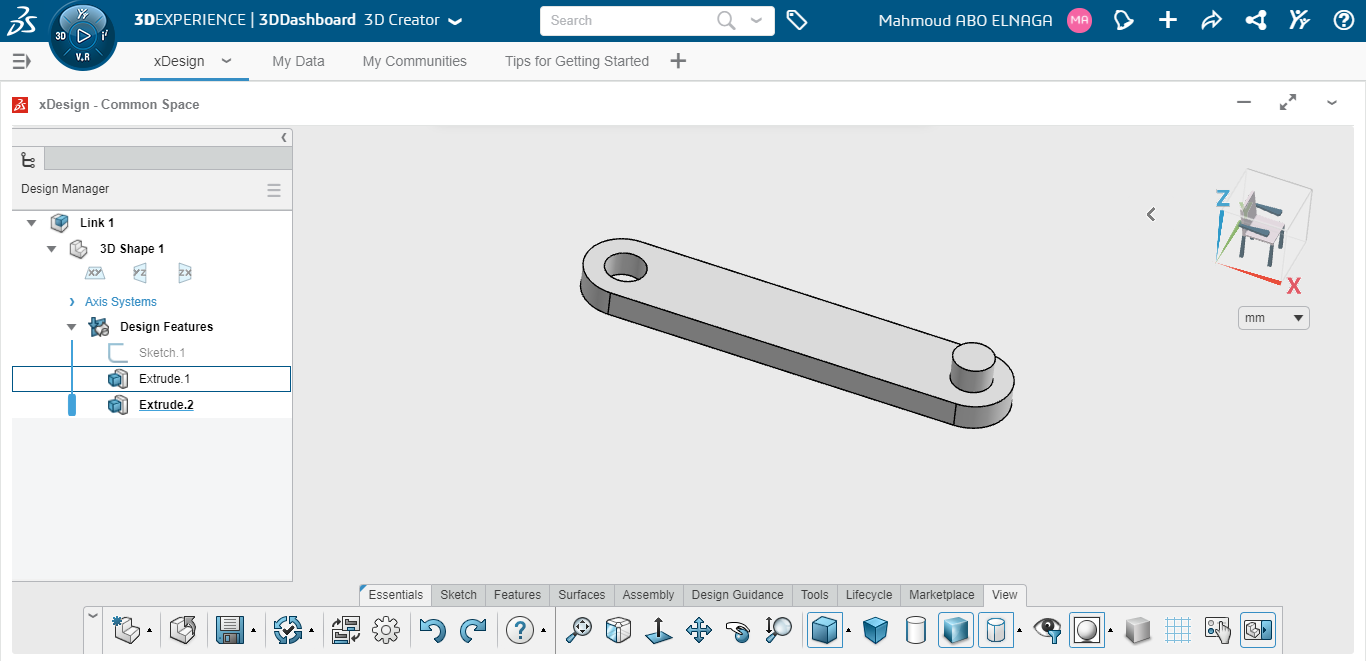
- Used the Extrude command to add a 10 mm thichness to the link and then pressed ok.
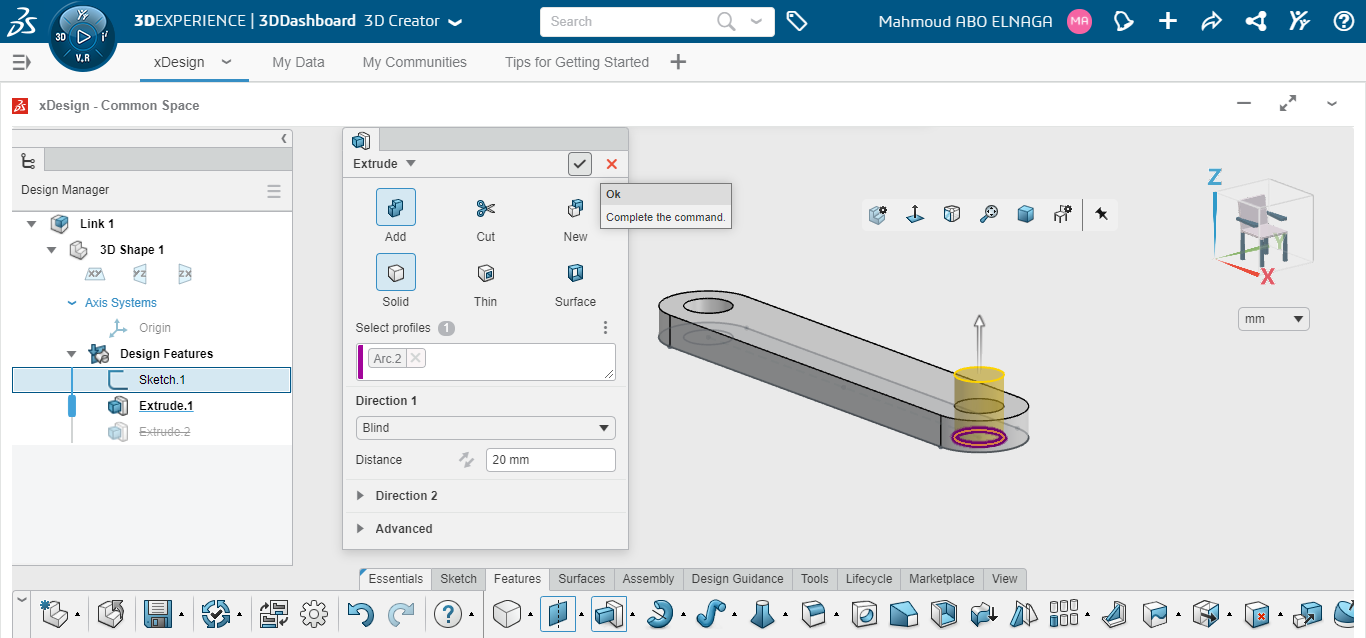
- Used the Extrude command again to make a joint pin of 20 mm height. This pin will be used while assembling link 2 with link 1.
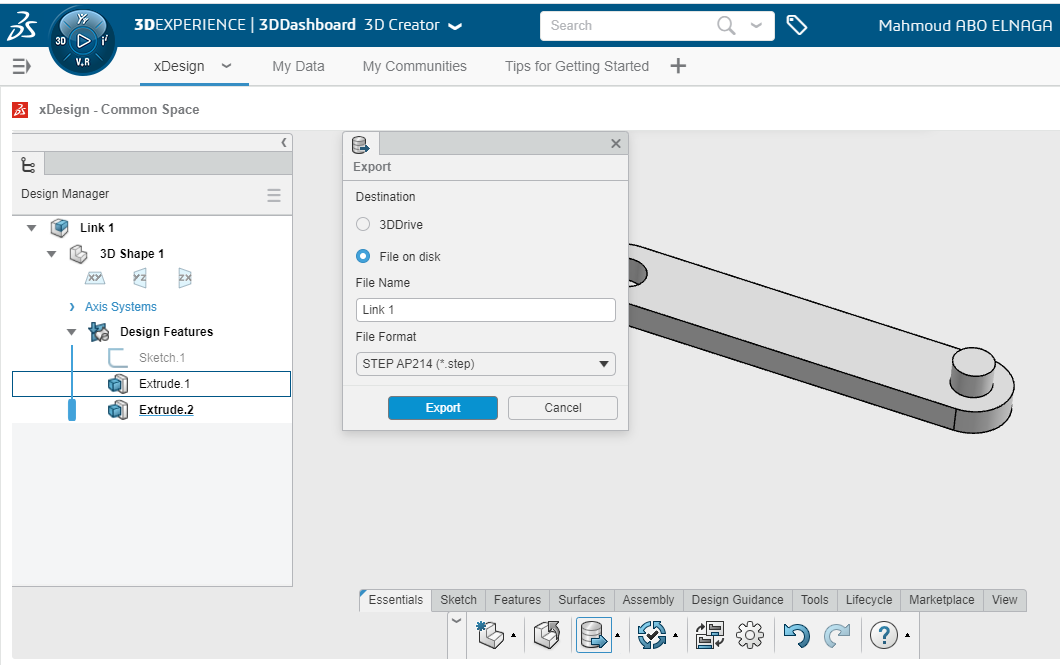
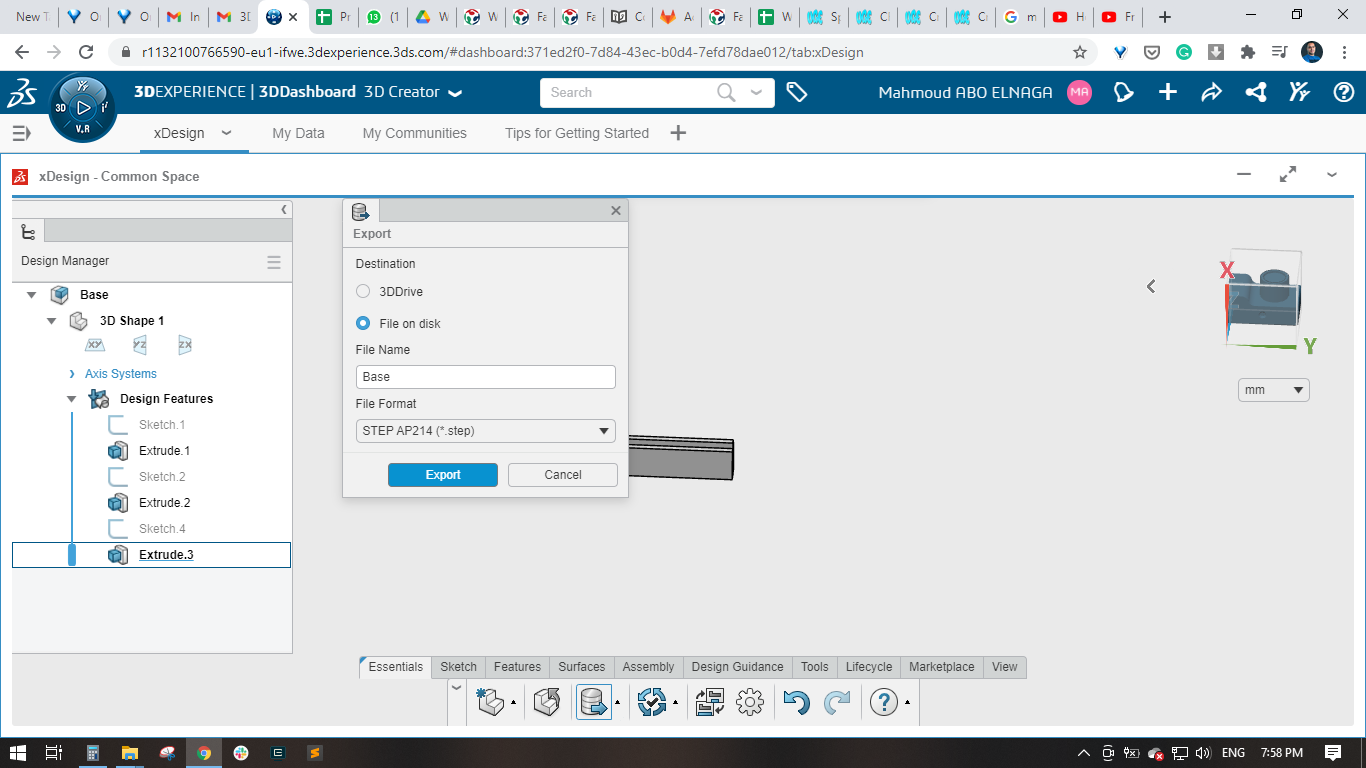
- Now! I finished modelling of link 1 and exported it as .step file. This format is suitable when importing the link in Fusion 360 or any 3d modelling software.
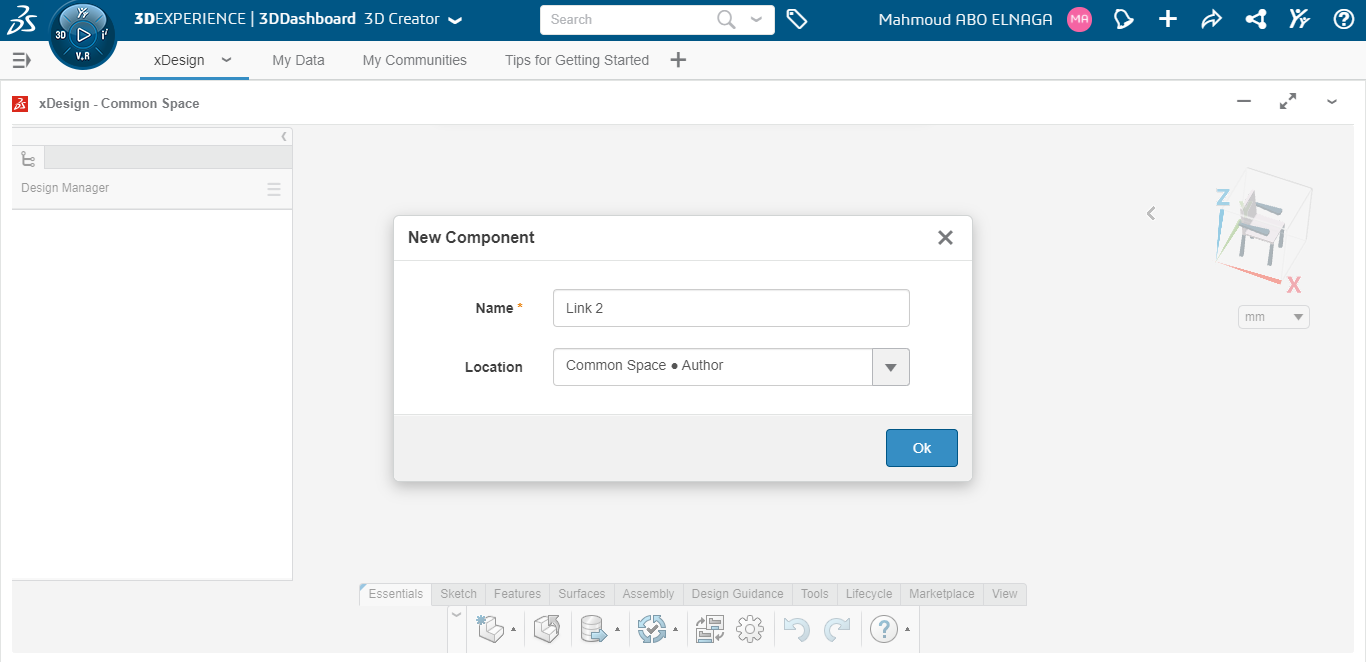
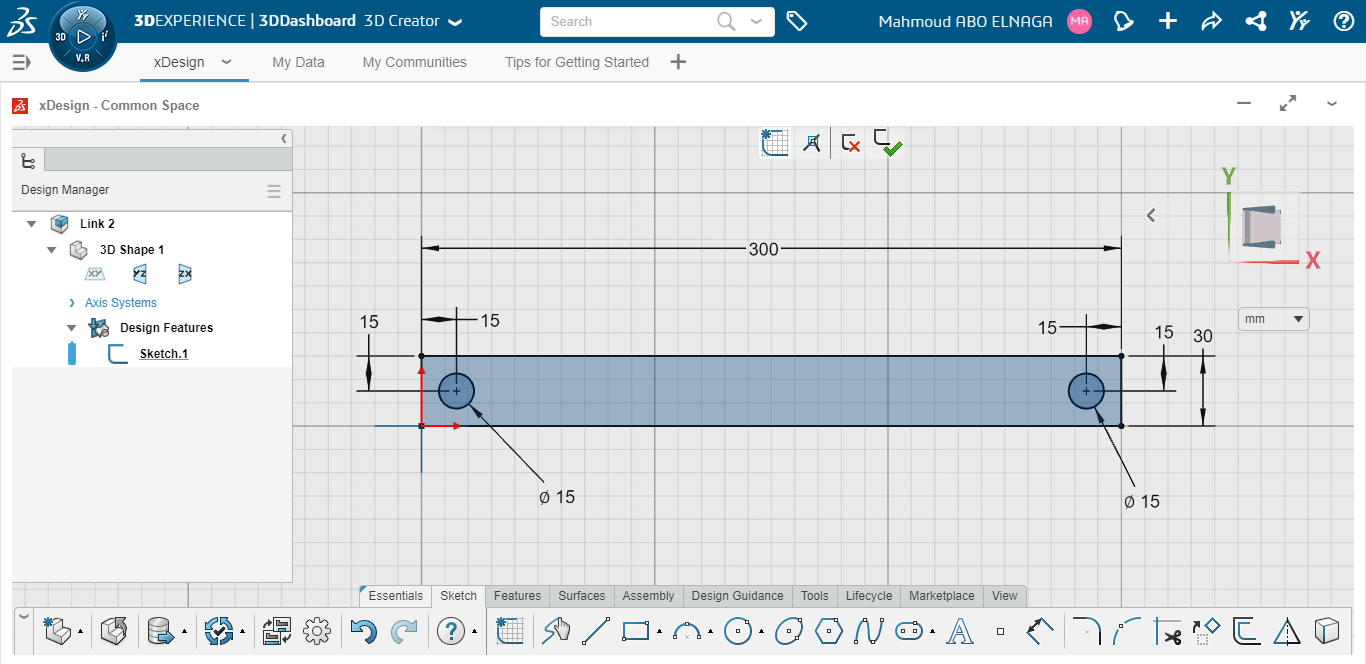
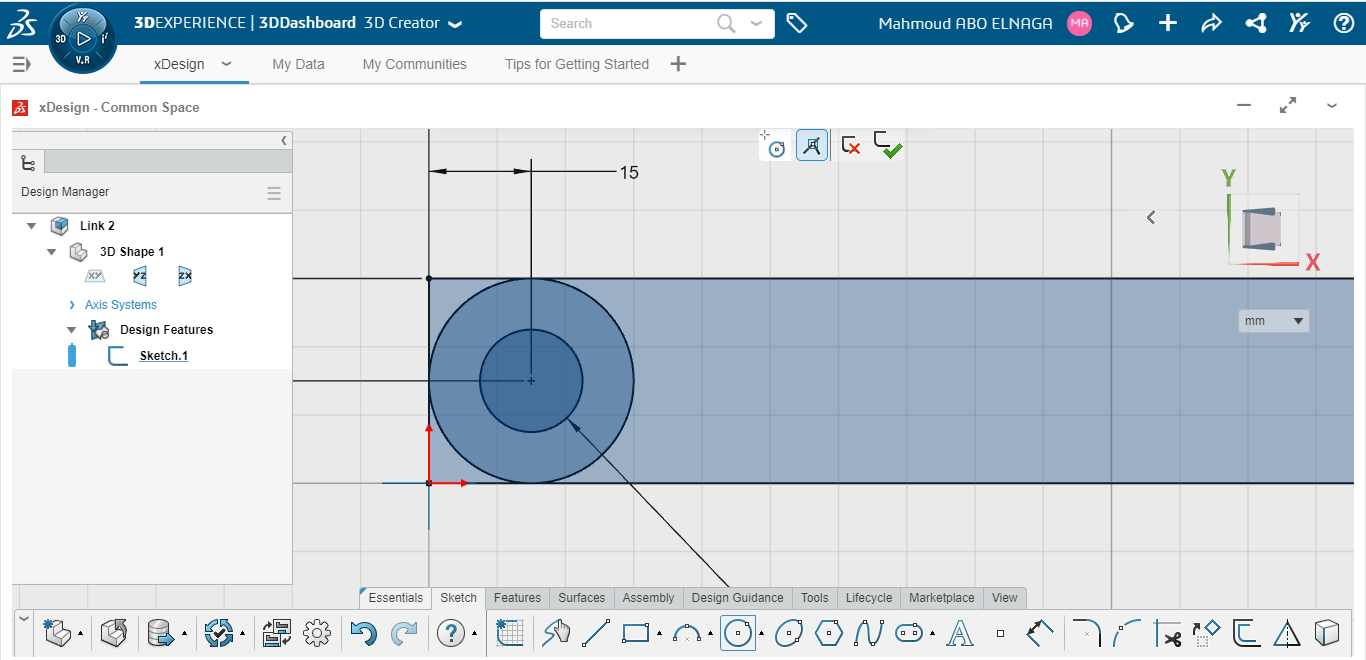
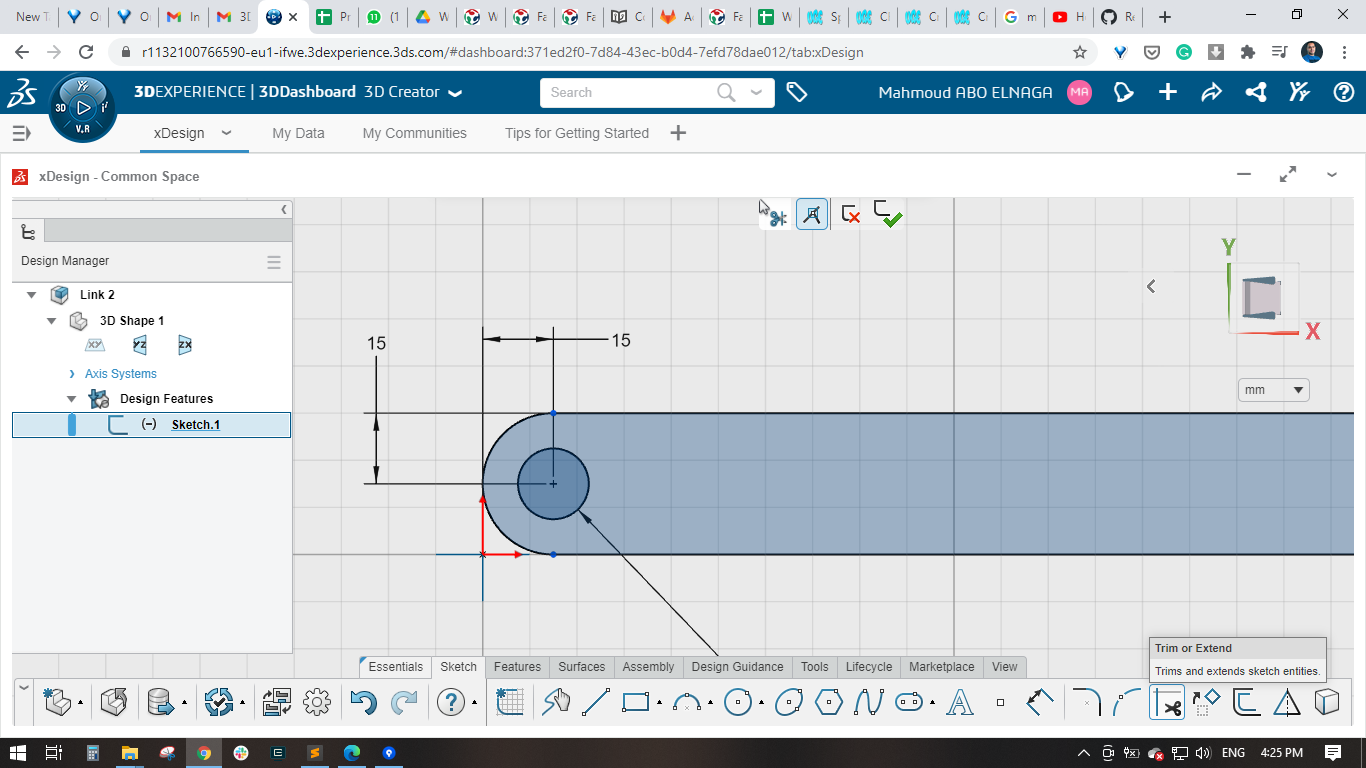
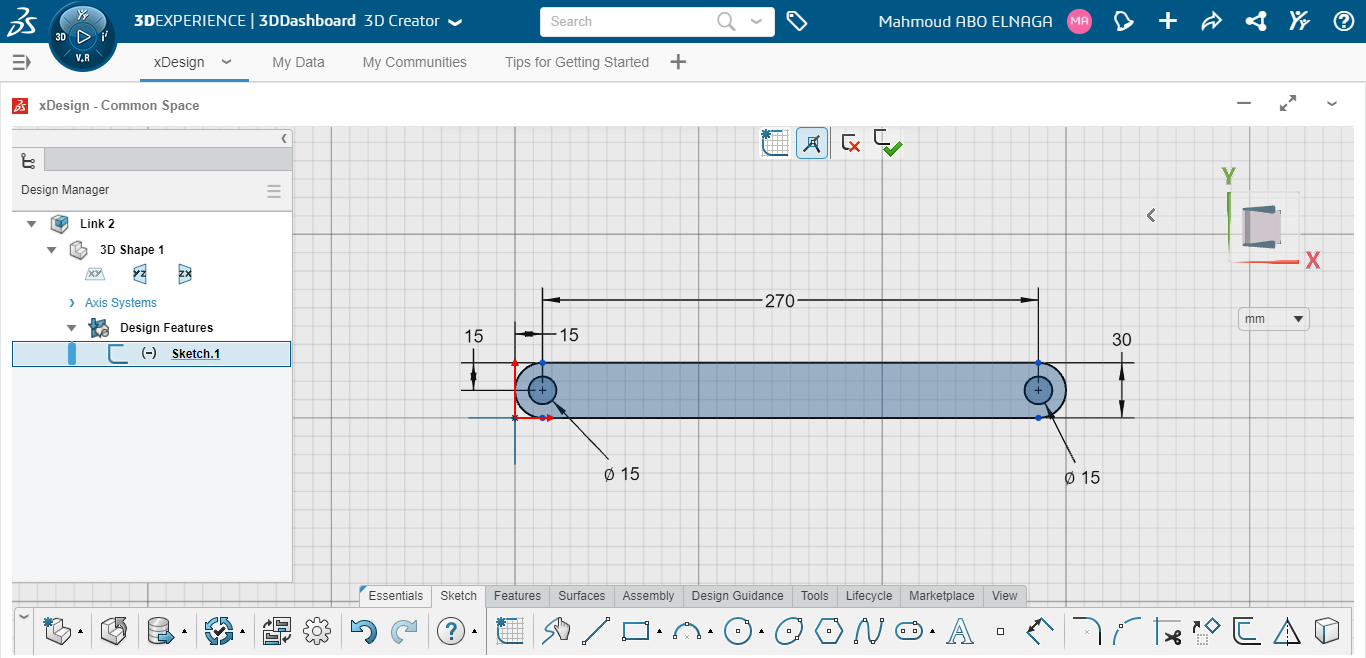
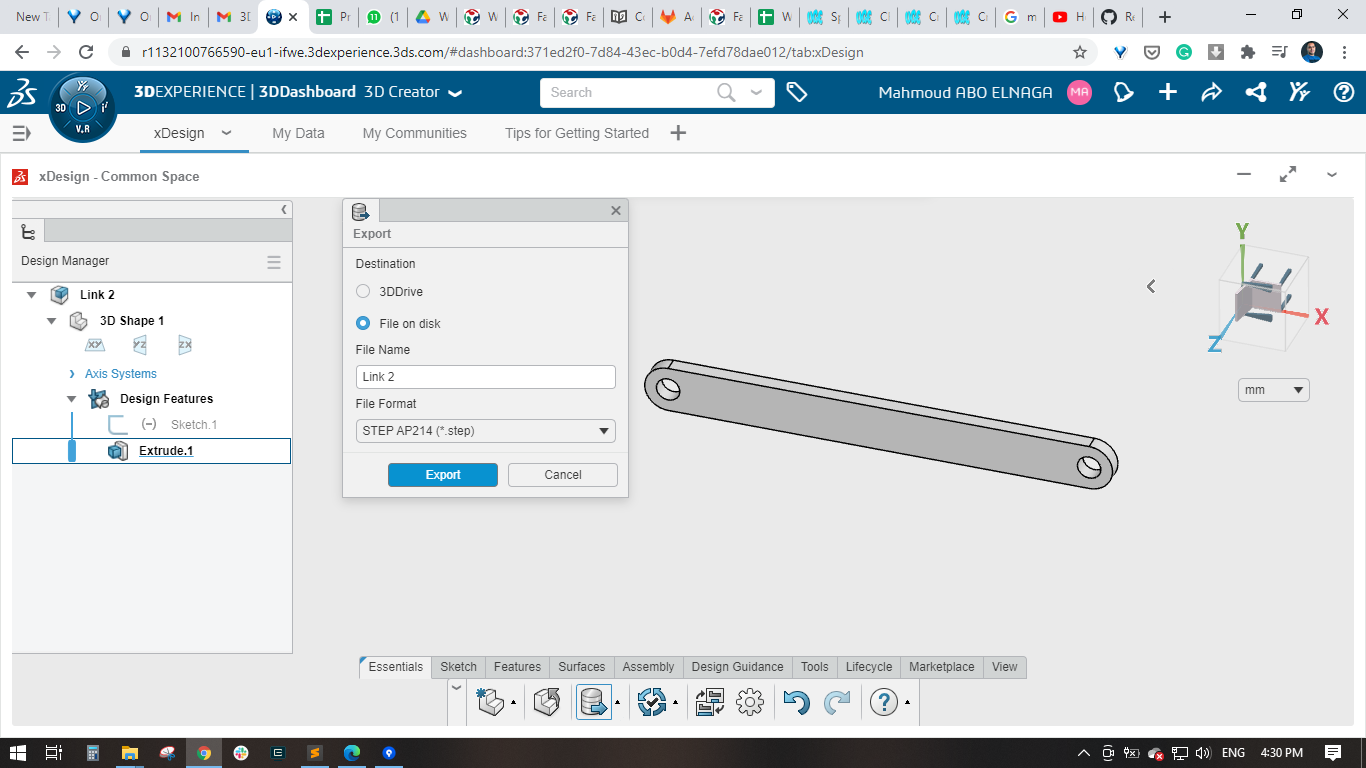
- Created a new component Link 2, drawed a rectangle (300 mm * 30 mm) and made 2 circles of 15 mm diameter at the end of each side with spacing of 15 mm as shown
- Drawed another 2 circles of 30 mm to make rounded edges instead on sharp corners, and used the trim tool to cut the unwanted lines and curves.
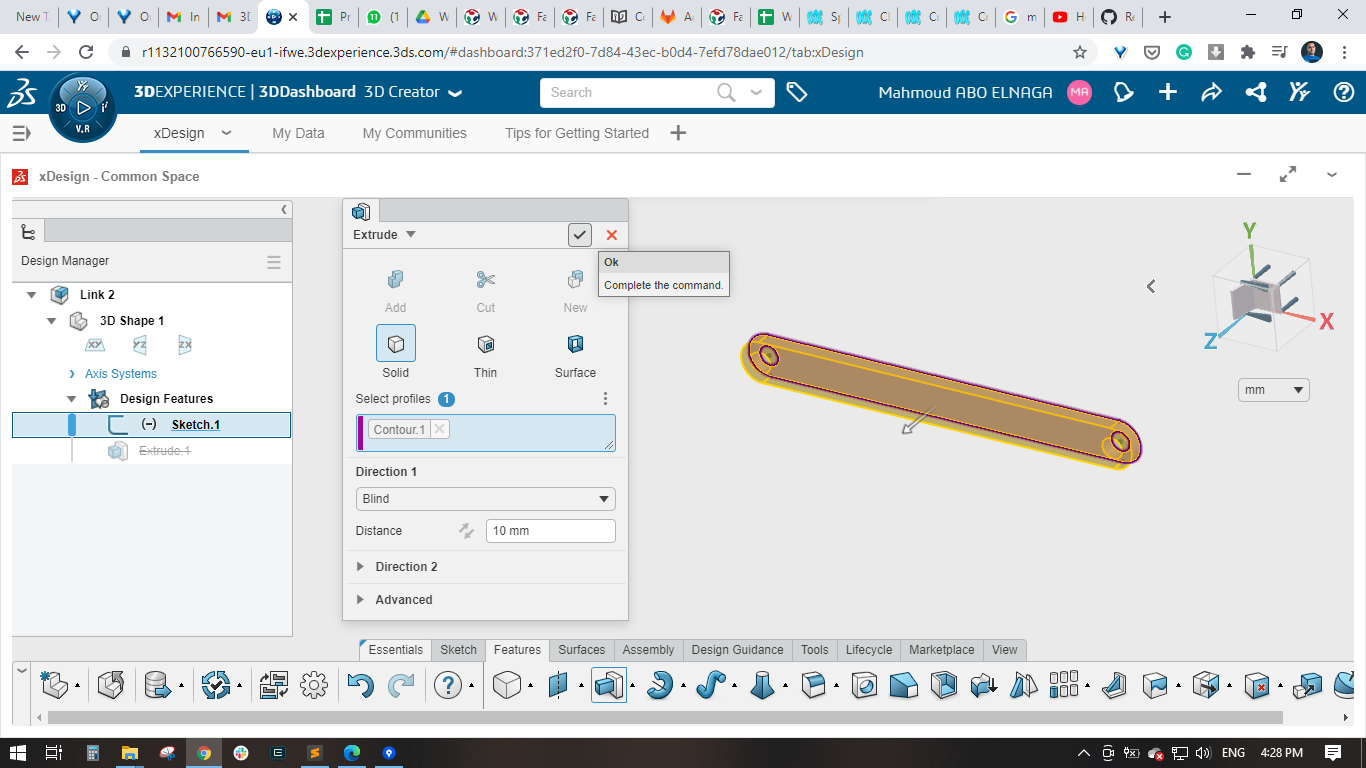
- Extruded the link 2 to 10 mm thickness as same as link 1 and exported it with .step format
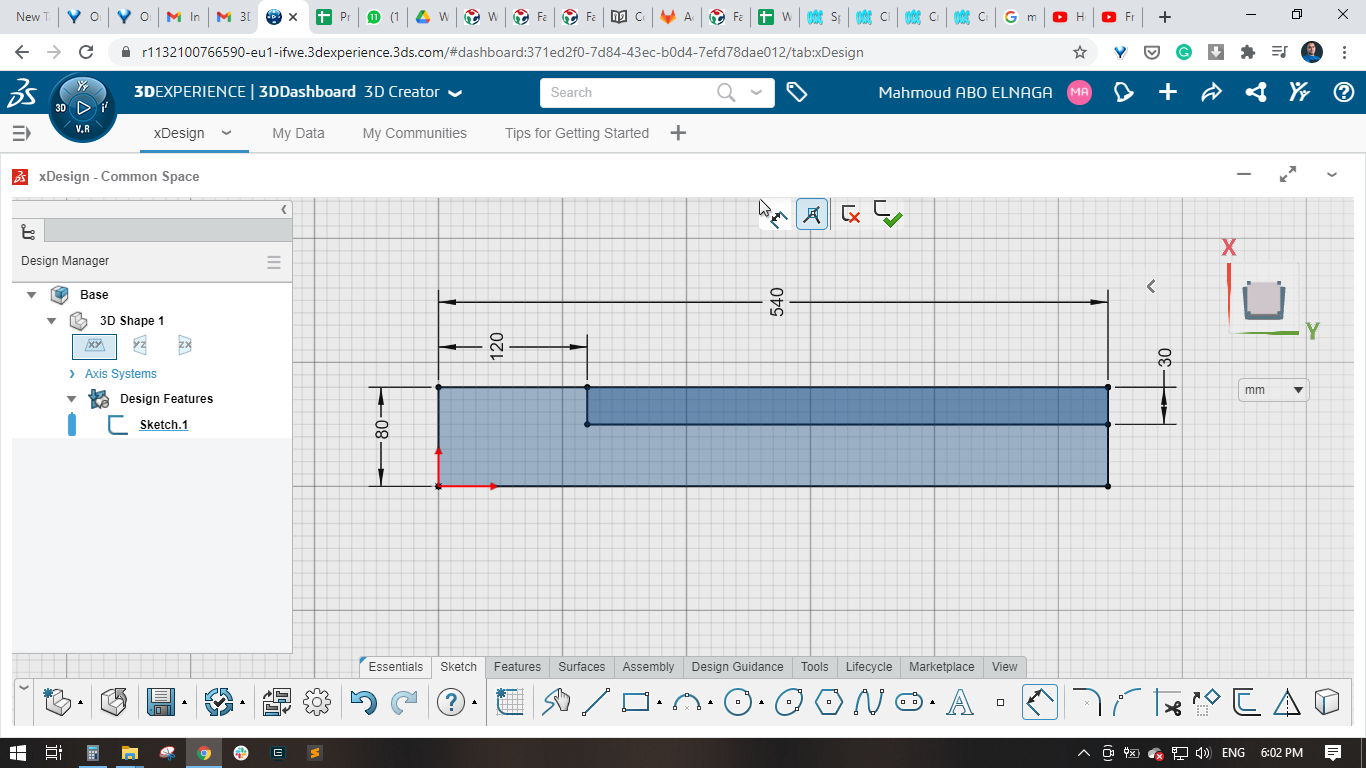
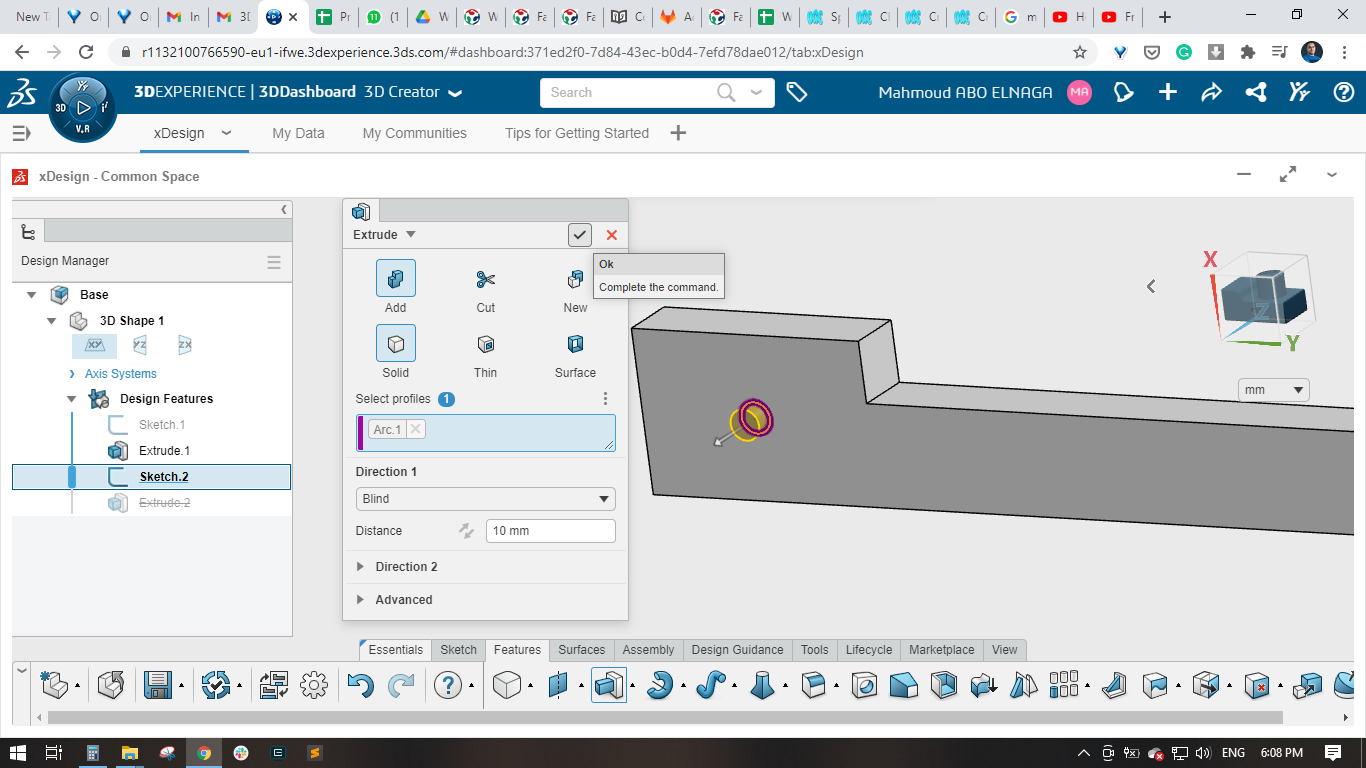
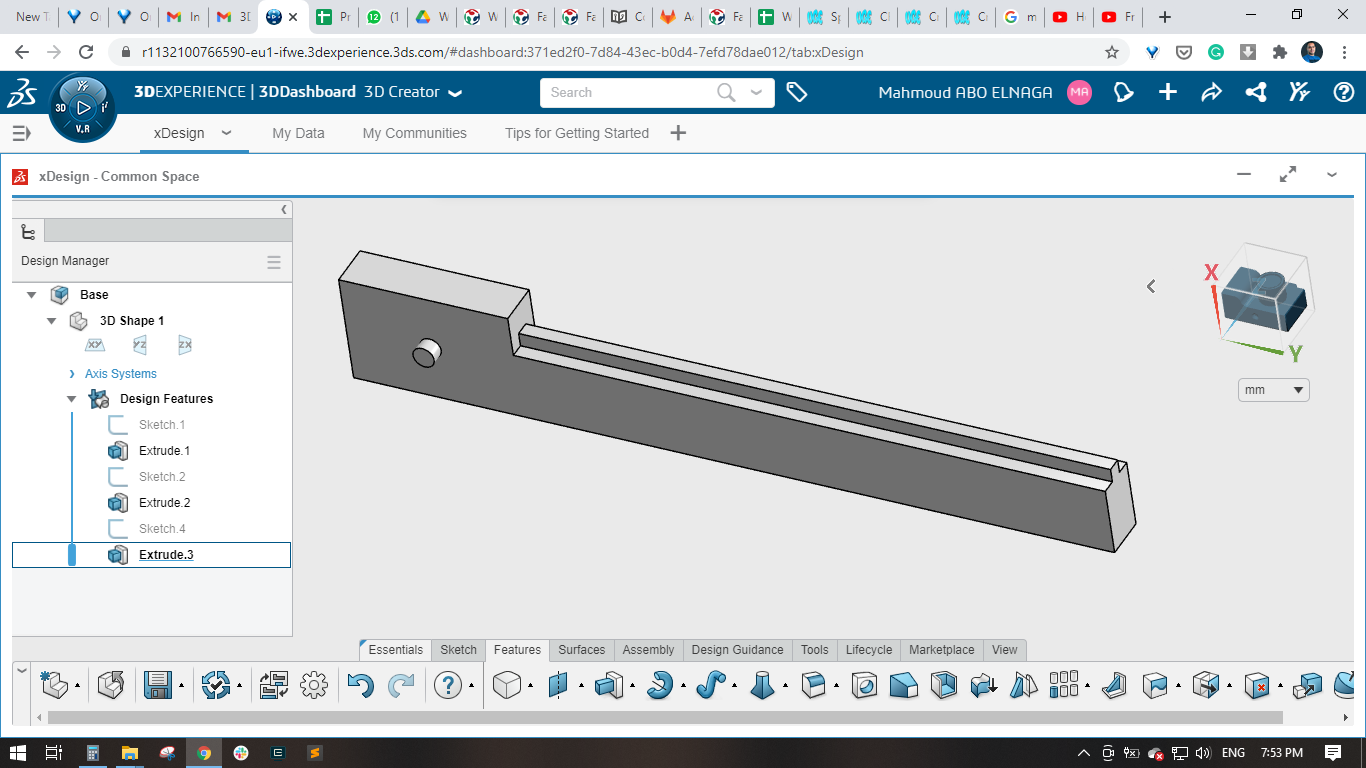
- For designing base, I drawed 2 rectangles, one with dimensions of 540 mm and 80 mm, and the other with dimensions of 420 mm and 30 mm
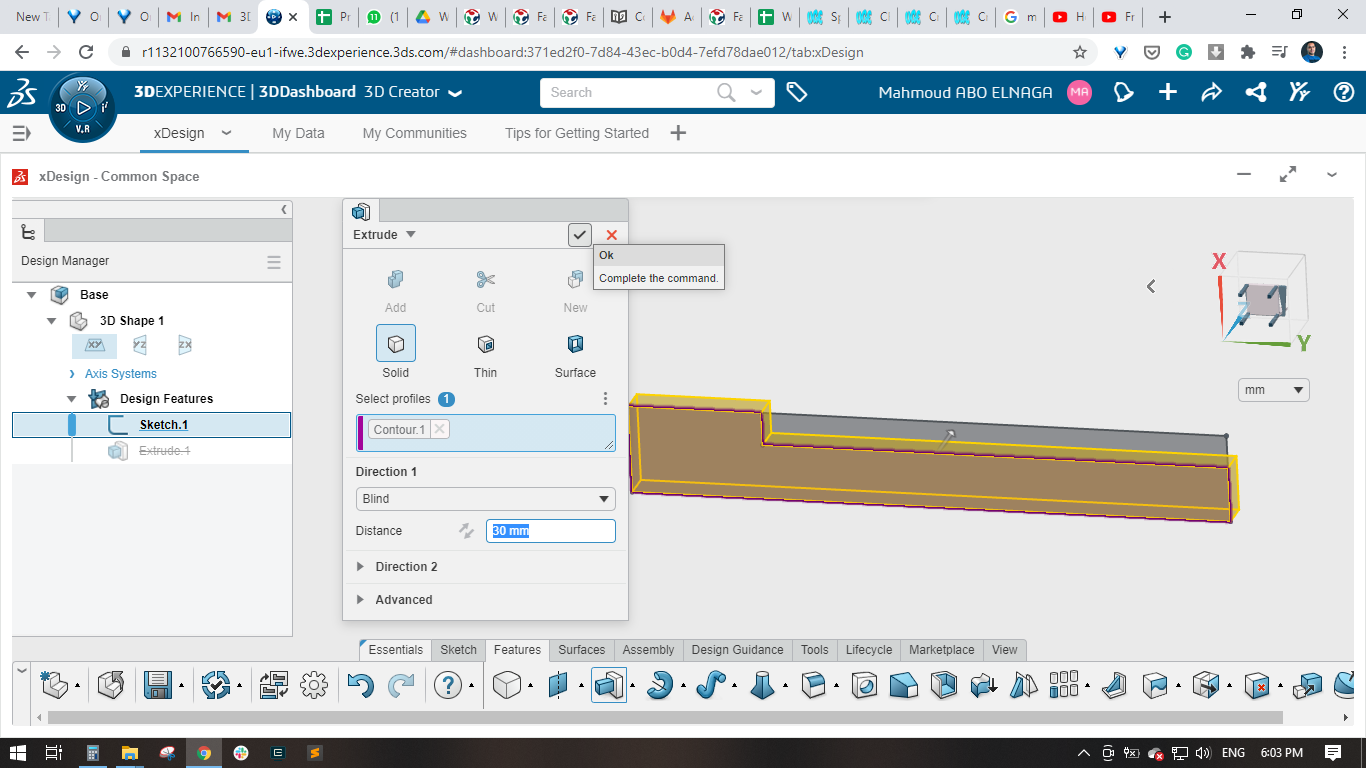
- Extruded the shown area to 3o mm, the small rectangle will be cut from the whole part
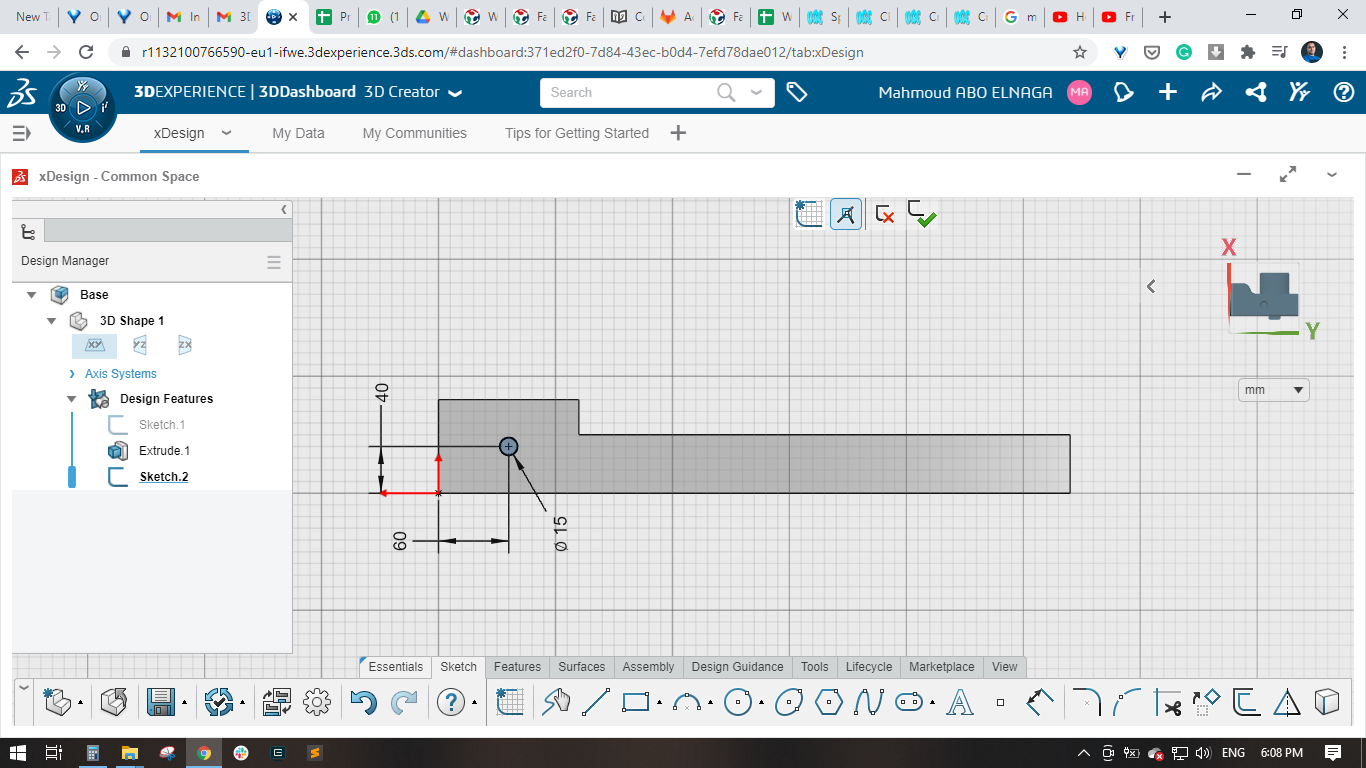
- Drawed a 15 mm circle on the base to make a pin joint which connects link 1 to base and extruded it to 10 mm
- Now the base is ready and will be exported as .step file
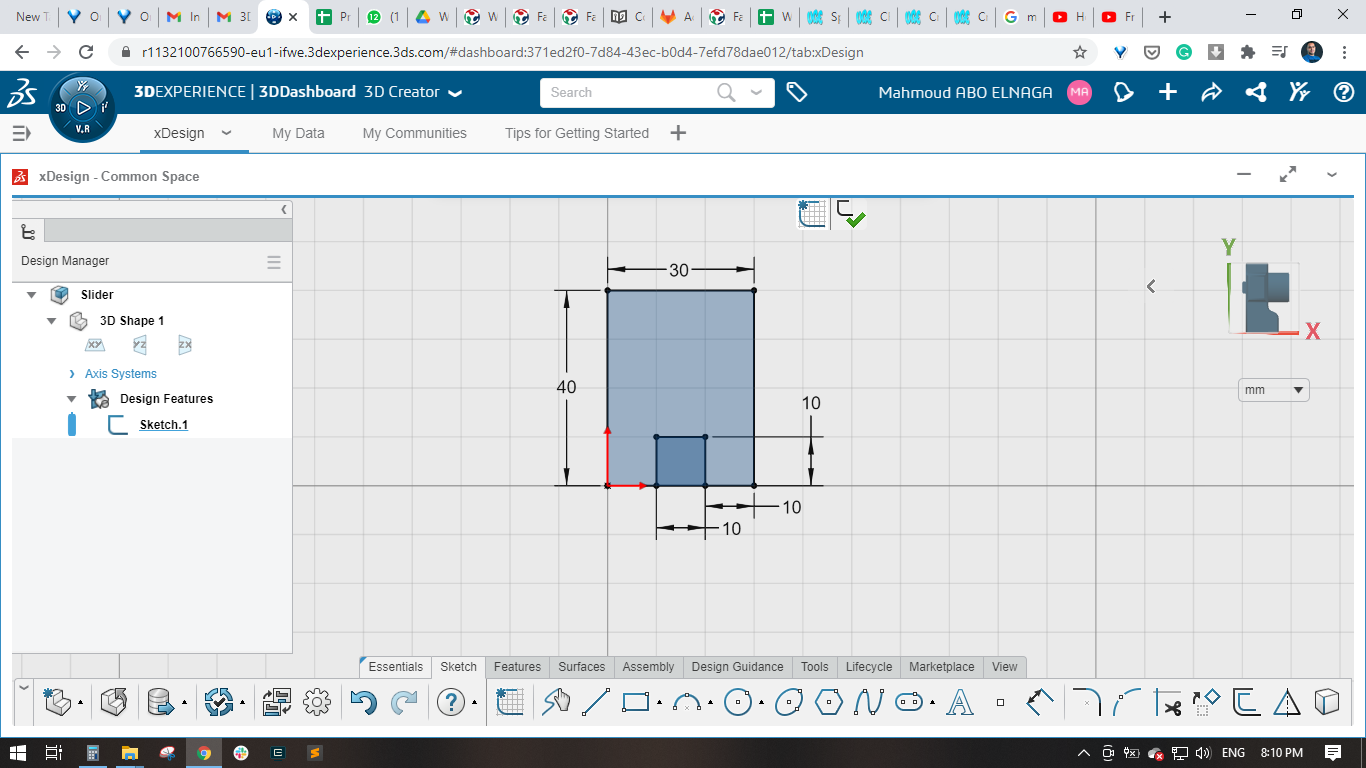
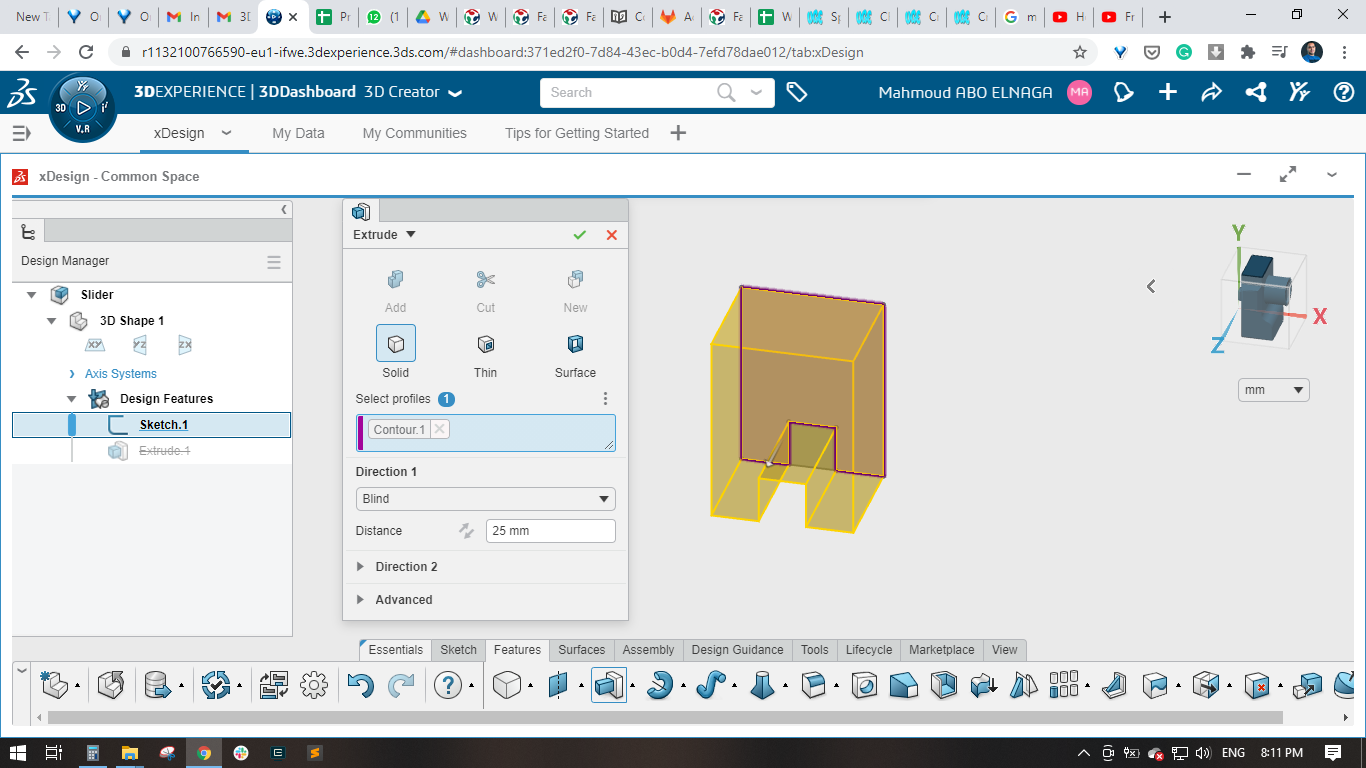
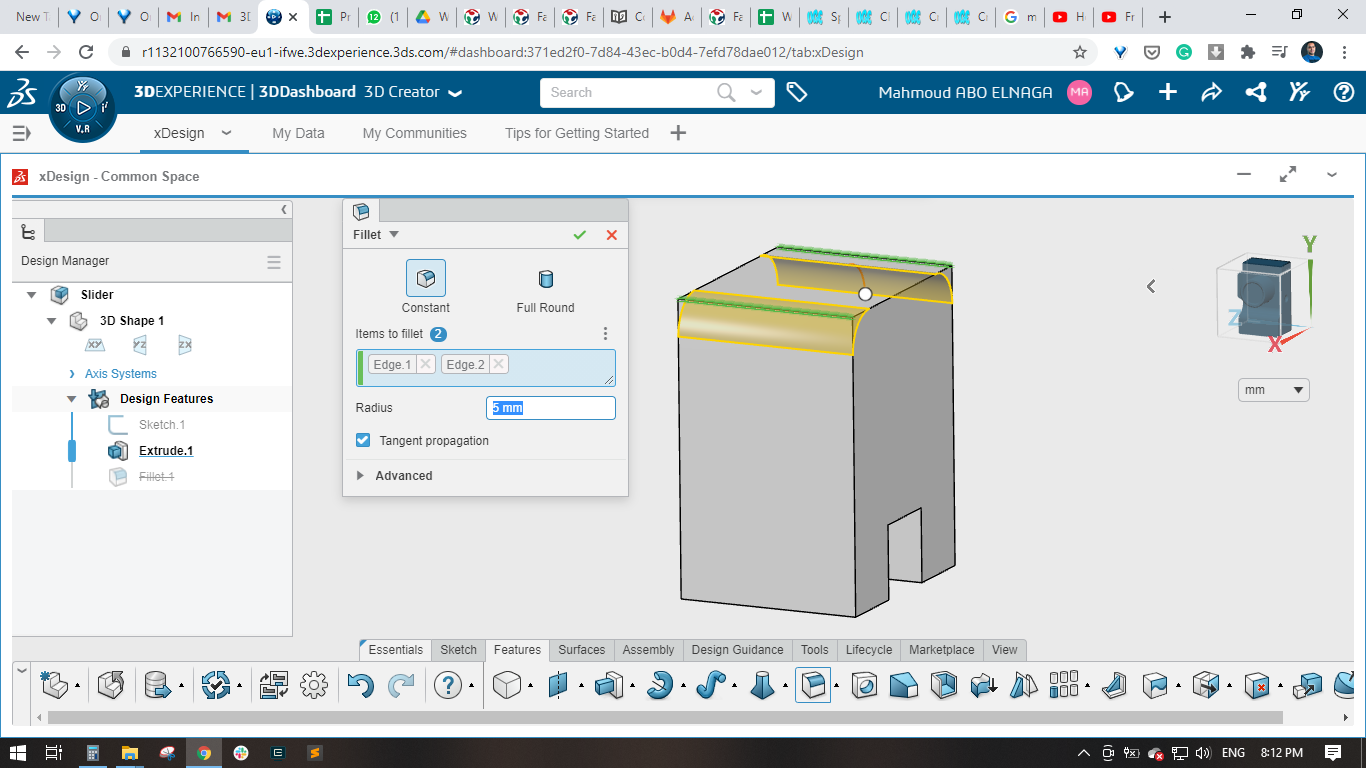
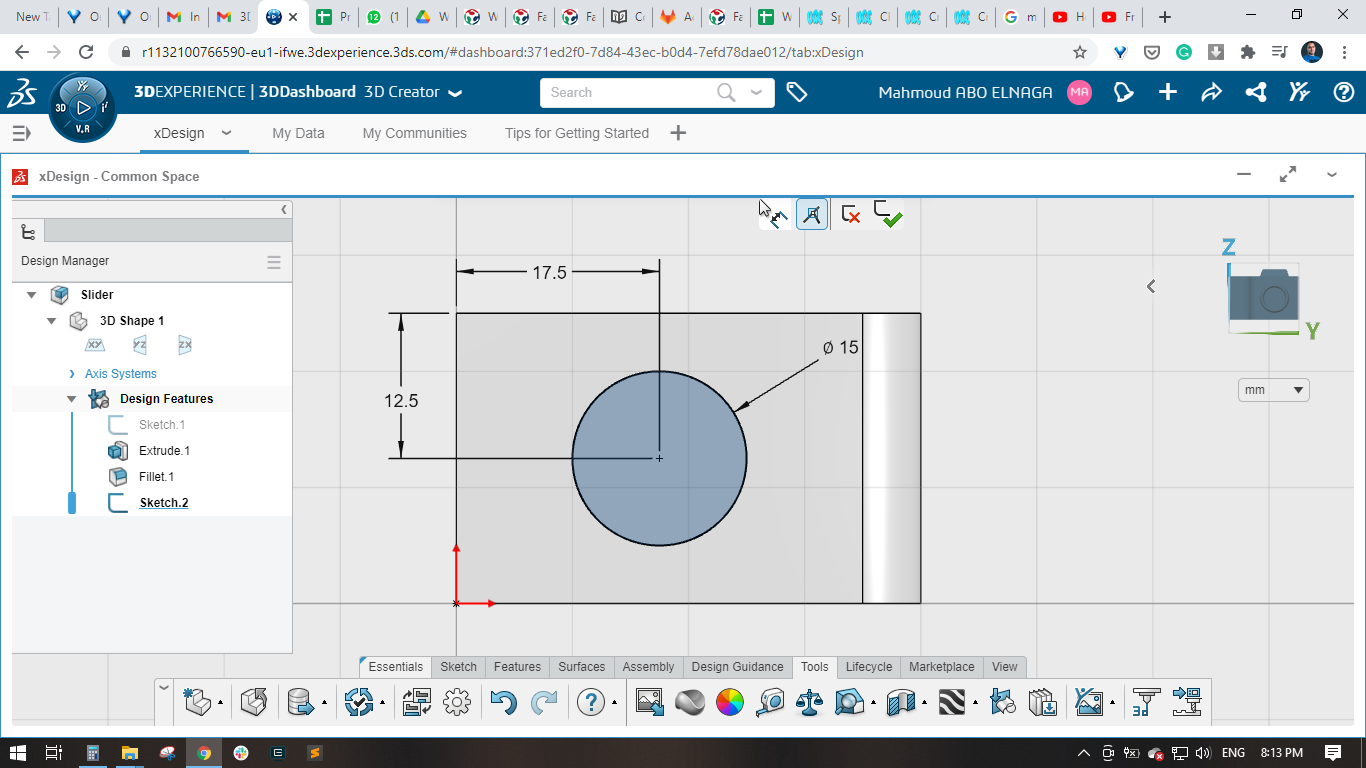
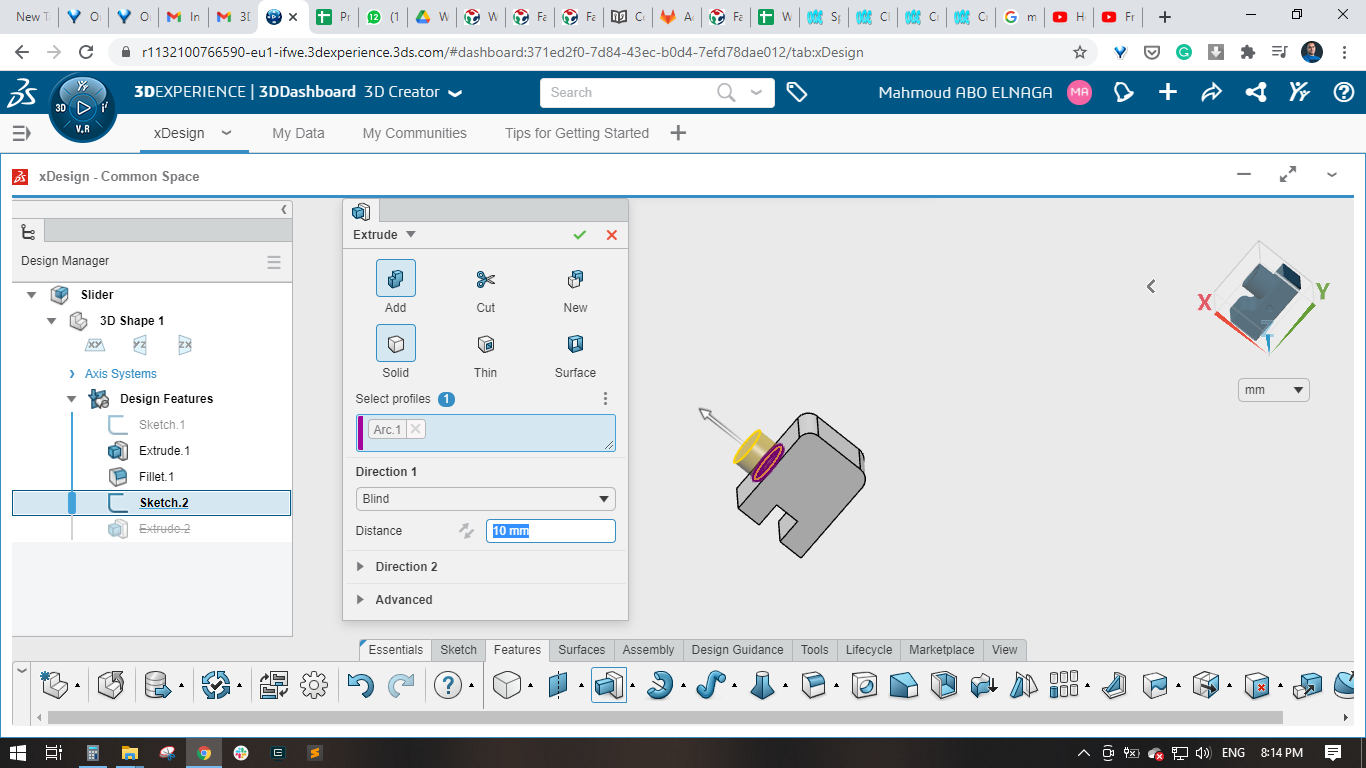
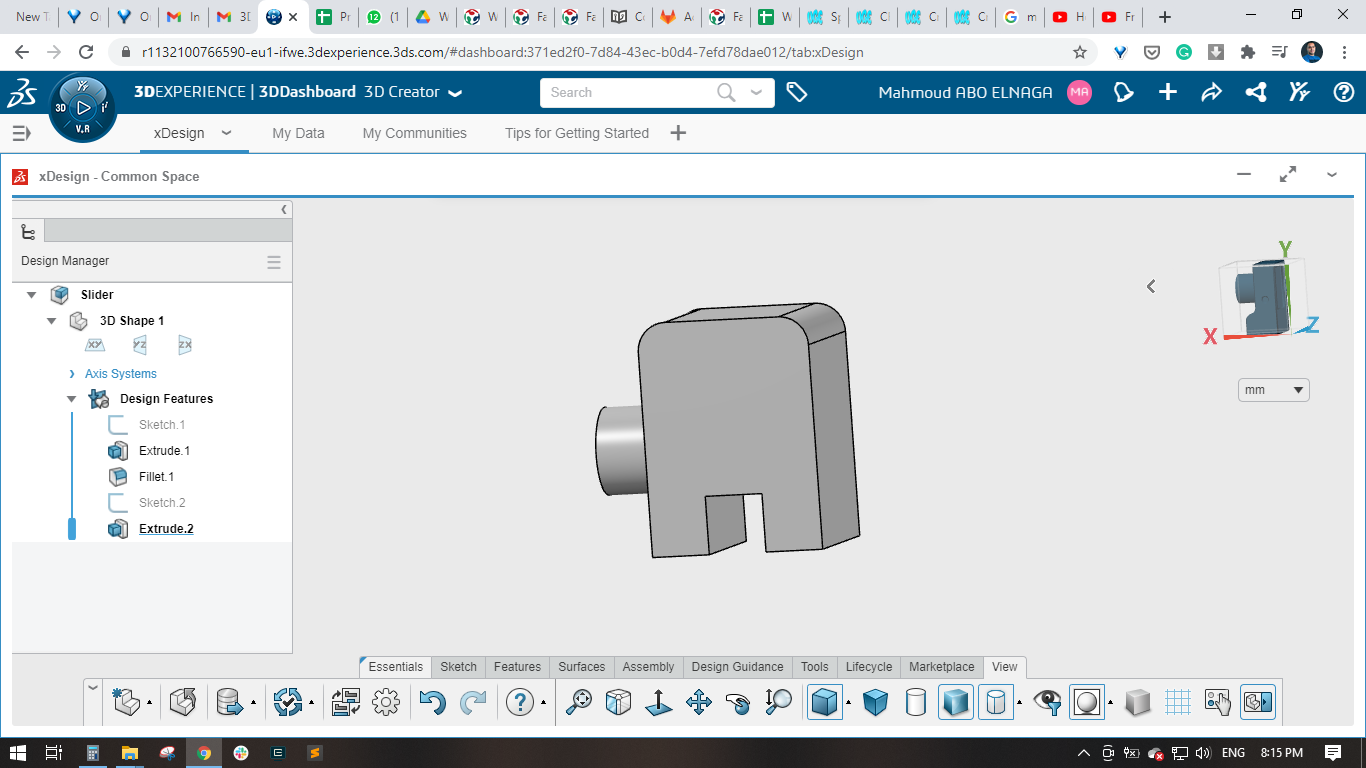
- For designing the slider part, created 2 rectangles, the small rectangle will be cut extruded to create the sliding slot, used the fillet feature to make the top edges rounded and then created a pin that will be used while assembly link 2 with the slider.
- Now! Link 1, link 2, base and slider are ready for assembly.
Step(3): Assembling, rendering, animating and simulating the mechanism on Fusion 360
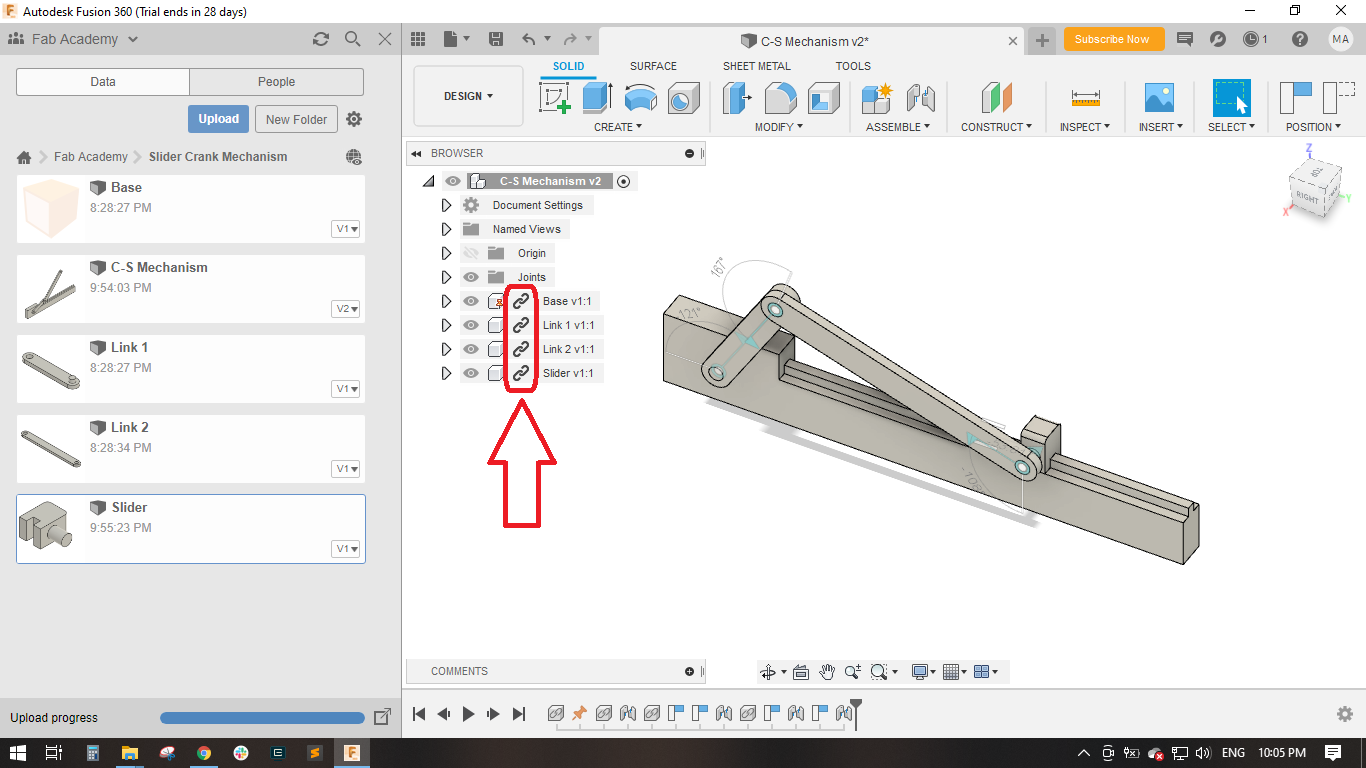
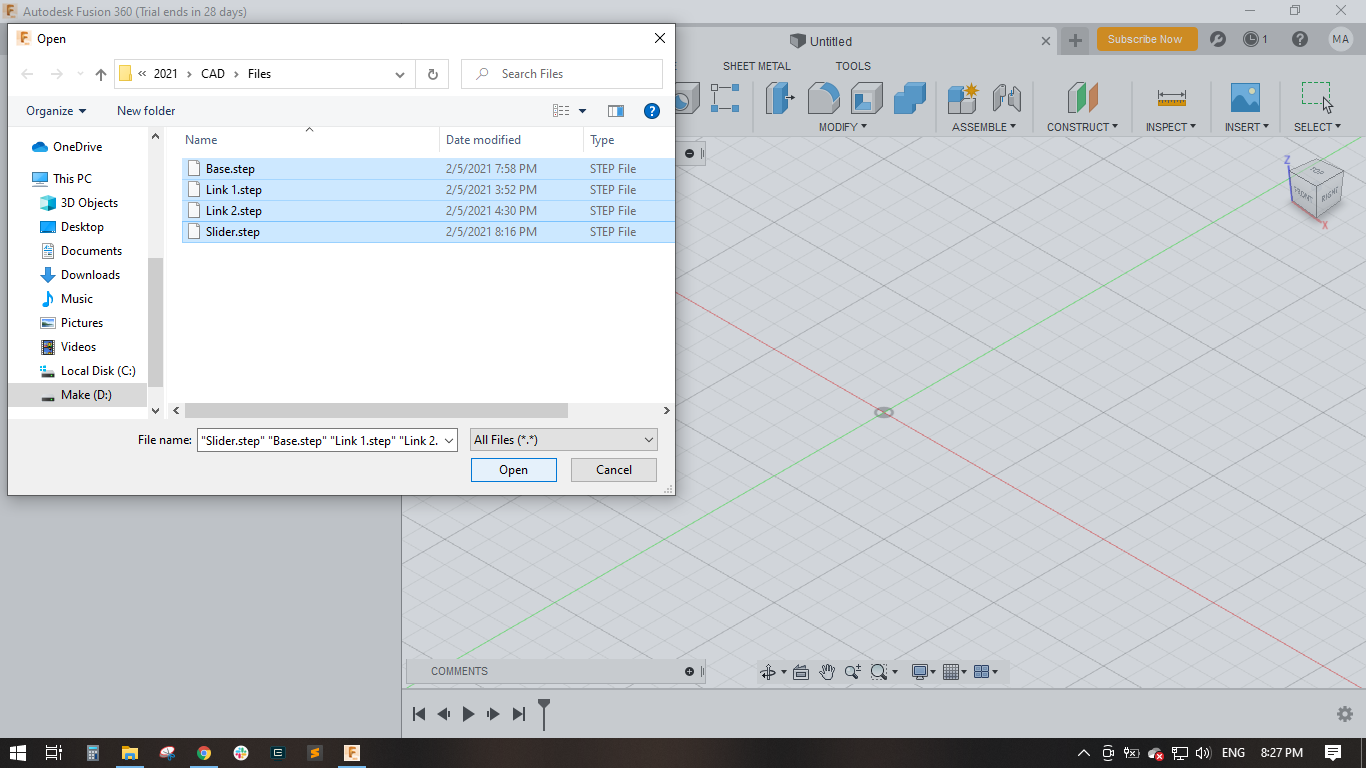
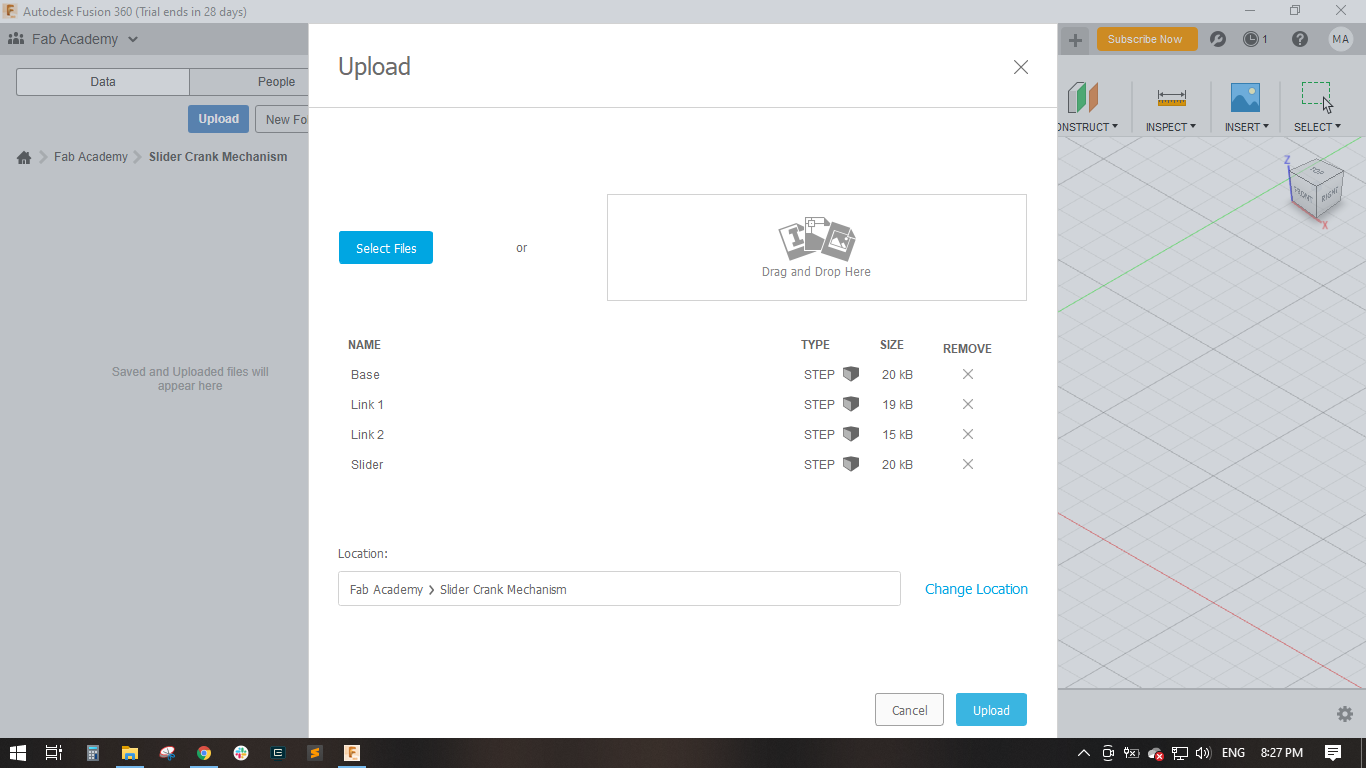
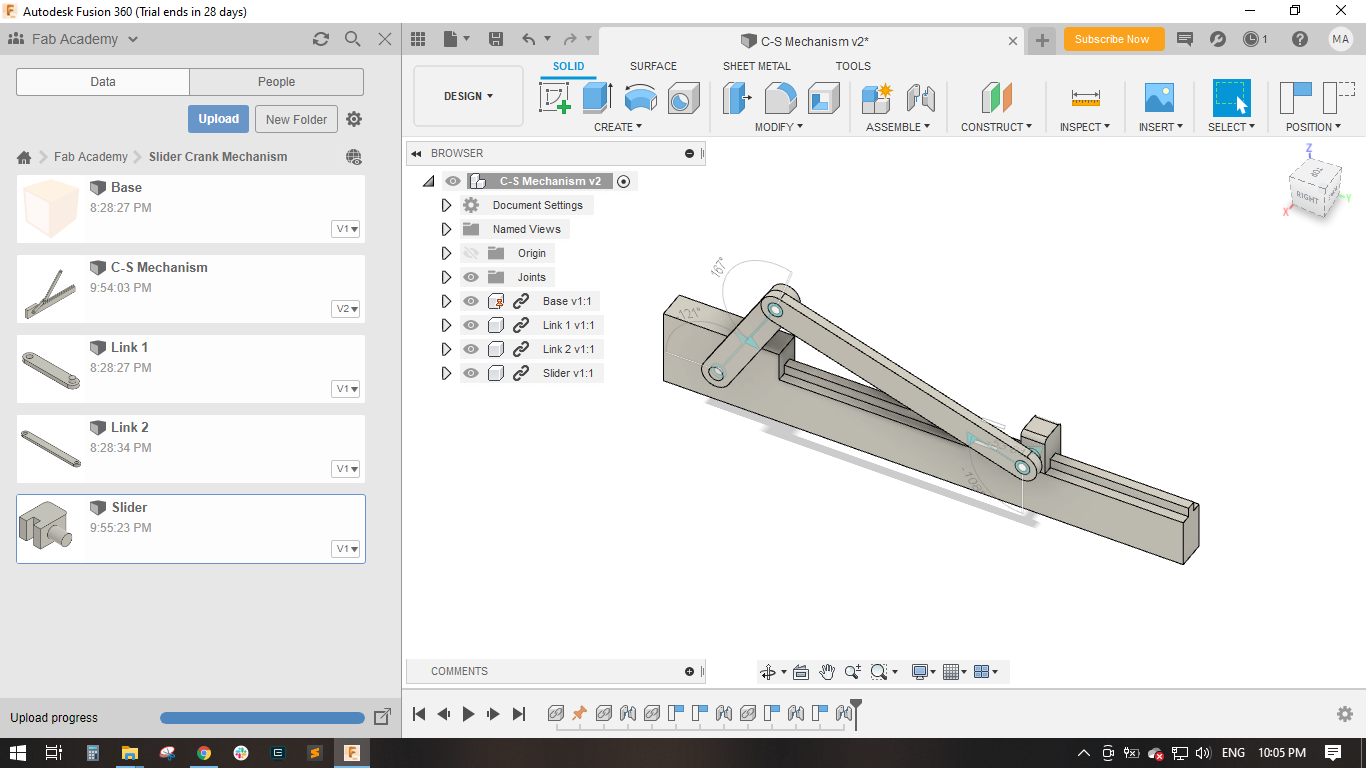
- Started by creating a new project called Fab Academy and made a new folder called Slider Crank Mechanism and started uploading the base, slider, link 1 and link 2
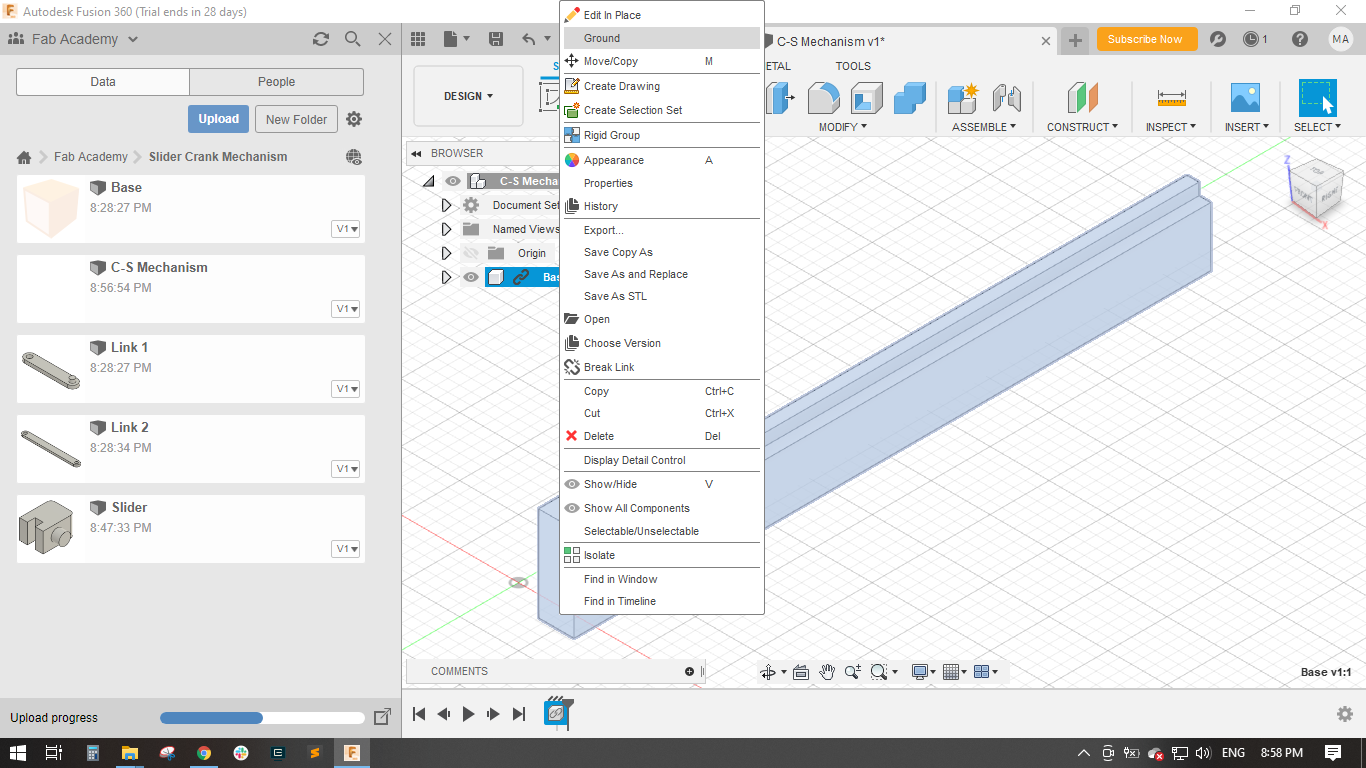
- Inserted the base into the current design and made it ground to restrict its movement.
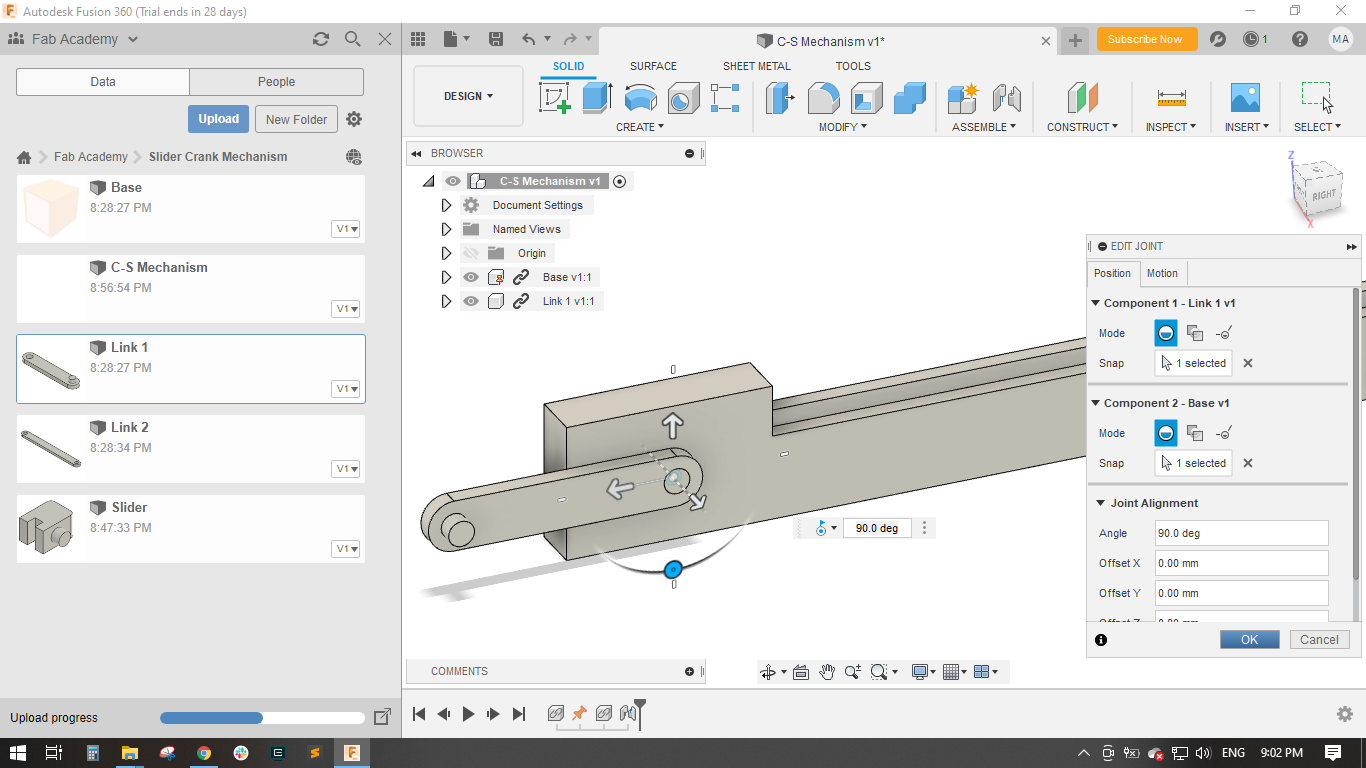
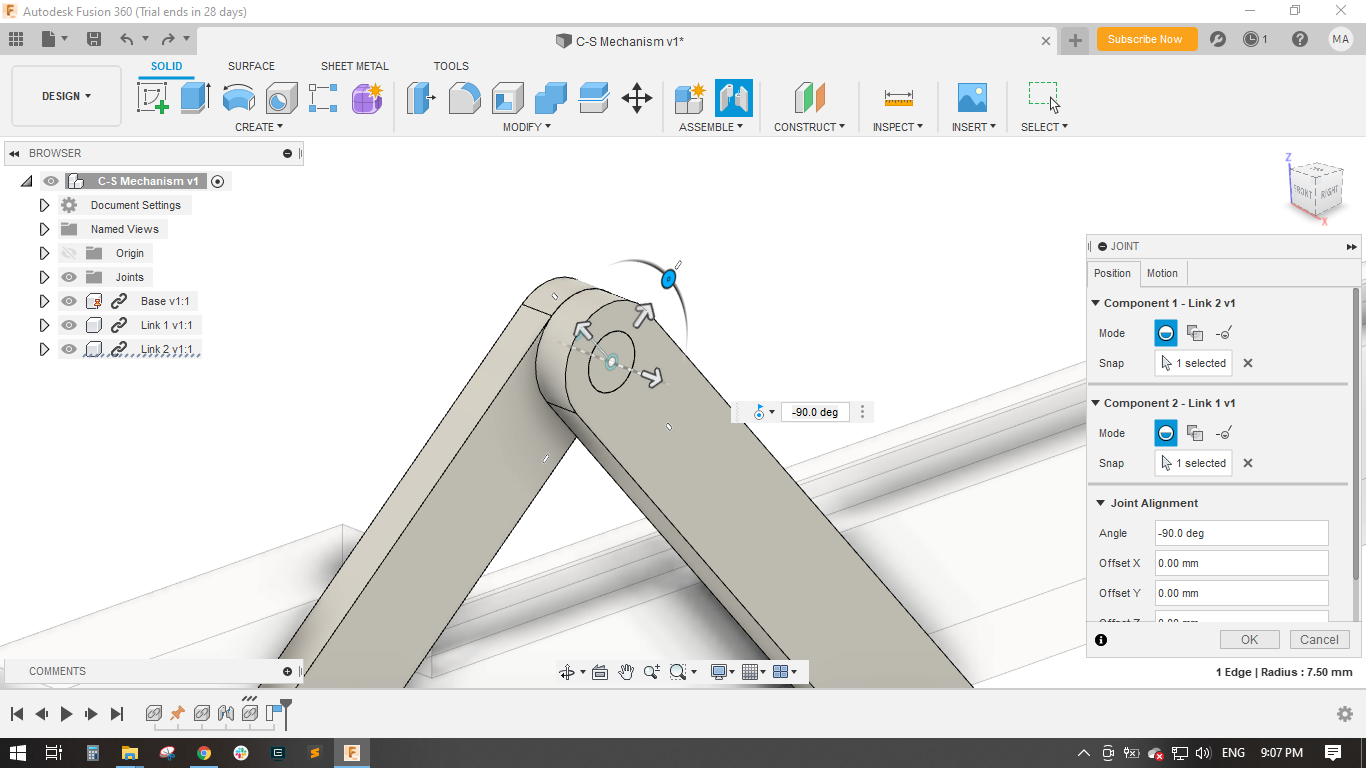
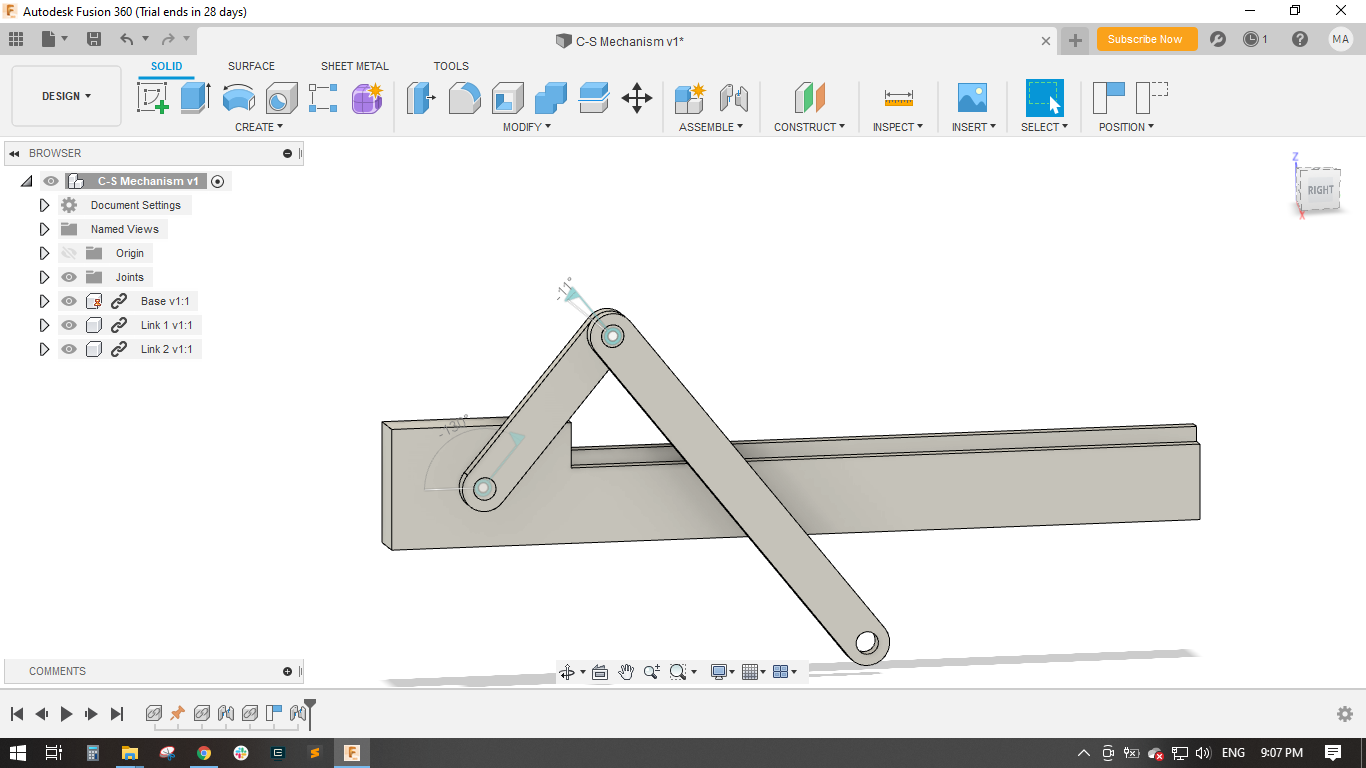
- Inserted link 2 to the design, made a revolute joint between base and link 1, now link 1 can be rotated w.r.t base through the base pin.
- Inserted link 2 and made a revolute joint between link 2 and link 1
-
Inserted the slider and made a revolute joint between link 2 and slider and then made a sliding joint between the the slider and the base.
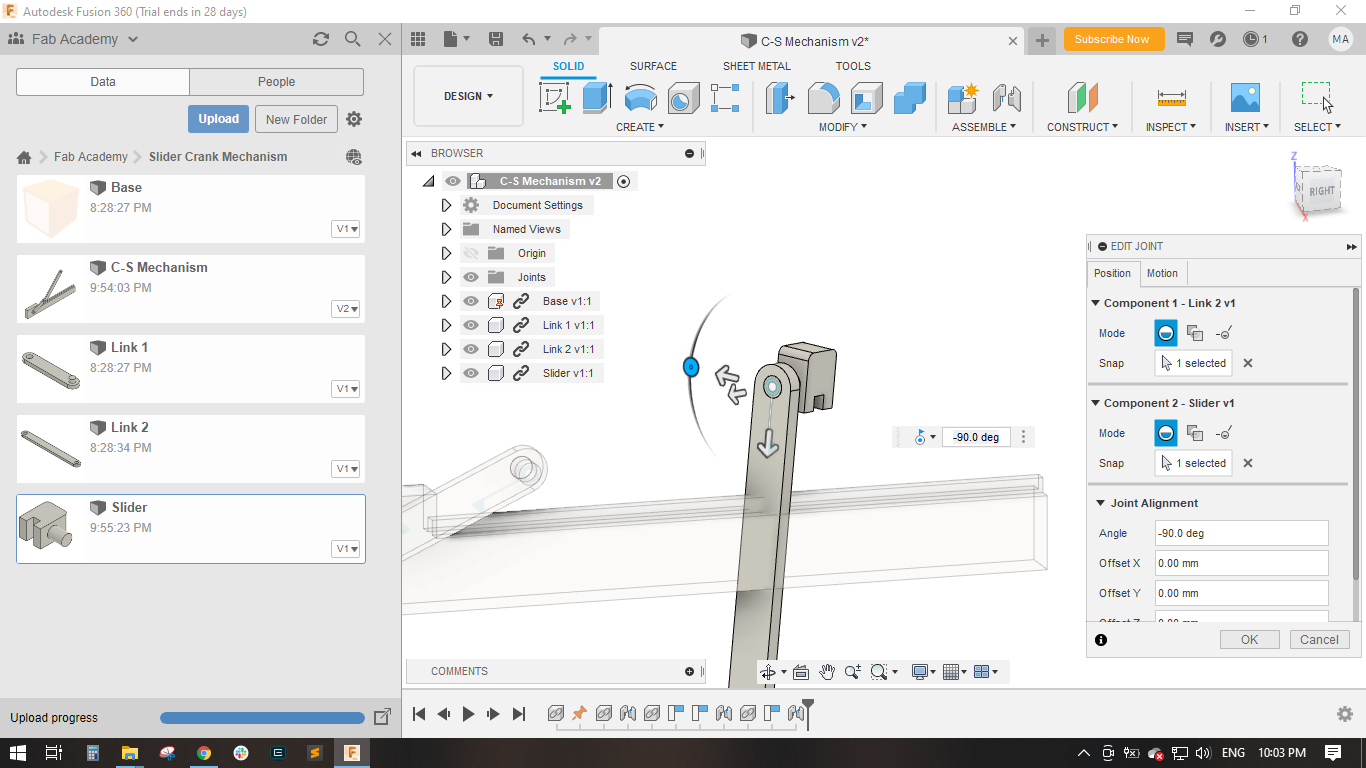
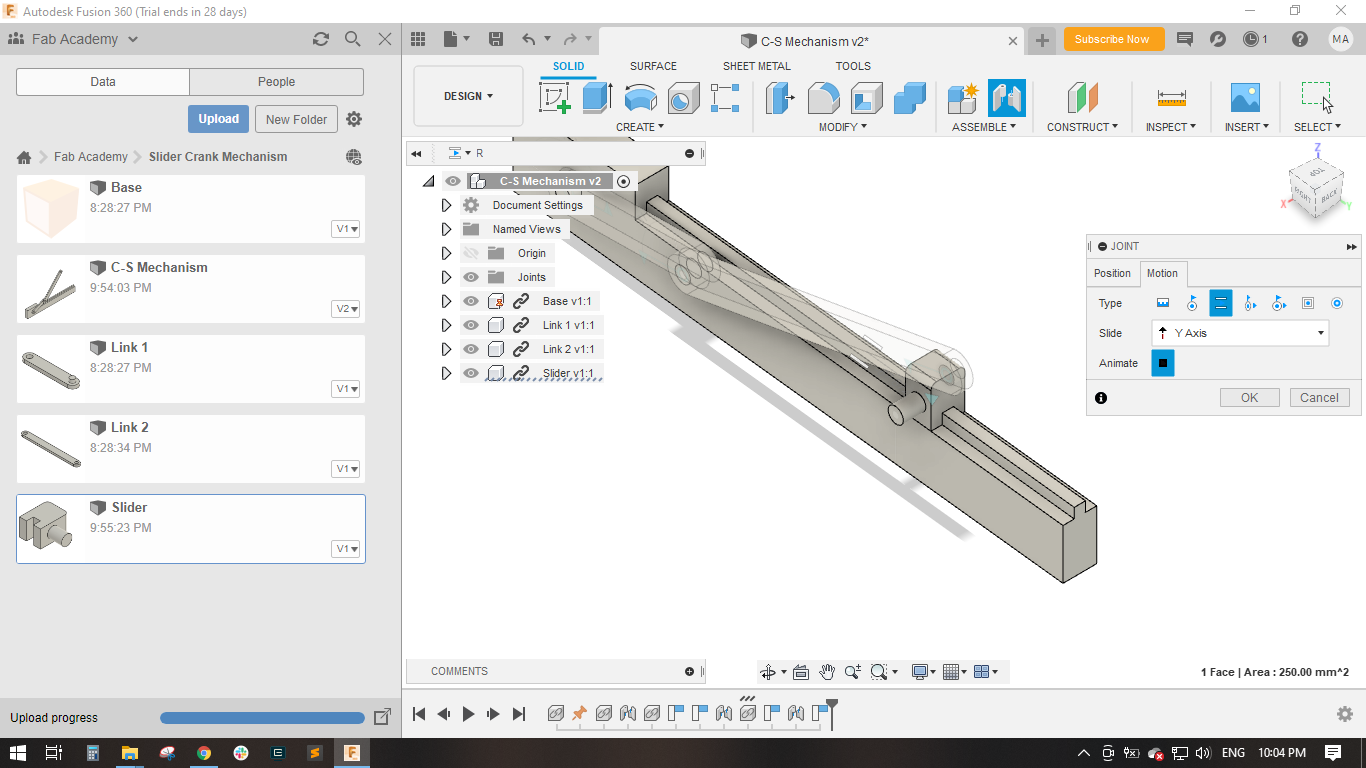
- Now the mechanism is ready and rotates well
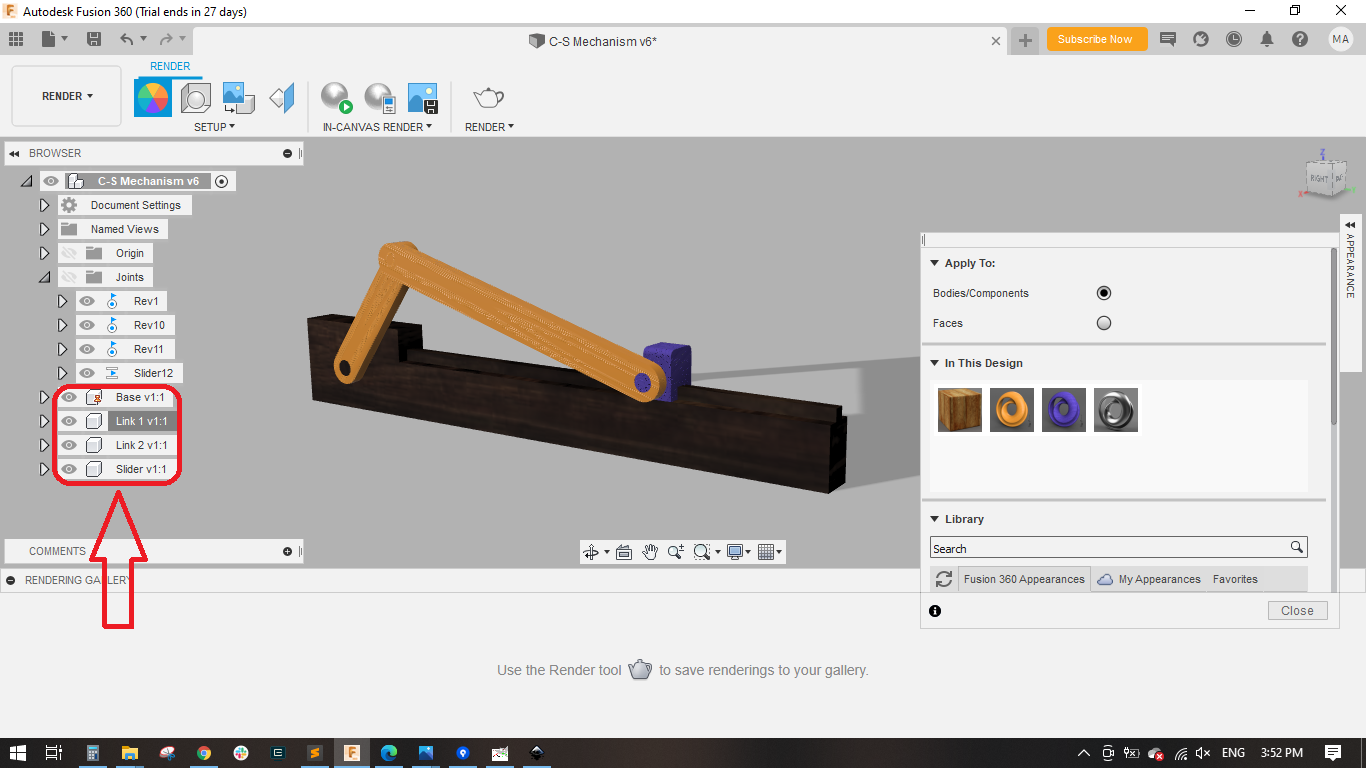
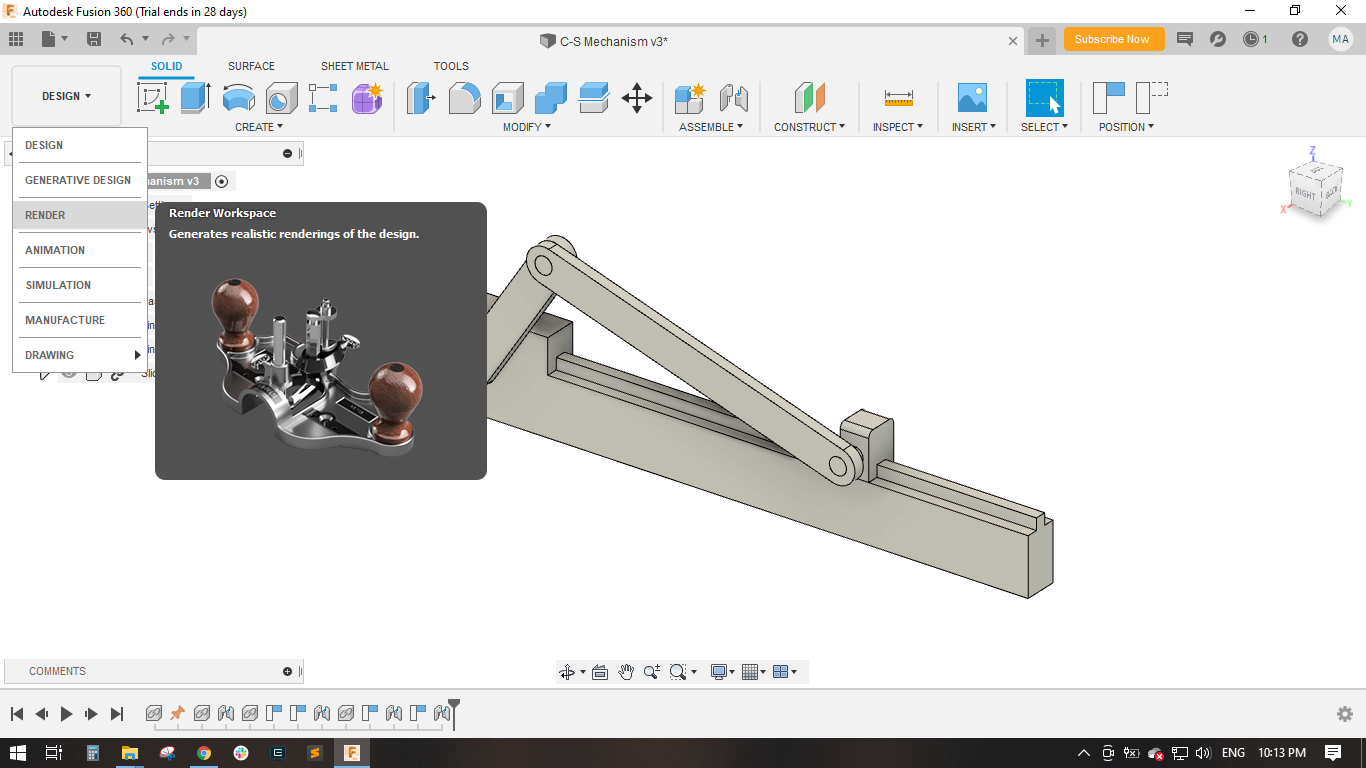
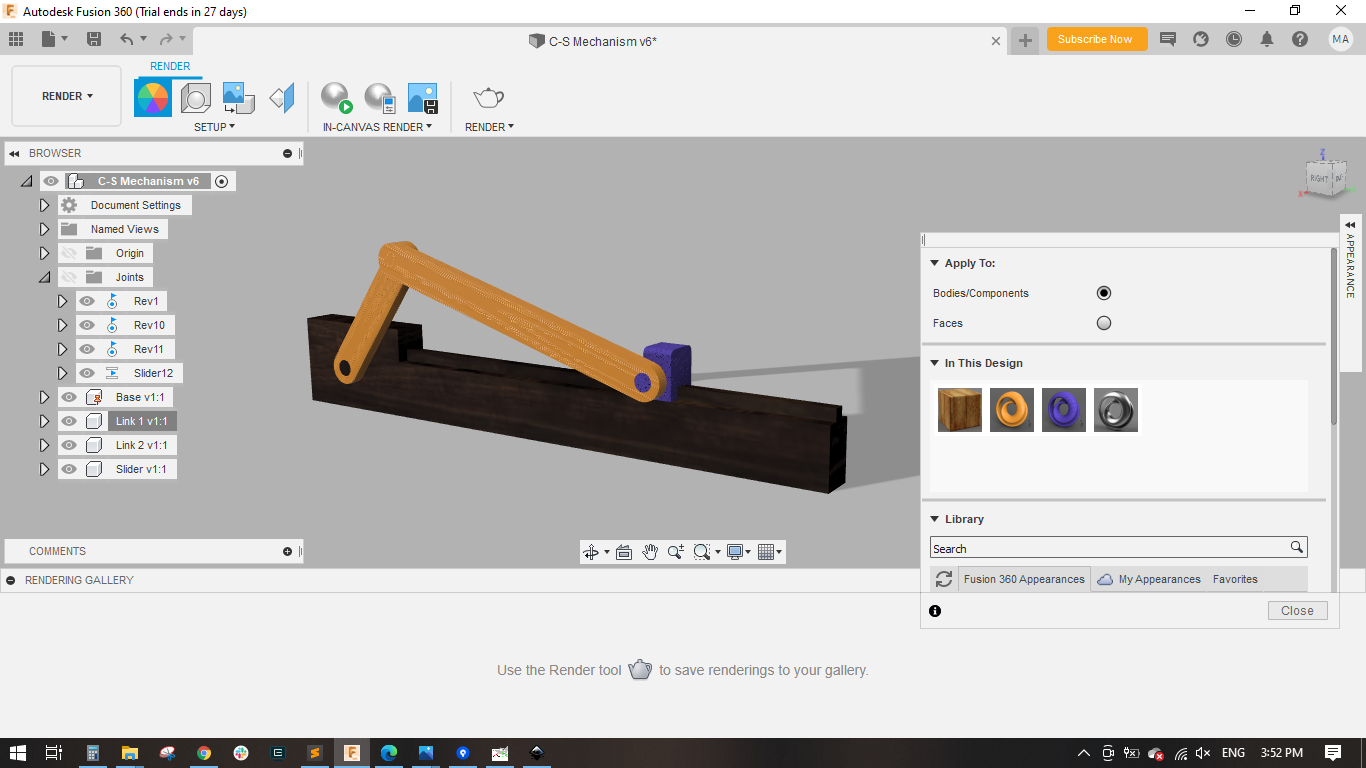
- Opened the Rendering workspace and applied material for each part.
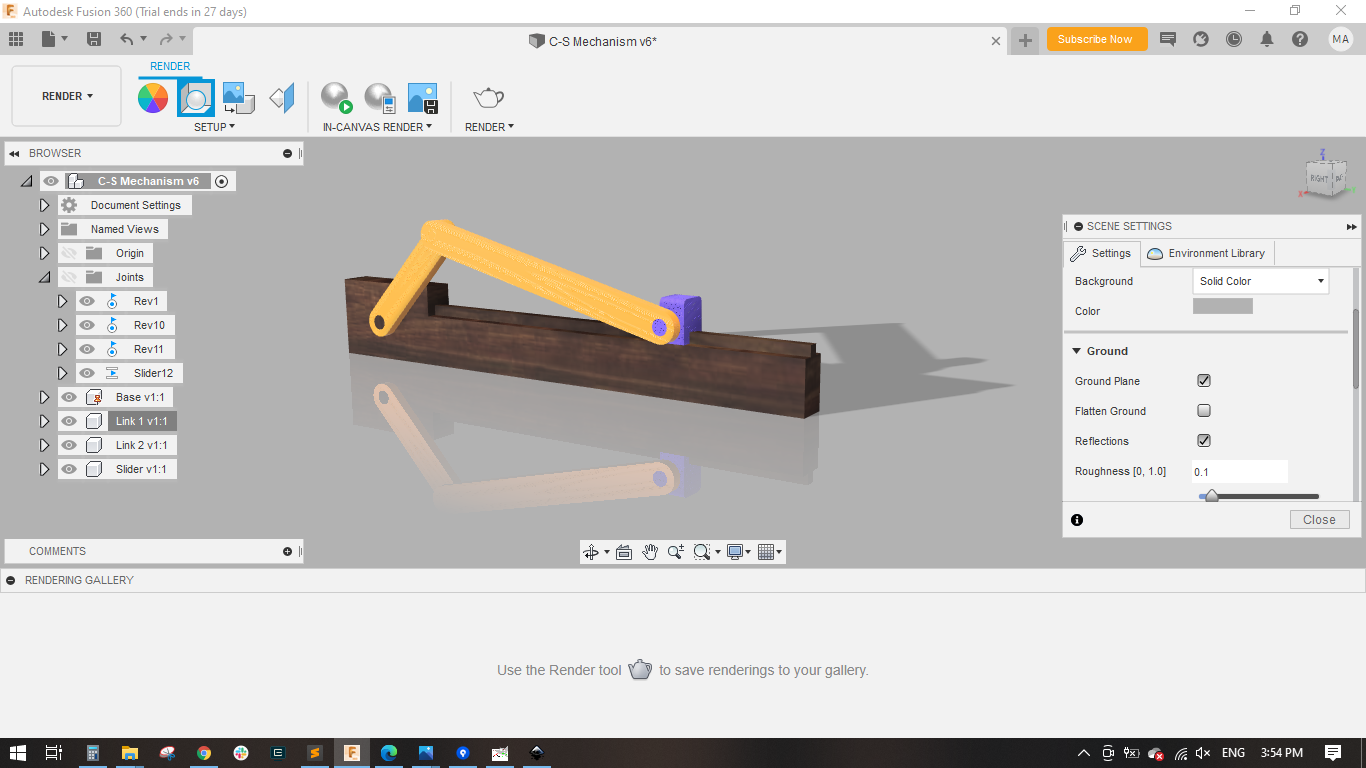
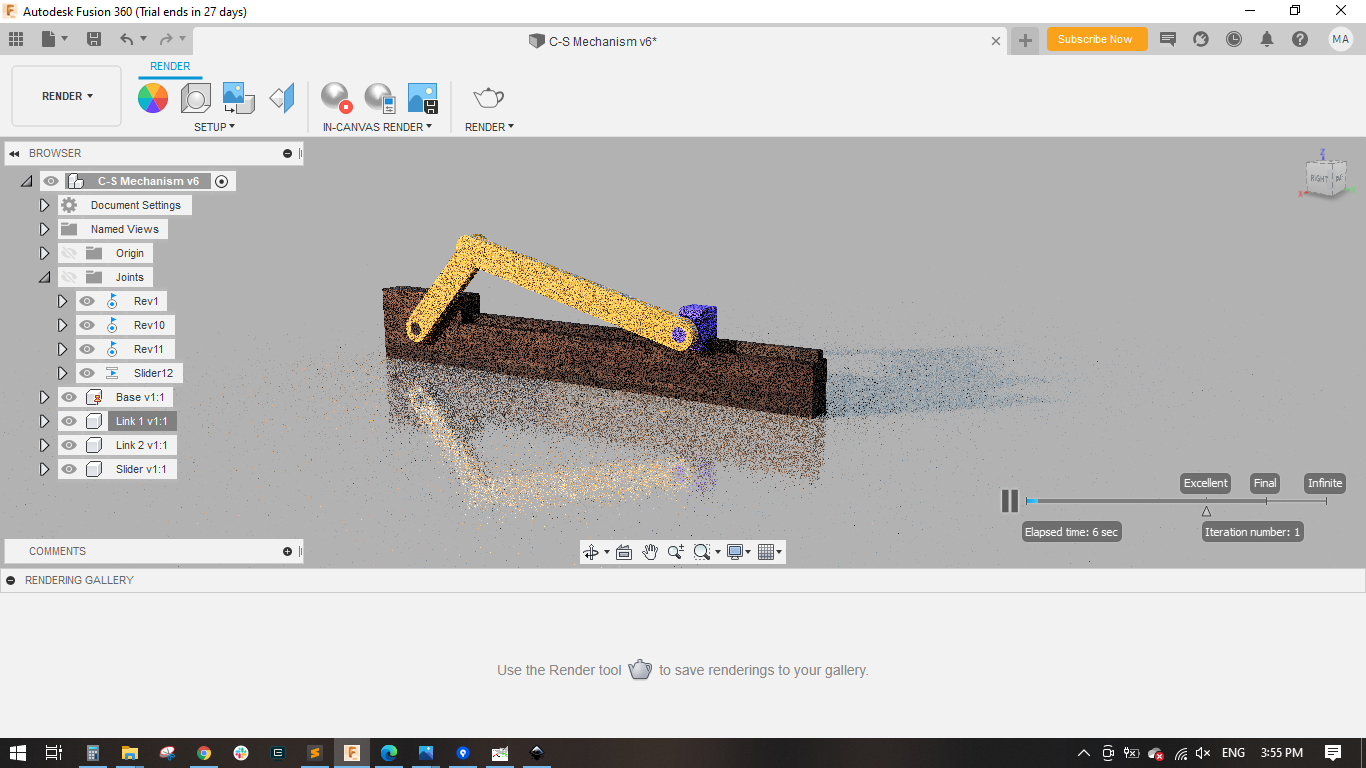
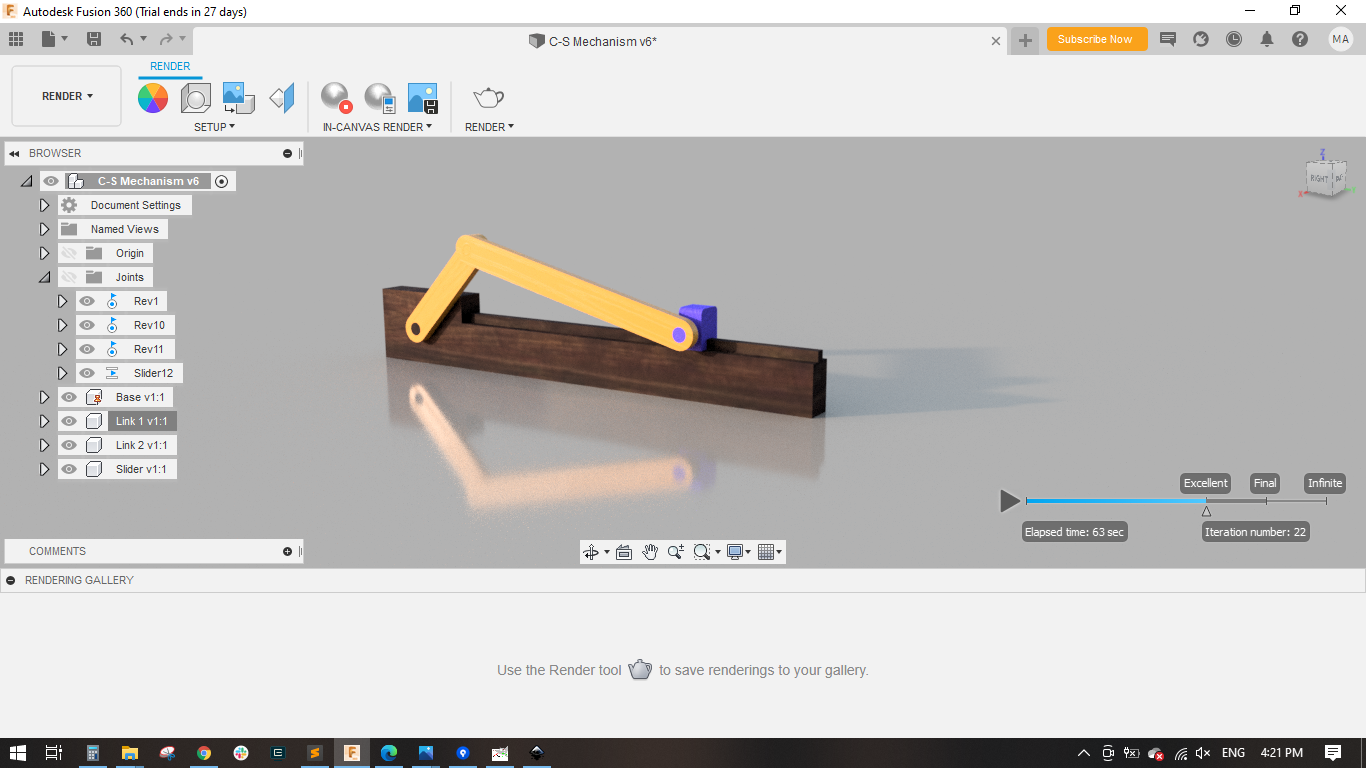
- From the Sence settings, selected Ground plane and Reflections and then pressed on the In-Canvas rendering to start rendering the model locally.
- After finishing rendering, I captured an image.
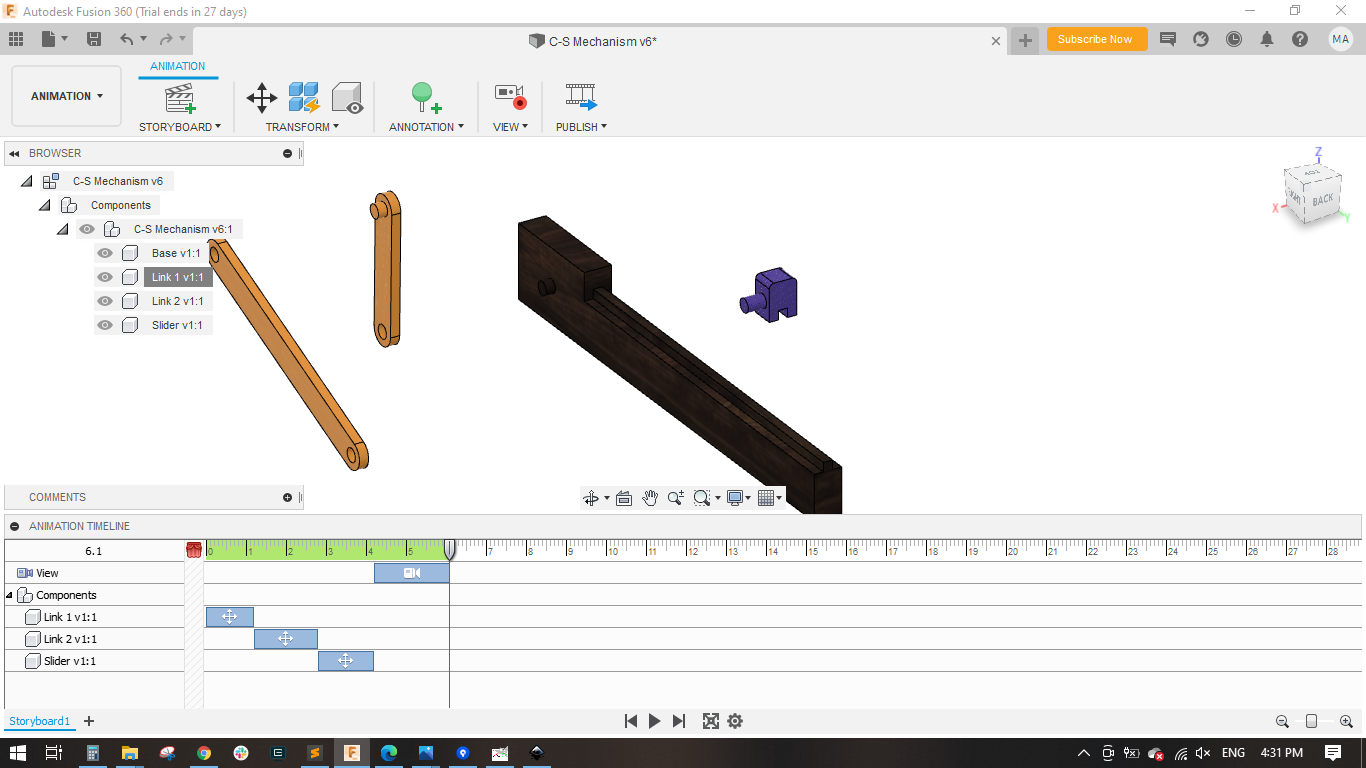
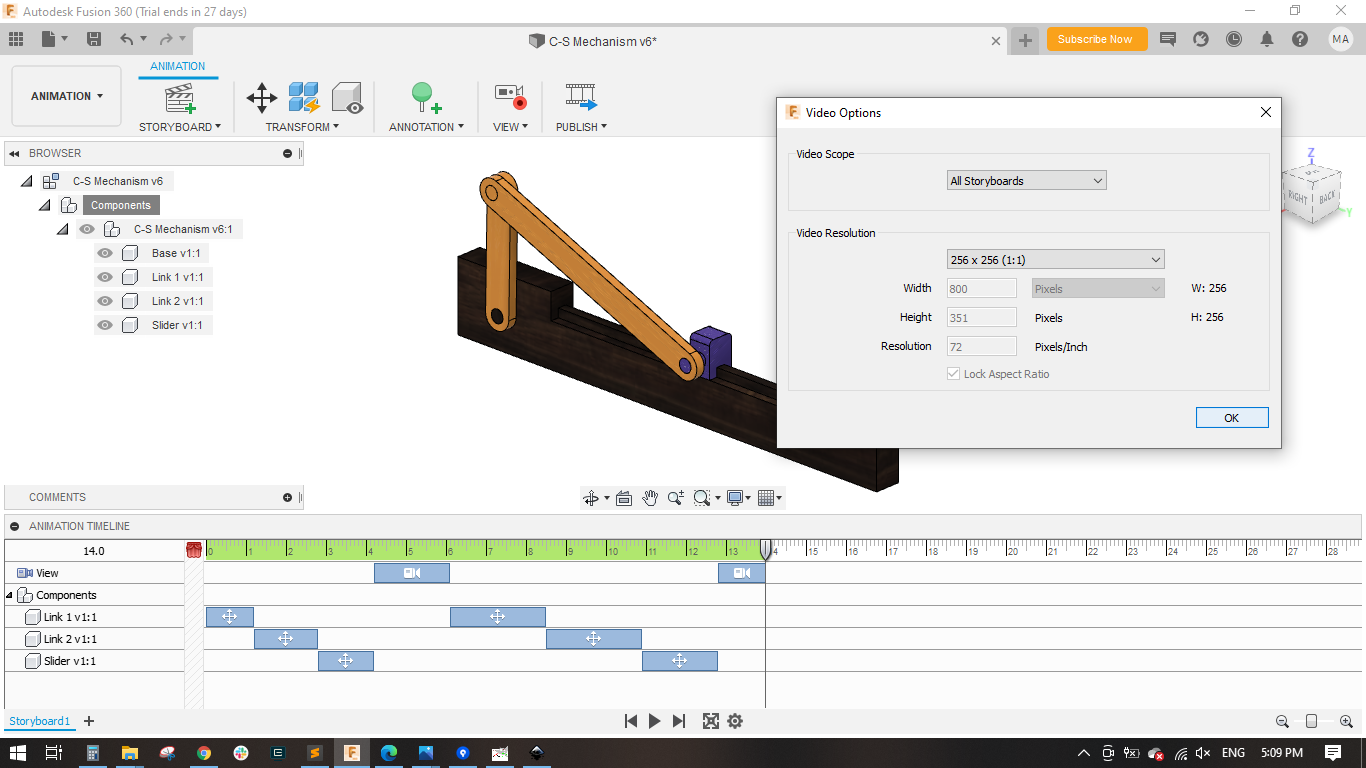
- In the Animation workspace, I disassemblied the parts by moving each element for a distance, then used the restore home option to return each element to its place and orientation.
- Here is the animation video showing the disassembly and assembly of the C-S mechanism.
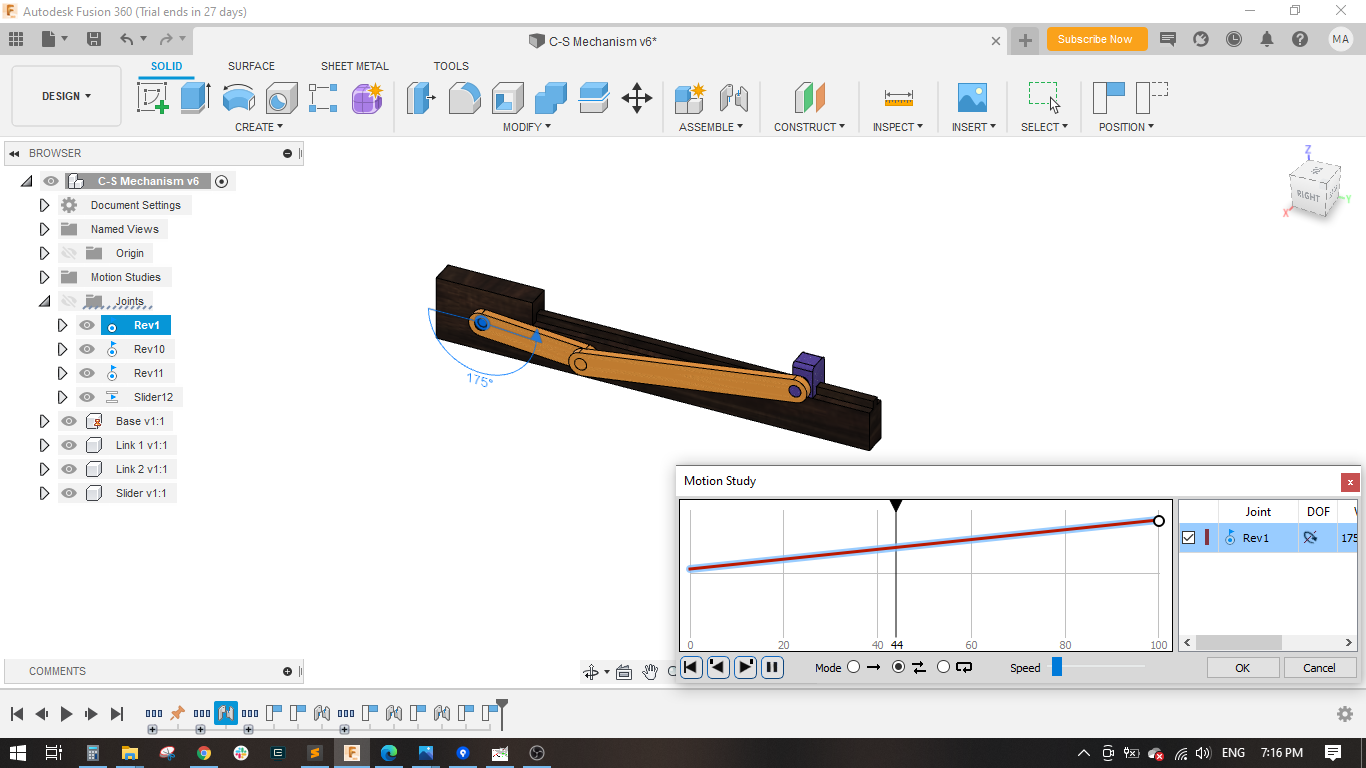
- For simulation, I chose to make a motion study for the mechanism when link 1 rotates from 0 to 360 degrees
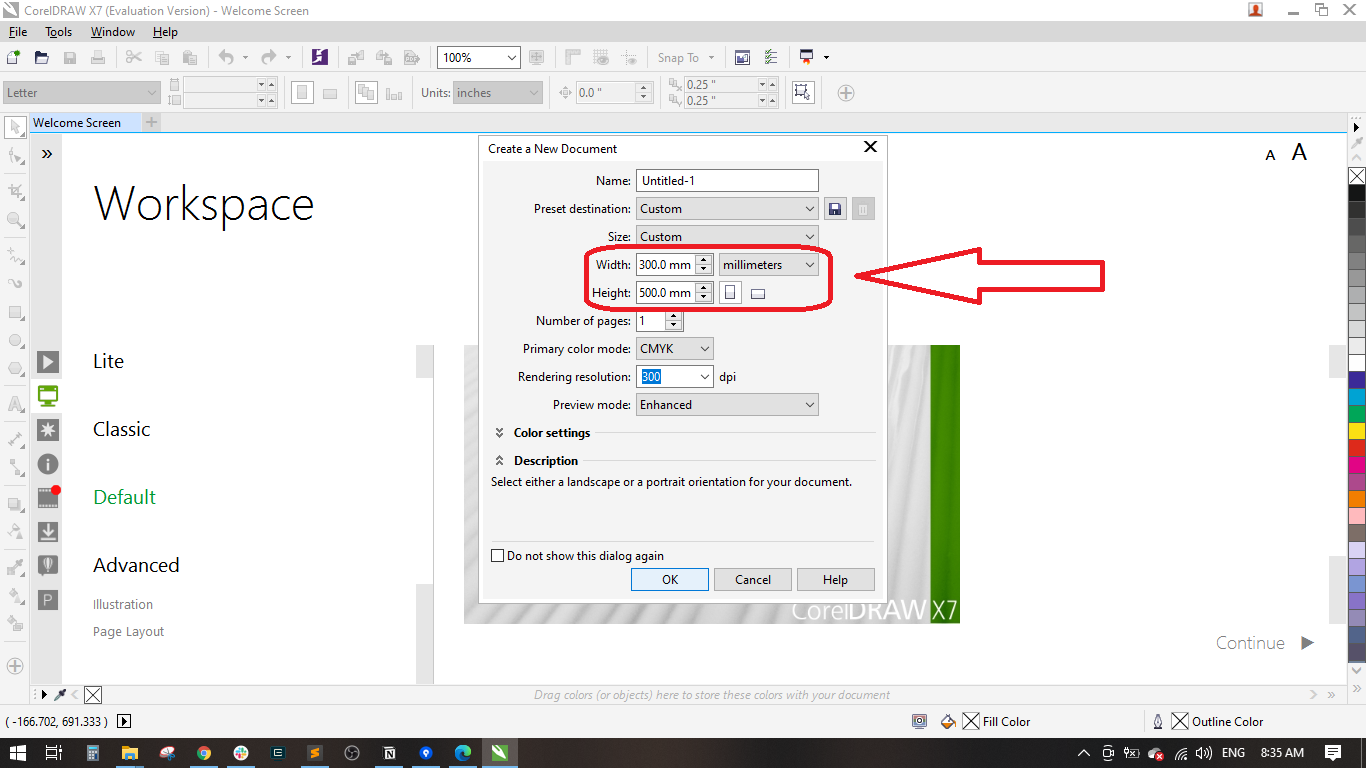
- Downloaded and installed CorelDraw
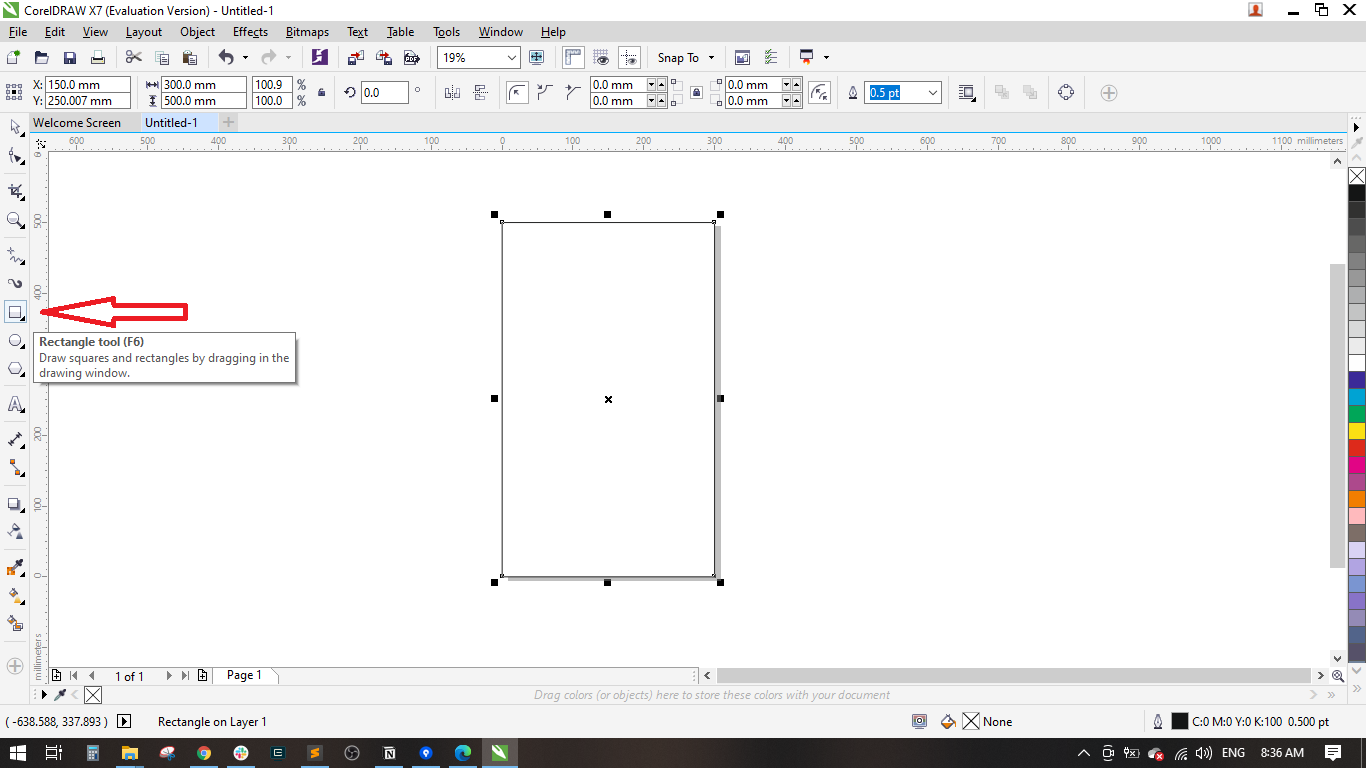
- Created a new document of 300 mm width and 500 mm height.
- Used the rectangle tool to draw a rectangle of 300 mm width and 500 mm height.
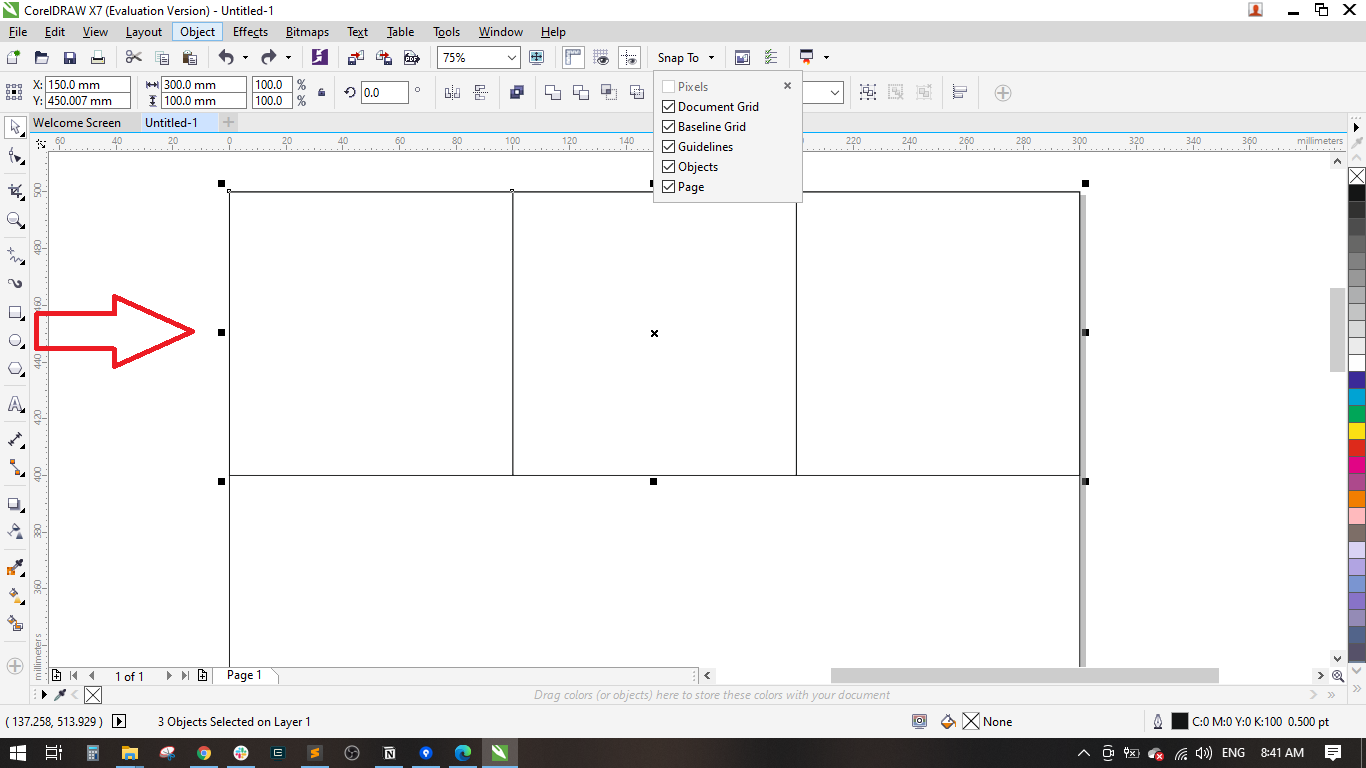
- Used the rectangle tool again to draw a rectangle which represents a drawer of 100 mm width * 100 height.
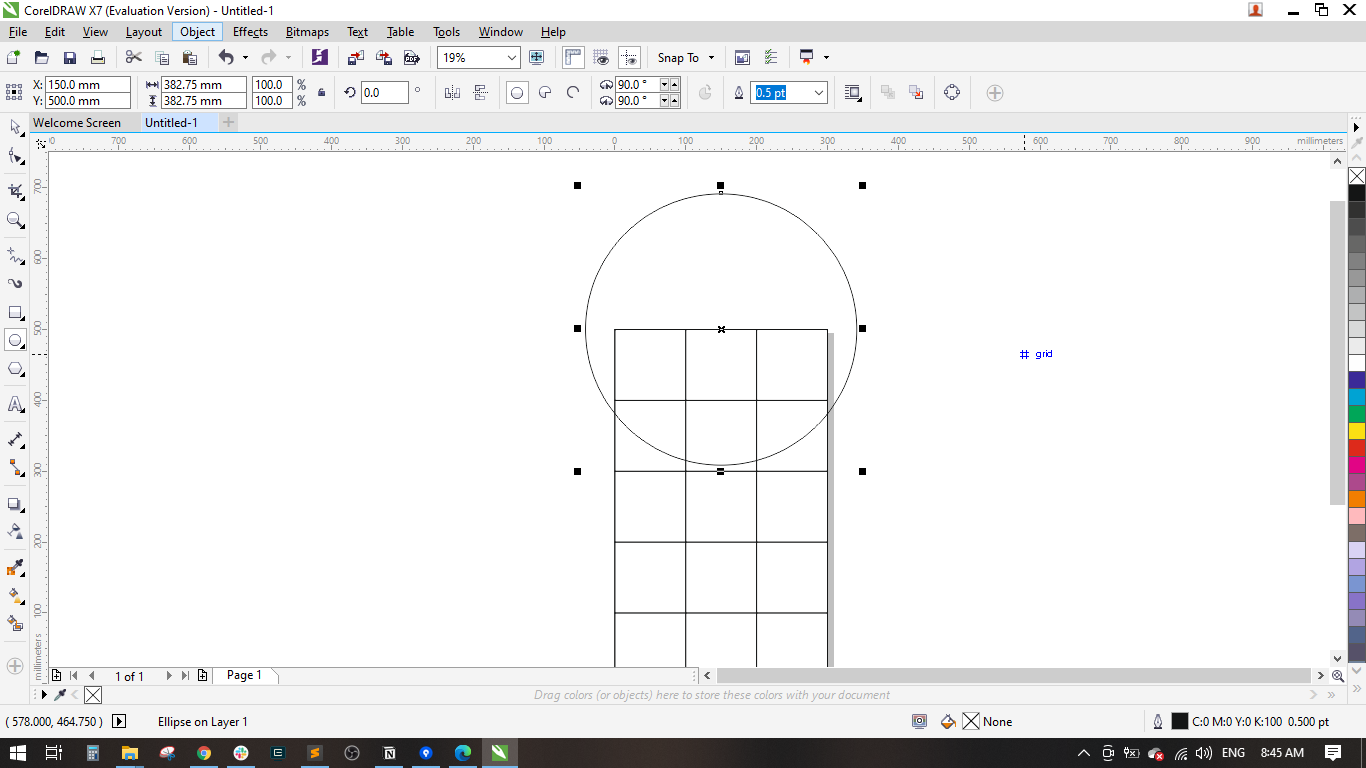
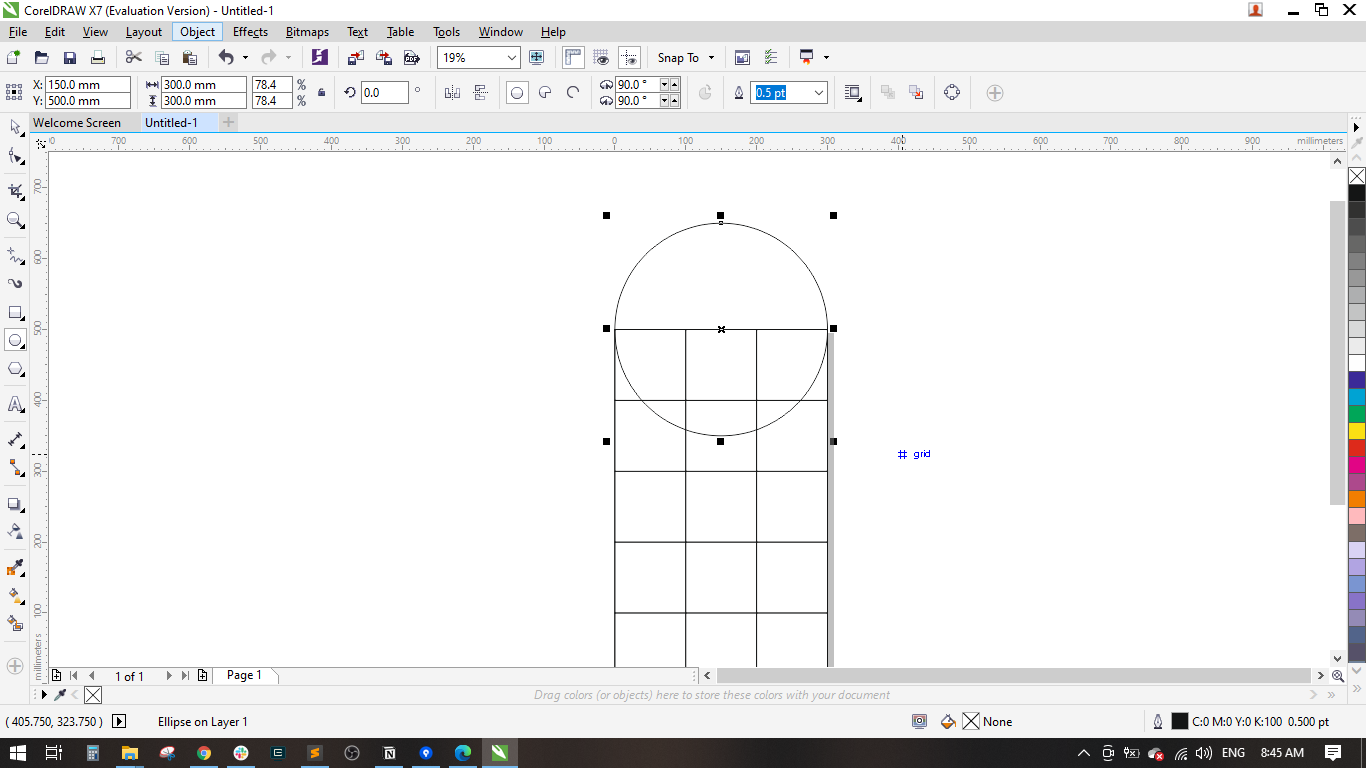
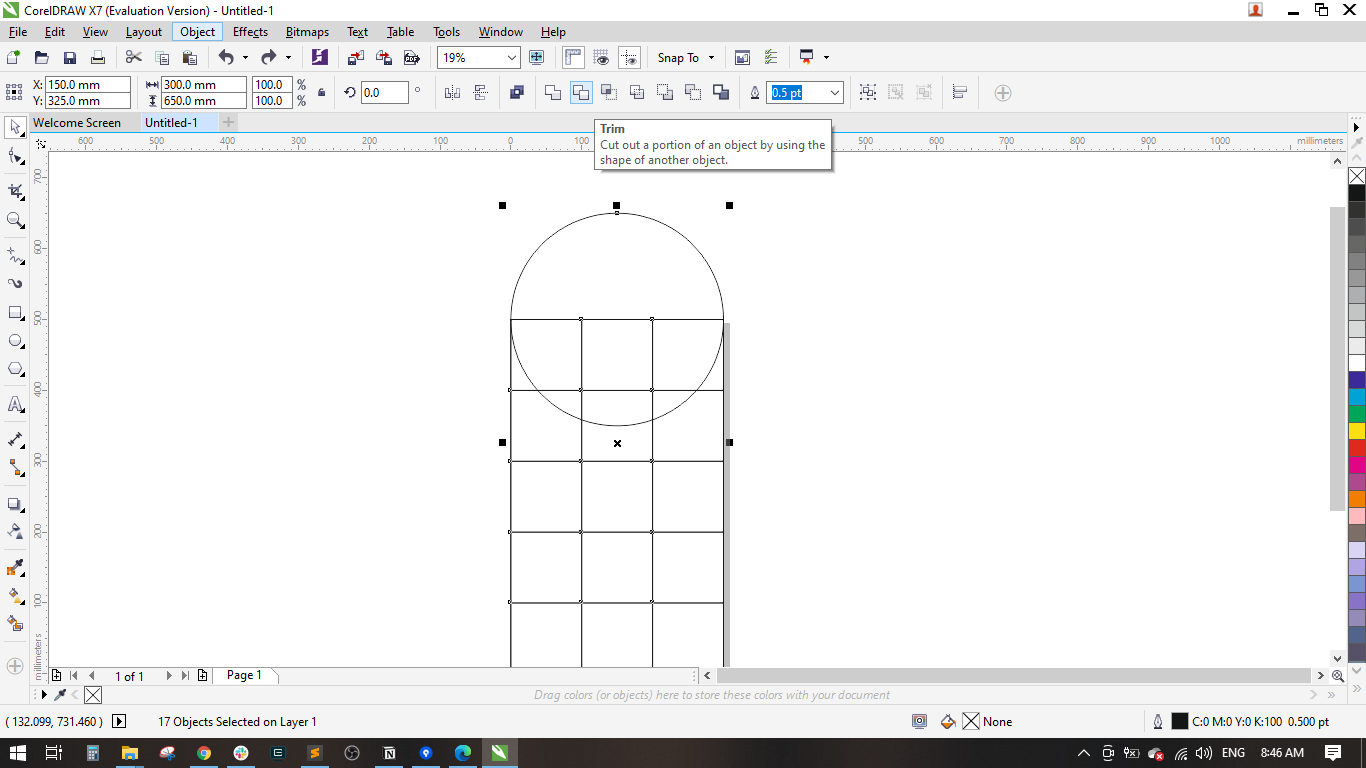
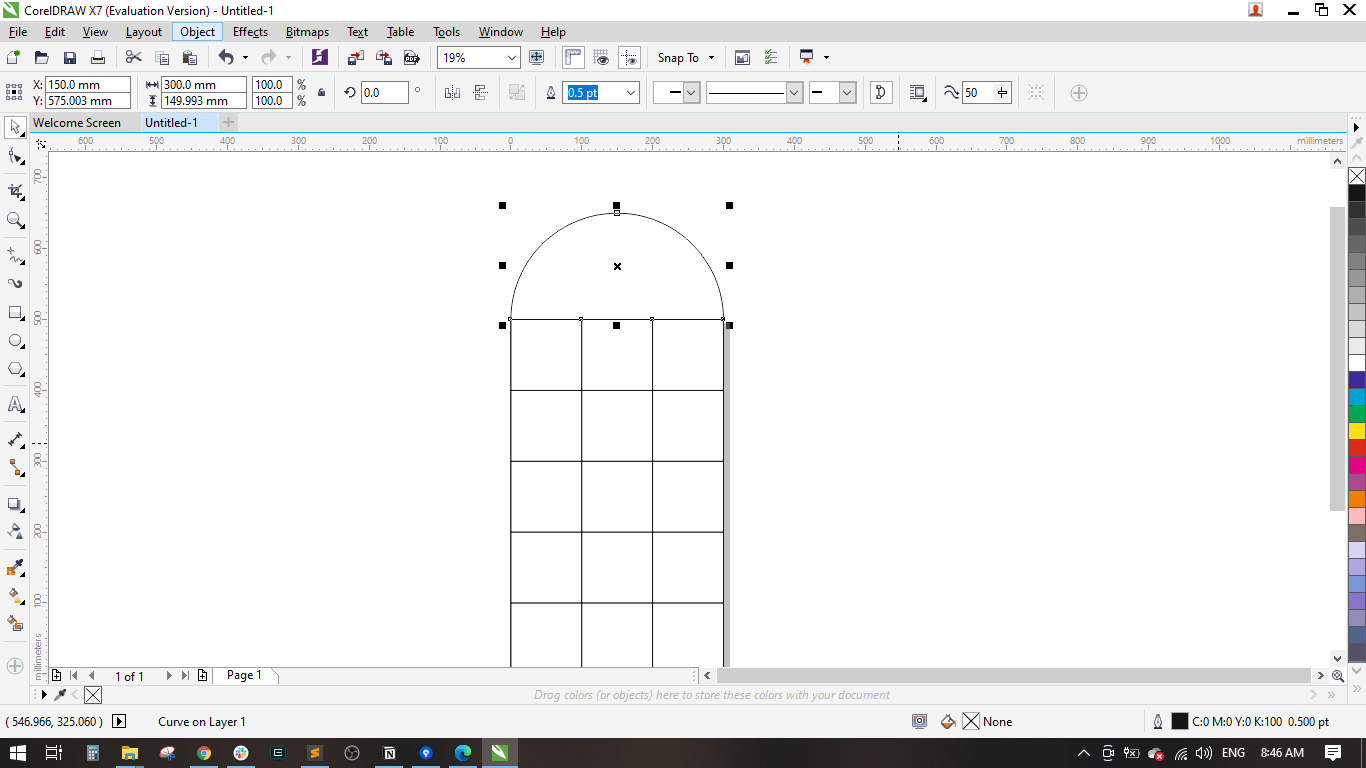
- Made a copy of the previous rectangle and pasted it beside and made a third one to create the first raw, did the same to create 15 identical drawers. Created a circle and trimmed it to create the following shape.
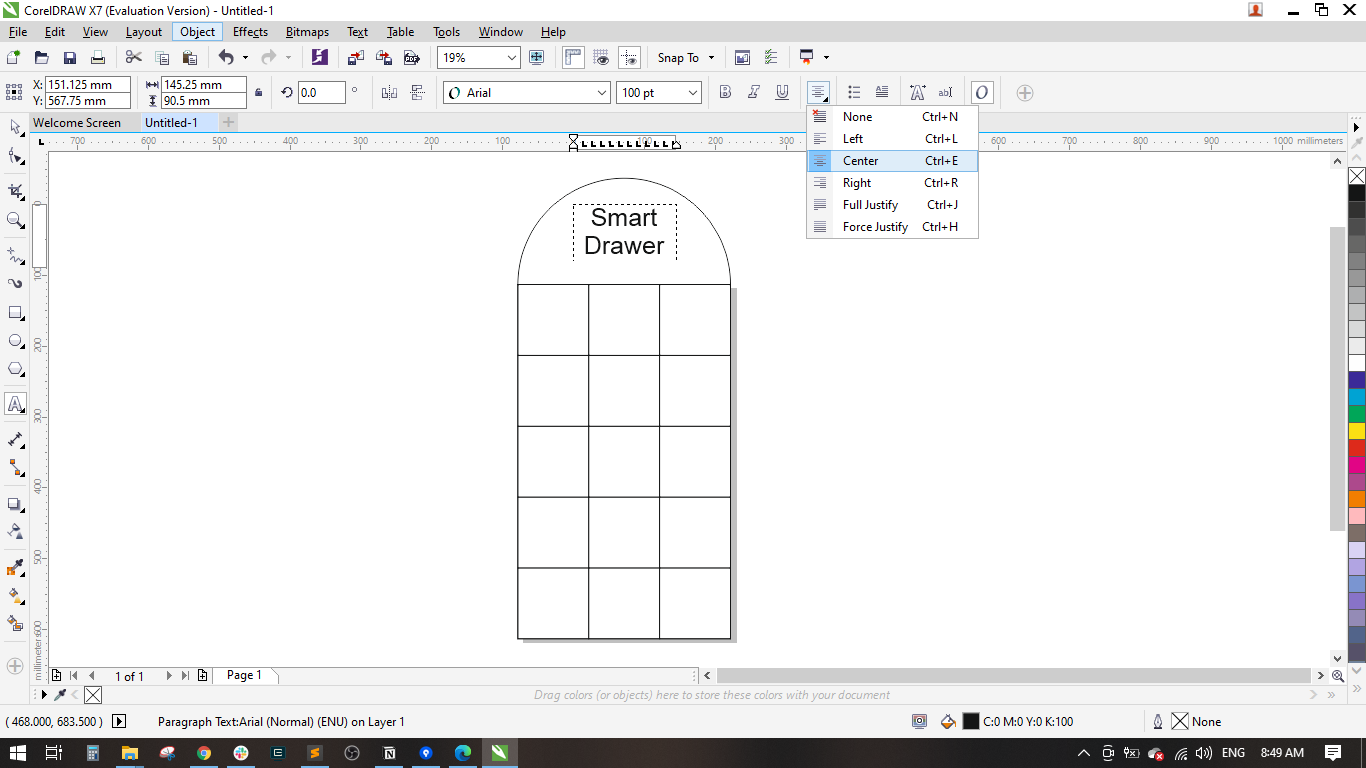
- Used the text tool to write down Smart Drawer
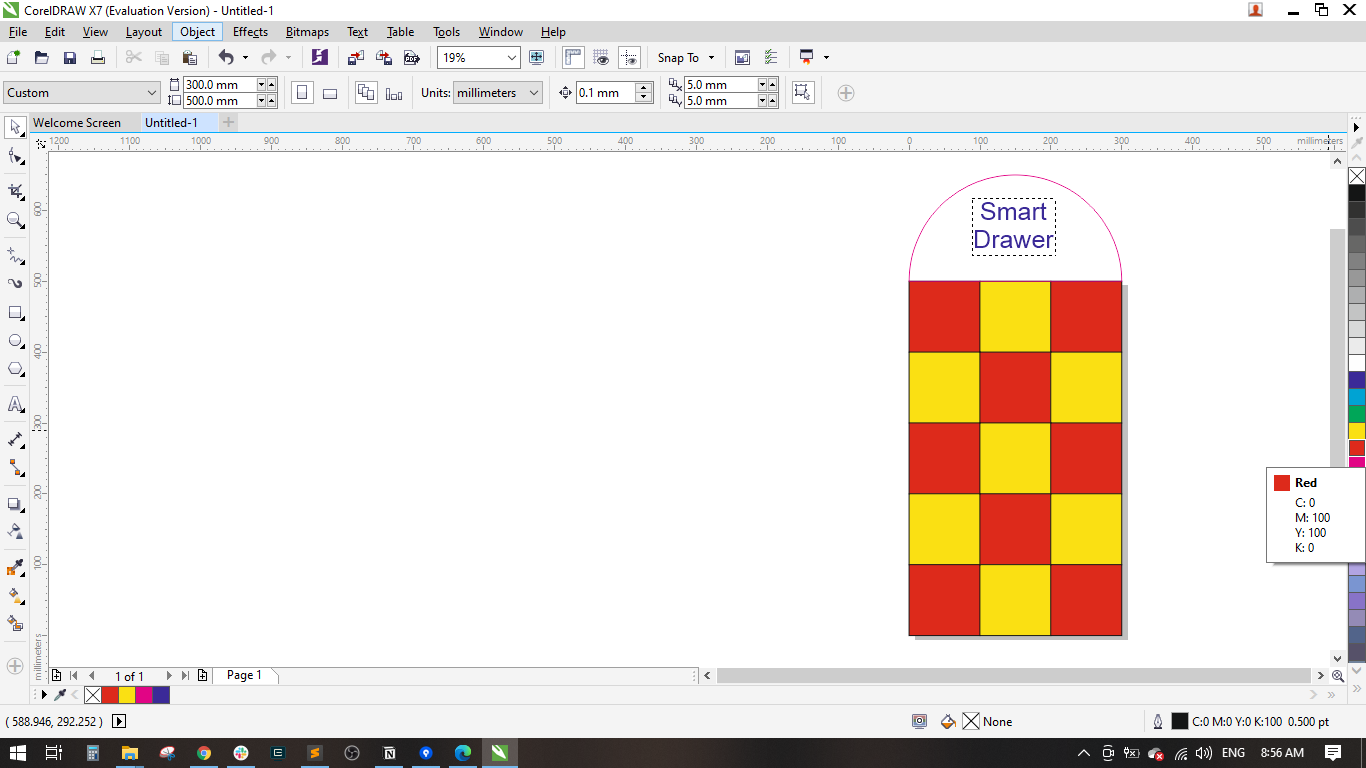
- Used the color palette to fill each drawer with a color.
- Here is a basic sketch for my final project.
- Issue#1: When I tried to apply a material appearance for each component, there was no change!
- Solution#1: I found that it is a must to break the link between the component in the assembly environment and its original source.
- Issue#2: When I uploaded the parts in .step format to be downloaded, there was an error and they could not be downloaded through the browser!
- Solution#2: I compressed the files in .rar format instead of .step and it worked well.
- Videos showing demonstration and animation for Slider Crank Mechanisms.
- OBS Studio is a free and open source software for video recording.
- Thanks to Ahmed Saeed, his assignment was really helpful and easy to follow.

Step(4): Sketching the final project using CorelDraw

Finally, I have:
√ Modelled (raster, vector, 2D, 3D, render, animate, simulate, ...) a mechanism
√ Compressed images and videos
√ Posted in my class page
Downloads:
Parts.rar Mechanism.f3d Final Project Sketch.cdrIssues & Solutions:
