Materials Information and Testing
Because of the last year of lockdowns most of the moulding and casting materials have been sitting unused for that long or longer. I was hoping to find a date of manufactures on the bottles to tell us how old they were. Each bottle has a lot number. On Smooth-On’s website they explain that the lot number starts with two digit year and two digit month of manufacture. It also lists the shelf life of each of the materials. To do a test we had some Ecoflex 00-30 which was unopened but more than a year old so it was technically expired. We didn’t want to waste our limited new materials for our first demo. We selected an existing wax mould that was in the lab so we didn’t have to make a new one. Once we had our materials selected we set up the space.
Space Preparation and Safety
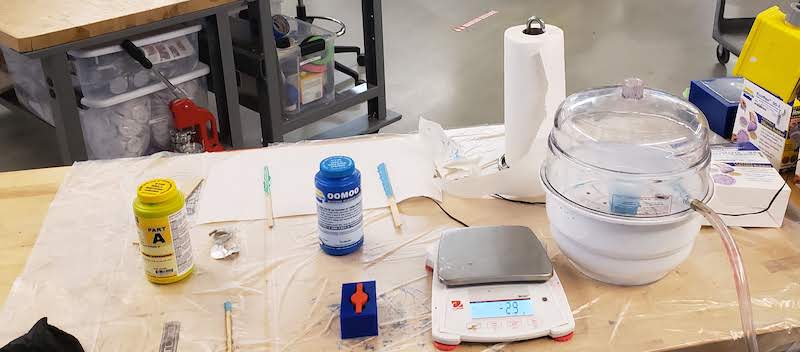
We covered the casting table in a plastic sheet to keep any mess contained. We also wear long sleeves, rubber gloves, and safety glasses. Even though these materials are skin safe according to their documentation we want to avoid unnecessary contact. These materials require room level ventilation which we have.
Casting Tools
The tools we prepared for casting are:
- Mixing cups
- Stir sticks
- Scale
- Vacuum chamber
- Vacuum pump
- Mould release spray
Casting Process
The instructions for the EcoFlex 00-30 said to mix it 1:1 by weight or volume. To determine the volume of our mystery mould we filled it with ground up plastic that Griffin had for his project. We then poured the plastic into a graduated cup to measure the volume. We needed 12oz total so 6oz of each part. Before you pour make sure to check the pot time and the cure time. Also make sure your vacuum chamber and mold are ready to go with mould release applied if needed. Our EcoFlex had a pot time of 45 minutes so we had plenty of time to get it into the mould. Make sure to pour slowly and smoothly to not introduce bubbles into the mix. Next stir parts A and B together. Mix side to side not up and down again to limit introduced bubbles. Check your instructions for suggested mixing times. Next degas the mixture in the vacuum chamber. Wait for the bubbles to finish popping or as long as you can before you run out of pot time. Make sure to slowly release the vacuum hose to not shock the chamber into launching the lid or your mixture. Pour the mix into your mould. Again pour slowly and smoothly. If there are multiple low spots in your mould start there and don’t move too much. The mixture will flow into the higher areas and minimize introduced air bubbles. If it fits put the mold back in the vacuum chamber and get any last air bubbles out. Now just set it aside somewhere that it won’t be bothered and wait for it to cure.
My Project
For my project I wanted to make a translucent silicone diffuser for the RGB LEDs that I have mounted to my tall bike. I’ve seen some really cool diffusers for strip LEDs and they give the lights a cleaner look than the exposed LED under a clear plastic cover.
Design
I started by modeling a single node of the GE G35 color effects LED string that I used. I 3d printed a sample to compare it to the real thing and that looked great.
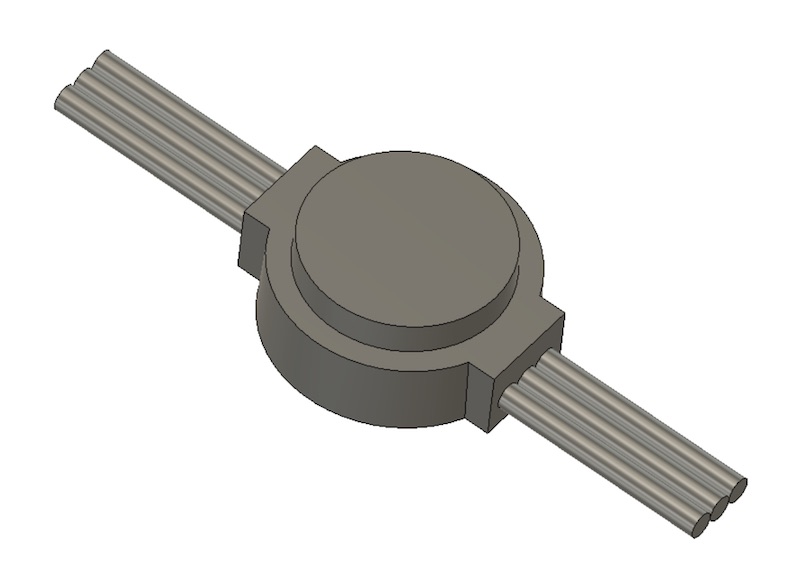
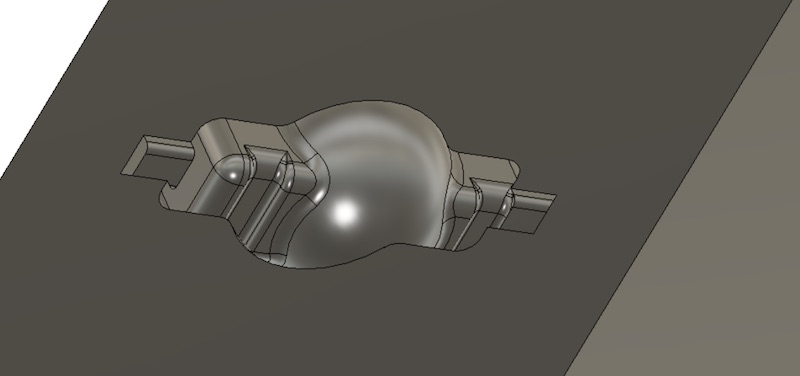
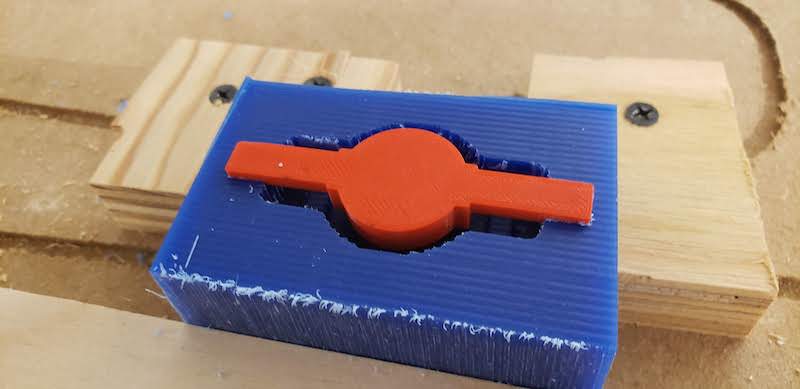
I then modeled a domed diffuser with some tabs on either side to pin down the wires and had a notch for a zip tie on either side to hold it down. I chose the sizes relatively arbitrarily just guessing what would be strong enough to survive the moulding process easily and no be ripped by a zip tie getting tightened around it. I then used a boolean cut to intersect the diffuser model with the model of the light. I added tangent lines around the wires to reduce the interior detail of the mould.
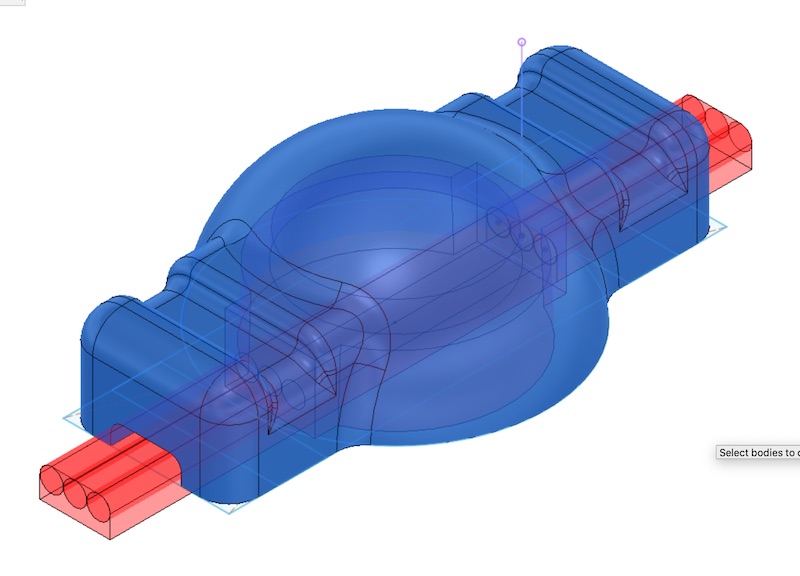
I then modeled the wax block and took a cut the shape of the diffuser out of that and made a cut so that the dummy LED could fit in the top of the mould. I parameterized the block so that whatever size stock I had could just be plugged in and the model automatically adjusted.
This is a very simple version of a 2 part mould. If I could remove the LEDs from my bike easily and just cast them right into the diffusers that would be a bit more robust but that’s not happening so the dummy LEDs will do the job.
Design Files
Machining the Mould
Stock Preparation
My part is fairly small so I cut a piece off one of the wax bocks in the lab to about 10mm larger in X and Y dimension and plugged those into my parameter table of my model. I exported an .STL file and uploaded that to mods
CAM
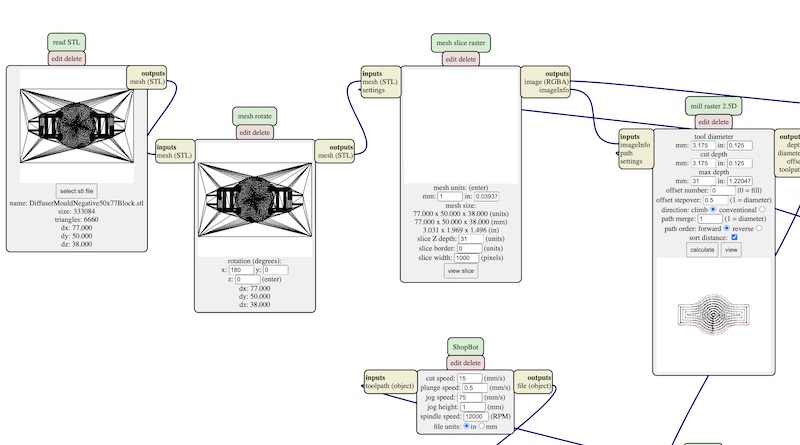
I used the Shopbot 2.5D stl program to create a roughing pass with an 1/8" flat end mill. I wasn’t sure what feeds and speeds to use but I found this helpful page from Bantam Tools on settings for wax machining.
Tool: 1/8" flat end mill
Feed rate: 37.402 in/min (950 mm/min)
Plunge rate: 1.575 in/min (40 mm/min)
Spindle speed: 12,000 RPM
I plugged those settings into mods and got a tool path out.
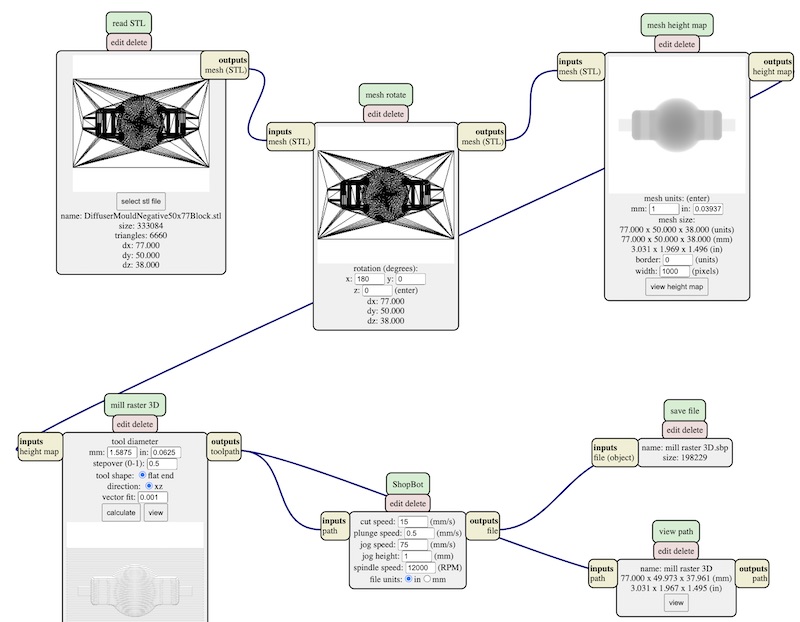
I created a finishing pass with the Shopbot 3D STL program. I used a 1/16" end mill and naively used some of the default settings which I hadn’t thought too closely about, more on that later. I used the speeds and feeds suggested by the article above.
Tool: 1/16” flat end mill
Feed rate: 37.402 in/min (950 mm/min)
Plunge rate: 1.575 in/min (40 mm/min)
Spindle speed: 12,000 RPM
Mods only supported a flat end mill but I wanted to use a ball end mill because my part had a lot of curves and fillets so I figured I would just wing it and see what happened.
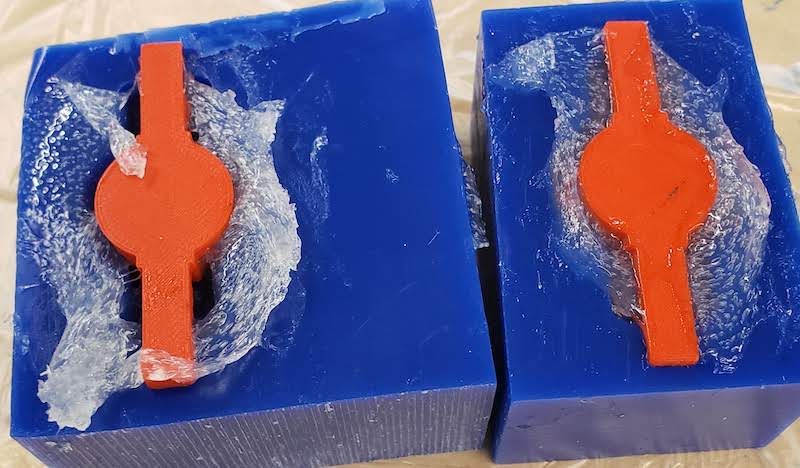
Milling
Setup
I used some plywood scraps to pin the wax block down to the Shopbot. All the force would either be down into the block or lateral the fact that it wasn’t strictly secured vertically was fine.
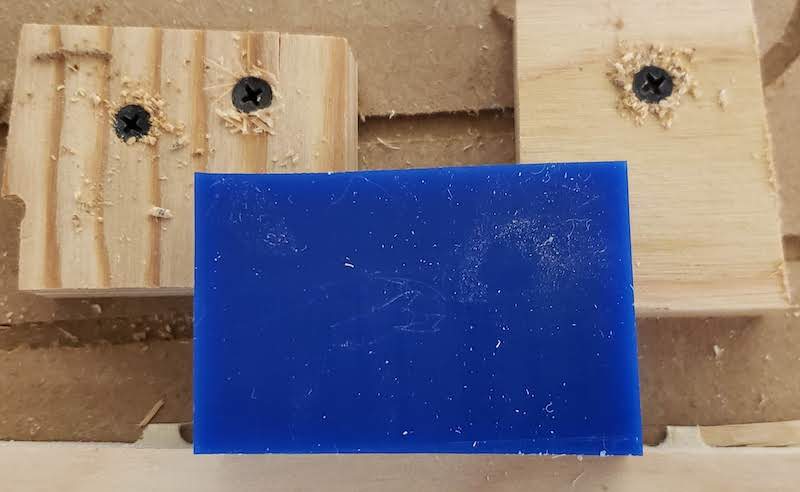
I setup for the roughing pass by using an 1/8" flat end mill with a 1/4" shank. I made sure it had enough stick out to reach the bottom of my 15.5mm deep part. I zeroed the x and y axes by eye to the corner of the part. I knew I had at least 5mm of clearance on all sides so it didn’t need to be that accurate. I zeroed the z axis on top of the wax block and ran the first cut.
Roughing Cut
It seemed a bit slow and when the cut finished it looks like there was a bunch of melted wax hanging onto the edges of the cuts. In general it seemed fine so I moved on to the finishing pass.
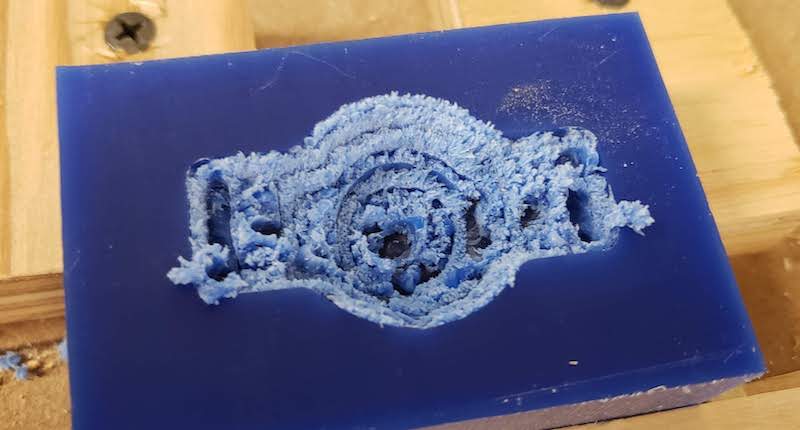
Finishing Cut
For the finishing pass I swapped to a 1/8" collet and a 1/16" ball end mill. I hoped that would give me nice smooth fillets and curves on the finished part. Running the cut was slow, about 20 minutes. With the dust collector hovering over the part I could only get a glimpse of what was going on at the end of each sweep of the part.
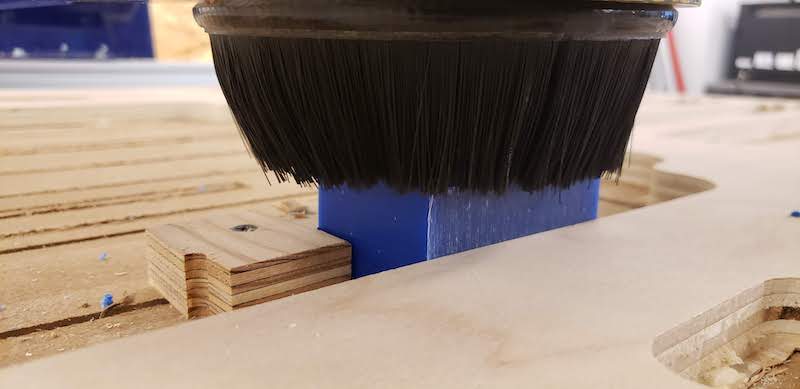
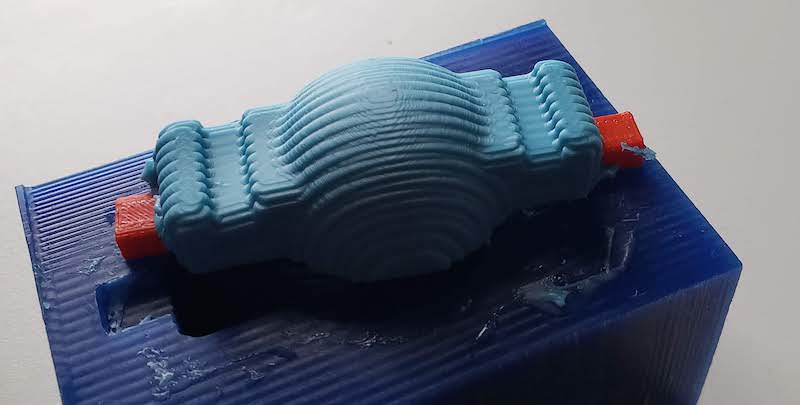
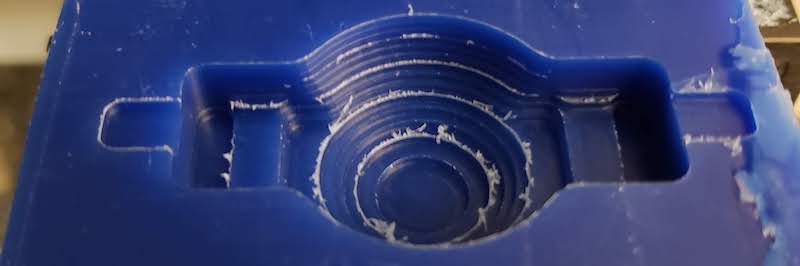
The limitation of using mods is that while it did nice smooth 2d moves on the YZ plane it was only moving on those two axes so at the end of the cut it still looked very striped like a 3d print. I should have thought about that at CAM time and reduced the step over between passes which would have smoothed that out more. What I did instead was after it finished I though that might be improved because the CAM was meant for a flat end mill so I swapped in a 1/16" flat end mill and reran the operation. It got a little better but not much. These finish passes did clean up most of the issued from the roughing pass with the wax remnants so the mould looked usable.
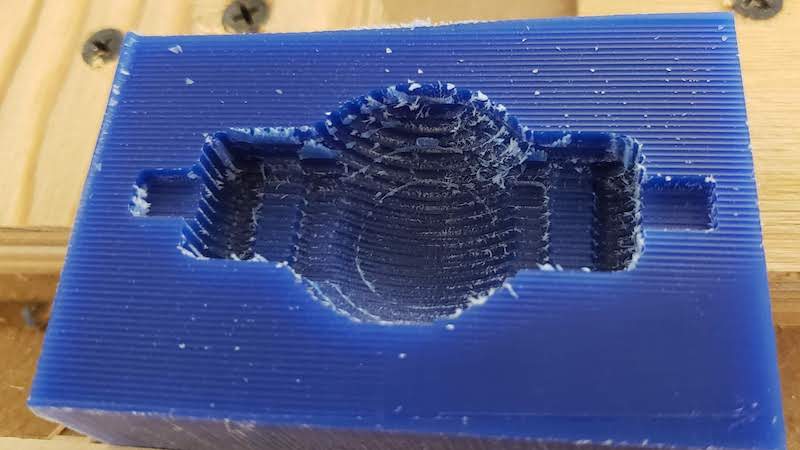
I was surprised that the 3d printed dummy LED wouldn’t fit into the notch that was meant for it but now that I know I should have done more passes that makes sense. Fortunately wax is soft so I could just jam it in there scraping away the edges for a perfect fit.
Casting
I setup the casting station as described above and was ready to test my mould. Greg had ordered us some OOMOO 25 so I chose to use that since it was the only thing we had that we knew for certain wasn’t expired. The major differences between this and the EcoFlex we had used the day before was the pot time is only 15 minutes but the cure time is also much shorter at 75 minutes. I knew time would be short once I had mixed the parts so I double checked that the vacuum pump was in position and plugged in, my mould and dummy LED had been sprayed with release agent, I had plenty of stir sticks, and everything I would need was within easy reach. Then I was ready to mix.
Mixing
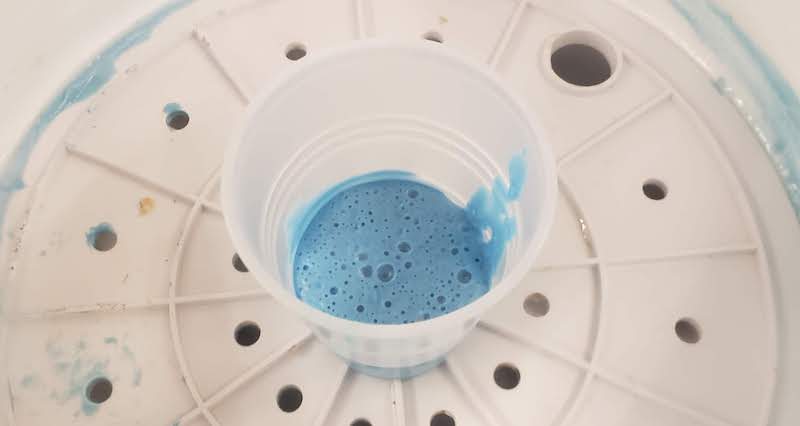
The mix ratios are 1:1.3 by weight. I opened up my model in fusion and it told me my part volume was 11.57 cc. I decided to make 15cc of silicone. The spec sheet on the OOMOO 25 said it’s Specific Gravity was 1.34g/cc so I needed 20.1g. Using the mix ratio above I calculated that I would need 8.74g of Part A and 11.36g of Part B. The bottles said to stir the parts thoroughly before mixing so I did so using the side to side motion as best I could but I think I added some air into each part. With the bottles full they frequently rode up the top edge and folded over onto themselves. If I was using most of the bottle it would probably make more sense to pour them into an open cup before this stir but since I was using so little that didn’t make sense. Once they seemed uniformly stirred I poured 8.9g of Part A into a cup on the scale. A bit over my target but pretty good. I then got up to my final 20.1g with Part B. I started mixing until the color was uniform. The instructions said to mix for 3 minutes but with only 15 minutes of working time I probably didn’t wait that long. I put the mixture into the vacuum chamber and a lot of bubbles came out. I released the vacuum and did that a second time for good measure.
Filling the Mould
I had to pour into the gap around the dummy LED and the mixture was more viscous than I expected. This caused quite a bit of overflow onto the top of the mould and dummy LED. A syringe would have made this process cleaner, but fortunately nothing spilled over the edge of the mould. Doing this again I think I would fill the mould most of the way before installing the dummy LED. Once filled I put the mould in the vacuum chamber. Very few bubbles came out but a few did. I shook the whole chamber a bit to induce some vibration into the mould incase there were bubbles trapped under the dummy LED. I noticed that when I released the vacuum the silicone level in the mould had dropped by 1-2mm so I used a stir stick to scrape some of the excess silicone sitting on top of the mould block back into the mould. This brought the level back up to the top and cleared off most of the over pour.
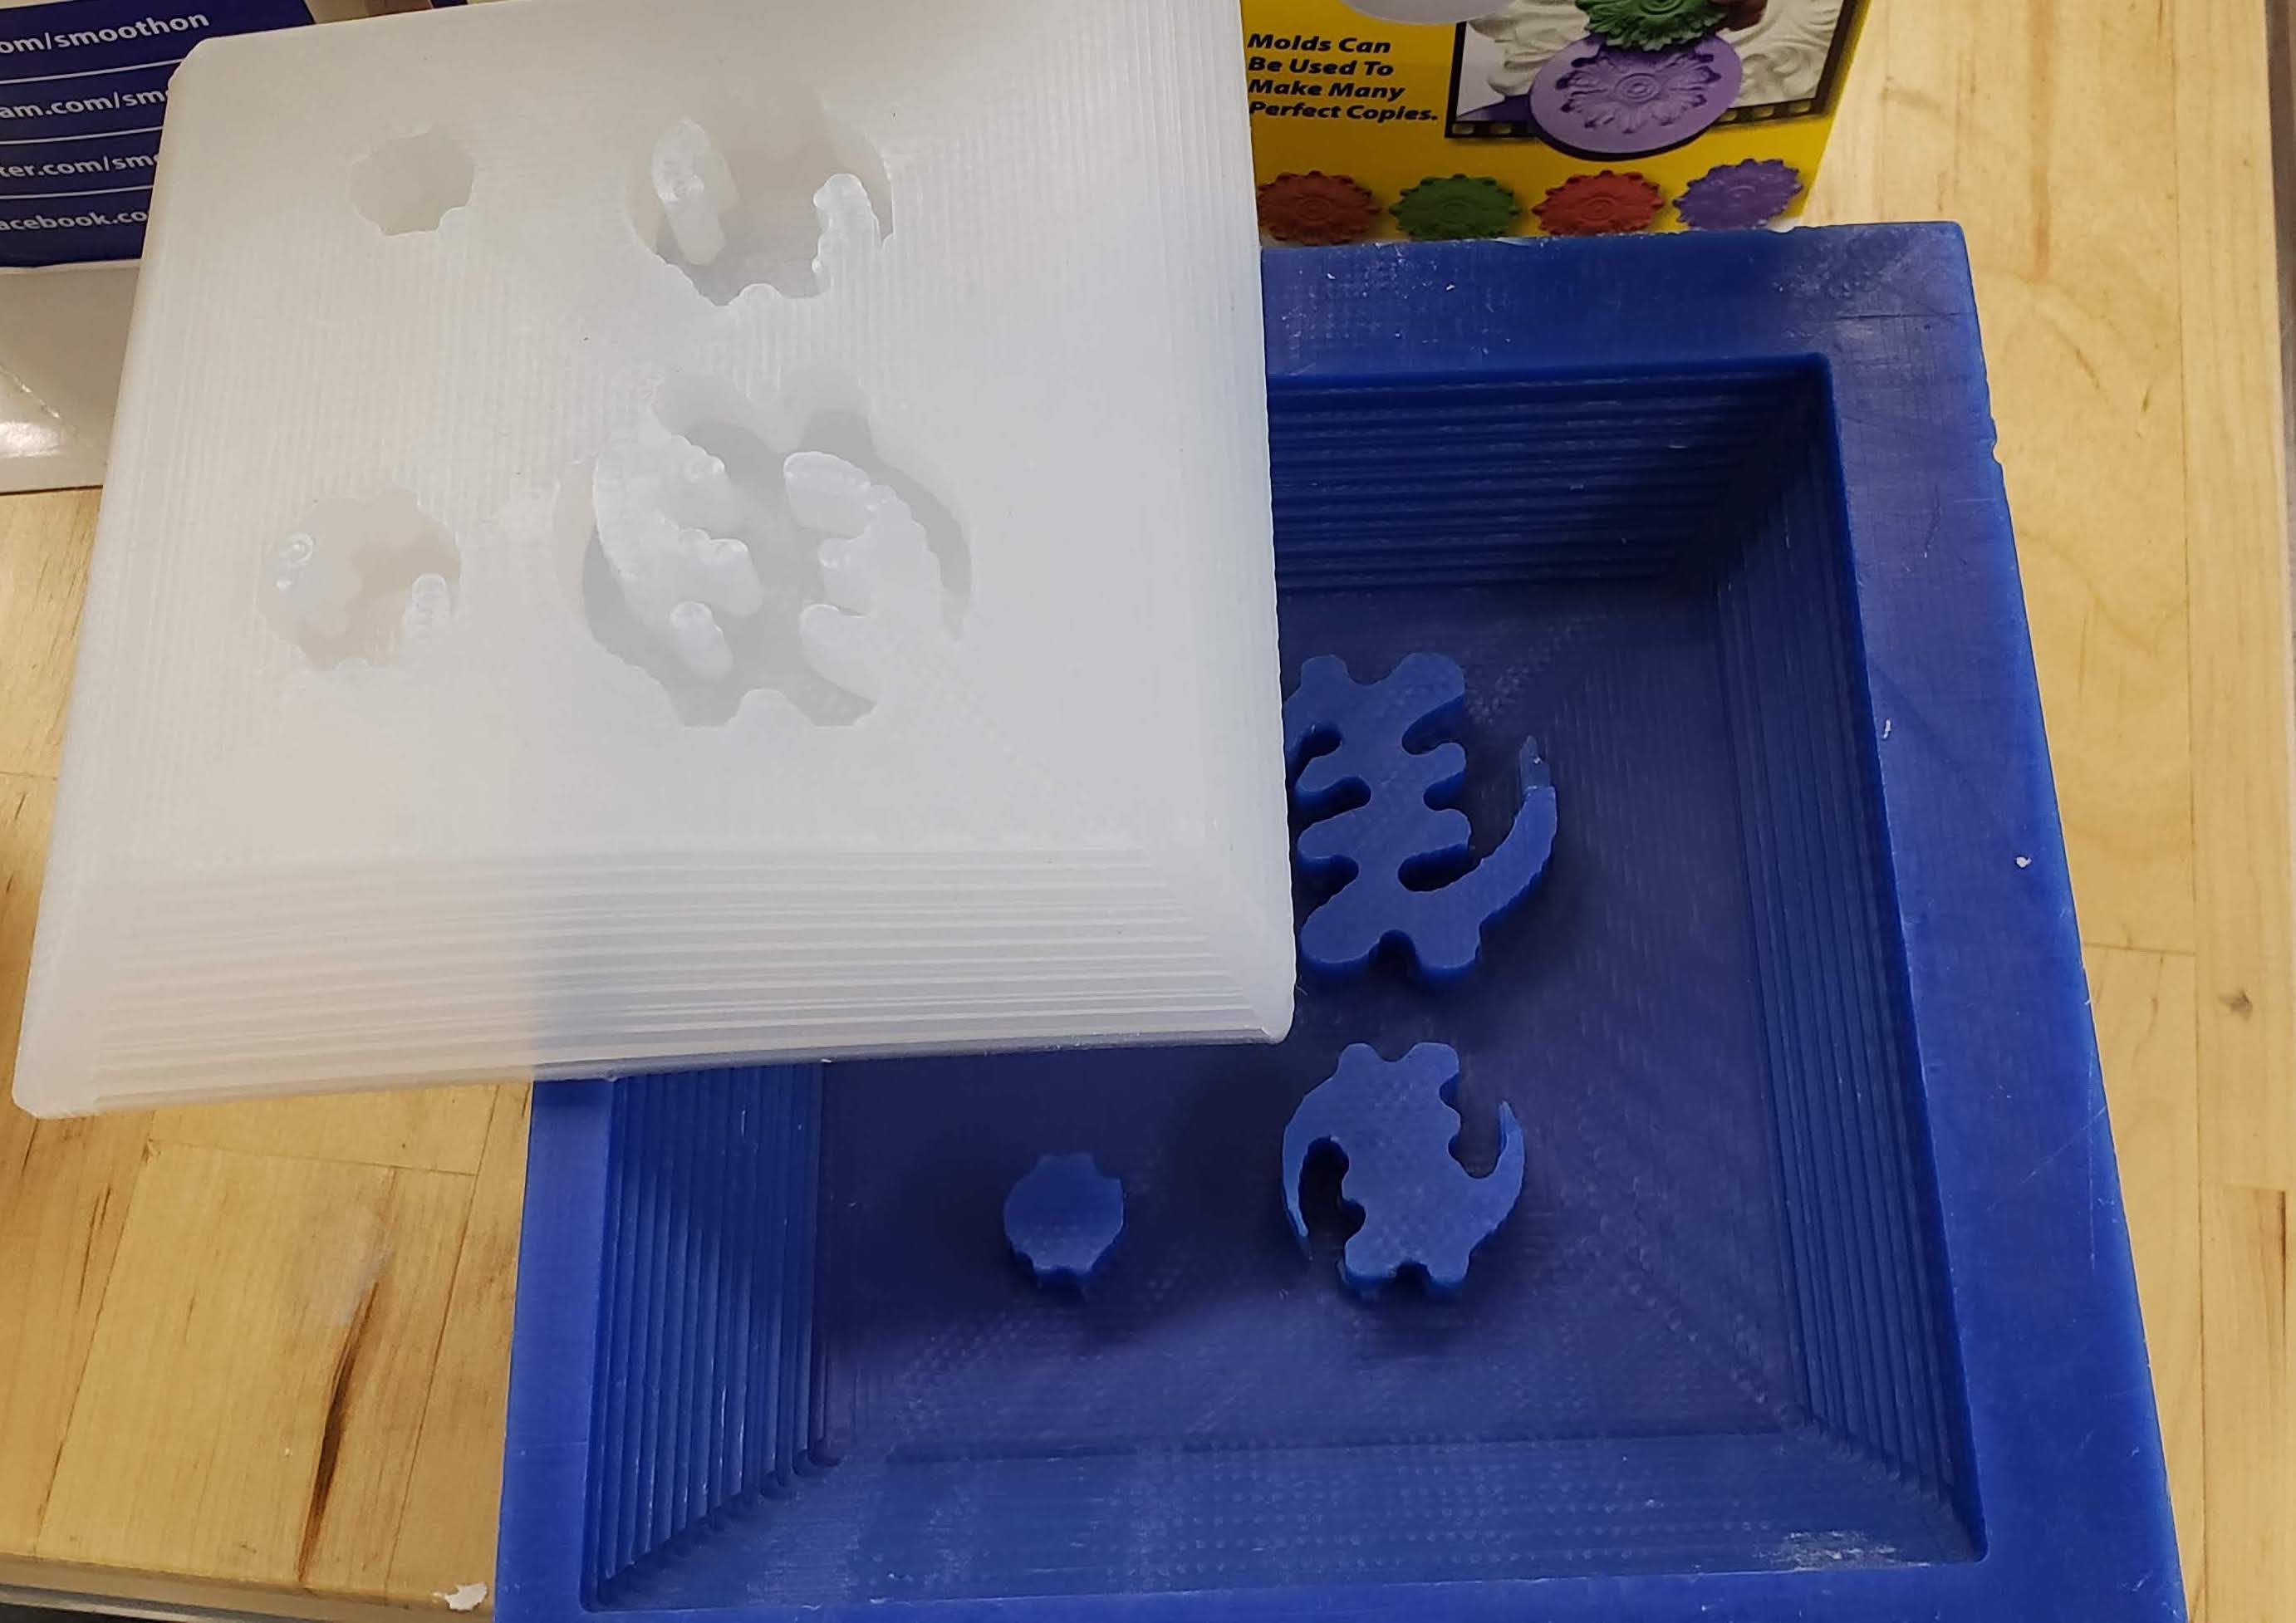
Finished Part
I used the cup of left over silicone to determine when it had set. I would poke it with a stir stick every so often to see how soft it was. It took about 2 hours before I thought it was ready to come out of the mould and even then it was still a bit sticky and soft. I’m not sure if this is because I didn’t mix the parts well enough before combining them and only pouring a small amount off the top of the bottles. When I pulled the part out of the mould it came out just fine.
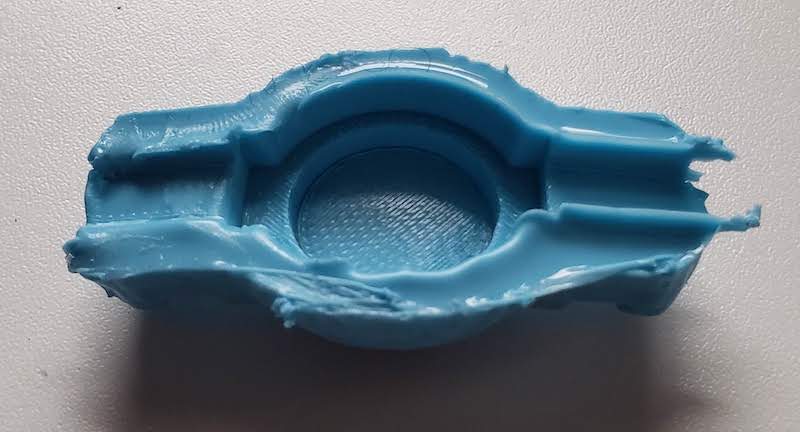
There was a bit of flashing where the mould over poured on top of the wax or up it has stuck to the sides of the dummy LED but it fit right onto the real thing and is strong and flexible. Of course I hadn’t though about the fact that this material would be a different color or translucency as the Ecoflex we had used the day before so it won’t work as a diffuser because its opaque but it proved out the mould would work fine.
Bonus Round: Spinning up the Tormach
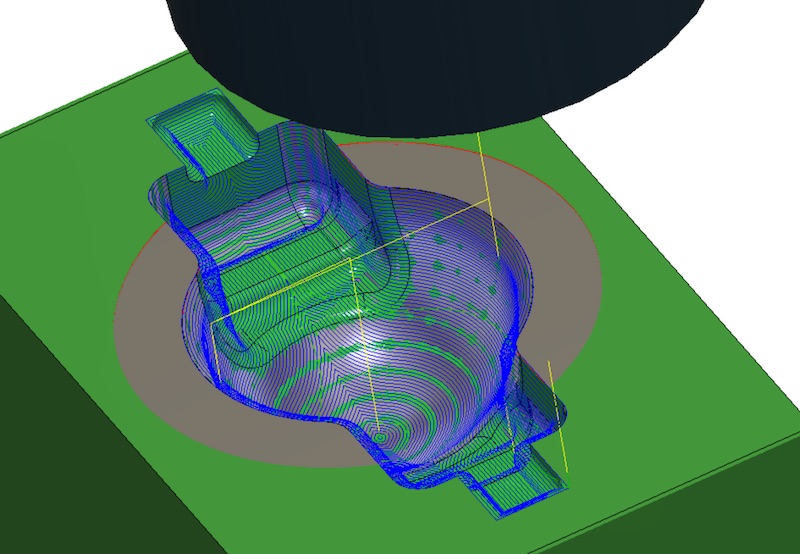
The lab has a Tormach PCNC 440 “that no one has used in a while”. Griffin and I wanted to figure out how to use it because we both had ambitions of machining aluminum parts for later projects. I also wasn’t perfectly happy with my first mould because I didn’t quite understand the CAM settings. To use the Tormach I spent a few days getting up to speed on Fusion 360 CAM. I started with the excellent video tutorials from NYC CNC. I used the 2D adaptive clearing and 3D contour tool paths to mill out the mould. I spent most of my time figuring out the tool libraries. There are some example tools build into Fusion and they worked for first passes but I found a library of Tormach tools that will have most of the tooling already at the lab as well as the correct tool holder.
Once we were at the lab we selected the actual tool we wanted to use to make our cuts and I modified the tool profile for a 4 flute 1/8" flat end mill to match our 2 flute 1/8" flat end mill. I measured the tool stick out and matched the tool number in the Tormach Path Pilot software.
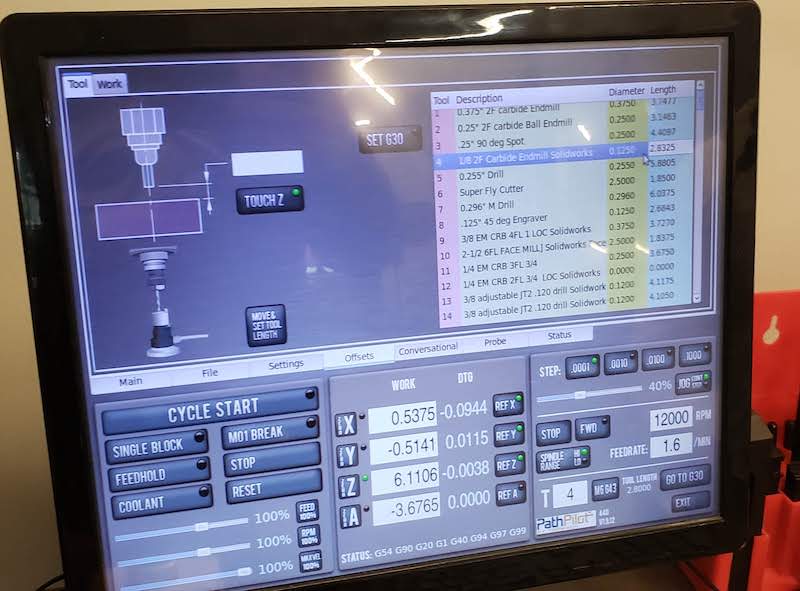
I tried to run a test cut with no tool in the spindle just to make sure nothing crashed. That showed me that my zeroing was wrong and the origin of my CAM in Fusion didn’t match where I thought my zero was in the machine. I figured out how to change the setup origin in Fusion and re-zeroed the machine. I also though that the machine wasn’t moving but I figured out that it was doing a helical plunge which was extremely small and slow. I could hear steppers moving but couldn’t actually perceive motion visually. I knew these helical plunges were not needed for wax so I found the setting to remove them and just plunge into the cuts.
Then I was getting inpatient and so instead of running another tool free pass I just put in the tool and hit run. Everything worked out. The “roughing” pass was definitely not as rough as it could have been. I think it was taking smaller cuts than was needed, but I’d rather be on the conservative side for our fist cuts on the machine. That cut took about ten minutes and looked great.
Next I loaded up the finishing pass with a 3D Contour tool path. I had intended to use a 1/16" ball end mill but there wasn’t one already setup for the Tormach so I just decided to see what kind of result I would get with the 1/8" flat end mill. I switched the tool in Fusion and regenerated the tool path and sent it to the machine. The took a while because the flat end mill needed to take a lot more passes in Z than the ball end mill would have but the results were fantastic.
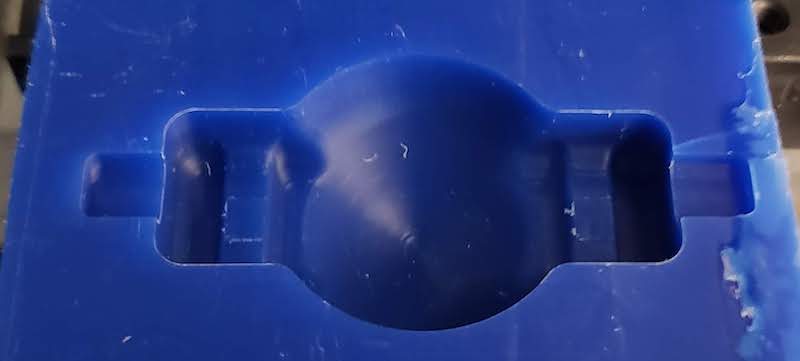
I had noticed in the CAM simulation that the finishing pass was leaving behind a little plateau of material on either side of the mould so I quickly added a third operation to clear out that material. it was on a flat surface so a simple 2D pass could do that very quickly.
Casting Take 2
Now with two moulds I wanted to try to cast some clear silicone. Unfortunately I think we used up the last of the EcoFlex 30 that we had in the lab and thinking it was expired we mixed the leftovers together to get that to set and throw it away. We had some EcoFlex 35 Fast that also claimed to cure as translucent white. The tricky part of it was the pot life is 2.5 minutes and the cure time is 5 minutes. The direction say to stir the mix for 90 seconds. That’s not a lot of time left for degassing and pouring. I setup a stop watch on the table and started it when I poured the two parts together. I stirred for about 60 seconds. I poured it into my two moulds. This time I mostly filled the moulds before I installed the 3d printed secondary mould because it was difficult to pour around it cleanly on my last attempt. I had filled the moulds at about the 2 minute mark and tried to rush them into the vacuum chamber because I could see that they were full of bubbles. This backfired because it was setting so fast I basically created silicone foam.
Fortunately because this cures so fast I didn’t have to wait long to pull the failed casts out of the moulds. The surface finish actually came out well but the vacuum had pulled so much of the silicone out of the mould and onto the surface full of bubbles that the parts were unusable.
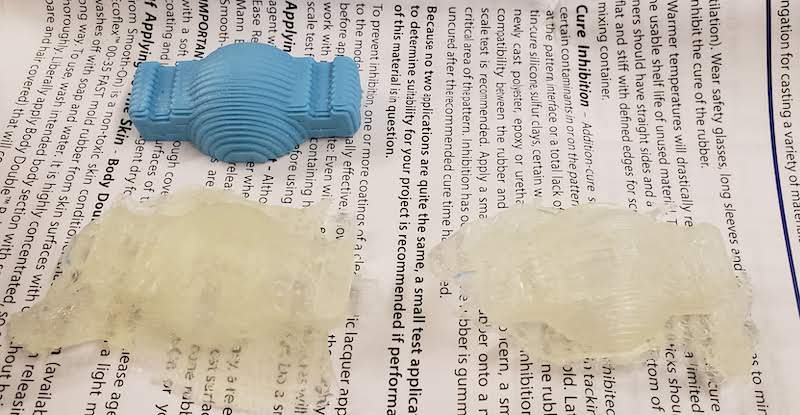
I also inspected the leftover silicone that cured in the mixing cup and it had a lot of bubbles but was translucent enough to work and the surface finish was pretty good despite the bubbles without going in the vacuum chamber.
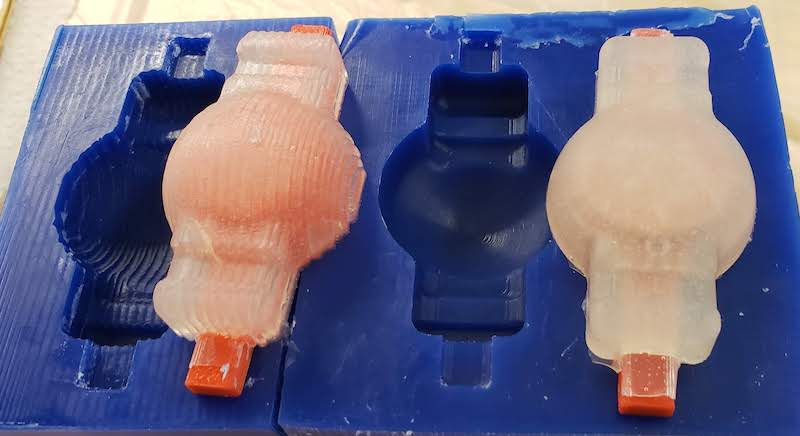
For the second try I mixed up some more and filled the moulds and just let them sit.

After about 5 minutes they had cured and came out of the moulds beautifully. The surface finish from the second mould is fantastic and smooth. There are tiny bubbles in the part and some larger ones got trapped against the LED blank but the external surface that was against the wax is beautiful.
Testing the Diffusers
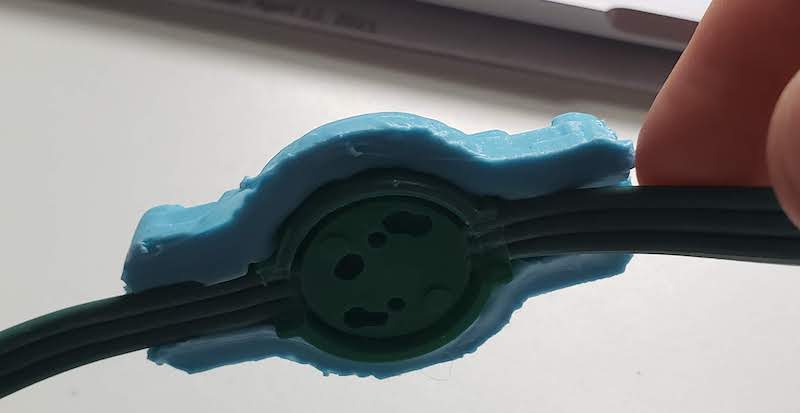
I had a few extra LEDs incase any of the ones on my bike break so I wired them up to an Arduino and put an example RGB blink program and put my test diffusers over two of them.
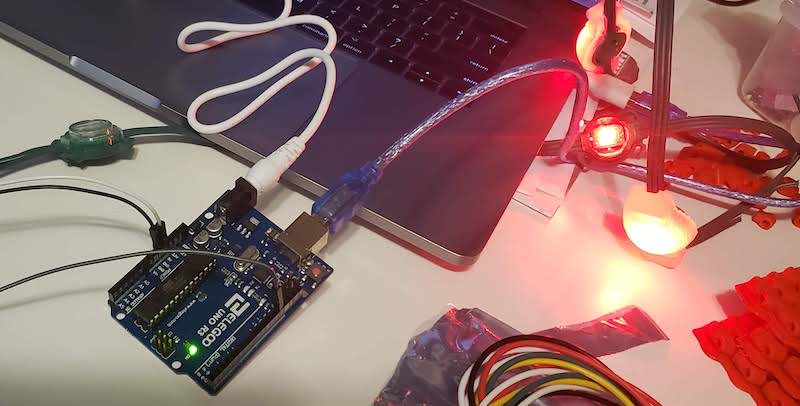
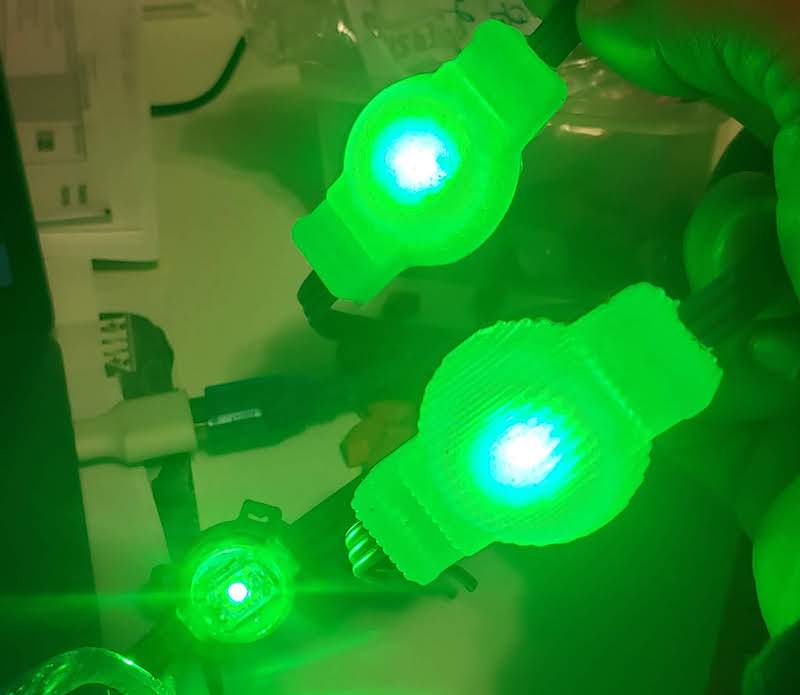
They look great and don’t dim the light much. I don’t think from a distance the two different surfaces make much of a difference but I would probably use the smooth one if I actually want to mould 38 more of these to go on all the LEDs on my bike.