5. 3D Scanning & Printing
Group Assignment
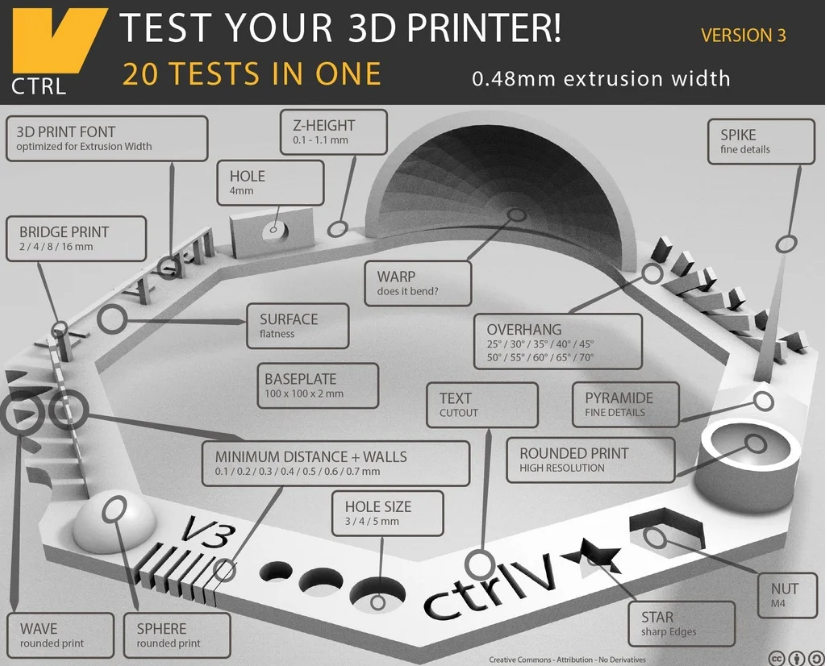
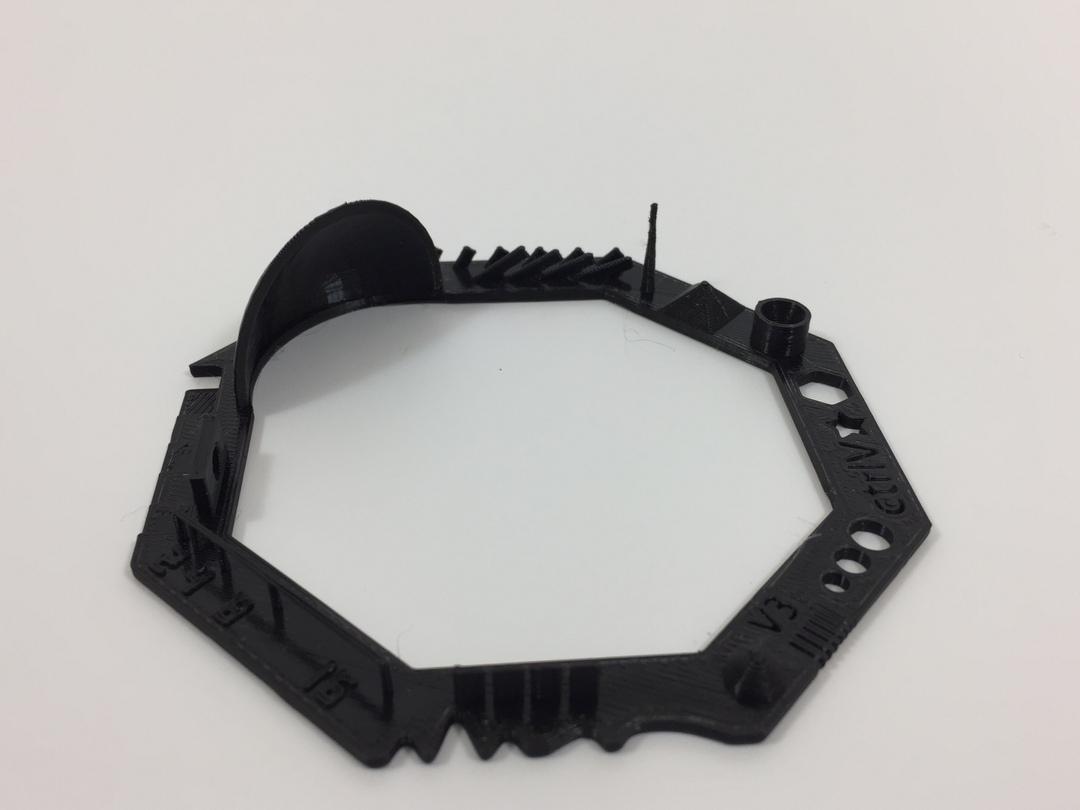
For the group assignment we printed with all the printers we had at our disposition the following part.
The video shows the first layers of the print. There was a default with the horizontality of the bed which made the left traces flatter and wider than the right traces. We corrected the effect by screwing the vertical axis of the Reprap.
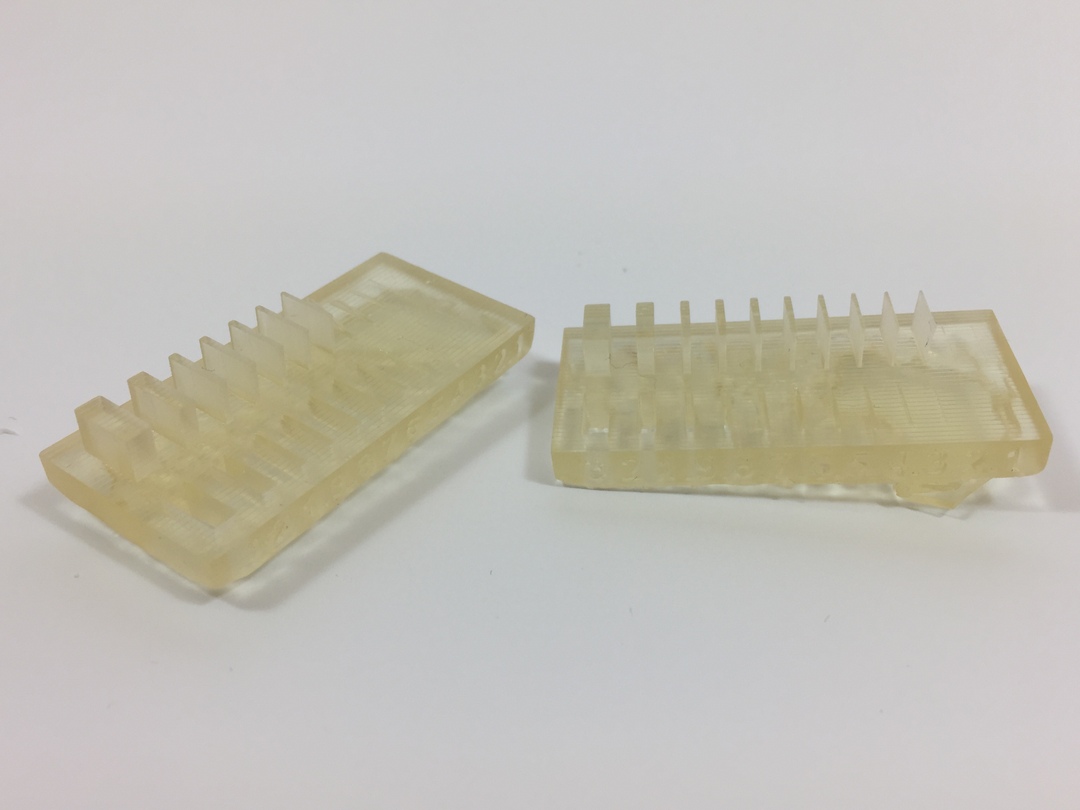
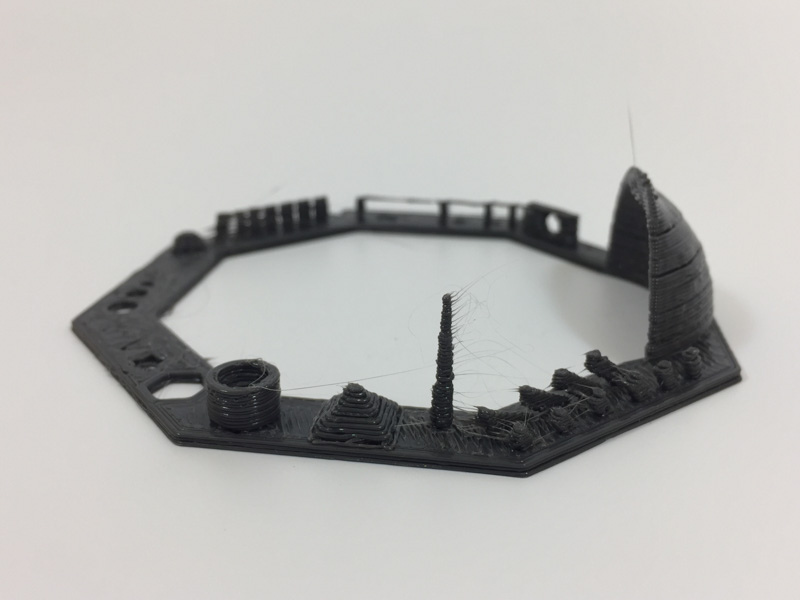
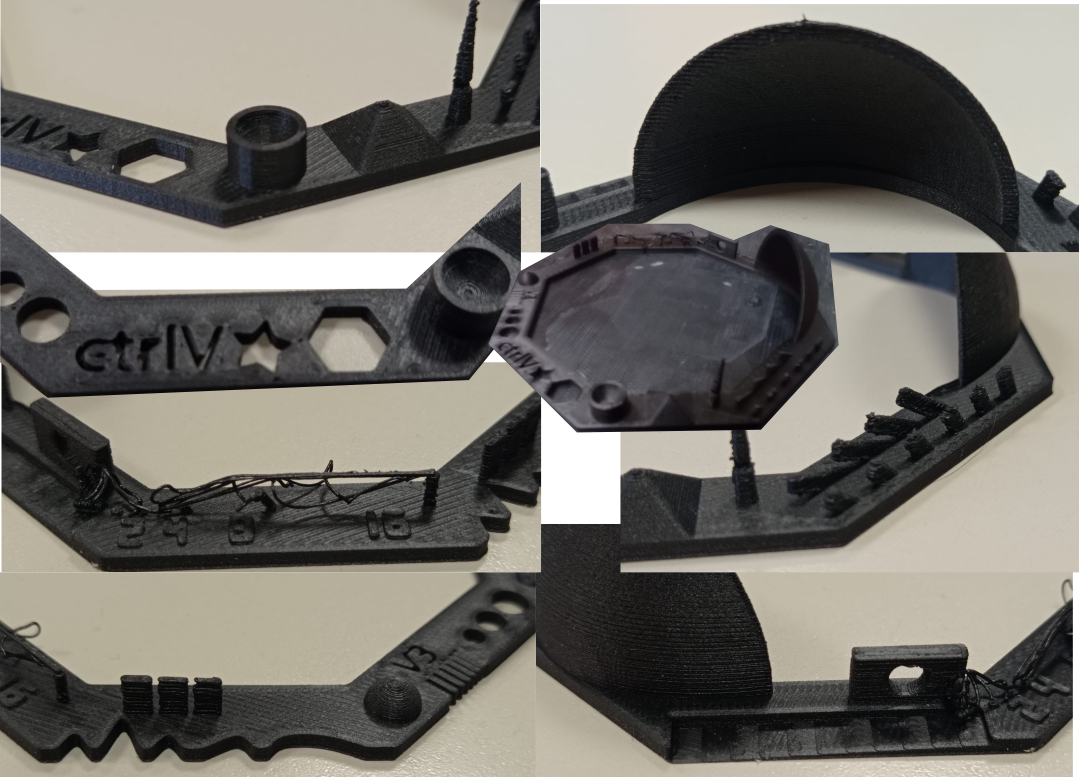
In the table below one can find the result for the part I was responsible of. But first the pictures below present the main defects.
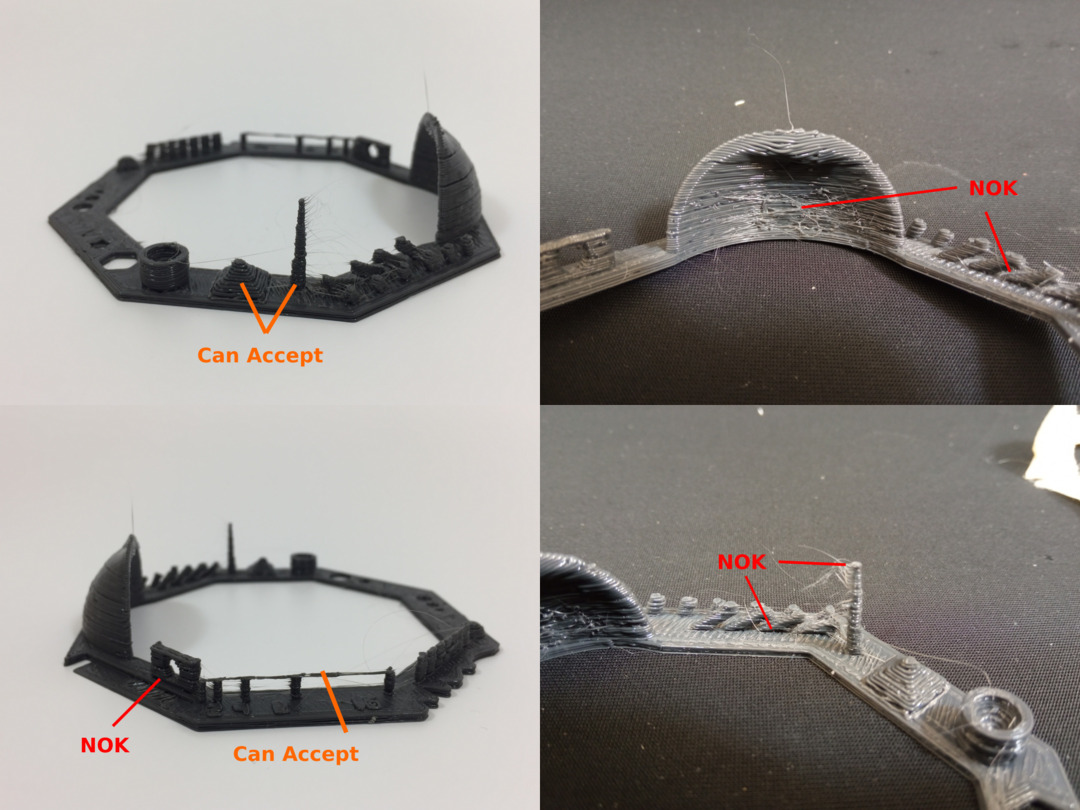
The main defaults of the printer I used where the following ones :
- Nozzle : 0.6mm - too big for this kind of precision work
- Cooling fan : No “part” cooling fan was mounted
- Plate horizontality : we had issues with the plate horizontality
- Extruder : the extruder being old the filament was not properly extruded
Taking into account the mentionned issue I tried to make a fair evaluation of the machine. But the result is not concluant and some time should be spent on the printer to make it work properly.
| ID | Description | Pass/Fail |
|---|---|---|
| 01 | Nut, Size M4 Nut should fit perfectly |  |
| 02 | Wave, rounded print |  |
| 03 | Star, Sharp Edges | |
| 04 | Name, Complex Shapes | |
| 05 | Holes, Size 3, 4, 5 mm | |
| 06 | minimal Distance: 0.1, 0.2, 0.3, 0.4, 0.5, 0.6, 0.7 mm | |
| 07 | Z height: 0.1, 0.2, 0.3, 0.4, 0.5, 0.6, 0.7, 0.8, 0.9, 1.0, 1.1 mm | |
| 08 | Wall Thickness: 0.1, 0.2, 0.3, 0.4, 0.5, 0.6, 0.7 mm | |
| 09 | Bridge Print: 2, 4, 8, 16 mm | |
| 10 | Sphere, Rounded Print 4.8mm height | |
| 11 | Sphere Mix, 7 mm height | |
| 12 | Pyramide, 7 mm height | |
| 13 | Overhang: 25, 30, 35, 40, 45, 50, 55, 60, 65, 70° | |
| 14 | Warp, does it bend? | |
| 15 | 3D Print Font, optimized for 3D printing | |
| 16 | Surface, Flatness | |
| 17 | Size, 100 x 100mm x 23.83 (10mm width) | |
| 18 | Spike, minimum Layer Time, 21 mm height from Bottom (include Baseplate) | |
| 19 | Hole in Wall, 4 mm diameter, check for proper print | |
| 20 | Raft Test, raft should be just under the model | |
| 21 | Retract Travel, check retract settings for longer travel | |
Global evaluation table
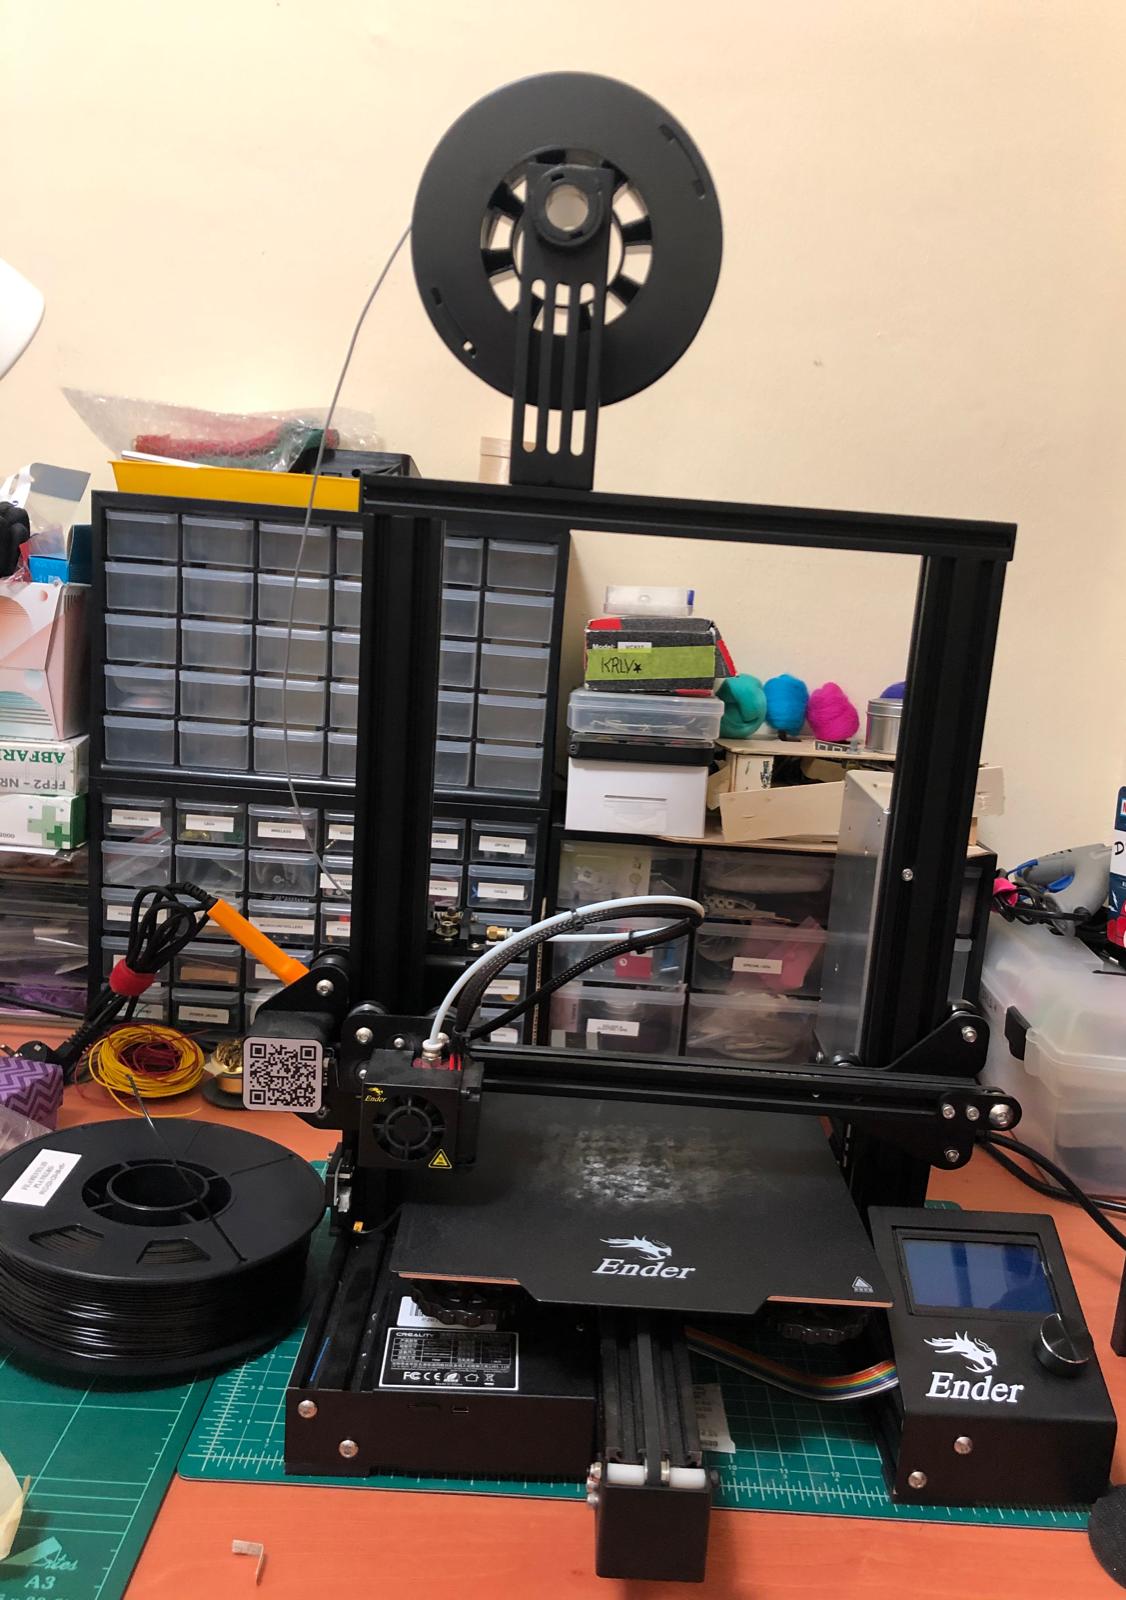
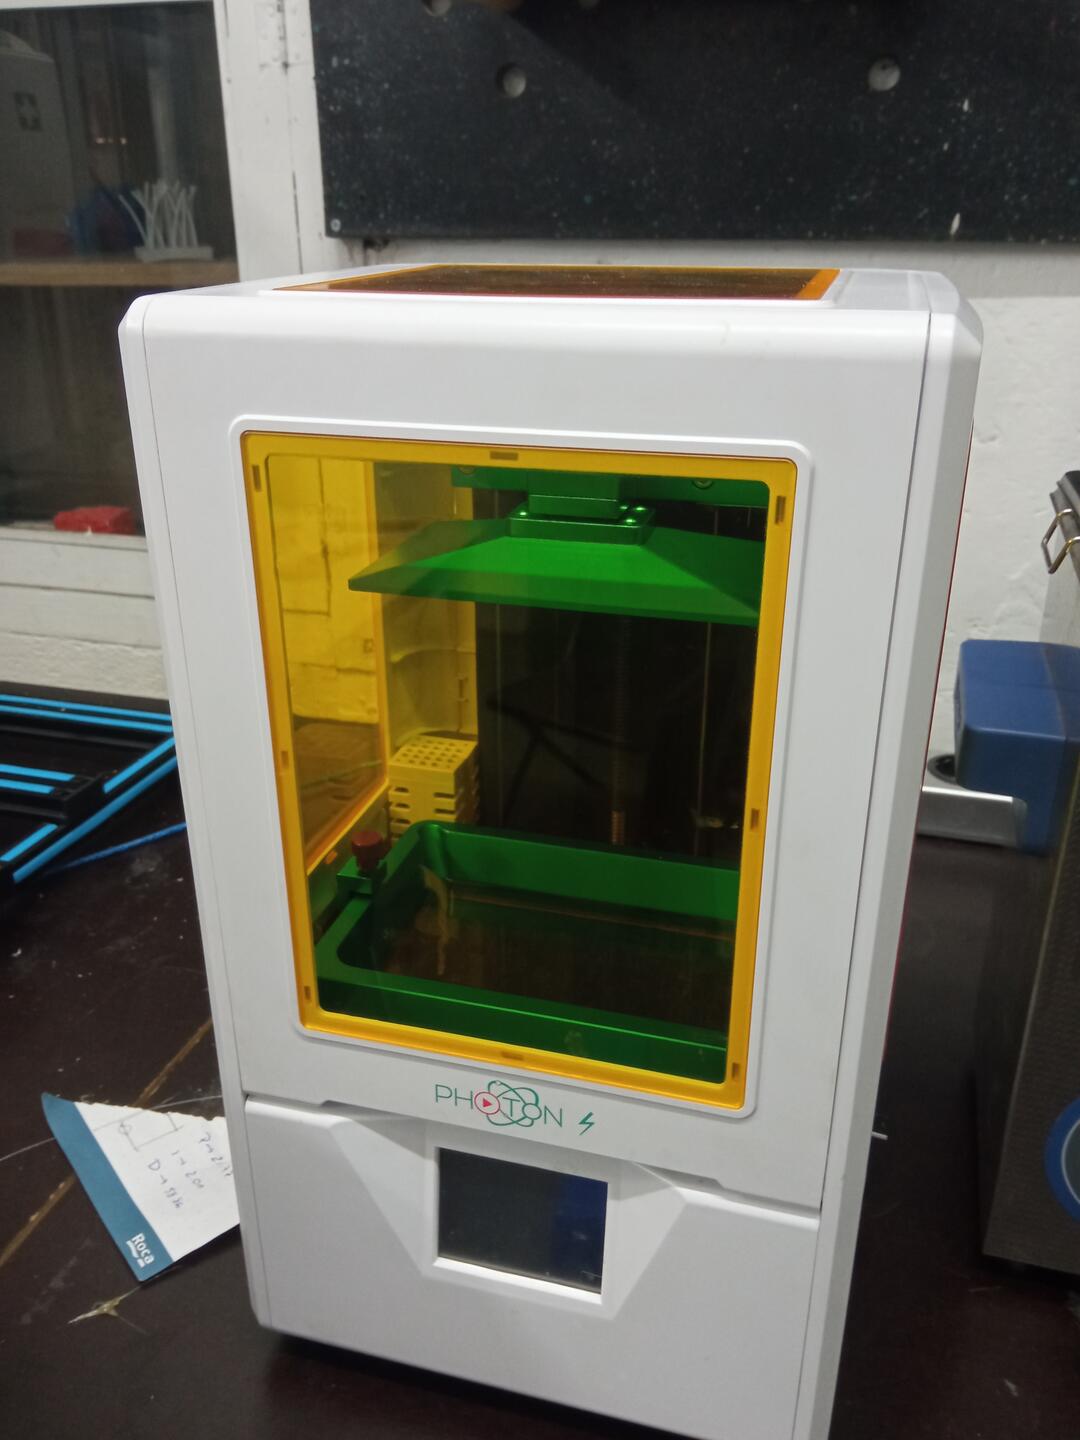
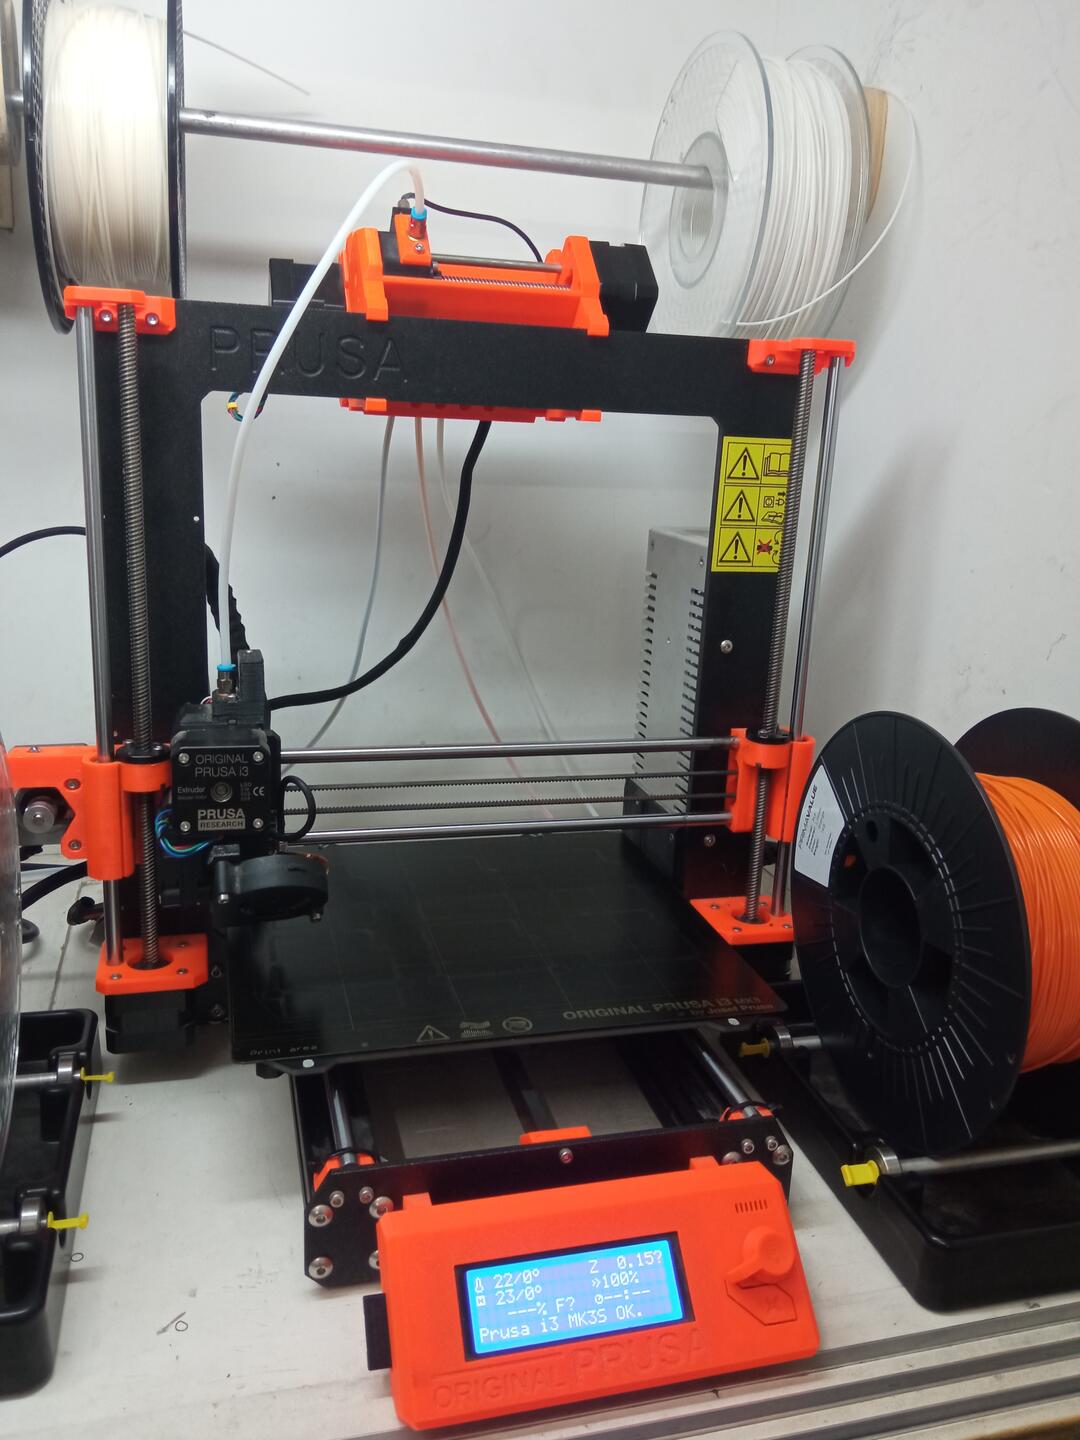
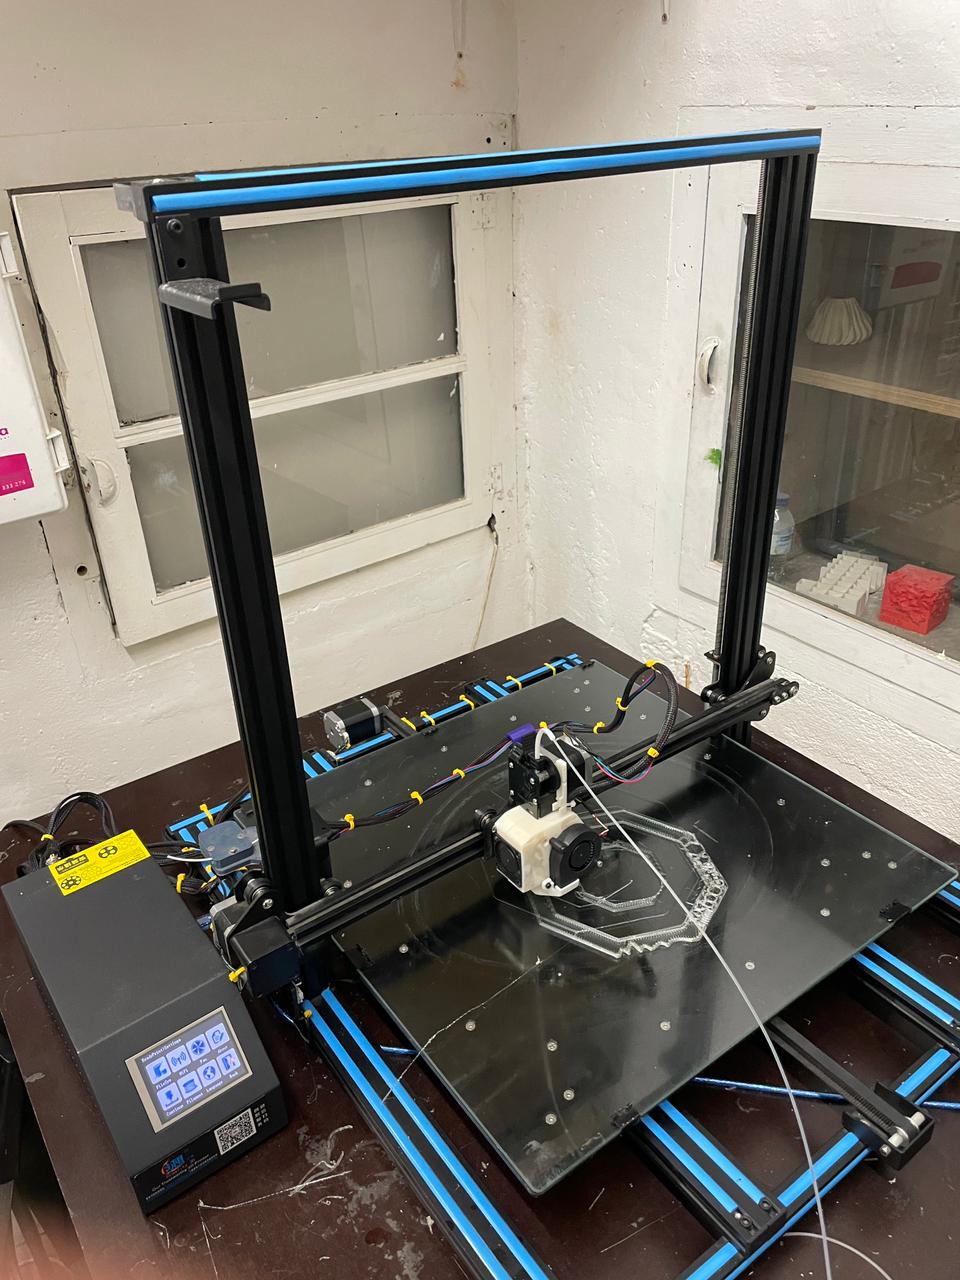
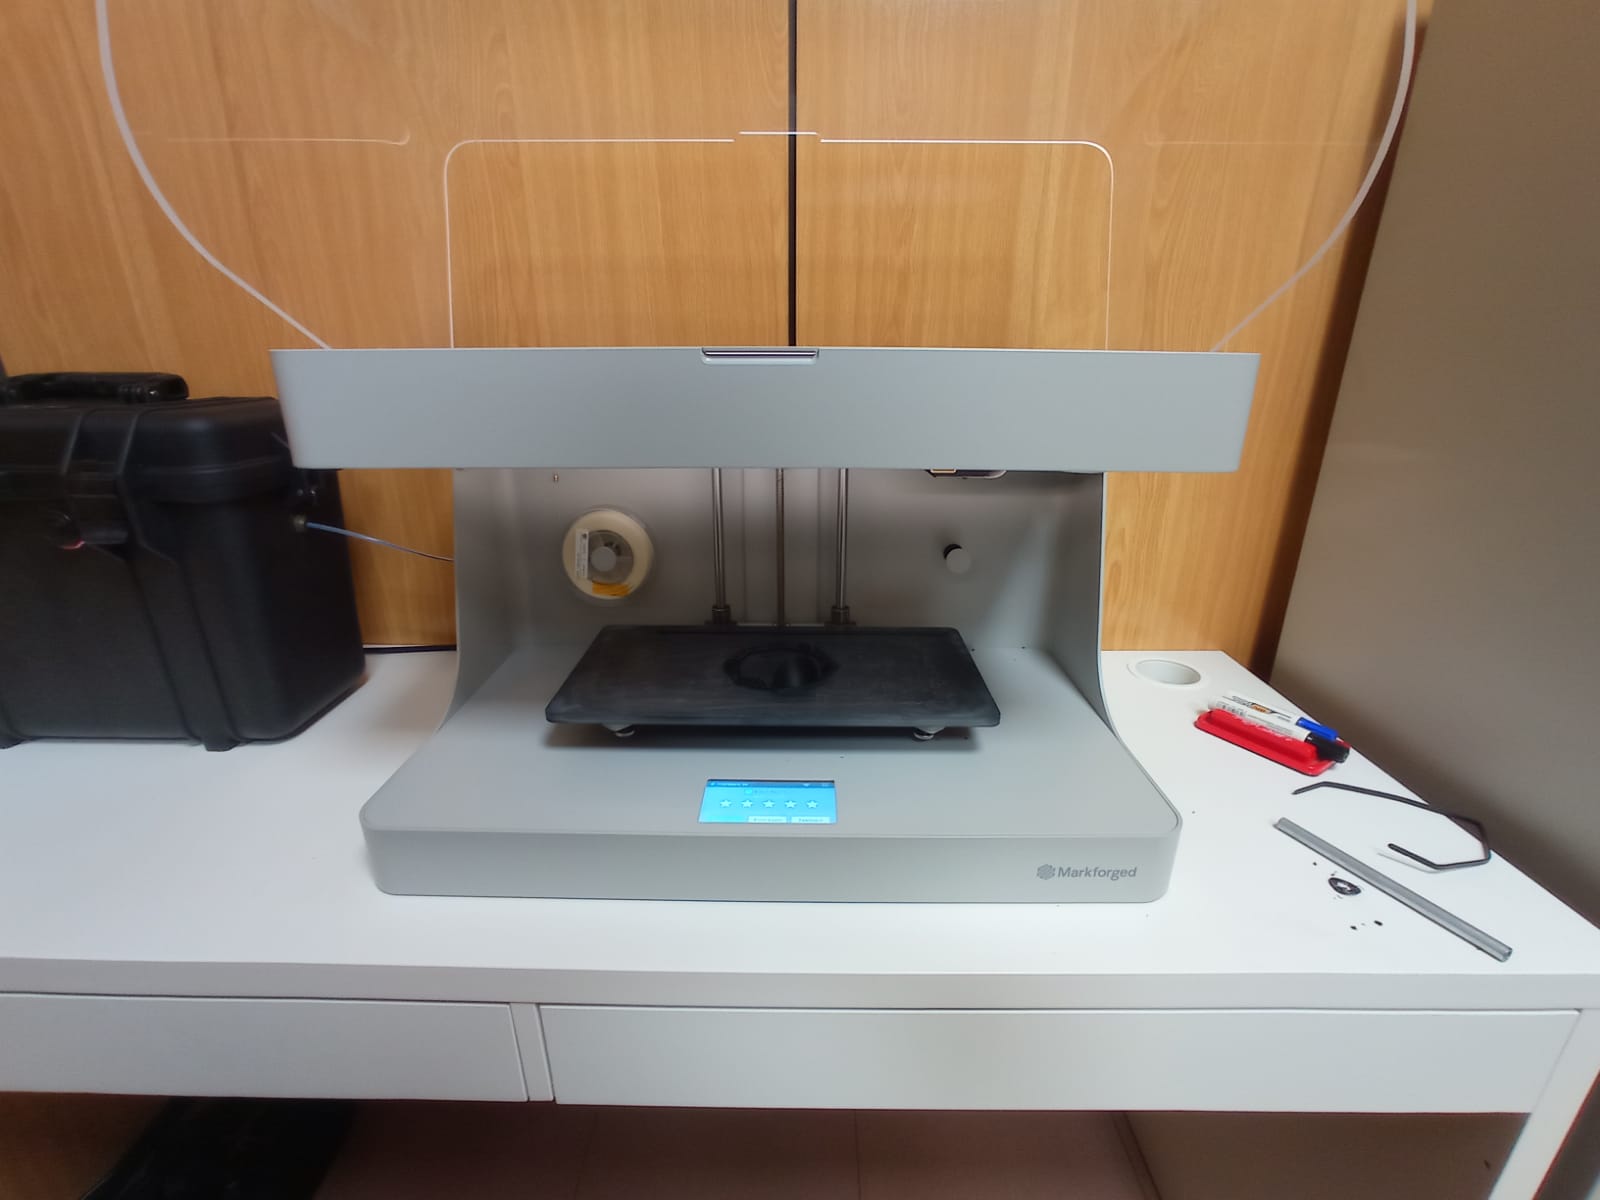
| RepRap | RepRap | AnyCubic | Crealty Ender Pro3 | Photon | Prusa | Crealty | Markforged,Mark two | |
|---|---|---|---|---|---|---|---|---|
| Type | FDM | FDM | FDM | FDM | SLA | FDM | FDM | FMD |
| Picture | 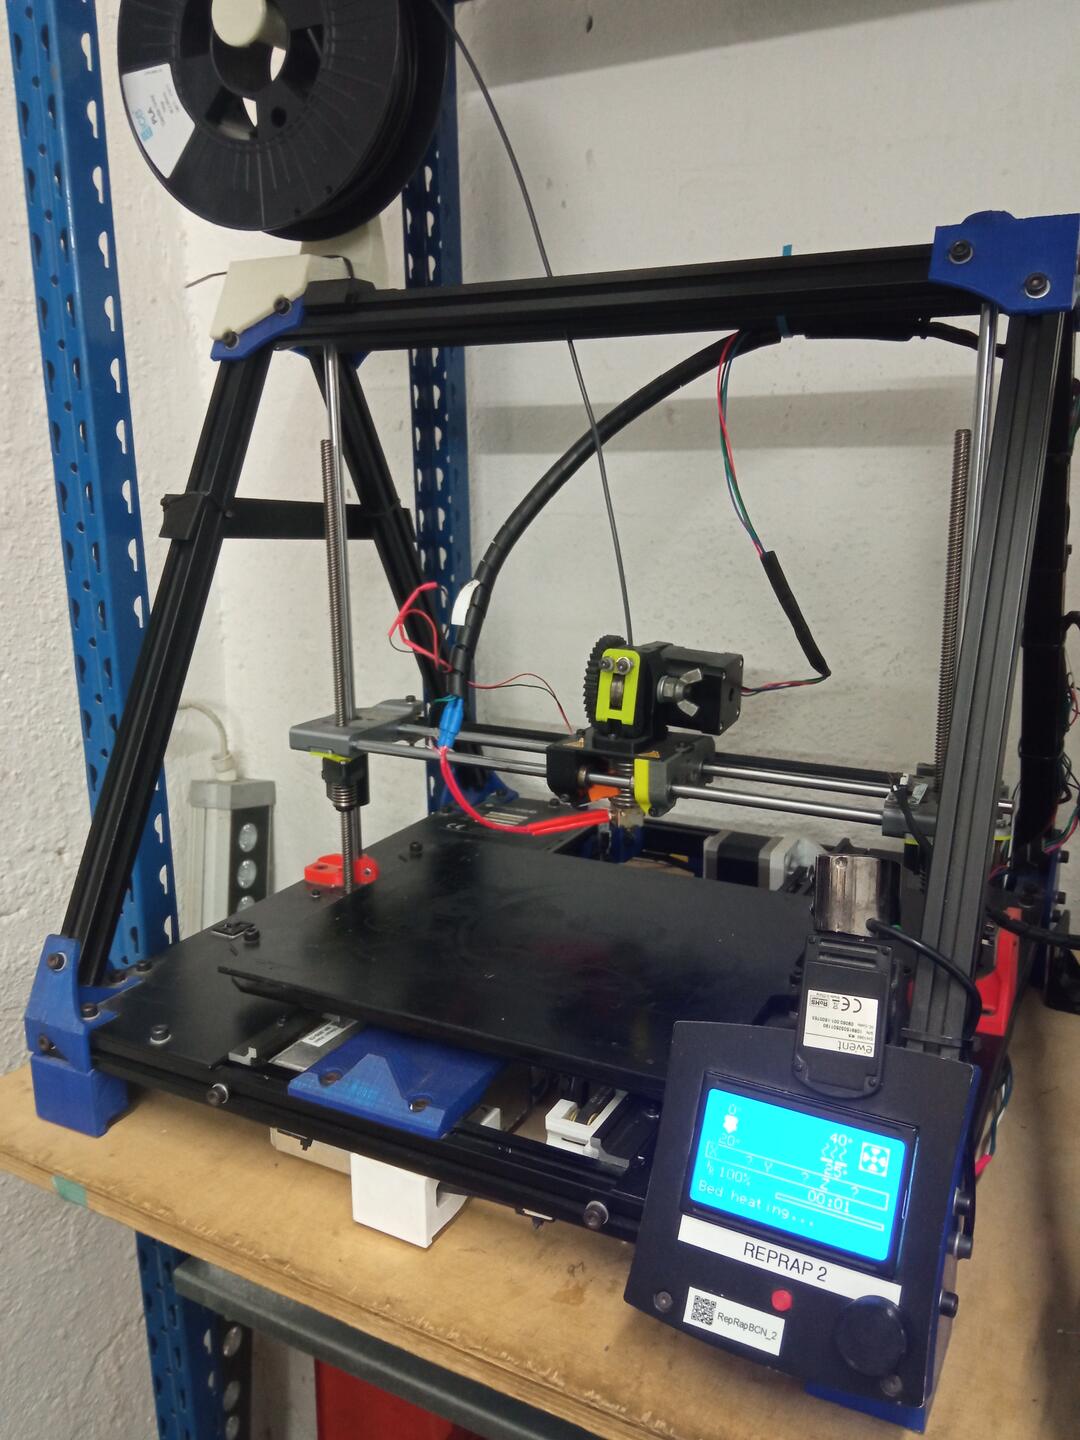 |
 |
 |
 |
 |
 |
 |
|
| Filament | PLA | TPU (Flex) | PLA | PLA | Resine | PLA | PLA | Onyx Microcarbon fiber filled Nylon |
| Nozzle diameter [mm] | 0.6 | 0.4 | 0.4 | 0.4 | N/A | 0.4 | 1 | 0.4 |
| Cooling fan part | NO | NO | YES | YES | N/A | YES | YES | YES |
| Bed Temperature | 40°C (not regulating) using fixing spray | 40°C | 60°C | 60°C | N/A | 60°C | 60°C | N/A |
| Filament Temperature | 250 | 240 | 210 | 200 | 220°C | N/A | ||
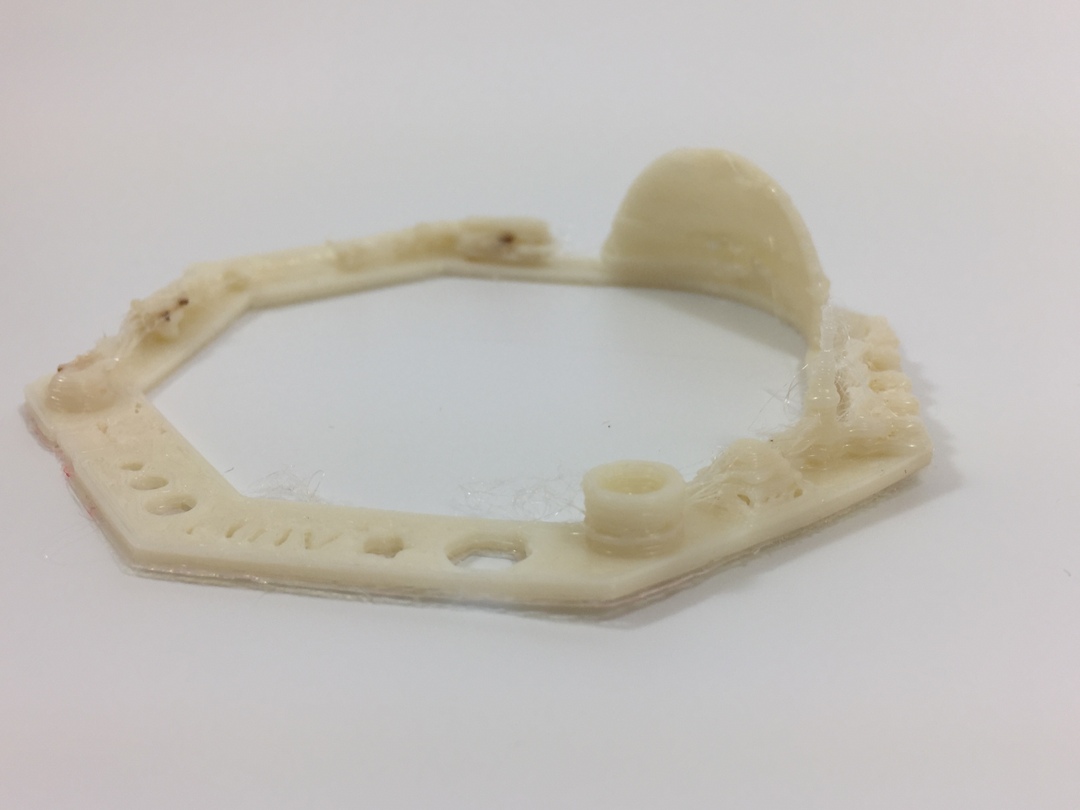
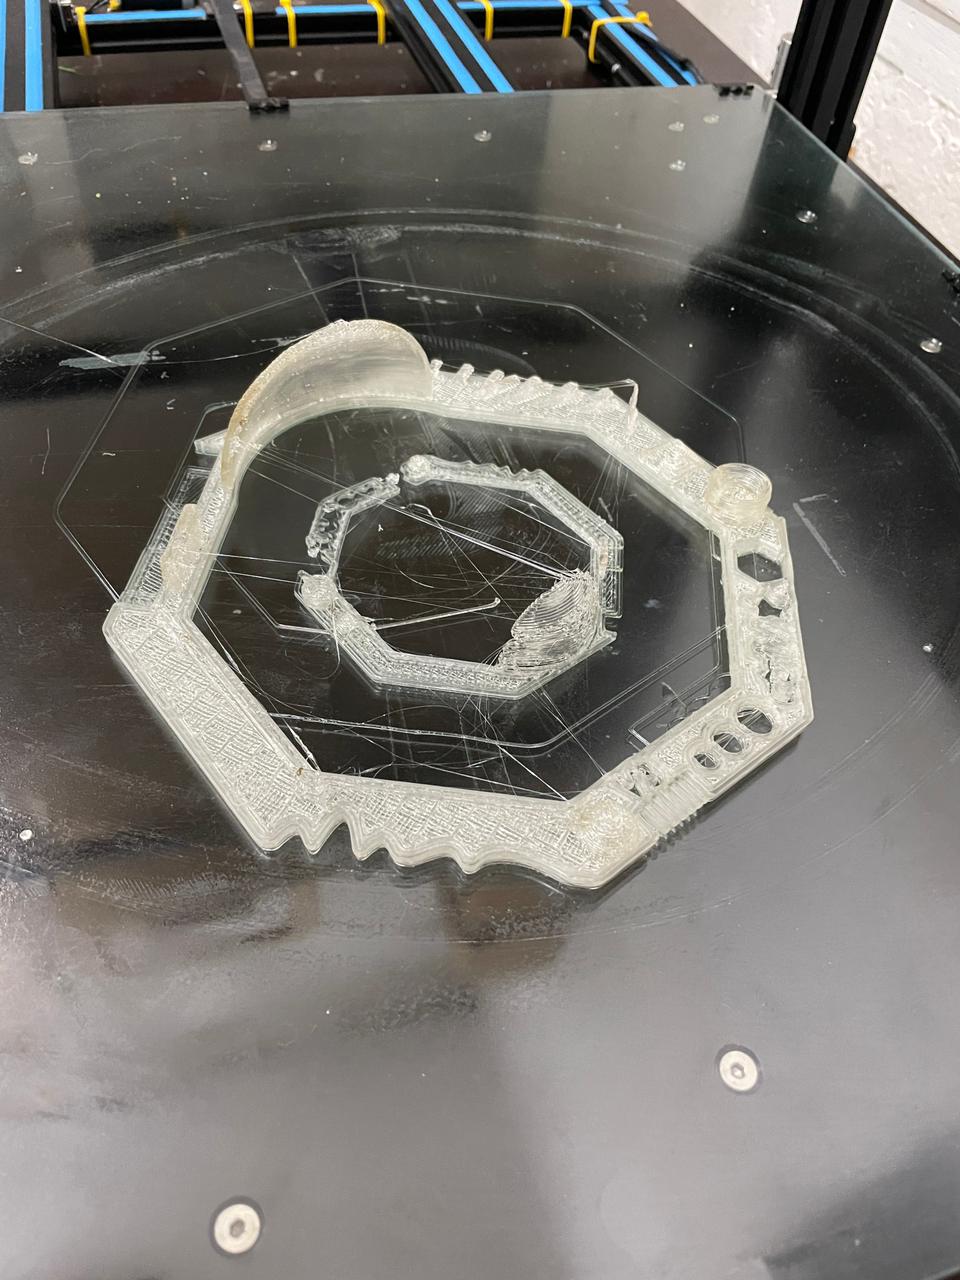
| Evaluation | NOK. Printer good for testing but lack precision | NOK. Good setting are 240°C for filament and 50°C for the bed. | OK. Simple and accurate | OK | Incredible precision but a lot of cleaning work | OK. Good precision and lot of options. Possible double extruder | OK with the scaled part due to the bigger nozzle | OK. The settings cannot be adapted but the precision is pretty good. Almost all the tests are passing |
| Result | 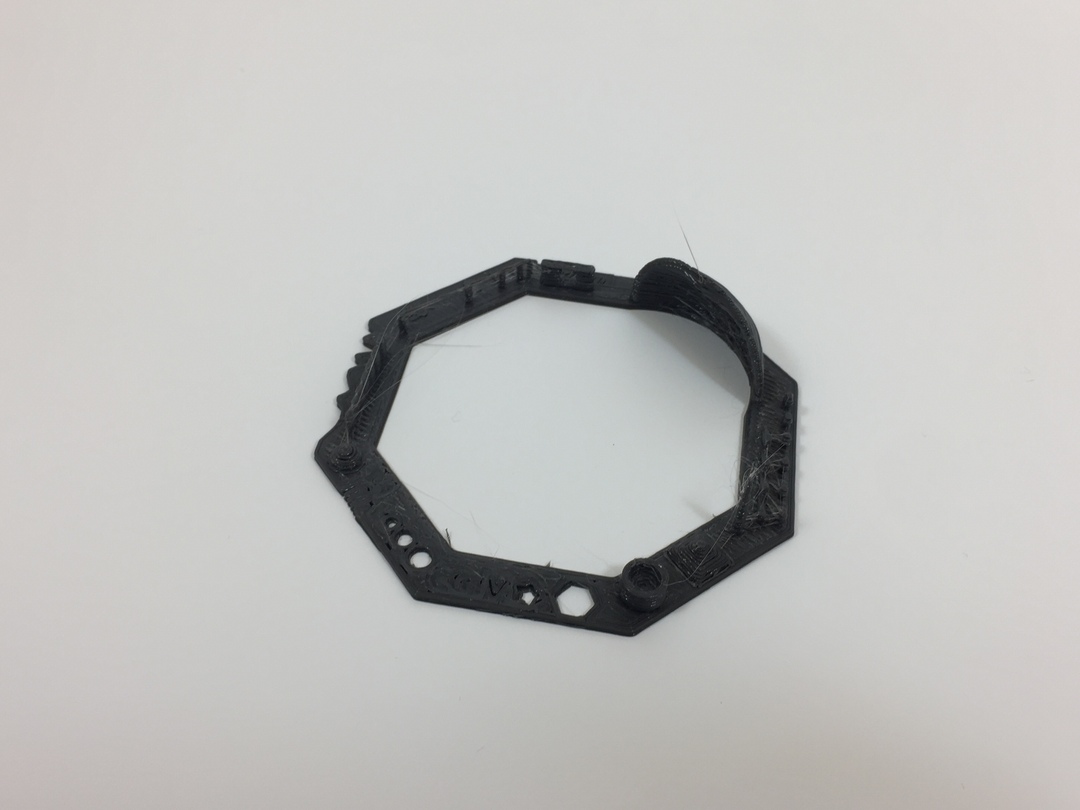 |
 |
 |
 |
 |
 |
 |
 |
Printer type at the FabLab
- FDM : Fusion Deposing Modelling (filament)
- SLA : Stereolitography (resine bath)
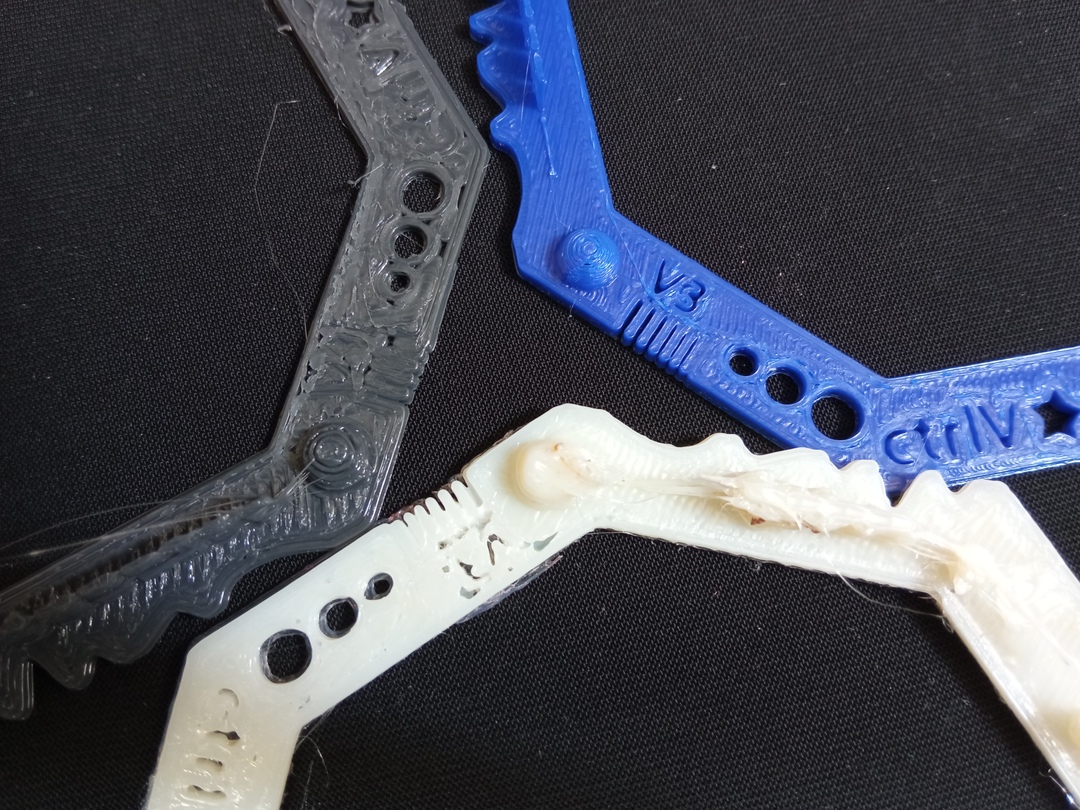
Detailed comparison
As mentionned earlier, the Reprap (here in grey and white) seem to lack of
precision. The fact that they do not have a side ventilator to cool down the
part does not help. The written pattern or small walls cannot be created. On
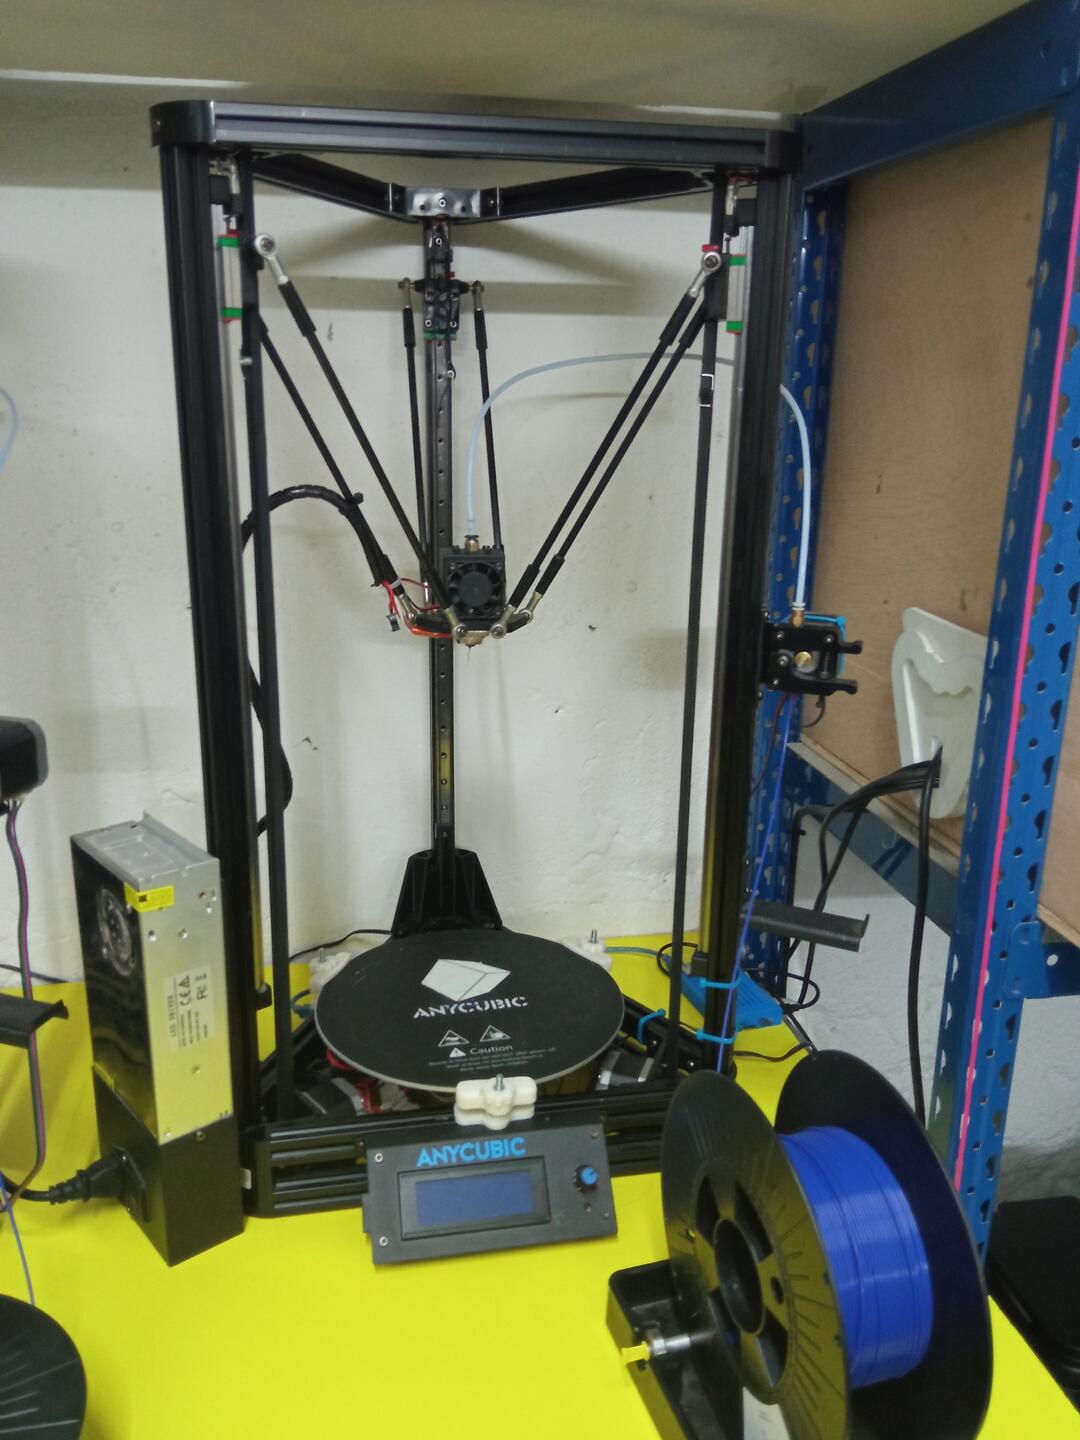
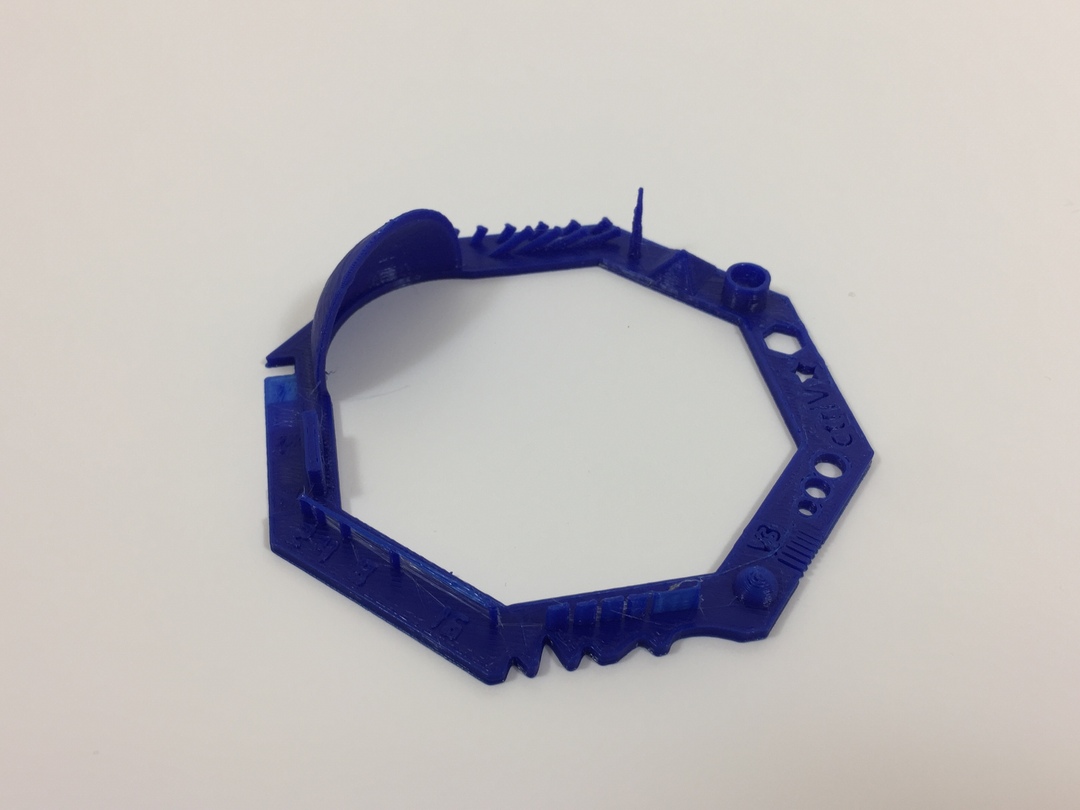
the other hand the AnyCubic (in blue) does a good job for tiny horizontal details.
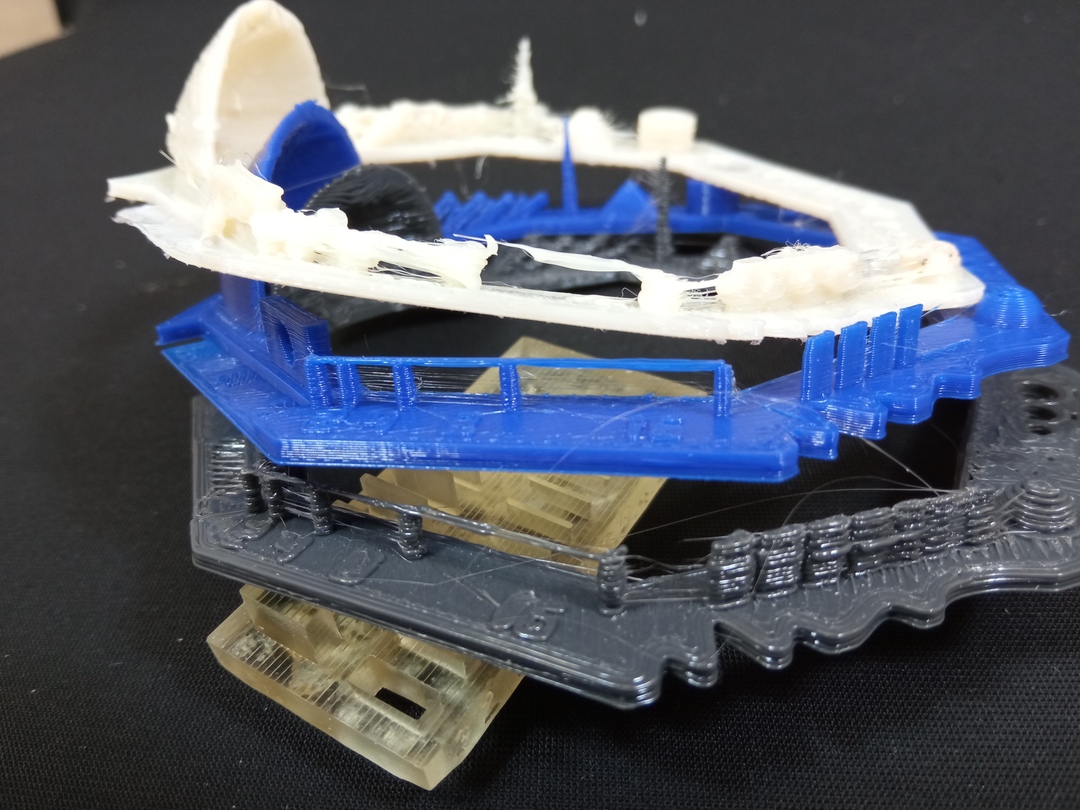
For the bridge testing the Reprap with normal PLA (grey) and the AnyCubic (blue)
were able to make the bridges. The AnyCubic gqve reqlly good results even
if some thin filaments can be seen but they can be easily removed afterwards.
The grey one made it but not with the honors. The Reprap with Flexible filament (white)
was not able to produce a good result probably due to the kind of filament that might
need specific retraction tuning.
Advice before printing
From this group assignement I learnt the following rule before starting an impression.
Tip
- Lower nozzle size = higher precision
- Higher nozzle size = bigger parts faster
- Good bed temperature = no bad surprise (otherwise use hairspray)
- Check that your extruder grasp the filament correctly
- Check that your filament was properly stored
- Is your filament adapted to work objective ?
- Is your installation horizontal ?
Personal Assignment
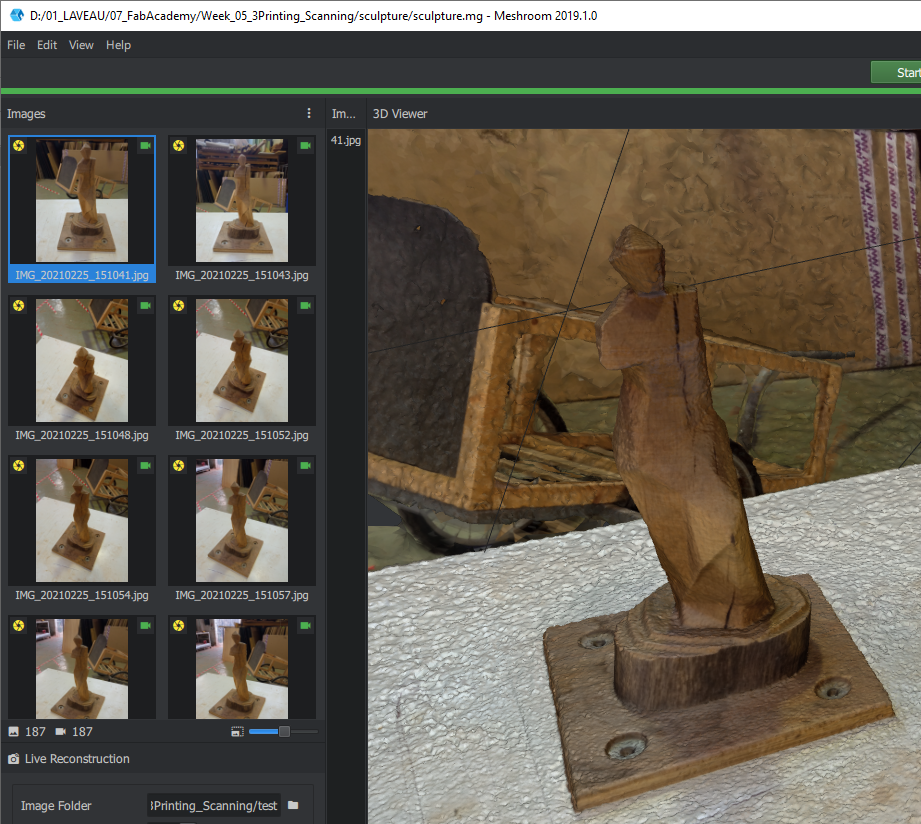
3D Scanning
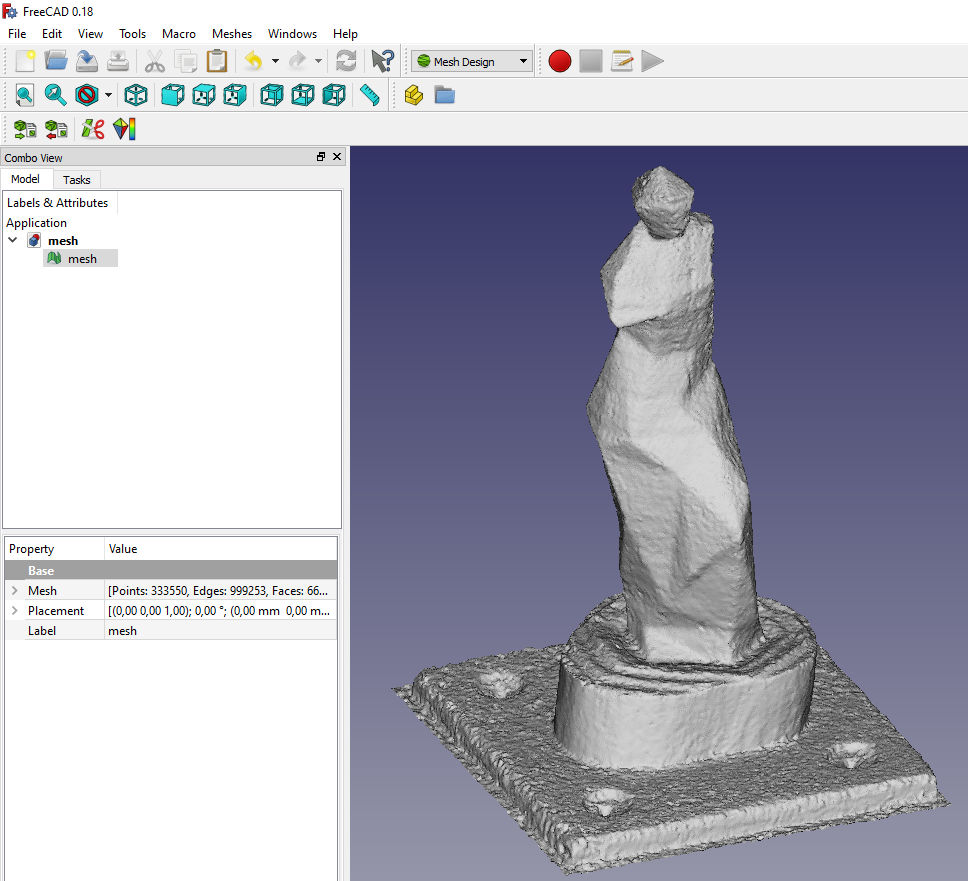
For the 3D scanning I used the software meshroom and worked based on a wooden statue available in the FabLab. I took 187 pictures following a semi-sphere pattern around it at approximately 80cm. The light was almost ok over 270º. Over 90º there is a huge door with daylight which I though would be a problem.

I launched the whole dataset in Meshroom (2019 because 2020 does not start on my computer) and the data treatment lasted for almost 8hrs. After 8 hours I could see that :
- All the 187 pictures have been used by Meshroom
- Everything went fine
Here is the result in Meshroom. I found it pretty impressive because a lot of
detail of the shape was captured but no only. Indeed, the background is also
really well reproduced (some one forgot his bag on the scene !  ).
).
Now if I had to redo it I would do the following :
- Crop the picture to keep only the part I am interested in.
- Tried with less pictures and increased step-by-step as it seems Meshroom accepts it.
To prepare the mesh for 3D printing I did a bit of work on FreeCAD and MeshLab.
I could work a little bit the mesh on FREECAD but it was not so easy. And I lost
the texture information that I was not able to get back. I worked at closing
the mesh from below to make a real shell.
I tried also meshlab which was more intuitive to work with. I wanted to create
a closed mesh and remap the texture to have only the part needed for the triangles
left but that did not work (I did not know how to it).

3D Printing
Design
I wanted first to print the sculpture of the 3D printing
assignment and make a “russian doll” by printing them one in another. But
due to the mesh complexity and the fact that russian dolls only can be made
if they have wide hip I had to give up.
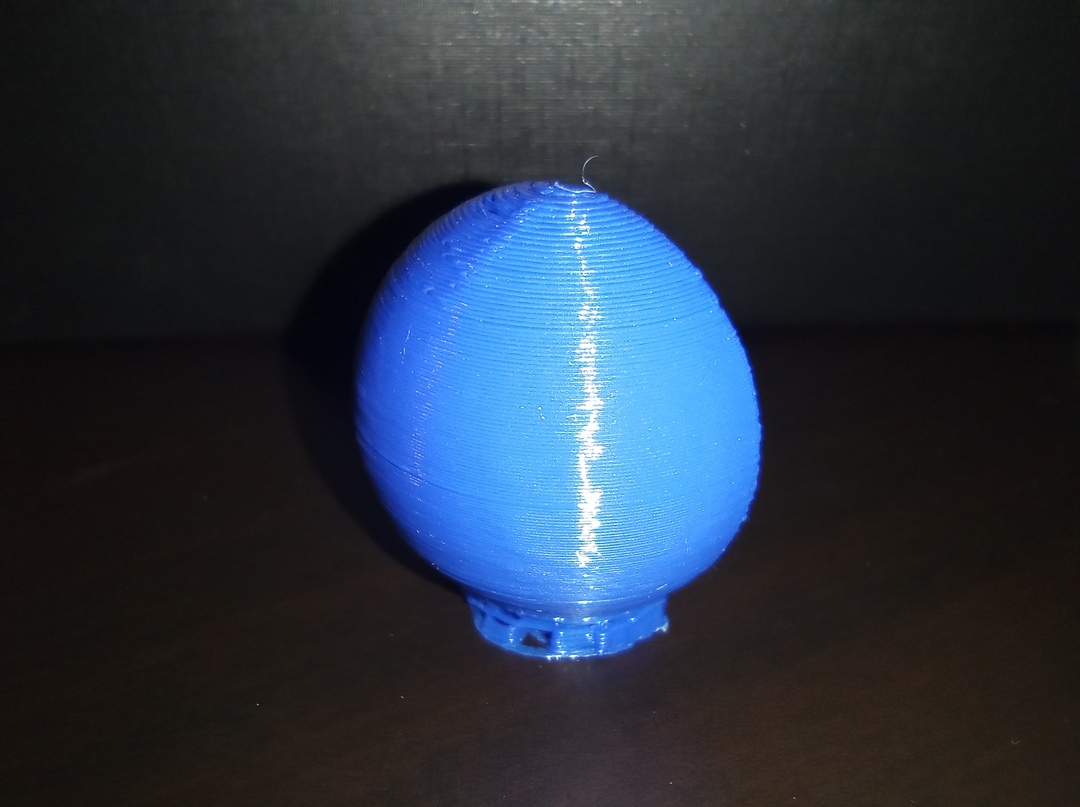
Keeping the idea of printing the same shape but scaled and imbricated, I
created the following 3 spheres in 1, also commonly know as : an oinon.
It has to be made by 3D printing because the inter-sphere part cannot be accessed
with a regular milling tool.
To design such a shape I used boolean operation between spheres following those steps :
- Create the outter sphere of the whiched total dimension.
- I create a smaller sphere inside matching the lower part of Sphere 1
- Create a cube at half the position of the spheres and use the “BooleanDifference” to cut all the previously created spheres.
- Start the “BooleanDifference ” function from Rhino and select 1st the outter sphere then the inner sphere.
- You now have an empty sphere with a given variable thickness ( because the sphere have a matching point at their bottom and not in the center)
- Repeat step 1,2,3,4,5 as many time as you which (but not too much otherwise the 3D printing will not be feasible).
Here is a little GIF of the process
And here is the 3d model that can be manipulated.
For this assignment I chose to use the AnyCubic that gave good result for small parts that require precision.
On cura the following settings were used for the printing :
- Infill : 10% - square
- Filament temperature : 210°C
- Bed temperature : 60°C
- Filament Speed
- Support : yes
- Support “roof” : 1 layer
- Base : yes
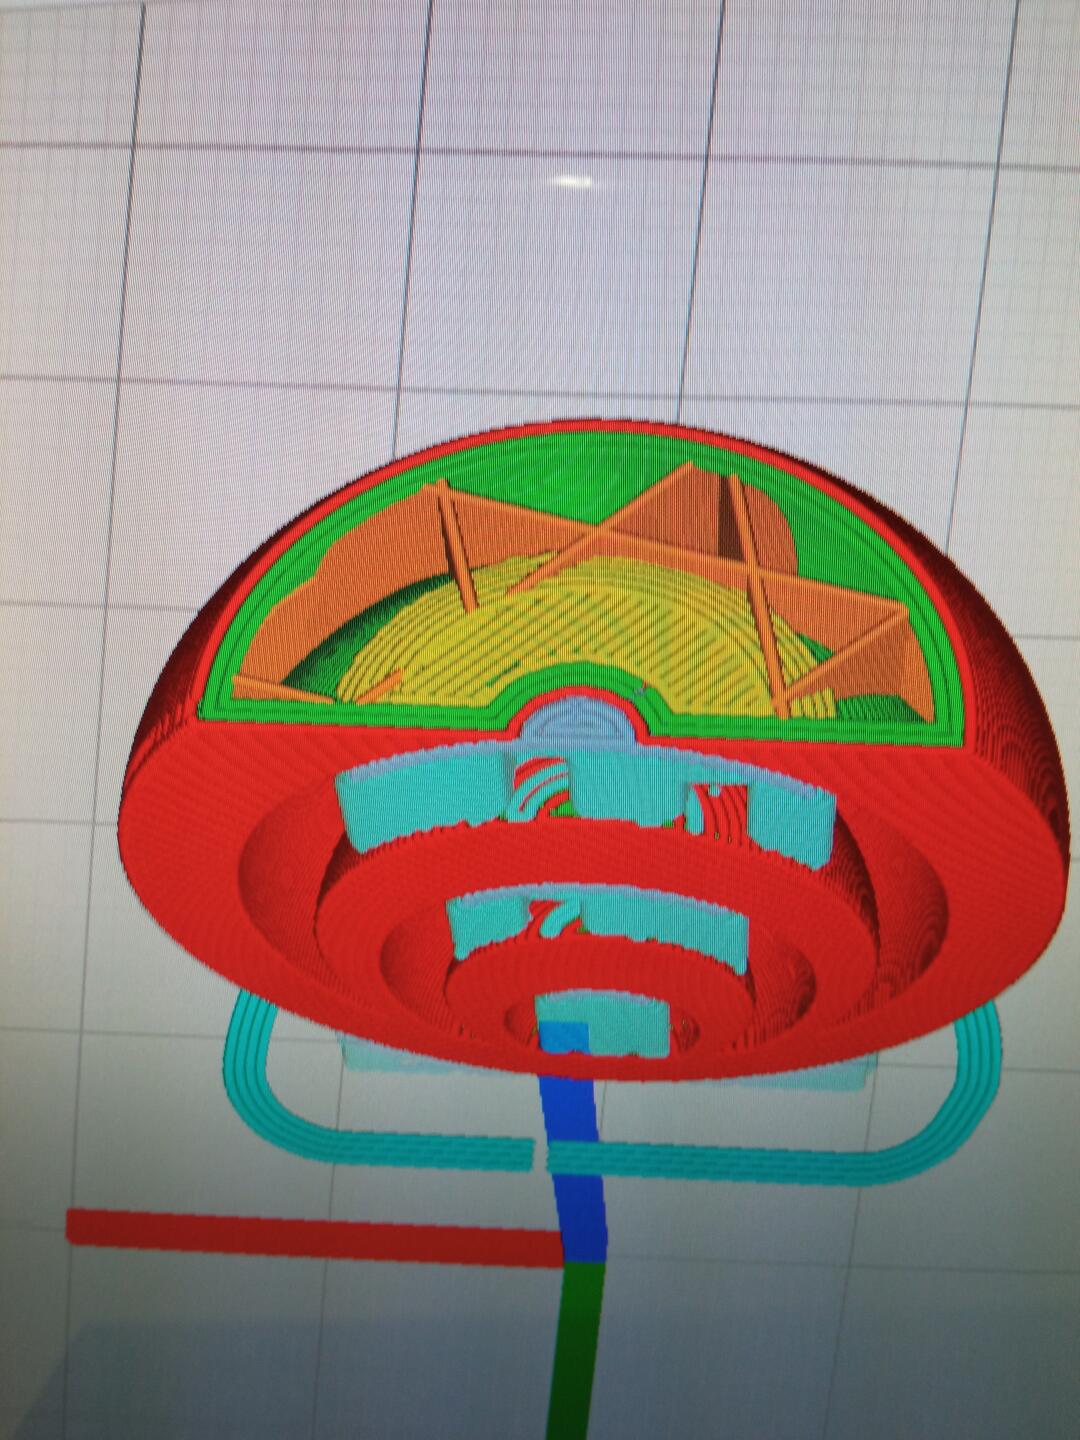
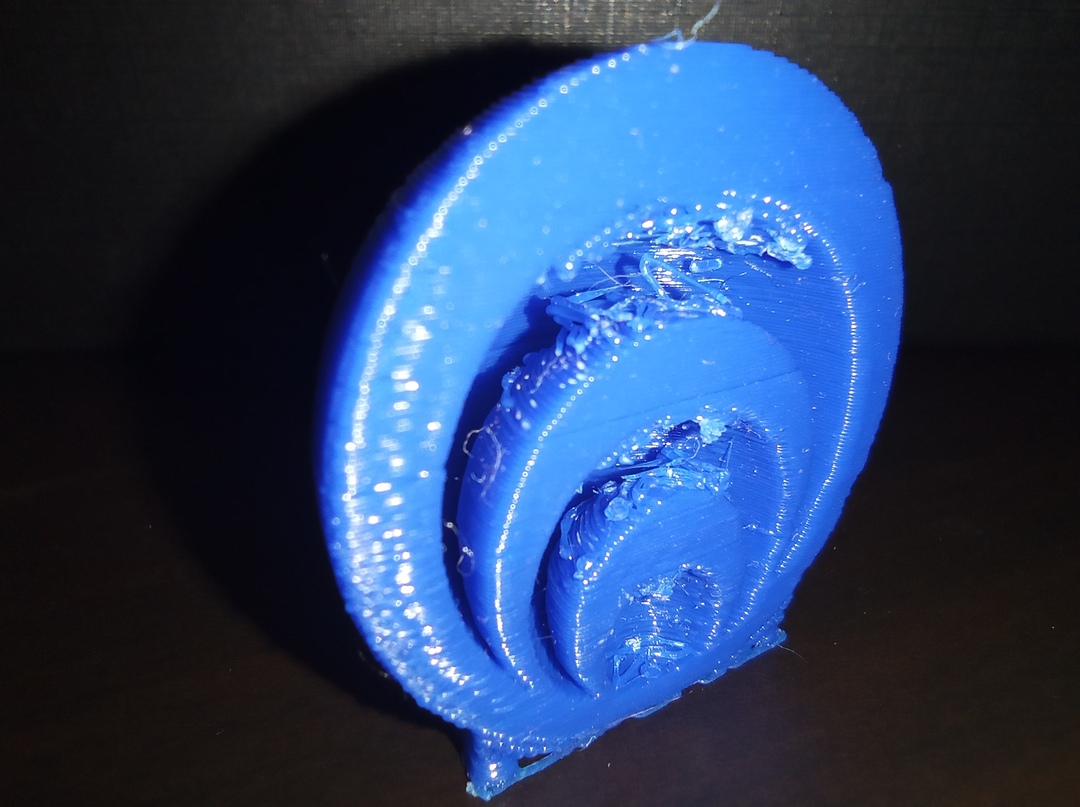
The printing went without any major issue. The following video shows the printing at 50% of the printing time.
As explained in the printing description, I chose to use support to avoid the collaps of internal and external walls. A posteriori I think I could have not used them because the testing went pretty well.
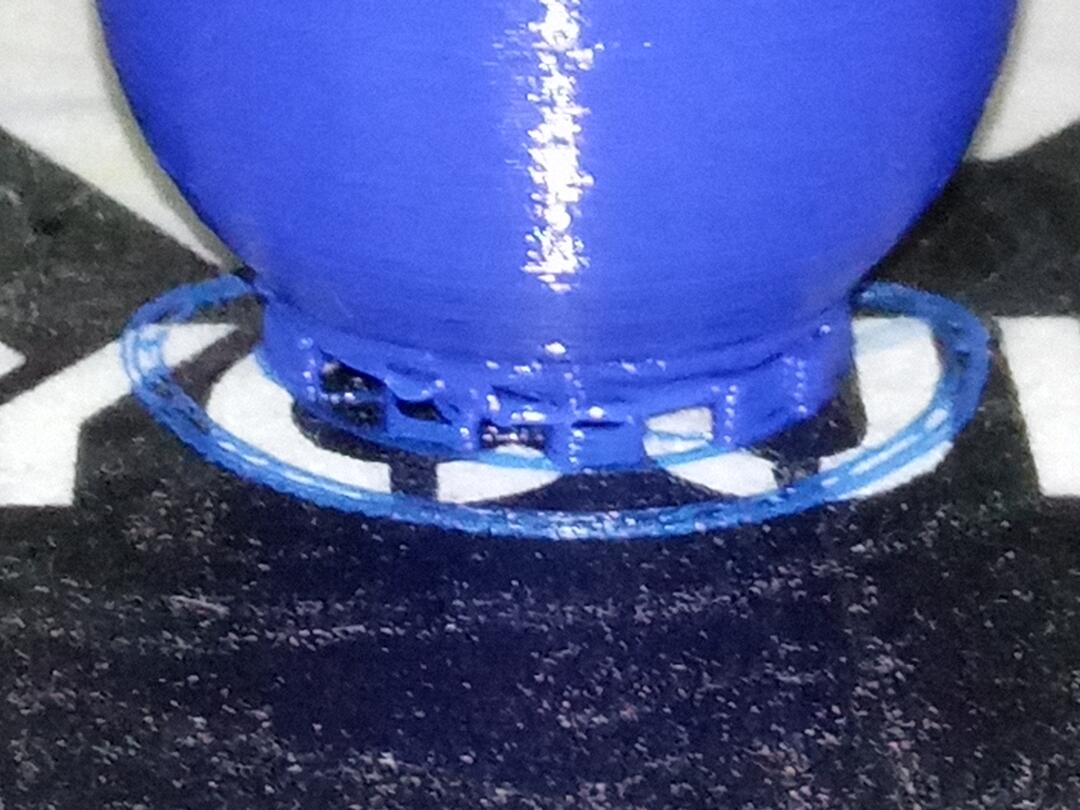
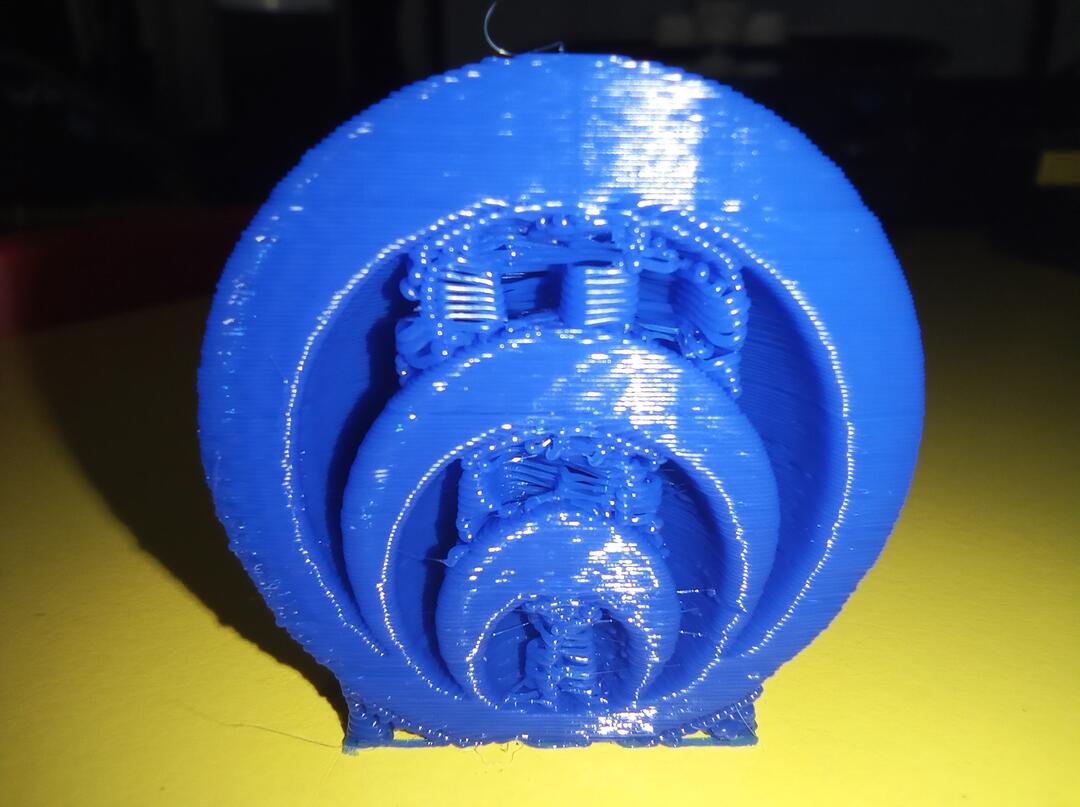
The internal support were complicated to remove even if we tried to use an option that limits the contact between the actual upper layer and the roof of the support.
Files
- 3D printing testing file - STL
- 3 sphere printing assignment - STL
- 3 sphere printing assignent - Rhino
Lecture notes
Assessement
Group assignment
Test the design rules for your printer(s)
Document your work and explain what are the limits of your printer(s) (in a group or individually)
Individual assignment:
Design and 3D print an object (small, few cm3, limited by printer time) that could not be easily made subtractively
3D scan an object, try to prepare it for printing (and optionally print it)
Learning outcomes
Identify the advantages and limitations of 3D printing
Apply design methods and production processes to show your understanding of 3D printing.
* Demonstrate how scanning technology can be used to digitize object(s)
Have you
Linked to the group assignment page
Explained what you learned from testing the 3D printers
Documented how you designed and made your object and explained why it could not be easily made subtractively
Documented how you scanned and prepared an object (for 3D printing)
Included your original design files for 3D printing (both CAD and common format for 3D printing)
Included your hero shots