Final Project
Presentation Slide
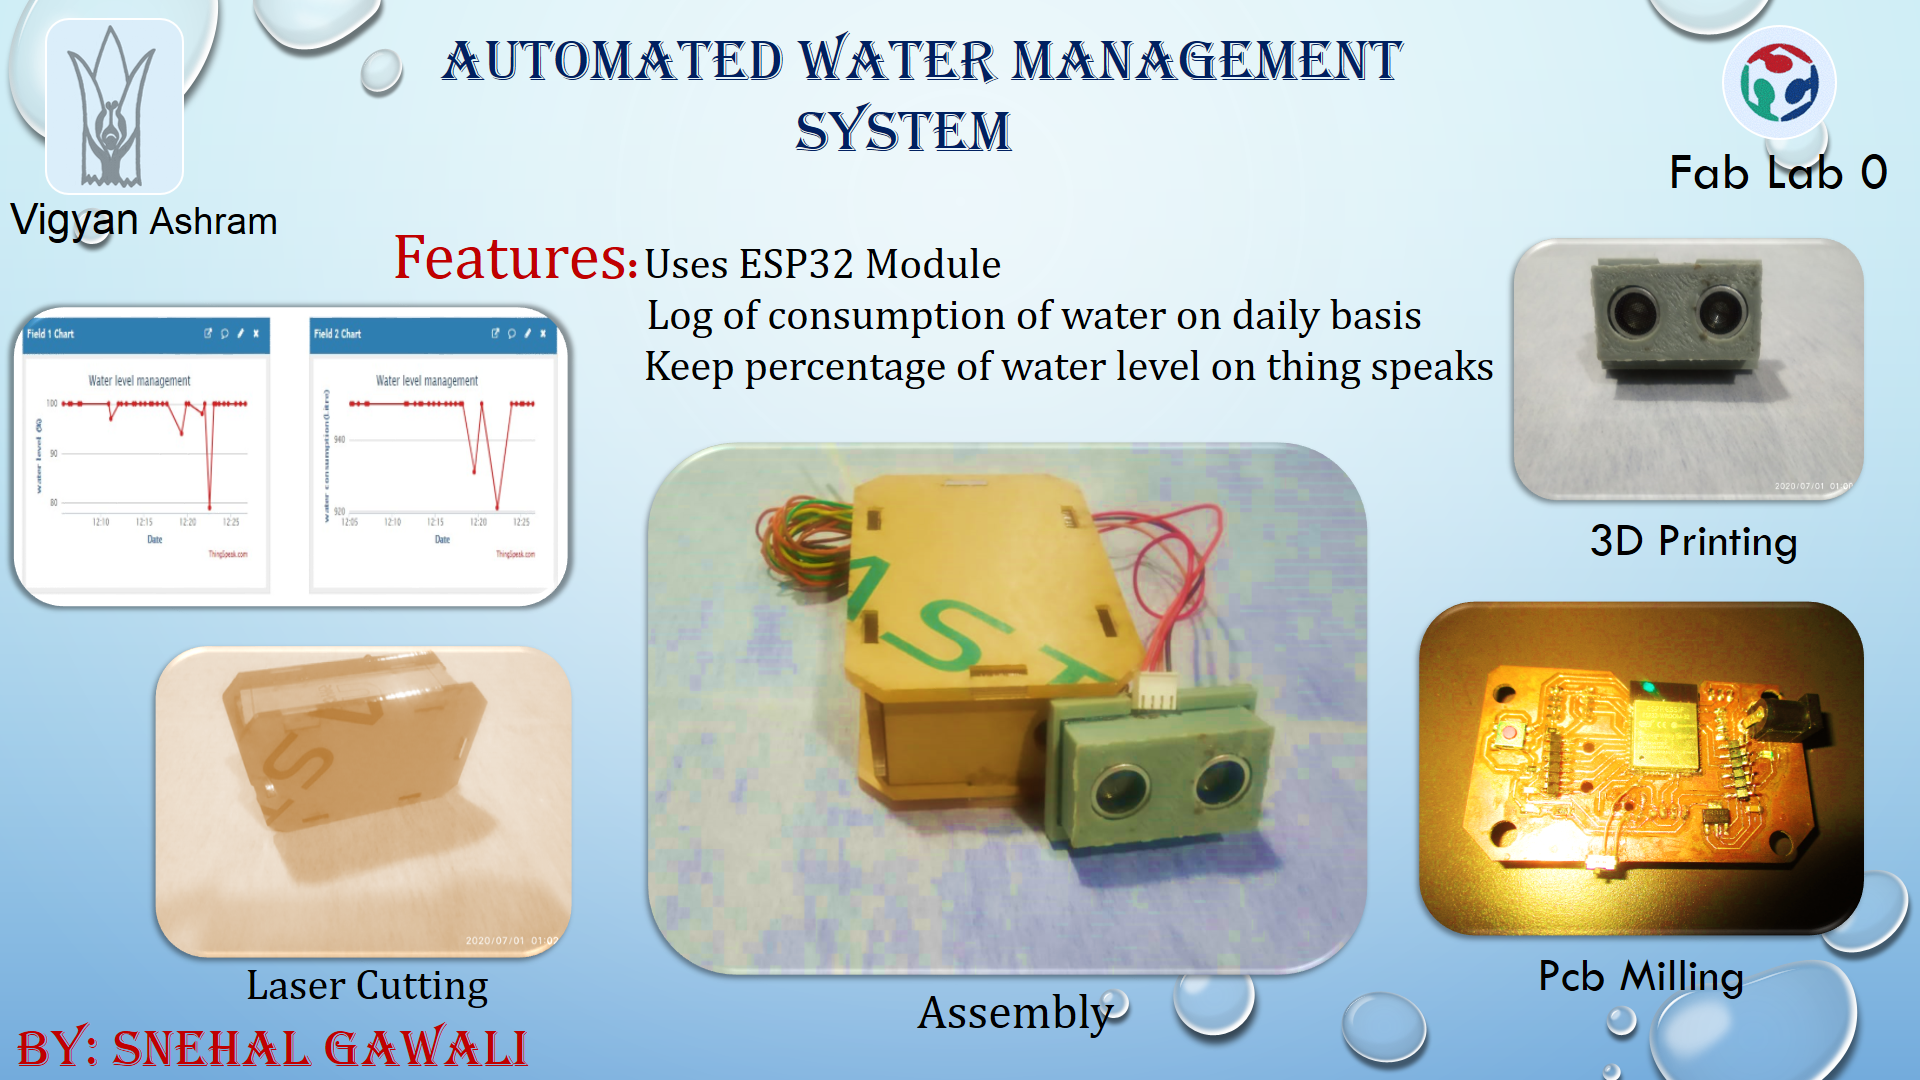
Automated Water Management System
Tank
What does mean by Automated water management system?In Vigyan Ashram,we have water scarcity issues because PABAL is drought prone region.So how to stop water wastage issue?This topic discussed with our director Yogesh Kulkarni Sir and with Dixit Sir.In discussion we discussed various solution ,problems and how we will work on it.How our solution is effective than others solutions?Also how much this project is important in rural area or in any sector,these all points are discussed in our discussion.
My collegue Pooja did project on Dam Water Level Indicator.In this project she worked on indication of water level in dam.It mean how much water is remaining in Dam is displayed on display.With reference to this project I have extended my project as I will keep data log of water consumption and display of water level.And also I have to on and off motor when tank is full or empty.I have to send message on mobile when water level is reached to 100% or when water level is fully low.
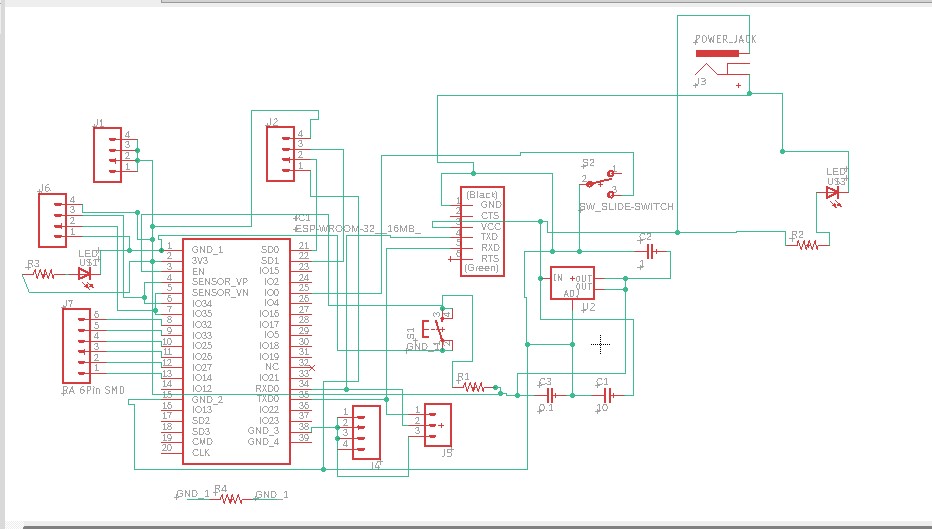
I discussed my project with our instructor Suhas Sir and Aditi.From discussion I understood what I have to do.According to this I started thinking on my project.What are input devices ,what are output devices ,which controller should I use?These questions came into mind.So I started working on schematic of project and I have studied different controller.
I will just give idea ,what I will going to do.In Vigyan Ashram ,there are number of tanks and to monitor each tank is difficult task.One specific person is required to monitor all tanks or to on or to make motor on or off.So to solve this problem,I am working on this project.What I will do is I will sense water level by using water level sensor and that data will displayed on display and how much water is used that data will stored on cloud.Because of this no person will required to monitor the system.
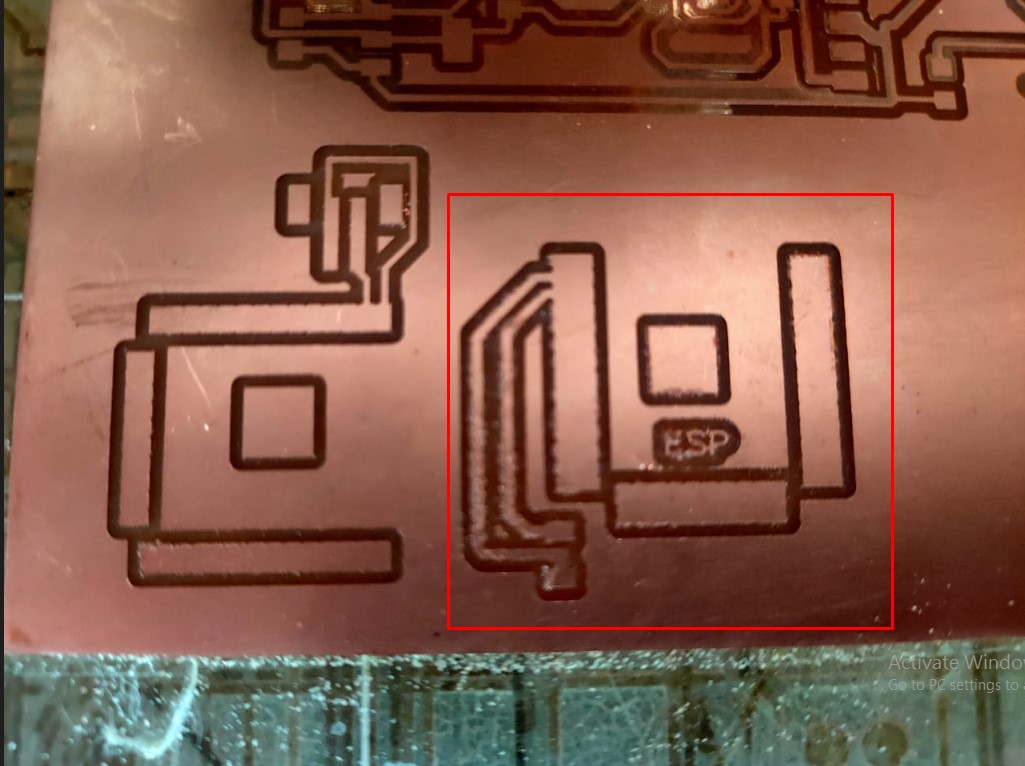
I have given idea of project by drawing sketch.Sketch gives idea about which components are required for my project.
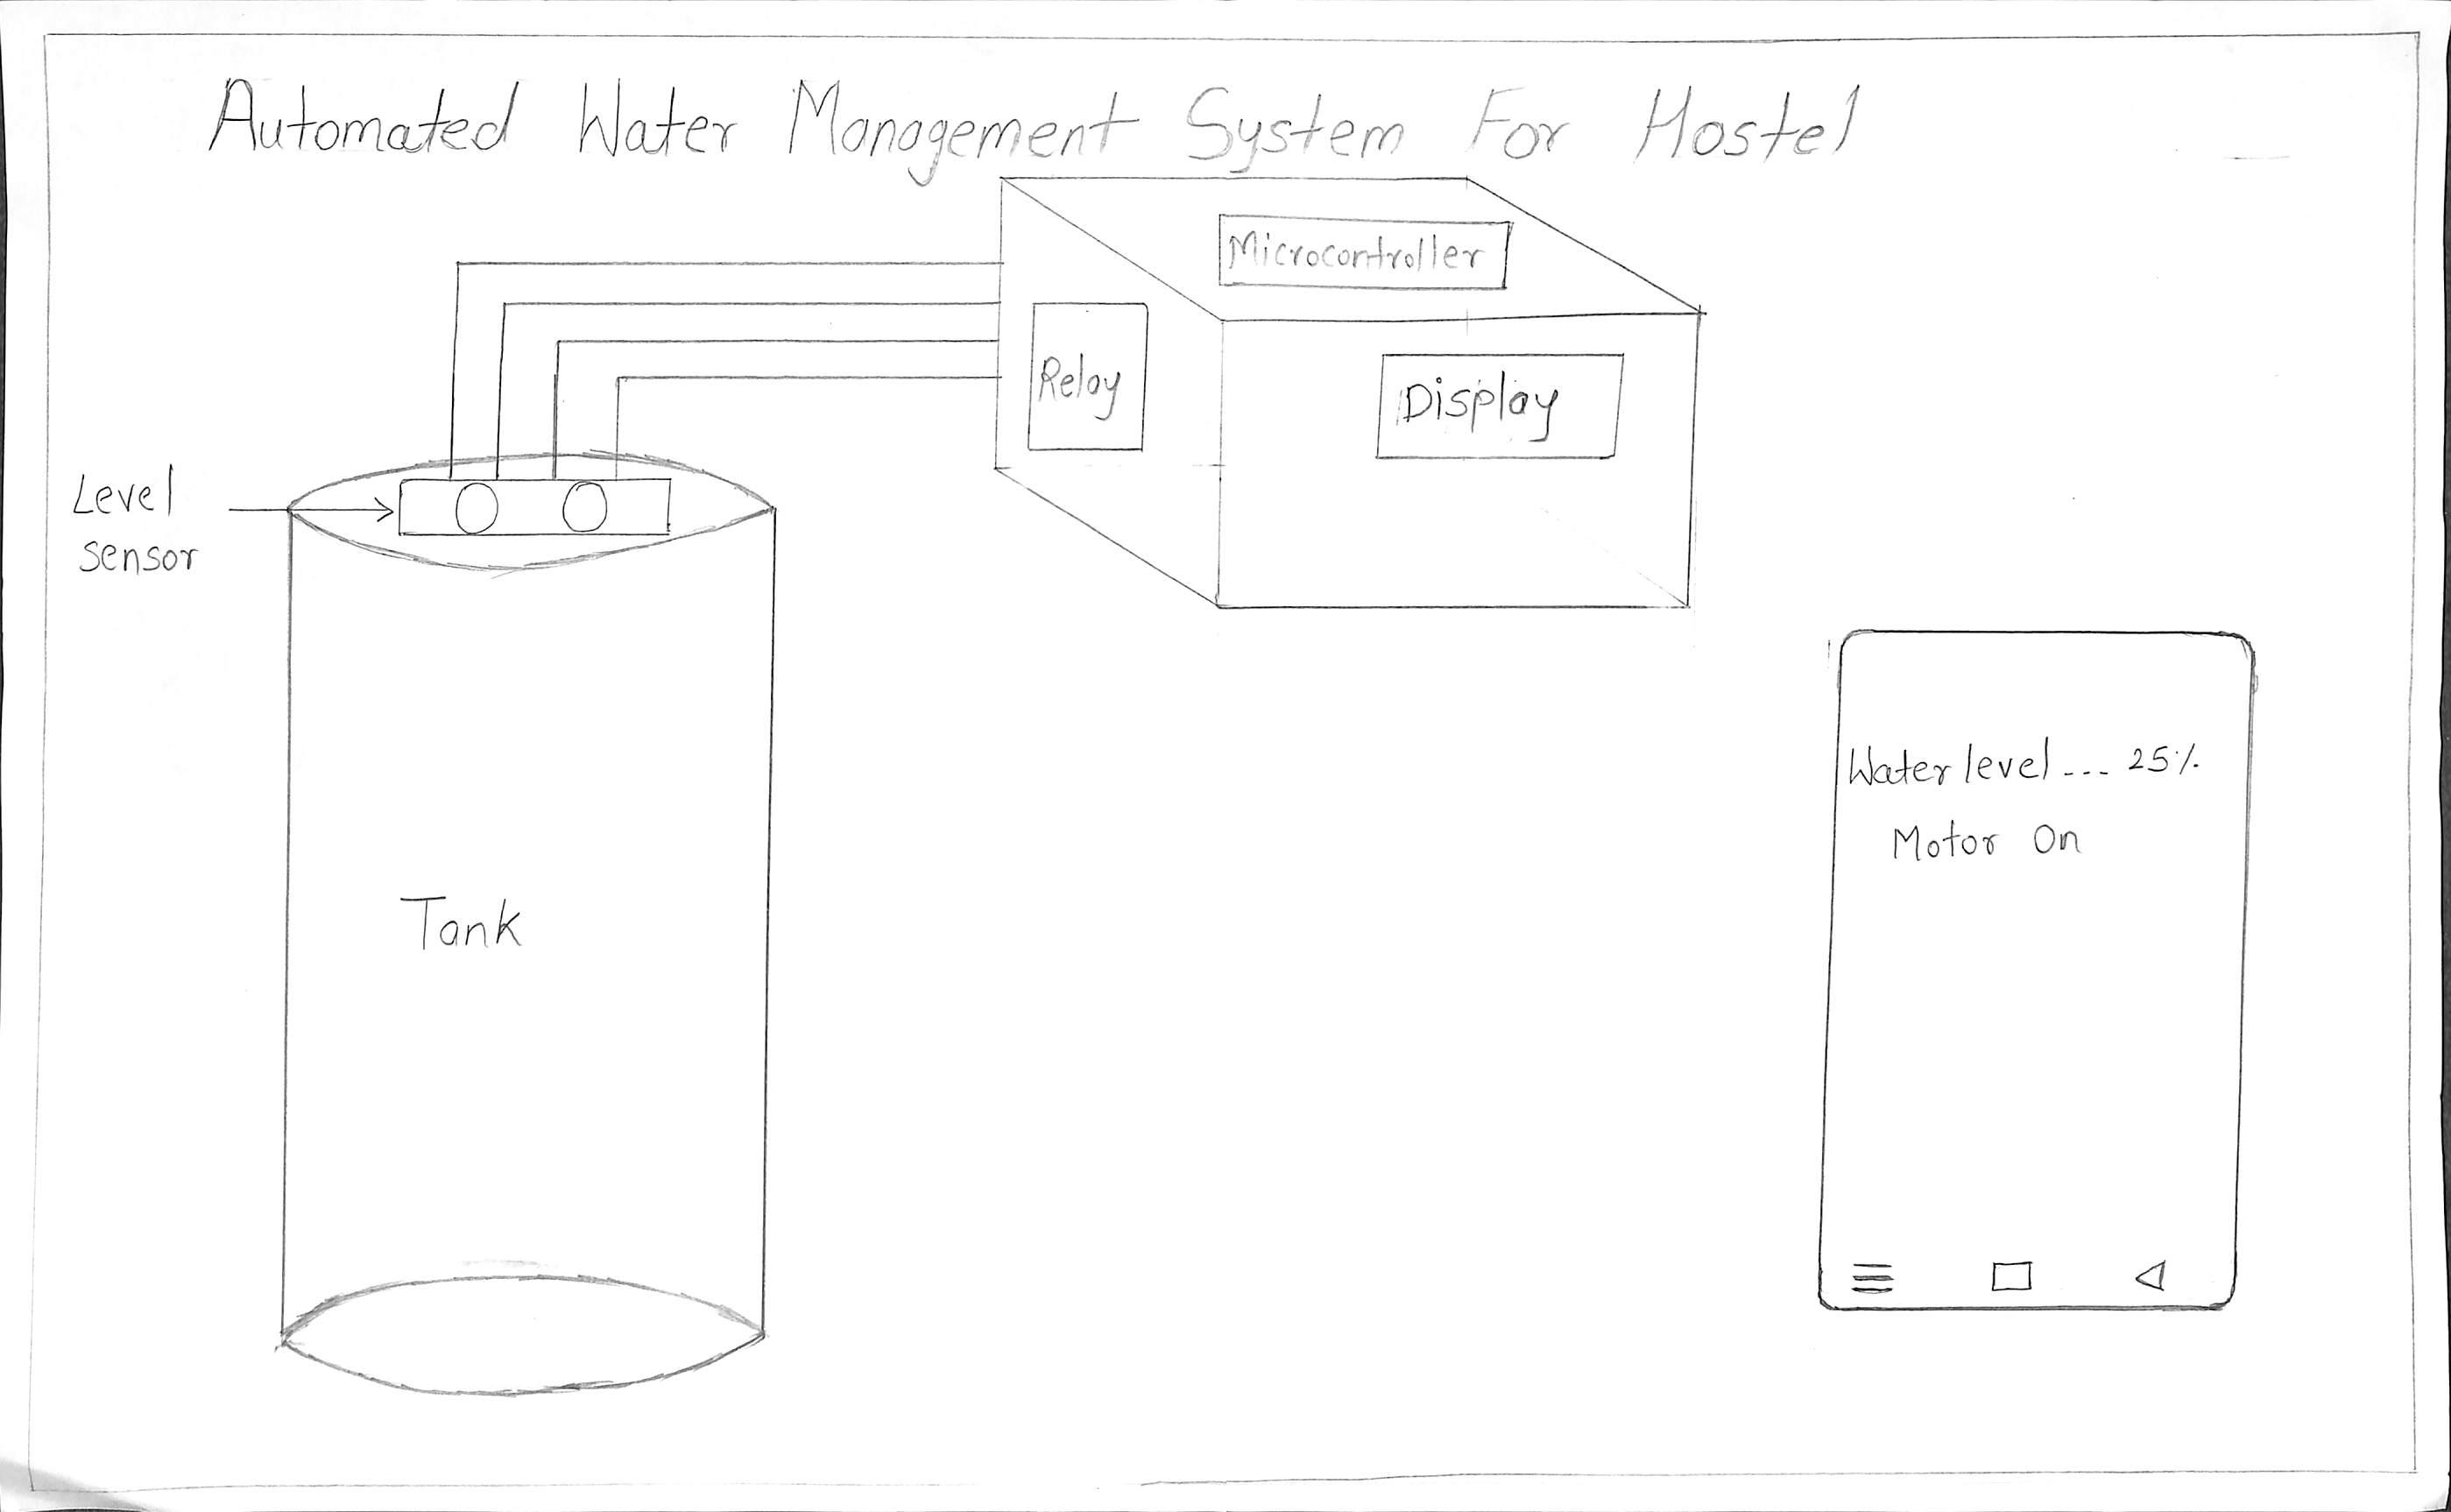
Sketch
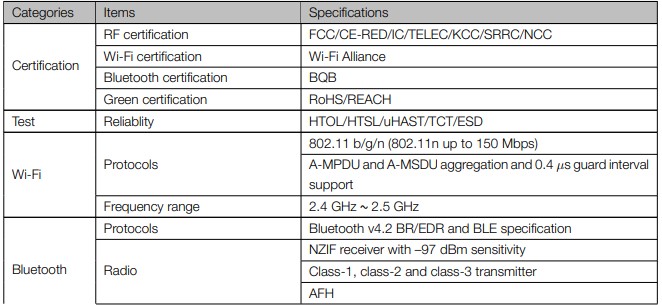
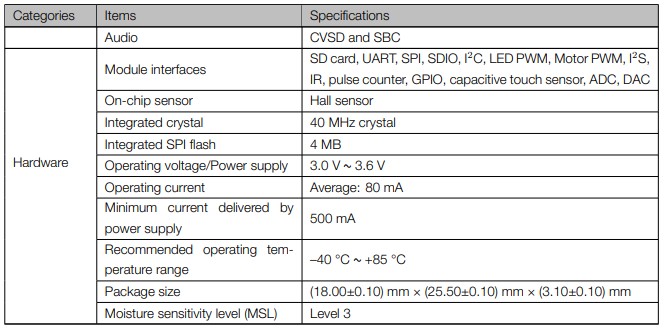
In Embedded programming assignment task is to read datasheet .So I decided I will finalize my controller.I read datasheet of ESP32 because it has inbuild wifi and bluetooth model.It has more advantage than other controller. I have to make mobile application for receiving message on mobile that tank is full or not.
Features of ESP32:
CPU: Xtensa dual-core (or single-core) 32-bit LX6 microprocessor, operating at 160 or 240 MHz and performing at up to 600 DMIPS.
Ultra low power (ULP) co-processor.
Memory: 520 KiB SRAM.
Wi-Fi: 802.11 b/g/n
Bluetooth: v4.2 BR/EDR and BLE (shares the radio with Wi-Fi)
12-bit SAR ADC up to 18 channels
2 × 8-bit DACs
10 × touch sensors (capacitive sensing GPIOs)
4 × SPI
2 × I²S interfaces
2 × I²C interfaces
3 × UART
|

|
NOTE:ESP32 required only 3.3v supply.Dont give 5v directly to ESP32.It will burn out.For that you need regulator IC.If you have 3.3v supply then you can directly give it to 3v pin.
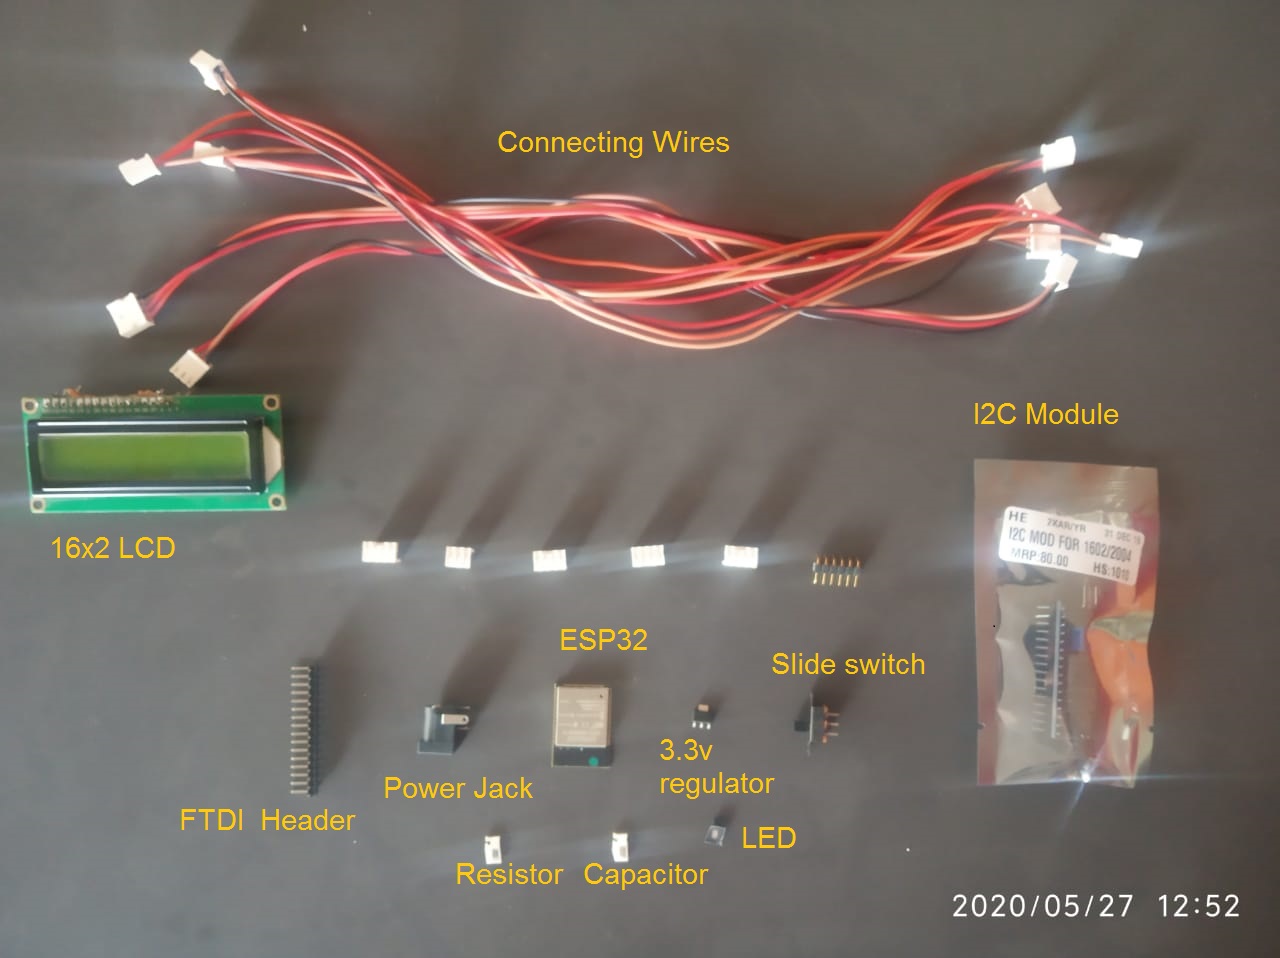
Project Material:
I made project material list in application and implication week.
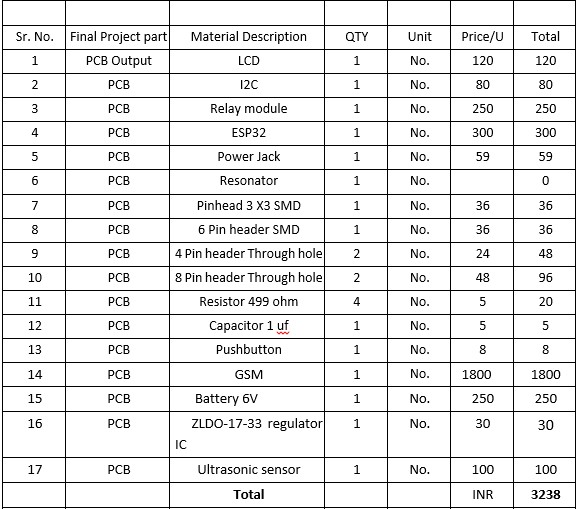
BOM
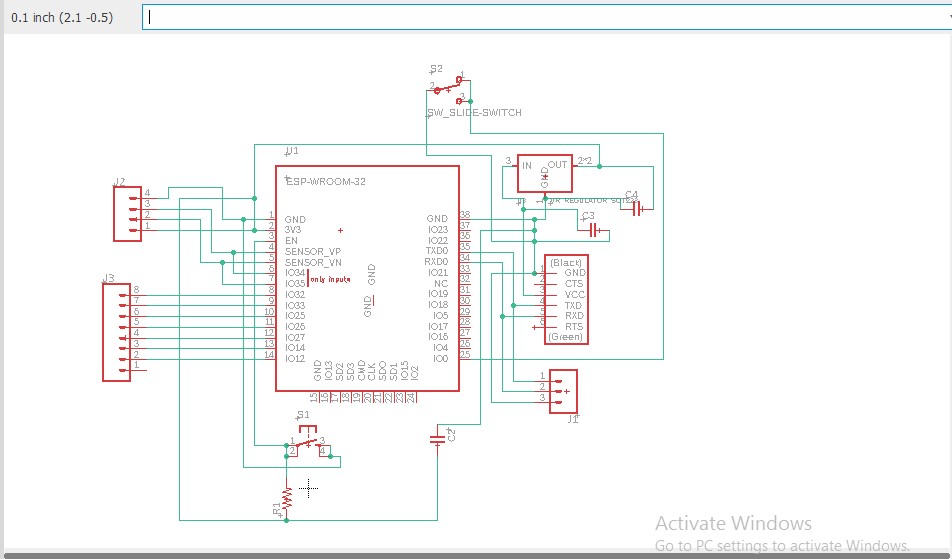
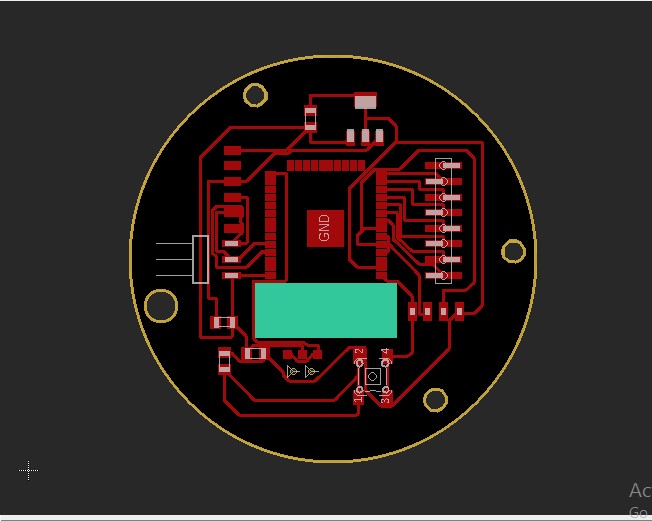
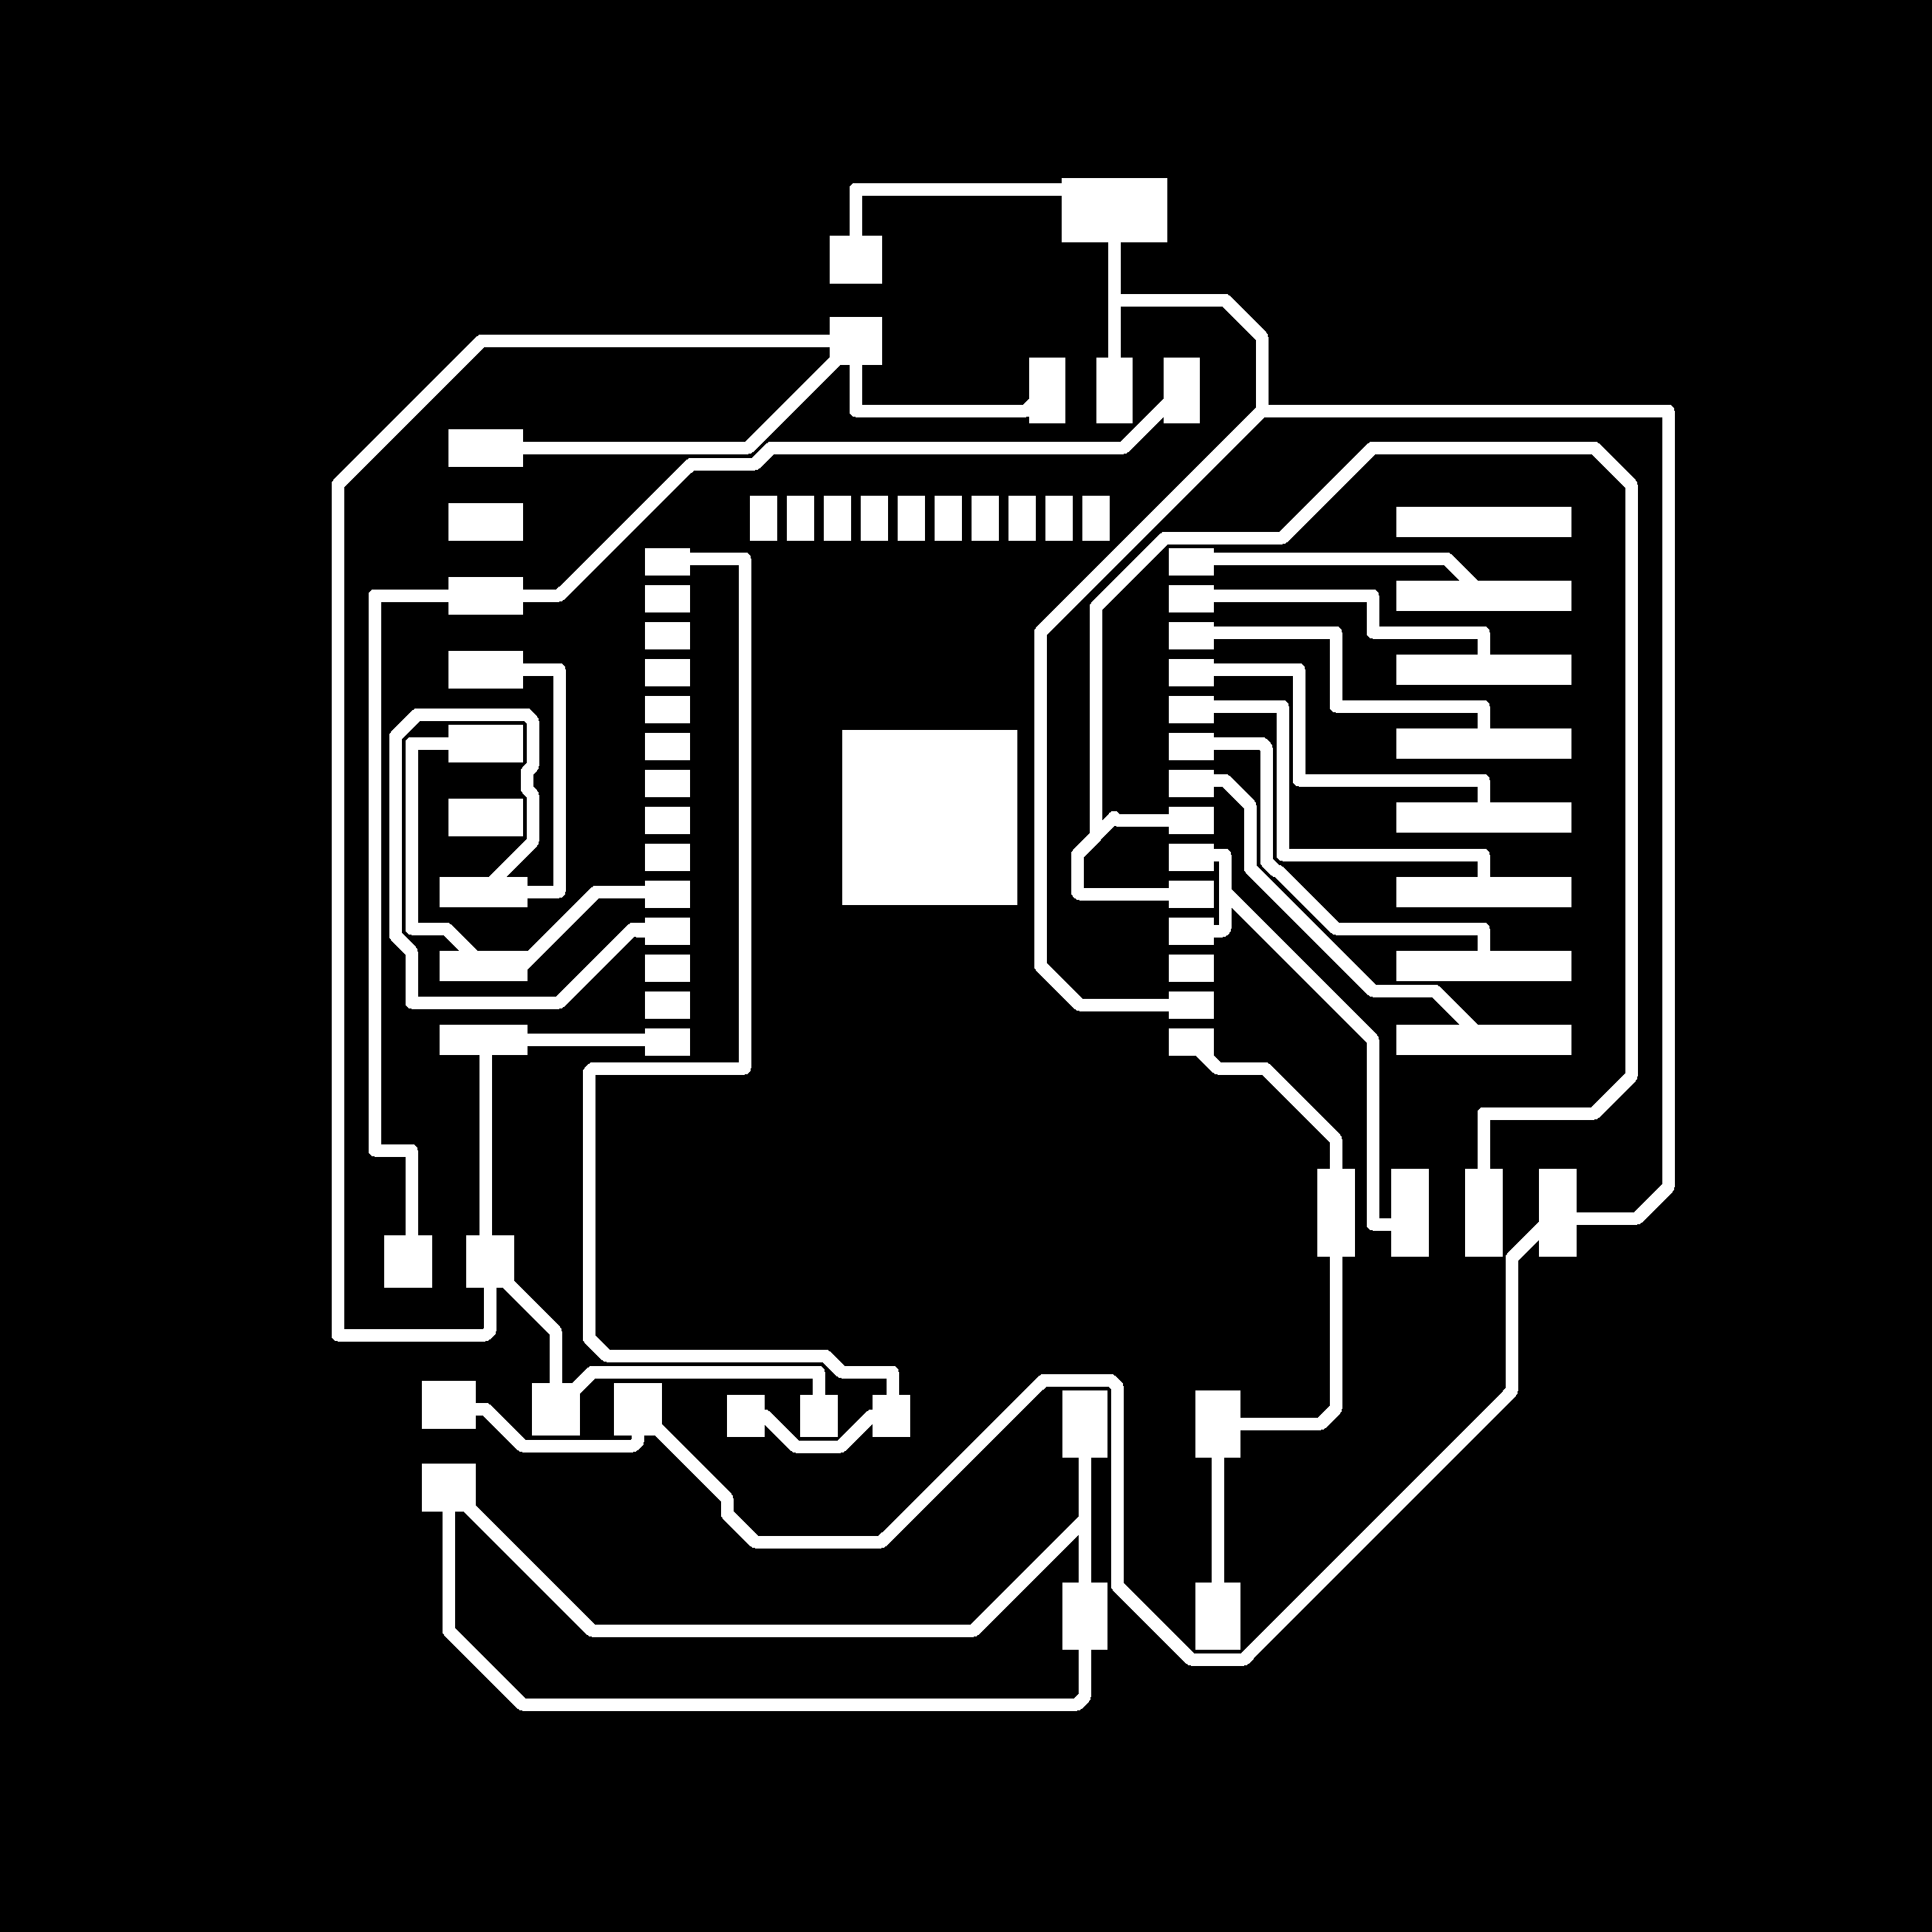
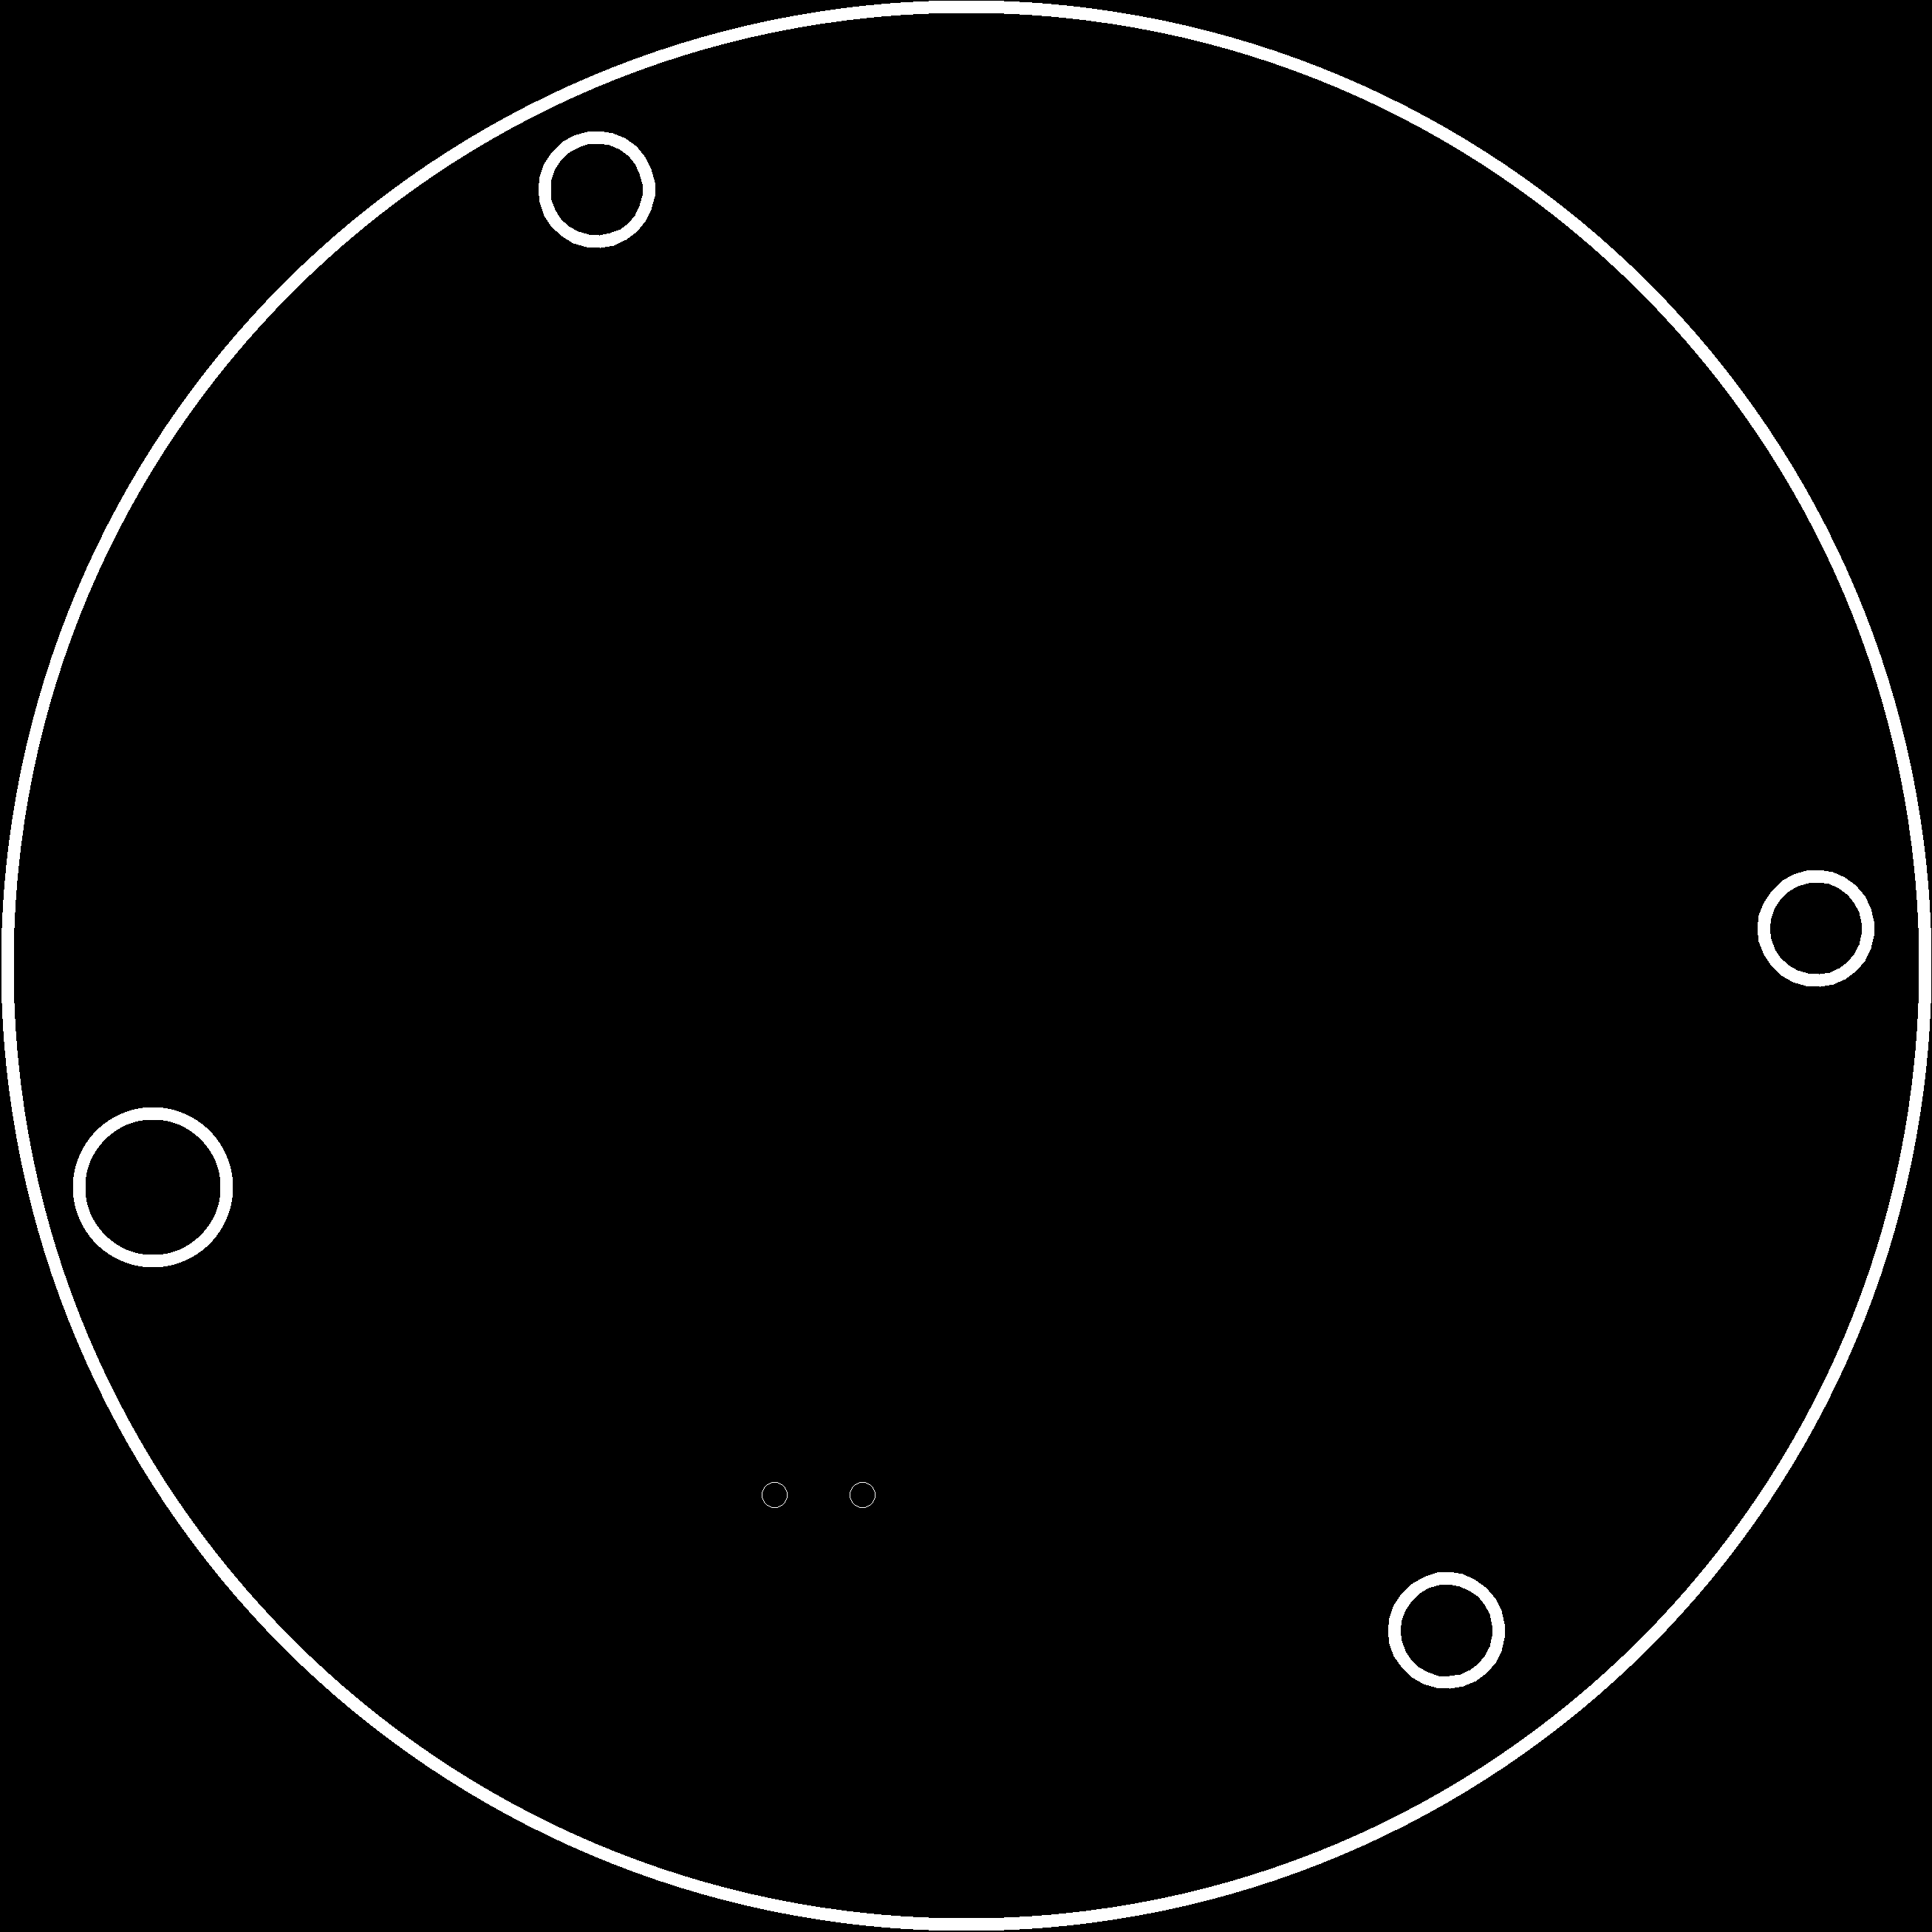
Electronic Design:
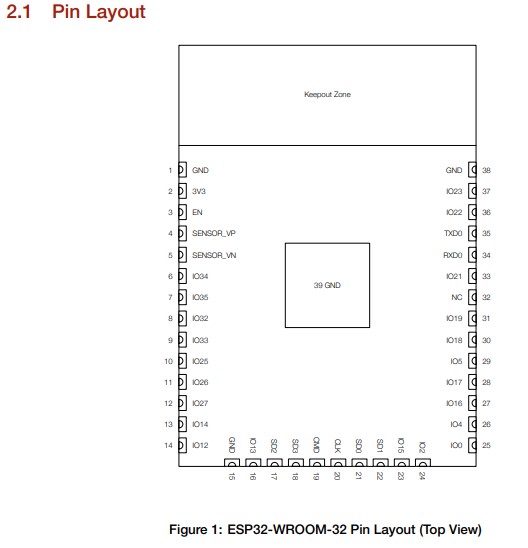
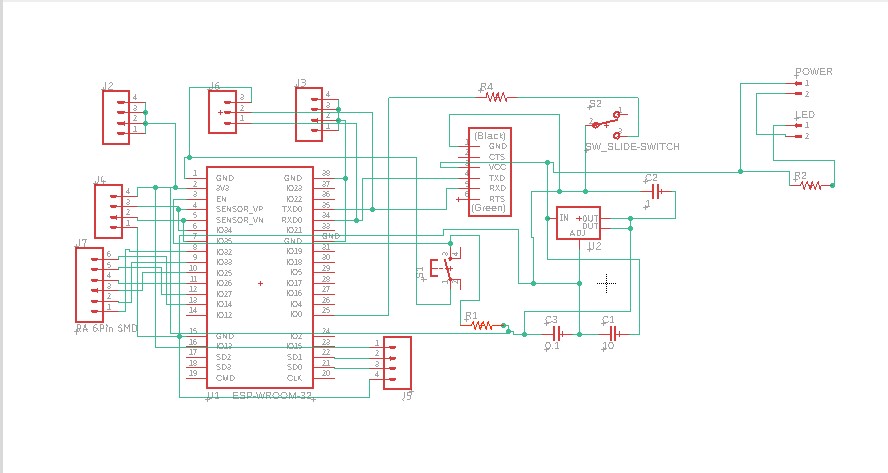
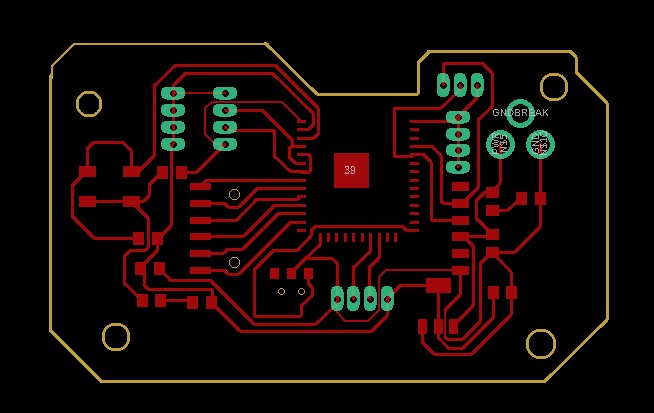
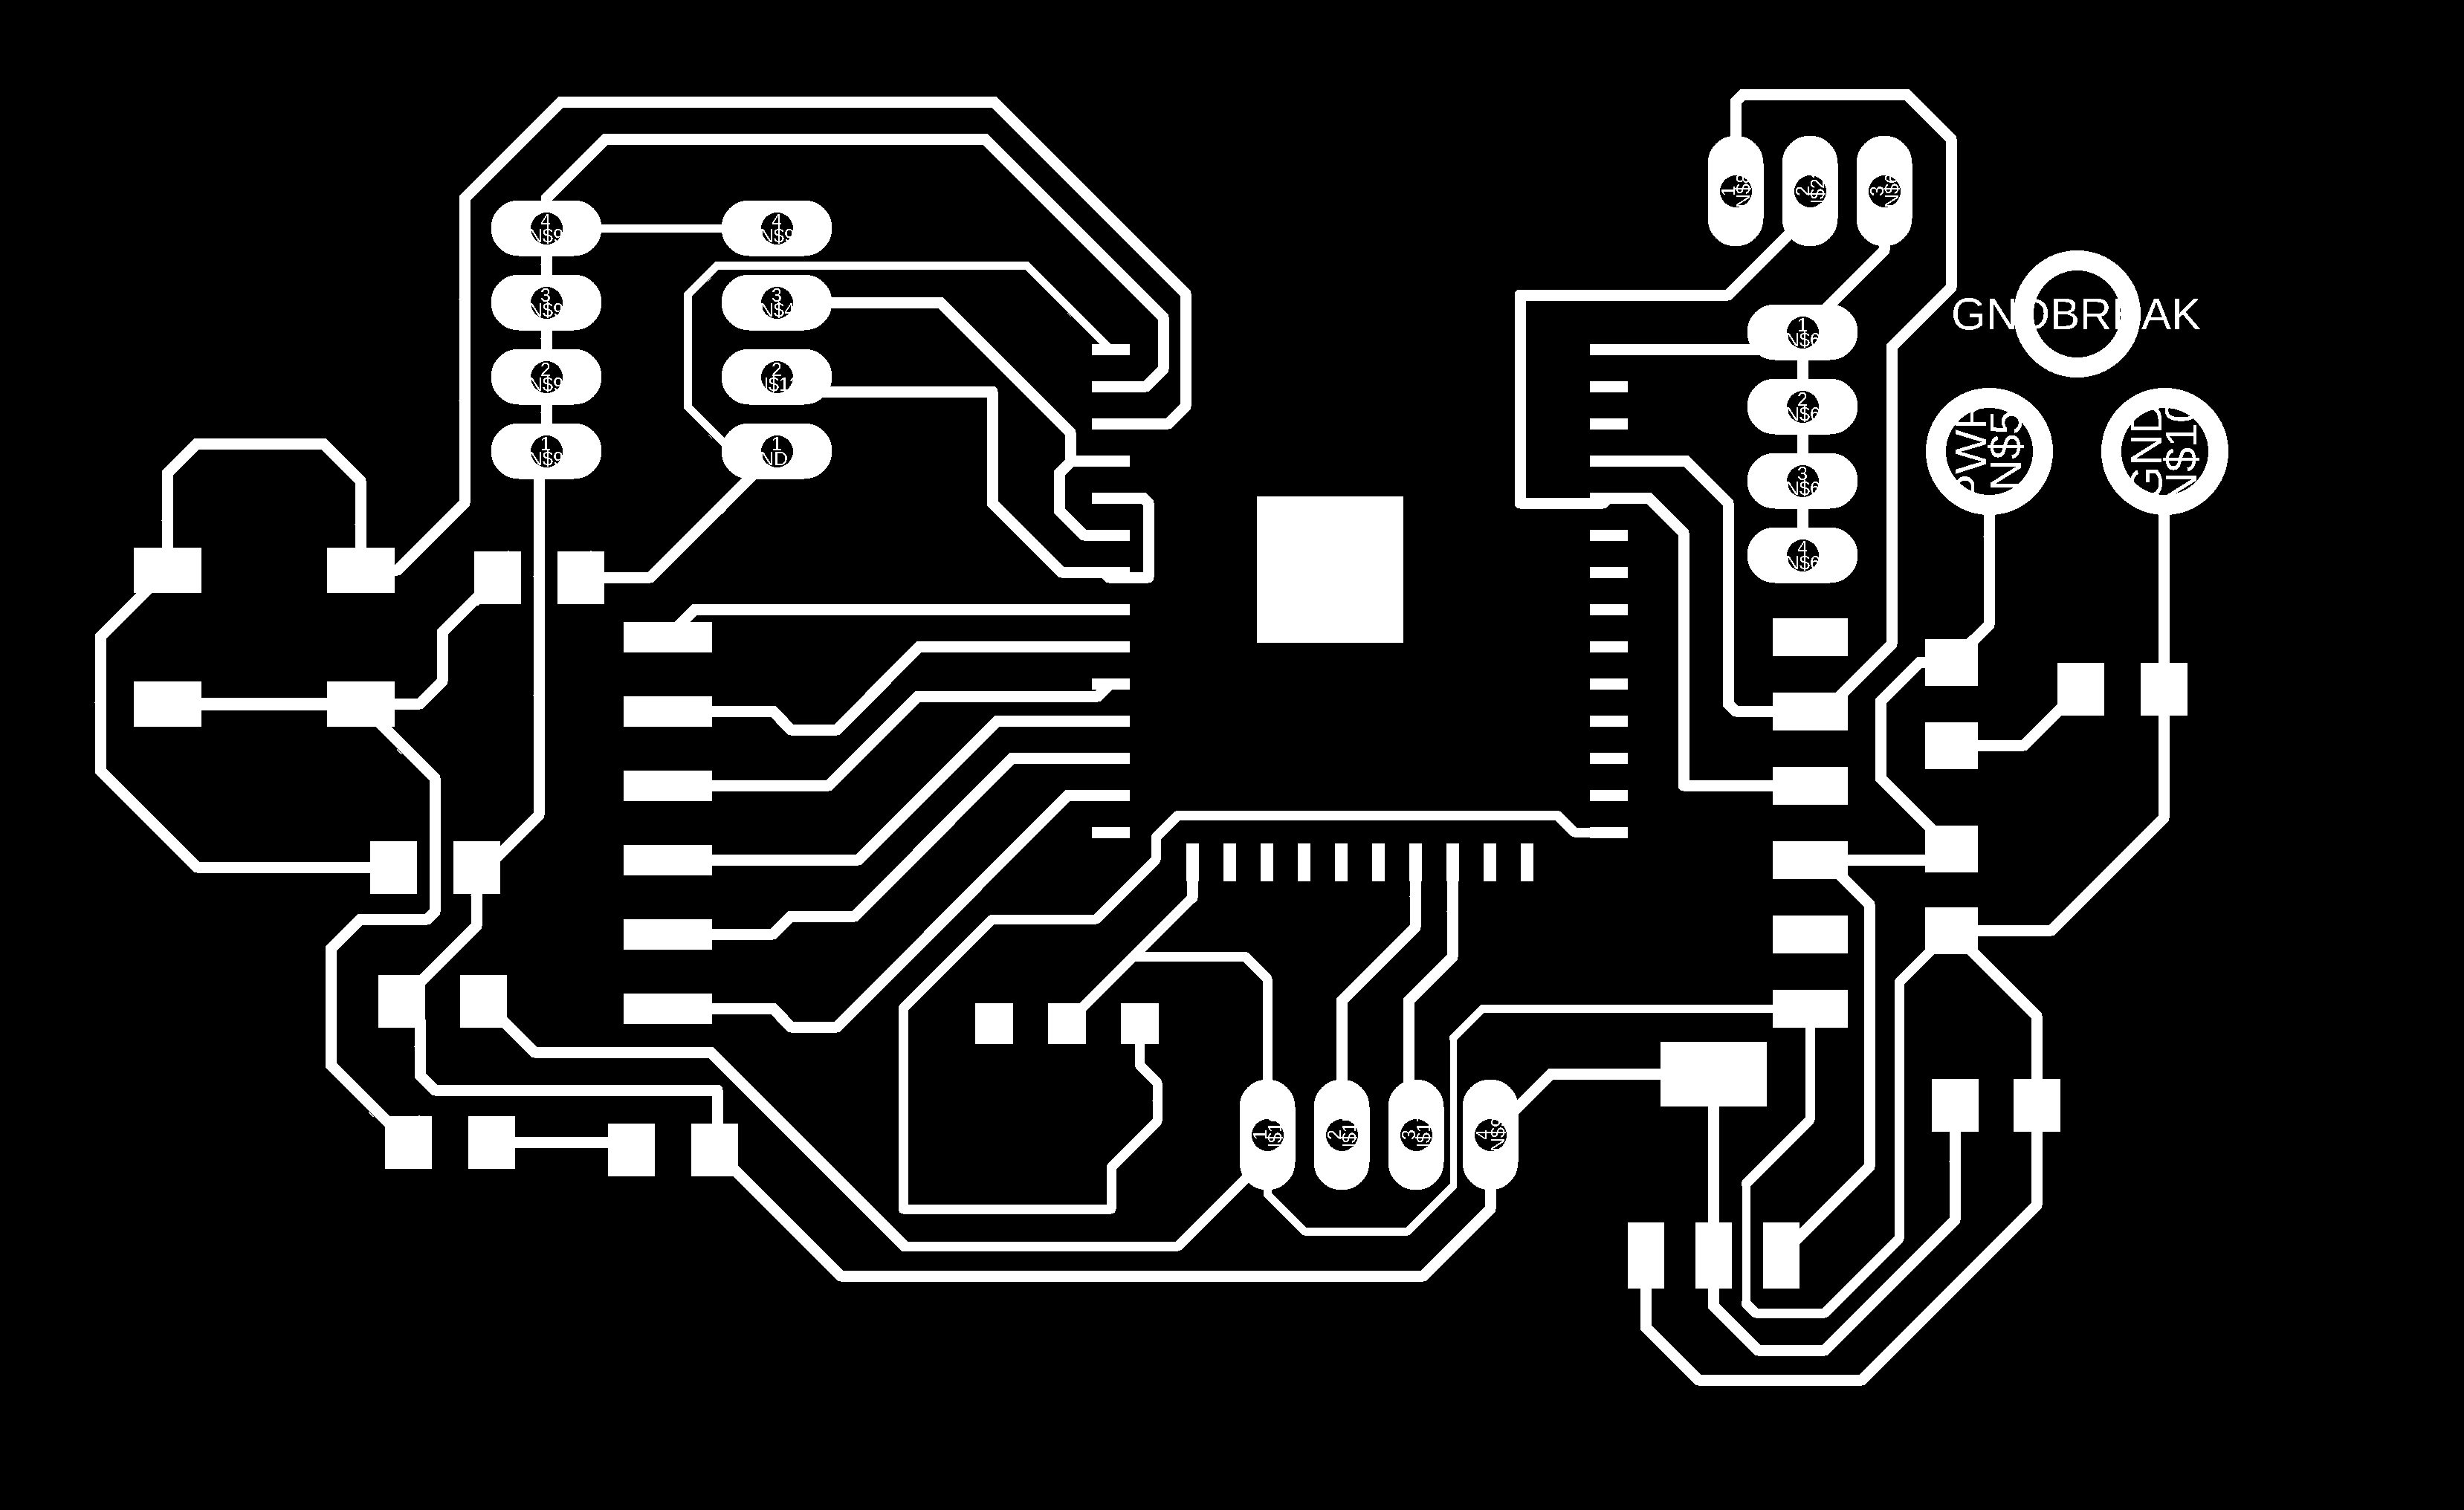
After study of ESP32 I started thinking of pcb design.Already Neil has given basic schematic of ESP32.For my final project board I need to add input and output devices ,so I need to design new board for that.So I started design of my new board which include input ,output device.In input device I need ultrasonic sensor.For output device I required OLED.For this I required pin header.In eagle I required SMD pin header library,so I added library from sparkfun.Also I need ESP32 library,but in FAblibrary I didnt found library for ESP32.I started searching for library on github.I downloaded various ESP32 library.
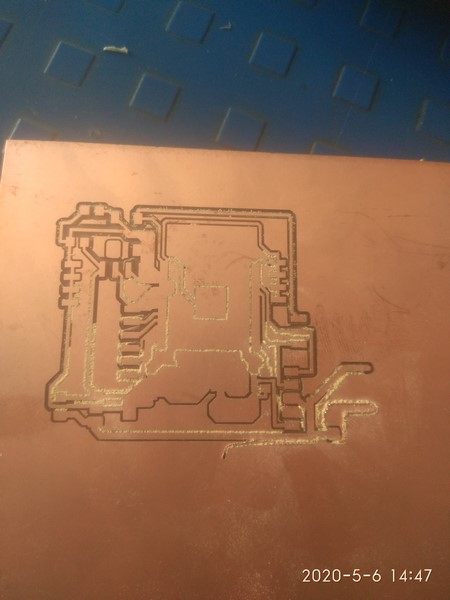
First I made schematic and made pcb board.After that I milled that board.After milling I get to know that I have selected wrong footprint for ESP32.All pins of ESP32 get short.I get so confused in ESP32 footprint.I didnt understand which one is correct footprint.
I decided to check footprint by milling it only .For that I milled 4 to 5 Pcb and I get all ESP32 pins short.I searched previous student sites ,I didnt get any input from that.I get so frustated ,then I decided to raise this question in issue tracker.
|
|
|
|
Again I designed new pcb using different footprint and milled it.Result of this pcb is also same as previous one.At the time of milling that pcb is not stick properly.After half milling it moved from original position.Because of this Pcb get wasted.
|
|
|

|

|
|
|
Errors and Solution:
I have downloaded footprint of esp32 from github.I used that footprint for my final project design,but when i milled board the esp32 pads get short.This happen with 3,4 footprint.So I discussed with local instructor.He told me to change the pad size.I searched how to change the footprint size in eagle.I got how to change the size.I followed document and did that.
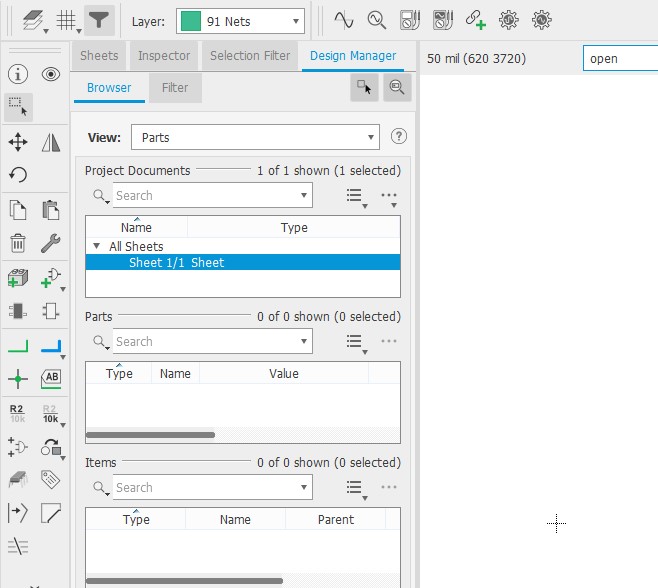
Open eagle.Go to schematic and type open command.
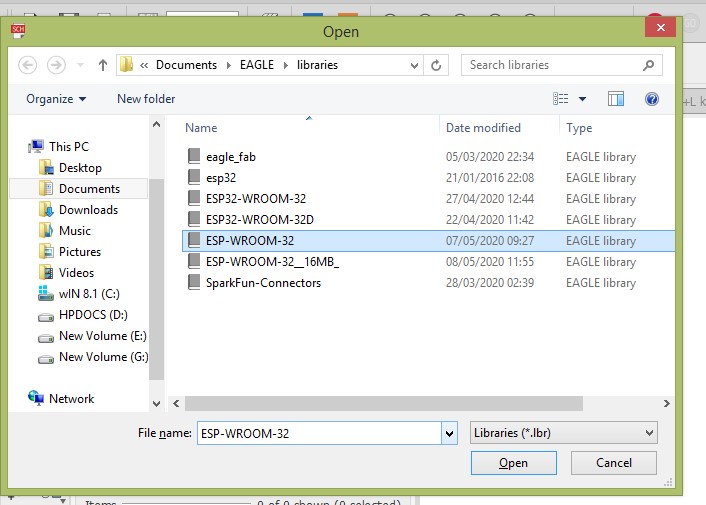
Select the library of specific footprint which you want to change.
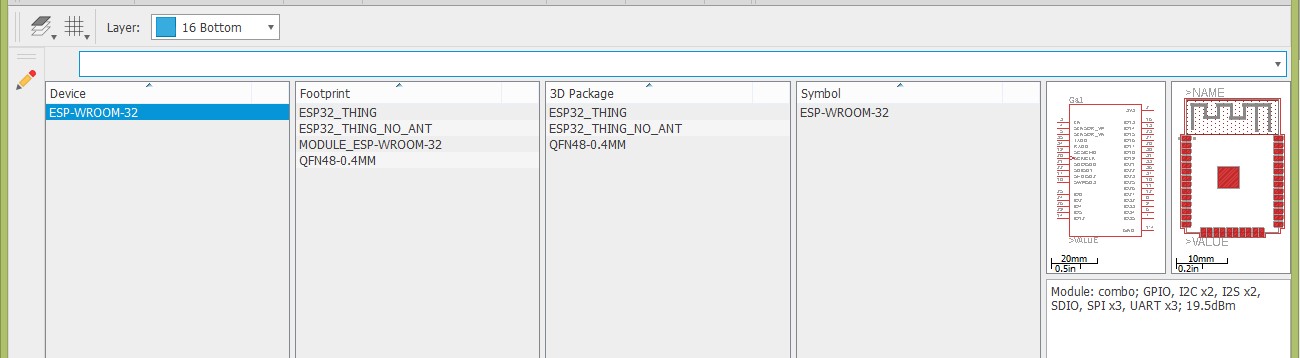
You will get this window .Choose the footprint which you want to change.
After selection of footprint you will get this window.

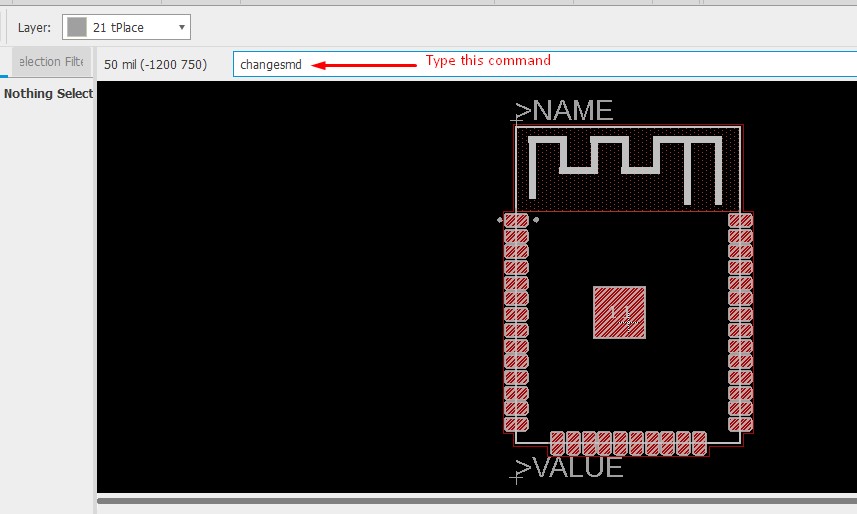
Type the changesmd command.
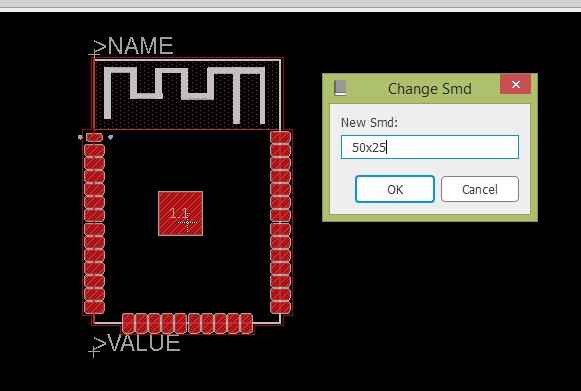
Change the pad size as you need.
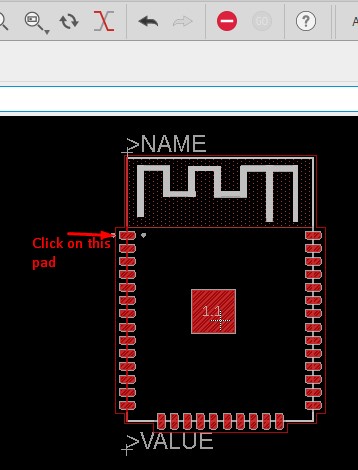
Click on pad to change the pad size.You will see in image.
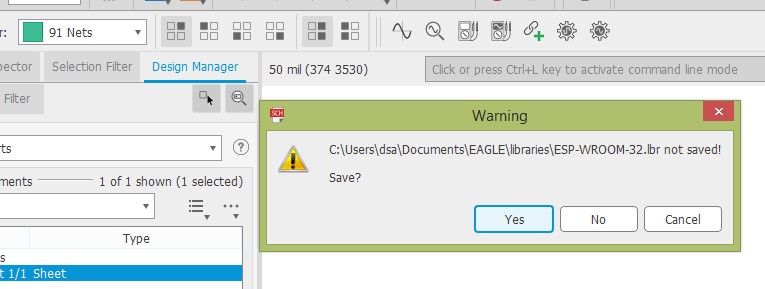
After completion you will get this message.It showing file saved or not.Click on yes.
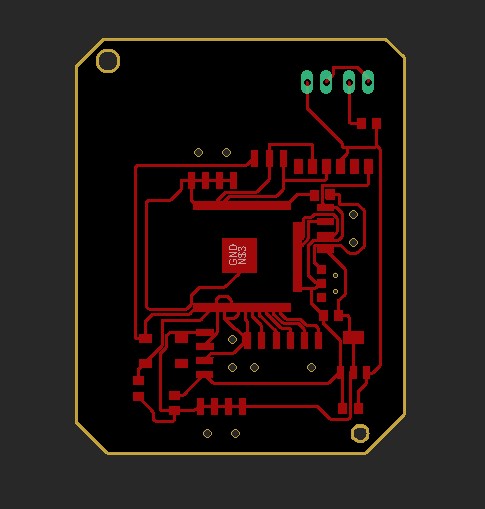
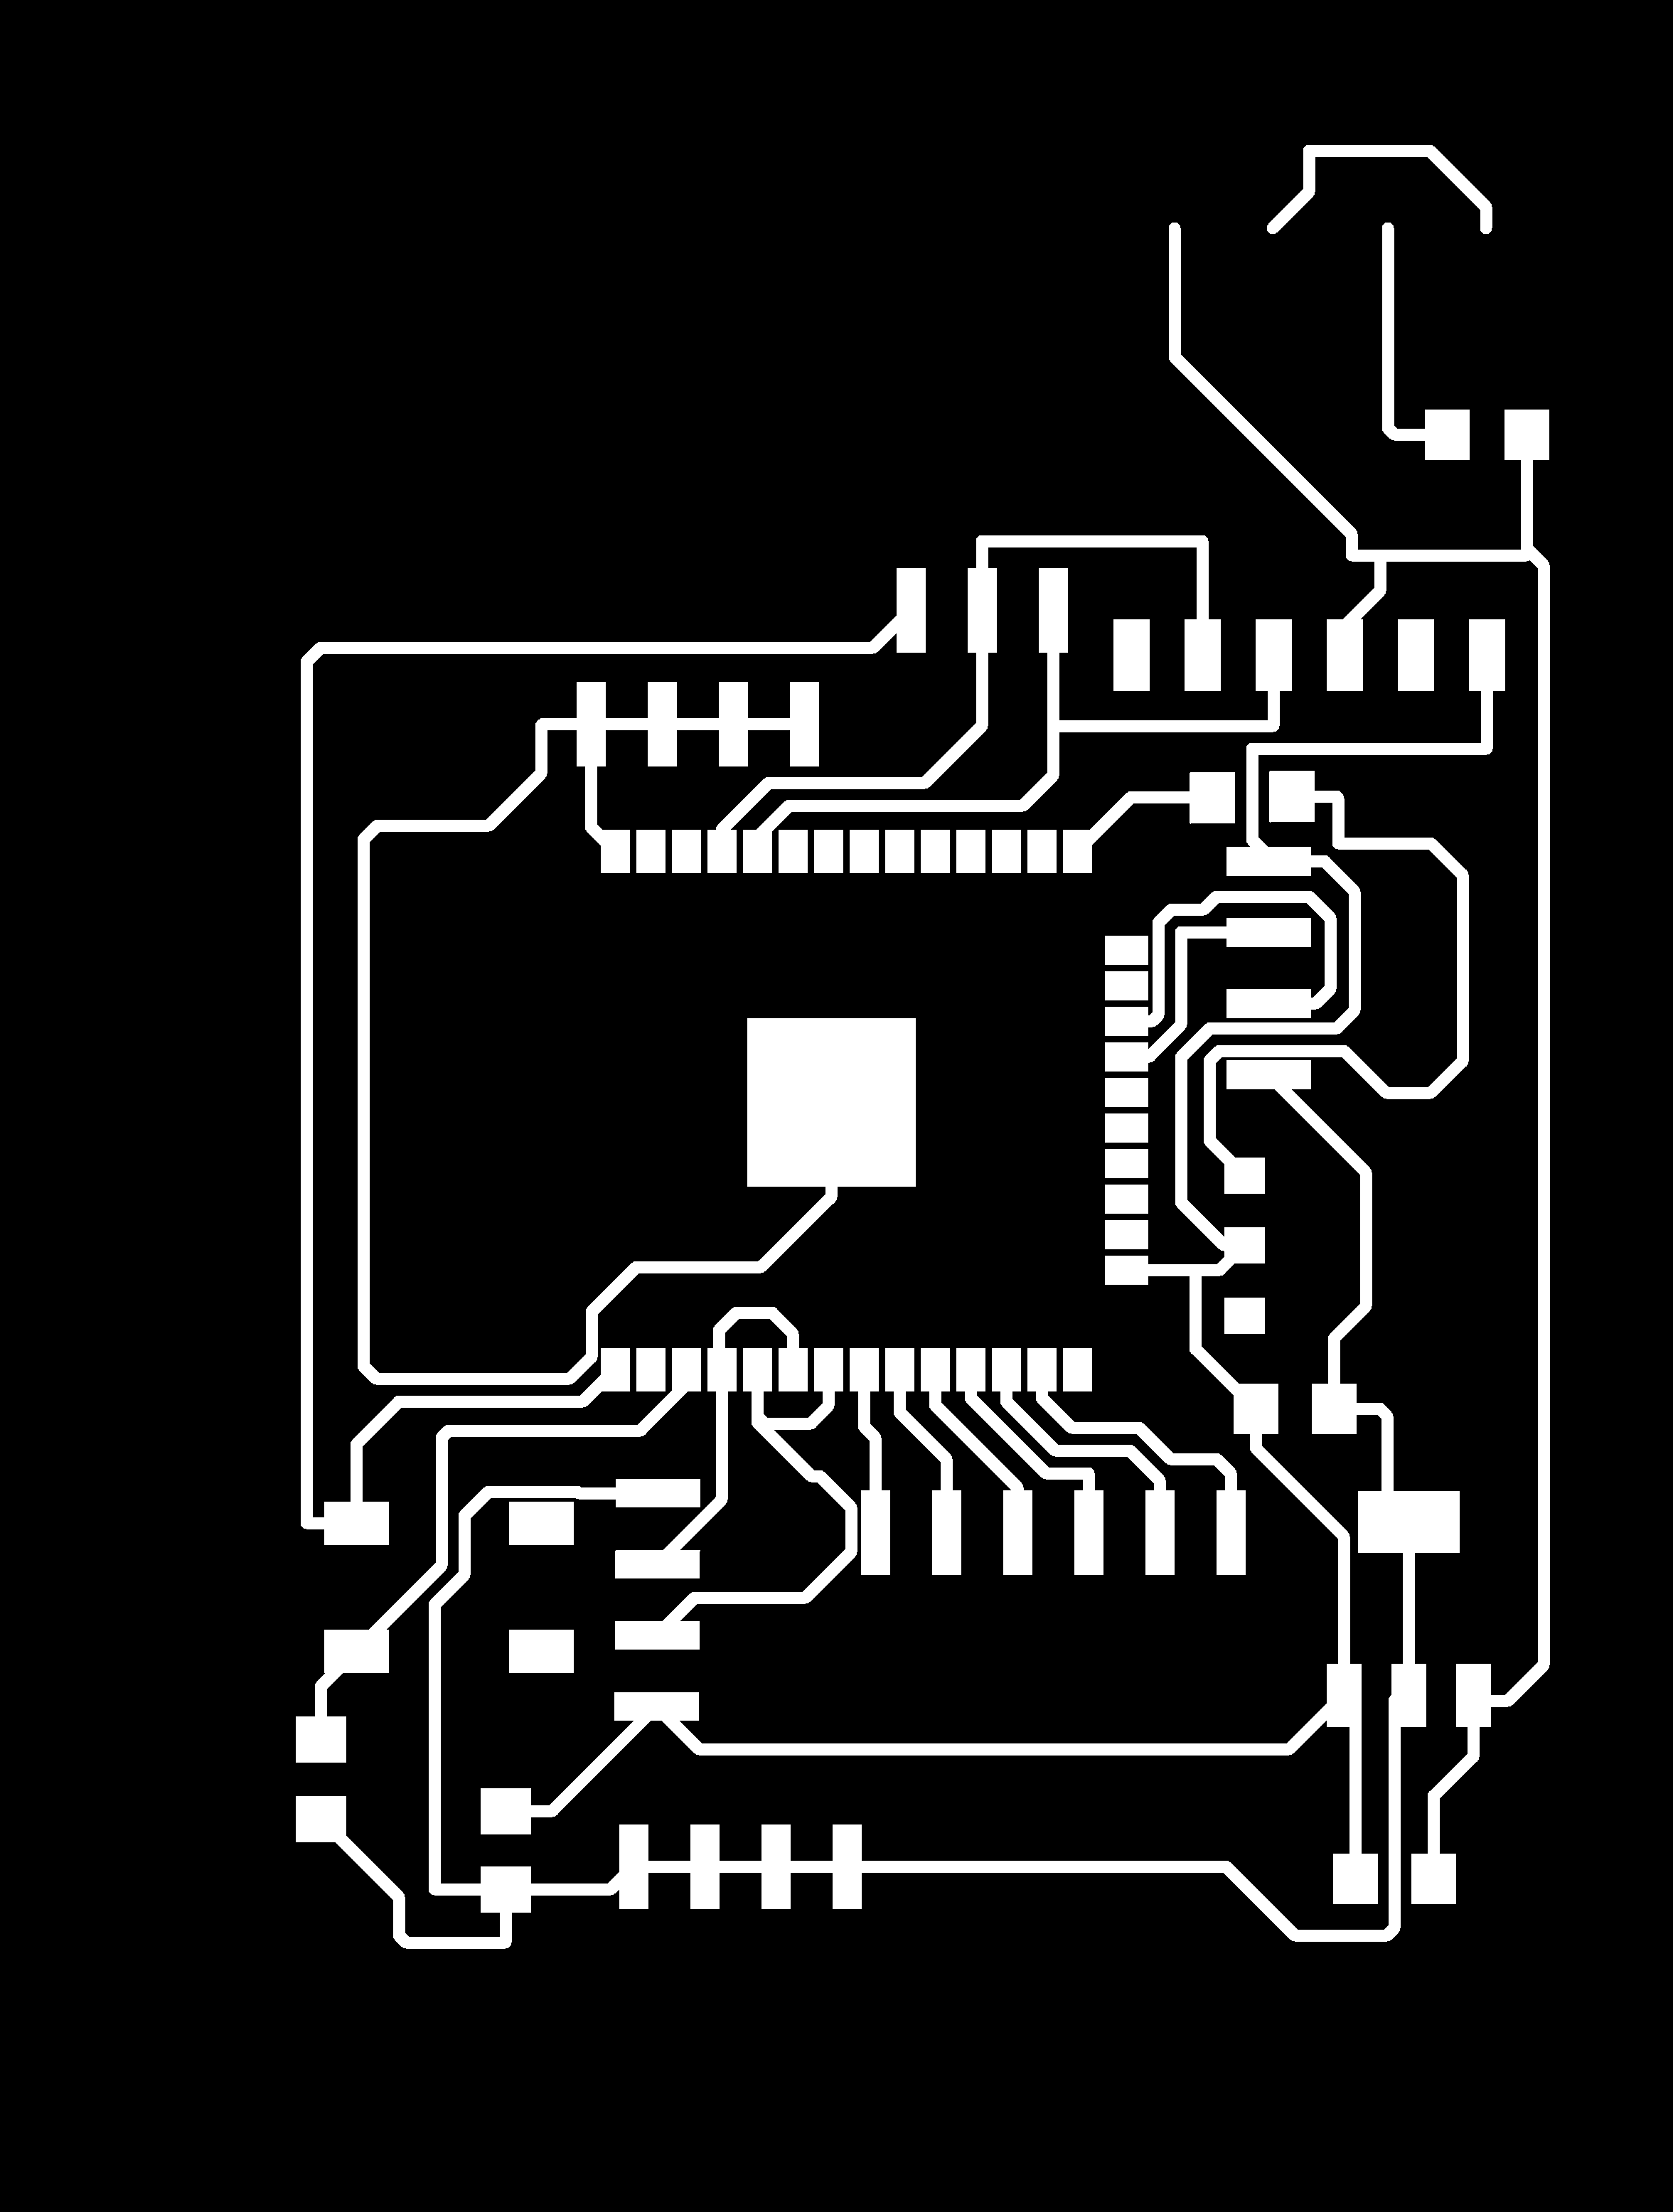
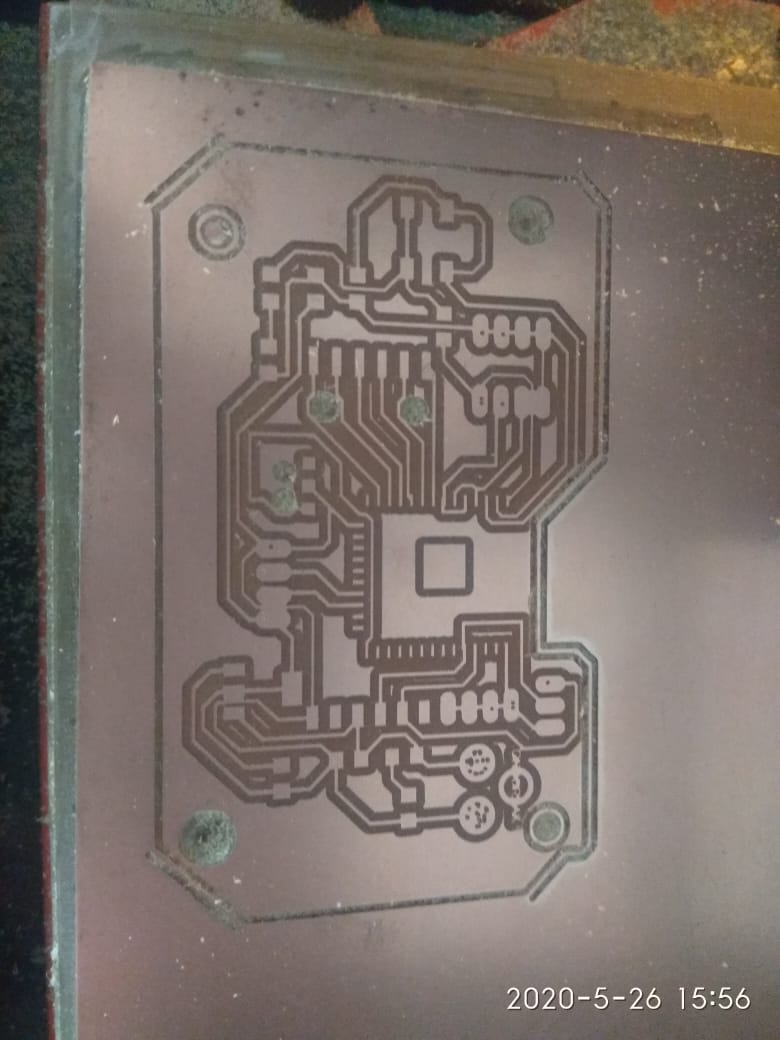
After lot of practice and search ,finally I made my design correctly.I have changed pad size of ESP32 .Because of this pads are not shorted.I have tested it first.
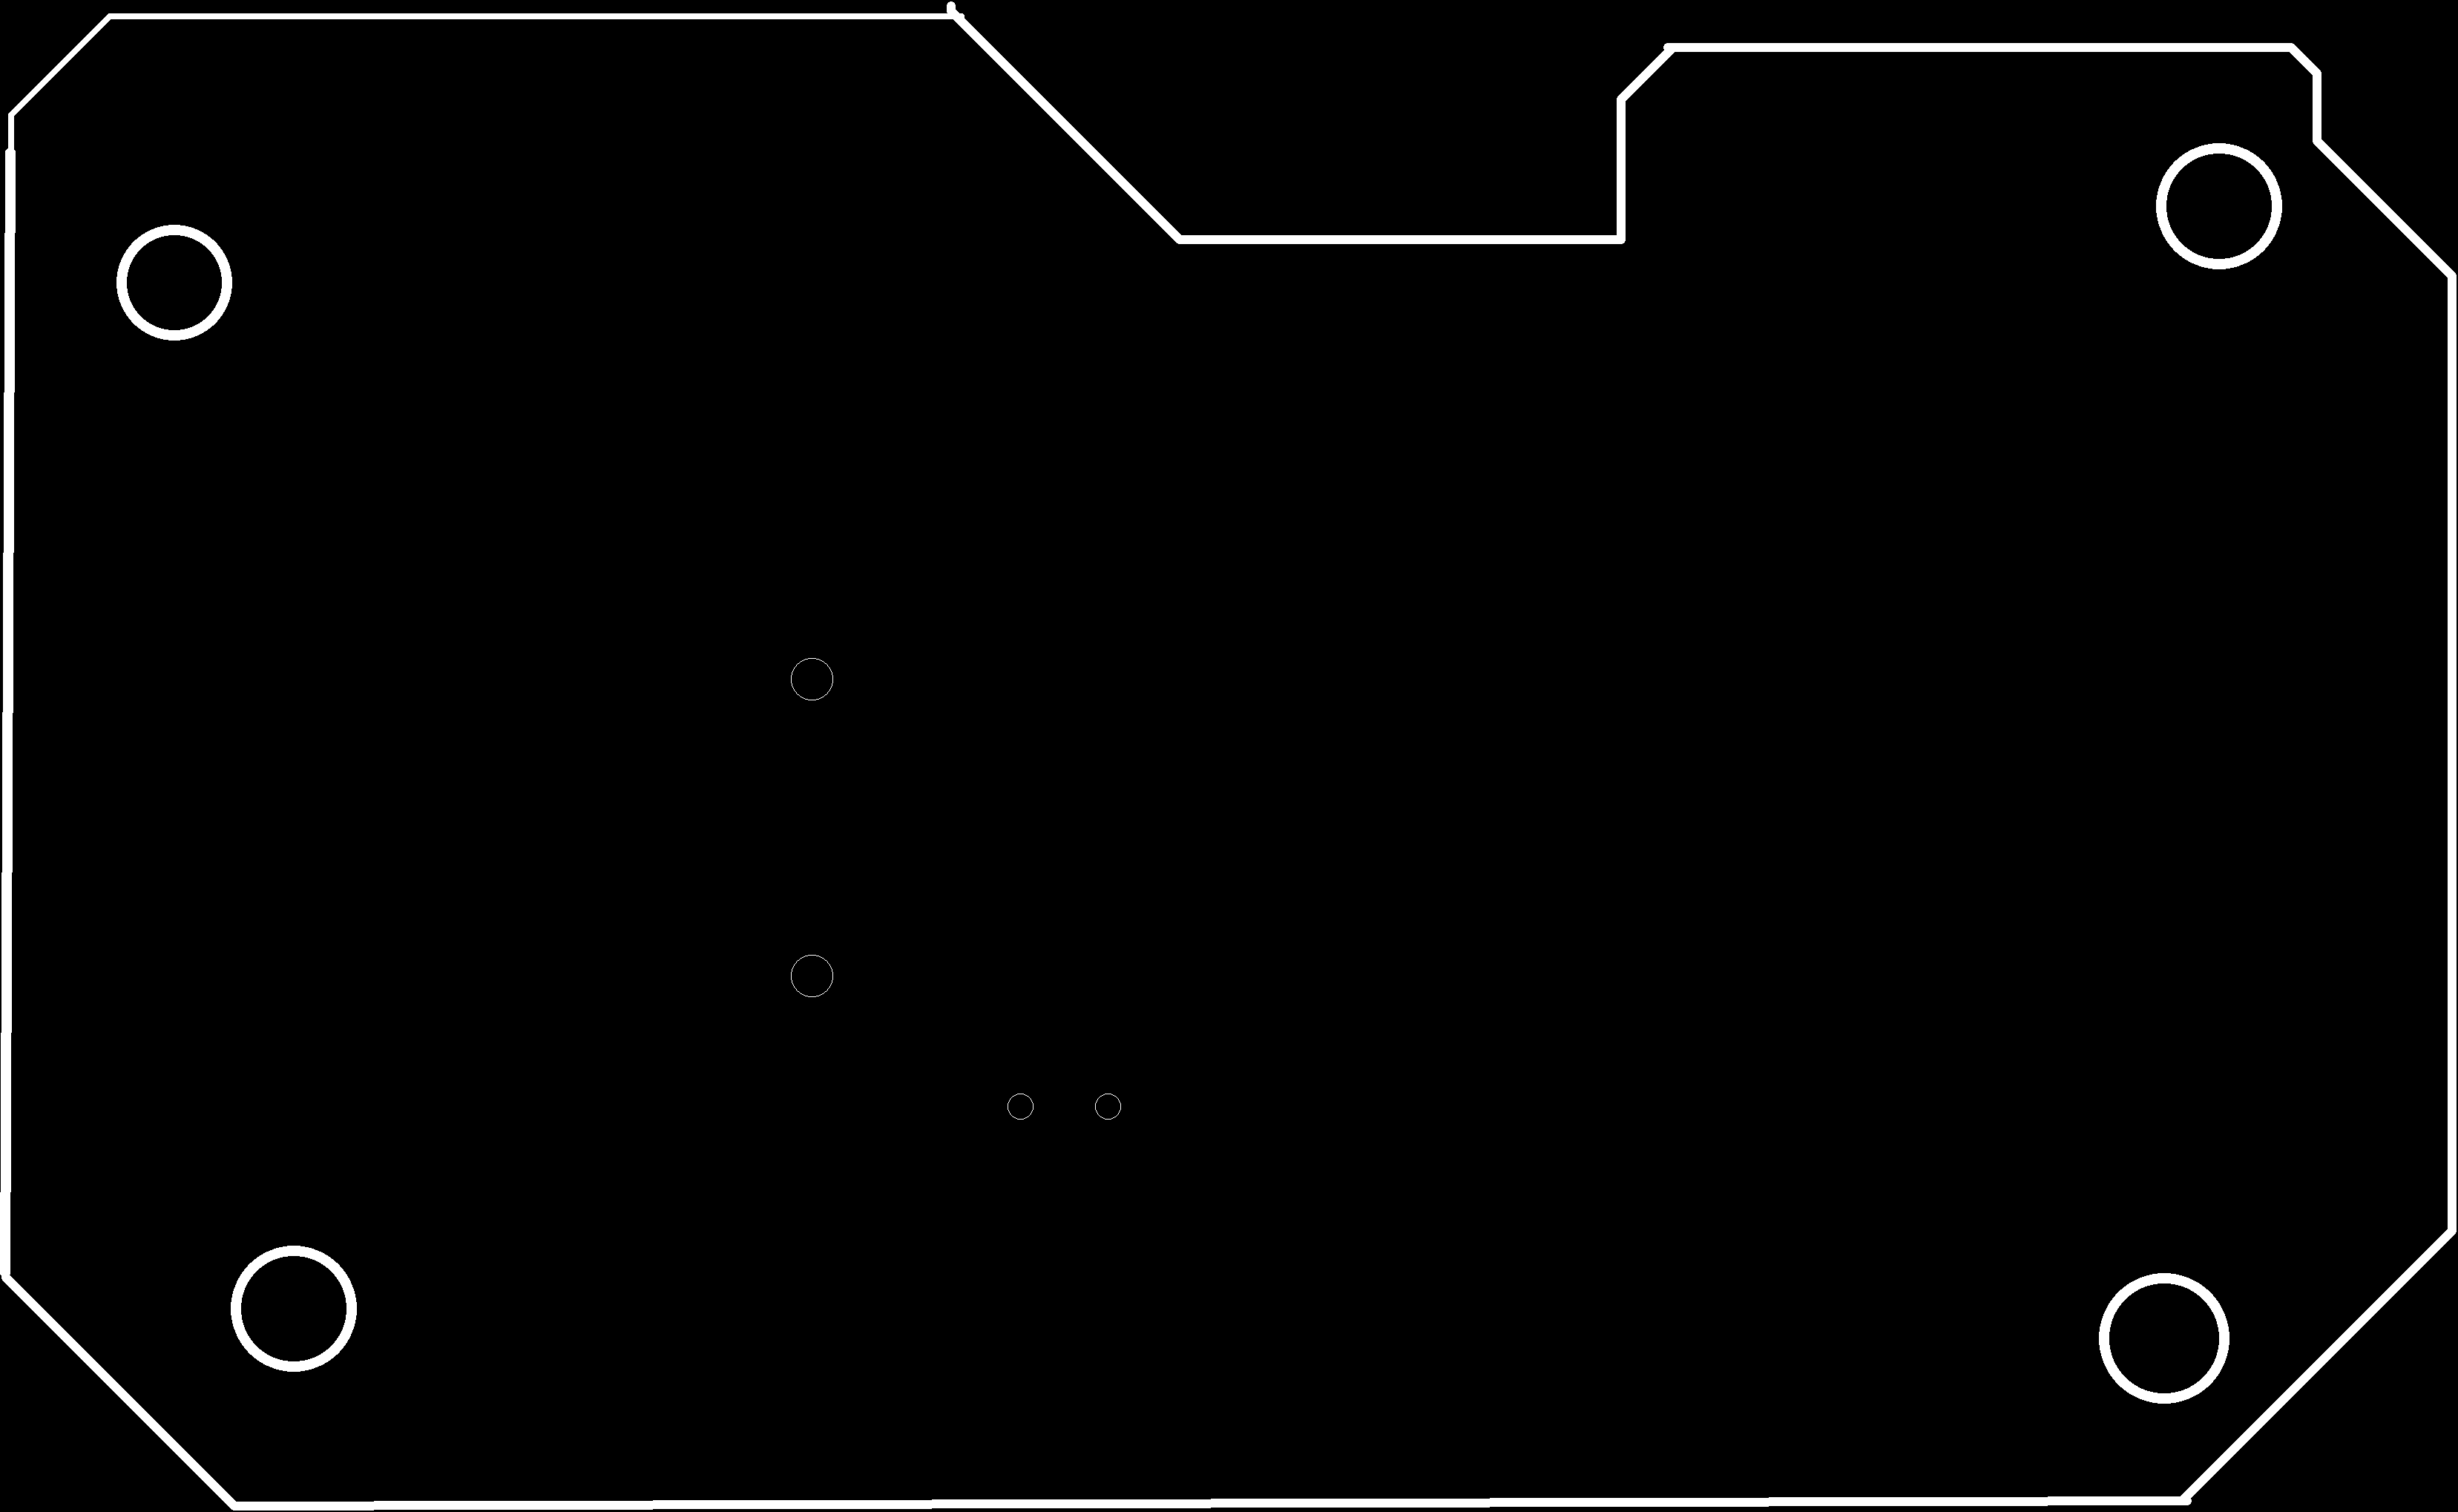
When design is finished I saved file in .PNG format.
|
|
SRM-20 require .RML file.By using mods I have converted png to rml.That file is given to SRM-20 machine.
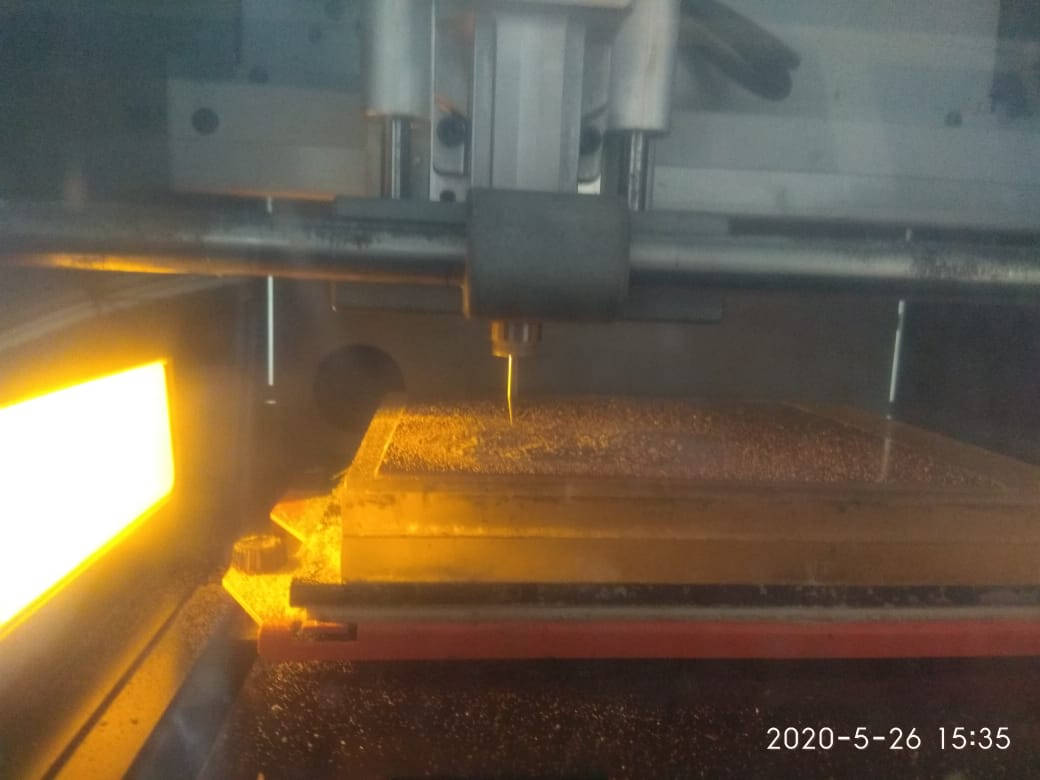
|
|
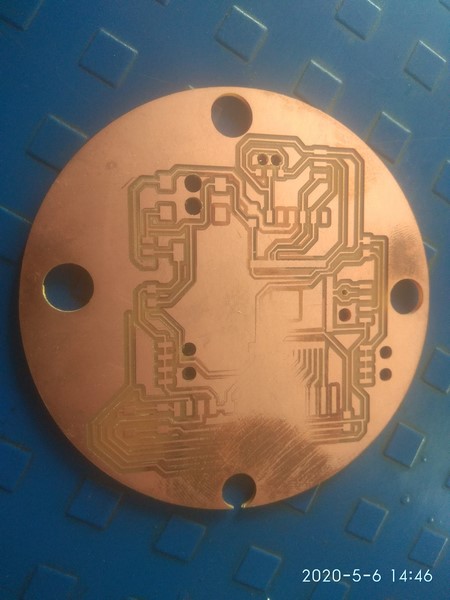
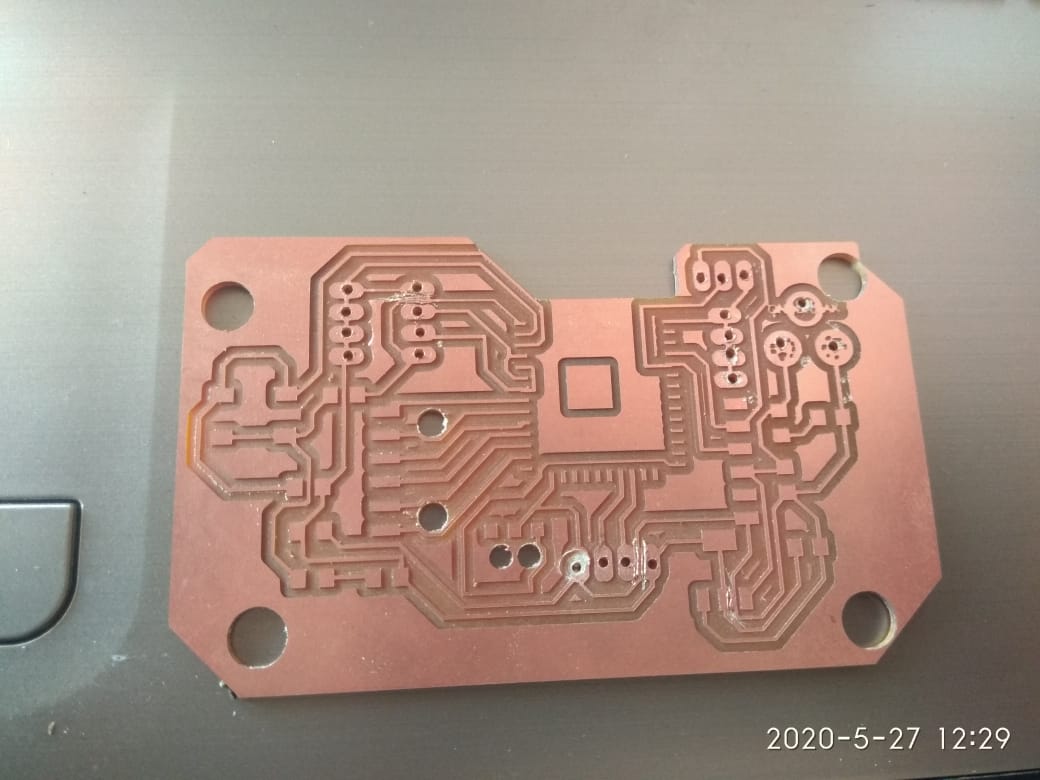
This is final milled PCB.I have checked continuity of my board.Also I have collected all components.
|
|
This is final soldered pcb with testing.I have tested blink program first.

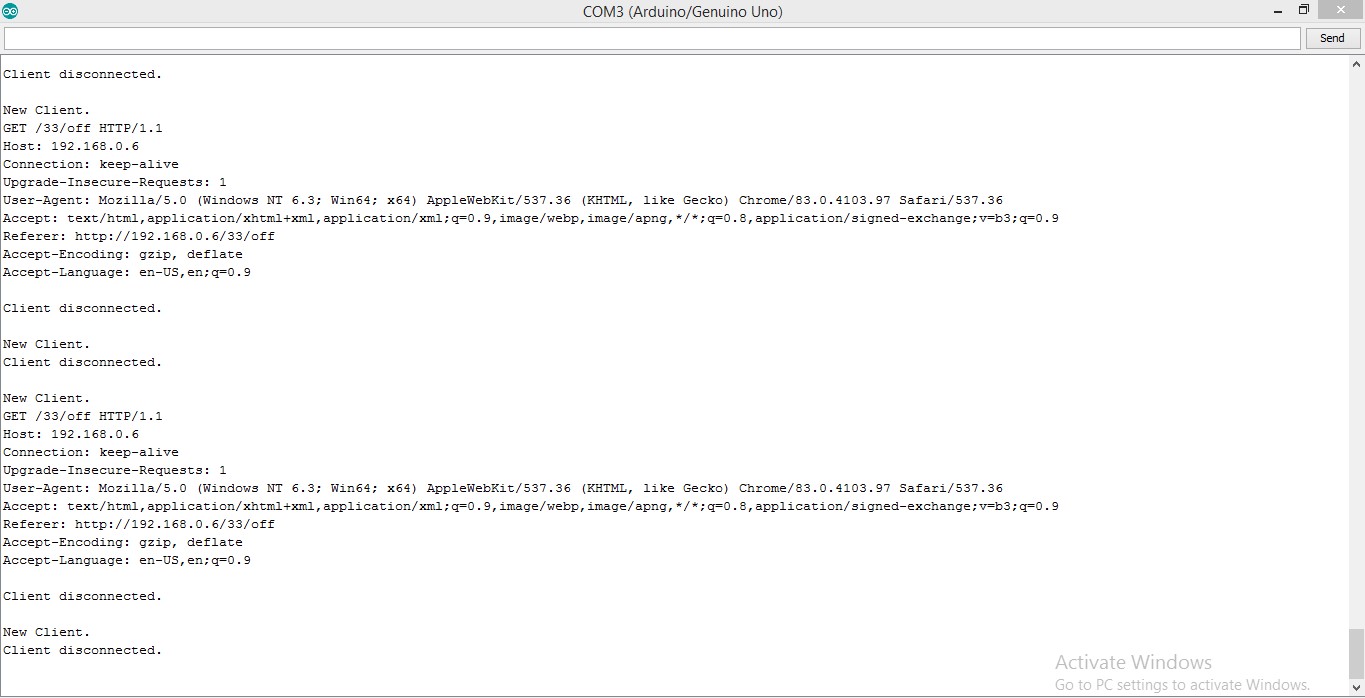
I have tested my board with web server ,when I clicked on web server led will be ON or OFF.Also wifi connectivity and ON OFF displayed on serial monitor.
The power supply for my board is 5V 1A adapter.But ESP32 required 3.3v for that I have used voltage regulator which will convert 5v to 3.3v
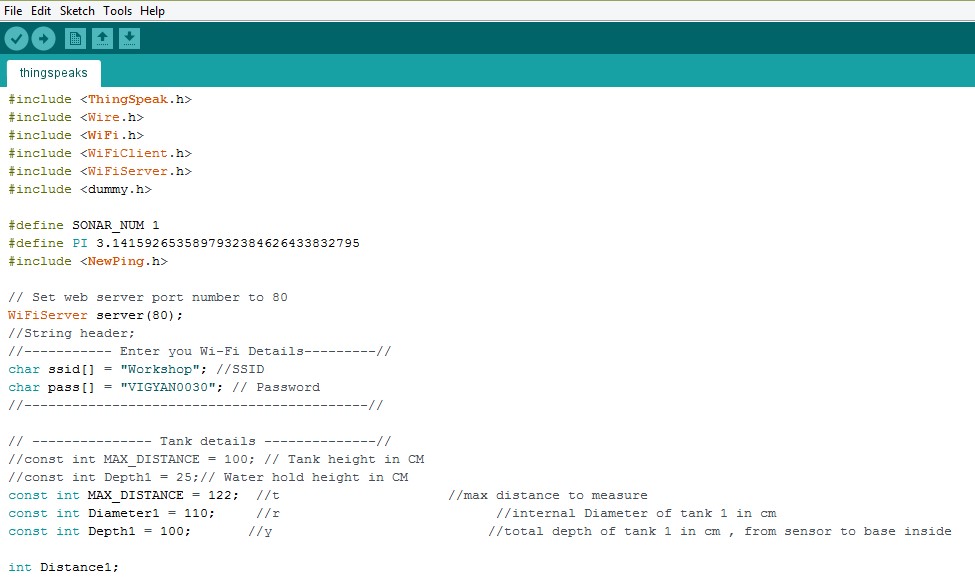
This is final code of my project which measure water level and water consumption and also send data on thingspeaks.
#define SONAR_NUM 1
#define PI 3.1415926535897932384626433832795


// Set web server port number to 80
WiFiServer server(80);
//String header;
//----------- Enter you Wi-Fi Details---------//
char ssid[] = "Workshop"; //SSID
char pass[] = "VIGYAN0030"; // Password
//-------------------------------------------//

// --------------- Tank details --------------//
//const int MAX_DISTANCE = 100; // Tank height in CM
//const int Depth1 = 25;// Water hold height in CM
const int MAX_DISTANCE = 122;  //t     //max distance to measure
const int Diameter1 = 110;     //r     //internal Diameter of tank 1 in cm
const int Depth1 = 100;       //y       //total depth of tank 1 in cm , from sensor to base inside

int Distance1;
int Litres1,WaterDepth1,WaterDepth2;
//-------------------------------------------//

//----- minutes -----//
int minute = 2; // Data update in min.
//------------------//
WiFiClient client;
//----------- Channel Details -------------//
unsigned long Channel_ID = 1078169; // Channel ID
const int Field_number = 1; // To which field to write data (don't change)
const int Field_number1 = 2; //
const char * WriteAPIKey = "Z4DKIZNQJ5LMQ28S"; // Your write API Key
const char * ReadAPIKey= "ZGCV0KK8K8LID0SL";
// ----------------------------------------//

const int trigger = 32;
const int echo = 33;
long Time;
int y;
int i;
int x;
int distanceCM;
int resultCM;
//int tnk_lvl = 0;
//int sensr_to_wtr = 0;

 const int Area1 = PI * ((Diameter1 / 2) * (Diameter1 / 2));//area of base of tank 1
 // Global variables


 NewPing sonar[SONAR_NUM] = {   // Sensor object array.
      NewPing(trigger, echo, Depth1)// Each sensor's trigger pin, echo pin, and max distance to ping.

    };

void setup()
{
  Serial.begin(115200);
  pinMode(trigger, OUTPUT);
  pinMode(echo, INPUT);
  WiFi.mode(WIFI_STA);
  ThingSpeak.begin(client);


}
void loop()
{

  internet();
  delay(1000);
  measure();
  Serial.print("Distance1:");
  Serial.print(Distance1);
  Serial.println("cm");
  Serial.print("WaterDepth2:");
  Serial.print(WaterDepth2);
  Serial.println("%");
  Serial.print("Tank Level:");
  Serial.print("WaterDepth1:");
  Serial.print(WaterDepth1);
  Serial.print("Volume:");
  Serial.print(Litres1);
  upload();
}
void upload()
{
  internet();
  ThingSpeak.writeField(Channel_ID, Field_number,WaterDepth1,WriteAPIKey);
  ThingSpeak.writeField(Channel_ID, Field_number1,Litres1,WriteAPIKey);

}

void measure()
{
  delay(100);
  digitalWrite(trigger, HIGH);
  delayMicroseconds(10);
  digitalWrite(trigger, LOW);
  //Time = pulseIn(echo, HIGH);
  //distanceCM = Time * 0.034;
  //resultCM = distanceCM / 2;


  Distance1 = sonar[0].ping_cm();//get distance to the top of the water tank 1


  //if (Distance1 >= Depth1 || Distance1 == 0 )  Distance1 = Depth1;//check it does not go negative
  WaterDepth1= Depth1-Distance1;
  WaterDepth2 = (WaterDepth1*100)/Depth1 ;

  Litres1 = (Area1 * WaterDepth1)/1000;

  //tnk_lvl = map(resultCM, sensr_to_wtr, MAX_DISTANCE, 100, 0);
  //if (tnk_lvl > 100) tnk_lvl = 100;
  //if (tnk_lvl < 0) tnk_lvl = 0;
}


void internet()
{
  if (WiFi.status() != WL_CONNECTED)
  {
    Serial.print("Attempting to connect to SSID: ");
    Serial.println(ssid);
    while (WiFi.status() != WL_CONNECTED)
    {
      WiFi.begin(ssid, pass);
      Serial.print(".");
      delay(5000);
    }
    Serial.println("\nConnected.");
  }
}
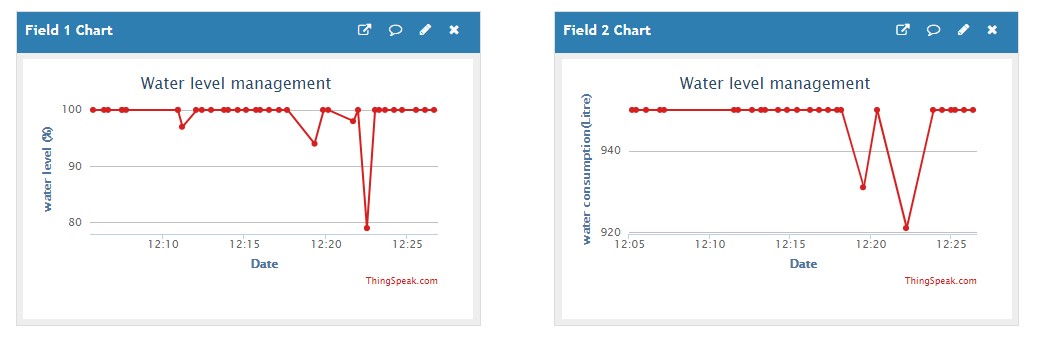
Above code is final code for measuring water level and water consumption and send data on thingspeaks.In this code I have defined variables for water tank i.e for maximum distance and diameter of tank.Also I have defined sensor pins ECHO and TRIGGER.After that I have writeen formula to calculate volume of water and water level.I want to send data to thingspeaks for that I have written SSID and password.Also I have defined channel details like channel ID,Field number and write and read API key.First code will find water level and it will convert it to volume and this will display on serial monitor.Then this details will display on thingspeaks channel.When the tank is full it will show water level is 100%.When it goes down it will show that level like 50% or 70%.And water level is directly proportional to volume so when water level is around 80% it will show more volume and vice versa.
This result showing on thingspeaks.
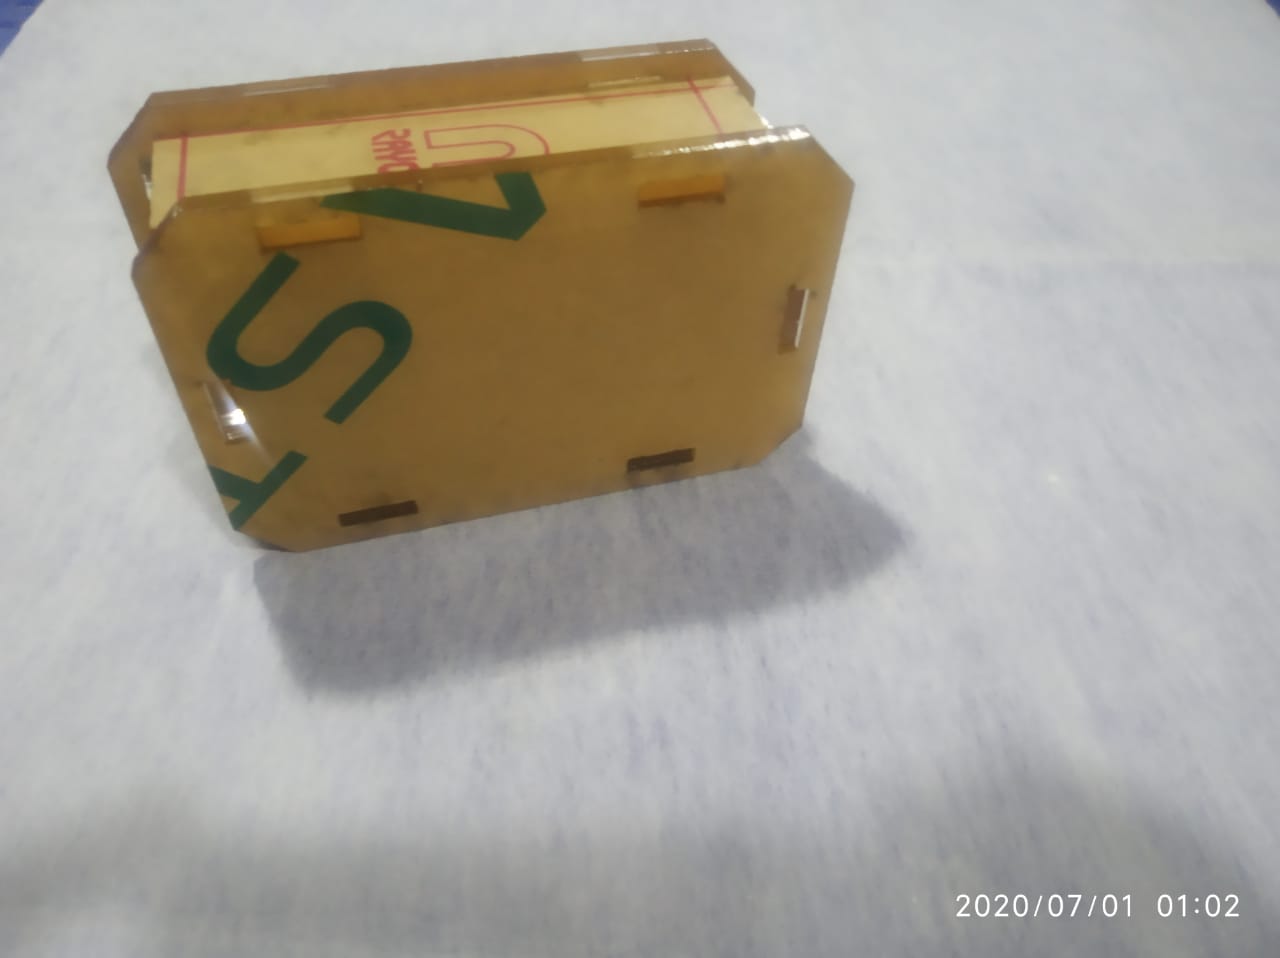
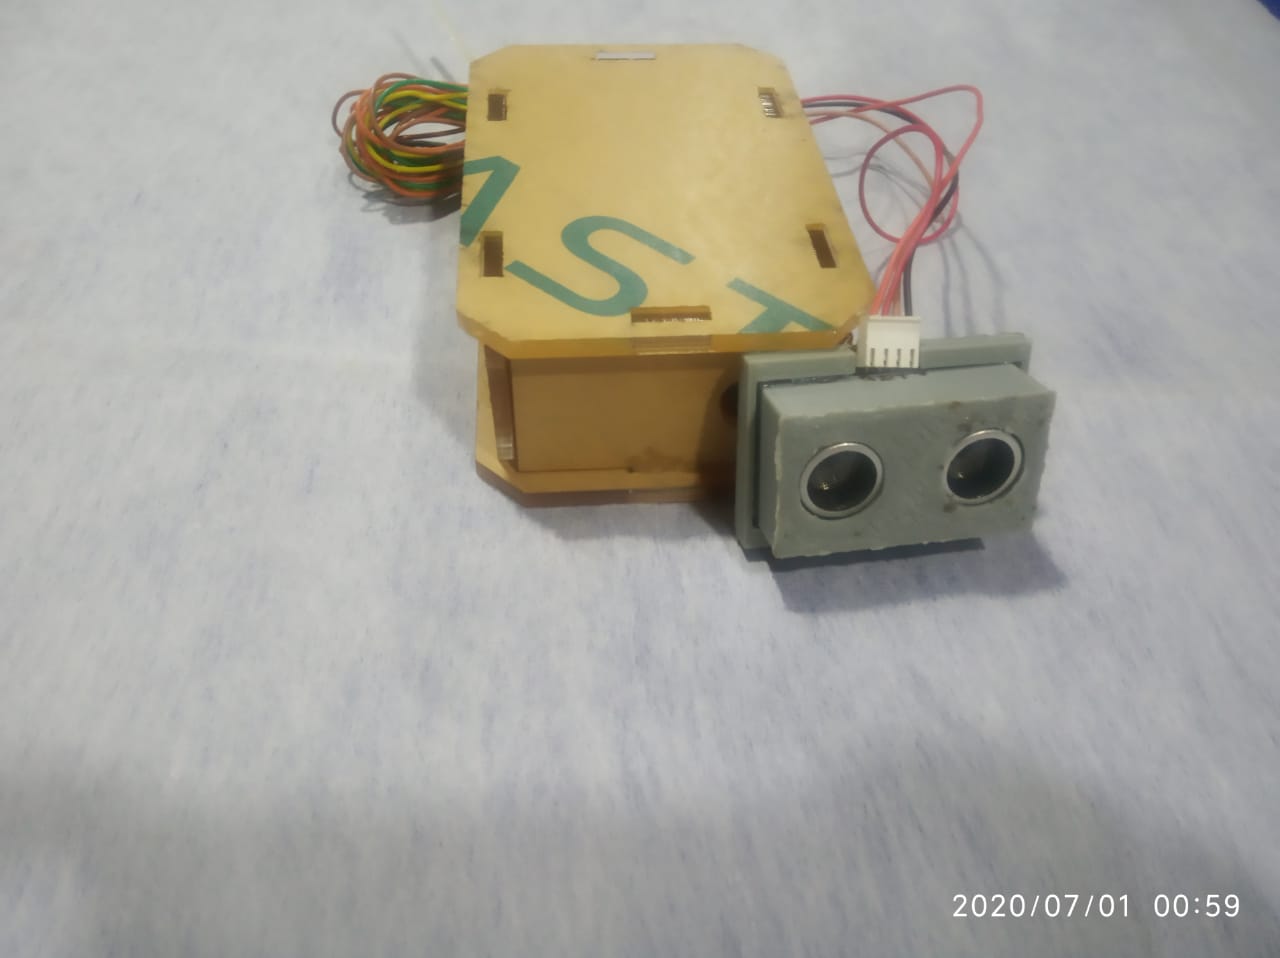
Also I have added design photos and also assembled photo after cutting on laser cutter.
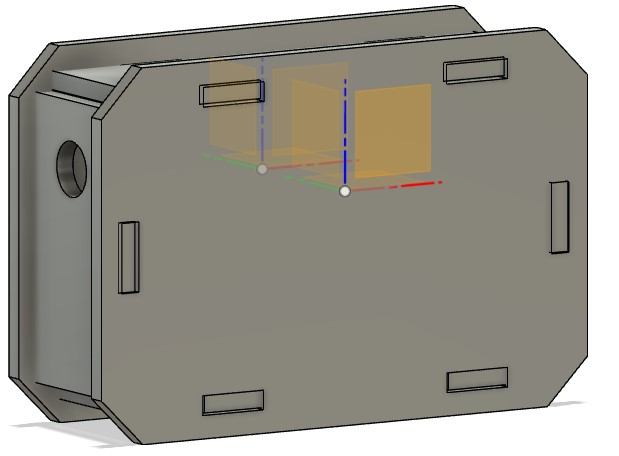
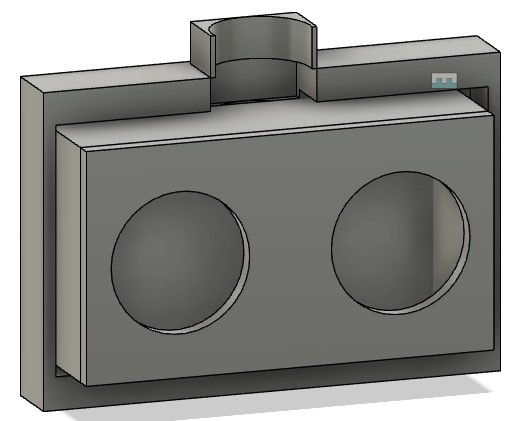
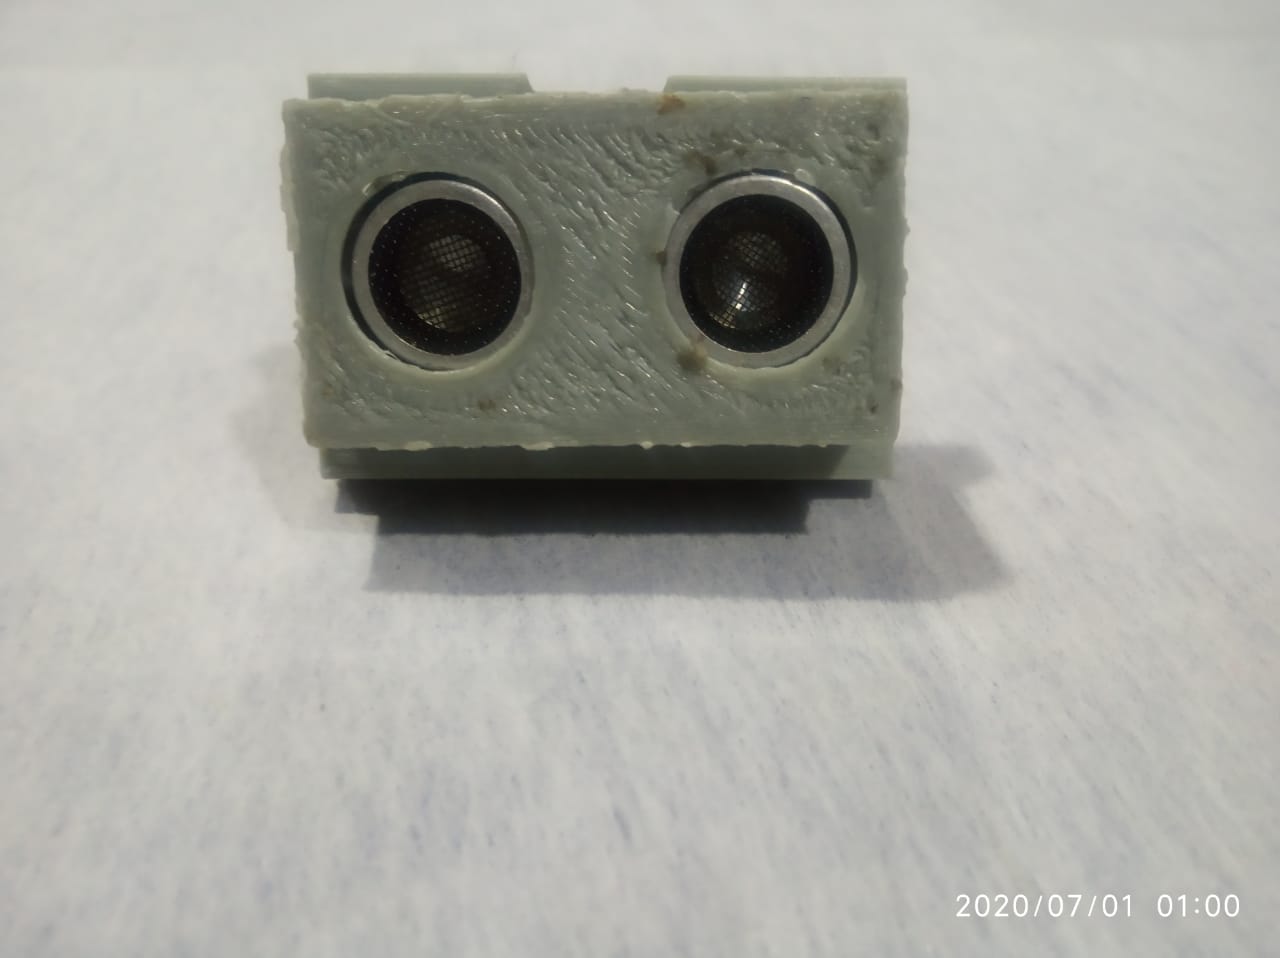
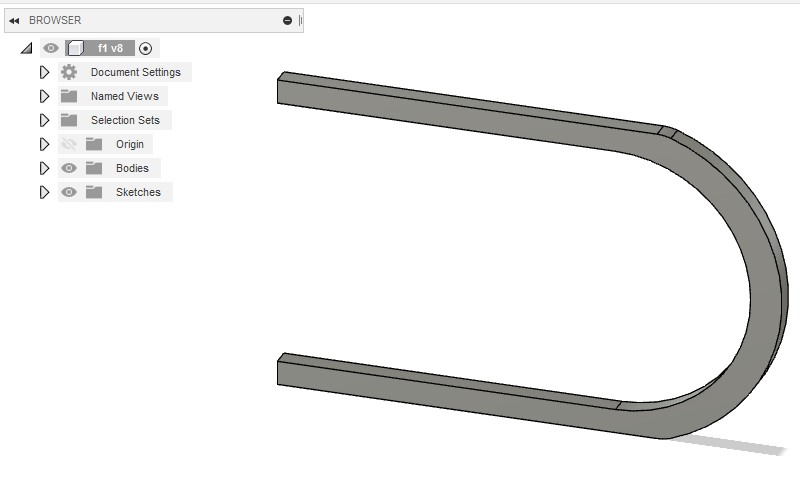
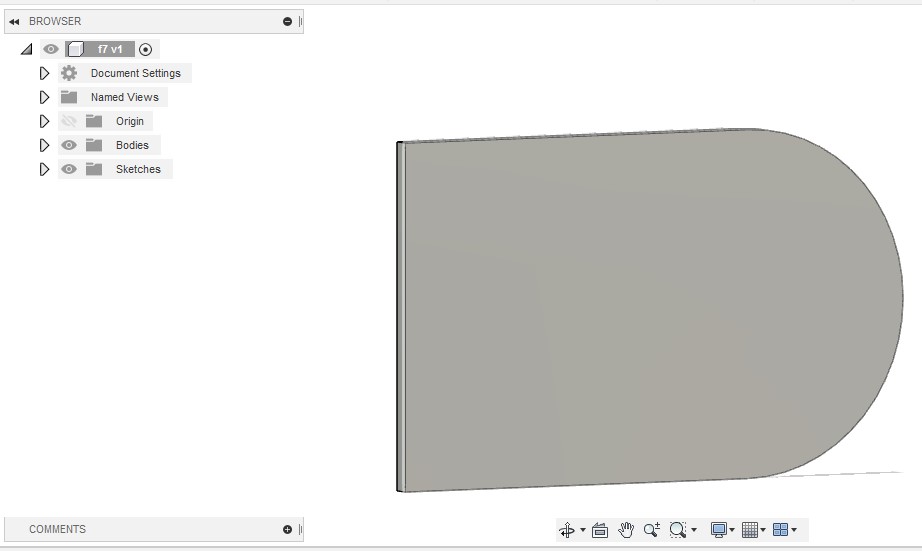
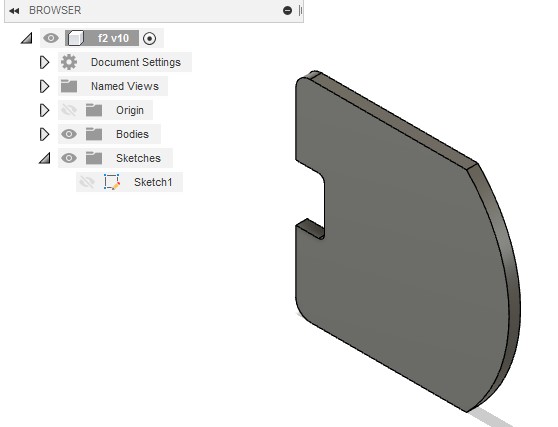
I have made casing for sensor in fusion 360 software.And print using 3d printer.
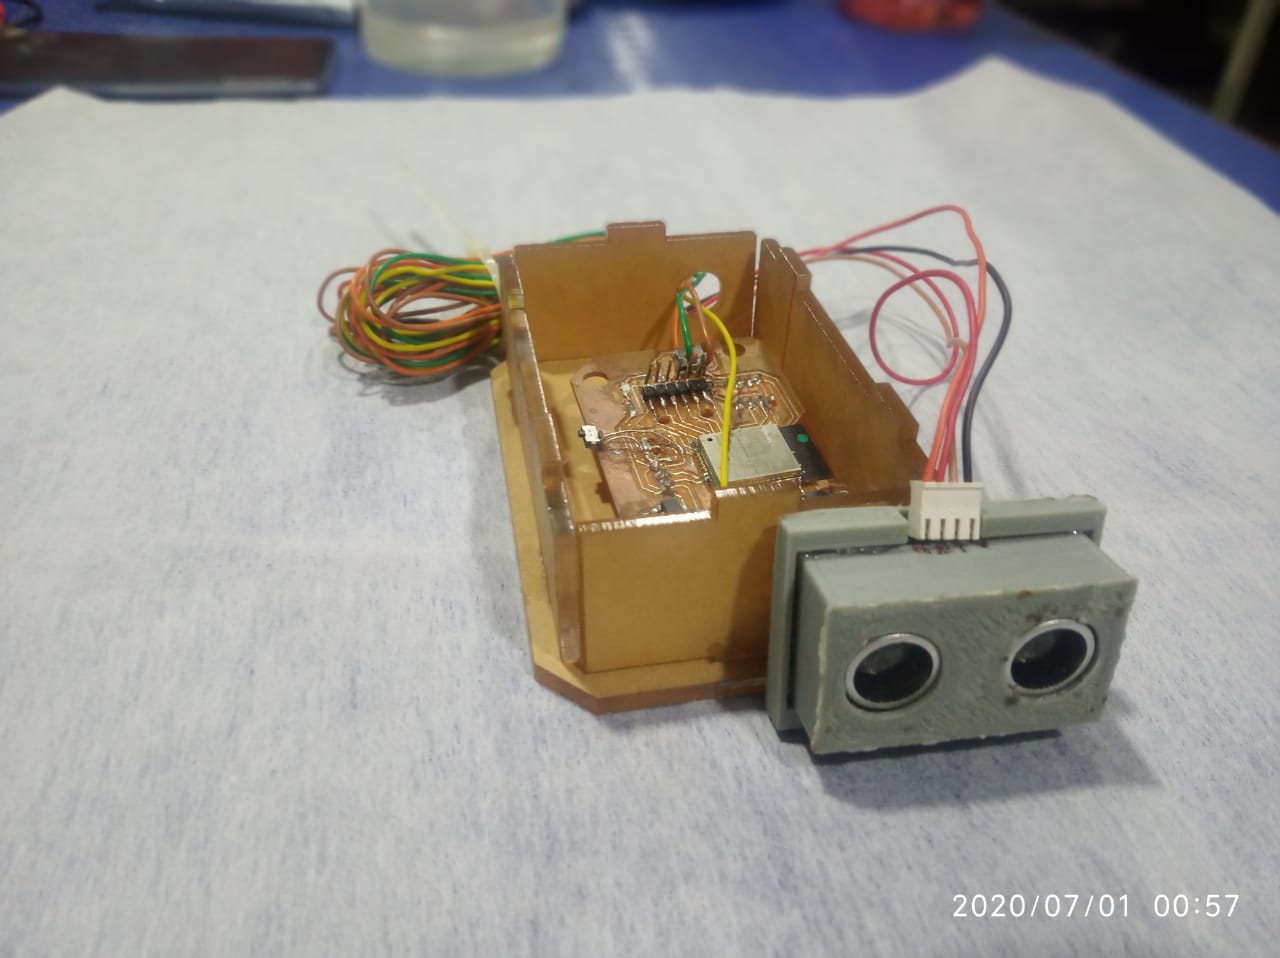
This is with all coonections and packing.
After presentation I got comments from Neil about packaging,so I made another design.But I could'nt cut design on laser cutter,because I was not in lab.I was working remotely.So I only made design and added screenshot of it.Also I have added all original design file.

This is final presentation video.
