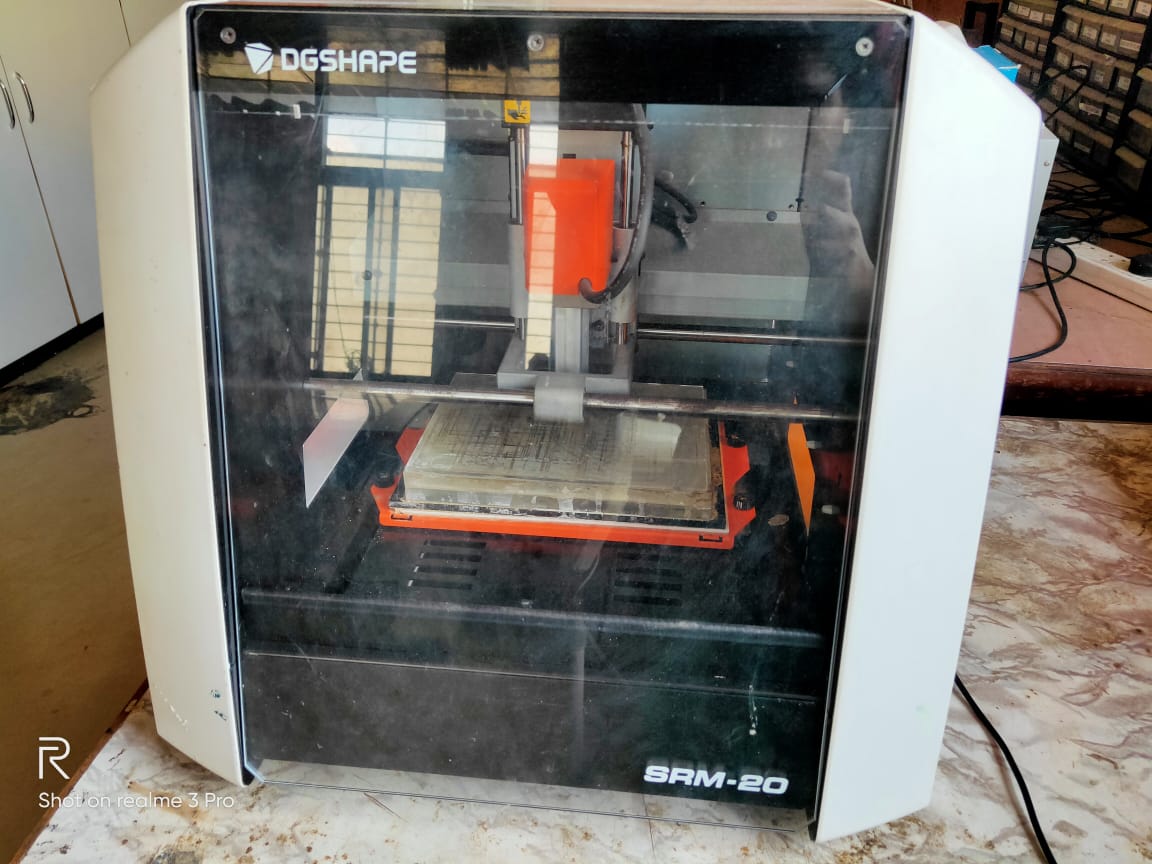
| Model |
SRM-20 |
| Cuttable Material |
Modelling Wax, Chemical Wood, Foam, Acrylic, Poly acetate, ABS, PC board |
X, Y, and Z Operation Strokes |
203.2 (X) x 152.4 (Y) x 60.5 (Z) mm |
Workpiece table size |
232.2 (X) x 156.6 (Y) mm |
Distance From Collet Tip to Table |
Max, 130.75mm (5.15 in) |
Loadable Workpiece Weight |
2 kg (4.4 lb) |
Control Command Sets |
RML-1, NC code |
External Dimensions |
451.0 (W) x 426.6 (D) x 426.2 (H) mm |
Weight |
19.6 kg (43.2 lb) |
Cutting Tool Chuck |
Collet method |
Power Requirements |
Machine: DC24V, 2.5A, Dedicated AC adapter: AC 100-240V ±10%, 50/60Hz |
Procedure For FabTinyIsp:
I have chosenBrian programmer.In syllabus they give its circuit diagram,traces ,interior files,Components and also make file programming.We have to just convert that png image into .rml file by using mods and mill it using SRM-20 machine.Solder the component and program that board using another programmer and make that board as programmer.
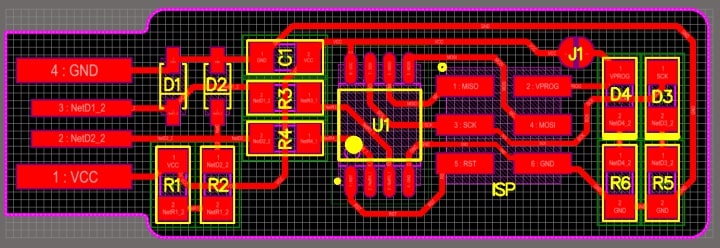
PCB
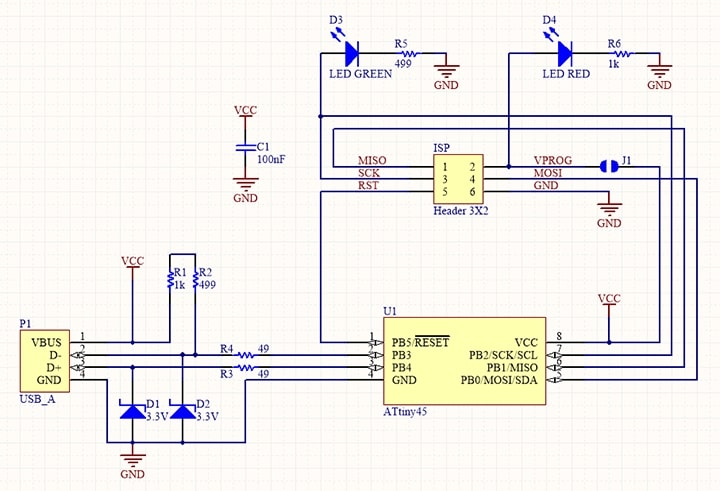
schematic
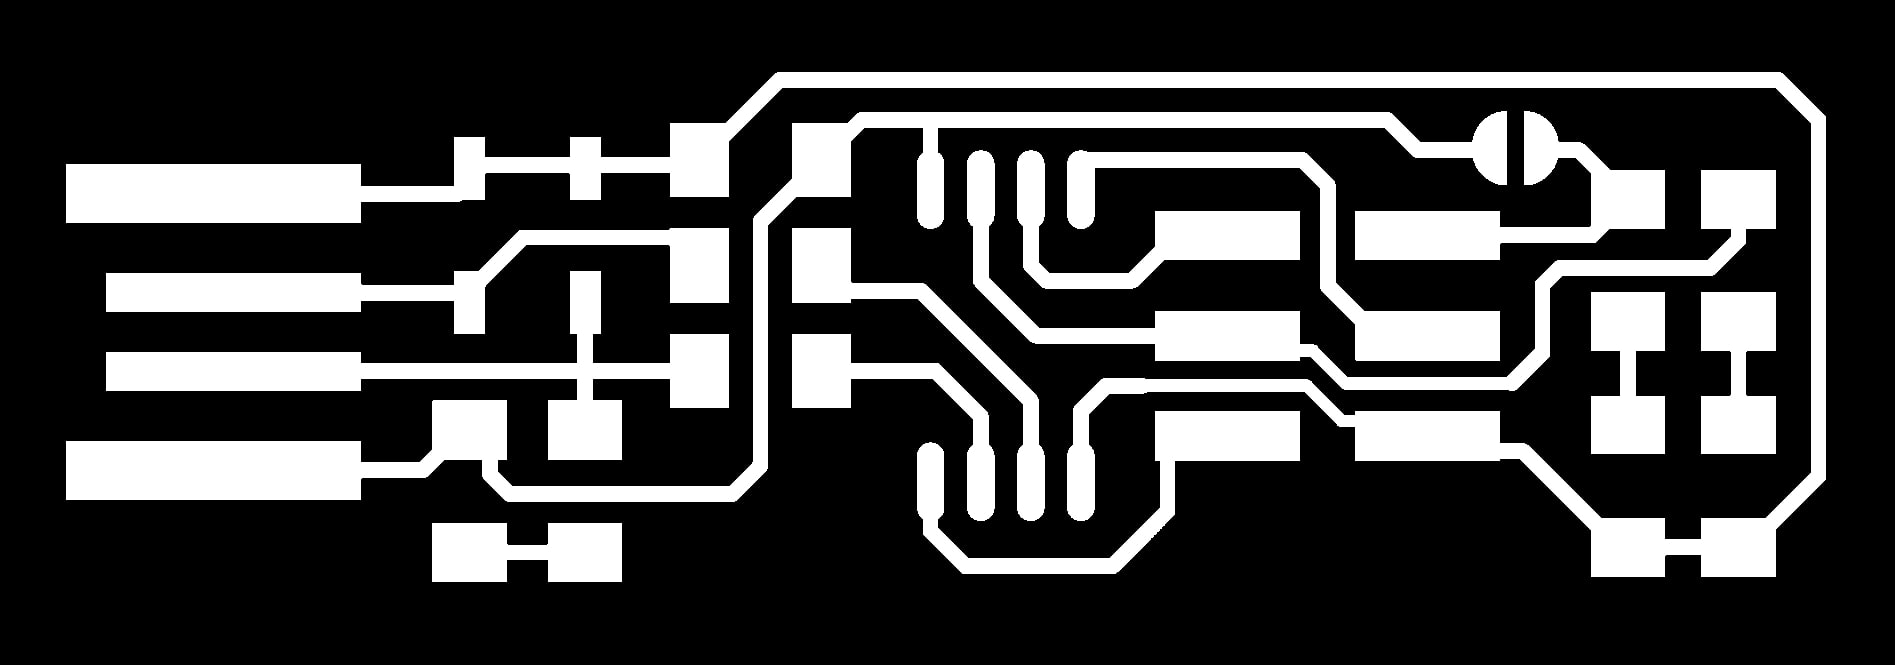
fts_mini_traces

fts_mini_cut
I have given trace and cut file in png format.Because to make .rml file it requires .png file.So I have given it below;
Setting up SRM-20:
Bed of SRM-20 machine is not plane so to make it smooth we have added sacrificial board on existing pcb board then I placed my copper clad to mill my programmer.For this I took single sided FR-1 pcb board and I took double sided tape and put on that board and stick that board on the bed of SRM-20.
Select exact end mill for cutting and milling of pcb board.We are using (1/64) bit for milling and(1/32) bit for cutting.Then fix the bit carefully.
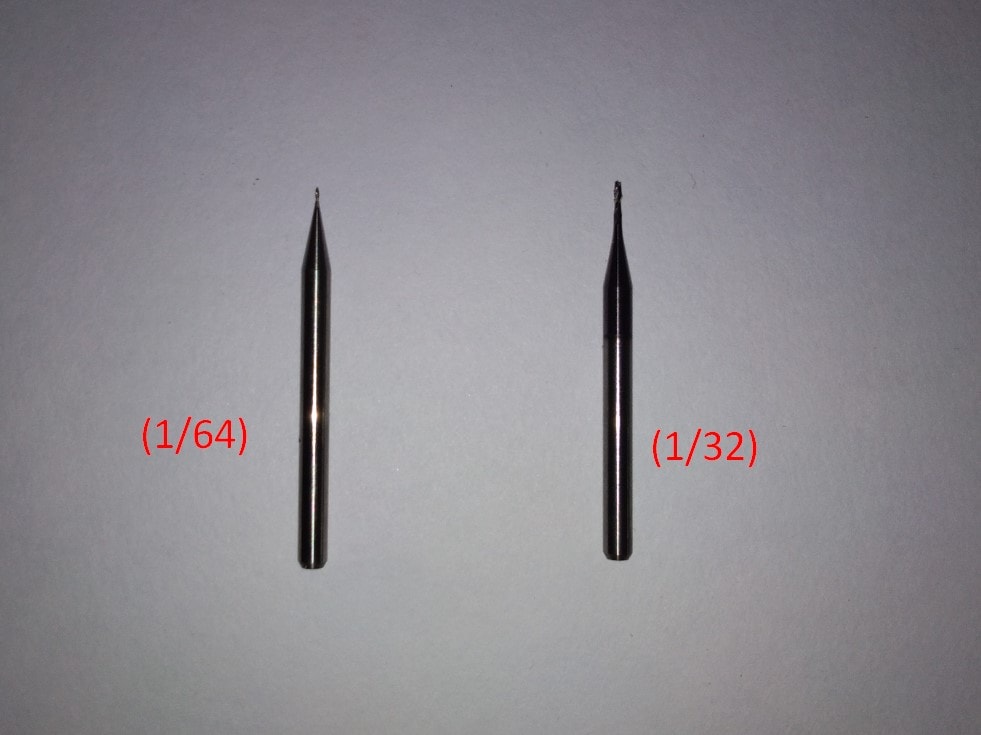
Bit
SRM-20 Machine & Software:
Placed sacrifical layer and cleaned: I used acetone to clean the surface.
Smooth and uniform surface is vital which decreased the chances of bid getting damaged.
Sticked FR1 board to sacrifical layer: Double side tape sticked on the bottom of the FR1 board and I sticked it on the sacrifical layer.
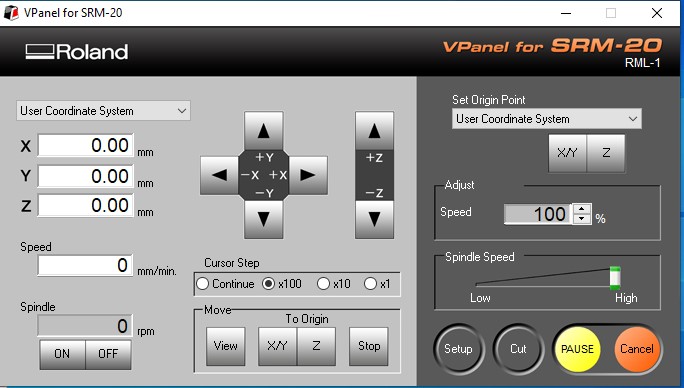
V Panel software & Machening:The sofware gives us the access to set origin, adjust axis and give command to the machine.
Adjusted X&Y axis:Under user coordinate system and looking at the space on the FR1 board set the origin.
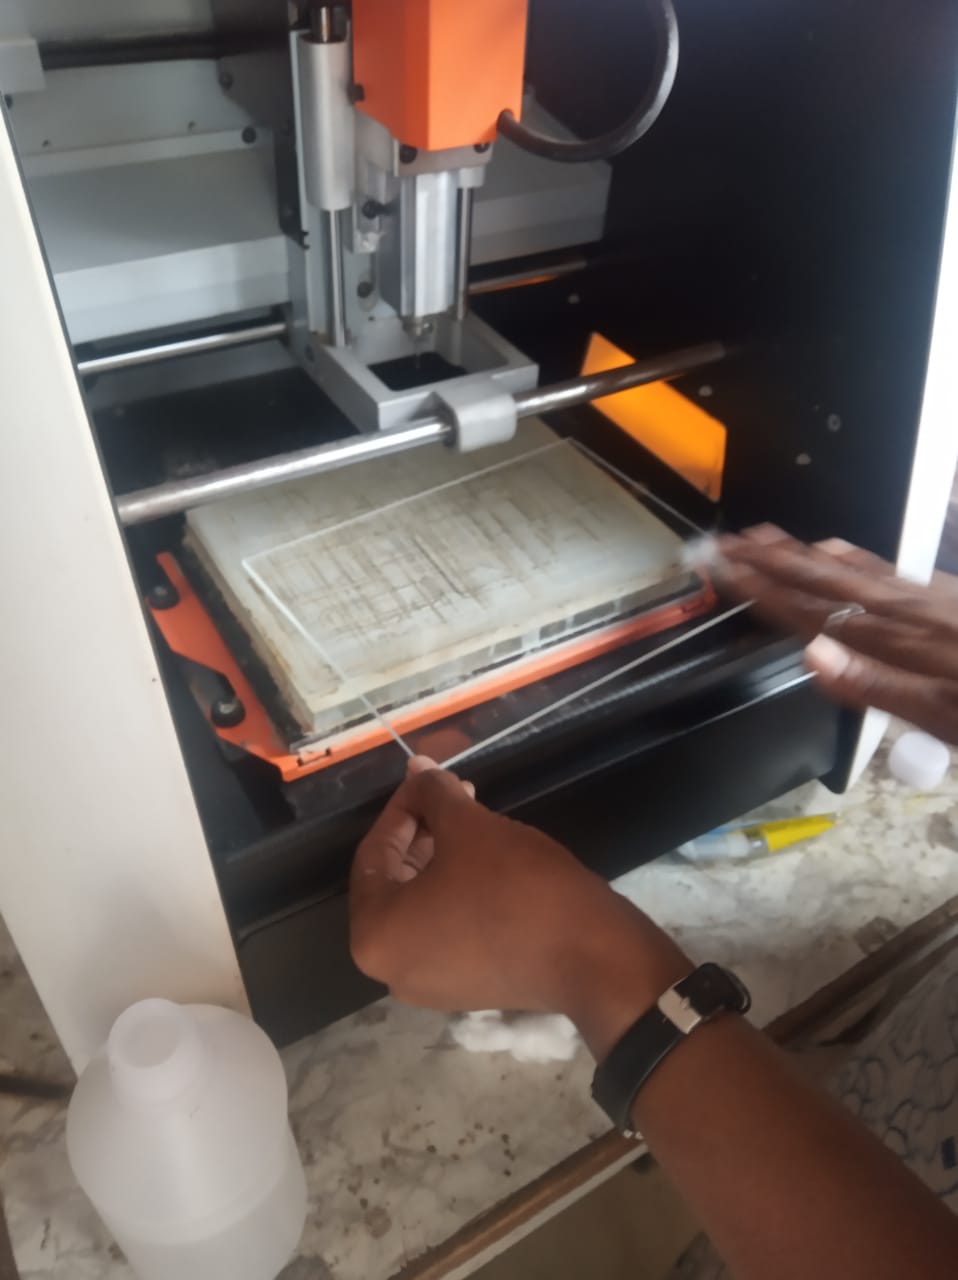
End Mill in Collate:Inserted the end mill in the collate and moved to the set X,Y origin.
Here, I set the collate loose and allowed the end mill to touch the board.
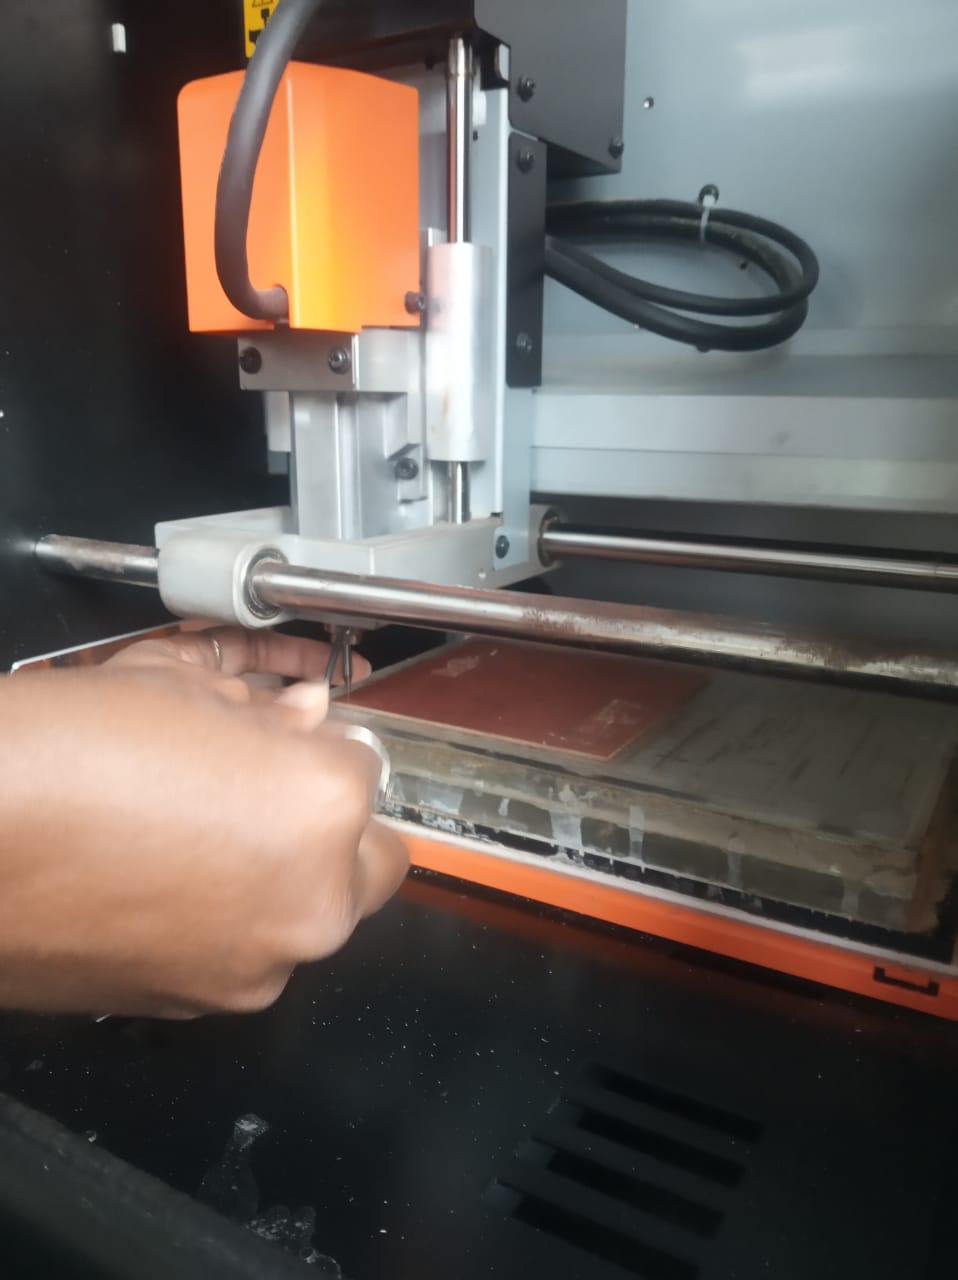
Z azis:After tightening the collate this fixed position was marked as origin for Z axis.
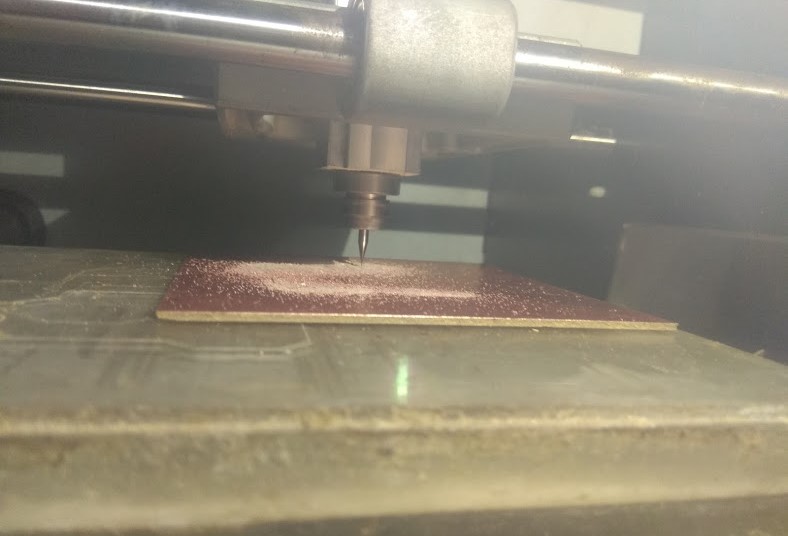
Setup & Tracing:Under setup command the file was sent to the machine and it started tracing.
e.Operation: The end mill moved and traced the board. The speed and spnidle value was visible on the software.
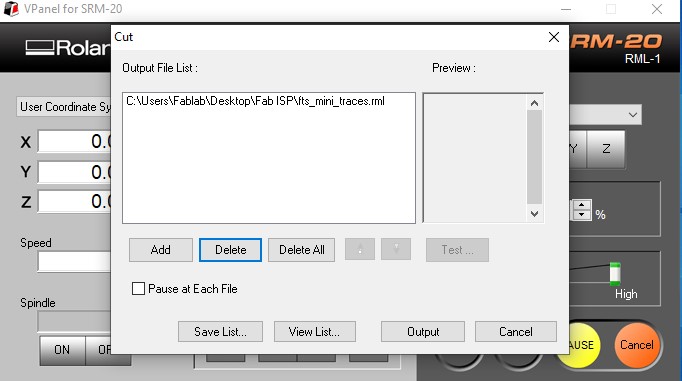
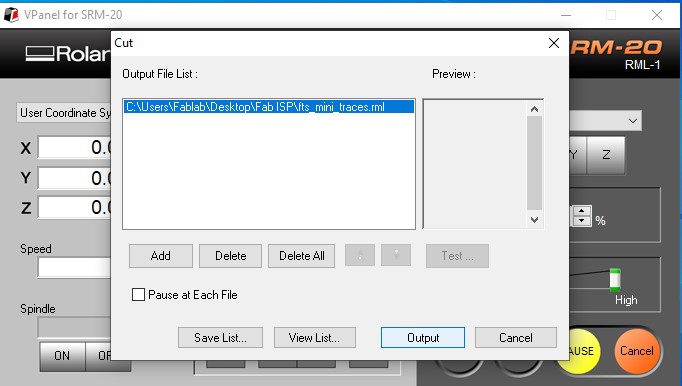
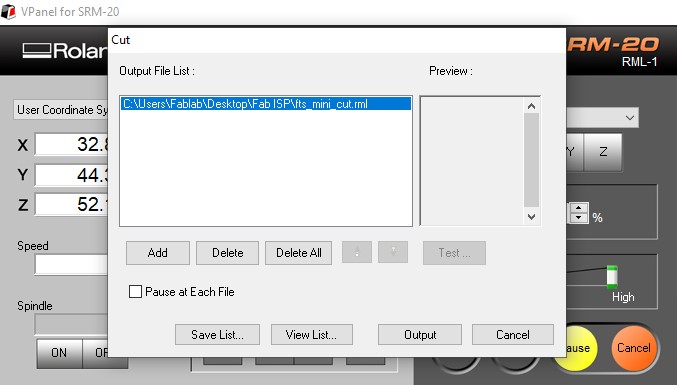
Vpanel:
SRM-20 require .rml file,Png file is converted into .rml using MOD and that file given to machine using vpanel.First download the vpanel,switch on the machine.Set the X,Y & Z axis position using vpanel.Make the desired position from where u want to mill PCB and set the origin.After that set the gravity manually.Slowly move the header downside ,then loose the end mill and touch to bed then tight it.
First give trace file through vpanel and choose (1/64)bit ,after milling clean the board and change th end mill as (1/32) for cutting.
Vpanel setting
File
Trace file
outline file
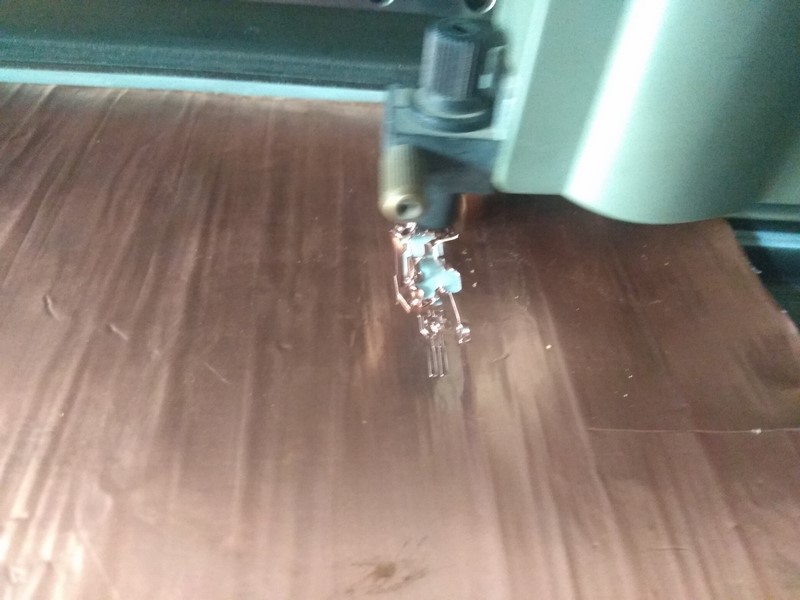
Milling
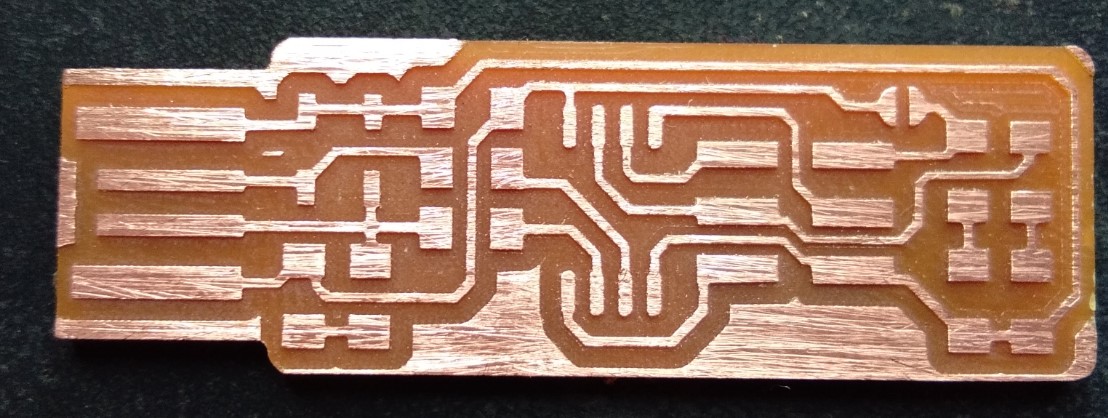
Milled PCB
Soldering
I have done through hole soldering before.I dont have experience of SMD soldering .As I am electronics engineer SMD soldering is new part for me.First I practiced smd soldering on old pcb .I learn how to solder and desolder the components. For soldering I have used flux, hot air gun ,tweezer and solder gun and desolder pump.Before starting soldering I collected all components required for Brian board.
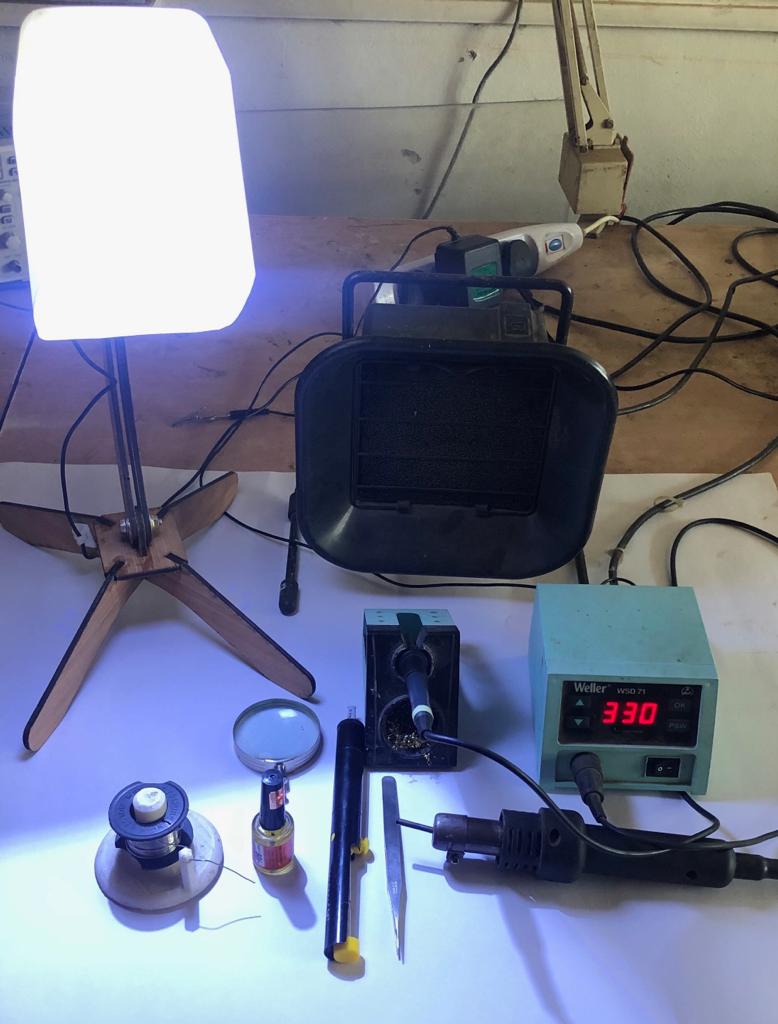
Soldering Station
Following are the components:
1xATtiny45 or ATtiny85
2x1kΩ resistors
2x 49Ω resistors
2x 3.3v zener diodes
1x red LED
1x green LED
1x 100nF capacitor
1x 2x3 pin header
After soldering, my FabISP is ready.I am so happy when I look my FabISP ,because this is something new for me.
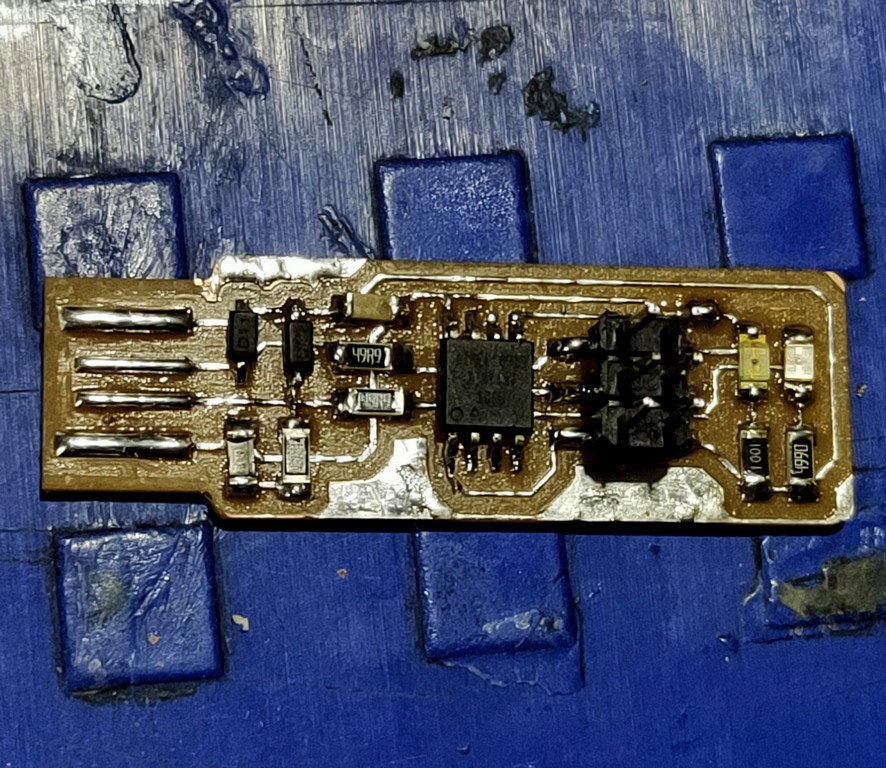
FabISP
AVR Programming:
After making FabISP last remaining part is programming.I followed the instructions for programming given by Brian document.For programming my FabISP I used another programmer i.e.USBASP to program my board and make it programmer.
In Brian document he has given two ways of programming i.e we can use linux or windows operating system for programming.Command line is required for programming.In linux we use terminal and in windows we use Bash for commands.I am going to use Windows for programming.For that I have to install 4 different software like
1.Atmel AVR toolchain for windows 2.GNU make 3.Avrdude 4.Zadig
Download Atmel AVR toolchain for windows from Atmel site and install it.
When it is asked for where to extract the files ,extract it in program file folder.
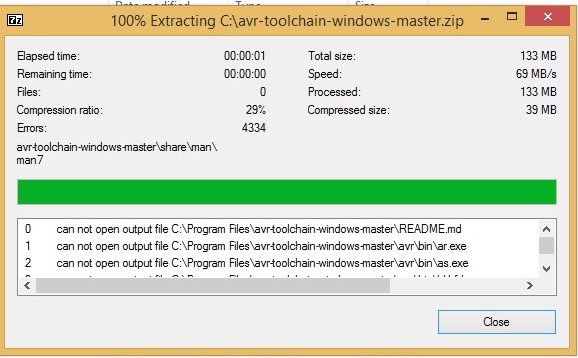
AVR toolchain
Download GNU make and choose default location or you can change the location by clicking on browse button.I installed it in program files(x86)folder.
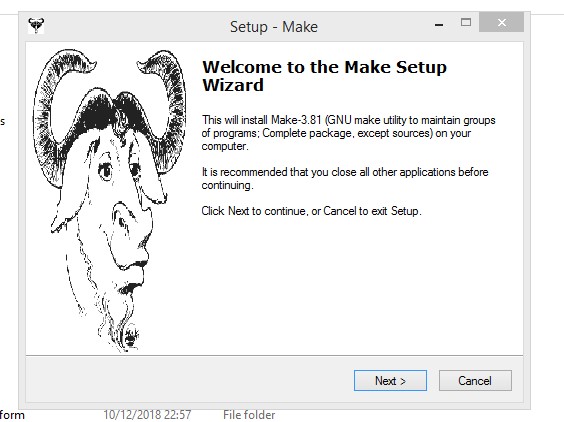
GNU install
Download Avrdude and extract it in program files folder.
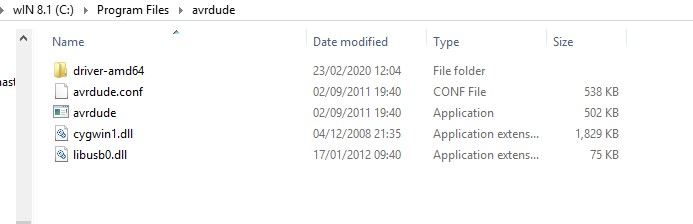
Avrdude
After installing all software now we need to tell windows where to locate all of the tools.open control panel then go to System.Choose Advanced system setting.Under advanced setting click on "Environment Variable" button.
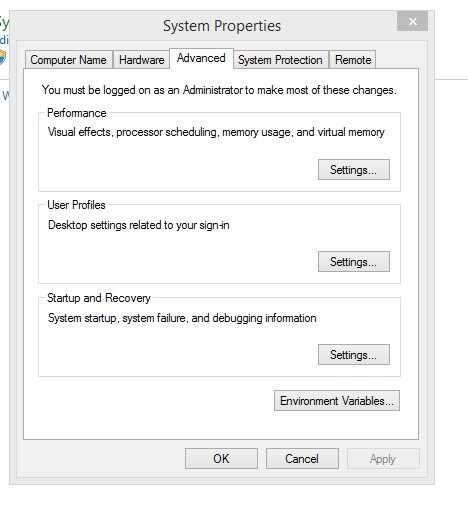
Environmental variable
Under user variable ,select "path" and click edit button.The edit window that pops up is different depending on whether you are creating a new variable or only have one item in your path.You want to add the following three values.Enter them separated by semicolon.Make sure that they are entered exactly.
The three values to add are:
C:\Program Files\avr8-gnu-toolchain\bin
C:\Program Files (x86)\GnuWin32\bin
C:\Program Files\avrdude
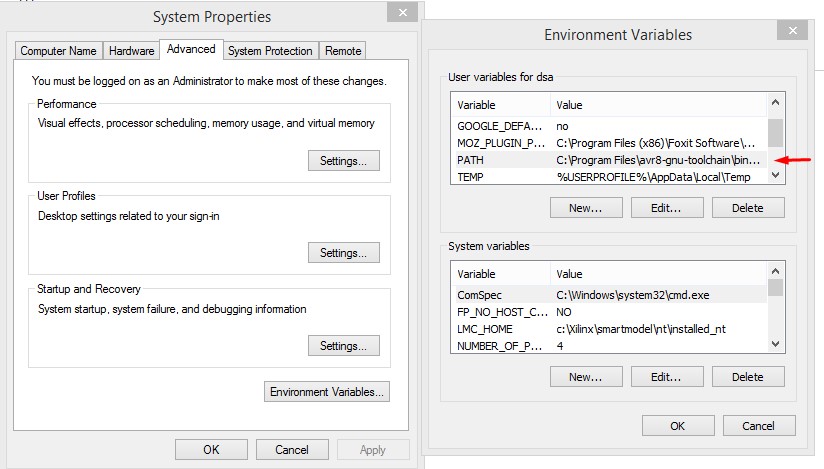
Path
For USBasp programmer drivers are required so install Zadig to install driver. select which driver you want to install and click on install driver.Plug your programmer and select "usbasp" from list.
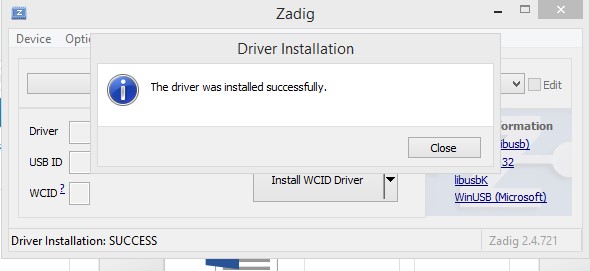
Zadig install
I connected my ISP to USbasp.Connections are made between Fabisp and USBasp as per given in Brian document.After that I opened Git Bash and I follow below command to check the installed software working or not.
Type make -v and press enter.
Type avr-gcc --version and press enter.
Connect your programmer to a USB port and type: avrdude -c usbtiny -p t45 and press enter.
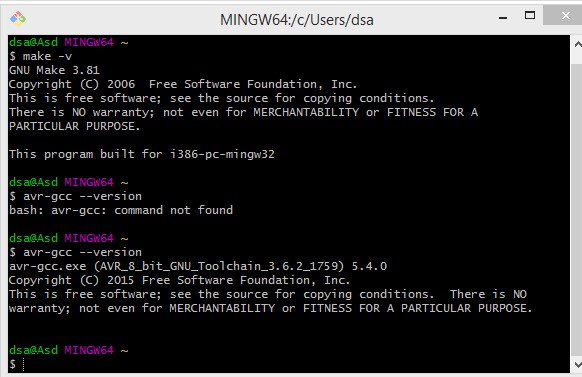
commands
Third command is giving error because connections are loose and Avrdude is not installed properly so I fixed that errors .I checked connections and again installed Avrdude and again run that command.

Error
Download the firmware source code and extract the zip file .Open Git bash and go in directory where folder is placed and run Make command which will generate hex file.
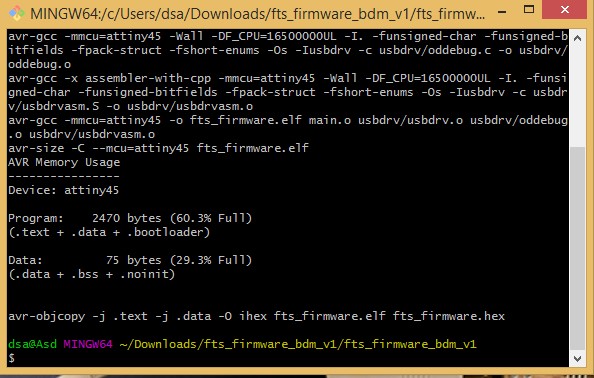
Make command
First, update the Makefile for the type of programmer you're going to use to program your board.Edit the file called Makefile.Use text editor like Notepad++ or wordpad to open make file.Change name of programmer as usbasp.Save the file.Connect the programmer to the ISP header on your board.Run Make flash command.This will erase the target chip, and program its flash memory with the contents of the .hex file you built before.
Run the make fuses command. This will set up all of the fuses except the one that disables the reset pin.
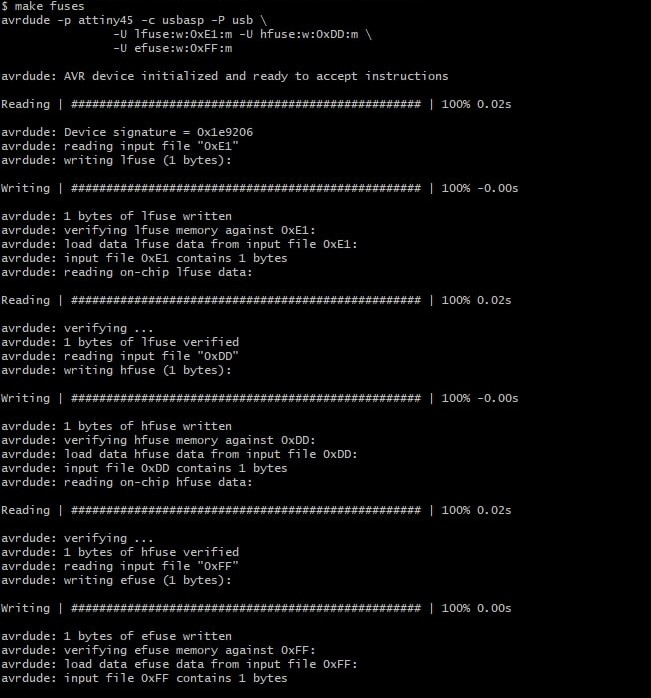
Make fuse
This is the interface of USbasp and FabIsp to program Fabisp using USBasp.
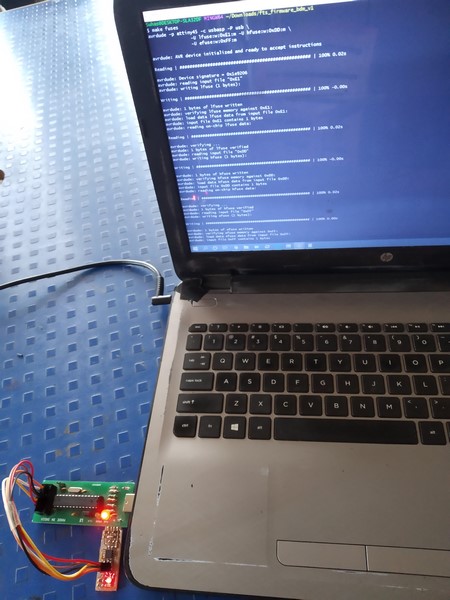
Interface
Unplug your board from the USB port and disconnect the programmer, then plug it back in to the USB. Make sure the programmer you used to program your board is also disconnected from the computer.Go to control panel then device manager you will see the name of USB you connected i.e.USBTINY.
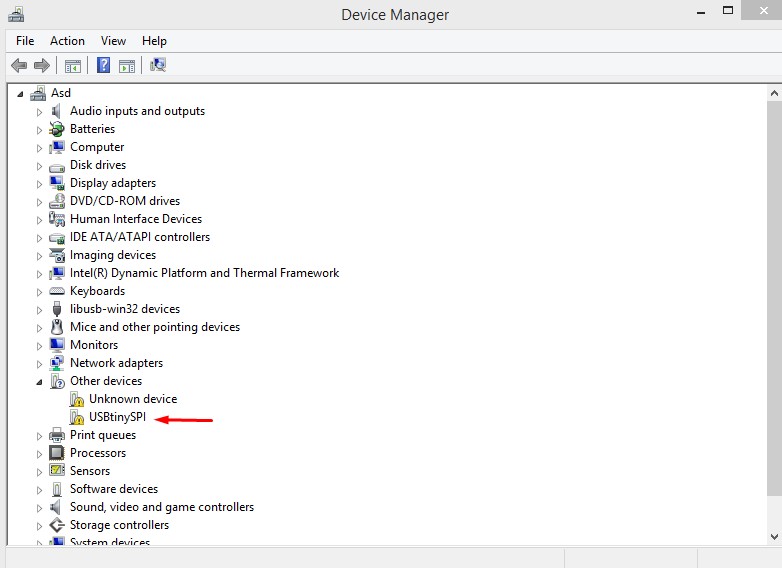
ISP detect
MODS
SRM-20 requires .rml file.So to convert .png file to .rml file ,we are using Mods.We can use it online or we can install it in linux.Older version for conversion of file is Fab module.Mods contain different modules and program.
Open mod in browser,Right click and select program then select open server program.
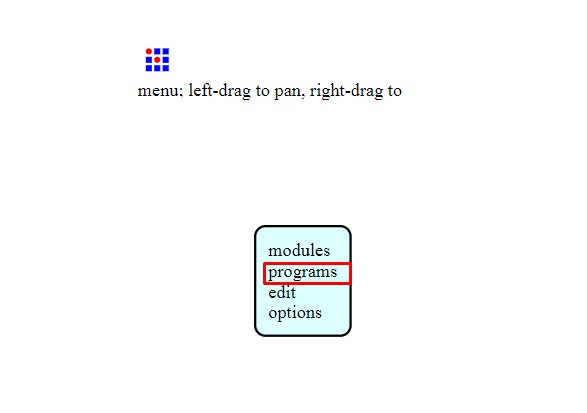
program
Select Roland.In that select SRM-20 machine and click on PCB png.
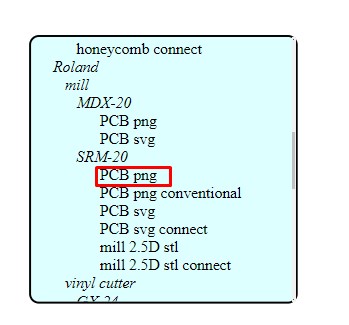
machine select
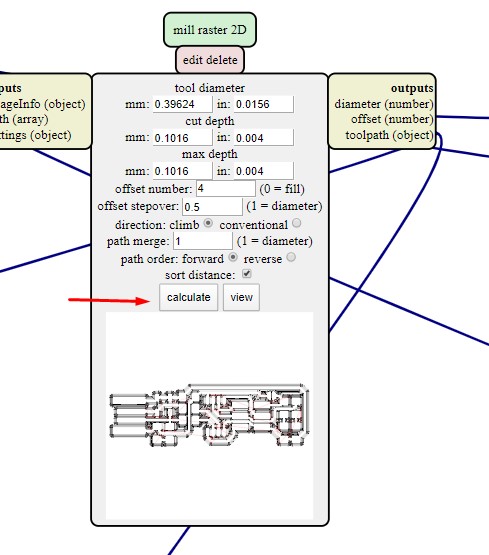
Select png file.After that select bit,for tracing (1/64)and cutting(1/32).
click on calculate button,you will see the results.
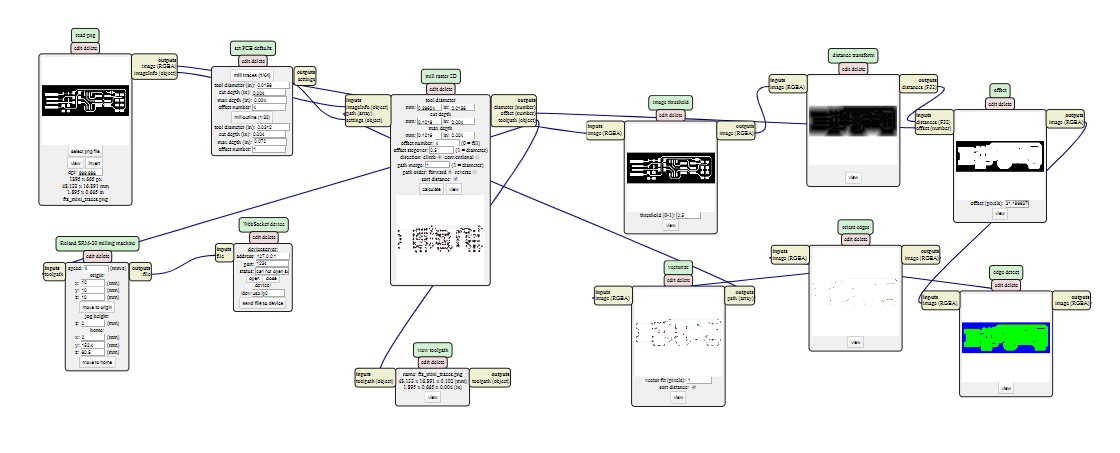
Calculate
Set the X,Y and Z co-ordinate.Set the origin from where you want to start milling.Also set the zog value.

Coordinate setting
Right click and select module ,click on open server module.Select file save module.
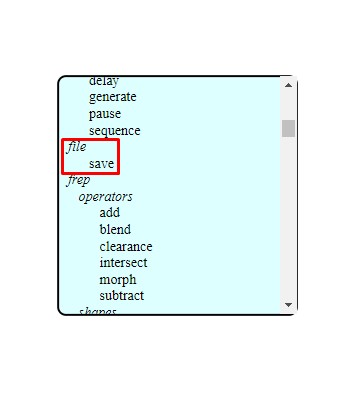
File save
connect SRM-20 machine file to save file module.
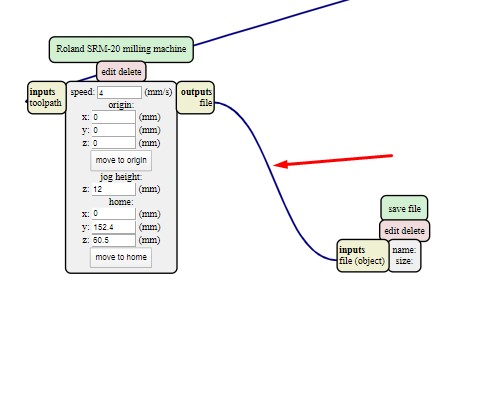
connection
Then click on calculate button,after calculating .rml file save automatically in our folder.
calculaion & file saving
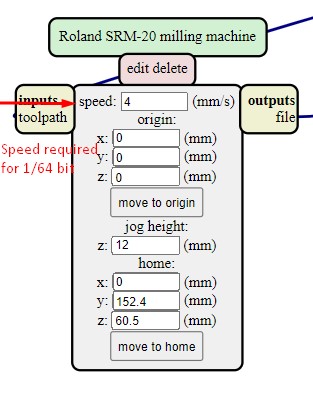
Below image shows the speed required for 1/64 and 1/32 bit.This speed we get from MODS. You have to set X,Yand Z to zero and jog set to 12.When we give this .rml file to vpanel and start milling the pcb spindle speed get changes according to your design file.It is not constant.
Group Assignment
In this group assignment task,we have to characterisize our PCB milling machine.we follwed same steps as I did in indivisual assignment for converting and importing the png image to .rml in "Mods" ,we did the line test.For line test PNG files are given in Fab academy syllbus.So we have to just convert png to .rml file .
Use SRM-20 for milling .So i downloaded png file.convert it into rml and given it to SRM-20 using Vpanel.
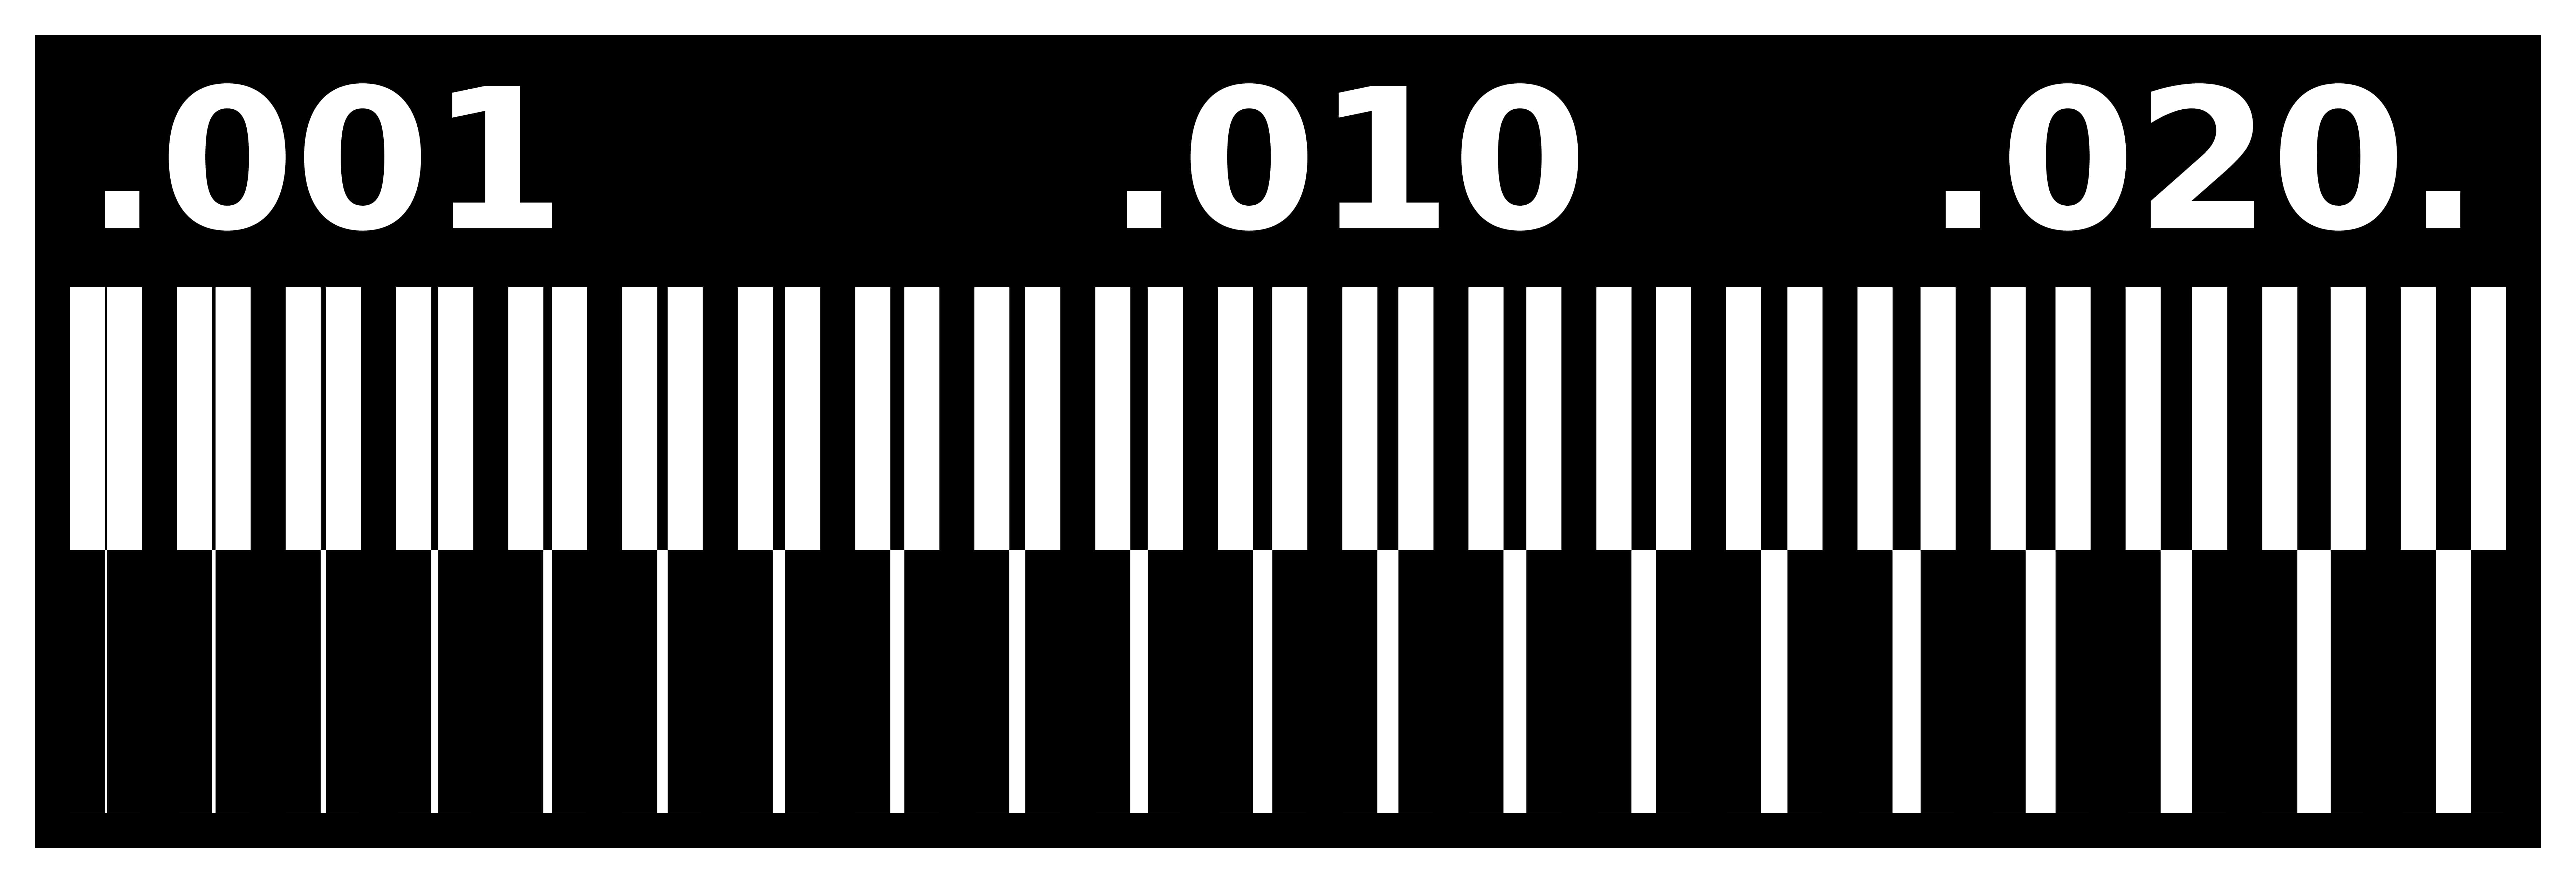
linetest

linetest.interior
This is the final milled test result.
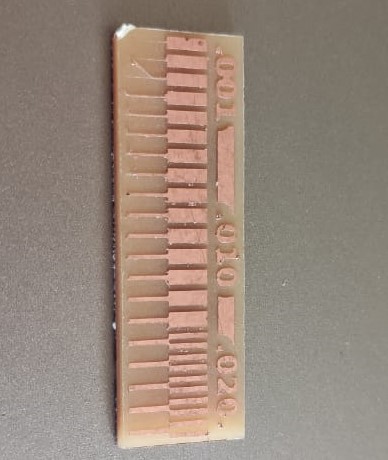
Test pattern
Flexible FabISP:
After done with my FabISP I tried to make flexible pcb on vinyl cutter.It seems very easy,but when you are doing it you will get to know difficulties in this task.So I paste copper foil on transperant paper.I downloaded png image from Brian's document.The problem is paper roll is not fitted properly.I took so many trials.I reduced force and velocity but it didn't work.
Flexible pcb
Learning Outcome:
In this week I learned lot many things.I learned SMD Soldering also I made my own FabISP.I learned programming.I learnt SRM-20 pcb milling machine.I get to know about SMD components.
