This week, I’ll be designing a mold that’ll be used around the tooling & stock I’m using. Then I’m going to perform a milling operation on it that includes a rough cut with a three-axis finishing cuts then it’ll be used to cast the remaining parts. This class was a refreshing class for me since I have conducted a molding & casting experiment during my university days and I really enjoyed it back then, so having to do it again was just as fun and entertaining for me. However, this time around the design has to be created by us individually by using a CAD design. The software that I used to create my design is Fusion 360. The design that I decided to go with is a Jewelry Piece. My colleagues Maha & Fatima supported me with this assignment & provided some instructions to me on how it works which really simplified a lot of things for me and made things even easier.
The link if the group assignment can be found here
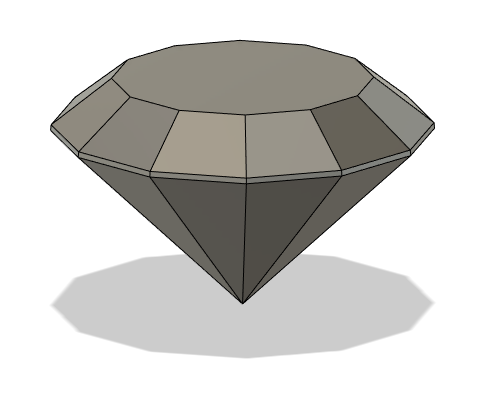
As Mentioned earlier, the software I used to create my design is Fusion 360 & the design I decided to go with is a Jewelry piece. A Diamond to be exact. I also created a box that’ll act as the mold’s stock. Below you’ll find the dimensions I used for the box:
The pocket will be mainly used to hold my design & help keeping it in place. I started by cutting my created design into two halves’ while placing one half in the pocket & the other half was mirrored by using a mirror tool from the software. Below you’ll find a short video that walks you through the design phase steps I mentioned briefly.
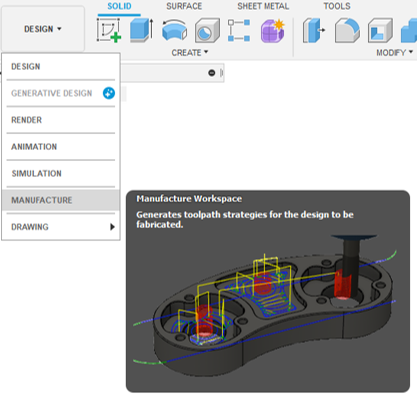
The next step requires shifting to manufacturing settings in the Fusion 360 software to generate a toolpath. I followed the same steps that my colleagues Maha & Fatima followed. Below you can find the steps:
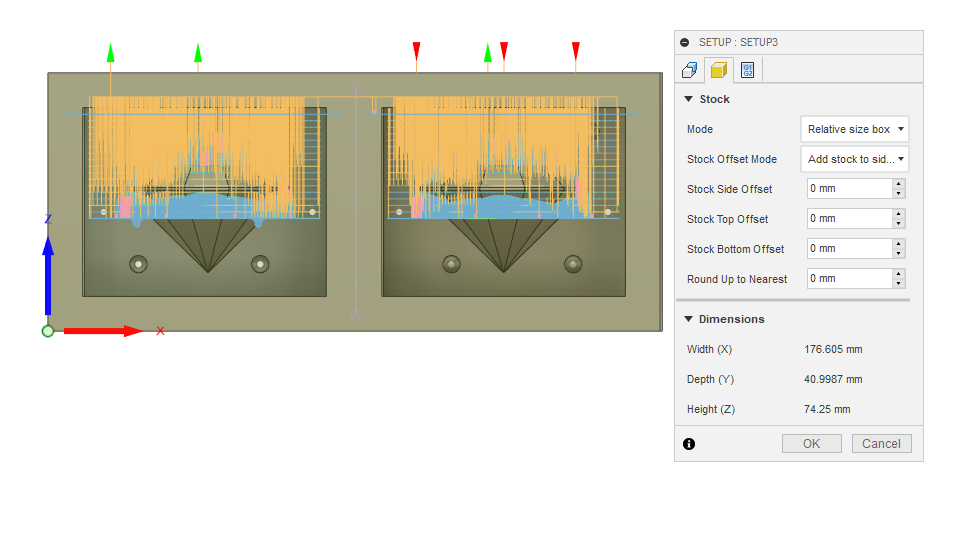
setup >> new setup to define my model. Then I selected the stock component as my body configuration which in turn will lead it to automatically generate and set the dimensions for my model. The only thing I had to do was to remove the off-set. The origin point was set as the lower left corner.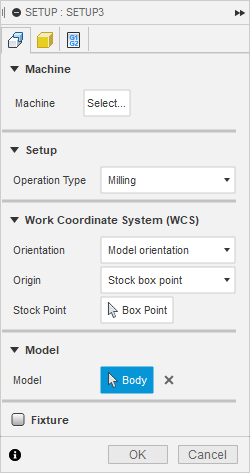
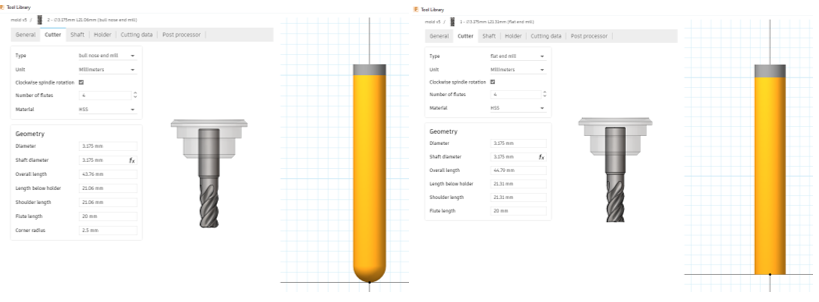
manage > tool library > add new tool. Two tools were added which were:1/8 inch flat end mill1/8 inch bull nose end mill
2D tab > adaptive clearing and select flat end mill to remove any unnecessary materials.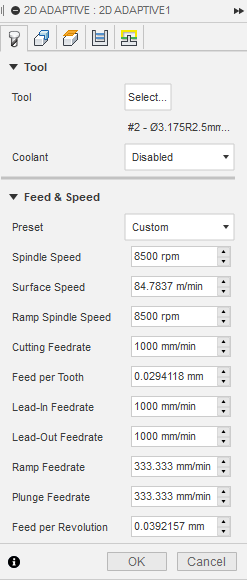
3D tab > adaptive clearing, then selecting flat end mill which will give me a rough estimate of the design shape.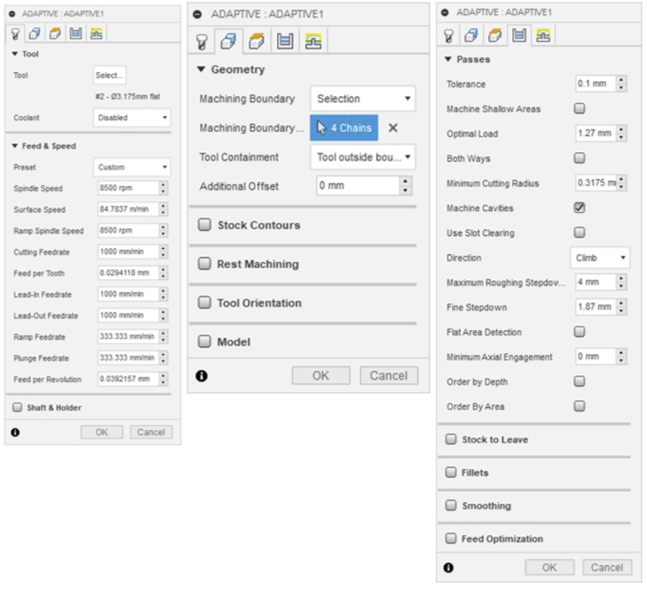
3D tab > Horizontal then the bull nose end mill. Which in turn will detect the flat/horizontal surfaces.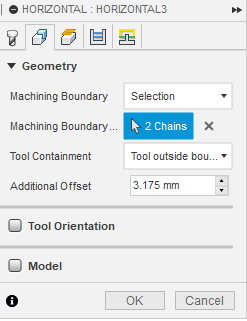
3D tab > parallel which provides a good finishing for the model and then selected bull nose end mill to execute it.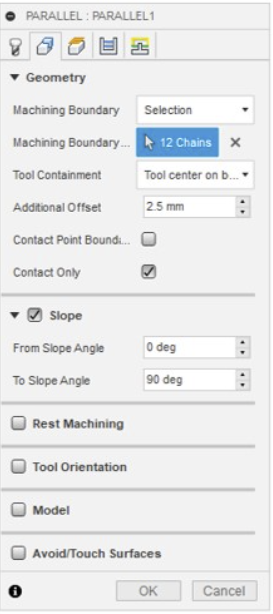
The machining time: 3 hour 3 mins.
Post process which will generate the Gerber files for the milling machine. The things that need modification is mentioned in the following picture: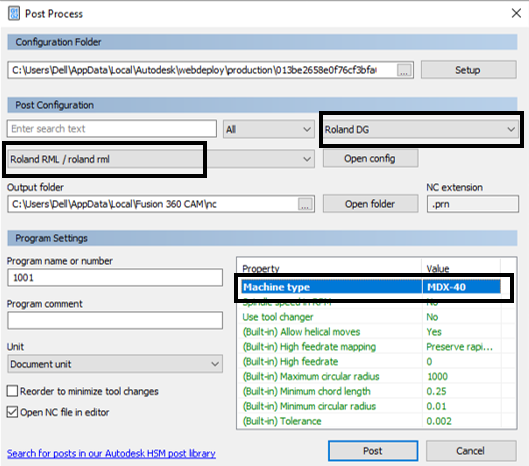 .
.
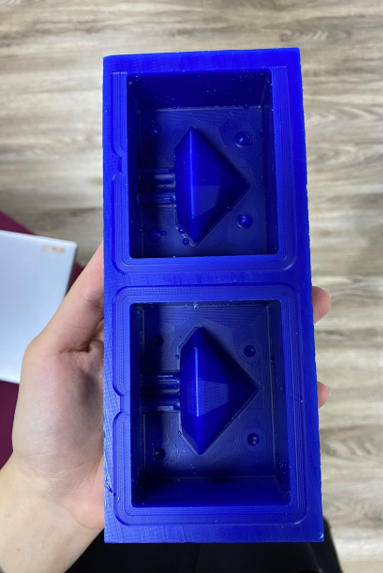
The second part of this week’s task is to create a mold from a Wax block material (Stock) by using the CNC milling machine. Then it will be casted by pouring a liquid material on the mold which in turn will solidify the liquid giving it the shape of the mold. Below you can find the steps that I did:
1/8 bull nose and flat end mill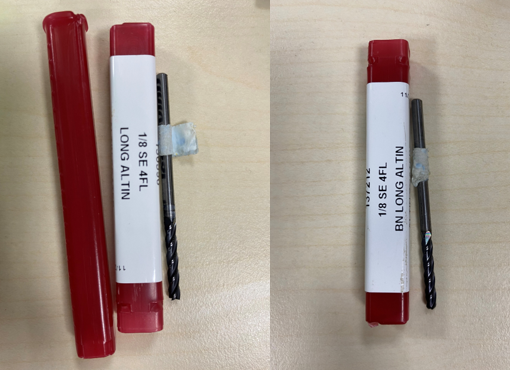 .
.
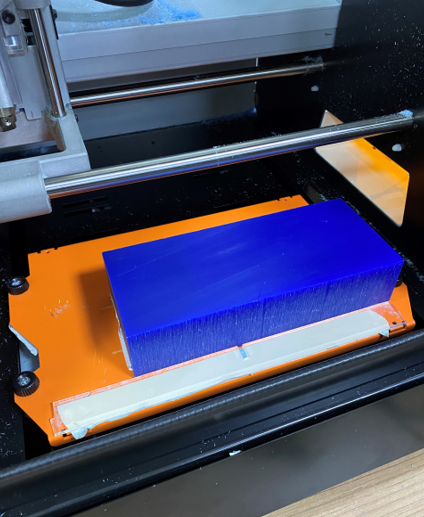
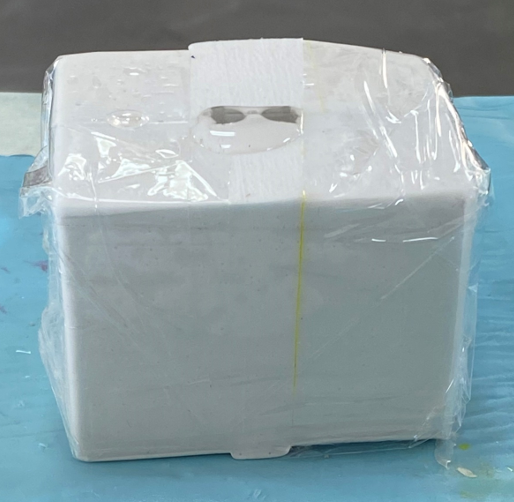
I applied a double-sided tape on the wax material.
I then placed the wax stock on the Roland machine.
 .
.
Next, I had to place the spindle & zeroing the XYZ axis. Please note that for each pathway & tool replacement the Z-axis has to be zeroed respectively.
The following video shows how the milling process is performed.
 .
.
 .
.
And here is the Safety datasheet
Mold Max 14NVWood SticksPlastic containers/cupsDigital weighing scaleThe machinable wax I milled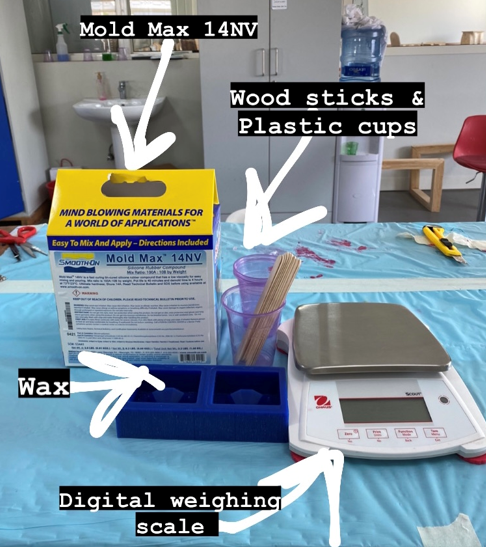 .
.
 .
.
First I have to make sure the cup & wax is dry.
Then, I mixed Part A in its container for an entire minute using the wooden stick.
Then, I have to shake Part B for an entire minute.
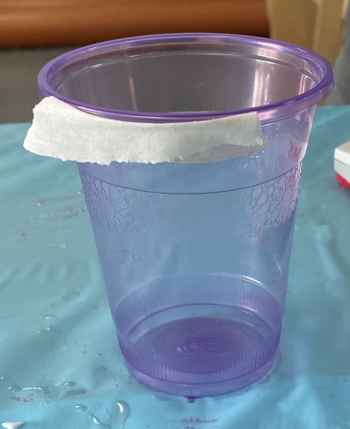
I placed the cup on the scale & zeroed it to eliminate the cup’s weight.
I poured Part A into the cup using the mark while taking into consideration the weight of it.
I found the ratio of Part A: Part B to be 10:1, So I had to measure 10% of Part A Original weight & add this weight from Part B to the cup.
Then I mixed both Parts A & B using the wooden stick and I made sure to scrape the sides and the bottom.
I poured the mixture to another cup and started mixing it for a minute.
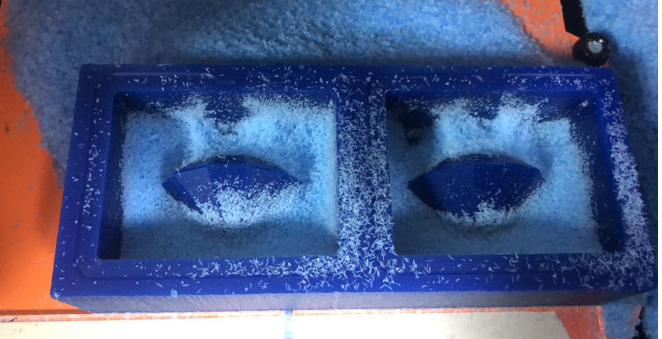
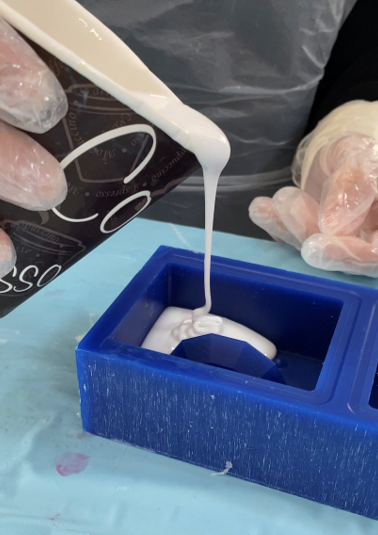
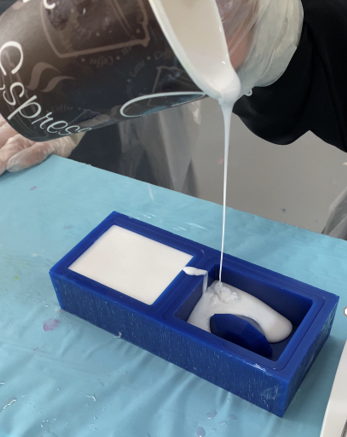
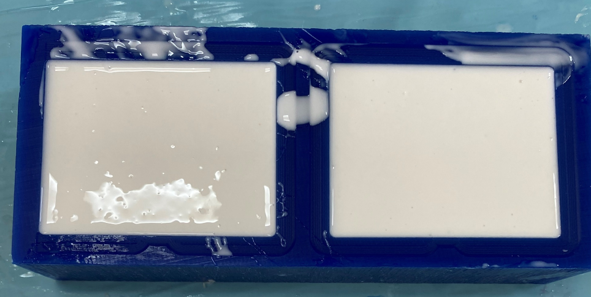
Then I poured the liquid to a single side of the mold.
 .
.
 .
.
 .
.
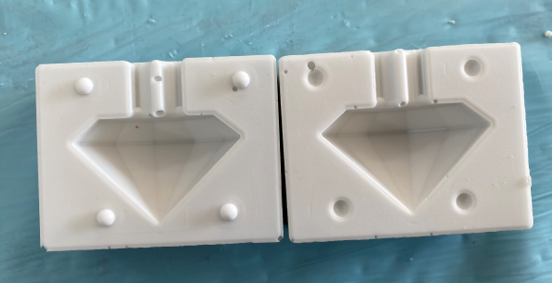
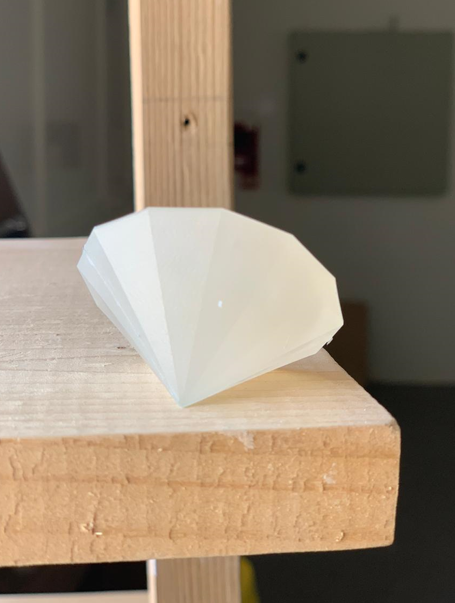
After the 24 hours have passed. The mold was ready to cast my design.
 .
.
 .
.
The final task for this week is to perform the casting operation. I used EpoxAcast™ 690. The PPE has to be used here as well. and this is the safety datasheet
The casting steps are somewhat similar to the molding steps. I have to start by measuring the volume of the material as mentioned previously.
I dried the cup and the mold.
I have to shake Parts A & B for a minute.
I placed the cup on the scale & zeroed it to eliminate the cup’s weight and poured Part A till the marked line.
The ratio of Part A : Part B is 10:3 which is approximately 30% of Part A. So, I have to add the same amount of Part B to the cup.
I had to mix the parts for a minute and a half.
I then added a color. I chose the flesh color.
I taped both sides of the mold together then started to slowly pour the mix in to the mold.
 .
.
 .
.