Review the safety data sheets for each of your molding and casting materials.
Make and compare test casts with each of them.
Please visit the group page to view the group assignment.
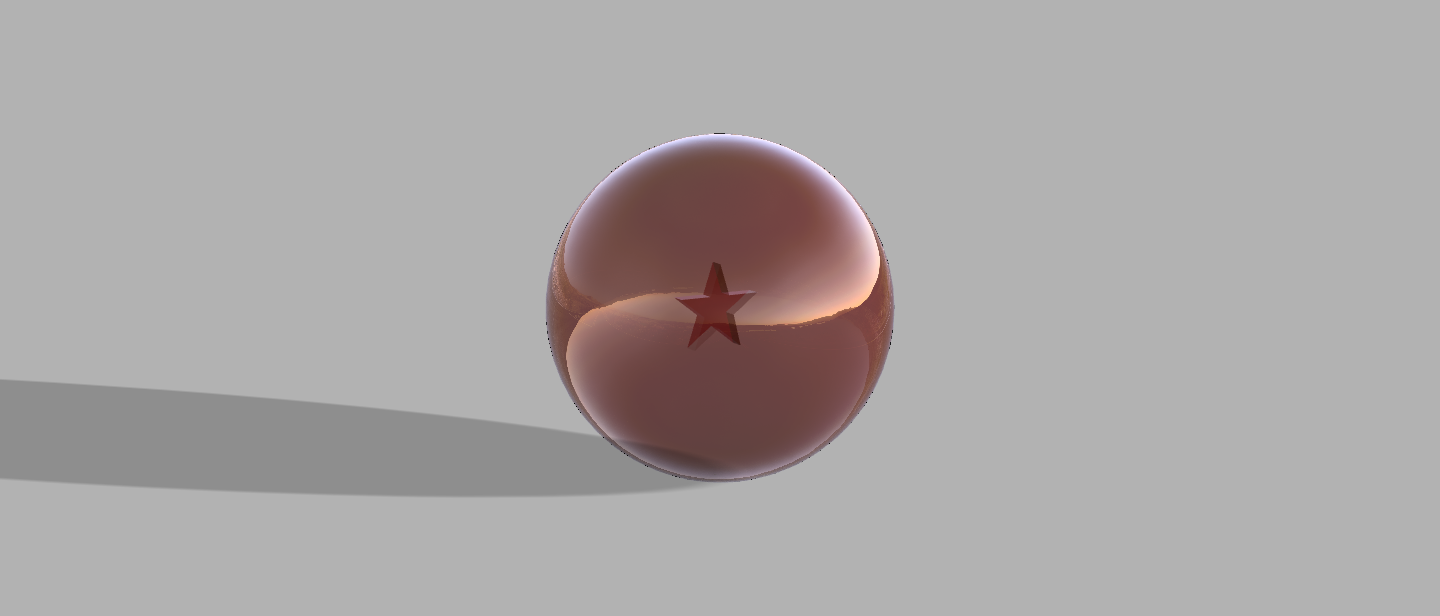
I decided to design and fabricate an Earth Dragon ball, which is a ball in anime and manga series called Dragon ball Z, I want to design the ball to be identical to the one in the anime.
"
Dragon Ballscan grant wishes, but their power and appearance differ slightly from the other balls, they come in sets of seven with each ball displaying the number of stars that signifies its respective number in the set."
According to the Anime/Manga 👆🏼🌚.
The design’s really simple, it’s usually a ball with a 7.5 cm diameter. I tried to fix the diameter of the ball to be identical to the original size of the ball in the anime.
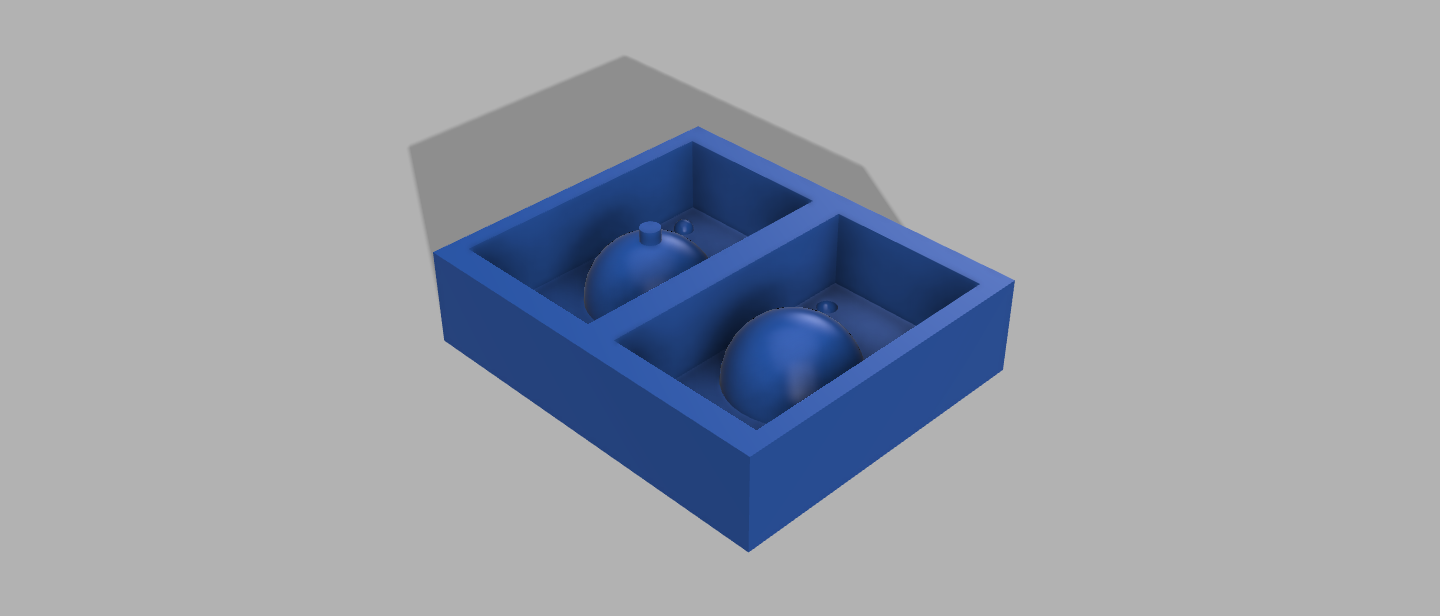
but Unfortunately, the biggest size of the machinable wax box available in the lab to build the mold is 128.10 x 152.55 x 38 mm, the problem not in the width or the height of the box, its because the depth. so I did the mold design based on these dimensions, I choose to make the ball with 5 cm diameter.
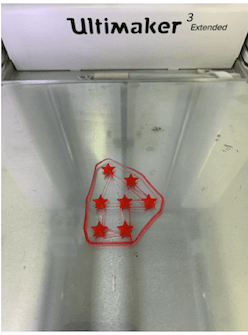
For the starts, I did print them using 3D printers, and then added them manually to the casts.
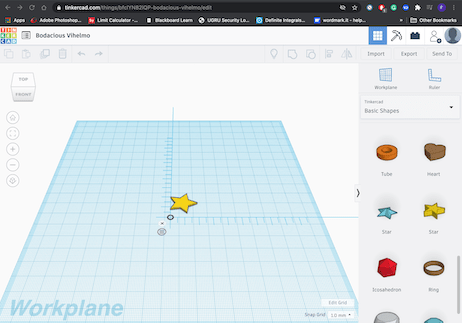
The stars at Dragon ball is Red and five-point stars. First I used tinkerCAD there is a ready star design at Basic Shapes. Next, I did print them but I did not like how they look like and it was hard to scale it down:
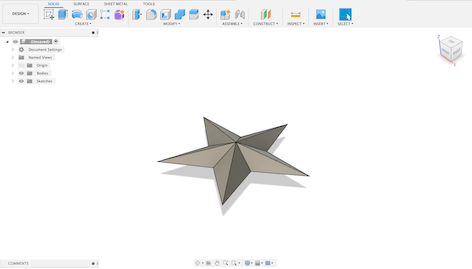
Afterward, my friend Maha offers me a design of 3D five-point stars, and I liked them more than the ones I did print before, many thanks to her:
The Dragon ball and wax box design are shown below:
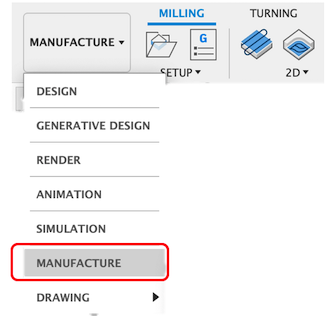
In Fusion change from design mode to Manufacture mode to generate tool paths for milling.
The first thing to do before generating the tool-paths and make a new setup is to add the end mill tool I have gone to use and have in the lab.
I will need two kinds of End-mills:
Flat end mill (used generally remove the excess material)
Bull nose end mill (used for finishing and for milling small details in design)
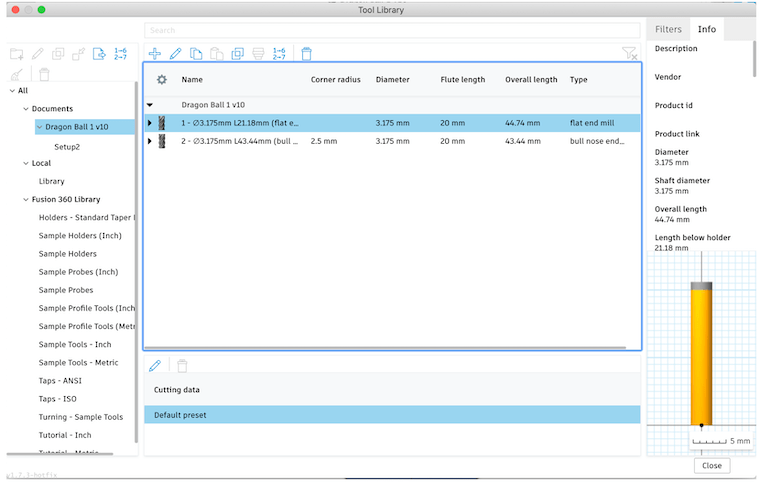
Next to add them Go to manga > Tool Library
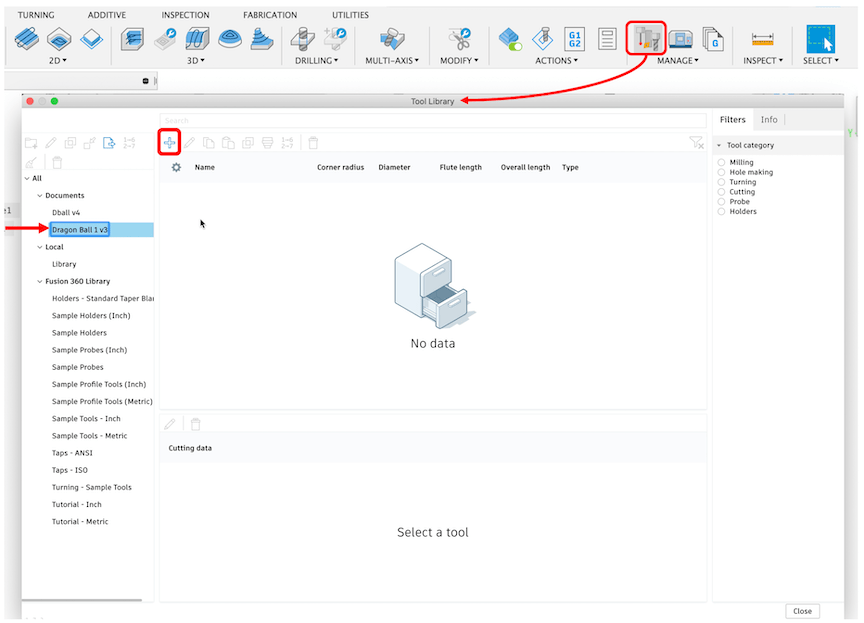
Select the design name.
Click on ```+ ```to create and add a new tool.
Then select Flat end mill
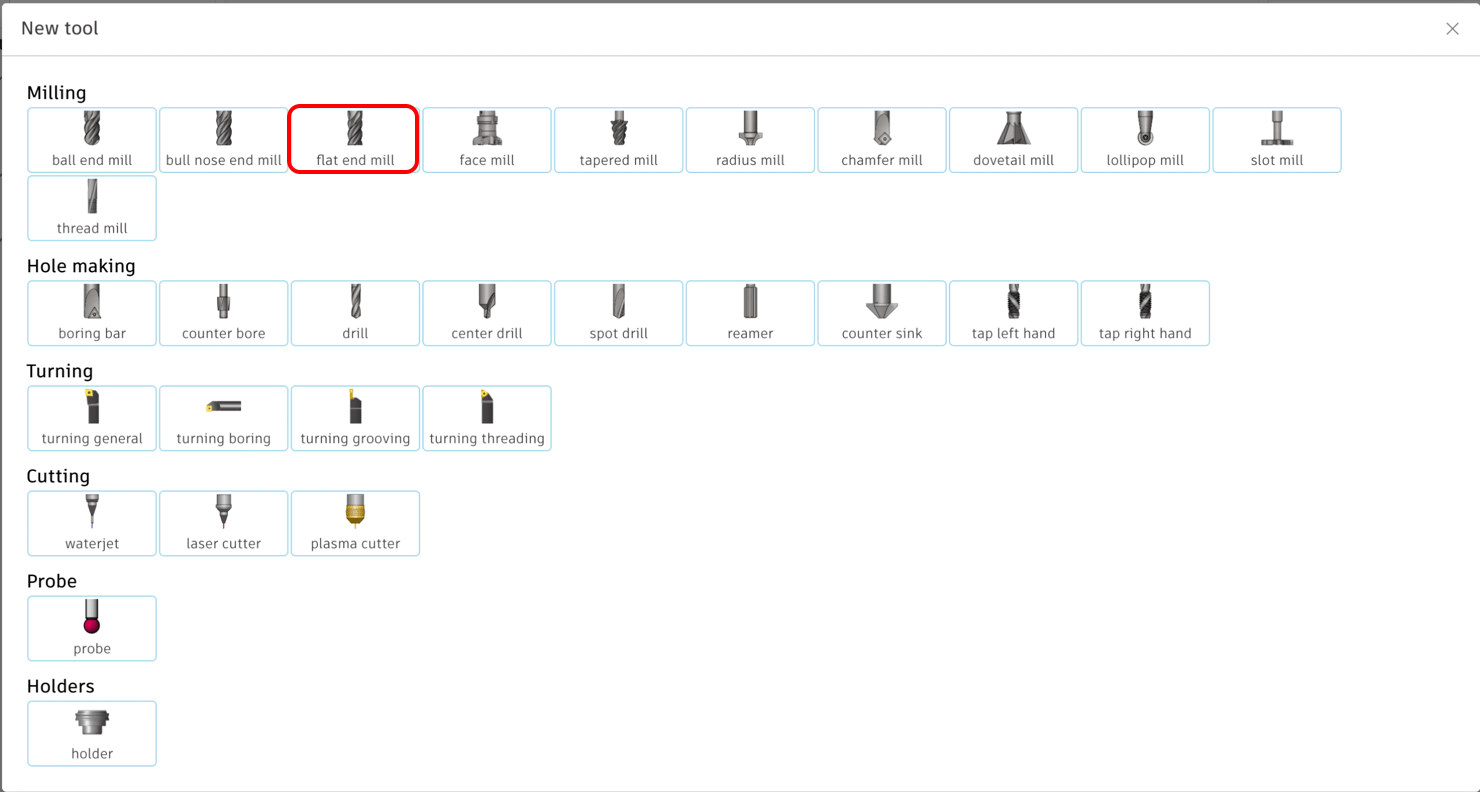
Cutter to edit the settings of the tool.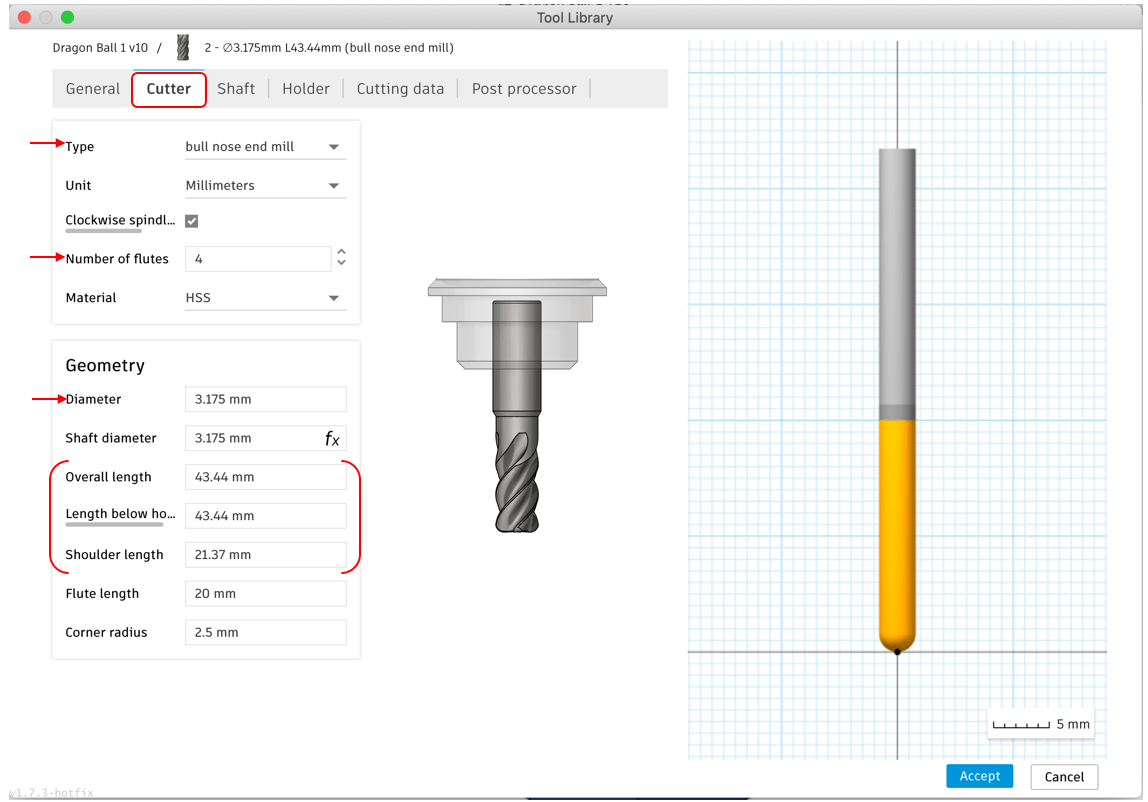
Add the number of flutes and the diameter of the tool.
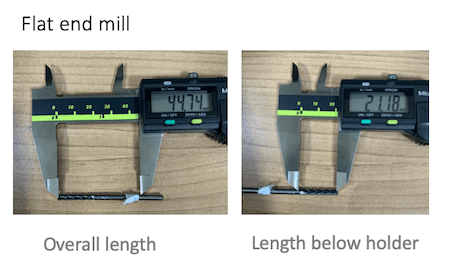
Next, There are 3 values required to measuring them manually which is:
Overall length.
Length below holder = Shoulder length.
As I measured lengths manually and add them in the settings as shown below in the image:
Then Click Accept, now new tool is added to my design as shown in image.
Afterward, add the other tool in the same way, but this time I will select Bull nose end mill, and edit the settings as shown in the screenshots:
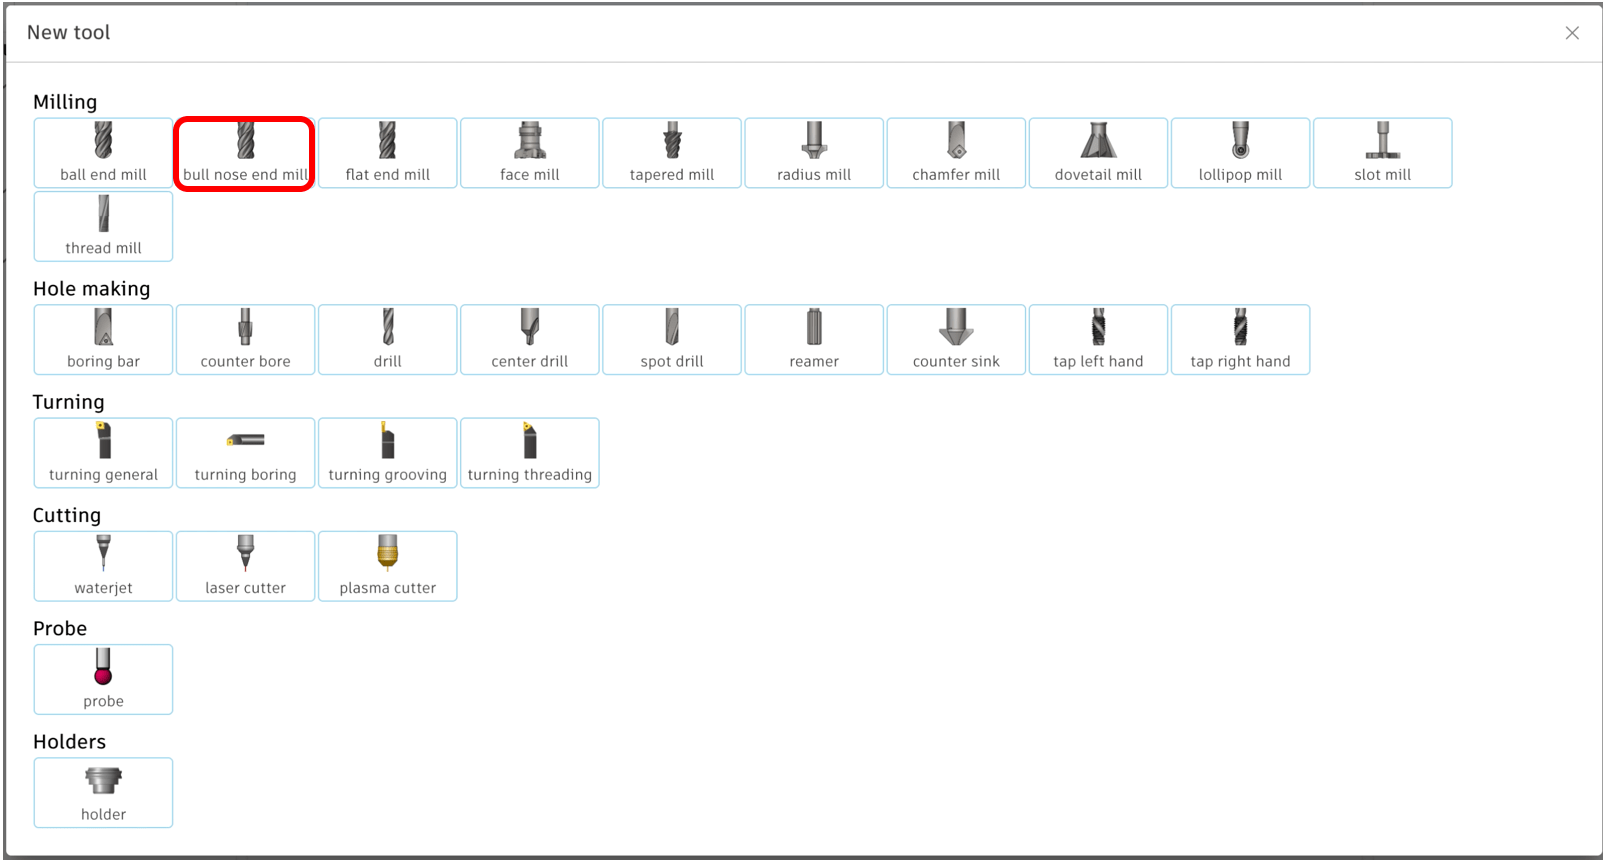

Finally, as shown below in the Tool Library there are two end-mills that can be used whenever required, also I can come back and edit them when is needed.
SETUP > New setup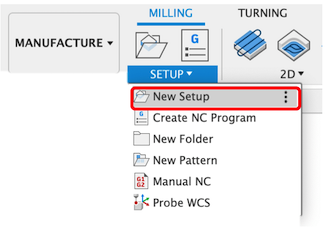
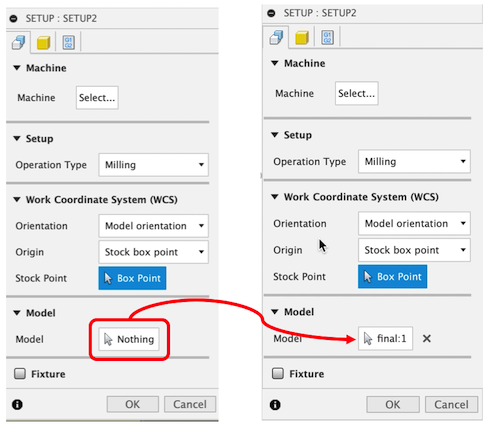
Setup:
Select the model want to create tool-path for. picture
Then select `Stock Solid > select the mold
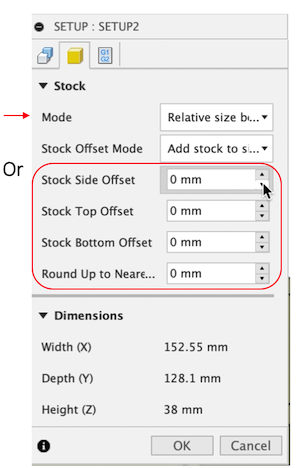
Stock:
Click Mode > select from solid or change the offset to zero, check the dimensions one more time.
Go back to setup and select the Stock point by move it and by clicking in the origin point to target point which is the extra left edge as show, because the used milling machine start milling from this point as shown in GIF:
Then Click Ok
Milling > 3D > Adaptive clearing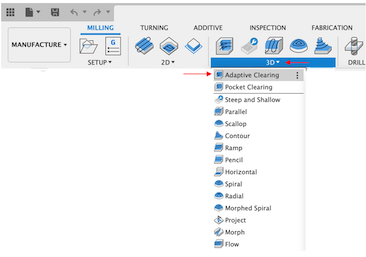
1. Tool
Flat end mill.Coolant > Disabled, this feature used if the milling material will produce liquid while milling, in our case will not, so we will Disabled it. Feed & speed:8500 rpm1000 mm/min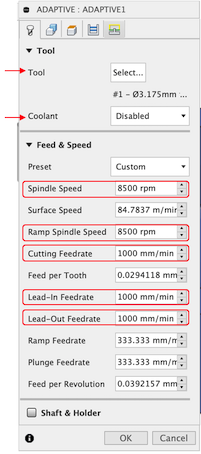
2. Geometry
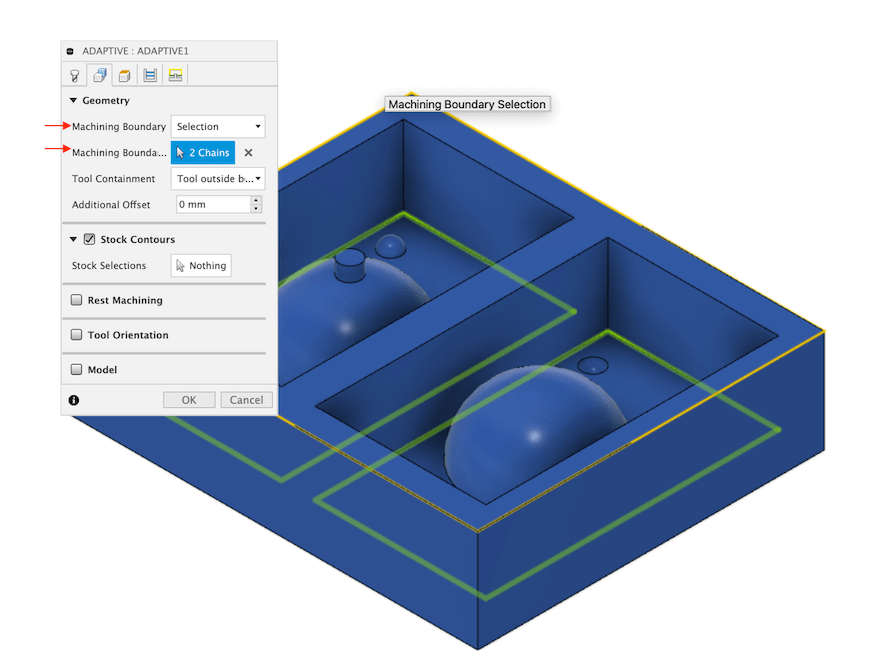
Rest MachiningMachining Boundary select Selection, then select the bottom of the mold from where the last surface in the design as shown in video.3. height
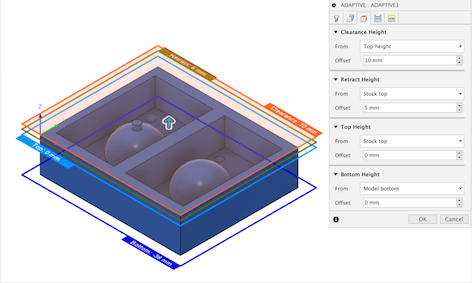
In this section is for selecting from where the end-mill will start milling, we keep as its.
4. passes
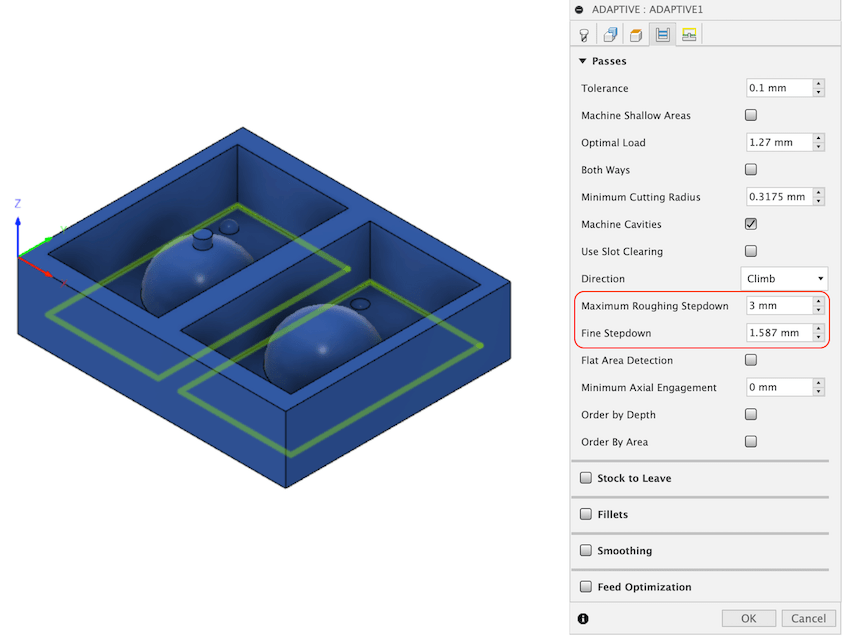
3 mm1.587 mm - half the diameter of tool, I did not change this why my milling took a lot of machining time more than was calculating.5. Linking

Click Ok
Now the adaptive tool path is ready and can check it by view the simulation, will show the exact moving paths of the tool.
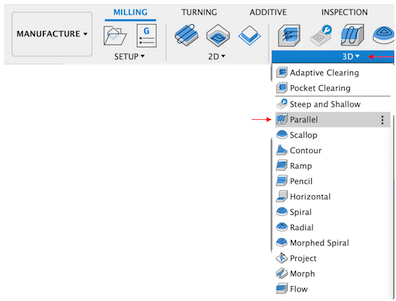
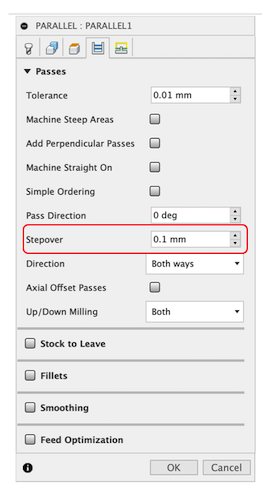
Go to Milling > 3D > Parallel
1. Tool
Select the tool: Coolant > Disabled, In addition add the settings for Feed & speed settings same as the Adaptive Tool-path.
2. Geometry
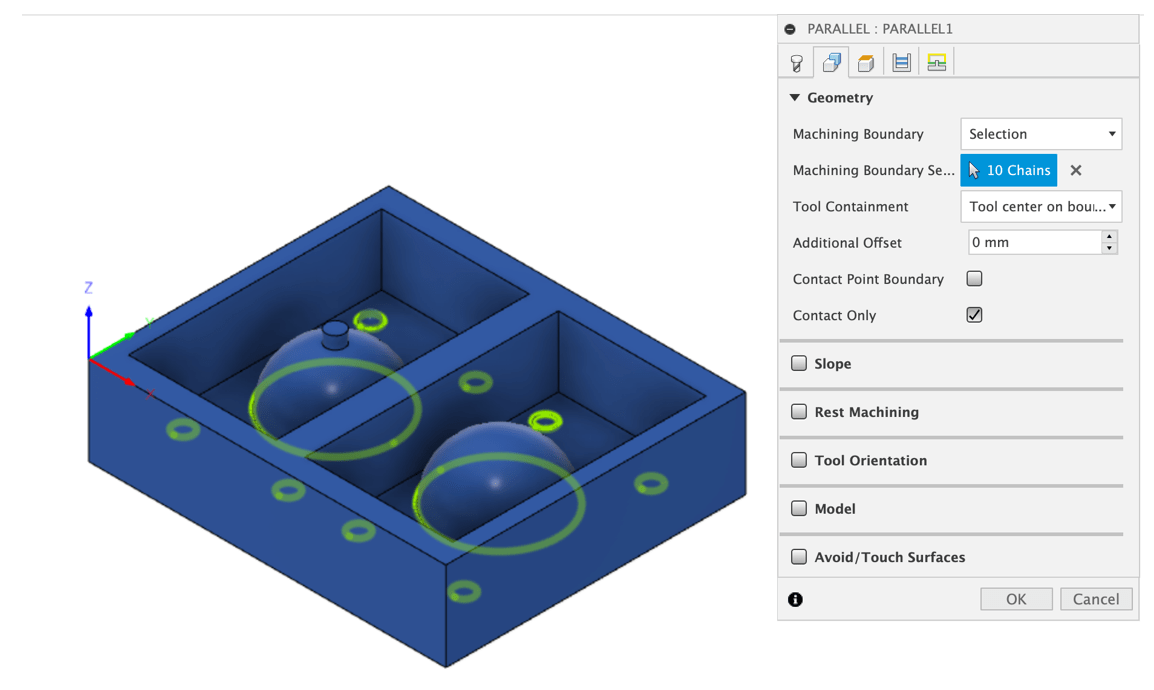
Rest MachiningMachining Boundary select Selection, then select the I did select the parts where the finishing is important and want it to look smooth as shown in video, I need to select the boundary of the shape.3. passes
Stepover = 0.1 mm
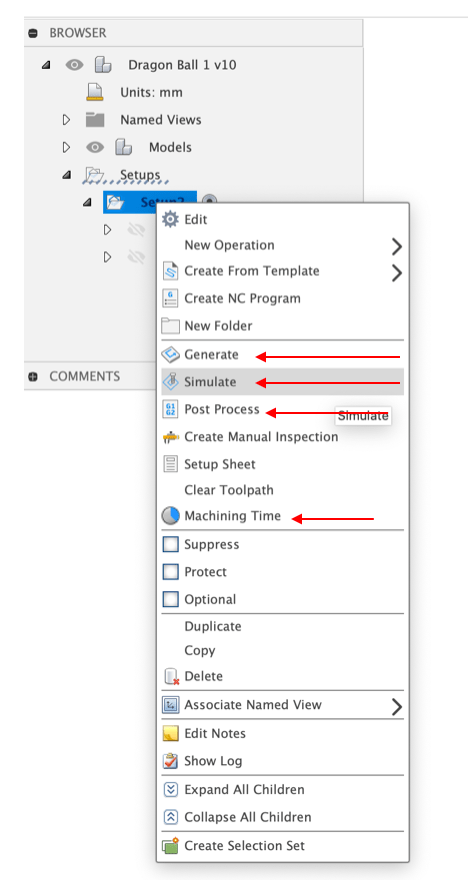
Finally, to get the milling g-code files right click on wanted path > Post process

To view the simulation for any tool-path, right click on the tool path and click on Simulate, also to view the milling time select Machining time. Before viewing anything click on Generate to update any changes.
Used machine:SRM - 20
Milling video:
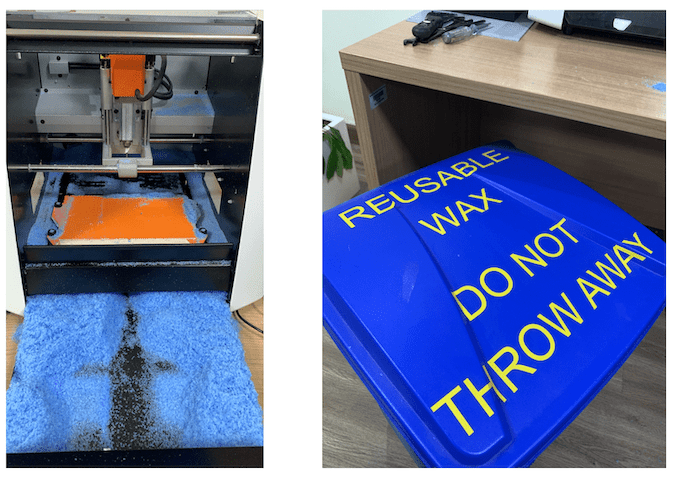
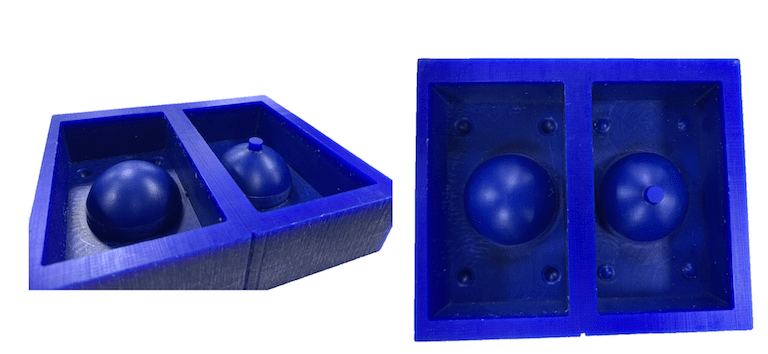
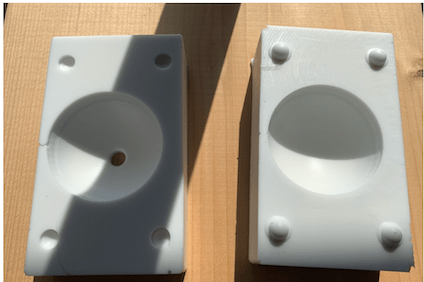
The Wax box after milling as shwon:
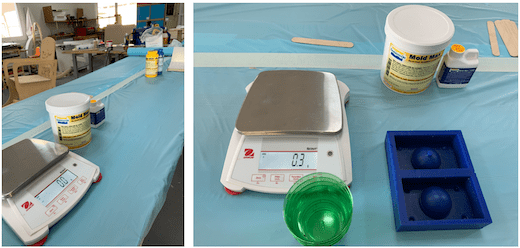
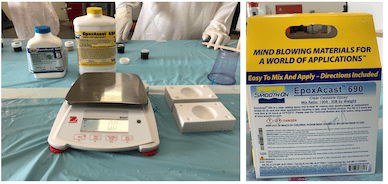
First thing to do is preparing the place for the assignment by covering the table, and bring all the safety equipment and others needed equipment.
Instructor Hashim did explain all the safety rules we must follow, In addition to that we did open the data sheet of mold mix and read it.
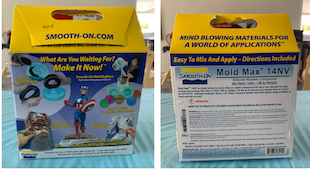
Dealing with these chemical components dangers we must be careful. Here is the safety data sheet of Smooth-On Mold Max 14NV.
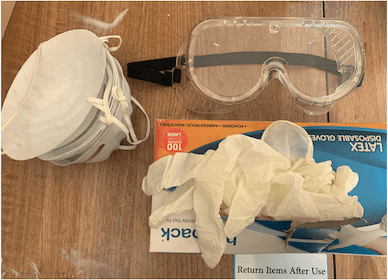
| Safety equipment |
|---|
| Mask |
| Gloves |
| Safety goggles |
| Plastic apron |
To measure the needed amount of the mix for mold there are two ways, either by weight or volume, so to start with we used the plastic container and full it with water to get idea how many cups I will need, for my design I will need around two cups.
Shake part A&B very well before using it.
Measuring and calculating the mix ratio required.
The mix Ration: 100A: 10B by weight for Mold Max® 14NV.
I did each half in wax box Separated
For the first half:
I put an empty cup in the scale then zero it.
Then add the max until we reached the estimated volume measured using water.
I need 162.6g for part A.
In other cup measure needed amount of part B , and it must be 16.26g = 162.6/10 because of the mix ratio.
Pouring part B into part A and mix it very well for a one minutes, then put the mixture in another cup and mix it for 40 second total ~ 2 minutes as it was recommended in the data sheet.
Finally pour the mixture into the wax box.
we must be careful in this step and the pouring must be slow and on the same place.
Repeat the same steps for the other half with the required amount for it.
Let the mold dries for 4 hours.
Finally the silicone mold look as shown below:
The video below summarize steps of making the silicone mold:
I used this video as Reference to get an idea how I can make a dragon ball.
The steps of casting the resin similar to steps of making the silicone mold:
Wearing safety equipment. Dealing with resin really dangers. here is the safety data sheet of EpoxAcast 690.
Estimate the necessary amount of resin using water.
Using the mixing ratio mention in product guide.Mix Ratio By Weight: 100A : 30B
I did pour 50g from part A and 15.6g from part B.
Mix Part A&B mixture for one minute and half in one cup, then pour the mixture on the other cup and mix it for more one minute and half tool 3 minutes as recommended.
Add the color by mixing Red and Yellow, to produce orange. I need to add more from the Yellow and less from Red as it’s a strong color, if I did add too much from Red it will cancel the other color. as what happened in the first trial of casting the dragon ball.
Pouring slowly the resin mixture in the first side of the, next add the stars using tweezer very carefully.
Close the other side of the mold and continue pouring.
Wait for 24 hours for the resin to dries.
After 24 hours open the mold.
The video below summarize the casting steps:
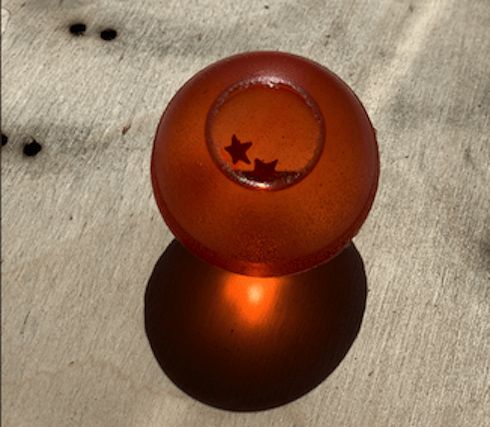
Unfortunately, as shown my first trial was a big failure. My friend Maha notice after I did open the mold that I did set the other side of the mold in opposite direction and we think this was the reason for the resin leakage of the and the sliding between both sides in the middle of the ball.
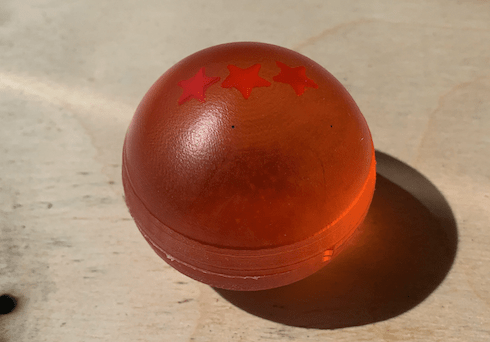
The next day, I did cast another dragon ball, hoping it will work this time, for this time I did use a torch to remove the bubbles. The video below summarizes my second trial:
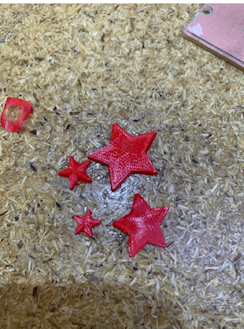
Fortunately, the second trial was successful as shown in the video above and in the image below:
Sanding let the ball appears in better quality and smooth surface. Sadly I didn’t have the chance to do the sanding, as there was no enough time, in future if I had the time I will do it
| Files | Link |
|---|---|
| Wax Stock design | |
| Dragon Ball desing | |
| star design |
