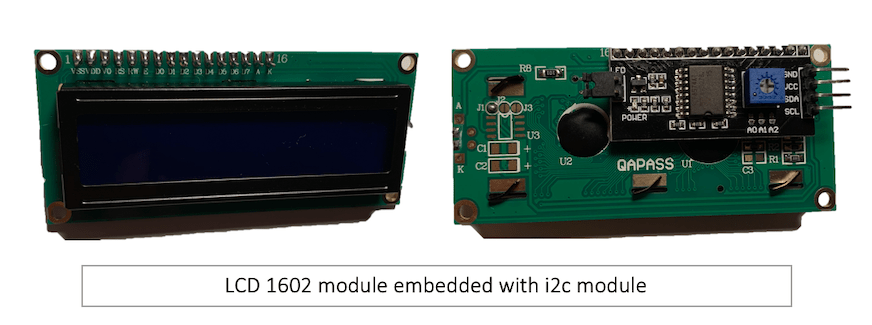
I decided to experience the LCD 1602 module for this week.
Liquid Crystal Display is an output device able to display 2 lines of 16 characters, this the reason naming it 1602, and it’s a type of dot matrix module to shows letters, numbers, and characters.
I watched this YouTube tutorial and read this article to work on this assignment.
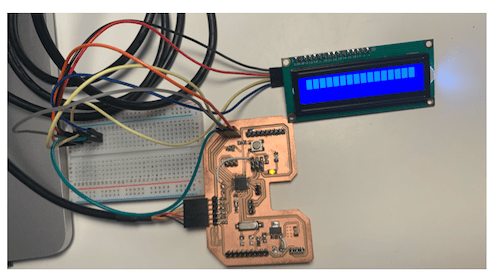
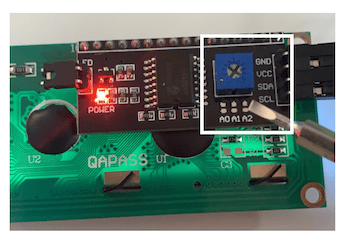
I used the ATmega328p board I fabricate in Electronic Design week, the LCD 1602 module was embedded with the I2C module which needs only two wires SCL and SDA as shown below the connection.

I used Arduino IDEto program the LCD module.
I downloaded the required library for Liquid Crystal.
The first code I tried was the example code HelloWorld.
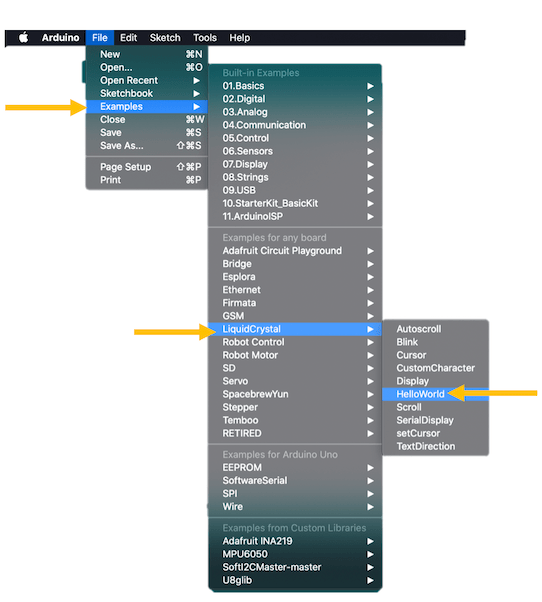
Note: all the codes used this assignment, is an examples codes available in LCD library.
#include <Wire.h>
#include <LiquidCrystal_I2C.h>

// Set the LCD address to 0x27 for a 16 chars and 2 line display
LiquidCrystal_I2C lcd(0x27, 16, 2);

void setup()
{
    // initialize the LCD
    lcd.begin();

    // Turn on the blacklight and print a message.
    lcd.backlight();
    lcd.print("Hello, world!");


}

void loop()
{
    // Do nothing here...
}
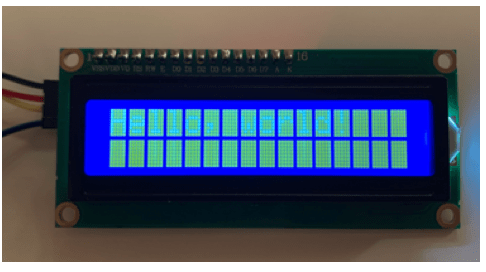
But unfortunately, the screen displayed only squares, did not show what suppose to display, Thus, I did run I2C scanner code to check the connection of the I2C:
/*I2C_scanner
  This sketch tests standard 7-bit addresses.
  Devices with higher bit address might not be seen properly.*/

#include <Wire.h>
void setup() {
  Wire.begin();
  Serial.begin(9600);
  while (!Serial);
  Serial.println("\nI2C Scanner");
}
void loop() {
  byte error, address;
  int nDevices;
  Serial.println("Scanning...");
  nDevices = 0;
  for (address = 1; address < 127; address++ ) {
    Wire.beginTransmission(address);
    error = Wire.endTransmission();
    if (error == 0) {
      Serial.print("I2C device found at address 0x");
      if (address < 16)
        Serial.print("0");
      Serial.print(address, HEX);
      Serial.println("  !");
      nDevices++;
    }
    else if (error == 4) {
      Serial.print("Unknown error at address 0x");
      if (address < 16)
        Serial.print("0");
      Serial.println(address, HEX);
    }
  }
  if (nDevices == 0)
    Serial.println("No I2C devices found\n");
  else
    Serial.println("done\n");
  delay(5000);
}
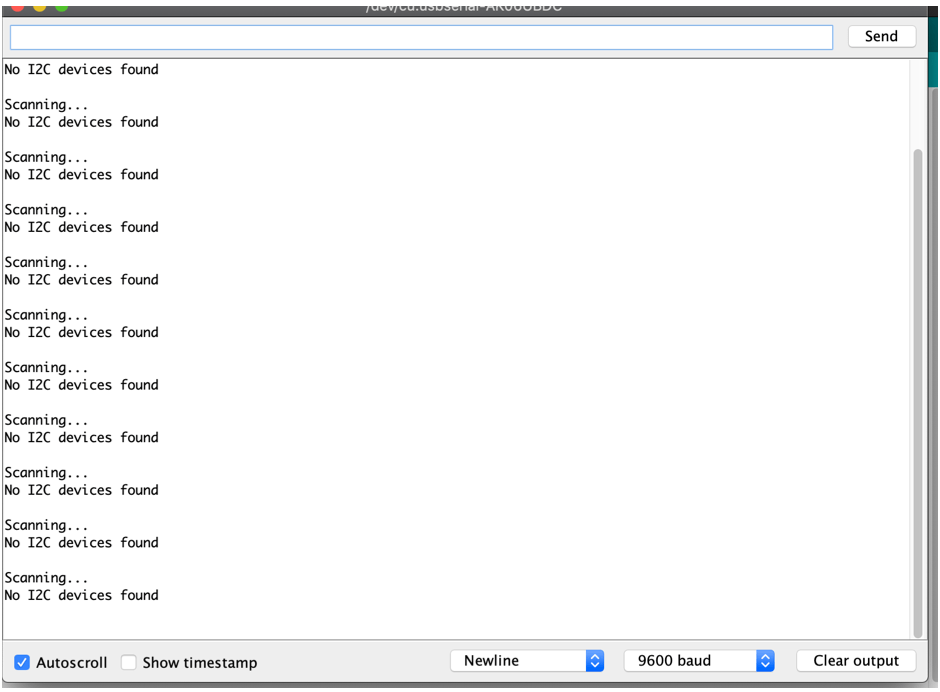
The output of serial monitor output shows "No I2C device found", therefore I returned to my board and checked the connections, I found out using the multimeter the SCL pin was not connected well with the header, I had to add more solder.
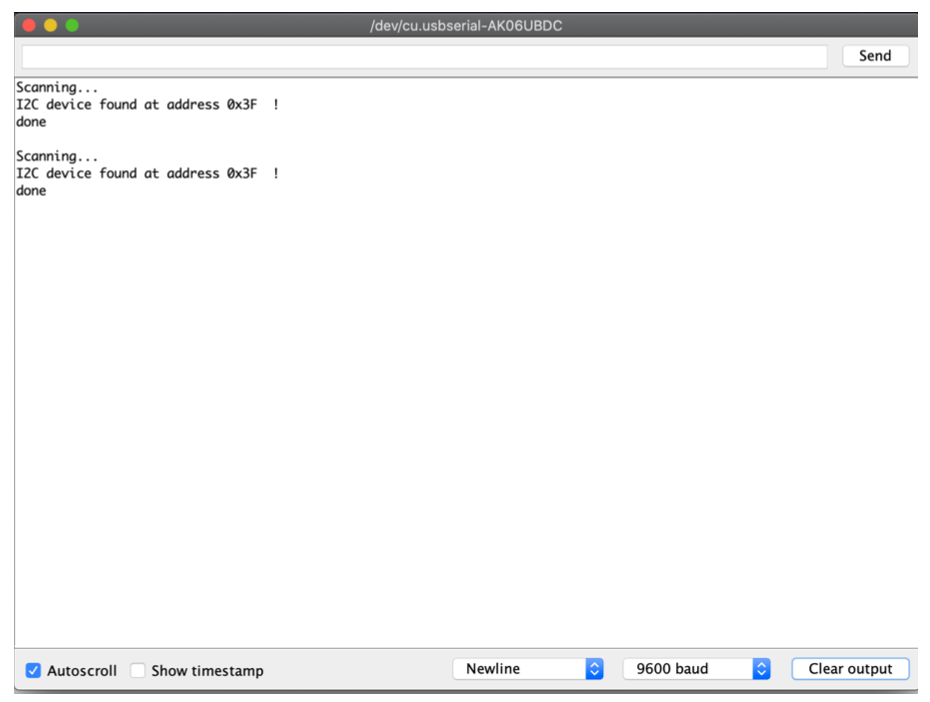
Next, I re-ran the I2C scanner code, then the output of the serial monitor shows there is the I2C device connected with the board and it’s connected in 0x3F address, which different than the default address in the example code, I had to change the address from 0x27 to 0x3F in the code.
#include <Wire.h>
#include <LiquidCrystal_I2C.h>

LiquidCrystal_I2C lcd(0x3F, 16, 2);

void setup()
{
    // initialize the LCD
    lcd.begin();

    // Turn on the blacklight and print a message.
    lcd.backlight();
    lcd.print("Hello, world!");
  // lcd.print(" Fatima Alhadi");
}

void loop()
{
    // Do nothing here...
}
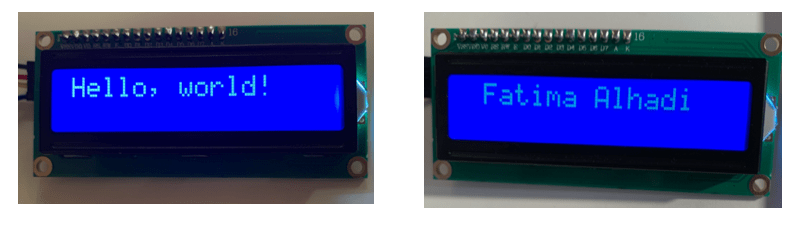
After running the code the text was not clear because of the intensity, I had to use a screw and control the intensity of screen light until the text appears clearly.
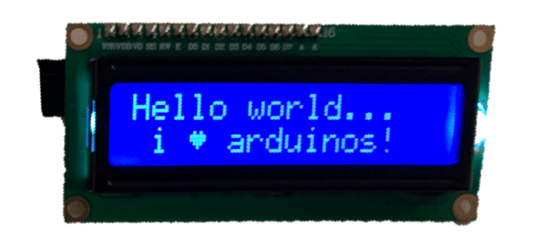
The images below shows the output from the codes above in the display:
The video below shows the output of the codes below:
This code responsible to display text with and with and without cursor blinking, between the two texts there is a delay as shown in the above video:
#include <Wire.h>
#include <LiquidCrystal_I2C.h>

LiquidCrystal_I2C lcd(0x3F, 16, 2);

void setup()
{
    // initialize the LCD
    lcd.begin();
}

void loop()
{
    bool blinking = true;
    lcd.cursor();

    while (1) {
        if (blinking) {
            lcd.clear();
            lcd.print("Fatma");
            //lcd.print("Stay Home");
            lcd.noBlink();
            blinking = false;
        } else {
            lcd.clear();
            lcd.print("FabAcademy2020");
            //lcd.print("Stay safe!");
            lcd.blink();
            blinking = true;
        }
        delay(4000);
    }
}
This code responsible to show special character as shown the heart on the screen. Moreover, to display text in two lines as shown :
#include <Wire.h>
#include <LiquidCrystal_I2C.h>

//uint8_t bell[8]  = {0x4, 0xe, 0xe, 0xe, 0x1f, 0x0, 0x4};
//uint8_t note[8]  = {0x2, 0x3, 0x2, 0xe, 0x1e, 0xc, 0x0};
//uint8_t clock[8] = {0x0, 0xe, 0x15, 0x17, 0x11, 0xe, 0x0};
uint8_t heart[8] = {0x0, 0xa, 0x1f, 0x1f, 0xe, 0x4, 0x0};
//uint8_t duck[8]  = {0x0, 0xc, 0x1d, 0xf, 0xf, 0x6, 0x0};
//uint8_t check[8] = {0x0, 0x1 ,0x3, 0x16, 0x1c, 0x8, 0x0};
//uint8_t cross[8] = {0x0, 0x1b, 0xe, 0x4, 0xe, 0x1b, 0x0};
//uint8_t retarrow[8] = {   0x1, 0x1, 0x5, 0x9, 0x1f, 0x8, 0x4};

LiquidCrystal_I2C lcd(0x3F, 16, 2);

void setup()
{
    lcd.begin();
    lcd.backlight();

    //lcd.createChar(0, bell);
    //lcd.createChar(1, note);
    //lcd.createChar(2, clock);
    //lcd.createChar(3, heart);
//  lcd.createChar(4, duck);
    //lcd.createChar(5, check);
    //lcd.createChar(6, cross);
    //lcd.createChar(7, retarrow);
    lcd.home();

    lcd.print("Hello world...");
    lcd.setCursor(0, 1);
    lcd.print(" i ");
    lcd.write(4);
    lcd.print(" arduinos!");
delay(5000);
displayKeyCodes();
}

// display all keycodes
void displayKeyCodes(void) {
//  uint8_t i = 0;

    //while (1) {
    //  lcd.clear();
    //  lcd.print("Codes 0x");
    //  lcd.print(i, HEX);
        //lcd.print("-0x");
        //lcd.print(i + 16, HEX);
        //lcd.setCursor(0, 1);

        //for (int j = 0; j < 16; j++) {
        //  lcd.write(i + j);
    //  }
        //i += 16;

        //delay(4000);
}
//}

void loop()
{
    // Do nothing here...
}
Moreover, In Embedded programming week, I tried additional output device Servo Motor, as shown in the video below, for more details please visit the assignment.
To Sum up, In this week’s assignment, I learned how to control different output devices, and programming them to do what I need.
