
Week_2 - Computer Aided Design
Sketching
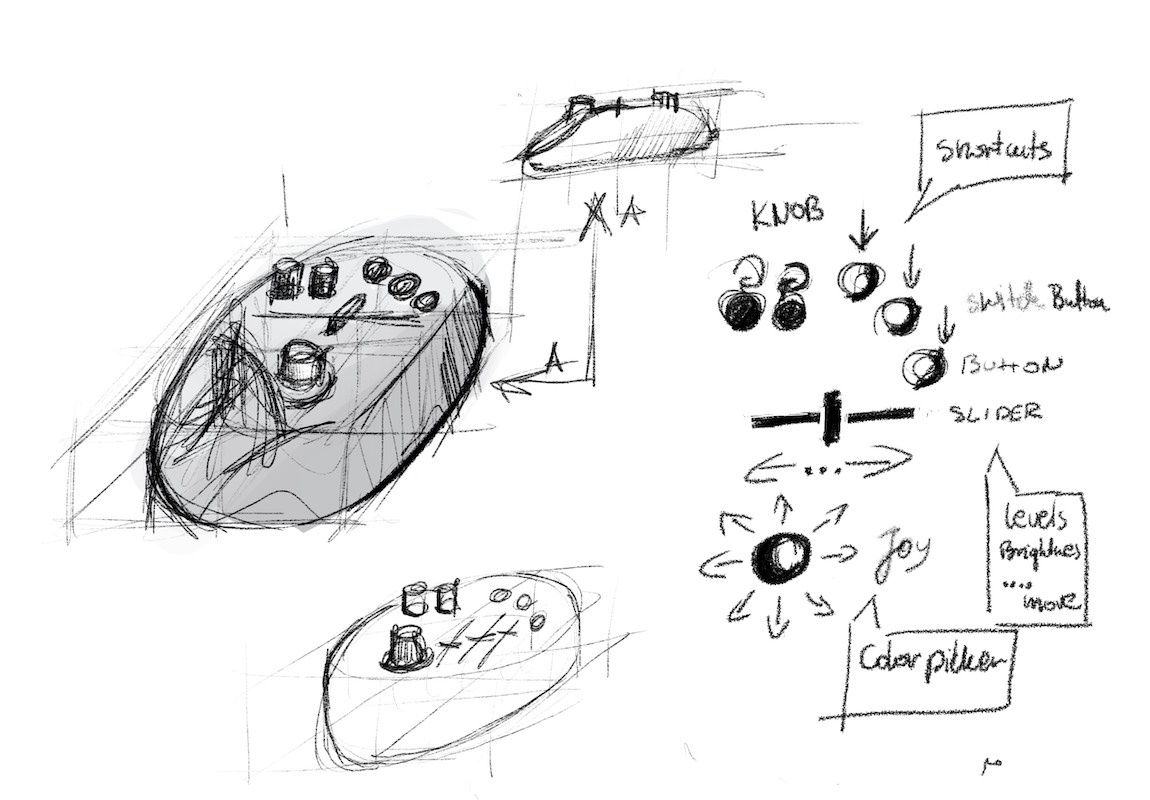
I started with working on a tablet where in Procreate I created sketches using apple pencil. Apart from this program there is also a lot of different free software that we can use to sketch on a tablet, e.g. Autodesk Sketchbook. Using simple tools like pencil brush or brush brush I created initial concepts.
Vectors

Then, using a vector graphics program like Inkscape or Affinity Design, which Im huge fan.
I created functional sketches of the product where I showed what
elements I care about.
Here you can watch my webinar (its in polish) about basics of lasercutters and Inkscape design.
Affinity Design
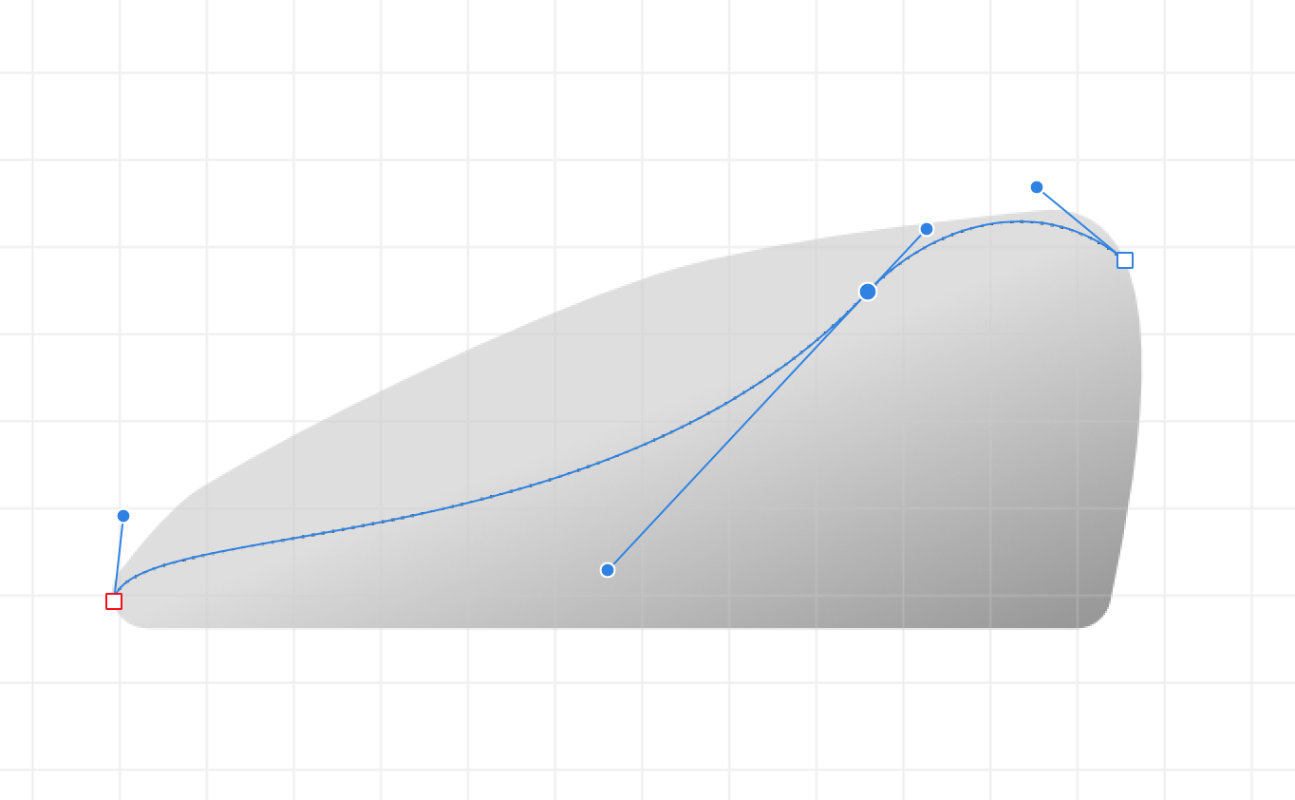
I used mainly basic tools such as a pen to create curves, and simple solids. All objects to get the final effect were modified by booleans, i.e. cut-outs, sums etc.
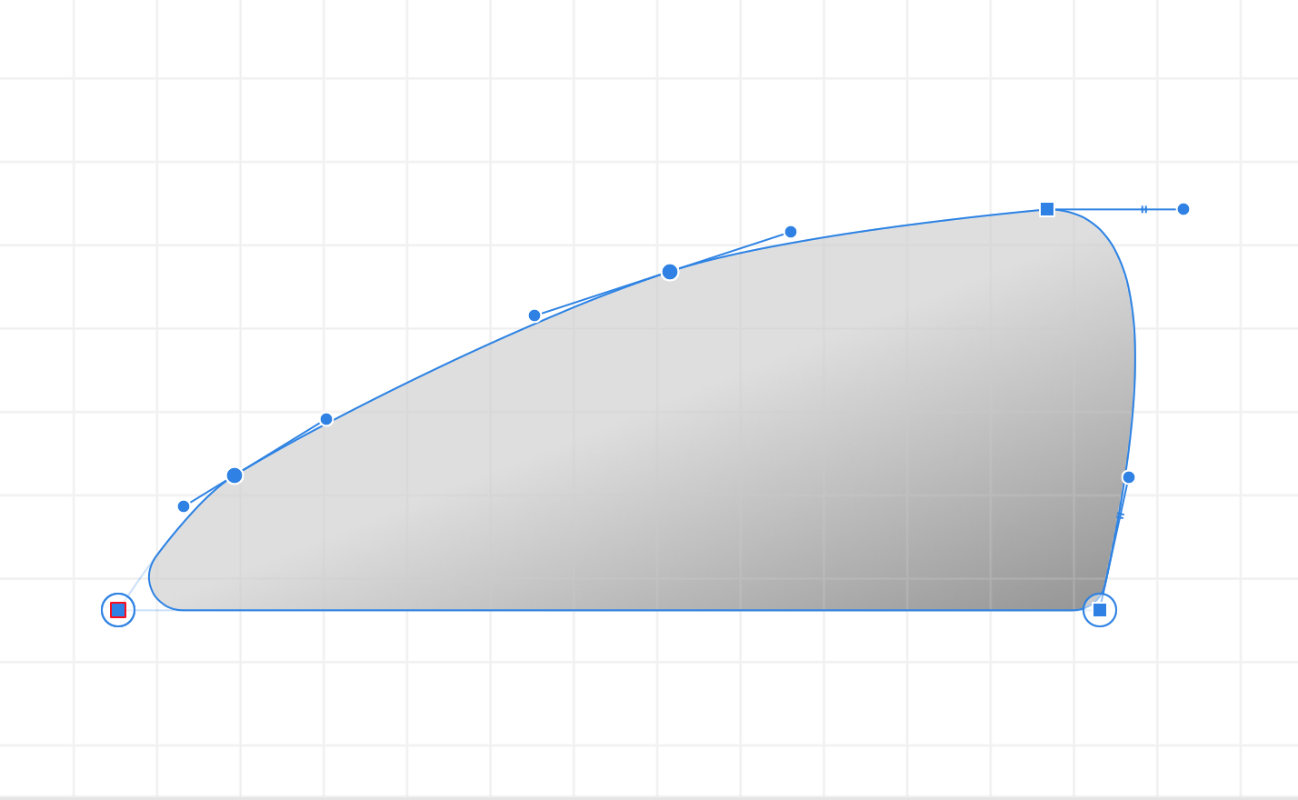 First curves and shape to imagine the look of the device. The top line was inspired by the hand alignment on the surface.
 Dotted line shows hiden part of the device.
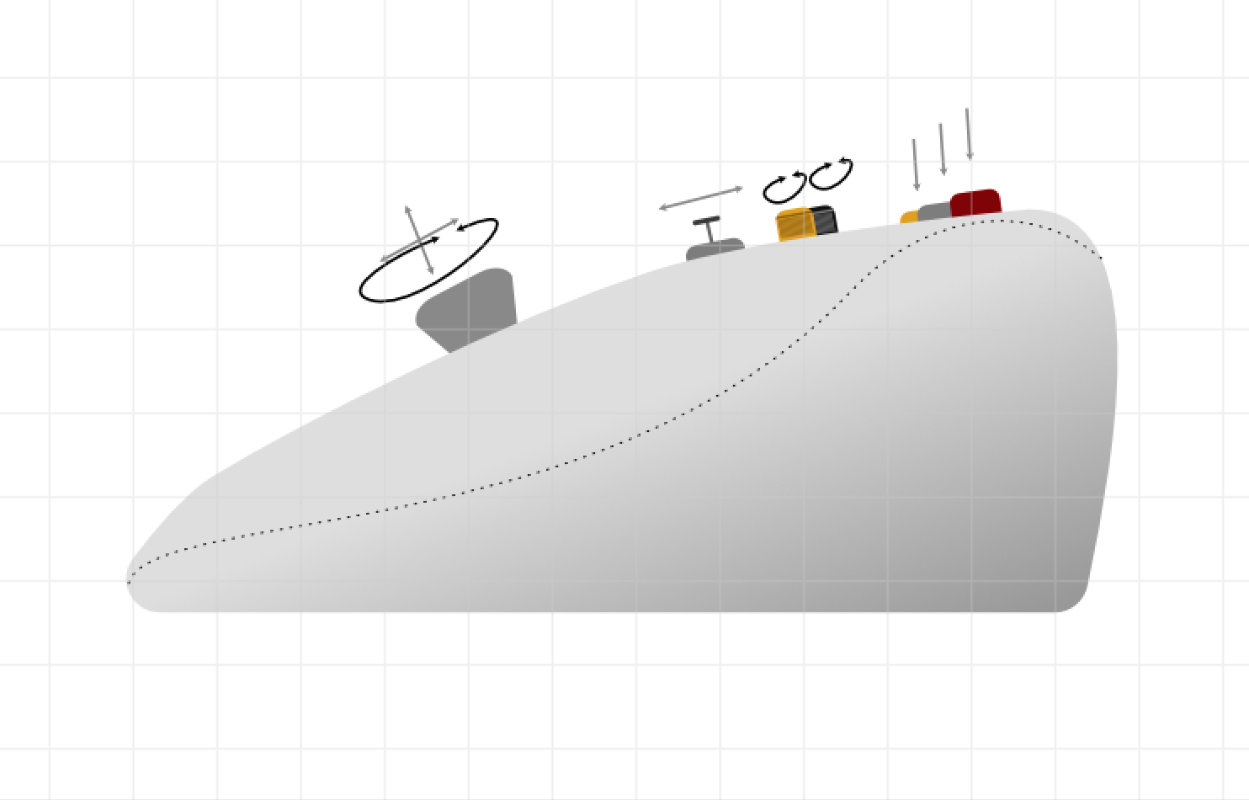 Here i added a few knobs and sliders shapes to show how their will be arranged.
Final projects. Here i add a background.
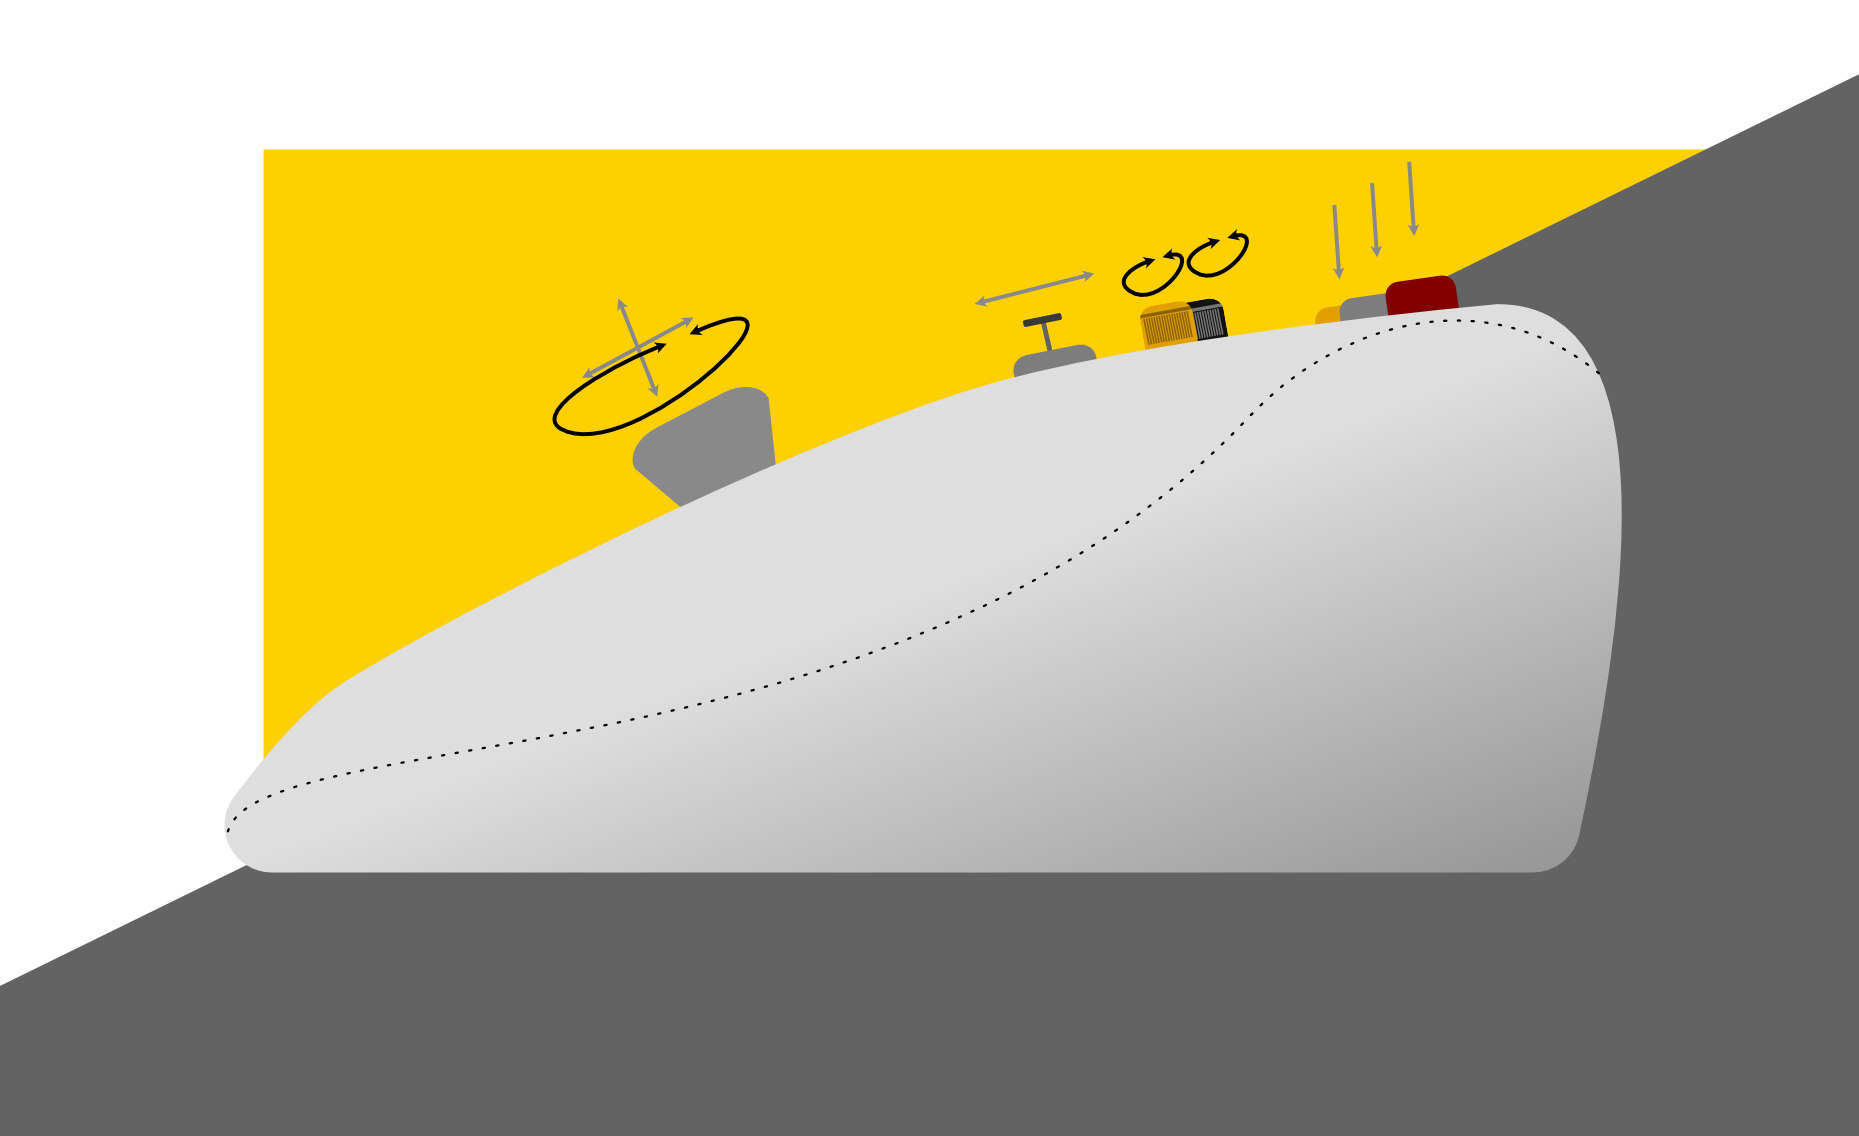
File in svg and affinity files are in the link on the button of the page.
3D Modeling
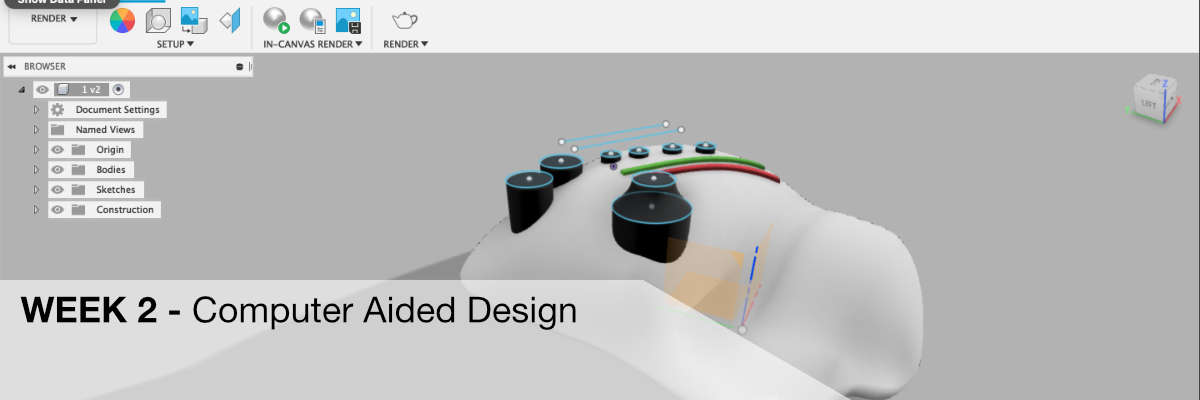
We got to my favorite element of conceptual work with the product - modeling and visualization. Here I have to say that I have the biggest problem because I teach 3d modeling every day and I didn't know how to get down to a model because unfortunately this week and the next one I have stuffed with meetings, workshops and activities, and I would like to add something from myself and maybe help future generations of fabacademy students to go through the 3d modeling process. What I can recommend at the beginning is to choose a program that will not discourage us at the beginning and here my shot is on Tinkercad, which is brilliant in its simplicity and will allow you to easily enter the world of 3D modeling (I even co-run a channel on the YT about modeling in this program). If you've never used this program it's worth to try it because you can discover some amazing features:)
But... I made my concept in Autodesk Fusion 360, which I consider ideal for work in the labs or at the university because of its simplicity and a very large community, and most importantly, a large dose of updates and new featers. If we would like to start modeling in this program, I recommend Lars Christensen's tutorials guru for Fusion and videos from the official Autodesk channel Fusion 360, which are really mass and professionally prepared.
Okay, but it's time to get back to my project. All I can say is that this is an initial project that will definitely have a follow-up.
Here is the process of what happened one by one. My concept assumes an organic shape adapted to the human hand. In the final design I want to use a 3D scan of the form, which will later be digitalized and improved with CAD. But for now, at the stage of sketches, I wanted to play with the form and the possible arrangement of elements. I decided to use the Loft option, but to be able to use it I had to first create a sketch of the base and frames that would create the skeleton. I also used the offset plane function to create sketch planes. Sketches were mainly drawn with spline curves.
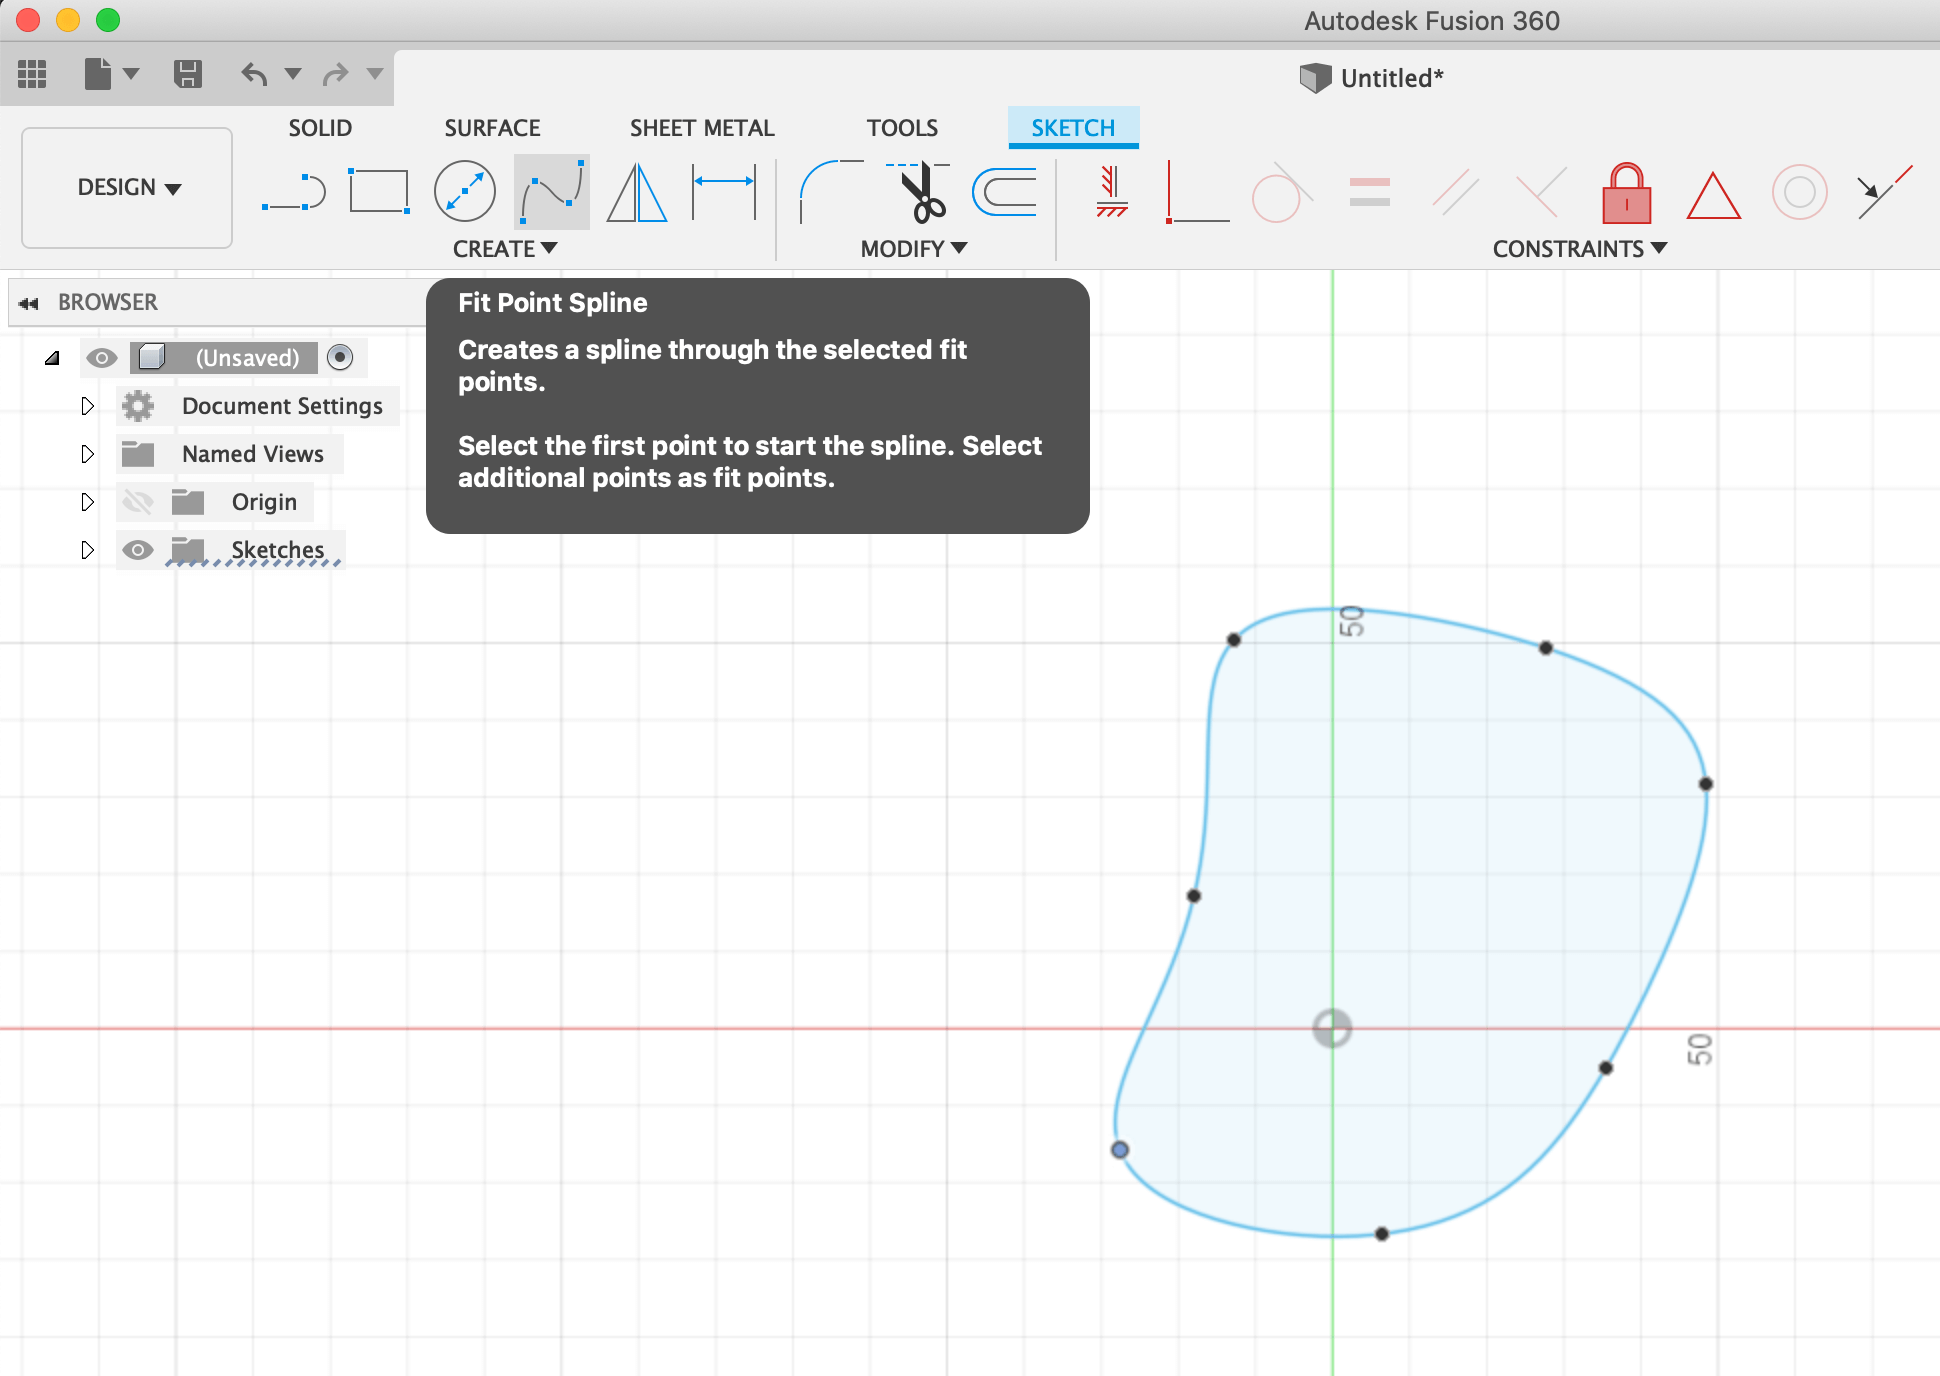 Spline
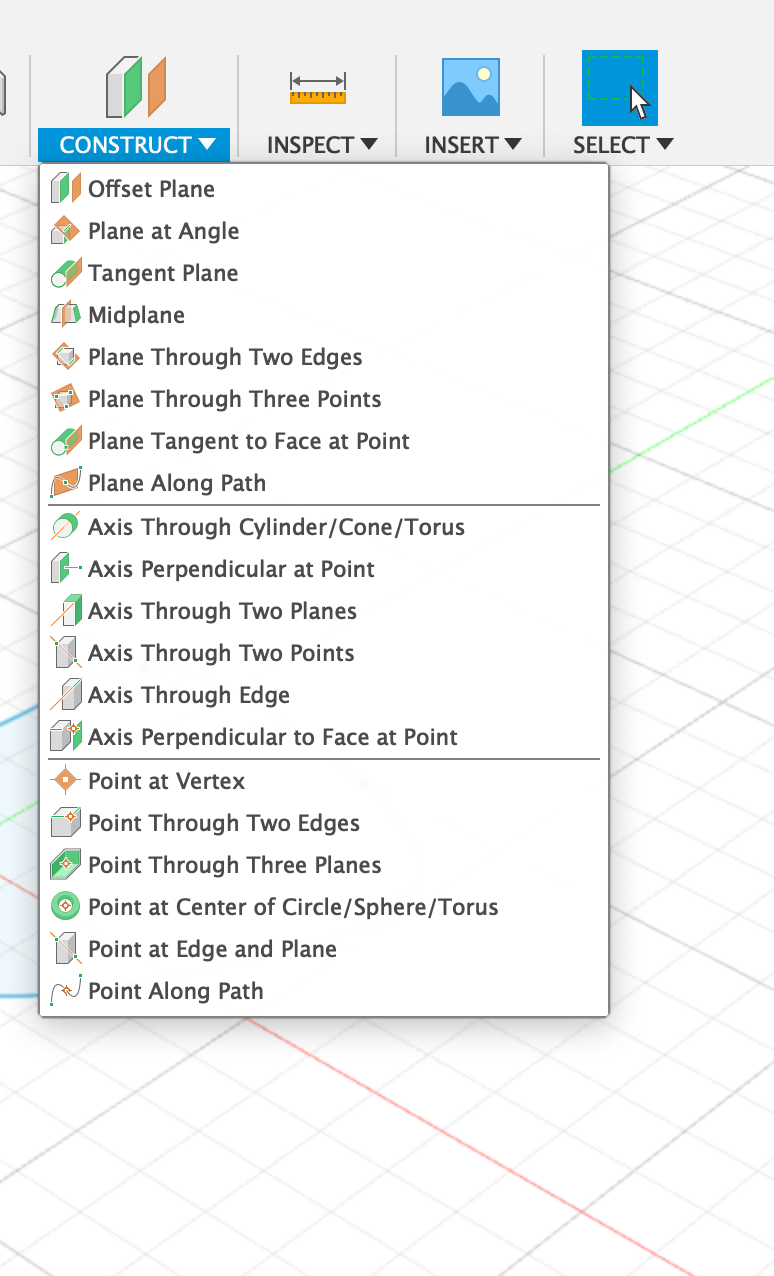 Offset Plane
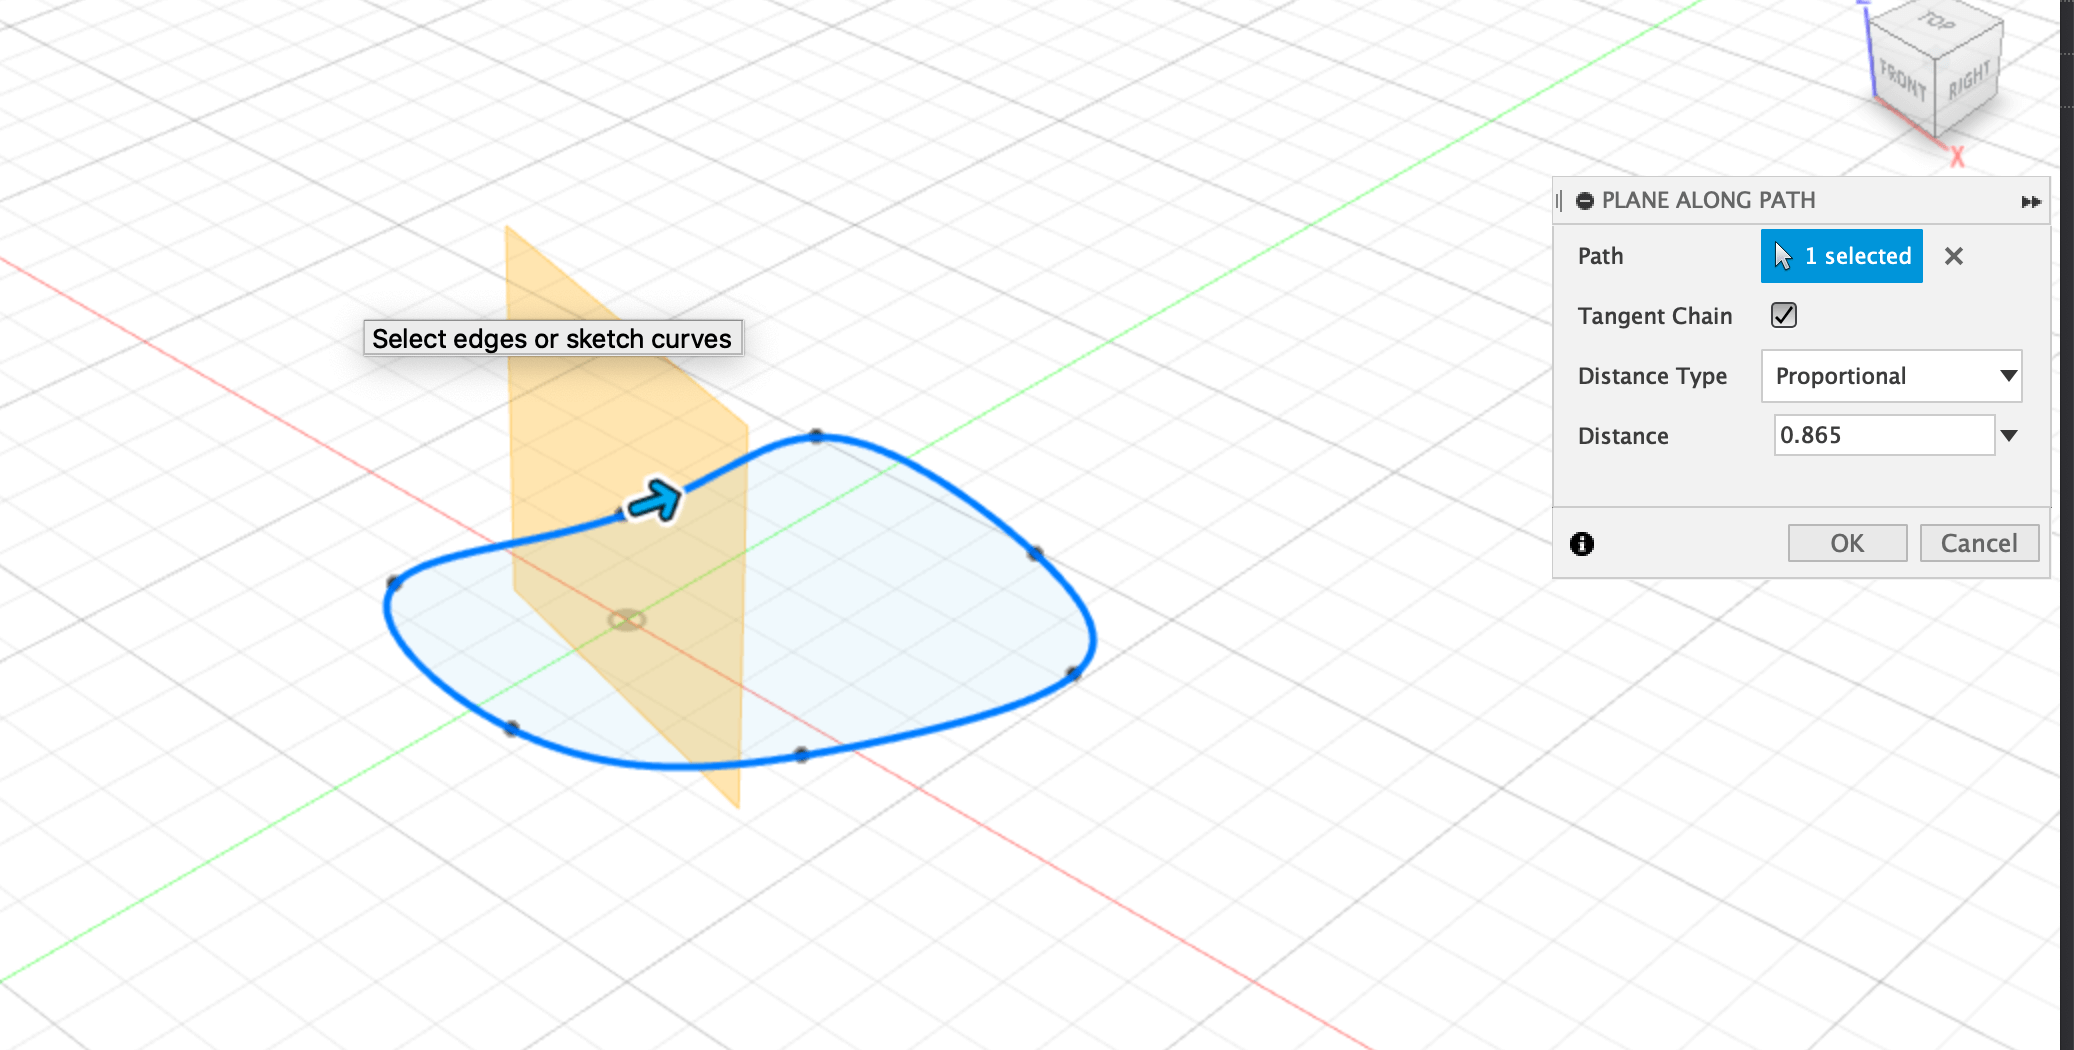 Plane Along the Path
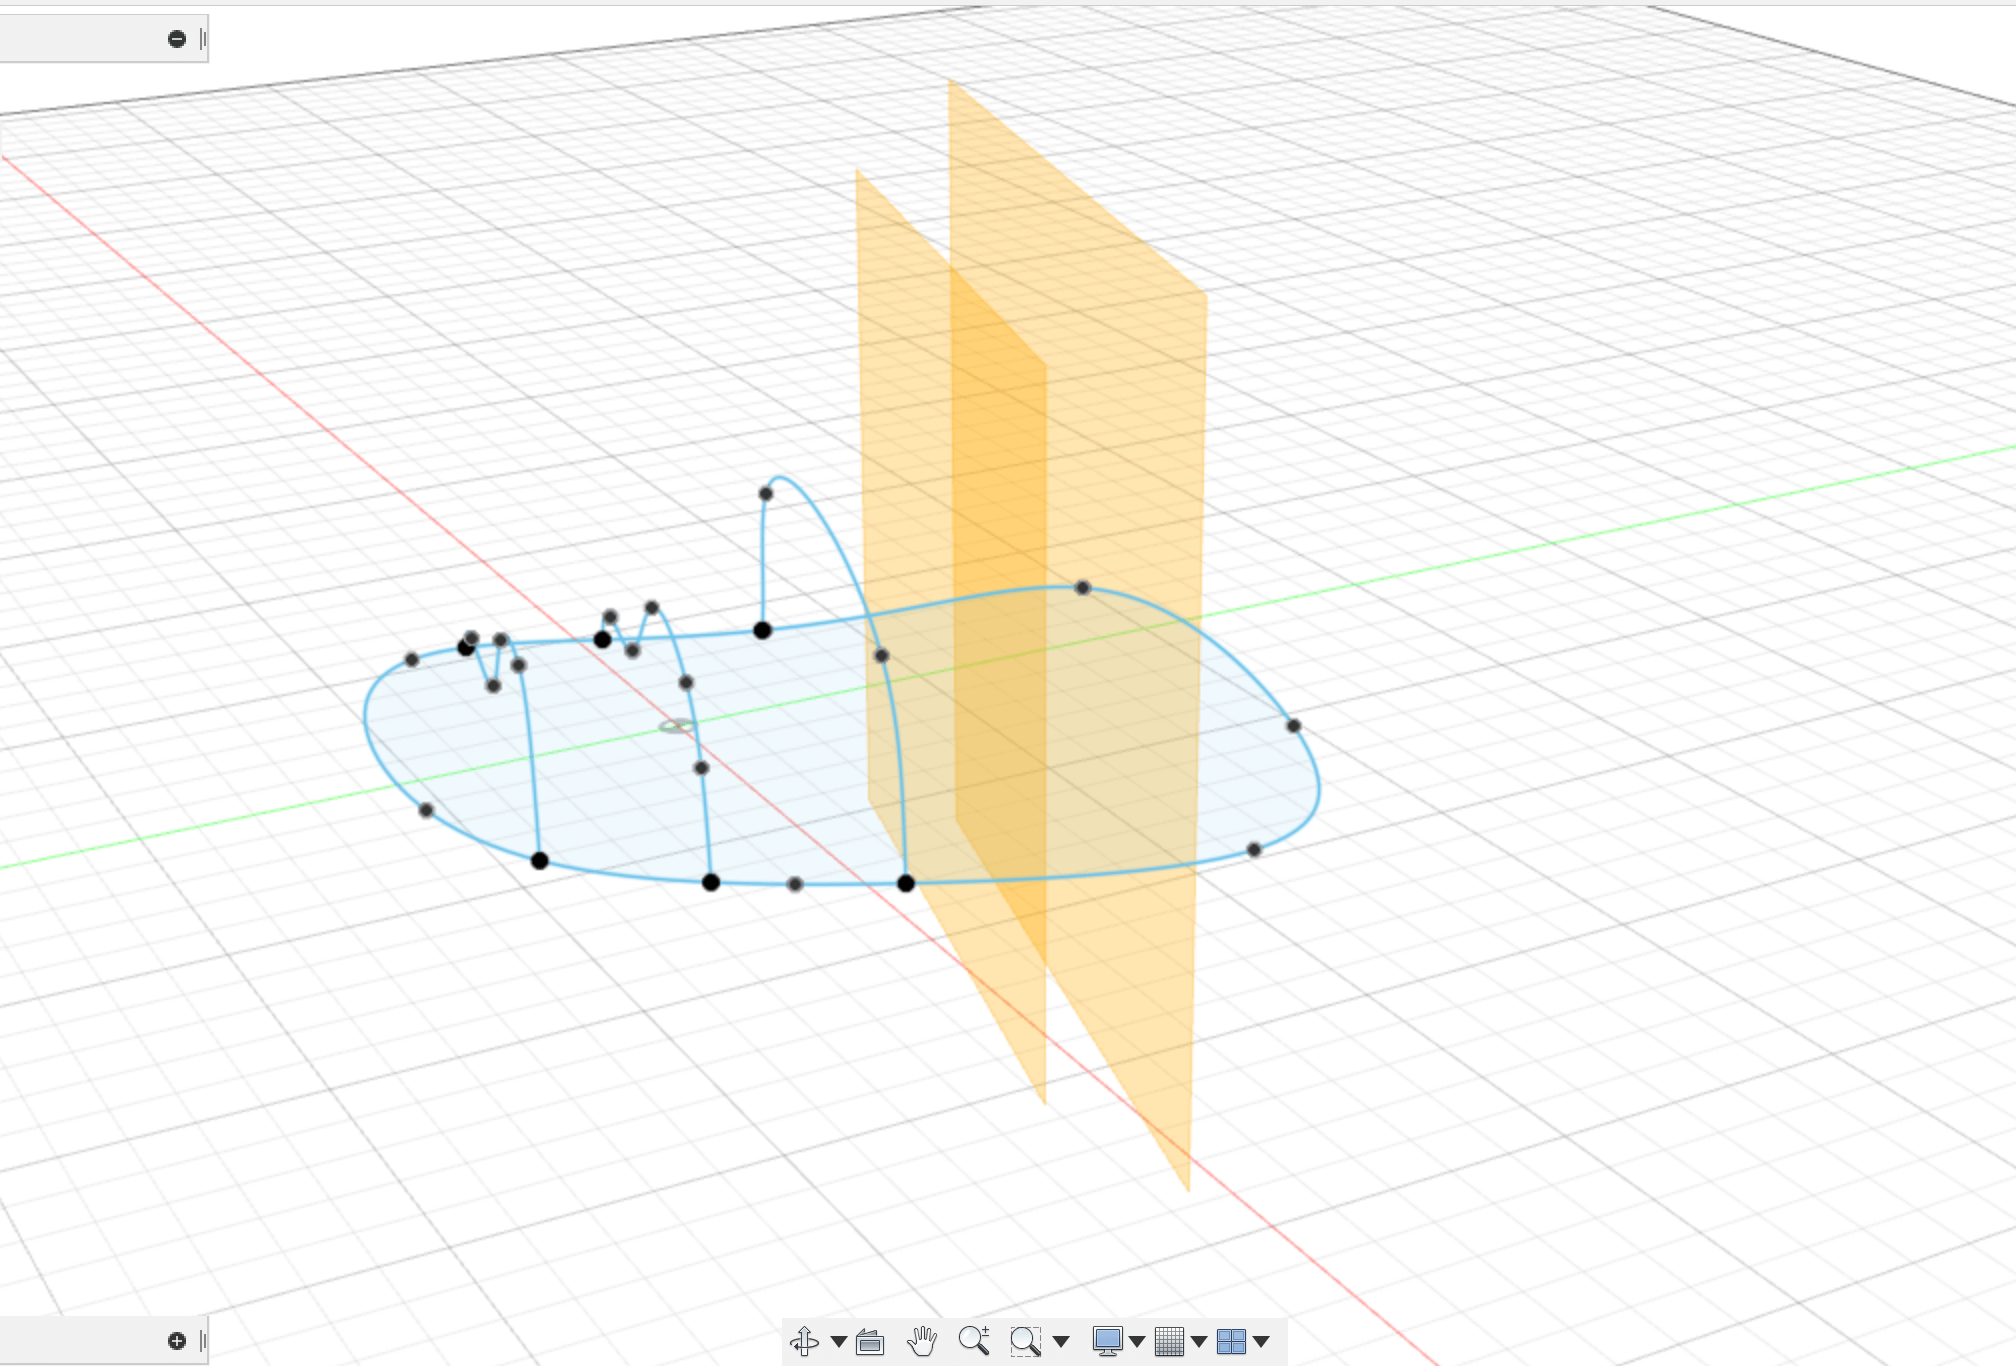 "Skeleton"
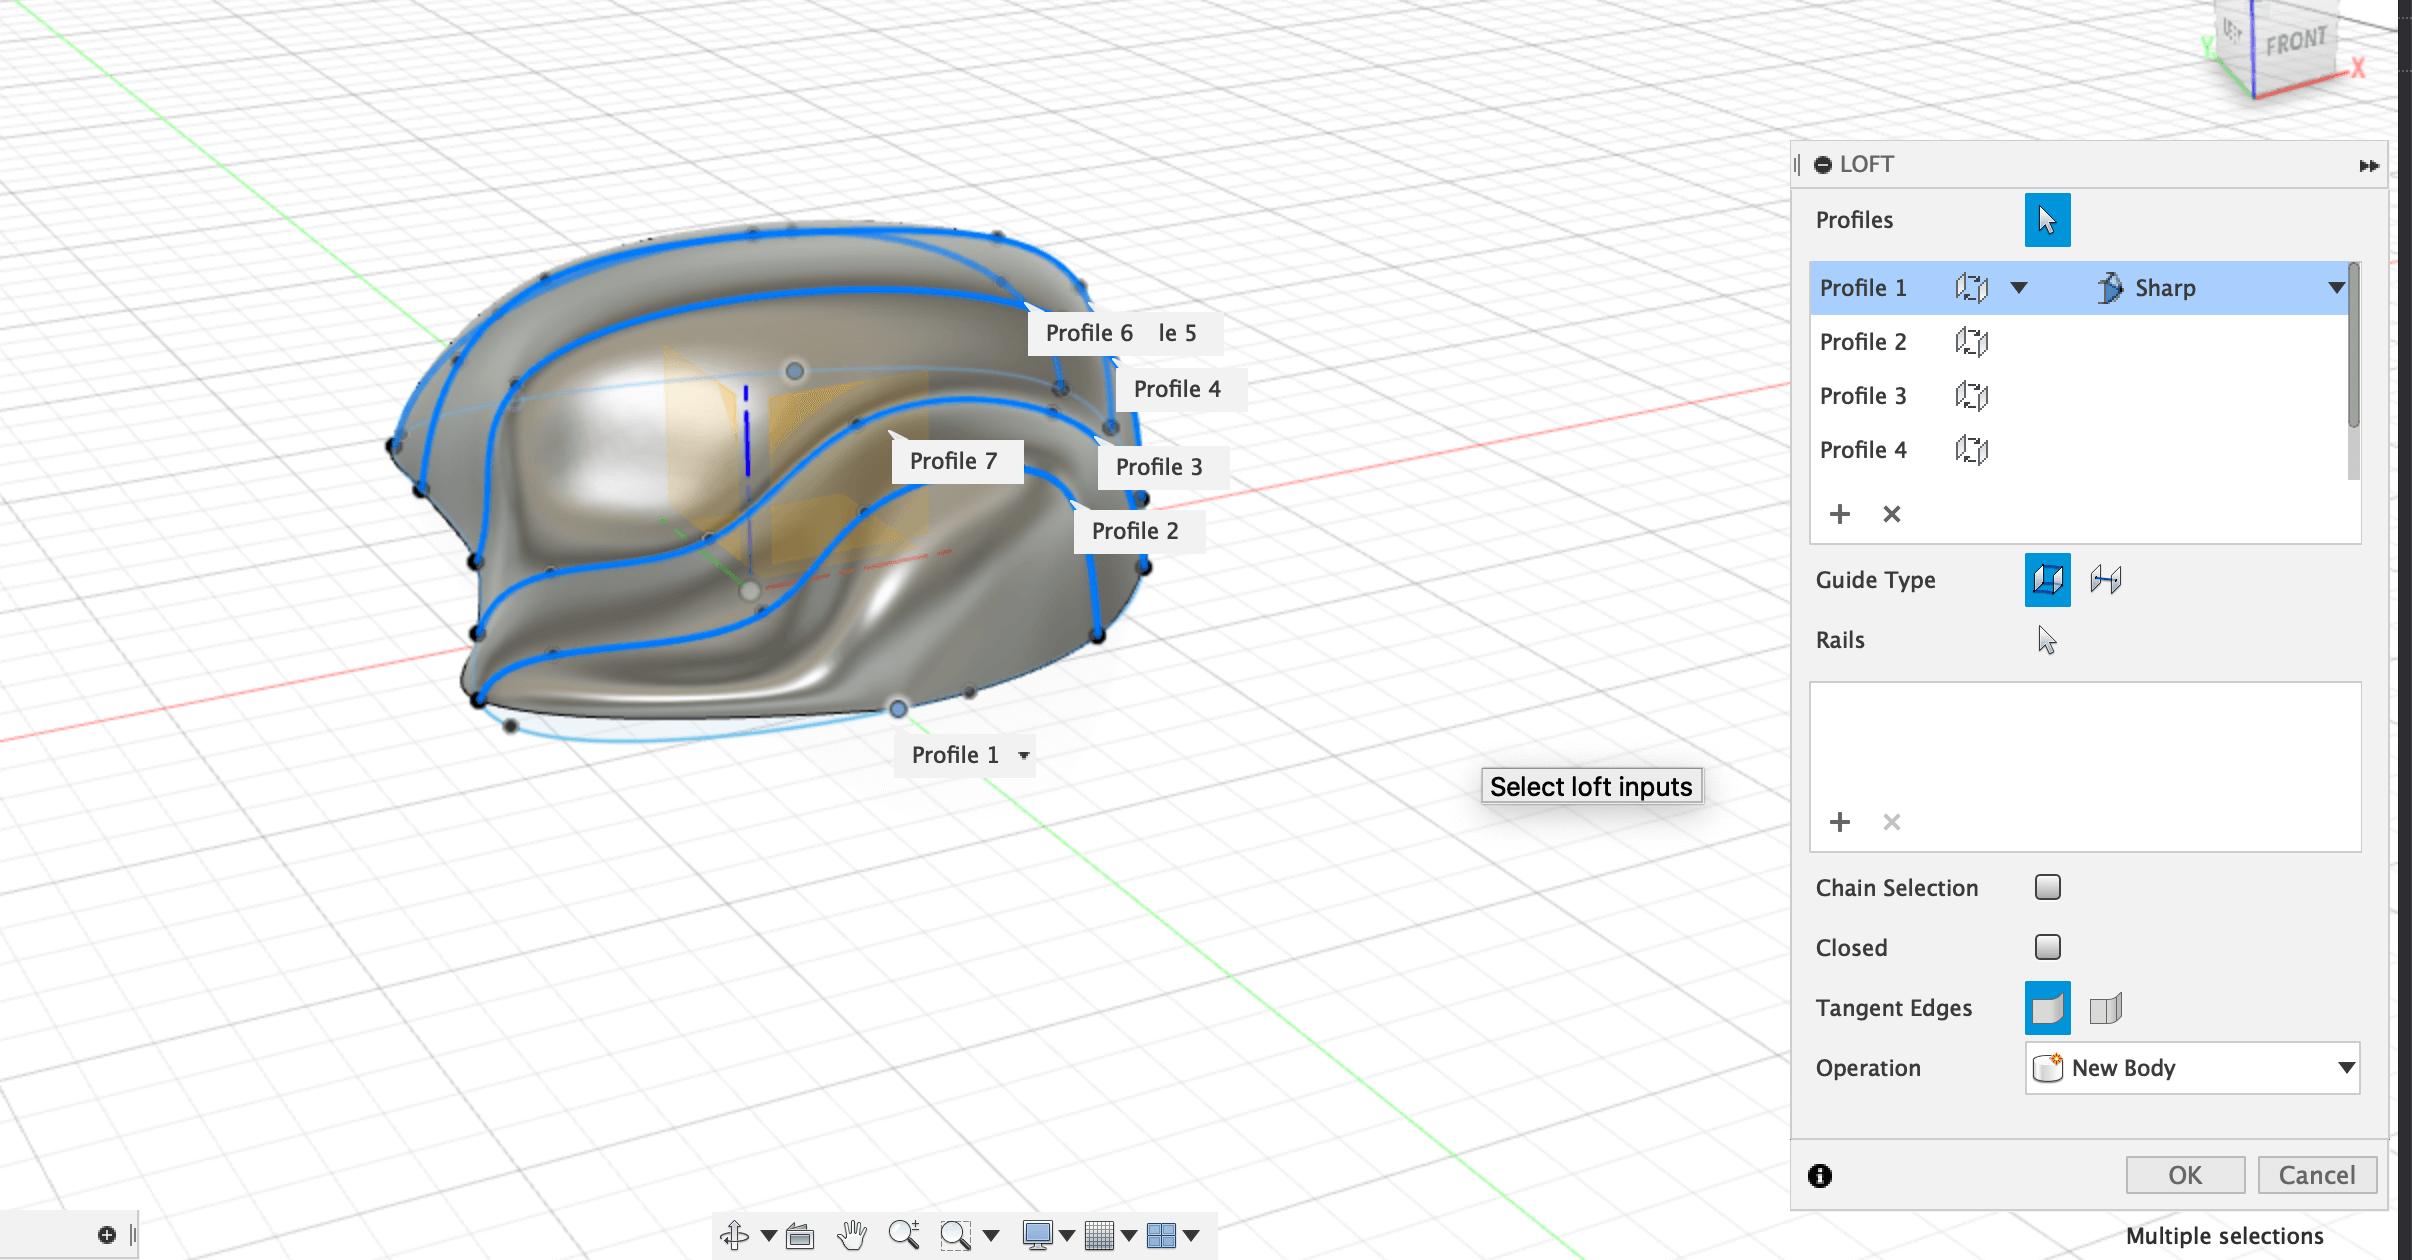 Loft
Loft
After creating the initial solid, I used the sketch and pulled out the elements (knobs and buttons) using the extrude function.
 Sketch
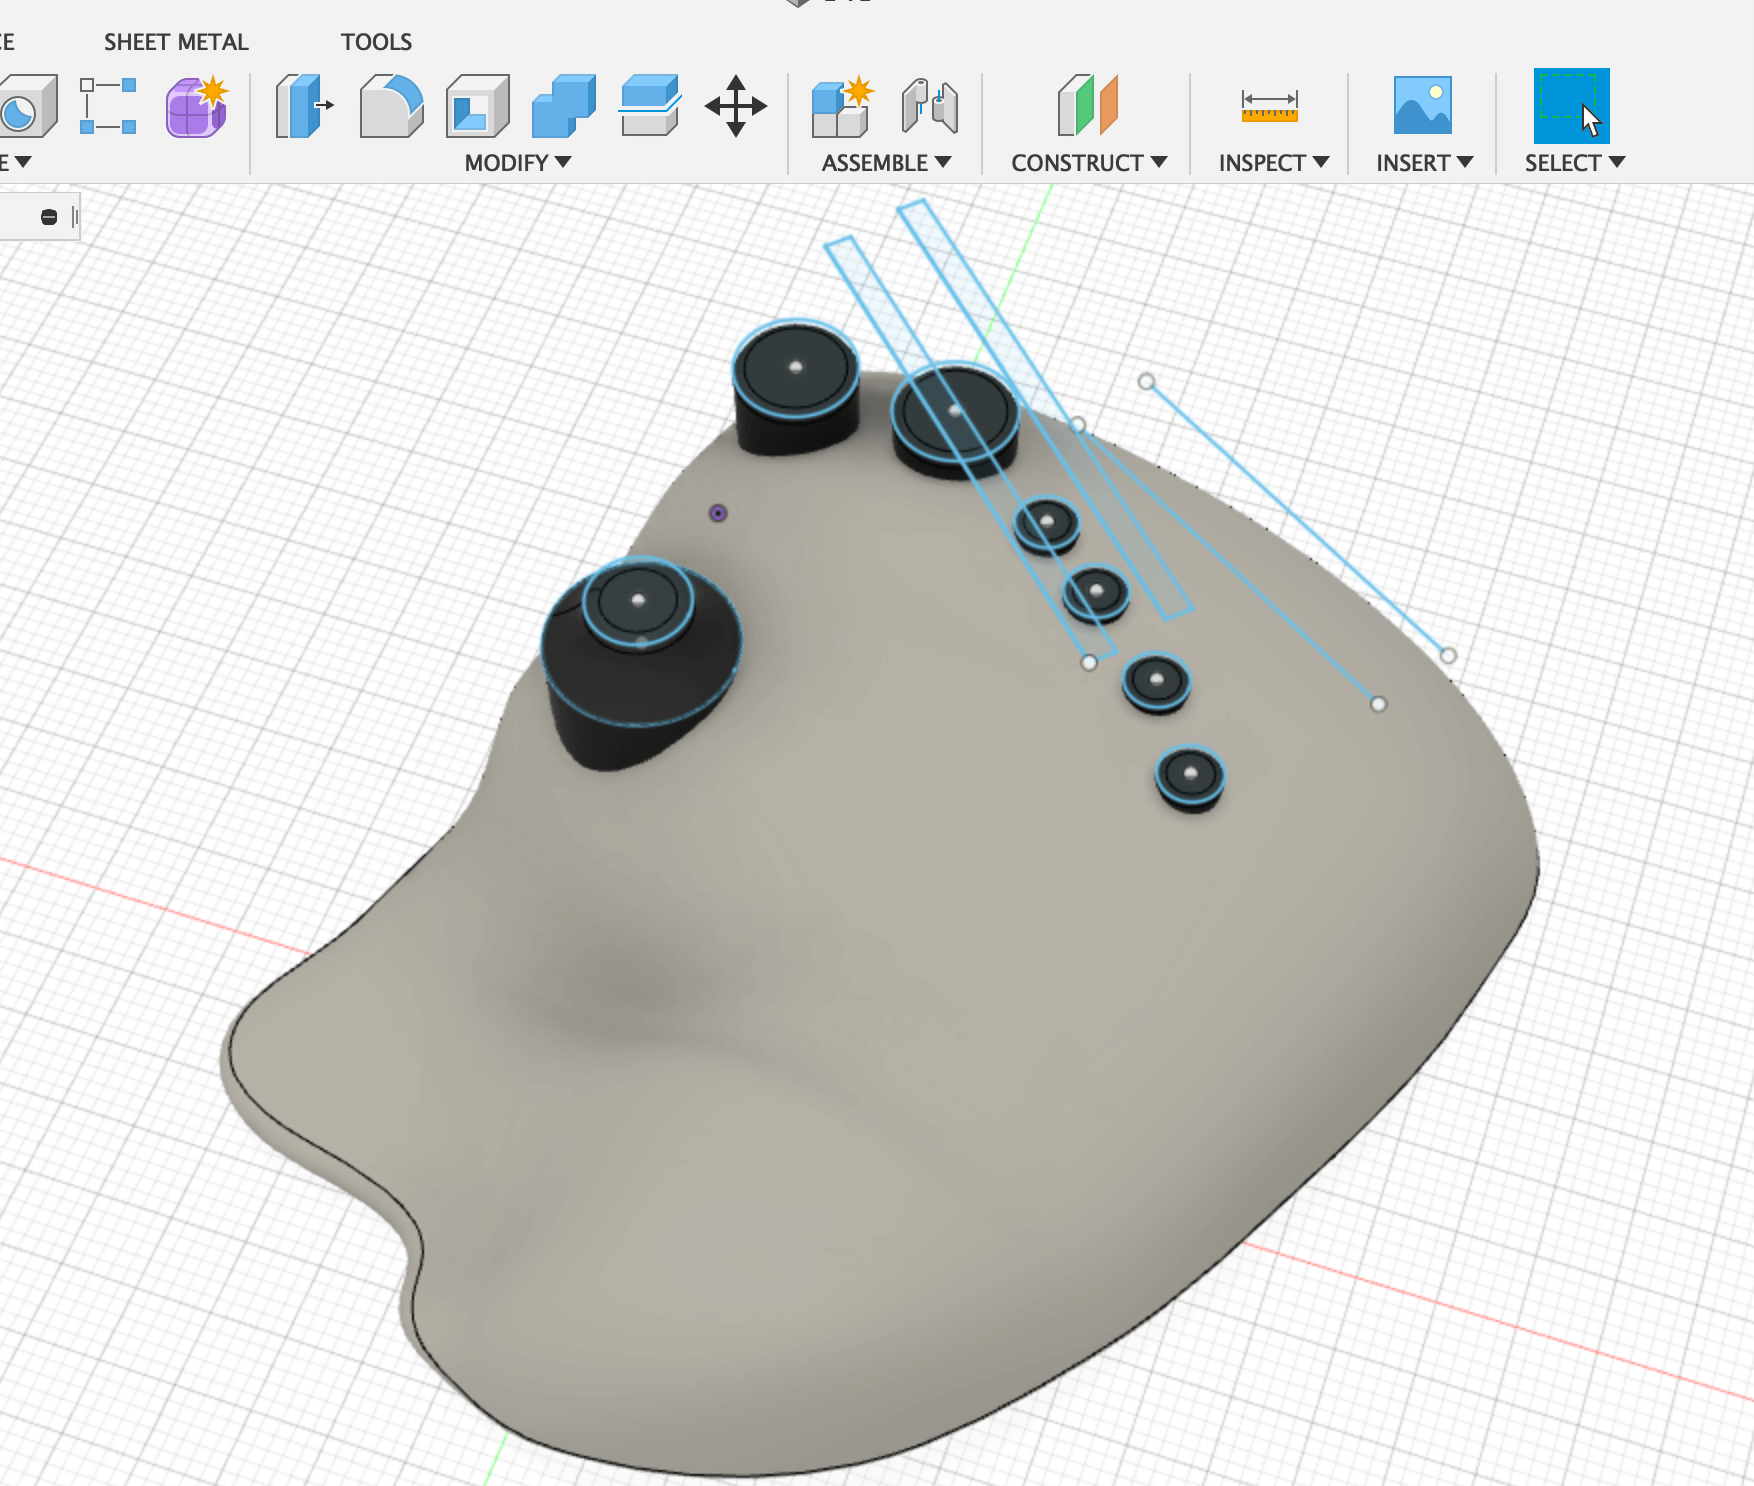
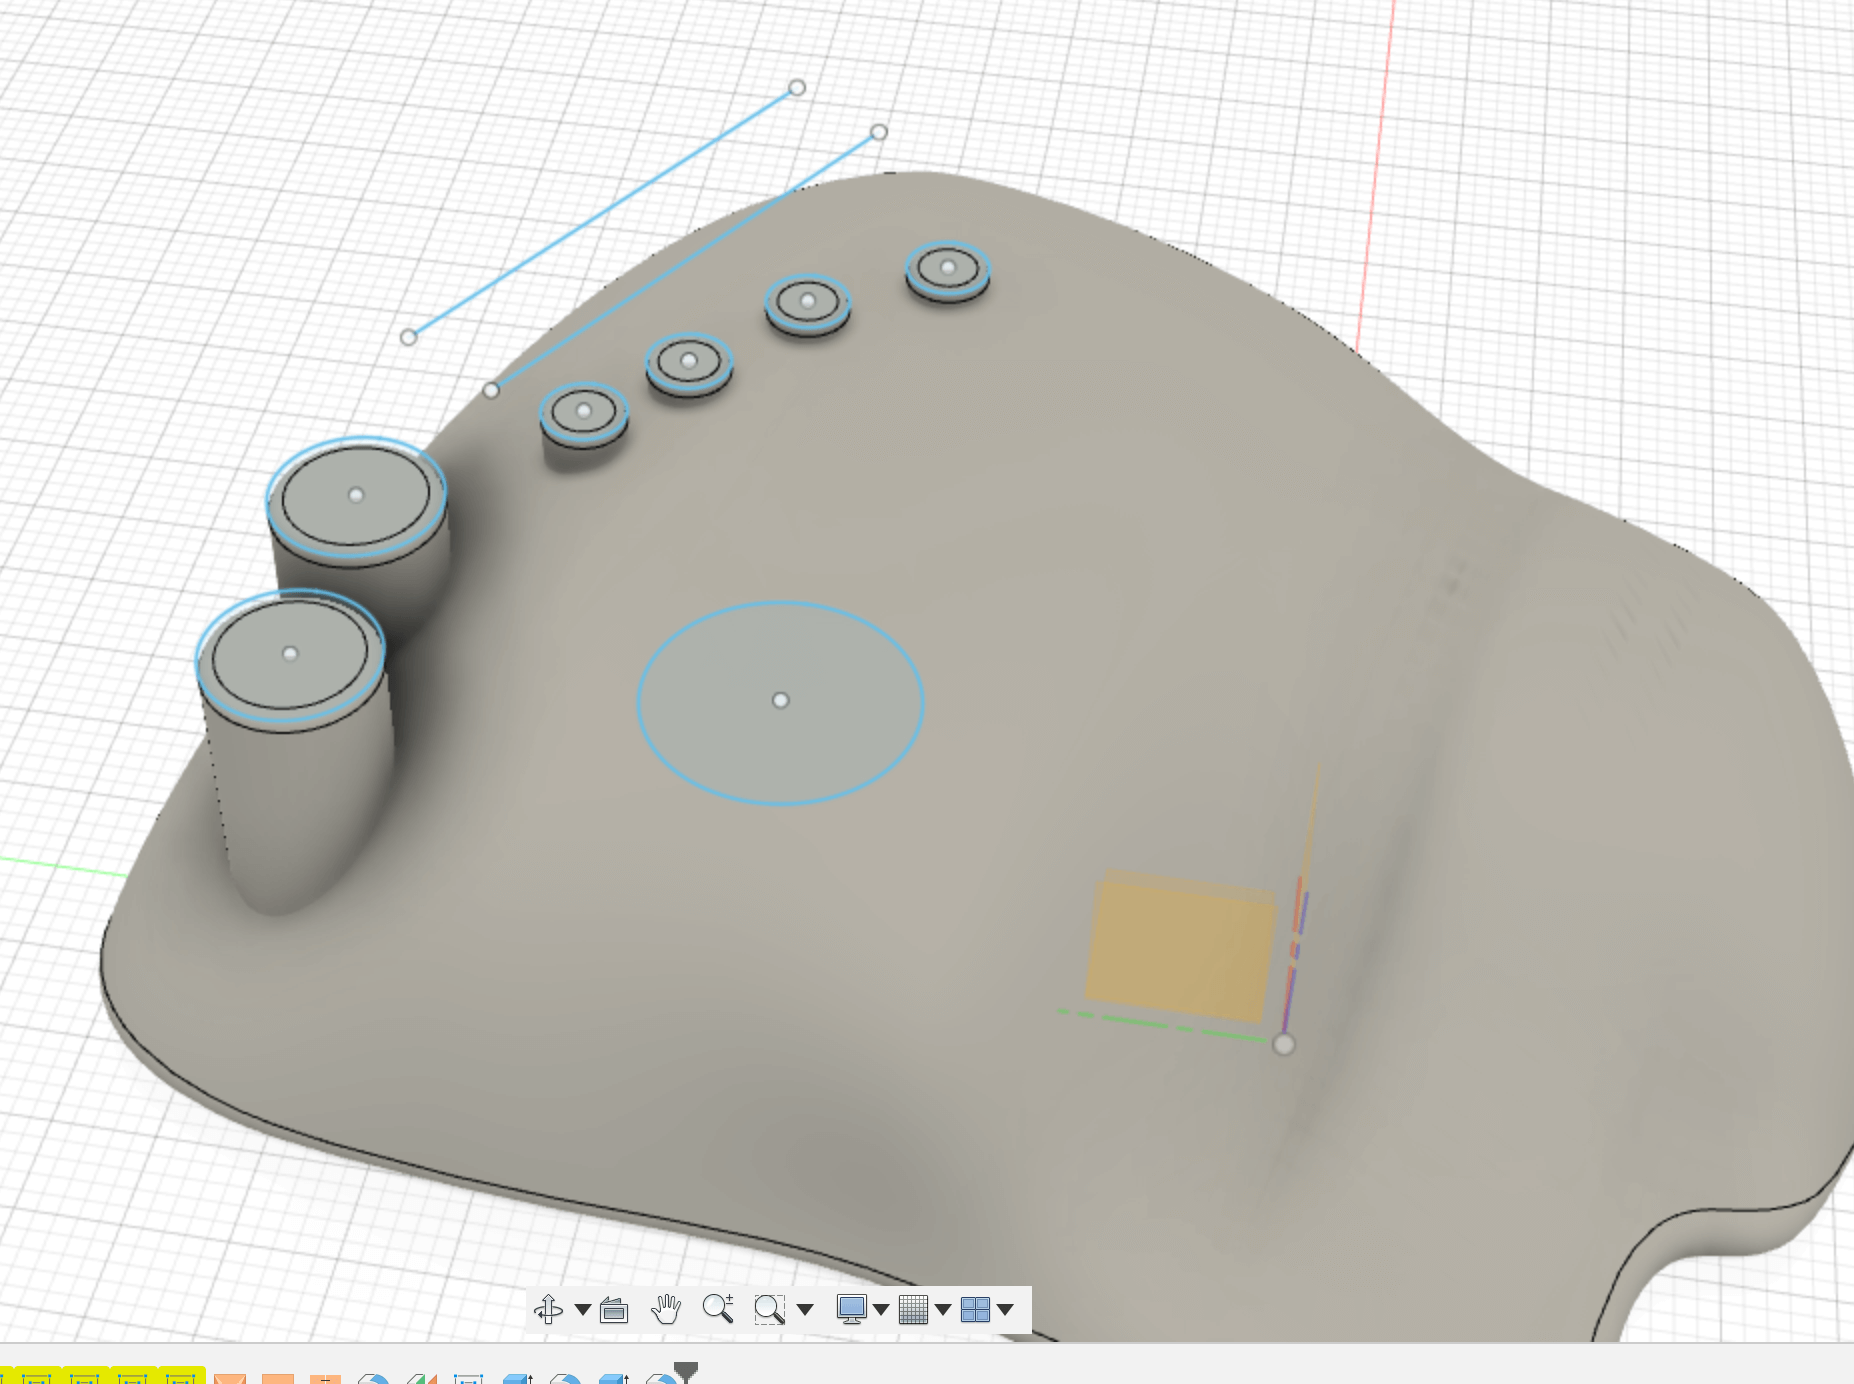 Extruded buttons and knobs
The rest of the sliders I'm still wondering what form they should be implemented in, so far I went crazy and made them as touch sensors. Here, I also used the offset of the plane and the sketches only with the fact that I later cut out the sketch in the object with a split body and pulled out the surface with a push pull.
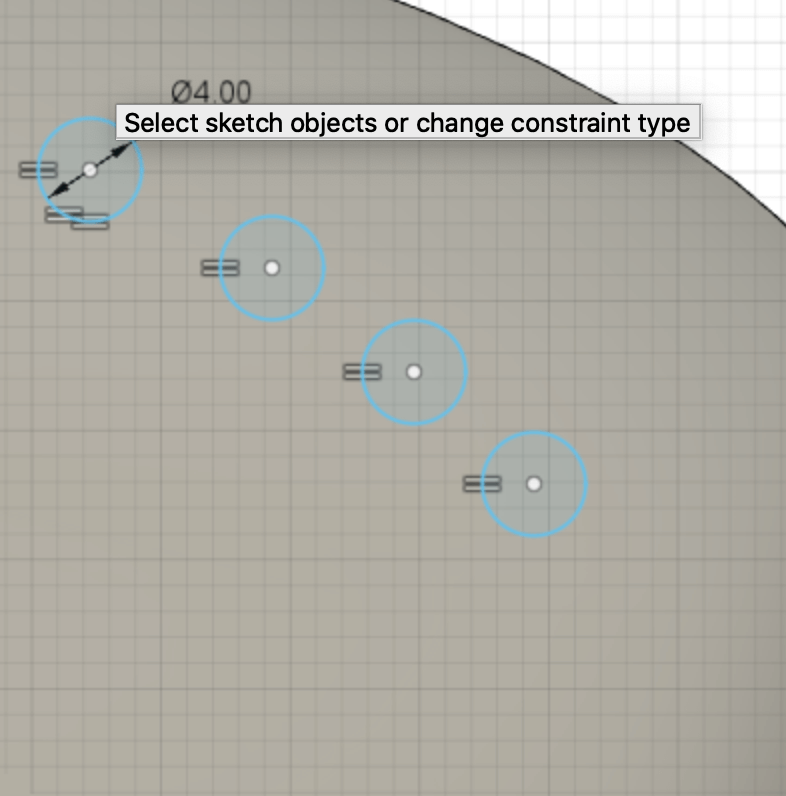
 Sketch for sliders
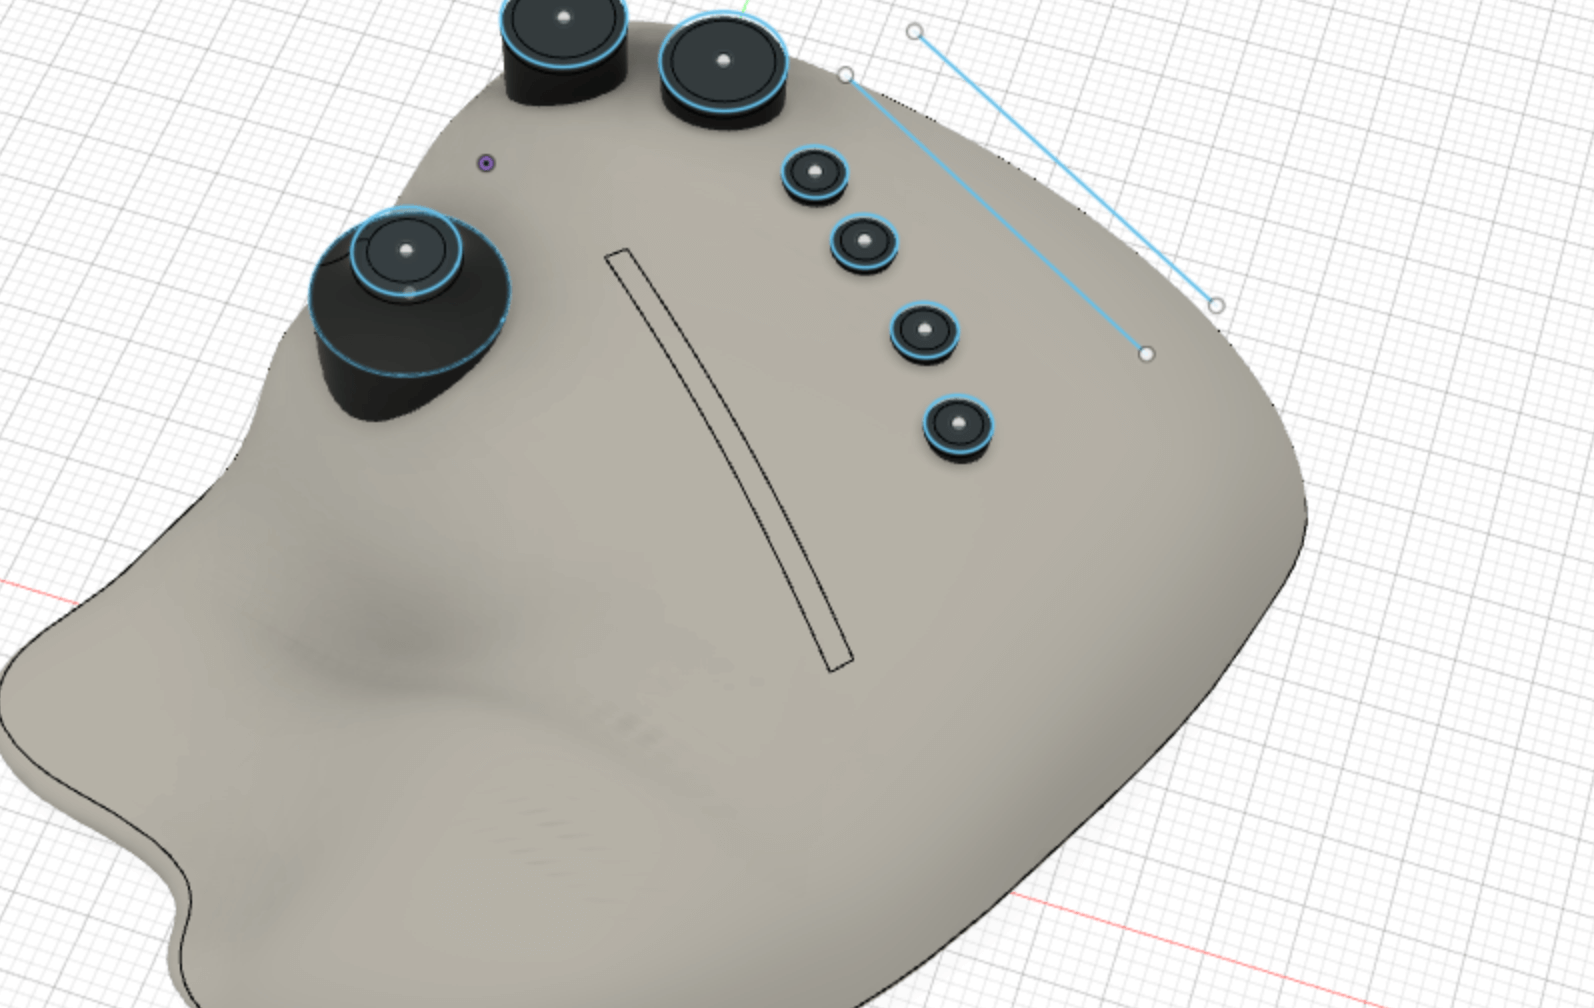 Split body
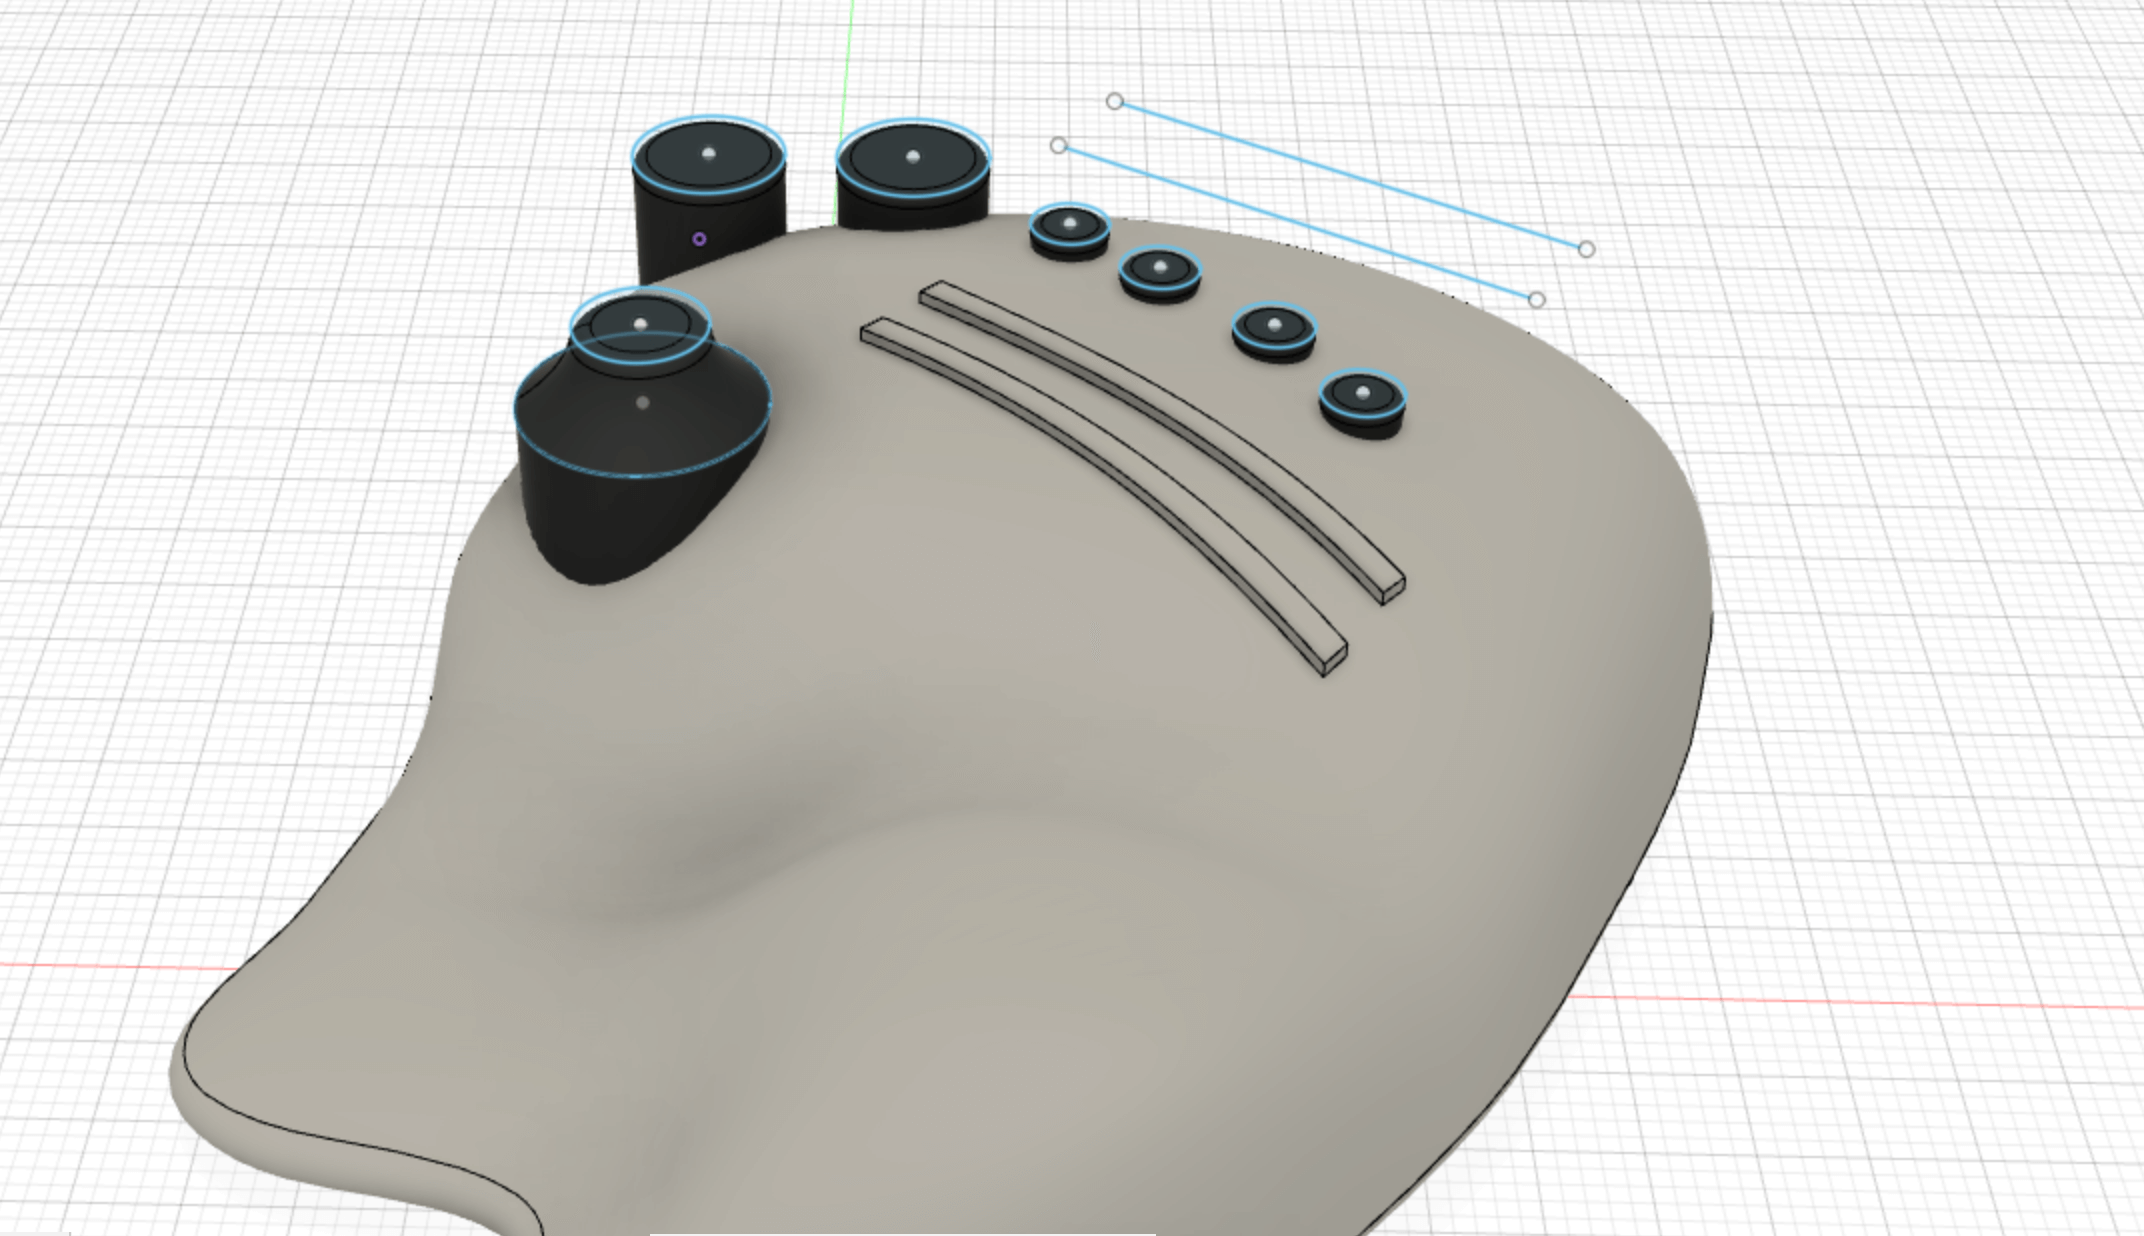 Offset Surface
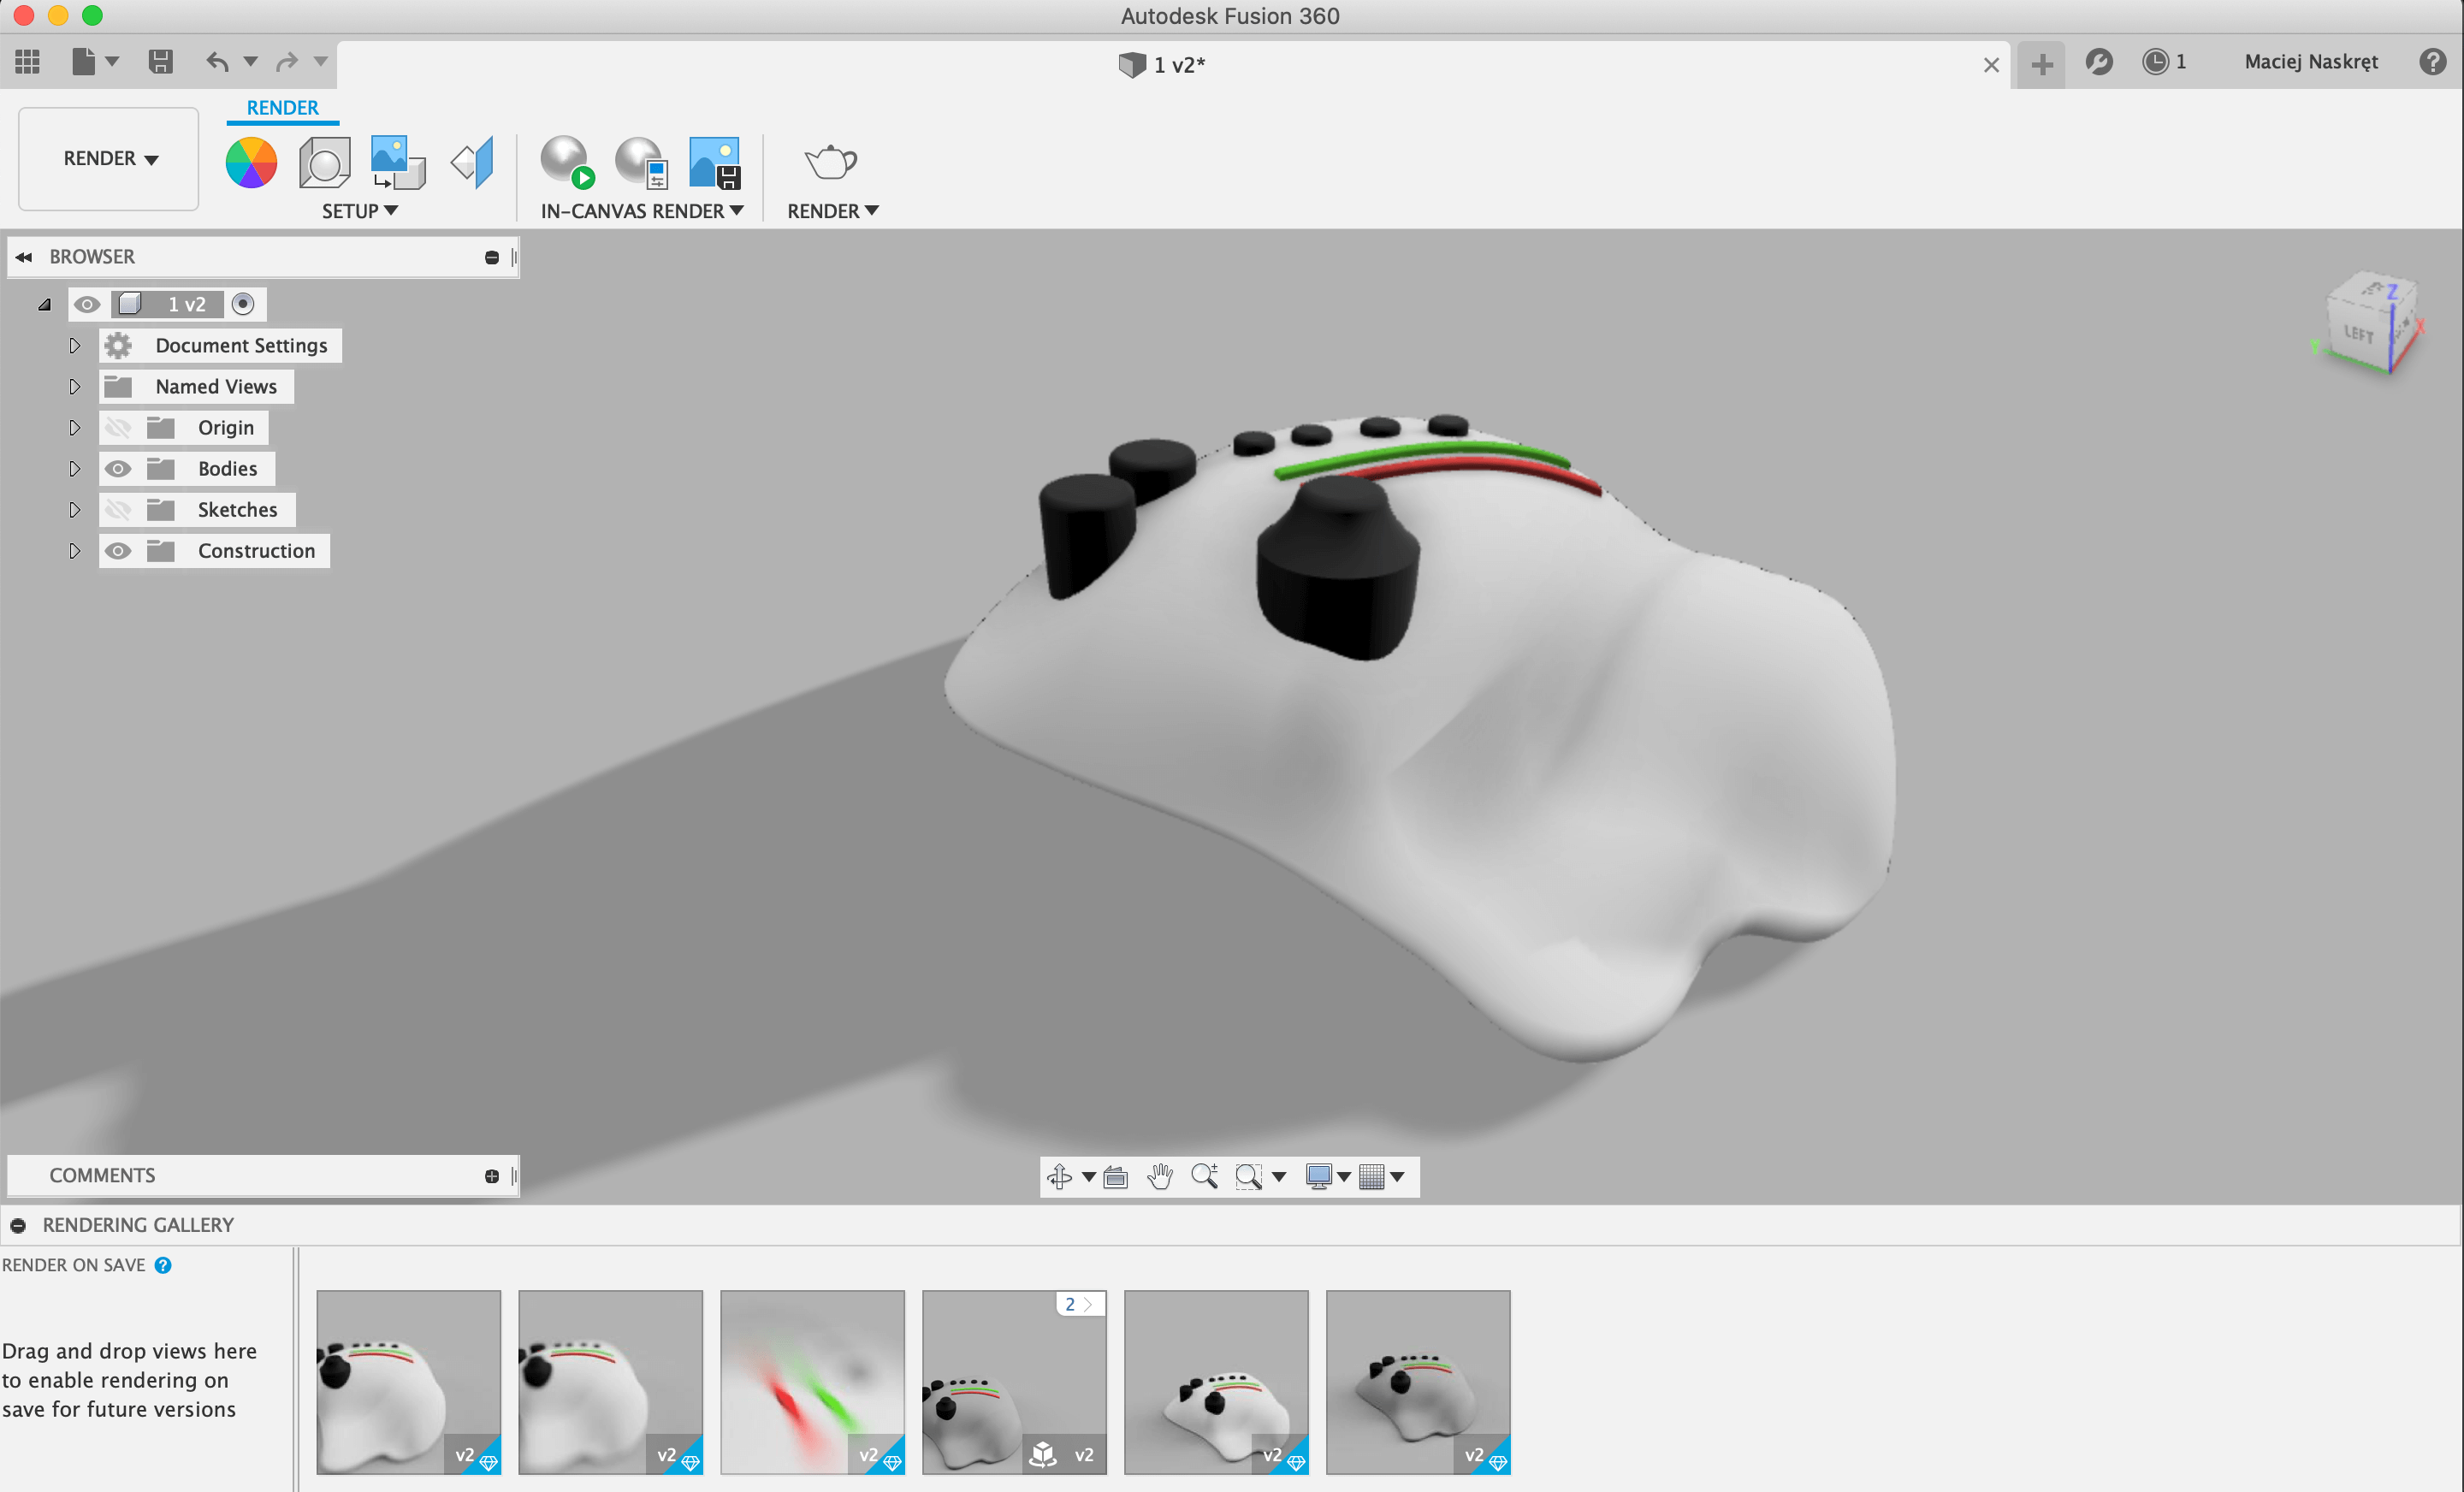
Rendering
Finally, I set up the materials with the Appearance ( A on keyboard) and threw them into the Fusion rendering engine.
 Render
all files from projects