
Week_15 - Molding and Casting
Assigment
Group assignment:
Individual assignment
Group assignment:
This week, a group task was to check various casting materials and to check the date sheets with particular attention to the dangers involved in using these materials.In Poland we have several producers of silicones and casting resins, one of them is Polish Silicones , high quality silicones to create from sculpting and specialty and several local producers in Warsaw, e.g. friendly company Jasskor , where the owner always shares his knowledge with buyers and advises what material to use for what activities. During this task we used 2 component silicone RTV 3325. The package contains the most important information about use, czas tężenia materiału w 23 stopniach celcjusza, 90-150 min przy uzyciu CATA 24H 20-60 min przy uzyciu CATA 6H temperatura przechowywania, 30 stopni celcjusza termin ważności oraz adres producenta. 06.2021 data sheet
Instruction of using
1. Mixing of the two componentsTo 100 parts of BLUESIL RTV 3325 add 5 parts of the selected catalyst. The two components are thoroughly mixed either using an electrical or pneumatic mixer on a low speed setting so as to limit the inclusion of air in the mixture as well as temperature rise.
2. Degassing
After mixing base and catalyst, it is recommended to degas to eliminate entrapped air. If the processing is done with the help of a machine both parts are degassed before mixing. The BLUESIL RTV 3325 is degassed under vacuum pressure of 30 to 50 mbar. Under vacuum pressure, the product will expand 3 at 4 times its initial volume and forms bubble on its surface. This bubble will disappear gradually and the mixture will sink back down to its initial volume within 5 to 10 minutes. Release the vacuum and repeat the operation a few minutes later. Remark: release the vacuum several times improves the degassing. For easier degassing only fill a recipient to 1/3 of its height.
3. Cross linking
The best curing conditions are at 23 °C and 50 % relative humidity. The use of products at higher temperatures and/or relative humidity levels will reduce the pot life and increase the setting rate. As opposed to this, lower temperatures and relative humidity levels will increase the pot life and decrease the setting time. It is recommended not to use the product at temperatures below 20 °C; under these conditions, the final product performance levels will be difficult to achieve. At 23 °C and 50 % relative humidity, the membranes can be demolded after 16 to 24 hours. In order to achieve the best possible performance levels from the membranes, it is preferable to wait for 24 hours before using them. The definitive properties will be acquired after 3 days.
Safety:
unfortunately we couldn't find Data sheets but as the measures affecting the safe use of silicones are similar I used the document that smooth-on prepared.
Basic safety from data sheet
Respiratory protection is not normally required when using this product with adequate local exhaust ventilation. Where risk assessment shows air-purifying respirators are appropriate, follow OSHA respirator regulations 29 CFR 1910.134 and European Standards EN 141, 143 and 371; wear an MSHA/NIOSH or European Standards EN 141, 143 and 371 approved respirators equipped with appropriate filter cartridges as a backup to engineering controls.
Wear any liquid-tight gloves such as butyl rubber, neoprene or PVC.
Safety glasses with side shields per OSHA eye- and face-protection regulations 29 CFR 1910.133 and European Standard EN166. Contact lenses are not eye protective devices. Appropriate eye protection must be worn instead of, or in conjunction with contact lenses.
Additional protective clothing or equipment is not normally required. Provide eye bath and safety shower.
Never eat, drink, or smoke in work areas. Practice good personal hygiene after using this material, especially before eating, drinking, smoking, using the toilet, or applying cosmetics. Wash thoroughly after handling.
Hazardous Materials Identification System:
We have 4 colors and space for numbers that indicate the degree of hazard:3. Major injury likely unless prompt action is taken and medical treatment is given.
2. Temporary or minor injury may occur (e.g., diethyl ether).
1. Irritation or minor reversible injury possible.
0. No significant risk to health.
4. Flammable gases, or very volatile flammable liquids with flash points below 73 °F (23 °C), and boiling points below 100 °F (38 °C). Materials may ignite spontaneously with air (e.g., propane).
3. Materials capable of ignition under almost all normal temperature conditions. Includes flammable liquids with flash points below 73 °F (23 °C) and boiling points above 100 °F (38 °C), as well as liquids with flash points between 73 °F and 100 °F.
2. Materials which must be moderately heated or exposed to high ambient temperatures before ignition will occur. Includes liquids having a flash point at or above 100 °F (38 °C) but below 200 °F (93 °C) (e.g., diesel fuel).
1. Materials that must be preheated before ignition will occur. Includes liquids, solids and semi solids having a flash point above 200 °F (93 °C) (e.g., canola oil).
0. Materials that will not burn (e.g., Water).
4. Materials that are readily capable of explosive water reaction, detonation or explosive decomposition, polymerization, or self-reaction at normal temperature and pressure (e.g., chlorine dioxide, nitroglycerin).
3. Materials that may form explosive mixtures with water and are capable of detonation or explosive reaction in the presence of a strong initiating source. Materials may polymerize, decompose, self-react, or undergo other chemical change at normal temperature and pressure with moderate risk of explosion (e.g., ammonium nitrate).
2. Materials that are unstable and may undergo violent chemical changes at normal temperature and pressure with low risk for explosion. Materials may react violently with water or form peroxides upon exposure to air (e.g., potassium, sodium).
1. Materials that are normally stable but can become unstable (self-react) at high temperatures and pressures. Materials may react non-violently with water or undergo hazardous polymerization in the absence of inhibitors (e.g., propene).
0. Materials that are normally stable, even under fire conditions, and will not react with water, polymerize, decompose, condense, or self-react. Non-explosives (e.g., helium).
This is by far the largest area of difference between the NFPA and HMIS systems. In the NFPA system, the white area is used to convey special hazards whereas HMIS uses the white section to indicate which personal protective equipment (PPE) should be used when working with the material
Individual assignment:
CNC preparation i fusion 360
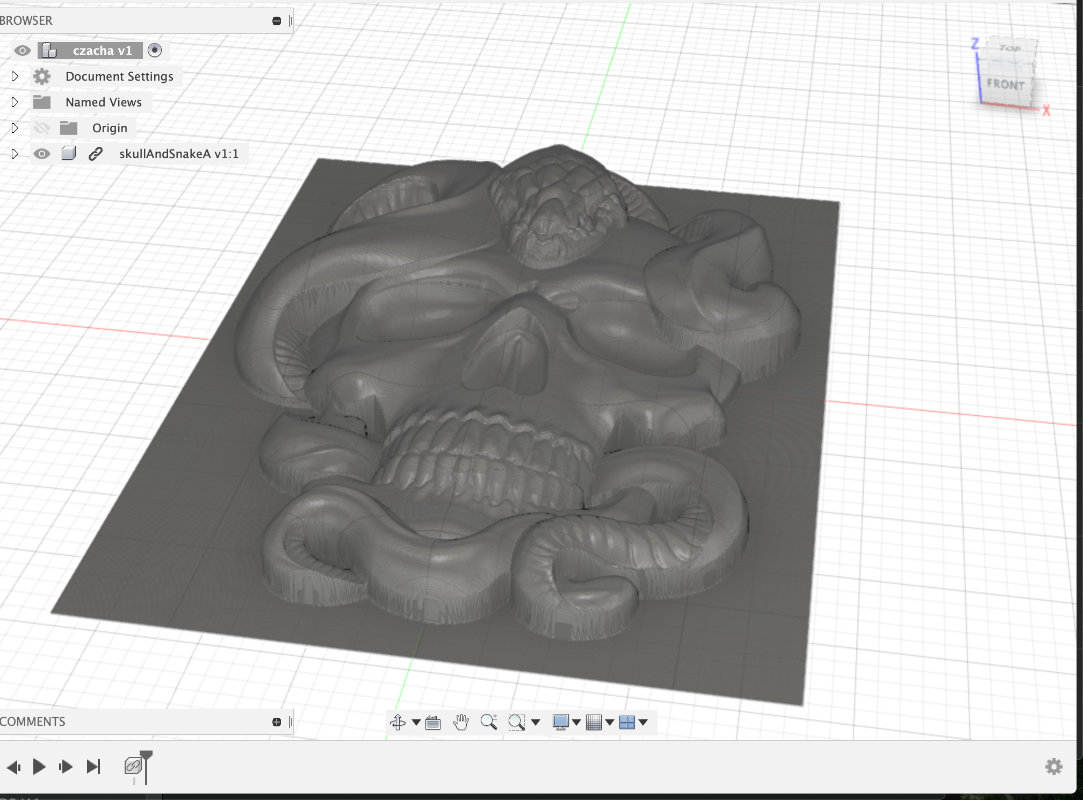
First I import dowloaded file to the Autodesk Fusion 360
In the mesh section in Fusion i cut unnecessary part of the file
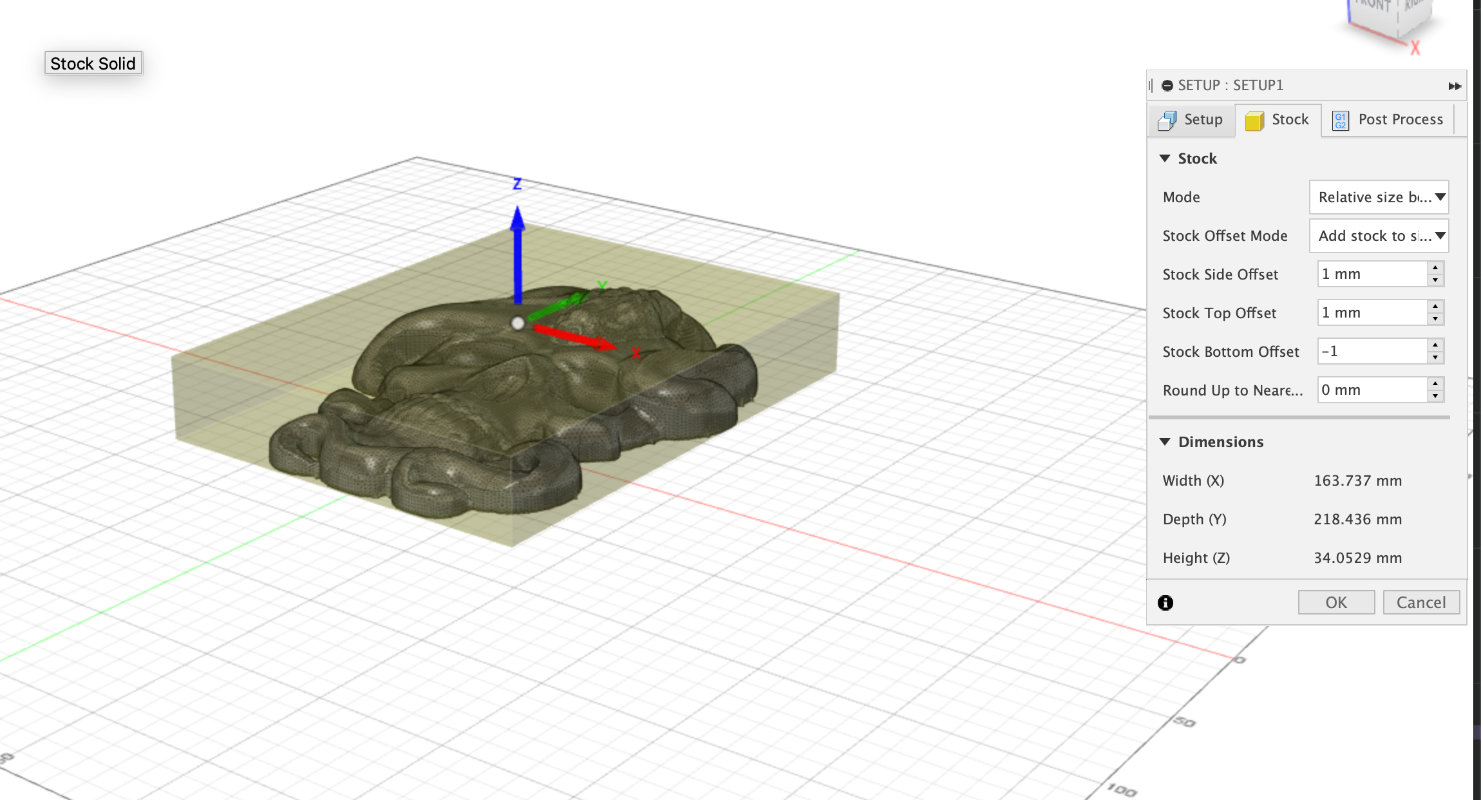
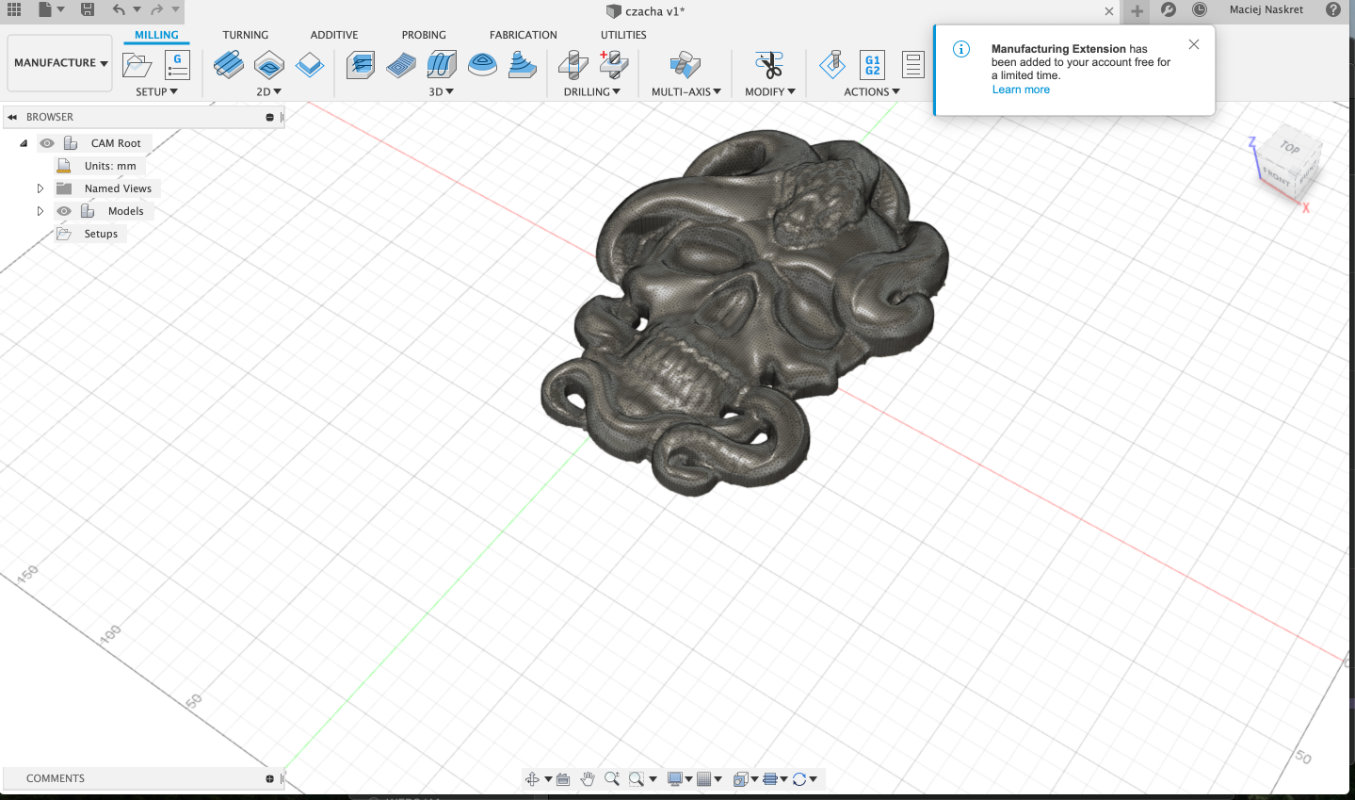
In the CAM section in Fusion i started Setup with setting stock
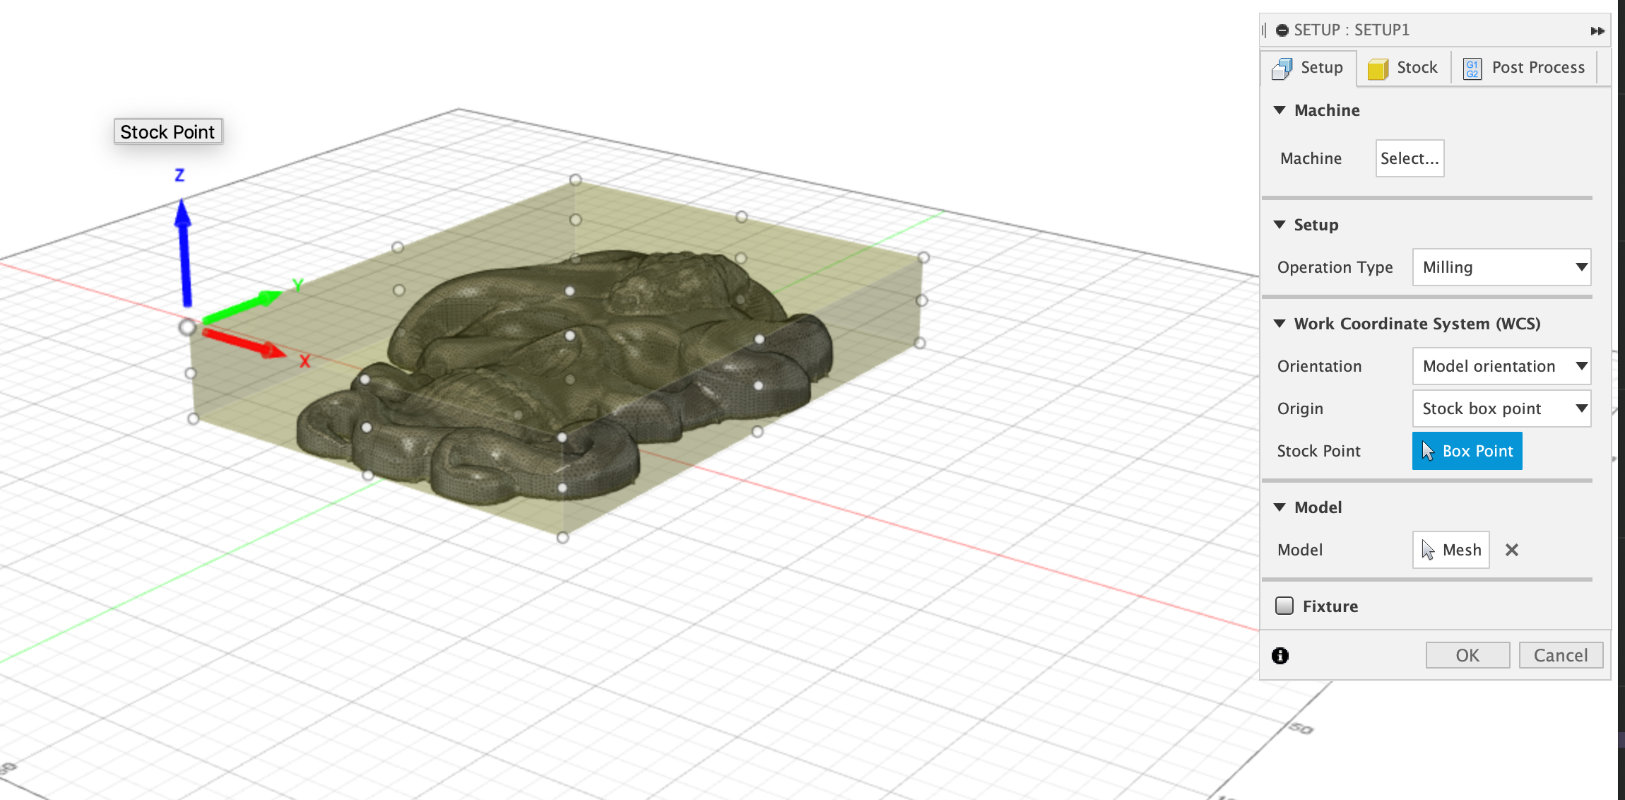
After that i set the WCS work Coordinate System to the left button corner on the top of the material
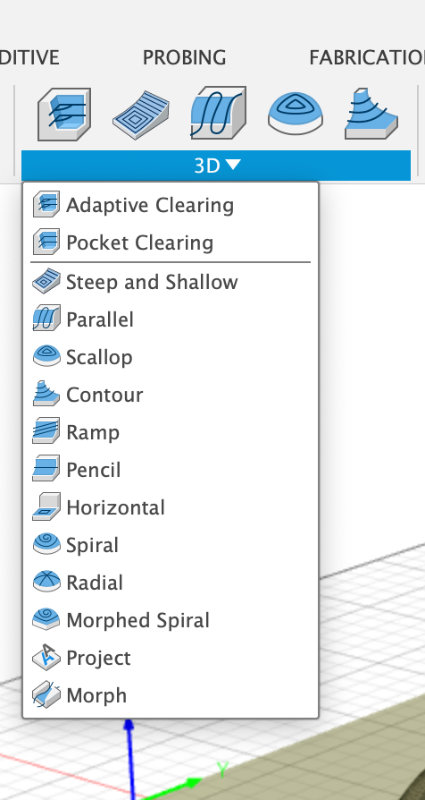
First thing i need to do is to roughly remove unnecessary material using the 3d option.
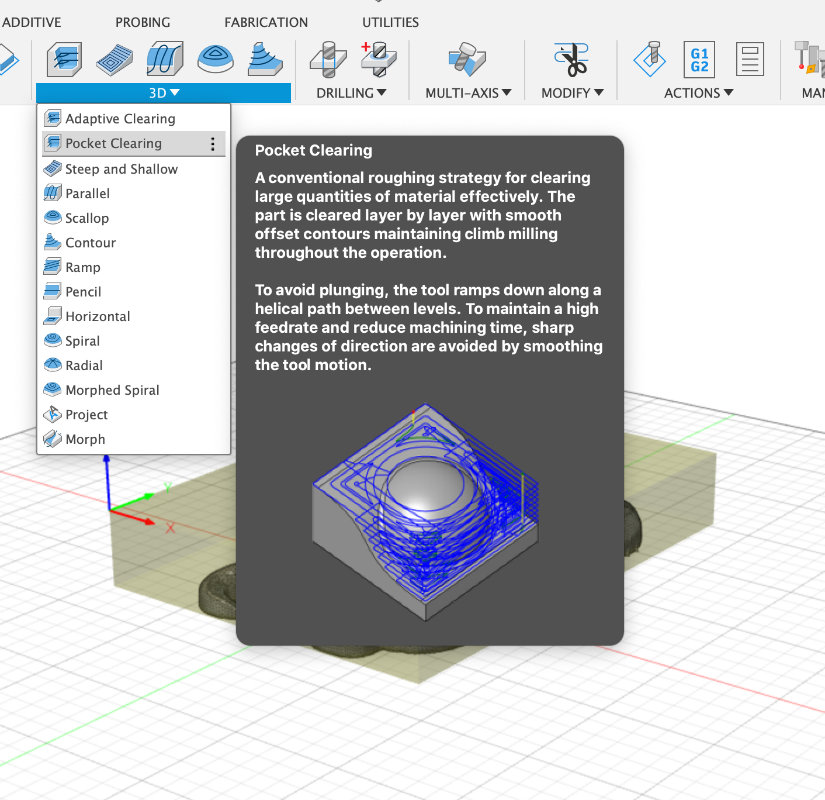
with Pocket Clearing
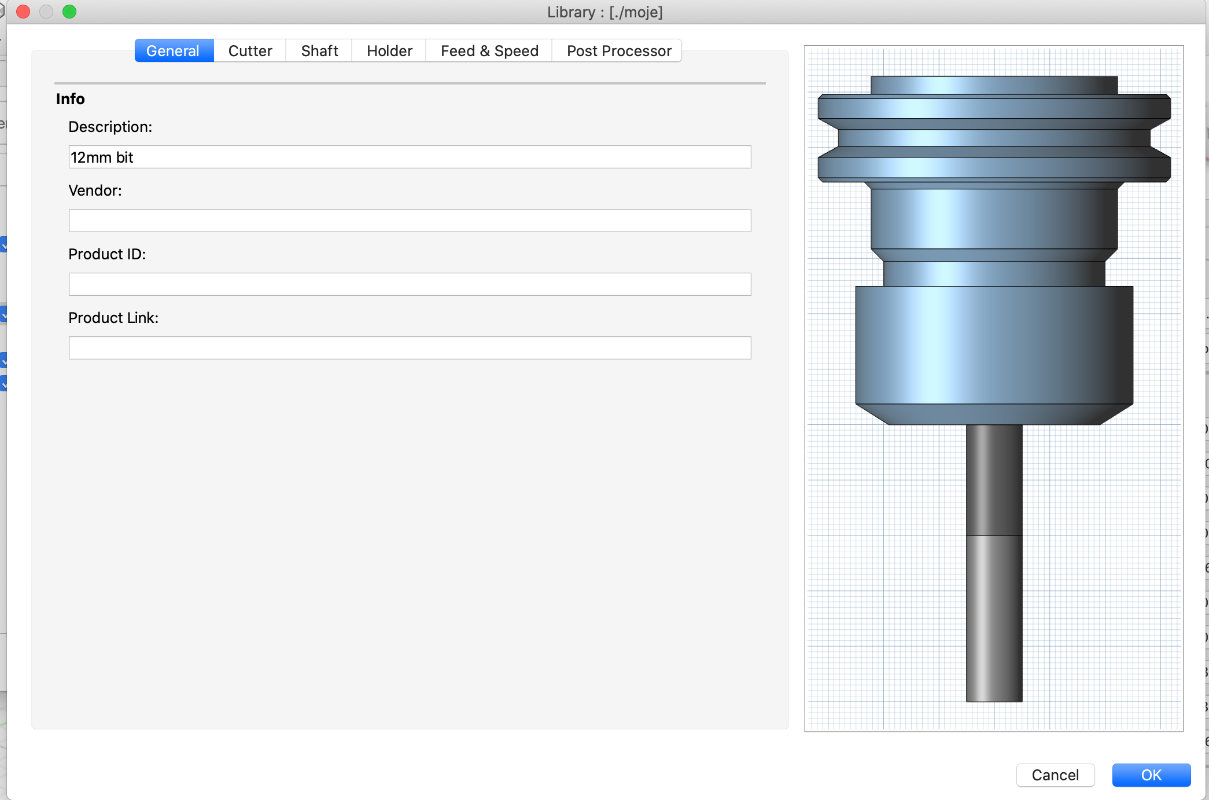
than we have to setup the bit we going to use for that operation (i will do that exacly how i did in a CAM week)
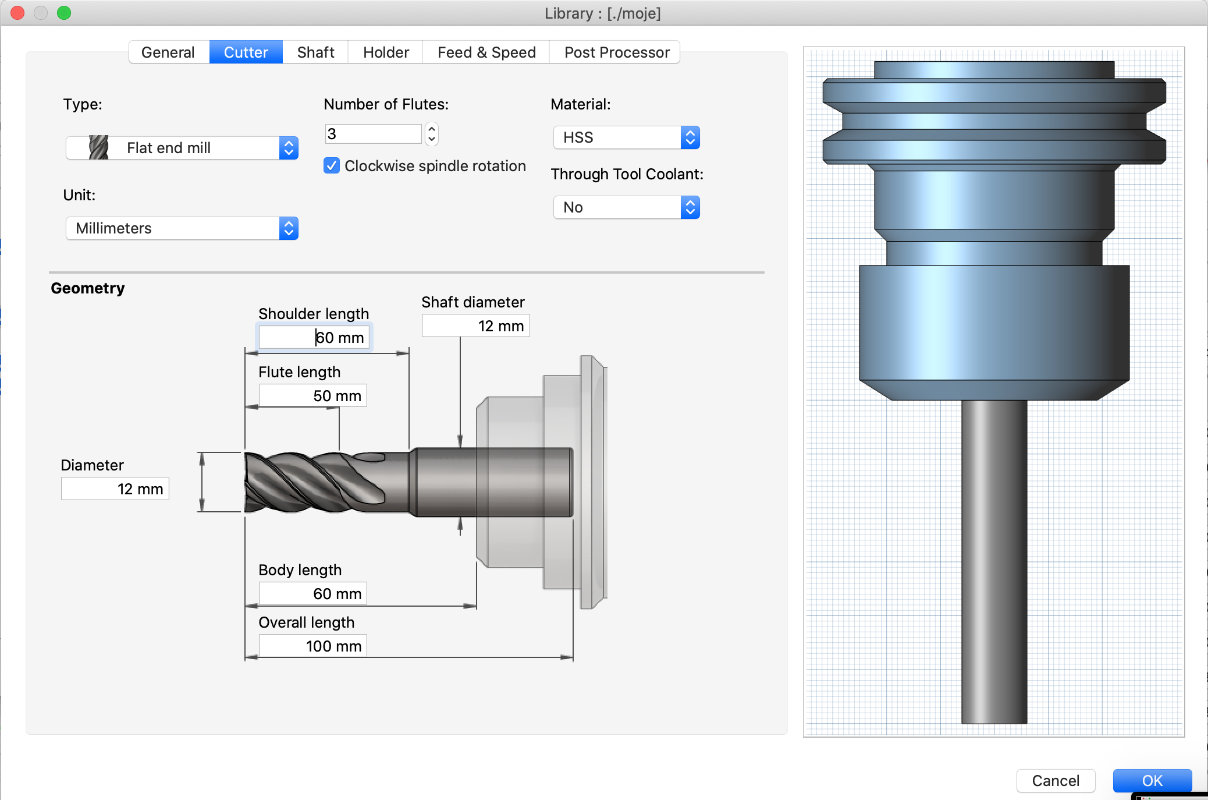
creating the profile for a 12mm drill for styrofoam
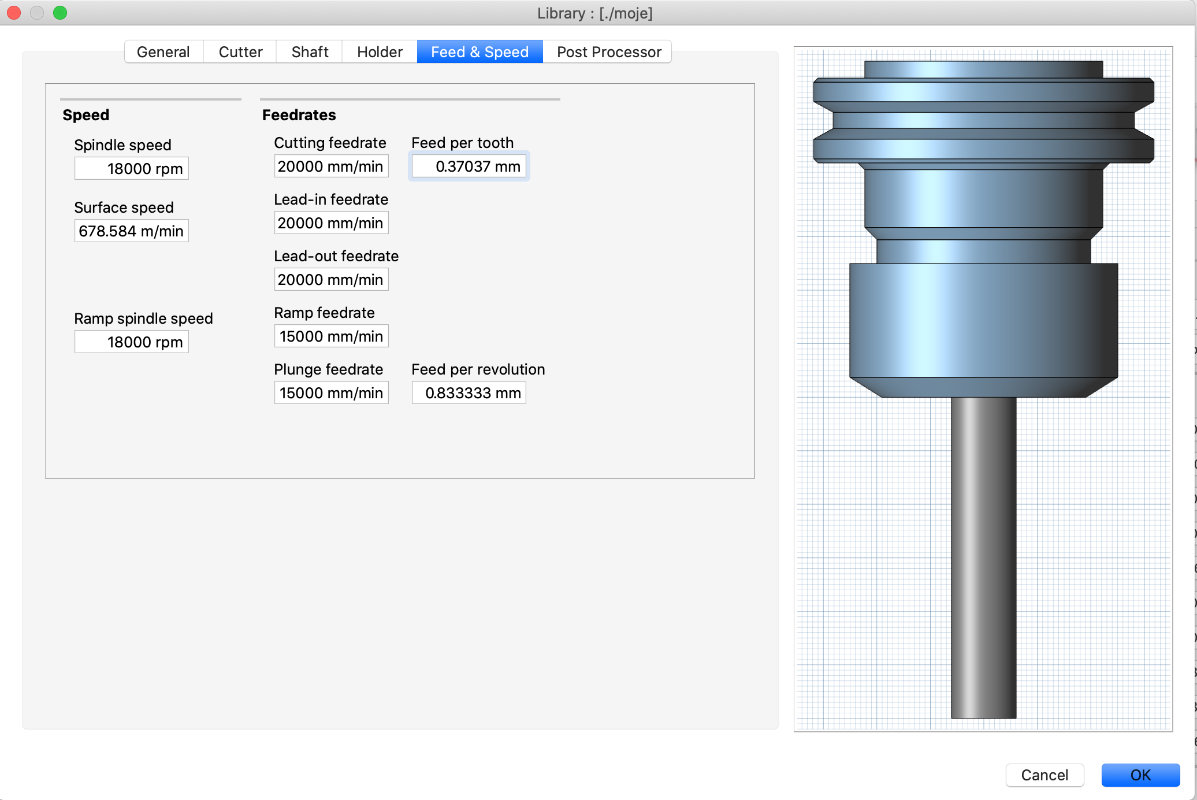
setting speed almost to the maximu for soft material like styrofoam
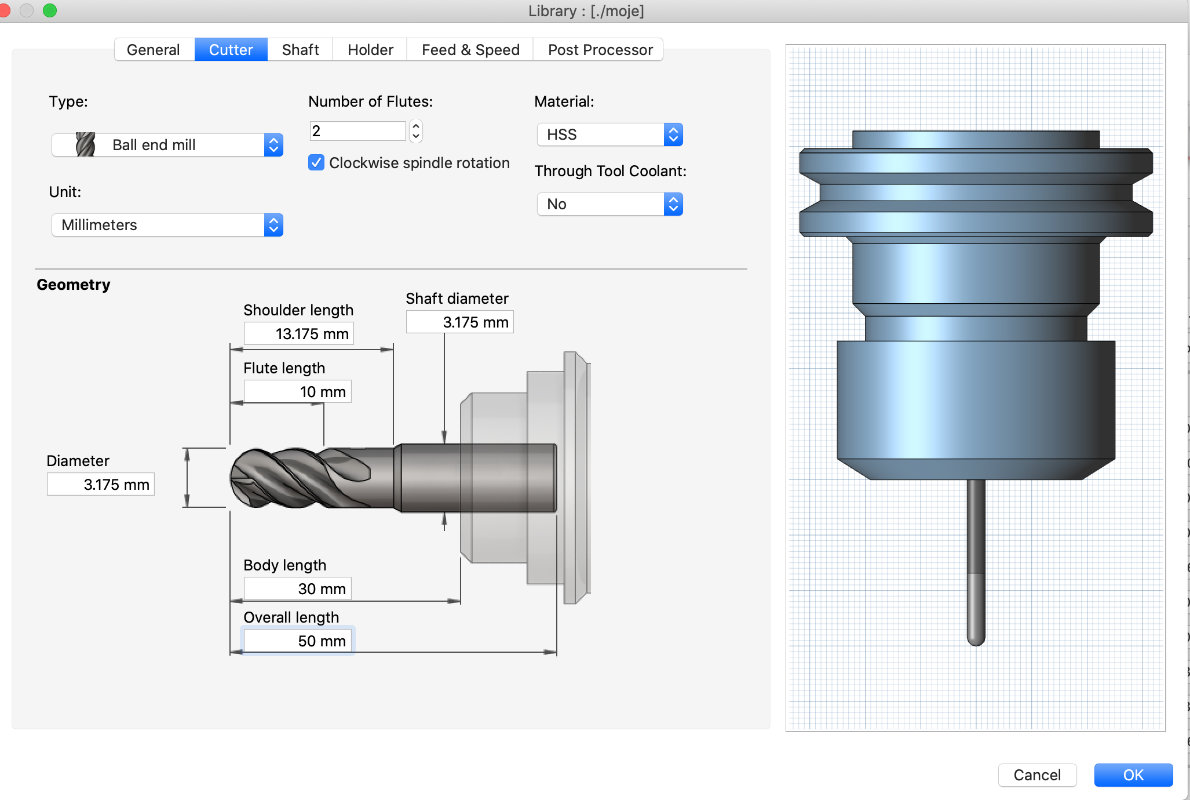
creating the profile for the second tool a 3,175mm ball end mill drill for styrofoam
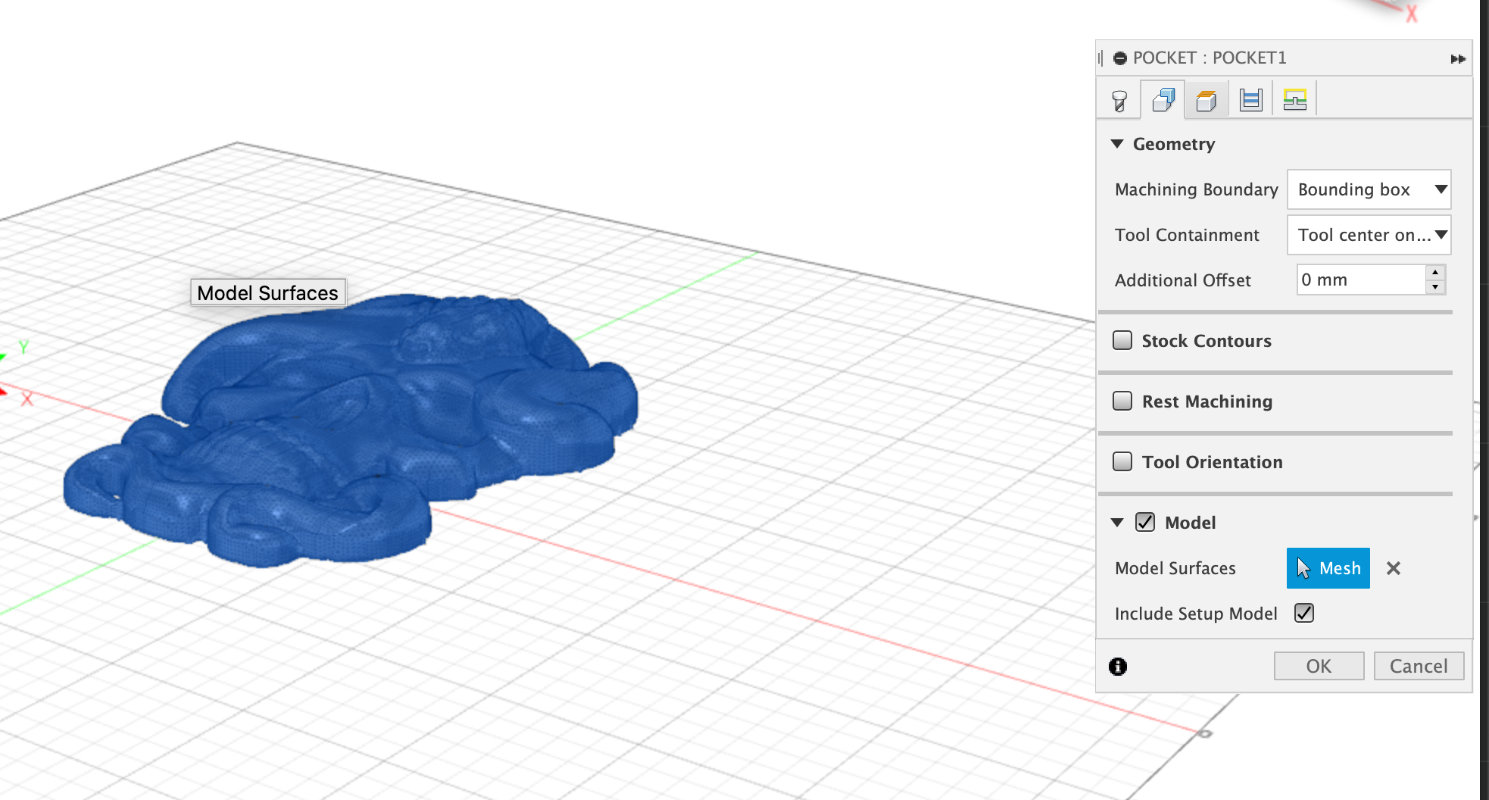
lets go back to the pocket cleaning and set the geometry ( tab ) for the first part of the program for the 12 mm drill, it will be model surface
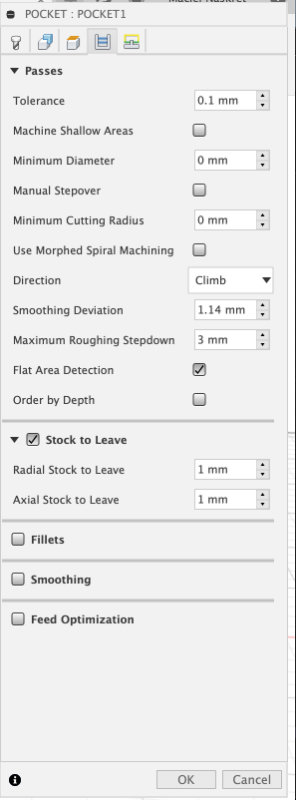
in the passes TAB the most important parts are Maximum Roughing Stepdown i set it for 3mm get nice prepered surface for more detal in next step and stock to leave for 1 mm to still have some material to process
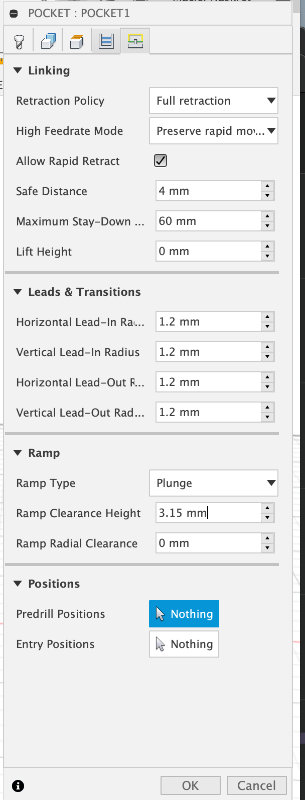
i setup ramp to plunge for faster milling
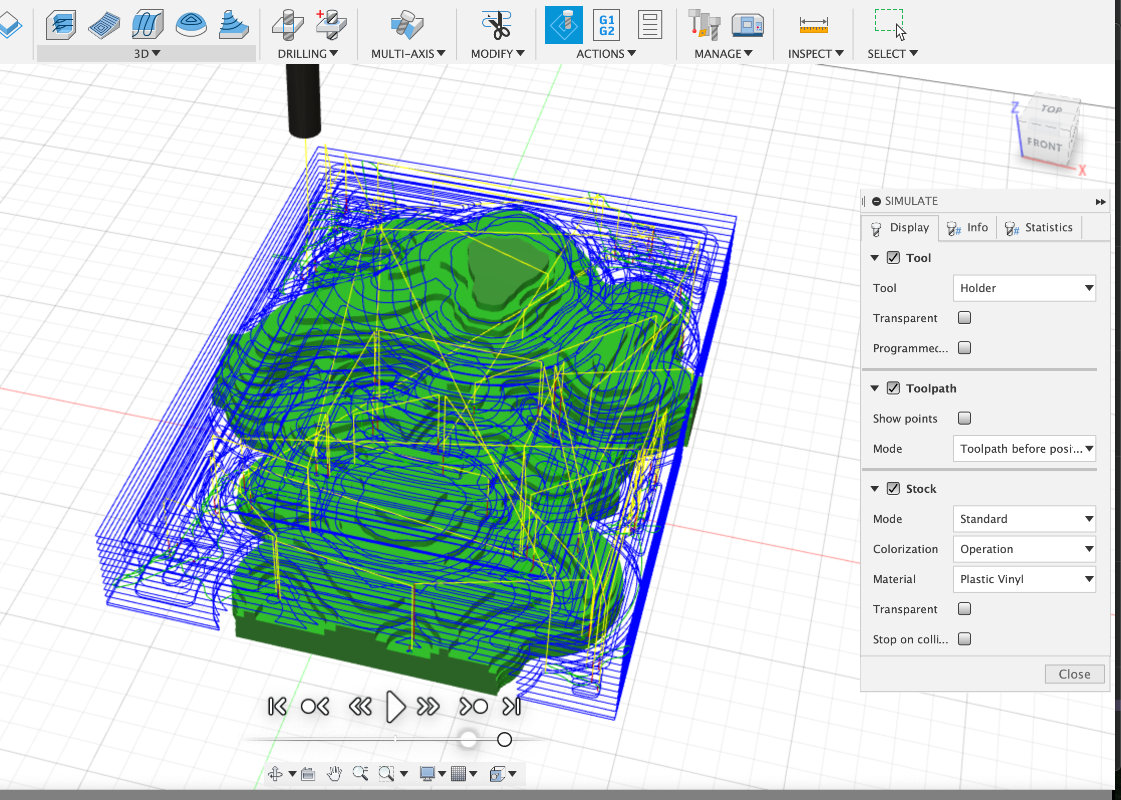
i got the result as on the screen above its time for more detail
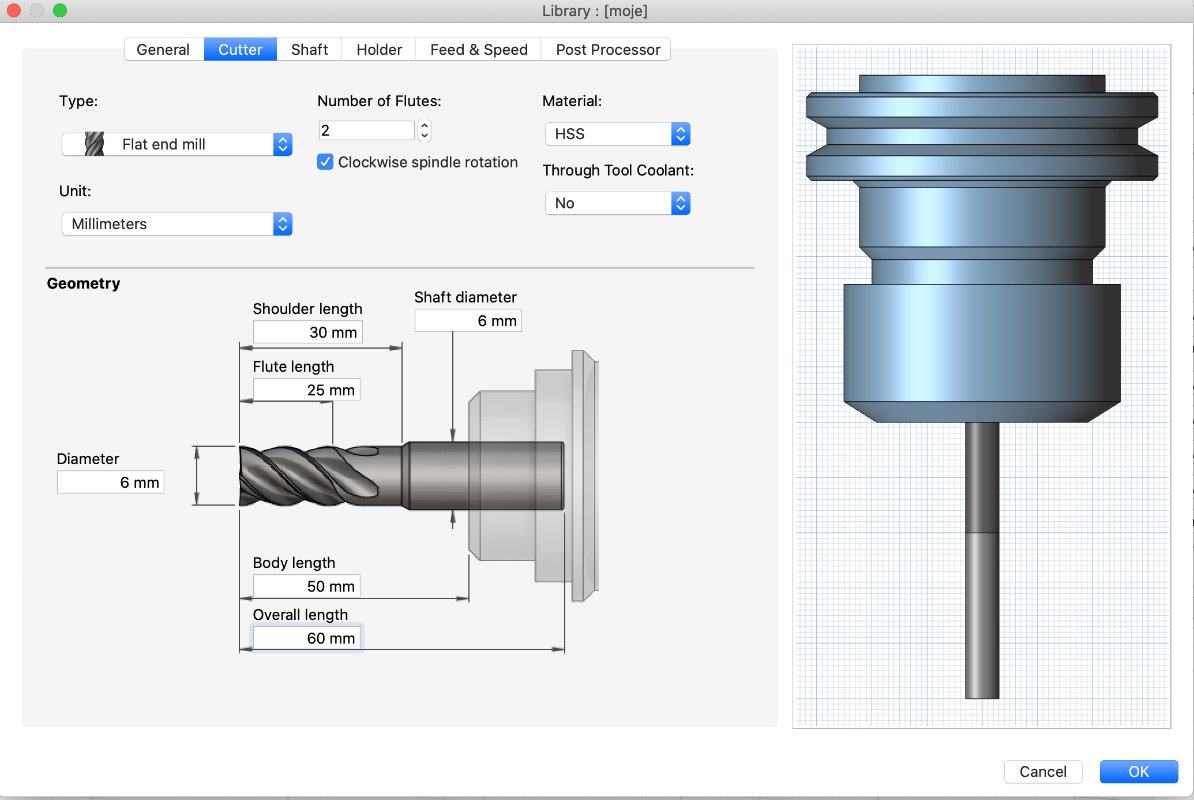
but i added the 6 mm falt end mill to takeoff some more matrials and left less for final step
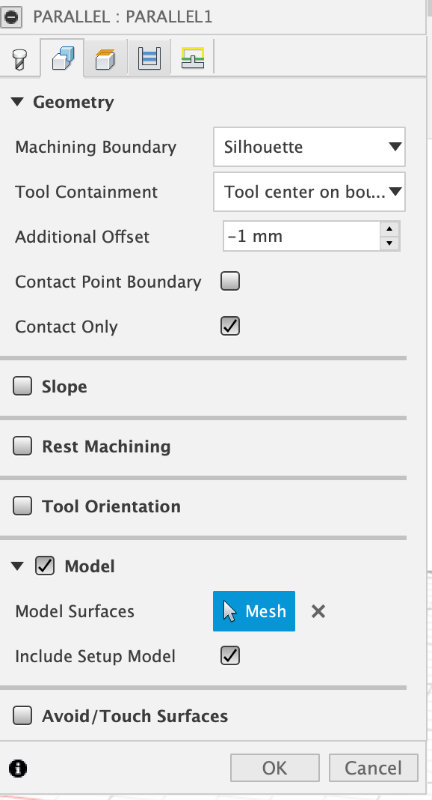
I used the parallel function and i added -1 mm offset not to hit the material which left after first program.
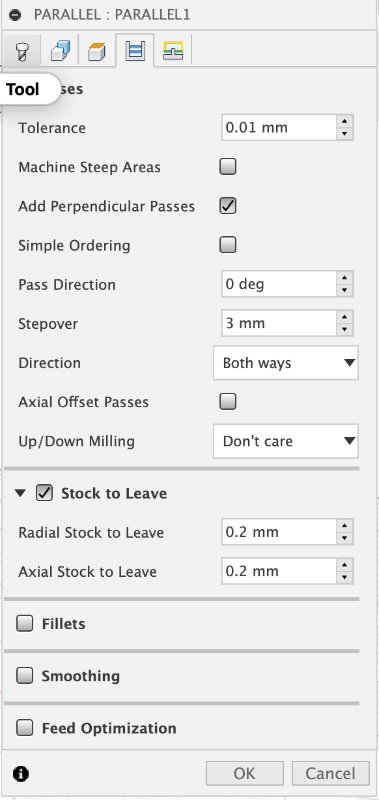
stock to leave 0.2 mm
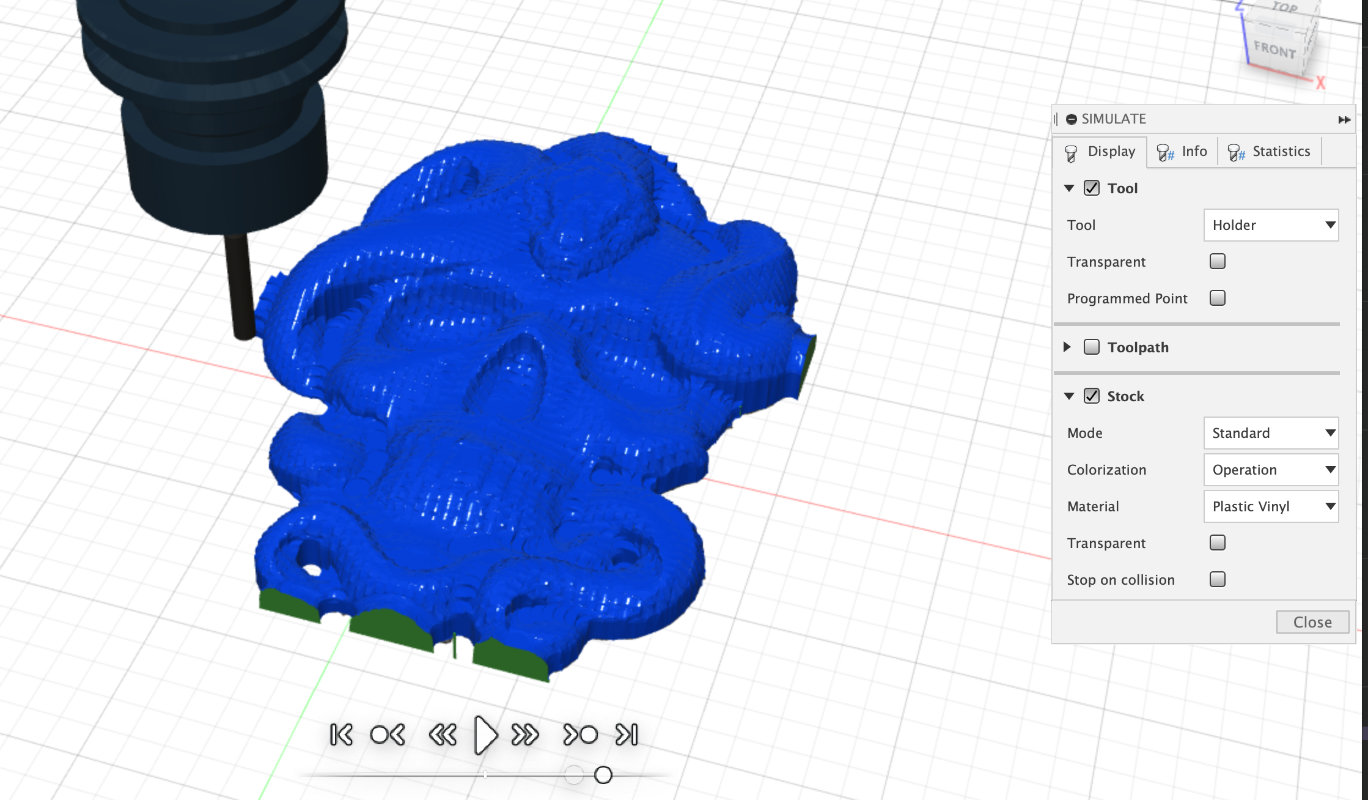
result after the parallel function
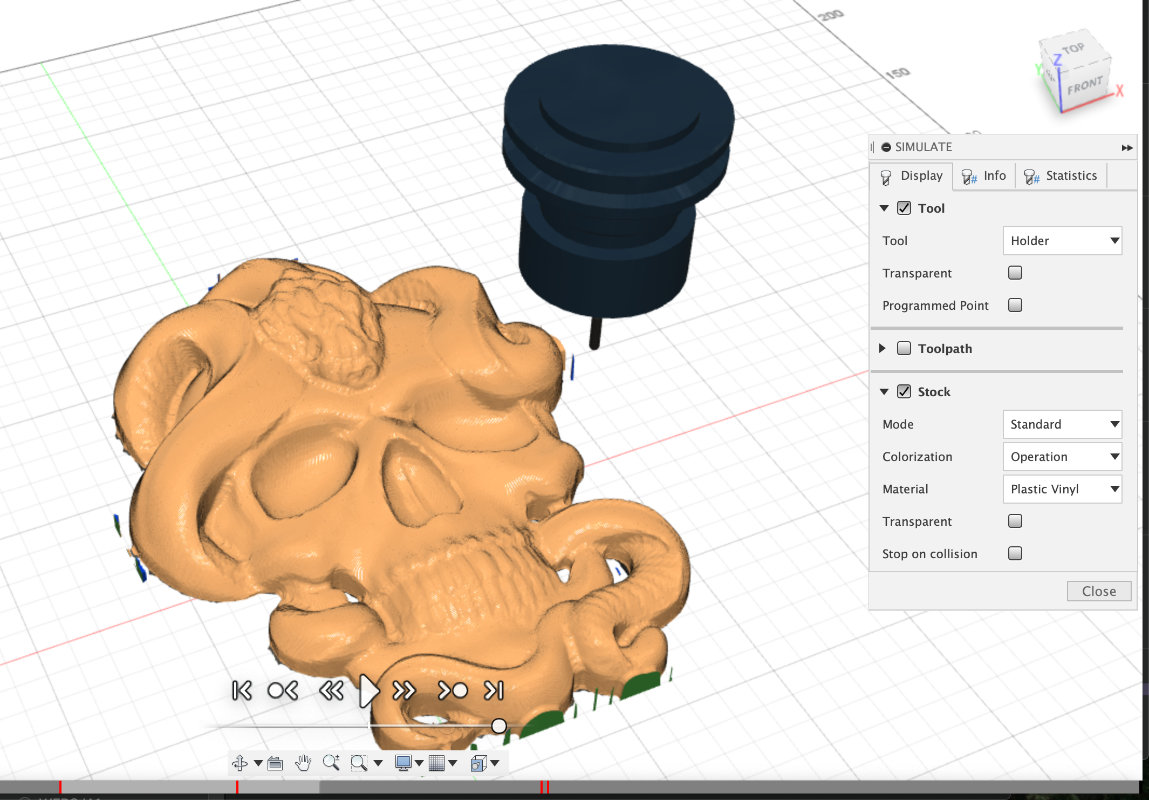
and this is result after adding the Morphed Spiral with the 3,175 mm mill
Molding
I started the whole process by attaching the xps foam well, which was to be used as a material for silicone casting. The best thing to do in this case is to use a double-sided tape and before sticking it to the milling machine table, clean it from the dust that often settles there. After checking the settings and measuring the tools in the tool bank I started the milling process. So first we measure the height of the material. Then we set the X and Y coordinates, in my case I turn on the vacuum table and start the program. After preparing the positiv, I prepared the silicone according to the manufacturer's recommendations, combining it with hardener. Then I vented the mixture with a pressure pump. In order to get a more uniform consistency. Silicone prepared in this way was suitable for pouring milled forms. Now you just have to wait a few hours and the casting mould is ready.Casting
The casting process is actually very similar to that of silicone when using resin. First, we combine the hardener with the resin in the appropriate proportion with Epidan 652 and IDA is 2:1. It is worth noting here whether the manufacturer asks for a weight or capacity measurement. After thoroughly mixing these two components it is worth venting the solution. Later I poured in my mould and again for a better effect I vented the resin that was already in the mould. For safety reasons, I left the casting prepared in this way for 12 hours to fully cure.
Hero shot
