Set up basic documentation system with Git and Jekyll.
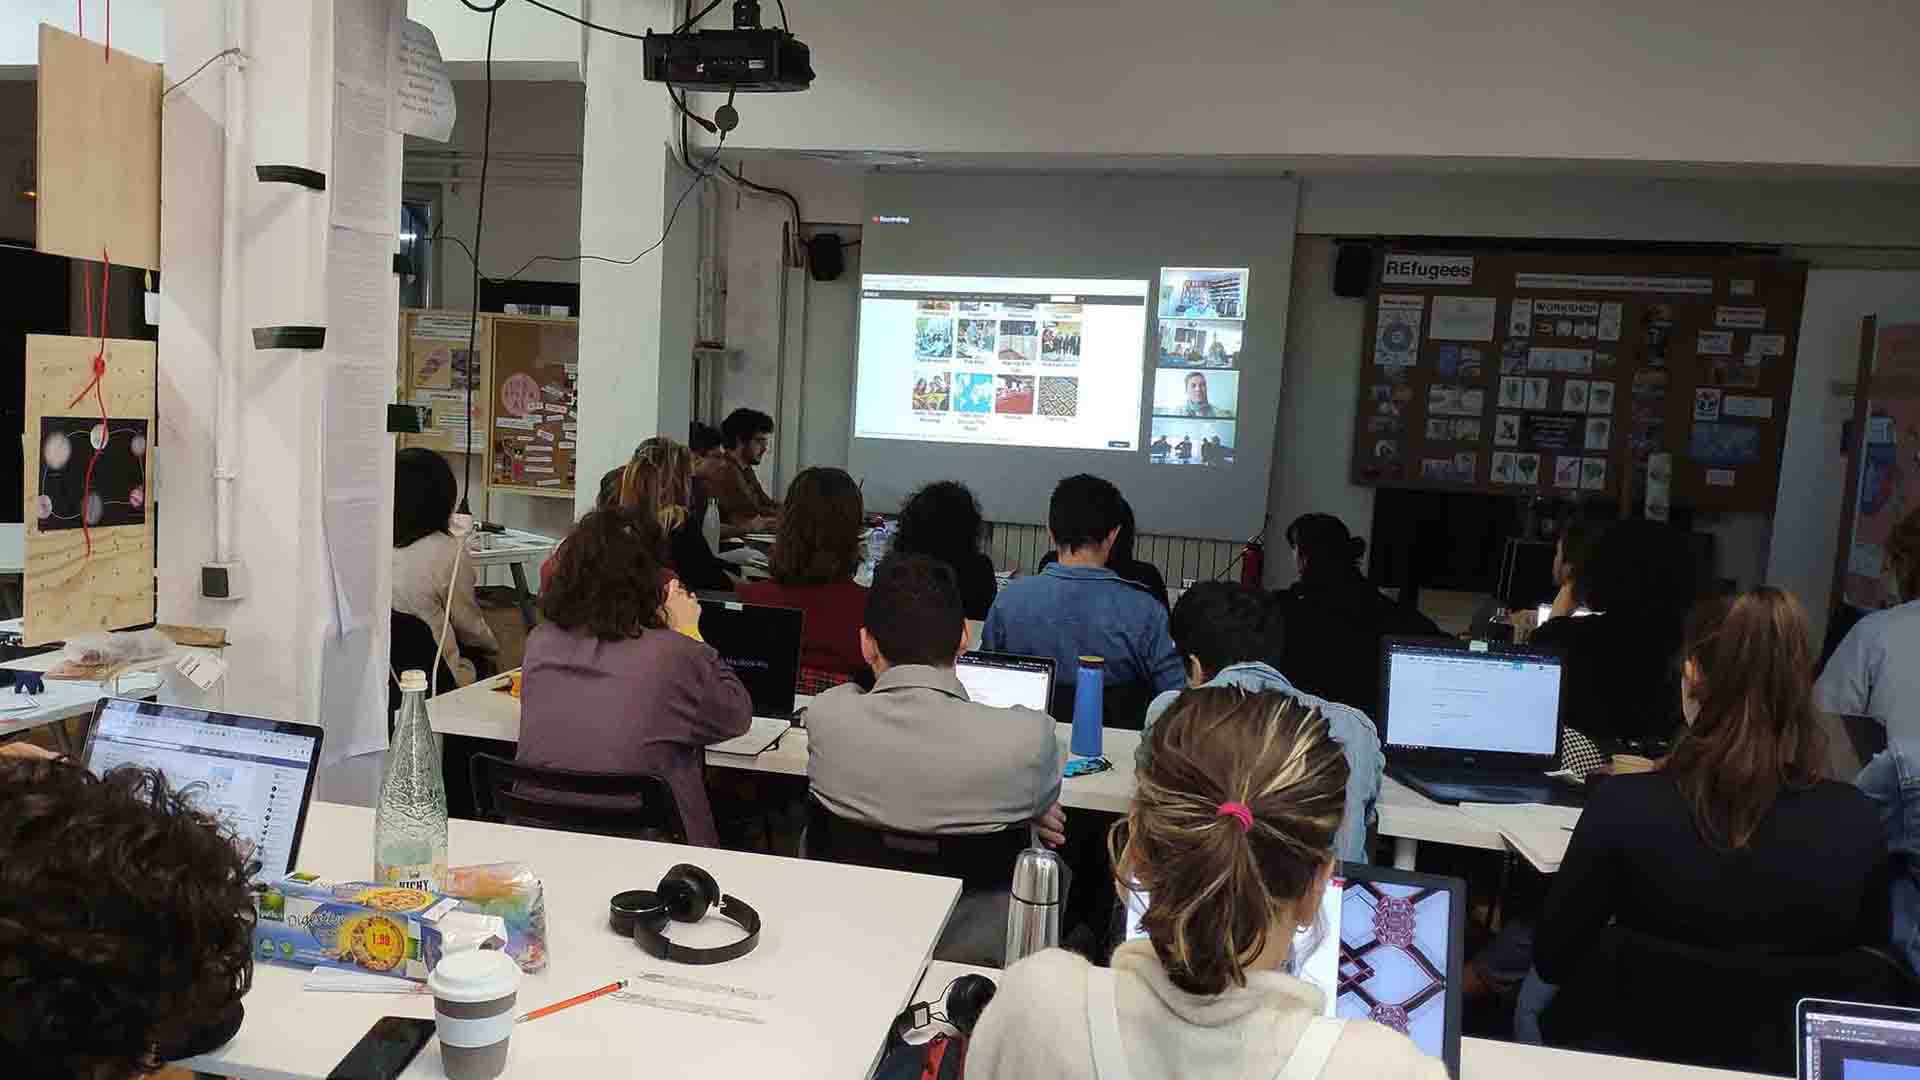 – opening lecture –
This post walks through main personal discoveries of mine in being introduced to an extensive and well-established system for working with digital systems.
technological synergy
Having some experience, though self-taught mostly, as both general coder and web-developer, - most valuable insight for me was a structured vision of all the big systems modern computing wouldn’t be the same without - Git, Static Site Generators, Markup/Markdown etc. Holistic combination of these on it’s own powerful tools can create synergistic effect.
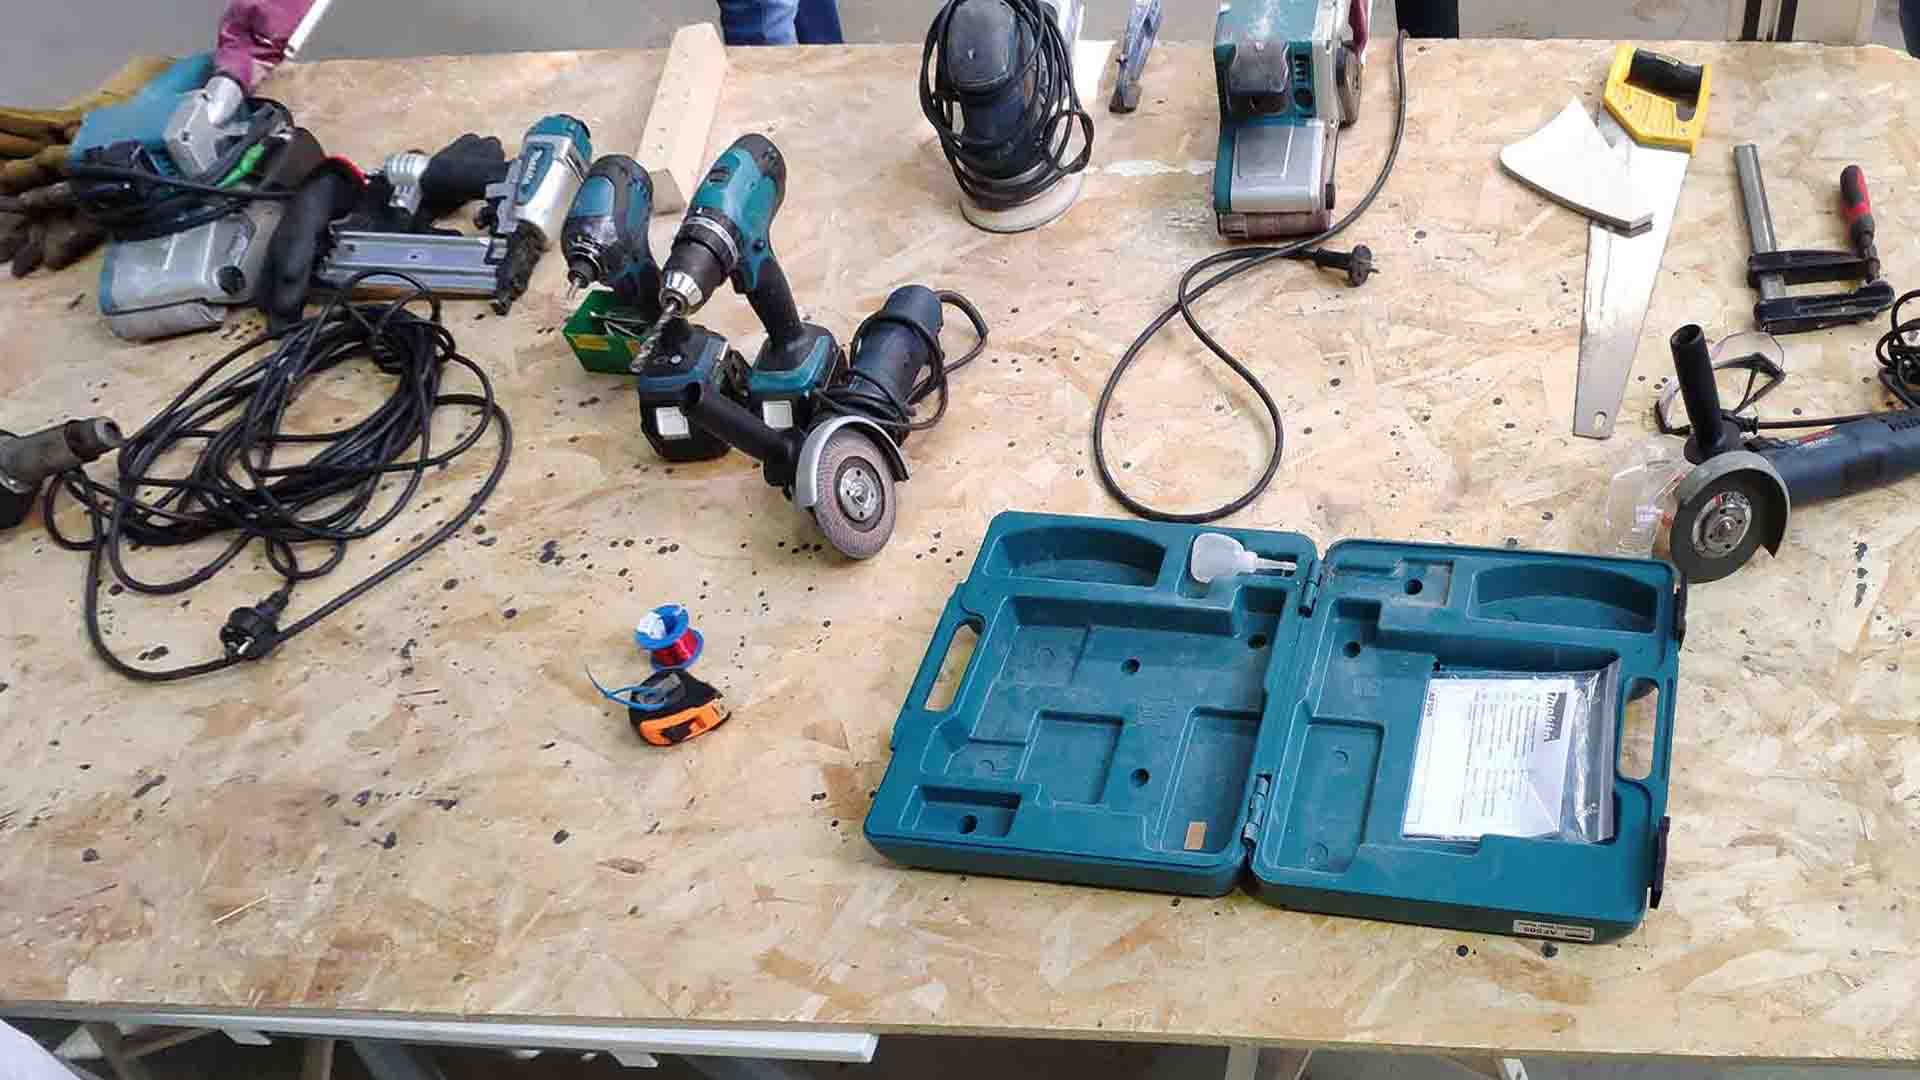 – IAAC lab demonstration –
document or explain to yourself
I never viewed for example documenting lectures and experiences as automatic teaching platform available to anyone with access to internet (I’m sure most students of FabAcademy can already attest to that). Indeed it only take getting used to relatively simple syntax of Markdown. In reality we have our ways to mark up the text anyway, so why not make it universal and share personal perspective on the way. Interesting experience was to try to document lectures with markdown right away. That is not even mentioning the fact that by trying to explain ideas after the fact (be that for yourself) - helps you to restructure thoughts and see weak points in understanding.
change management
My experience with git was limited to a few simple commands one would use to add and commit changes to local repo and maybe clone it to external drive or something, apart from some messy attempts to expand. But taking a deeper dive into how it manages to keep afloat gigantic projects and teams like the Linux Kernel itself encouraged me to plow through the messy experimentation and try to apply it. And when it’s not just blind commands you are trying not to mess up but you understand that it is nothing more than folders with a clever history system in it, - I wonder now whether all my project, architectural, design, generic should be completely powered by git.
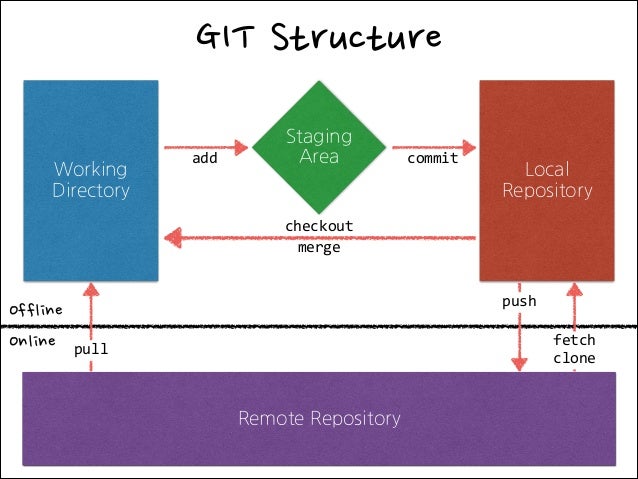 – revolutionary diagram for me –
A small side-note for myself here. One non-standard Git command that came to be useful (thanks to this post) - undo last commit (say you committed but than realized something else should have been changed into it, or the description of commit is wrong):
git reset --soft HEAD~1
reinventing the wheel
When trying to learn a new skill (especially in coding for some reason) I fall into a trap of trying to vigorously not depend on anything and develop everything from scratch. Reinventing the wheel. On one hand that make for the most immersive learning experience - like being thrown into the deep end. But it is obviously not scalable.
However, I argue, and I feel like this is one of the founding principles of the learning in the FabAcademy - maybe it is necessary for you to gain understanding, than to fall back on the specialists and the gigantic community. In 21st century it is absolutely impossible to not have clean and clear online presence - a website. And in years of layering on “onion” levels of abstraction on the web we got to the point where actually you can pretty much go from zero to a stylish and feature-rich website in about an hour completely for free. (Just to clarify, it took me noticeably more. For now.) All you have to do is follow organization strategy and a set of instructions and the rest is all your creativity.
The most amazing thing in the static site generation approach like that is that it is completely flexible. If you are more of a coder - you can extend that part, and take design as it is. If you are a designer and a perfectionist and don’t like predefined layouts - you can freely focus on that without having to learn almost no coding.
More tangibly, here are my steps over this week experimenting with these concepts: 1. update and install both jekyll and mkdocs SSGs and all necessary prerequisites; 2. generate default websites for both; compare; test; change; 2.1. while your at it set up git in them so if you mess it up you can always debug the mistake, and, more importantly feel for yourself how to apply this system in real task: 3. go through documentations (especially, in jekyll) trying on various built-in features; 4. check out some themes and see that they are structured the same way, just have more work put into them; 5. start from scratch to ensure understanding; 5.1. deploy to actual repo and marvel at your creation online; 5.2. bring in bits and pieces expanding more and more actual functionality:
My site went through the following steps 1. create basic index page 2. allow for custom themes and styles 3. introduce post system 4. deploy and test 5. painfully debug linking issues (links to styles and secondary pages should be set not as absolute, or relative, but root-relative) 6. allow for local sources 7. fill in contents
Post Scriptum
After applying both for academy related activities and other projects (for instance, when reinstalling my system on the laptop midway or when adjusting to the remote working during quarantine) some of the techniques mentioned or some tools related to the ones outlined in this week here are some things I thought are worth updating and expanding.
Multiple SSH credentials
At the moment I am working, doing FabAcademy and working on multiple additional projects. This requires me to maintain clean way to work with multiple git repositories from different sources.
This explains how I made multiple credentials:
-
Make new SSH key as usual into separate file
ssh-keygen -t rsa -C "email@example.com" -
Read and copy new SSH key and add it to your account (look for it in settings in your git server) (this notation works for windows PowerShell):
cat ~/.ssh/fileName_rsa.pub | clip -
Create new account entry in .ssh/config:
Host account-name HostName host.name(i.e. github.com) User username (i.e. git) IdentityFile C:/Users/UserFolder/.ssh/fileName_rsa -
Set your credentials locally (not using –global key):
git config user.name "Your Name" git config user.email "email.example.com" -
When cloning remote repository replace the part in the beginning (i.e. git@github.com) with the names specified in the files above to username@account-name
Batching on Windows
After I made a clean install of the system on my computer in the middle of the study period and while juggling multiple projects from remote setup, I came across a set of commands and windows actions that I had to perform daily. After some investigation I made a set of .ps1 files that automate these actions.
This .ps1 works in a same way as a batch file does and once called (remember to choose PowerShell ad a default program to execute it) opens a PowerShell window and executes line by line all commands in there.
A useful PowerShell package that I had to install is Virtual Desktop that allows you to control from code creation and use of virtual desktops on Windows 10 - helping to manage projects - for example, I usually have one general desktop where I work, but when things advance and I get to more than two windows for the topic I create a new one (one for work, one for academy, one for some personal project, etc.). These I can close and open when needed and thus help declutter the mess of working on multiple projects.
First important realization was: if the path to a program is not in the system environment path variable the system won’t know what you mean by saying say “chrome.exe” from command line. Thus for anything you need to access via PowerShell or command line you have to add it to the path variable. For it to take effect you need to close the PowerShell and restart it.
- my computer > Right click > Properties
- On the left plane of settings click “Advanced System Settings”
- in the Advanced Tab in the bottom click “Environment Variables”
- IF you have multiple users and you only want these changes to affect you do following steps for user PATH variable, otherwise in the System variables
- Double click on the path variable of choice
- Click New to add new Path Variable when you have the path copied to clipboard and paste it there.
- To edit - double click on it, to reorder - use move up and down buttons, to delete - delete button.
Second, on Windows command line is fairly limited in functionality. For everything it can do and far more use PowerShell. Unfortunately as with many Microsoft things it is also not that simple - to get the last one run this command from your command line and follow instructions to install it:
iex "& { $(irm <https://aka.ms/install-powershell.ps1>) } -UseMSI"
At the moment of writing this downloads and installs PowerShell 7. Remember to add it’s path o the PATH variable as described before. Something like this:
C:\\Program Files\\PowerShell\\7\\
When installing choose option to add into Explorer context menu to be able to launch PowerShell directly in the location you want.
Then in command line you can access it just writing
pwsh
OR if you want to start new Window:
start pwsh
OR if you want to start new Window from PowerShell itself:
Start-Process pwsh
Third, it is often useful to run a program from PowerShell with a given position.
For example, to open explorer where the PowerShell currently is. A quick way to do it is to type:
ii .
or to start atom:
atom .
Other Site Development Experience
During the study I came across multiple opportunities to develop a simple landing page for other things I was involved in. I took it as opportunity to practice what I’ve learnt here and extend the knowledge to some other experiments.
Node
First opportunity appeared through circumstances of my enrollment to Academy. As a first time the lab I work in, Tinkerers, became part of FabAcademy and as the only student in the lab, out node’s site was not present. Moreover, one of the ideas between collaboration between our small lab and FabLab Barcelona in IAAC was to combine the experience and the access to knowledge and tools from the two. In particular our lab had little experience in electronics and web development, which became my primary interests for the course. This meant I had to design and implement the website on my own.
As an exercise I decided to try a different platform from the one used for this site - MkDocs powered by python. After trying around the basics theme, some features of the tool as well as implementing a theme and customizing it here are some aspects that I think are worth noting in comparison:
-
ease of initial deployment
While Jekyll is as well set up in a straight forward was it was noticeably easier to deploy initially the site as well as bring in extra theme. Moreover, Jekyll has more complex structure which if more obscure in its organization. It does mean that it has more built in features that you can easily access by placing files in proper folders and configuring the project accordingly. However, it is rather hard to get into this structure and, more notably for me, it is not customizable (recognized folders are not renamable).
-
customizability
MkDocs is clearly set in a way to abstract away anything to deal with styling. However, as a designer, architect, creator, sometimes I want to extend the basics with custom features. This is what I like about Jekyll more - it is a lot more obvious how to create custom styles link them in and correspondingly customize the HTML structure.
So if the goal is to document certain topic - blog, - than I would go for MkDocs. However, if you are more comfortable and are interested in some coding for web be that in styles, JavaScript or what not, - I would recommend going with Jekyll.
The result can be seen here: Tinkerers FabAcademy 2020. It is a simple page, but hopefully provides some vision of our lab and the FabAcademy aspect of it as well as providing further points of contact with us.
Project
Latest endeavor of mine with some colleagues of my from the studies is the HoloFab project I started developing last year. It is a set of tools for designers and digital fabrication enthusiasts for working with Augmented Reality. It’s main focus is to create an opensource abstraction for communicating important design entities between design environment (Rhinoceros 3D with Grasshopper 3D) and Augmented Reality enabled devices in a universal way as well as provide interaction tools necessary for it.
Lately it started to take more solid shape (less bugs, more uniform experience, workshops showcasing the tool, etc.), - enough to require a certain face on the web we could reference people to and to start extending our reach.
HoloFab landing page than works as a meta-page for the users to access the latest versions of the tool, as well as a collection of materials for us to explain the world of Mixed Reality and demonstrate the capacities of the tool we’re developing.
It’s development brought to my knowledge that the GitHub Pages (and more specifically with Jekyll) work in somewhat similar manner as the GitLab’s CI/CD Pipelines (that we’re using for this site) allowing for static generation. Only this time I had to do (rather minimal set up - more of organizational rather than coding-wise since this really is a very simple page not requiring any special extra tools). Namely, one have to be careful how you name project to allow it to be a user landing page and enable Pages hosting in settings. One note to mention is that GitHub at the moment of writing differentiates project pages and user pages thus limiting control on where you can place content (only in the core for user pages) and in which branch (only on master for user pages), - hopefully this would soon be resolved.
To set up the pages with jekyll I had to add “github-pages” plugin in “config.yml” as well as in “Gemfile”. It comes with the following additional settings in “config.yml”:
# GitHub Pages
lsi:                      false
safe:                     true
incremental:              false
highlighter:              rouge
gist:
    noscript:             false
kramdown:
    math_engine:          mathjax
    syntax_highlighter:   rouge
Embedding videos
Embedding local videos turned out to be not as straight forward as I thought it would be. Instead of the normal iframe for external sources here it is required to use native HTML5 video tag. The tag is well accepted at the moment of writing but in some browsers support may very. It is very flexible and has multiple useful configurations, like looping, auto-starting and source substitution. This documentation with this sub-article clearly outlines the ideas and this forum dicussion collects many common solutions to test if the video not working.