Computer Controlled Cutting
characterize your laser cutter's focus, power, speed, rate, kerf, and joint clearance document your work (individually or in group).
Individual assignments:
Design, lasercut, and document a parametric press-fit construction kit, which can be assembled in multiple ways. Account for the lasercutter kerf.
cut something on the vinylcutter.
Learning outcomes
Demonstrate and describe parametric 2D modelling processes.
Identify and explain processes involved in using the laser cutter.
Develop, evaluate and construct the parametric construction kit.
Identify and explain processes involved in using the vinyl cutter.
- Exposure to the laser beam can cause burns and severe eye damage.
- Never disable access door sensors or try to operate the laser cutter with access doors open.
- Never leave the laser cutter unattended while it is operating.
- Most of the materials used with the laser cutter is combustible and can ignite when in contact with the laser beam.
- If a fire should start inside the machine turn off the power switch, turn off the exhaust system, and turn off the compressed air, leave the laser room and alert the staff.
- If it is safe to do so try to extinguish the fire with a fire extinguisher and call the city Fire station.
- The laser cutters use high voltage. Never touch or tamper with the exposed wiring inside the machine.
- Always operate the laser cutter with the exhaust system on.
- The staff is constantly evaluating the materials being cut with the machines in order to ensure that potentially harmful materials are not being used.
- That being said you should assume that the smoke produced by cutting could be harmful. Almost all of this smoke is expelled safely when the exhaust system is on.
- If the amount of smoke being produced seems abnormal stop using the machine and check with the staff.
- Do not stare at the light produced while the machine is cutting.
- Never engrave or cut any material containing PVC or vinyl. These materials (along with other chlorine/chloride-containing materials) produce a corrosive vapor that is extremely harmful to humans and will destroy your machine. Your warranty will be void if your machine is damaged by corrosion from engraving or cutting PVC or vinyl.
- Never engrave or cut any unknown material. The vaporization/melting of many materials, including but not limited to PVC and polycarbonates, can give off hazardous fumes. Please refer to the MSDS sheet from the material manufacturer to determine the response of any work material to extreme heat (burning/fire hazard).
If you want to read more about safety while using the laser cutter check links below:
Hobby Series Laser Cutter User Manual
Epilog lasers Laser Cutter User Manul
How safe is a laser engraver?

laser Cutter
What is the laser cutter? Laser cutting is a technology that uses a laser to slice materials. While typically used for industrial manufacturing applications, it is also starting to be used by schools, small businesses, and hobbyists. Laser cutting works by directing the output of a high-power laser most commonly through optics.
Laser Engraving:
Engraving is one of the most commonly used methods of marking products and materials. If you bought yourself a school ring at graduation, then chances are you already own an example of engraving. During this process, the material is removed in order to create depth.
Laser Marking:
Laser engraving is a form of laser marking; however, it isn’t the only form available. If you do not want to damage the Laser Marking longevity, integrity, or the appearance of your product by cutting into its surface, then laser marking might be a better option. Instead of cutting into the surface of the material, laser marking enables the surface to stay intact. The heat from the laser redistributes the carbon without damaging the surface, leaving marks.
Laser Cutting:
Laser cutting is quite different from engraving and marking. Laser cutting involves sectioning a piece or cutting shapes through materials like metal and plastic. If you want to create that silhouette look or create a design that does more than simply leave a mark on or engrave a mark into the surface of your material, consider laser cutting so you can cut through the surface of your material.
Whats the difference between laser engraving laser marking and laser cuttin?
Below I copmared between the laser cutter machines I had used before.
Here I found something rally interesting about the Trotec invention for the laser machine.
Parametric Modelling processes
Is a term used to describe a dimension's ability to change the shape of model geometry as soon as the dimension value is modified.Parametric models use feature-based, solid and surface modelling design tools to manipulate the system attributes. There are two popular parametric representation models:
Constructive Solid Geometry (CSG):
CSG is a combination of 3D solid primitves (for example a cylinder, cone, prism, rectangle or sphere) that are then manipulated using simple Boolean operations.Boundary Representation (BR): a solid model is formed by defining the surfaces that form its spatial boundaries like, points, edges.The object is then made by joining these spatial points.As it allows the interior meshing of the volume to be more easily controlled.
Advantages of Parametric Modelling:
These are the benefits offered by 3D parametric modelling over traditional 2D drawings:- Produce flexible designs.
- Vast range of ways to view the model
- Better product visualization, as you can begin with simple objects with minimal details.
- Existing design data can be reused to create new designs.
Parametric Modelling Tools
There are many software choices available for parametric modelling. On a broad level, this software can be categorized as:- Small scale use.
- Large scale use.
- Industry specific modelling.
Design Stage
I design a piece of leave by using Inventor an paramteric tool. The idea is that the leave with tow joint can use in many ways after cutting more than 6 pieces, it can use as a game, or as a coaster or home office accessories, or hanger.
Open Inventor,then got to New Part.
On the left side choose the drowing Plate as 3D software it will allow you to see all the sides.
Click on the plate athen click on create 2D sktech.

Drow a line by using line tool, and this line is very important to use it later one to reflect the other side, and you can delet it later.
Use arch tool to drow the leaf shape, as I explained before, you can mirror the other side by using the virtical line you already drow it in the first step.
keep drowing the leaf lines by using Arch and Line tools.
Add the jount by drowing lines connected to each others, for the width it should be as the matrial thickness, I will use wood .3mm. from dimension tool you can change the size.
I use Porject tool to mirror the other side of the plate based on the vertical line I drow in the first step.
It looks like a leaf, after that close the sktech mood by click finish sktech as below.

After that save the file as .ipt format.
Preper the file for laser cutting:

Go to file then new the Drowing.
Edit the sheet dimension as your piecework you will use, for me It is 500x500mm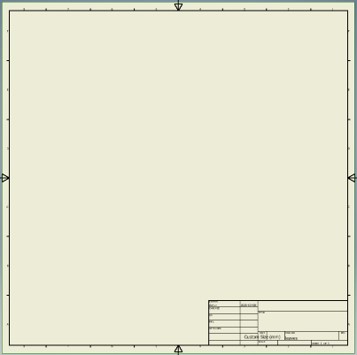
I prefer to delete the frameborder and the titleblock, because I will cut by myselfe with laser cutter.
Open the .isp by clicking on Base.
Keep the Scale 1:1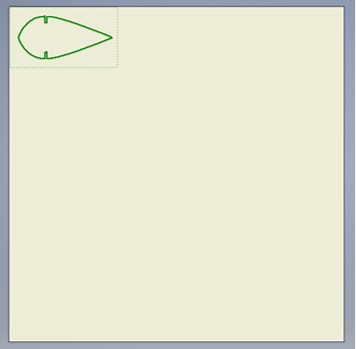
I faced a problem, the inner lines are not showing.
I try anthor way to save the file.
I go back to the part mode, edit the 2d sketch.
select all the lines.
again with project tool.
Then go to the left tool bar, click right and select Export sketch as
Then save it as .dwg
All the inner lines appear.
Open it with Inventor agian and safe it as .pdf
Nesting
On the college I always keep aware the students to use the materials in a smart saving way to reduce the number of waste materials, I used to arrange what I will cut before using the laser cutter, then I search for a program especially for nesting, I found Trunest from Auto Desk, also there are two more free programs Deepnest and SVGnest.
for more about the programs vist the links:
Trunest
svgnest
Deepnest
When I tried both, SVGNest and Deepest, I did not get the right nesting, I went back to Illustrator to group each part and the result was the same. I opened the file with Deepnest there were some objects highlighted in red color it mean an error, then I opened the file in Inkscape I combine each leave together, I imported it to Deepnest again.
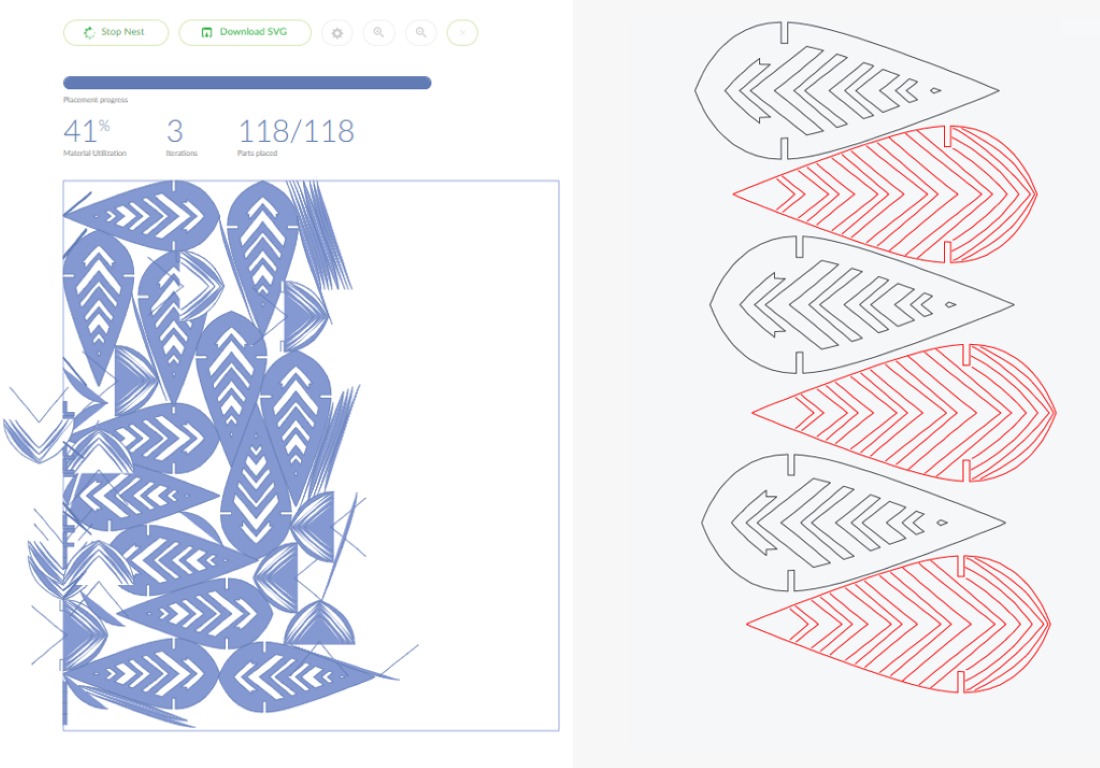
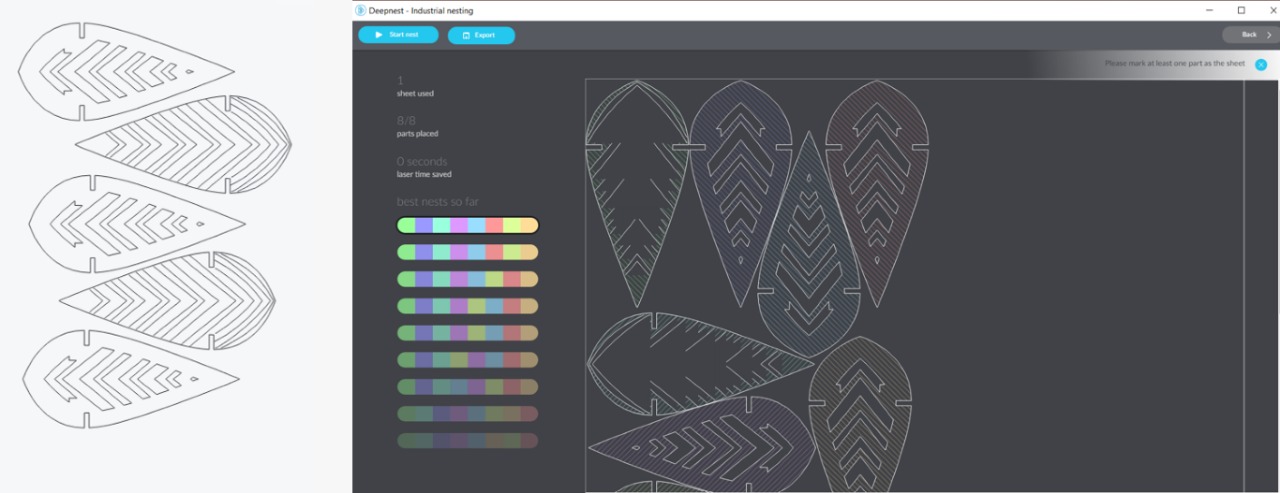
What I mostly like about Deepnest rethar than SVGNest, it gave you many options to pick the best nest for you, also it’s free, fast and friendly to use. I faced an error after export the design from Deepnest to (.Svg or.Dxf) format when I tried to open it with any other program, after many trails I found the soliton simplifies export it then rename the file with (. Svg) and it will work.
The error was like this.
Sending the design to the laser cutter:
After exporting the file as Pdf, I use Coral Draw to set the laser cutter setting and send the order to job Control program -the laser cutter program-.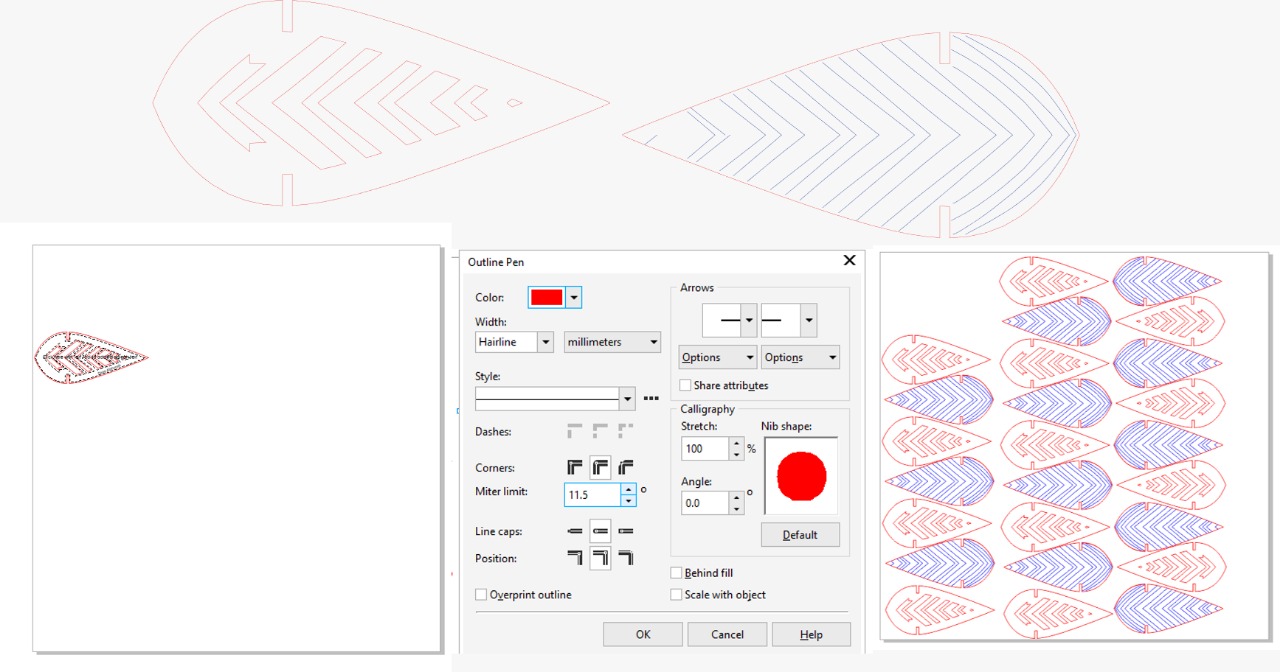
Make sure about the workspace size it better to match the design workspace.
I started cutting with only tow pieces to test the joint and press fit construction.

I got the excellent result from the first time, but I believe if I try it with cardboard I should make the joint size -.1mm or -2mm depends on cardboard type. Because normally the total material removed (0.1 mm kerf n either side) so we should care about the joint size.
What is the kerf of a laser cutter? The laser burns away a portion of material when it cuts through. This is known as the laser kerf and ranges from 0.08mm – 1mm depending on the material type and other conditional factors.
Download files here:- Leaf
- P:70
- S:.3
- PP/Hz:1000
- P:40
- S:10
- PP/Hz:1000
- P:70
- S:80
- PPI:1000
- No spraying sign
- Cut:
- 4mm Cardboard: 80 Power, 0.7Speed, Auto Hz
- Engrave:
- 4mm Cardboard: 70 Power, 30 Speed, 1000 PPI
- Make sure to focus the machine before each material and.
- Cut:
- 3mm wood: 80 Power, 0.3 Speed, 1000 PPI
- Engrave:
- 3mm wood: 70 Power, 20 Speed, 1000 Hz
- Cut:
- 3mm Acrylic : 40 Power, 0.28 Speed, Auto PPI
- Engrave:
- 3mm Acrylic : 40 Power, 20 Speed, Auto Hz
Laser cutter setting
Material: Plywood 3mm.
Cutting setting:
Marking setting:

I forget to engrave my name, I retune back to the design , I add my name to one piece, I set the setting after I delete all the others part then I engrave it.
Engraving setting
Final result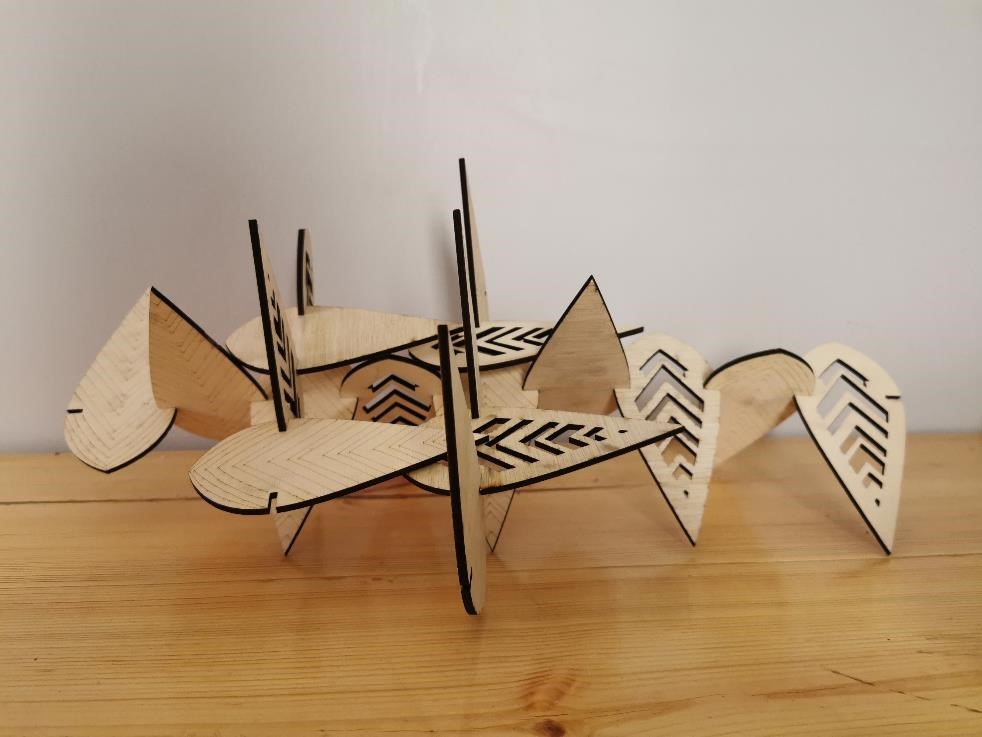
Vinyl CutterA vinyl cutter is a uses a computer-controlled blade to cut out shapes designed using vector graphics. As we know we cannot cut the vinyl or any PVC material with the laser machine because of the toxic gases. Also, the vinyl cutter will cut the stickers perfectly and clean with all the details you need. In the college lab, I work with Roland machines for cutting vinyl, one of the machines, Roland Versa CAMM SP-540i printing and contour cutting all in one device through one seamless workflow. Roland Intelligent Pass Control technology virtually eliminates banding by optimizing masking patterns and dot placement at the edge of each pass and offers print speeds that are up to 50 percent, there are many options to print in different materials and qualities, also it’s ECO friendly. I highly recommended for those who need to print large-scale posters, and vinyl cut. The second machine is Roland CAMM1 PRO GX 300 it’s vinyl cutter only, but it can cut up to 90cm. The third machine desktop vinyl cutter CAMM-1 Gs 24, its like CAMM PRO GX30, with workspace 60cm. Make sure all your designs should be vector outlines with .025mm.

Offset Blade
Is the distance from the tip of the blade to the center of its shaft.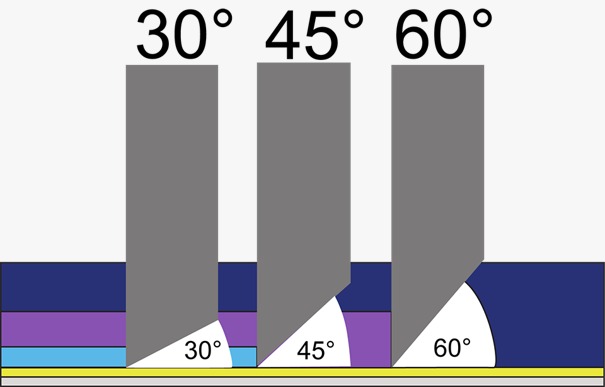
25° blade is used when cutting very thin materials. It is excellent for cutting t-shirt transfer materials and polyester films like window tint.
45° blade is used for cutting standard thickness materials. It is excellent for general purpose cutting of 2-3 mil adhesive backed substrates.
60° high-performance blade is used for cutting the thickest materials. It is excellent for use with sandblasting, reflective, and heavy floor laminate materials.
For more about the blades
Die cut machines
I choose to use my Cricut die cut machine, what I mostly like about this machine small portable, can use it throw online program and recently they offer the offline version for Mac and Windows, a free mobile app for both android and IOS, it’s different than the commercial vinyl machines many materials can be used such as fabric, papers, cardboard with thickness up to 2.4mm, and many others materials if you like to do crafty works, like cards, small packaging, gifts, 3d paper shapes, scrapbooking even cutting vinyl. I recommend Cricut Maker it’s commercial-grade cutting technology, it cuts over 300 hundred materials, from the thinnest paper and fabric to the tough stuff like matboard, leather, and basswood. Not only for cutting it can use for engraving, scoring, deposing and marking, drawing, writing, and more.

Cricut Maker
Design stage To create a decal I decide to use Illustrator, to create a warning sign, to avoid spry in the floor and wall, epically there is an area only for spraying. The setting that you can change in any vinyl cutter, Force, speed, pass, in Cricut, it’s default after you choose the material.
Prepare the design for cutting:
After opening the Cricut Program.
1.Upload the file after save it as .Jpg or .Svg it depends on your design I prefer to save it as .png to keep the size as it’s.
2.set the position of your design and double check the size. it’s depends on your design I prefer to save it as .png to keep the size as it’s..
3. Do weld and attach for all your parts if you want to cut it in the exact arrange, otherwise, the Cricut program will do nesting for all your parts.
4.choose you matt size, make sure to use the suitable matt for your material.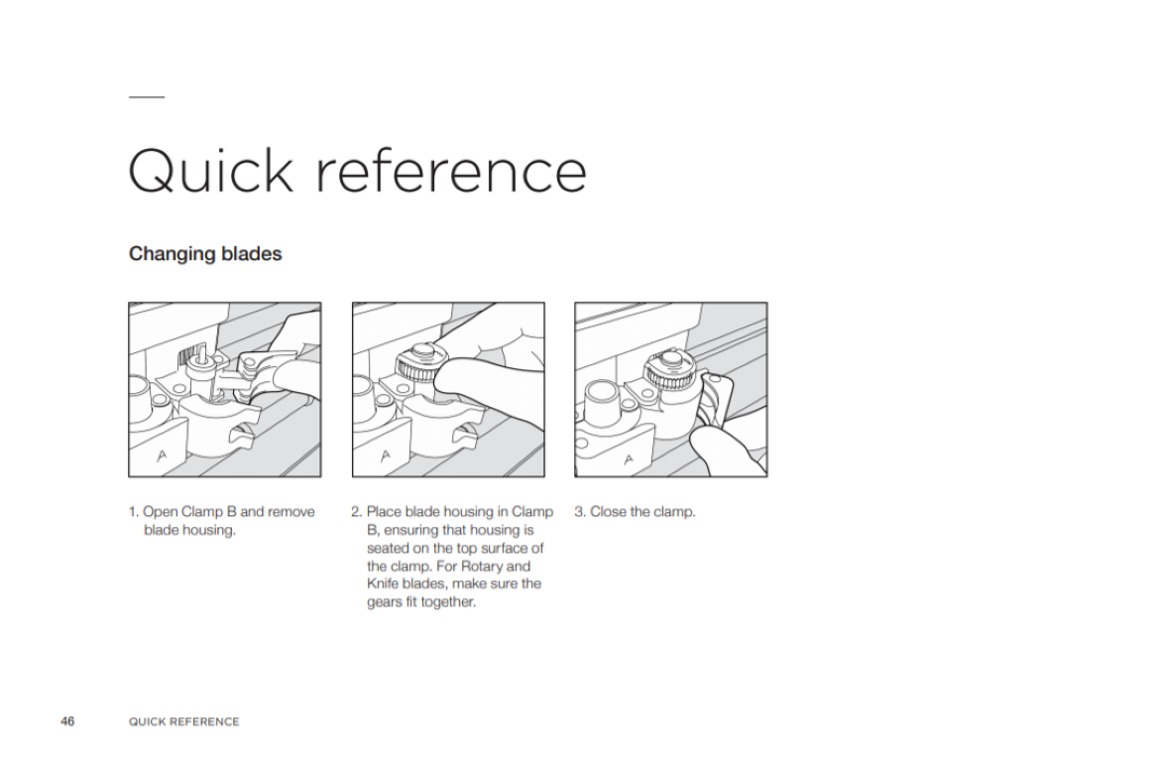

5.choose the suitable Mat based on the material thickness.
6-stack the material and prepare the mat for loading.
Make sure to stack it without any bubbles ,I do use sometimes masking tape in the margins to make sure it’s fixed and flat.
7-choose the right material to avoid damage.There are over than 300 materials in Cricut, it will set the suitable speed presser force based on your material type if it doesn’t cut well you can recut again, but make sure your material fixed well with the suitable mat and blade.
Start cutting
The time varies based on the work order, kind of material, and material thickness.
It’s ready to use!
8-make sure to use the tools kit, to take off your project gently.
For the vinyl I always use transfer vinyl and sometime clear tape or mask tape, clear vinyl (usually used for wrapping books) to do the same of transfer vinyl, but make sure to loosen the glue by a piece of fabric.


Group assignment:
-Characterize your laser cutter's focus, power, speed, rate, kerf, and joint clearance.
-document your work (individually or in groups). Sometimes I work in a different lab, but we do share the experience between us in our weekly meetings at Talent lab, also because of the limit of time I choose to work in the college. Out of two laser machines, I choose speedy 400 from Trotec, the engraving area 100 x 60cm, maximum material thickness to cut depends on laser lens I go with 2.5-inch CO2, when to use for engraving/marking graphics with low detail, low resolution ( 500 dpi). Engraving on heat-sensitive materials (e. g. laminate) if large areas have to be removed completely when to use for cutting high laser power, acrylic 12 mm, the wood of medium hardness 15 mm, the better quality of edges during laser cutting than for lower focal distances.
Speedy 400 Trotec.
Lenses diameter.
Depth of cutting for each lens diameter.
More about lenses.
Machine descripation

Testing Cardboard
- Settings used:
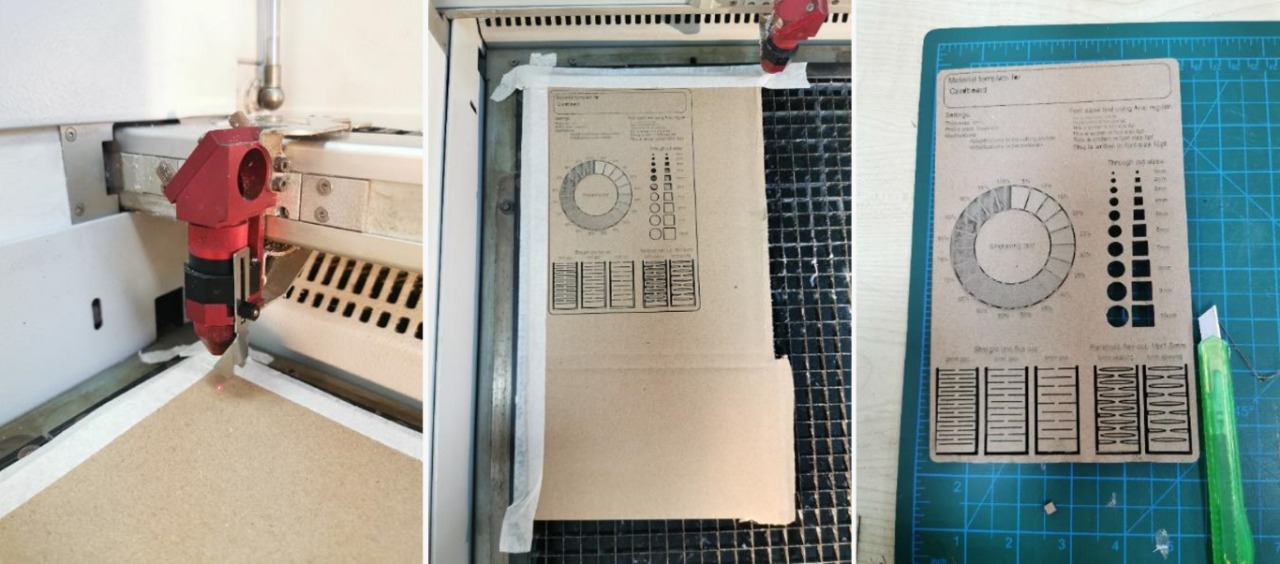
Testing Wood- Settings used:

Testing Acrylic- Settings used:

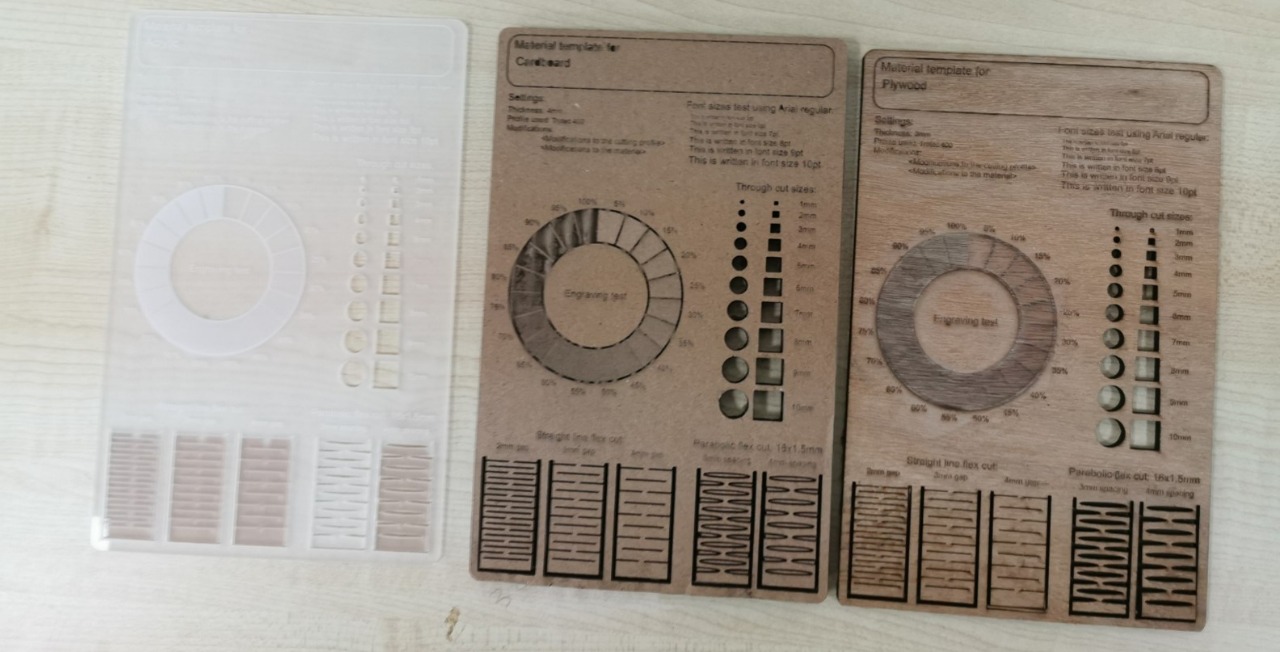
Final Result
Download the file form Thinkgavers
Kerf test