Mechanical Design
and Machine Design
Learning outcomes:
This week I will explain what we did as a group assignment during Machine and Mechanical weeks with the whole Talents Lab team. the assignment was to design and build a machine, after we did a virtual meeting and brainstorming ideas to do a one-week project, each one of us proposed one idea with support links and list of components, after that we vote for one idea, the vote was for a vending machine. The documentation is more detail will be in our group assignment page. We set one group leader to organize the tasks between us we all vote for Nora Alghufaily. After that, she did a task table to define each one task. We divide the group assignment to four tasks.
Design Part
This task is done by Nora and Sara. You can see the workflow on Sara Alghofailty and Noora Alghofailty Pages.
Electronics Part
I will document my part, and the other part on Mohammed sheraif page.
Assmbly Part
will do it until we finish the two main parts in our lab if we can use it during these days of curfew.
Poster and Video Part
We take snaps and short videos and added to the sharable folder between us via google drive. I'll design the poster and Mohammed sheraif will do the video.
Now I will explain my role in this assignment in the part I was more involved in the process. As the beginning, I did a small draft to organize the idea and I uploaded it to the shareable google drive file with the team. Below you will find a part of it.
Filament Vending Machine
What type of vending machine? Coin, portable, low-cost DIY.
Main objective
The main objective to build a vending machine. The user will receive the corresponding product once the payment is completed.
Software requirements
Arduino is an open-source hardware and software company, project, and user community that designs and manufactures single-board microcontroller kits for building digital devices and interactive objects that can sense and control both physically and digitally. Its products are licensed under the GNU Lesser General Public.
Eagle is a scriptable electronic design automation application with schematic capture, printed circuit board layout, auto-router, and computer-aided manufacturing features. EAGLE stands for Easily Applicable Graphical Layout Editor and is developed by CadSoft Computer GmbH.
Scenario of use
In this project a group we plan to make this vending machine to be for filament, the input will be the coins there is a sensor will detect it if the coin inserted the user will choose between A or B, after that the output will be a confirmation message in the LCD, LED light on, the buzzer sound and finally the motor will move the coil to deliver the product to the user.
Figure -will add it soon.
Output Design
It is the part of overall system design. The goal of the output design is to capture the input and get the product as expected by the user.
Implementation
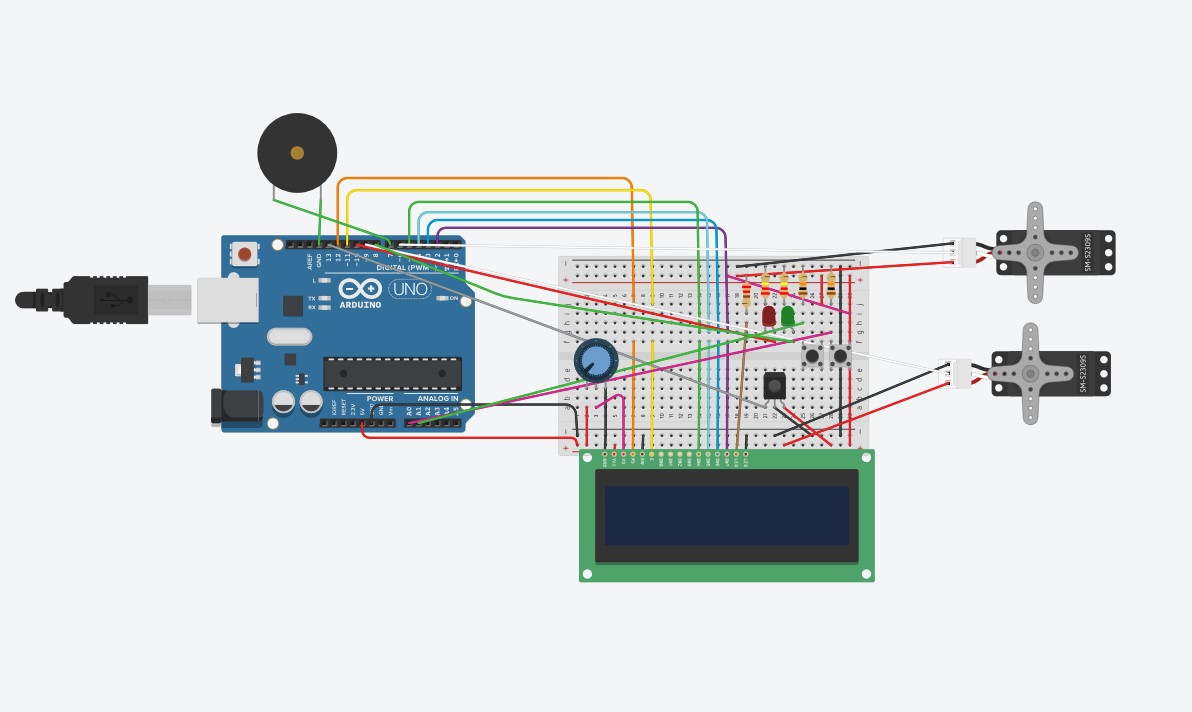
I did the first implementation as a digital prototype then a physical prototype, with the first trail I test the circuit with LDR instead of push-button, and micro servo 180 instead of MG 996R servo, because not all the components are available with me in this time. I will explain step by step how I did the first trail of our vending machine circuit.
Hardware requirements for the first trail:
Digital Prototype
I used Tinkercad to simulate the circuit. Starting with all the components and make sure that the connection is corrected, then I added the servo 360.
Coding
I build the code by using the IDE Arduino environment, for this prototype I used servo motor 180 because I don't have servo motor 360.
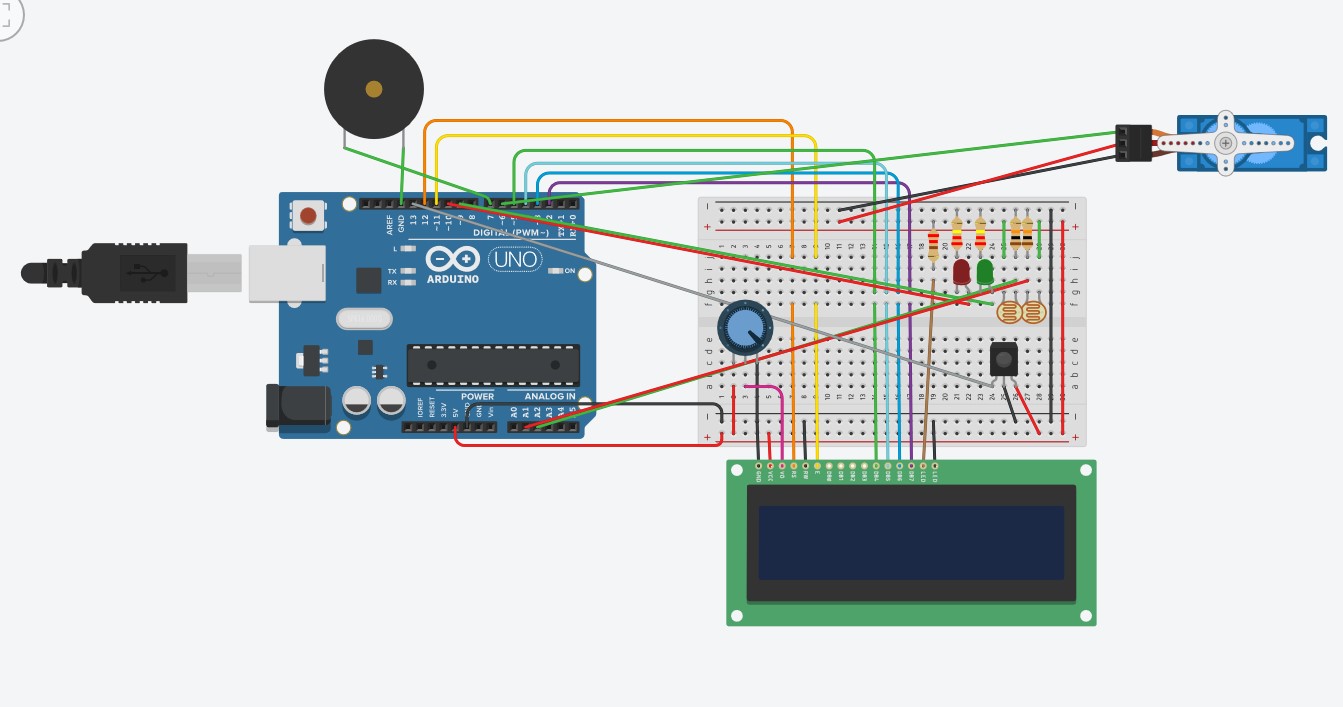
physical Prototype
In this prototype, I matched the connection of the components as I did in Tinkercad. I tasted the three main components in the circuit the IR sensor, the LDR, and the servo motor.
LDR testing code.
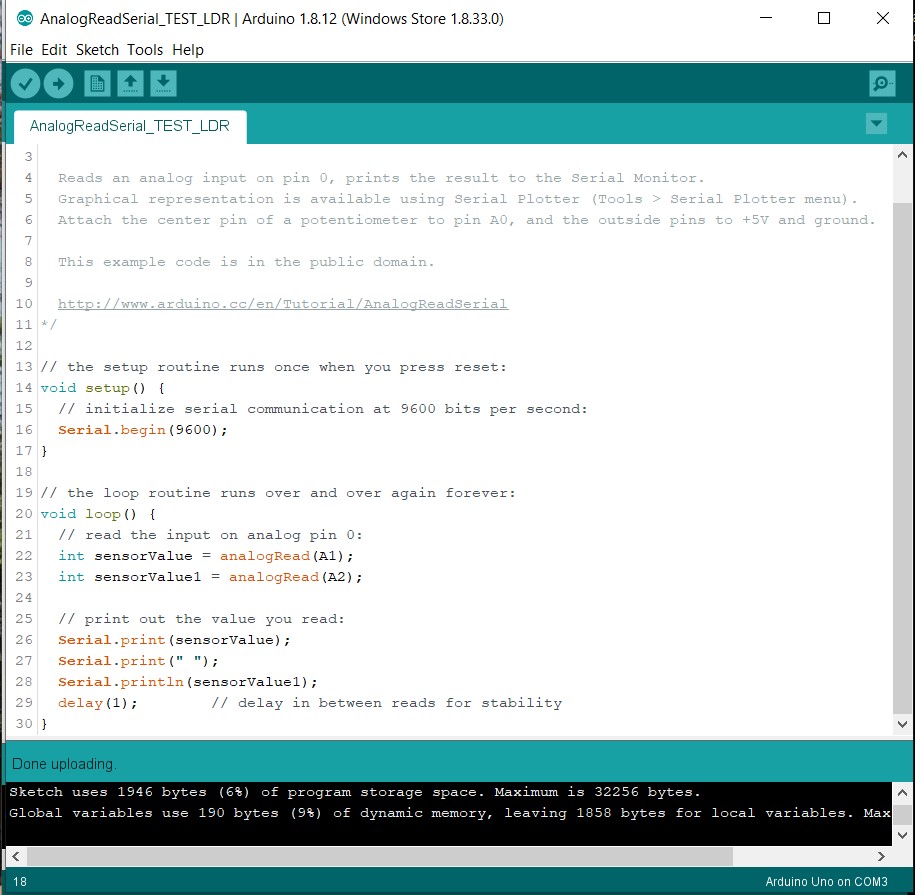
Coding
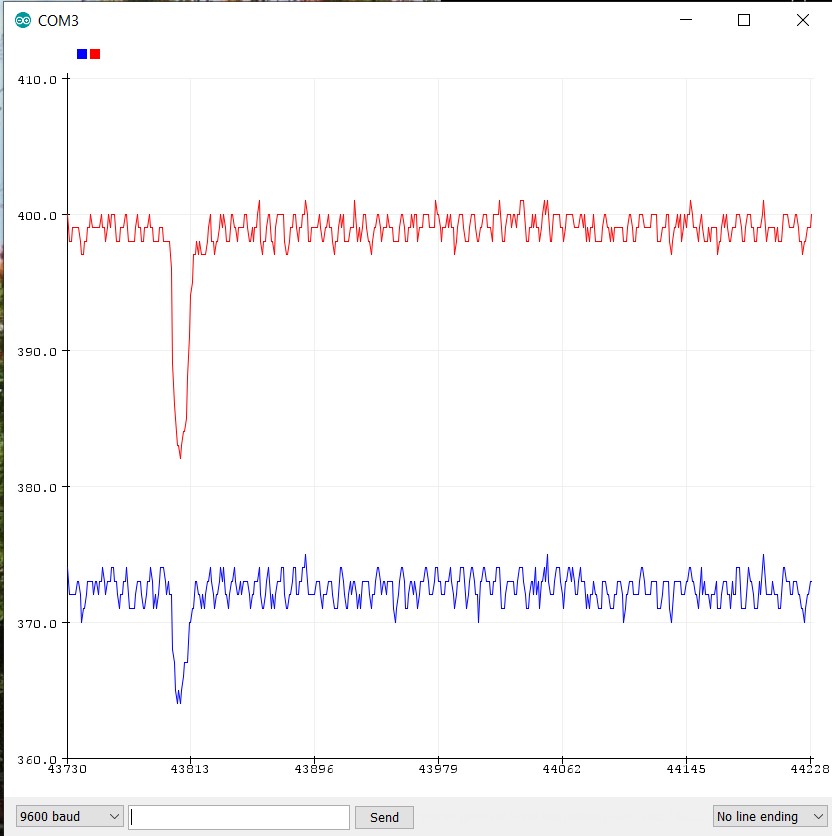
LDR testing result.
IR sensor testing code

Coding

IR testing result.
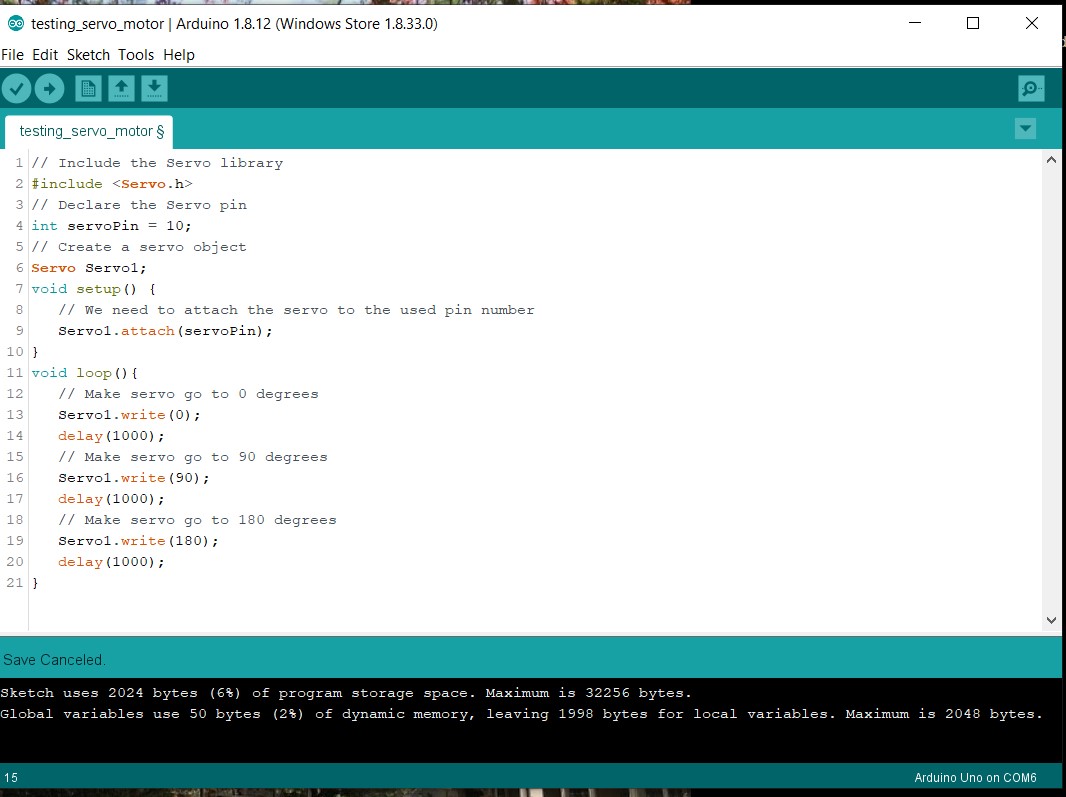
Coding
Servo motor testing result.
First trail of the Vending Machine
Now After I checked all the main componants, it is time to Upload the code.
Coding
Final result.
Secound trail of the Filamen Vending Machine
Now after I checked the main components and the connection between the sensor and the motor, I connected the MG 996R servo and push-button by using Tinkercad.
Hardware requirements for the first trail:
Digital prototype
Coding
Final result.
Download files here: