Design and Digital Fabrication
ABIZO Health Care Kit
Posture Keeper and Smart Hydration Water Bottle
How I design ABIZO?
In this page I will explain how I designed the ABIZO Health Care Kit, I will explaine more about the softwares and how I fabricated.
This project is devided to tow main prodcts, the ABIZO robot it act likee a posture keeper and the smart hydration water bottle.
First I will start with ABIZO robot the posture keeper.
Structure of ABIZO robot
in this project I developed the design to act like a humanoid robot, by adding more features and design it to be more interactive with the children.
3D design
For 3D design I used Fusion 360 to design my first prodcut, I devided to four parts, the head, the body and it will countain the pcb circit, the legs and last the foot.
The Foot Part
The first part is the foot and the legs, I redesigned the foot by using Fusion 360 to look more huminied, but I kept the legs as the orignal design and this is the only part I did not design it.
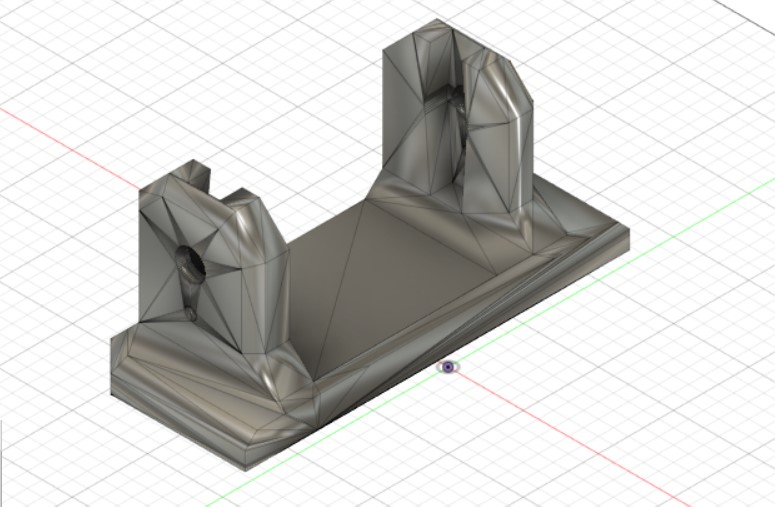
I cut the design and builded on it.
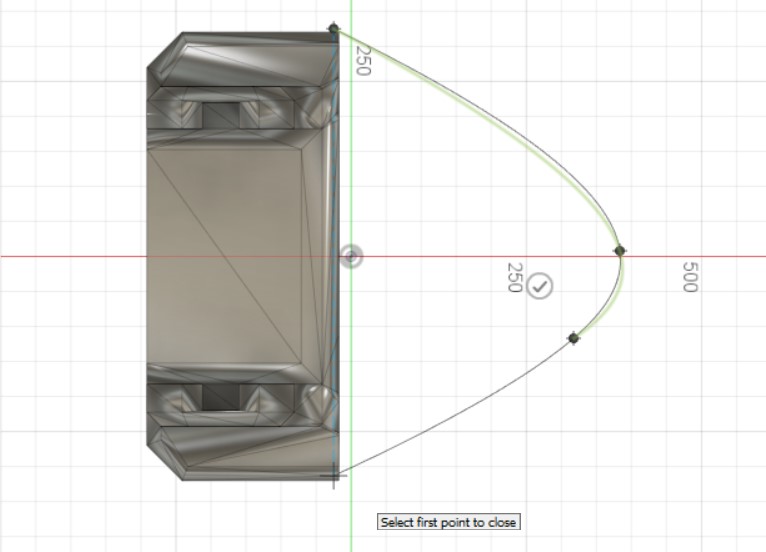
I created a 2d sketch and used fit point spline tool to creat the shoe shape.
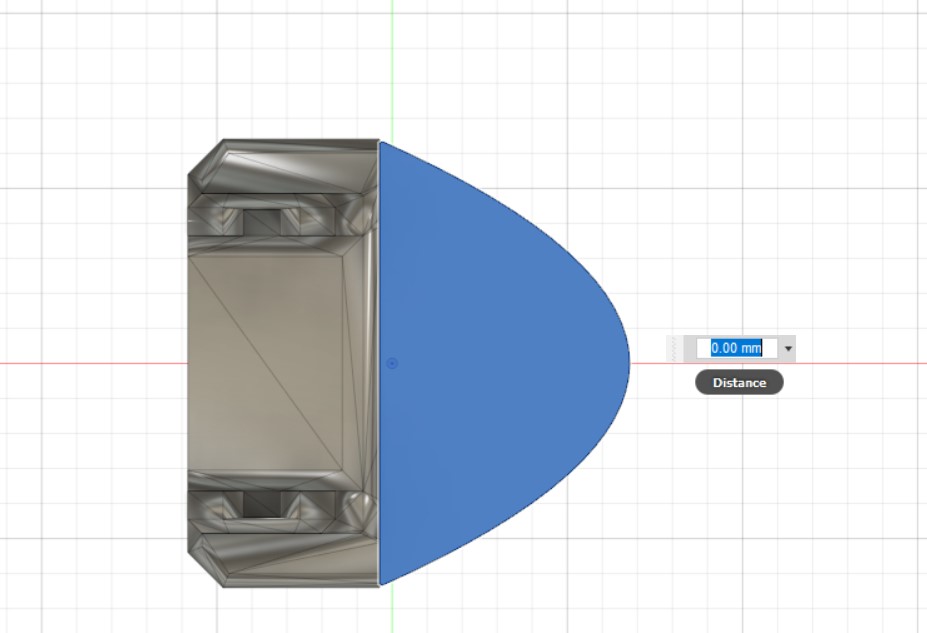
After that I used the extrude tool to git the thickness 5mm.
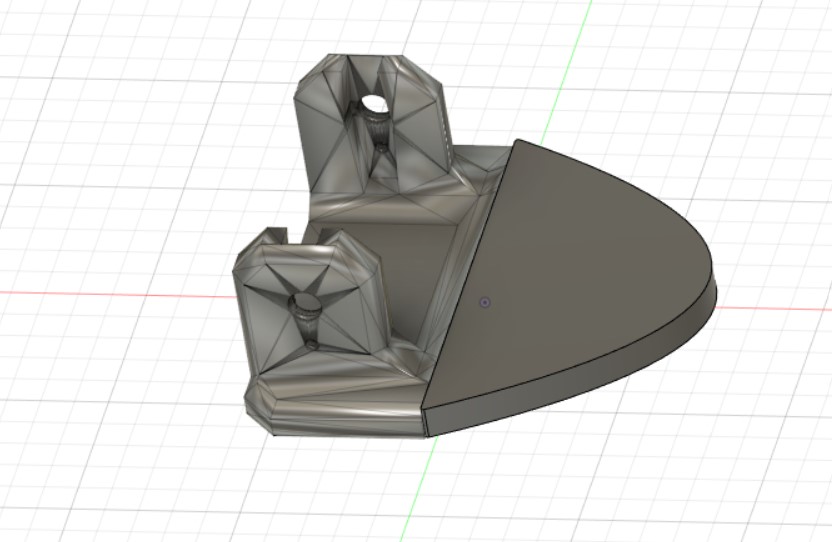
The shape after I extruded.
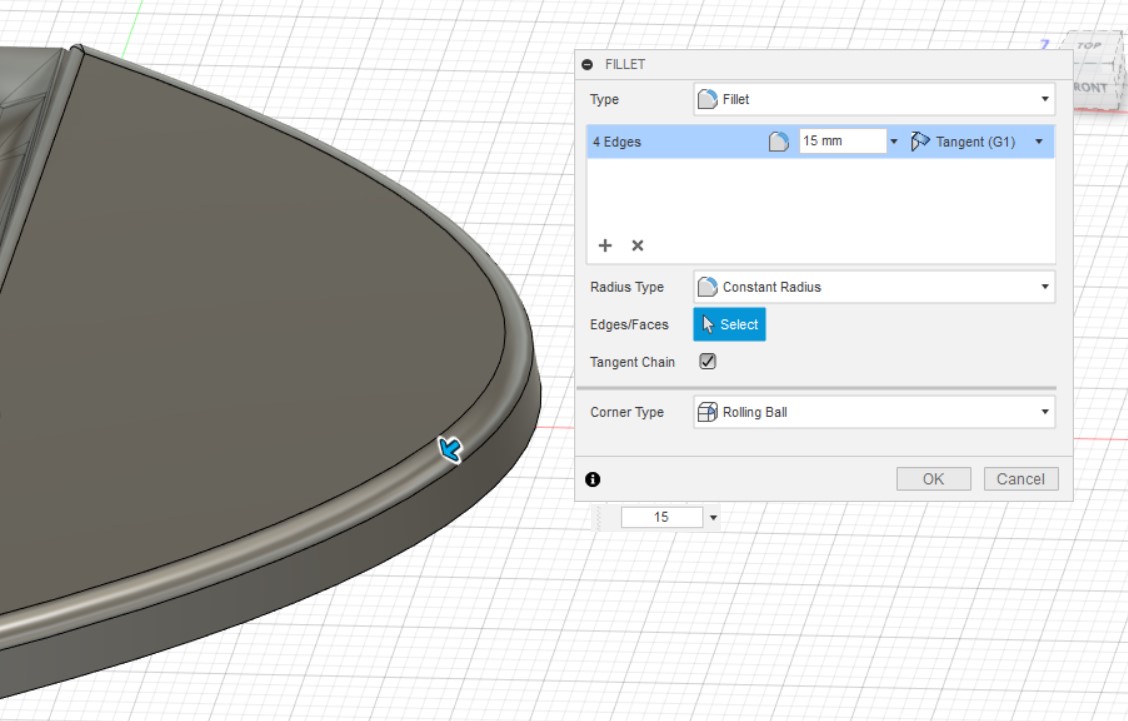
I used fillet tool for the edges to fit more with the final design of my robot.
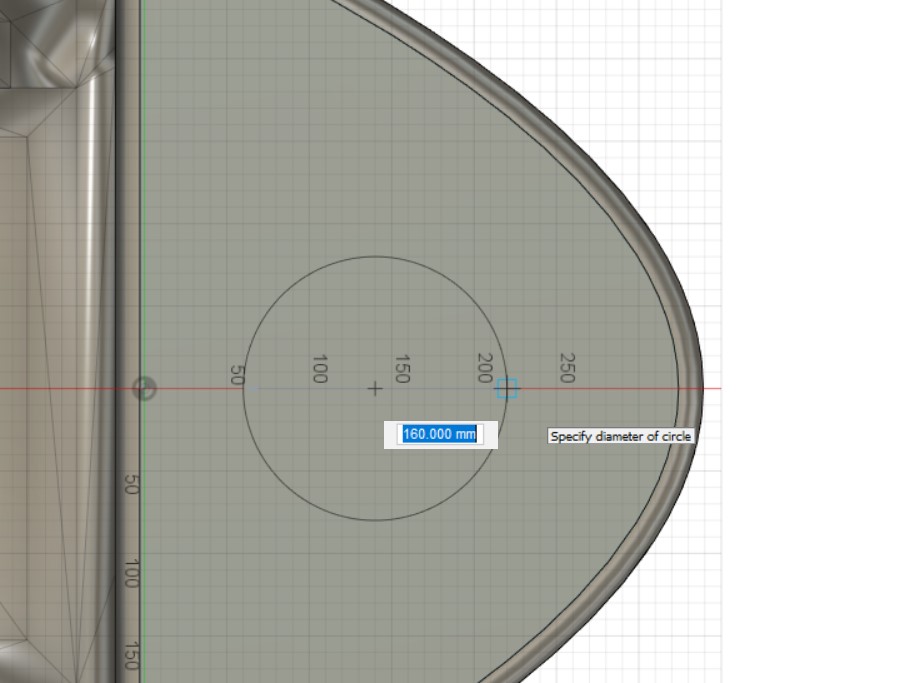
I added a circle in the middle to look more like a real shoe.

After extrude the circal shape.
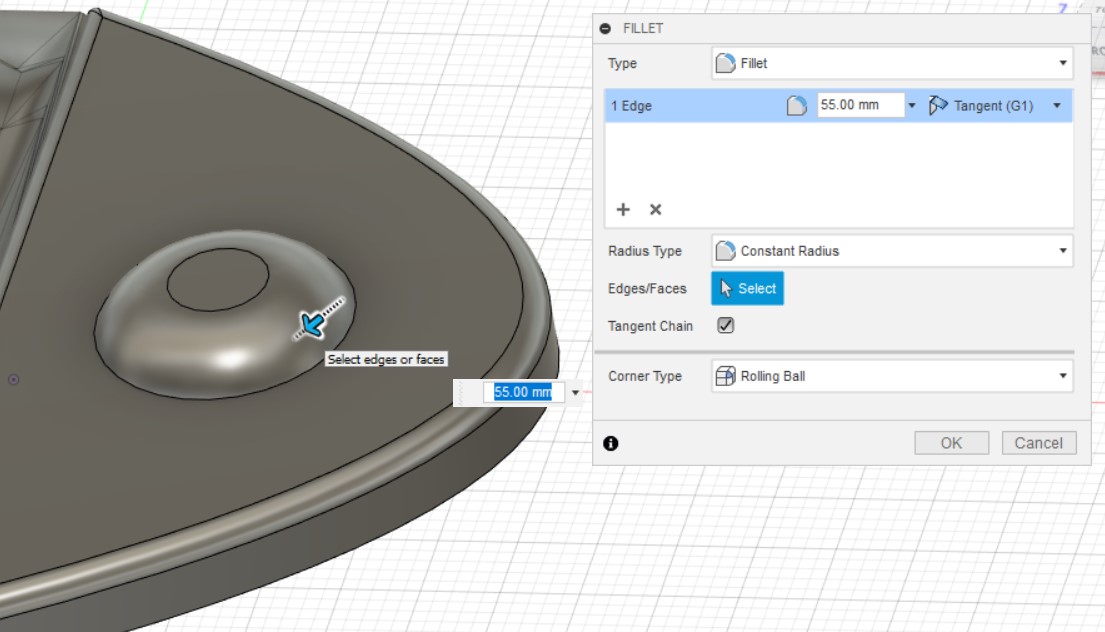
I used fillet tool to make the half-sphere shape.
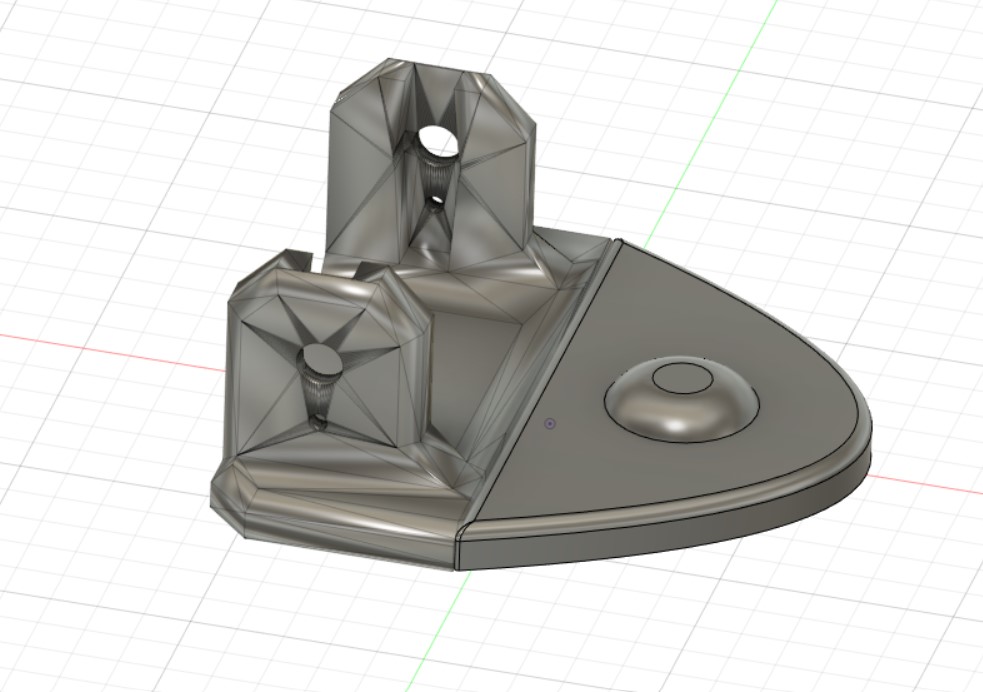
Final result after I combine between the two bodies then I saved it as STL.
Legs Part
The leg is the second part and as I sied this is the only part I used it as it is from Otto Robot
The Body Part
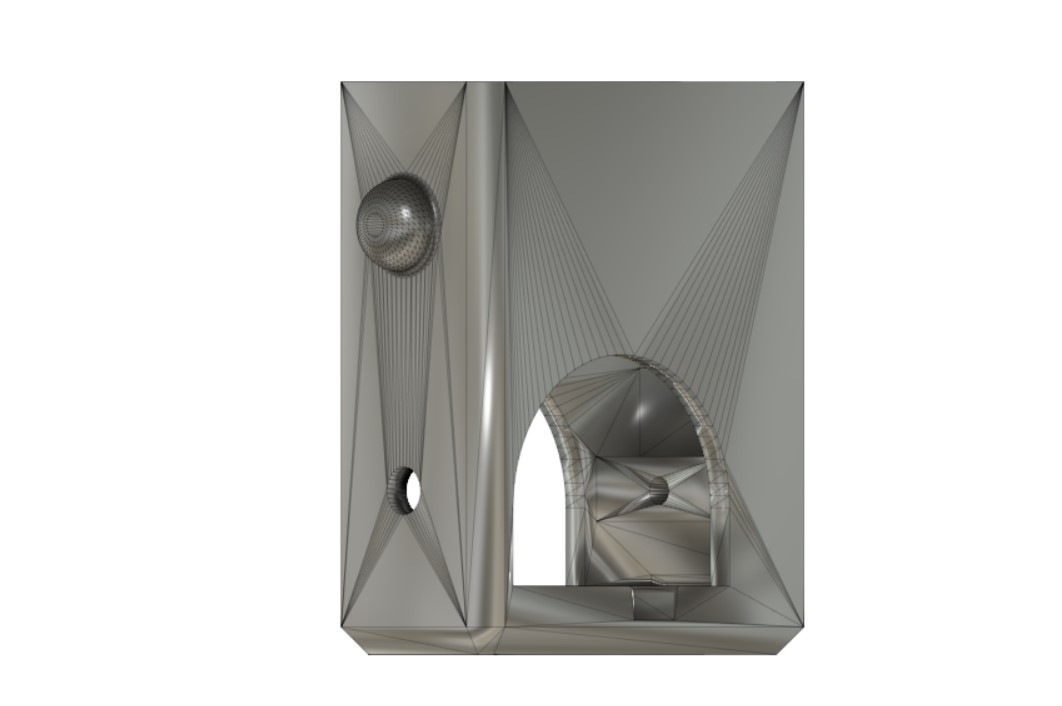
The body is my third part it contains the circuit and the rechargeable battery, I designed it in a rounded shape to be more friendly for the kids.

I designed the body to hold the two micro servo motor, and the battery.

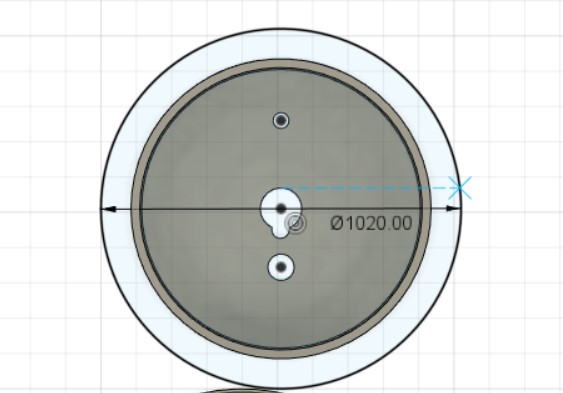
For the two legs I will use two micro servo motor so, I drow it in 2d sketch.

After I finished the 2d drawing, I used extrude tool, then I deleted the walls, and kept only the holes.
The second part of the body to contain the head micro servo only.

When I drow the shapes and then extruded them, I deleted all the walls and kept the holes only.

After exruded and edit it.
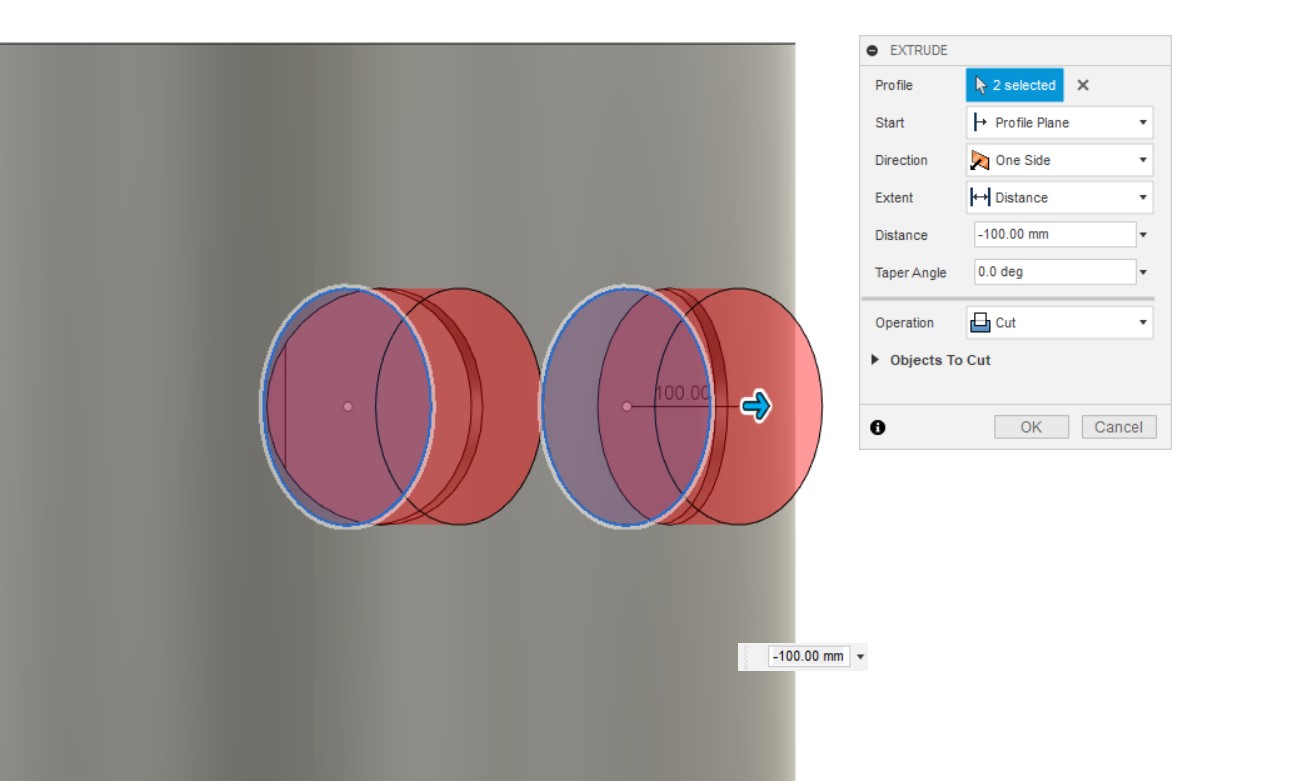
I added two holes for the ultrasonic sensor to be also as the eyes for my robot.
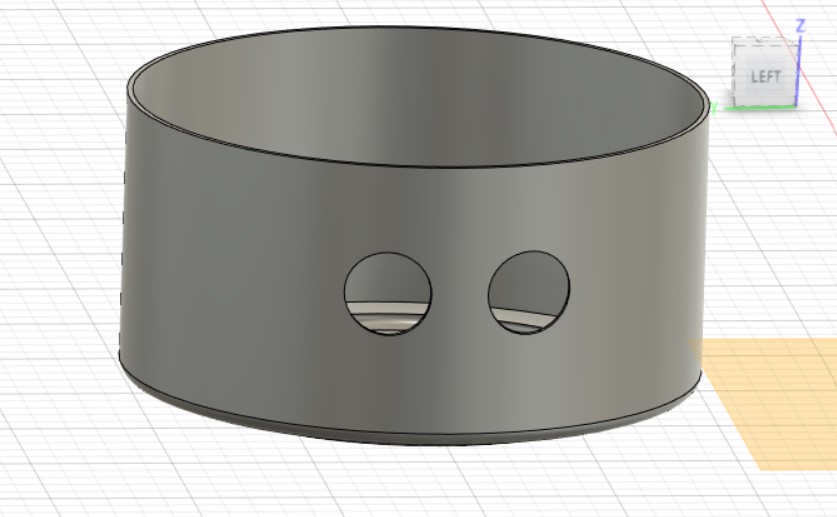
I extruded cut the holes by using extrude tool.

I filleted the edges.
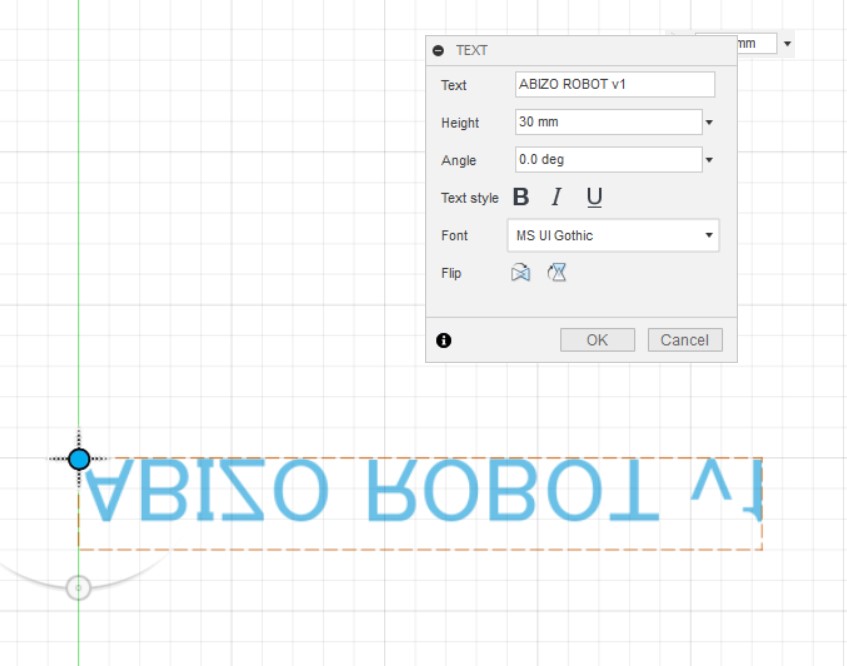
I added the name of the robot by using the text tool.
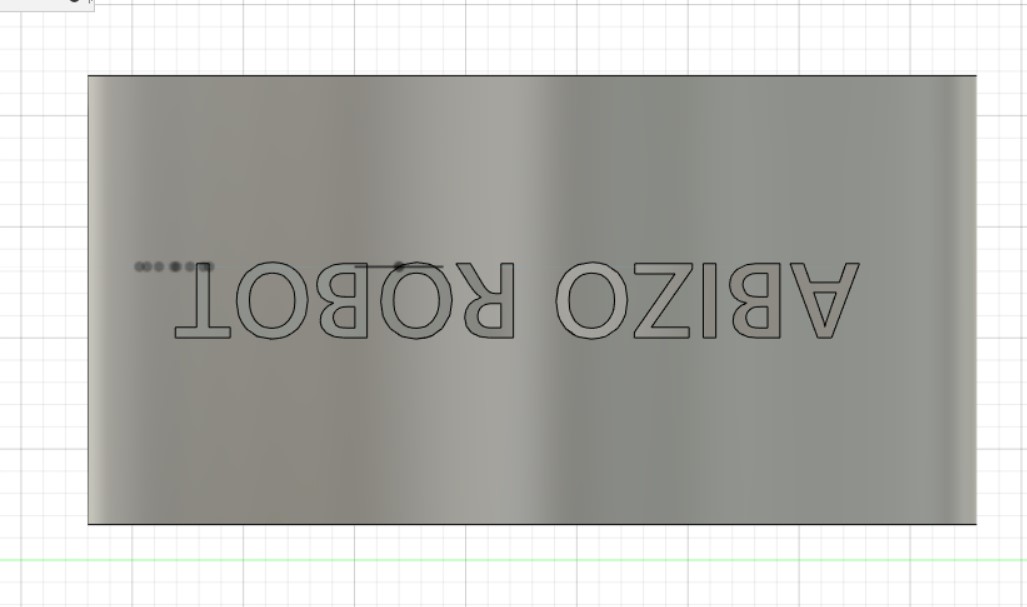
I changed the text type and the size also.
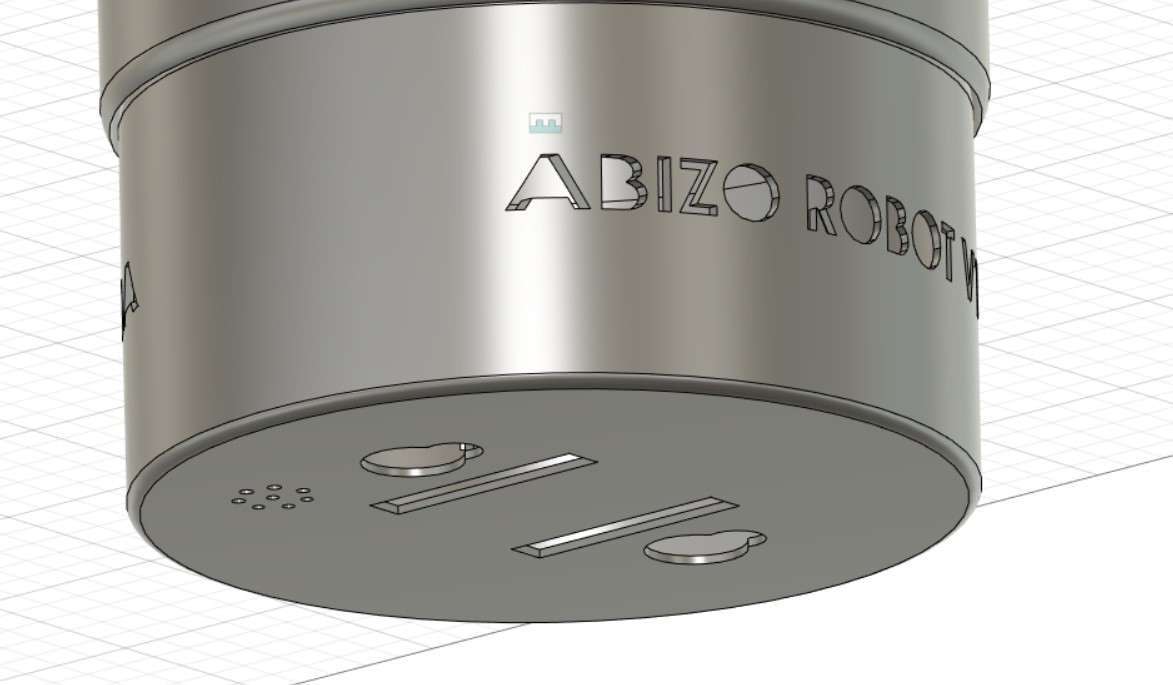
Final look.
The Head
This the last part, the head I designed it to be able to move and interact with kids while they are getting closer to the screens.
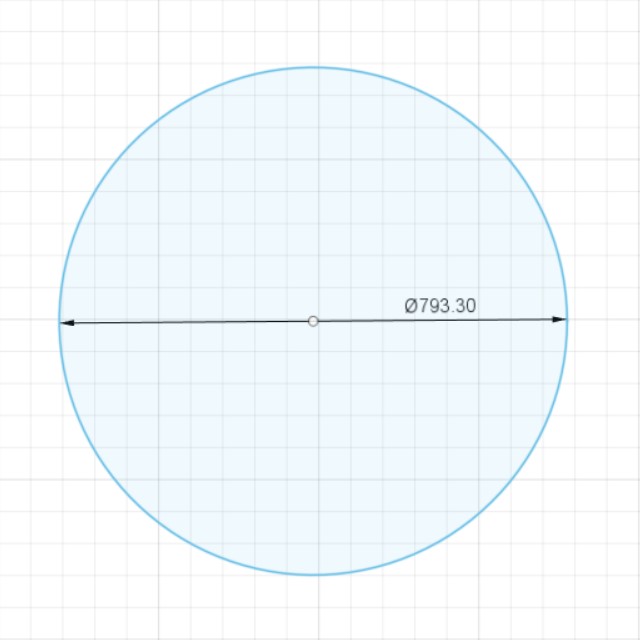
By drawing a circle in 2d sketch.

Then I extruded and use the fillet tool to create the dome.

The Star
I designed the star by using Inkscape to match the props that I used with the hydration water bottle, it will help the child to know if he/she setting in the right distance or not by moving the servo motor right and left.


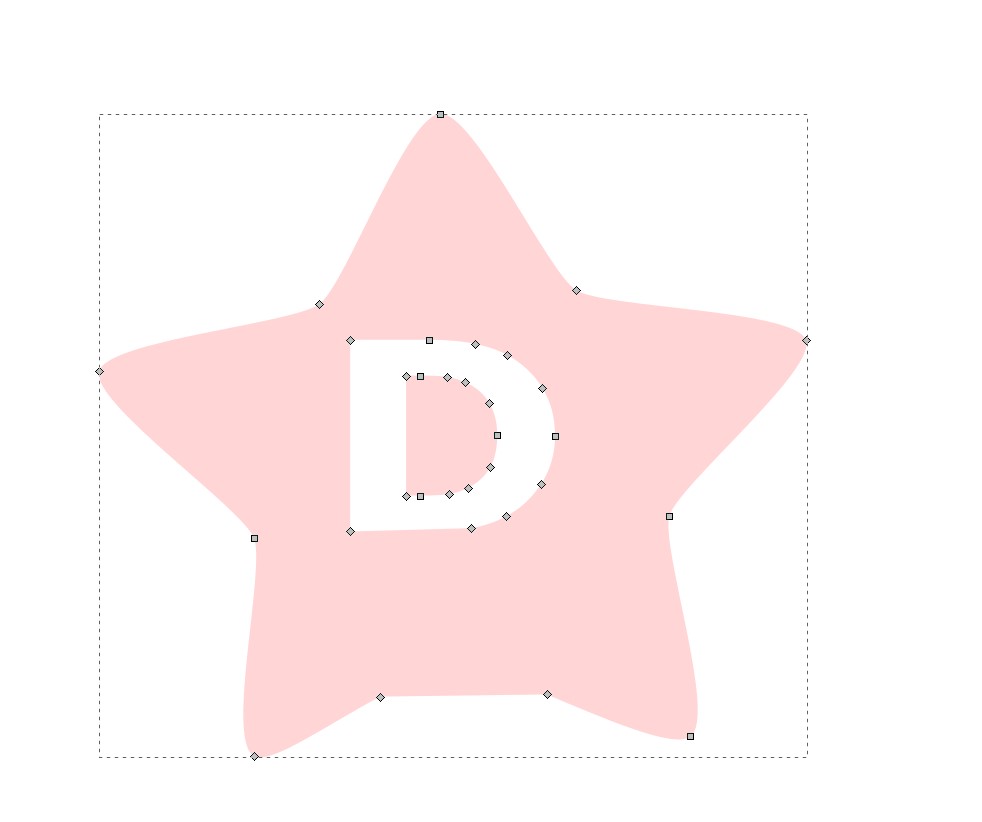
2D design steps, I used exclusion tool to do the star with a letter as one part.
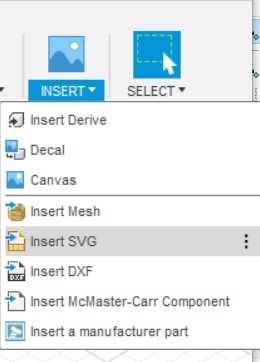

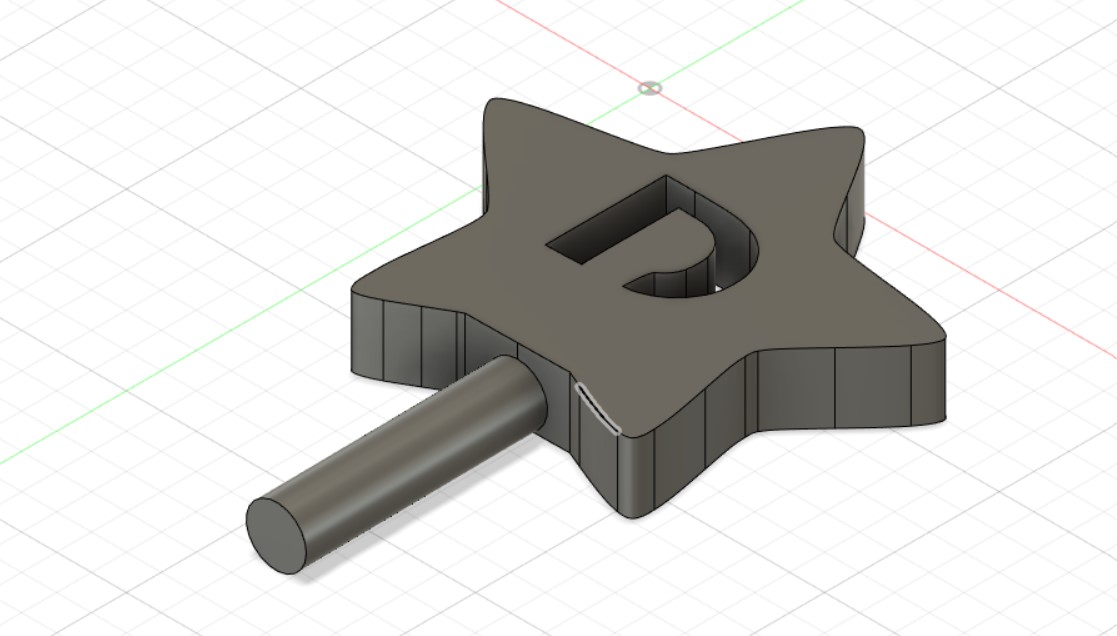
After imported to fusion 360 and extruded, I draw also a column to fit in the head.

Final result for ABIZO V1 robot.
Smart Smart hydration water bottle
This is my second product in my health care kit "ABIZO KIT". I designed the prodcut by using Fusion 360, I will explain how I designed each of the three parts, the led, the water container, the wires holder.
The Water Container
I designed based on the standard size of the water bottle, in this design, the amount of the water will be =330ml.

First I created 2d sktech.
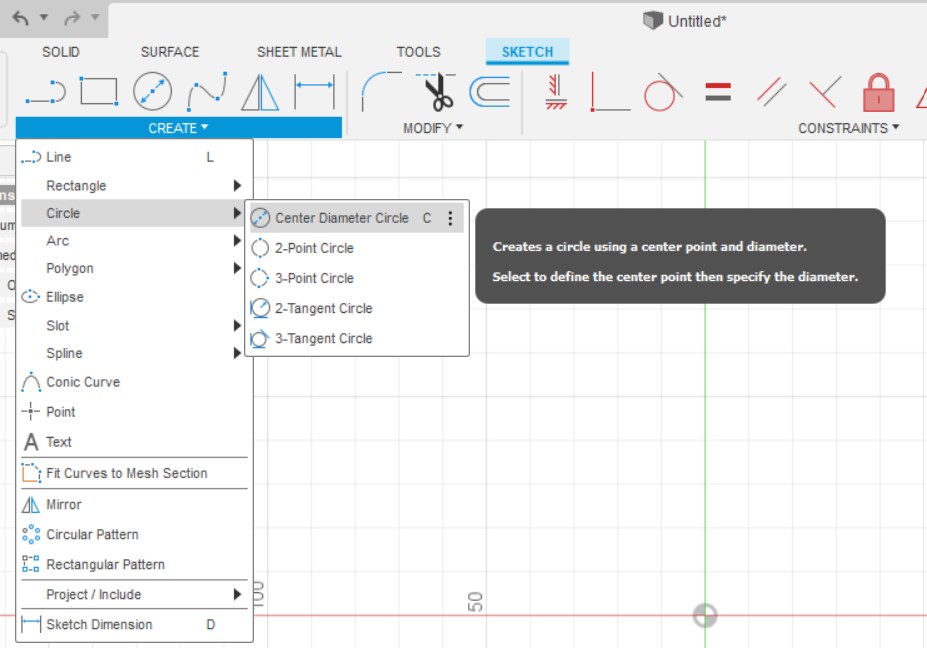
I Draw a centreed circal.
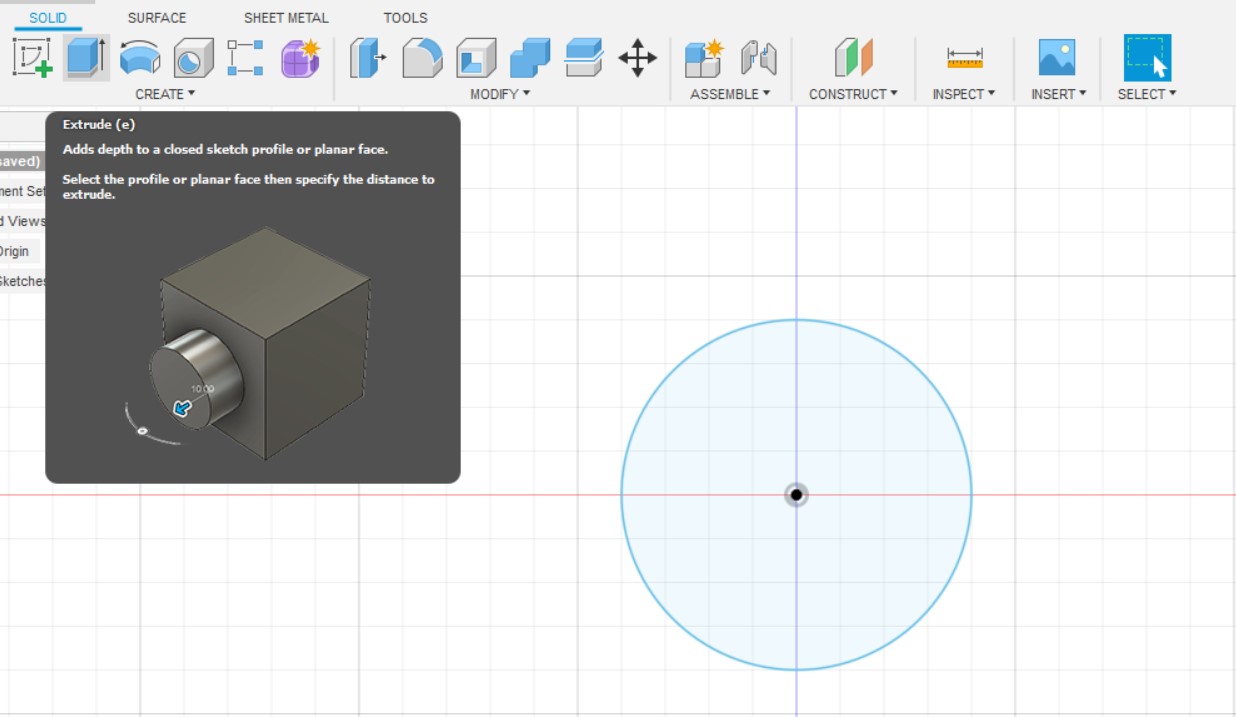
With 8cm diameter.
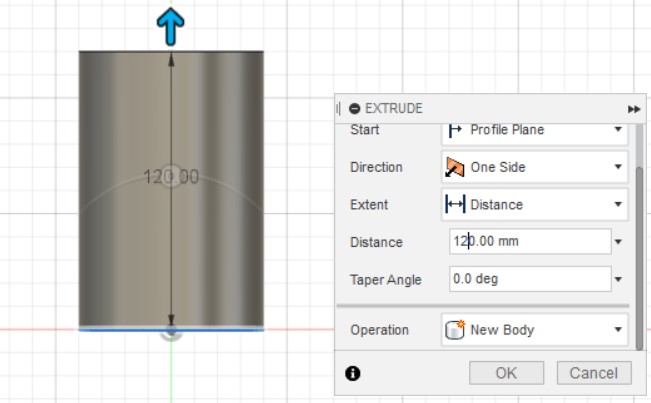
Then I extruded up to 12cm as hight.

Again I draw a circle on the top and extruded, I filleted some edges.
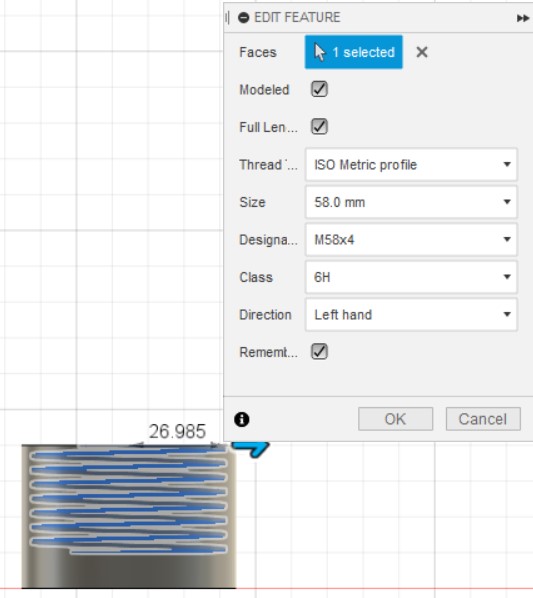
I added a thread to make sure that the bottle will close, and for keeping the size I checked the remember size option.
Make sure to check modeled option to be able to 3d printing.
The Smart hydration water bottle lid
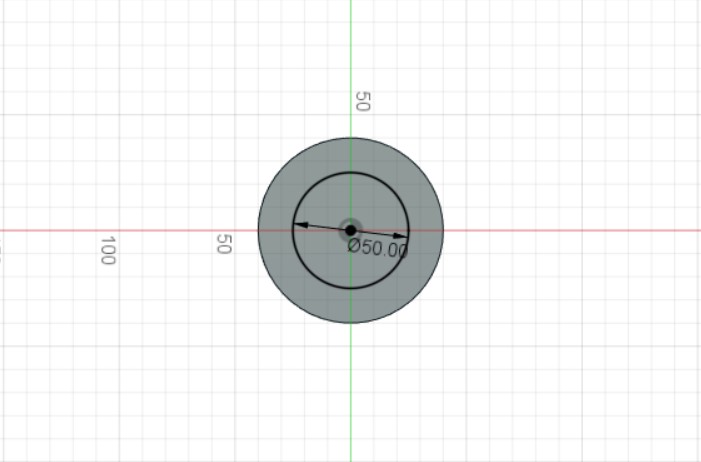
The lid I draw two circles, it will the circuit for my first prototype, so I designed it with increasing a little bit the hight.

After I extruded it.
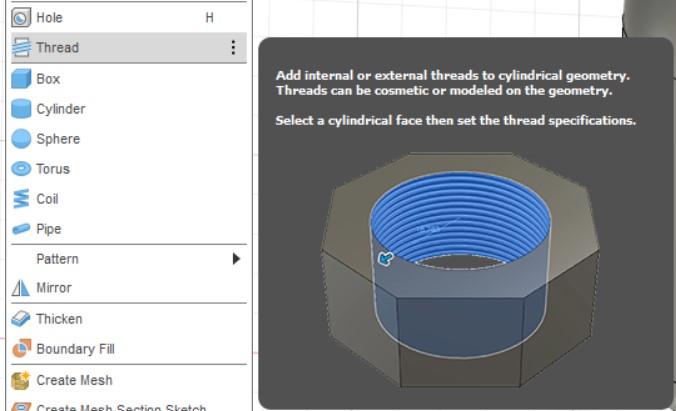
Again I used the thread.
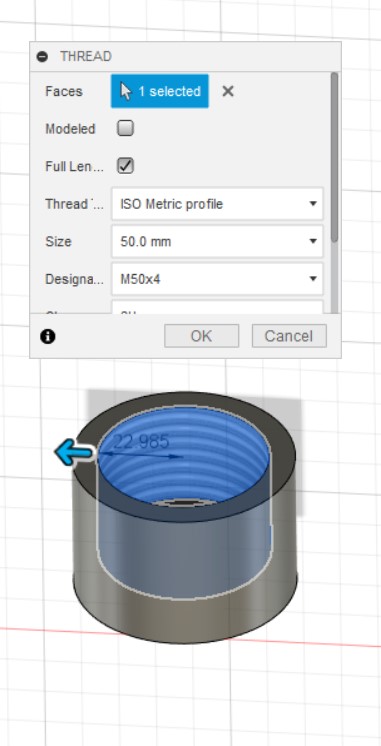
Thread editing.
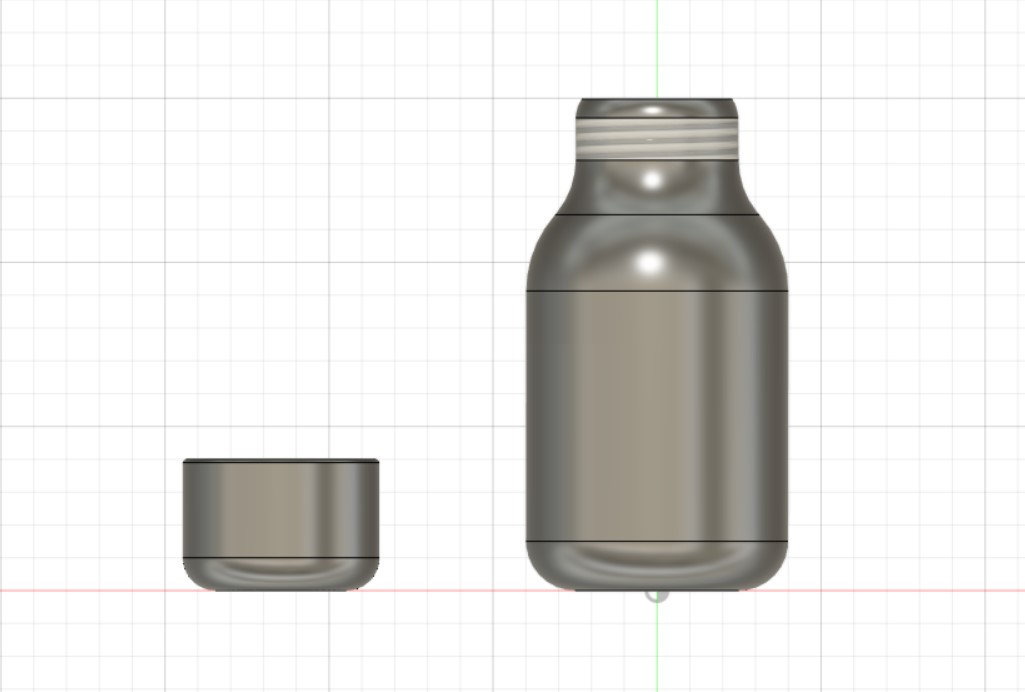
Semi final result.
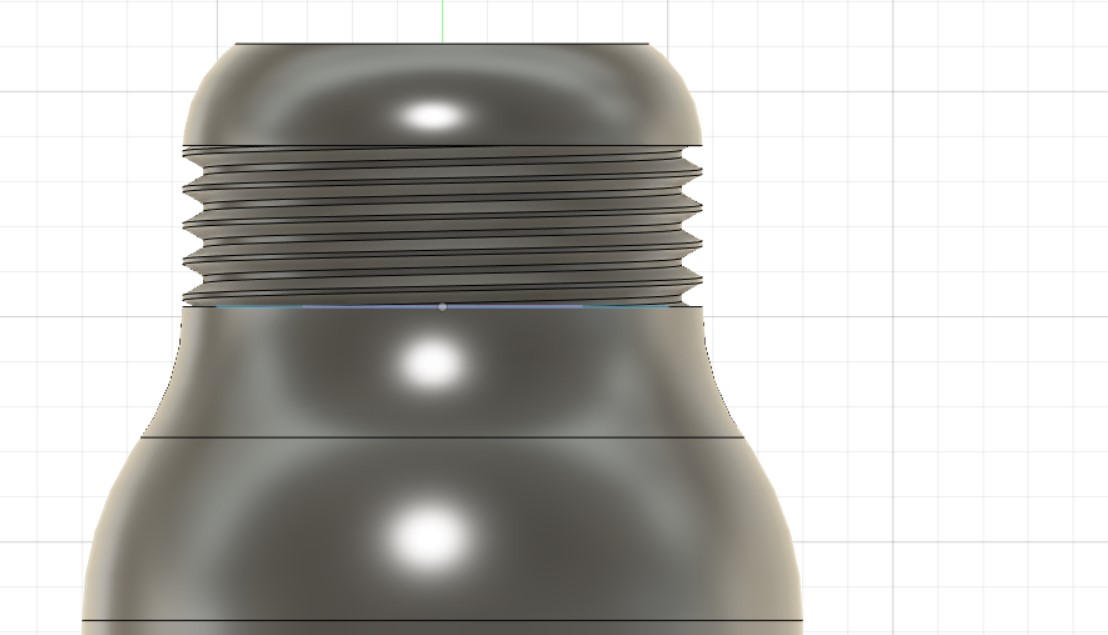
For the thread we should mark it as moulded so we can use the 3d printer and print it.
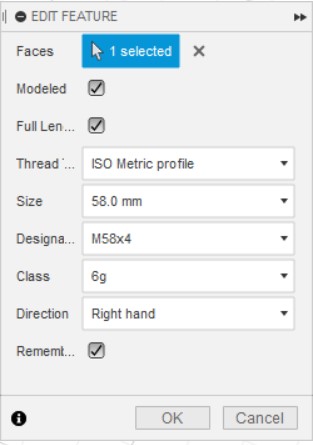
After cheked to moulded option.

In this step I converted the thread to be as part of the modle, and I increased the lid height 2 cm more to hold the circuit.
The Smart hydration water bottle ring
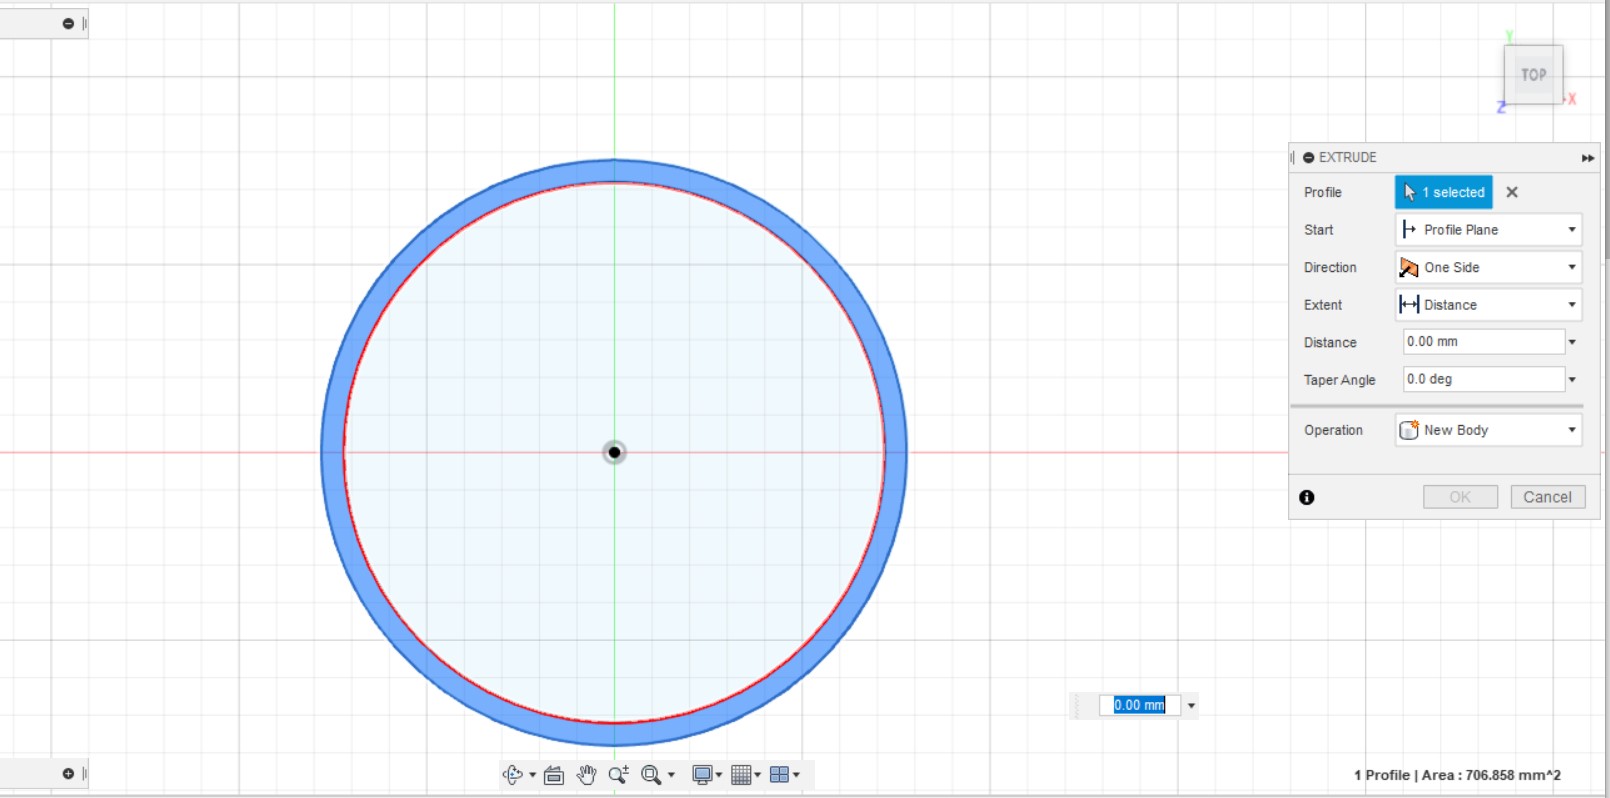
I designed a ring to hold the first letter for the kid and to be more special and customized for him/her.

After filleted to match the hole design.
The ciriciut cover
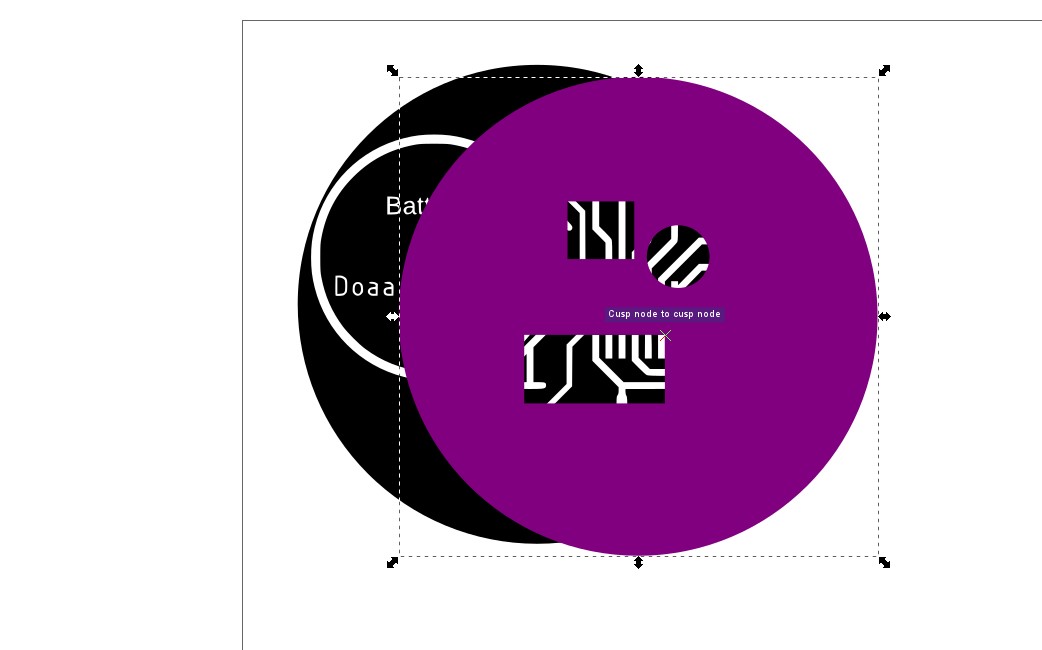
I used Inkscape to draw over my circiut to know where is the switch, the sensor pin, and the RGB LED places.
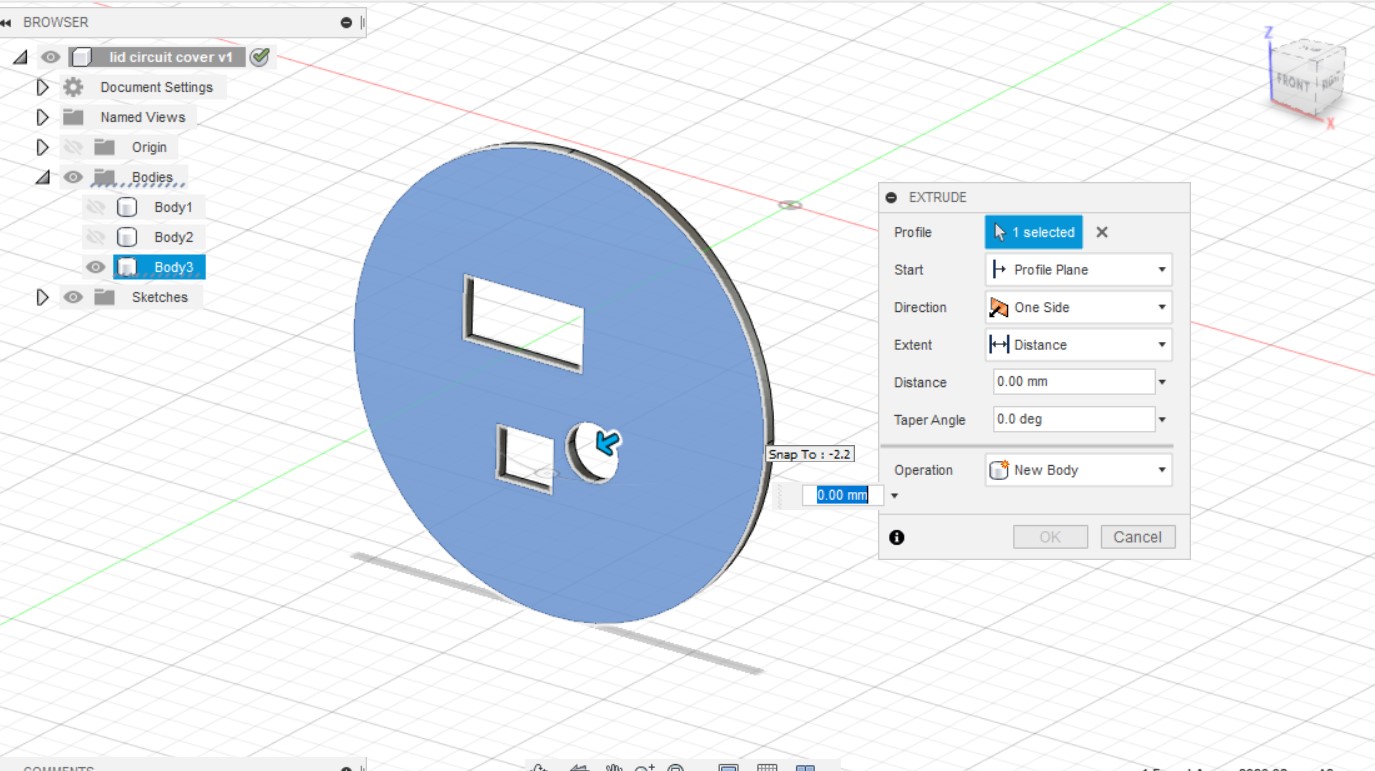
I saved it as SVG and imported to Fusion 360 to extrude it to 2.5mm
Final design.
2D Design
In this stage, I decided to design simple chains for the Smart hydration water bottle to be more customized and uniqueness, by adding the first letter for the kid and the special icon he/she likes.
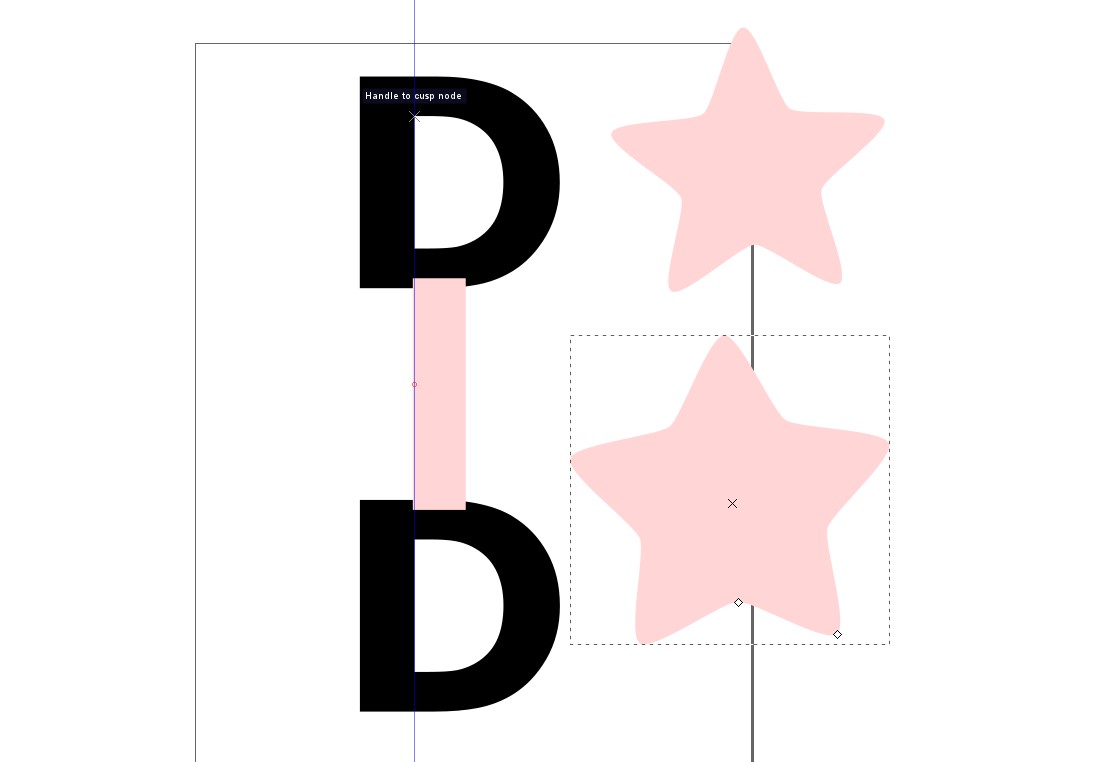
I used Inkscape to draw simple icons and wrote the letter, also I drow a rectangle shape to merge all the shapes together.

From Path tab, I used the union tool to merge all the shapes.
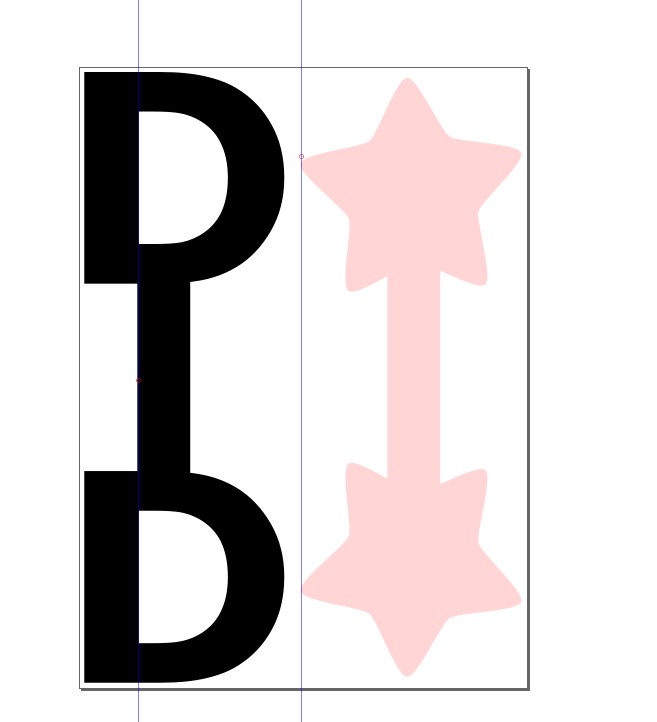
Final design.
Digital Fabrication
One of the main objectives of my project was to make a printable fabable prototype, that anyone could make in any makerspace. This was a real motivations for me to preduce the project on my own makerspace at home. Below are the processes and machines I used.
3D printing
3D printing saves time and therefore costs associated with using different machines for manufacture, and it is the most accessible and affordable digital fabrication process.
Printers
I used two diffrent 3d printers. I can use one machine but based on the filliment diamter size I used ultimaker2 extnded+ to print the feet and the head, for the whole designes I used my own 3d printer under 3 pro machine.
They gave a good results but it take time as any 3d printer.
Slicing Program
To slice the STL files I used usally Cura by Ultimaker for printing my designes.
Those are the main settings I used for all the pieces:
Layer hight:.2.5-3mm It's a good quality, I usedto minimize the printing time .
Infill Density: 2-5%
Infill Pattren: Traingles
Print speed 70-80%
Intial layer speed: 30%
Buield plate adhvesion: Skirt
Supports: I did'nt used it in any part.All the files I prepared them to be printed without supports.
The Parts list
For Smart hydration water bottle
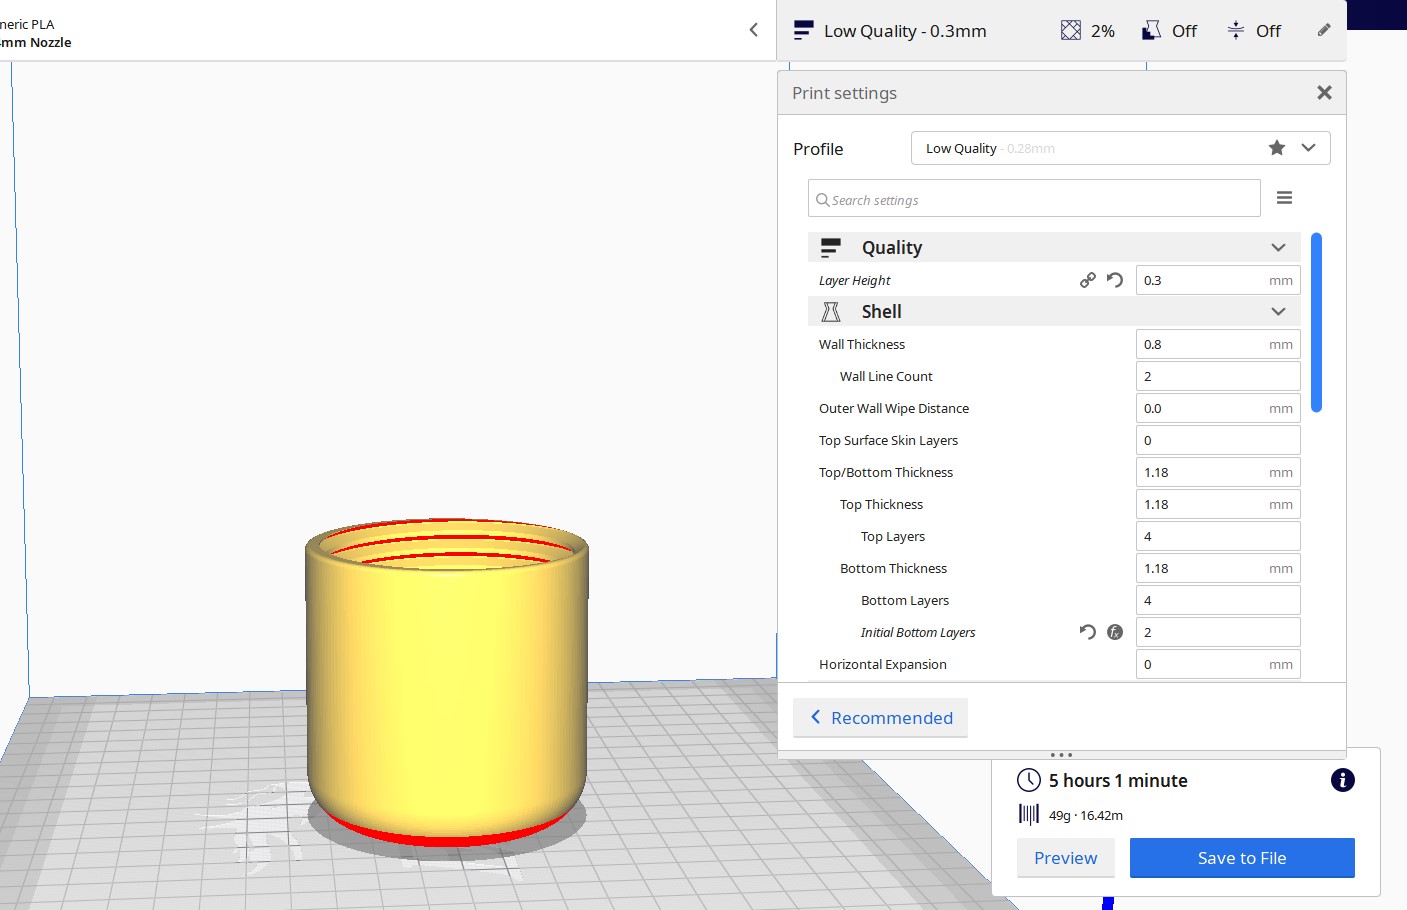
The lid I printed with metallic PLA filament.
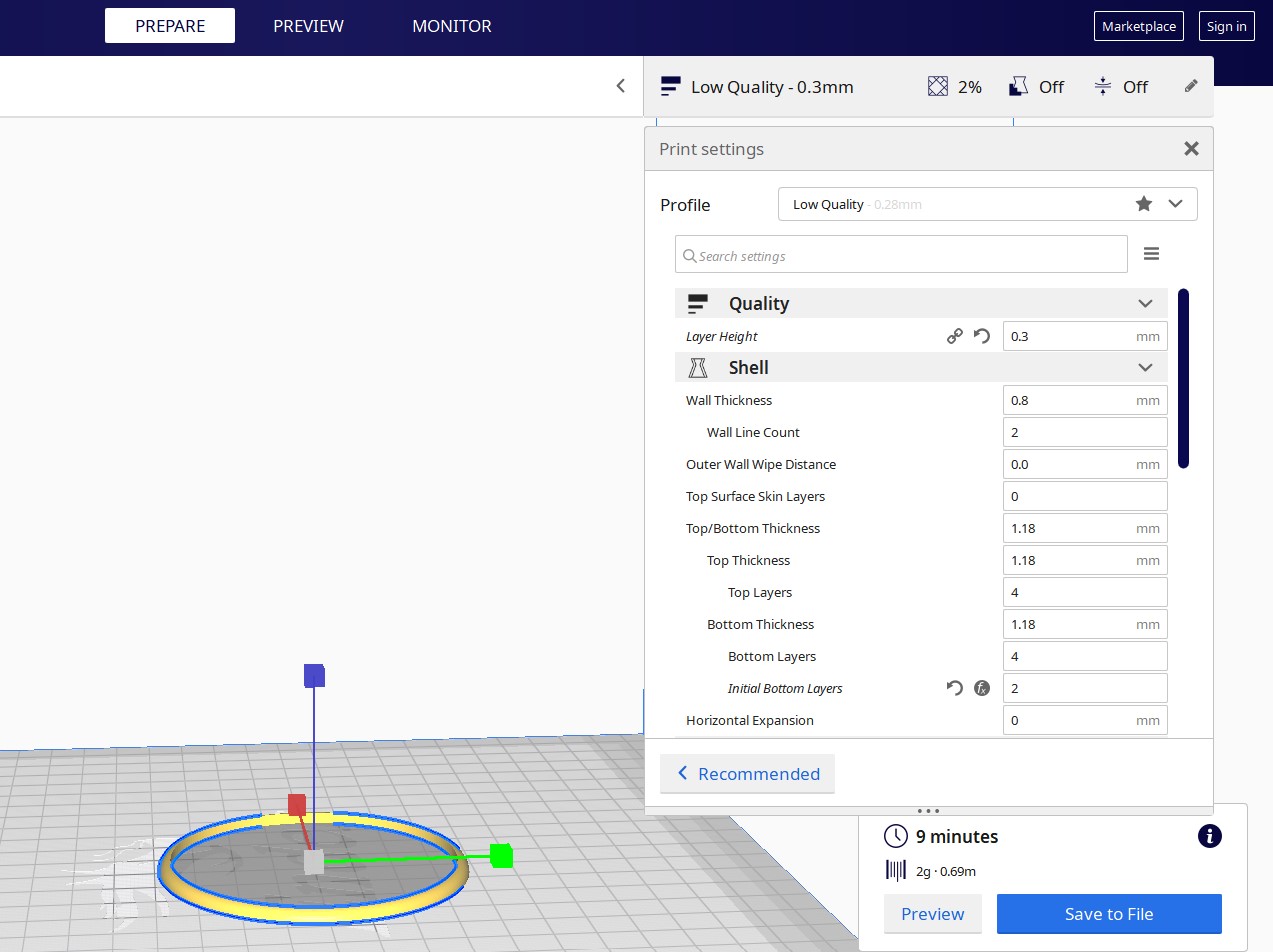
The chain.

The circuit cover I printed with semi-transparent filament to get the light go through.

Coin battery holder I downloaded from the Thingiverse website. It was made by John Clymer.

The bottle I printed by using 2 different filaments the wooden and the metallic PLA filaments.
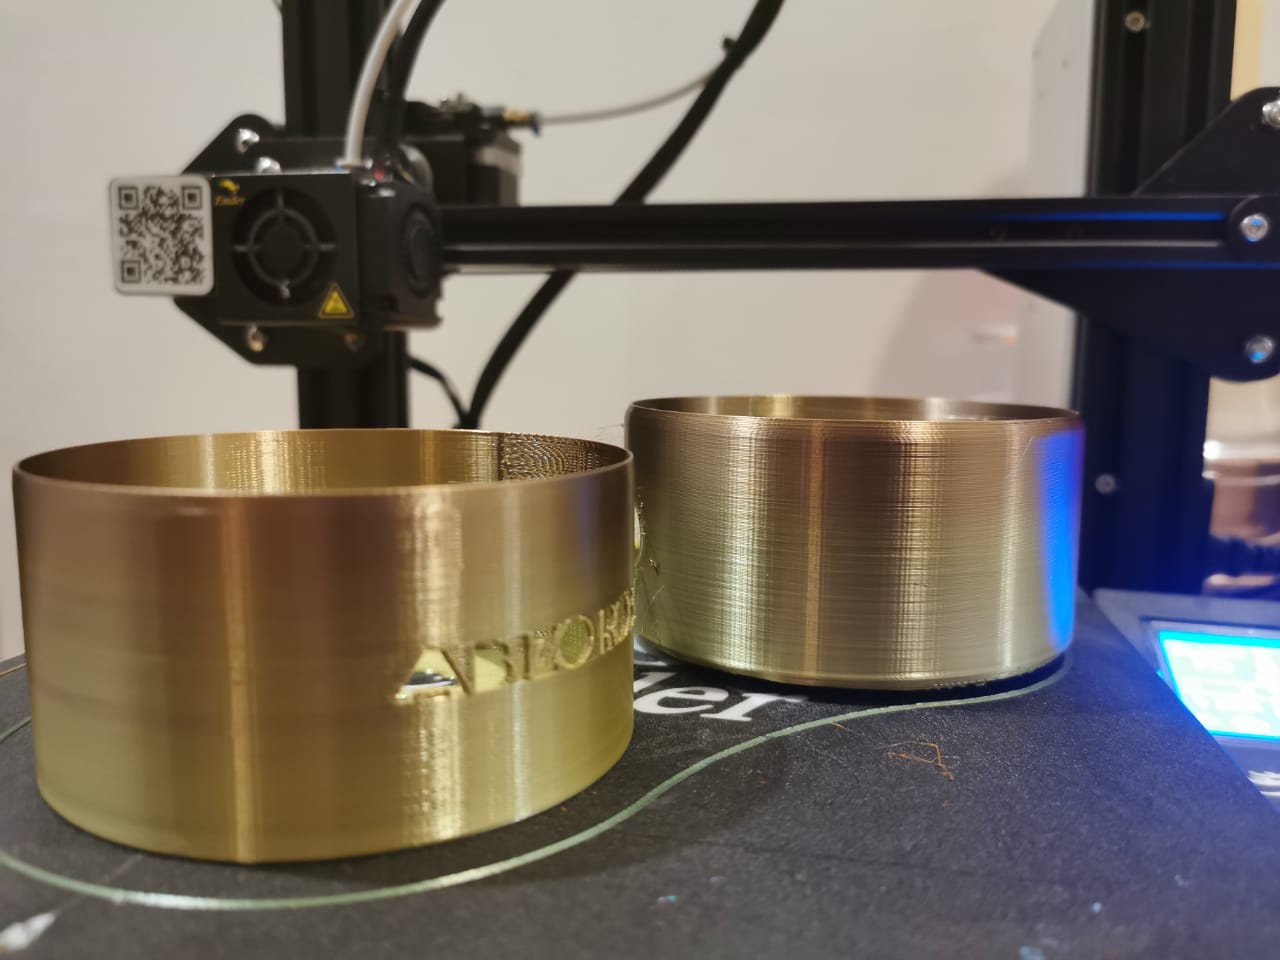
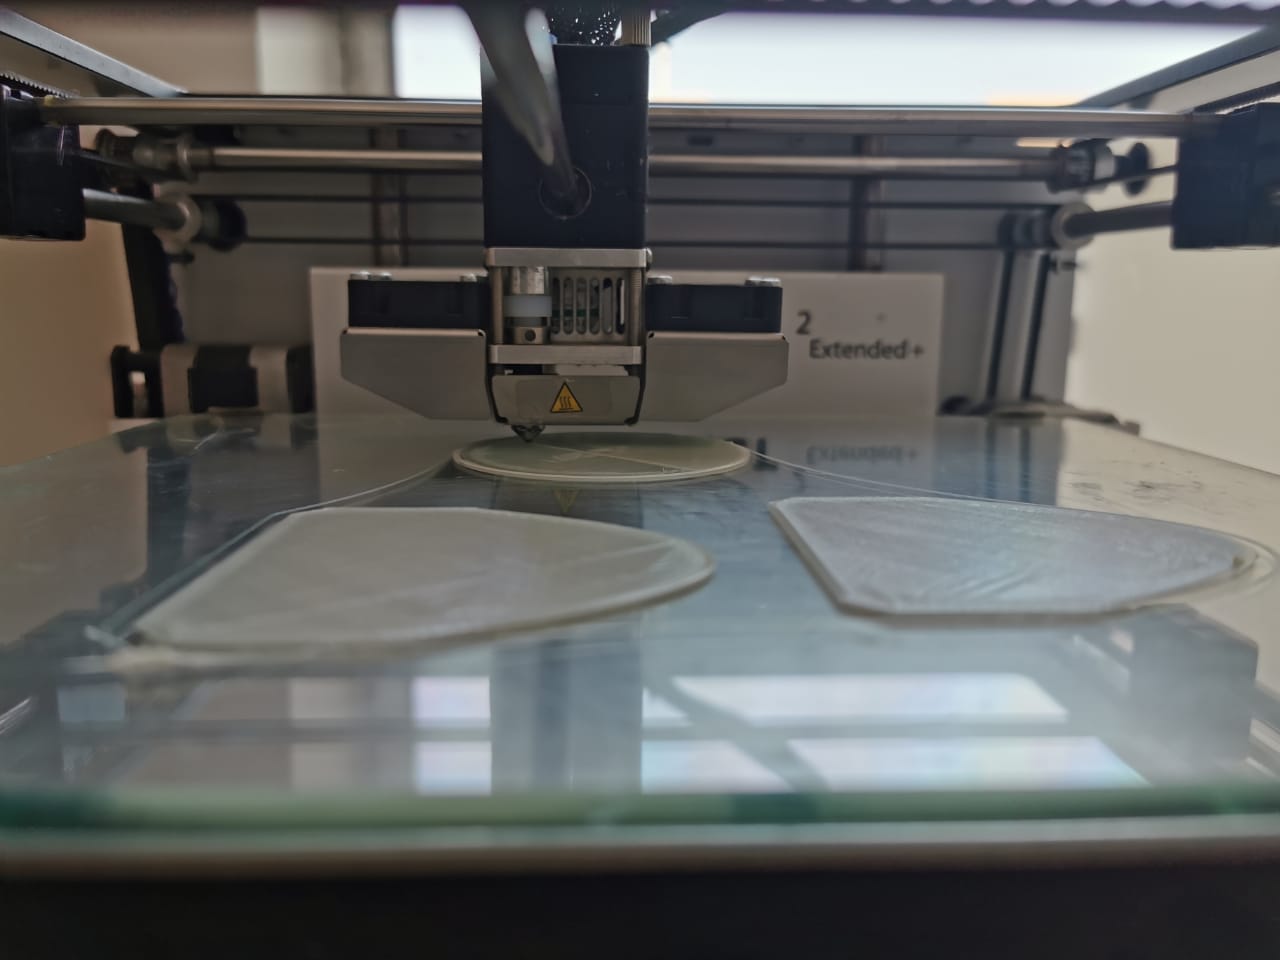
while printing the parts.
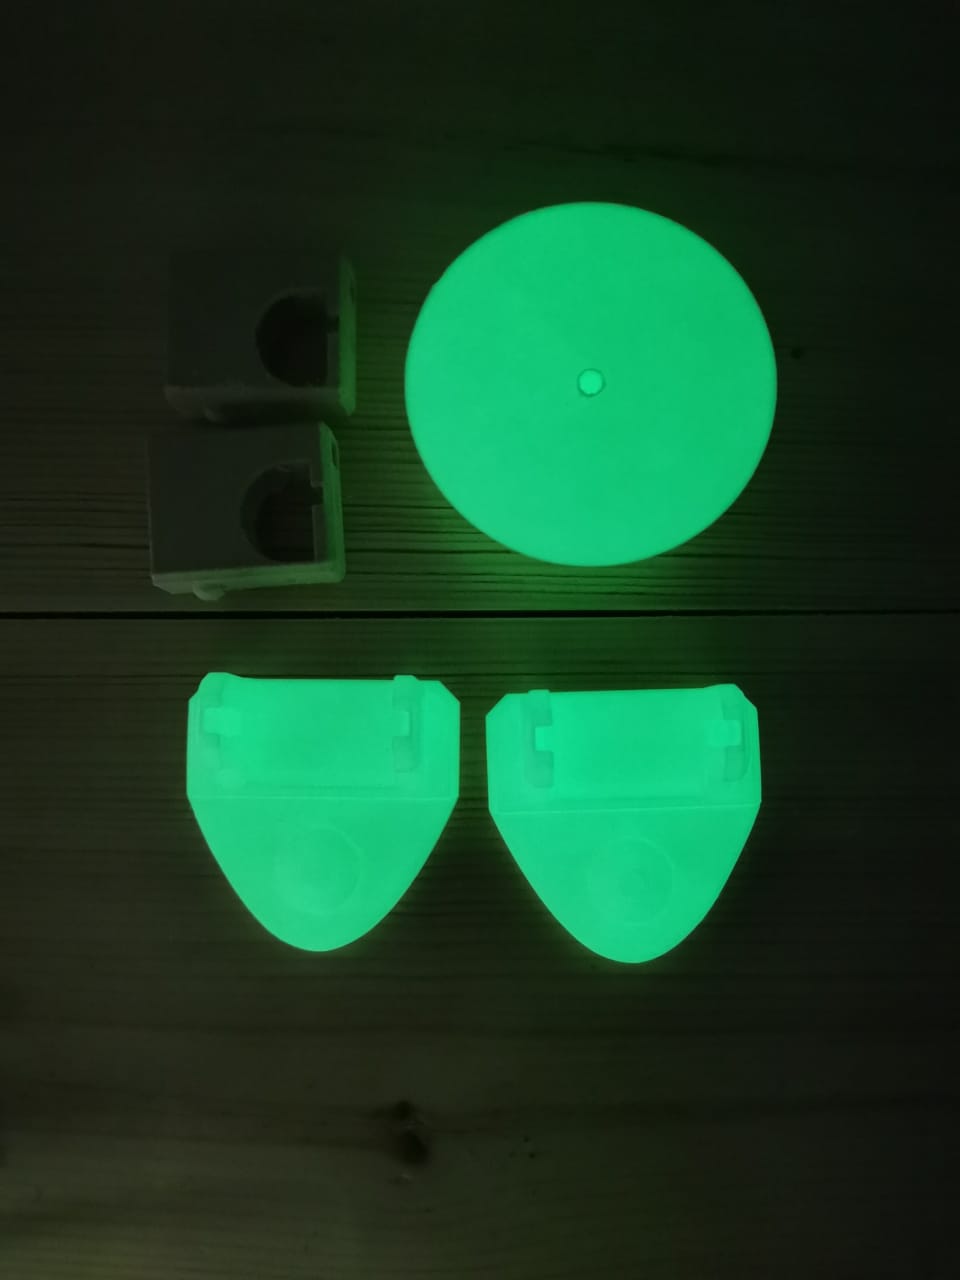
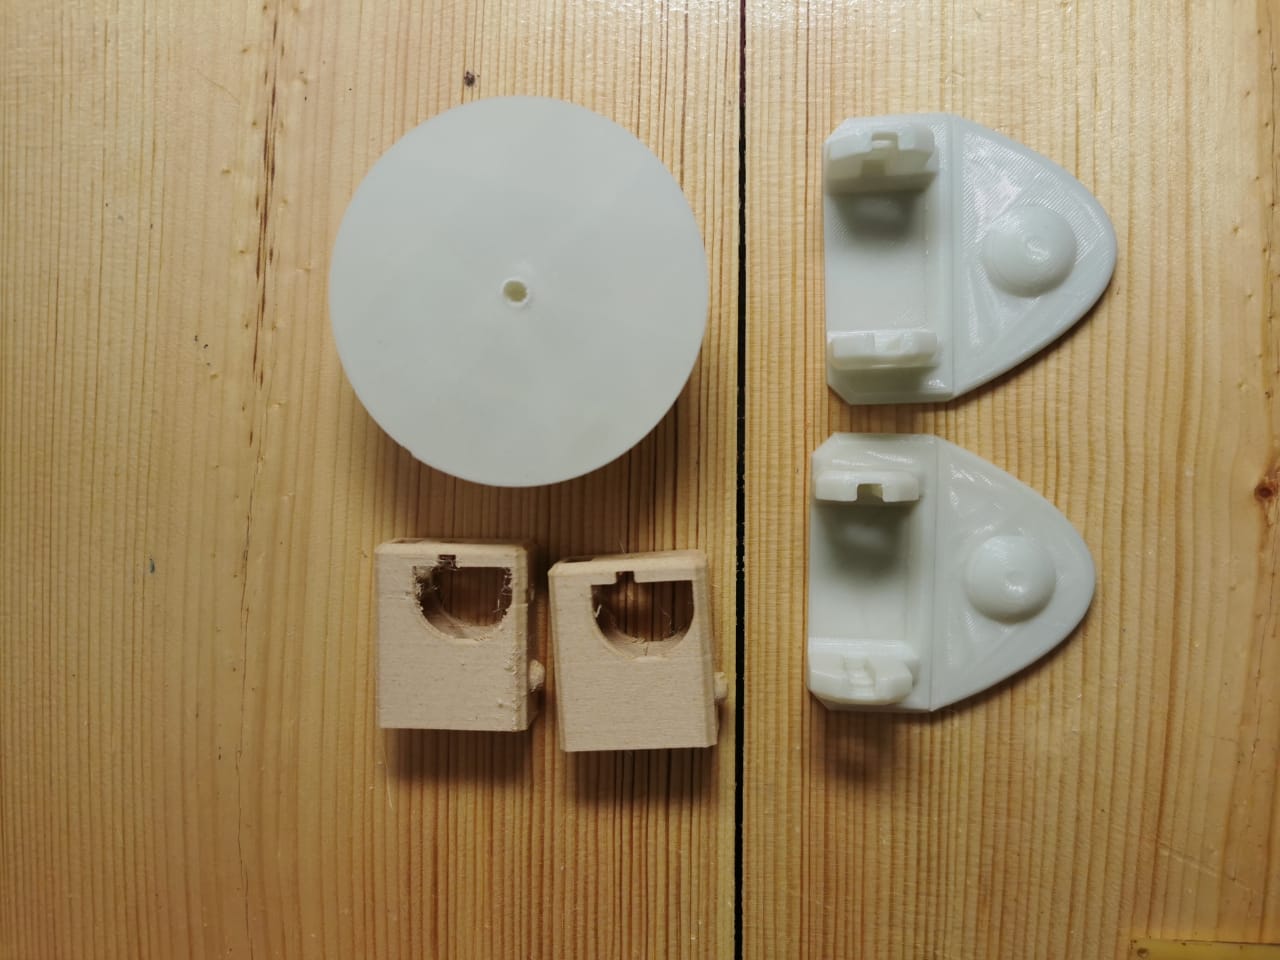
Glow in the dark filament.
For ABIZO robot:
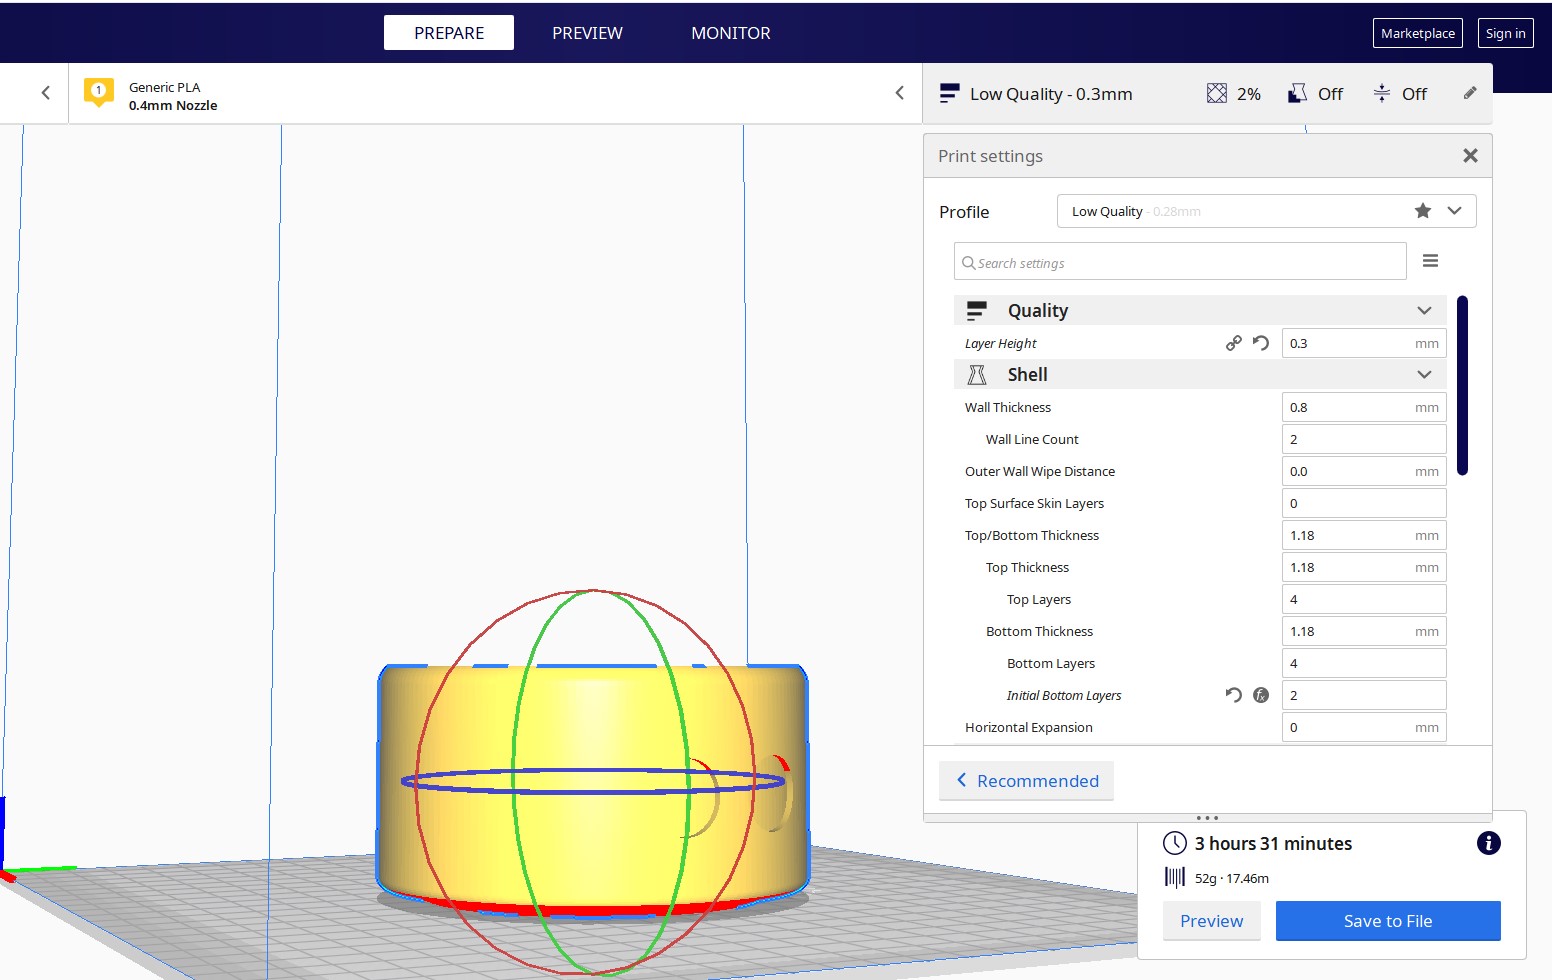
The first part of the ABIZO robot it holds the ultrasonic sensor and the head servo motor.
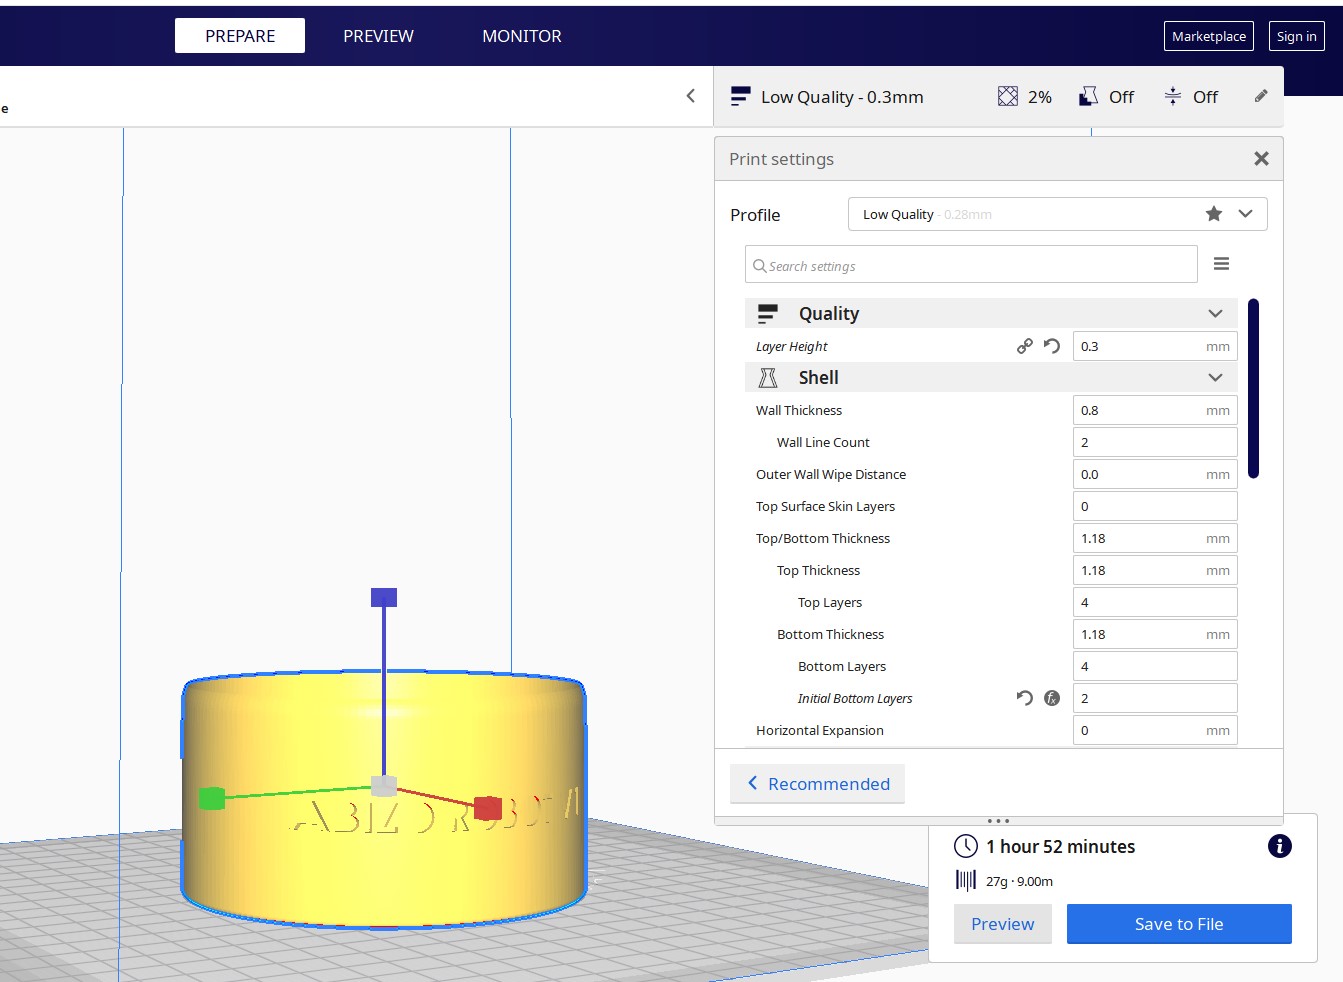
The second part for the ABIZO robot it counted the circuit and it holds the legs.

The only part I downloaded from Thingiverse website. It was made by Camilo Parra Palacio from Otto DIY robot.

The star to move it left and right.
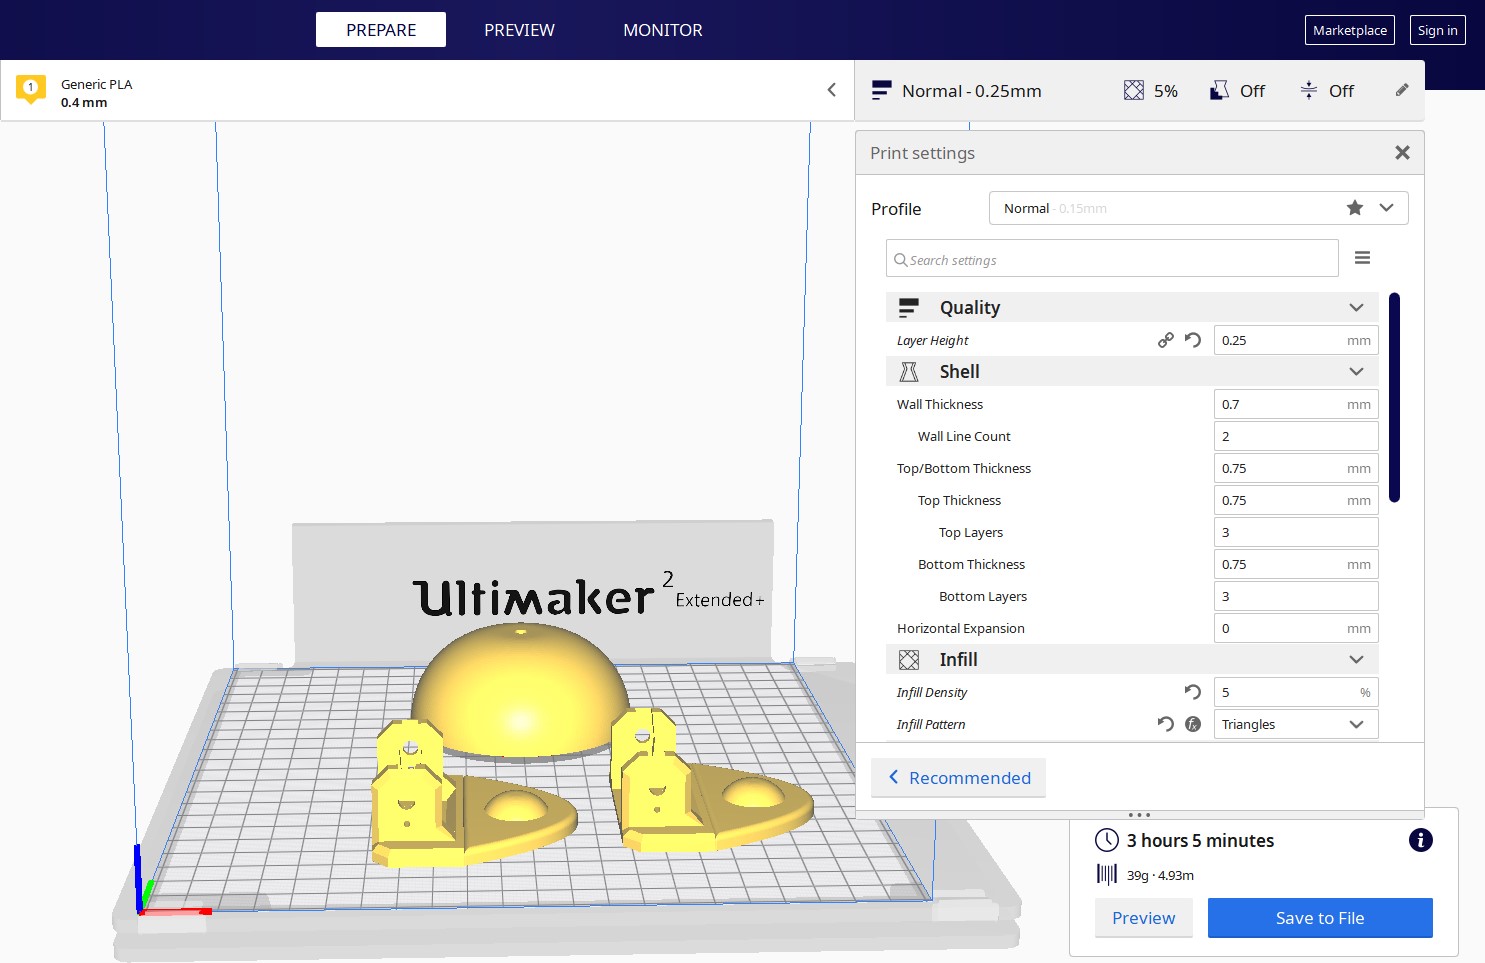
These are the part I printed them with glow in the dark filament by using the Ultimaker 2 extended +

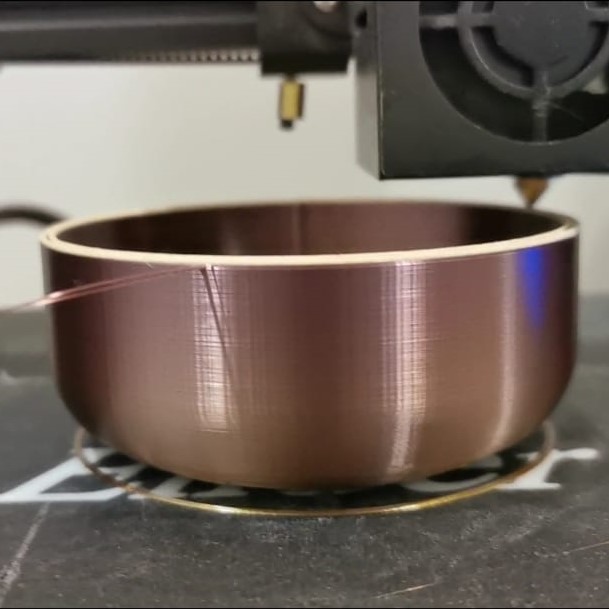

while printing the parts.
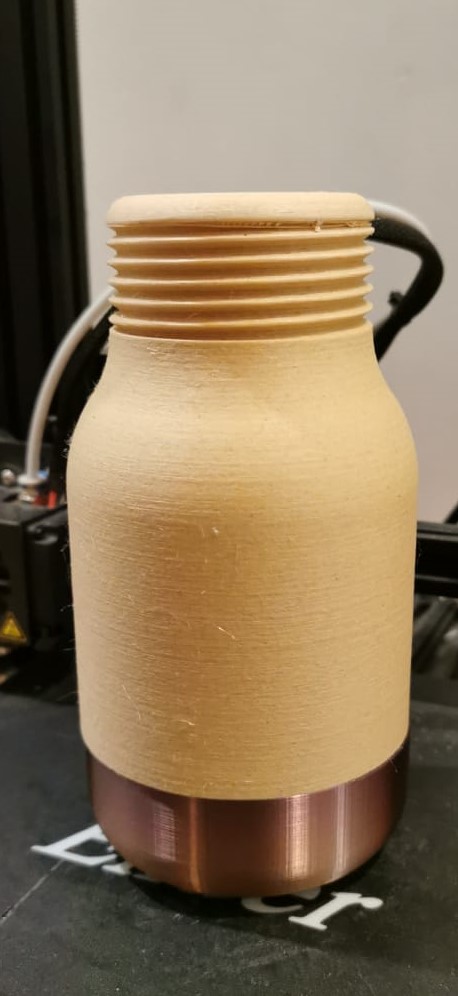
After printing with the wooden and metallic filament.
Clculation
Total printing hours for the Smart hydration water bottle was 12h total filament amount was 200gm.
Total printing hours for the ABIZO robot was 10h and 25min total filament amount was 141gm.
Die-Cut Machine
The die-cutting machine uses a combination of rollers and cutting plates to put pressure on a die and push it through the card or paper or fabric to create a shape with neat and precise outlines – this shape is called a die-cut.
I explained how to prepare the machine and set the material on Computer Controlled Cutting week
I used Cricut design space software to cut the design.
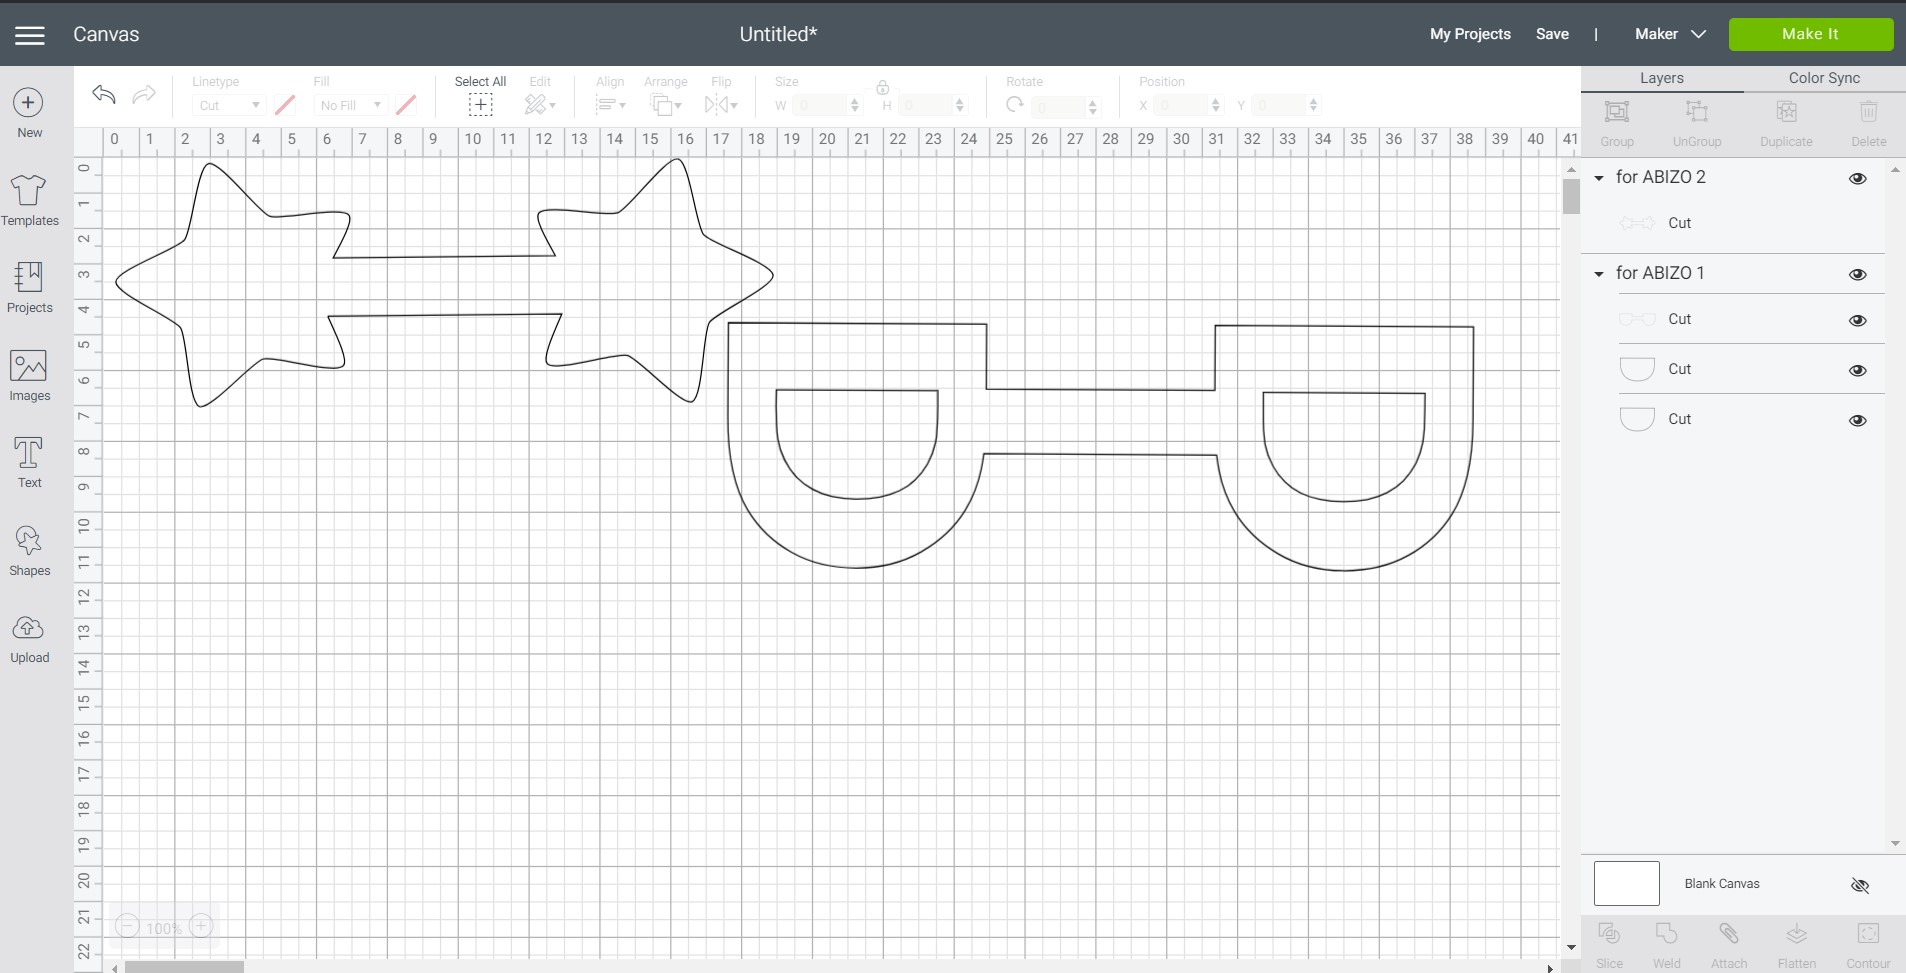
I uploaded the designs as DXF files.

I chose the material.
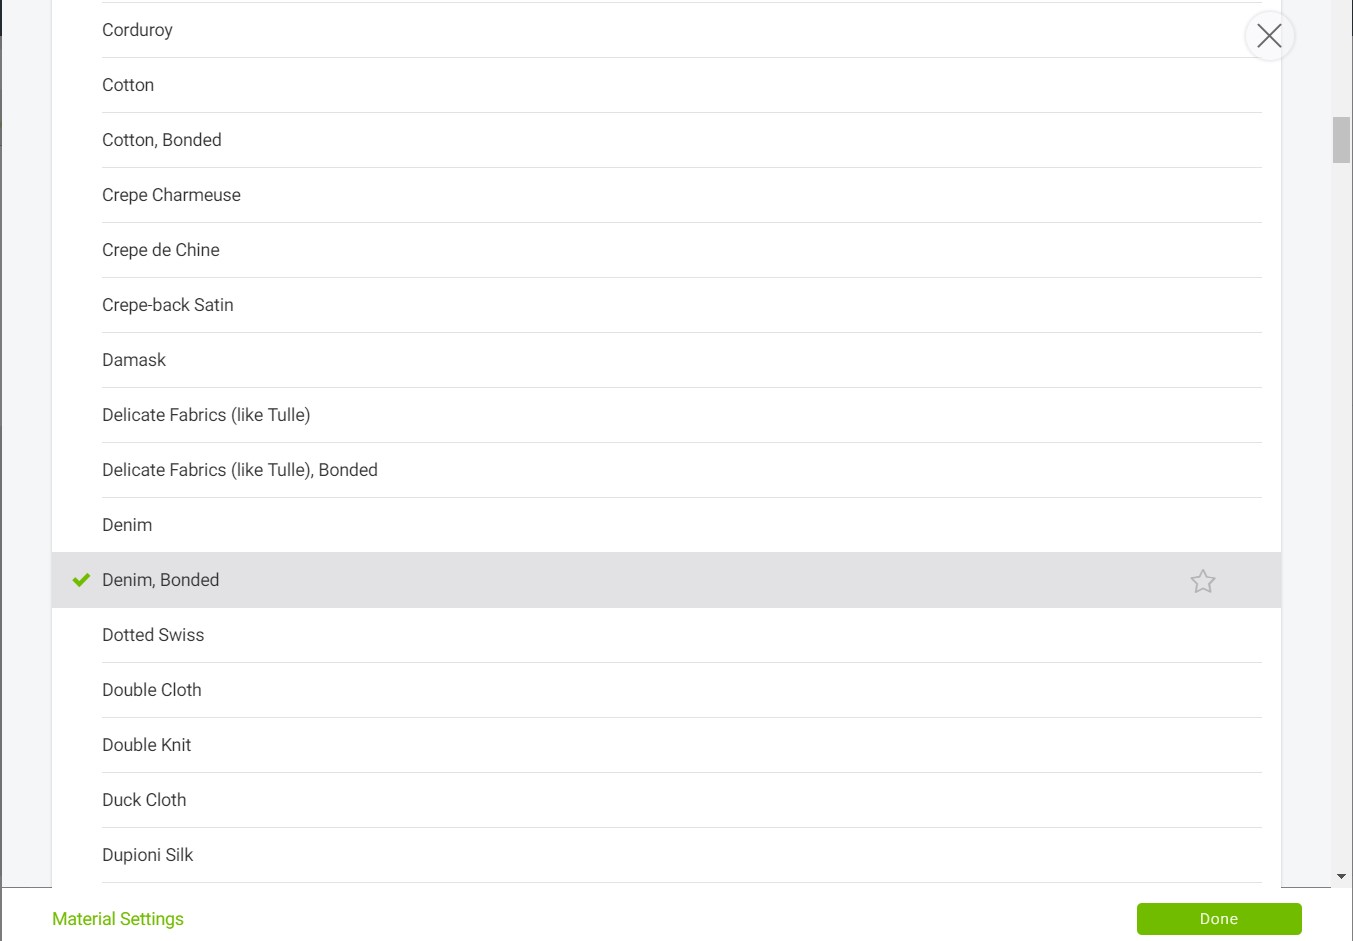
I used denim bonded.
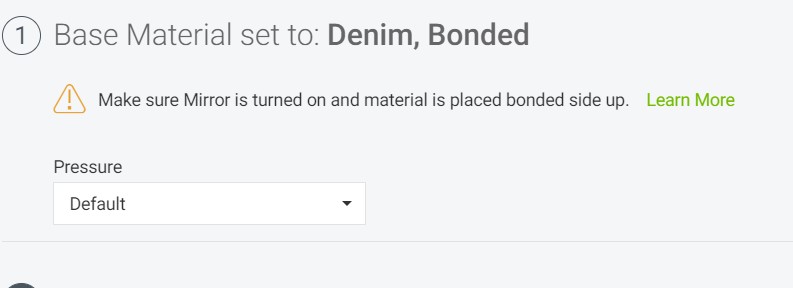
This is a very important caution about the material to avoid raveling the denim.
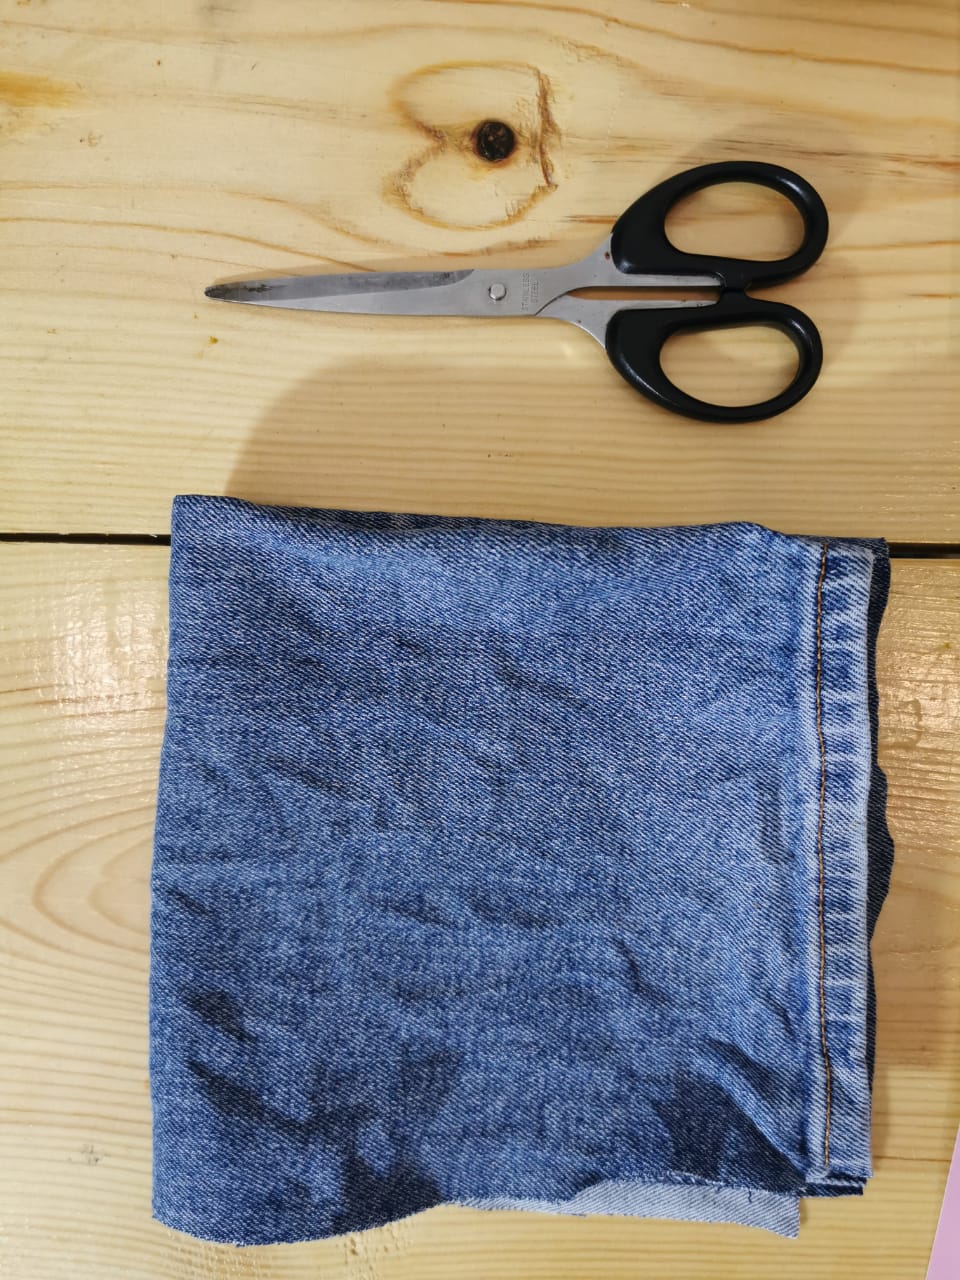
I recycled an old pair of jeans pants.

The set up before cutting.
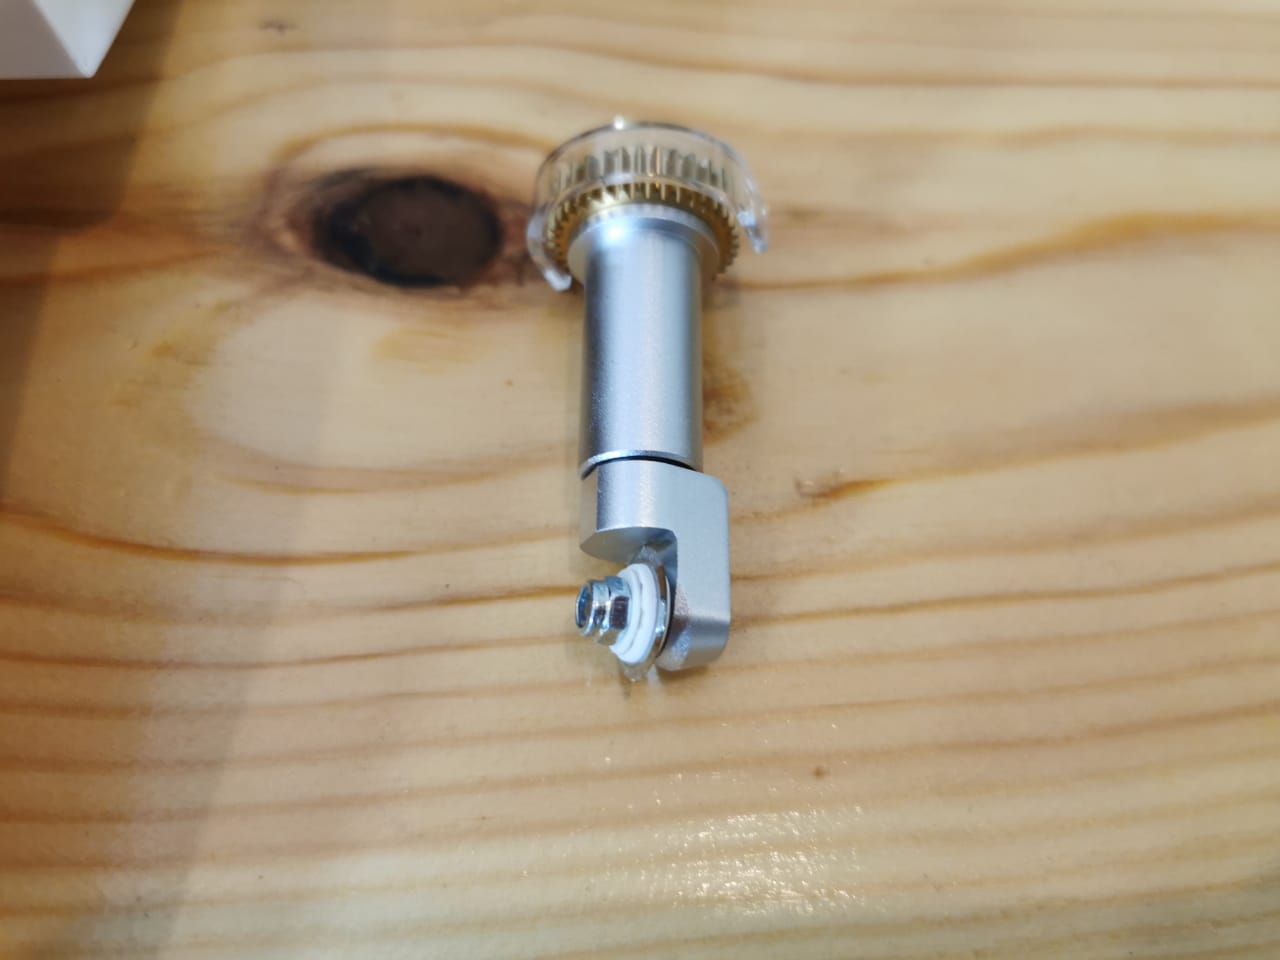
The rotary blades for fabric cutting.

After assembled to the B part.
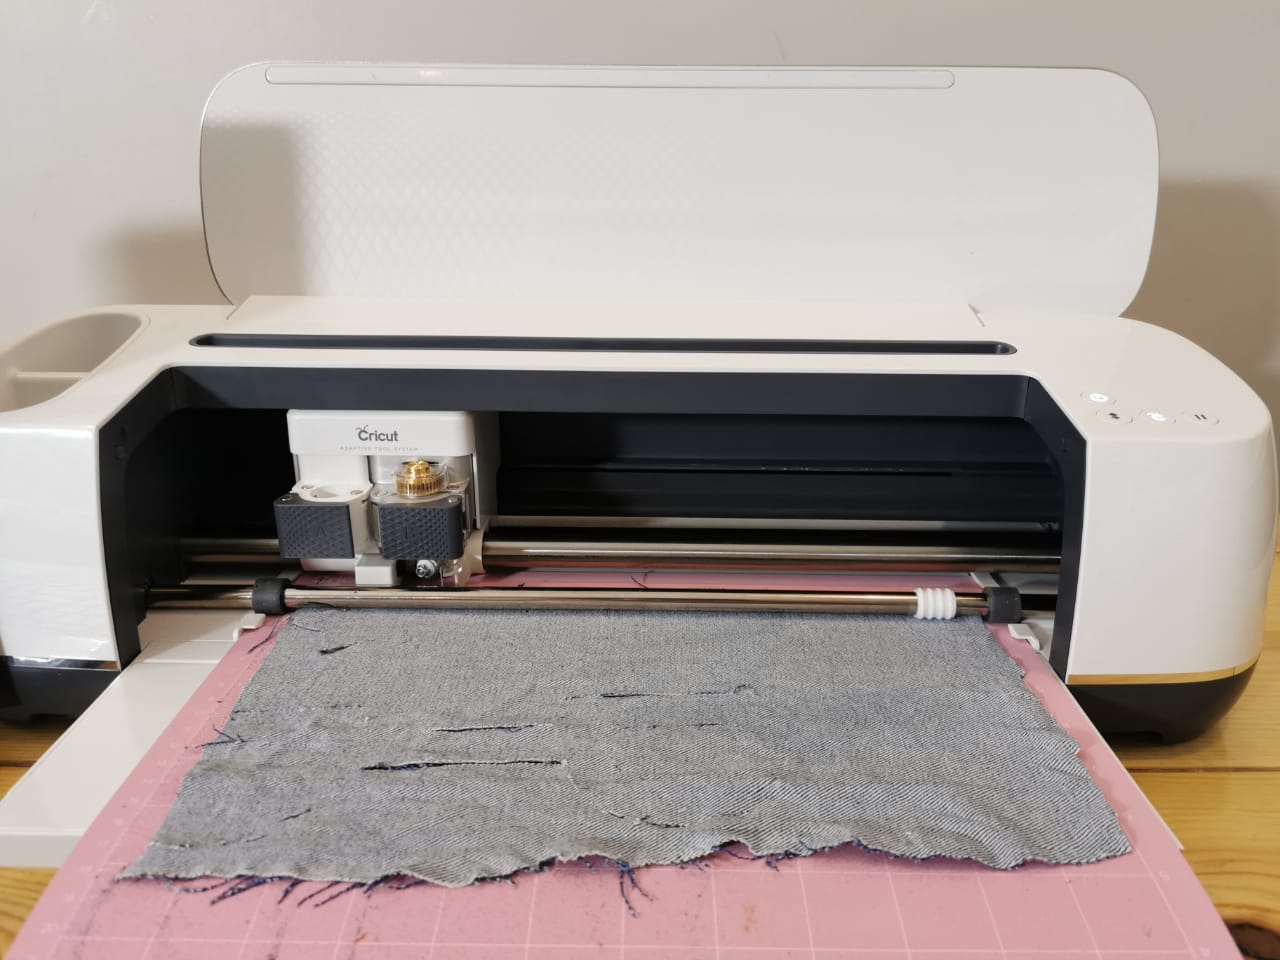
After assembled the denim.
Assembly
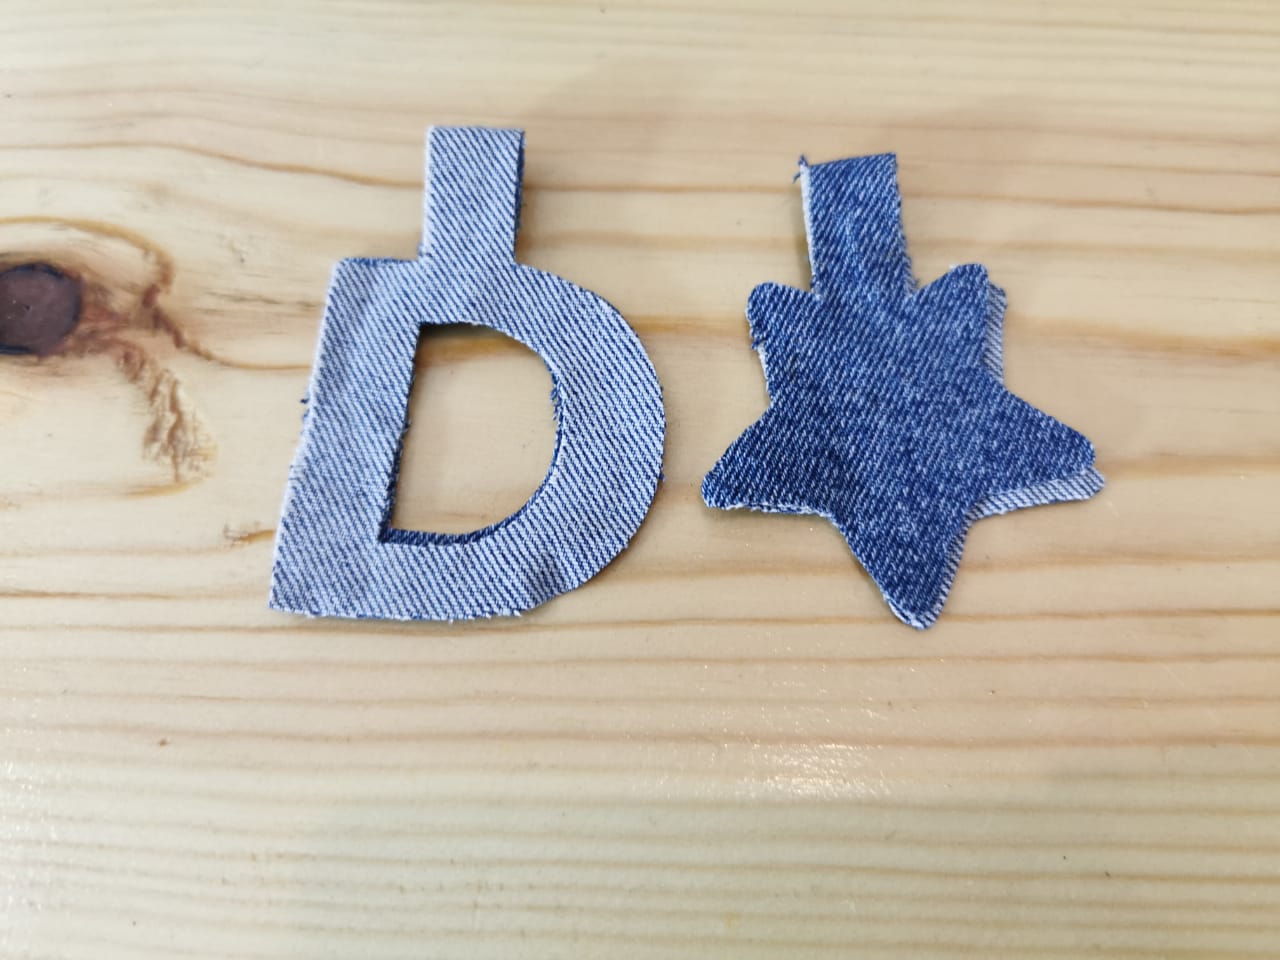
Final result.
Design Files:
- ABIZO robot 1
- ABIZO robot 2
- ABIZO robot head
- ABIZO robot feet
- The Star
- ABIZO robot legs
- smart hydration water bottle - chain
- smart hydration water bottle - Lid
- smart hydration water bottle - container
- smart hydration water bottle - circuit cover
- smart hydration water bottle - coin cell holder
- smart hydration water bottle - Props
The Foot Part
The first part is the foot and the legs, I redesigned the foot by using Fusion 360 to look more huminied, but I kept the legs as the orignal design and this is the only part I did not design it.

I cut the design and builded on it.

I created a 2d sketch and used fit point spline tool to creat the shoe shape.

After that I used the extrude tool to git the thickness 5mm.

The shape after I extruded.

I used fillet tool for the edges to fit more with the final design of my robot.

I added a circle in the middle to look more like a real shoe.

After extrude the circal shape.

I used fillet tool to make the half-sphere shape.

Final result after I combine between the two bodies then I saved it as STL.
Legs Part
The leg is the second part and as I sied this is the only part I used it as it is from Otto Robot

The Body Part
The body is my third part it contains the circuit and the rechargeable battery, I designed it in a rounded shape to be more friendly for the kids.

I designed the body to hold the two micro servo motor, and the battery.

For the two legs I will use two micro servo motor so, I drow it in 2d sketch.

After I finished the 2d drawing, I used extrude tool, then I deleted the walls, and kept only the holes.

The second part of the body to contain the head micro servo only.

When I drow the shapes and then extruded them, I deleted all the walls and kept the holes only.

After exruded and edit it.

I added two holes for the ultrasonic sensor to be also as the eyes for my robot.

I extruded cut the holes by using extrude tool.

I filleted the edges.

I added the name of the robot by using the text tool.

I changed the text type and the size also.

Final look.
The Head
This the last part, the head I designed it to be able to move and interact with kids while they are getting closer to the screens.

By drawing a circle in 2d sketch.

Then I extruded and use the fillet tool to create the dome.

The Star I designed the star by using Inkscape to match the props that I used with the hydration water bottle, it will help the child to know if he/she setting in the right distance or not by moving the servo motor right and left.


2D design steps, I used exclusion tool to do the star with a letter as one part.


After imported to fusion 360 and extruded, I draw also a column to fit in the head.

Final result for ABIZO V1 robot.
Smart Smart hydration water bottle
This is my second product in my health care kit "ABIZO KIT". I designed the prodcut by using Fusion 360, I will explain how I designed each of the three parts, the led, the water container, the wires holder.
The Water Container I designed based on the standard size of the water bottle, in this design, the amount of the water will be =330ml.

First I created 2d sktech.

I Draw a centreed circal.

With 8cm diameter.

Then I extruded up to 12cm as hight.

Again I draw a circle on the top and extruded, I filleted some edges.

I added a thread to make sure that the bottle will close, and for keeping the size I checked the remember size option.
Make sure to check modeled option to be able to 3d printing.
The Smart hydration water bottle lid

The lid I draw two circles, it will the circuit for my first prototype, so I designed it with increasing a little bit the hight.

After I extruded it.

Again I used the thread.

Thread editing.

Semi final result.

For the thread we should mark it as moulded so we can use the 3d printer and print it.

After cheked to moulded option.

In this step I converted the thread to be as part of the modle, and I increased the lid height 2 cm more to hold the circuit.
The Smart hydration water bottle ring

I designed a ring to hold the first letter for the kid and to be more special and customized for him/her.

After filleted to match the hole design.
The ciriciut cover

I used Inkscape to draw over my circiut to know where is the switch, the sensor pin, and the RGB LED places.

I saved it as SVG and imported to Fusion 360 to extrude it to 2.5mm
Final design.
2D Design
In this stage, I decided to design simple chains for the Smart hydration water bottle to be more customized and uniqueness, by adding the first letter for the kid and the special icon he/she likes.

I used Inkscape to draw simple icons and wrote the letter, also I drow a rectangle shape to merge all the shapes together.

From Path tab, I used the union tool to merge all the shapes.

Final design.
Digital Fabrication
One of the main objectives of my project was to make a printable fabable prototype, that anyone could make in any makerspace. This was a real motivations for me to preduce the project on my own makerspace at home. Below are the processes and machines I used.
3D printing
3D printing saves time and therefore costs associated with using different machines for manufacture, and it is the most accessible and affordable digital fabrication process.
Printers
I used two diffrent 3d printers. I can use one machine but based on the filliment diamter size I used ultimaker2 extnded+ to print the feet and the head, for the whole designes I used my own 3d printer under 3 pro machine. They gave a good results but it take time as any 3d printer.
Slicing Program
To slice the STL files I used usally Cura by Ultimaker for printing my designes.
Those are the main settings I used for all the pieces:
The Parts list
For Smart hydration water bottle

The lid I printed with metallic PLA filament.

The chain.

The circuit cover I printed with semi-transparent filament to get the light go through.

Coin battery holder I downloaded from the Thingiverse website. It was made by John Clymer.

The bottle I printed by using 2 different filaments the wooden and the metallic PLA filaments.


while printing the parts.

Glow in the dark filament.
For ABIZO robot:

The first part of the ABIZO robot it holds the ultrasonic sensor and the head servo motor.

The second part for the ABIZO robot it counted the circuit and it holds the legs.

The only part I downloaded from Thingiverse website. It was made by Camilo Parra Palacio from Otto DIY robot.

The star to move it left and right.

These are the part I printed them with glow in the dark filament by using the Ultimaker 2 extended +


while printing the parts.

After printing with the wooden and metallic filament.
Clculation
Die-Cut Machine
The die-cutting machine uses a combination of rollers and cutting plates to put pressure on a die and push it through the card or paper or fabric to create a shape with neat and precise outlines – this shape is called a die-cut. I explained how to prepare the machine and set the material on Computer Controlled Cutting week
I used Cricut design space software to cut the design.

I uploaded the designs as DXF files.

I chose the material.

I used denim bonded.

This is a very important caution about the material to avoid raveling the denim.

I recycled an old pair of jeans pants.

The set up before cutting.

The rotary blades for fabric cutting.

After assembled to the B part.

After assembled the denim.
Assembly

Final result.
Design Files:
- ABIZO robot 1
- ABIZO robot 2
- ABIZO robot head
- ABIZO robot feet
- The Star
- ABIZO robot legs
- smart hydration water bottle - chain
- smart hydration water bottle - Lid
- smart hydration water bottle - container
- smart hydration water bottle - circuit cover
- smart hydration water bottle - coin cell holder
- smart hydration water bottle - Props