Exercise 2 - Computer Aided Design 6/2/2020 to 12/2/2020
The assignment for this week is explore different types of design software and use them to model my final project. In the beginning, I was puzzled why there is a need to even try out different software. I believe being an expert in one is better than “a jack of all trades but master in none”. However after the lesson and explanation from my coach, Steven, I begin understand the different types of software (such as 2D raster, 2D vector, 3D CAD, simulation, animation, audio and video editing) and their areas of applications. Due to the short time frame, I decided to explore one software in each category.
For 2D Raster, I tried GIMP
I have been using Irfanview image viewer by Irfan Skijian for several years to do simple image manipulation such as cropping and resizing. While Irfanview is free and extremely easy to use, as an image viewer, there is little functionality to do photo-retouching apart from adjusting contrast, brightness, gamma and etc. It is also not able to do draw and sketching.
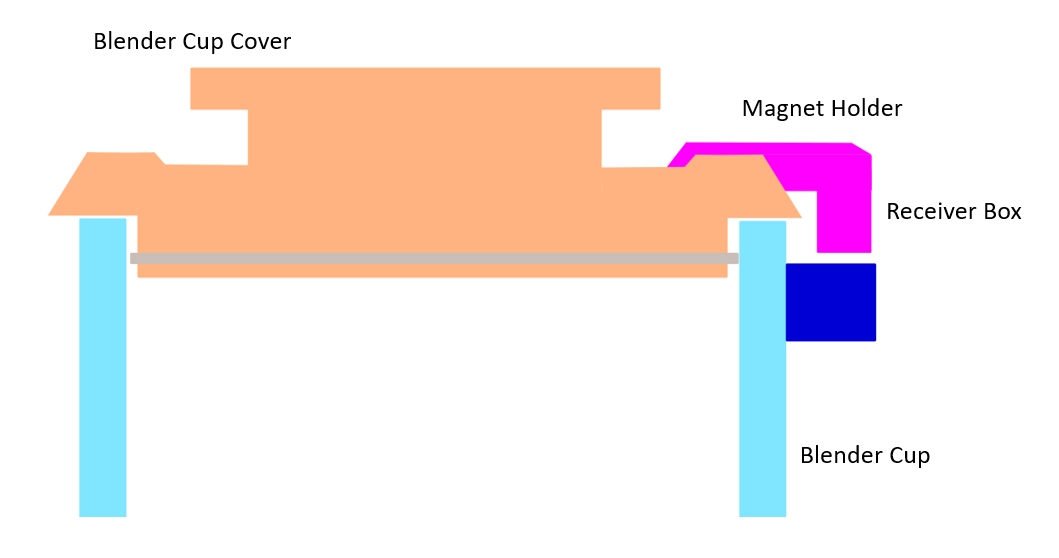
Thus for the 2D raster software I decided to learn GIMP primarily for sketching and drawing. I downloaded GIMP 2.10.14 directly from http://www.gimp.org. Sketching with GIMP using a mouse is not as easy as I thought to be. It took me more than 3 hours just to draw this simple side view of the blender cup and my preliminary final project idea.
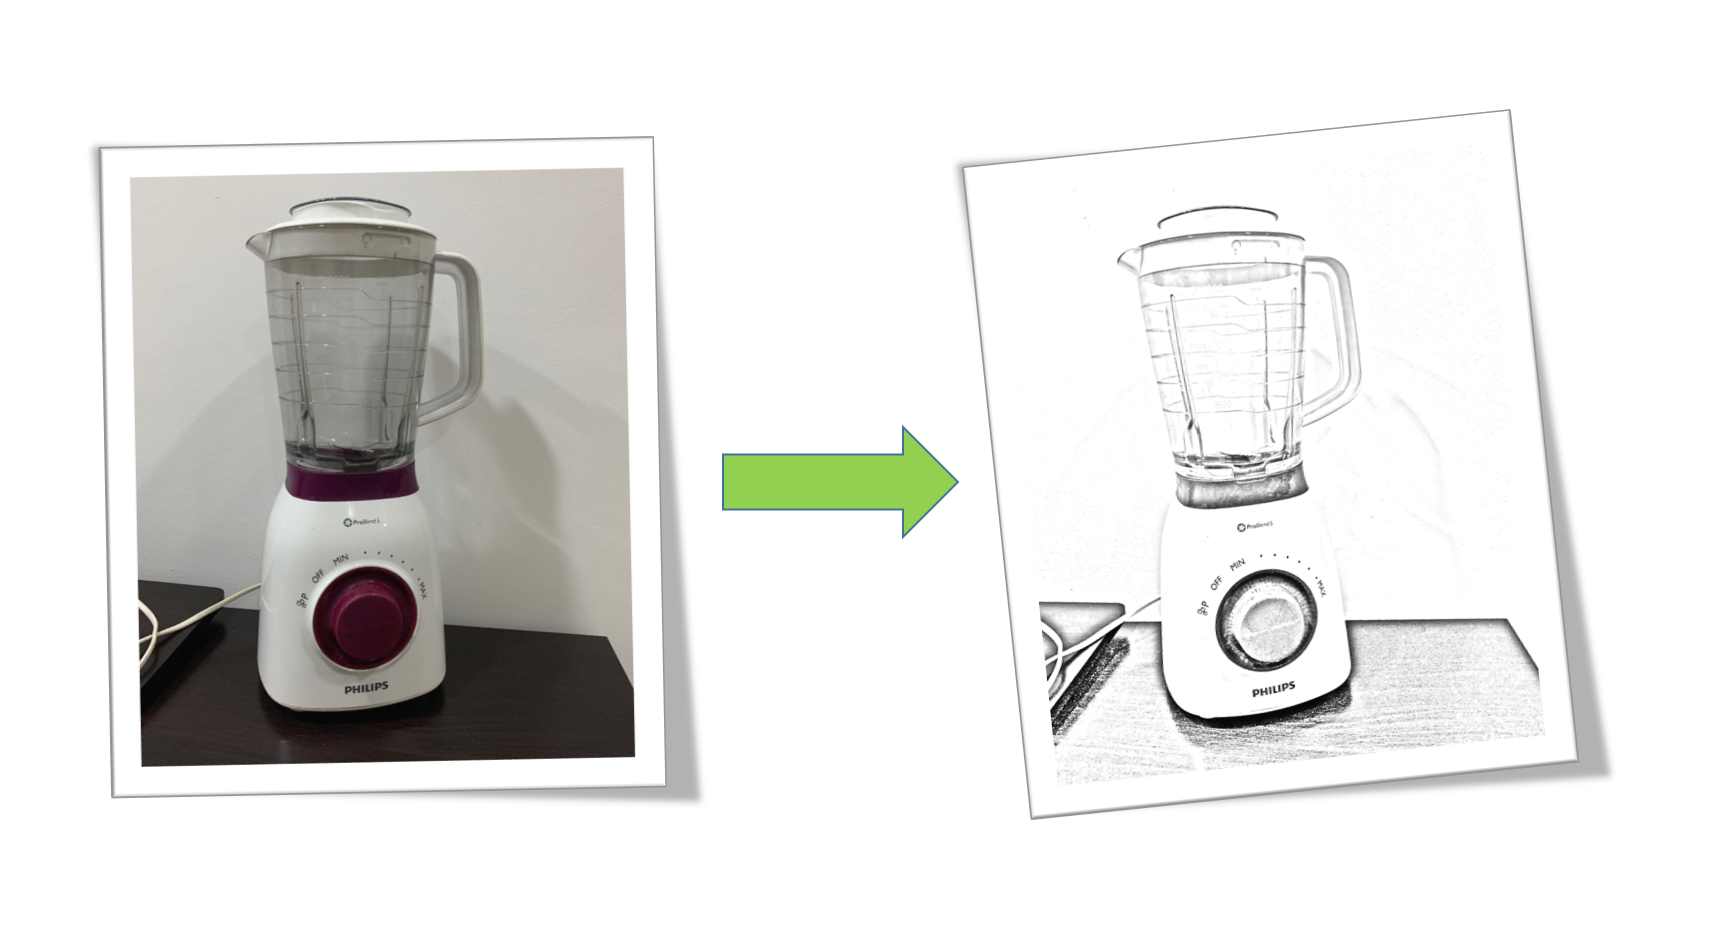
I also learn how to convert a photo to sketch with GIMP. For the several Youtube tutorial videos I watch, I find this video by Daniel from f&D most useful.
For 2D Vector, I tried Inkscape
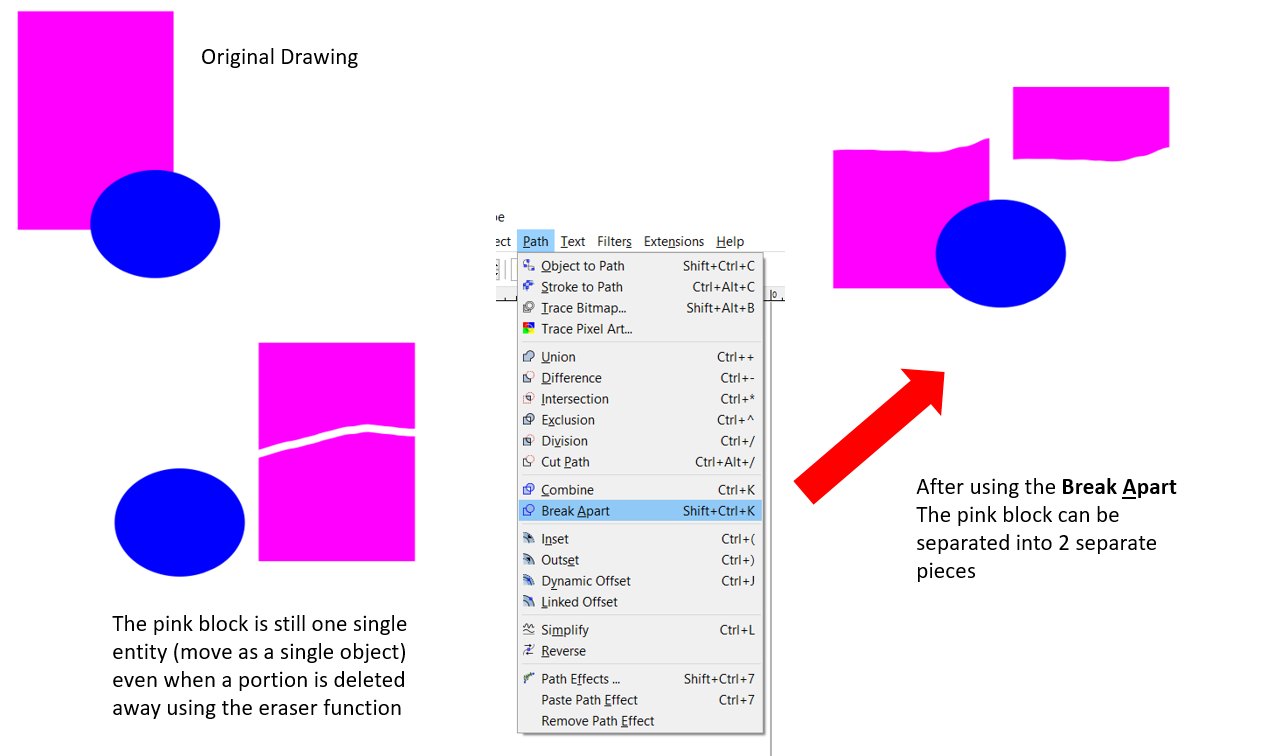
Inkscape is a 2D vector drawing and image edit program. Inkscape manipulates object using a series of mathematical equations unlike GIMP which works at the pixel level. I downloaded from Inkscape.org. After going through the 4 tutorials on Inkscape.org page, I started drawing. While the tag line for Inkscape is “Draw freely”, it is not at all free. There is a lot of unlearning and relearning to do. For example, deleting function is very different. Even after separating an object into 2 by deleting the middle portion, the object still remains as one single entity. To separate the two halves, the command “Break Apart” under the "Path" pulldown menu must be used.
Links to Inkscape Tutorials
Click Here to download the SVG file.
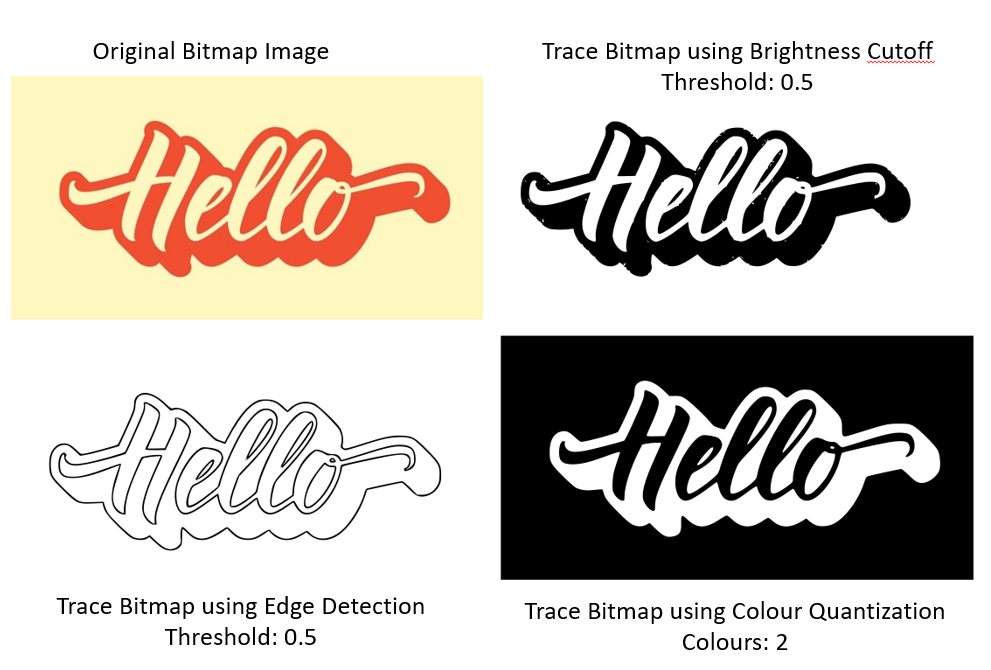
Another feature Inkscape that I explored is the Trace Bitmap. It is useful for converting a raster (bitmap) to a vector. Inkscape has an automatic tracing tool that makes it to vectorize bitmap images. While operation is simple, it takes a lot of practice to know what mode and setting to use in order to get a good vectorise image.
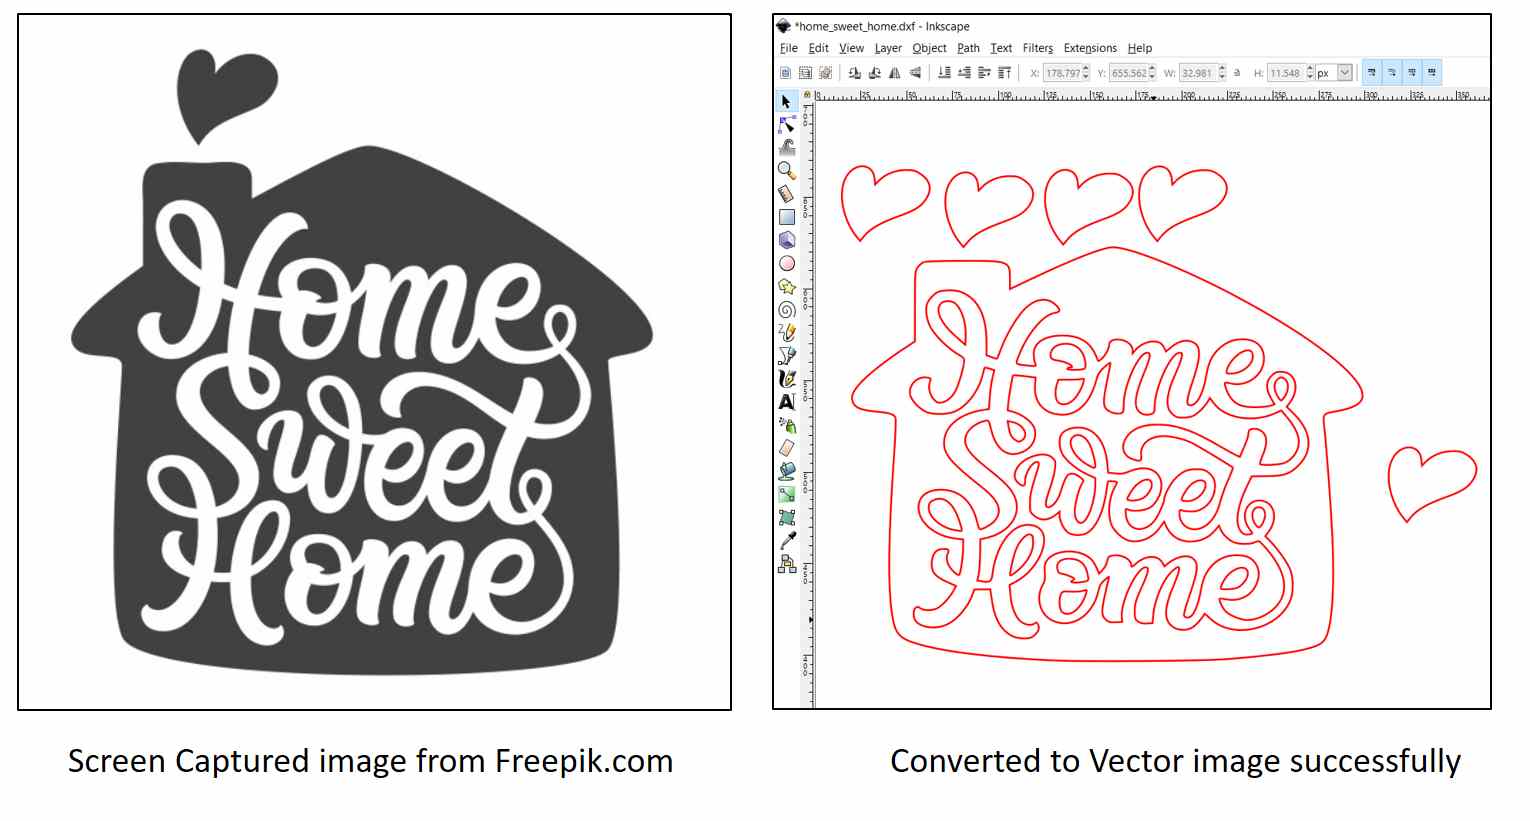
Vectorizing a bitmap image is a very important function as machines such as the laser cutter only process vector images for cutting, when raster image is loaded, the laser machine will only engrave the picture on the material surface. I found a vector image I liked on freepik.com. but unfortunately it is a premium image that requires payment. I decided to apply what I learnt to get a vector image from a bitmap image. I use screen- capture to obtain jpeg version of the image and use Inkscape to process it. The result is as below.
3D CAD Software - I tried Fusion 360
Fusion 360 by Autodesk is a cloud-based CAD/CAM tool for collaborative product development. As I was previously introduced to Fusion 360 briefly, I decided to learn this software as it is less daunting than the rest. My plan is to explore FreeCAD in the near future one I am comfortable with Fusion 360. Fusion 360 is also free for students and teachers, thus I can enjoy its full functionality without having to pay. I am currently using Shapr3D on my IPAD together with IPencil. Shapr3D is extremely powerful and easy to use, unfortunately it is USD240 per year!!!
The figure above is what I created with my IPAD. For the free version, I can only export low resolution files in STL format.
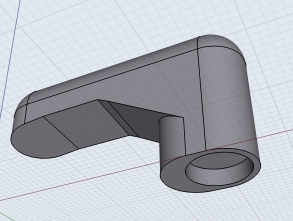
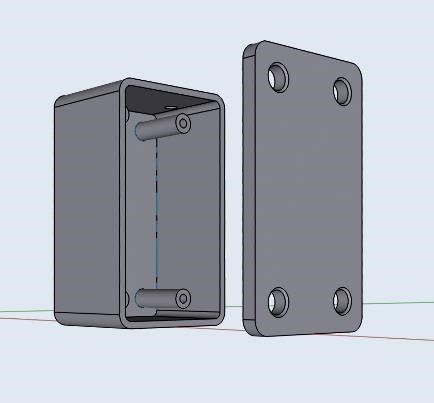
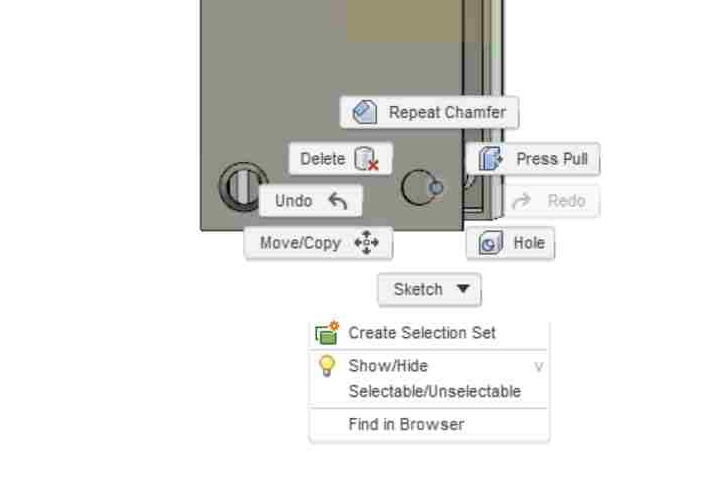
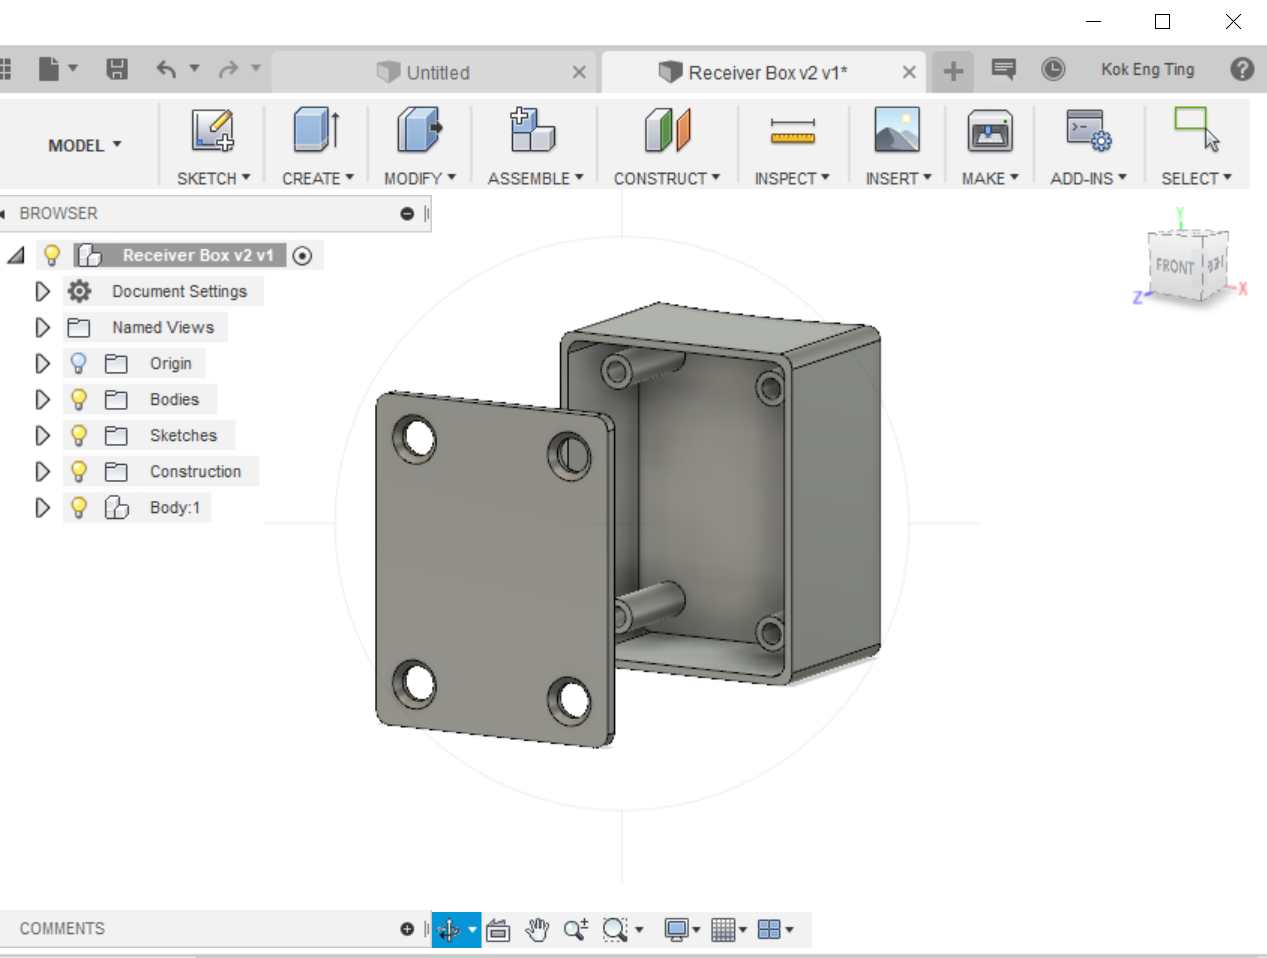
After watching several YouTube tutorials by Kevin Kennedy and Paul McWhorter, I began my journey of learning how to use Fusion 360. Learning would be very daunting without the tutorials on Youtube. After several attempts, I was finally able to create the body for the first part of my preliminary final project, the receiver box. What I love about Fusion 360 most is probably the Right mouse click which opens up a range of command as shown below:
One challenge I had was to create the curve surface on one side of the box so that it can sit firmly on the blender cup. To do so, I learnt how to use construction lines to locate and mark out the centre of the curvature.
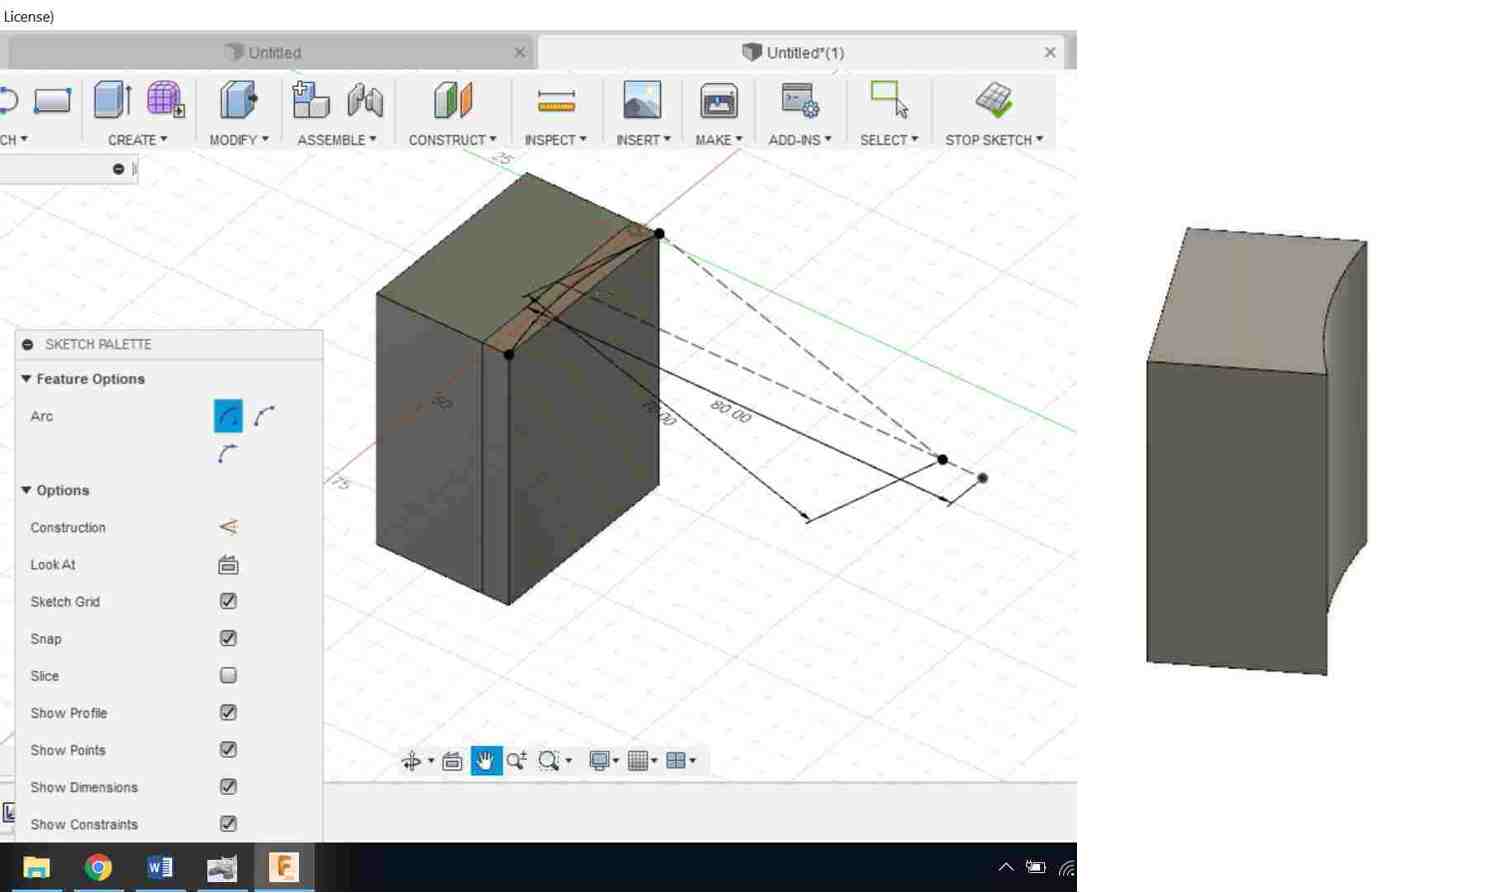
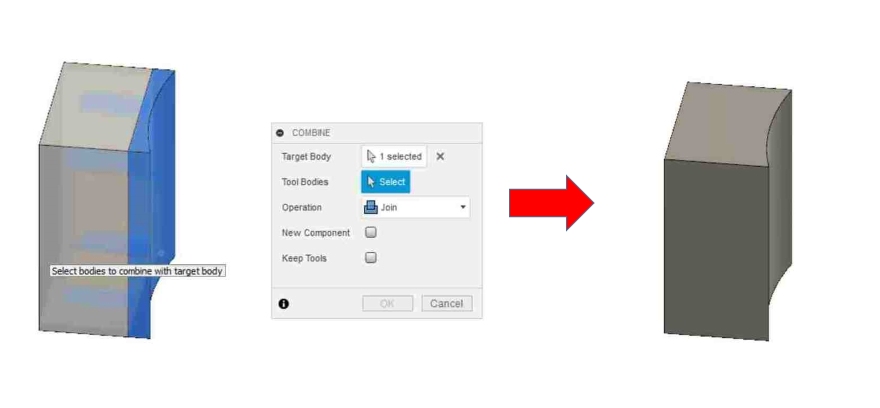
To create the box and its cover, I use the create menu (rectangle, offset, circle) to draw the basic shape in 2-D and use the Pull function in the Modify menu to create the box and Fillet to smoothen the edges. To create the cover, I have to use the Off-set panel under the Construction Menu before I can start drawing. I also used the Combine function under modify to fuse two parts into one as shown in the picture below.
I am happy that I was able to create the receiver box and its cover using Fusion 360 which is quite similar to the one I created with Shapr3D.
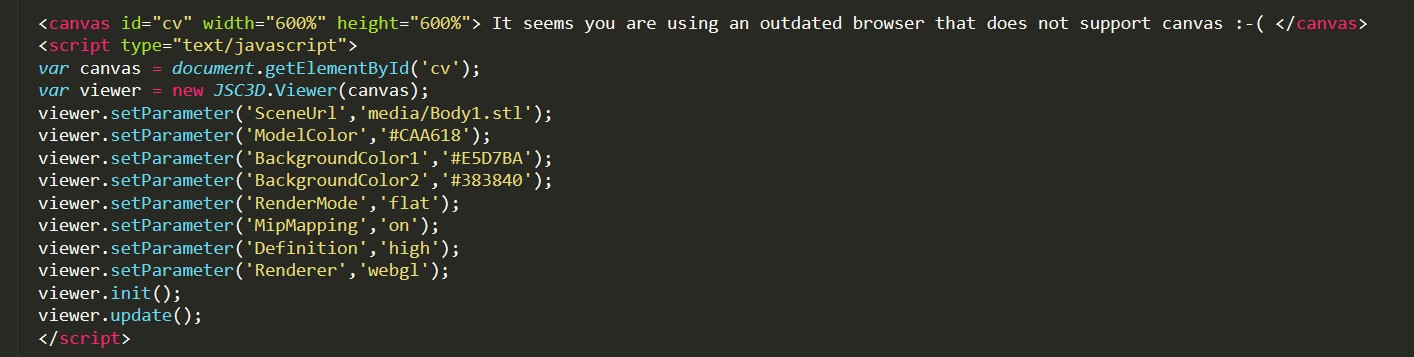
3D Model
For better visualisation, the javascript graphic rendering plug-in in html done by Massimo Menichinelli is used. To rotate the model, click and hold down the left mouse button and to zoom-in or zoom-out, simply use the scroll wheel.
The next stage is to model the magnet holder which is part of my preliminary final project using Fusion 360. I am still learning how to intercept a cylinder rod with a rectangular block. I have done this with Shapr3D as below: