Principles & Practice (Project Management) 30/1/2020 to 5/2/2020
For this week, the assignment is to get familiarise with Git as well as to develop a personal webpage that introduces myself as well as pen my
preliminary idea for the final project. This webpage is the assignment itself and the preliminary final project idea is included under its own dedicated page.
Webpage Design
For the webpage design, I used Sublime Text together with Sea Monkey. Sea Monkey is very user-friendly and it can accelerate my learning of the html language greatly, however when I look at the html codes, I was shocked to see more than 200 over lines in the files, most of them were for formatting purposes and were unnecessary for my simple webpage. This prompted me to learn how to code html directly. I referred extensively to W3Schools.com as its bite-sized tutorials were easy to follow.
On thing I learnt is to make the text and images resizes automatically to fit different devices from W3Schools.com. By adding a meta viewport tag, the width and scaling can be sized correctly on all devices. To use the Meta Viewport tag, the html page must have the follow command lines at the <head> section:
meta name="viewport" content="width=device-width, initial-scale=1"
Link to W3Schools.com site on Viewport.
According to an article in stackoverflow.com changing inline html to make an image responsive does not work in all browsers and can even cause problems in Firefox. The article recommends that the images on the website be sized using pixels for example: img src="image.jpg" width="1200px" height="600px" and the command for making the image responsive be added to the CSS instead, such as:
I plan to try this when I am more comfortable with html, for now, I will stick to inline html method.
On Git
Git is completely new to me and took me quite a while to understand what is it and how it works. From the videos I watched and the discussion with my coaches, I have summarized what I understood about Git in the picture below:

Subsequently, my coach introduced me to the Unwiredlearning.com which give an excellent overview of the git structure.
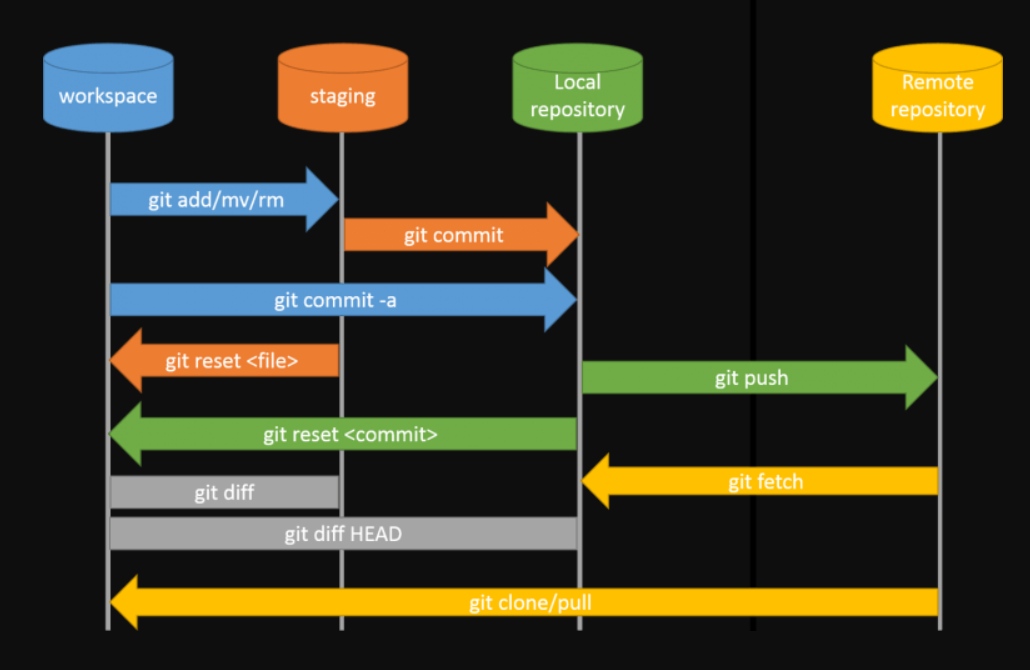
Image from https://unwiredlearning.com
Youtube Video 1: "Git & GitHub Crash Course For Beginners"
Youtube Video 2: "Git Tutorial for Beginners: Command-Line Fundamentals"
Gitbash was already pre-installed in my loaned laptop which saved me the pain of installing it. When I get own laptop, I plan to install Gitbash myself following the steps given in Stanley Ulili's website.
Using the tutorial within the Fabacademy.org I started using Gitbash and add my Git username and email using the following commands:
git -config –-global user.name “kokeng1969"
git -config -–global user.email “kokeng1969@gmail.com"
Thereafter, I followed the instruction and generated the SSH key successfully.
ssh-keygen -t rsa -C "kokeng1969@gmail.com”
To display the SSH key, the following command was typed:
cat ~/.ssh/id_rsa.pub
The next step was to create the Local Repository, I did not create a new directory and try to directly clone my student repository.
The cloning process was unsuccessful and I was unable to add the index.html nor any other files according to the steps given in
the Git Simple Cheat Cheats.
After consulting my coach Mr Steven, I realized that it is better to create a directory before cloning. After doing this,
the cloning is successful.

Cloning will create a local repository on my harddisk where I can update my work. To upload new materials onto Github, it is always a good habit to download the latest materials form Github before uploading. Downloading using Gitbash is termed "git pull" and the steps to "pull" is as follows:
At the command prompt, enter "cd fabacademy to change to the correct directory. This step reminds me of the older days when computer using run on MsDoS. When inside fabacademy directory, I have to change directory or "cd" again to my student directory: "engting-kok". The name of this directory is very funny as my name is completely jumbled up. As I do not have a "middle name", the directory should more correctly be: "kokeng-ting". Nevertheless, this is not an important issue, and I decided to just let it be.
After changing to my student directory, the command to "pull" is git pull . (Note: the fullstop "." is important and cannot be omitted).
After updating the material in the local repository, to upload (or "push") to Gitlab, the following steps must be carried out.
git add . (again the fullstop "." is important and cannot be omitted) Using the fullstop adds only files in the current folder that have changed while using "git add * adds all files, even in subfolders, that have changed.
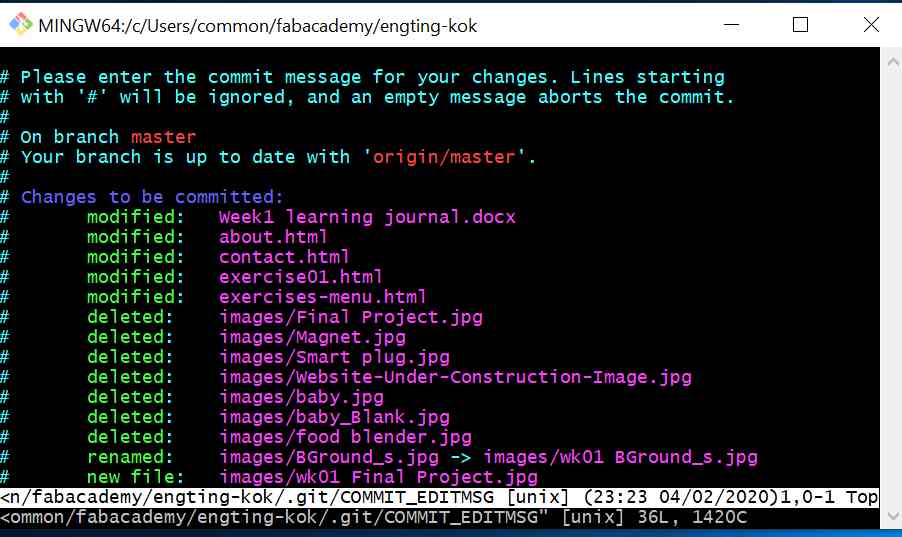
git commit -m "details"
Referring to the image above, the "git commit command upload the content to the "staging area". The details about the update must be given for easy tracking.
git push. This command will upload the content from the "staging area" to my respository in Gitlab.