Embedded-Programming
This week, I used Aduino and C languages to code the program. In group work, we tried coding the program, including two and a scratch, and we could see the strengths and weaknesses of each.
Here is our group works : week8

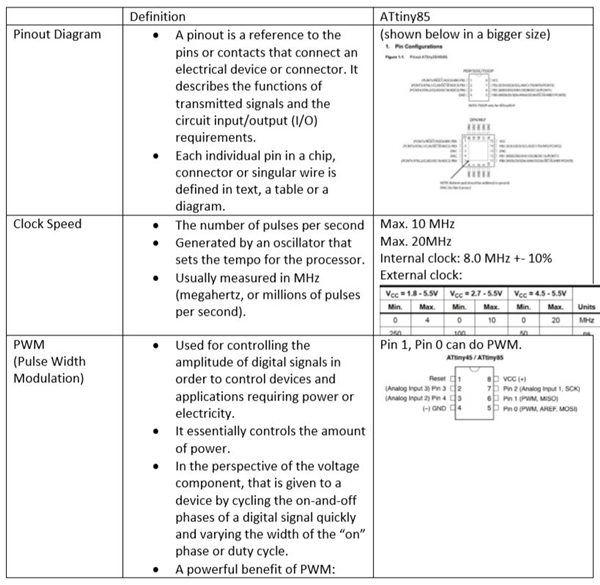

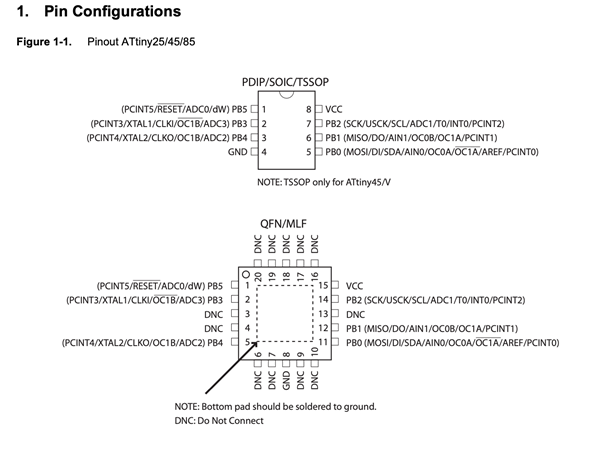
The reason why data sheets are useful in programming boards is that they have all the characteristics and information they have. For example, the available forms may vary depending on the pinout that one board has. You can also know in advance how much data you can process. And most of all, if you make the power or other things you need without looking at the data sheet, you can burn some like me, so be sure to check it out!
Arduino
First, I used Aduino to press my LED button to make light come out. Aduino's advantages are easier to compile and more accessible than other languages.
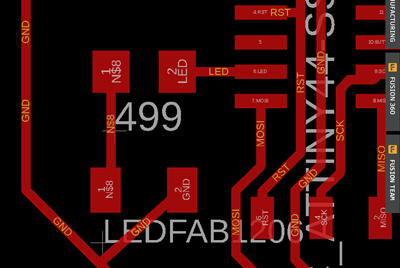
First of all, my board changed the position of LED and resistance and had to be modified. So we worked on supplementing and modifying it first.
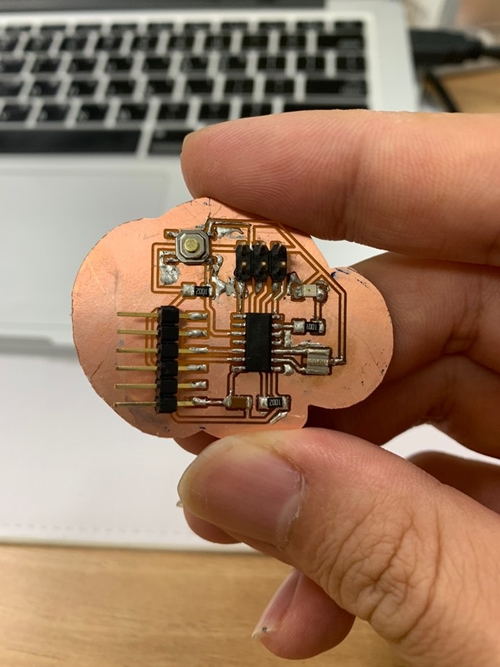
And the board is finished after modification. First, the board has only one number of red LEDs.
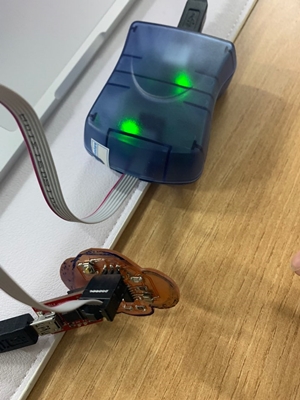
I tried the flow or check of current once again with the AVR ISP. Clear!
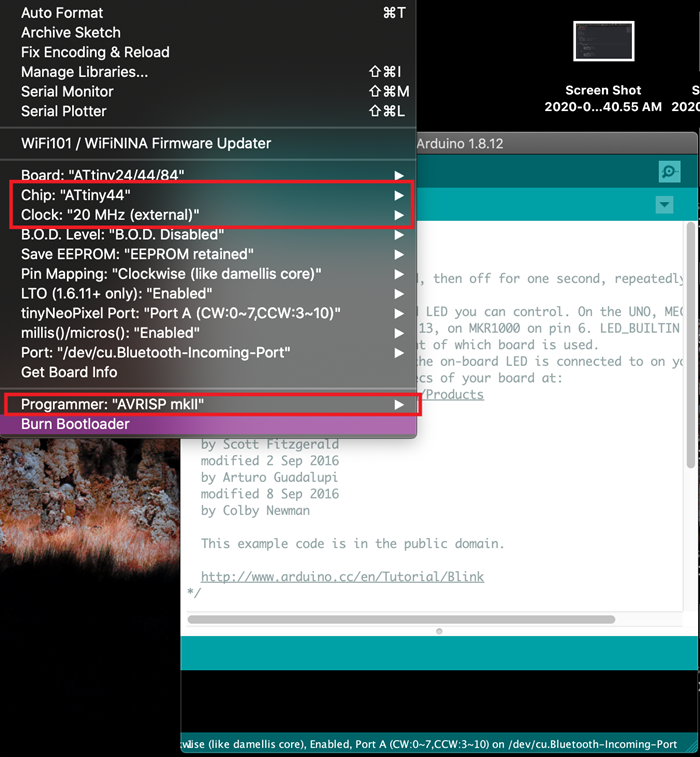
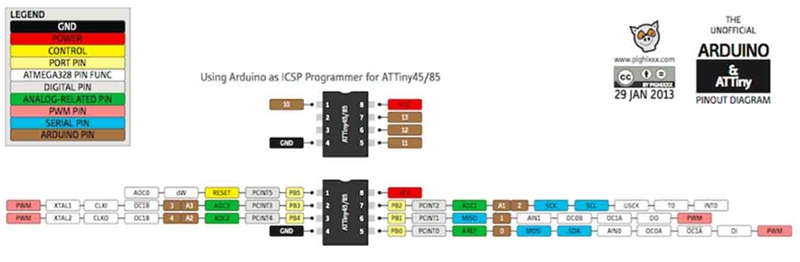
This is the place that creates the environment of Aduino before coding. Enter the tool, set the ATtiny type, and set the ISP type.
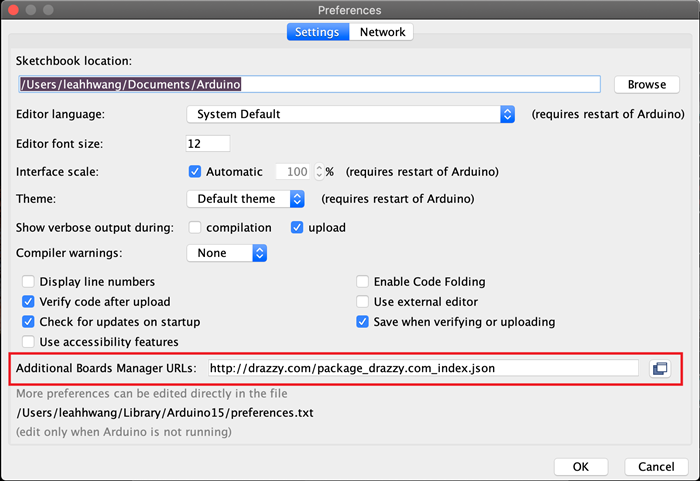
Set the board manager URL as follows:
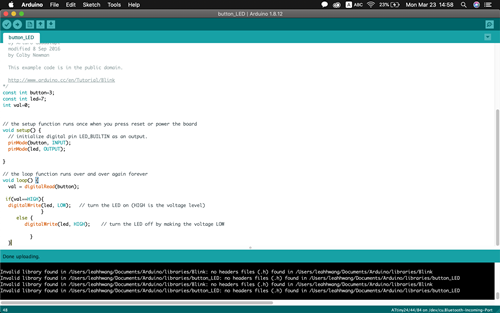
This is my Aduino coding. It is a coding that lights up when a button is pressed. se a simple if sentence and run the else sentence if the value of the value of the value is pressed on the button.There was no problem when I compiled it!
/*
  Button

  Turns on and off a light emitting diode(LED) connected to digital pin 13,
  when pressing a pushbutton attached to pin 2.

  The circuit:
  - LED attached from pin 13 to ground
  - pushbutton attached to pin 2 from +5V
  - 10K resistor attached to pin 2 from ground

  - Note: on most Arduinos there is already an LED on the board
    attached to pin 13.

  created 2005
  by DojoDave
  modified 30 Aug 2011
  by Tom Igoe

  This example code is in the public domain.

  http://www.arduino.cc/en/Tutorial/Button
*/

// constants won't change. They're used here to set pin numbers:
const int button = 3;     // the number of the pushbutton pin
const int led=  13;      // the number of the LED pin
int val = 0;


void setup() {
  // initialize the LED pin as an output:
  pinMode(led, OUTPUT);
  // initialize the pushbutton pin as an input:
  pinMode(button, INPUT);
}

void loop() {
  // read the state of the pushbutton value:
  buttonState = digitalRead(buttonPin);

  // check if the pushbutton is pressed. If it is, the buttonState is HIGH:
  if (buttonState == HIGH) {
    // turn LED on:
    digitalWrite(led, HIGH);
  } else {
    // turn LED off:
    digitalWrite(led, LOW);
  }
}
First of all, the definition of LEDs and buttons is needed in the code.In the setup window, the pin mode LED is output and the button is input. The LED turns off and on according to the value of the button.In the void loop() window, we set how the functions actually work, where we coded the LED to turn on when the button was pressed, or turn off otherwise.
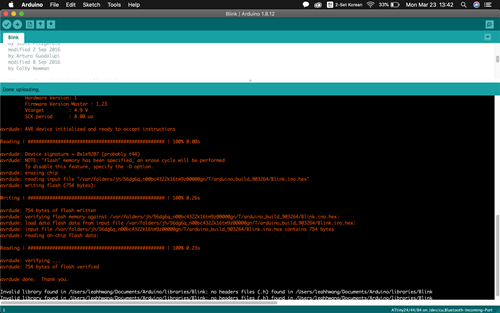
It looks like I uploaded a program. Easy coding, easy success!

This is the last line that comes out if you succeed in coding, which tells you how much coding occupies in the MCU!
Reference : Link
C
This time, I used C language to code LED's flashing. C language was harder to read code than Aduino, so I had to surf the web a lot!!!!
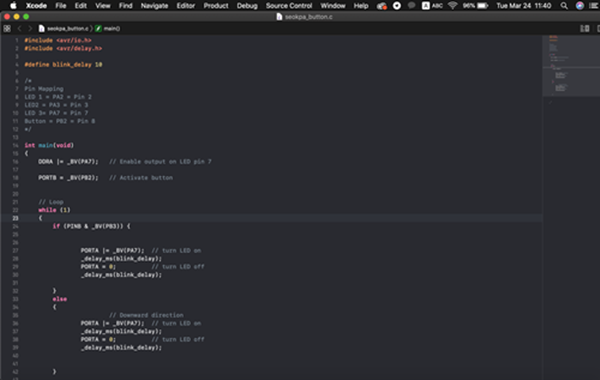
POTA is a function that allows a computer to read a power of a variable. _BV() is the digital of Arduino.A language that a computer can read, such as Read().
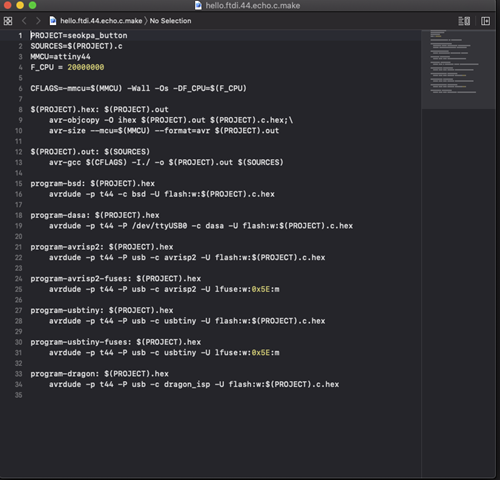
And the language C is compiled through Makefile and can be coded into BOARD. So after you receive the make file, you set the environment (ATtiny type, pin number etc.) for your board and upload it through the terminal.
C language coding in MAC is as follows.
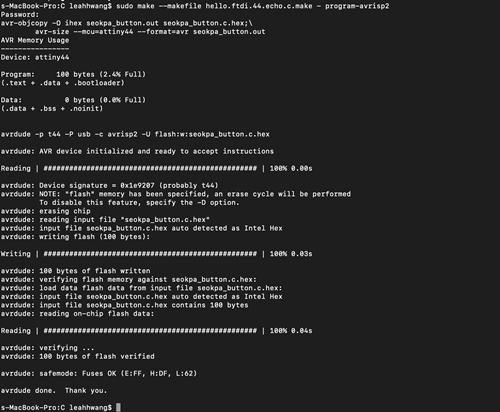
sudo make --makefile (C. code file name).make - program-(Kind of ISP)
Then you get coded and like Aduino, you get the capacity of the code!
C Language tutorial
C code : Download
Makefile : Download