Week 7
Computer-controlled machining
Before start, I would like to send positives though to the people who is handling or suffering COVID-19 these days. ¡Ánimo!
I used this week assignment to improve my final project because it has a lot of common with it. I took inspirations in different project for all students:
- Chair base: Javier Alboguijarro. Fablab Barcelona 2017
- Chair back: Alex Chair from Obrary website
- Legs and table’s improvement: Rafael Aguirre. Fablab La Puebla 2019
During the process I hit myself against a couple of walls. I mean, I worked with other people’s files and it is not that easy than you think:
First: Convert the file to the program you are using.
Second: Your computer cannot open the files because they are so heavy and breaks down.
Thirds: Trying to fix it, you made it worse and lost the main program from your computer; Fusion 360.
Forth: Read on forum that your computer (MAC OS 10.11.6) cannot use the new version of Fusion360 and they deleted the old one.
Below you can see a couple of sketches trying to fix without see properly on 3D.
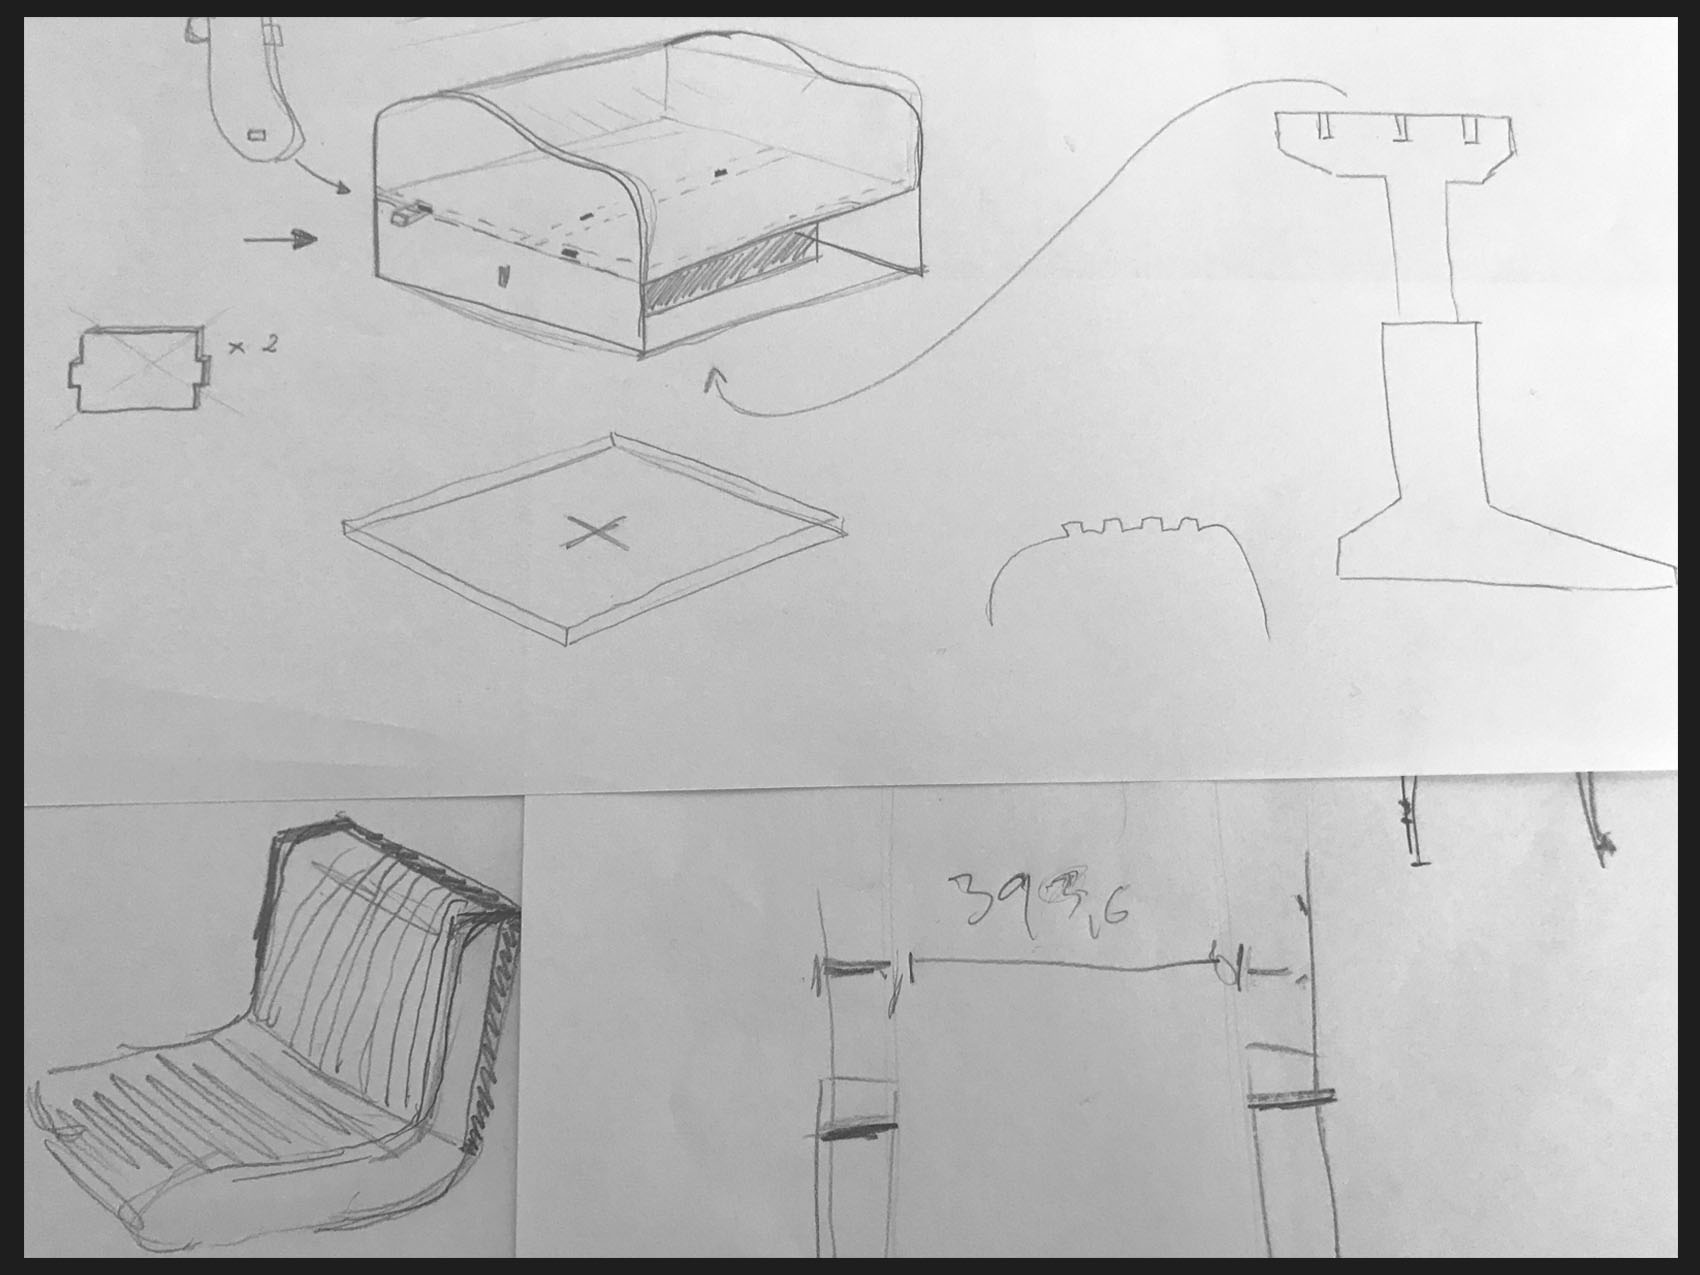
For the seat, I used the design of Javier directly and add the back and other legs that fit better with the additional elements that I add.
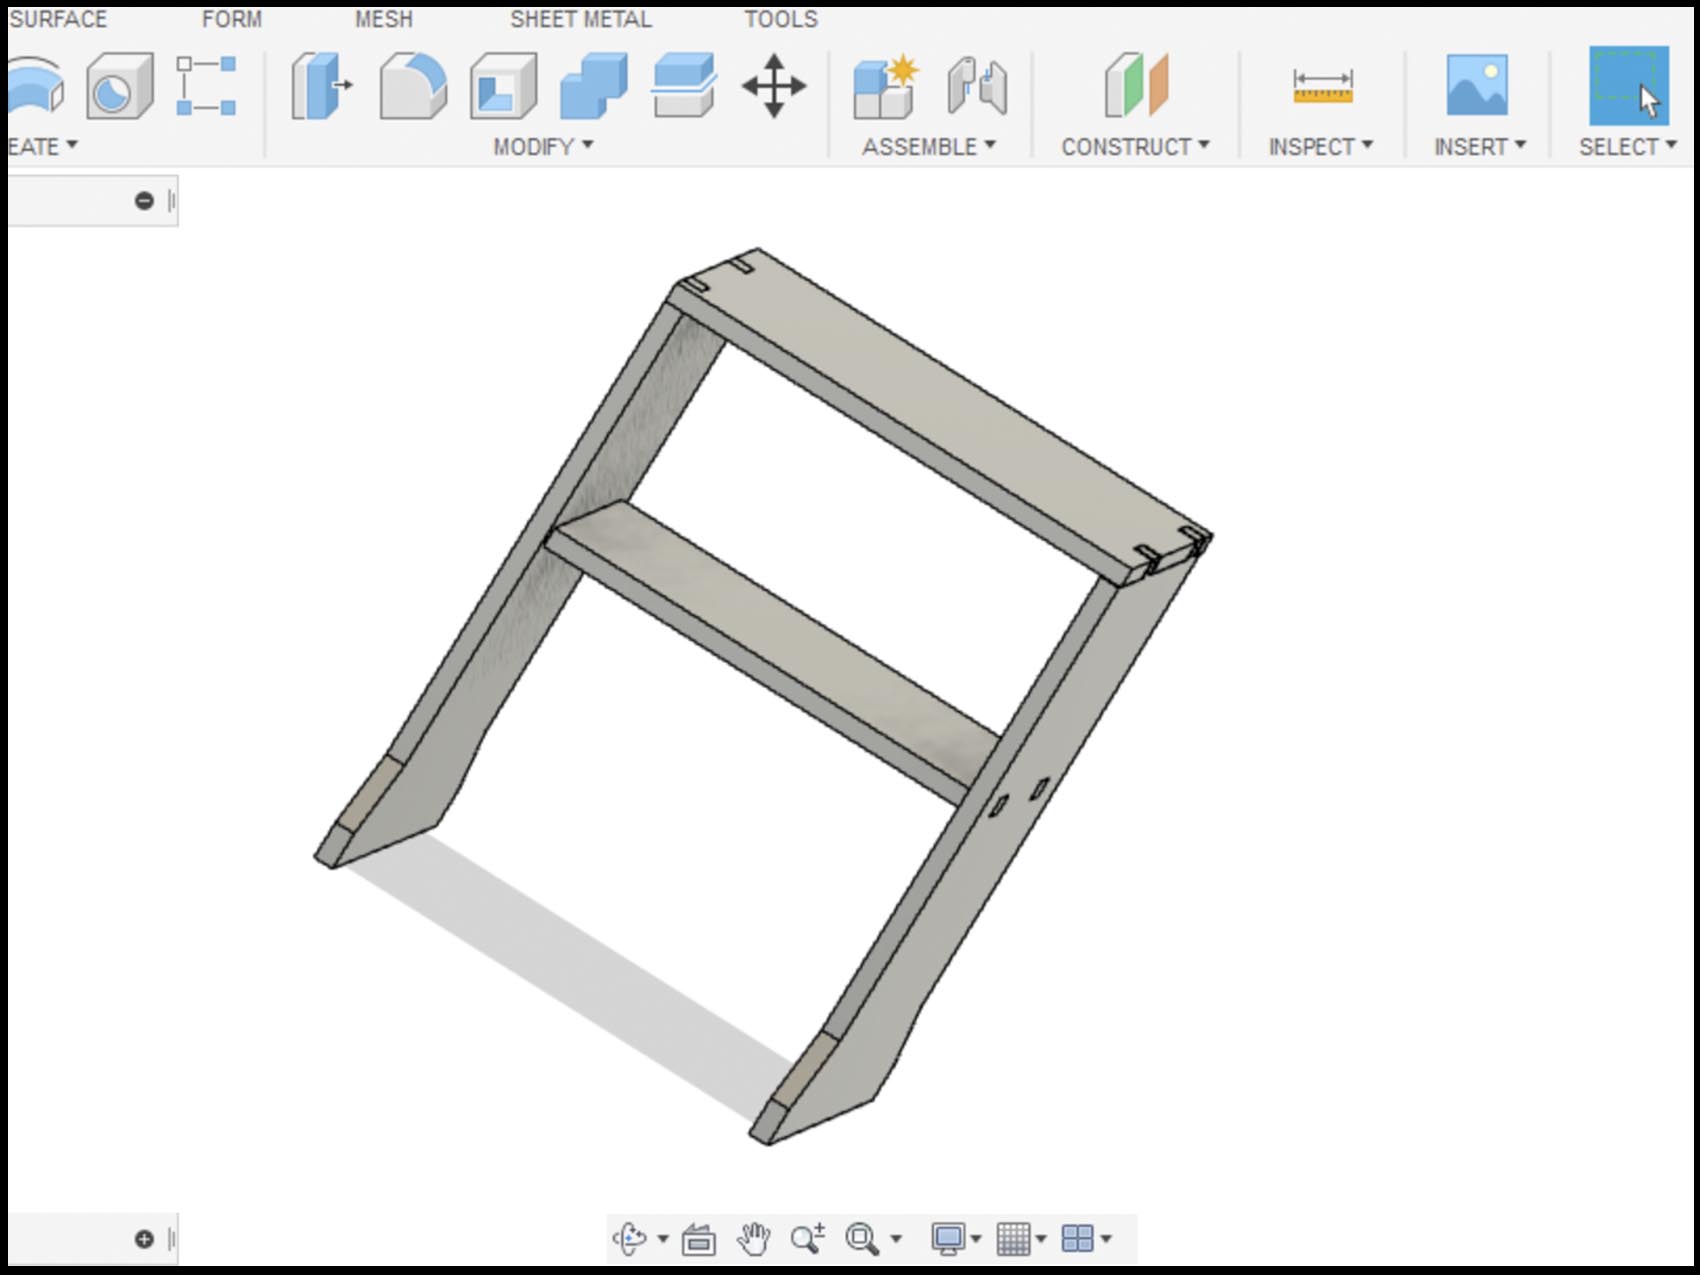
Once I got the measurements of the seat, it was the moment to design the legs. For that, I used Fusion 360 and give a support platform at the middle of the height to keep the structure together and strong.
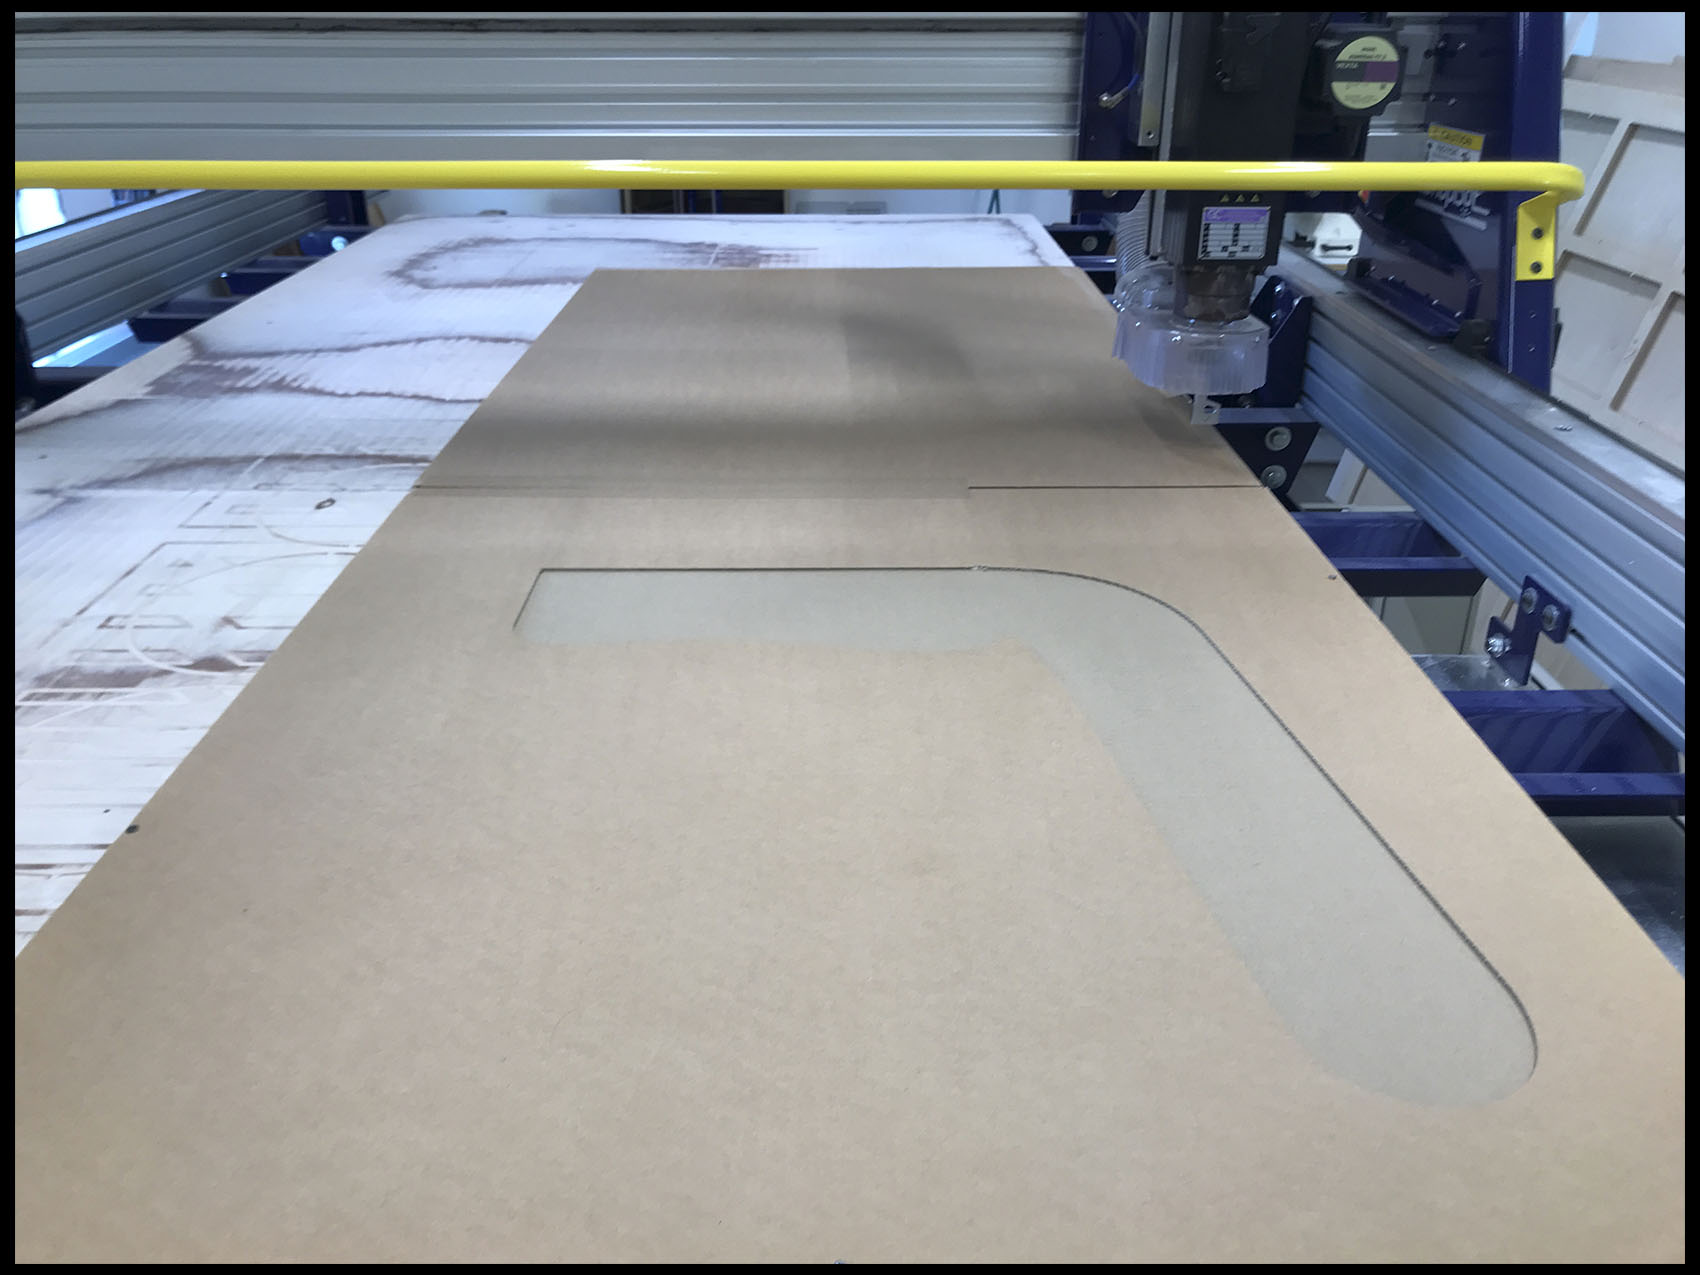
Later, it was the turn to design the support of the back on Illustrator. This structure contains two part. One of them, it is a group of two supporter that are attached to the seat on the sides. They were design on Illustrator taking like a guide one of the pieces of Javier’s design. Before milling them on the right material, I prefer to test it on cardboard, it was huge! So, after a couple of tests more, I got the one that fit with the measurement of my body. This helped me a lot to realize some mistakes on the design, and I still working on it.
A summary of the additional pieces and changes of the original design from Javier:
- I added to the seat two closed pieces that have the supports of the back.
- CThe back is connected, like I just say, to the seat and finished with a flexible pattern.
- The pattern is connected to the master by little outsides pieces.
The other part is the back of the chair that was taking from a pattern and adapted by Illustrator to attached it later with the back holding. In this case, I also test first to see if the flexibility of that pattern will resist the strength when is bent.
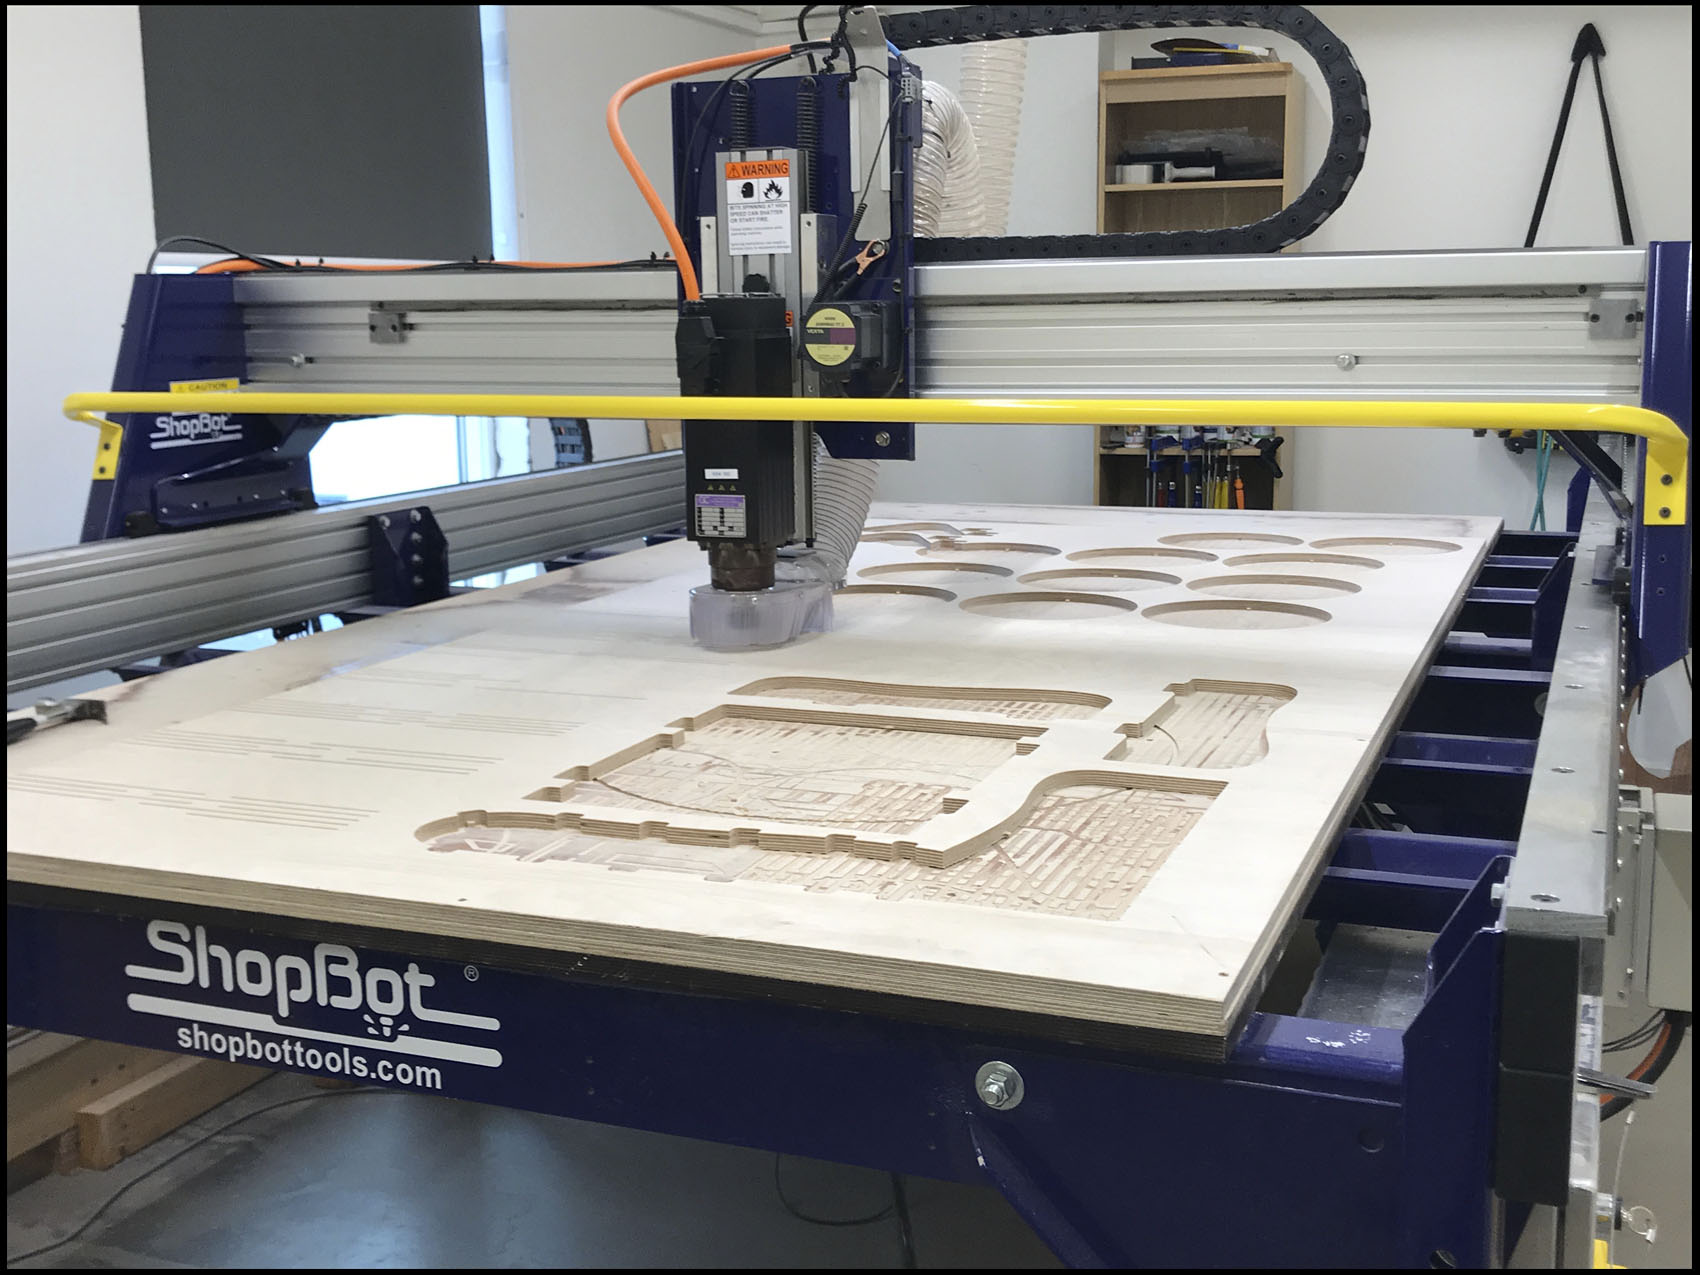
Now, it was time to mill. Not forget that you are using a milling machine and it dangerous so, safety first: keep your eyes safe with transparent glasses, your ears with a headphone for the noise, take your hair out of the way and be careful with hands and fingers, the beat are knife and cut.
Overall, before start, there are a couple of thing to take care of: Shopbot preparation and Vcarve files.
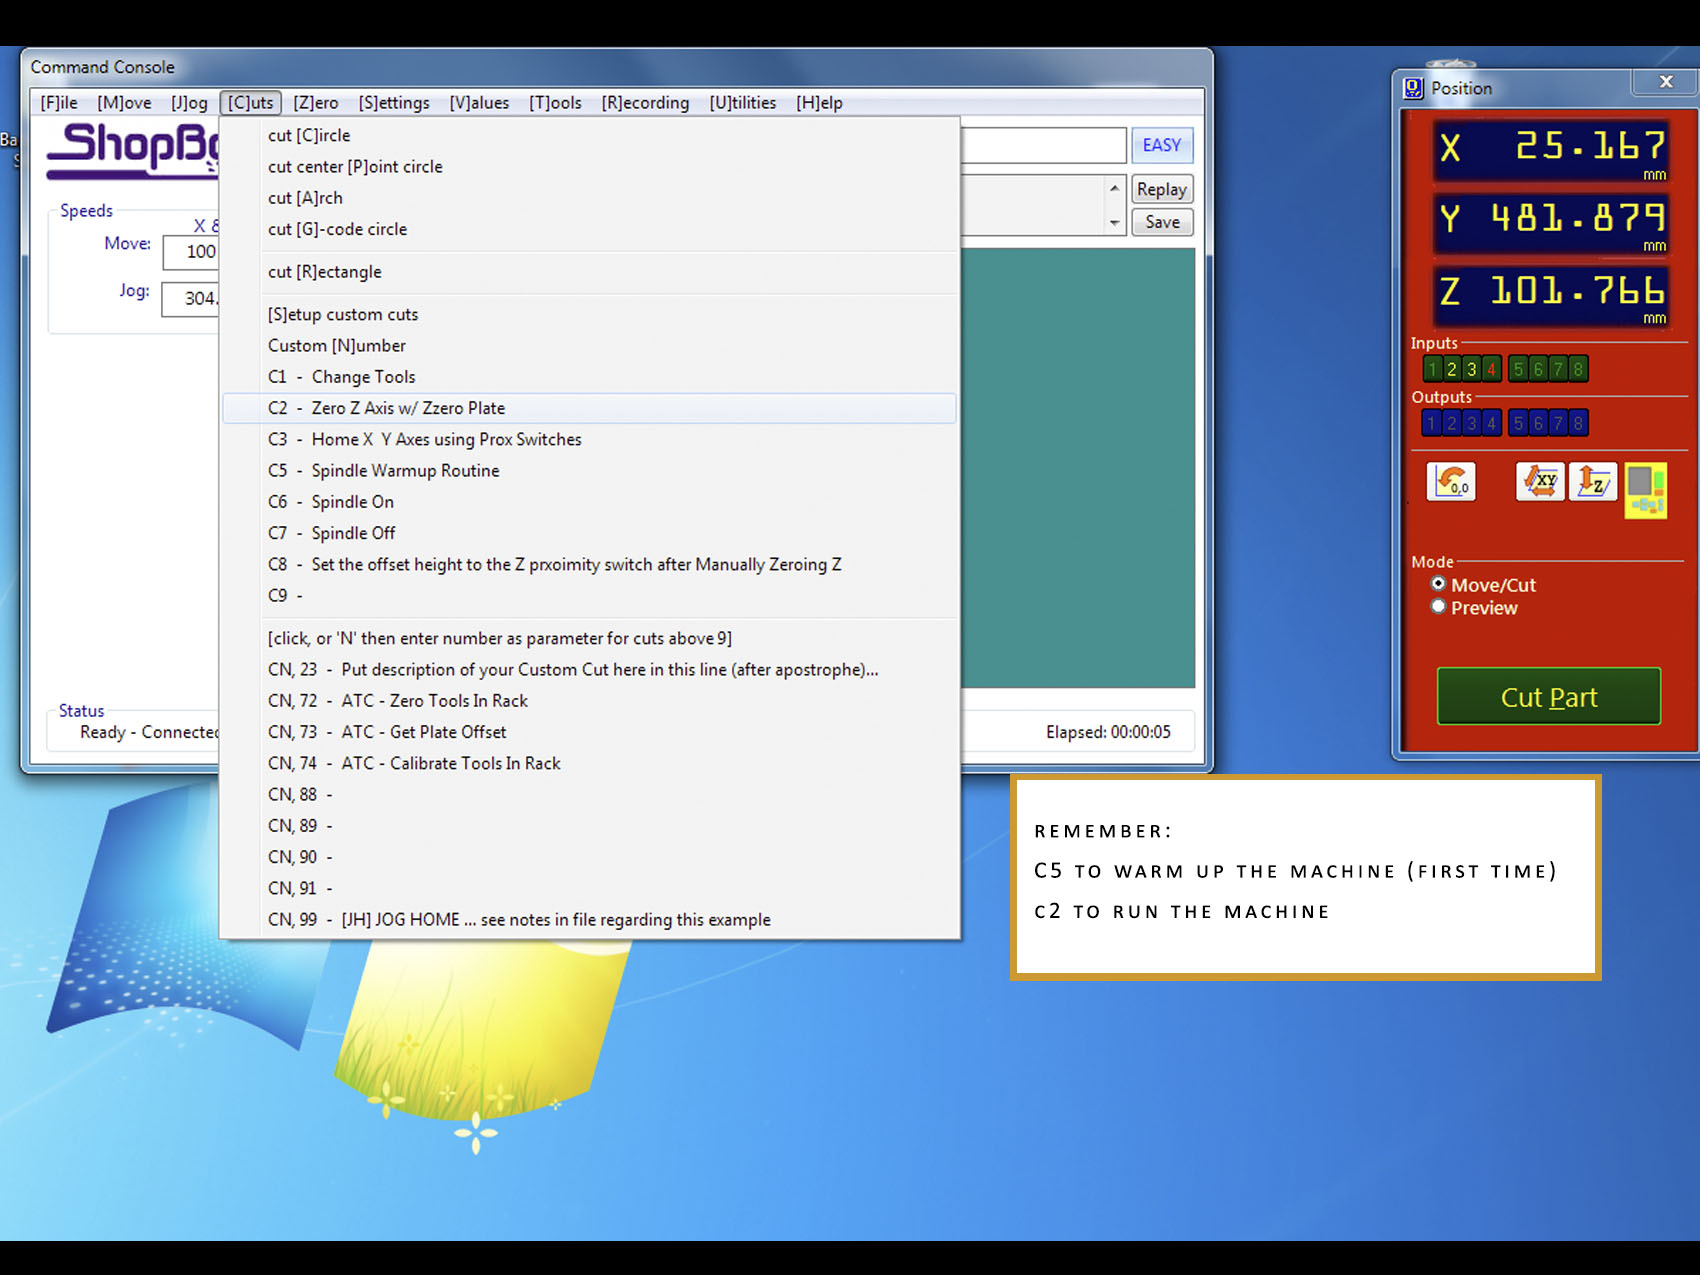
Before start, run Shopbot and check setting for the machine, the XYZ positions and the cut with C2 and warm up the machine in C5 for 5 minutes approximately. The Z point is measure on the top of the material using this process.
On Vcarve we set our files and prepare them for the shopbot. There we set the material, the beat, the speed, if we dig or we cut. It is important to go step by steps for our safety and for our success.
On the job setting you set the type and the side. Then, you import your DXF or PDF file to the program and set the pieces properly, no so close to each other to not destroy with the beat when you mill it.
The material used on the project is wood:
- 12 mm for the back.
- 15 mm (14,6) for the seat.
The beat tools to mills use it are:
- 1/4” (6,35 mm.) for the back pattern.
- 1/8” (3,15 mm.) for the inside lines.
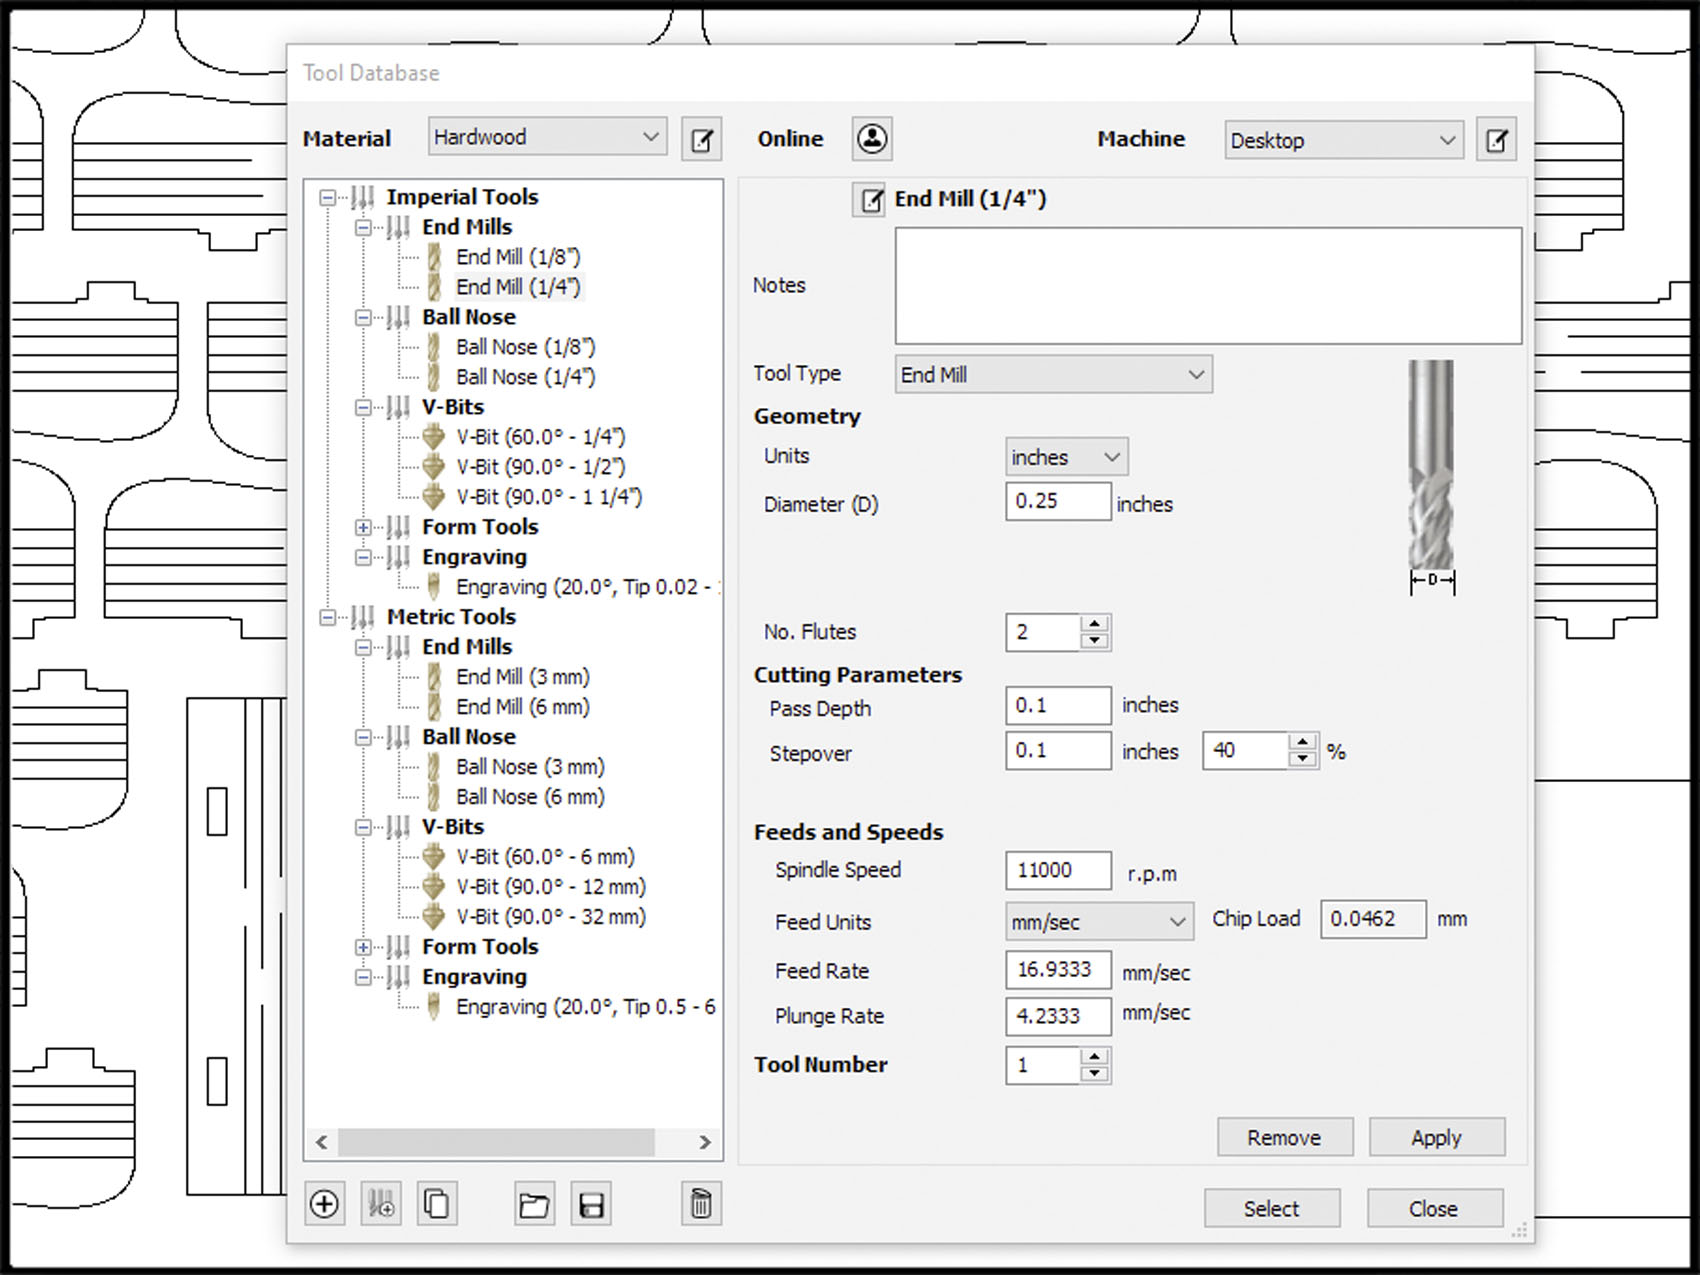
When you set up the beat you also see the speed, how much material the beat will take from the material. (Remember the laser cut kerf, this is the same). Every detail can be a change on the final art.
With Vcarve we organize also what the machine will mill first. For that, we have to set and organize the job by profiles in order. For example, in this case:
1. The inside lines are the profile 1 with the 1/8” beat.
2. The cutting lines are the profile 2 with the beat 1/4” beat.
Not forget to put the taps on the cut lines to prevent unpleasant moves of the material that can destroy the piece and damage the machine. Also, it is important to take care of that pieces that need to fit and attached together, one advice for that is to set dog bone on the inside corners because sometimes the mill cannot reach it and can be difficult later on to build.
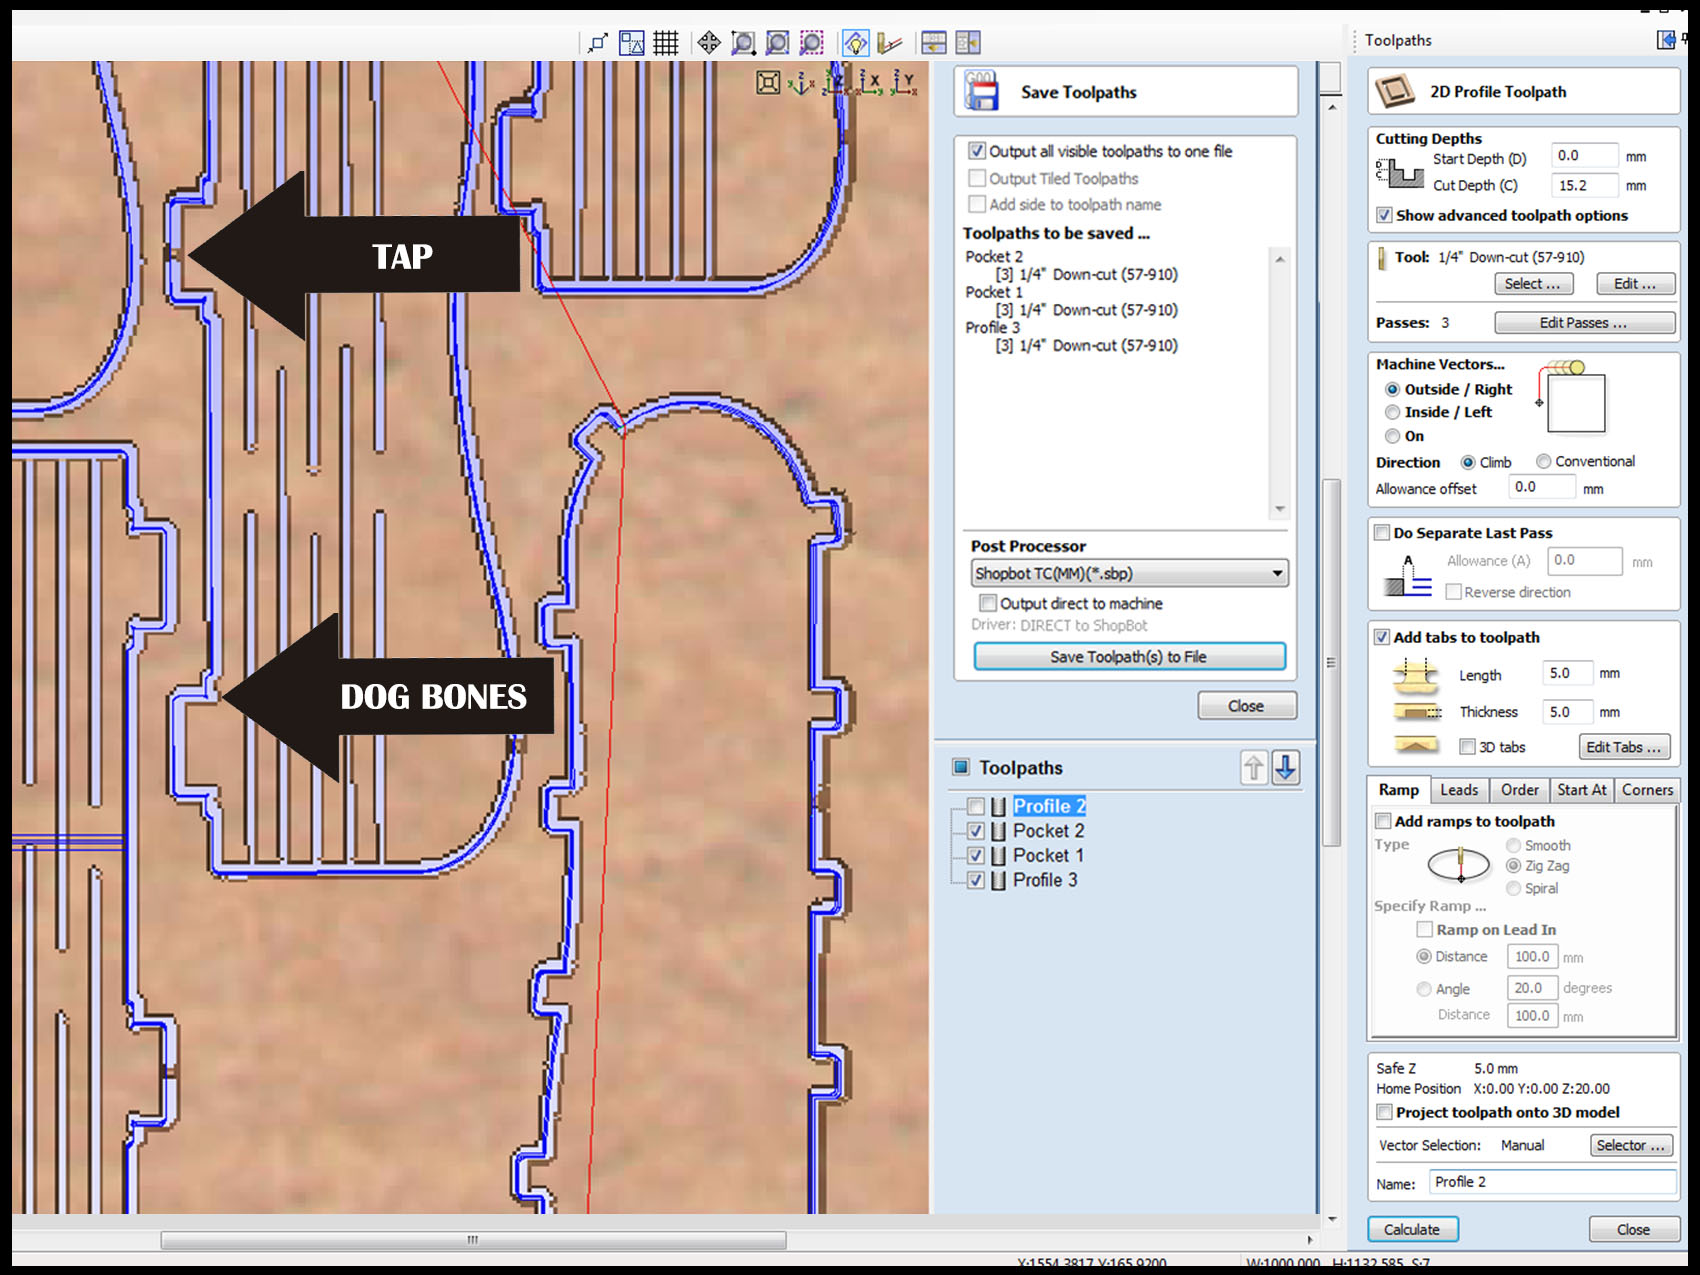
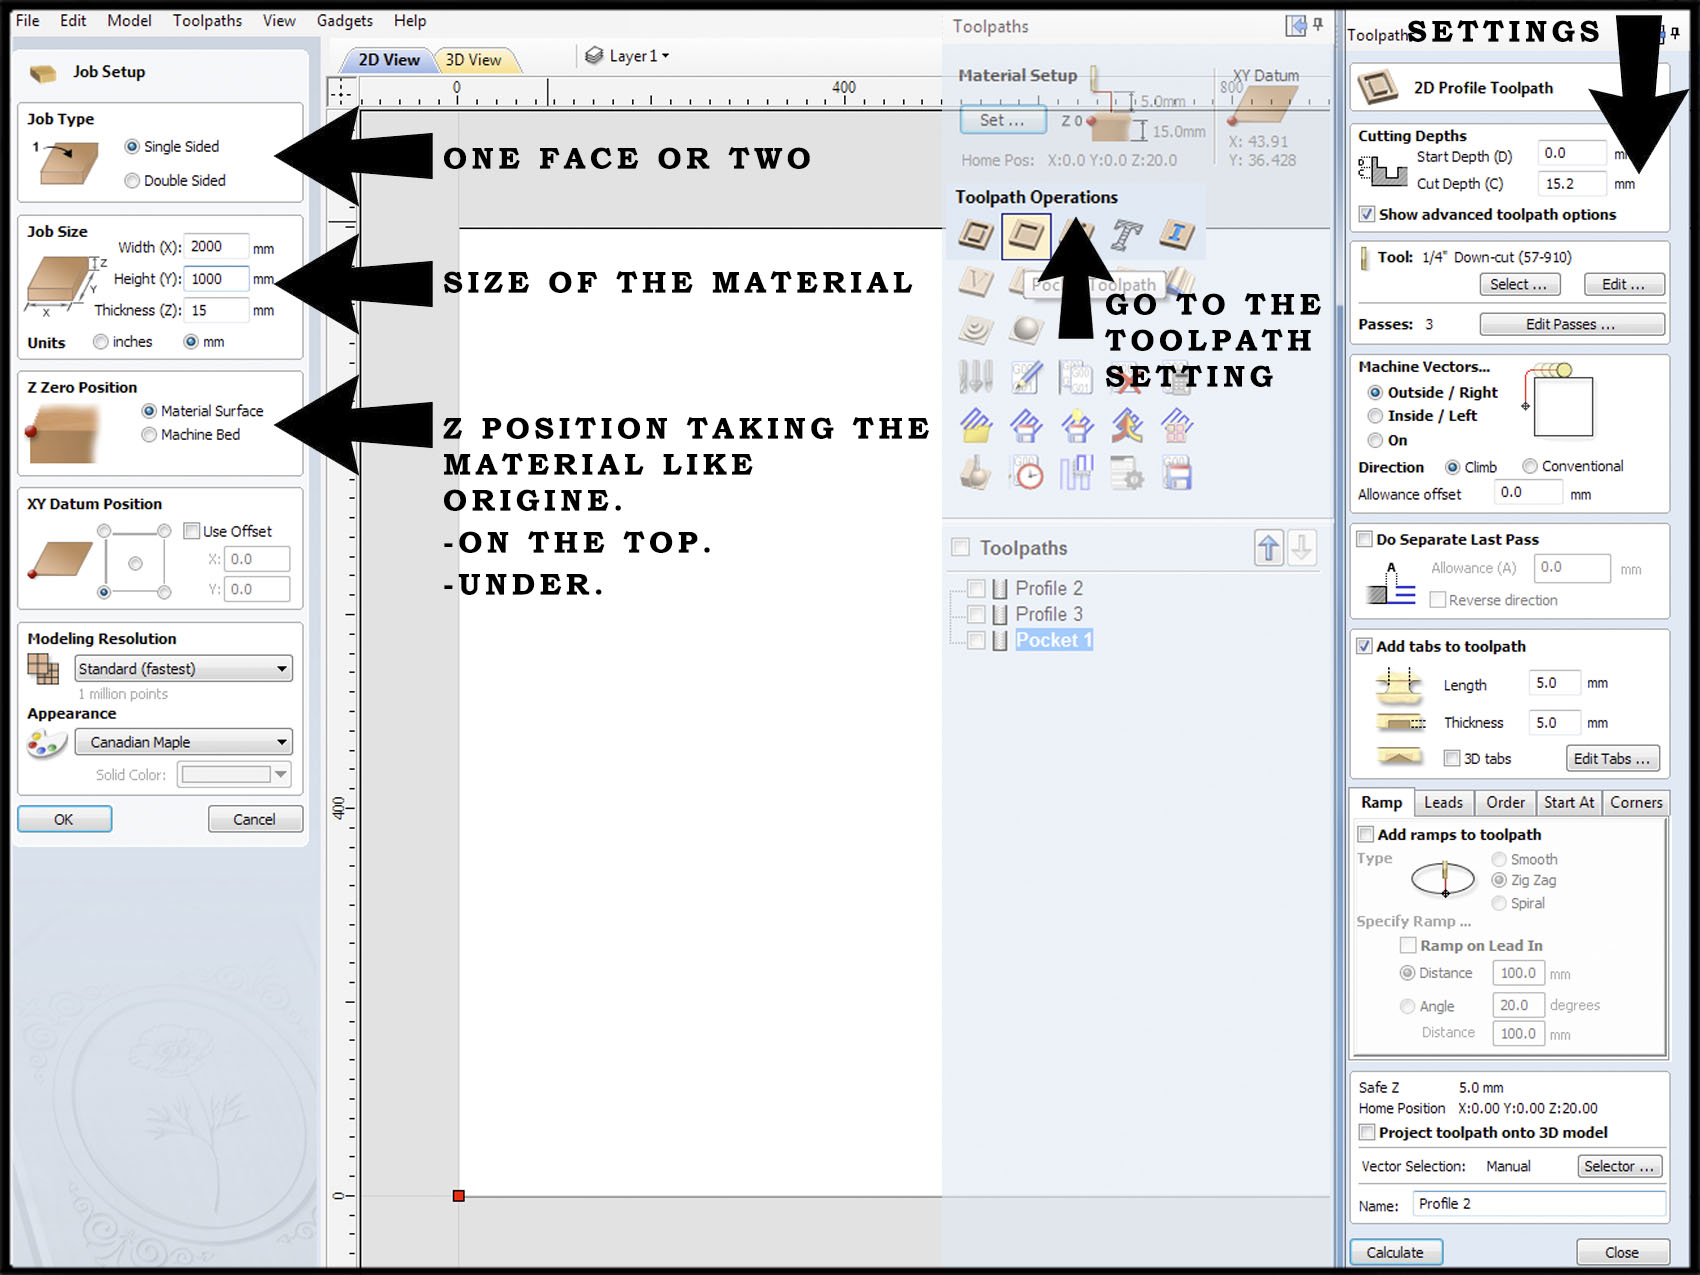
Now, take a look of the setting of the profile for the 15mm material that was used for the seat and legs of the chair.
Open a new file and go to Job setup, there you write which side you want to mill, how big is your material and where is your Z point, on my case, I measure the set point on the top of the material like I said before.
Next step is to import the file and locate it on the material. If something does not have place, delete it from the file and you will put it in another round.
The setting for the 15mm material that I worked have a depth of 15.2mm to be sure that cut through, it is an outline and a beat called 57-910 of 1/4". In addition, you can also control the measure of the tabs and the measure of the dog bones depend on your convenience.
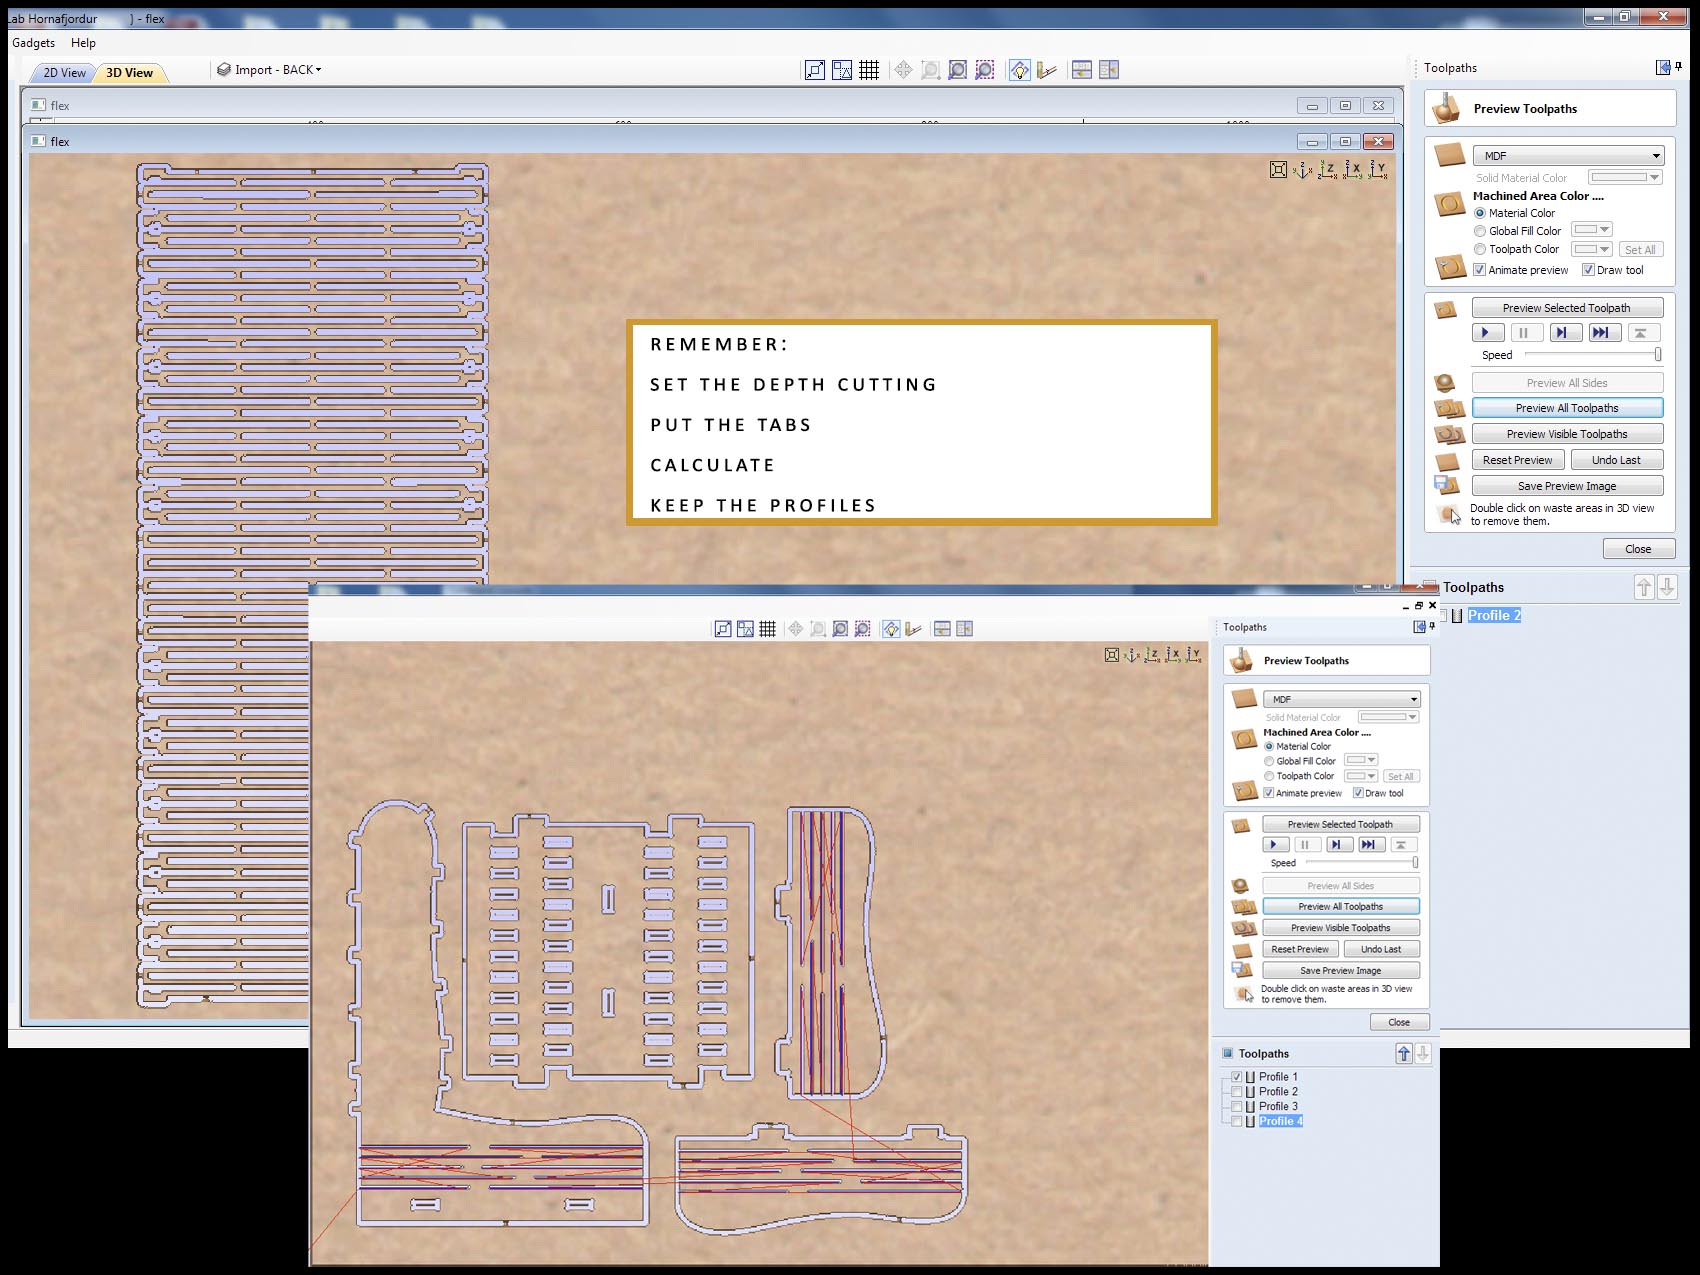
After setting, you select the pieces and calculate, and you will get a 3D vision of your path. Like you can see on the picture below, each movement of the beat is a profile.
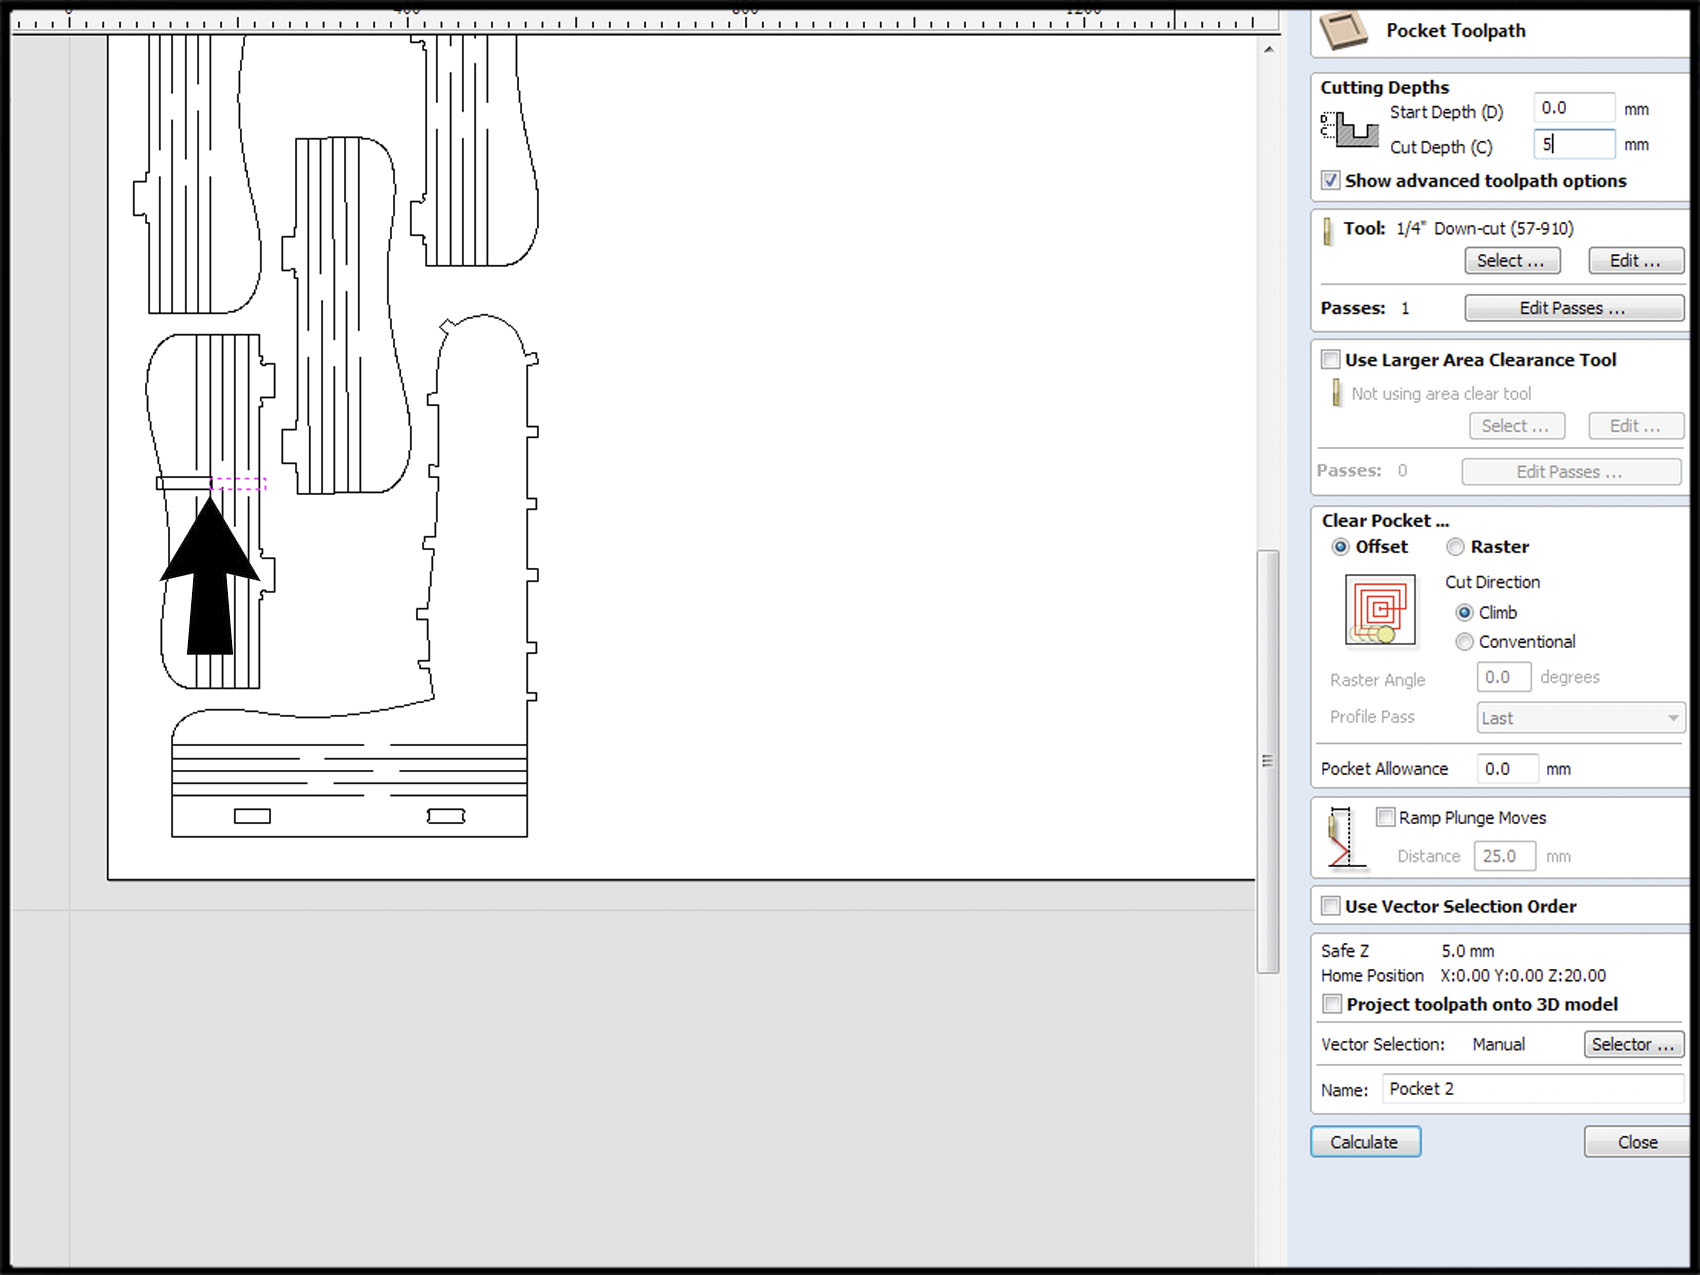
One of the pieces of the chair has a small climb of 5mm depth. This is an extra profile.
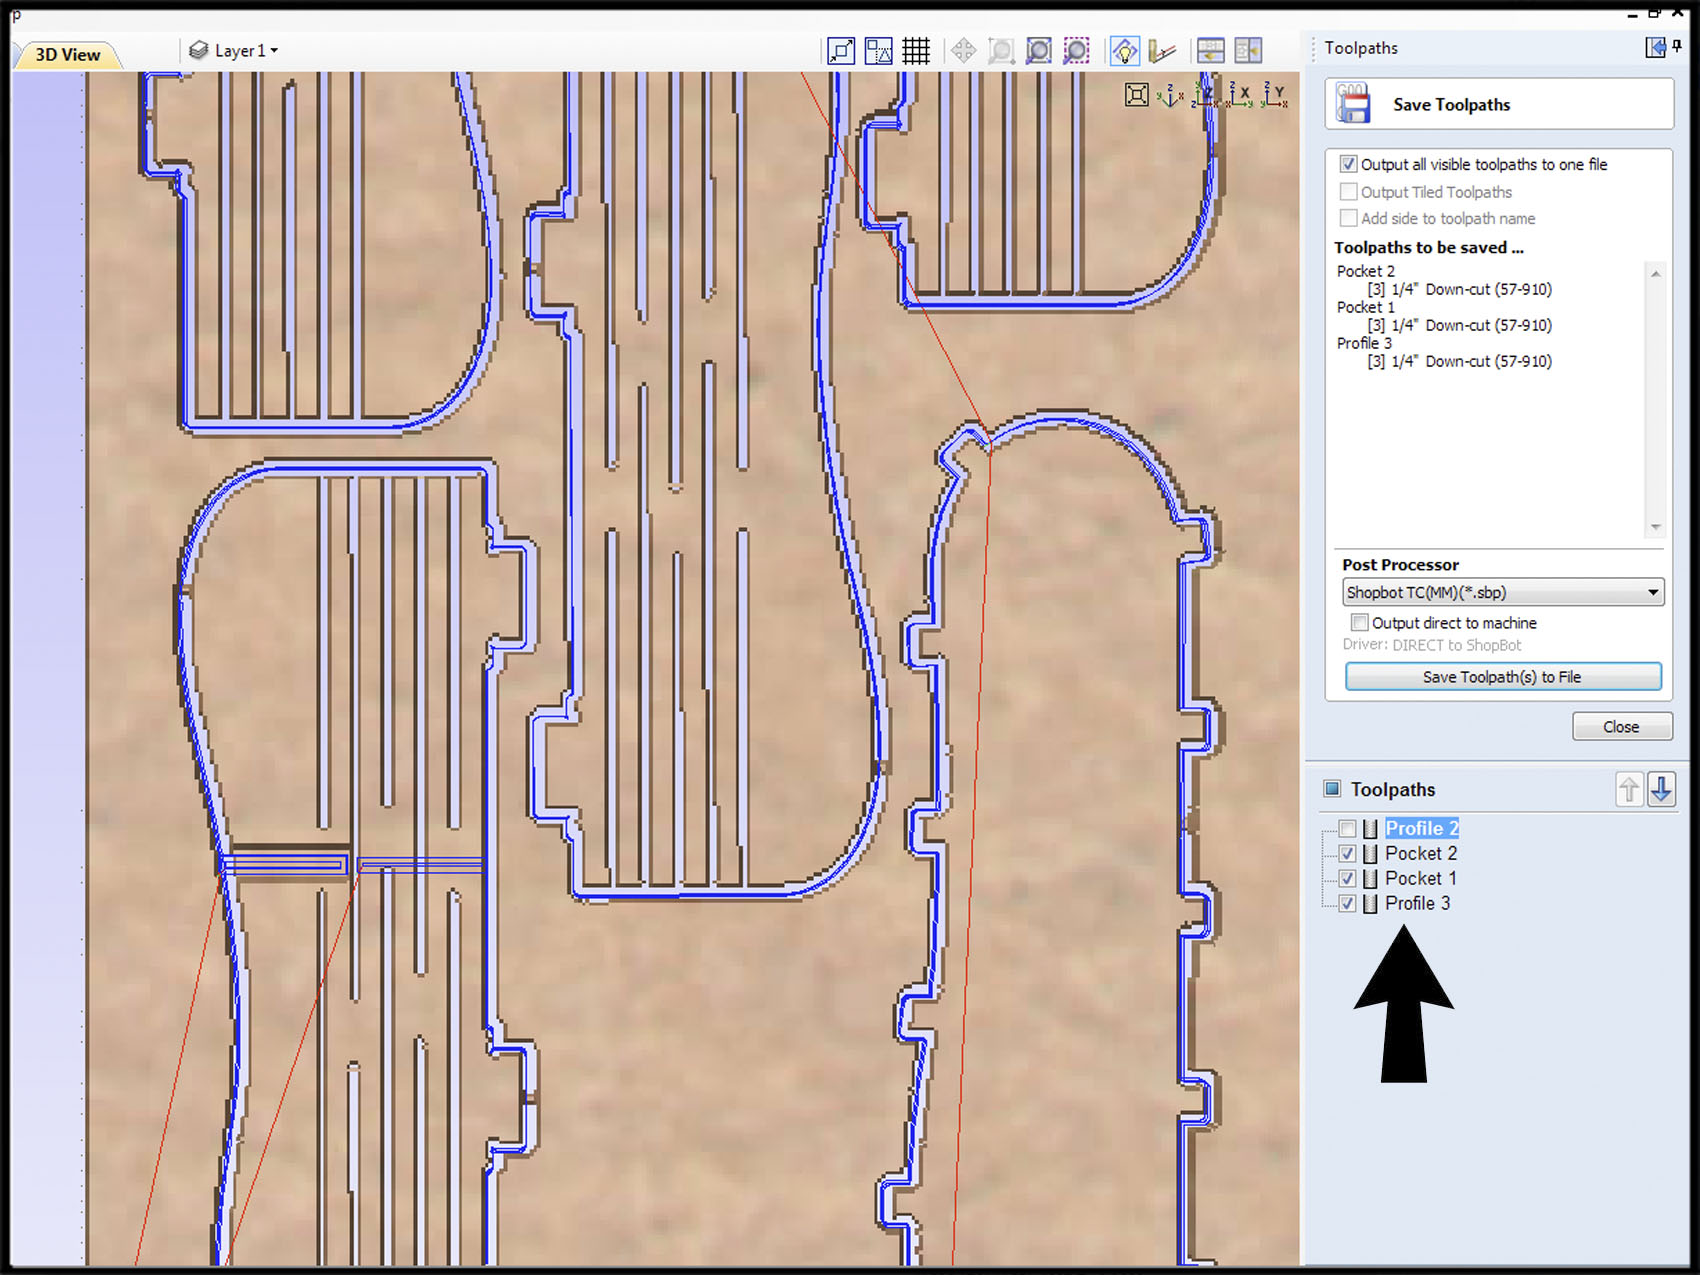
At the end, keep the profiles on the computer and run the Shopbot from his panel. It is good idea to name them in order, so you know how to send them.
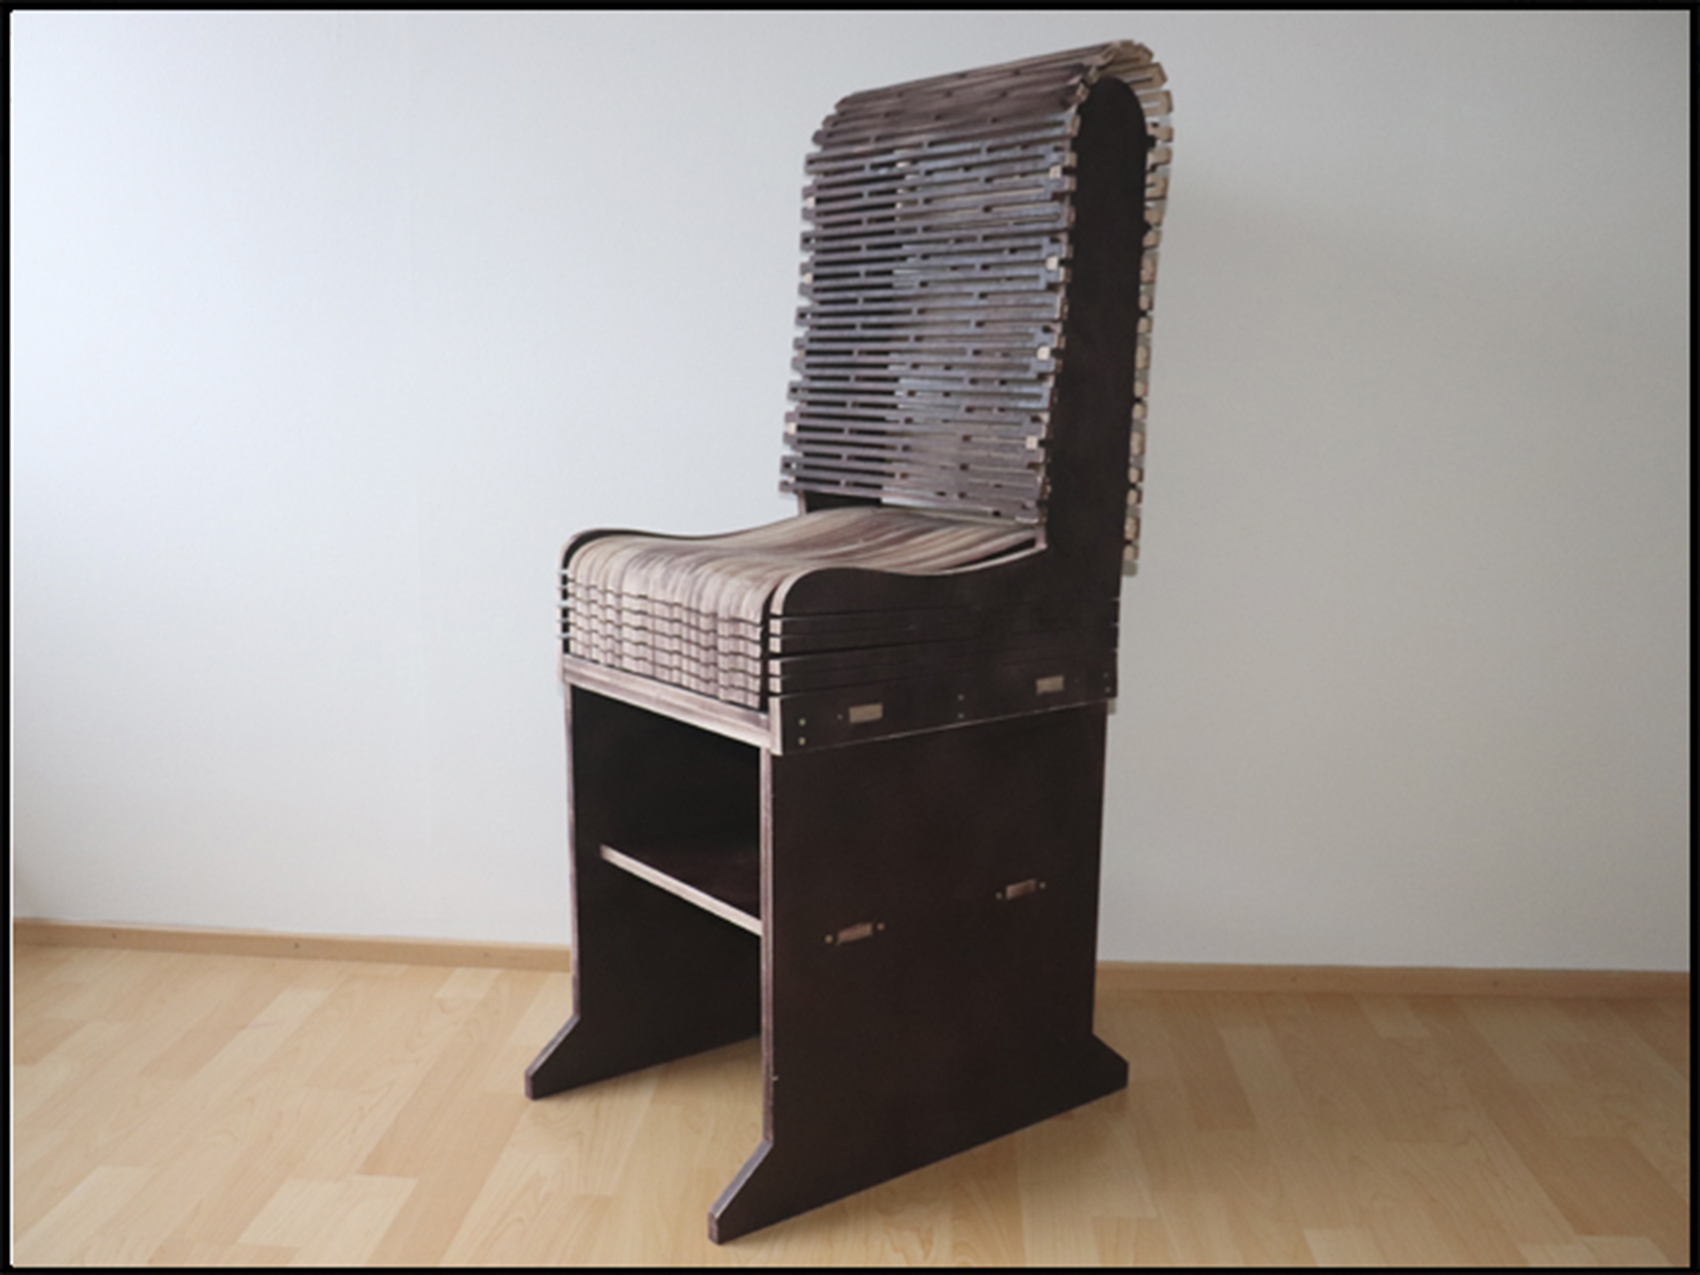
When you cut everything, you can start to build your puzzle of pieces. The full chair has a total of 30 pieces without the legs.
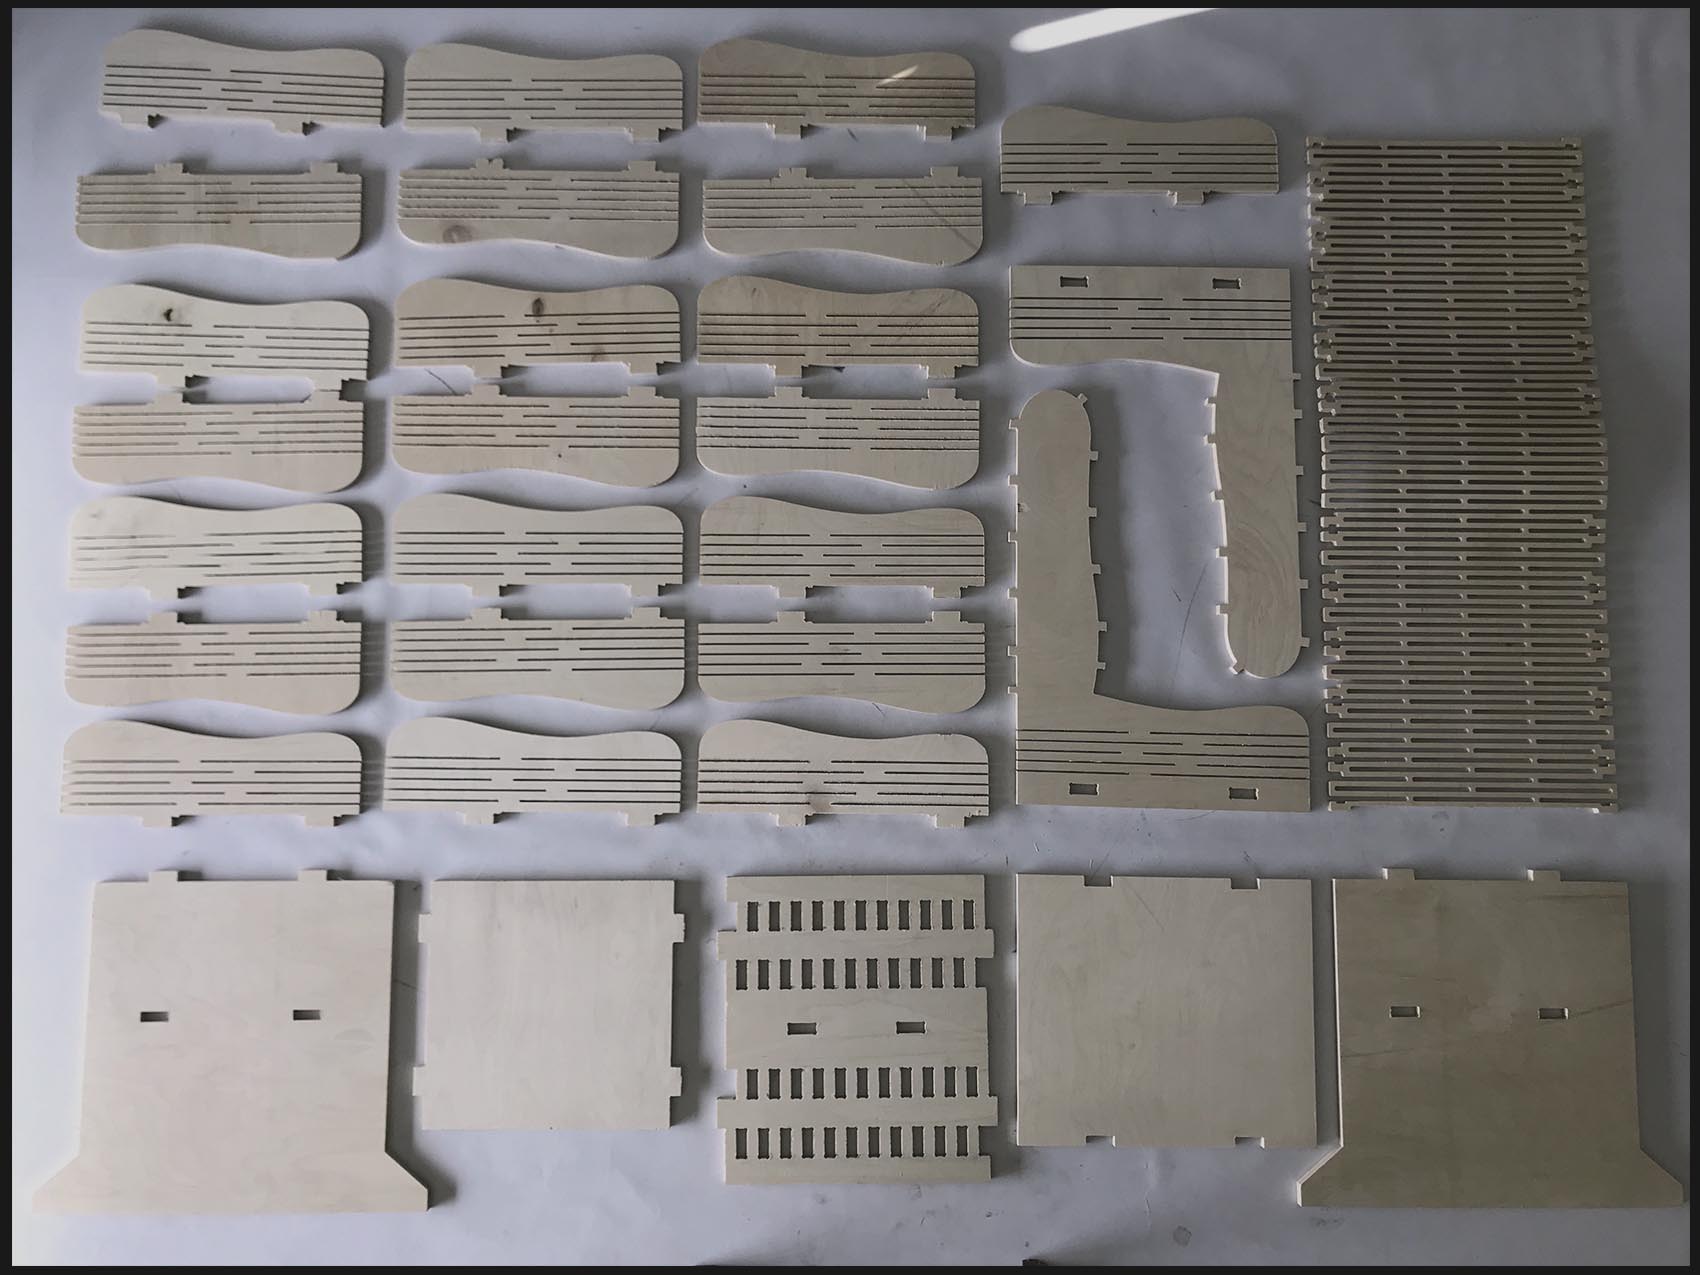
To add the leg it is one more piece that is screw to the one that hold the 22 pieces that built the seat because I wanted to give a more support to all the structure.
When I join the back of the seat it was a little bit longer so did not fit perfect, but give the space to be able to grap the chair and it is also higher and fit to hold the head.
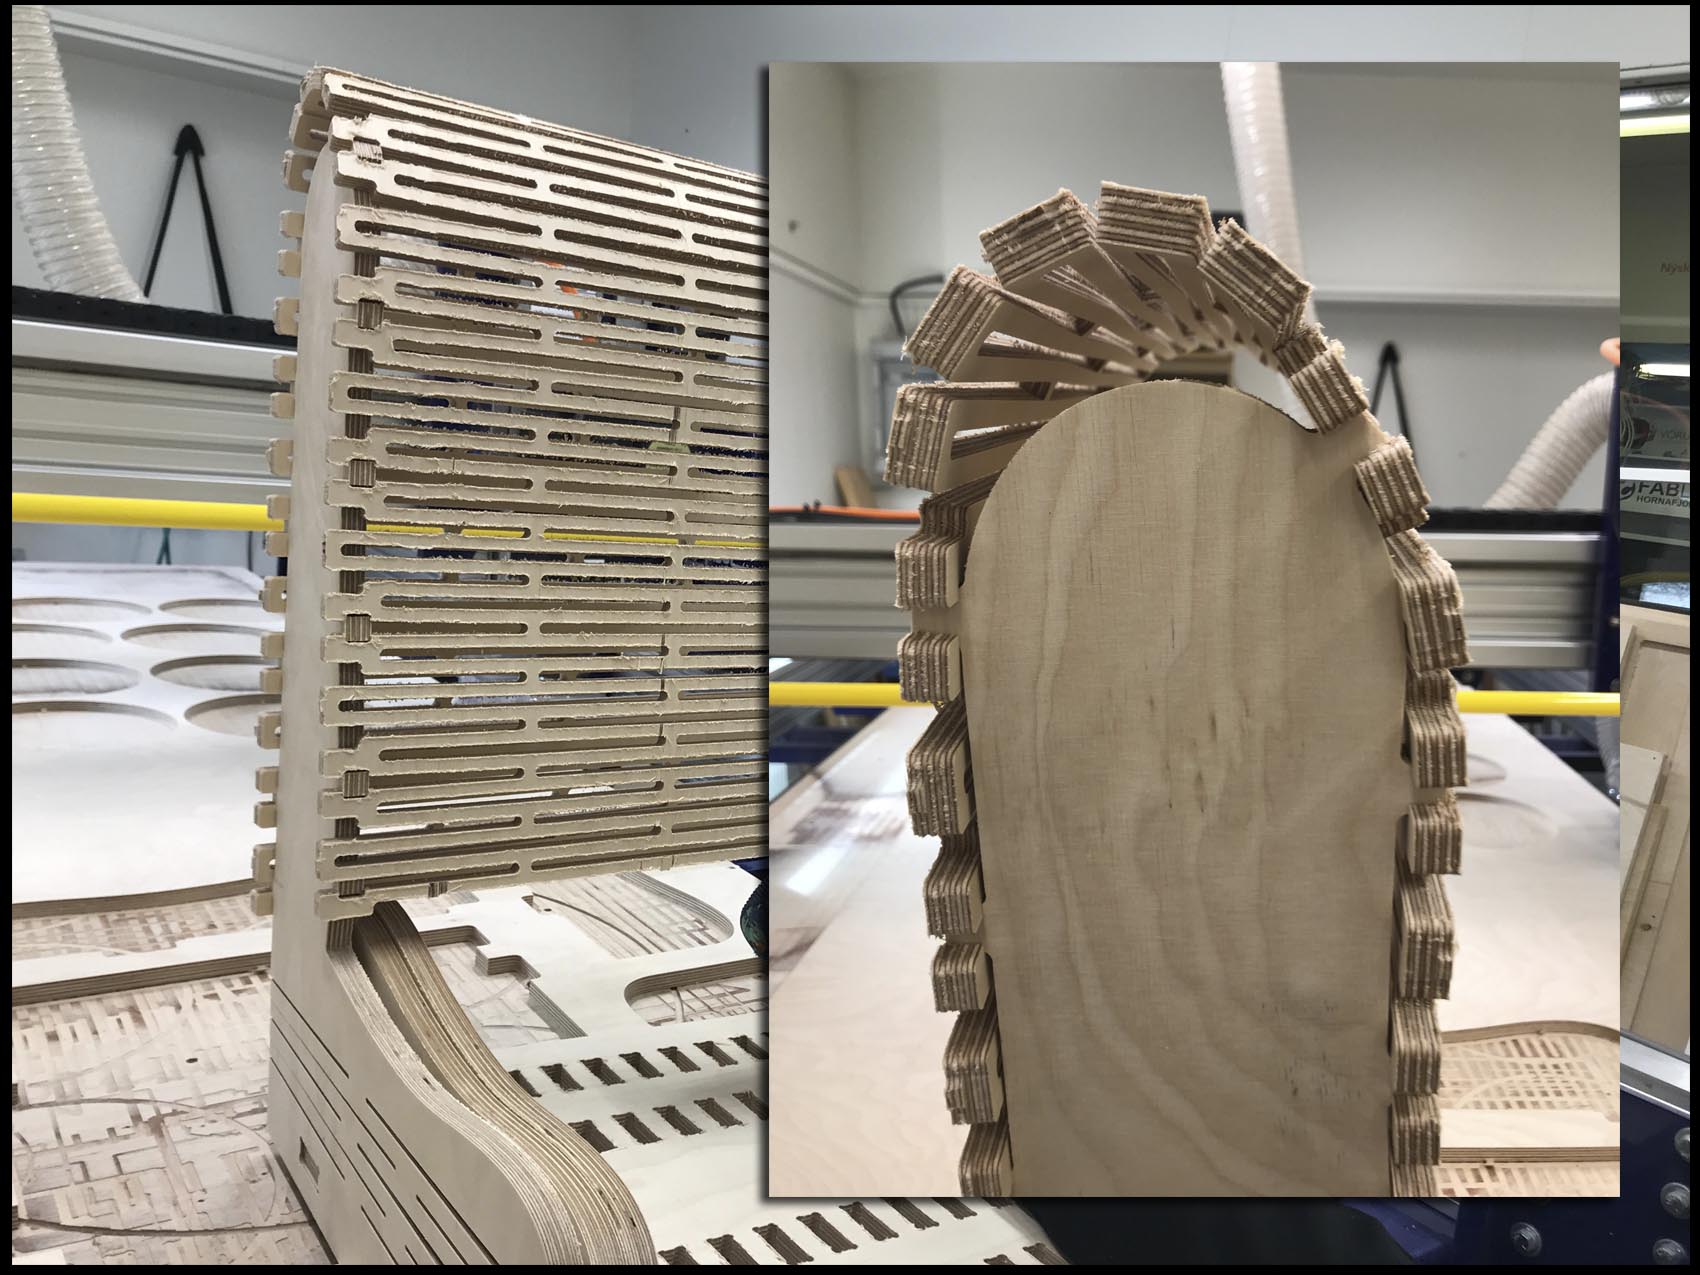
this assignment is connected with my final project, so you will be able to see how is this chair changes later on.
The previous steps for the chair after finishing the mill were:
- Each piece of the chair was prepared, cleaned and painted.
- Put together the pieces of the seat.
- Attach the outside pieces with the back support.
- Fit the back.
- Build the legs.
- Set the top with the seat and the back.
- Screw to give more strength and support to the balance.
Because of this chair is part of the final project, one of the pieces of the seat (the one on the middle) had to be fixed to keep inside the light sensor that is the input for the bluetooth that is connected to the light on the table.
