
Introduction
The idea of this project was on my mind for a long time and I will be able to build it at the end.
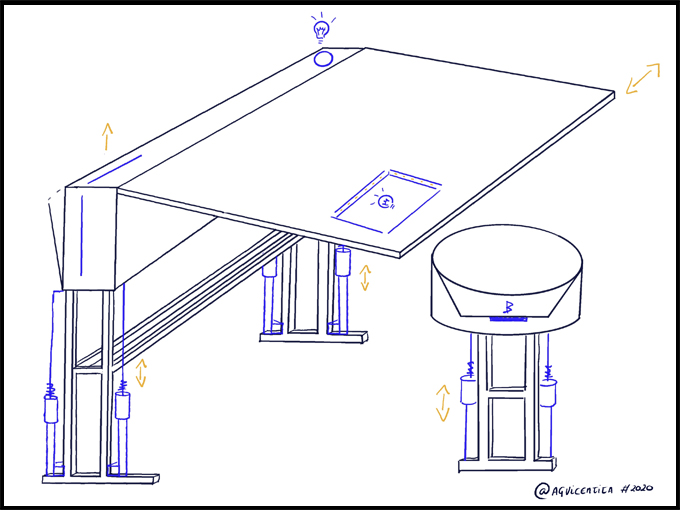
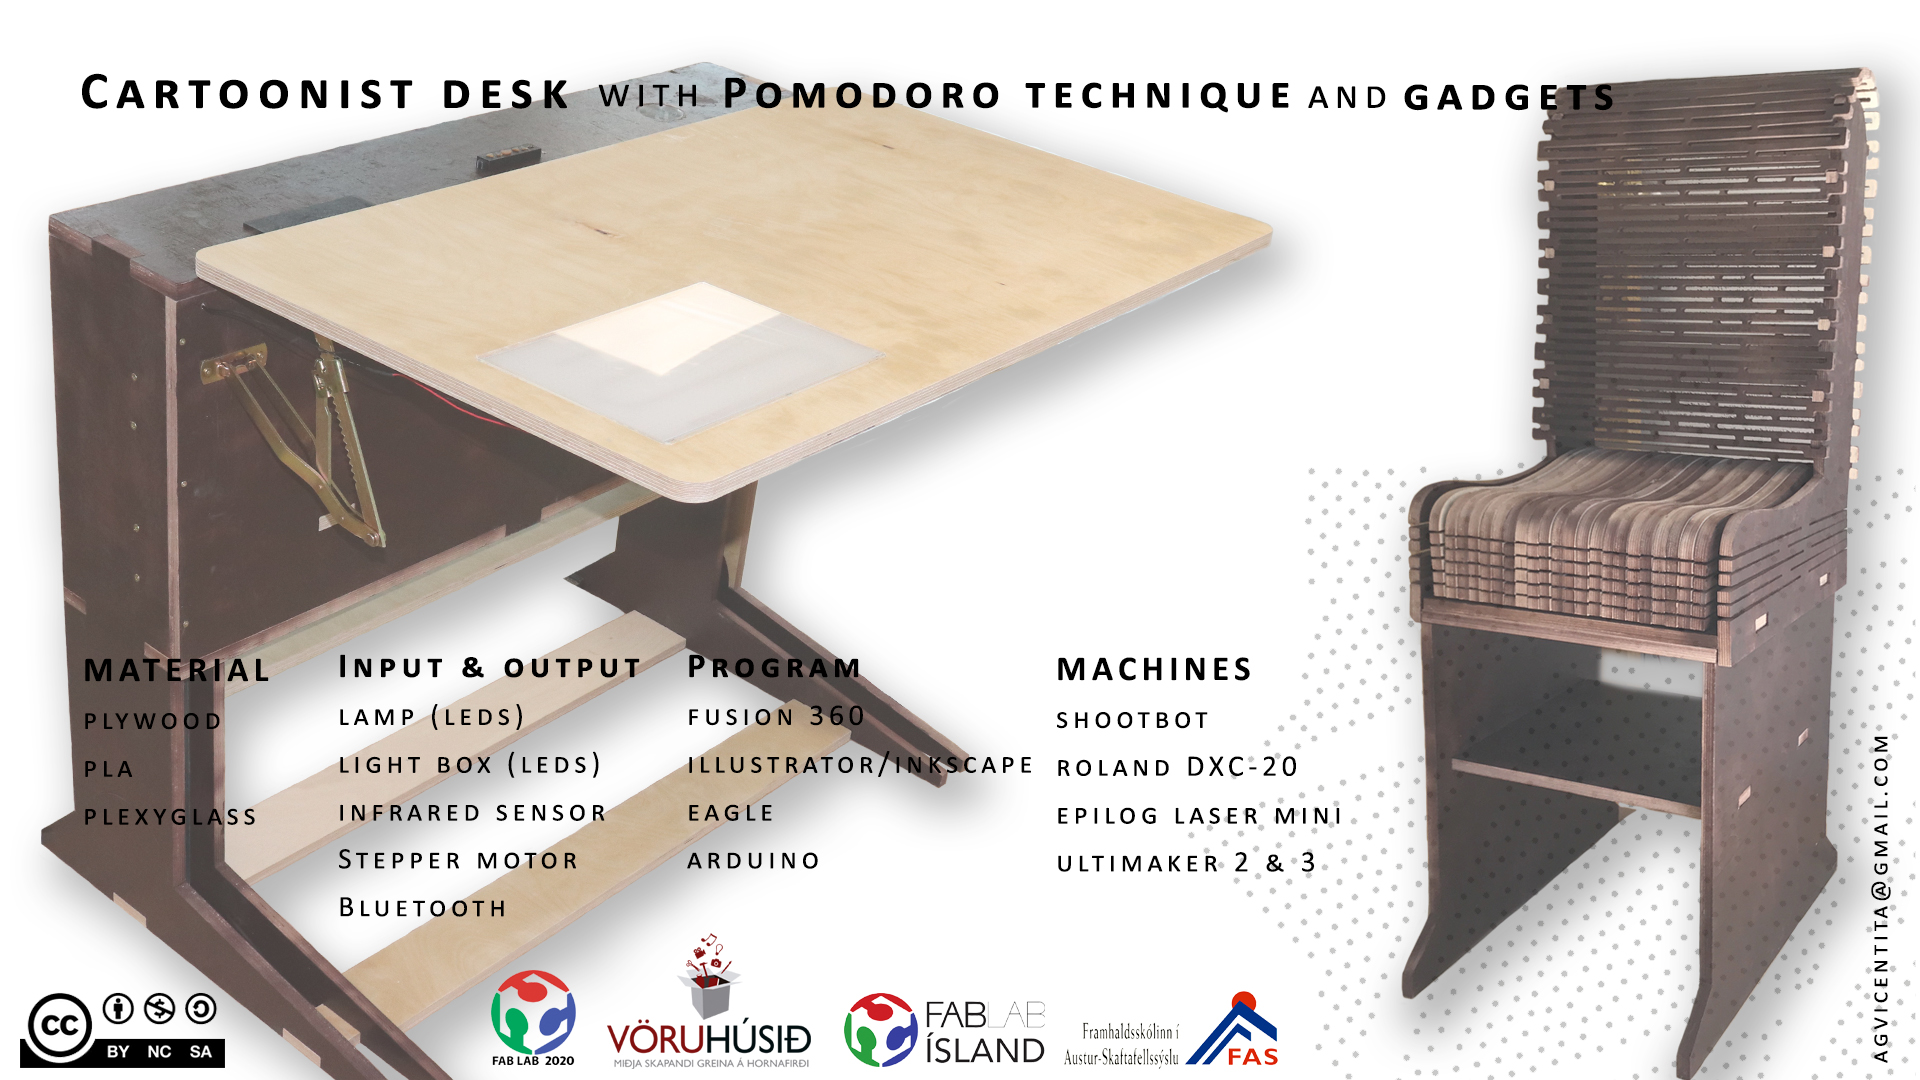
I will build a desk and a chair, my work place, that will be able to notify me to stand up if I spend more than one hour sitting. The table has gadgets incorporated like a mirror, a lamp and a light box; all of this will be controlled for an electronic device. Also, the table can go up and down depend on if I am working sitting or standing and it will bend if I wanted too, but this is manually. The chair has a sensor to detect a person sitting on it, that sensor start a countdown and activate the lamp, that will change color depend of the time.
Legs and electronic are safe inside the box that keep the balance of the table. This drawer has an easy access just in case that is necessary to fix something inside.
The picture below is the first sketch of the table.
Pressing the link below you can see some of the picture of the process: Picture on PDF.
Development
Once I had a clear idea I researched a bit around the old Fab Academy projects and I found great inspirations, ideas and also so similar projects like:
Chair seat: Javier Alboguijarro. Fablab Barcelona 2017
Chair back pattern: Alex Chair from Obrary website
Legs’s table: Rafael Aguirre. Fablab La Puebla 2019
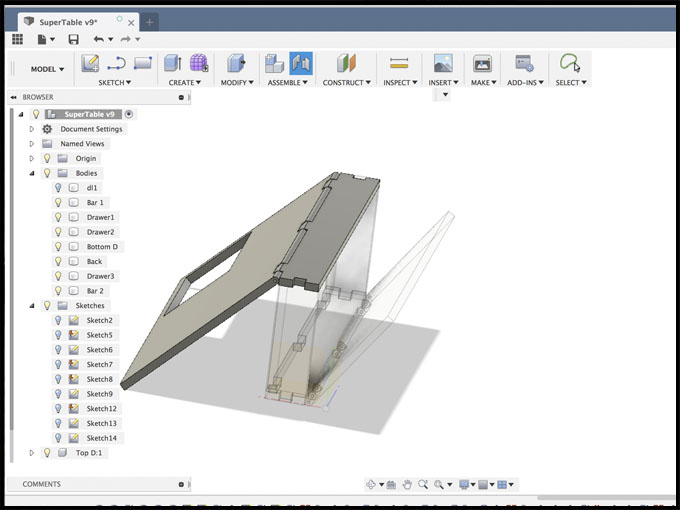
I was surprise when I took a look on Rafael Aguirre’s desk because it was so similar project, even if I draw the sketches before found him. Anyway, from the first sketch to the final results the plans were changing every day.
The main idea it was clear: a desk that can up and down and incline.
After that, I considered to add the lamp and the mirror to help me with the illustrations. Then I thought about to implant the Pomodoro working technique to help me on my work productivity. Little by little the final project was increasing and having usable gadgets. What about if I can control de lights of the table, the time with a sensor implanted on the chair that starts a countdown when I seat? That was a real challenge for me, a beginner on electronics.
On the table below, you could see all the material have been used to be able to build this project, the price of them and where they were found:
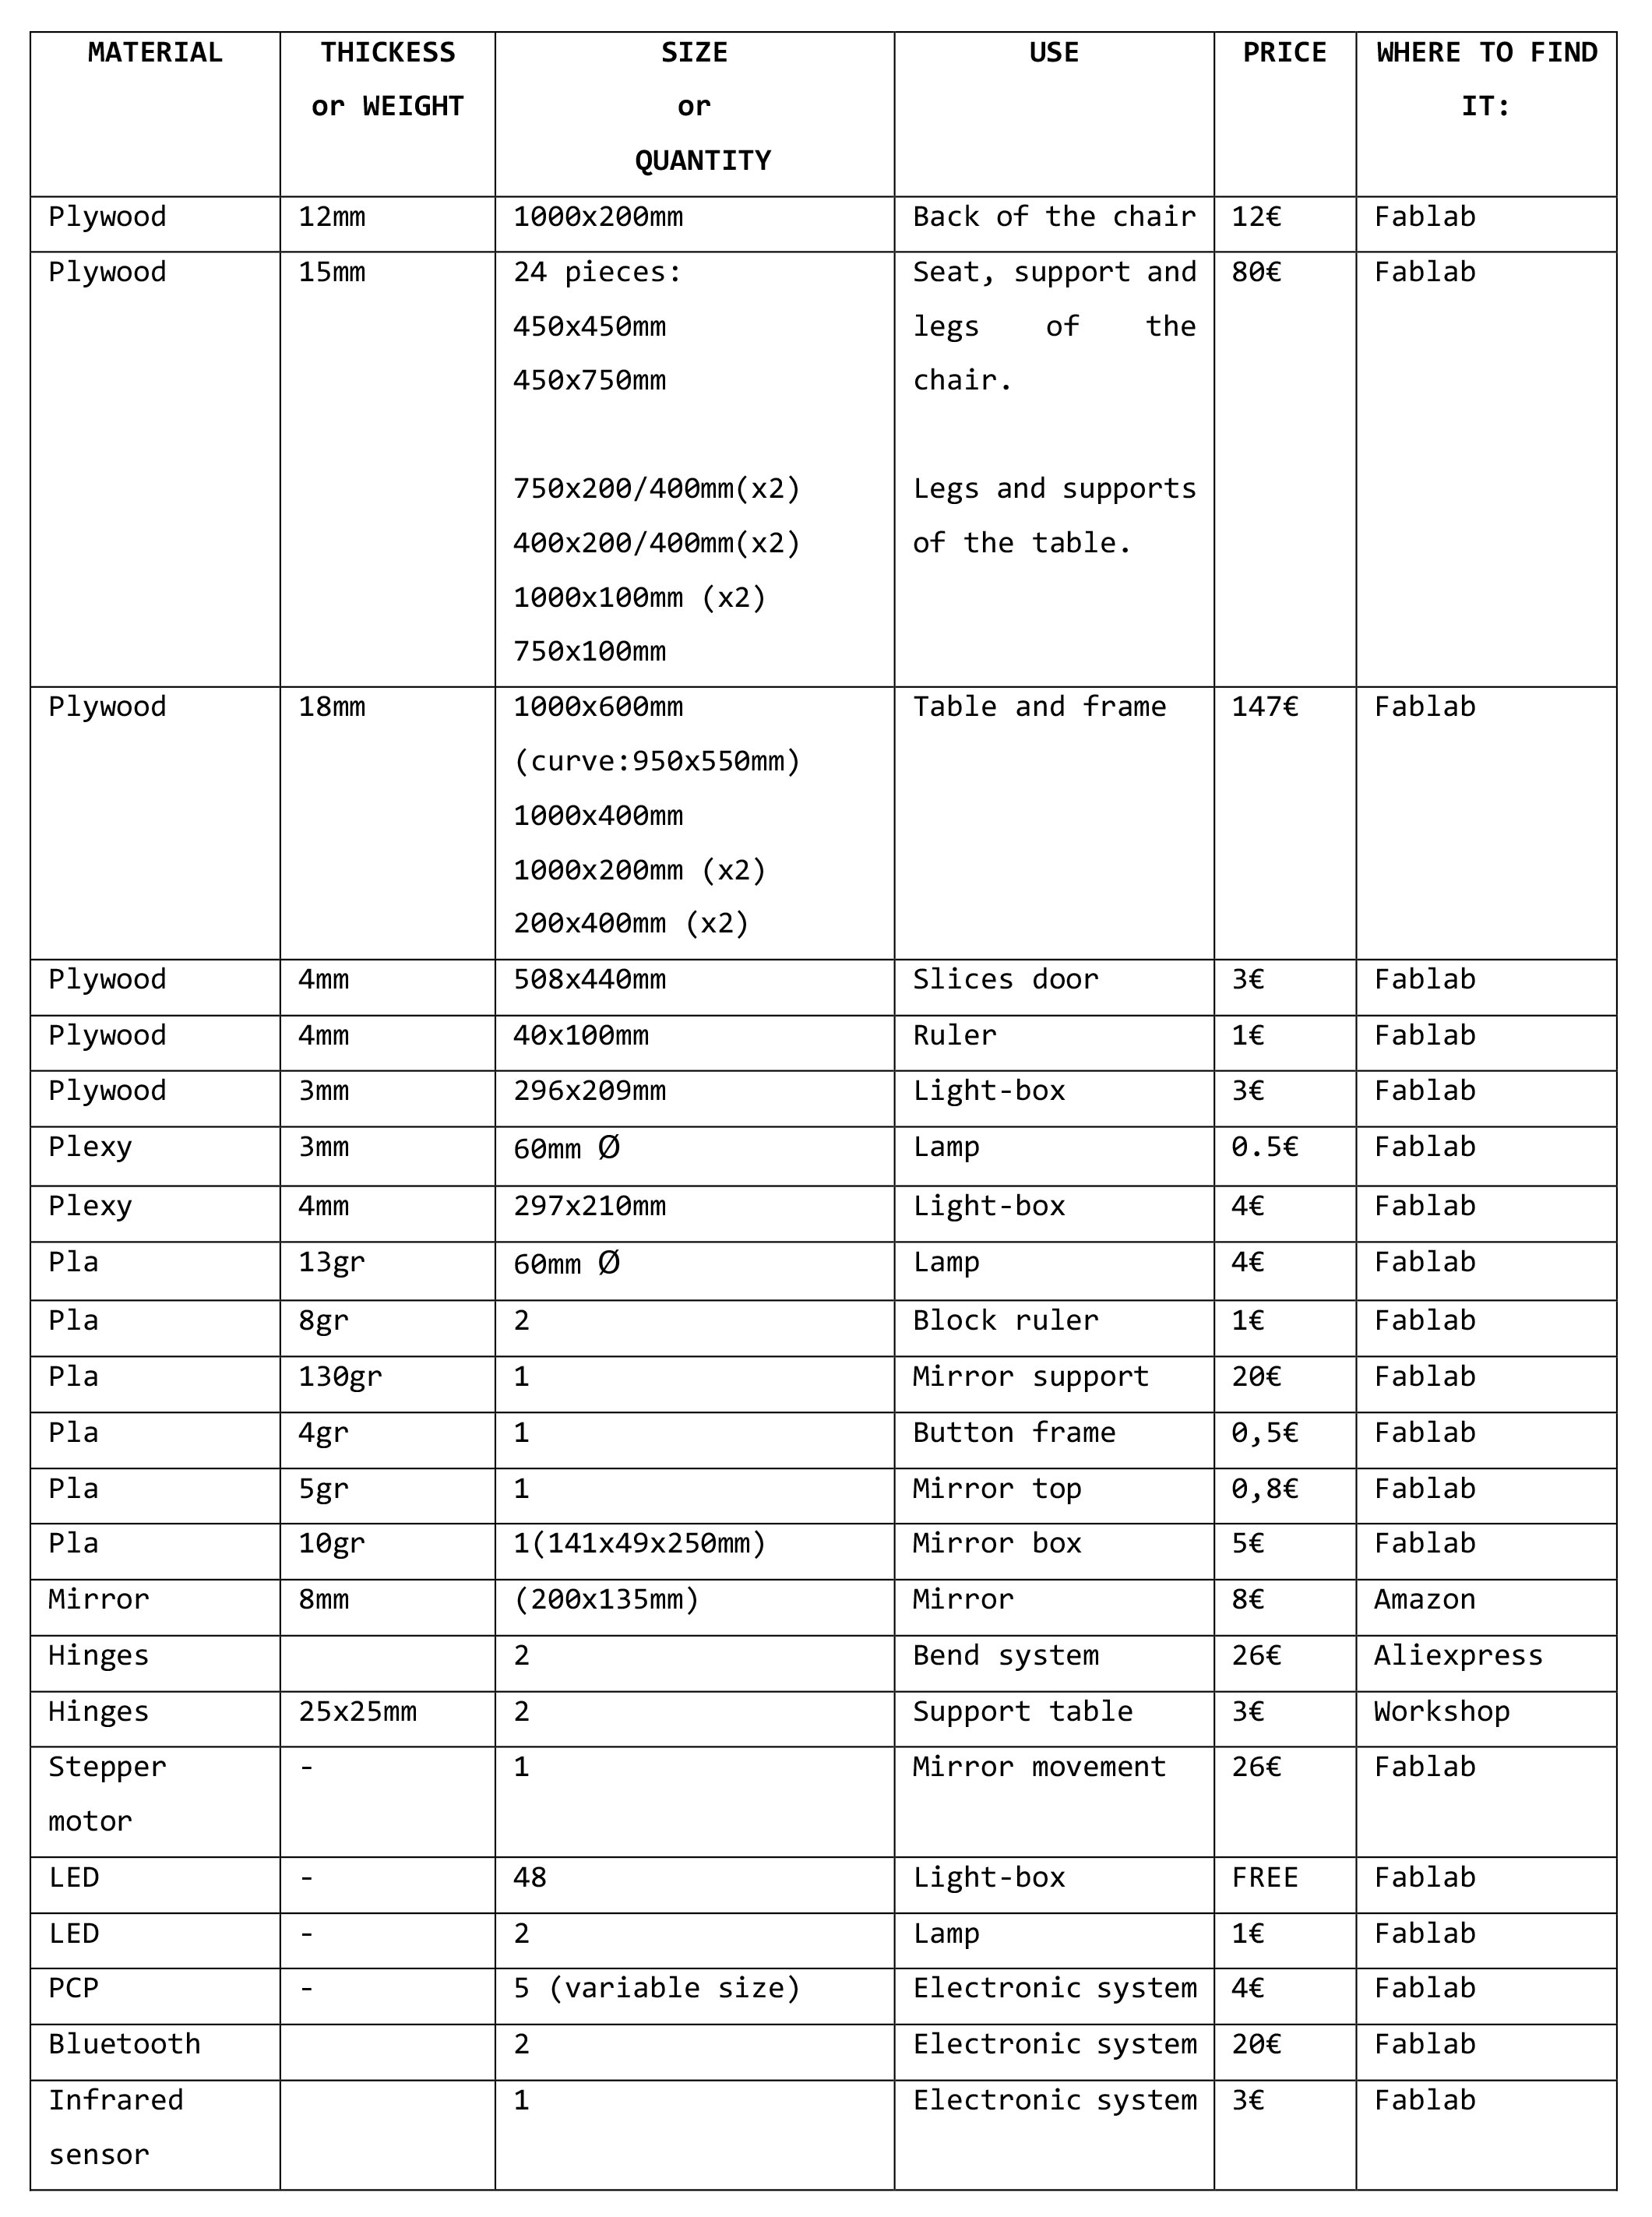
The table on the set position is 750mm and the maximum high that can get is 1050mm, 300 mmm more.
The hardest pieces to find were the motors to move the table up and down, and the rails for the legs that I found the in an old table.Also, still on the table to change it to manual instead of using the electronic for that.
Machines used:
- Shootbot with 1/4" and 1/8" beats milling bit.
- Laser cut, Epilog laser mini.
- Roland DXC-20.
- Ultimaker 2 and 3 extended.
I made the structure of the table and the chair. Once I mill all the pieces, I built it.
Also, I create the electronic system from the beginning, adapting all the knowledge and material to the project and viceversa.
On the list below are divided all the pieces and gadgets of the table:
- Table (Main size: 1000x836mm.)
- Main board: 1000x600x18mm.
- 2 Doors: 54mmx44mmx4mm.
- Drawer box 1000x400x236mm.
- Mirror: 200x135x80 mm.
- Light box: A4 //297x210 mm.
- Lamp: 60mm.
- Chair:Seat(450x450 mm) and back (450x550 mm)
- Other accessories:
- Mirror with led light in it.
- Pomodoro technique. Infrared and lamp.
-Light box.
- Drawer.
- Inclination by manual hinges.
-Adapting legs.
Electronics items:
- Stepper motor.
- White LEDS for the light box.
- RGB LEDS for Lights of the lamp.
- Infrared sensor.
- Bluetooth.
- Power supply.
- Relay.
- Buttons.
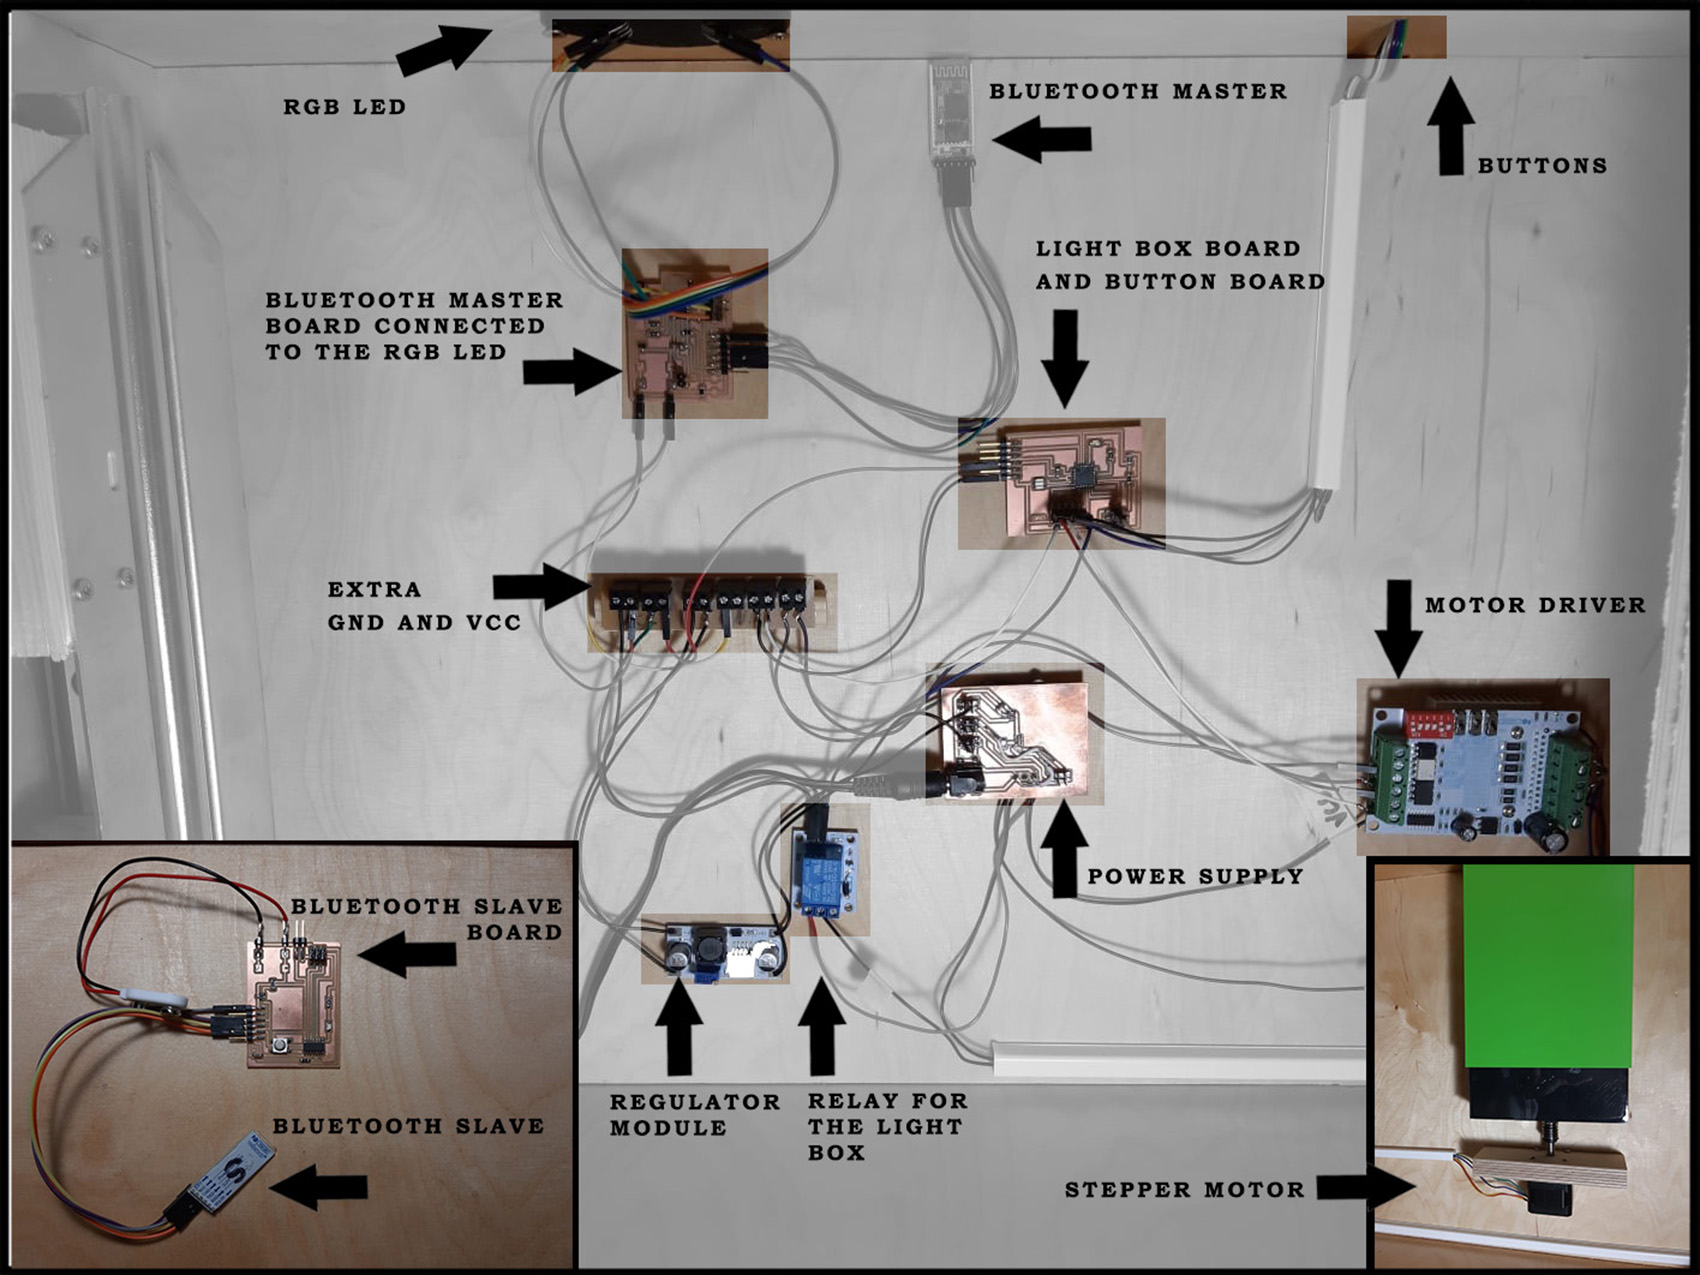
Electronics systems (Attiny1632):
- Power board.
- Mother board: distribution of power.
- Bluetooth master board: lamp connected to the chair.
- Bluetooth slave board: chair sensor.
- Buttons board.
- Stepper motor and driver:mirror movement.
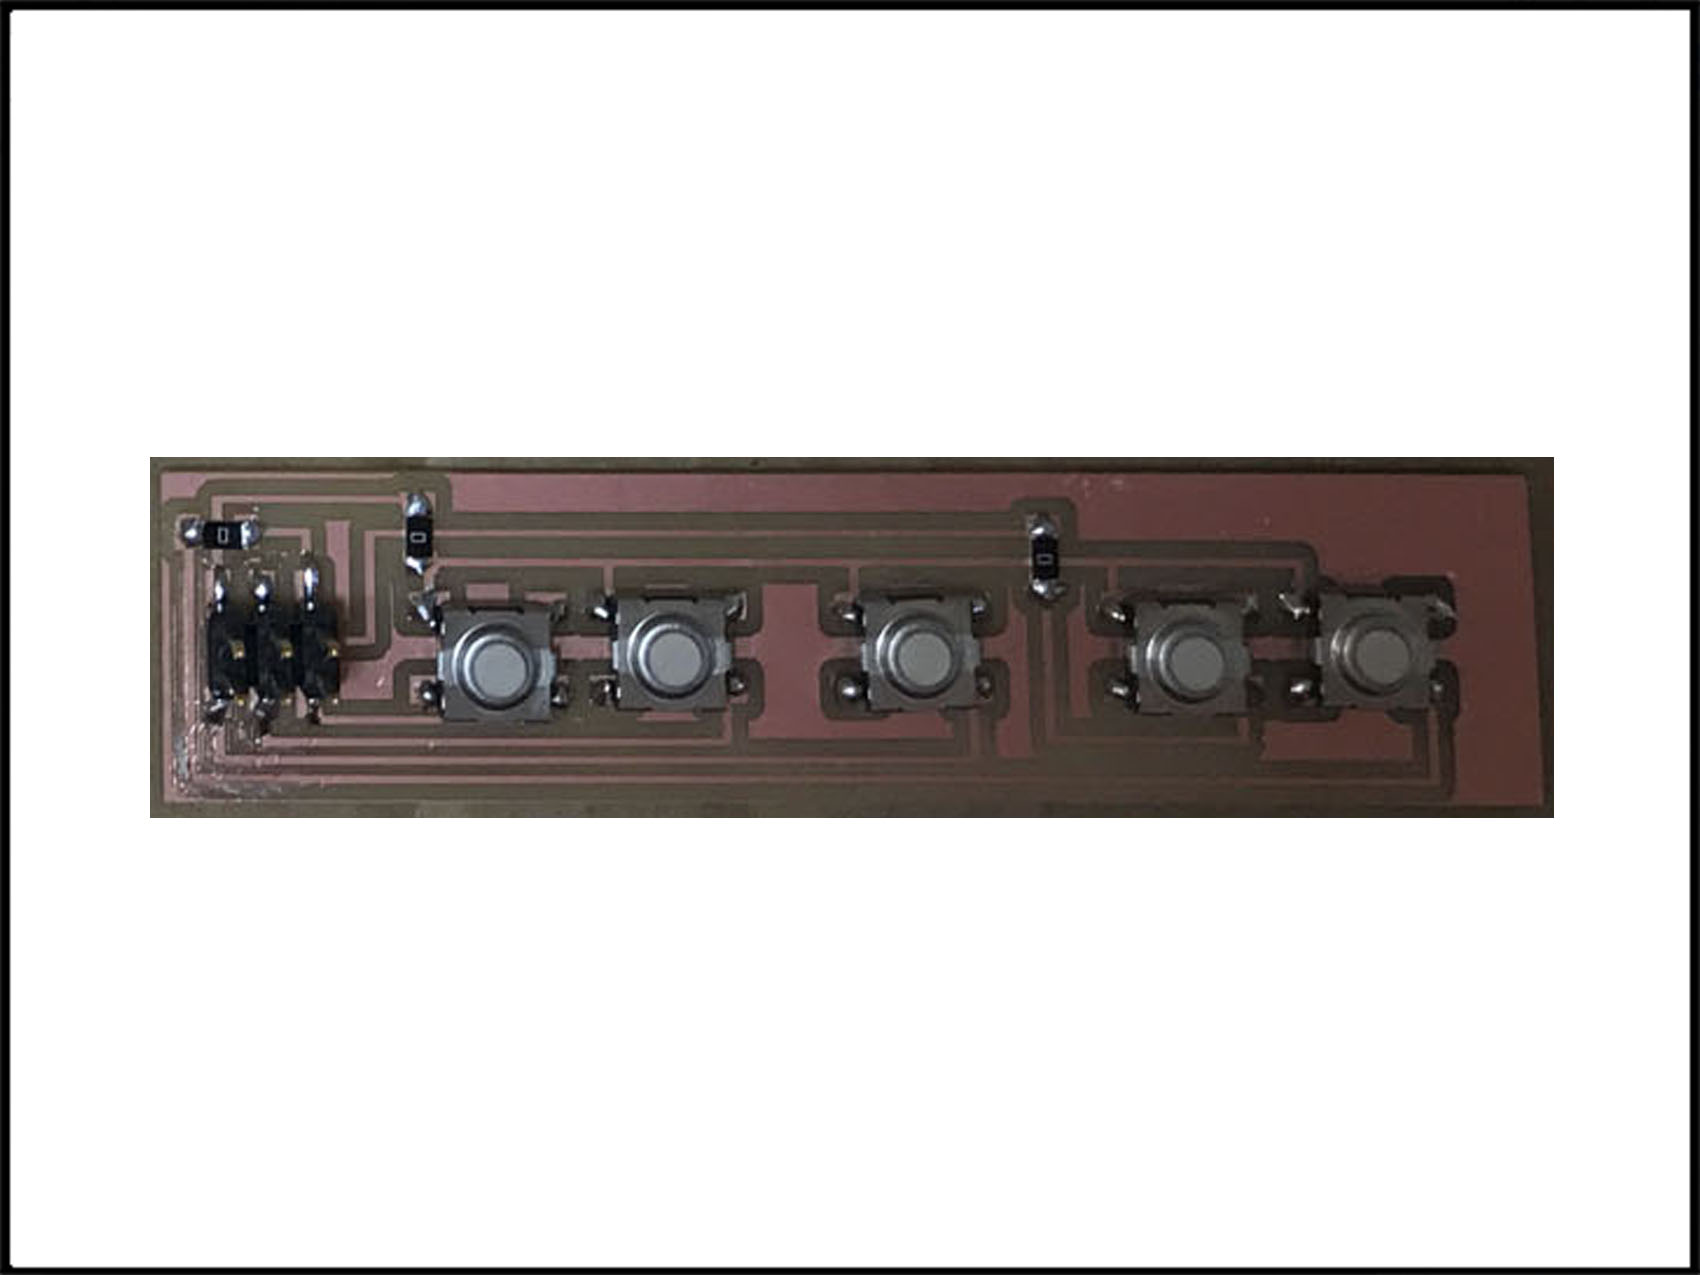
BUTTON BOARD
- 1x 2x3 pin header
- 3x resistor 0hm
- 5x button
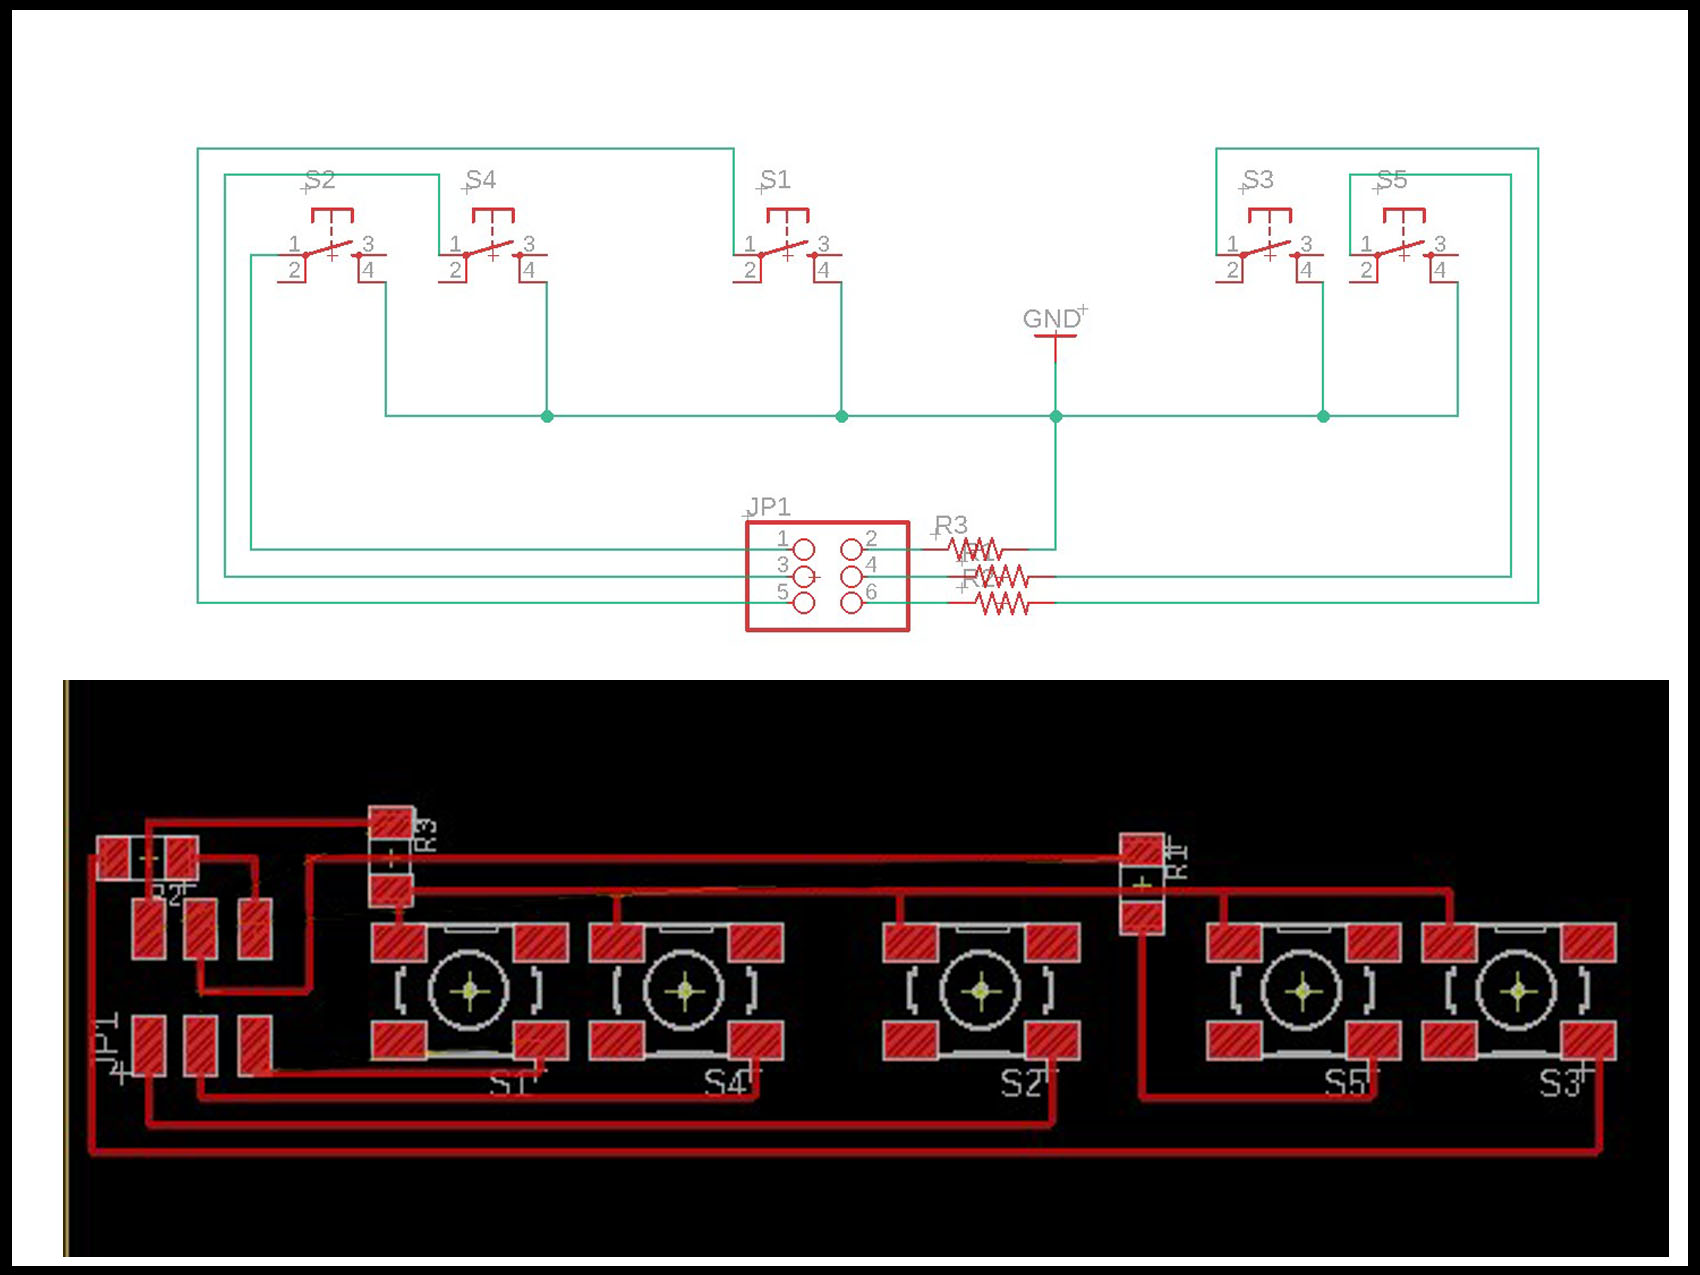
This board just has the buttons connected by a 6-pin header to the mother board. Also, the resistor that you can see on the traces and the schematic are used like jumpers. This board is not on the main pictures because it is cover by a button case and stuck on the table.
BLUETOOTH MASTER AND LAMP
- 2x RGB LED.
- 1x capacitor/li>
- 1x resistor 0 ohm
- 1x ATTINY1614
- 1x regulator 5v
- 1x power supply
- 1x 6 pins FTDI
- 1x 2 pins
- 2x 4 pins
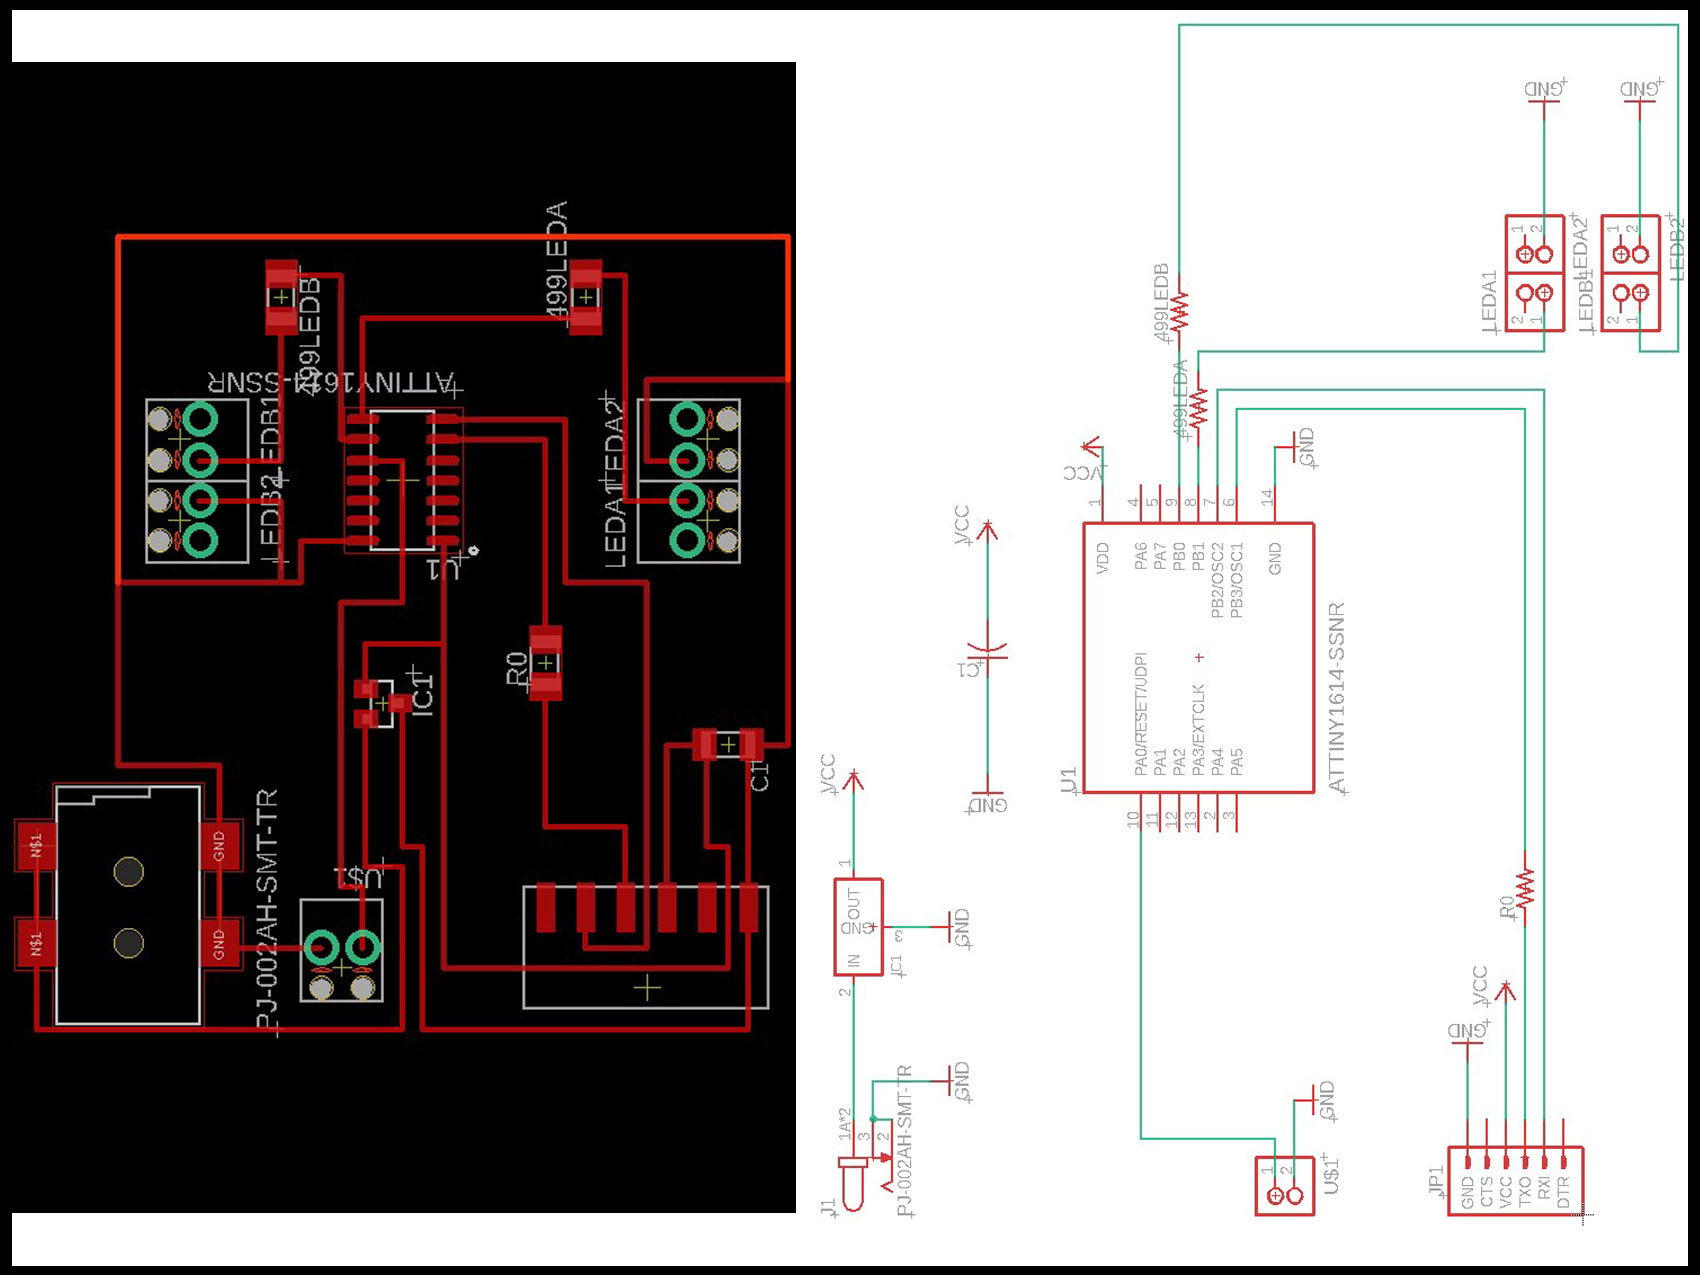
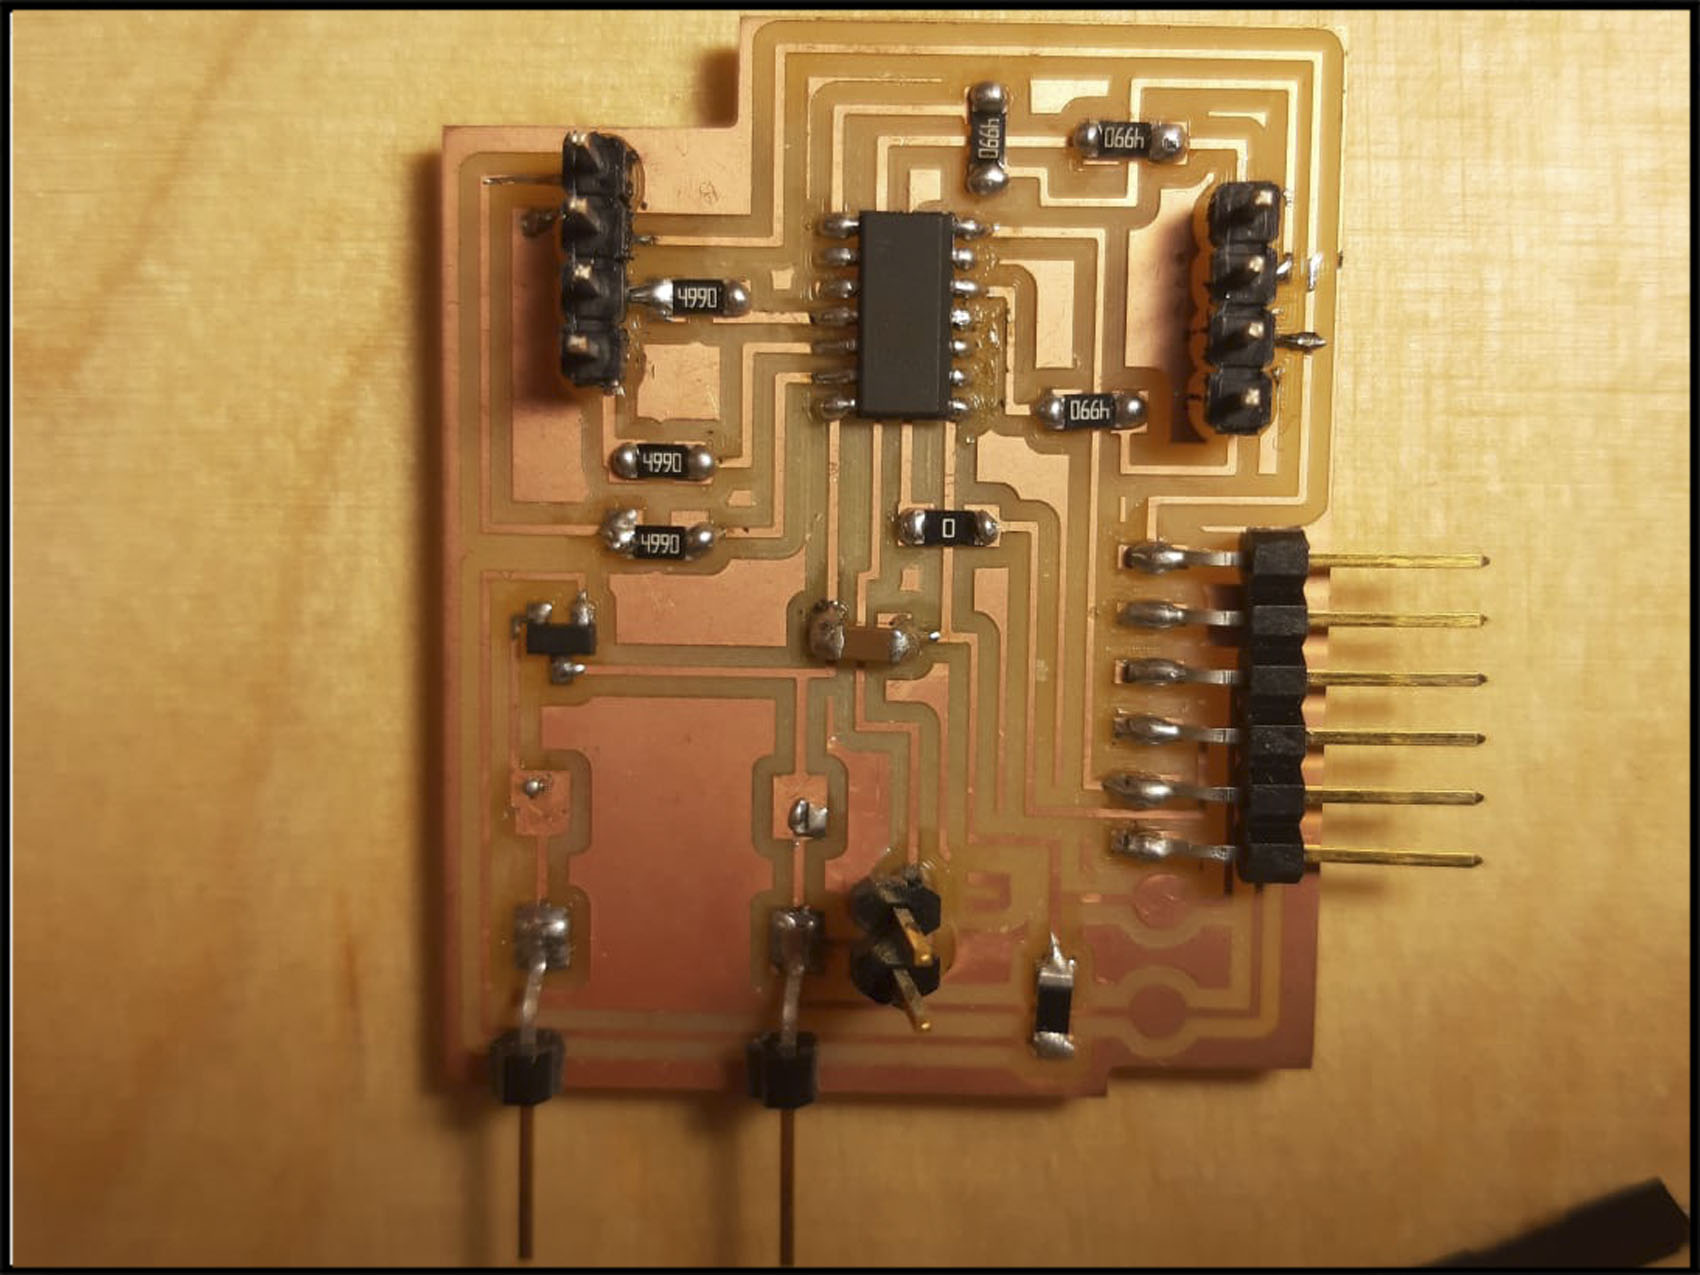
This board contend the RGB LED and a microcontroller ATTINY1614, that you can read more on week 9. The LED traces are holes because at the beginning was thought to put them through, but that idea was discarded for the place available inside the lamp. The FTDI connects the Bluetooth master and with the 2-pin header we got the GND and the VCC.
BLUETOOTH SLAVE AND SENSOR
- 1x LED
- 1x capacitor/li>
- 1x resistor 0 ohm
- 1x ATTINY1614
- 1x regulator 5v
- 1x power supply
- 1x 6 pins FTDI
- 1x 2 pins
- 2x 2x3 pins
- 1x button
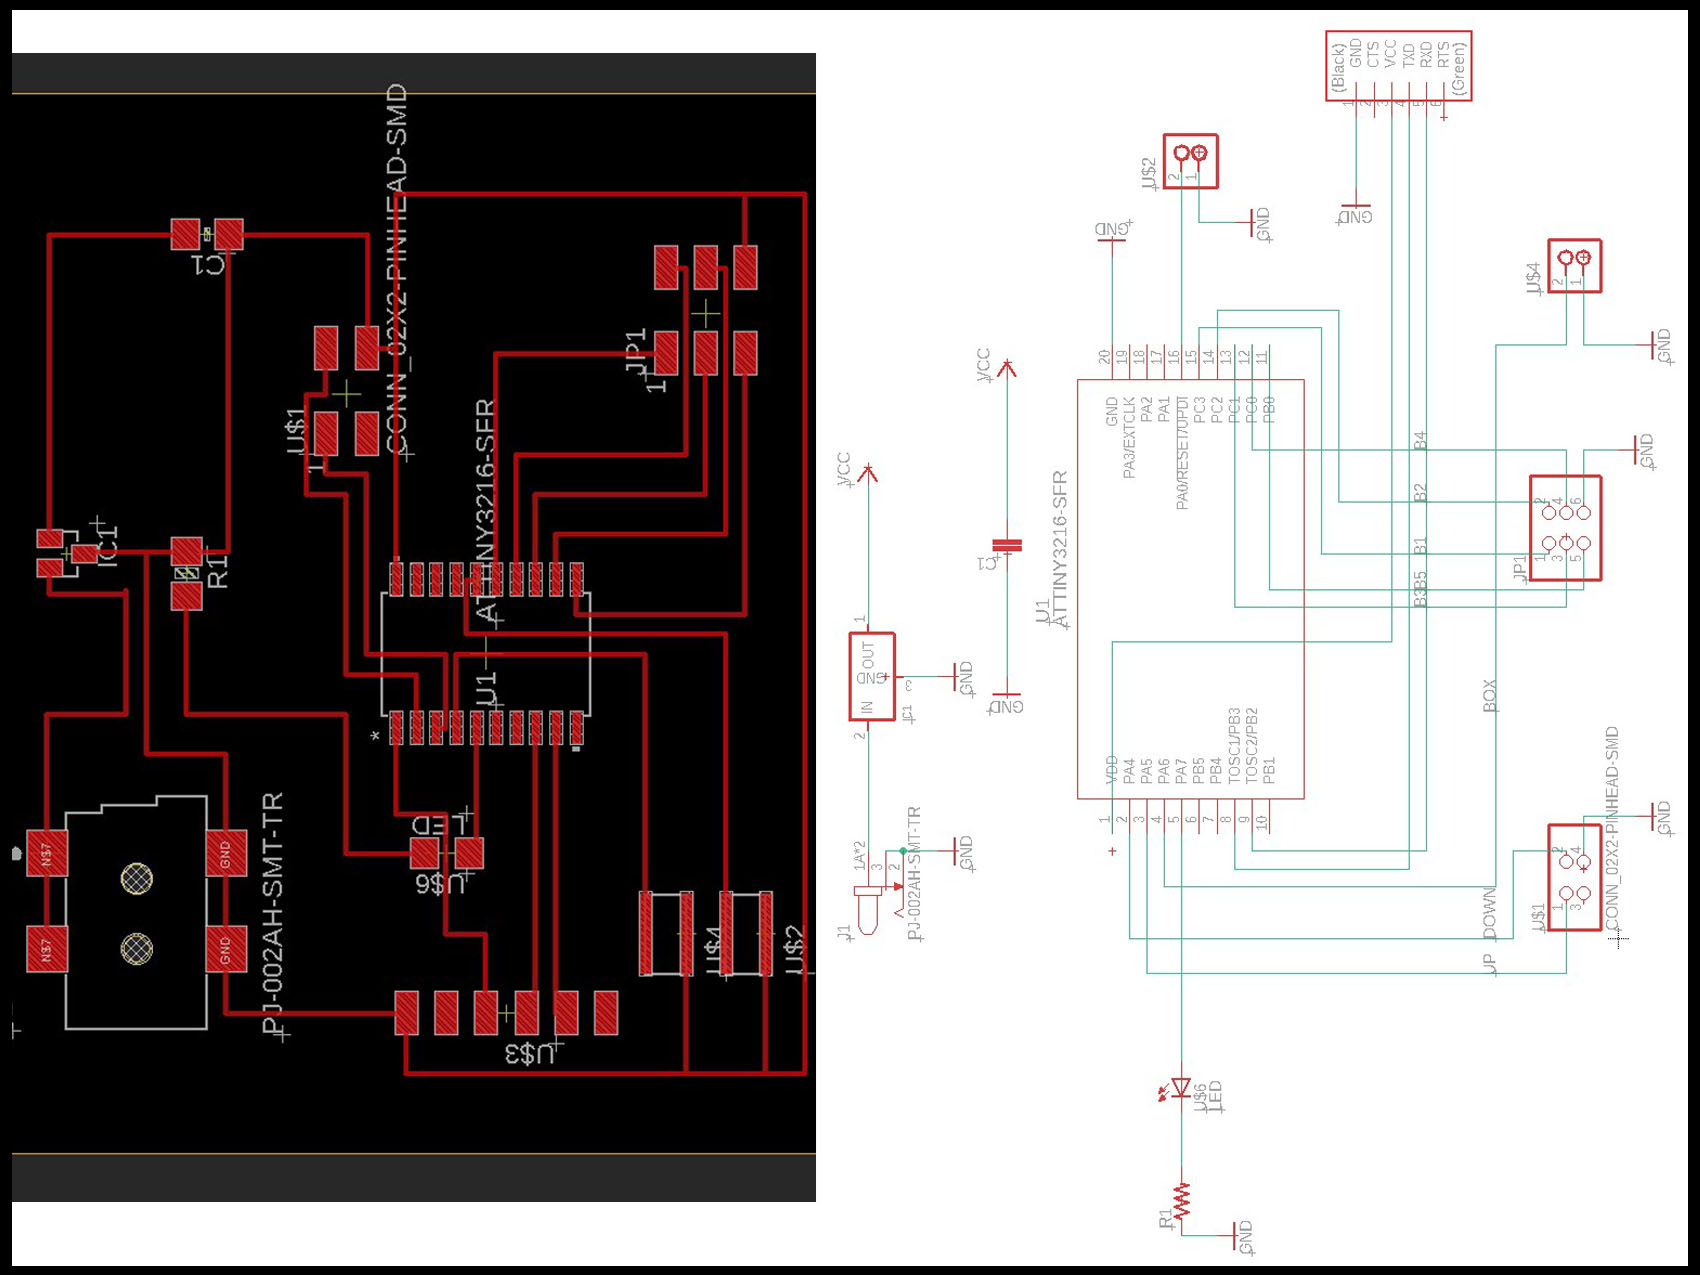
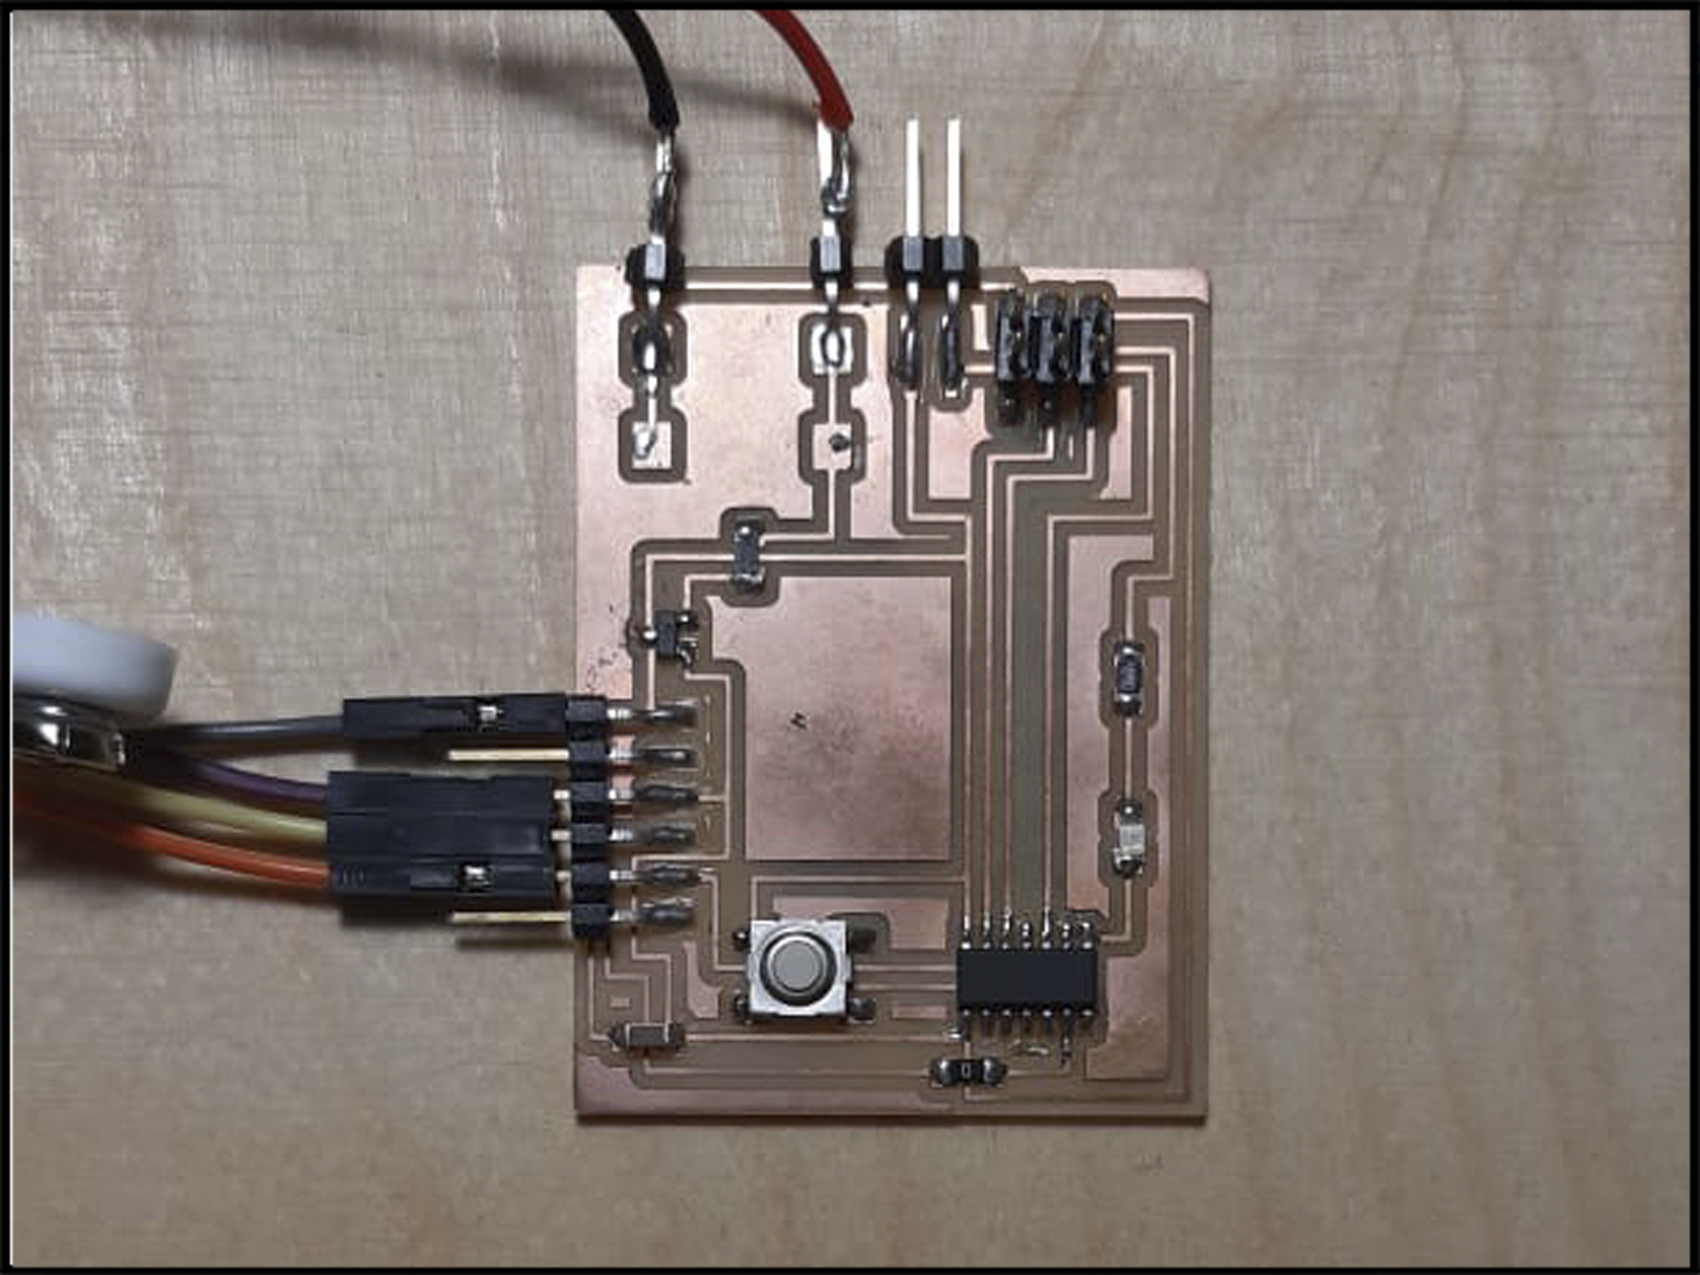
The slave board is the only one that is outside the board totally because is found it on the chair and is communicated by bluetooth with his master board.
MOTHER BOARD (Button and light box)
- 1x LED.
- 1x capacitor/li>
- 1x resistor 0 ohm
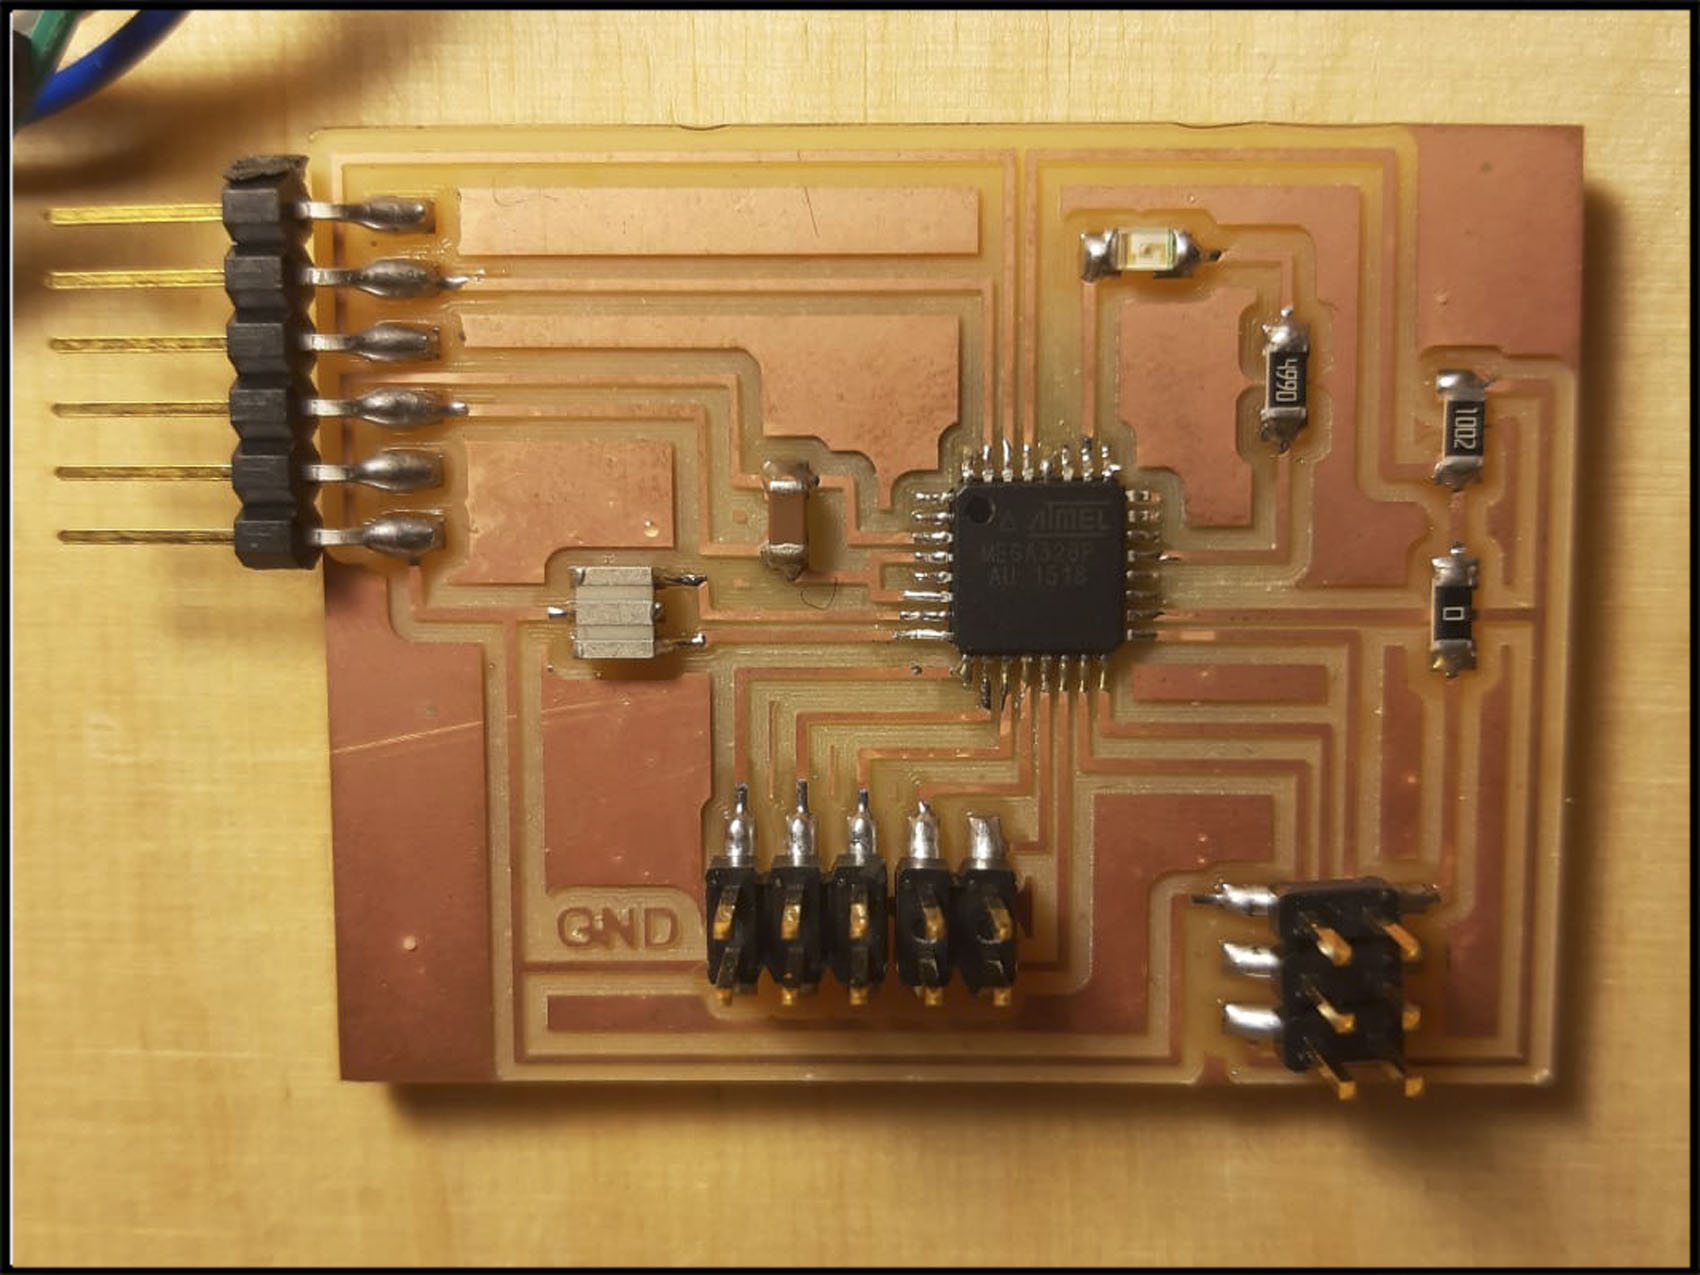
- 1x ATMEGA328p
- 1x resistor 1002 ohm
- 1x external clock 20MHz
- 1x 6 pins FTDI
- 1x resistor 499 ohm
- 2x 2x3 pins
- 1x 4 pin header
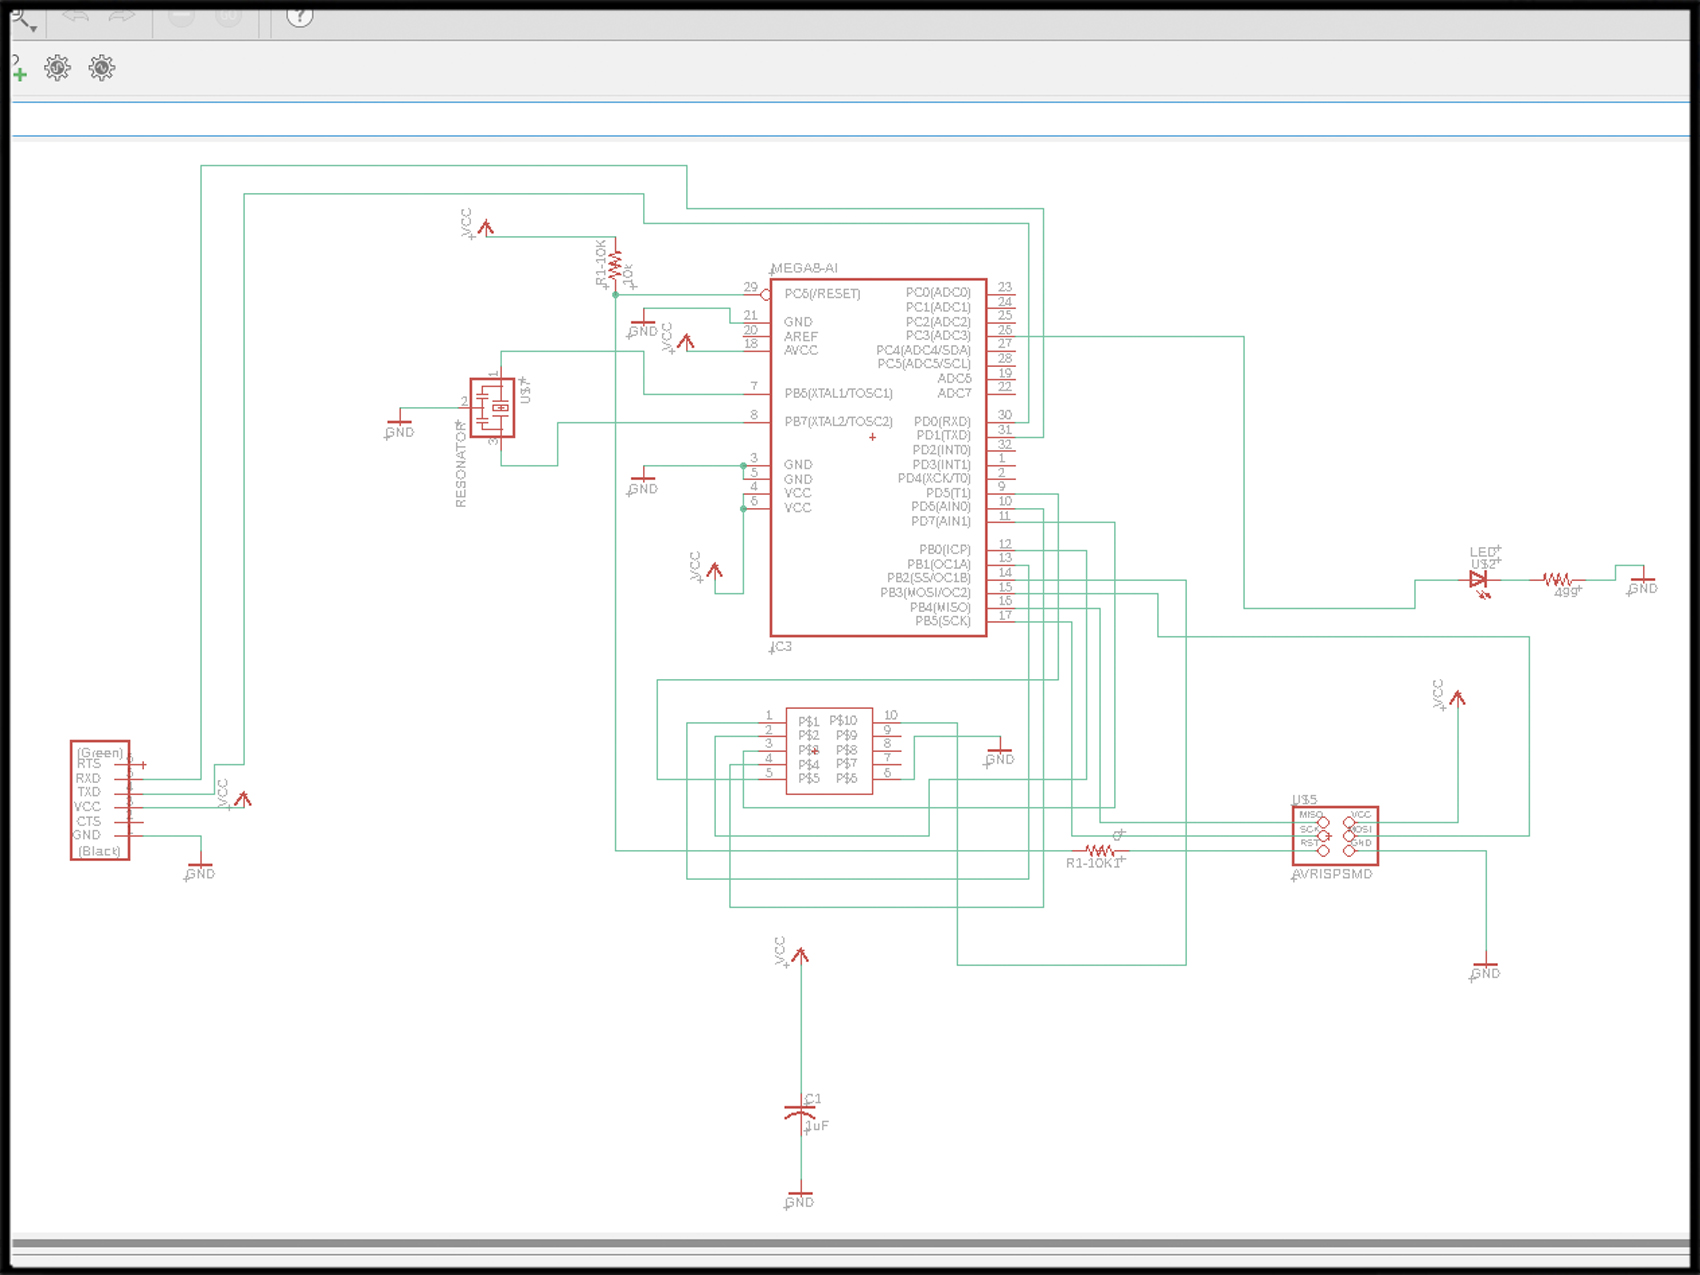
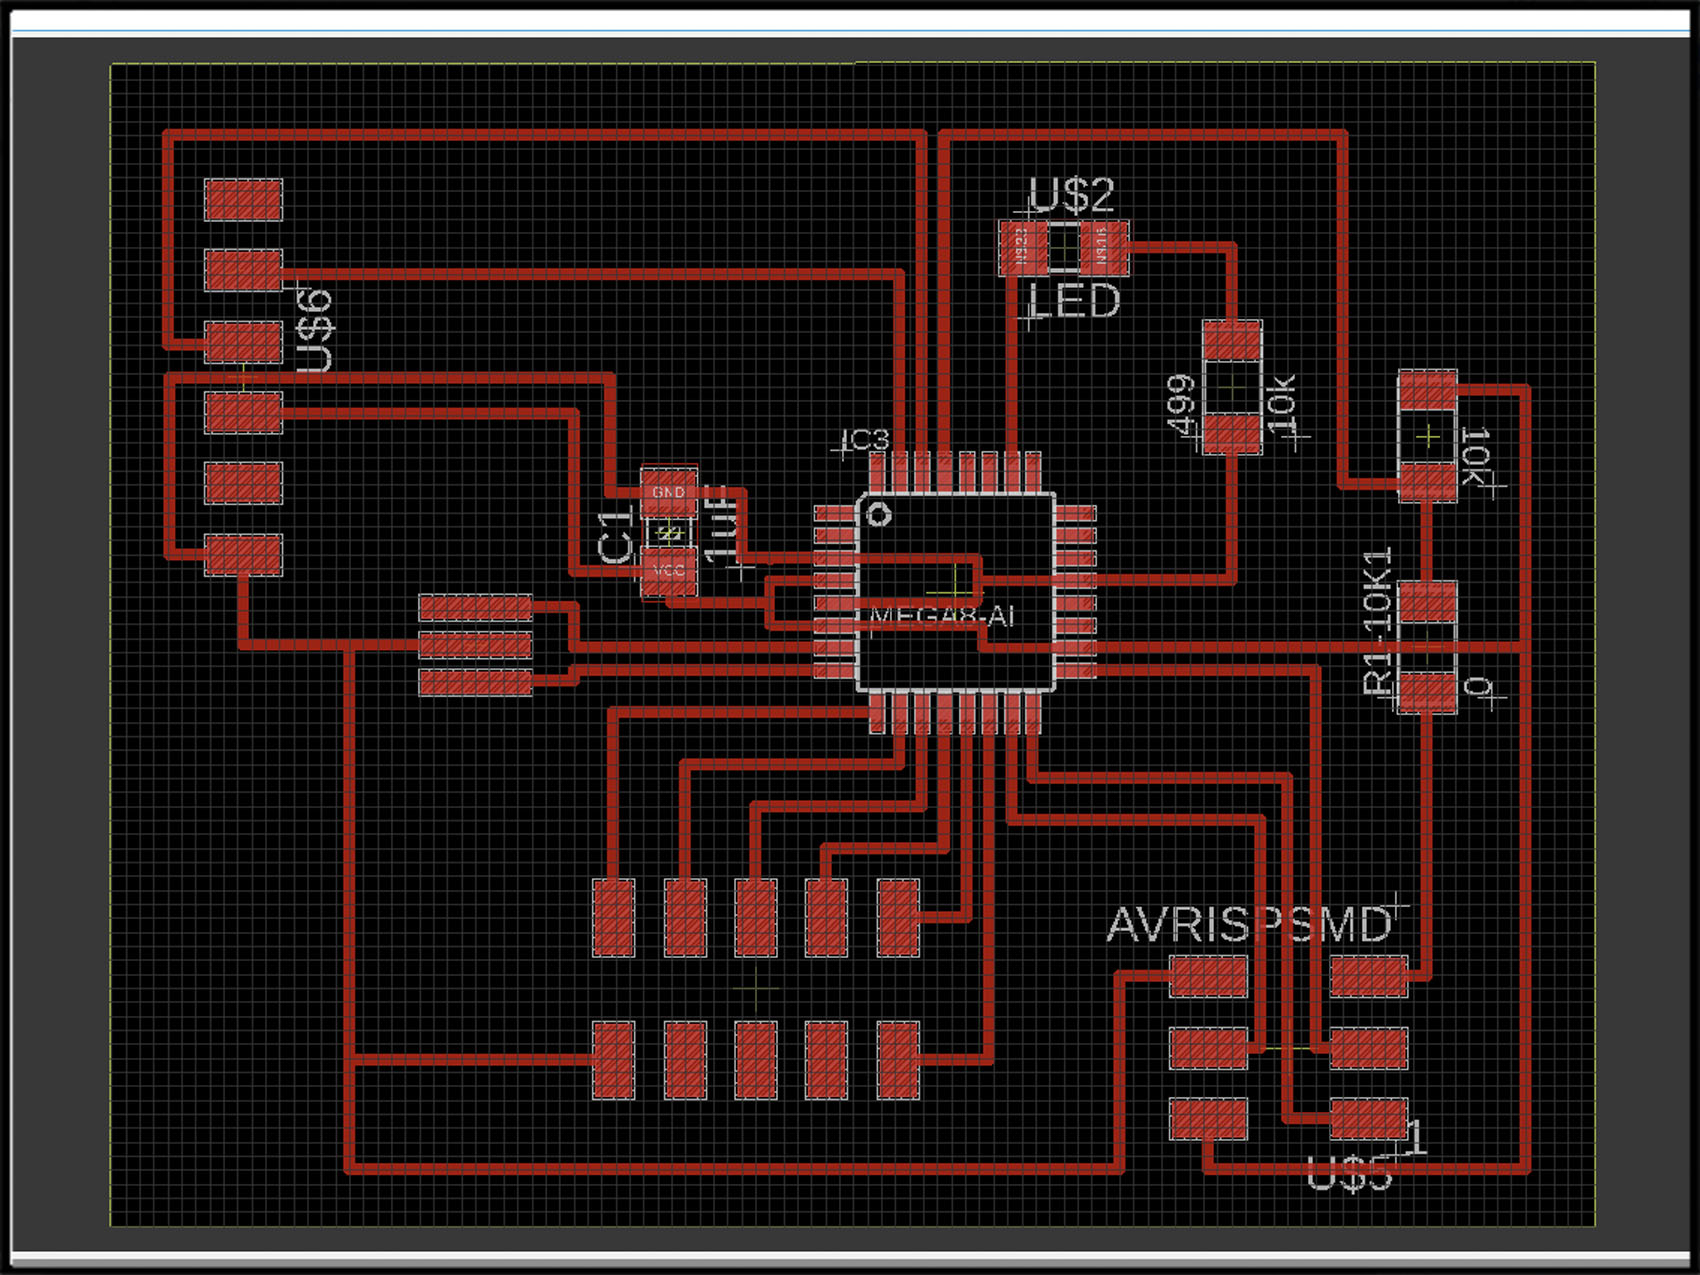
For the Mother board was necessary to use MEGA328P because the buttons and the light box required many pins, as buttons and light box need.
POWER SUPPLY
- 4x 2x3 header
- 1x JACK power supply
- 1x capasitor
- 2x regulator
- 3 pins
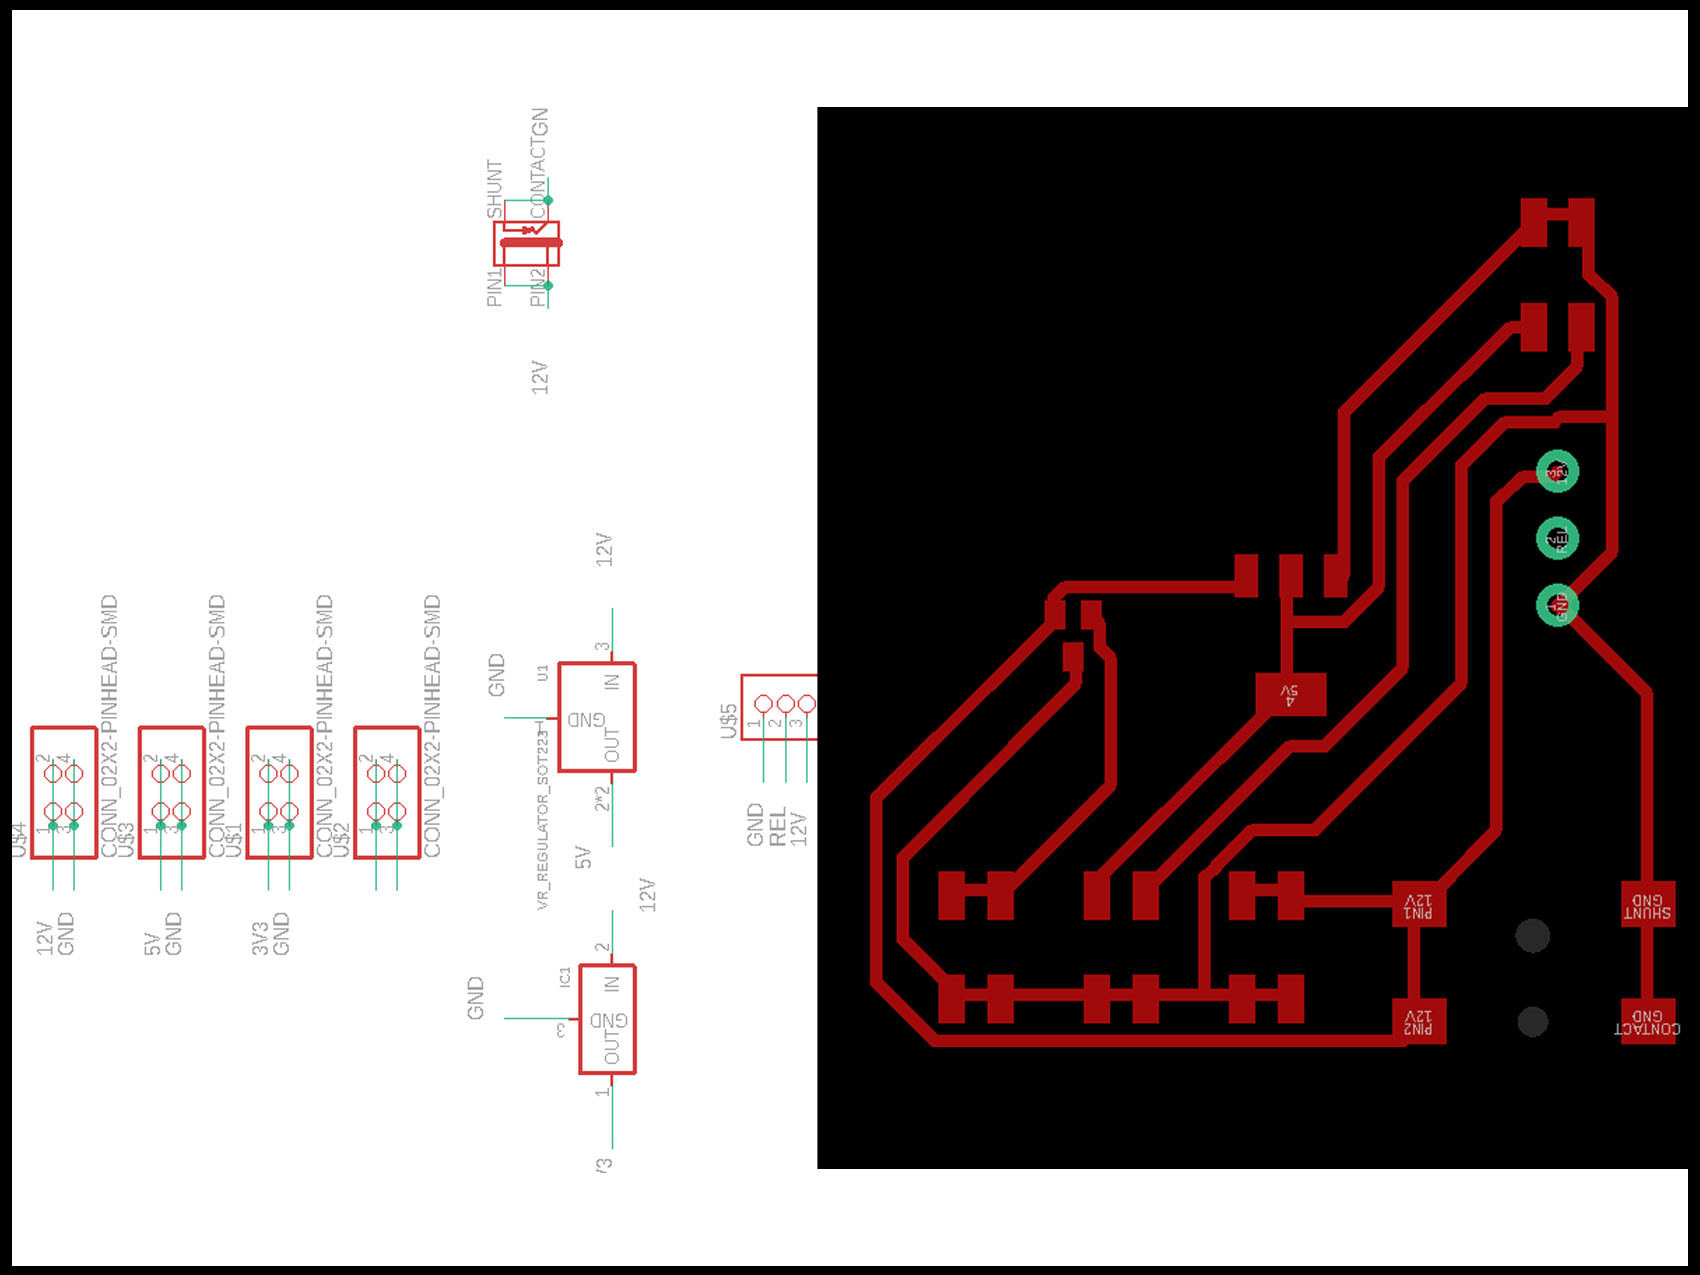
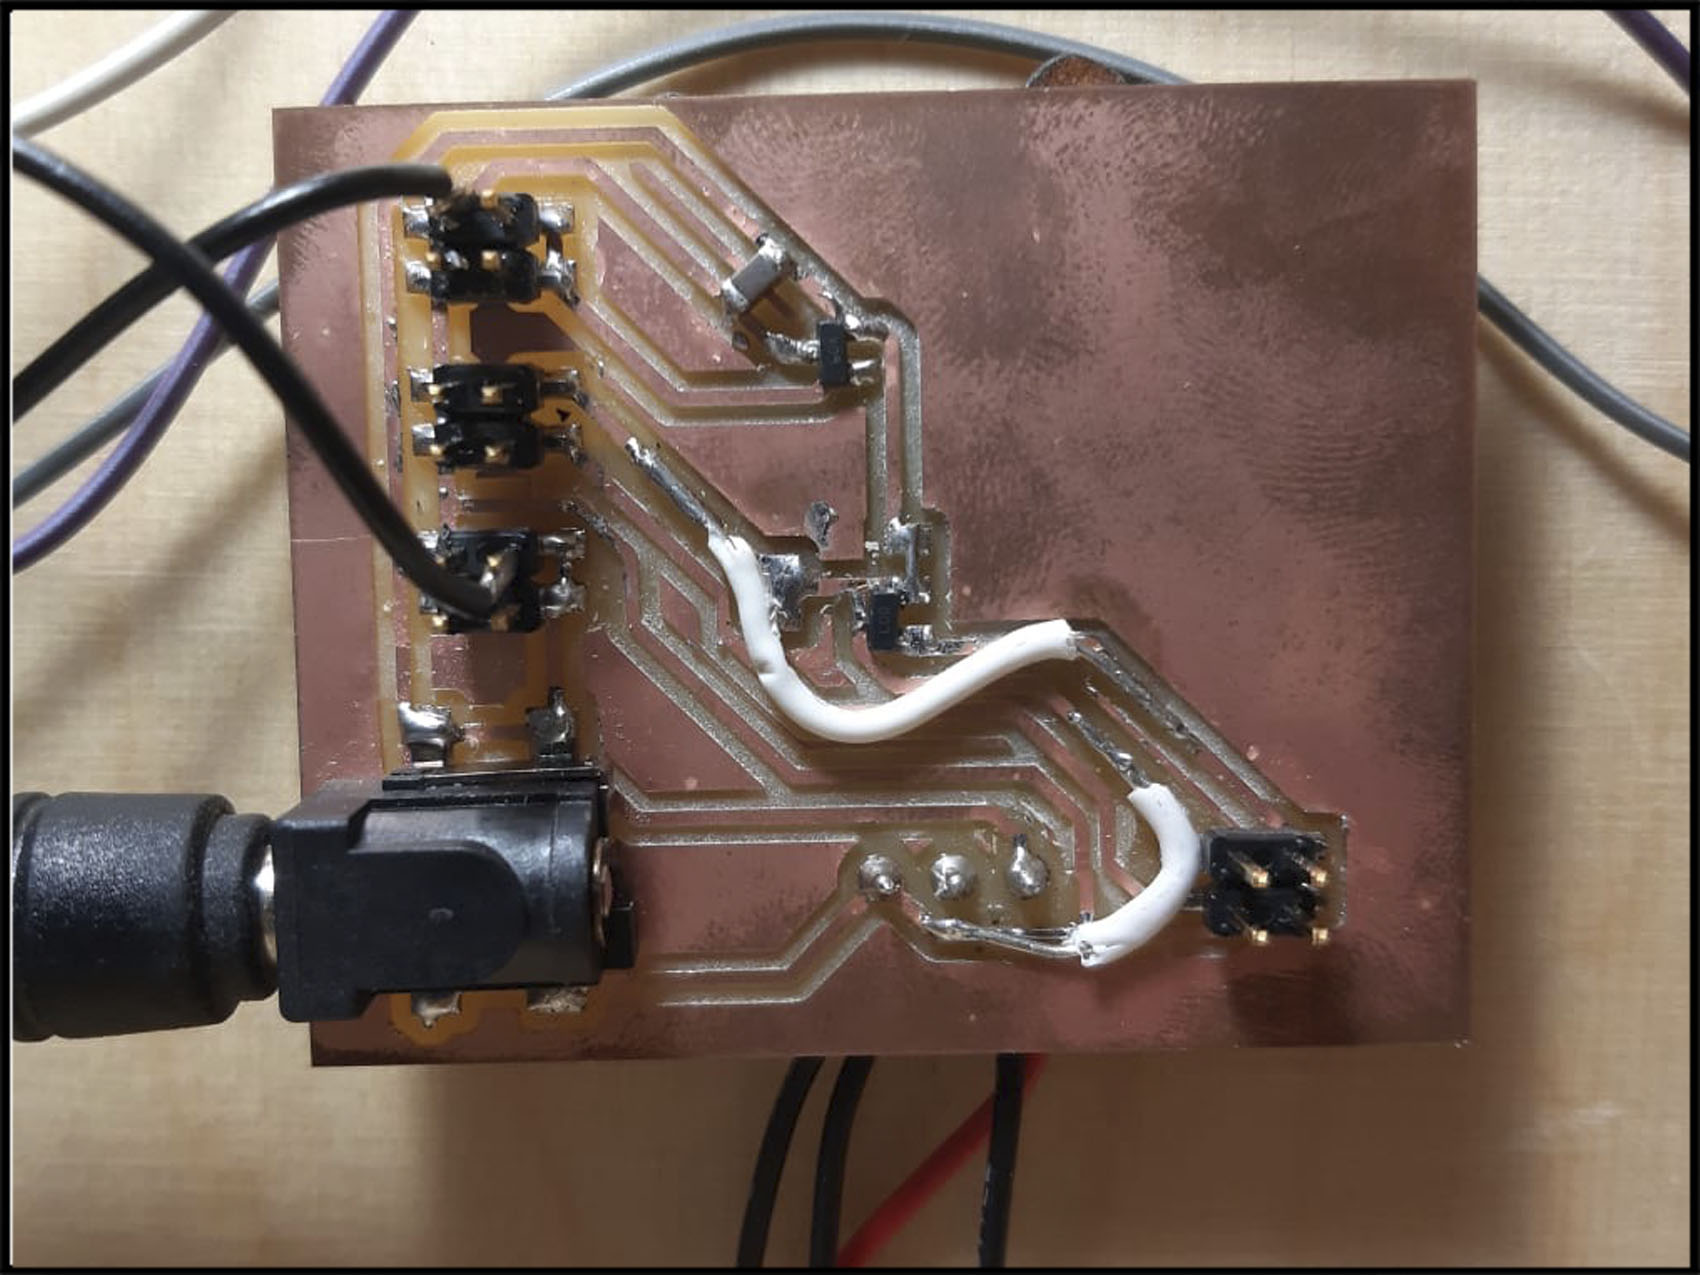
All the boards are settles on the table are supply by the Power supply board. All the boards are settles on the table are supply by the Power supply board. The initial schematics have a mistake on the design process, so it could not divide the voltage to different outputs to 12v, 5v and 3,3v. The mistake came from the 5v regulator and to fix it on time had to have that jumper in white shrink.
MOTOR DRIVER AND STEPPER MOTOR
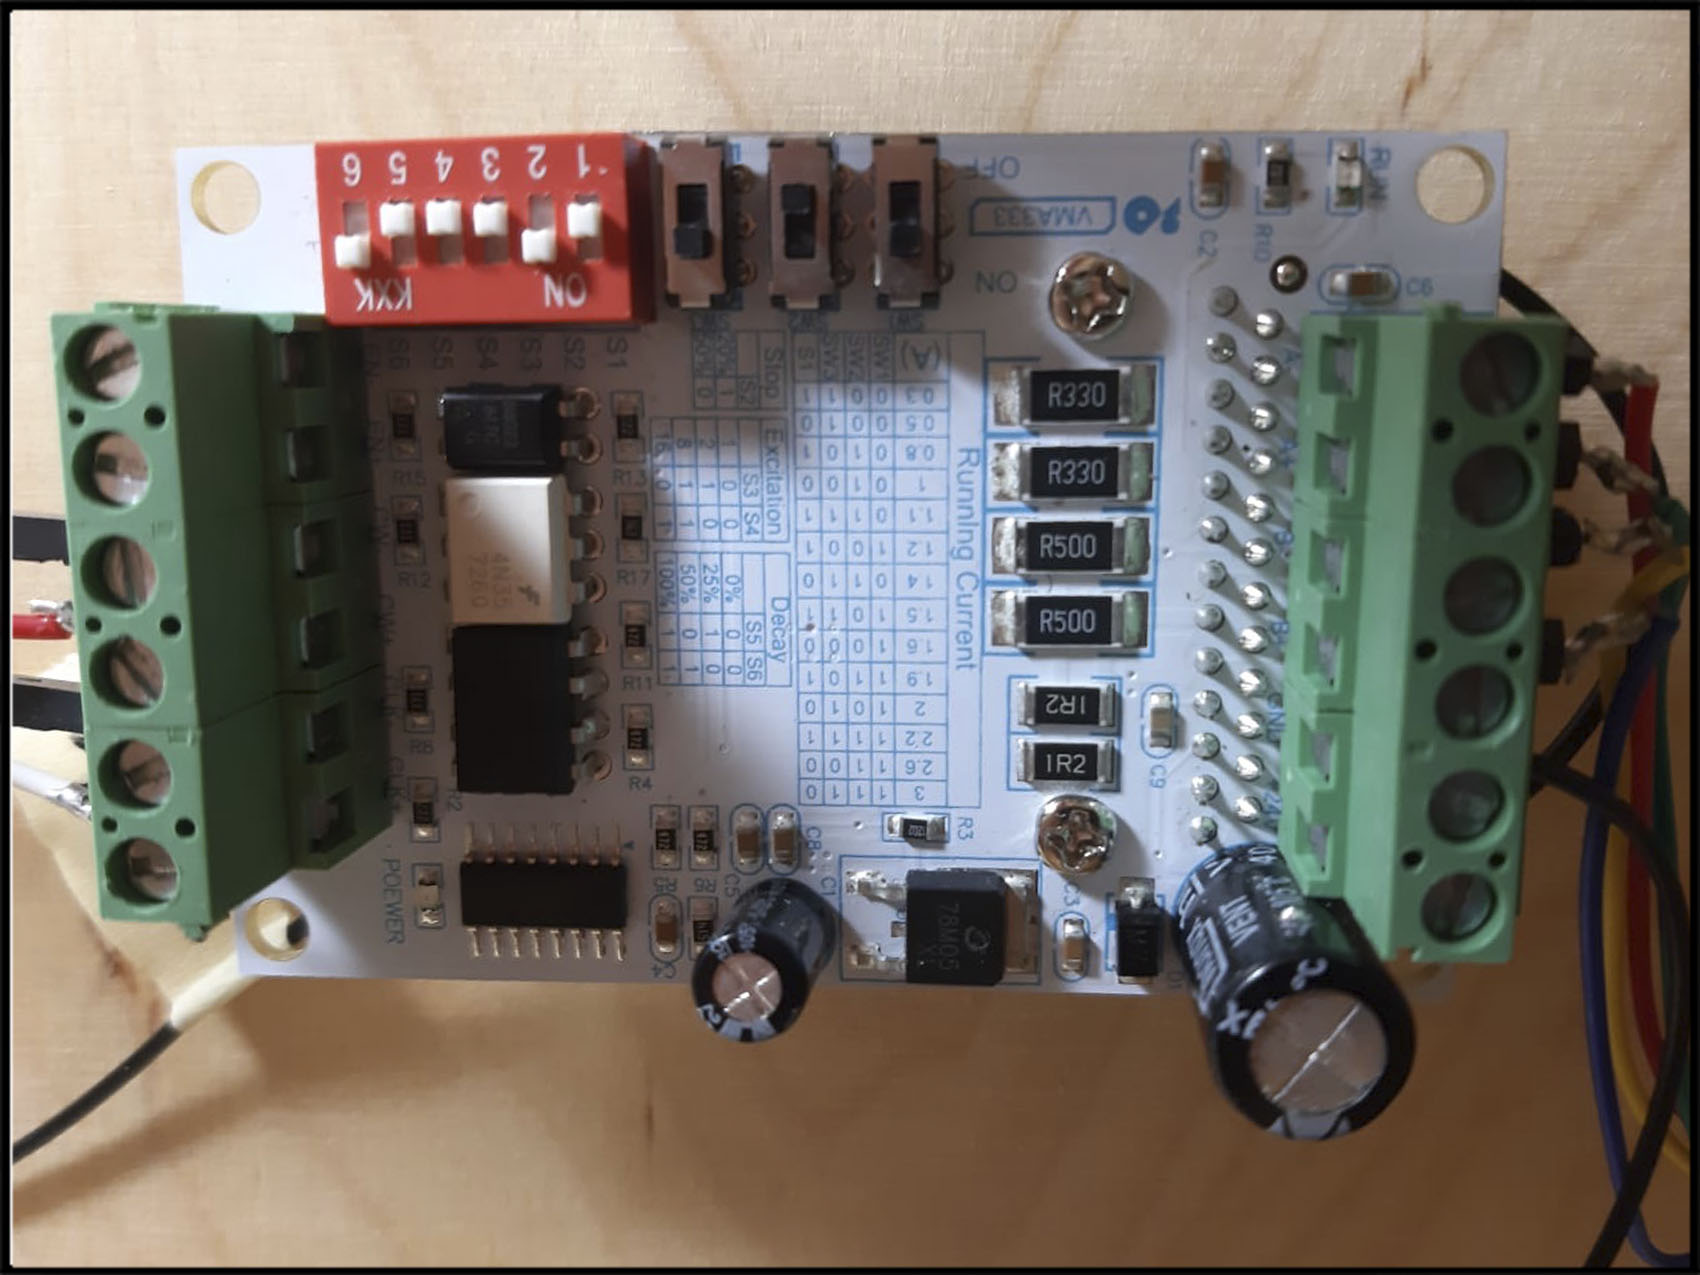
With all the previous boards designed, the targets of the knowledge were complete and the time past so fast that we decided to do not risk deadline creating a new board, because of that was decided to use instead the motor driver for the stepper motor of the mirror movement and attached to the rest of the system.
EXTRA VCC AND GND, RELAY AND REGULATOR MODULE
We need to add the extra VCC and GND to be able to have for all the board and extra supplies that the table needs to be able to be functional 100%. The relay is protecting the boards from the energy coming from the electricity when we connect the board supply. The regulator module distributes 12v, 5v and 2v depend on which order is sent.
First to set was the networking by Bluetooth connecting the chair and the lamp table. Then the code to configurate the timing for the Pomodoro system was tested a few times until get the right one, because the code works in millisecond and the programming and the clock of the microcontroller work different.
Once these was done, it was the time for the light box. On this case, it just took more time to set and connect the lights together, the button code was easier to fix. The problem came when the stepper motor board and the light box had to work at the same time because it looked like they were interfering each other.
Other thing to take care it was how to power the board to be functionals. For that was designed the power board that divided the power between 12v, 5v and 3v with a relay working depend of what is used at that moment. On the case of the chair, is connected with a battery.
It just one part of the whole project that I will try to fix and improve after and it is the up and down of the table. The problem came when we realized how heavy is the table for the stepper motor to lift it up. However, we took the machine week to think about it and try to make it work with jameco motor. It was not possible either. At that point of the time, the best option was to postpone and focus myself to make the rest work functionable.
PRESETANTION
VIDEO
MASTER PIECE
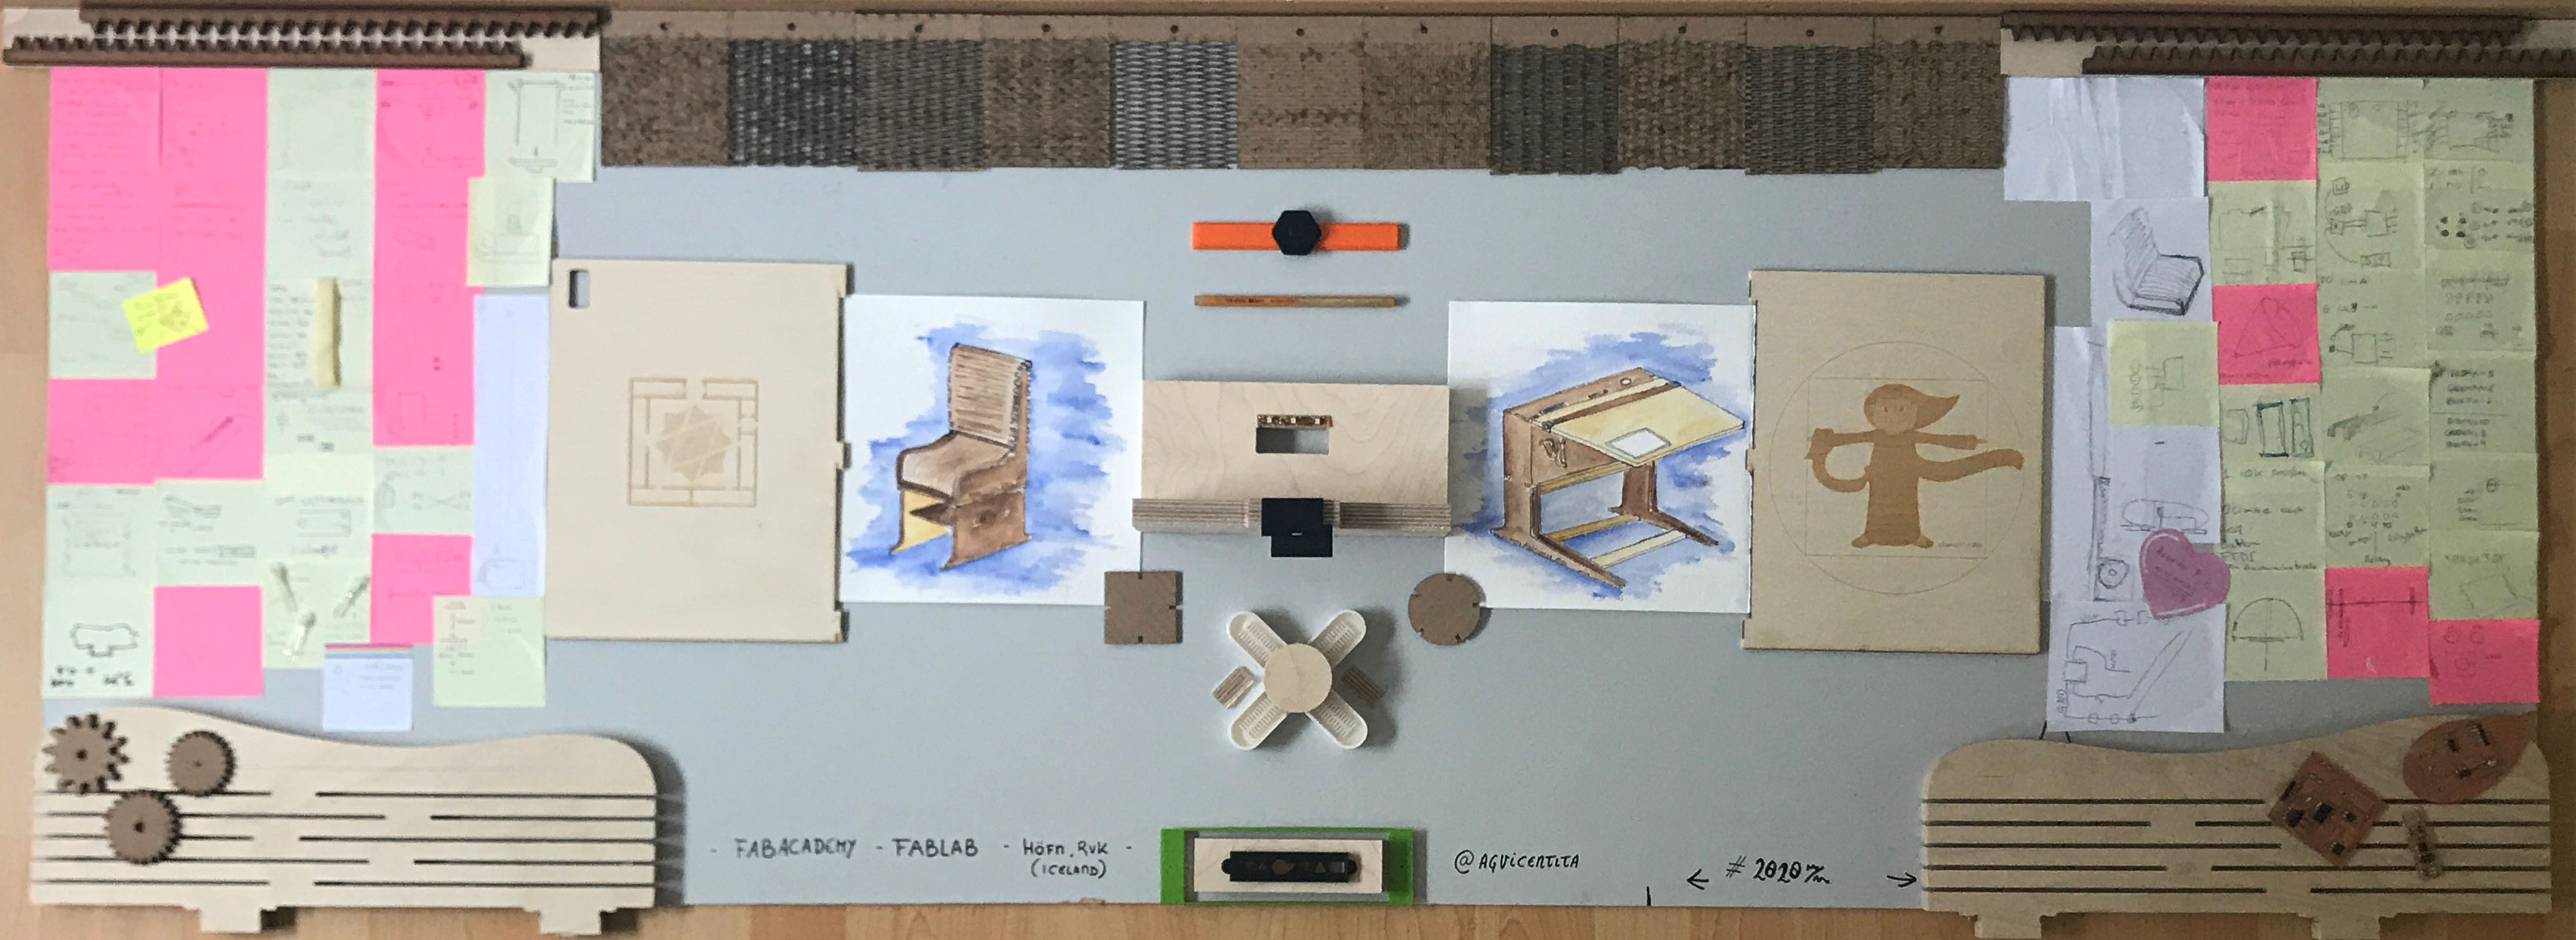
On the picture below you can see a collage of all the process to reach the final project. This composition is made it with notes, post-it, fails millings and prints, tests and two sketchs watercolors.
Files
Eagle files
Fusion360 design
Accesories STL files
Arduino files
DXF files

