
Week 4
Electronics production
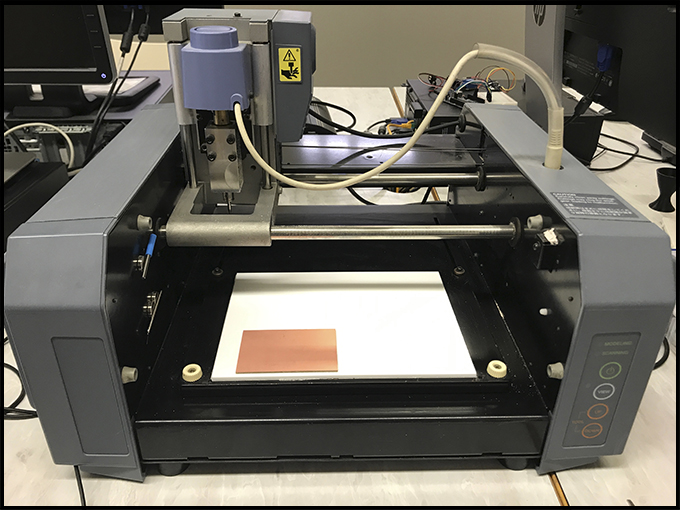
Personally, I have never created or thought about electronic before so, this is going to be a plus of challenging.
The first thing to do is to recognize and familiarize with the tools, equipment and component that you will use. The machine is a Millyn DXC-20 that use two kind of mills:
- To cut the lines 0.8 mm
- To draw the traces 0.4 mm.
Take your time to change the tools softly and nicely because they are delicate and can break easily.
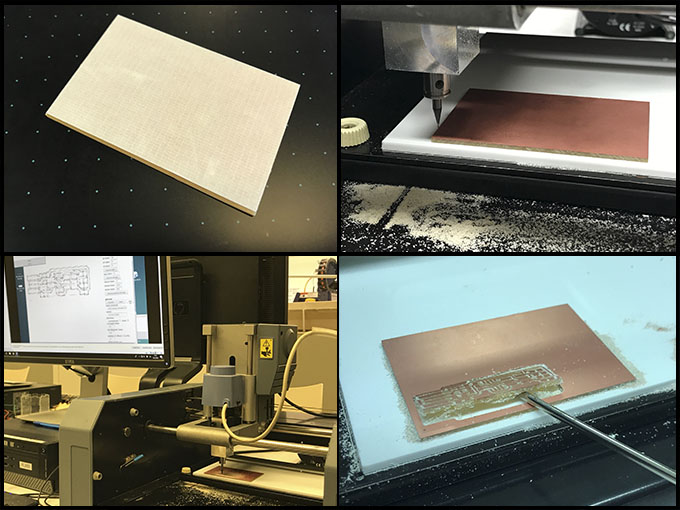
The machine works with Linux or Ubuntu like Operative System. Before setting it, it is necessary to clean the working area, over all, the milling area. Once it is done, paste the PCB well on the superficies, to prevent movement that can damage the results.
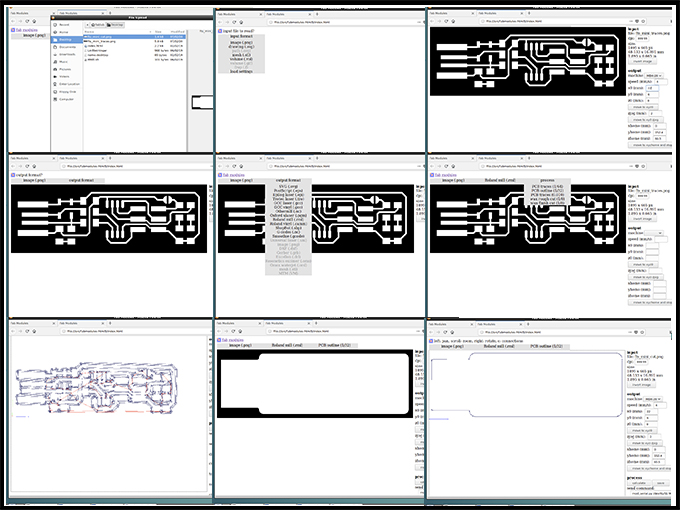
The assignment is to build a tiny ISP from a common design provided.
Step by step:
Set the picture of the traces in and choose Roland mill or the name of your milling machine.
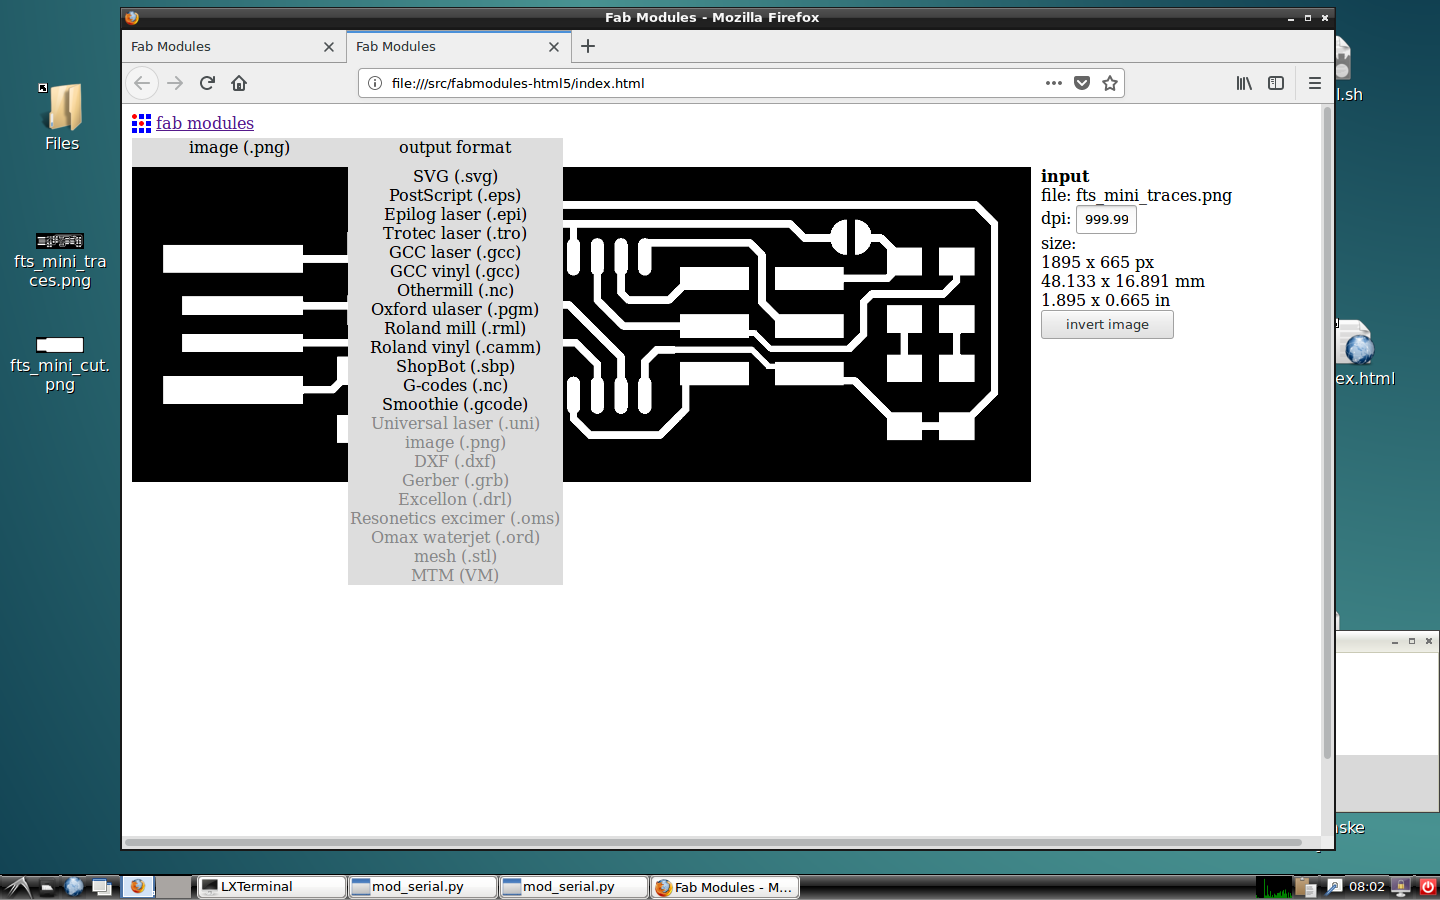
The first process to set is the PCB traces in 1/64.
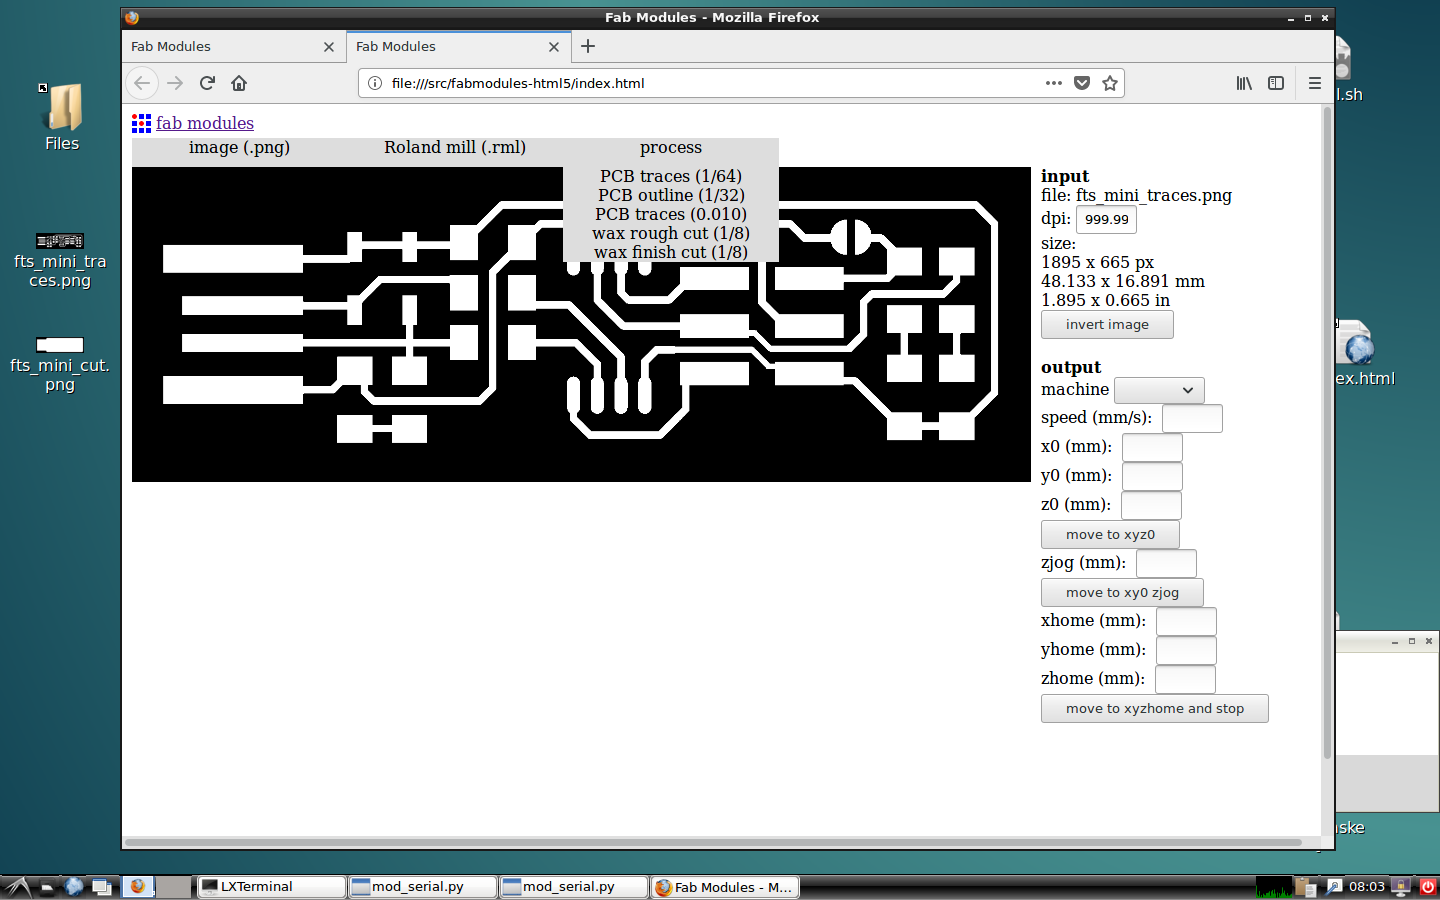
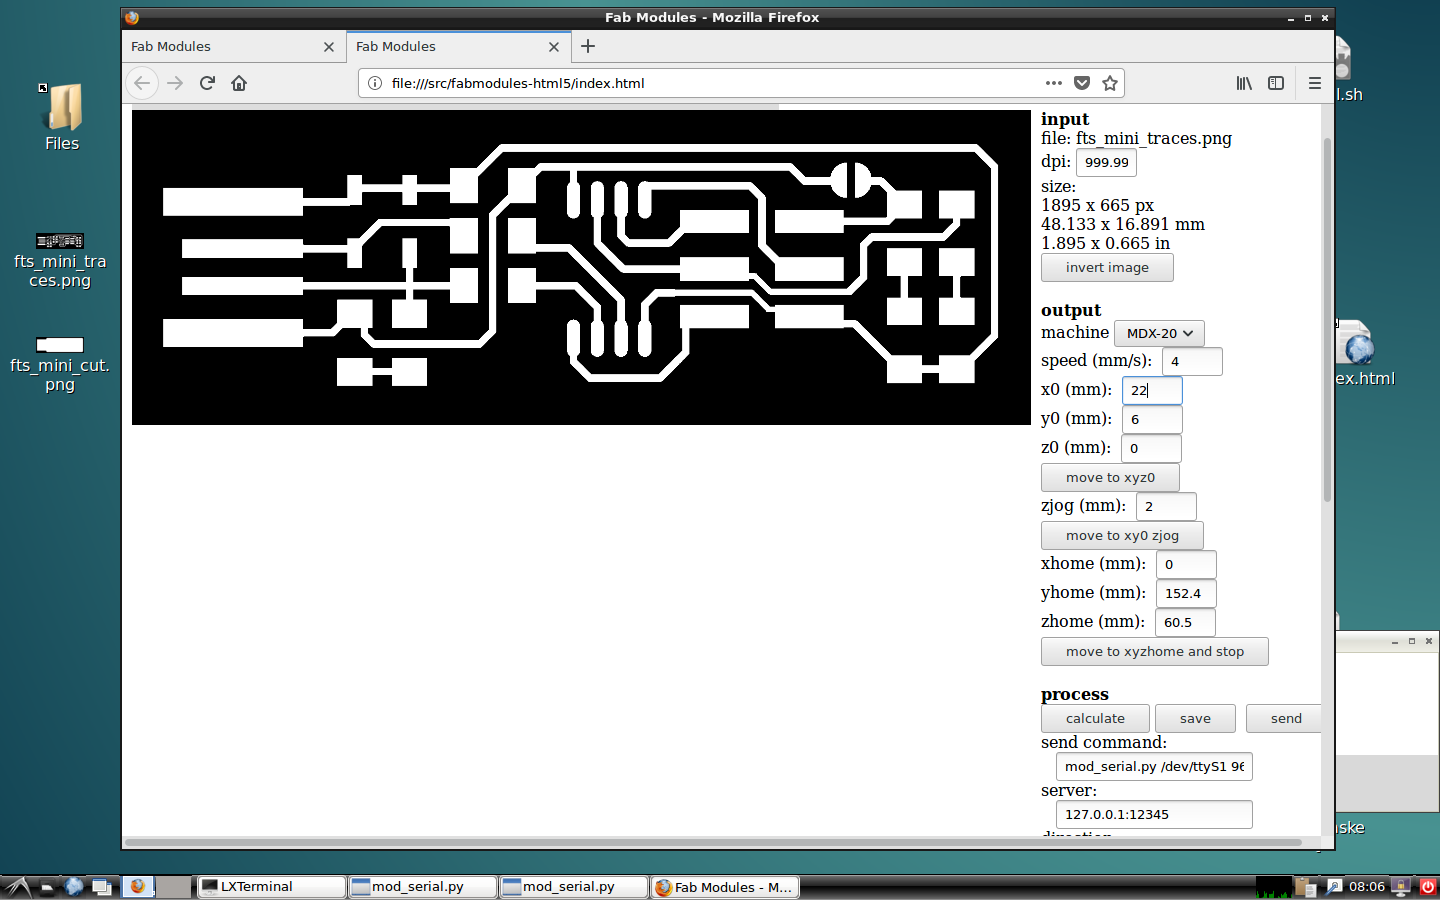
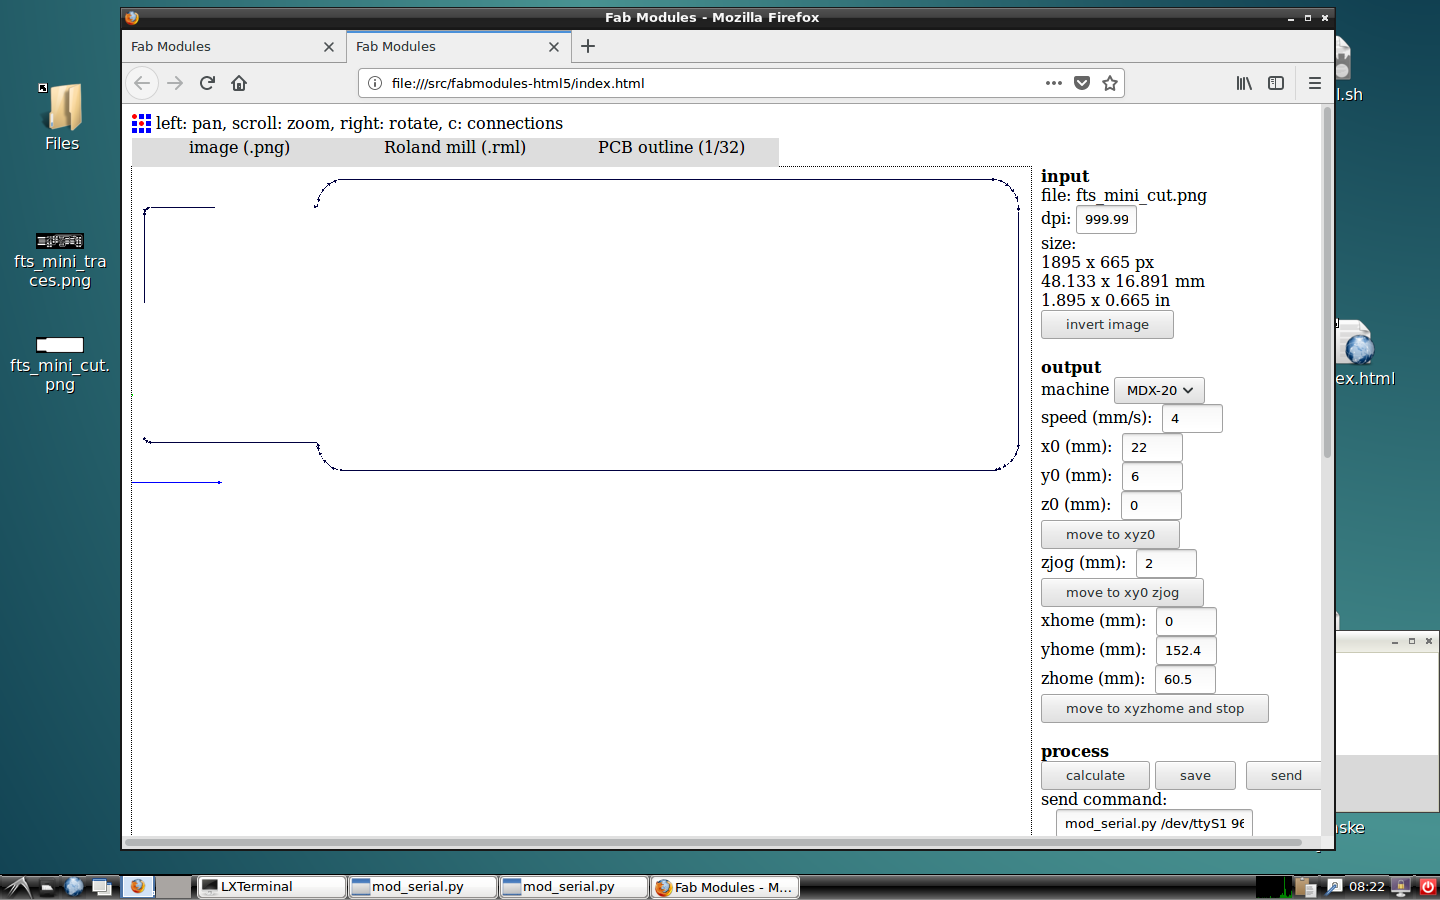
Focus on the outpur settings: choose the milling machine model, speed of 4mm/s and locate the origin point and calculate de Z point
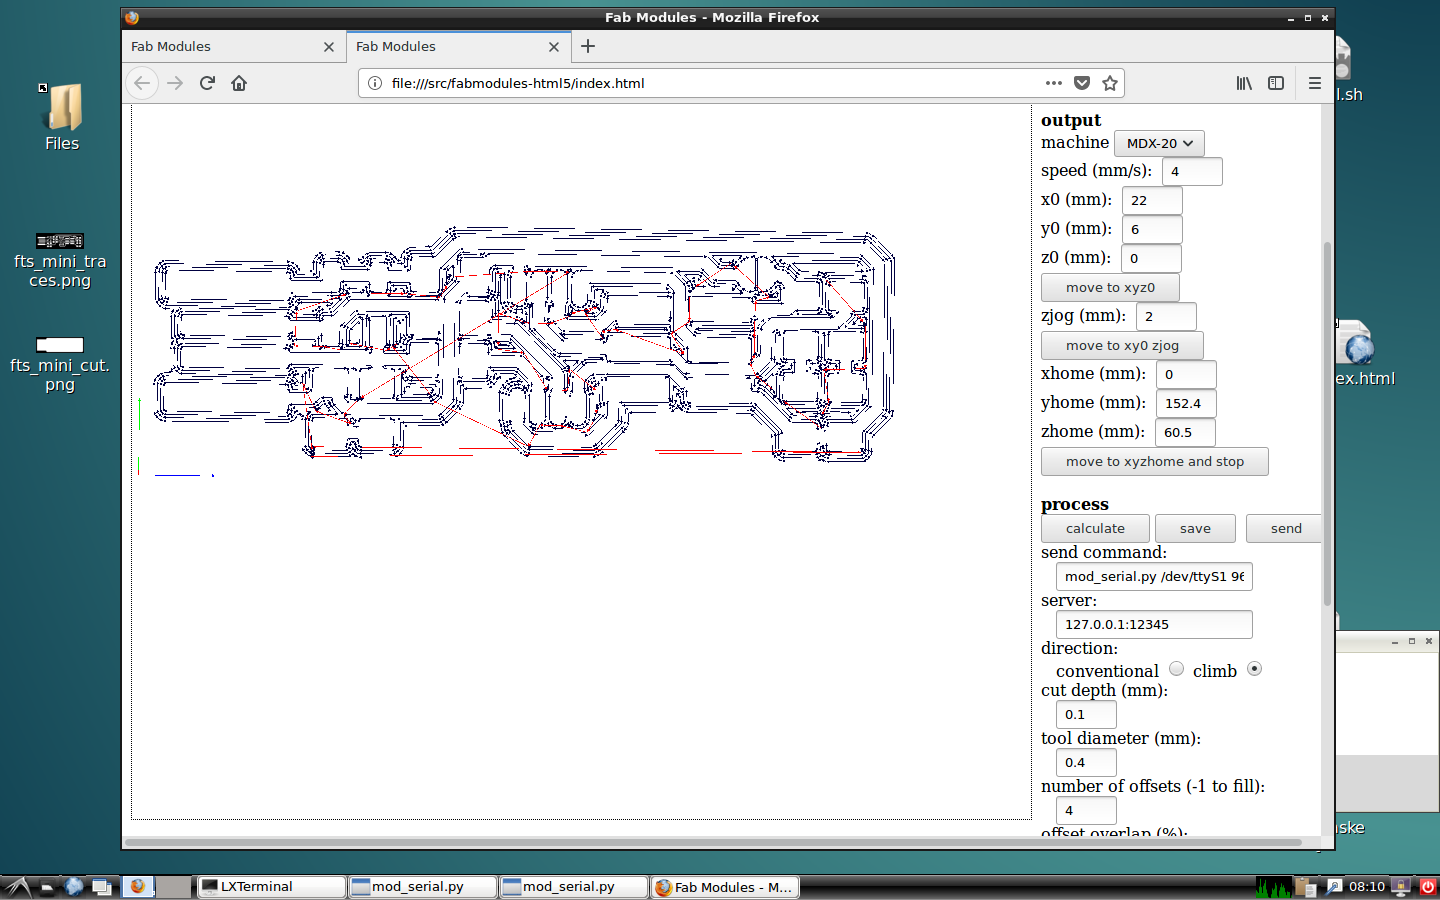
Calculate and mill
Now, it is the turn of the cutting lines. Start importing the picture of the outline.
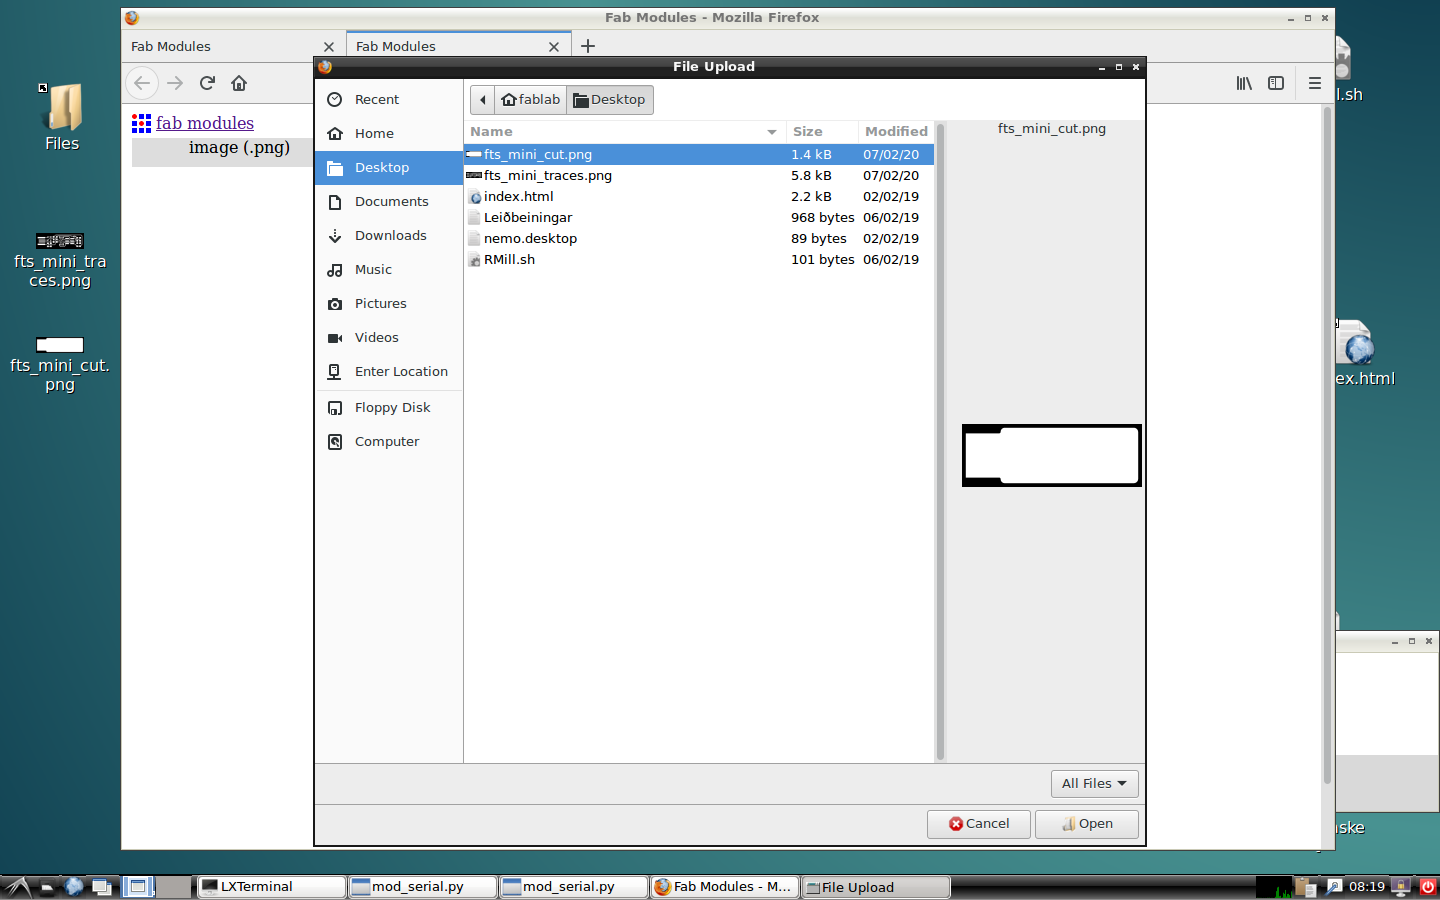
Choose the PCB outline in 1/32.
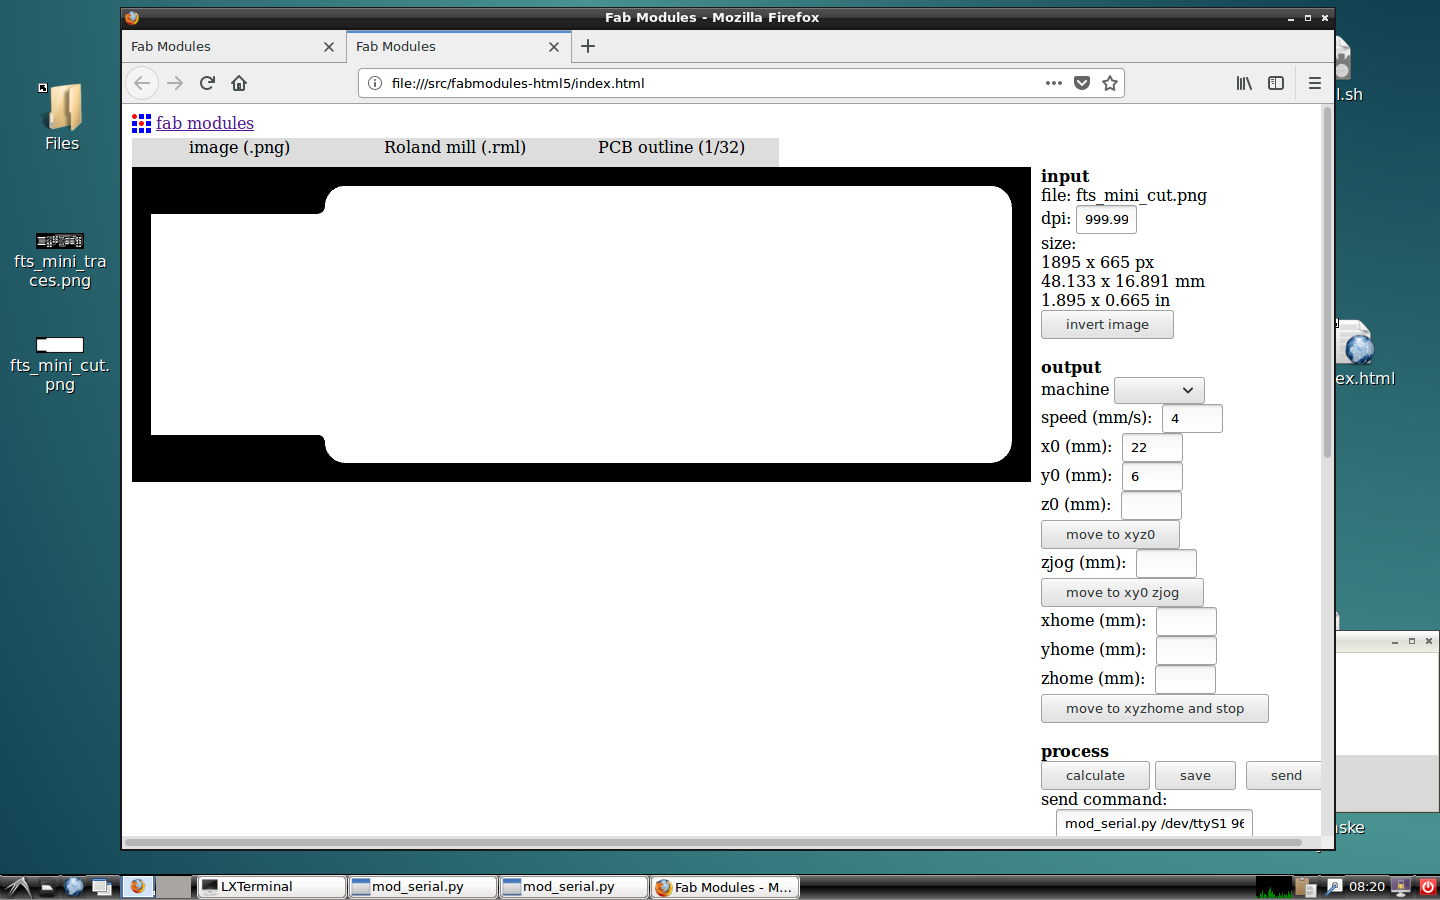
Remember to put the same location that you put on the traces lines, check that the settings are the same, calculate and send it to mill.
Take it off carefully, clean it with a little bit of water, and try to not put your finger print too much on. Now, it is ready to weld.
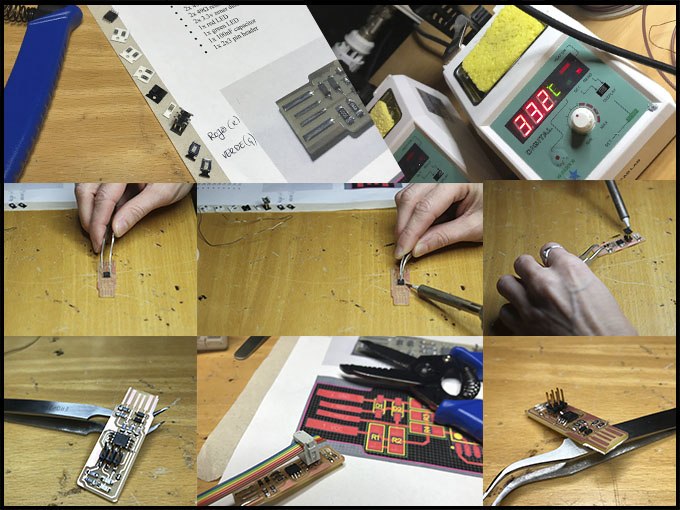
Check that you have all the elements for the ISP. The welder pen needs to be between 326-330 of heater and is good to have a wet sponge to clean it sometimes. It is also good to heat a little bit the area before going right the way to weld with the tin.
Check that you have all the elements for the ISP:
- 1x ATTINY45
- 2x 1kΩ resistor
- 2x 499Ω resistor
- 2x 49Ω resistor
- 2x 3.3v zener diodes
- 1x red LED
- 1x green LED
- 1x 100nF capacitor
- 1x 2x3 pin header
The welder pen needs to be between 326-330 of heater and is good to have a wet sponge to clean it sometimes. It is also good to heat a little bit the area before going right the way to weld with the tin.
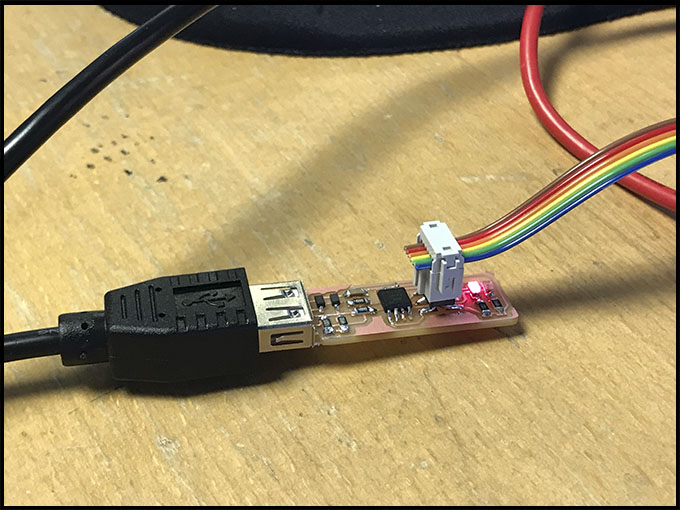
Once it is finished, it is time to check if it works. For that, we will create a bridge on one part of the board, that we will separate later. Put tin on the straights lines that we can see on the top of the ISP. Also, we will add under the lines a plastic base to help us to set the connection.
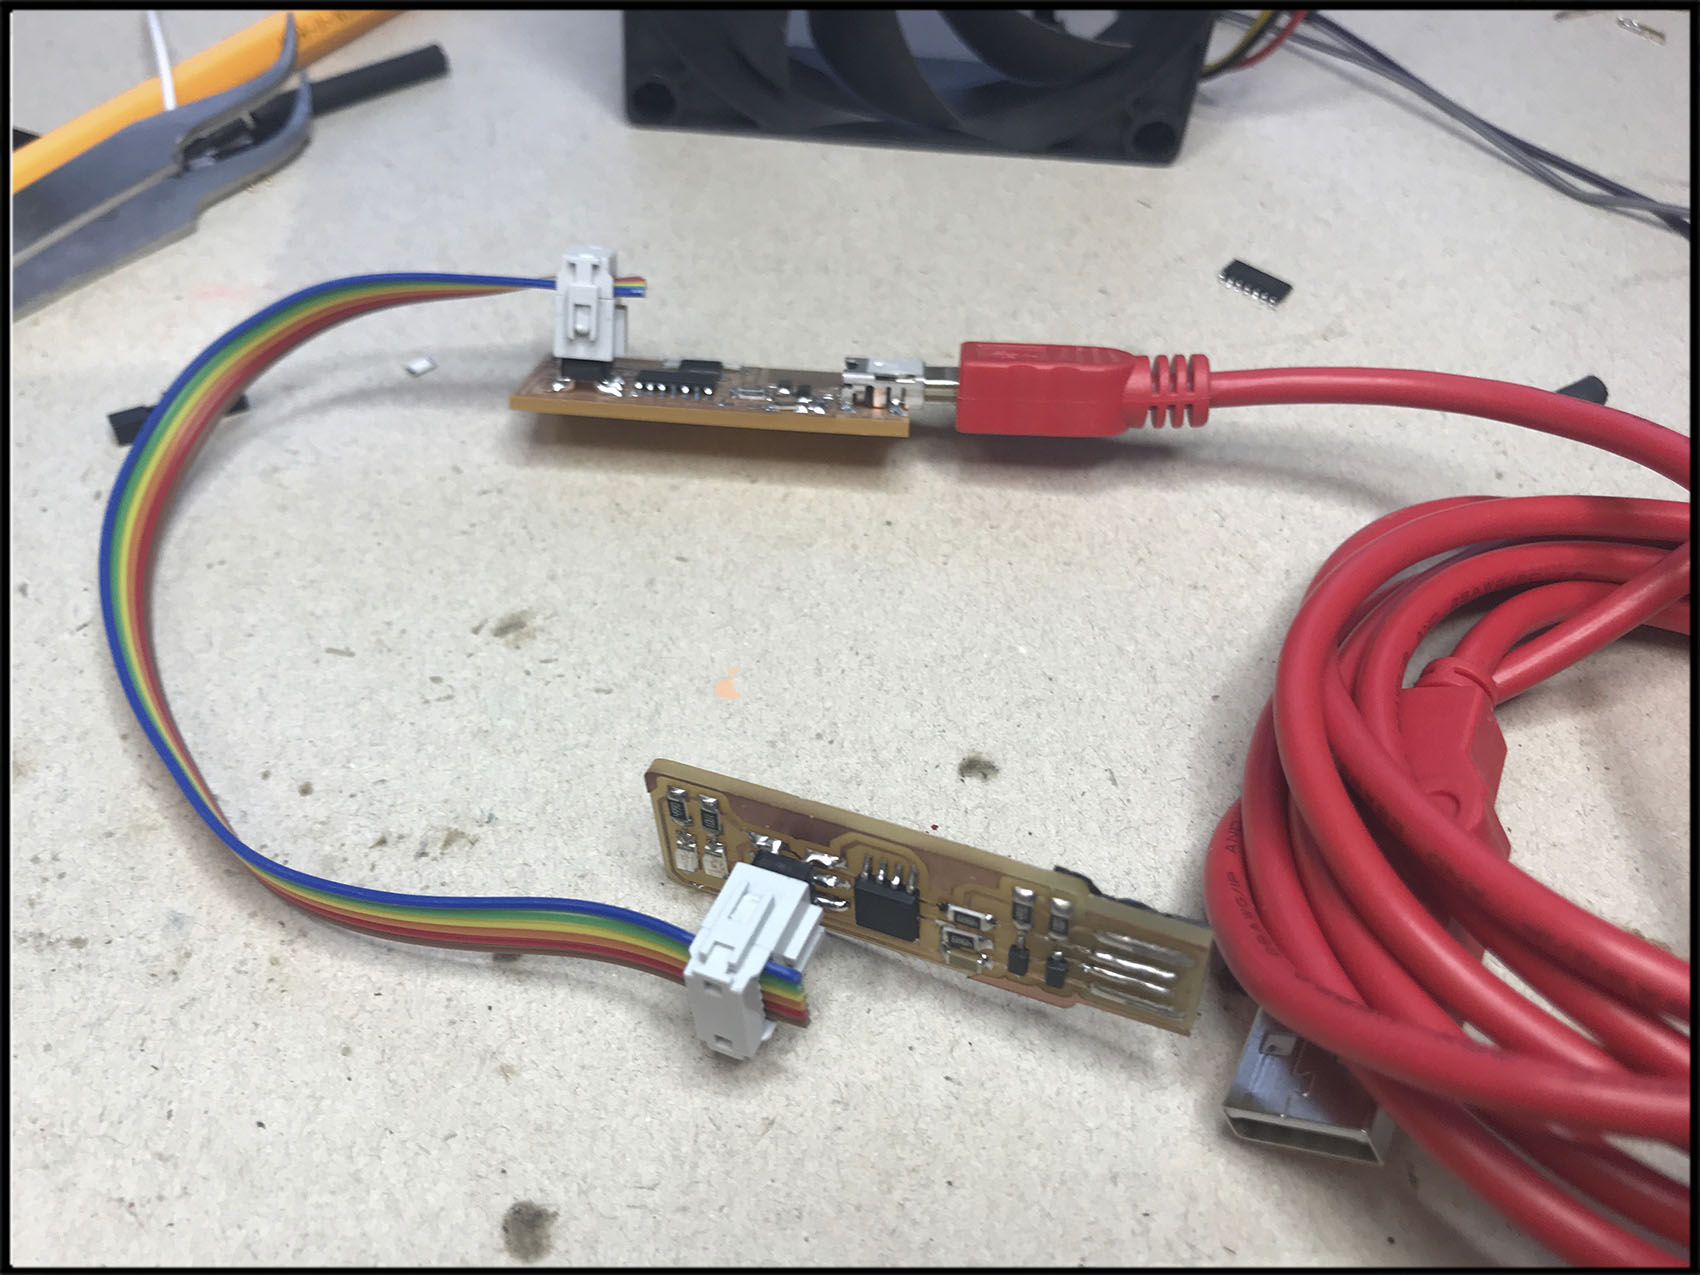
However, to finish we will need two cables: one to connect the ISP with the computer and the color one to connect with the board.
I program the programmer with another usbtinyisp.
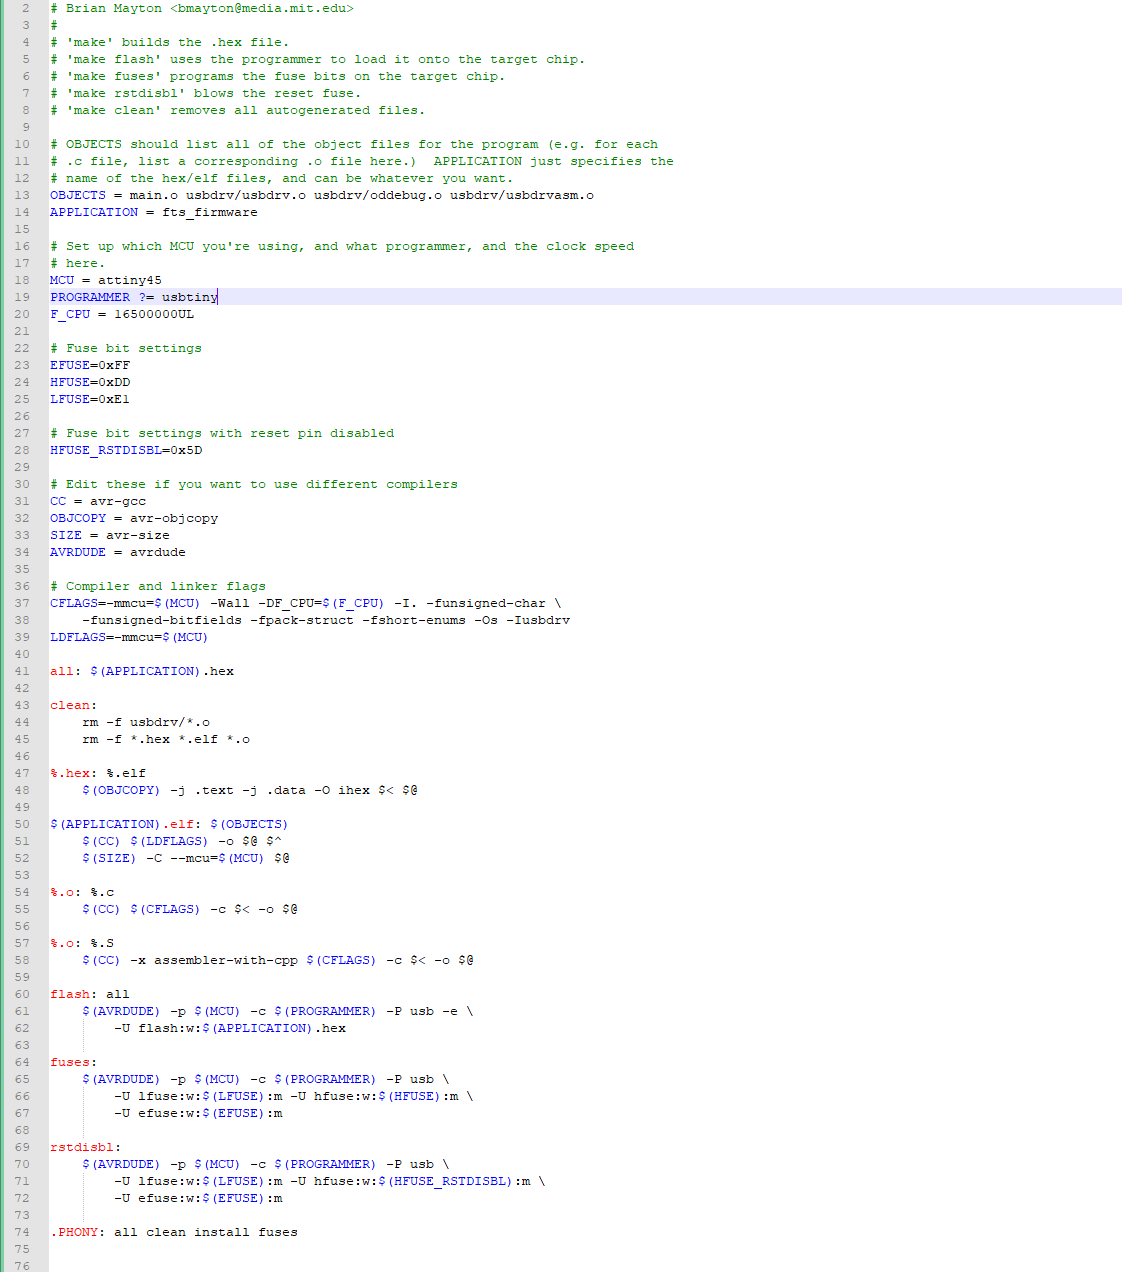
I did not change the Makefile because Id did not use AVRISP2. If that was the case, it is necessary to change this line:
Now, we are ready. Open the terminal and send the information:
- Cd name of the file
- Make flash
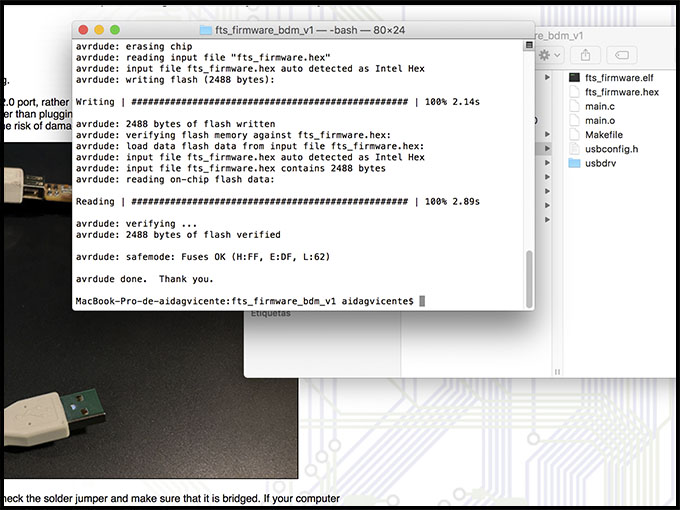
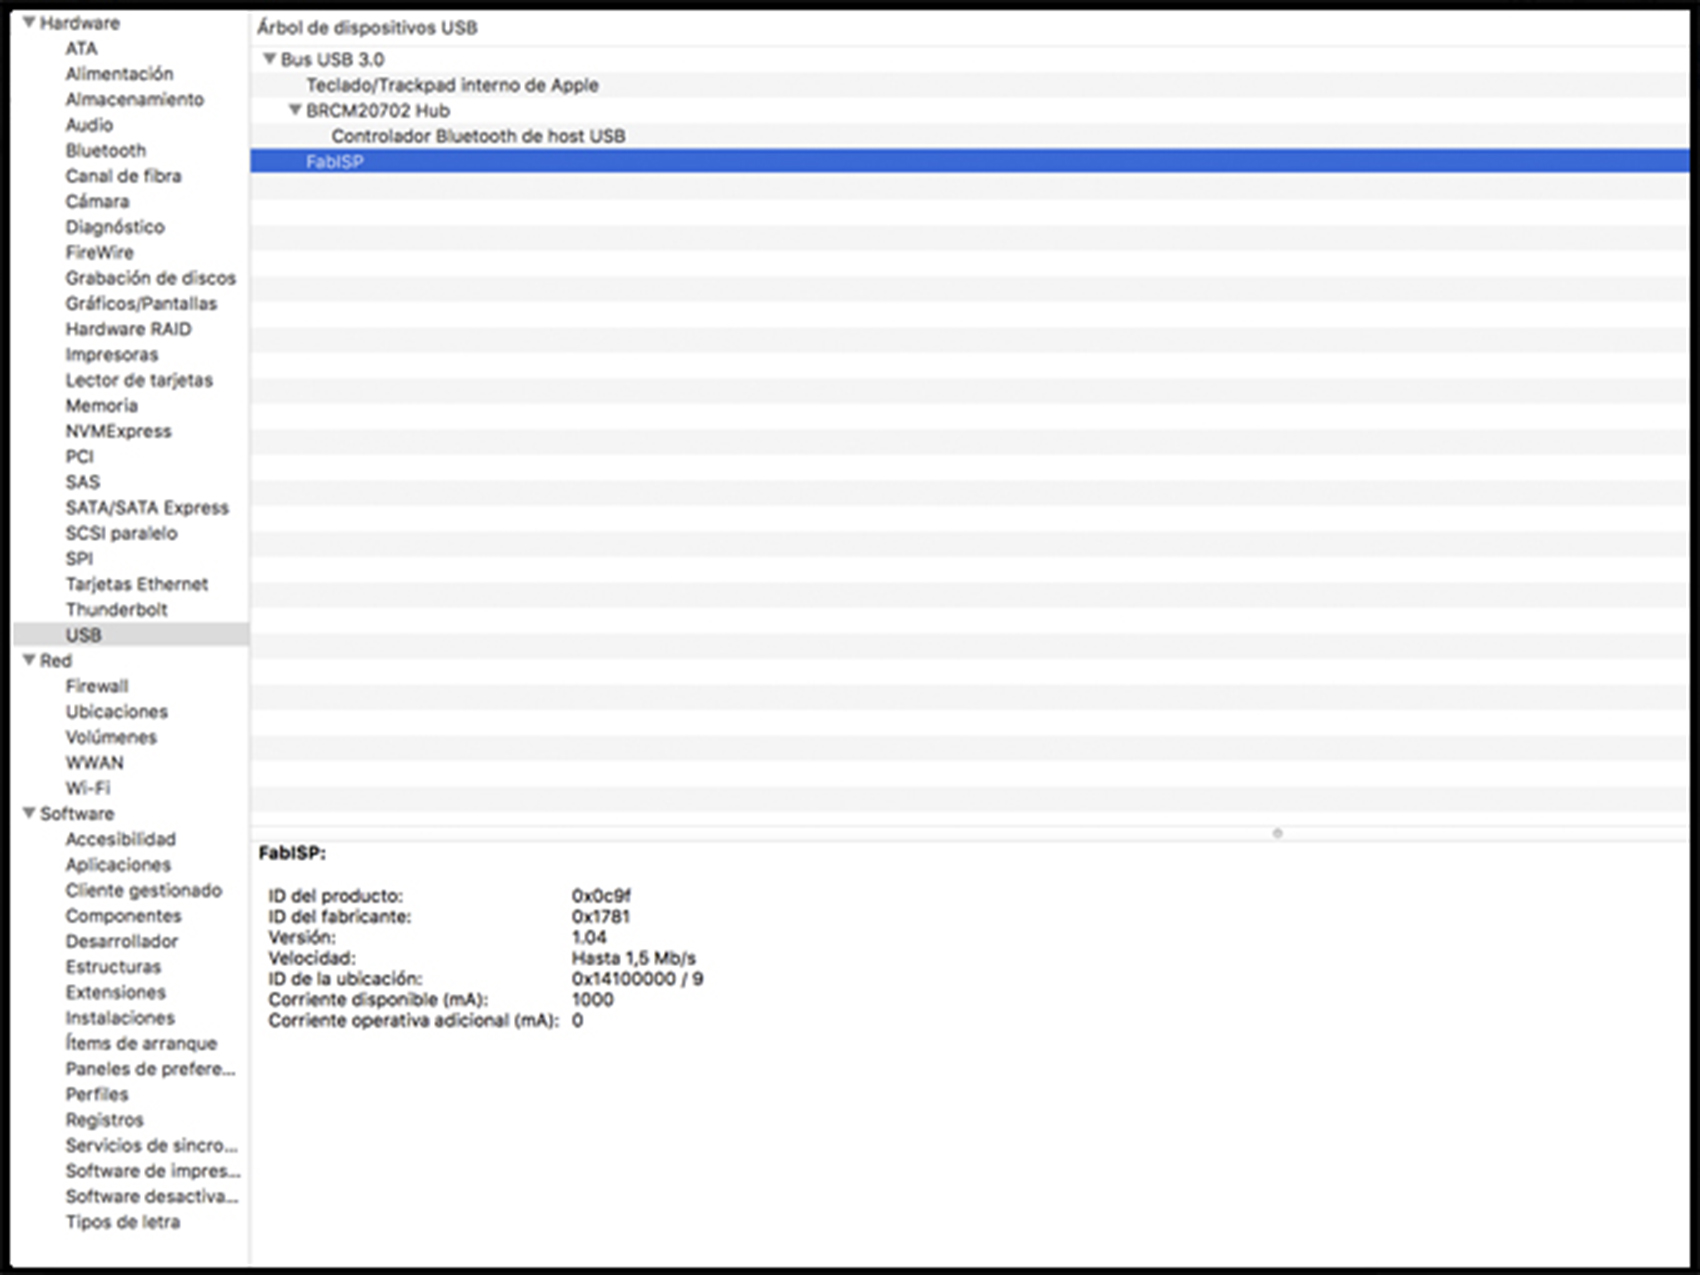
It is working! Also, to be able to see your success, you can go to the system of your computer and see it there.
Not forget to follow the tutorial that you will find in Fab Academy, where you can find the Makefile with all the steps for the ISP.
To be able to attache the ISP to your computer, you will need to paste a small piece of plastic to reach the width of the port and not get lose.