Week 18
Project development
Once I had a clear idea I researched a bit around the old Fab Academy projects and I found great inspirations, ideas and also so similar projects like:
Chair seat: Javier Alboguijarro. Fablab Barcelona 2017
Chair back pattern: Alex Chair from Obrary website
Legs’s table: Rafael Aguirre. Fablab La Puebla 2019
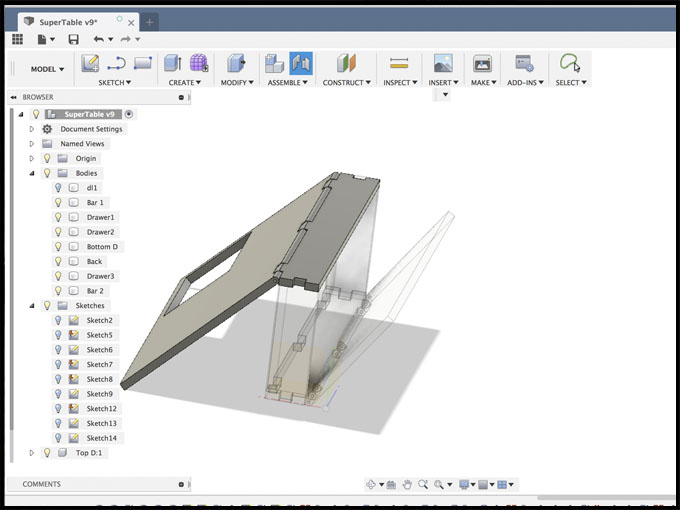
I was surprise when I took a look on Rafael Aguirre’s desk because it was so similar project, even if I draw the sketches before found him. Anyway, from the first sketch to the final results the plans were changing every day.
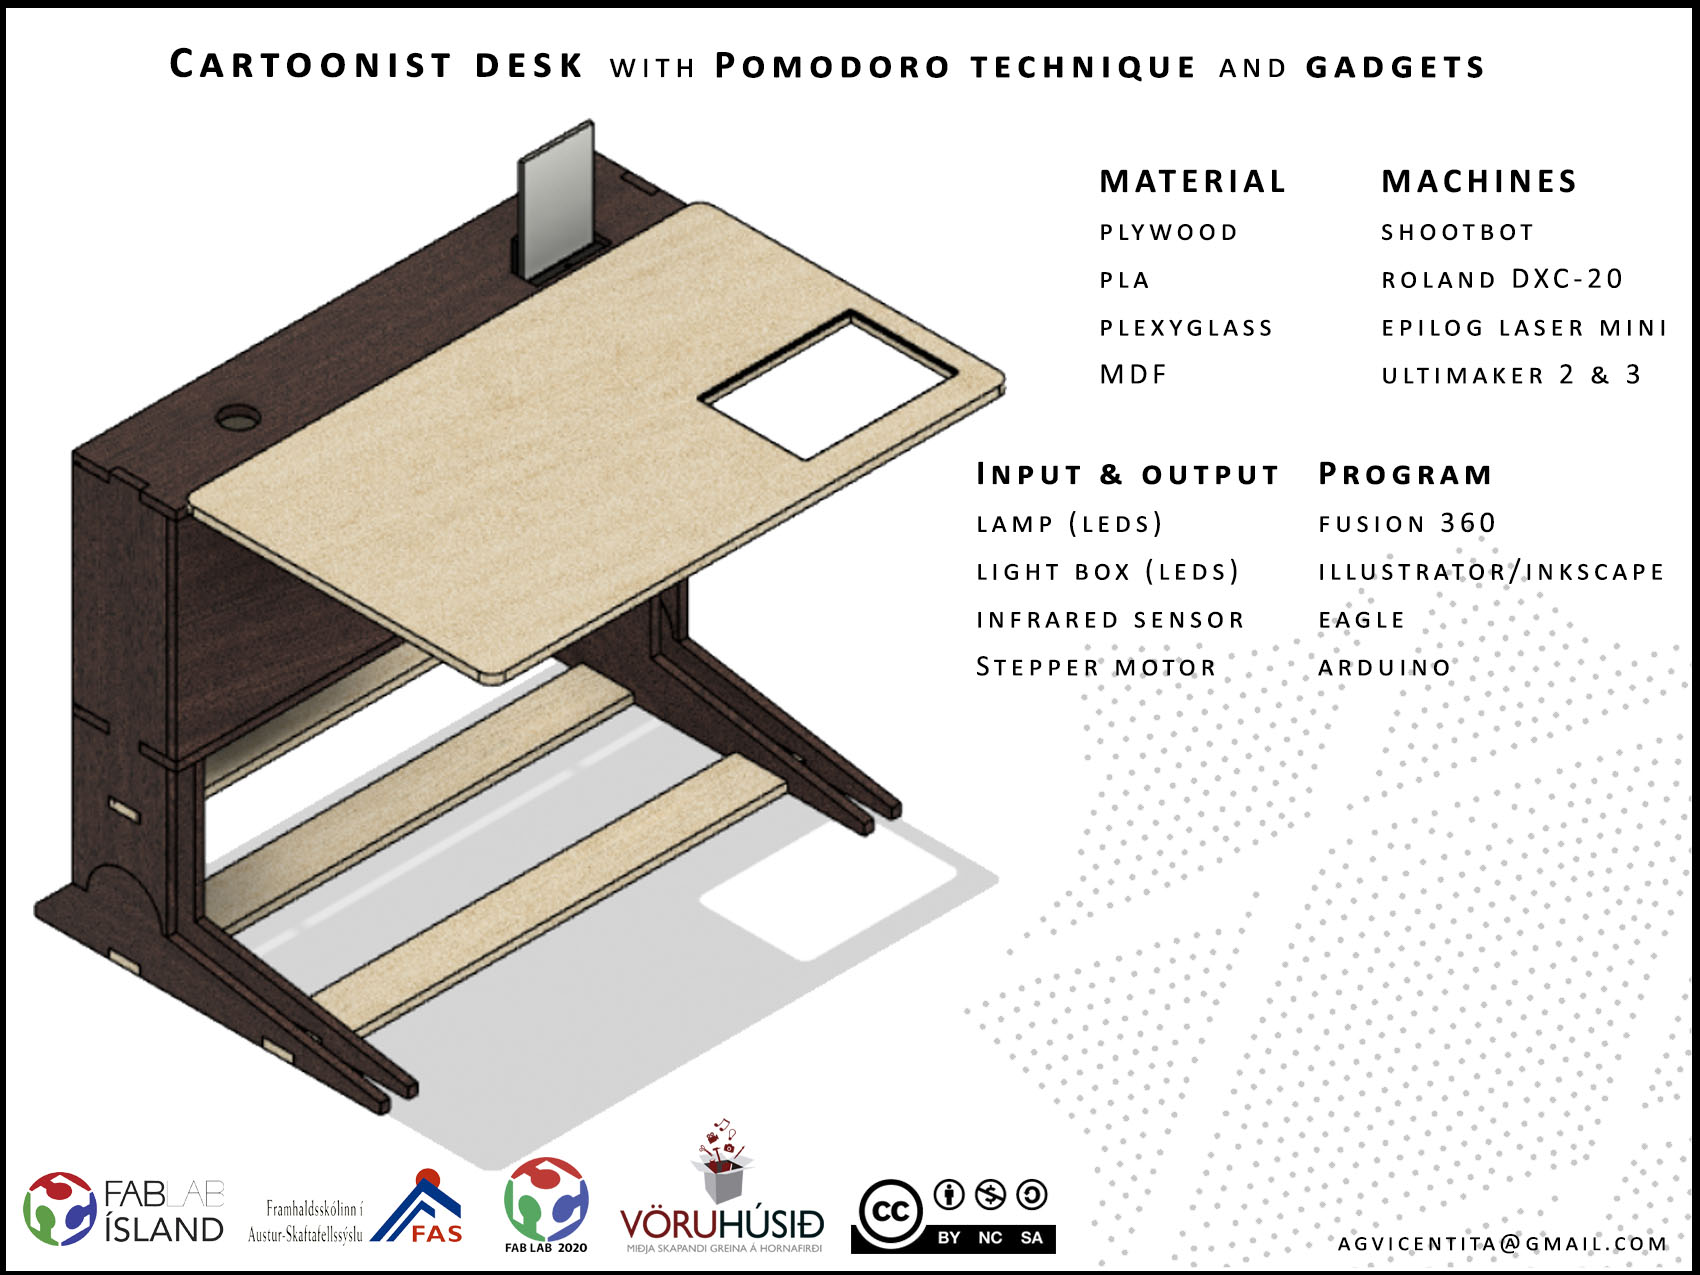
The main idea it was clear: a desk that can up and down and incline.
After that, I considered to add the lamp and the mirror to help me with the illustrations. Then I thought about to implant the Pomodoro working technique to help me on my work productivity. Little by little the final project was increasing and having usable gadgets. What about if I can control de lights of the table, the time with a sensor implanted on the chair that starts a countdown when I seat? That was a real challenge for me, a beginner on electronics.
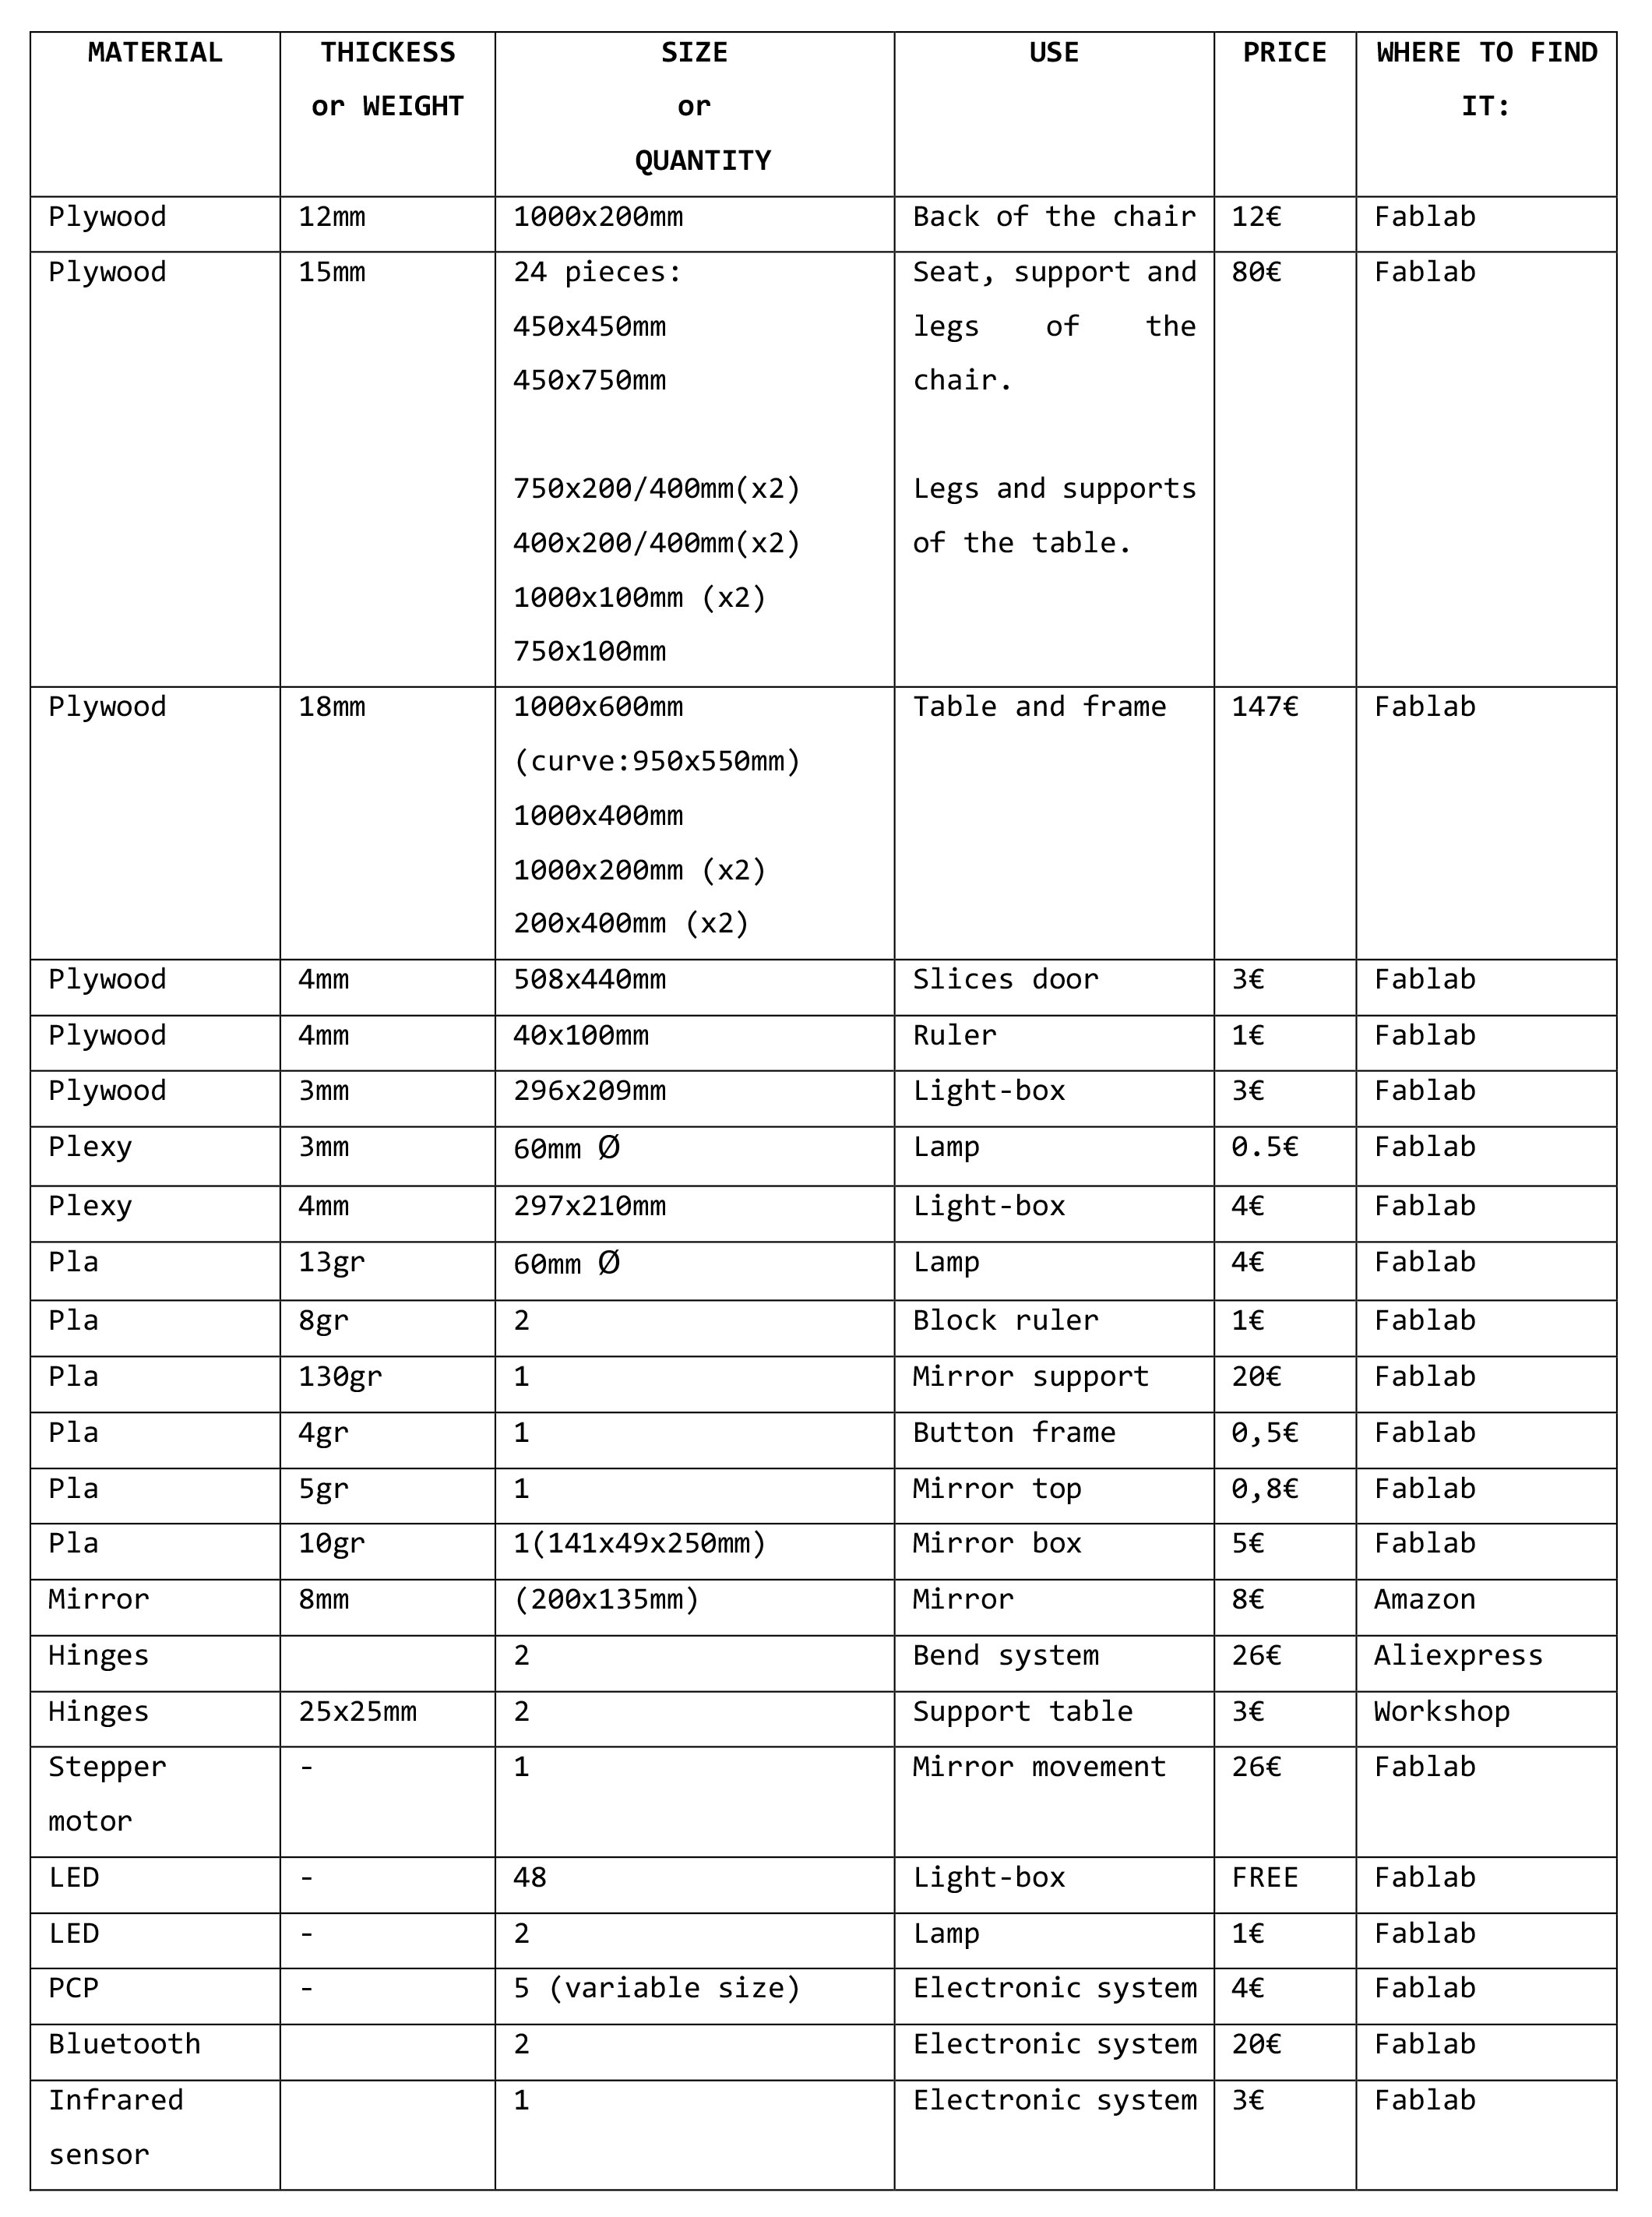
On the table below, you could see all the material have been used to be able to build this project, the price of them and where they were found:
The table on the set position is 750mm and the maximum high that can get is 1050mm, 300 mmm more.
The hardest pieces to find were the motors to move the table up and down, and the rails for the legs that I found the in an old table.Also, still on the table to change it to manual instead of using the electronic for that.
Machines used:
- Shootbot with 1/4" and 1/8" beats milling bit.
- Laser cut, Epilog laser mini.
- Roland DXC-20.
- Ultimaker 2 and 3 extended.
I made the structure of the table and the chair. Once I mill all the pieces, I built it.
On the list below are divided all the pieces and gadgets of the table:
- Table (Main size: 1000x836mm.)
- Main board: 1000x600x18mm.
- 2 Doors: 54mmx44mmx4mm.
- Drawer box 1000x400x236mm.
- Mirror: 200x135x80 mm.
- Light box: A4 //297x210 mm.
- Lamp: 60mm.
- Chair:Seat(450x450 mm) and back (450x550 mm)
- Other accessories:
- Mirror with led light in it.
- Pomodoro technique. Infrared and lamp.
-Light box.
- Drawer.
- Inclination by manual hinges.
-Adapting legs.
Electronics items:
- Stepper motor.
- White LEDS for the light box.
- RGB LEDS for Lights of the lamp.
- Infrared sensor.
- Bluetooth.
- Power supply.
- Relay.
- Buttons.
Electronics systems (Attiny1632):
- Power board.
- Mother board: distribution of power.
- Bluetooth master board: lamp connected to the chair.
- Bluetooth slave board: chair sensor.
- Buttons board.
- Stepper motor and driver:mirror movement.
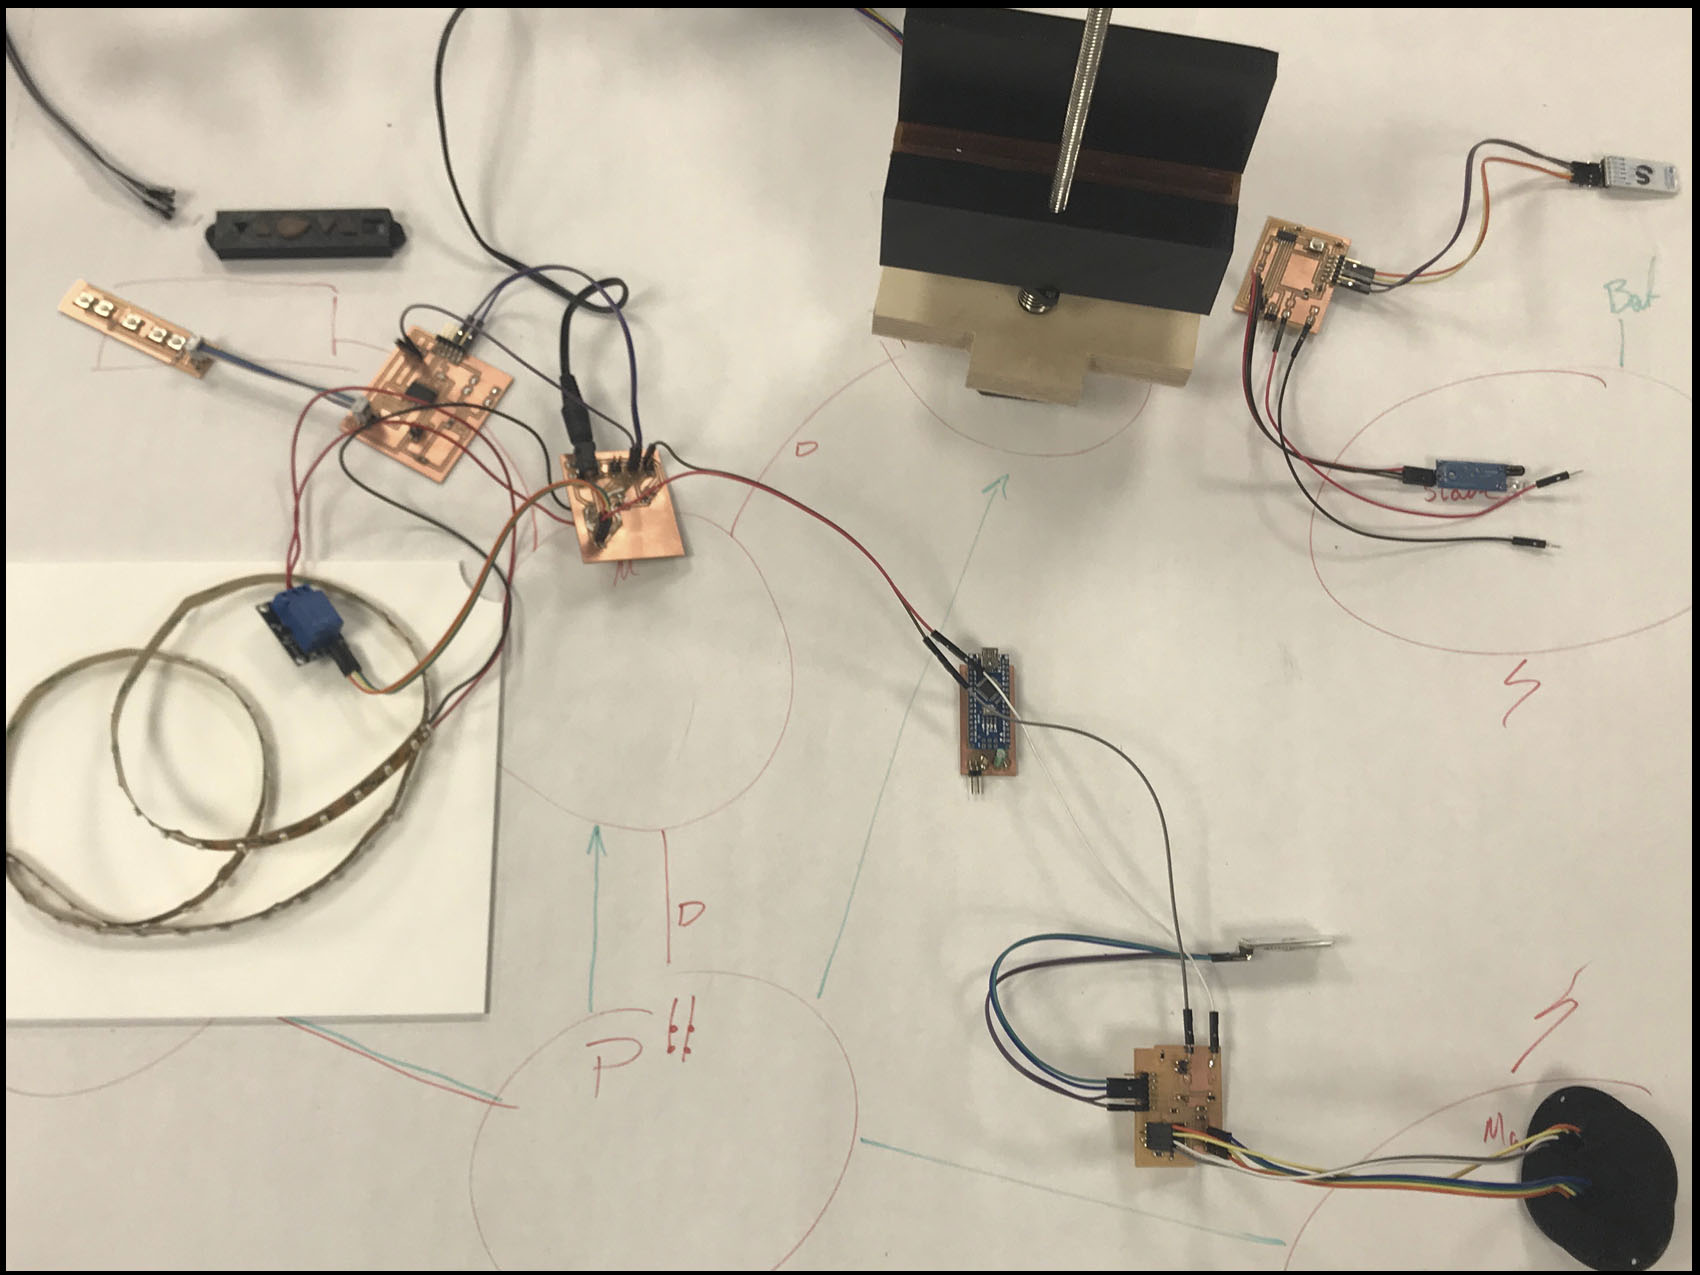
Then, I create the electronic system from the beginning, adapting all the knowledge and material to the project and viceversa. To get the boards ready and communicating to each other through the button orders, it was quite challenging. The picture below shows how the board are connected on the cupboard behind the table and, in addition, the chair sensor and the stepper motor for the mirror.
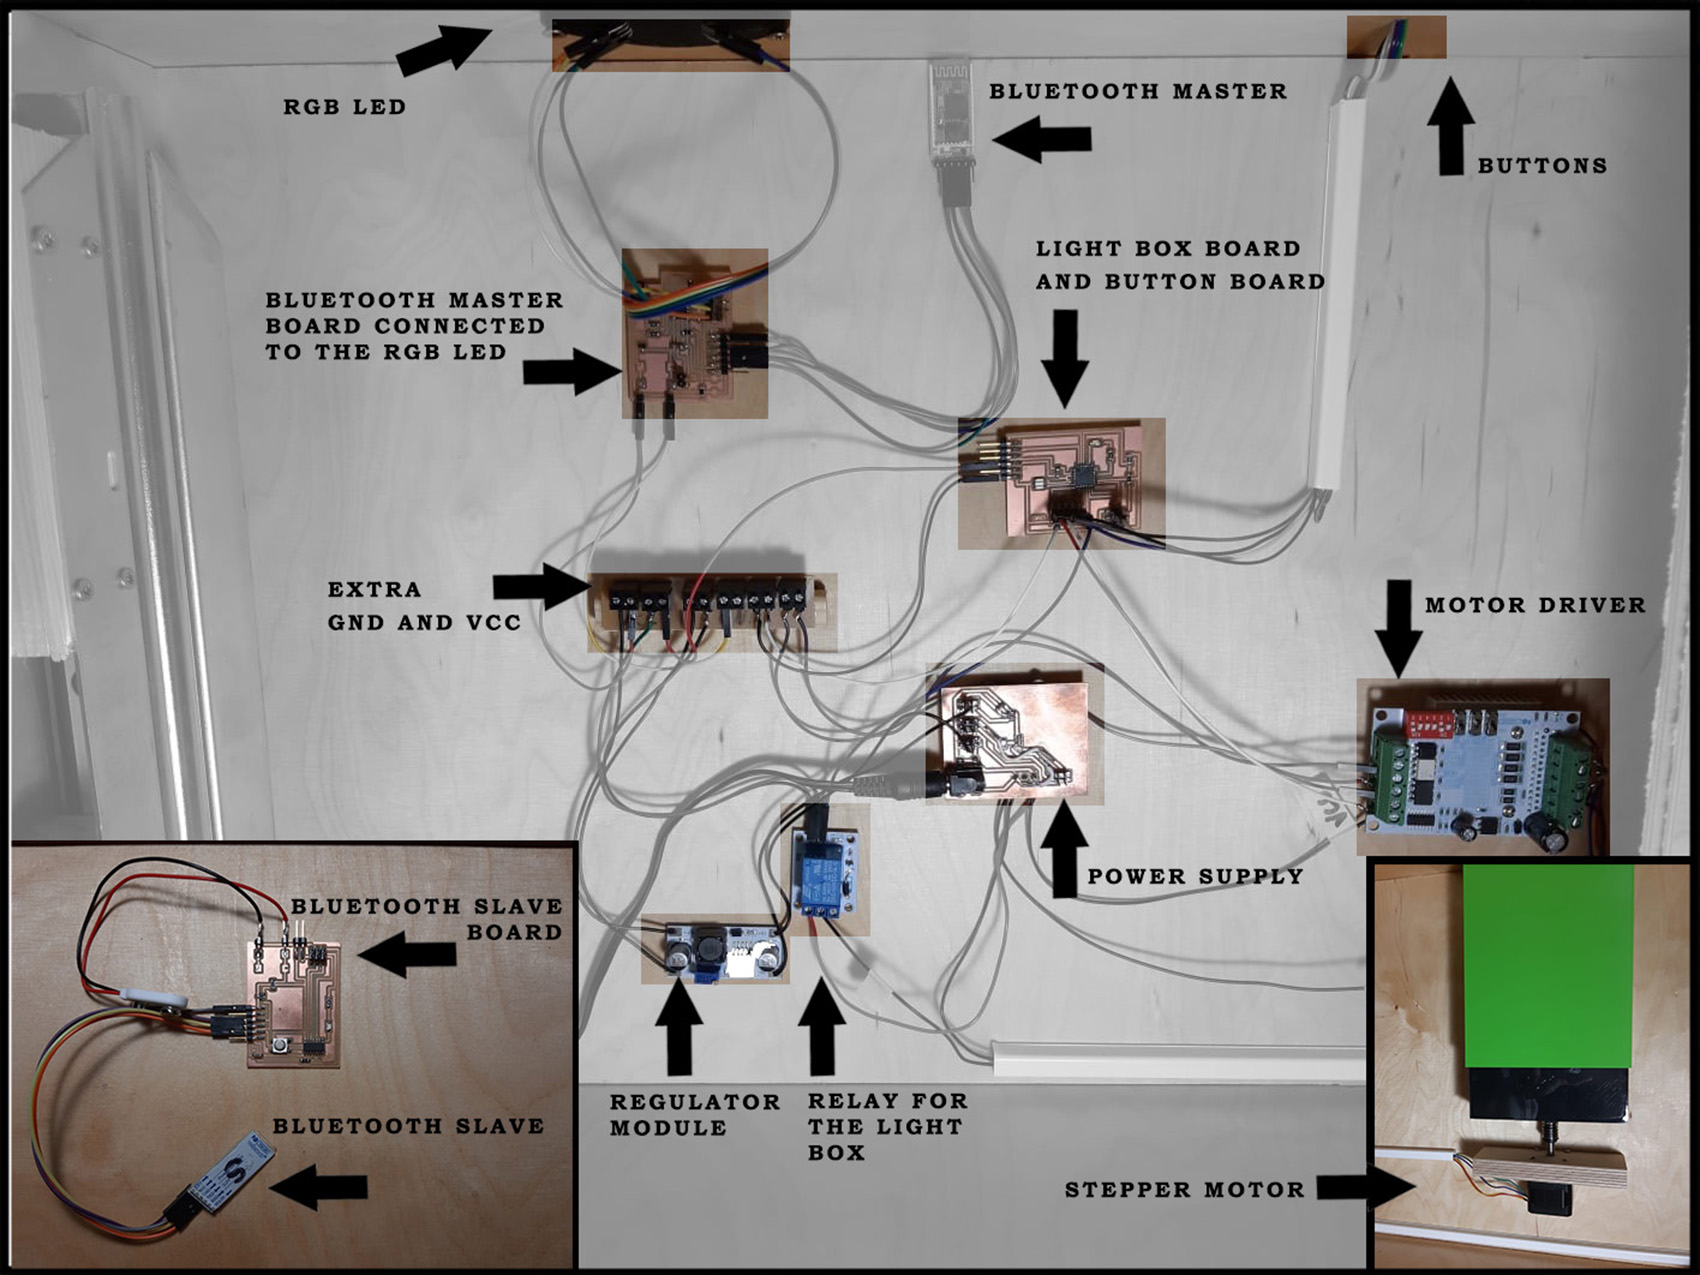
To see better how they work and communicate between each other you can go to my final project page.
