Input Devices
Federico, 25 March 2020
- individual assignment: measure something: add a sensor to a microcontroller board that you have designed and read it
- group assignment: probe an input device’s analog levels and digital signals
Link to the lesson. Link to the videolesson.
Board used for this experiences
Since the spread of the Corona Virus didn’t allow me to mill my own board, I decided to use the Arduino Nano Clone to test some input devices.
Since there are several Arduino Clone boards I list below the configuration I’m using:
- Type: Arduino Nano Clone
- Programmer On board: CH-340G , Brand manufacturer: WH, Datasheet
- Bootloader: The old one
Remember to fetch the drivers from WH official site, but on my Windows 10 the right drivers are working fine even if I’m using an usb 3.0 port.
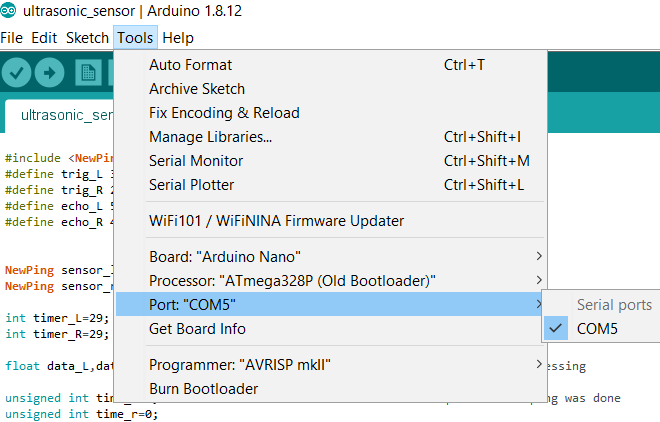
To summarize, here is my configuration setup from the Arduino IDE:
Here’s the pinout of Arduino Nano from
Reading distances with the HC-SR04 sensor
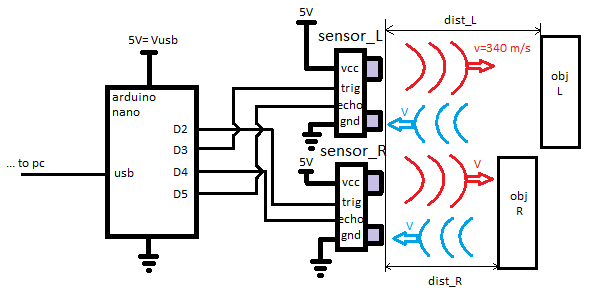
I will need a control for the Interface and application programming week that let me drive the y-position of the player with hands, so I wire two ultrasonic sensor HC-SR04 to an Arduino Nano.
I decided to use the Newping Library, available on Newping Official Website or by installing from the Arduino board Manager. This is the newest and better implemented library I found and it works well for multiple sensors.
Be careful
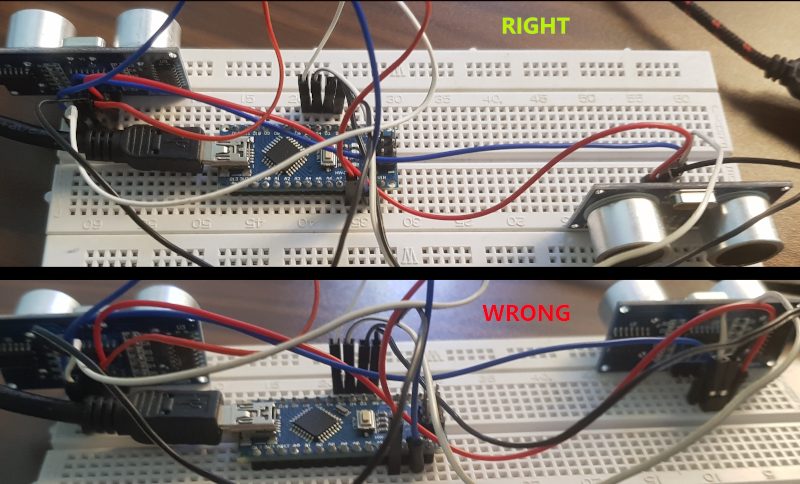
Consider that if you put sensor very close to each other you will obtain lots of misreading measures. To avoid this, I oriented the sensor in a way that waves emitted from sensor are not colliding with the waves of the other sensor.
Characteristics of the sensor module should be:
- Operating voltage: +5V
- Theoretical Measuring Distance: 2cm to 450cm
- Practical Measuring Distance: 2cm to 80cm
- Accuracy: 3mm (…I don’t believe in that so much…)
- Measuring angle covered: <15°
- Operating Current: <15mA
- Operating Frequency: 40Hz
and here some datasheets from different sources:
Datasheet_1 Datasheet_2 Manual_3
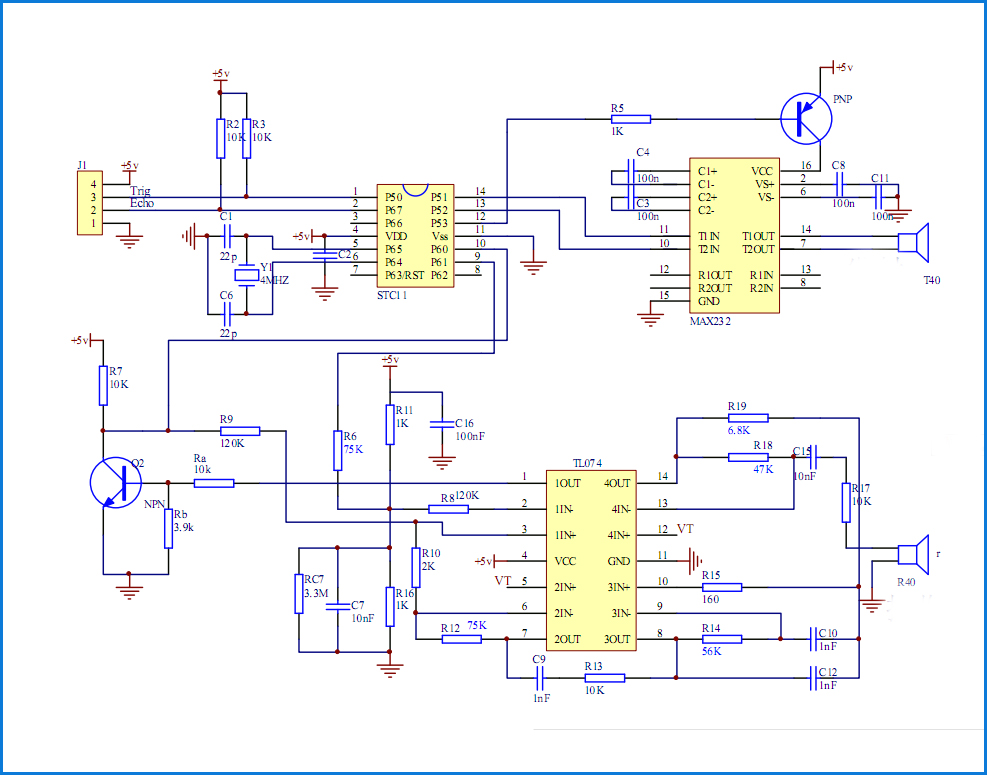
This is the schematics reference of the module:
and here’s mmy schematic for the sketch:
Here’s the Arduino Sketch I programmed for let the sensors work:
#include <NewPing.h>           // I'm using the NewPing Library

#define trig_L 3              // defining pins for both sensors
#define trig_R 2
#define echo_L 5
#define echo_R 4


NewPing sensor_lx(trig_L,echo_L,400); // creating one object for every sensor
NewPing sensor_rx(trig_R,echo_R,400);

int timer_L=29;    //mllisecond that must occur between two ping request for the same sensor
int timer_R=29;

float data_L,data_R;      //where the data is store before to be sent to Processing

unsigned int time_l=0;   //variables that contains the timestamp when last ping was done
unsigned int time_r=0;


void setup() {
    unsigned long time = 0;

    Serial.begin(115200);    // I start the serial begin for debugging
    Serial.println("test");  // I make a test print
    Serial.println("\n ");

}

void loop() {

  // when millis is called outside or inside a if statement it gives the timestamp relative the moment we have powered on the microcontroller

      if (millis() - time_l > timer_L){         // this a efficient way avoid the use of delay function, allowing a fine execution of both sensors
          time_l =millis();
          data_L = sensor_lx.ping_cm();
          Serial.print("sensor_L:");
          Serial.print(data_L);
          Serial.print("\t");
      }

      if (millis()- time_r > timer_R){
         time_r =millis();
         data_R = sensor_rx.ping_cm();
         Serial.print("sensor_R:");
         Serial.print(data_R);
         Serial.print("\n");
      }


}
With this sketch I was able to obtain the reading with the accuracy of 1 cm.
When you need a microcontrolled that does many things is very convenient programming WITHOUT the famous and over-used Delay(); function. That function in fact freezes the microcontroller for an amount of time: This is all time lost!
With this method of programming the if functions the program is continuing the execution of the program.
You can schedule your own routines in a simple and easy way, with few lines of codes.
The new ping library is also a well-optimized library, even though is more heavy than using just the DigitalRead (for echo readings) and DigitalWrite(for triggering the sensor) function.