This assignment is divided into two main parts.
Fisrt part is a group part that gives an overview about the moulding and casting, discussing materials properties, and giving a background about different characteristics to be familiar while dealing with it.
Second part is individual represented it, this includes an individual effort of designing, planning, bringing, and implementing moulding and casting in an application related to the final project.
In order to accomplish the learning outcomes of this assignment, I have divided it into four main stages:
Design stage, materials stage, preparations stage, and casting stage.

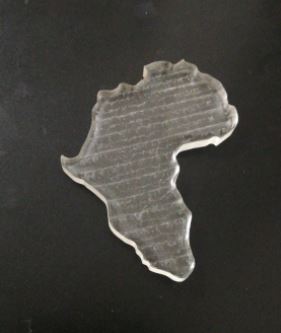
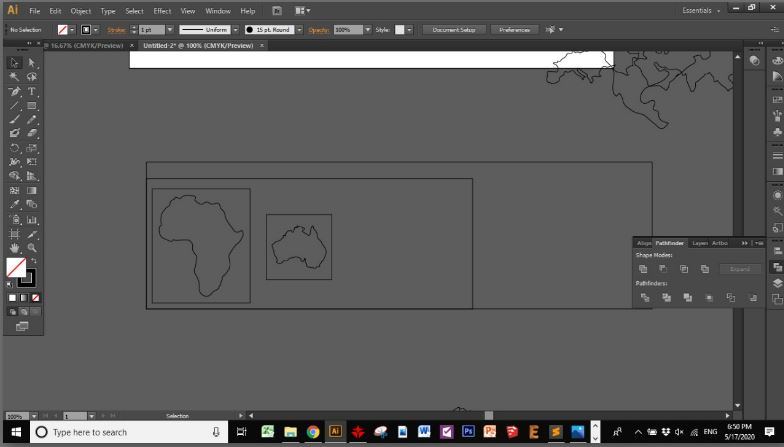
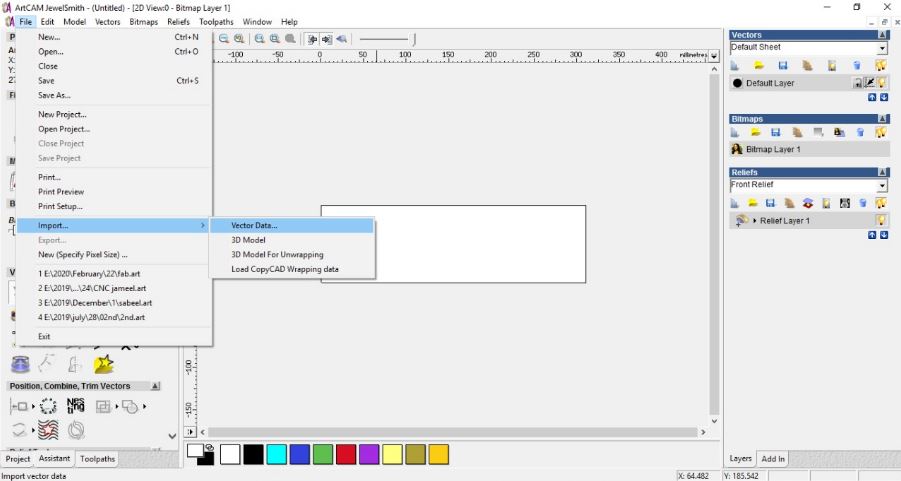
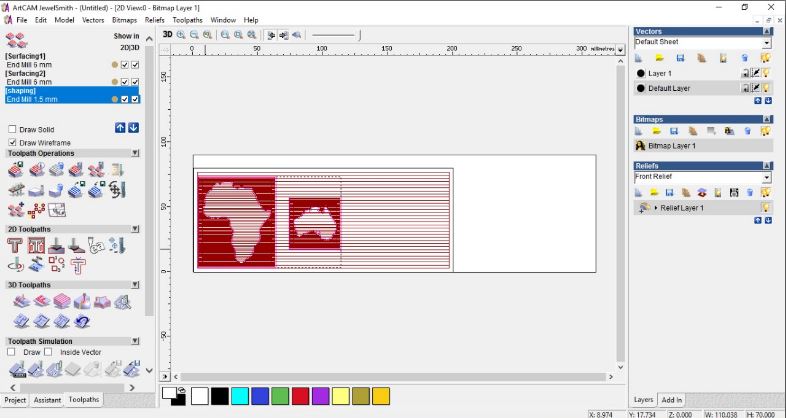
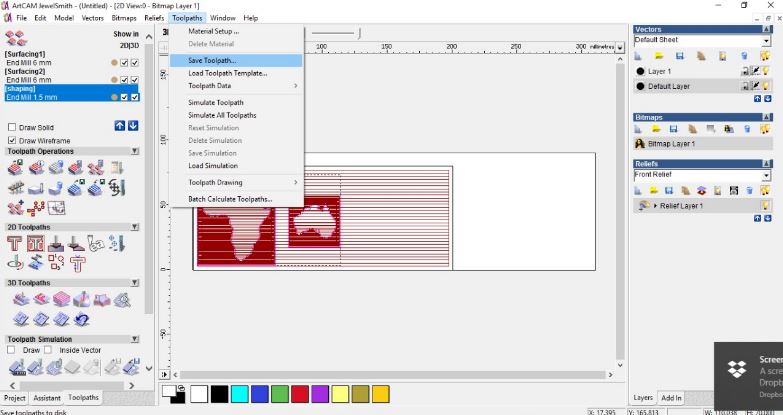
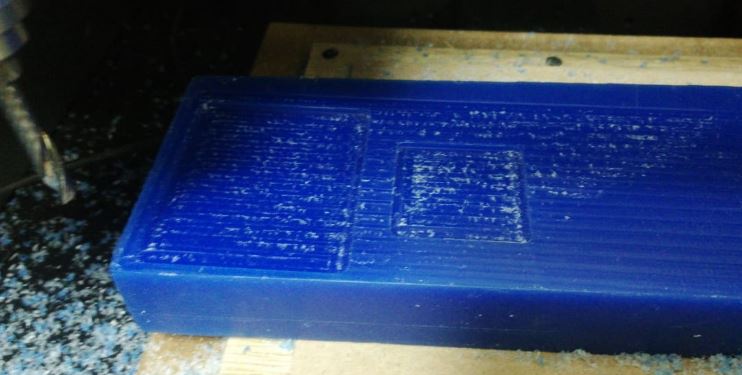
In this stage, the design of the object that will be molded is being drawn. Then, the design imported to the machine software to check on the operating details and test before going to machining stage. The figures below show the different design stages related to the design itself on adobe illustrator and showing the machining preparations on ArtCAM. In this stage I was making sure of design a 3D mould capable with the available machine and create a rough and finish toolpath for machining, including machine settings.
Import the files in ArtCam software
You can also find a good toturial for ArtCam here

2D design.DXF
ArtCam file
Toolpath1(for roughing material)
Toolpath2(for Finishing)
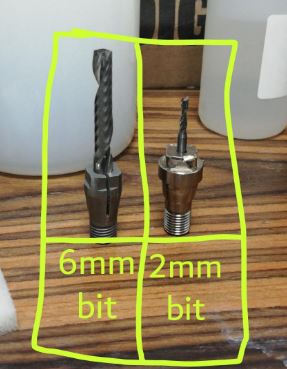
In this stage, I have brought the needed materials taking a background from the group assignment. The materials have been brought to be ready for the use in the next stage of preparing the materials to be machined and used. In last Fab conference I met a friend and gave me these bottles of the silicon from the company he works at, and I decided to try it in this assignment. The materials brought to be used are: machinable wax, machining tools, silicon with it hardener, resin epoxy with its hardener, spatula and cups, and other equipment used in the preparations as shown in the figures below.
(1)About the Machinable wax:
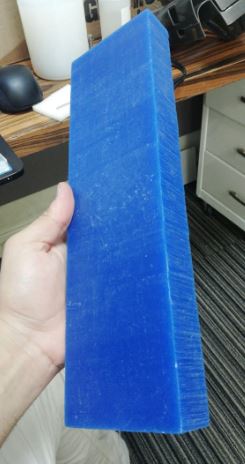
Machinable wax is an extremely hard wax that has been formulated to deliver exceptional machining properties including high resolution detail. Since it is harder and has a higher melting temperature than most other waxes, machinable wax can be machined, cut, or shaped using standard metalworking or woodworking equipment. High quality surface detail and dimensional accuracy are possible. Machinable wax is ideal for verifying CNC machining programs. Machinable wax is often used for precision lost wax casting. Machinable Wax is available in both blocks and cylinders. We stock the most commonly requested sizes and can usually provide alternate sizes on request.
Typical applications include:
The product is environmentally friendly and the shavings produce no harmful dust or hazardous odors. The material is self-lubricating and easy on tooling.
Technical specs
Extremely hard, hybrid plasticized wax blend. Recommended for high resolution CNC milling and turning. This wax is somewhat more flexible than our green or purple blend. Available in small, medium and large pieces. Excellent choice for parts with high but delicate components such as turbine blades. This wax is too tough to be considered carveable. Usually the first choice for lathe or turning applications. The Safety Data Sheet is available here.
For more information ...
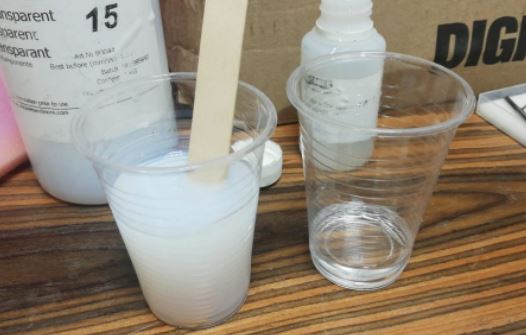
(2)About the Slilicon:
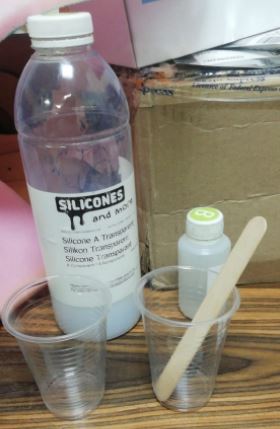
Silicone Addition Transparent 40 Fast (Hard):
The Silicone Addition Transparent are a very versatile 2-component (Platinum) Poly-addition pourable silicone which cures at room temperature. These silicones are quite liquid and the results provide a very high tensile strength. This is a skin safe and food grade silicone!
The transparent silicone are suitable for dyes in which it is important that the molded-object remains visible. In this way, one can make a mold very accurately and it is possible to cut the mould open inthe right place.
These silicones can also be used for food related materials, skin contact projects and even for the making of stamps or podological items.
Technical data:
Note: Pot life / de/mould time is highly dependent on temperature! At a higher temperature, the processing time and de-mould time are shorter.
Processing:
- The Silicone A and B component can easily be mixed by hand or by machine.
- Mix the A and B component carefully and in the indicated ratio (100 parts A and 100 parts B by weight) .
- Process the mixture within the pot life and demould only after it is cured complete.
- Alternatively, you can speed up the curing process by placing the whole mould in an oven.
//Please note that air bubbles will then have less time to escape the casting//
Extra information
Trapping of air bubbles can be prevented best by placing the silicone under vacuum immediately after mixing.
To prevent air bubbles, stir the A and B component well but slowly without stirring in air.
You can change the hardness (Shore) Readily by mixing the A components of the Shore 15 set and the Shore 40 set.
If you take for example, the same amounts of Silicone addition Transparent 15 A and Siliconen addition Transparent 40 A you will get a hardness of about Shore A 27.5.
Note: The percentage of the total B component must always be 10% of the total weight of the A component.
For more Information ...
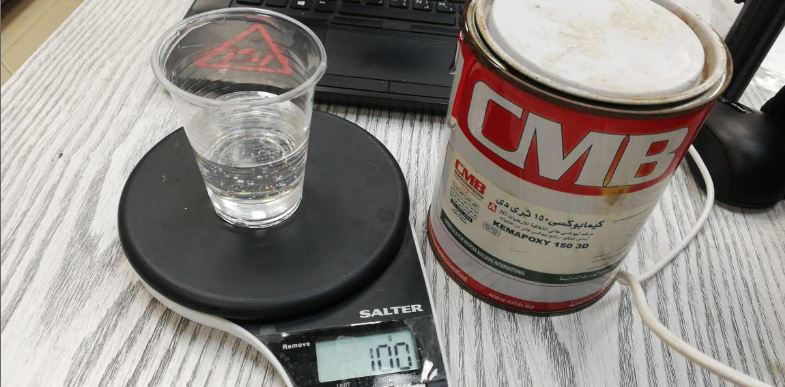
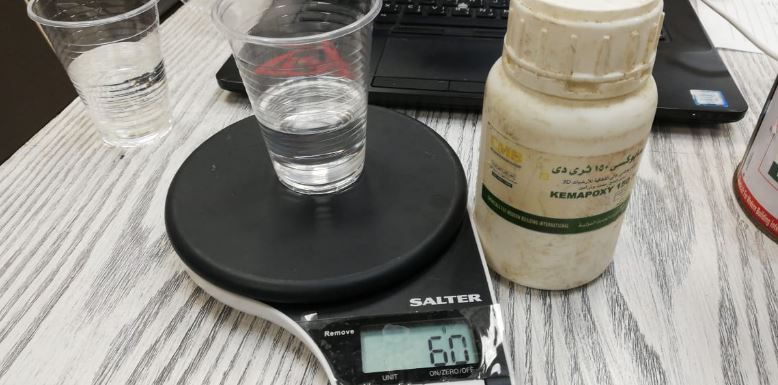
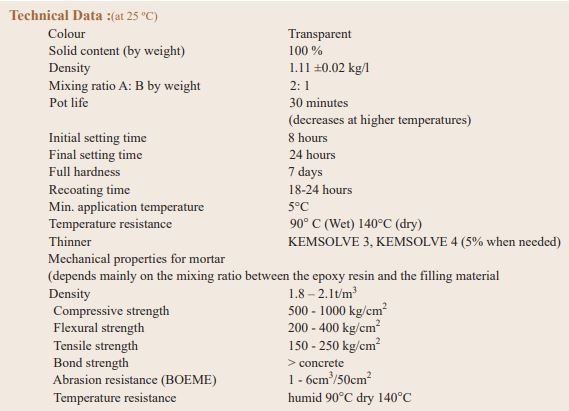
(3)About the Epoxy:

I bought epoxy from a local manufacturer CMB I searched for other manufacturers but couldn't find a company that provide epoxy for small scale clients and with enough technical resources available for their products.
Also you can find Material Datasheet her for further information
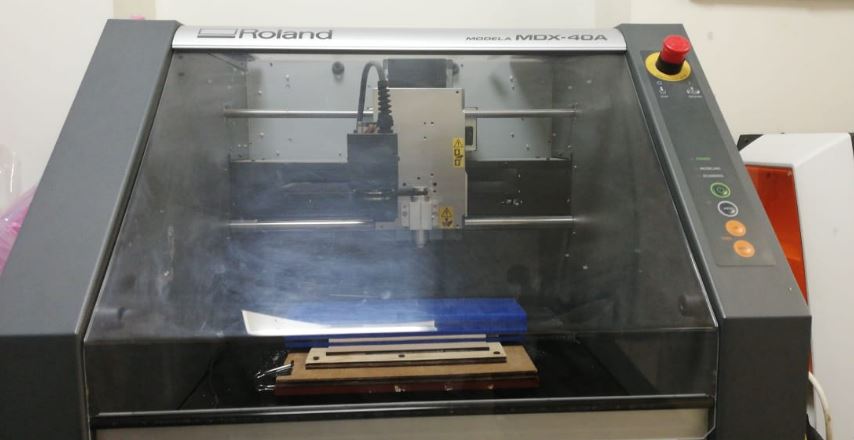
In this stage, the preparation for casting has been made in the flow as listed below:
using the 3-axes milling machine following the machining specs in the design stage.
The figures and videos below show these steps in making
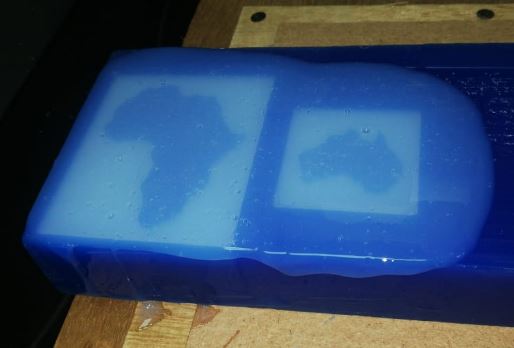
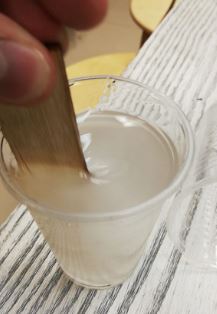
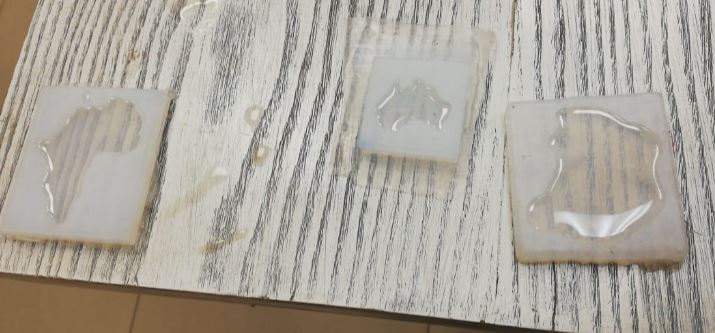
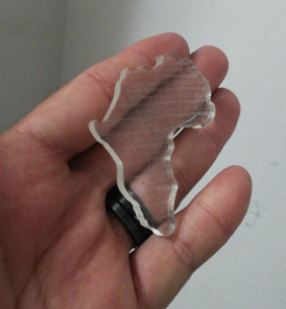
Now the mould is ready. In this stage, the resin epoxy has been poured in the mold made using silicon mix. The figures below show the epoxy while it is left to harden to be ready to use. And now the finished parts are ready to use.