Let's implement it on the 3D printer by Cura (Cura tutorial)
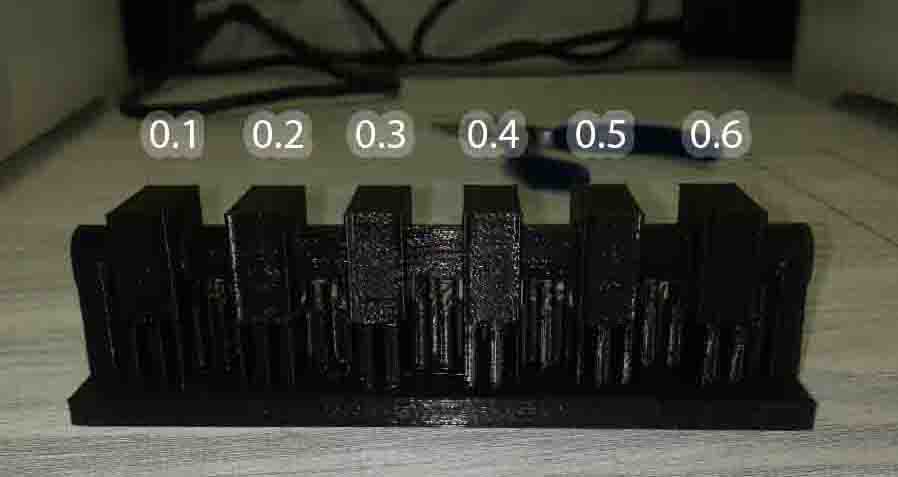
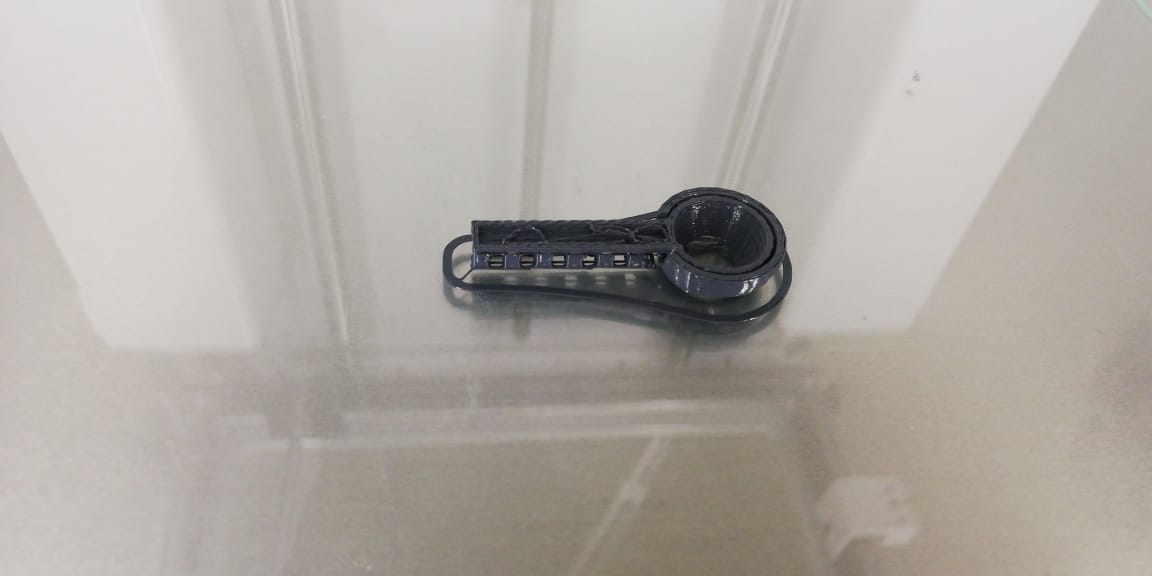
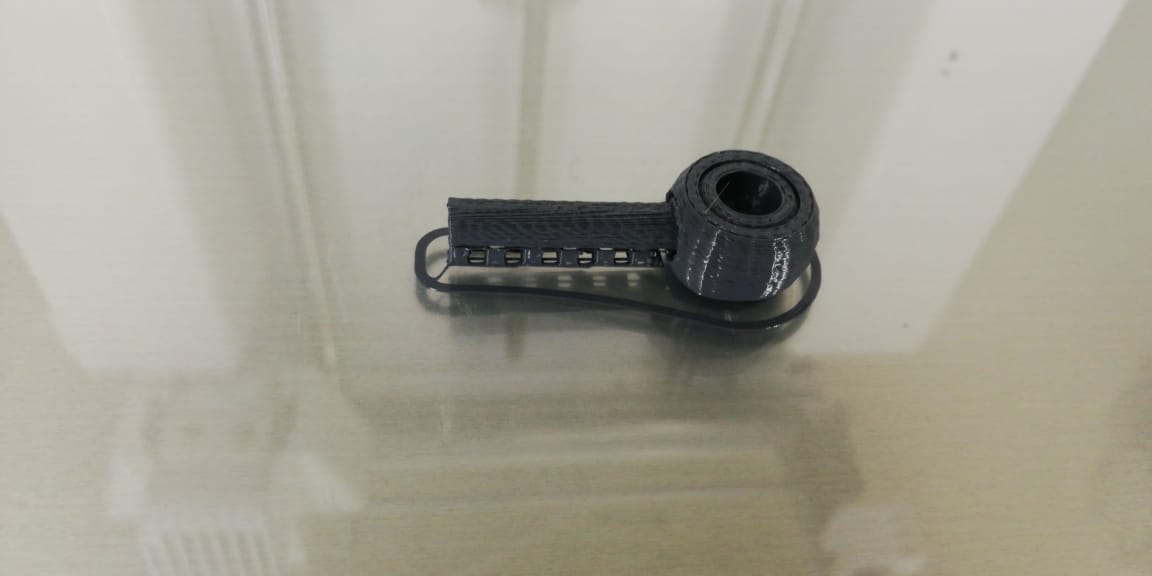
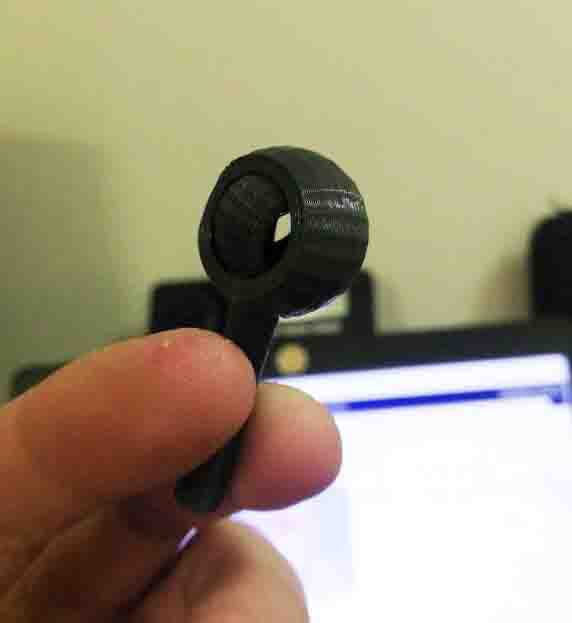
The output with the support, Then i removed the support, and each ring has a different tolerence spacing between the inner diameter and the bar diameter. ( number with millemeter)
All spacings allow the ring to rotate except (0.1, 0.2)
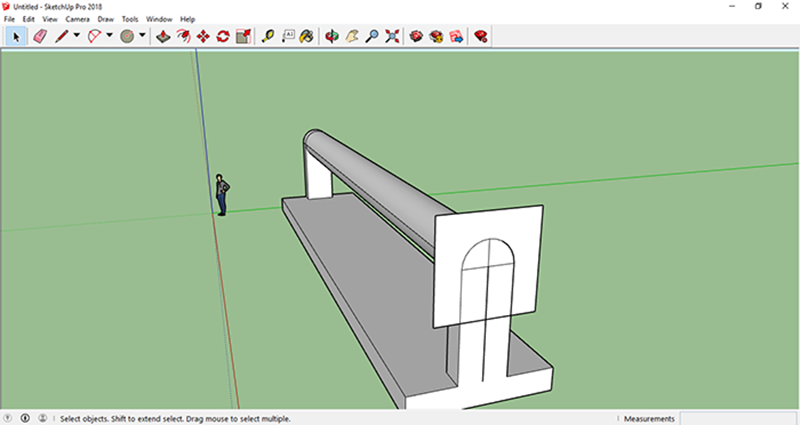
Trials to make a complex 3D shape that can't be implemented on CNC
Now let's implement the shape
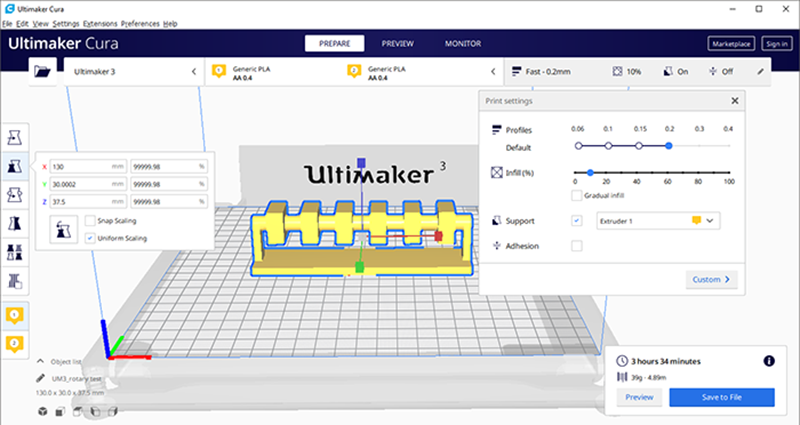
Cura is very interting software to work on, User frinedly interface, easy to learn and fast process to do .. you can find a good tutorial for it here
Cura steps:
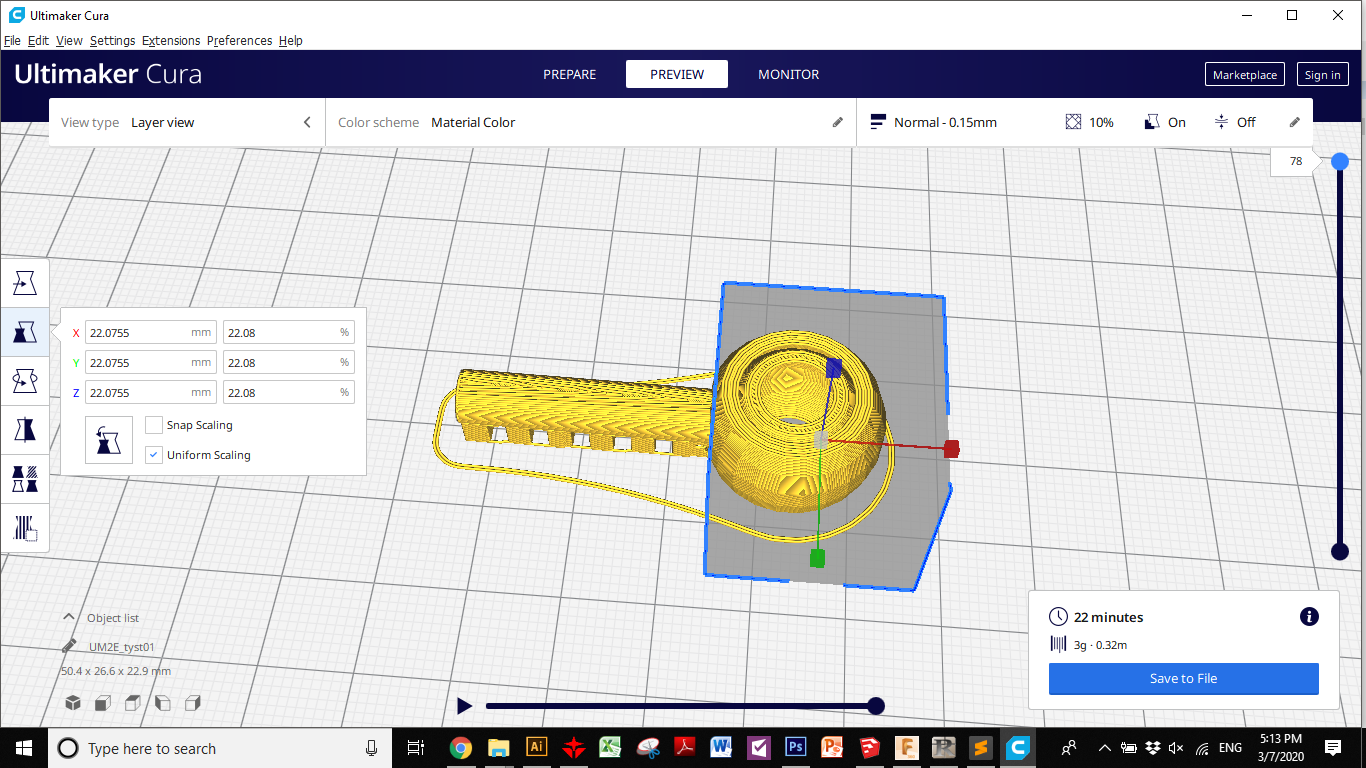
Opene the saved ".stl file" with Cura File>import (or drag and drop it on the cura interface)
Selected the type and model of the printer in my lab (Ultimaker2 extended+).
Select the kind of filament you are going to use (I chose PLA).
Choose to print in a normal layer hight of 0.15
Choose to print with 20% infill( or any infill persentage you want 10% for almost hollow or 90% almost solid.
Left all other defaults unchanged.
Click on slice, preview the item and the estimated time. Finally I save the file to the Printer's memory card.
Printing steps:
Connect the card to the machine.
Navigate with the roller button and select print.
Select the file with it's name (usually the last file loaded to the card be in the top of the list)
Let the printer prepare the file, heat up and do its work.
Make sure to monitor the printer every now and then to make sure nothing went wrong.
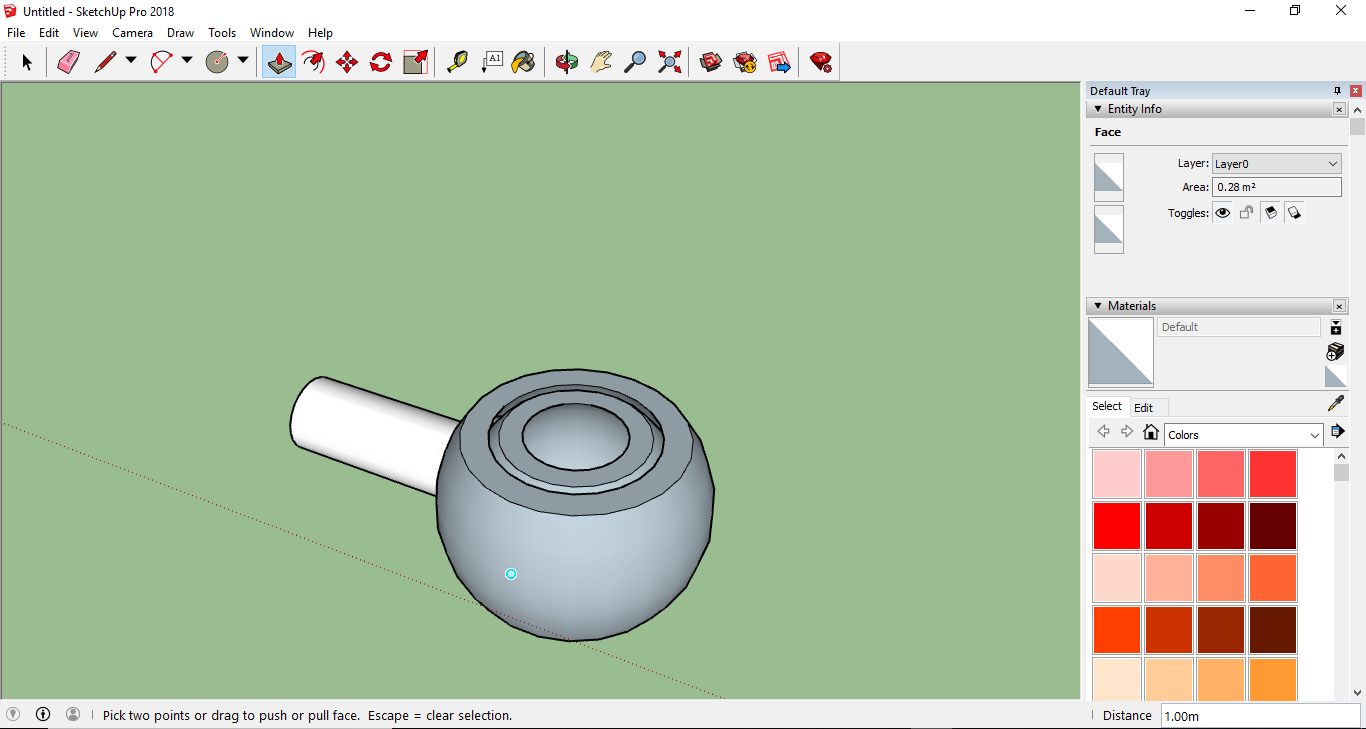
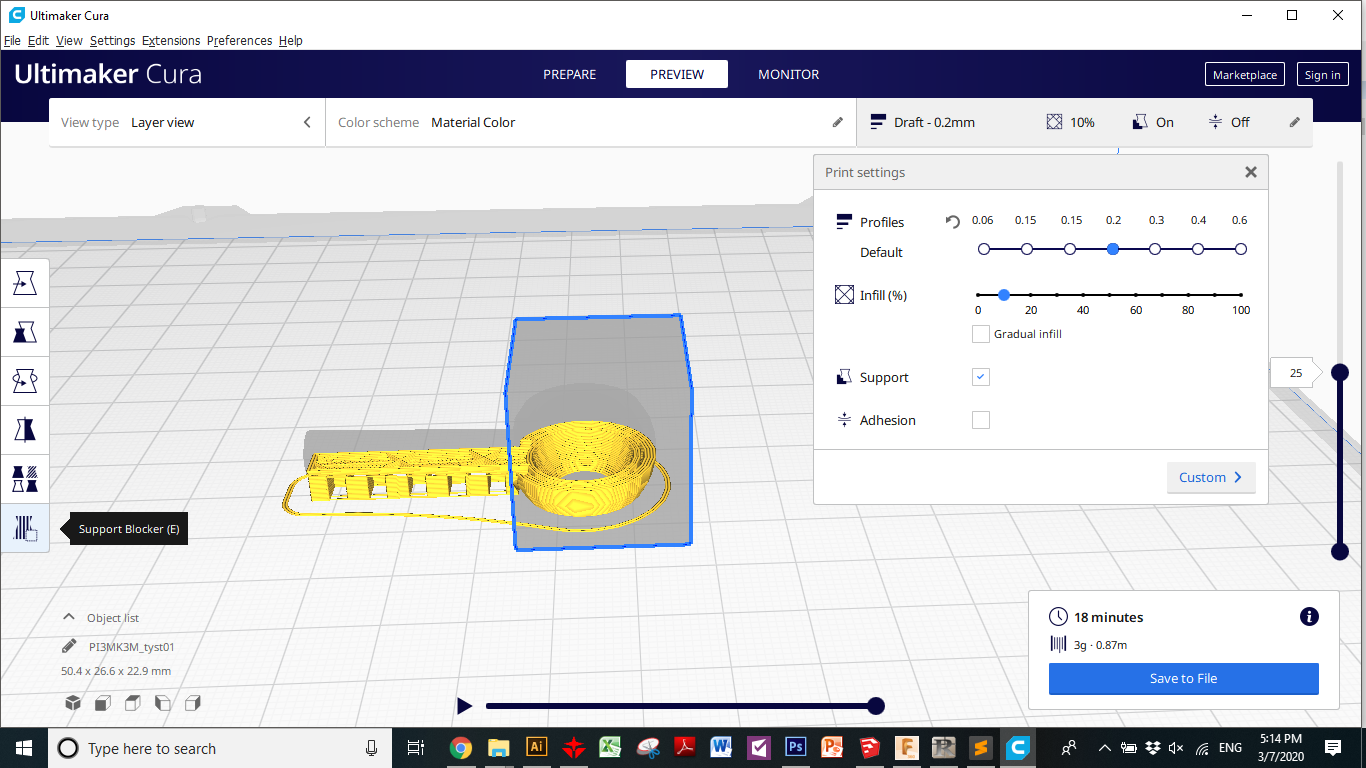
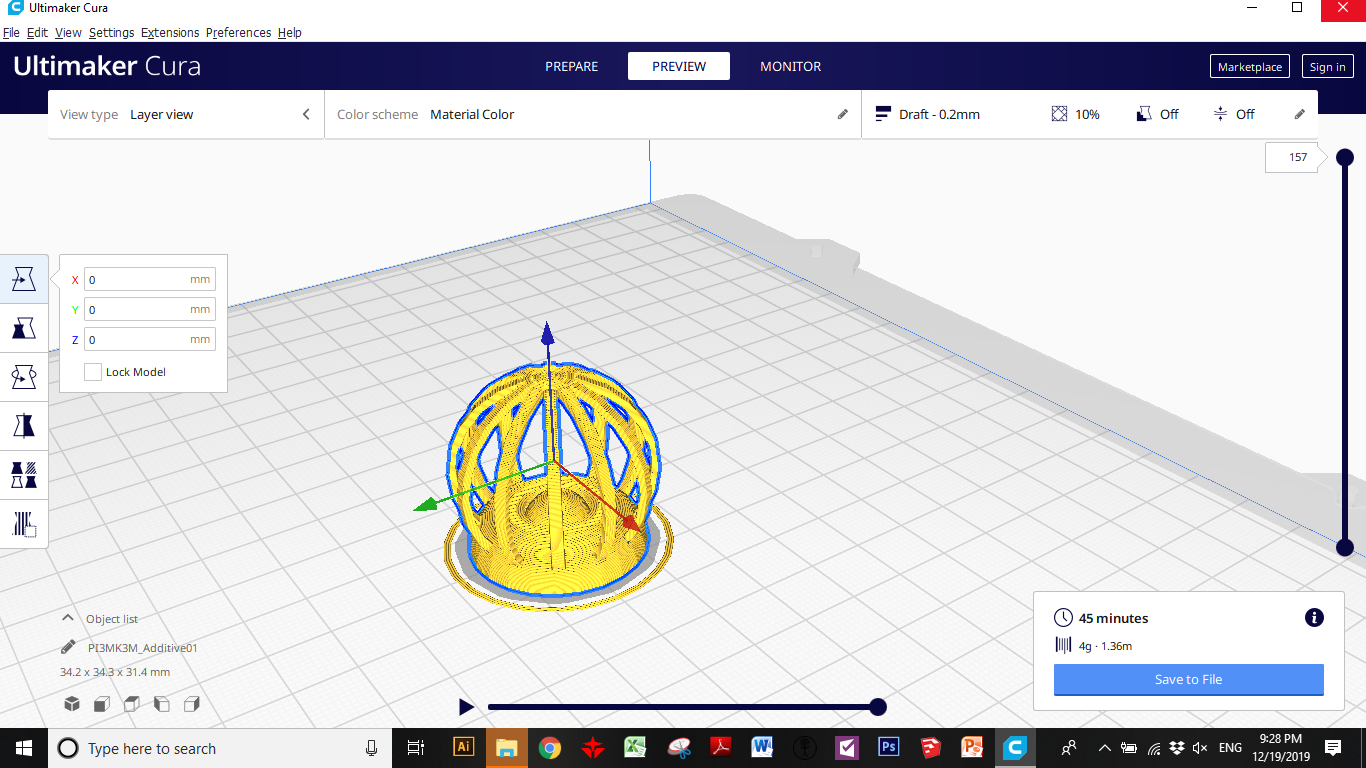
Here where i imported the file and have added a support blocker to enable the spherical shape to rotate and enable the floating part build with a support too. Then i press slice to start slicing after set all the settings we mentioned above
After pressing slicing you can see the layers and print view in Preview tab
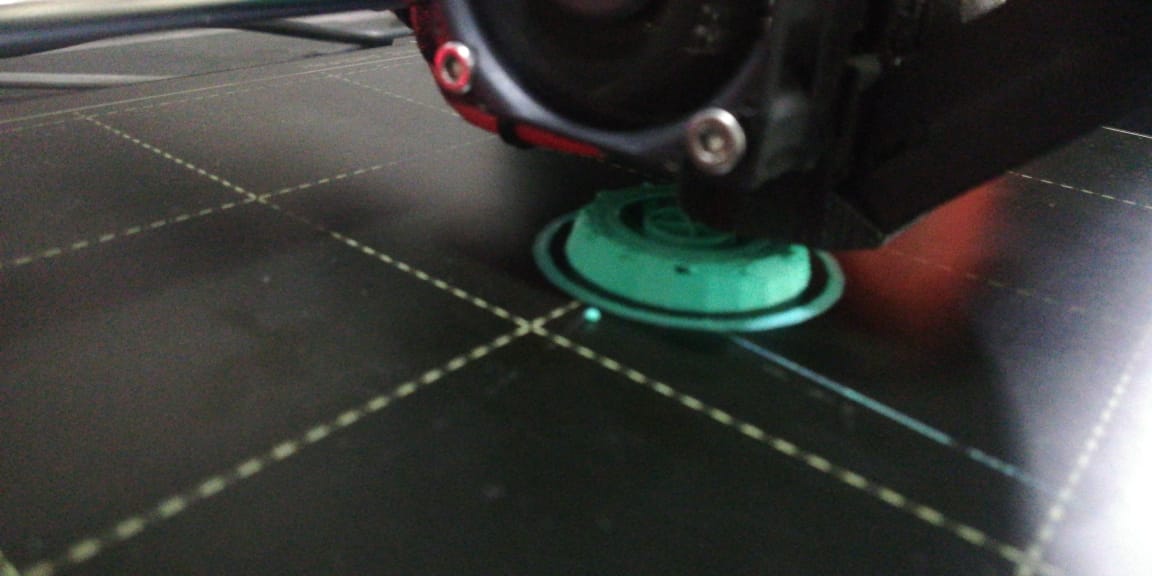
The results
I've paused the machine in the middle to make sure that the print and support is ok, and show you the infill.
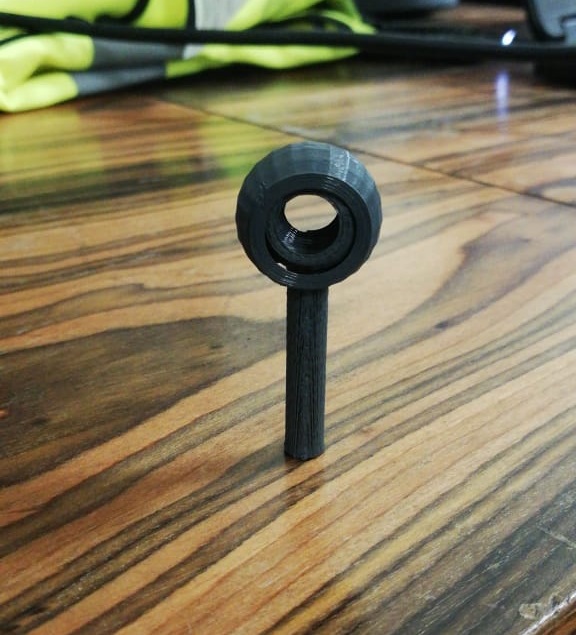
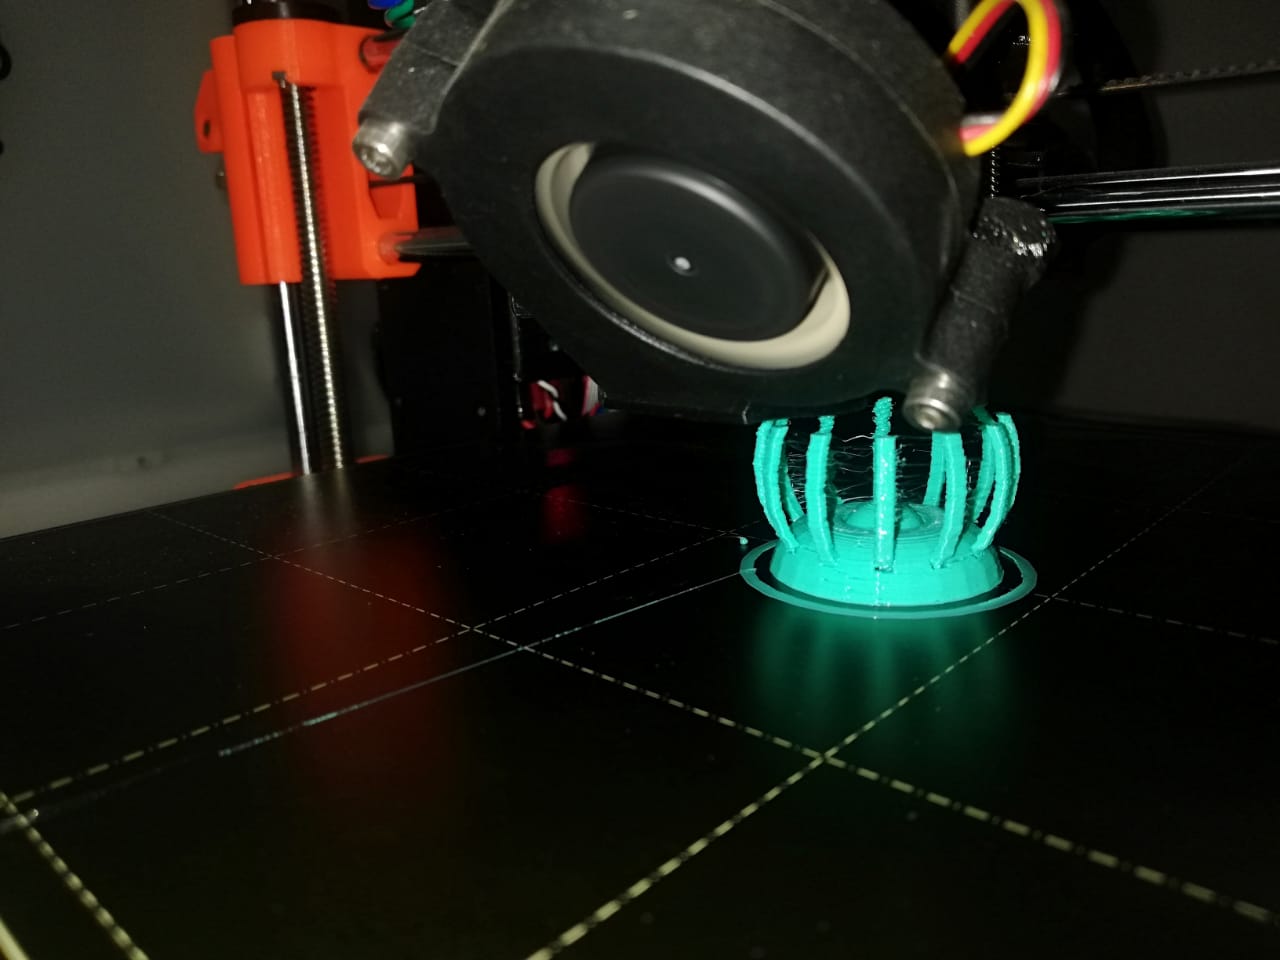
Now it's finished and you can see the full part with support.
I've removed the support adn now you can se the shape rotating
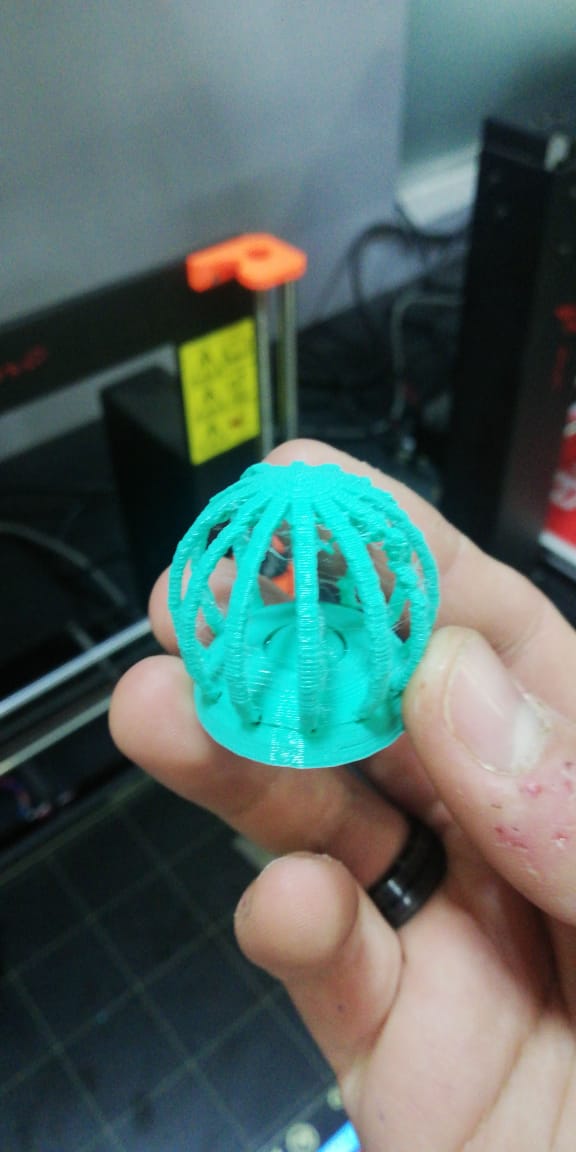
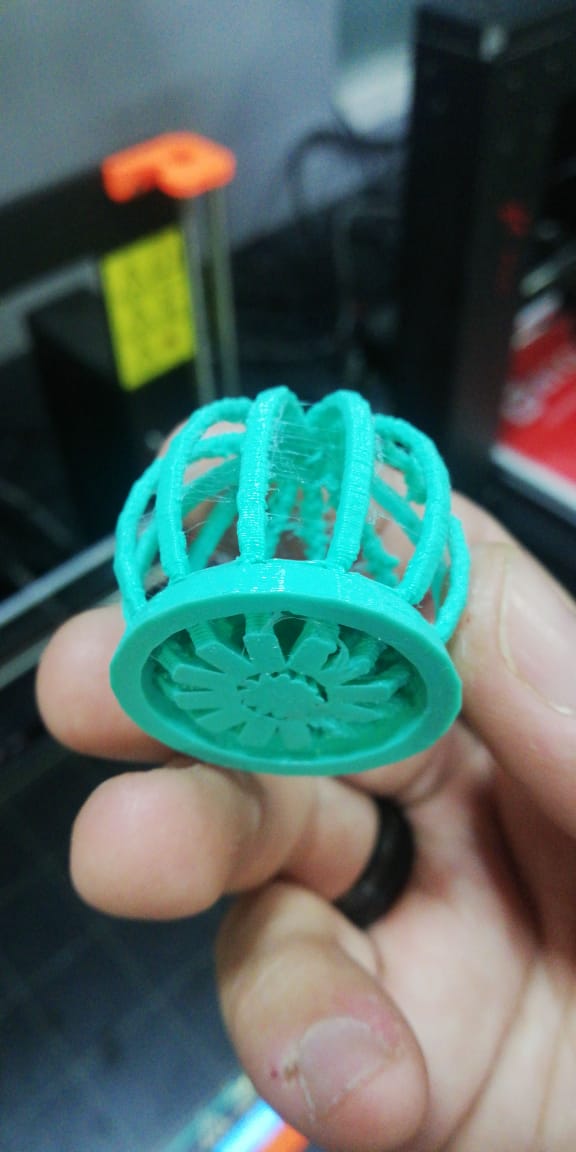
This shape can't be made easly by a subtractive technology.
But then i Figured out that i made the same design on of my coleage without any preparations, So i made another one for the review conflicts only
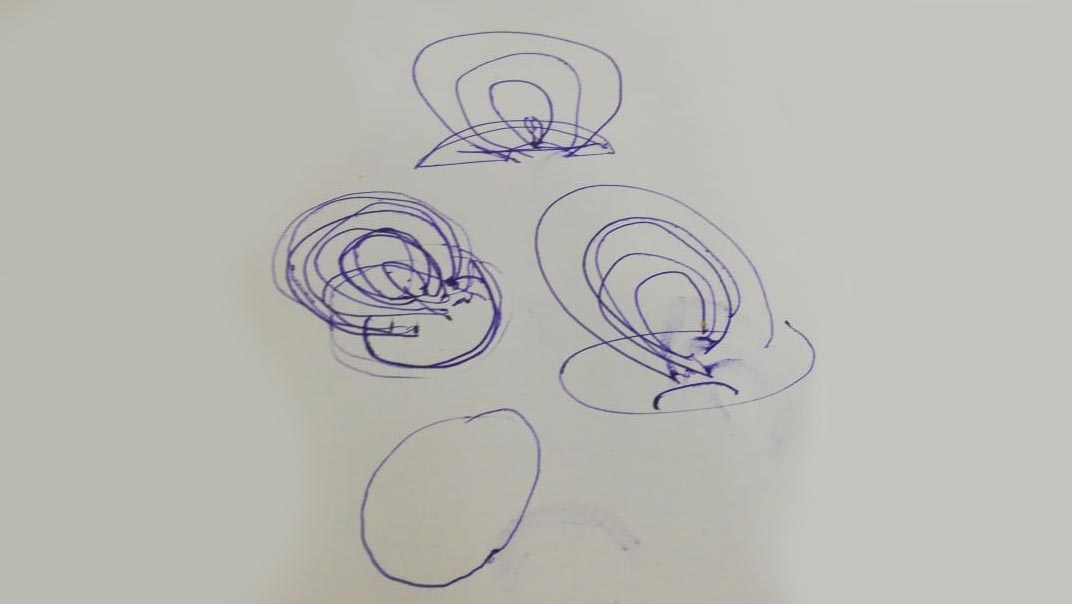
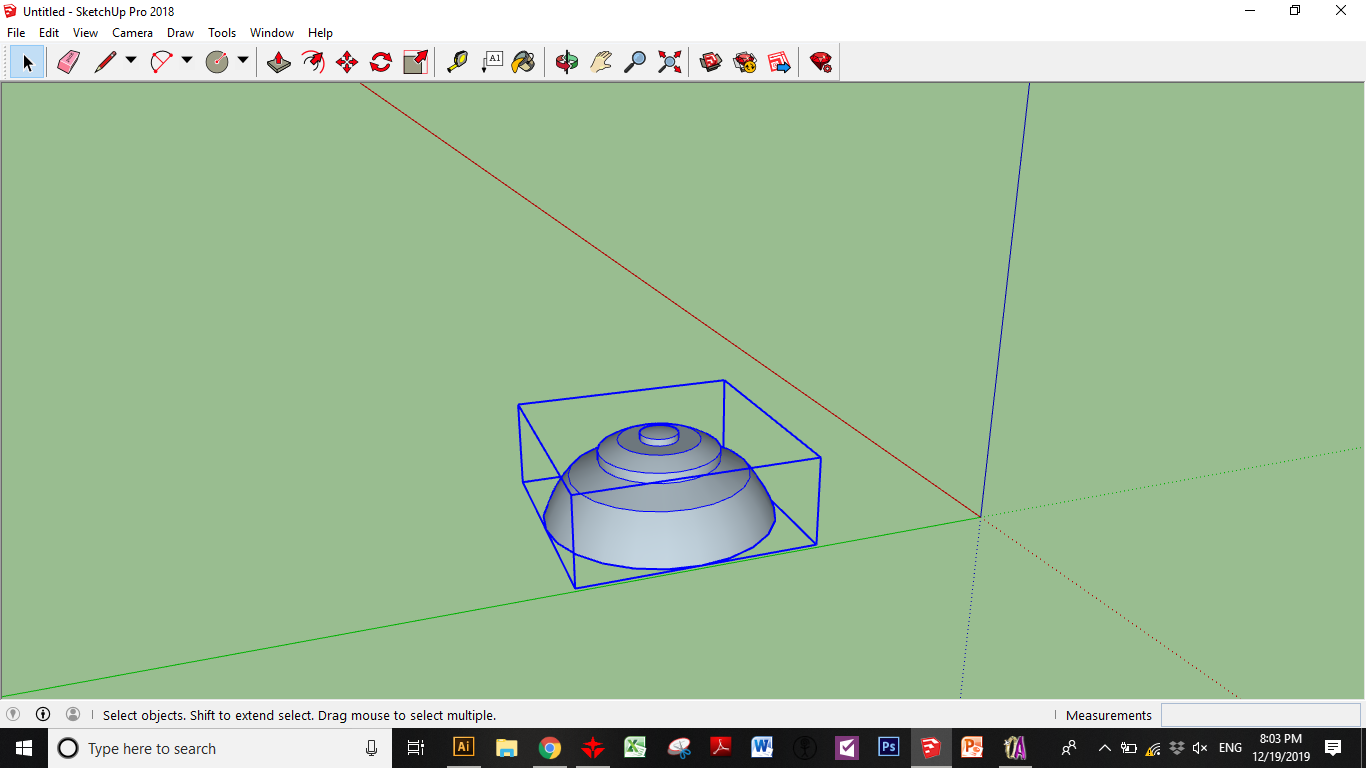
Making a sketch to get a shape idea, It's very abstract but i left the rest of deatils while i drawing on the software
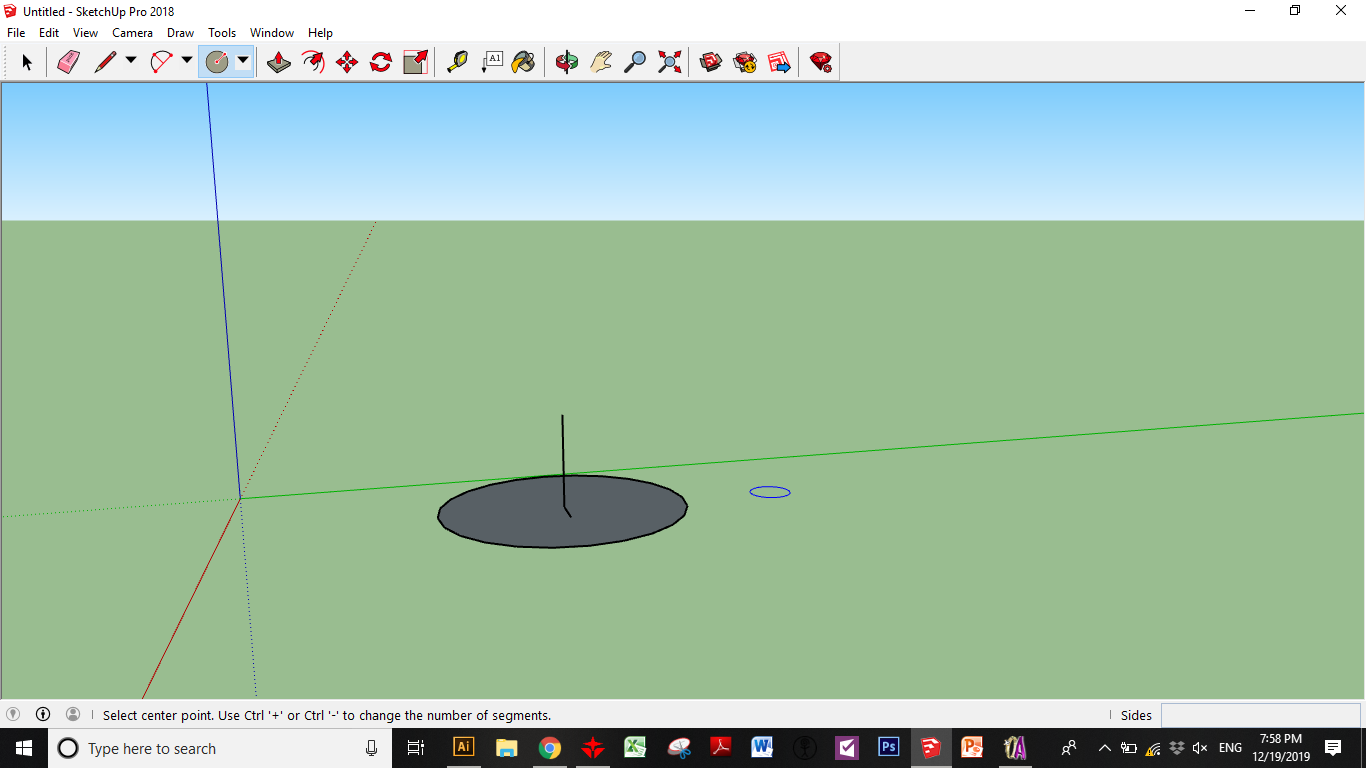
I made a base circle to start draw the base
I've used follow me order to make this rotated shape
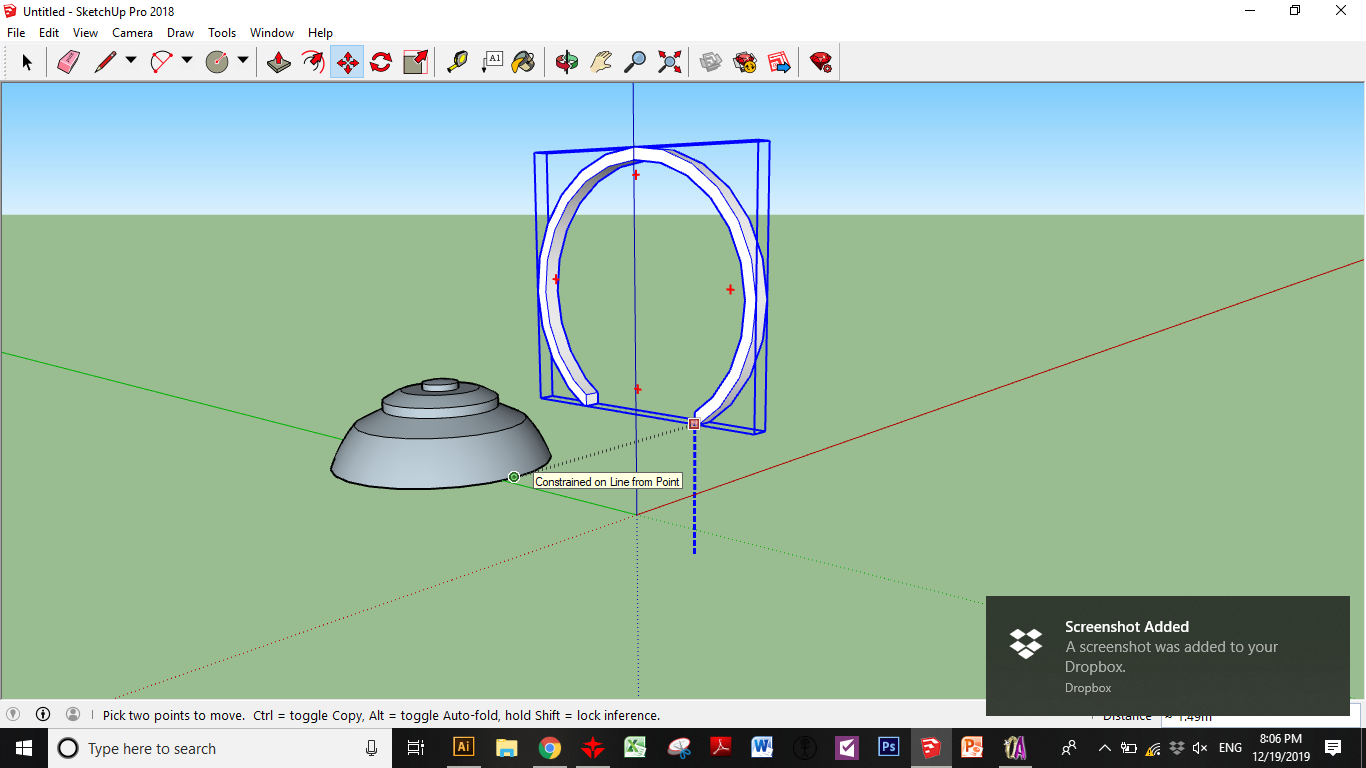
Here i trying to ade the parts above
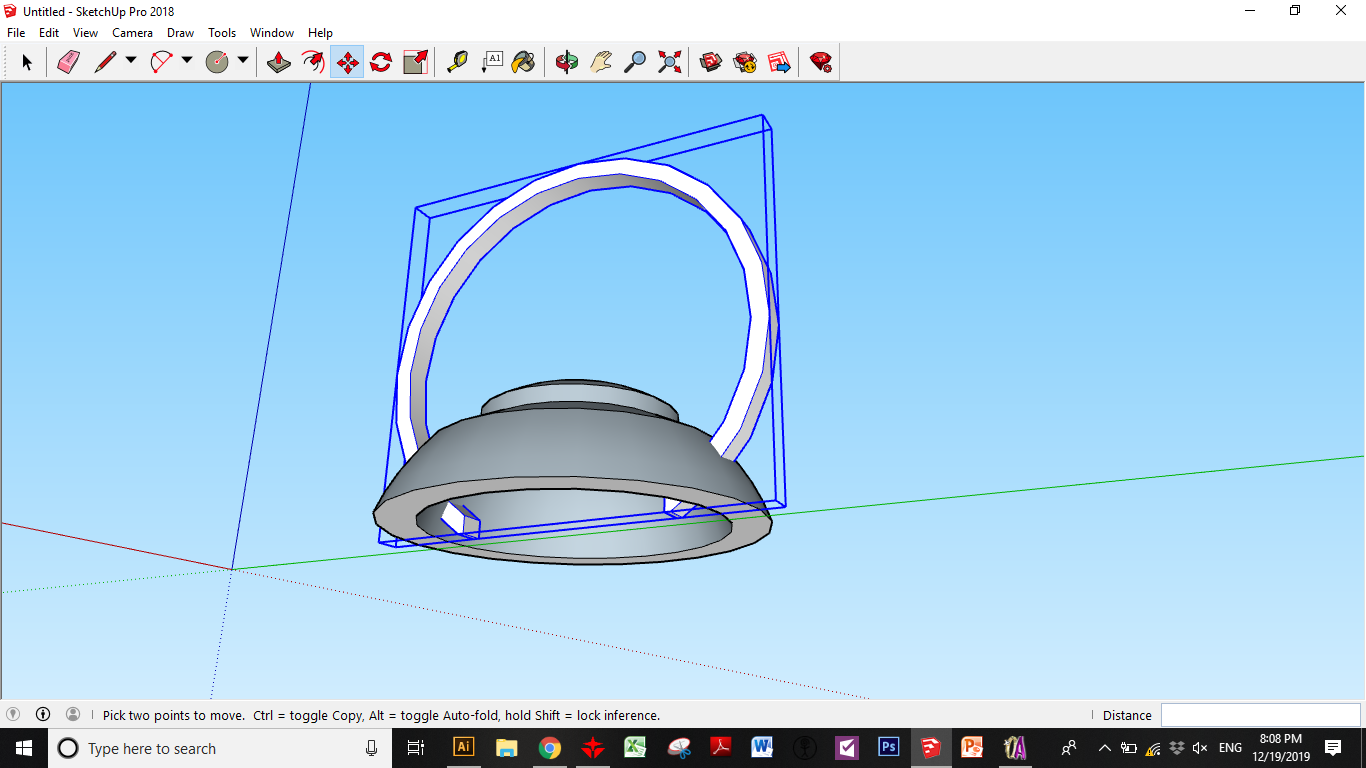
Let's put it inside the base and let's coppy it circularly
I can type the nummer of copies i want to make it circuralrly
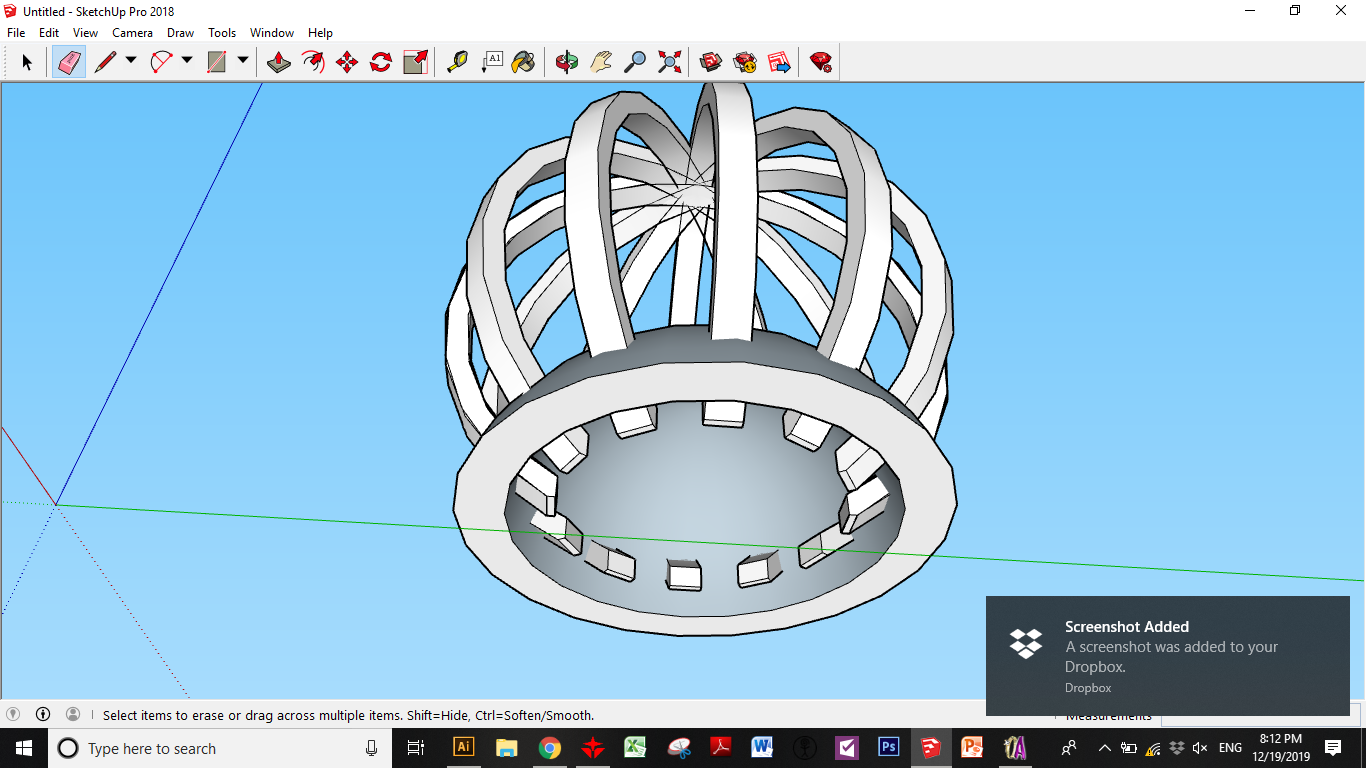
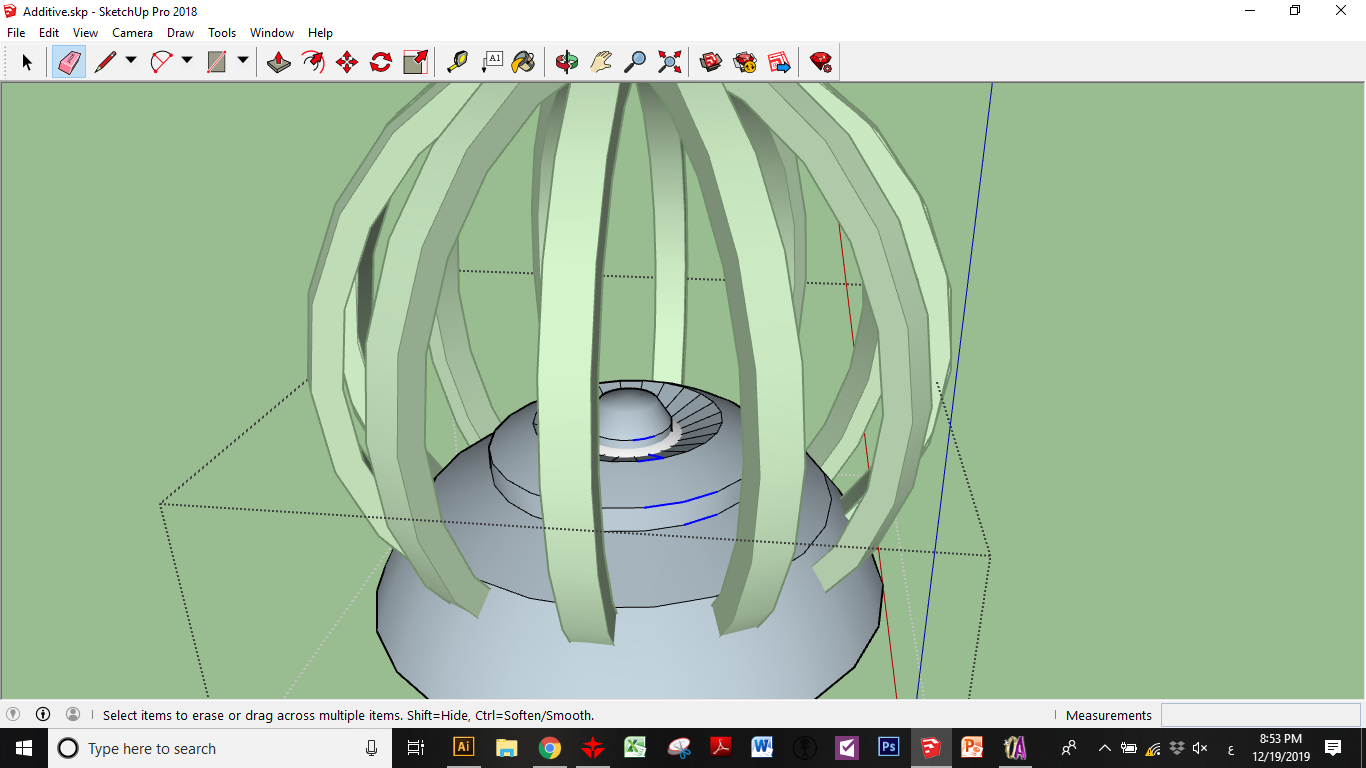
Here i removing a part from the base and adding somethong else.
I've added a sphere inside the base to make the part more dificult to made subtractivly
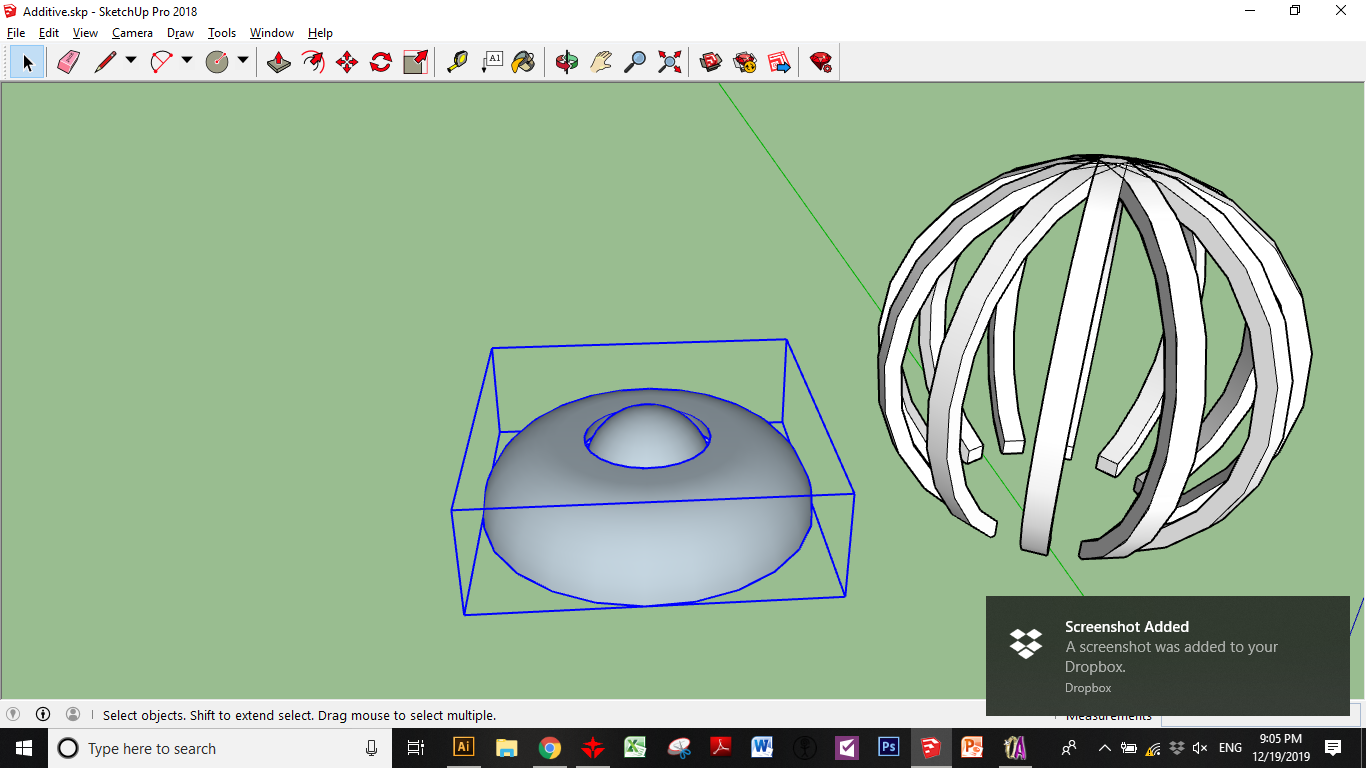
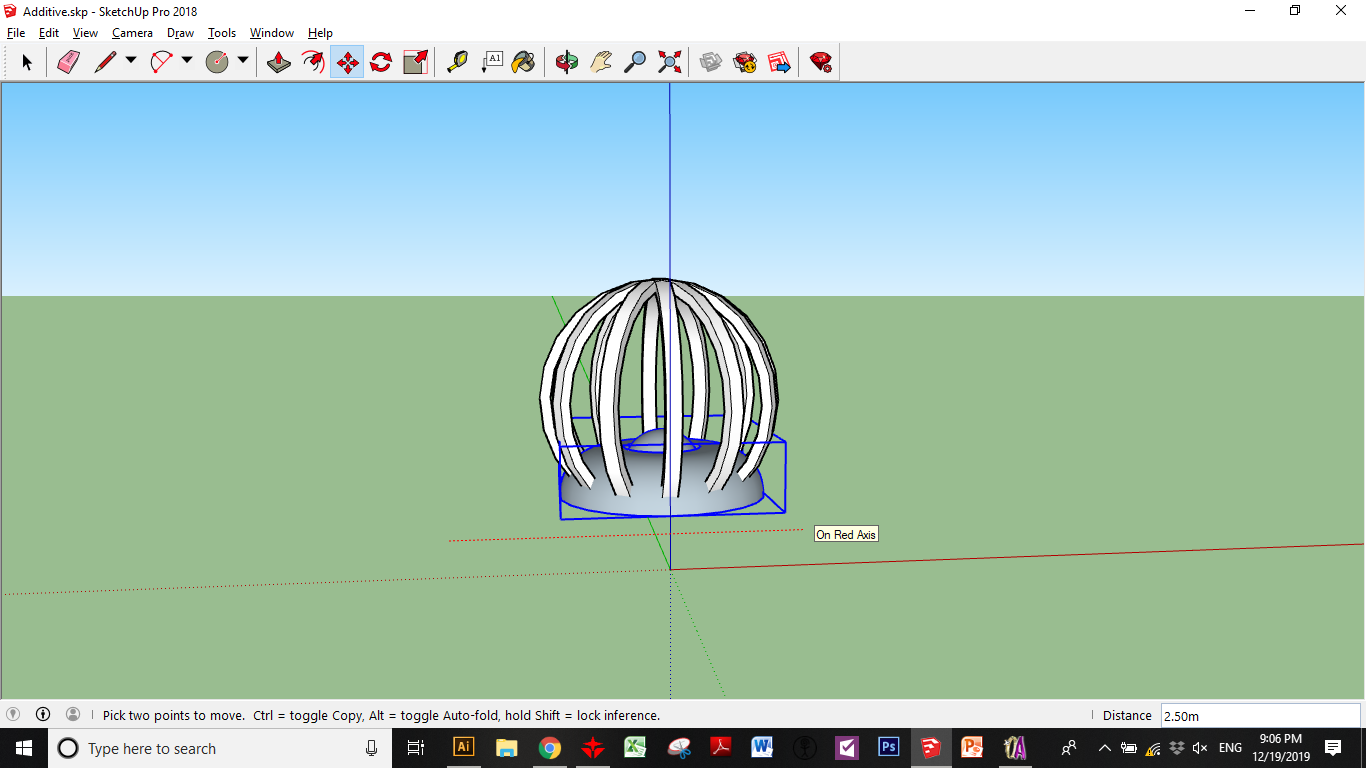
Here i trying to centerize the parts together
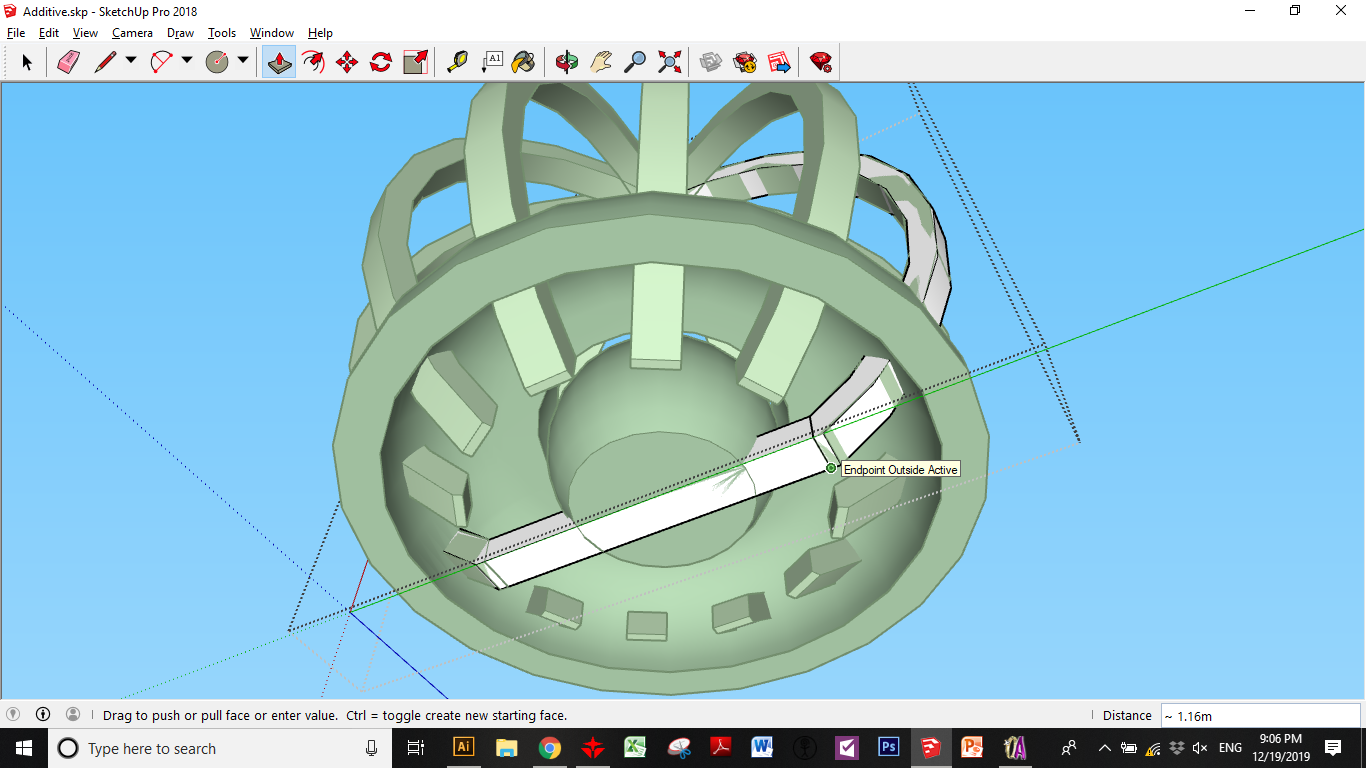
Let's go a little mad and add other details
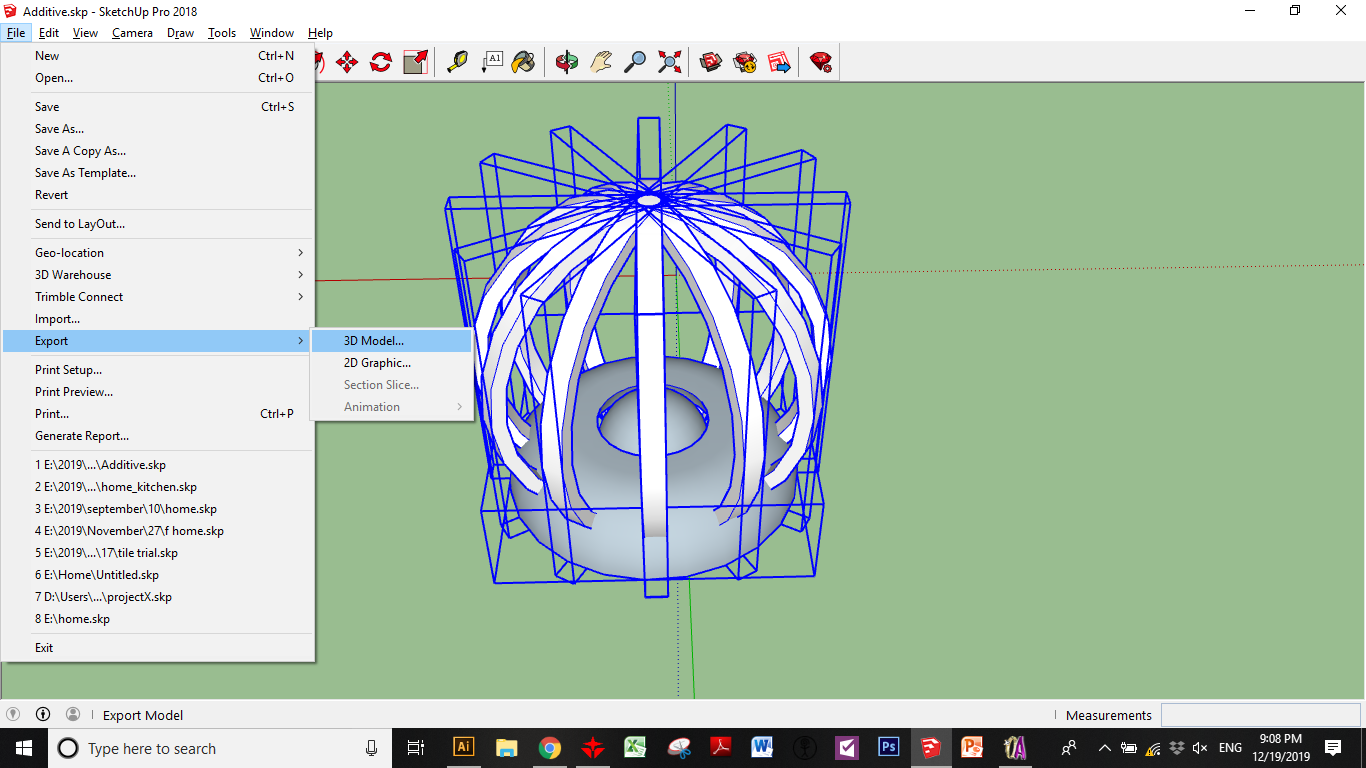
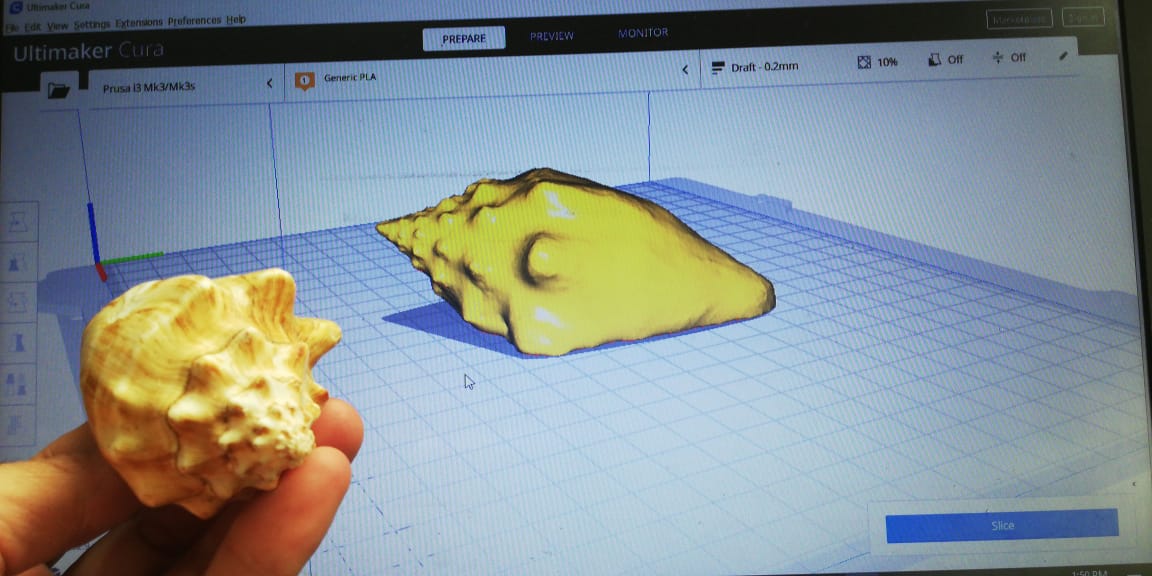
Exporting the file into STL extension for Cura
Drag, drop and slice in Cura
This time i will use another 3D printer, It's Prusa i3, Maybe it's not the same quality as ultimaker machines but it can impress you with an elegant printing process with a fast pace
First layers as i like to show you
Woring on the most difficult part and finishing
The final output from the top, Yes it's very difficult to subtract that!
The final output from the button, Yes yes it's imposible to subtarct that! = )
This part of the assignment takes a lot of time to reach a result. Alot of trials, Some bad applications/softwares
The list of failure applications (i wouldn't recommend):-
SCANN3D.
3D Scan Pro.
Easy 3D scann.
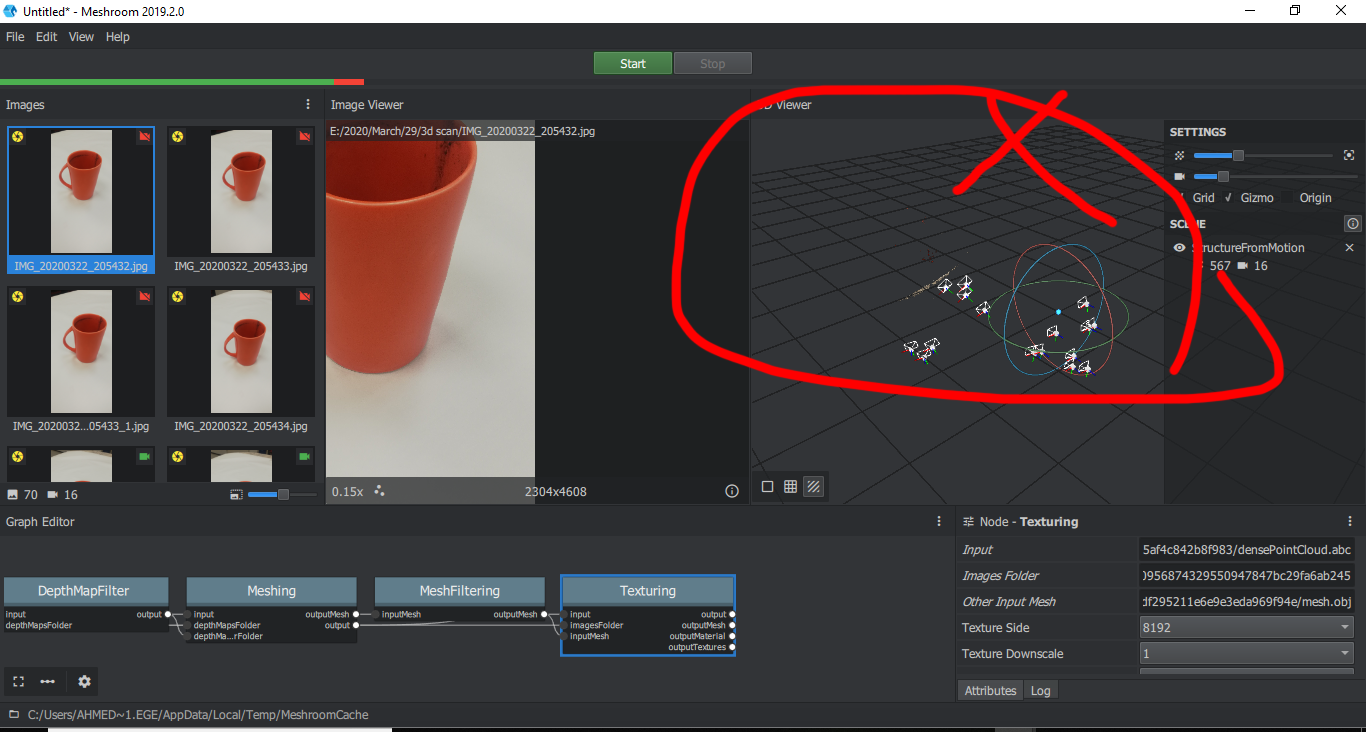
Meshroom
The reasons:-
Too complicated to deal with.
Needs a lot of preparartions and a big number of pics to get a good result.
Not for free or not easy to download/setup.
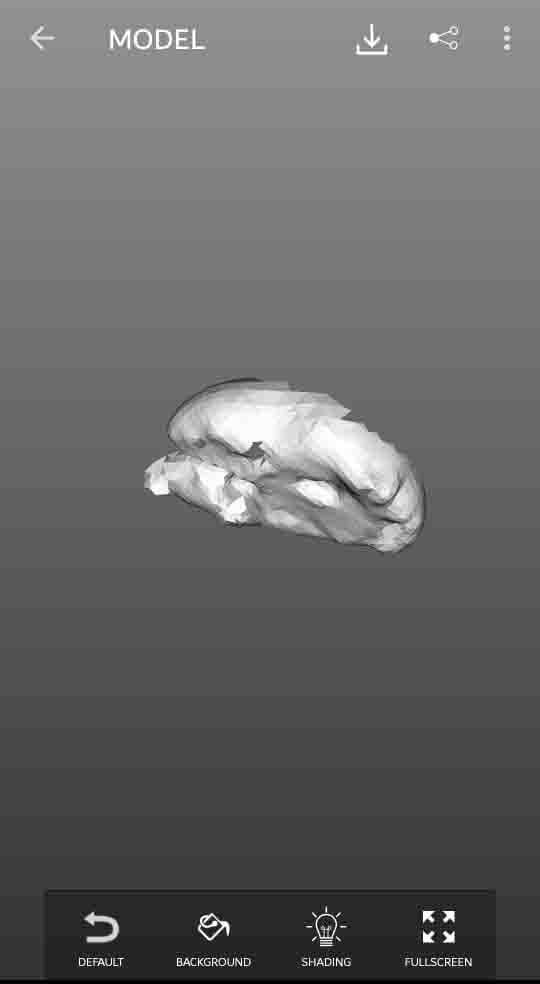
Failures
Now let's make it with the right one
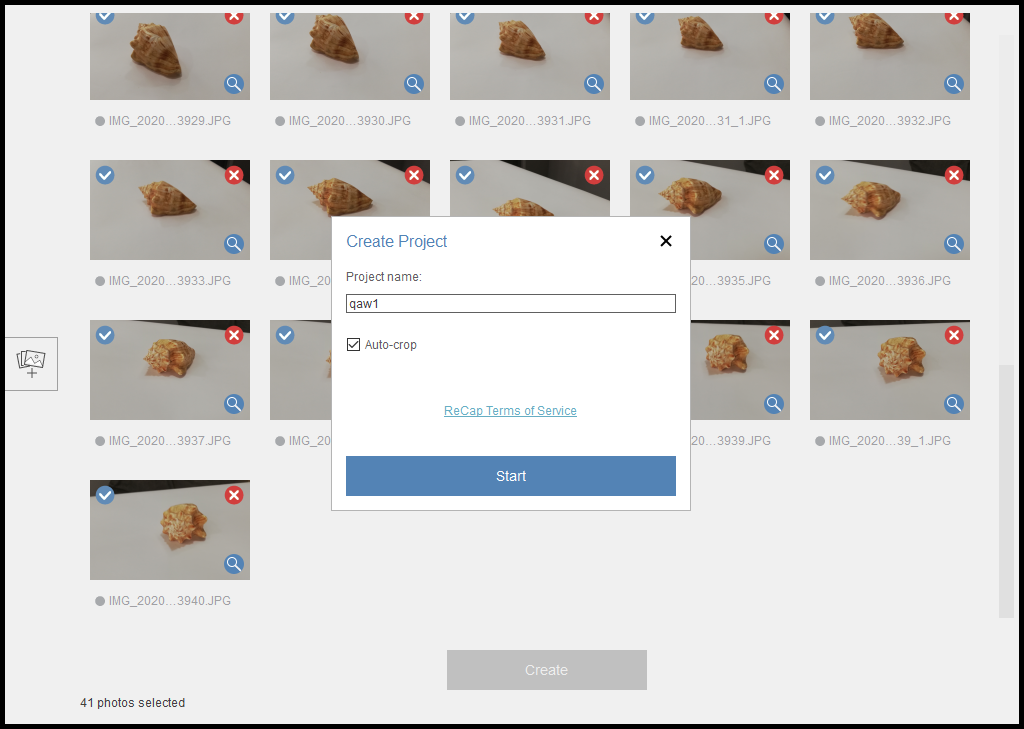
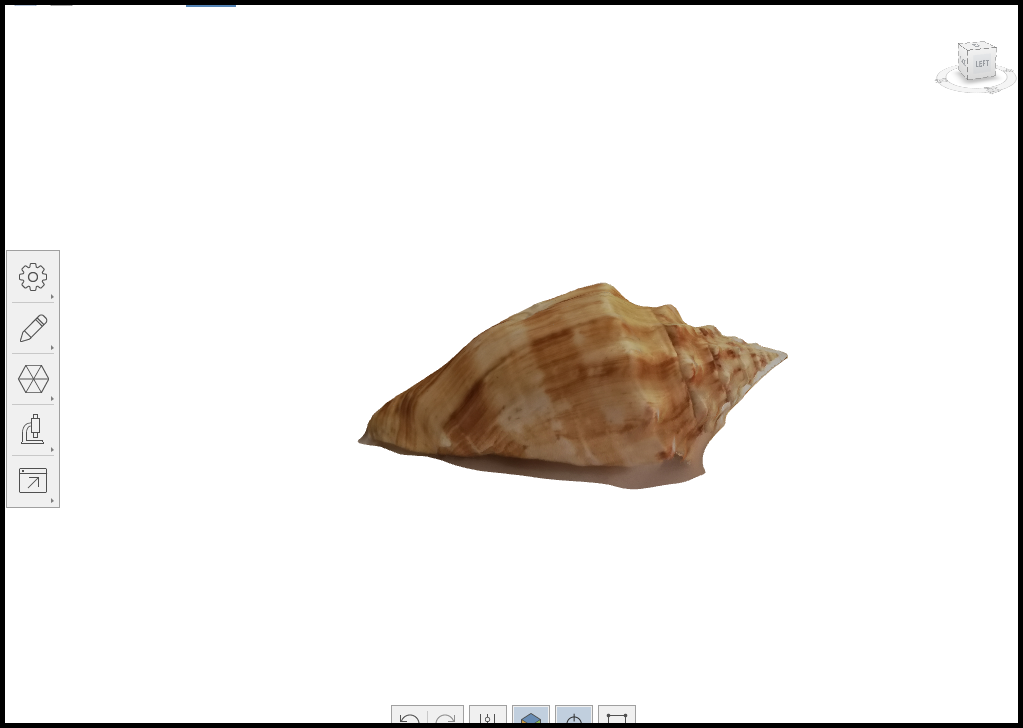
Finally i found the best software for this(the best for me at least), It's Autodesk ReCap and here the best and fast tutorial for it from downloading to exporting the files.
Steps i made
A tip: don't take the photos in a place that has a diffirent light sources which leave the shape without any shades ( the software needs the shades to recognize the shape sides and contours.
Importing pics to the spftware (just drag and drop)
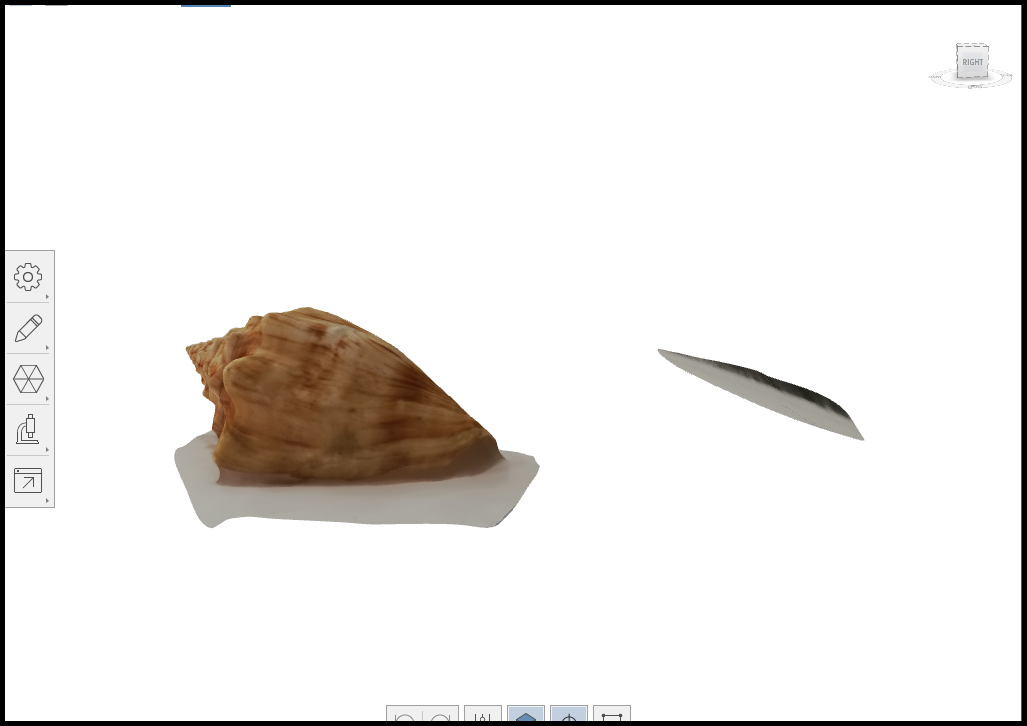
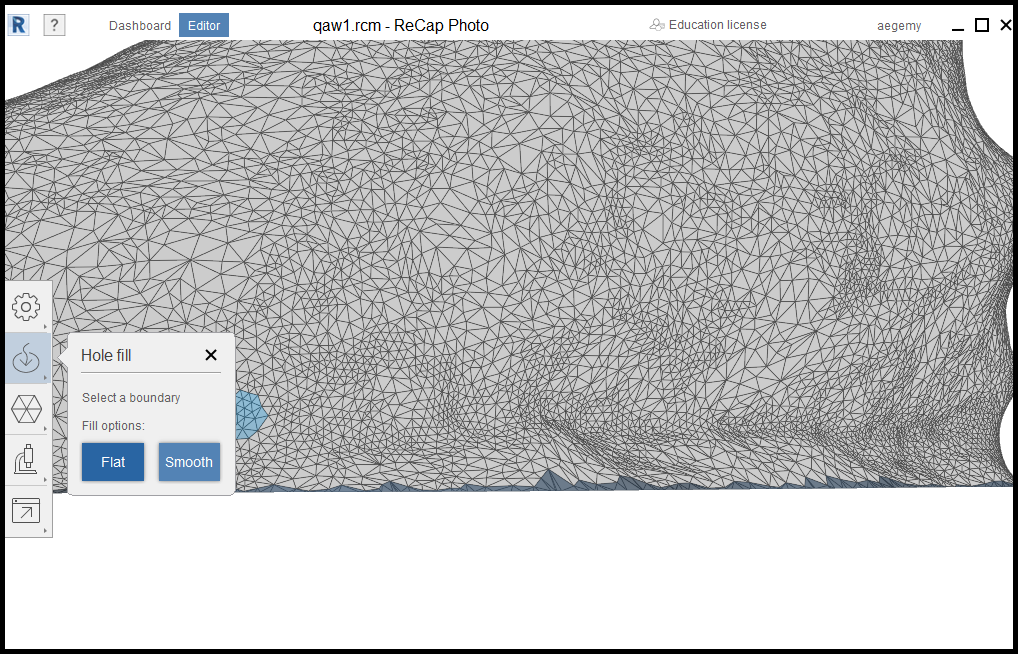
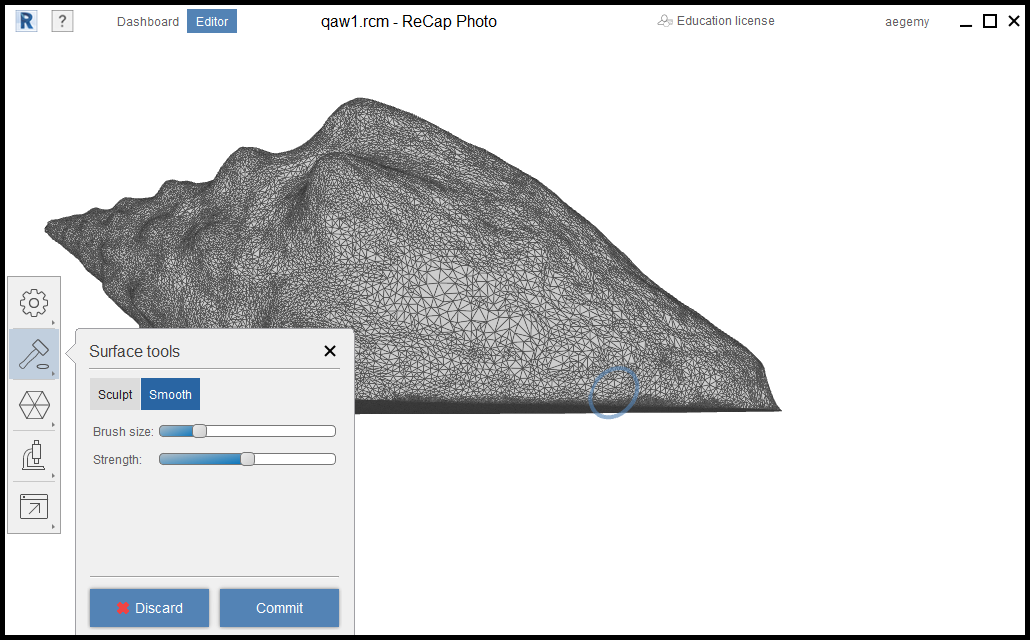
After the processing i've used the tools in the left to edits on the model(deleting the extras, edit in the mesh deatils or mesh quality)