First of all, I’m web developer, so I’m quite comfortable with Git, continuous integration principles, markdown, bash and static site generators. So for this assignment I tried to go to unknown lands with the aim of discovering some static site generator that I don’t know.
Also note that this site will also serve me as a blog, so it is available on the url of the Fabacademy : https://fabacademy.org/2020/labs/lamachinerie/students/alban-petit/, but also on my personal domain name : https://albanpetit.com.
Finally this is my second year of fabacademy, not having been able to validate the first, I preferred for this assignment to change SSG, so there is documentation for Docusaurus and for Hugo.
Enjoy 😄
Git
 Git is a version control system, widely adopted in the software development and opensource community. Multiple web platform provide free or lowcost solution to host repository : Github, Gitlab, Bitbucket…
More informations about git here
Setup git
Install git
Before starting anything, git is needed to deal with repository, so, let’s install it. Even if it’s installed, it’s a good idea to update it.
- macOs :
On Mac, the easiest way is to install it with
Xcodecommand line tool, you can do this simply by trying to run a git command from the terminal :If you don’t have it installed already, it will prompt you to install it.git --version - linux:
On linux you can use
apt, it’s a command line interface for the package management system on debian based distribution, so with a terminal, run :sudo apt update sudo apt install git - windows ( best idea is to install linux )
Managing windows software can be really annoying and time-consuming, some software can resolve this problem like
chocolatey, so with powershell :Now you can install git, also with powershell :Set-ExecutionPolicy Bypass -Scope Process -Force; [System.Net.ServicePointManager]::SecurityProtocol = [System.Net.ServicePointManager]::SecurityProtocol -bor 3072; iex ((New-Object System.Net.WebClient).DownloadString('https://community.chocolatey.org/install.ps1'))choco install git
Generate SSH key
When you work with git, a good idea to commit a small amount of modifications so that you can roll back anytime, if something goes wrong. But with a basic configuration each time you want to push a commit gitlab or github requires authentification. I’m a lazy guy, so I use SSH, ssh-key security is a very good way to authentify everywhere. ssh-key are based on asymetric cryptography protocol. Which mean that when you generate a key, the program gives you a public key which can be shared with every one, and a private one which shouldn’t. When a website want to check you’re identity it can send a bunch of data encrypted using your public key, then to decrypt the data, the private key is needed, in theory only you’re computer should be able to decrypt the data and autentify. To create a new SSH key pair:
- Open a terminal
- Generate a new SSH key pair:
ssh-keygen -C "email@example.com" - Copy the ssh public key :
- macOs :
pbcopy < ~/.ssh/id_rsa.pub - linux (require xclip**) :
xclip -sel clip < ~/.ssh/id_rsa.pub - windows git bash :
cat ~/.ssh/id_rsa.pub | clip
- macOs :
- Put the
SSHto gitlab or github parameters
Tips : Command to install xclip, debian/ubuntu,
sudo apt install xclip
Define git user parameters
Git indentity
The first thing you should do when you install Git is to set your user name and email address. This is important because every Git commit uses this information, and it’s immutably baked into the commits you start creating:
git config --global user.name "firstname lastname"
git config --global user.email email@example.com
You need to do this only once if you pass the –global option, because then Git will always use that information for anything you do on that system. If you want to override this with a different name or email address for specific projects, you can run the command without the –global option when you’re in that project.
Git default editor
You can configure the default text editor that will be used when Git needs you to type in a message. If not configured, Git uses your system’s default editor. If you want to use a different text editor, such as Emacs, you can do the following:
git config --global core.editor emacs
On a Windows system, if you want to use a different text editor, you must specify the full path to its executable file. This can be different depending on how your editor is packaged.
Review the configuration
Git provide a command to check the configuration settings :
git config --list
Git command line
Here is a list of basic git command to interact with repostories.
Git clone
git clone allow to make a local copy of an online repository. See below how to use it :
- Open a terminal
- Point at the folder of your choice :
cd /ideal/path - Clone the repo with the command
git clone, two solutions withsshorhttp: If you have a ssh key configured, with the gitlab of the fabacademy :# SSH version git clone git@gitlab.fabcloud.org:academany/fabacademy/2020/labs/lamachinerie/students/alban-petit.git # HTTP version git clone https://gitlab.fabcloud.org/academany/fabacademy/2020/labs/lamachinerie/students/alban-petit.git - Now, you can run
lscommand to list the files in the current directory :ls -al
Git pull
Incorporates changes from a remote repository into the current branch.
- Go to a git repository in your local files :
cd /my/awesome/repository - Now you can update your local files with changes available online :
git pull
Git add
This command updates the index using the current content found in the working tree, to prepare the content staged for the next commit.
- To take a snapshot of the contents of all files under the current directory :
git add . - To take a snapshot of all files :
git add -A
Git commit
git commit updates the index using the current content found in the working tree, to prepare the content staged for the next commit.
git commit -m "message"
You can replace “message” with your commit message. For example: “🎉 initial commit”.
A second -m parameter allow you to add a second message to the commit, the first one must be short, but the second allows to go further in the explanations concerning the modifications made with this commit, see below :
git commit -m "message" -m "full description about the modifications"
Git push
Updates remote repository using local snapshot of the content.
git push
VScode
 I personally use VScode to program and work on my project.
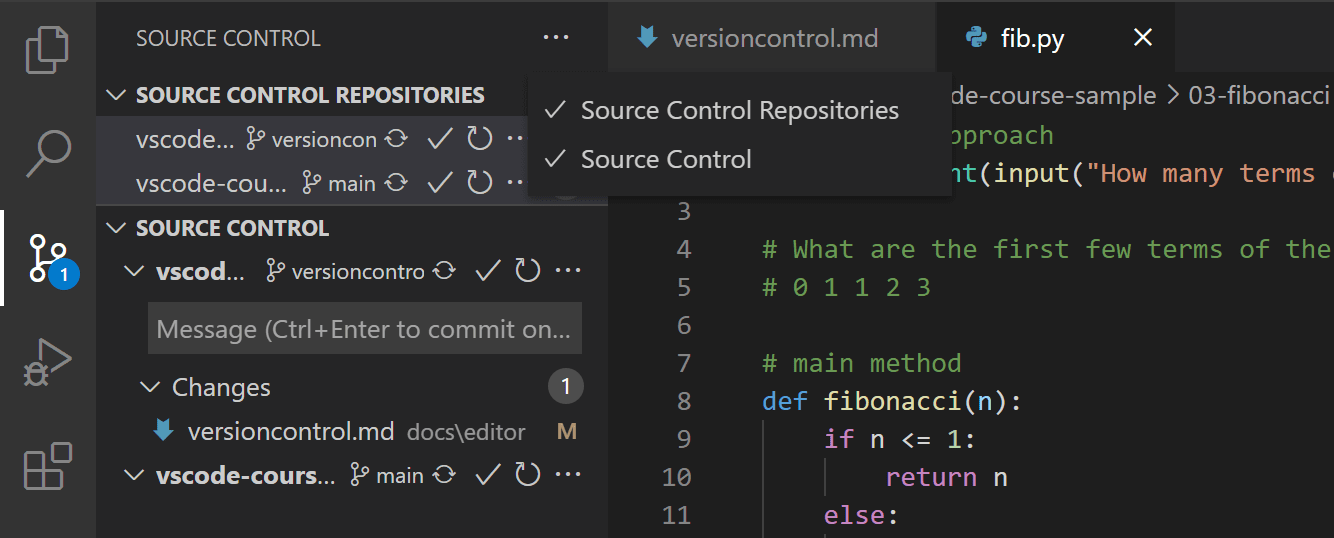
VScode have Git possibilities integrated, and you can make all the commit/push/pull command directly inside it. Just click on the icon named “Souce Control” in the left panel inside VScode, and you will find all the command to commit/push/pull your modifications.
Commit name convention
With Git, and big projects, commits can get messy quickly, especially if several people work on it, trust me, so it can be good to use a convention. Good commit messages serve at least three important purposes:
- To speed up the reviewing process
- To help us write a good release note
- To help the future/other maintainers of the project
Personally I try to use this method as often as possible :
<type> <sujet>

<description>
- Type defines the type of commit
- build: build solution (gulp, webpack, npm)
- ci: Continuous integration (Travis, Circle, BrowserStack, SauceLabs)
- docs: Documentation
- feat: Add feature
- fix: bug fix
- perf: Performance improvement
- refactor: Code changement which does not change the usage
- style: Style modification
- test: Tests modification
- Sujet contains a brief description of the changes Using the present imperative (“change”, not “changed” or “changes”) Without capital letter at the beginning No “.” at the end of the description
- Description allows to detail in more detail the motivations behind the change. The rules are the same as for the Subject part.
To define the type of commit, you can use another solution : Gitmoji
Static site generator
Docusaurus
 Docusaurus is a Facebook dev team project for easily building, deploying, and maintaining open source project websites.
This website is running with the alpha release Docusaurus : Docusaurus 2. Docusaurus 1 used to be a pure documentation site generator. Docusaurus 2, was rebuilt, allowing for more customizability, so now it can feat to content-driven websites (Documentation, Blogs, Product Landing and Marketing Pages, etc) extremely fast.
Install
The easiest way to install Docusaurus is to use the command line tool that helps you scaffold a skeleton Docusaurus website :
npx @docusaurus/init@next init [name] [template]
# Replace [name] and [template].
Development server
Command to run the dev server :
cd [name]
# Replace [name]
yarn start
By default, a browser window will open at http://localhost:3000.
Build
So, Docusaurus is a static site generator, the end goal is to transform all the markdown into an HTML file, to be able to host it on a server and then open it with a browser. Soon, gitlab or github will work there for us, but for the moment, we must check that the site is building correctly, for that :
yarn run build
Contents will be generated within the /build directory.
Gitlab Pages

-
Continuous Integration is the practice of merging all the code that is being produced by developers. The merging usually takes place several times a day in a shared repository. From within the repository, or production environment, building and automated testing are carried out that ensure no integration issues and the early identification of any problems.
-
Continuous Delivery adds that the software can be released to production at any time, often by automatically pushing changes to a staging system.
-
Continuous Deployment goes further and pushes changes to production automatically.
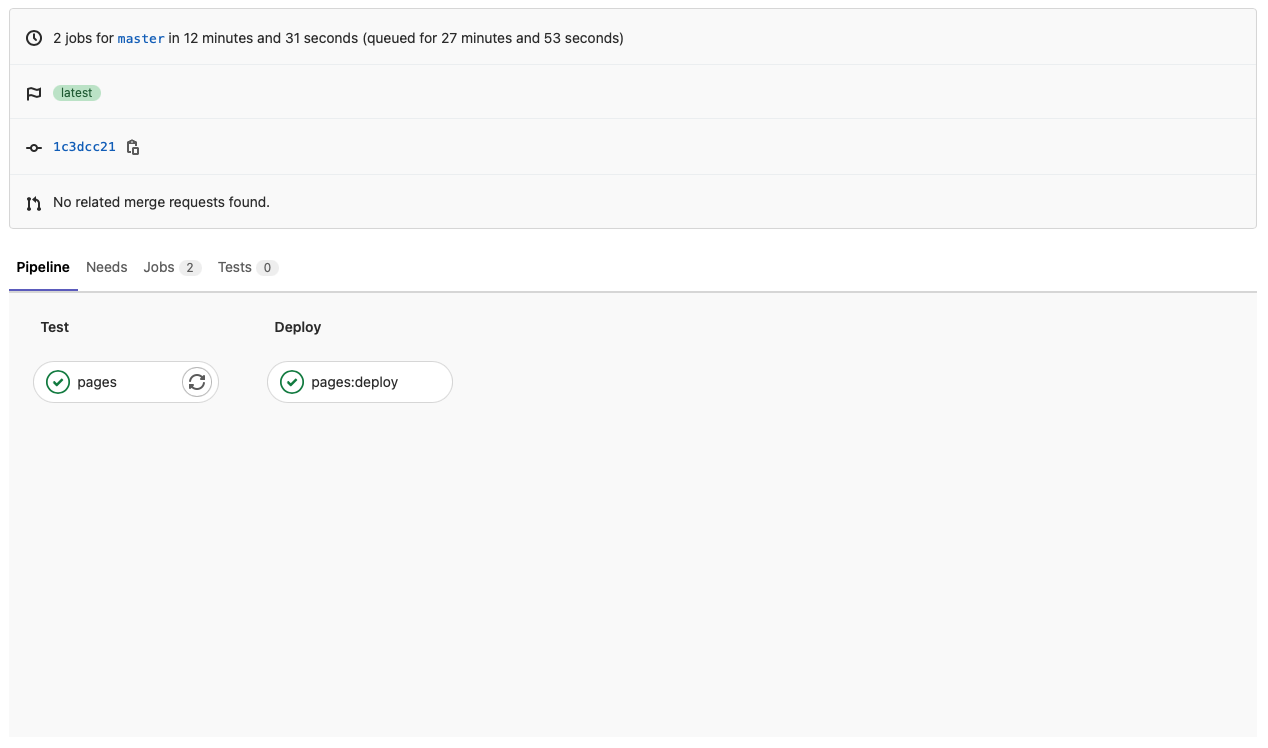
This project is put into production with each modification of the Master branch of the gitlab repository. So I use for this the integrated solution to gitlab, Gitlab CI to do this.
So each time a commit is sent, a docker container instance will be launched by gitlab to build the application.
This procedure is described in the yaml file: .gitlab-ci.yml.
The container will therefore build the application and transfer the final files from the application to a second feature of gitlab, Gitlab Pages which allows hosting of static websites.
Here is the file to put at the root of the project, /.gitlab-ci.yml :
image: node:9.11.1

pages:
  script:
    - ls -al
    - yarn install
    - yarn build
    - mkdir ./public
    - mv ./build/* ./public
  artifacts:
    paths:
      - public
  only:
    - master
Now let’s push the modification to the repository :
git add -A
git commit -m "👷♂️ init gitlab pages"
git push origin master
And just watch gitlab do the work for us :
Hugo
Unlike Docusaus, which was built with the idea of quickly making documentation sites for IT projects, Hugo was built to be more flexible. Small bonus it is developed in Go which allows it to be extremely fast.
Install
The quickest way to install hugo is to download the appropriate binary version on the official github and put in /usr/local/bin or any directory in yout PATH. But better way to install it, is to use a package manager so :
- macOs :
brew install hugo
- linux :
sudo apt install hugo
- windows with
chocolatey:
choco install hugo -confirm
Fun fact: On my mac hugo work fine, but on the linux side, the development server won’t run, after some research multiple version of Hugo are available, to build and minify
sccsthe extended version is needed, so to install it : Hugo extended versionThe same problem occur on windows : Hugo extended on windows
Generate Hugo files
Time to generate the hugo files structure :
hugo new site myAwesomeWebsite
Development server
Command to run the dev server :
hugo server
By default, a browser window will open at http://localhost:1313.
Build
Exactly like Docusaurus, you must first check that the generation of HTML files is done correctly :
hugo
Gitlab Pages
image: registry.gitlab.com/pages/hugo:latest

variables:
  GIT_SUBMODULE_STRATEGY: recursive

pages:
  script:
  - hugo
  artifacts:
    paths:
    - public
  only:
  - master
Github Pages
Unlike Gitlab Pages, the configuration must be in a folder with a specific name so :
cd myAwesomeProject
mkdir .github
mkdir .github/workflows
touch .github/workflows/gh-pages.yml
And here is the content of the file :
name: github-pages

on:
  push:
    branches:
      - master
  pull_request:
  workflow_dispatch:

jobs:
  deploy:
    runs-on: ubuntu-20.04
    steps:
      - uses: actions/checkout@v2
        with:
          submodules: true
          fetch-depth: 0

      - name: Setup Hugo
        uses: peaceiris/actions-hugo@v2
        with:
          hugo-version: 'latest'
          extended: true

      - name: Build
        run: hugo --minify

      - name: Deploy
        uses: peaceiris/actions-gh-pages@v3
        with:
          github_token: ${{ secrets.GITHUB_TOKEN }}
          publish_dir: ./public
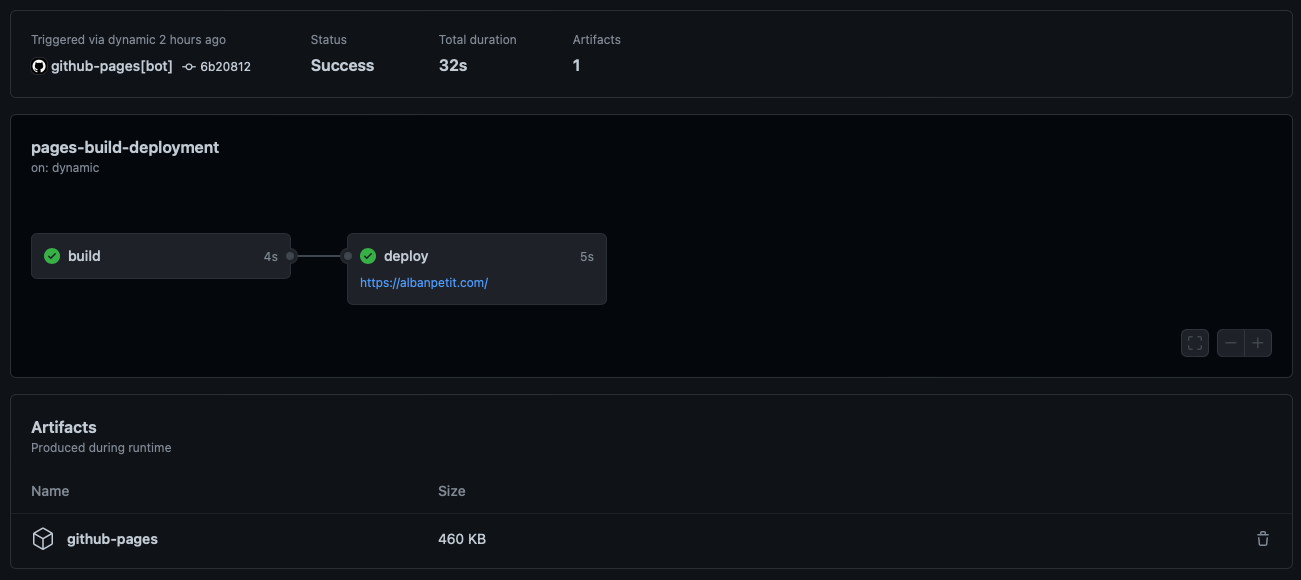
Fun fact: with a custom domain name, the DNS configuration of github reset at each push and build, after some research, Github pages need a
CNAMEfile at the root folder of the builded elements with as unique content the target domain. it took me a few days to understand …
Time to push the modifications to the repository :
git add -A
git commit -m "👷♂️ init gitlab pages"
git push origin master
And finally :
Final Checklist
For this week we had to :
- Build our Site :
- Edit the template site
- Describe ourself : About me
- Describe our final project : Principles and practices
- Document our work using git