Assignment
Week5: 3D Scanning and Printing
Assignment
- group assignment
- test the design rules for your 3D printer(s)
- individual assignment
- design and 3D print an object (small, few cm3, limited by printer time)
that could not be made subtractively
- 3D scan an object (and optionally print it)
- test the design rules for your 3D printer(s)
- design and 3D print an object (small, few cm3, limited by printer time) that could not be made subtractively
- 3D scan an object (and optionally print it)
My Work
I tried printing the additive model of original whistle by 3D printer: Maker Bot and UP Plus 2. Also, I scanned some objects by some scanning tools: iSense, bellus3D, ScandyPro and Qlone.
Group Assignment(test the design tools for 3D printers)
Link to group assignment page at Kannai lab
3D Printing
Additive 3D Design
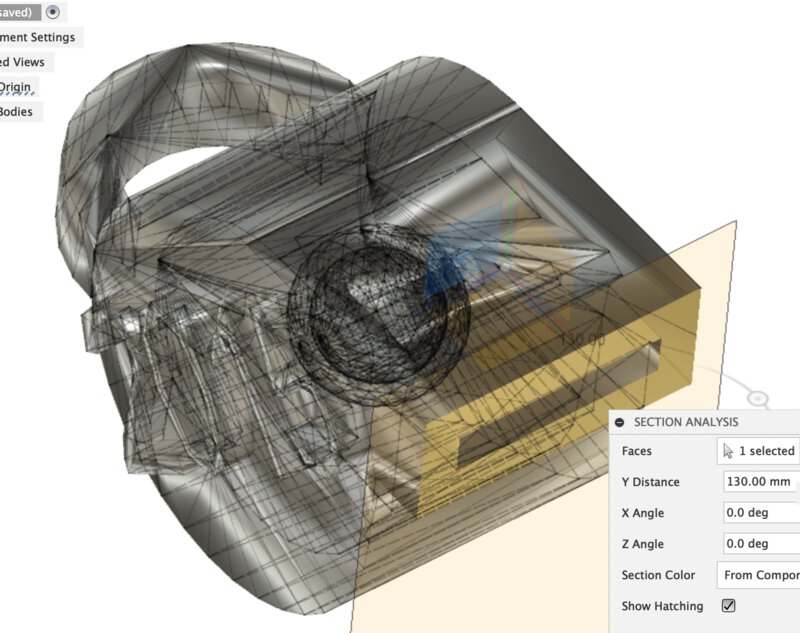
For designing tiny material that cannot be made subtractive cut, I came up with an idea to make a small whistle. I thingiverse site, I found a set of whistles' design. The design is complex, the scale is wired in my local and difficult to get simple image of concept. Therefore, I analyzed section of one of the shared thingiverse models and re-drew it in simplified sketch.
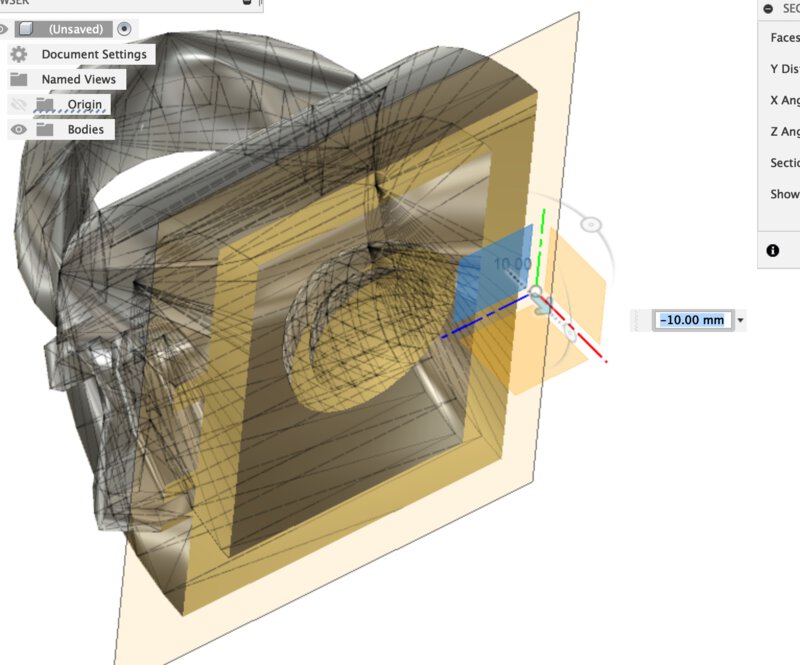
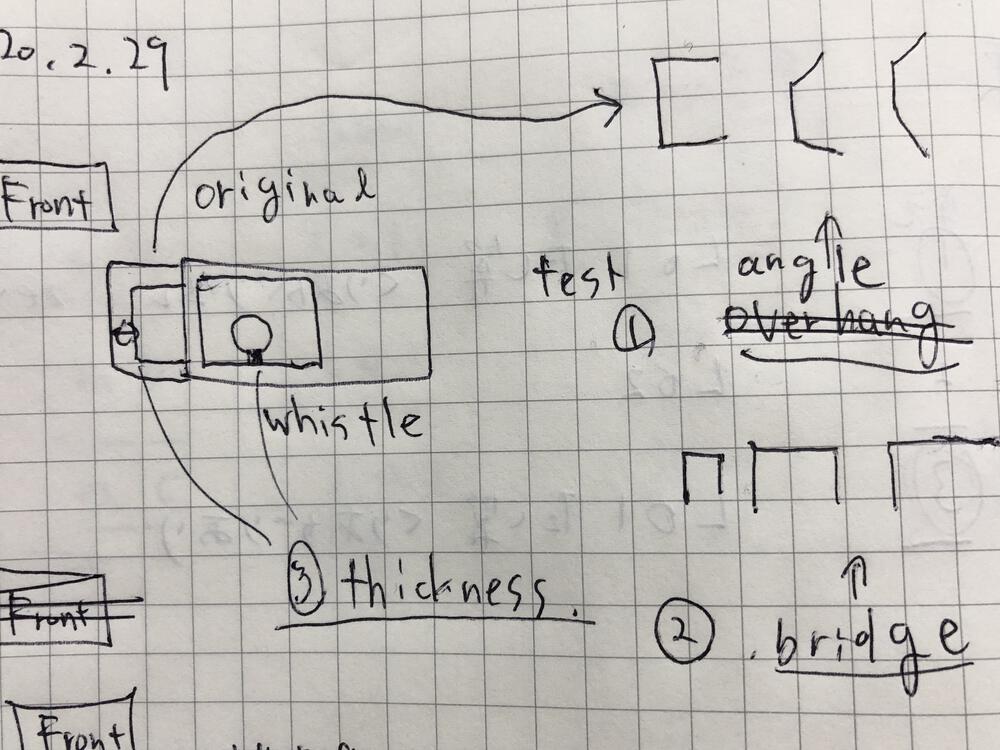
Re-sketched the model considering simplicity and scale of dimension
From test-cut evaluation at Group Assignment, minimum rule of design printing UP Plus 2 AND Maker Bot is as follows:
- minimum length of bridge (without support): 18mm
- minimum width of slit: 1.0mm
- minimum wall of thickness: 0.5mm
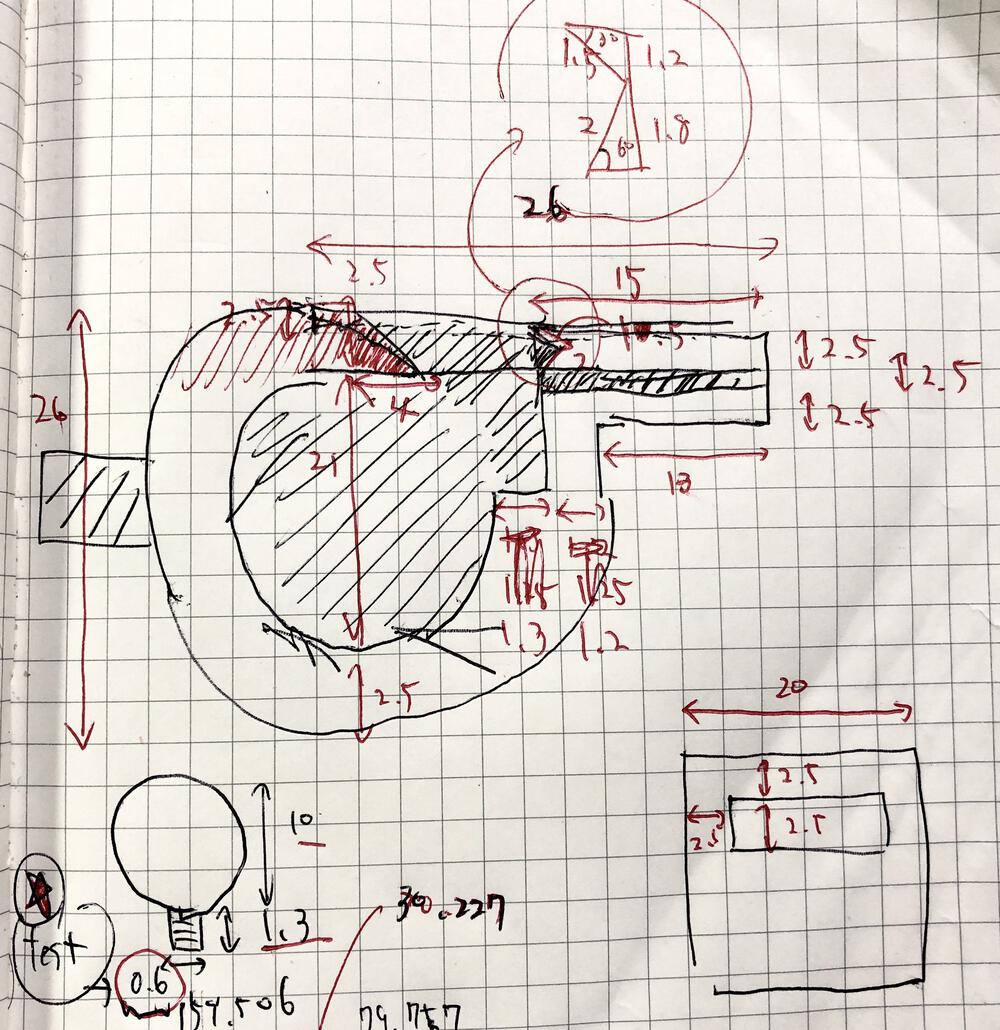
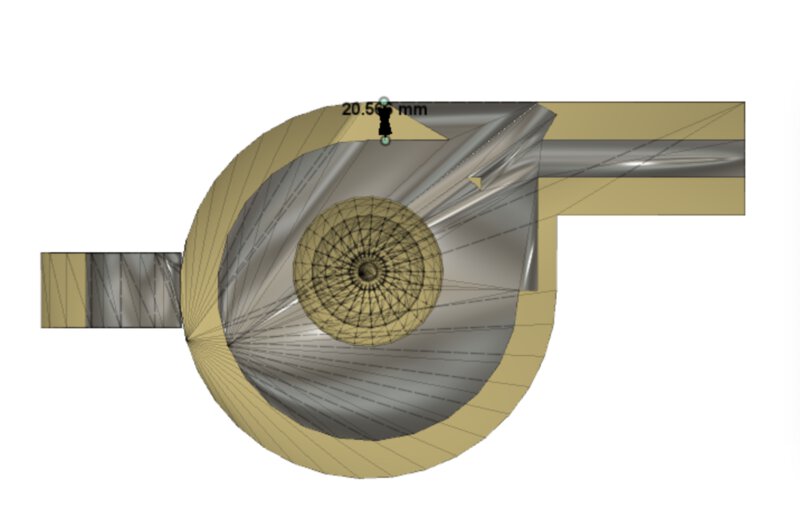
Whistle comprises from cylinder, so the bridge is more strongly supported by circle wall (than by 2 pillars). That's why I tried to start from the diameter length as 21mm and tried to check how that works.
The minimum wall of thickness was 0.5mm. So, I set the pillar diameter below the sphere (that is intentionally designed support) as 0.6mm, and tried to break it after printing.
Then I got a fine 3D design of my whistle.
Printing
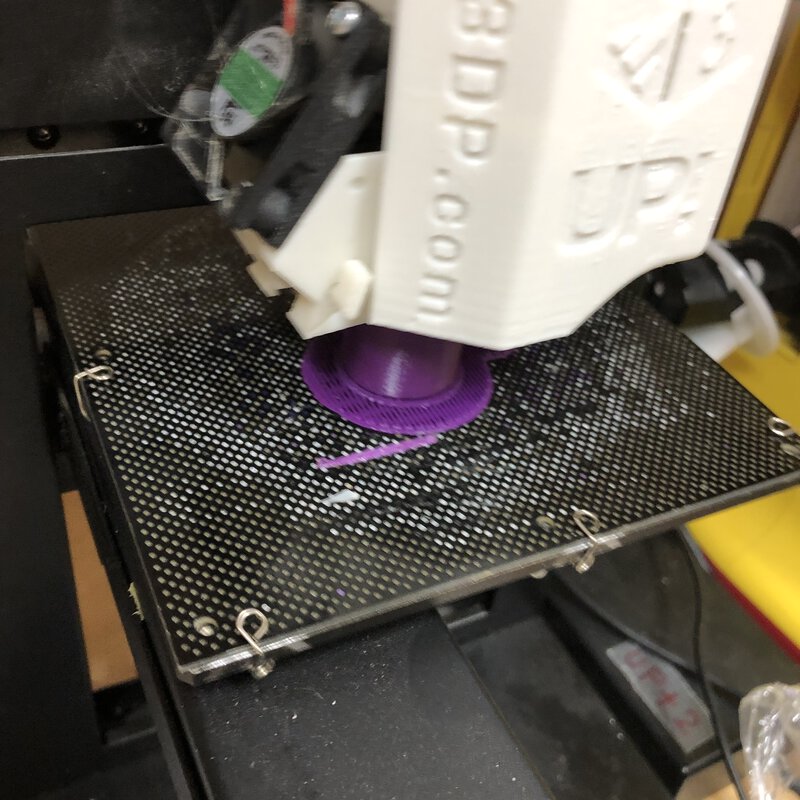
1st Trial: UP Plus 2
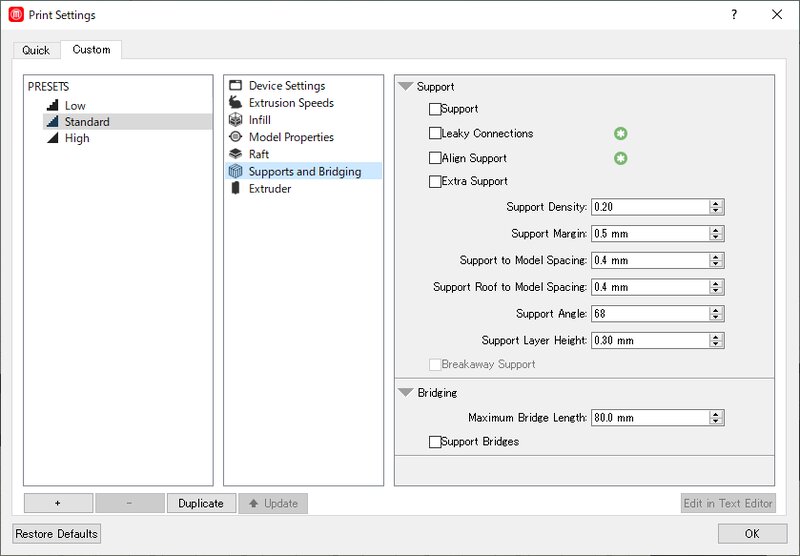
1) Turn off the support of slicer software of UP Plus 2. The other parameters are in default preset of UP Plus 2.

Make slicer data and bring that to printer by mini SD card

Print time is 19 minutes and started from raft.
Bridging by UP Plus 2.

The design of a pillar(diameter: 0.6mm) that supporting sphere looks to be too small.
You can see tangled strings from the bottom part of the sphere. The pillar is collapsed.
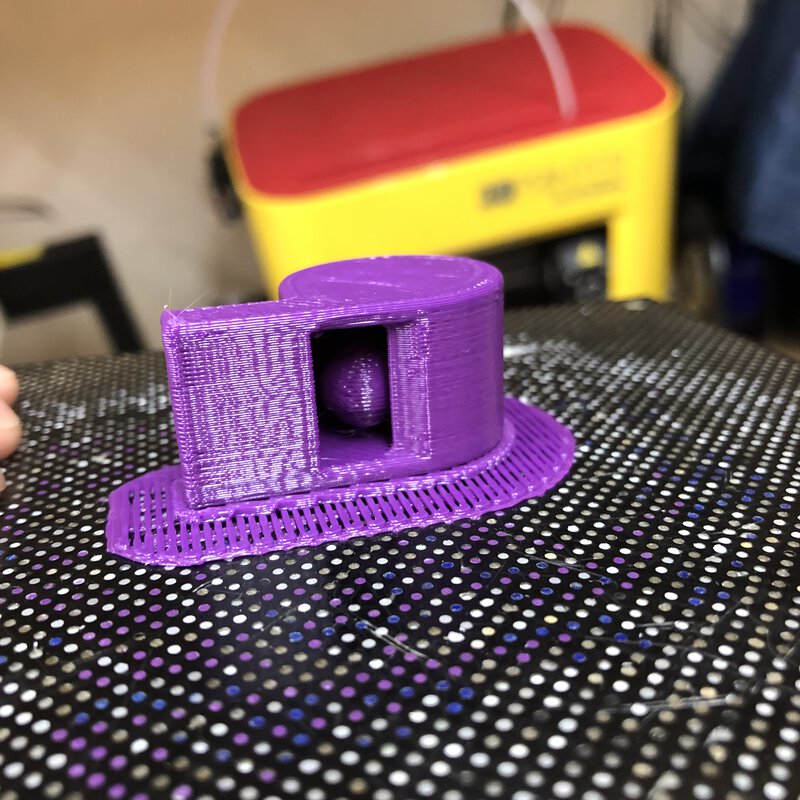
2nd Trial: Maker Bot
Considering 1st Trial above, I should re-design the pillar thickness supporting the ball inside of the whistle. With doing that, I just tried to print the same data with 1st trial by the other material, ABS, from the other printer, Maker Bot.
From test-cut evaluation at Group Assignment, Maker Bot can build thinner wall like 0.1mm of thickness. So, the outcome by Maker Bot(PLA) is better than UP Plus 2 hopefully.
_01.HEIC_800x_q85.jpg)
_03.HEIC_800x_q85.jpg)
Bridging by Maker Bot.
_04(tangled).HEIC_800x_q85.jpg)
Tangled strings from the bottom part of the sphere comes out as well as trial 1. Nevertheless, the outcome is a little bit better than trial 1 as inside ball did not come out from the hole.
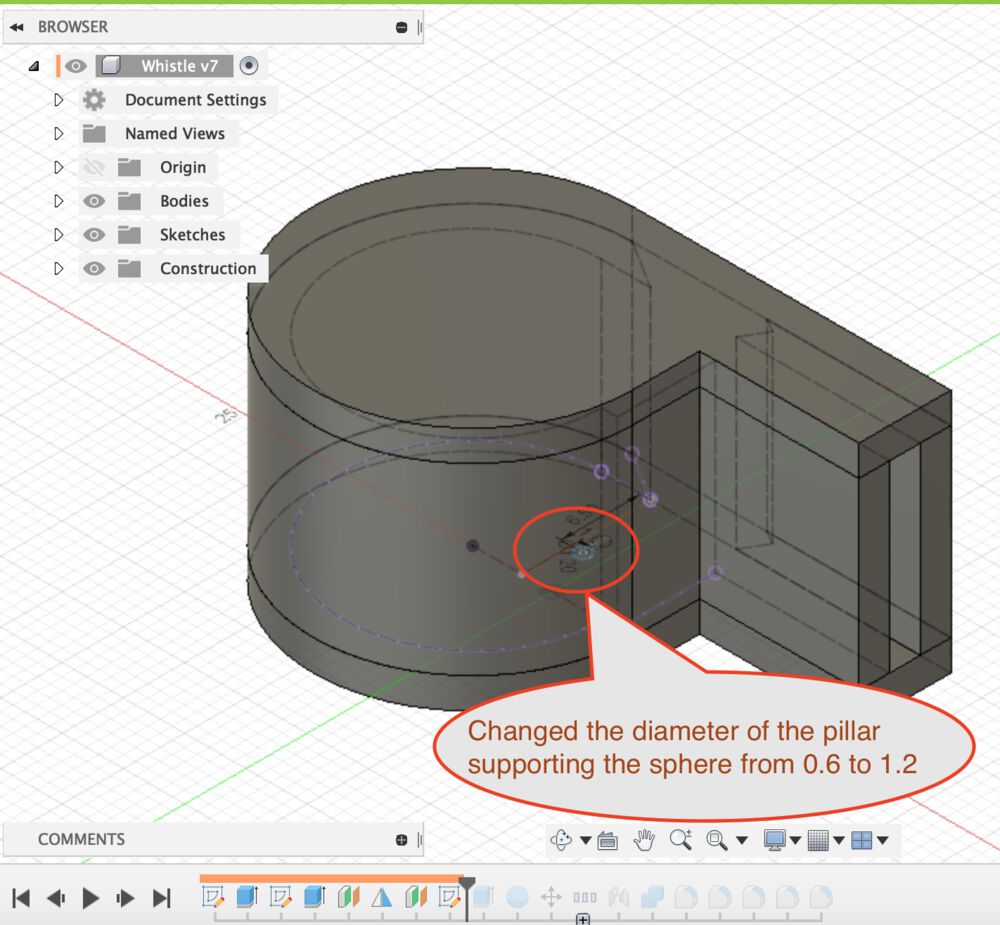
I changed the thickness of pillar supporting the sphere inside of the whistle to 0.6mm to 1.2mm. The value comes from discussion with my instructor, Tamiya-san. The idea that "physical filament width(0.6mm) can be sandwiched by 2 filament might be strong" - that means 0.6mm * 2= 1.2mm might be good. And that idea worked!
Then I printed again. This time, the tiny pillar and the bottom part of sphere is printed out stably!
After breaking the pillar, the ball is perfectly isolated from the inside of the whistle.
Testing the sound of whistle!
1rd Trial by UP Plus 2, ABS
Oh my god! The ball came out from the hole of whistle.
2nd Trial by Maker Bot, PLA
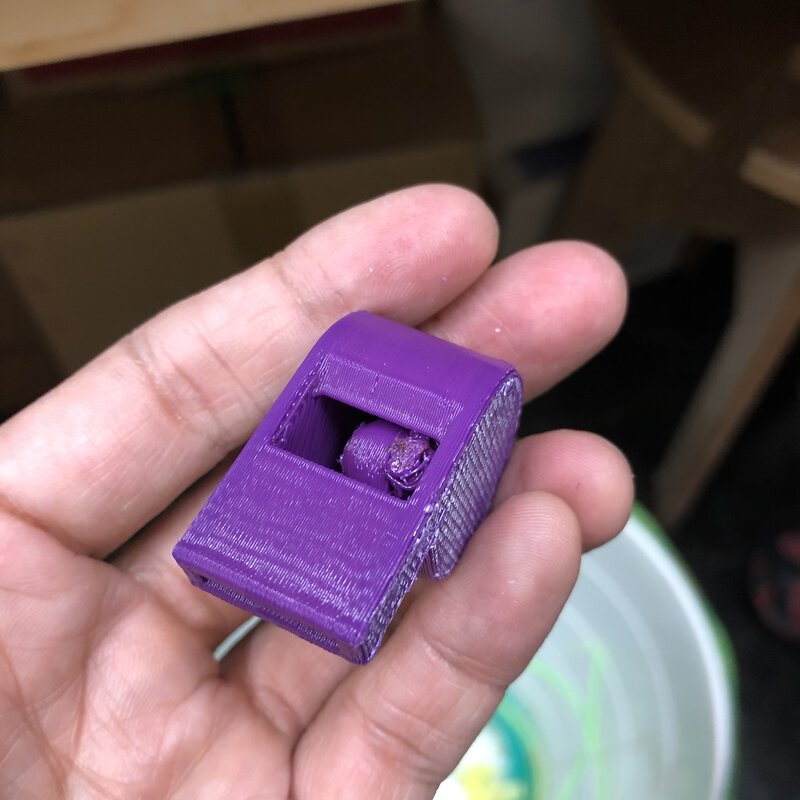
2nd trial, the ball did not came out. But the sound is a little bigger than the 1st?
3rd Trial (Re-design the pillar support) by UP Plus 2, PLA
3rd trial with redesign the pillar is the most successful one!
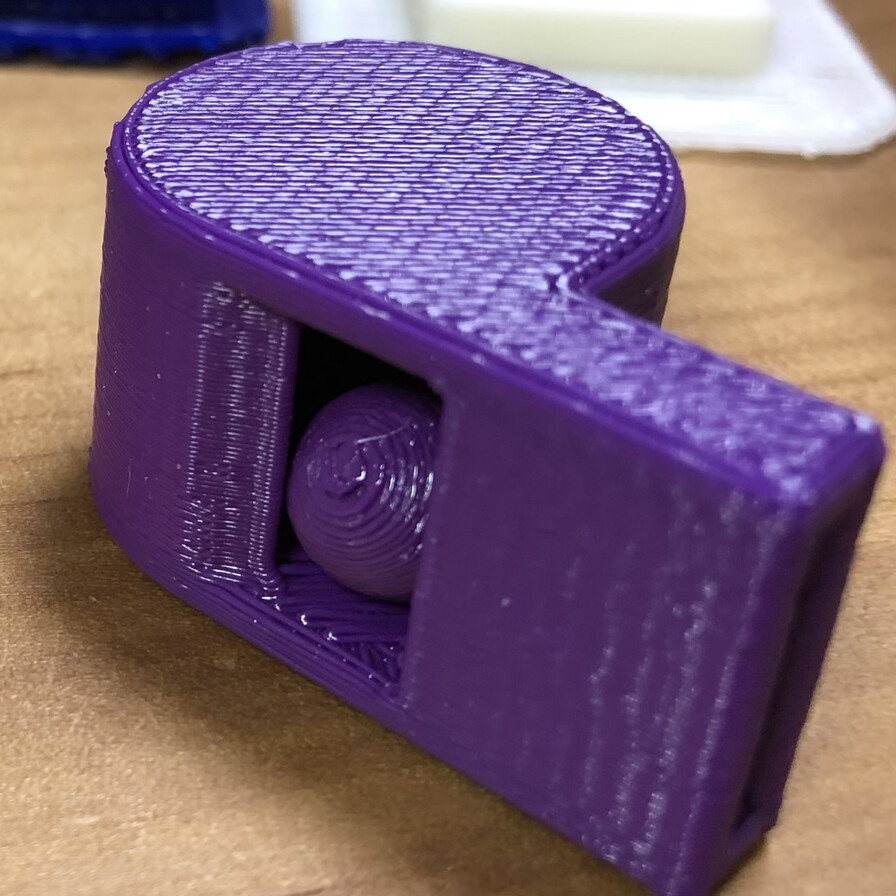
A hero shot of this week!
3D Scanning
This is my first experience to do 3D Scan.
iSense
I tried to scan my shoes (gray color, New Balance M368) using iSense installed in iPad and attached high resolution camera. It's difficult to scan entire object precisely. I edited some wired scan result (deleted unnecessarily added part)
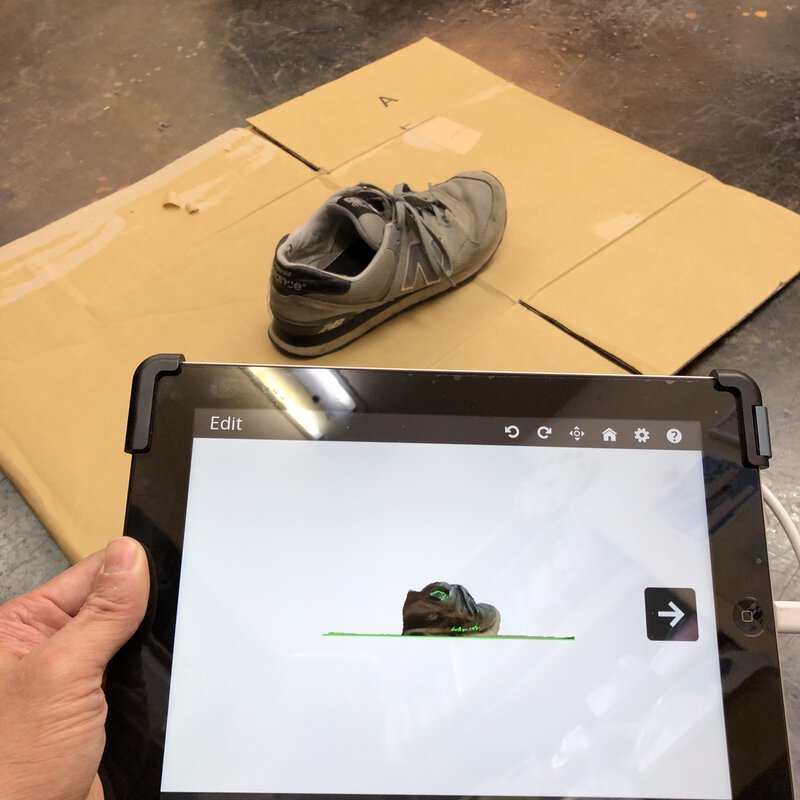
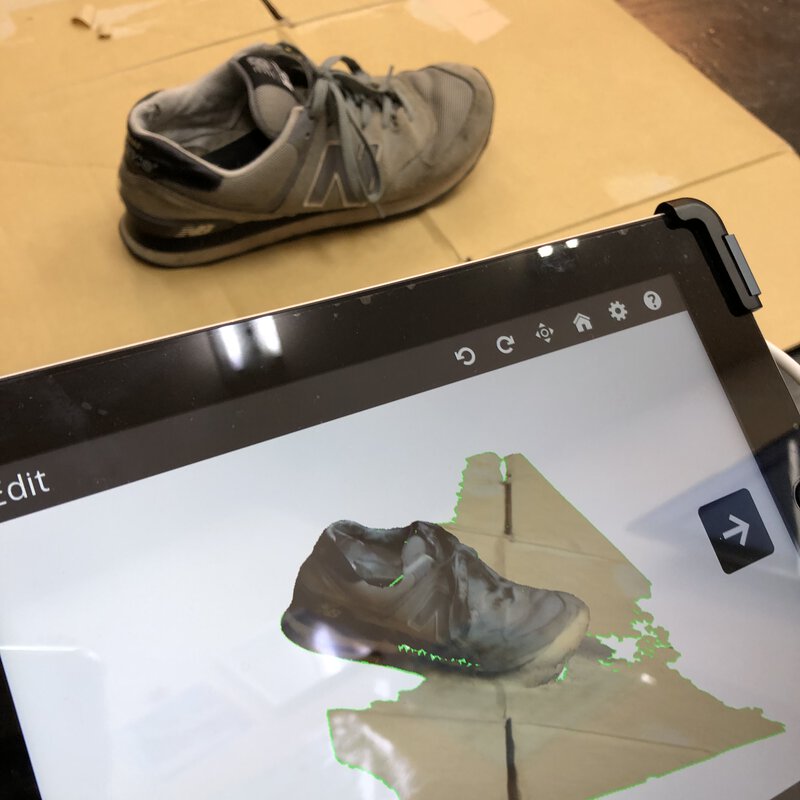
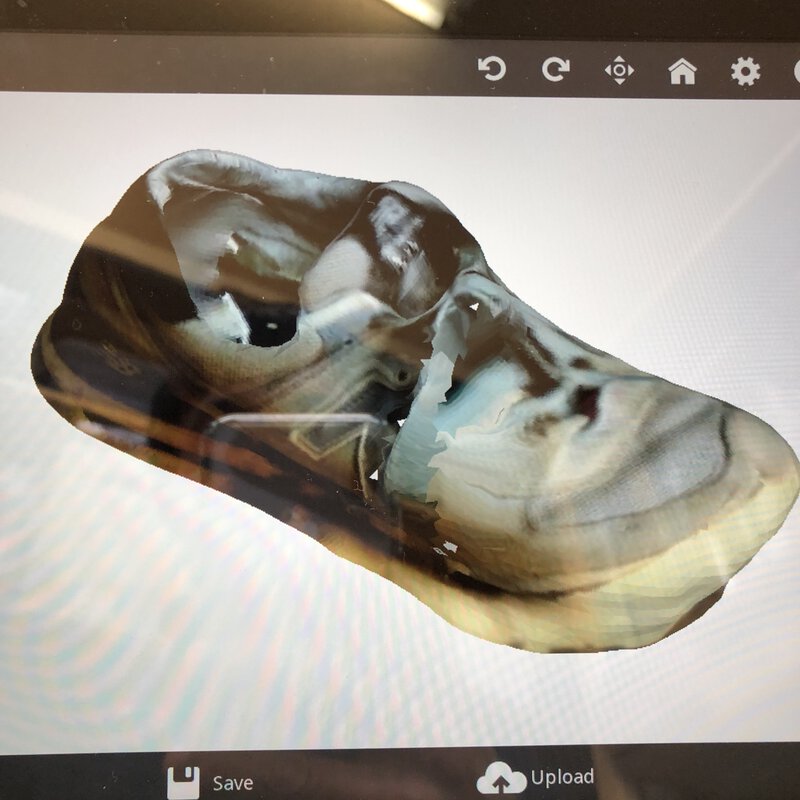
The outcome is not bad. The scanned shoes is slightly dirtier than the real one even though the resolution of scanned object is smaller than real object:). I could not find a way to export data from iSense in free.
Then I checked and tried some of an article about recent 3D scanner apps on smartphone. Also, Tmaiya-san recommended me to use Qlone as well.
Bellus3D
Bellus3D scans with a simple instruction to take a selfie by smartphone.
Scandy Pro
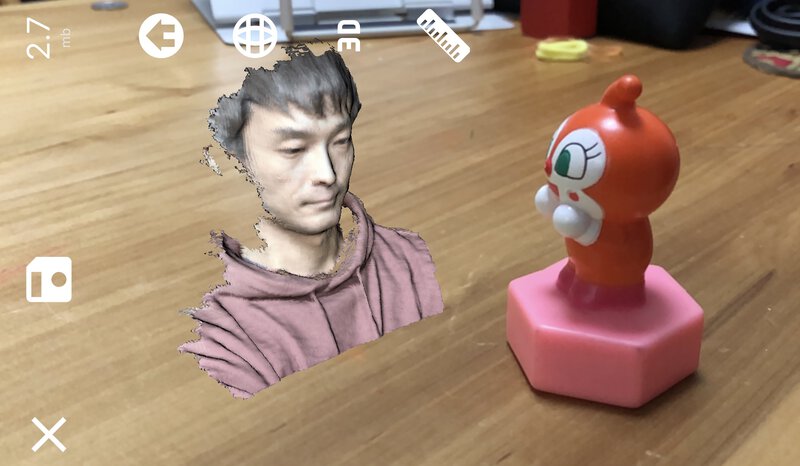
Scandy Pro is also an app that can make a picture by front-facing camera of smartphone. Scandy Pro supports AR function and editting tool.
Honestly, I'm not so comfortable at "selfie".. So, I tried to make the other approach of scanning. Qlone seems the one that worth trying to use as a handy 3D scanner.
Qlone
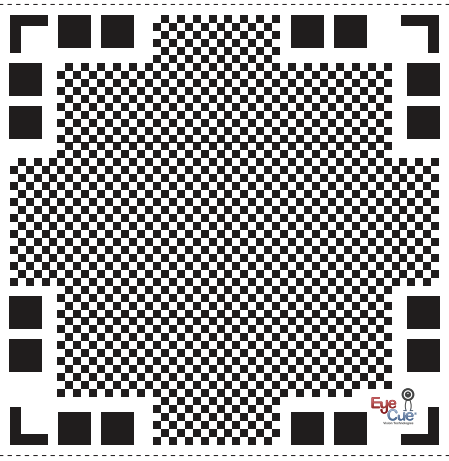
Qlone scans the object on the sheet like marksheet OCR. That sheet allows scanner software to recognize the position of the object much accurate than the other photogrammetry apps.
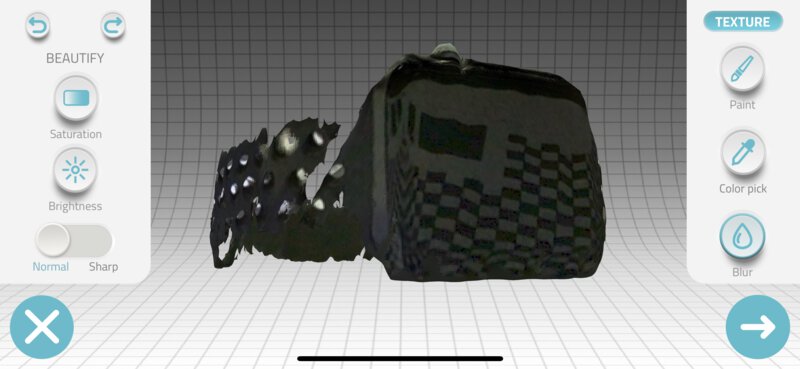
I tried to scan my apple watch on the sheet.
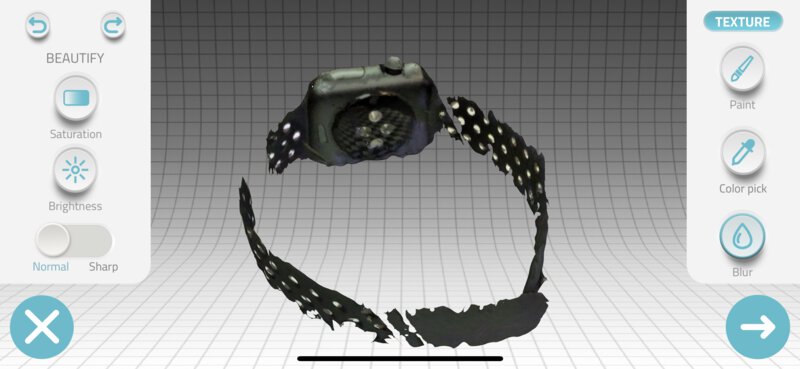
Backside of the watch is captured clearly. However, the part of band was not be captured well. This looks to be because a black band of my watch has bunch of holes. This hole would make Qlone confuse about recognition of position.
Then I tried the other objects - tiny toy house and small toy figure of Dokin-chan(ドキンちゃん), a character of Anpan-man, Japanese famous picture book. Following video is made by multiple animation gif files exported from Qlone.
It looks to be good to put the sheet on the flat table and scan it under the light without tendency. Tiny object is good because it did not prevent capturing the position of the sheet.
Currently, Qlone has price table of purchase plans to unlock(can export to 3D model format and sharable in cloud software). For my child, I bought the minimum one and exported it to sketchfab.
Files
Lessons Learned
- It's very important to know about the 3D printer hardware and slicer software. That allow us to print accurately and lower the cost of time and filament.
- It's good to have clear defintion of the model in the product. That brings efficient test print and evaluation for the outcome.
- It's very intersting about additive design made by the other students (utilize clearance to shaft of the car(Ogri-san), vertices of the vector equilibrium(Kimura-san) etc.) I will try to open my eyes to desgin
- 3D Scannning is difficult but recent app can support the operation smoothly.
References
- Maker Bot Replicator
- UP Plus2 (Angency site in Japan)
- da Vincii Mini (XYZPRINTING)
- L-DEVO
- Wistles degsign in Thingiverse
- Sense(3D systems)
- Bellus3D
- scandy
- Qlone
- THE 8 BEST 3D SCANNING APPS FOR SMARTPHONES IN 2020 (FREE!)