Computer-Aided Design

Model your final project using raster, vector, 2D, 3D, render, animate & Compress your images and videos.
Individual Assignment:
- Evaluate and select 2D and 3D software
- Demonstrate and describe processes used in modelling with 2D and 3D software
First, I will start with “My Paint” I trayed to sketch my idea with my paint it was a fun experience but I think it failed in some way x”D, I think it would be more efficient if I did use Graphics tablet but anyways this was the final result.
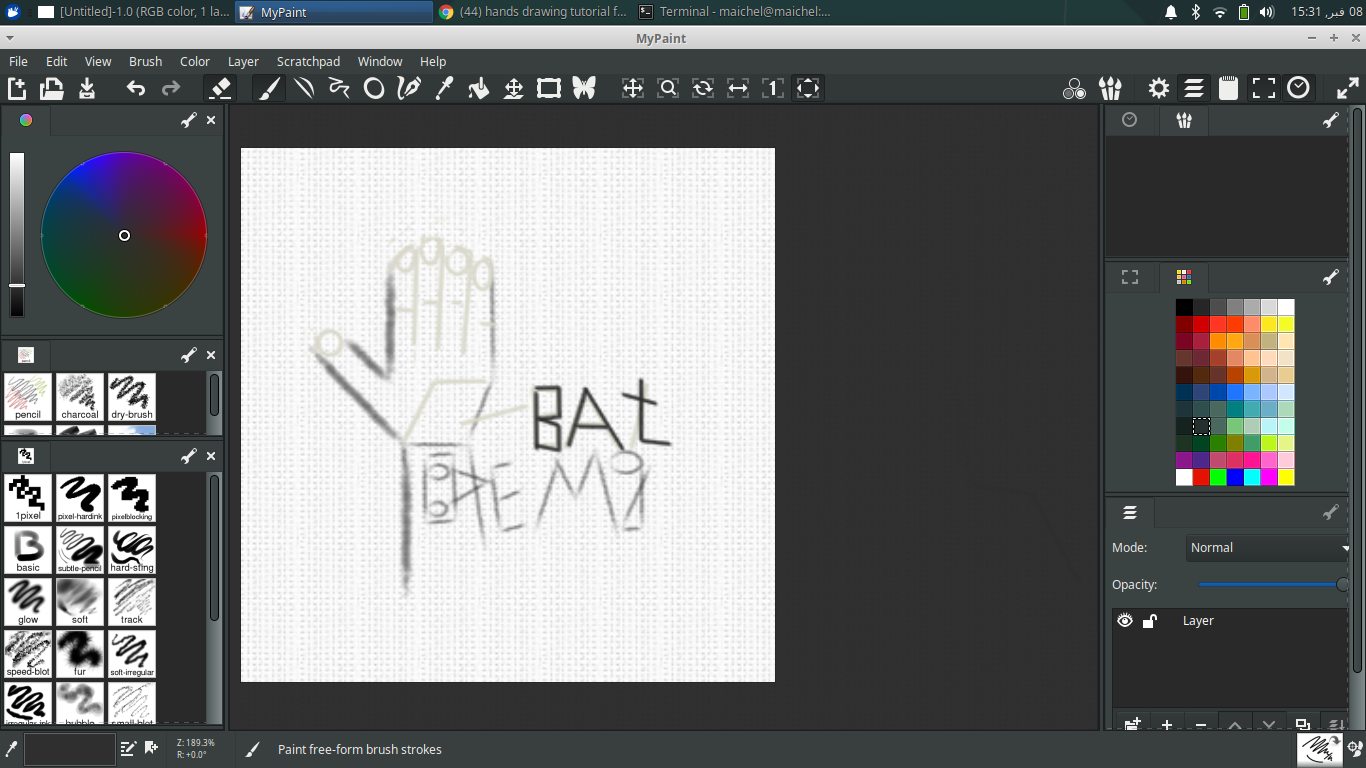
okay, first it doesn't look that bad.but the first problem was that I couldn't find the “ text box “ except for that, everything was great.
Now let’s talk more about the program, so I don’t think the program needs any explanations there no hidden tools or complicated methods so I recommend installing the tool and try it you will figure everything in the program for less than 15 min that’s all.
CAD
fusion 360
Now I will use fusion 360, I will try to make something related to my final project, I will try to draw a prostatic finger.
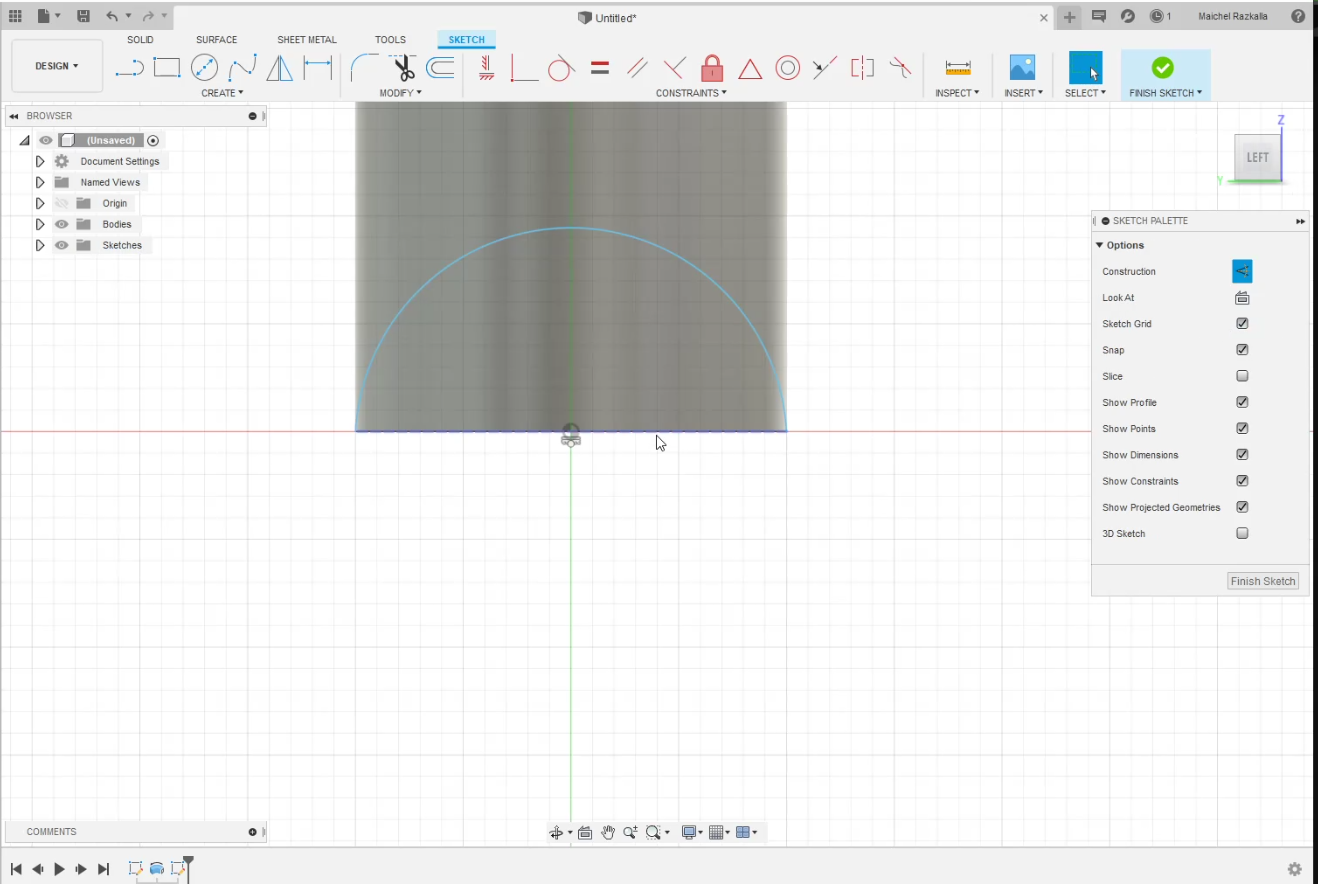
So first is to create a “sketch, I have trayed many ways until now to create the finger but I will stick with the last result.

So after I created the sketch I trayed to imagen section of the finger to draw in the sketch.
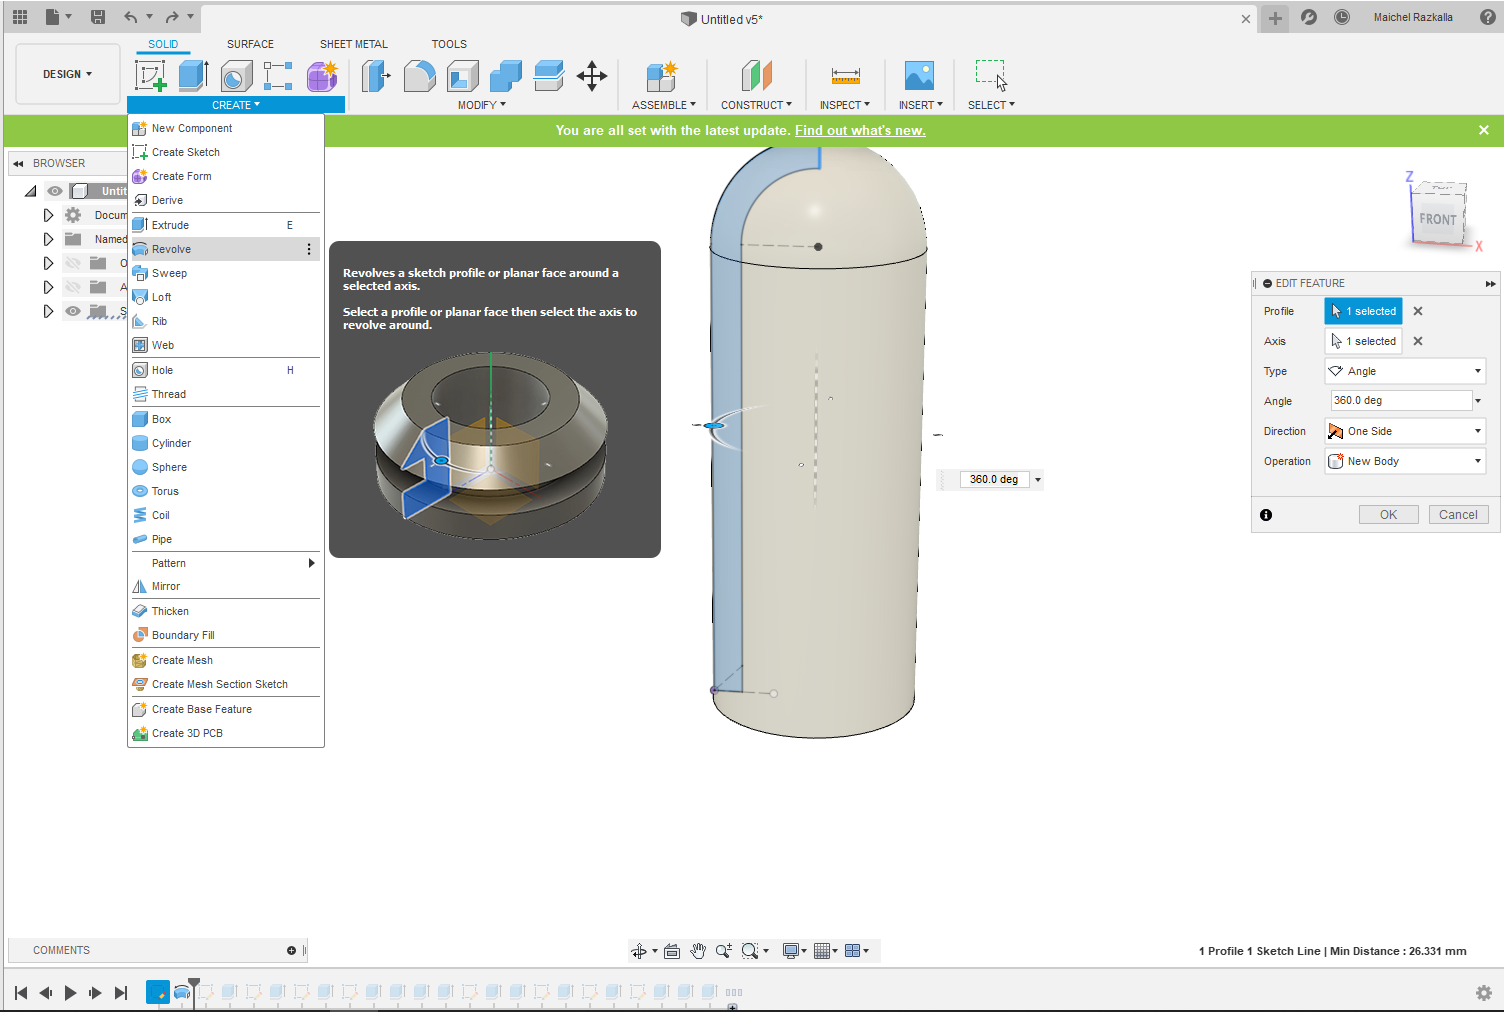
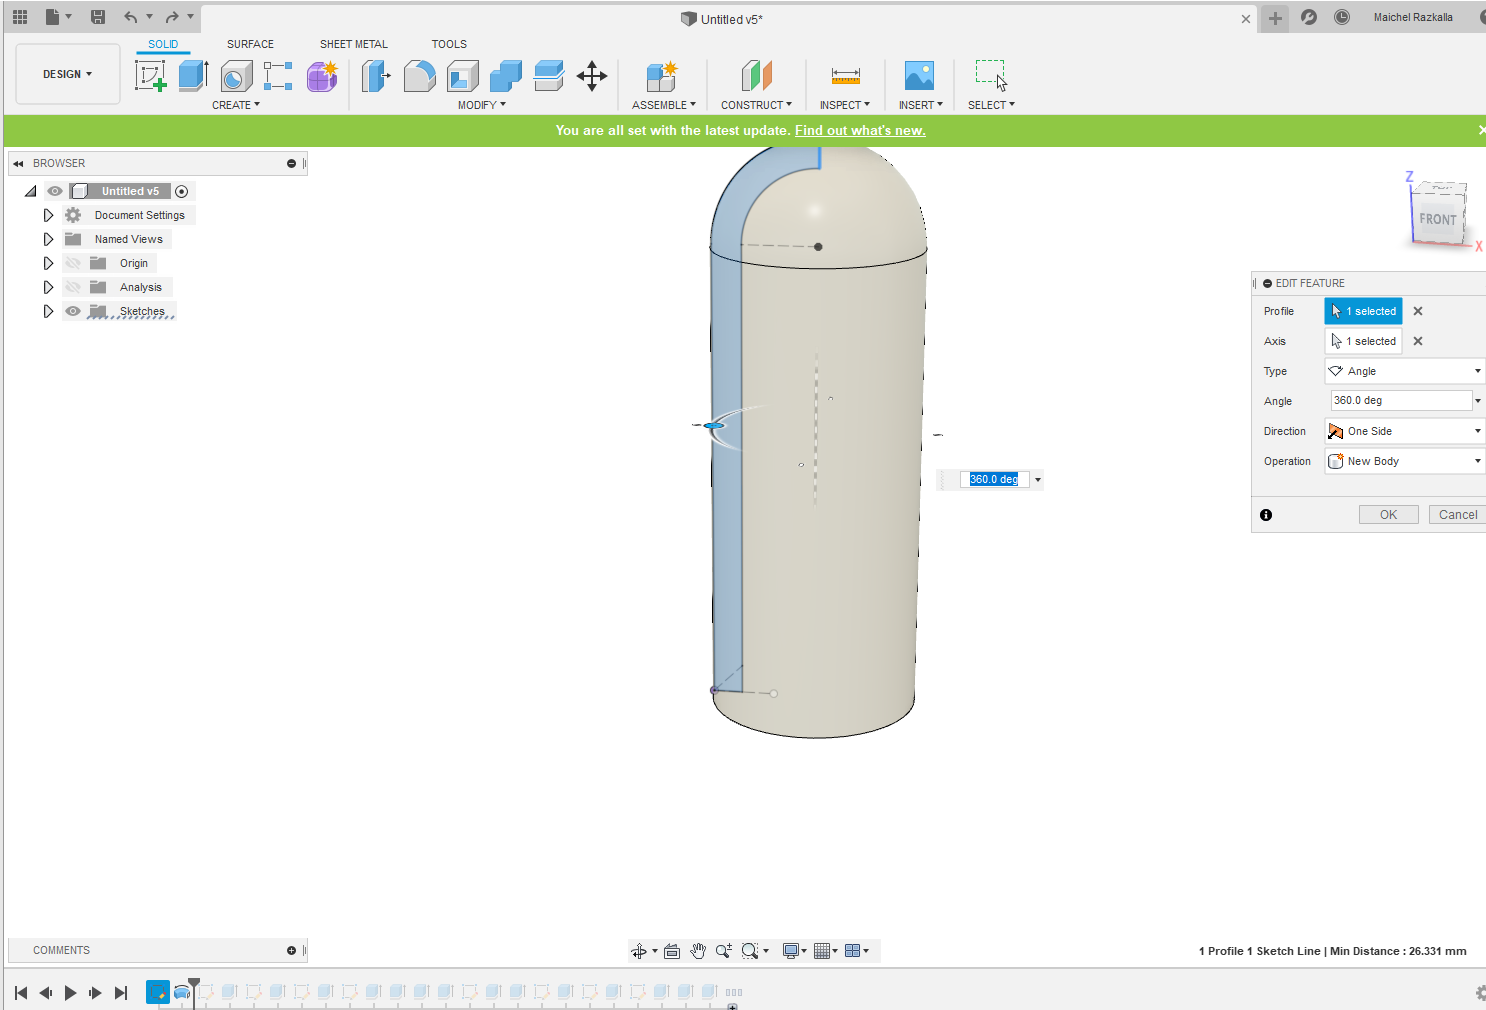
Next, after I finished the sketch I used “Revolve tool”, so what revolve tool makes, it’s Creates the revolution in one direction.
Now I will create another sketch to create the joint hole.
After finishing the sketch now I will use “Extrude” I tried to change the “Taper Angle ”
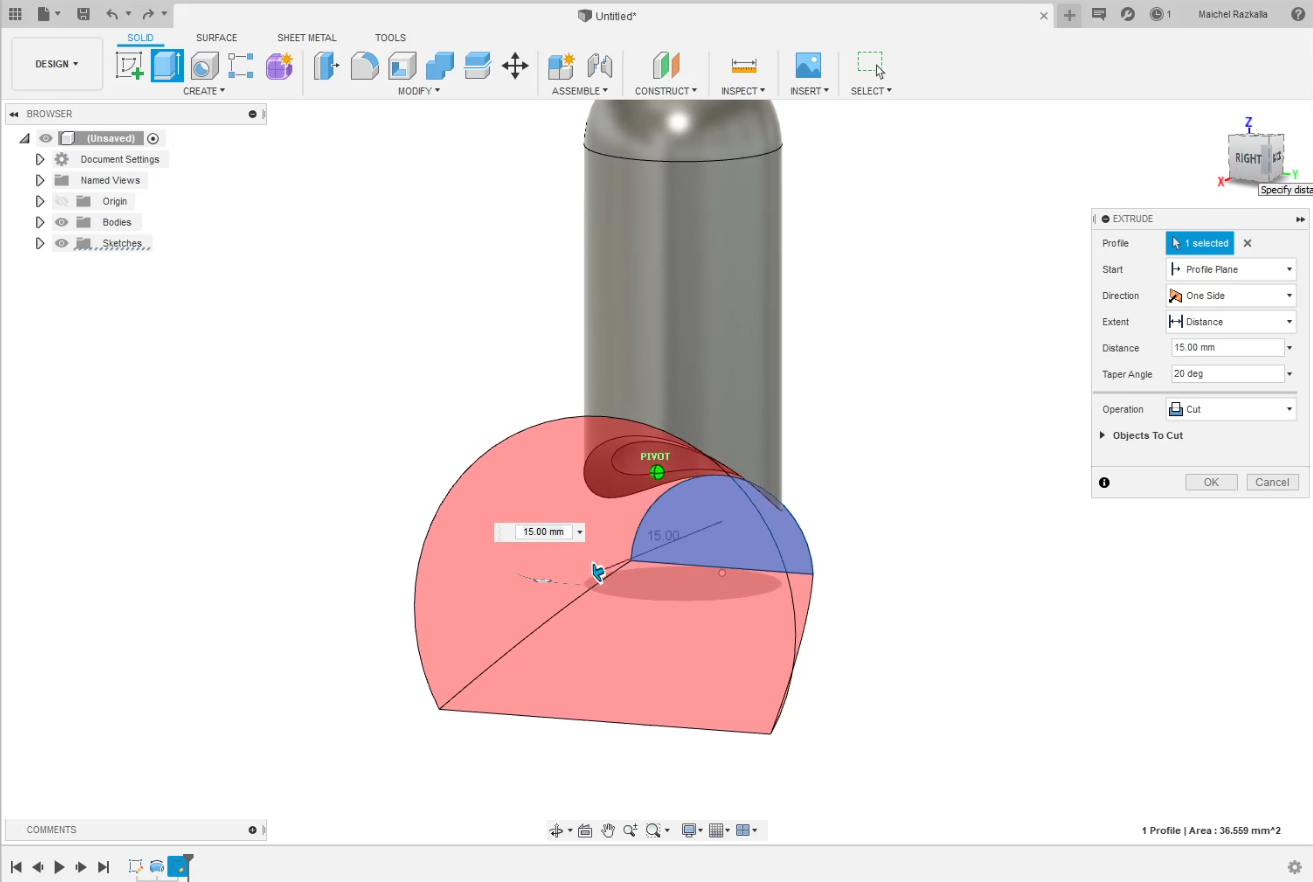
as you can see to make an extruded curve with the sketch and it worked will

Next step is to create a sketch at the bottom view and extrude to create the middle part of the finger
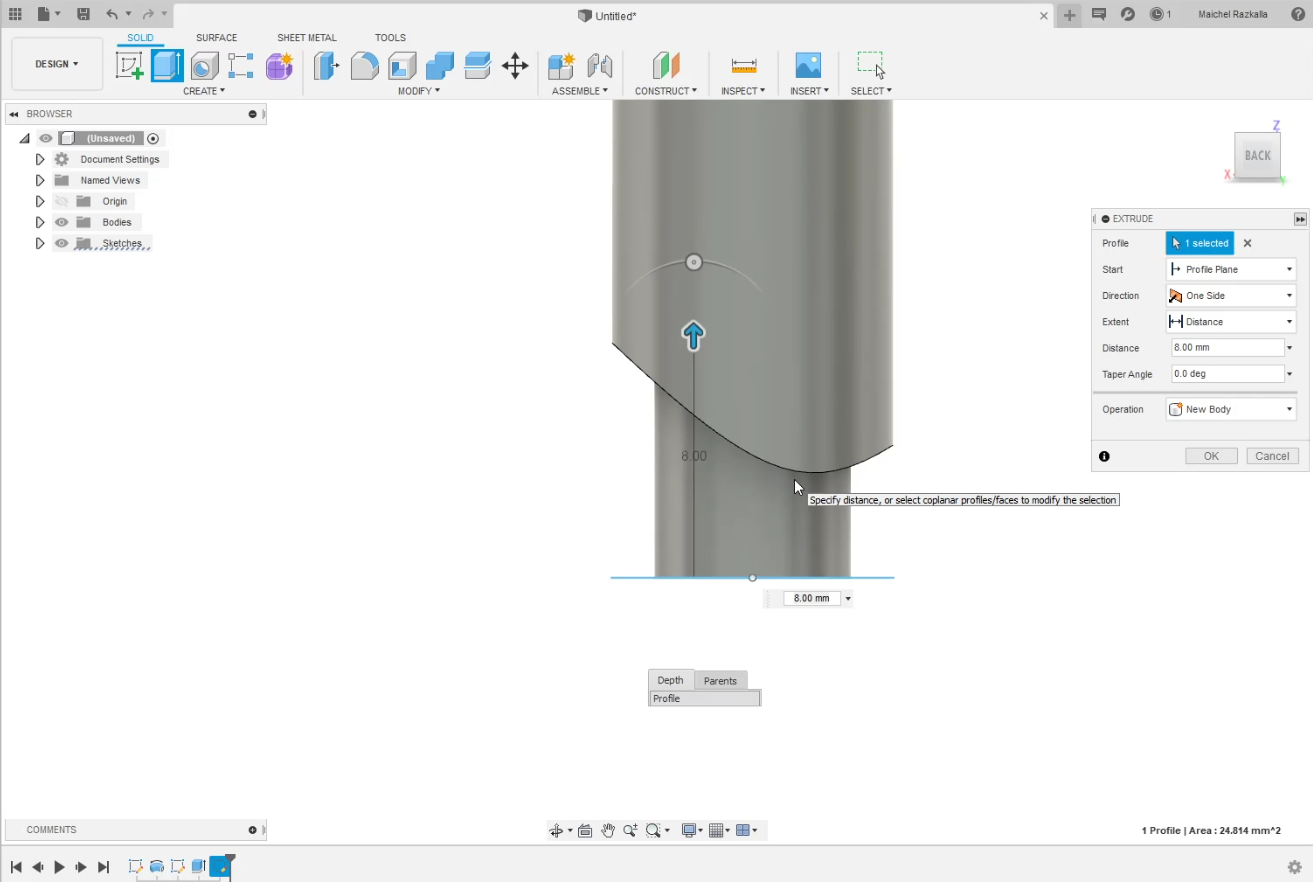
so to make the curve in the middle part I draw a "Spline" with some lines to complete the sketch, the last step is to extrude.
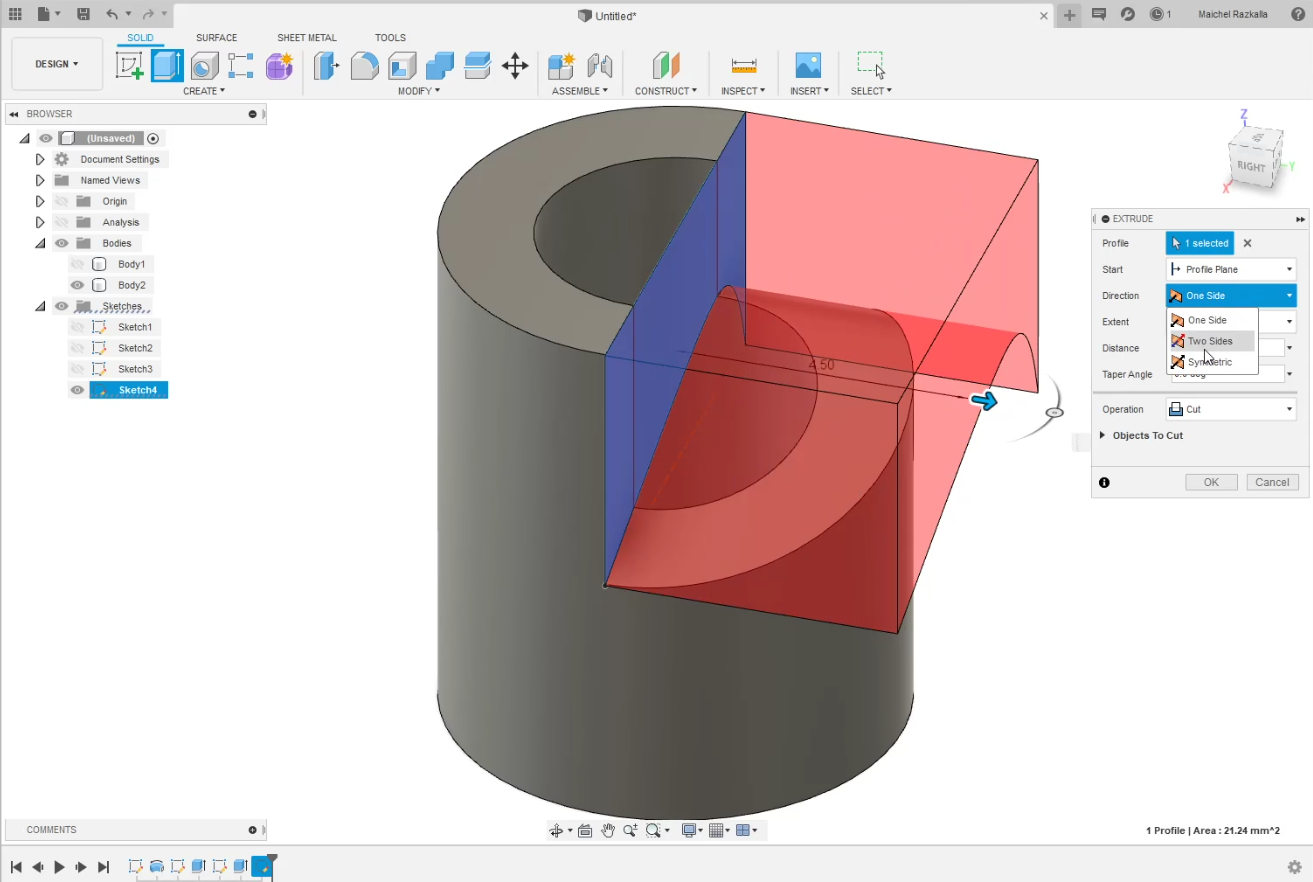
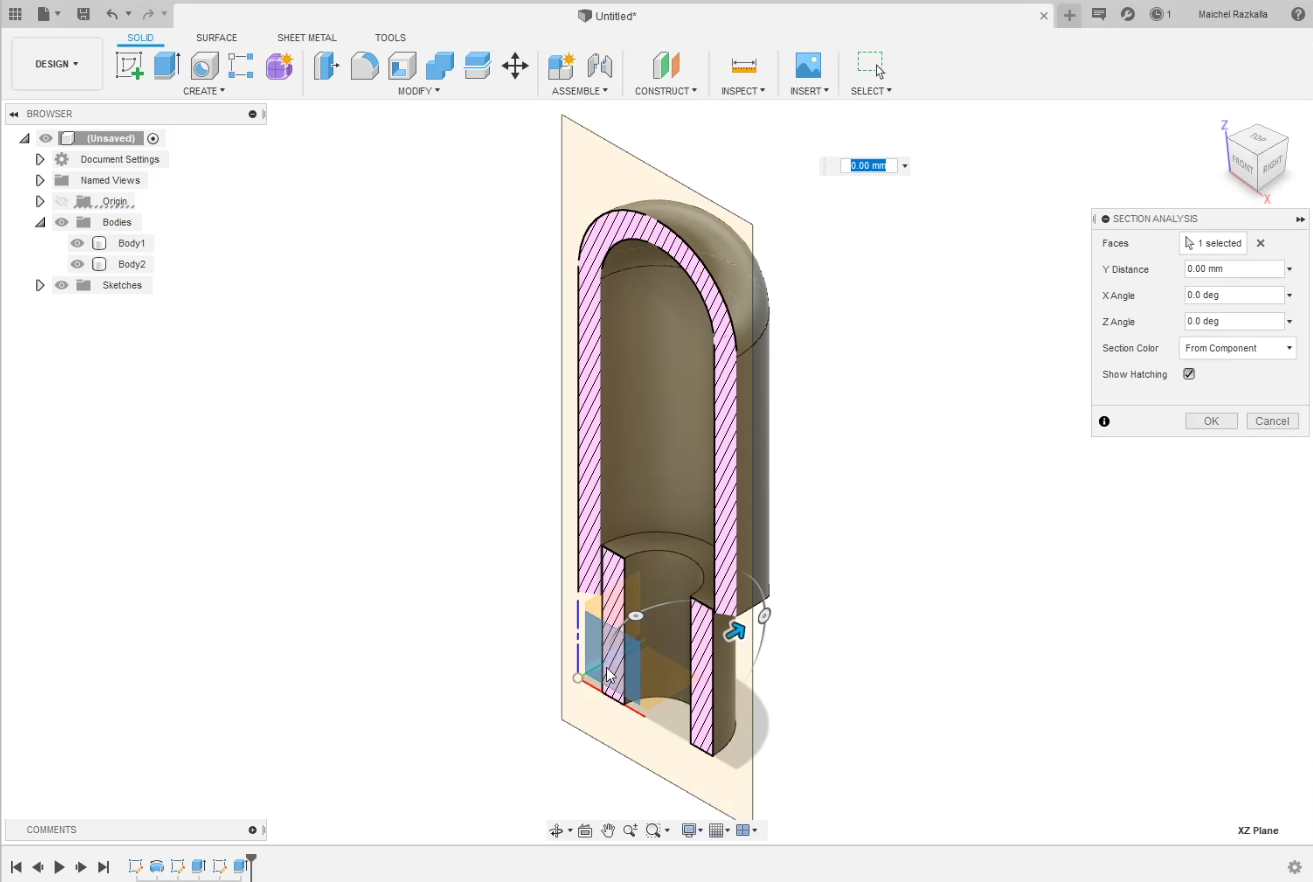
Now I will need to see inside the design so I found this useful tool “Section analysis”

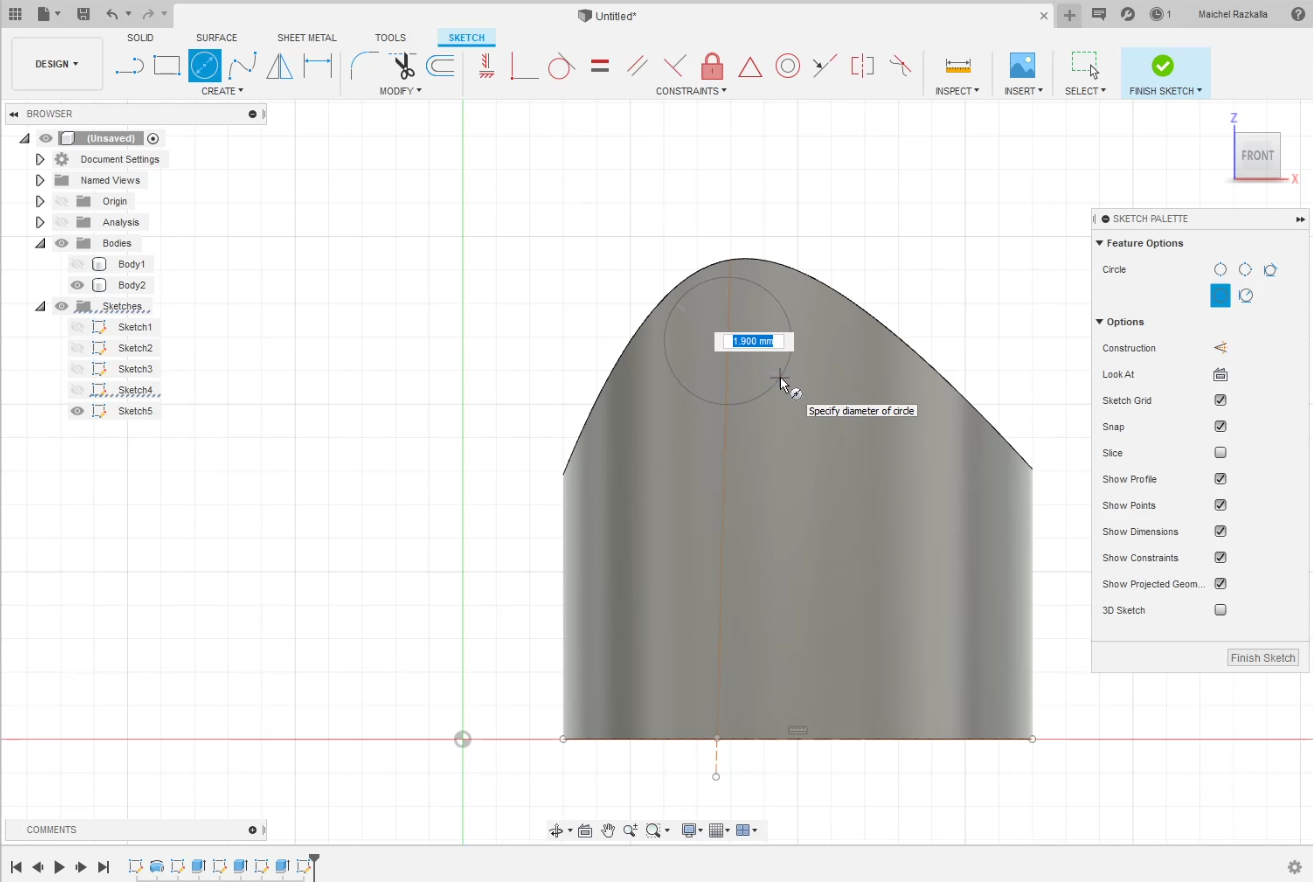
Now I will create a sketch with small circles to make the joints in the inside part and cut the hole joints at the outside
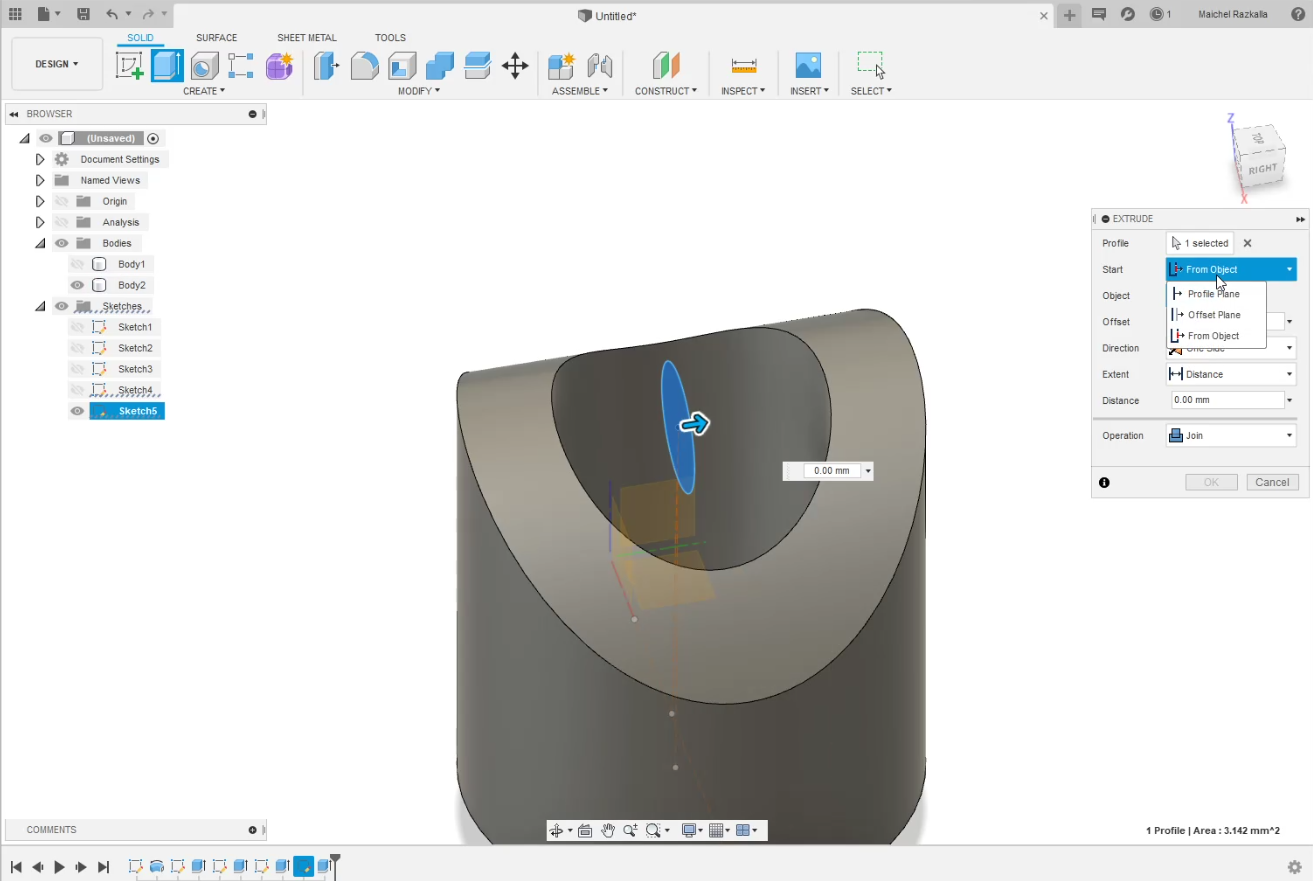
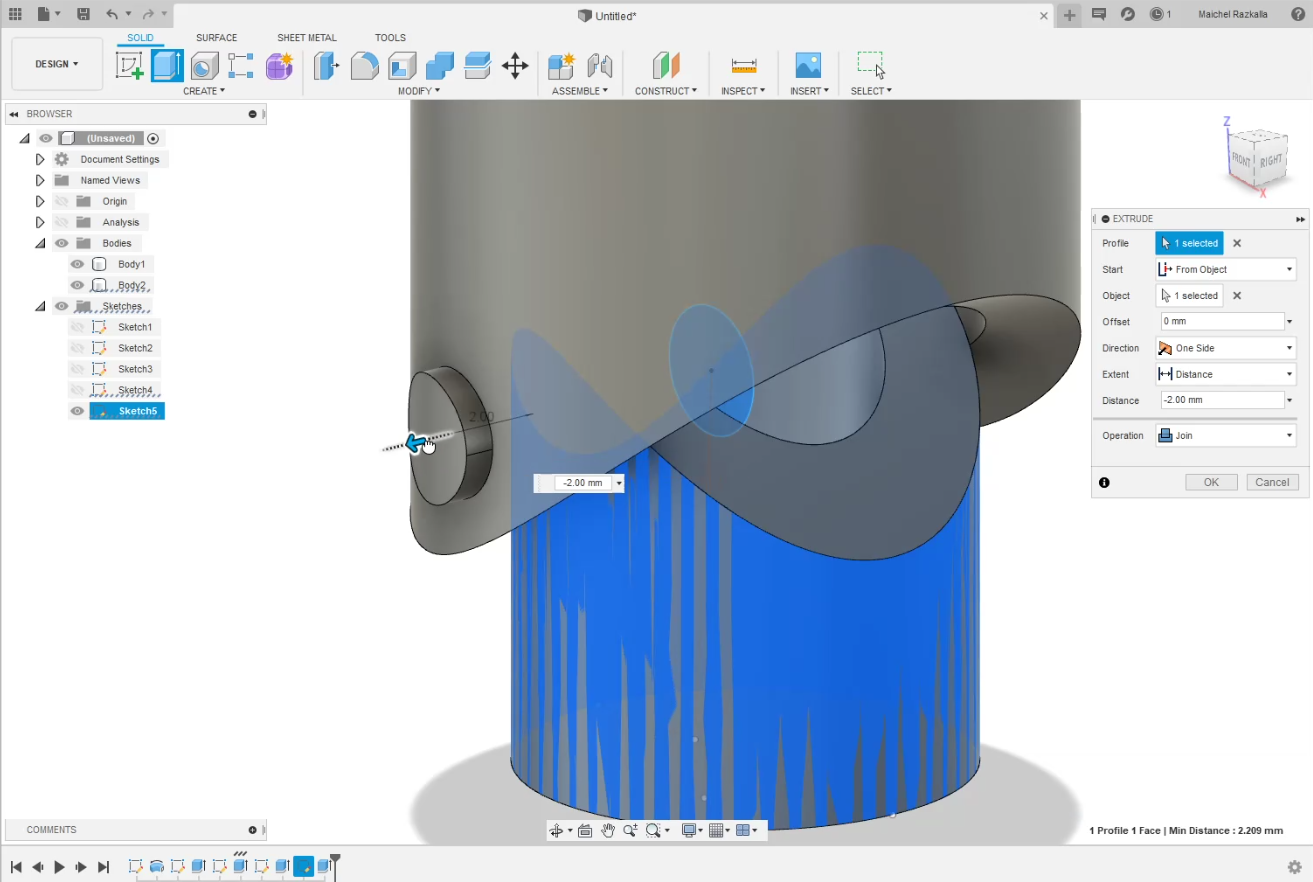
Now all I have to do is to select from “Start” “from object” and chose the joint dimension and do the same at another side but with a negative value
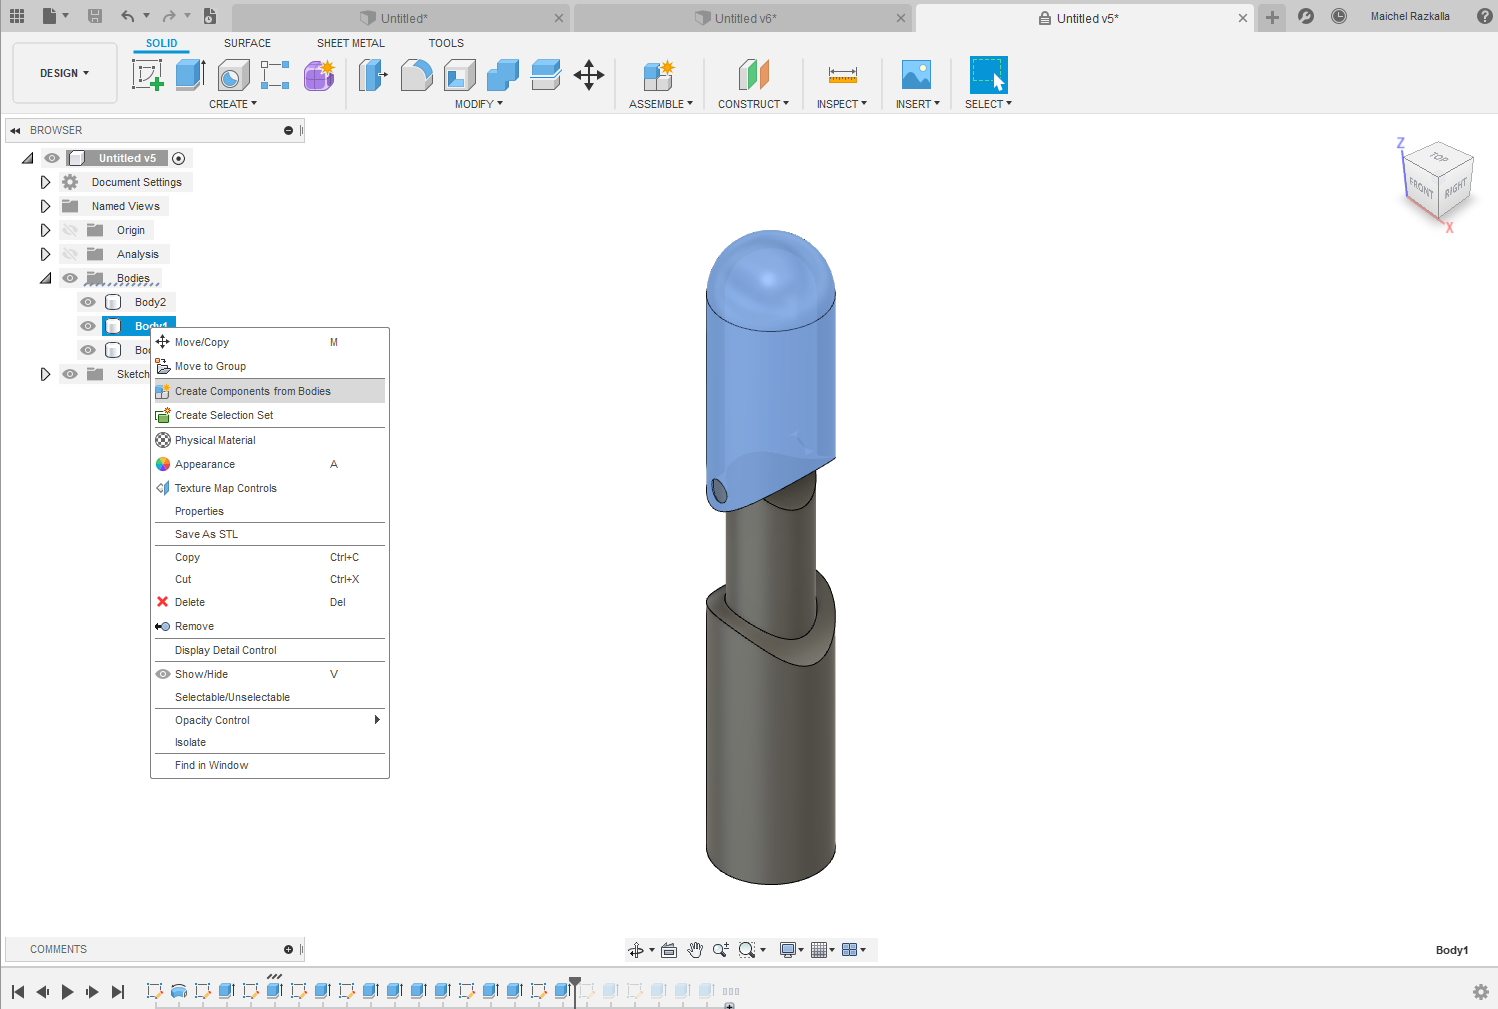
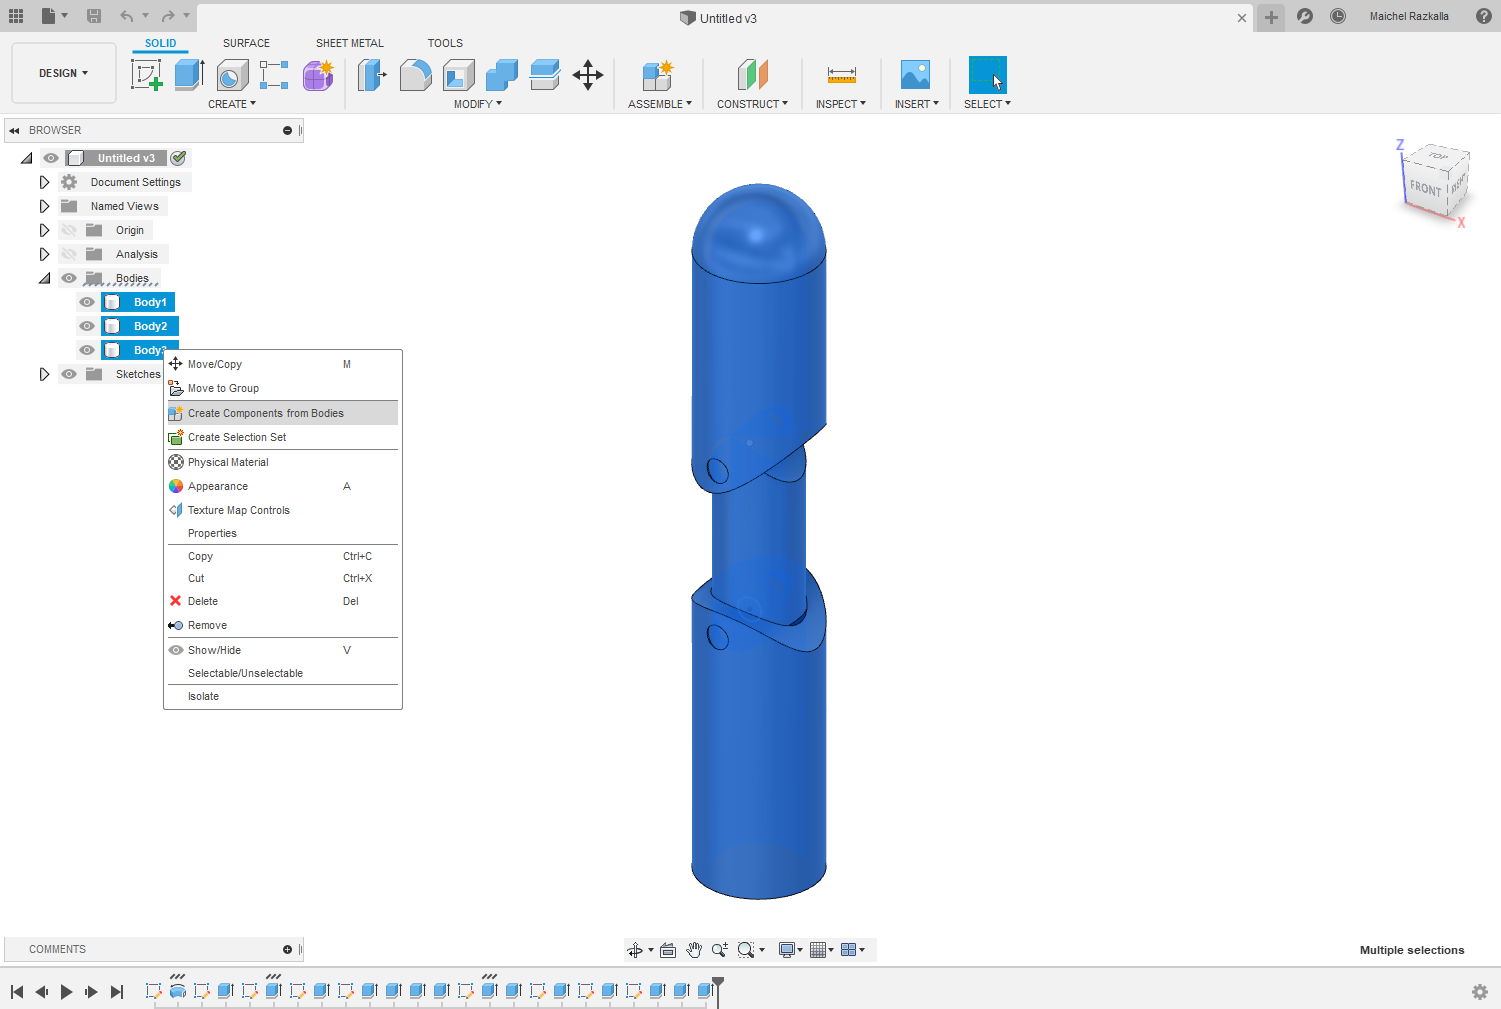
Now we have joint we need to make the last part of the finger, So I didn’t do anything new to make the last finger joint I did repeat all the last steps that's all
first you need to “Create Components From Bodies ”.
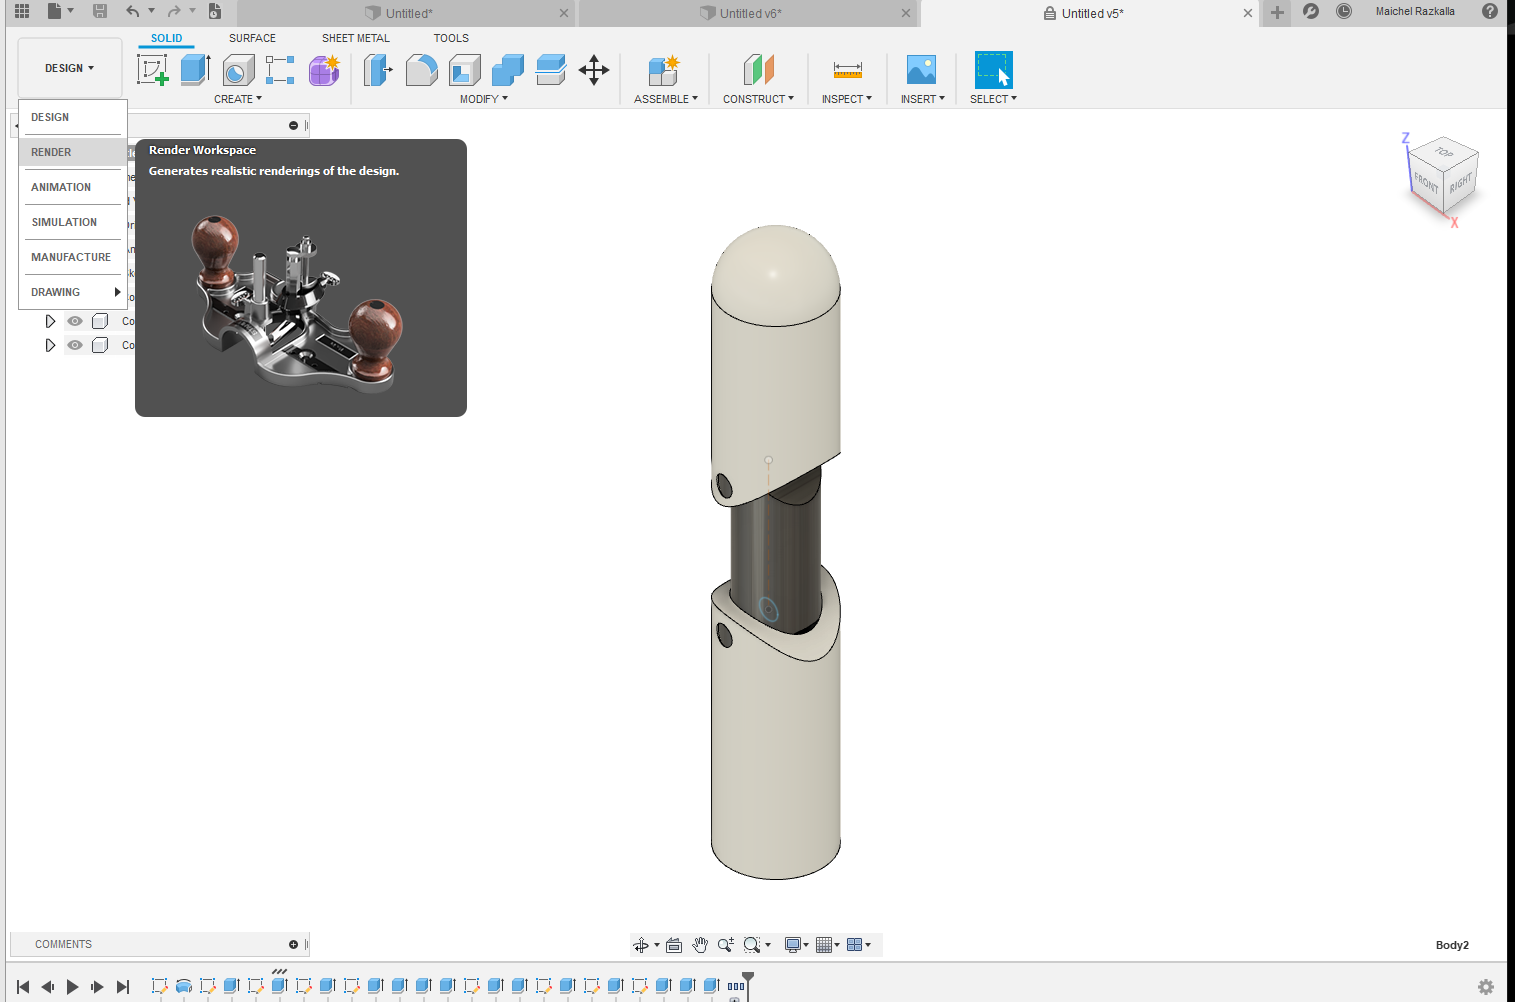
Now after I created the last part I will use “ِِAppearance” to give the part structure of any material like I used ABS for my model.
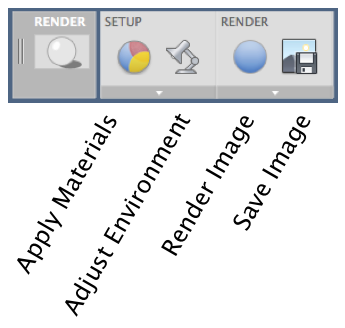
last step is to render the model all you have to do is to select "Render" from Design
So There are alot of tools for rendering in fusion 360 but for now i will just use "Render image tool
So what i loved in fusion rendering tool is that you can render your file locally or using cloud and when i usd cloud rendering tool it has been done in less than 10 min.
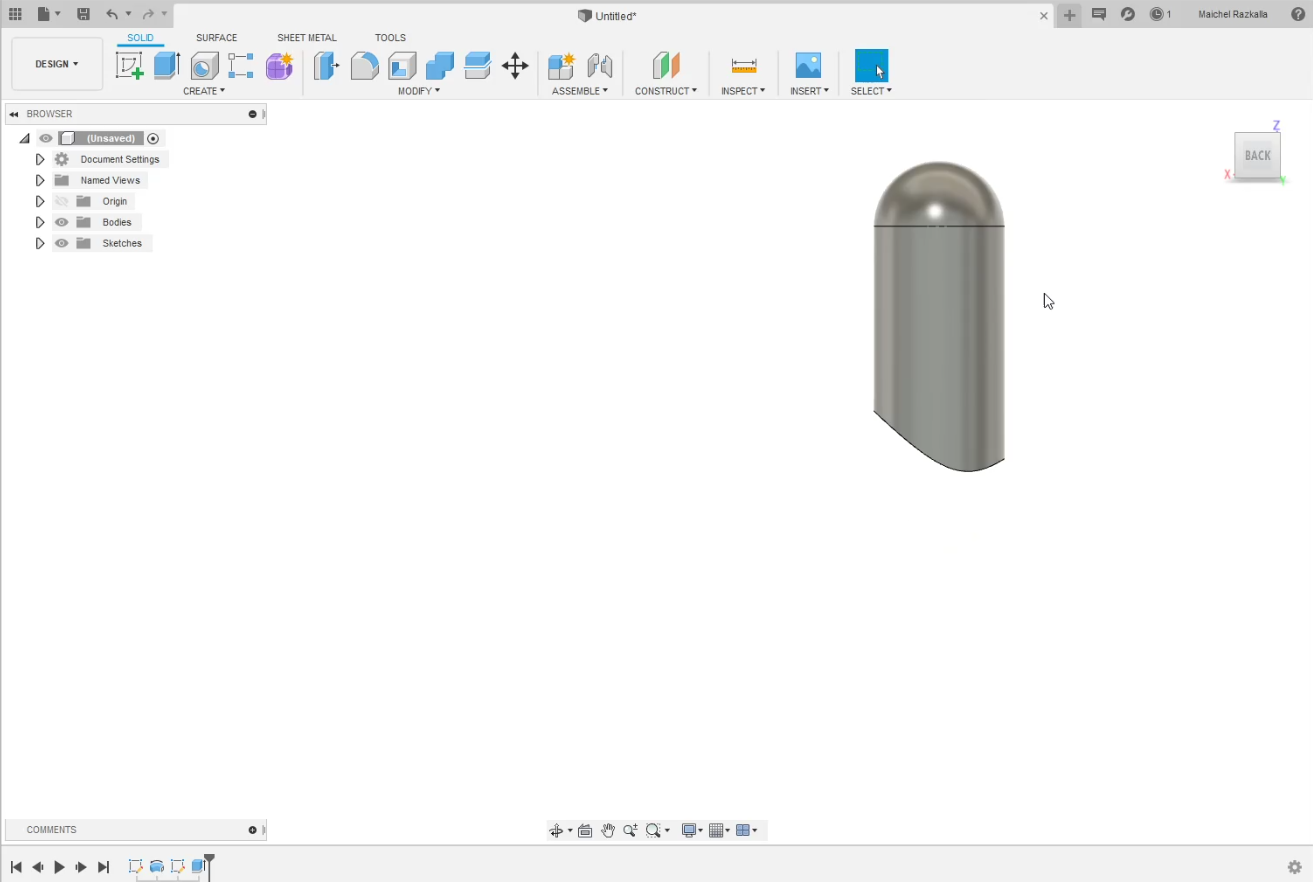
And this was the final result.
So now I know that I need to draw the finger again with "Sculpt form" tool in fusion 360 to make the finger more real and I need to make the mechanical design to see how I will control the finger
So now I'm working on the finger mechanical design you will find all the updates at the final project web page
Xdesign
So because I'm a big fan with Linux operating system and one of the problem I face when I'm using Linux that I didn't found any Decent software I can use so after locking into my options from the assignment link.
I have two options first one was Xdesign is a 3D, parametric solid modeling program freshly minted by Dassault Systèmes SOLIDWORKS. It leverages the 3DEXPERIENCE Platform, a different modeling kernel than the Parasolid in SOLIDWORKS. Further differentiating the systems is that Xdesign will store its data on a database on the cloud, So I just use it from any browser to access my data.
the idea was great but I have a deadly problem that I don't have a stable internet connection so the program was lagging most of the times and it was away from perfect, so I decided to look for Another program.
freecad
so I found this program and I can use it on any platform, so I decided to give it a try I started with the freecad website Documethion it had nearly everything but I didn't found any videos so I searched on youtube for tutorials so I found video it was very helpful.
I found freecad interface was a little bit complicated and it's not easy to get used to it, but I have to give it a chance so I started with making a skitch.
because this program has a lot of Cad categories so I need to select one of these categories, to start drawing the part we need to select the "part design" workbench.

Next to select "Create body" from "Tasks"

Now to select "creat sketch"

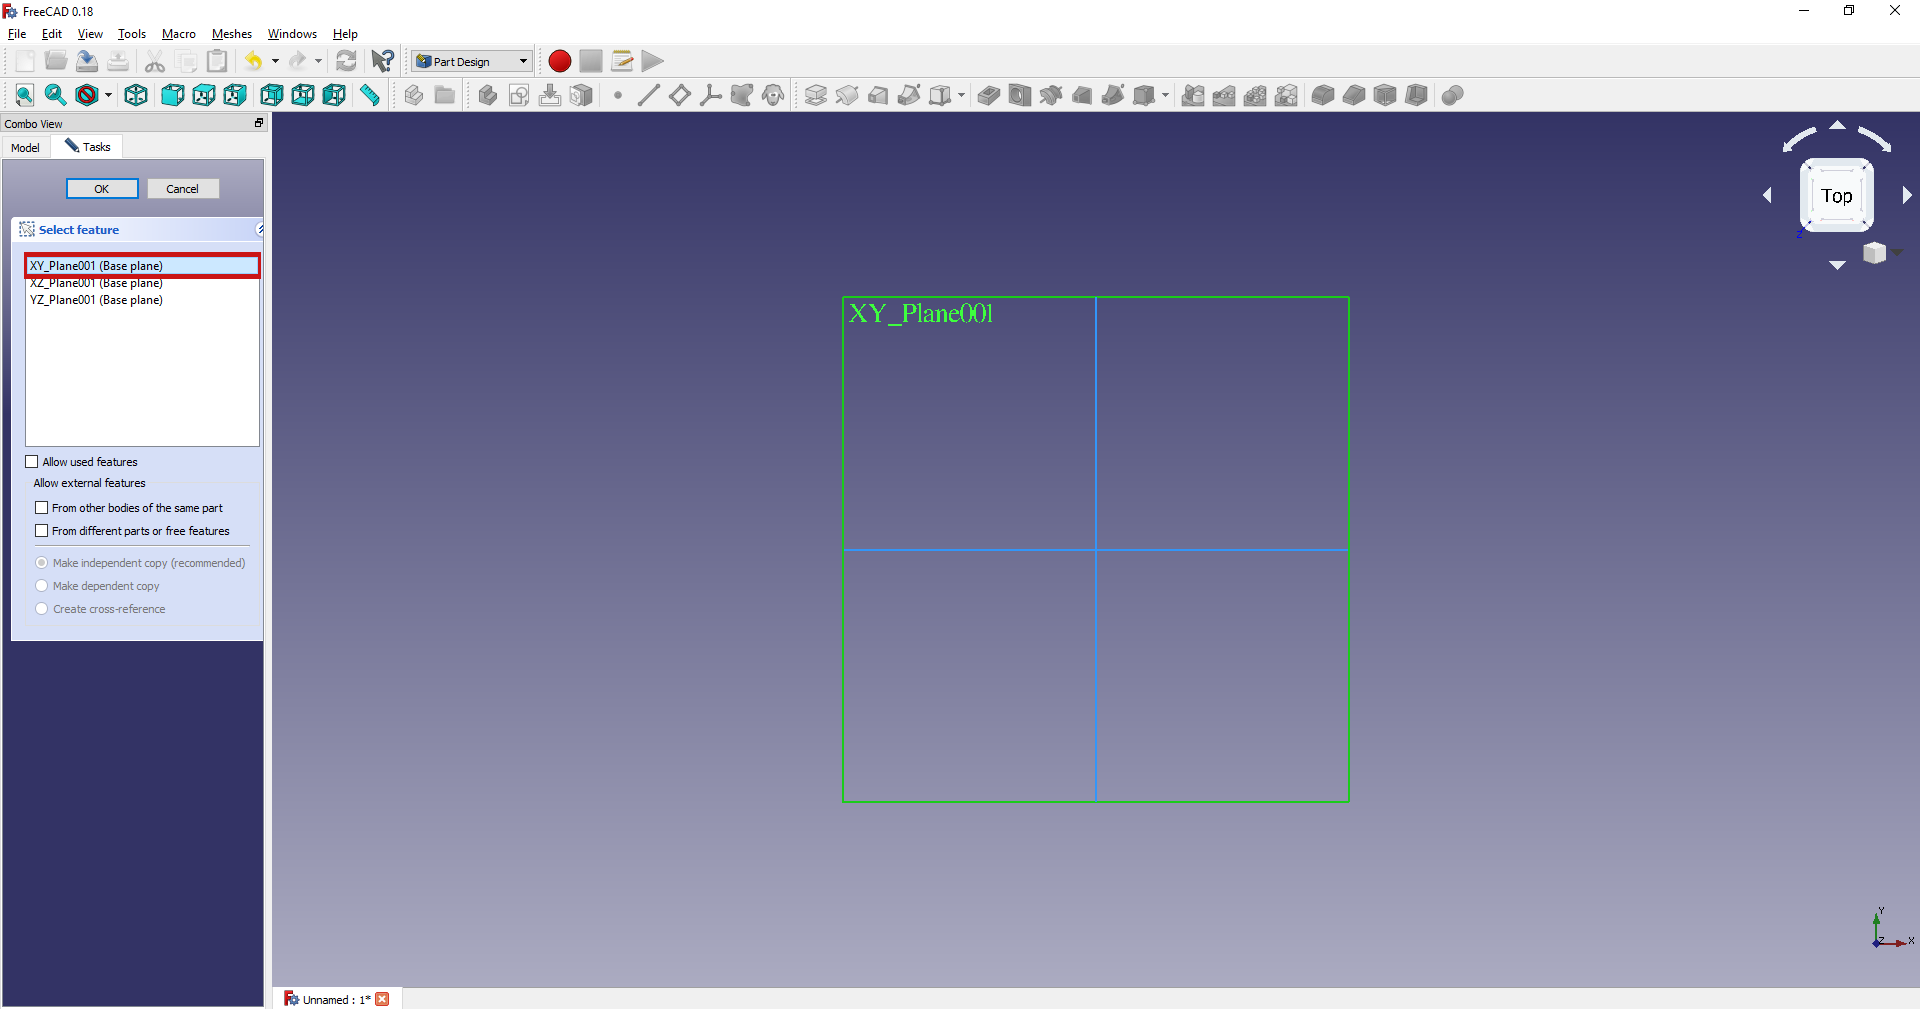
Next for plan selection as I understand the most common plane is "XY plan"
so as I understand there are two main categories first the "Sketcher geometries" for the basic drawing tools like line and square, and "Sketcher Constraints" and I think that's all I need to create a perfect skitch.

So I decided to make a paper holder so I draw a basic shape look like what I'm going to draw using polyline tool.
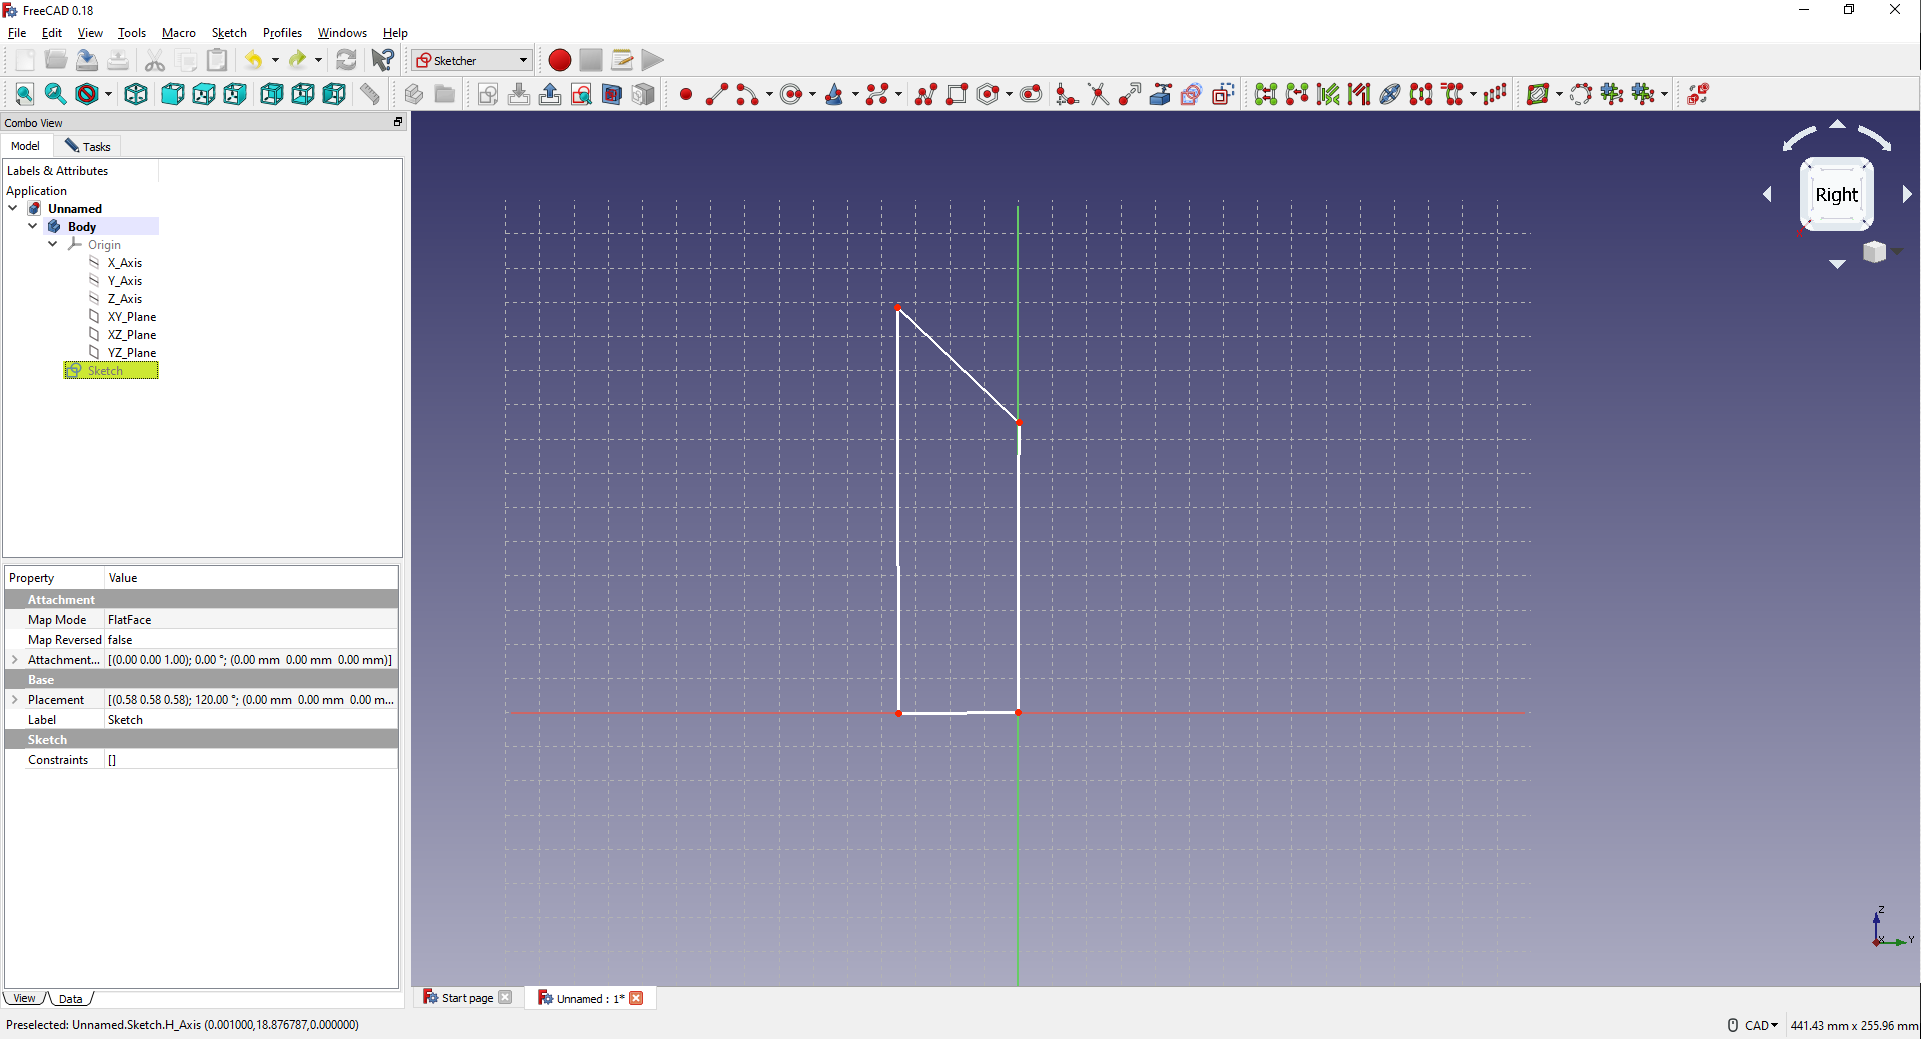
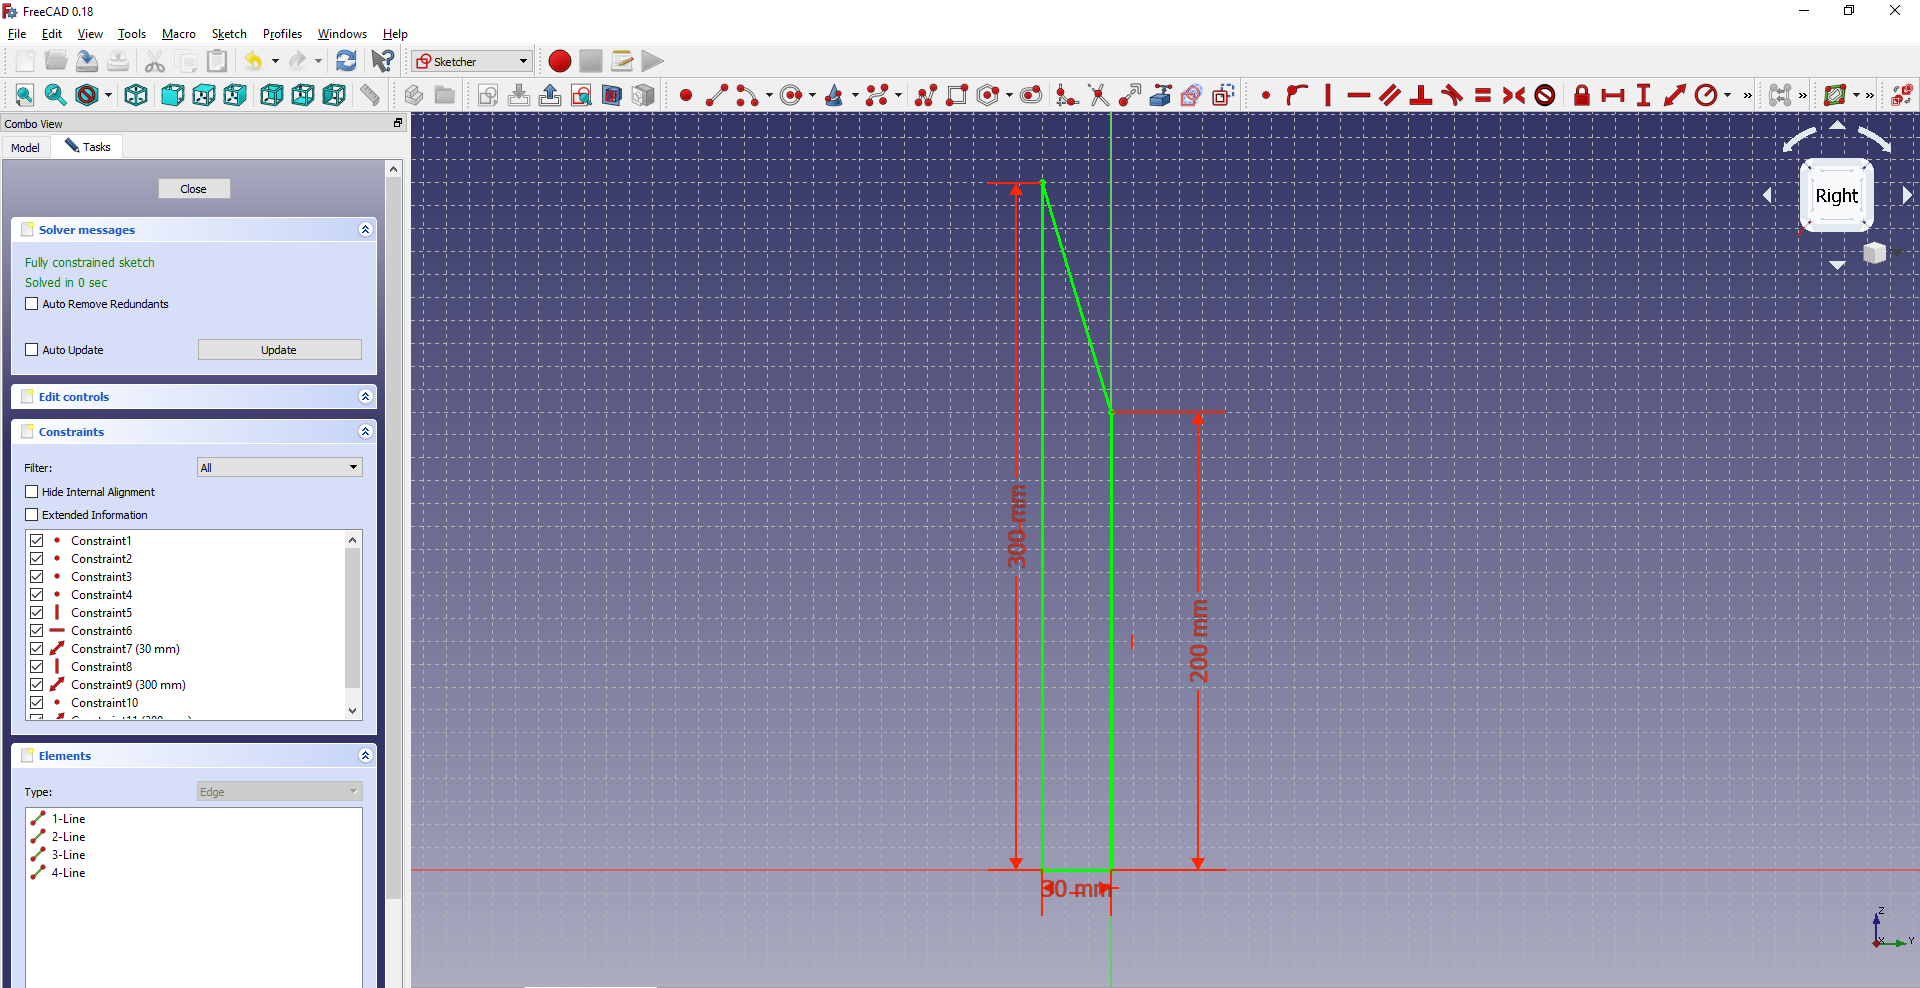
so this shape is not stable I can click any point and move it so now I need to use the Constraints tool to constrain all the lines, so all the lines are constructed it will be in green like that.
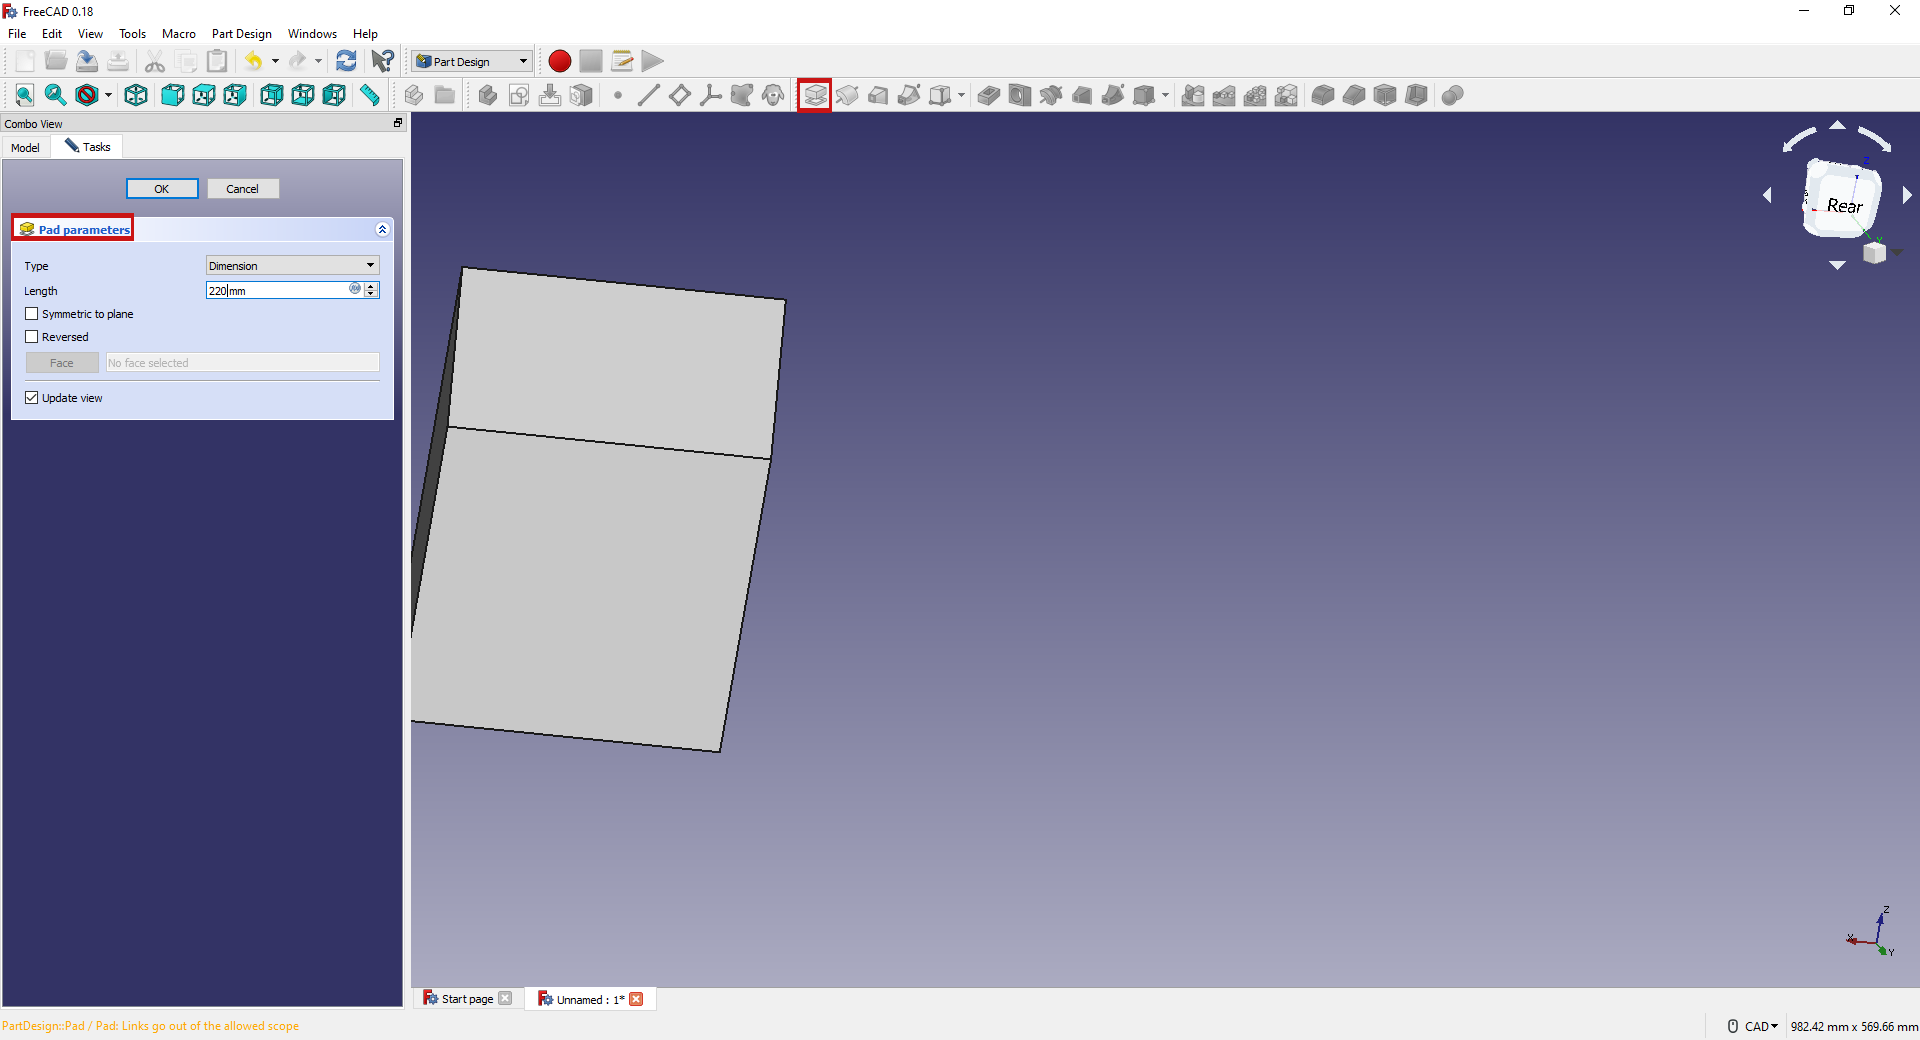
now I will click cancel now I need to give this thickness so I didn't fount the extrude tool but I found a similar tool call "pad" so I used it and right the length I need.
note to rotate the object you have to press "Shift+Right click"
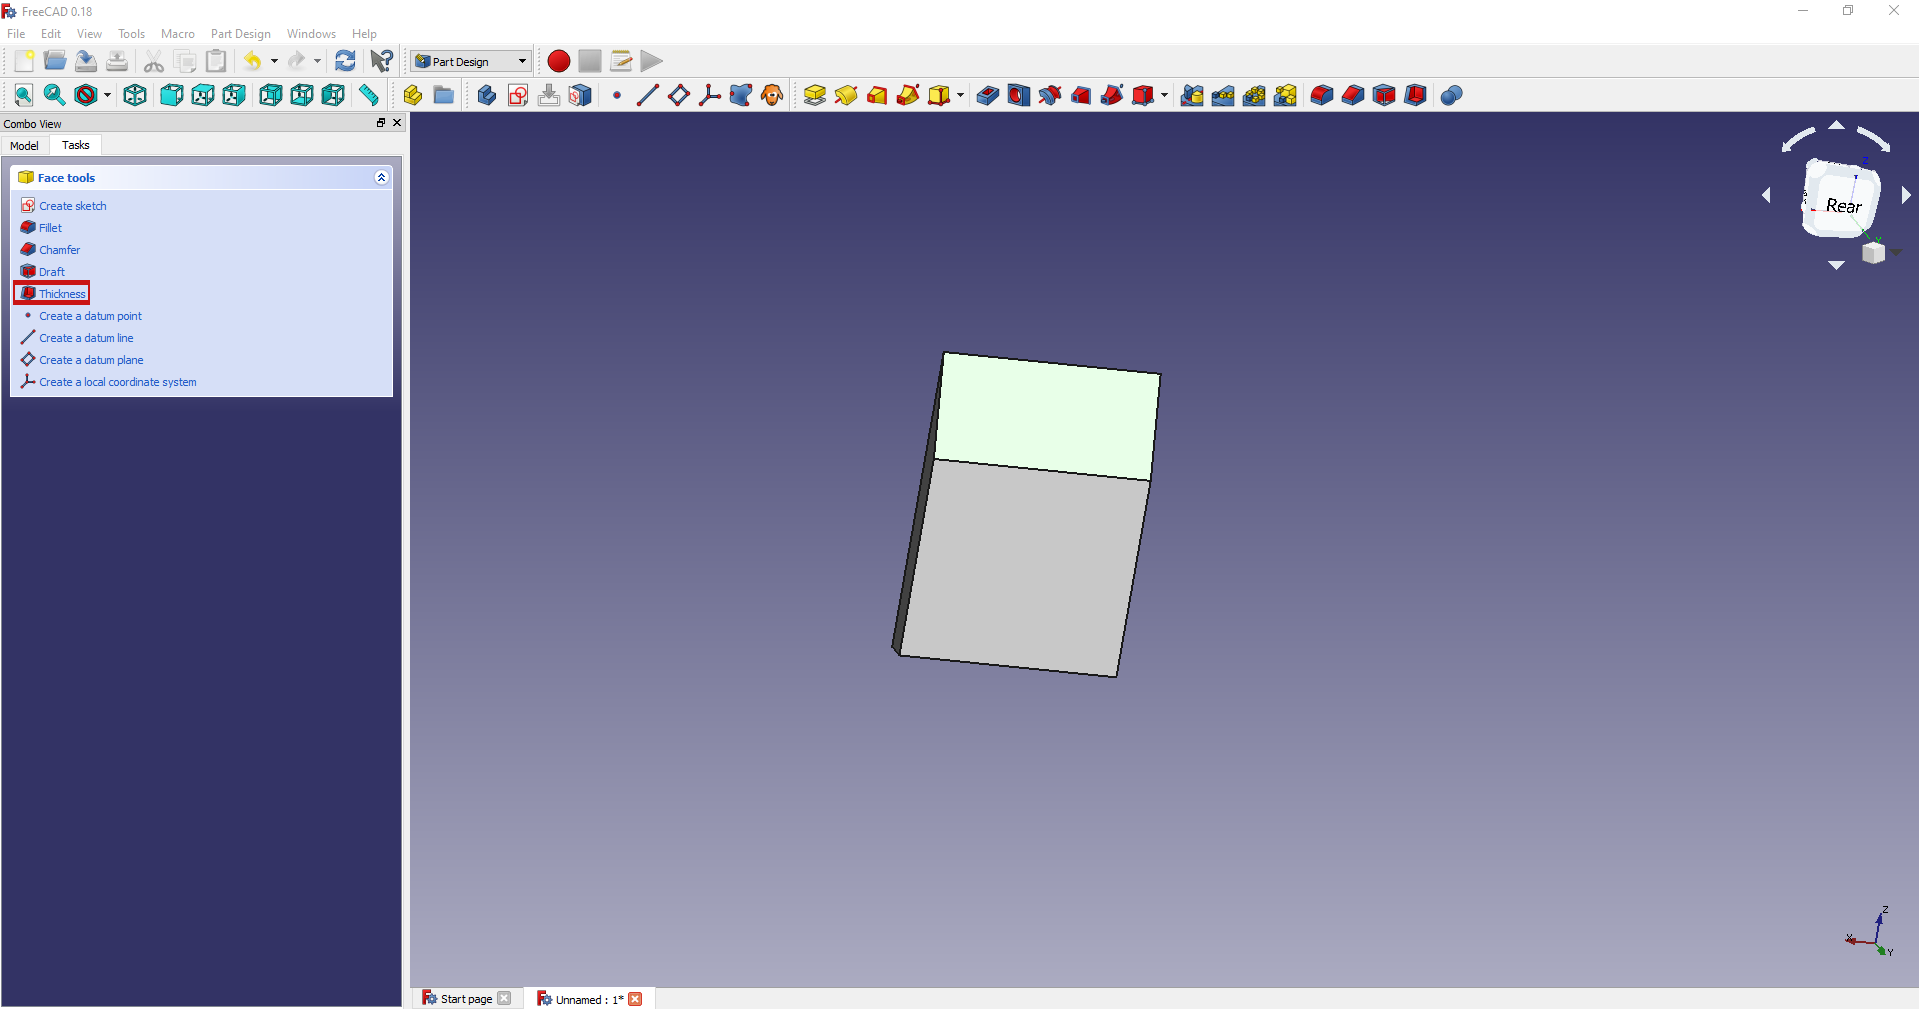
Now the last step I will use a tool called "Thickness" to make my design hollow, so after selecting the top face in tasks I get a list of options I can use so I will select thickness.
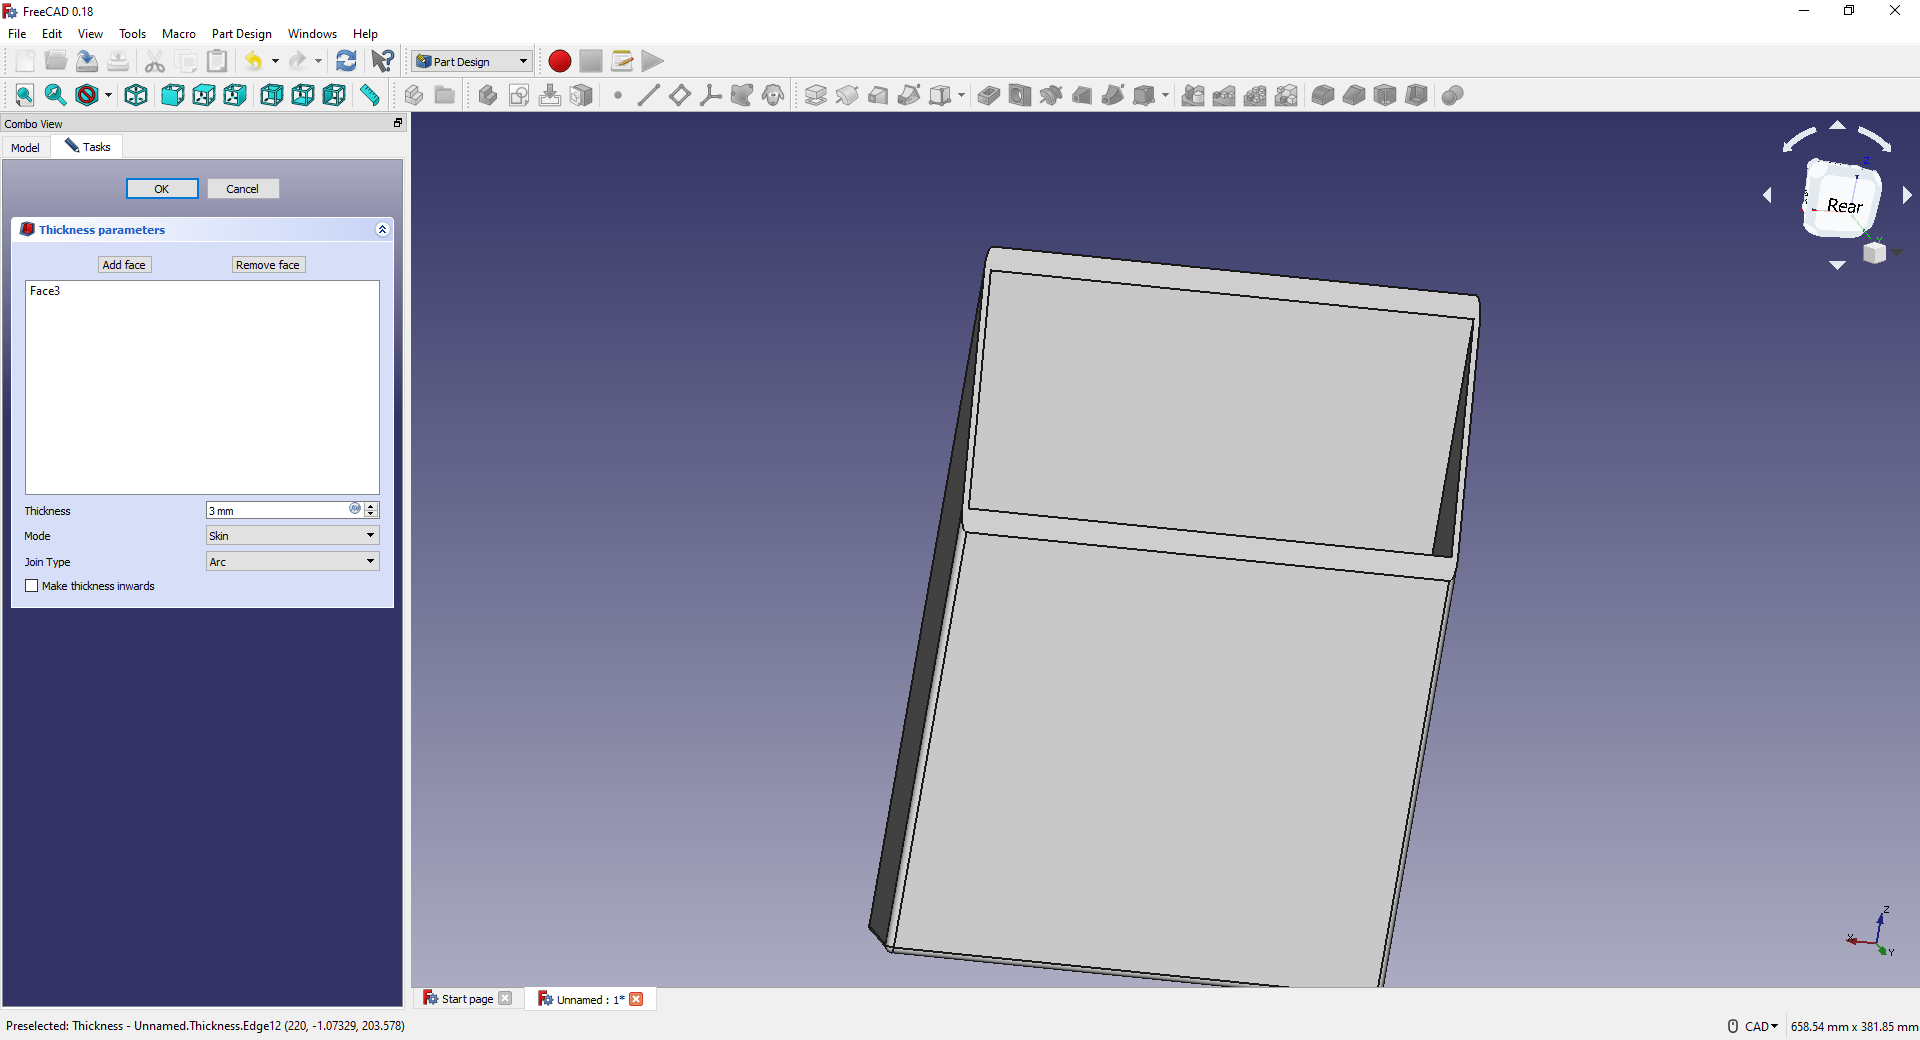
In the "Thickness" tool it has multiple options what Caught my attention is "Join type" option it has two options "arc" shape and "Intersection" so I selected the arc because it looks better and for the Thickness, I made it 3 mm.
so I really enjoyed drawing with freecad it's not easy as fusion of course but what I really like about it it's a free program and opensource and have most of fusion options and maybe more so I think in the near futcher I will learn more about freecad.