Wild Card Week
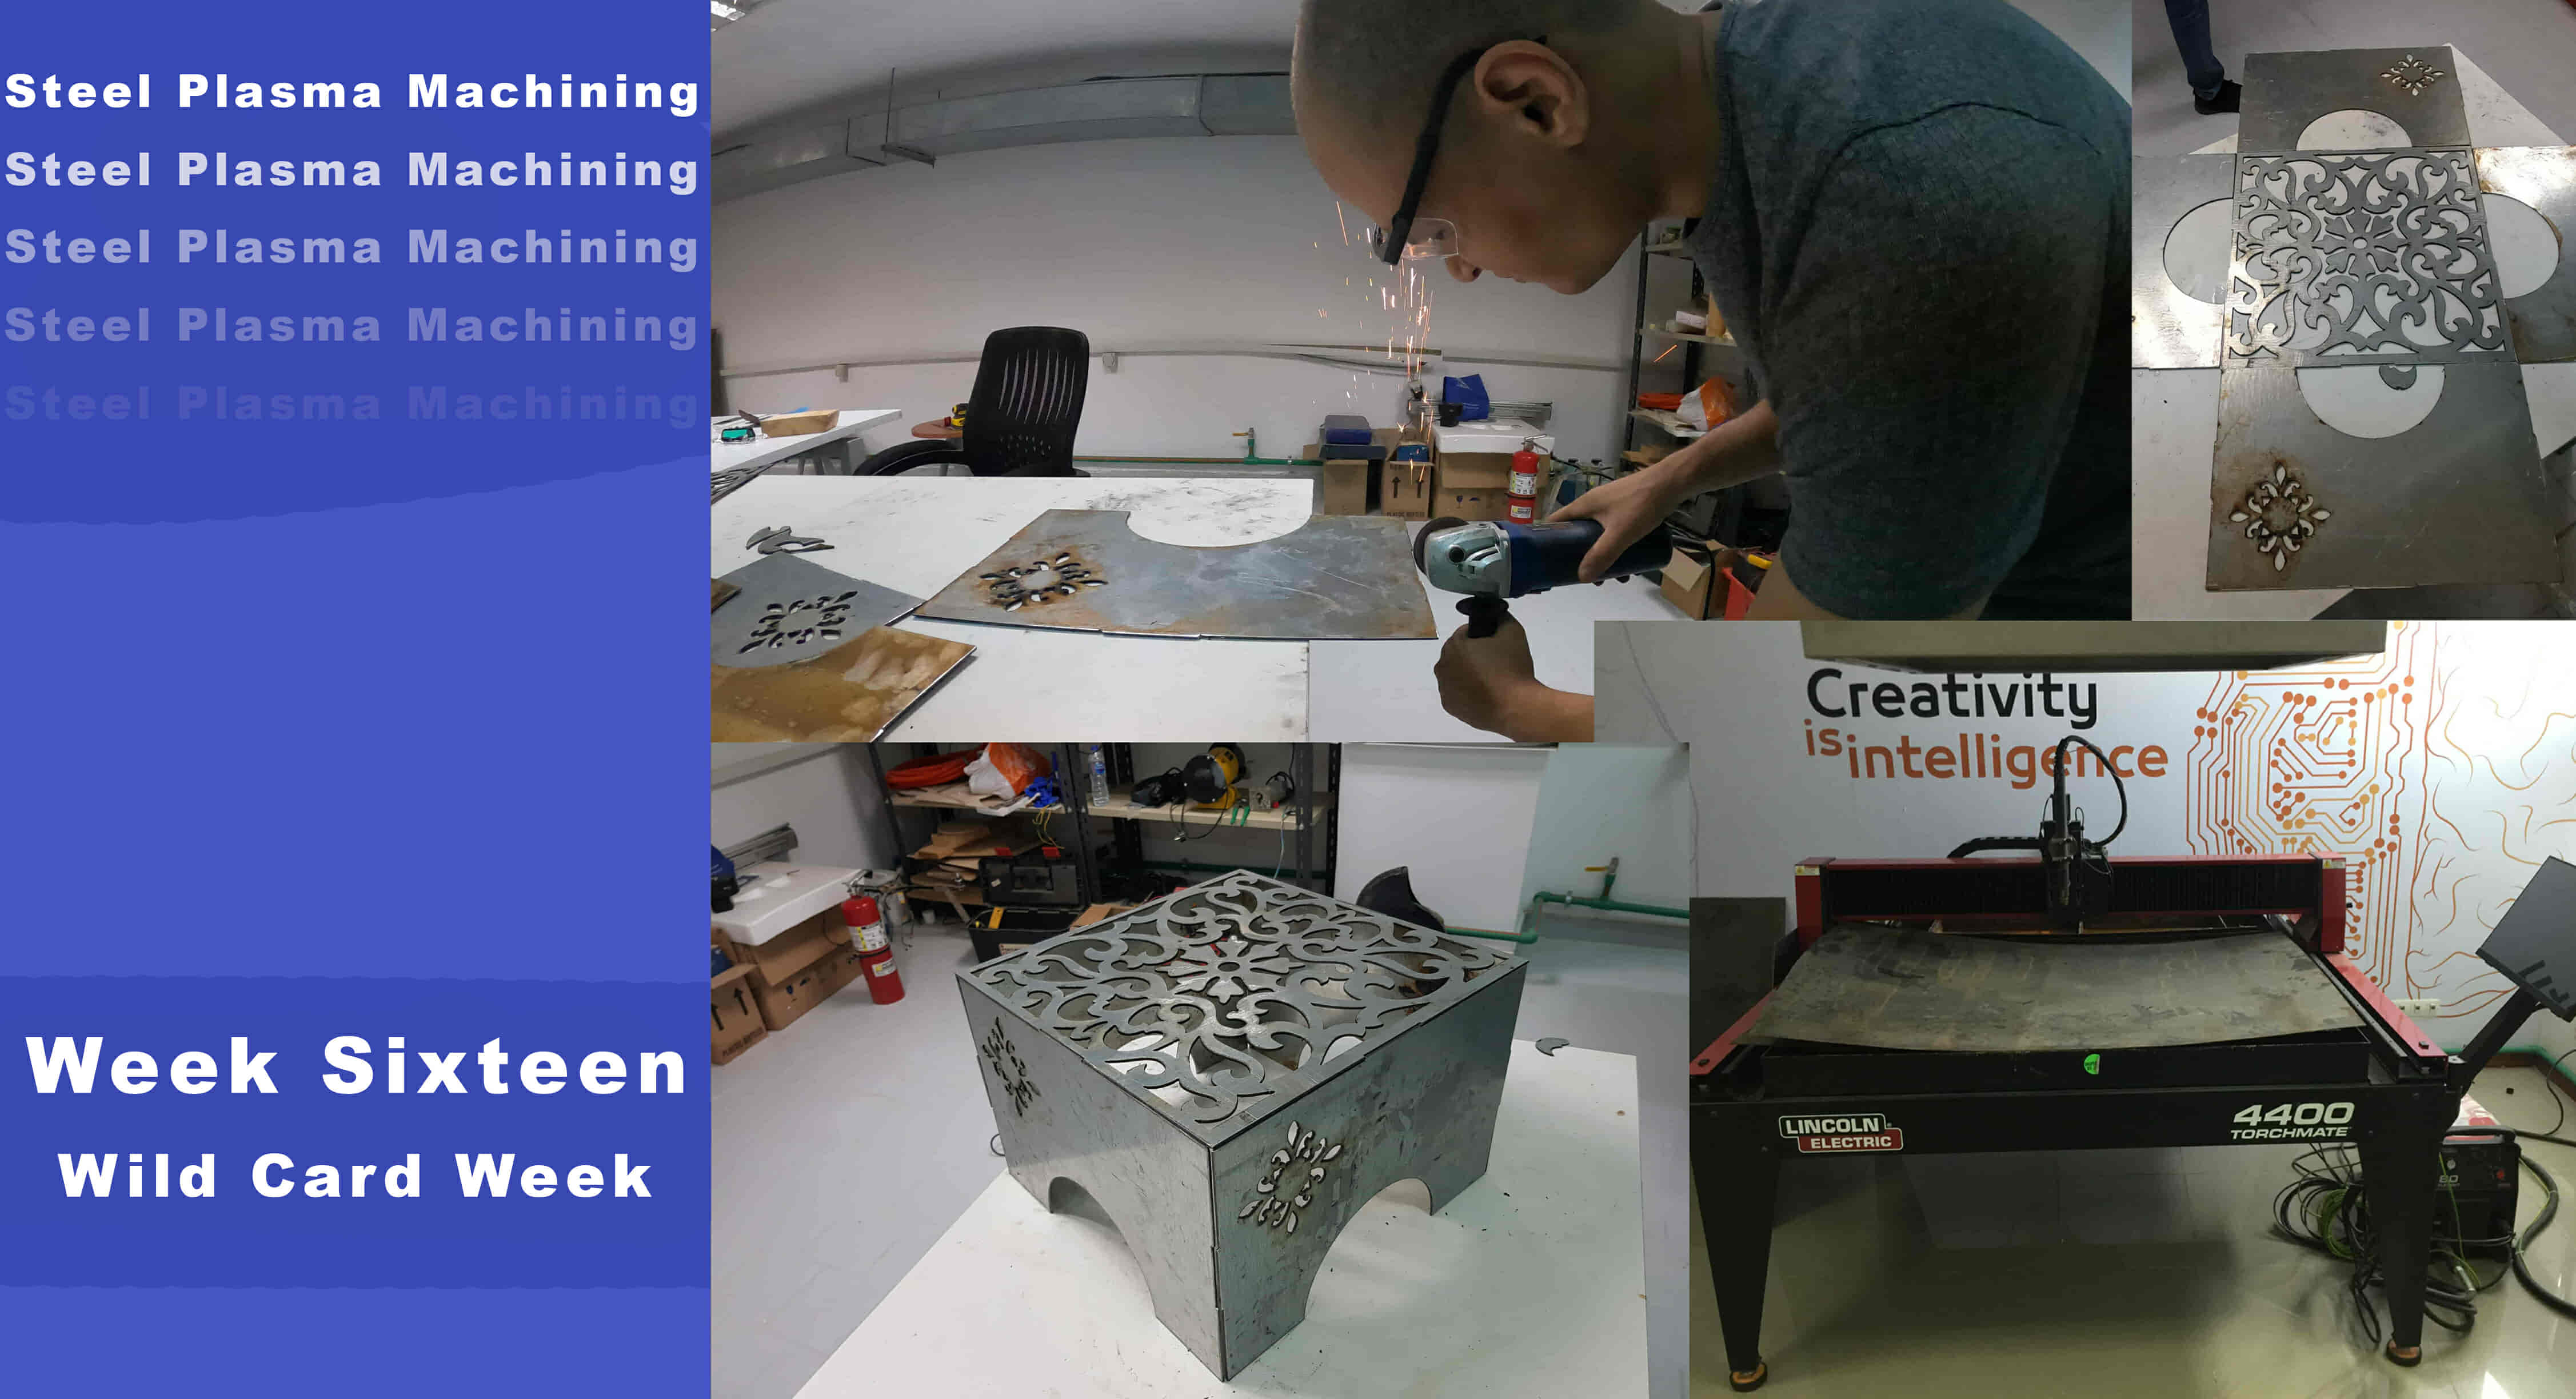
What’s Going On?
This week I was very puzzled, there are a lot of things that I never tried before and I wanna try it, like working with FPGAs, making flexible PCBs, tinkering with soft robotics, Metal casting, CNC metal plasma cutting, … and a lot of other things. I guess one week will not be enough to work on all of these stuff :D So, I have to select one thing to work on this week.
I was talking with my friend Ahmed Saeed and I asked him to suggest one thing to work on this week. He suggested cutting something metal on the plasma cutter machine which is something that I wanted to try a long time ago.
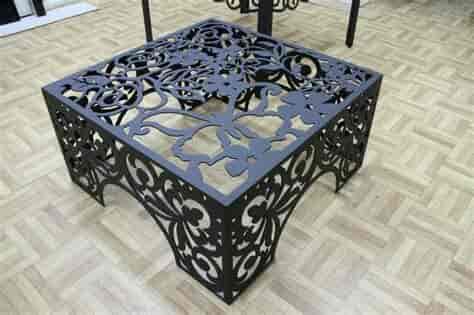
I started searching for some inspiration on the internet related to metal plasma cutting. I found a lot of great projects. I liked the metal furniture work a lot. So, I decided to make a table!
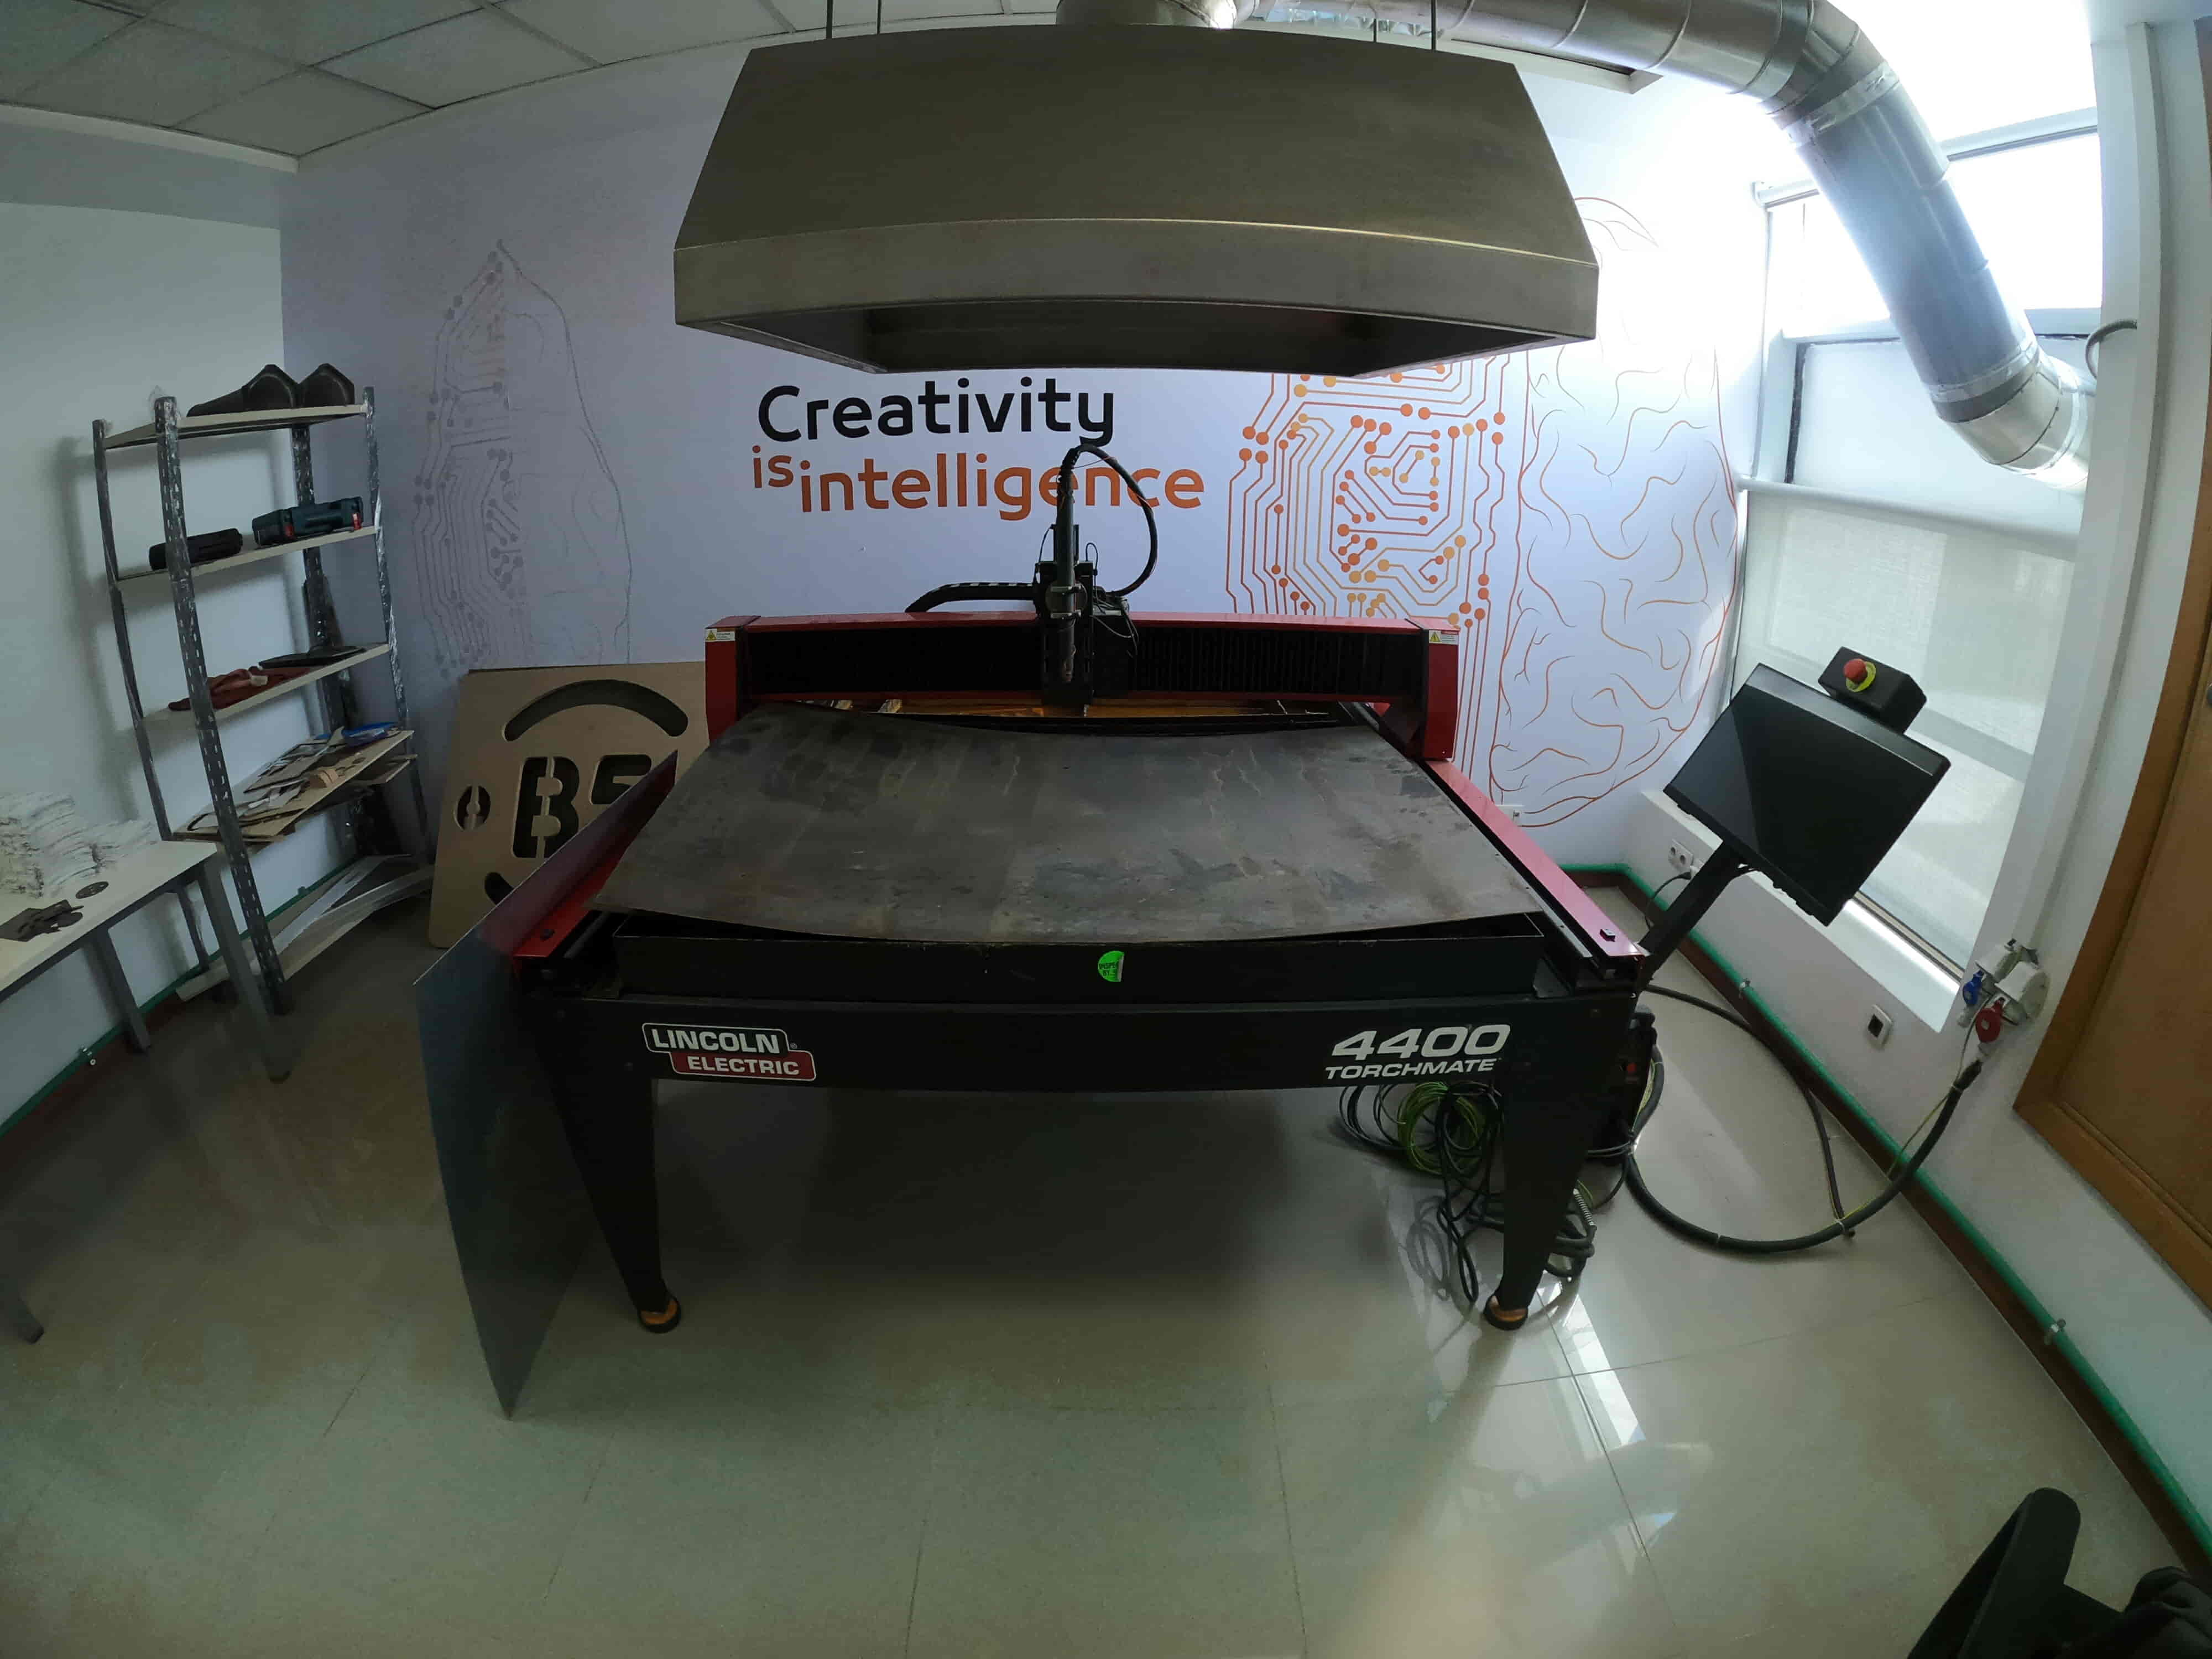
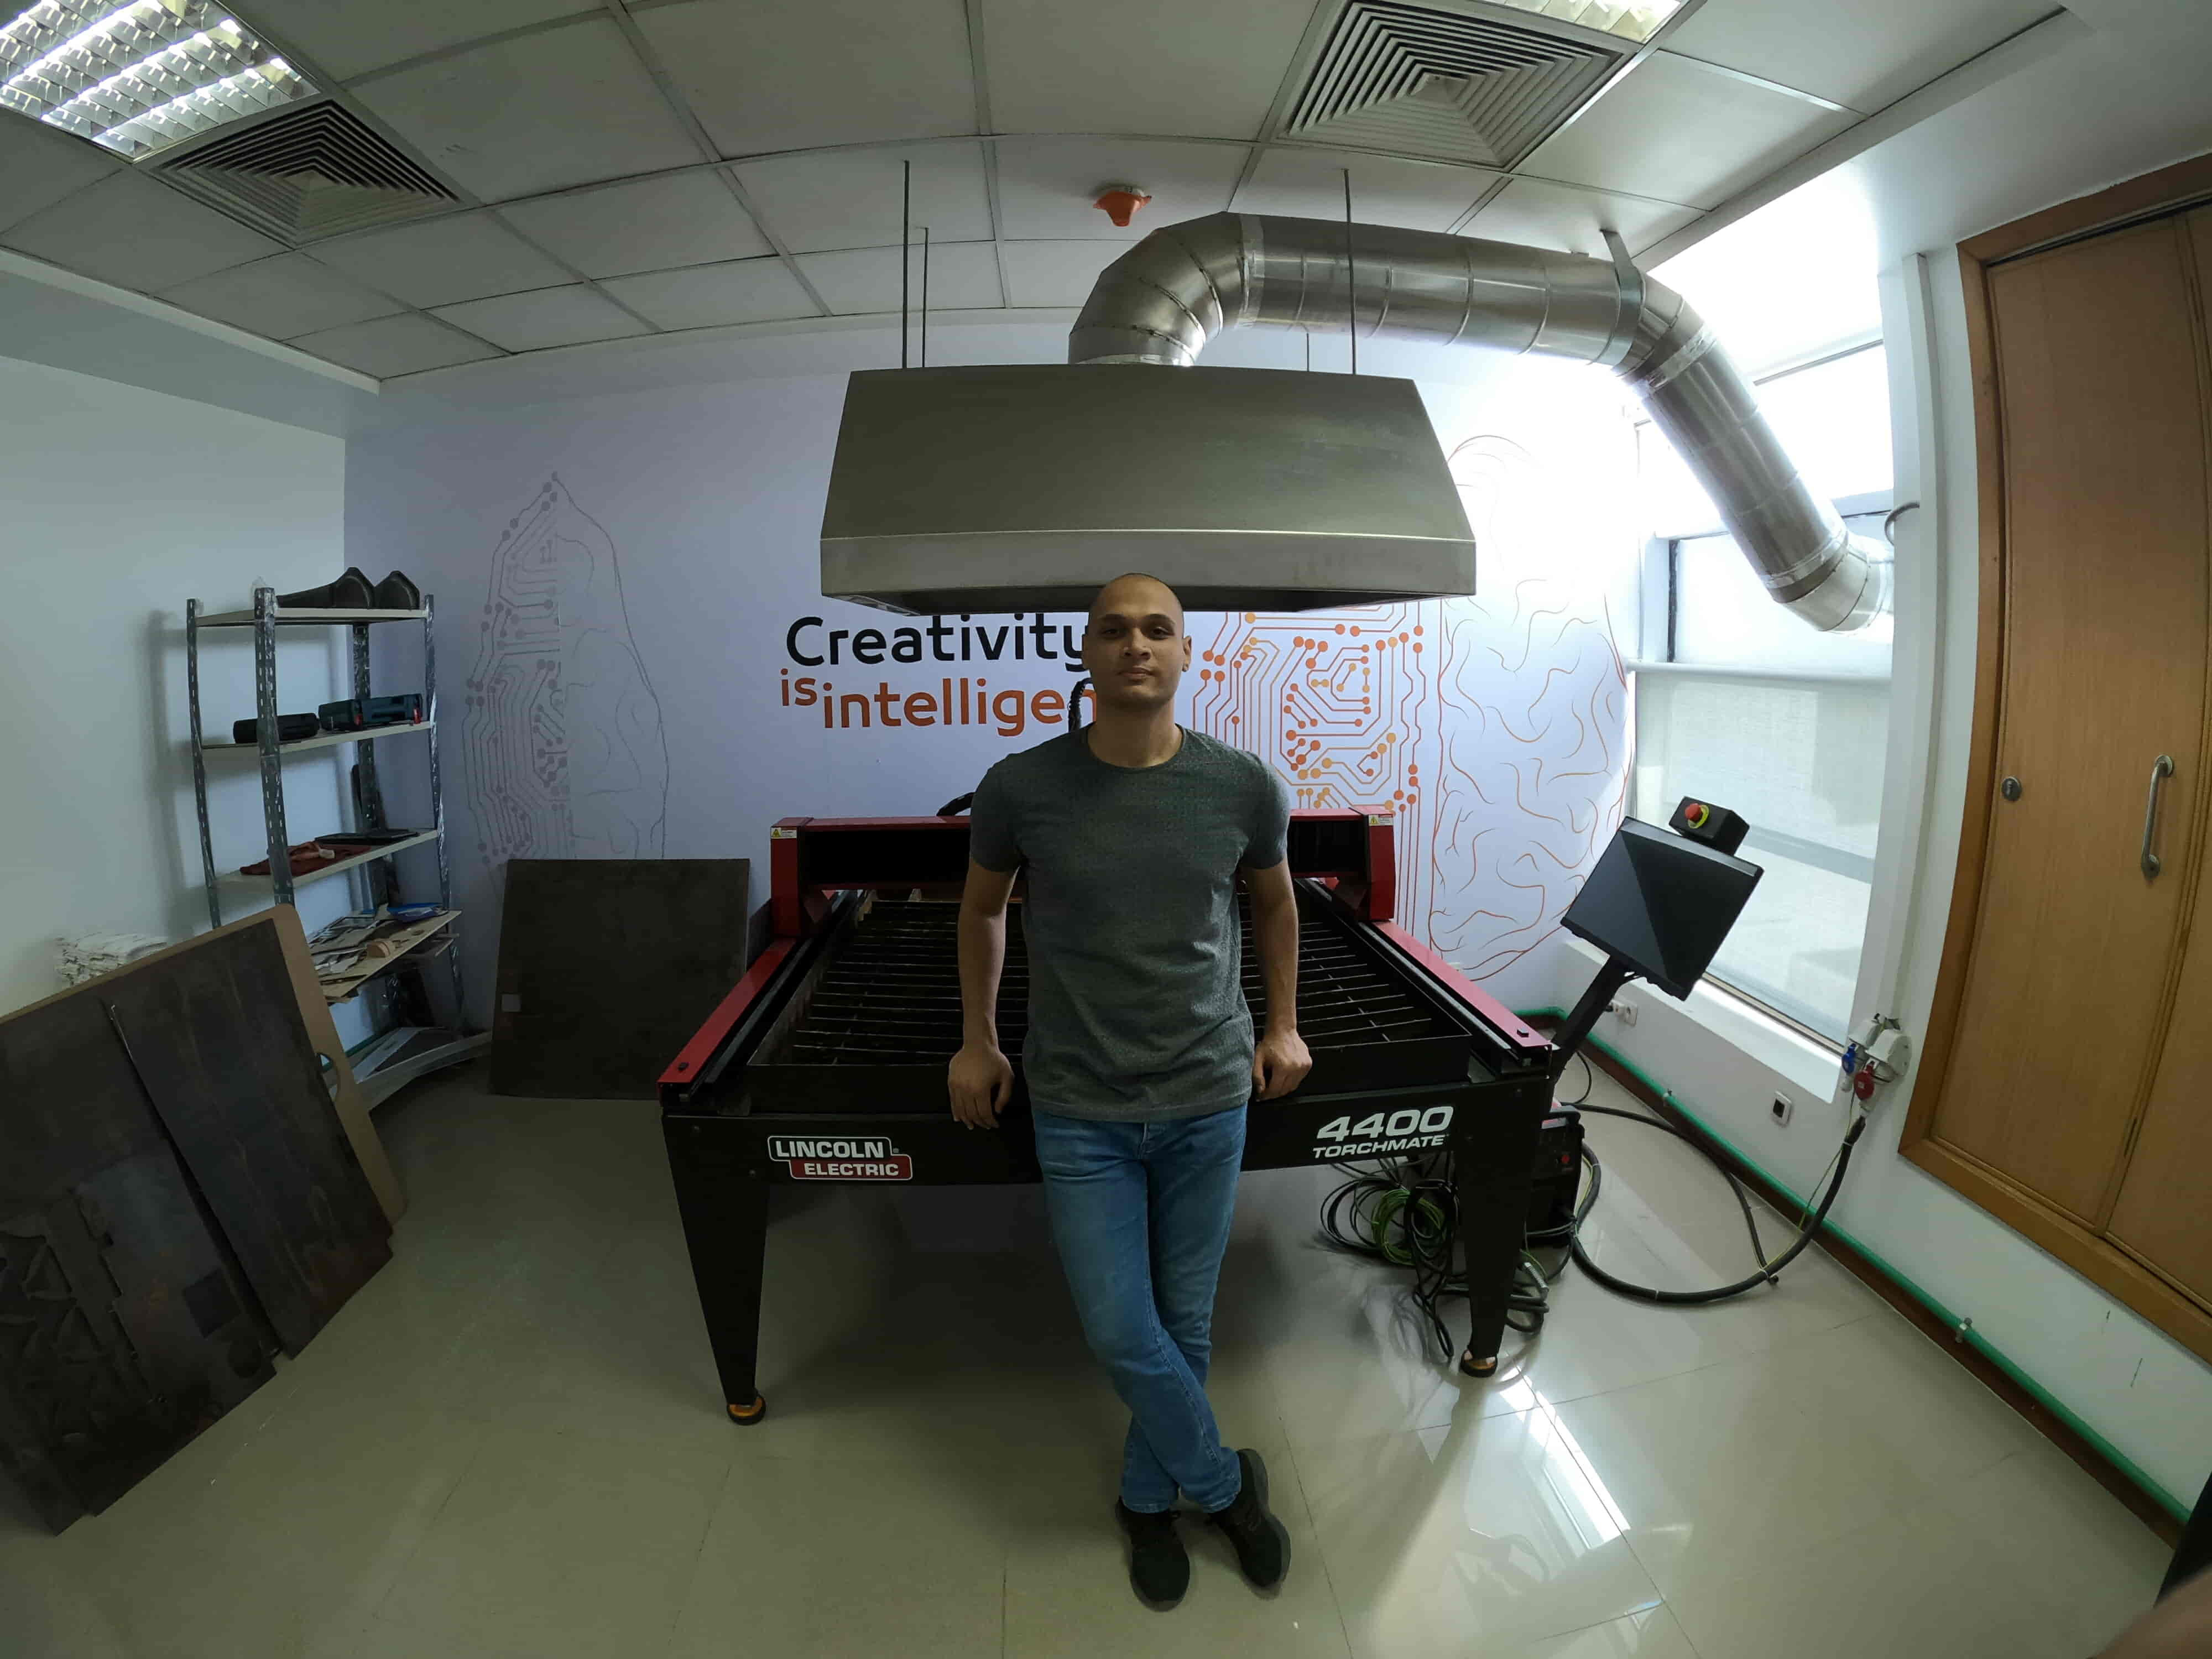
Get To Know More Our Machine
Metal cutting is the process of producing a job by removing a layer of unwanted material from a given workpiece. There are a lot of methods to do that job. Like using a fiber laser machine, plasma cutter machine, CNC milling machine. They are all good and will do your job. Each method has its pros and cons. But, today specifically I will take you on a journey with the plasma cutter machine that I will use to cut my metal table.
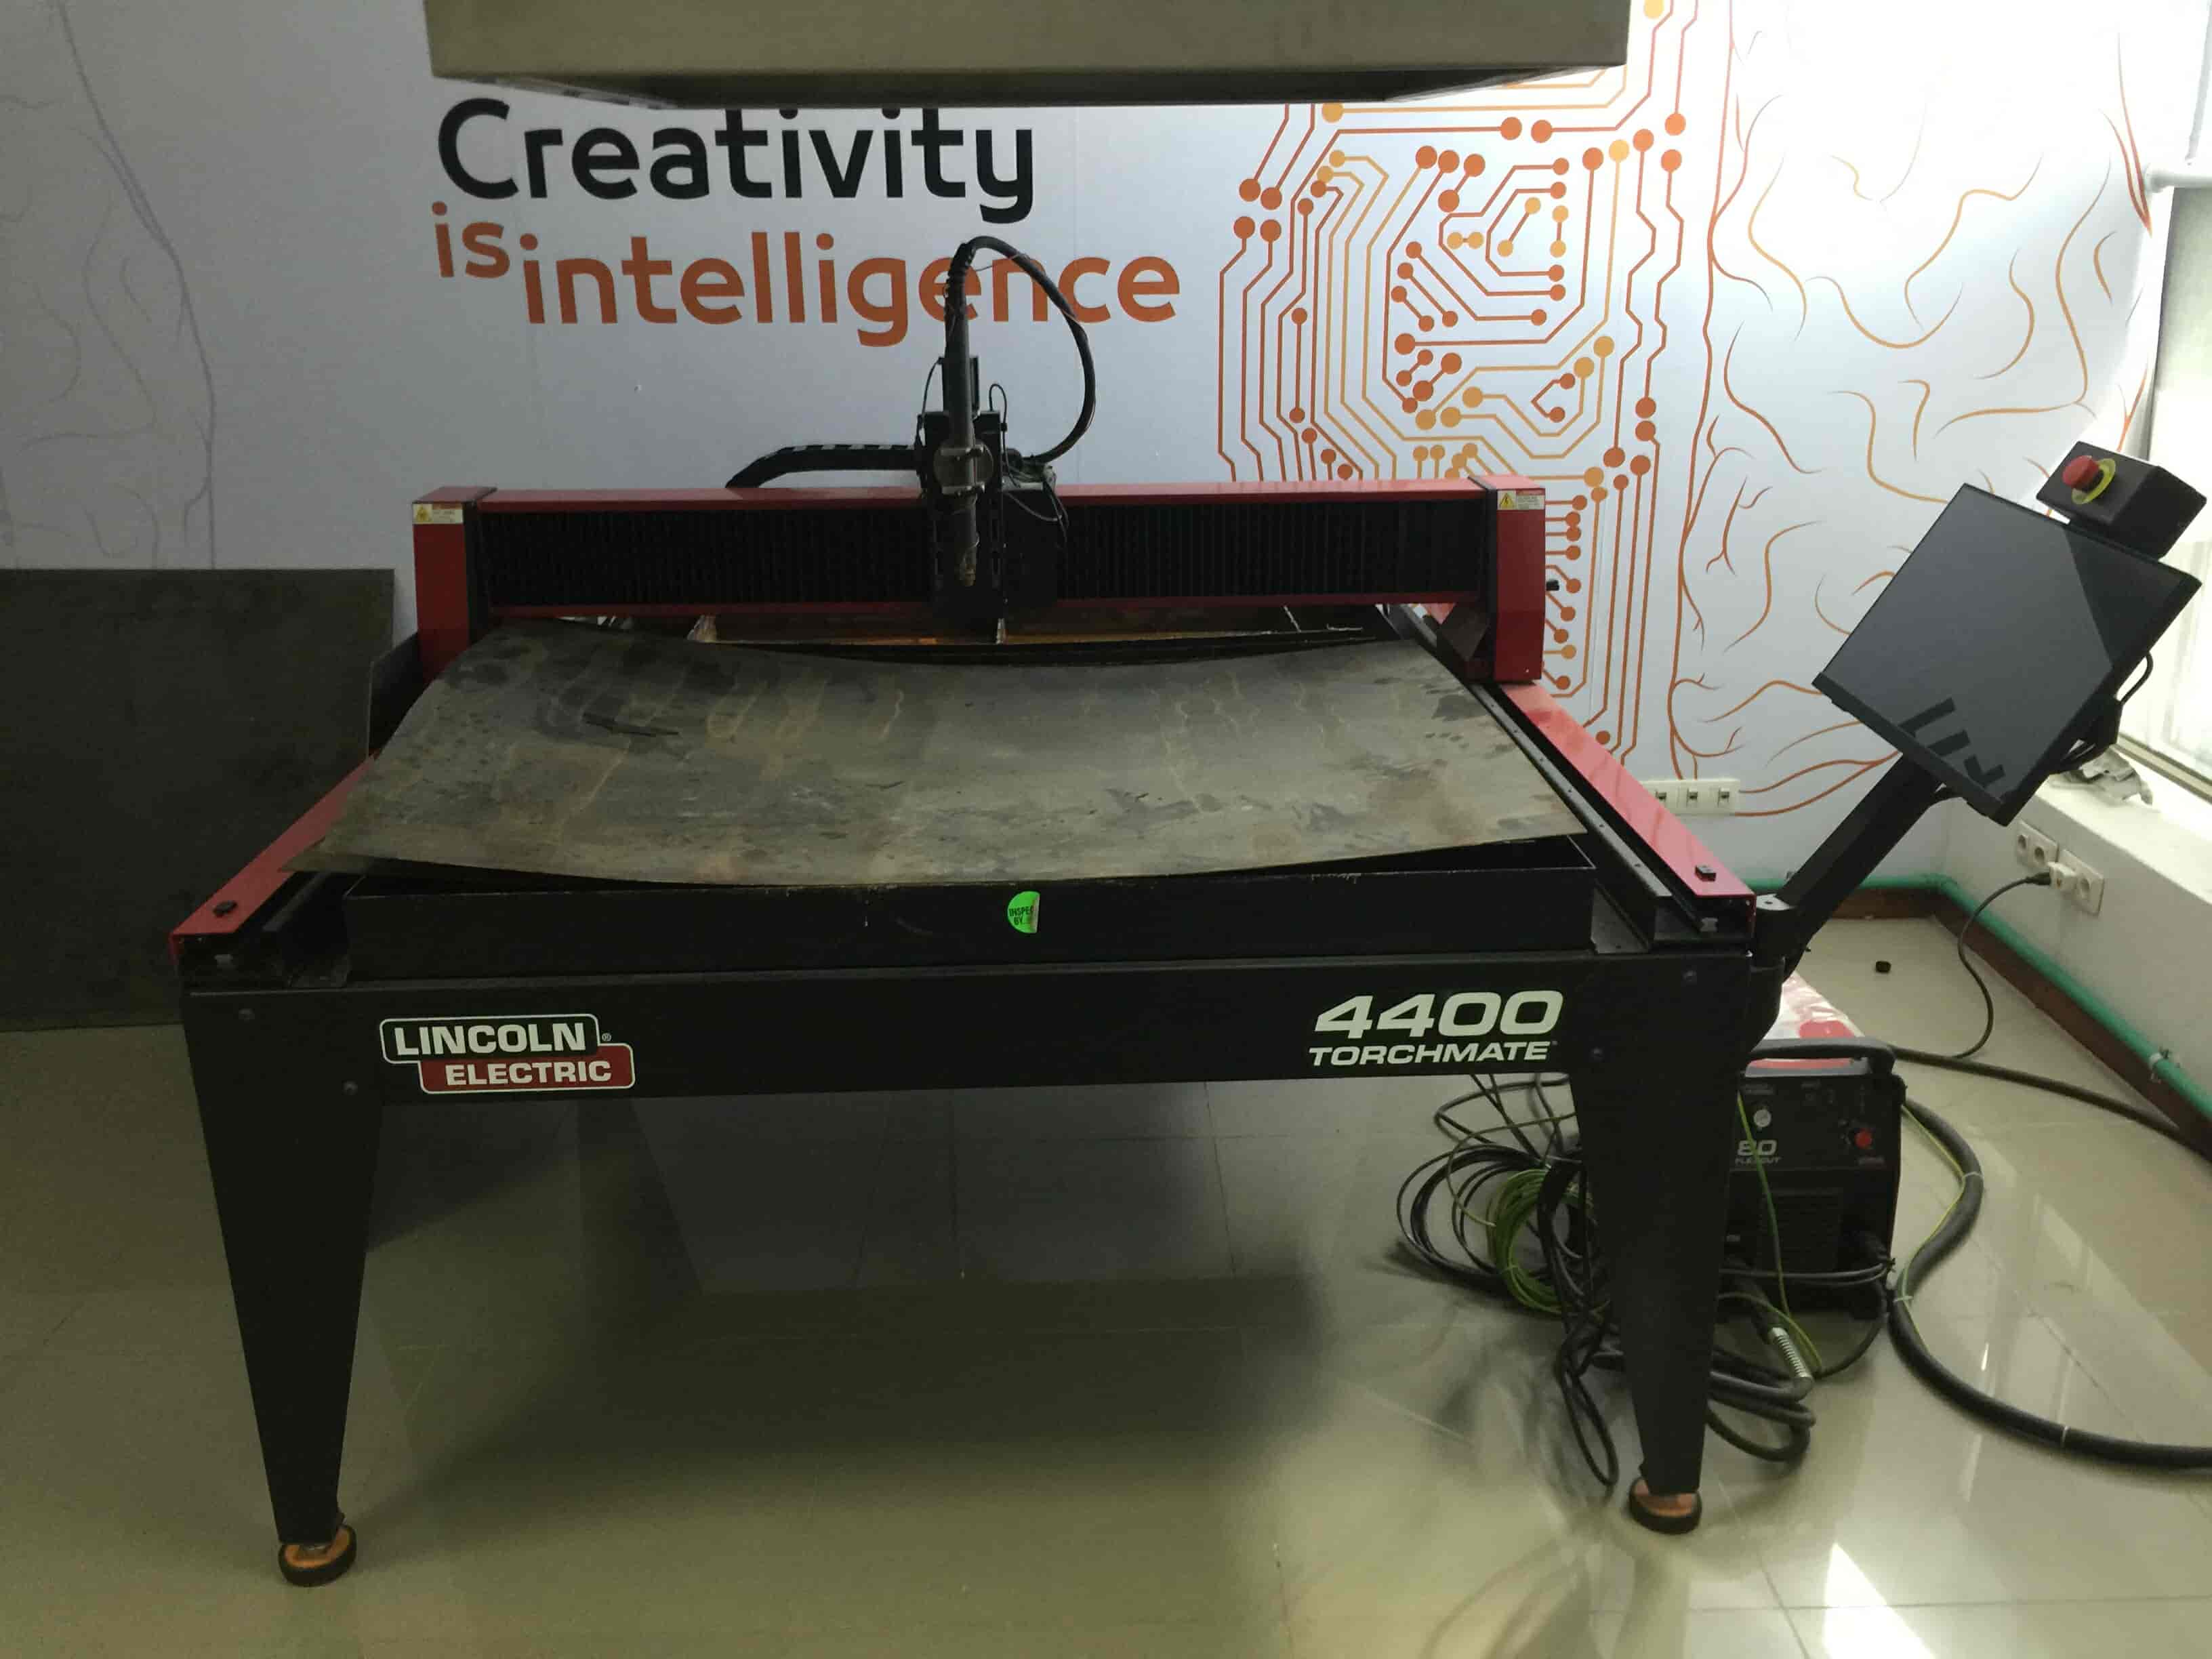
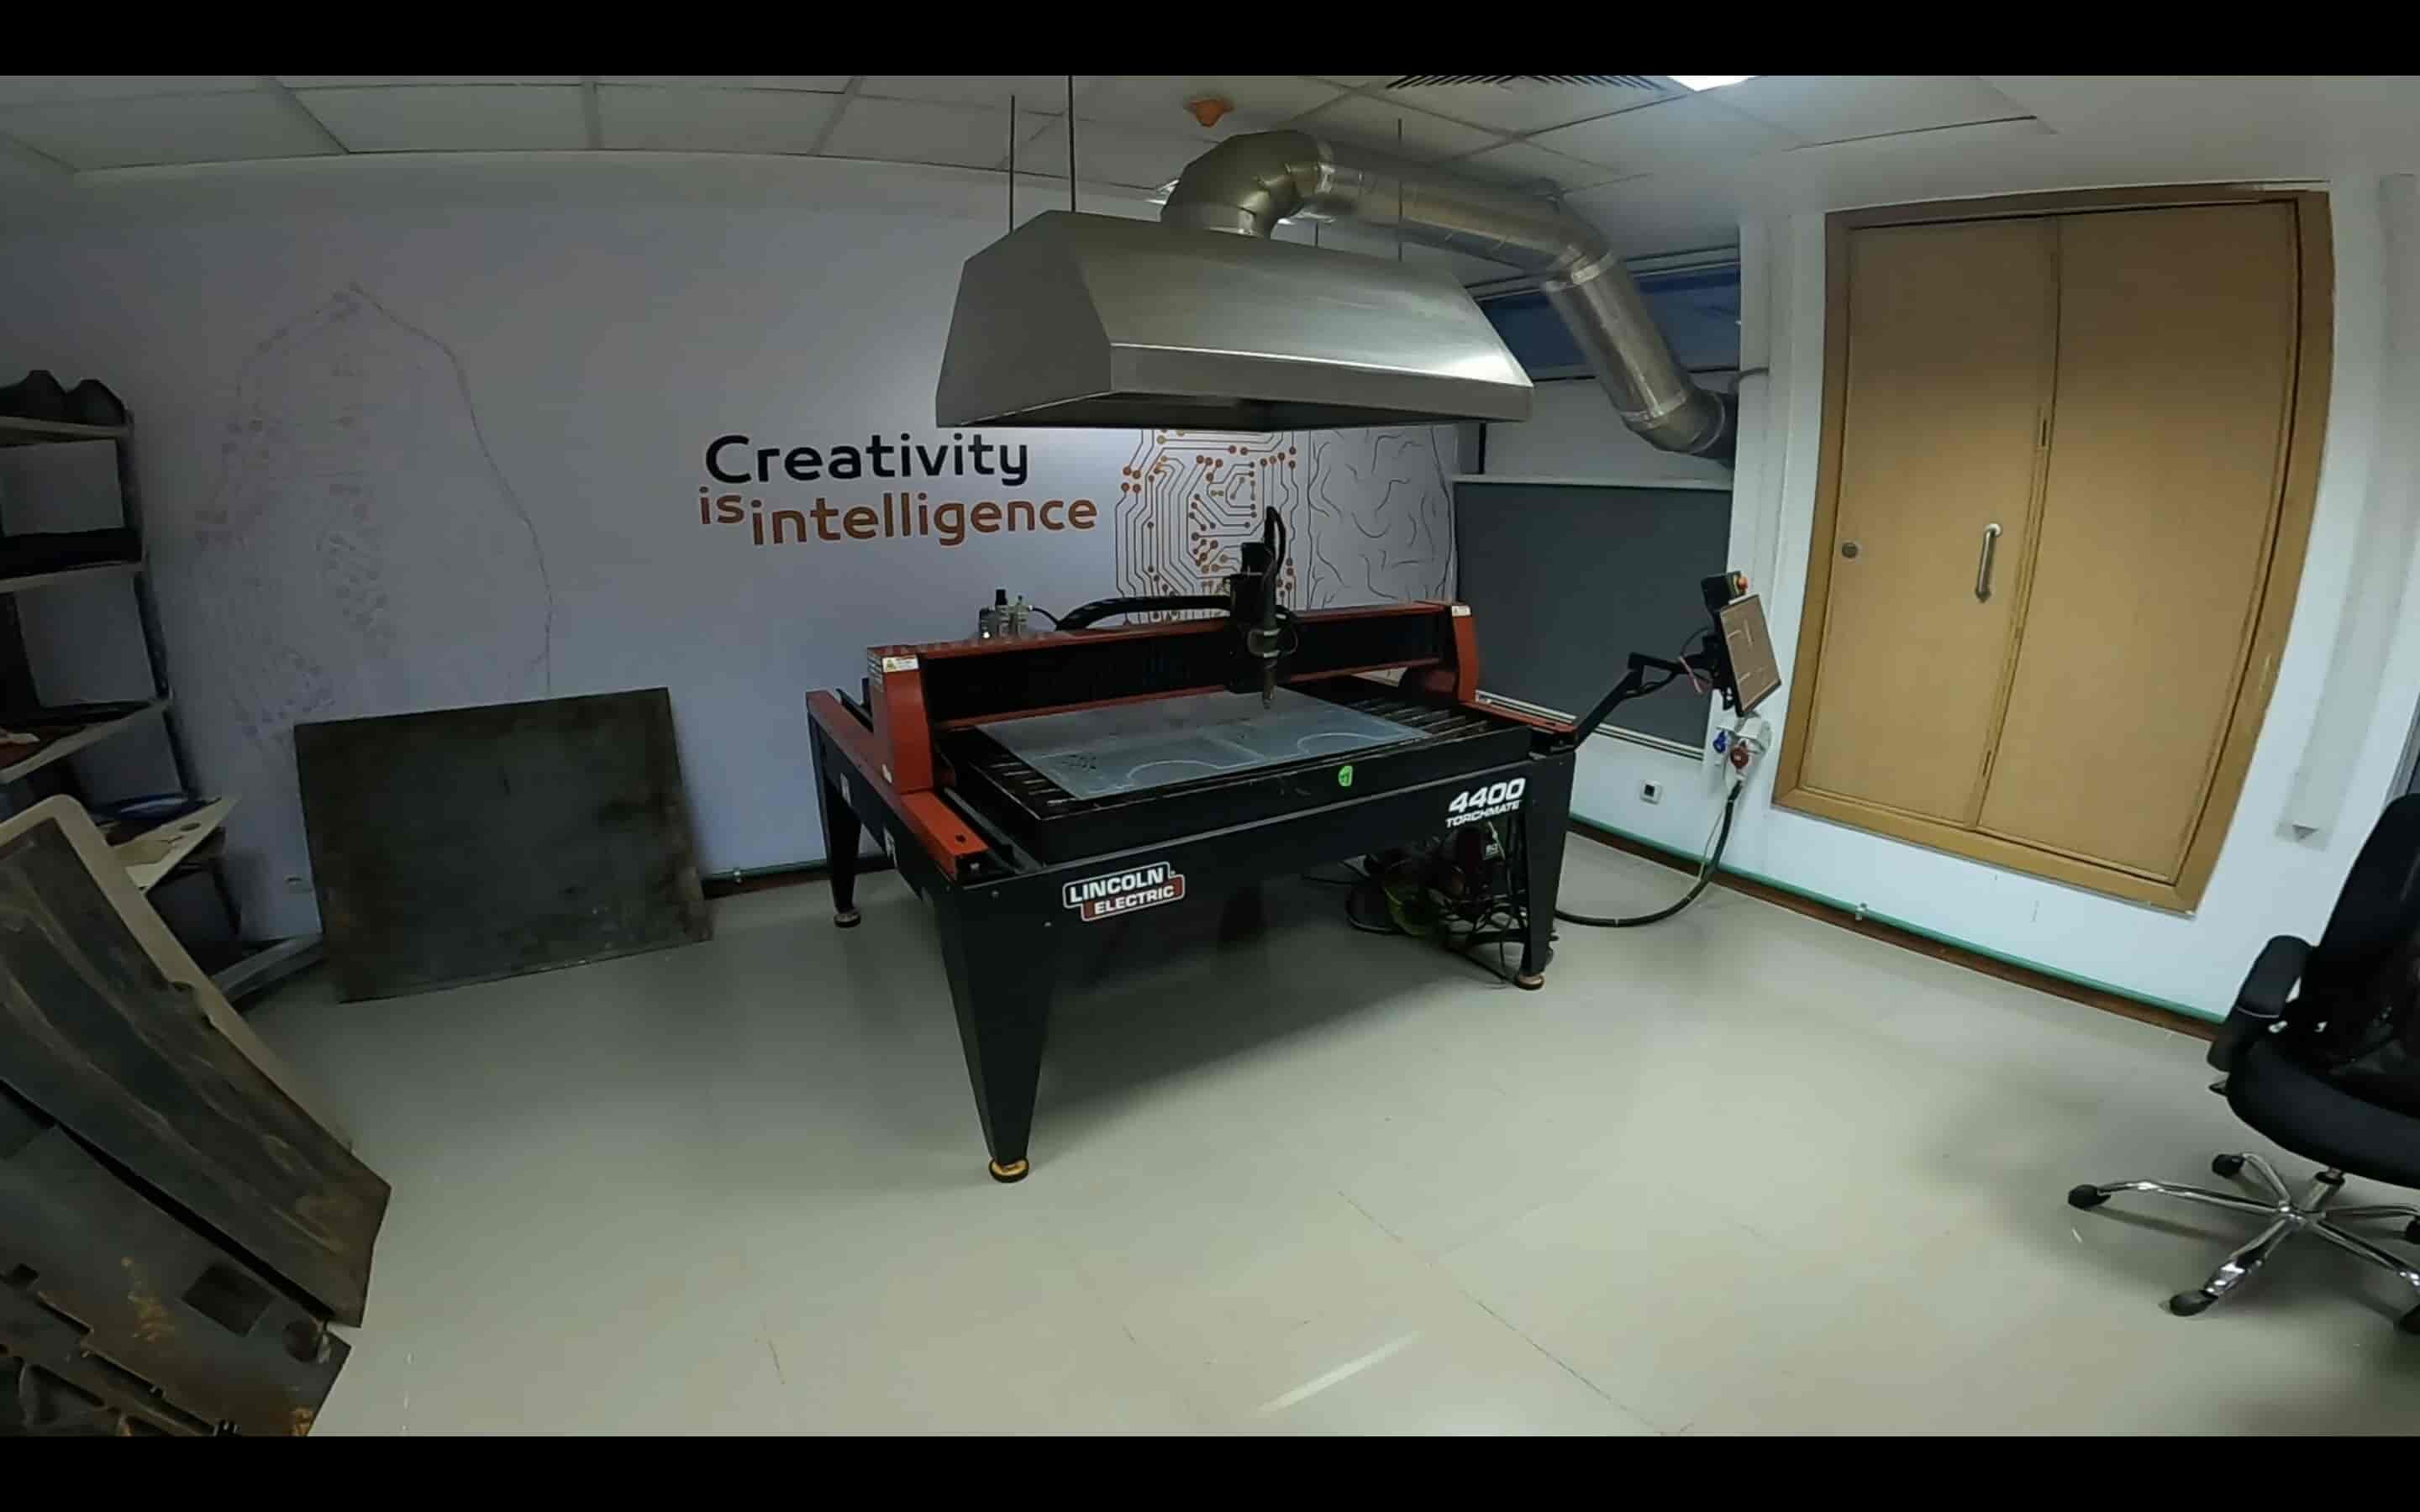
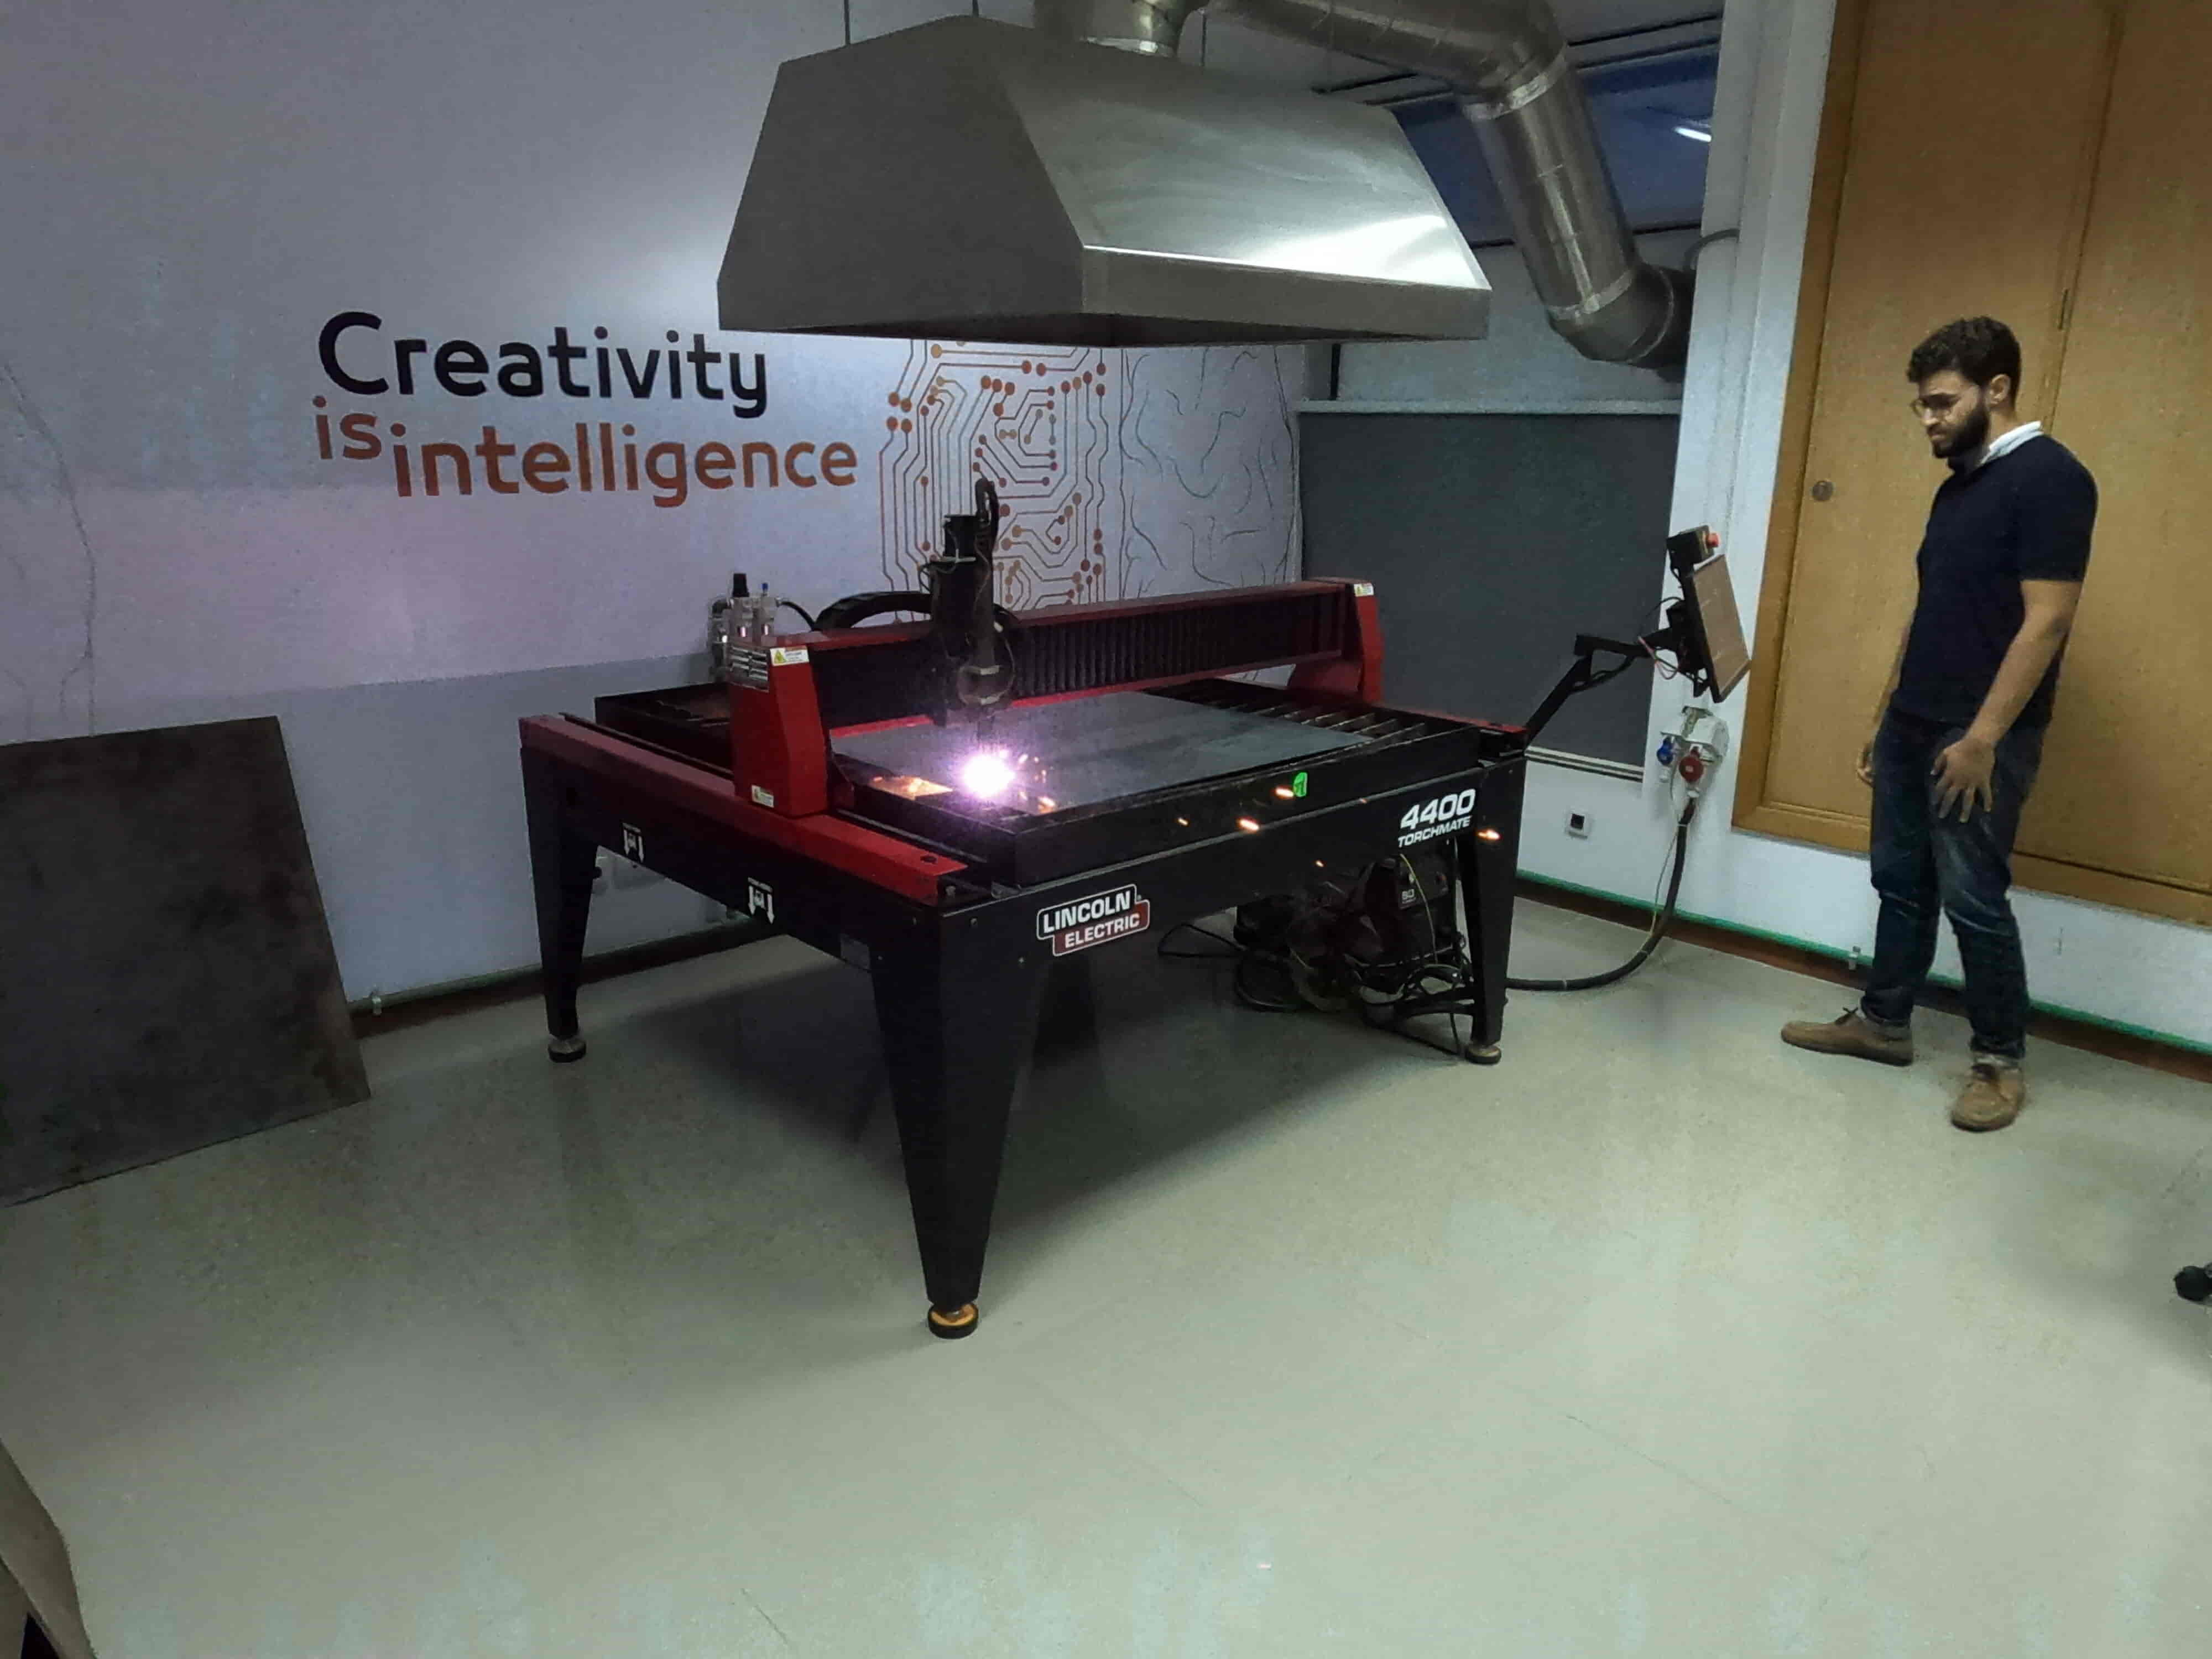
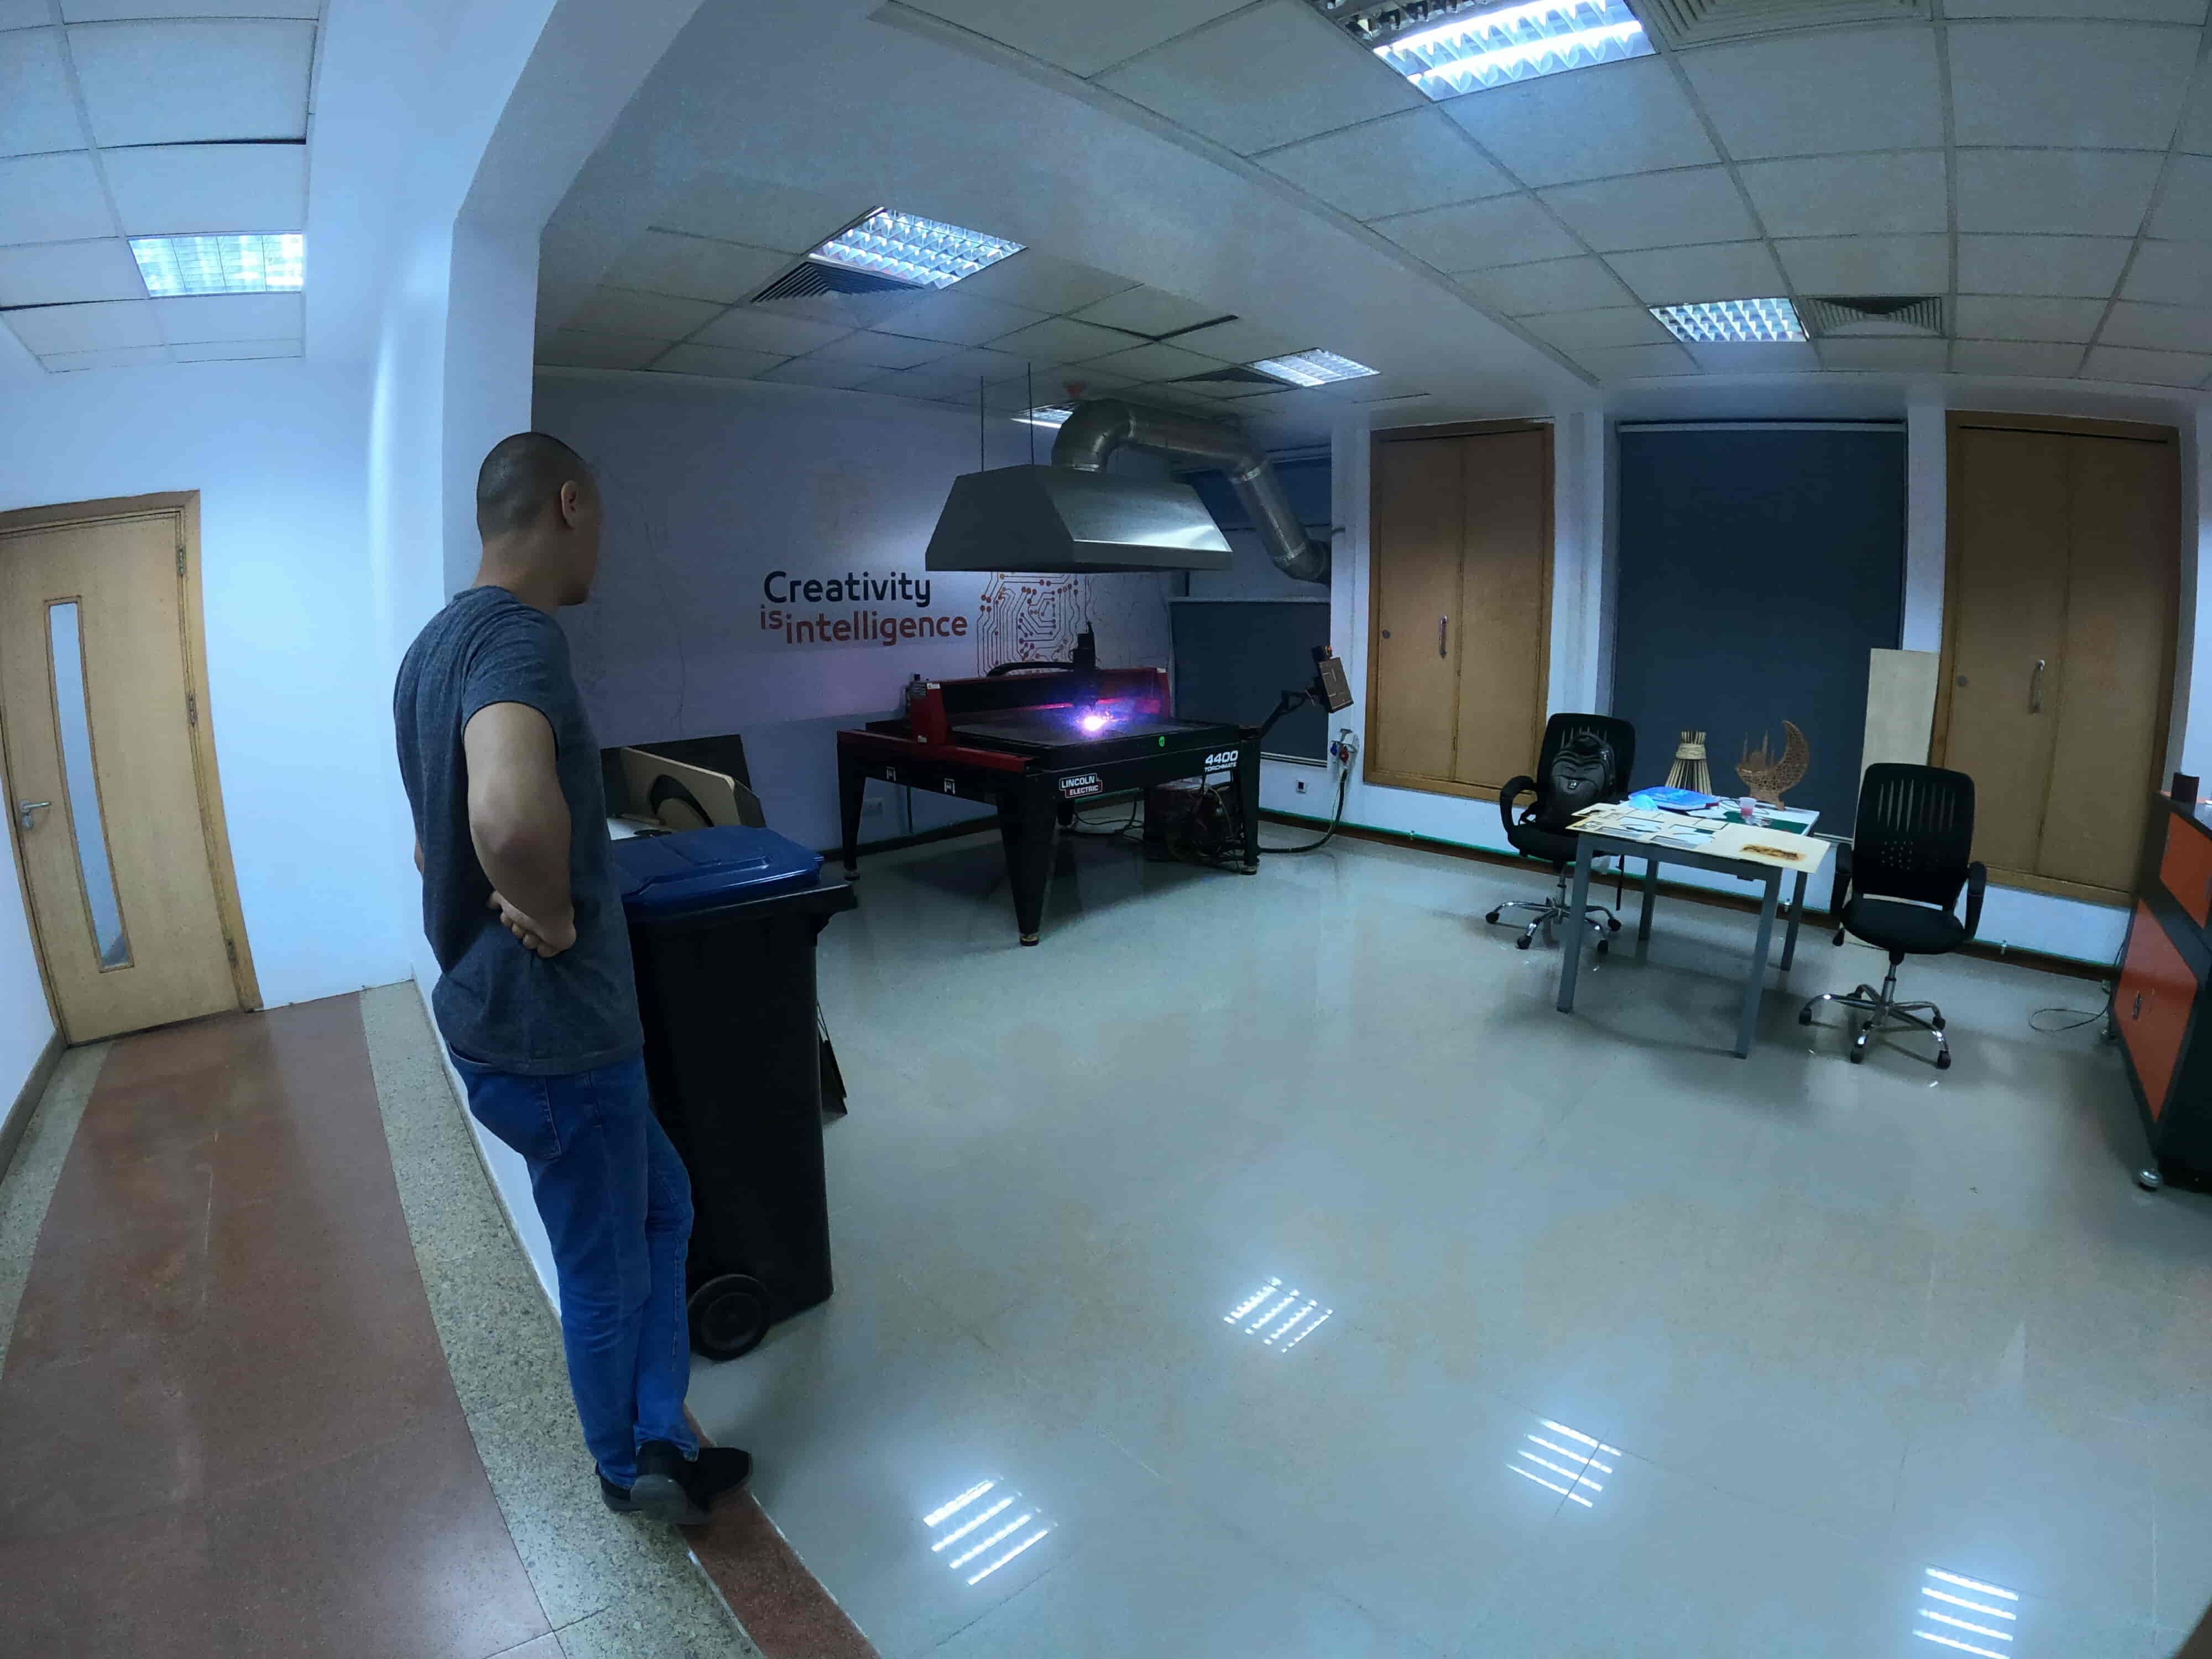
Today, I will use the beast Torchmate4400 CNC Plasma Cutting Machine with the Flexcut80 plasma cutter 40A. This machine working are is 1.2m*1.2m. And, can cut steel, aluminium, and stainless steel. This machine can cut different metal thicknesses, starting from 0.5mm to 19mm.
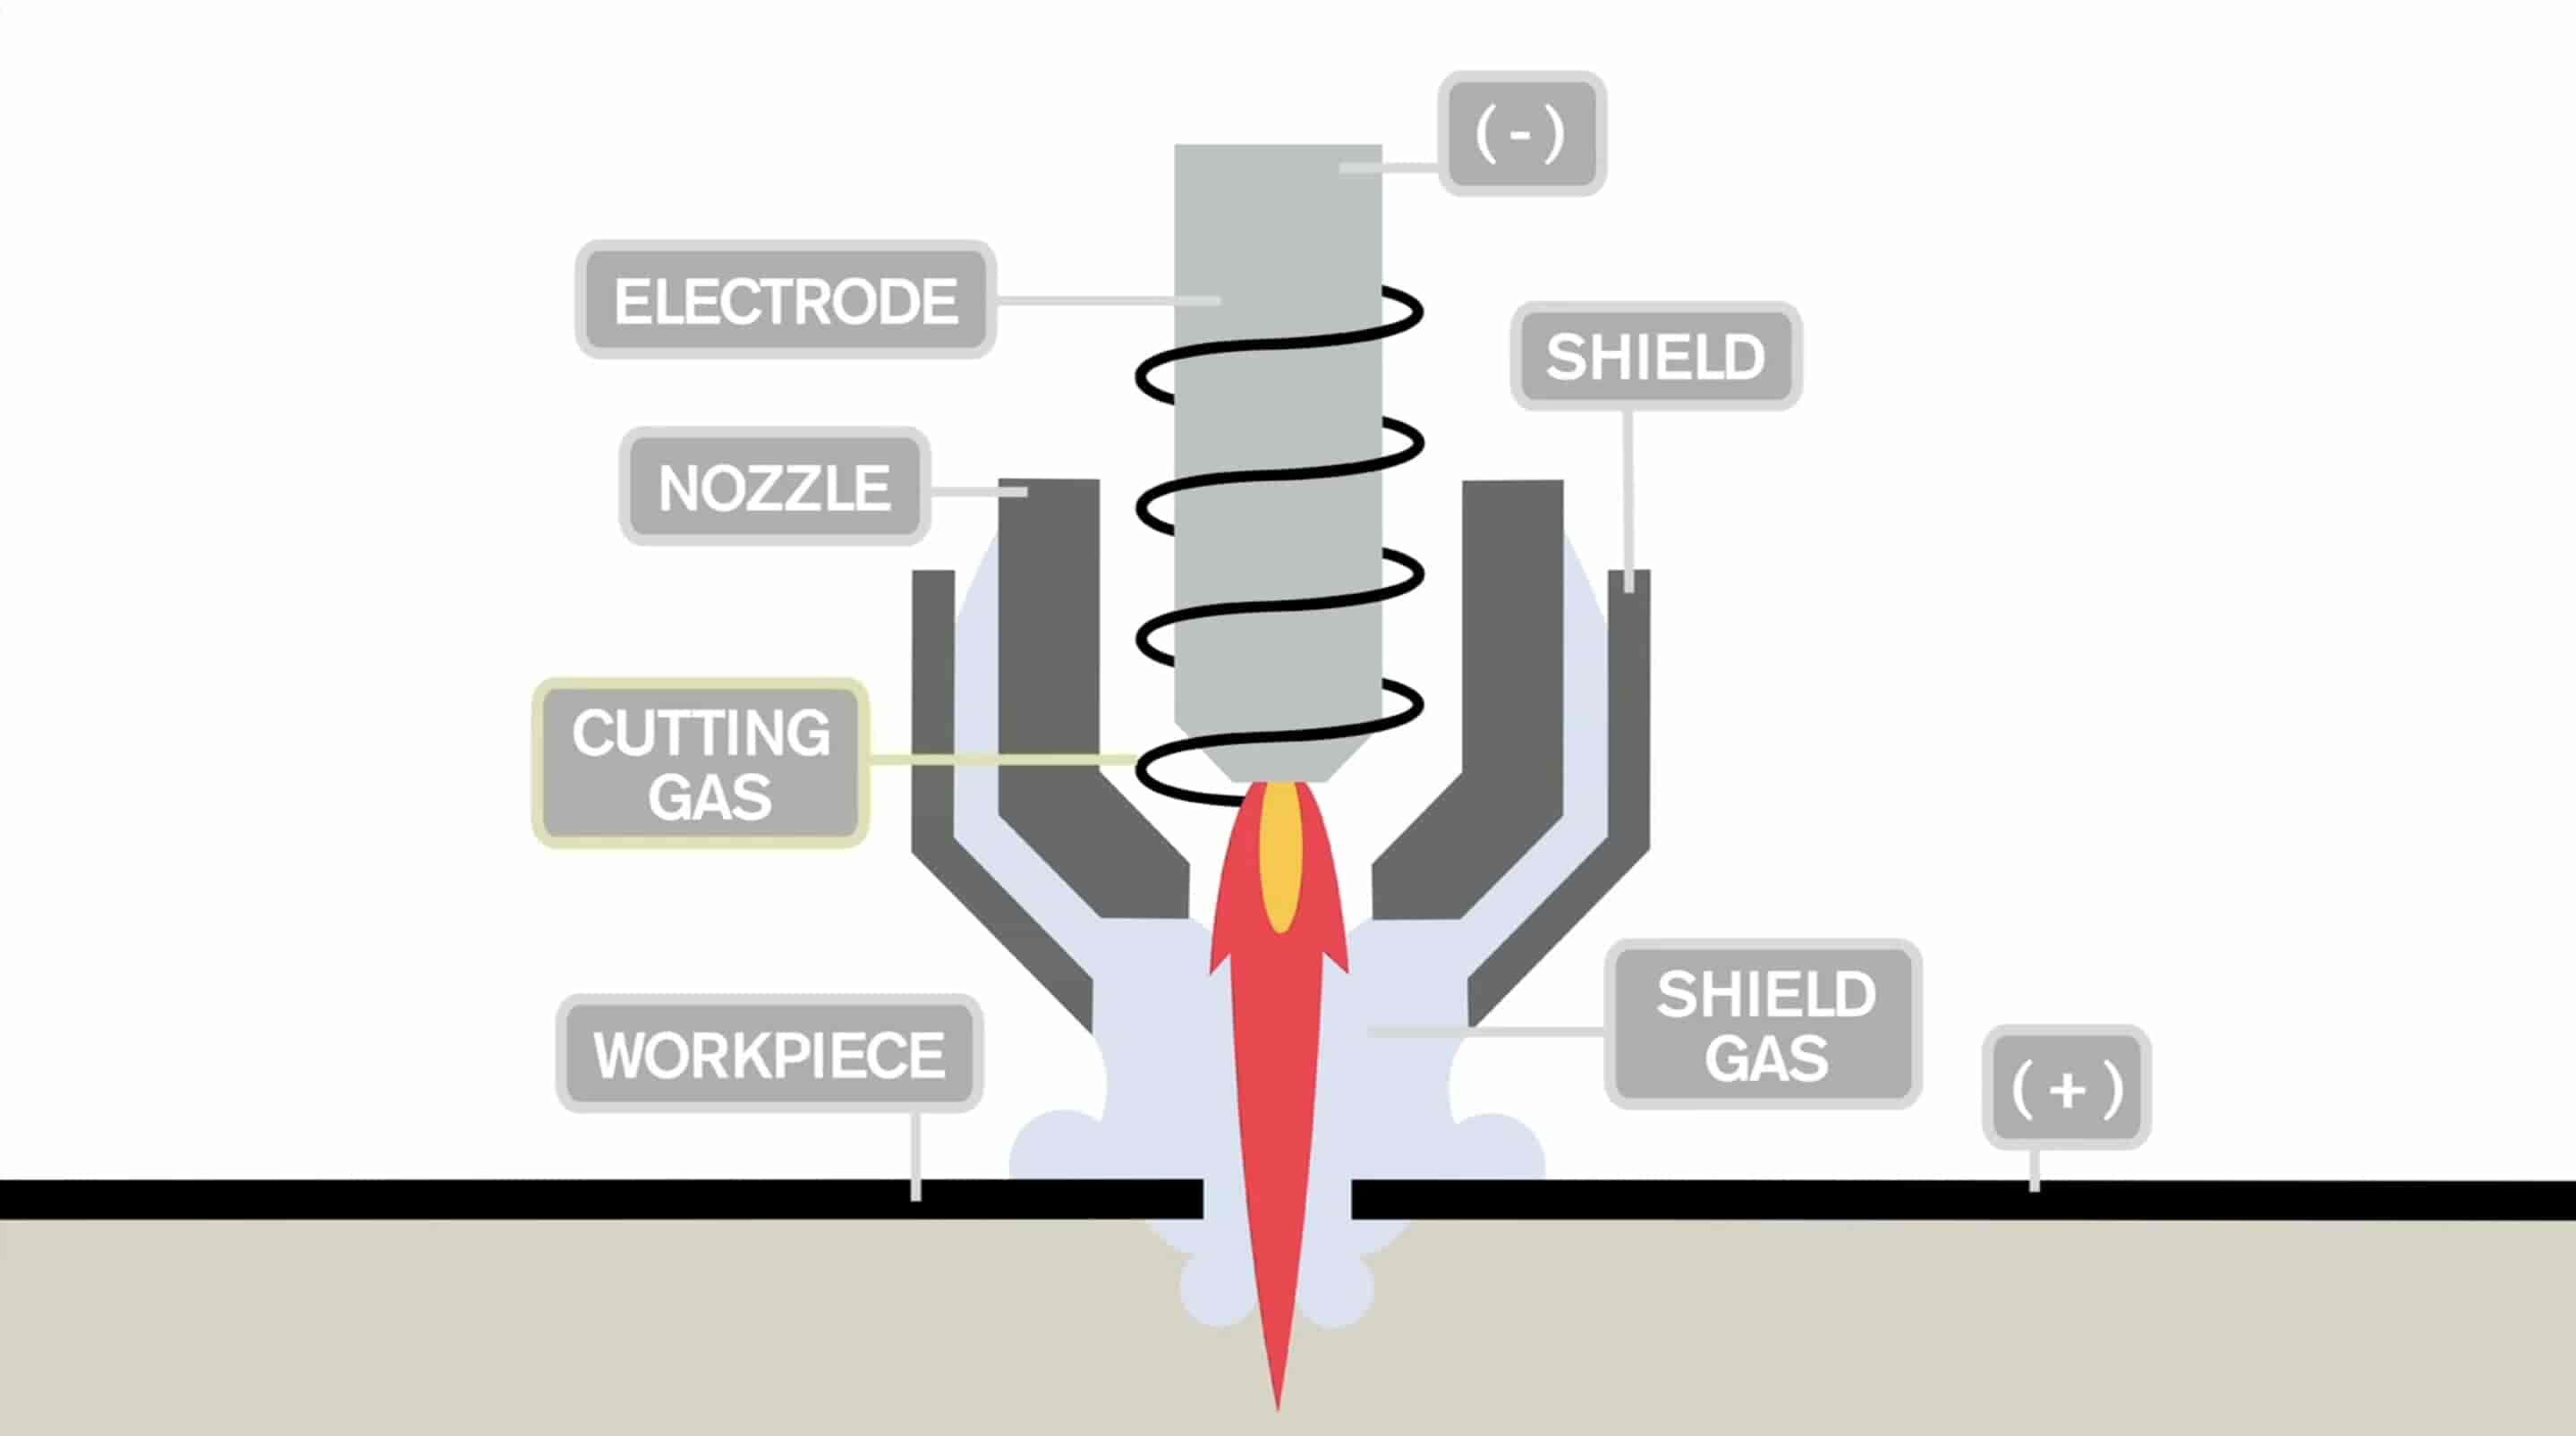
How does that machine work and what’s plasma? Ok, Plasma is often called a fourth state of matter, the three other states are solid, liquid, and gas. The difference between these states is how much energy the material has. When you apply energy in a form of heat to ice(solid) it melts to form water(liquid), if you apply more energy to it in a form of heat, it will evaporate to become steam(gas). From ice to water to steam. What would happen if we applied more energy in a form of electricity to the steam? It will ionize the gas which is called plasma. Plasma is created when you expose gas to very high temperatures or when you pass electricity through it. With these plasma you can cut heavy metals.
What happens inside the plasma cutting machines is heating up a nitrogen gas by applying an electric current on it to ionize the nitrogen and turn it into plasma. The higher the ampere is, the hotter/stronger the plasma comes. A specially engineered nozzle used to concentrate the plasma into a small area to cut the job material.
Using plasma cutter machines is not something that is very different from laser cutting machines. The way you operate the plasma cutter machine is very similar to the laser cutter machine, you import the DXF to the machine software, edit some cutting parameters, export Gcode, send it to the machine to work. Designing for plasma cutting is not very different from designing for laser cutting too. You design your model and export a DXF file for your model sketches to fabricate your model. The something that may be different in designing for plasma cutting is the cutting tolerance. Tolerances in plasma metal cutting are bigger than tolerances in the normal laser cutting. You have to put tolerances in consideration while you are designing according to your machine. Here are some samples that machined on the plasma cutter machine.

To work on the Plasma cutter machine you need to deal with three main things. First, the machine itself, the Torchmate CAD-CAM software, the Lincoln Electric UI software that runs the machine
First, The Torchmate440 machine itself. You should take care while you are working with the plasma cutter machine. It’s a heavy duty machine that can cause a serious injury. Second, the Torchmate CAM-CAM software that you use to set the machine appropriate cutting parameters to export a Gcode file that will operate the machine. Third, the Lincoln Electric UI software that helps you to run your Gcode file, set the machine zero point, set the running mode(active or dry), and move any axis manually.
Designing The Table On Fusion360
I have no specific design idea in my mind, but I want to make a small and simple table since it’s my first time with metal cutting. I opened Pinterest and searched for metal furniture, plasma cutting, and plasma cutting projects and I found a lot of super cool ideas. I liked this table specifically because
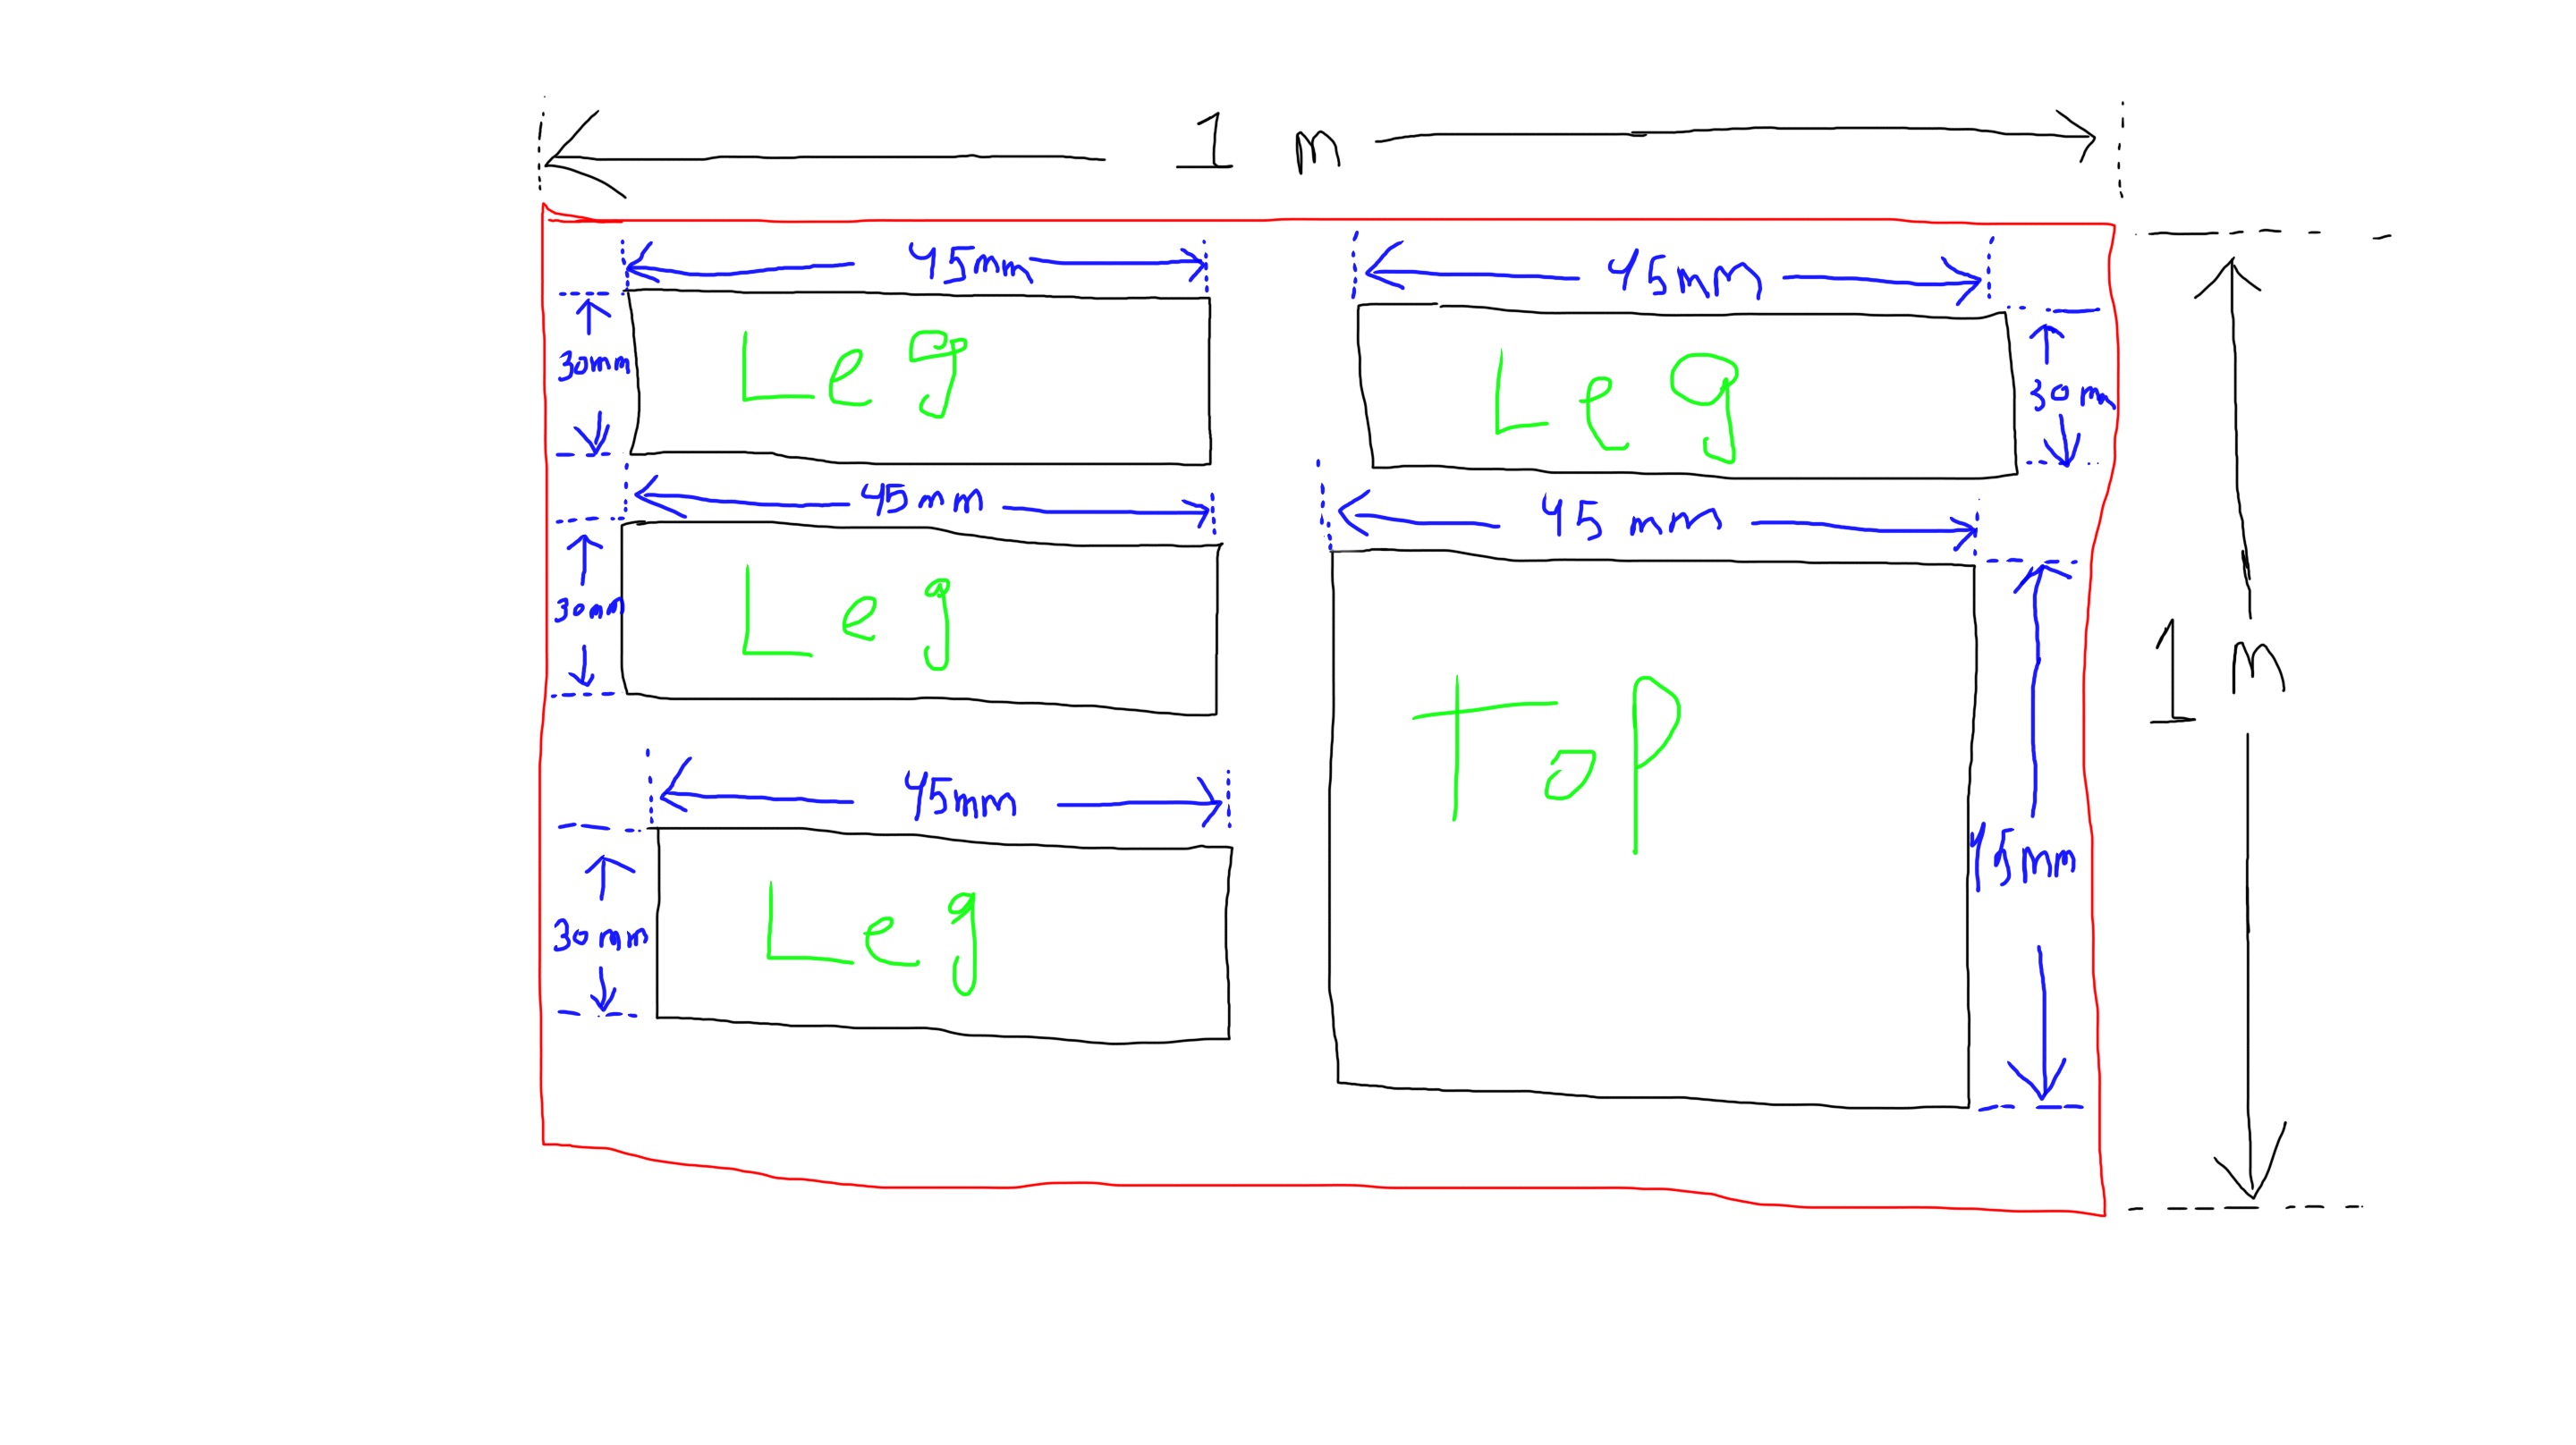
At the beginning we need to decide the table size that can fit a 1meter*1meter metal sheet. So, I started by drawing a hand sketch for all the table parts and placed it inside the 1*1 meter sheet to make sure that my design will fit inside a 1*1 meter metal piece. After making sure that a 45cm*45cm*30cm table will fit inside my 1m*1m metal sheet, I will start designing it!
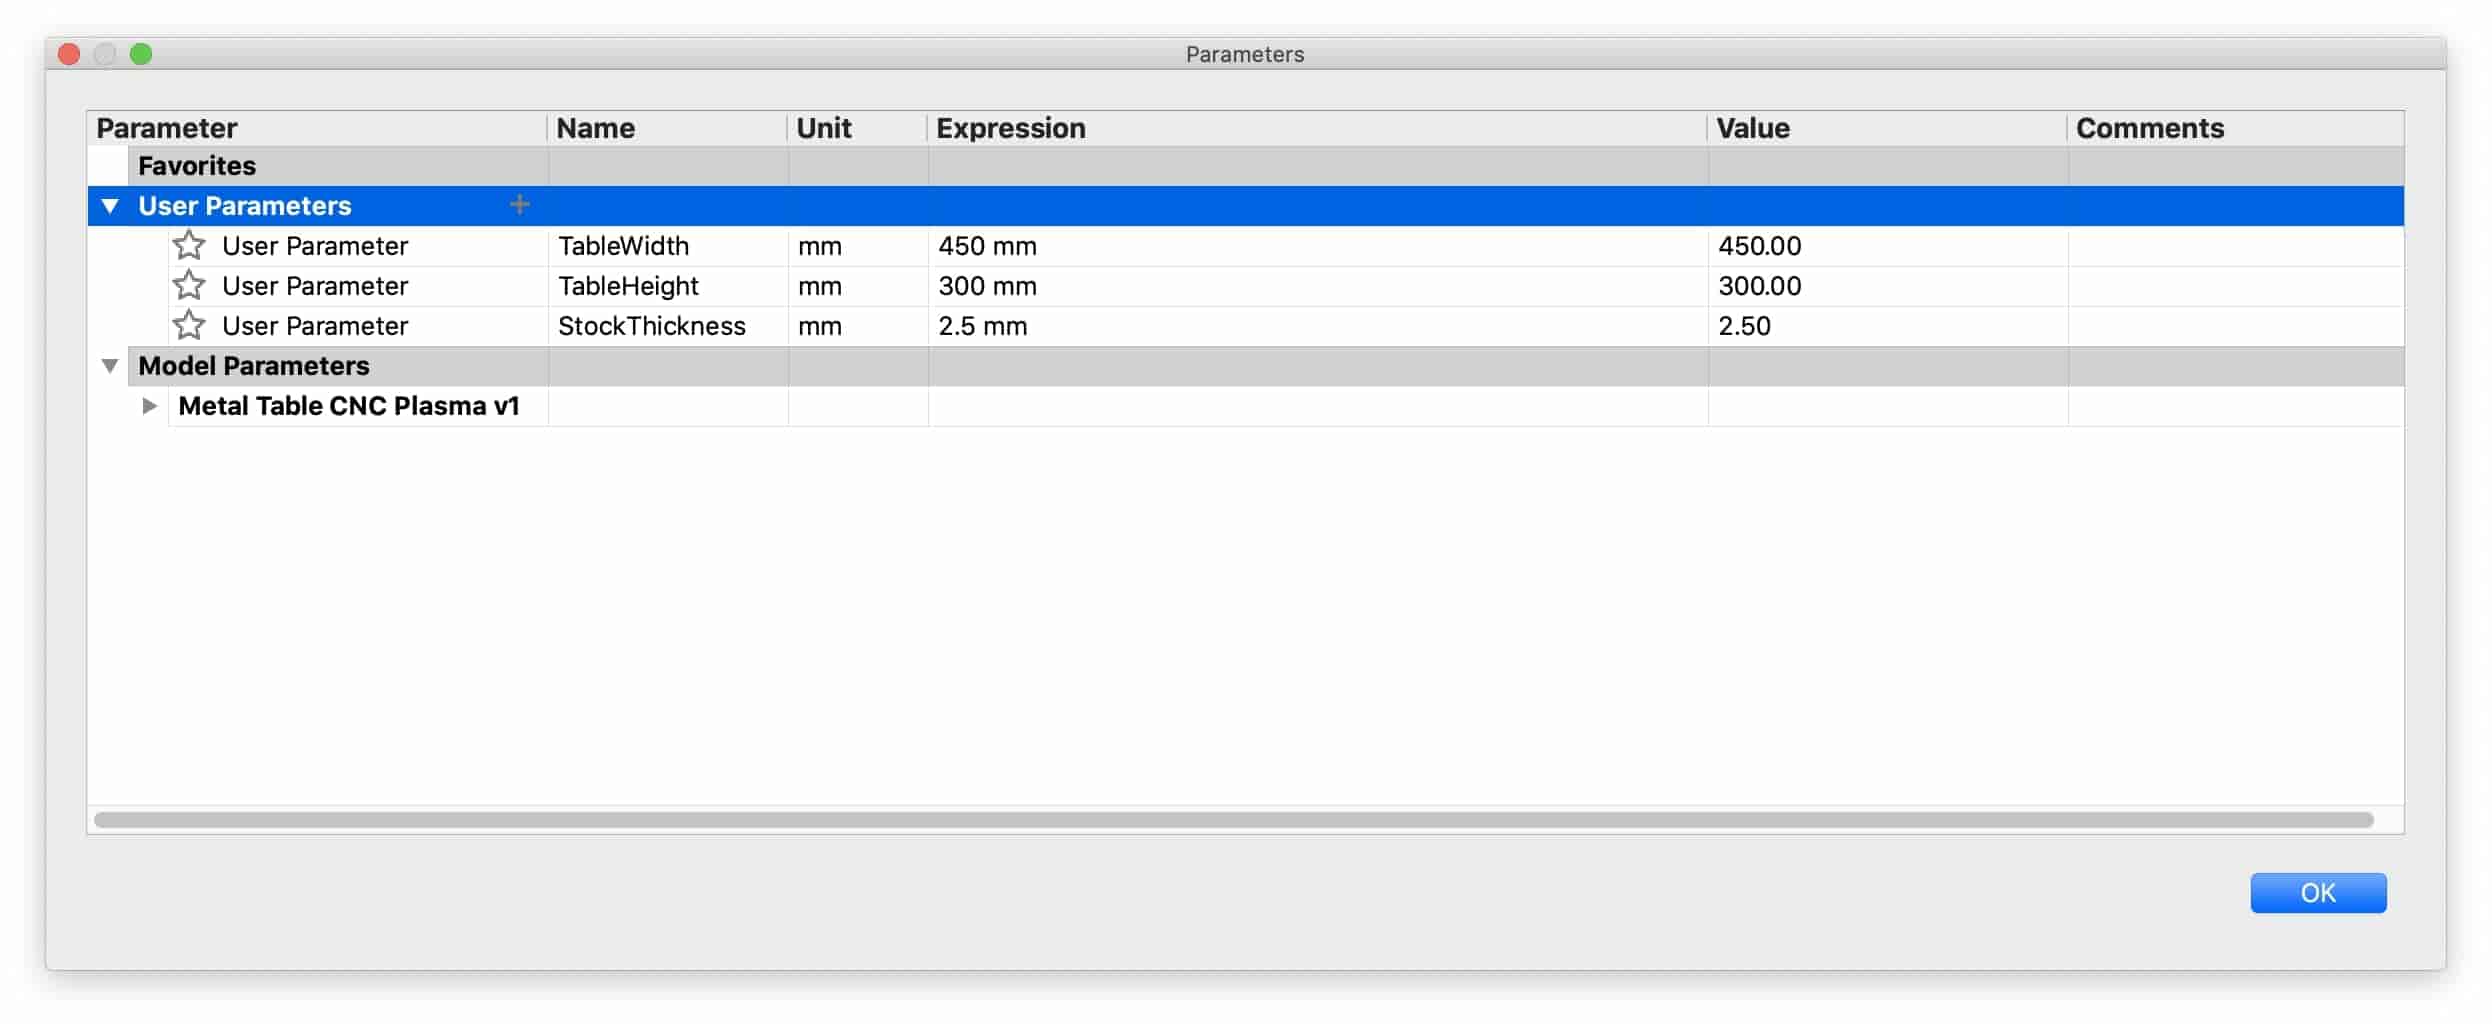
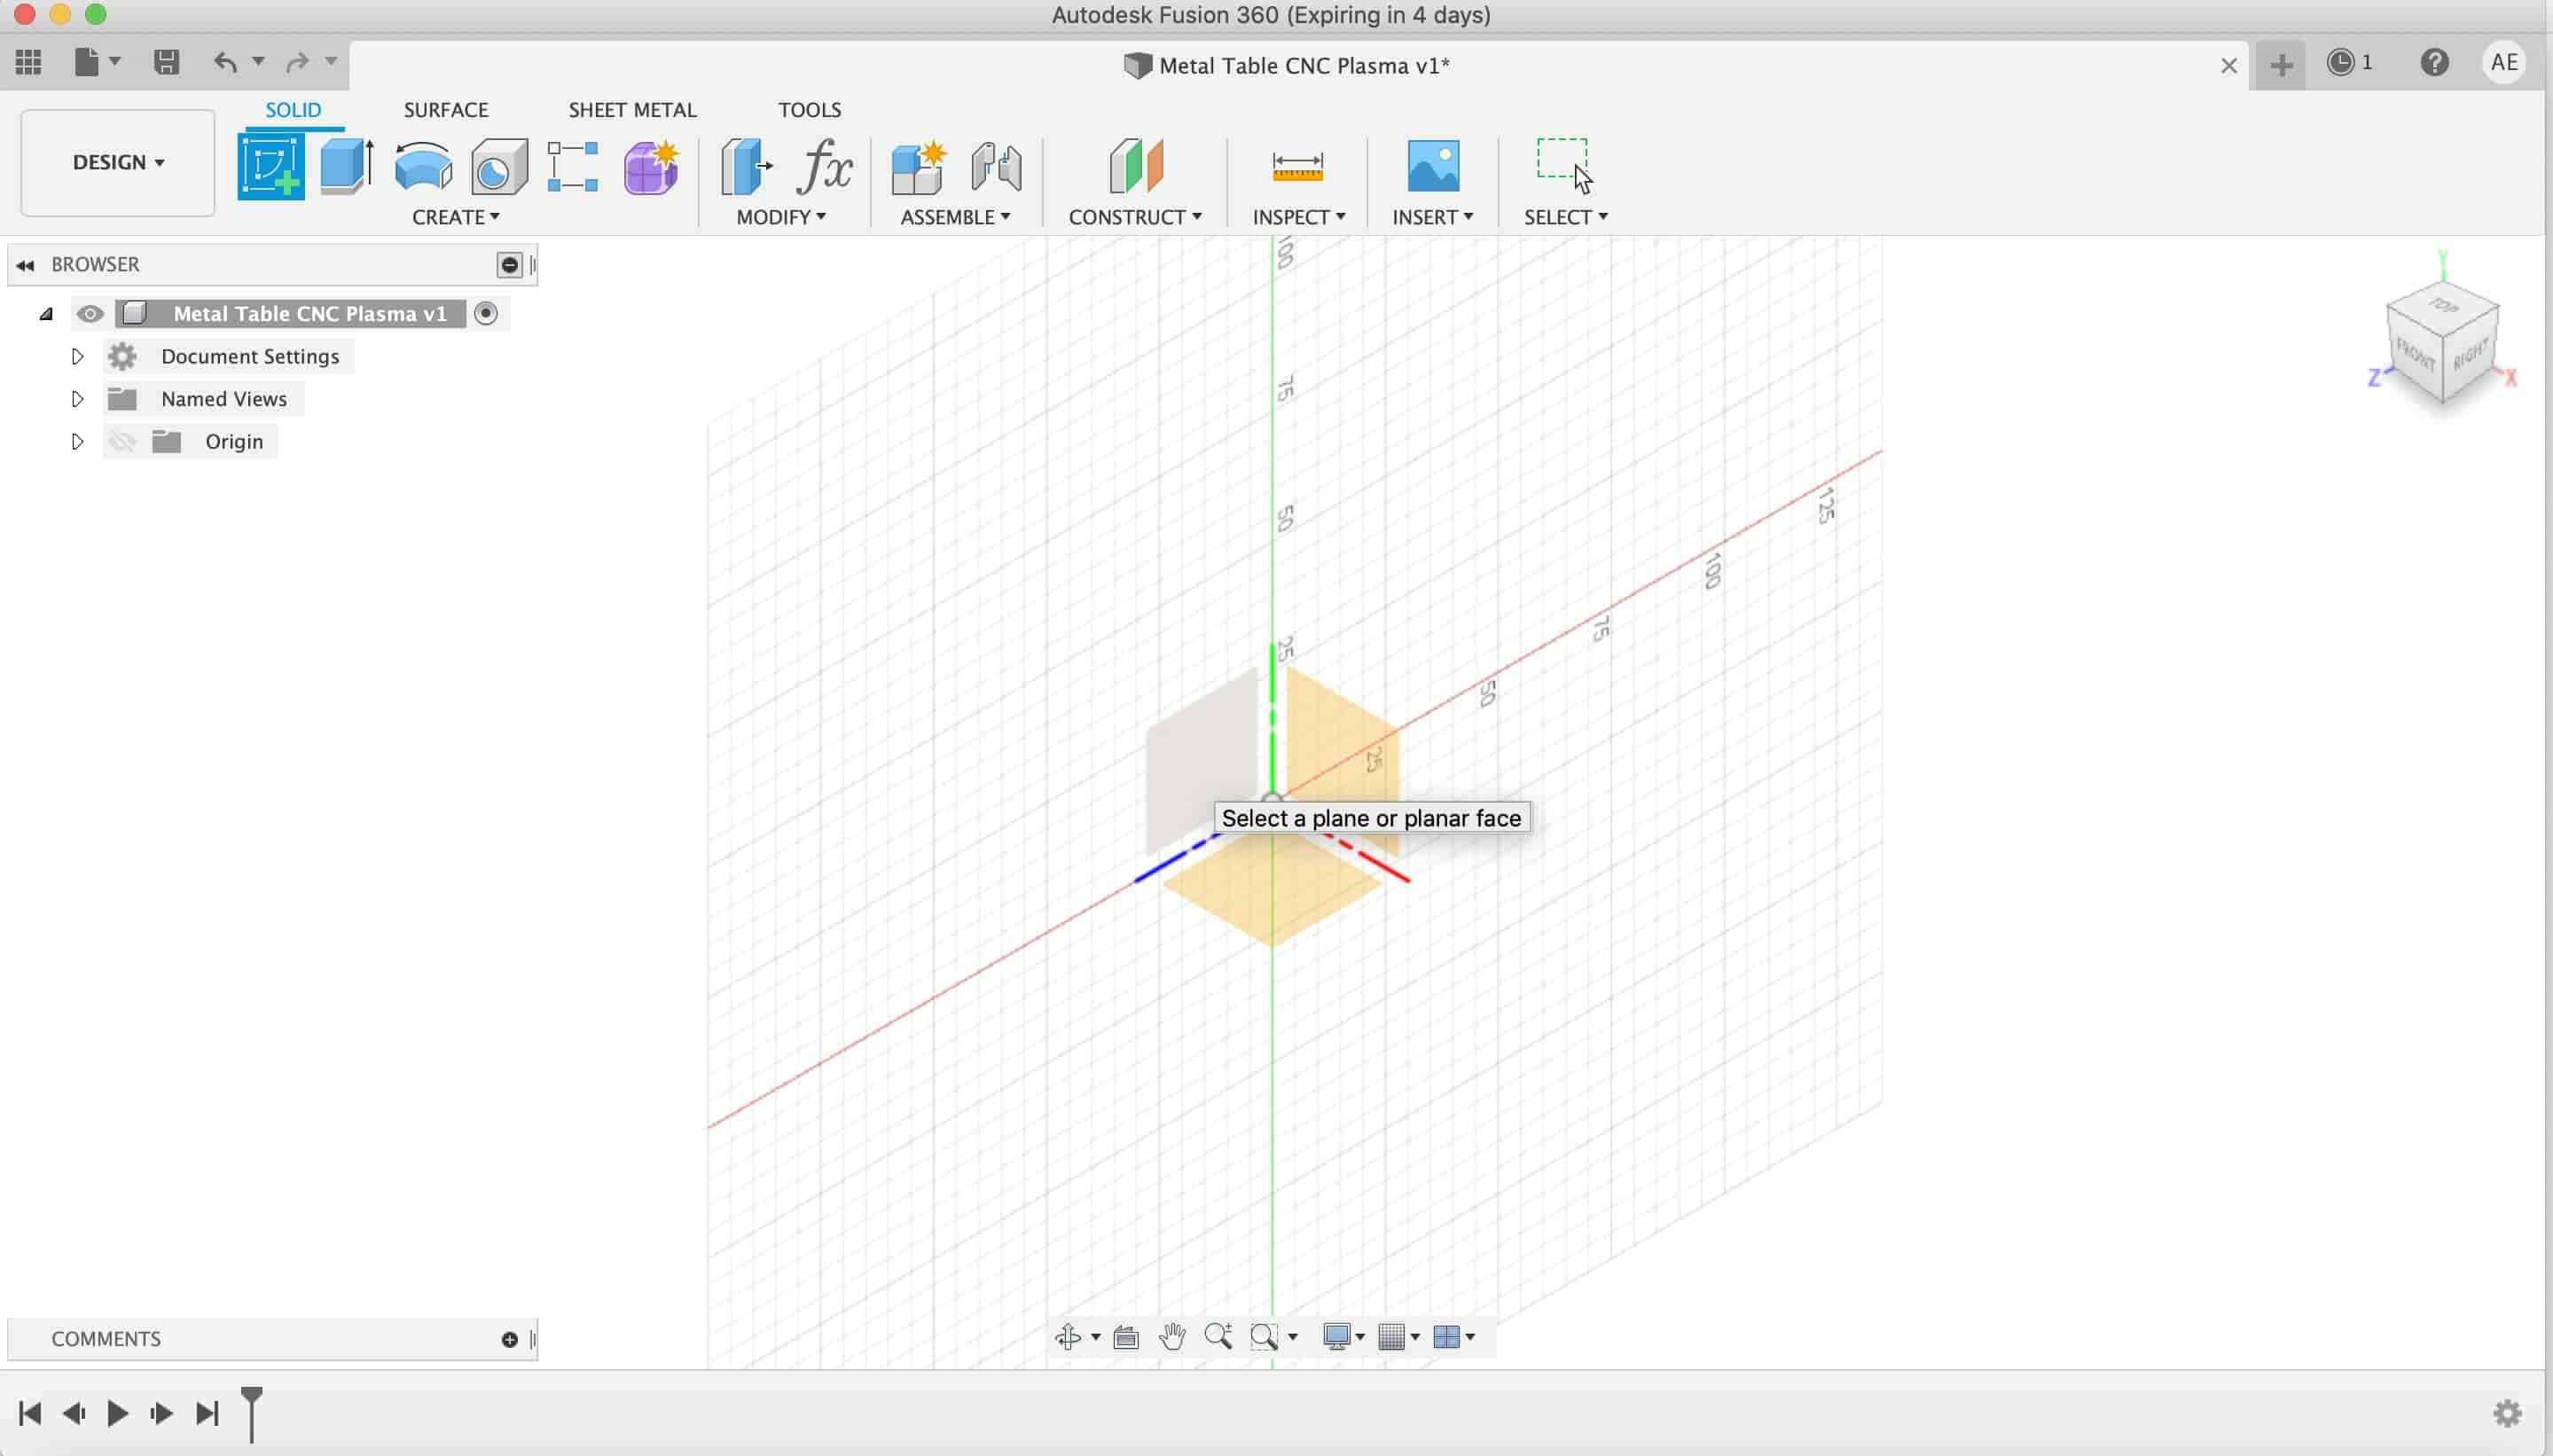
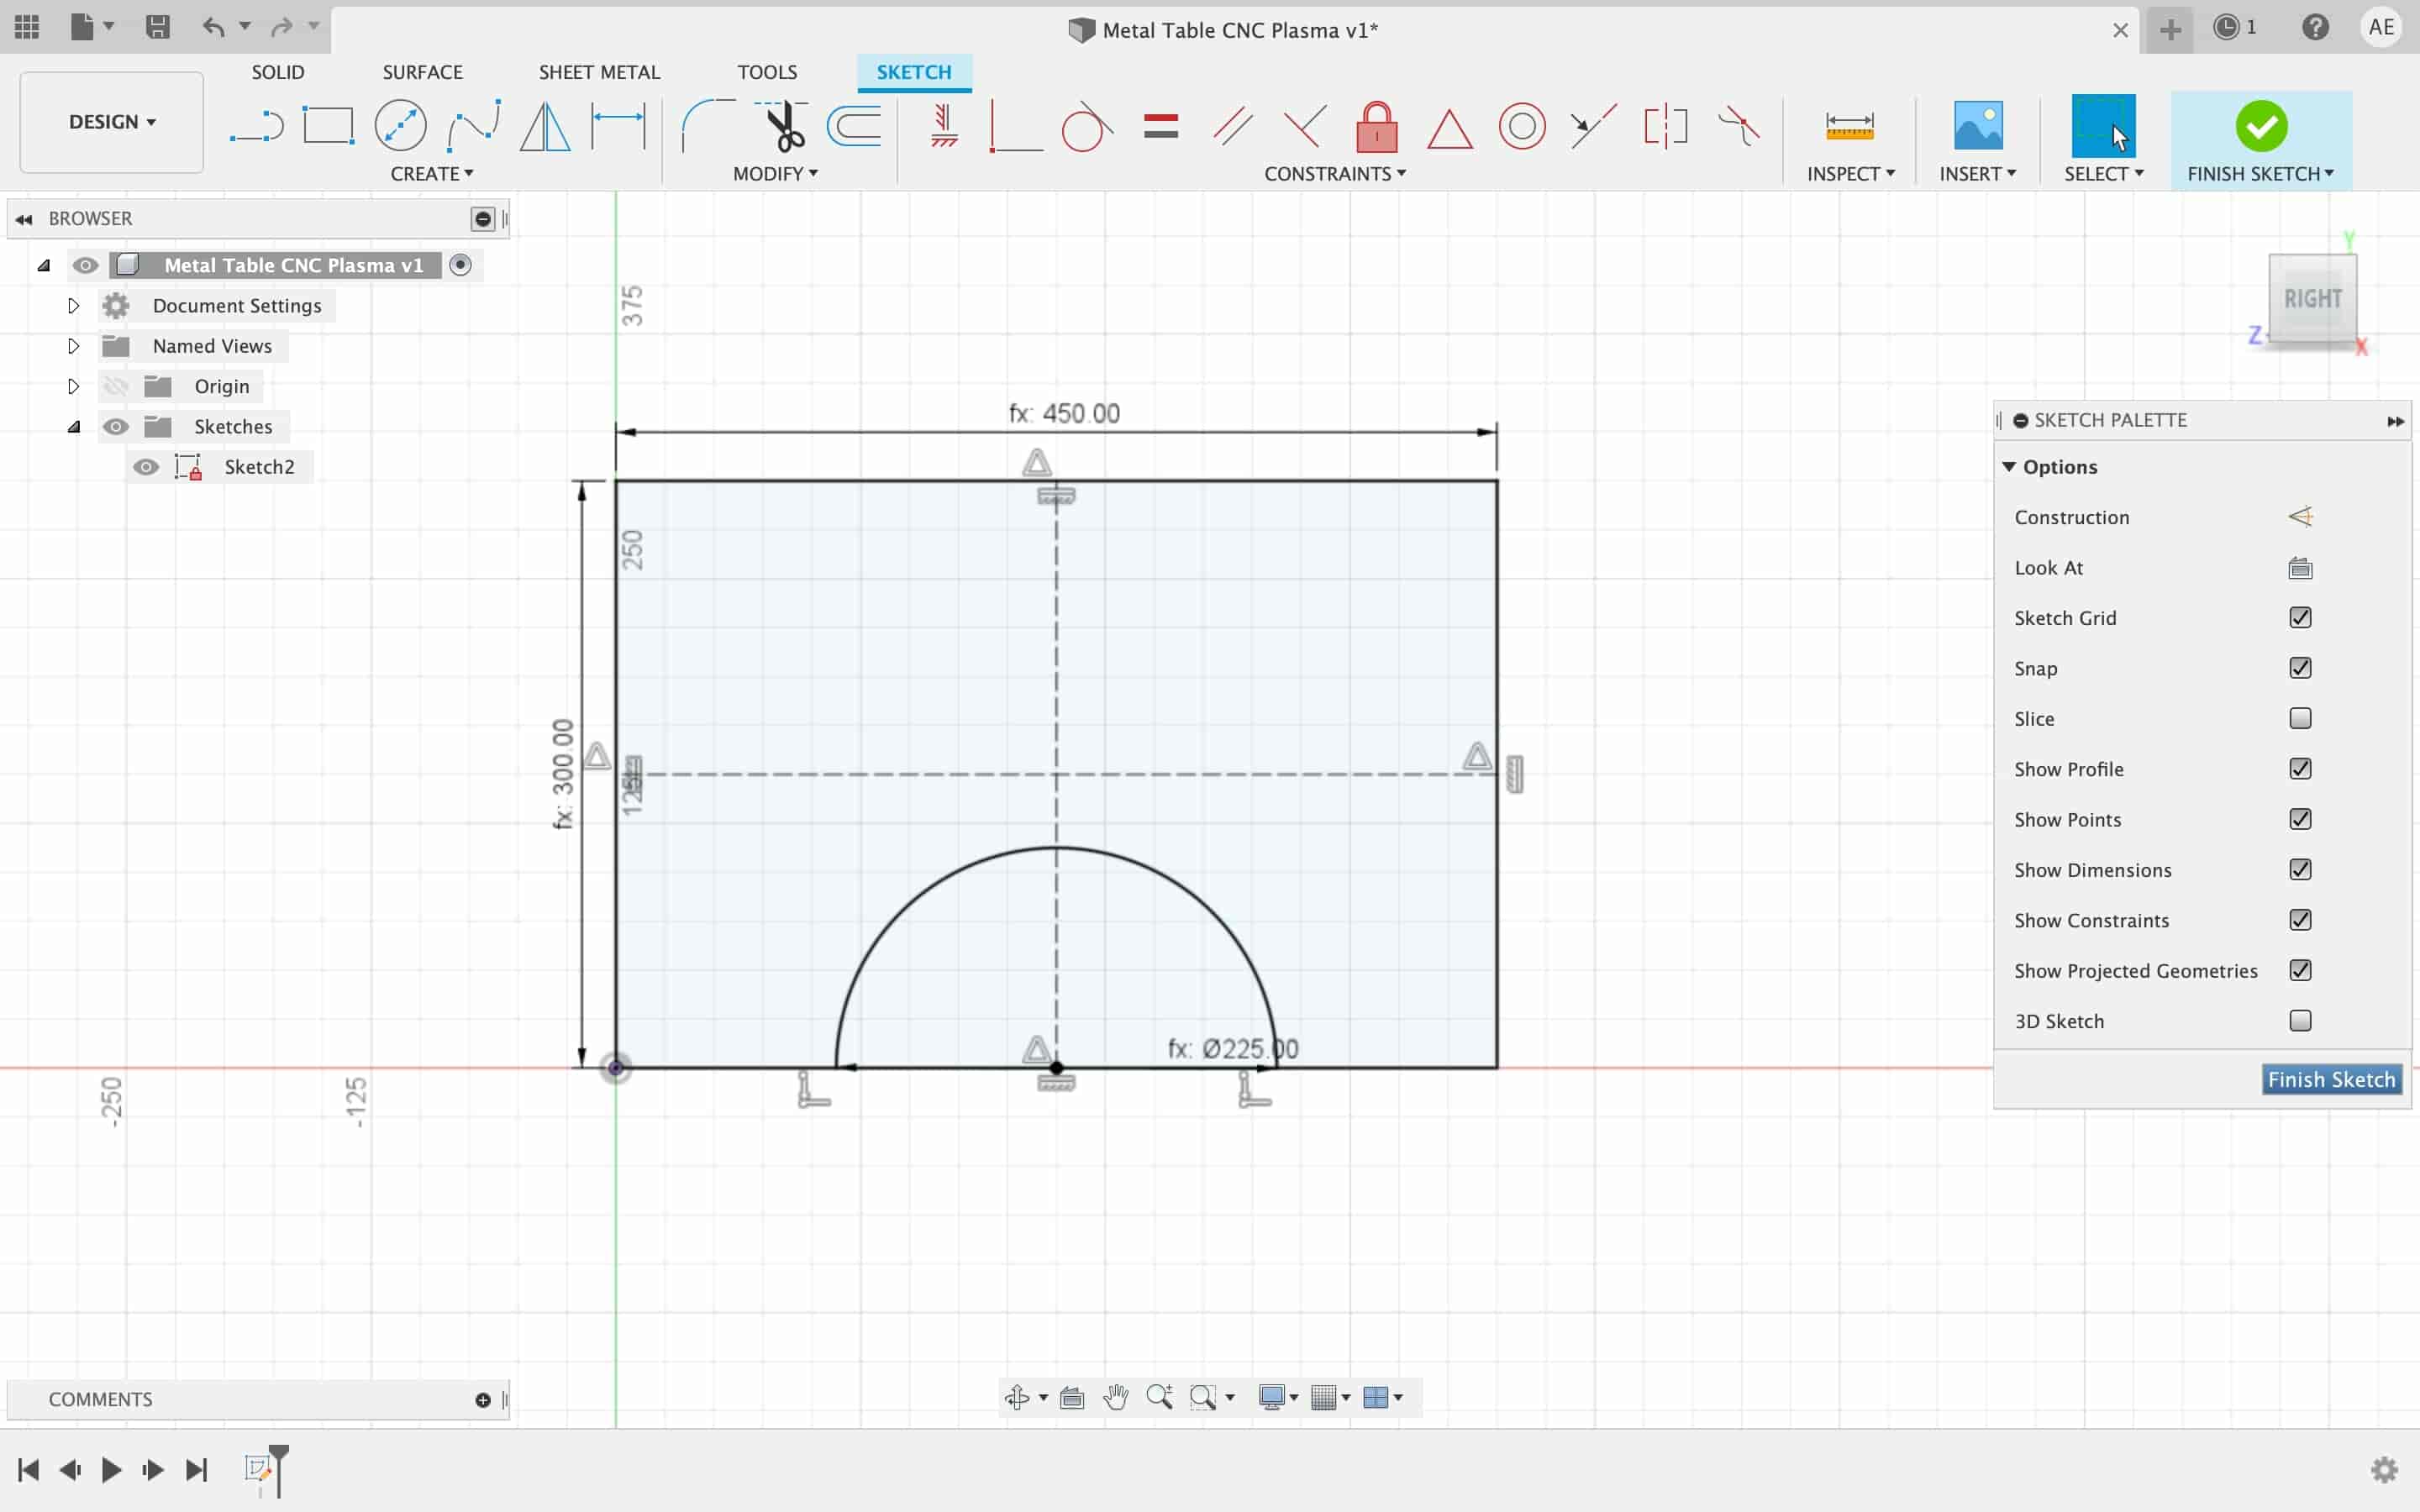
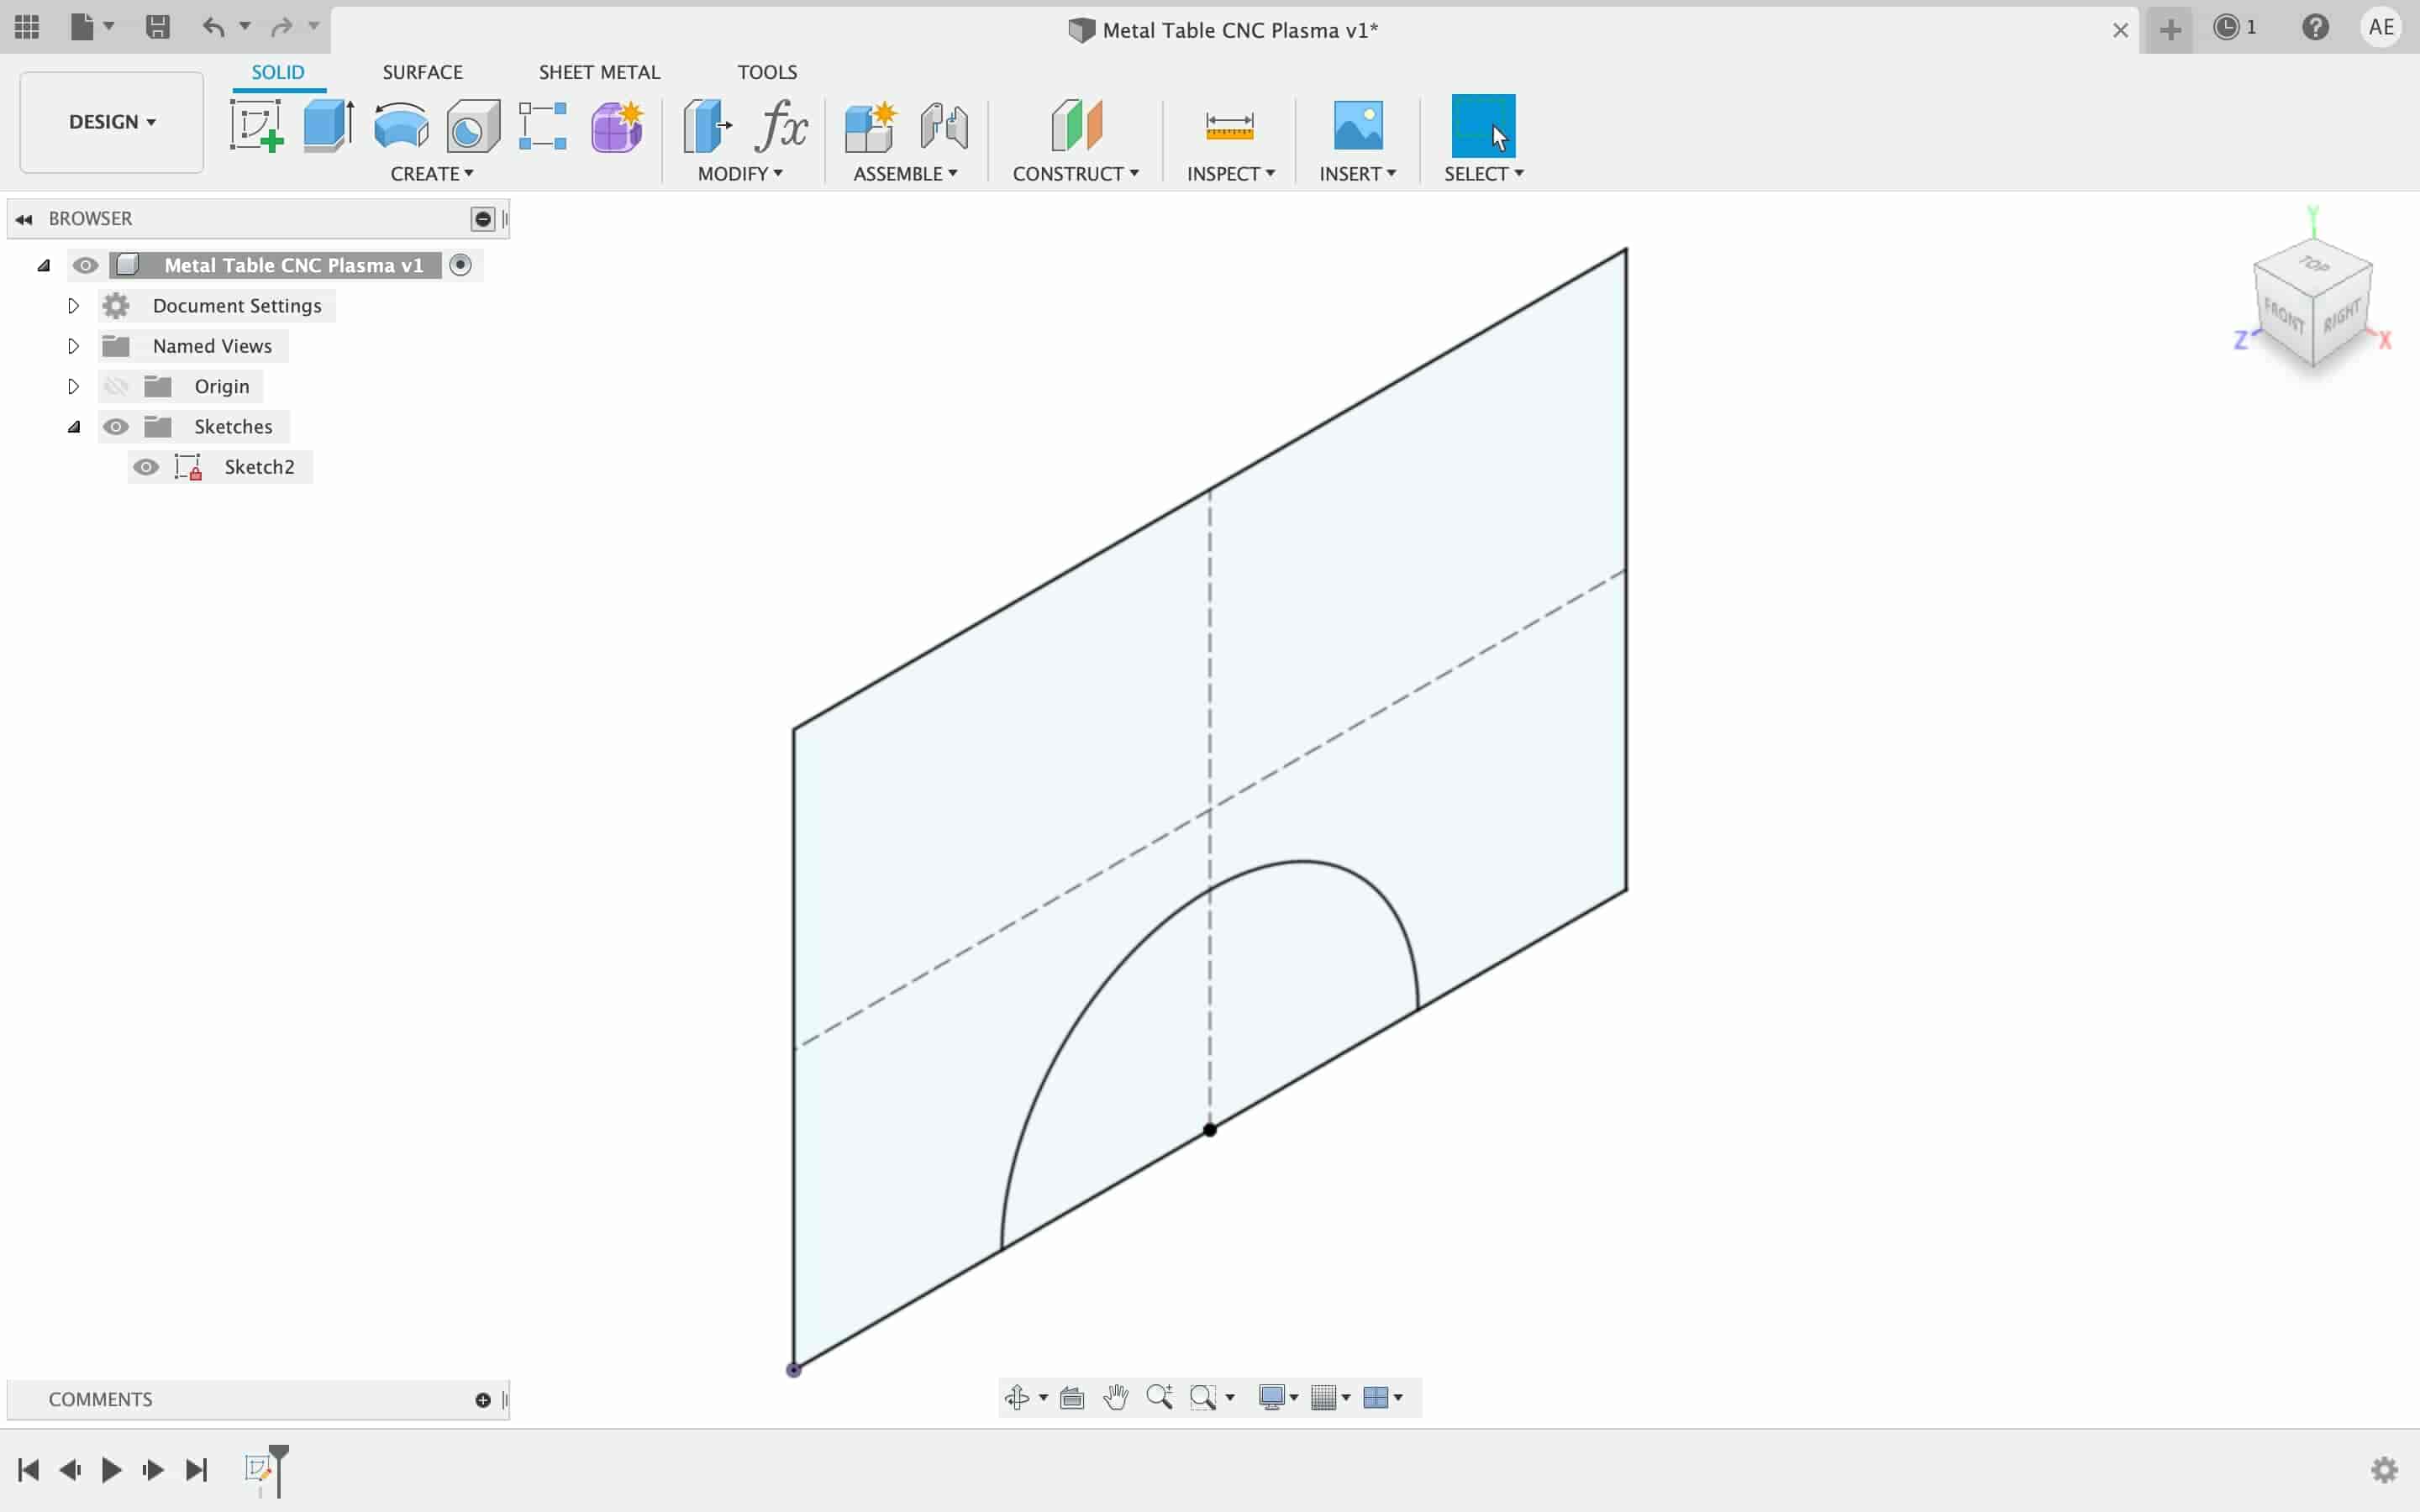
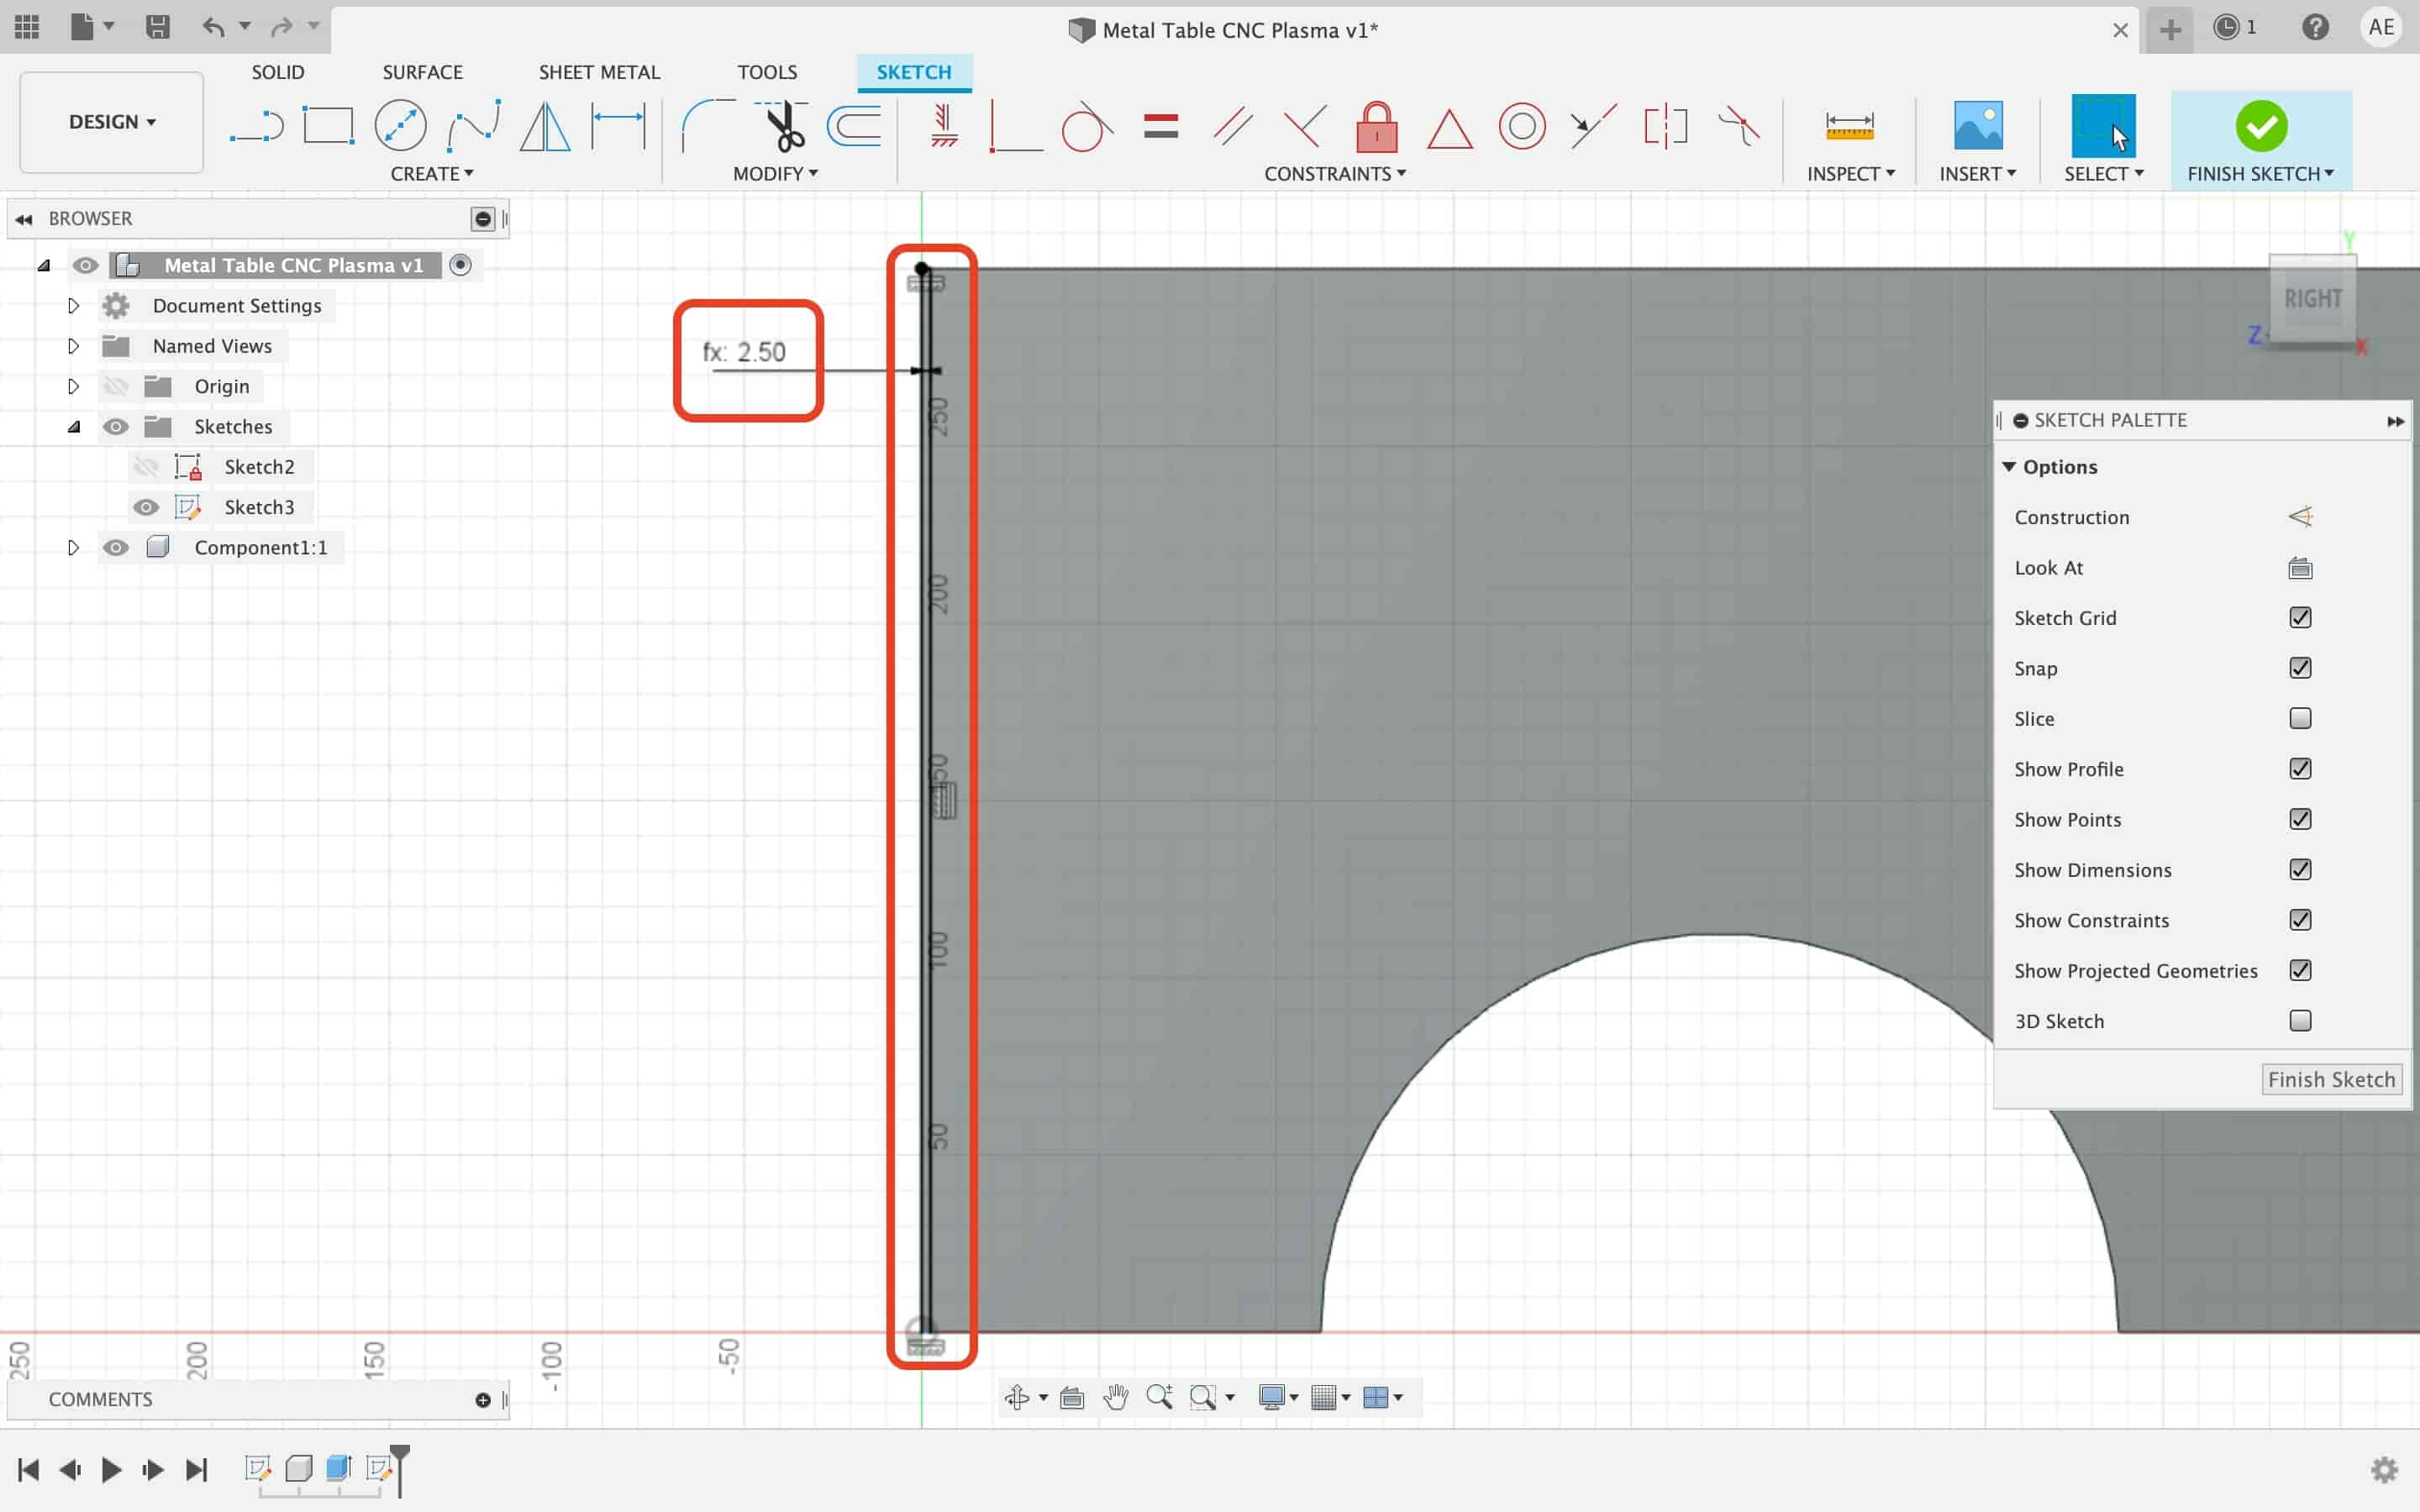
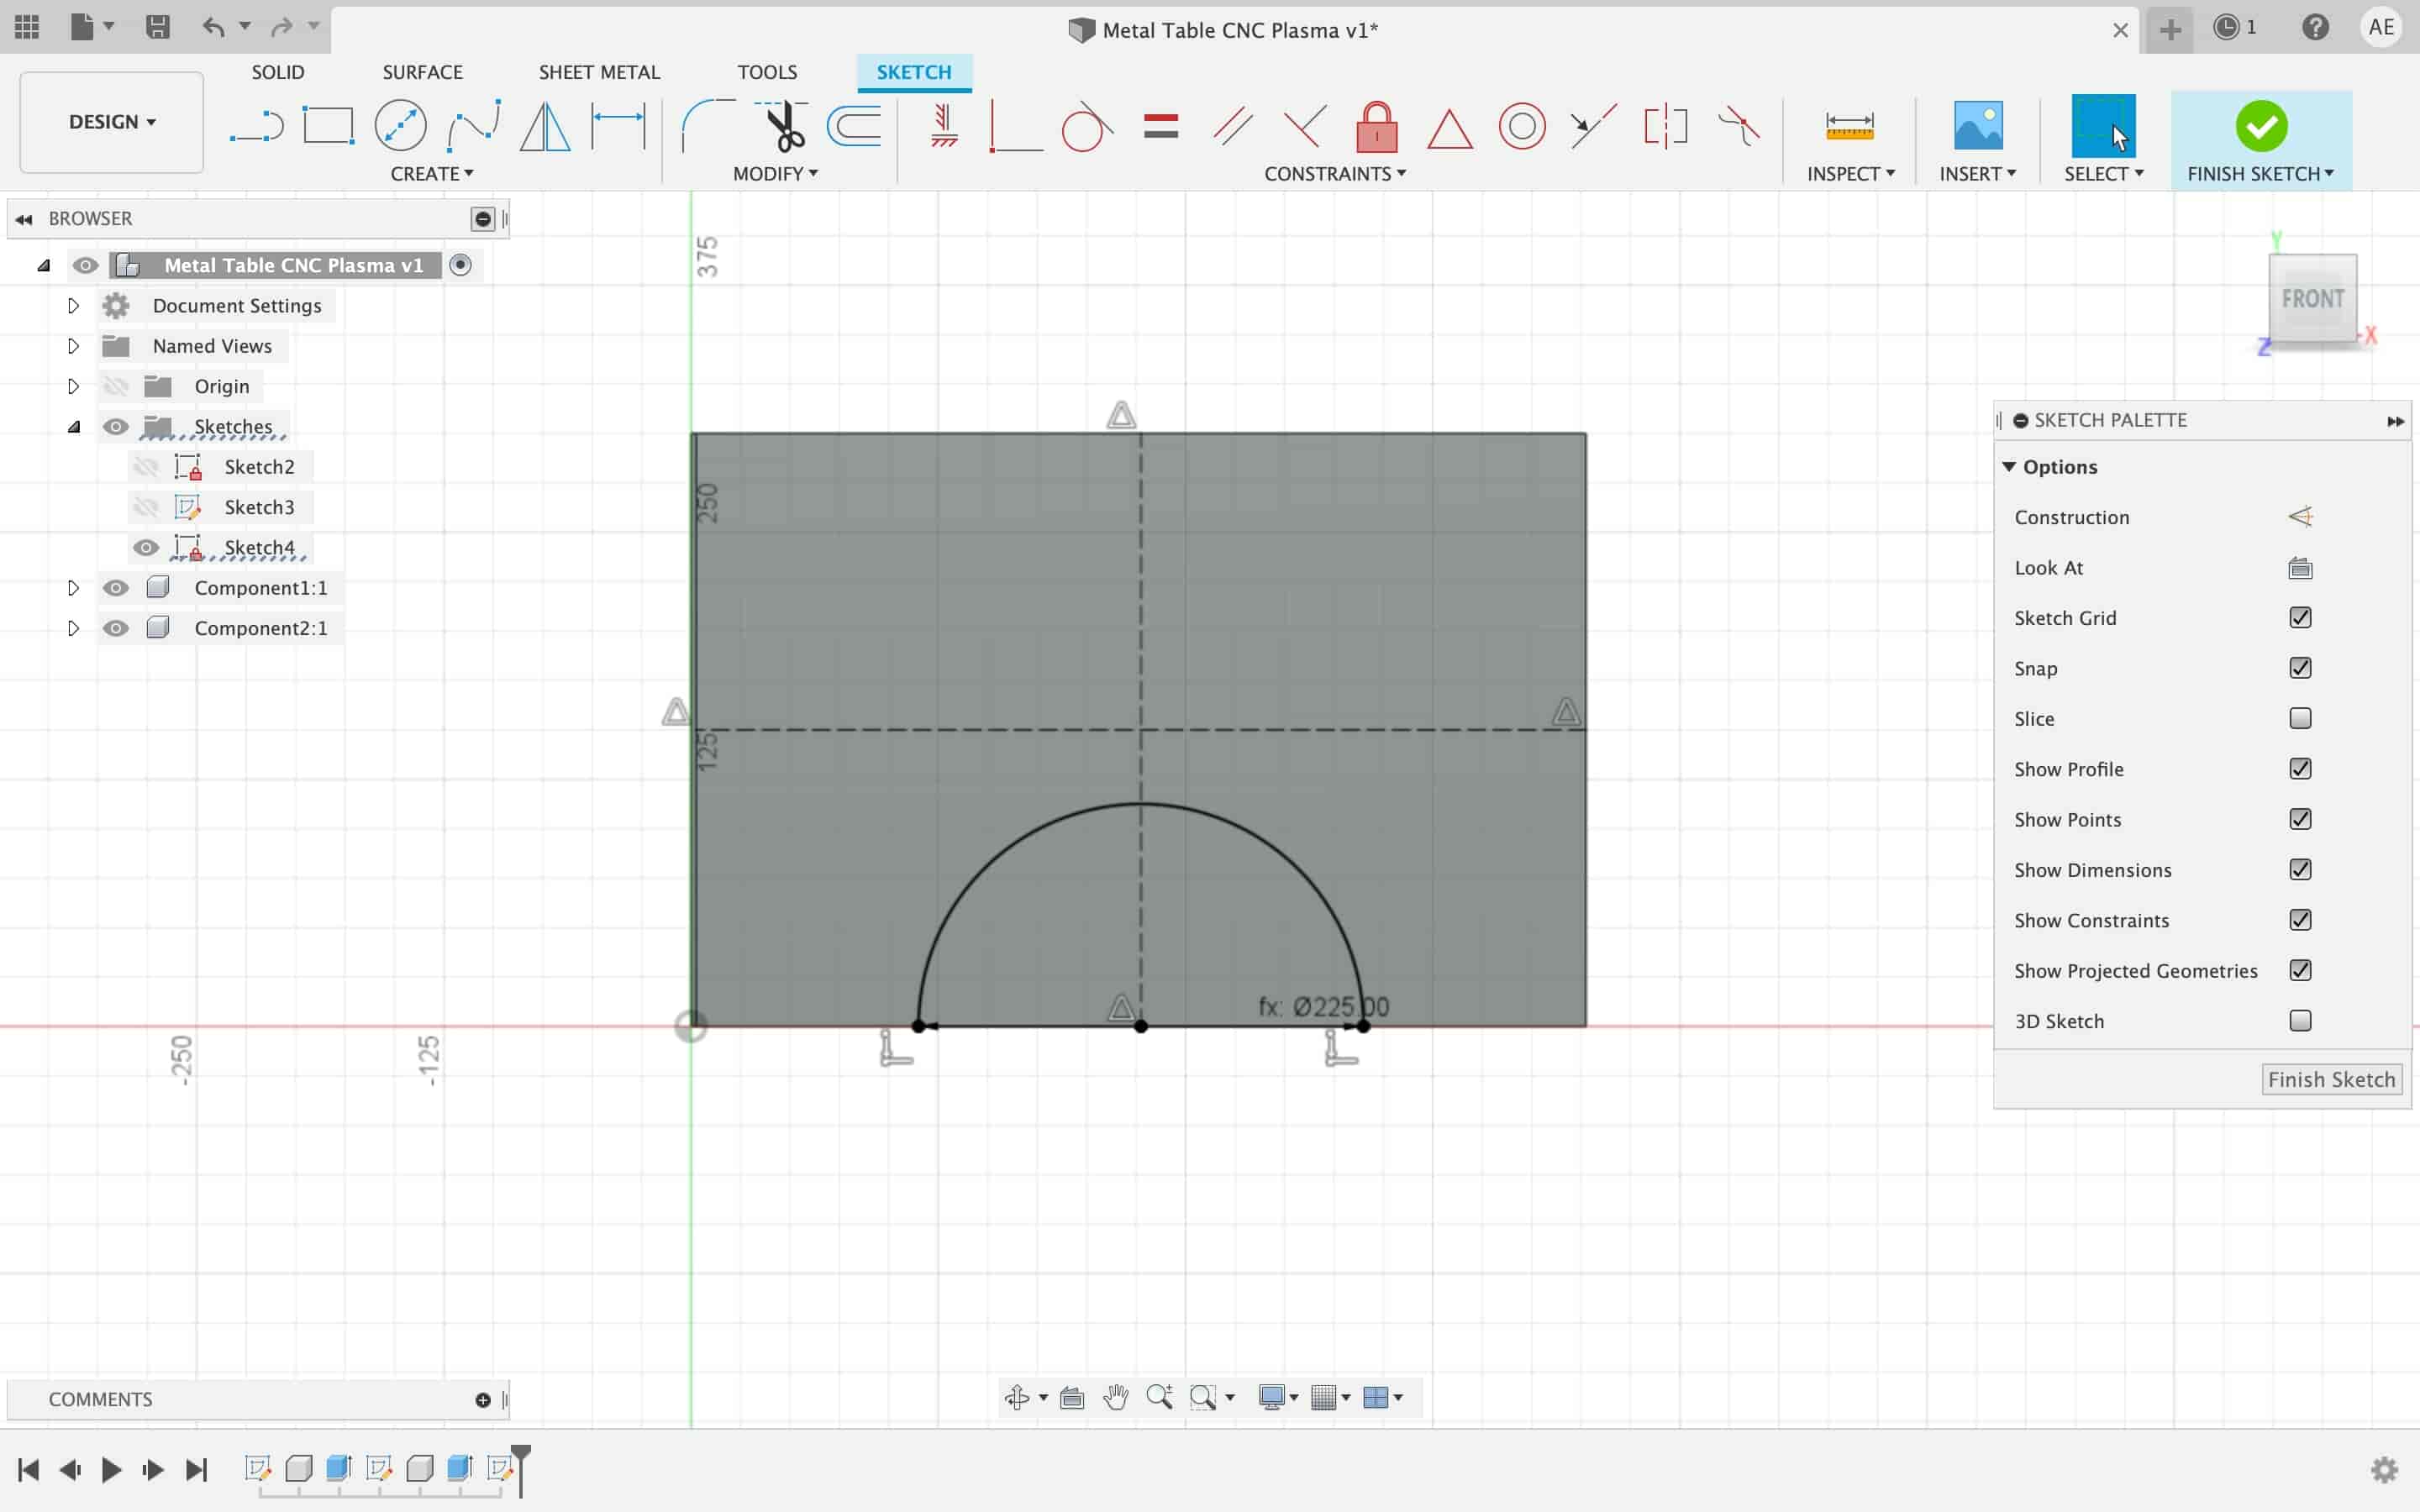
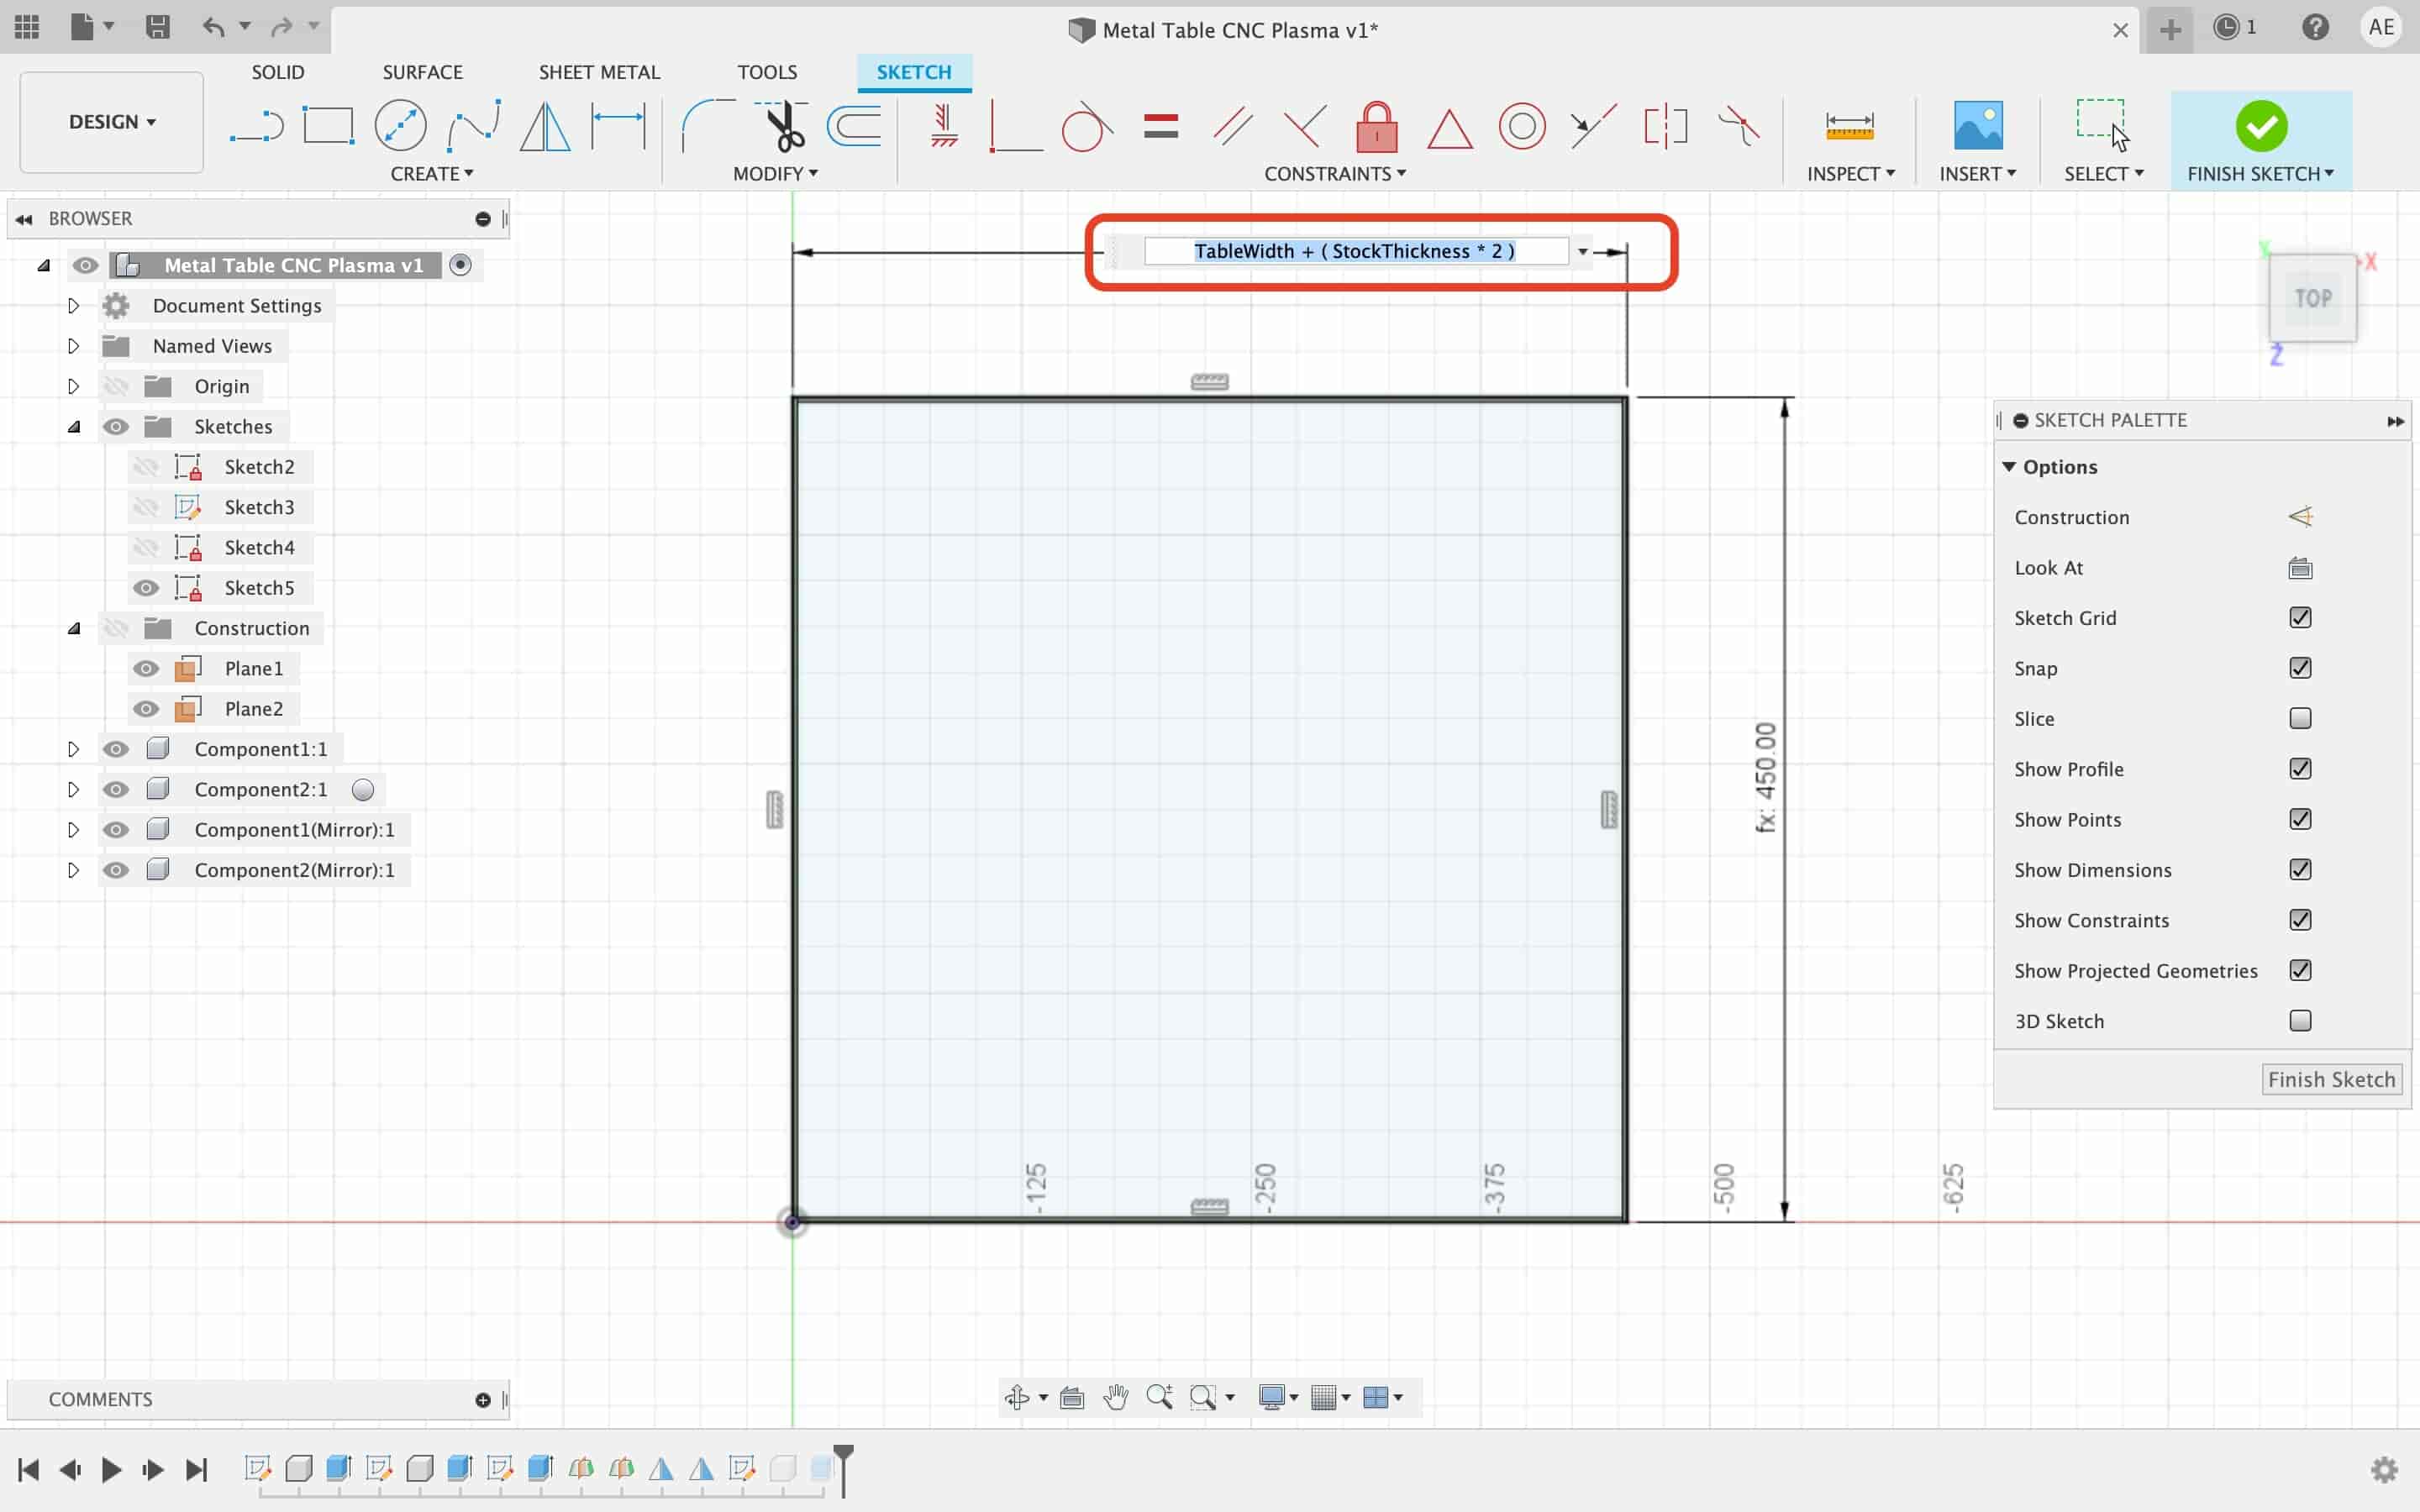
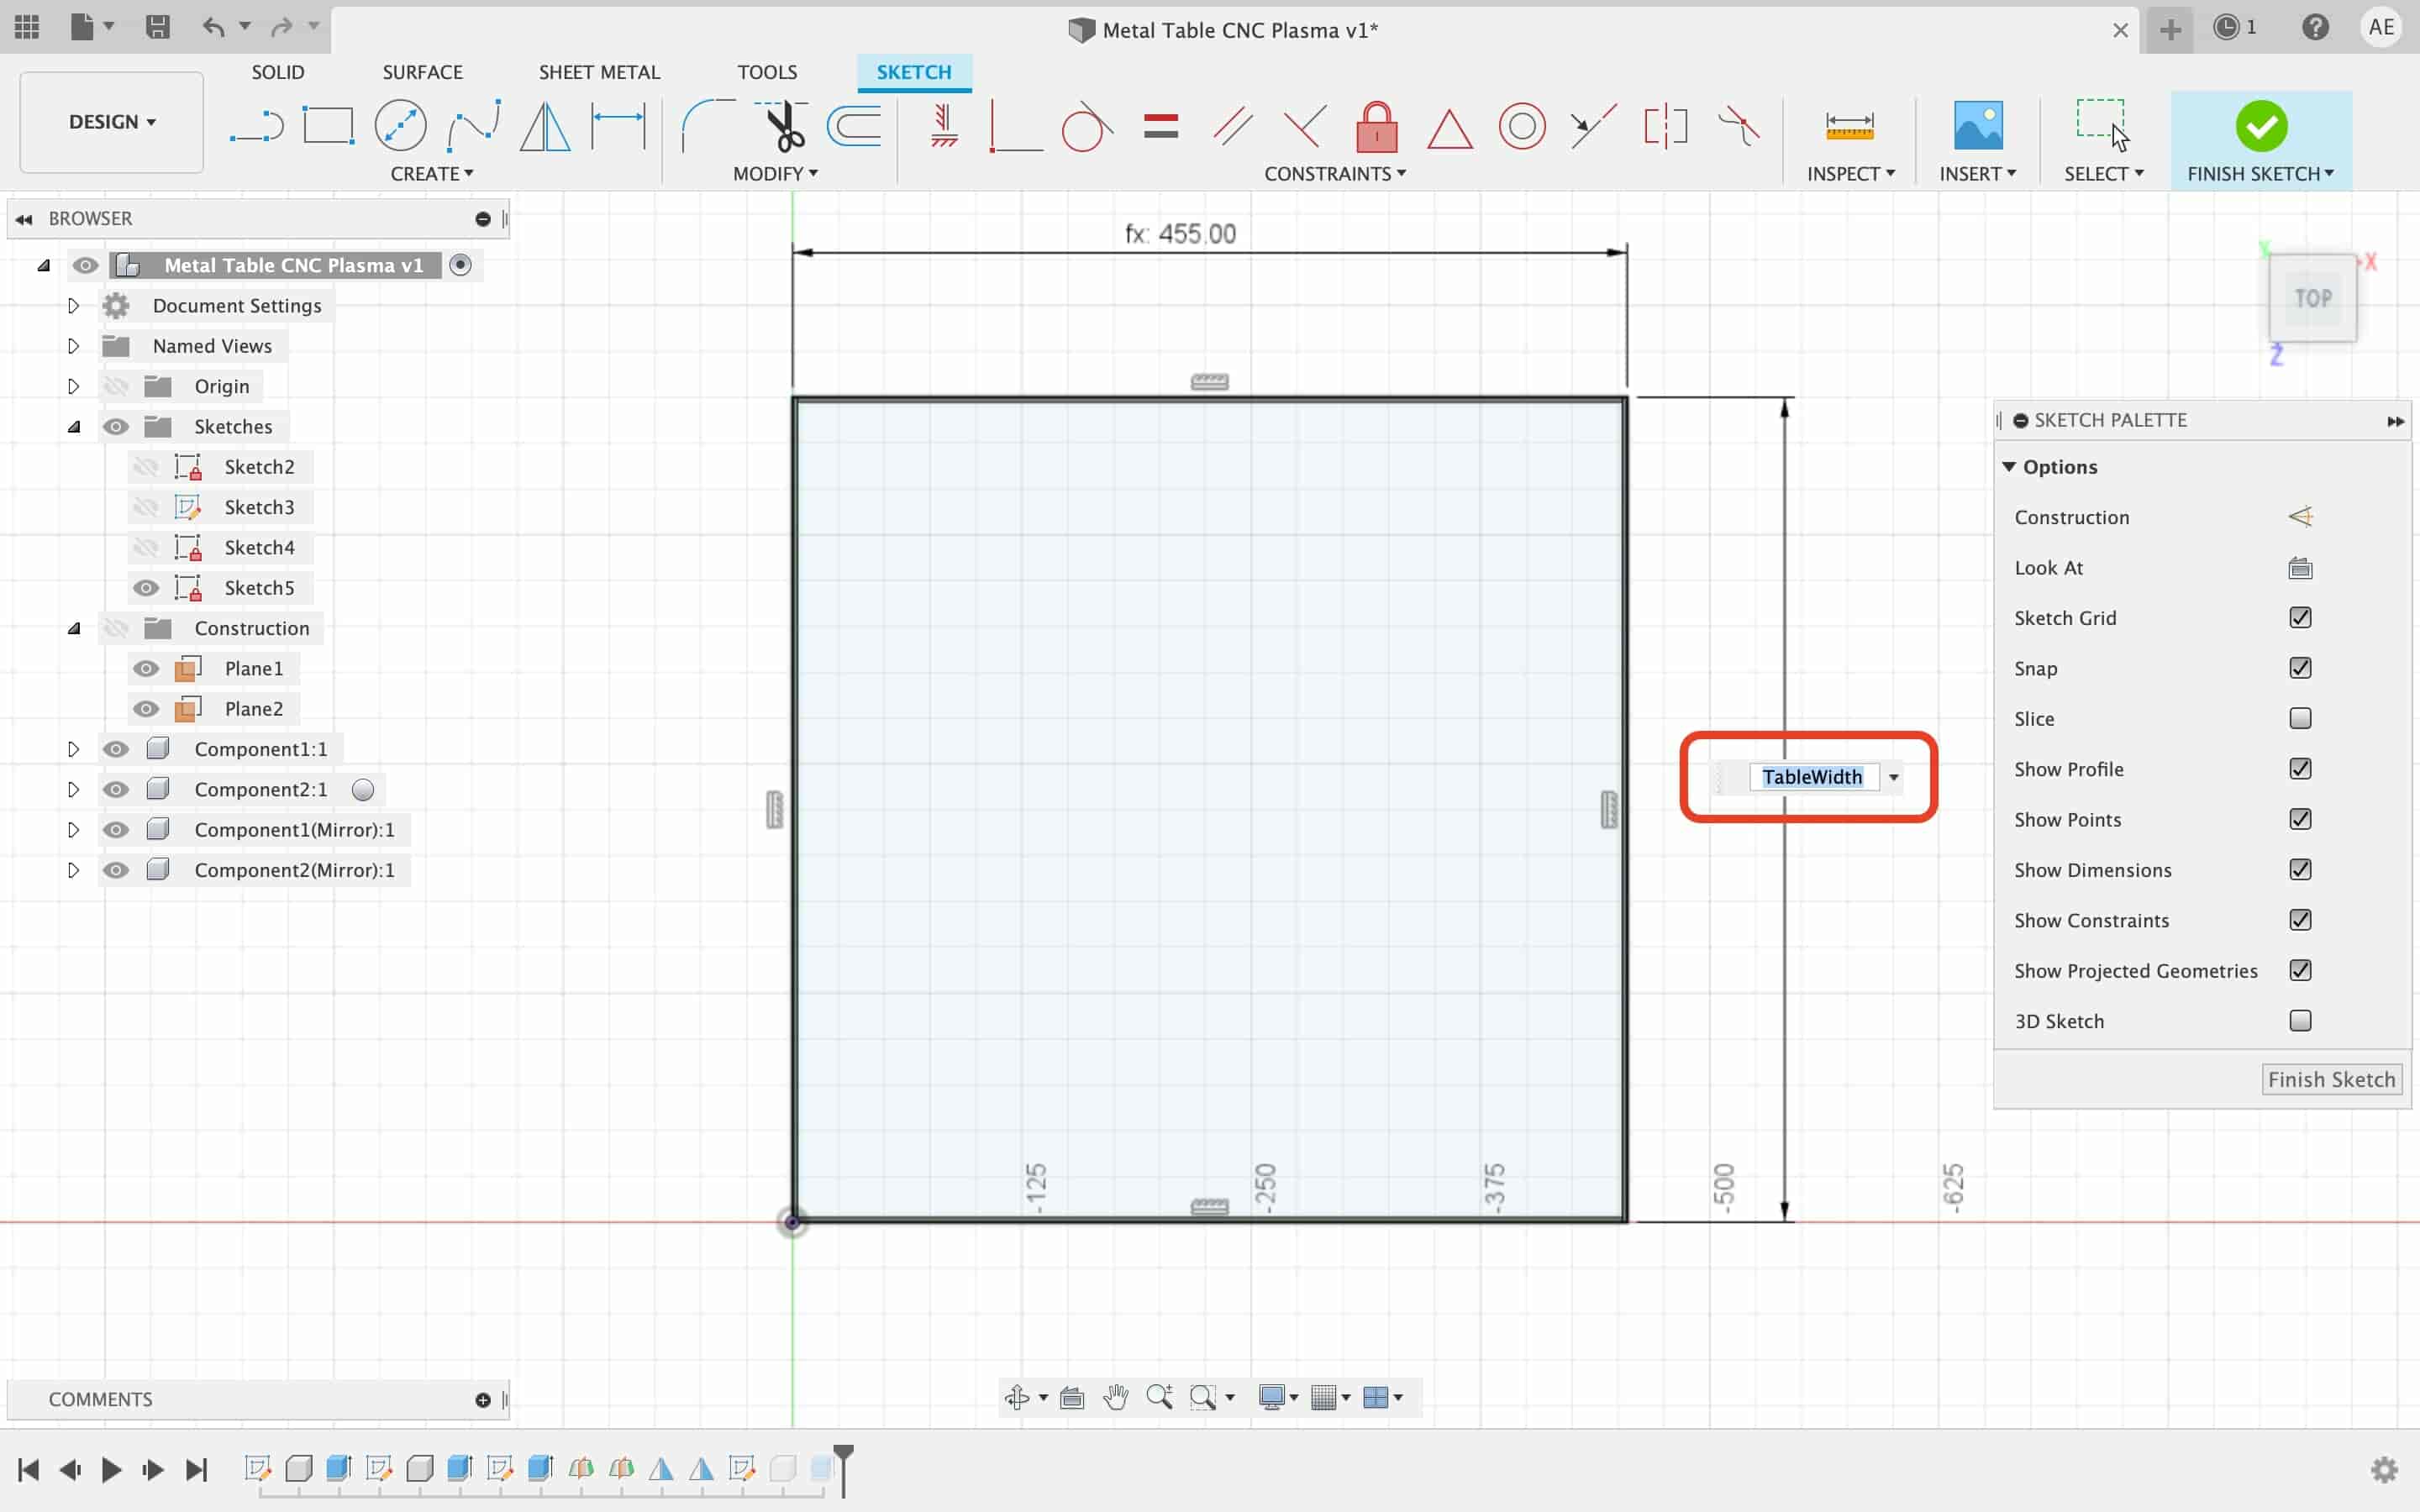
Now I’m ready to convert the idea into a real design on Fusion360, I initialized some user parameters to help me modify the model later easily. Then, I started a new sketch and started to draw the left leg of the table. The table leg is 45cm in width and 30cm in height. Then I draw a half circle at the center bottom of the table leg.
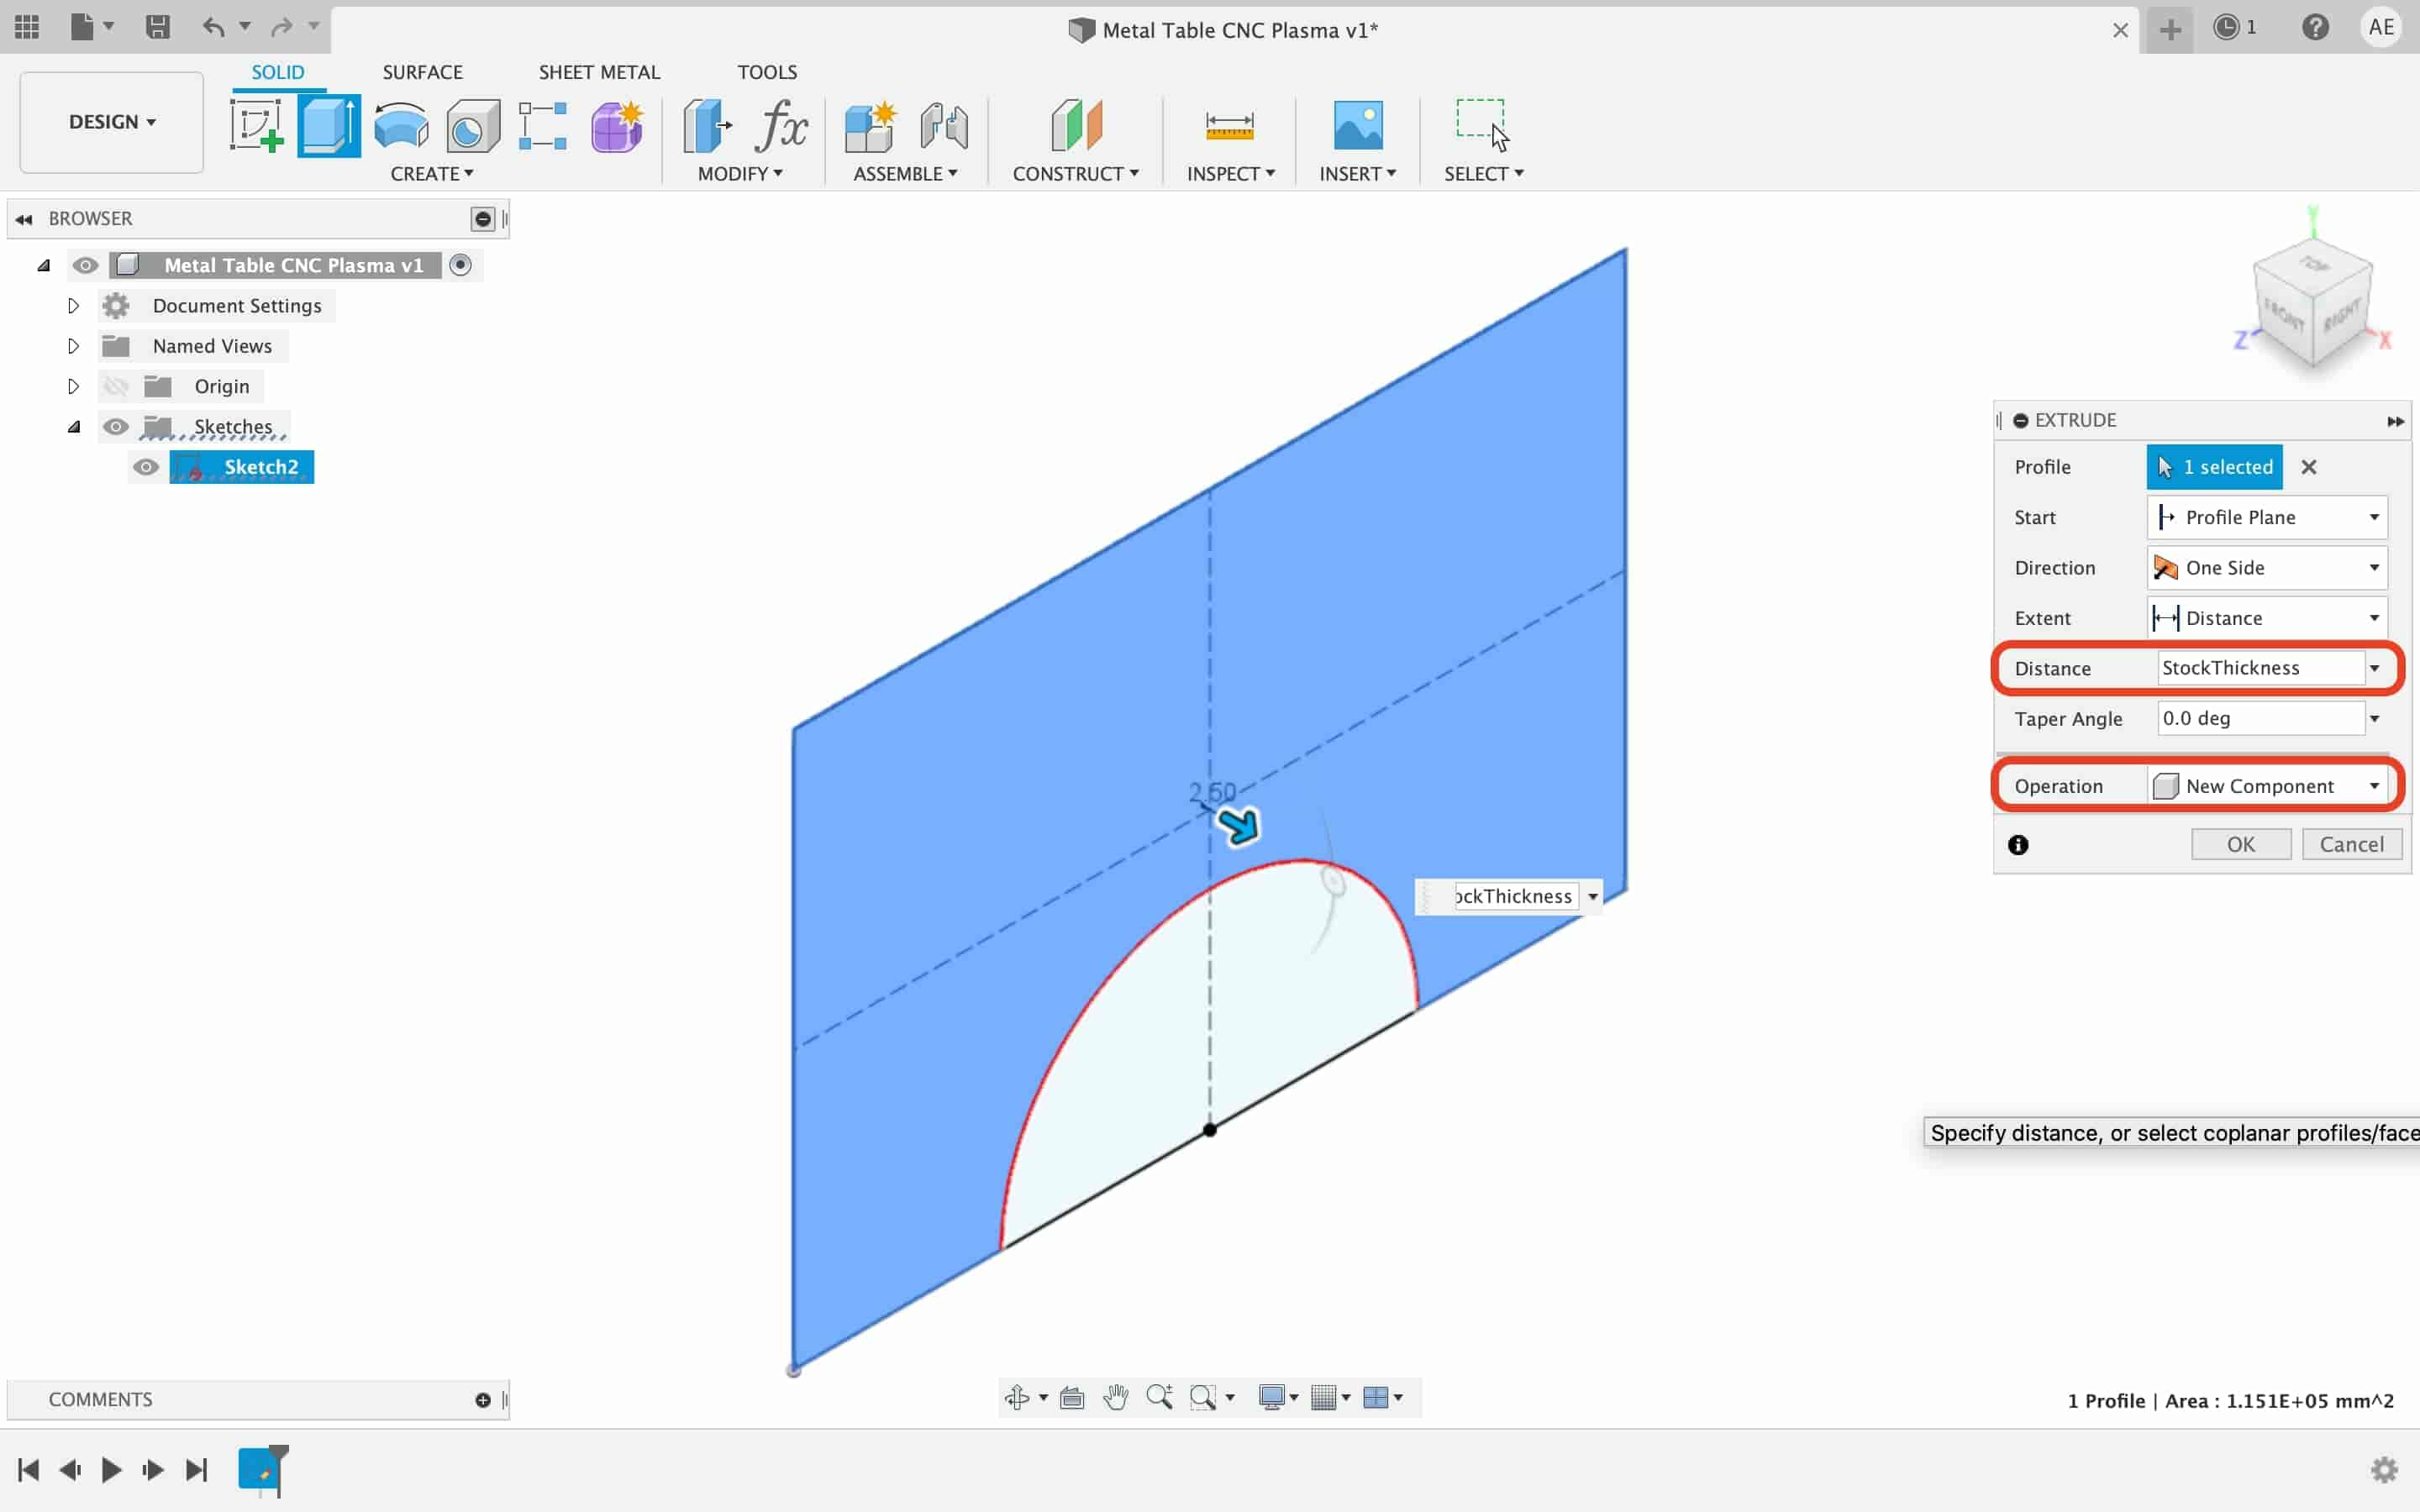
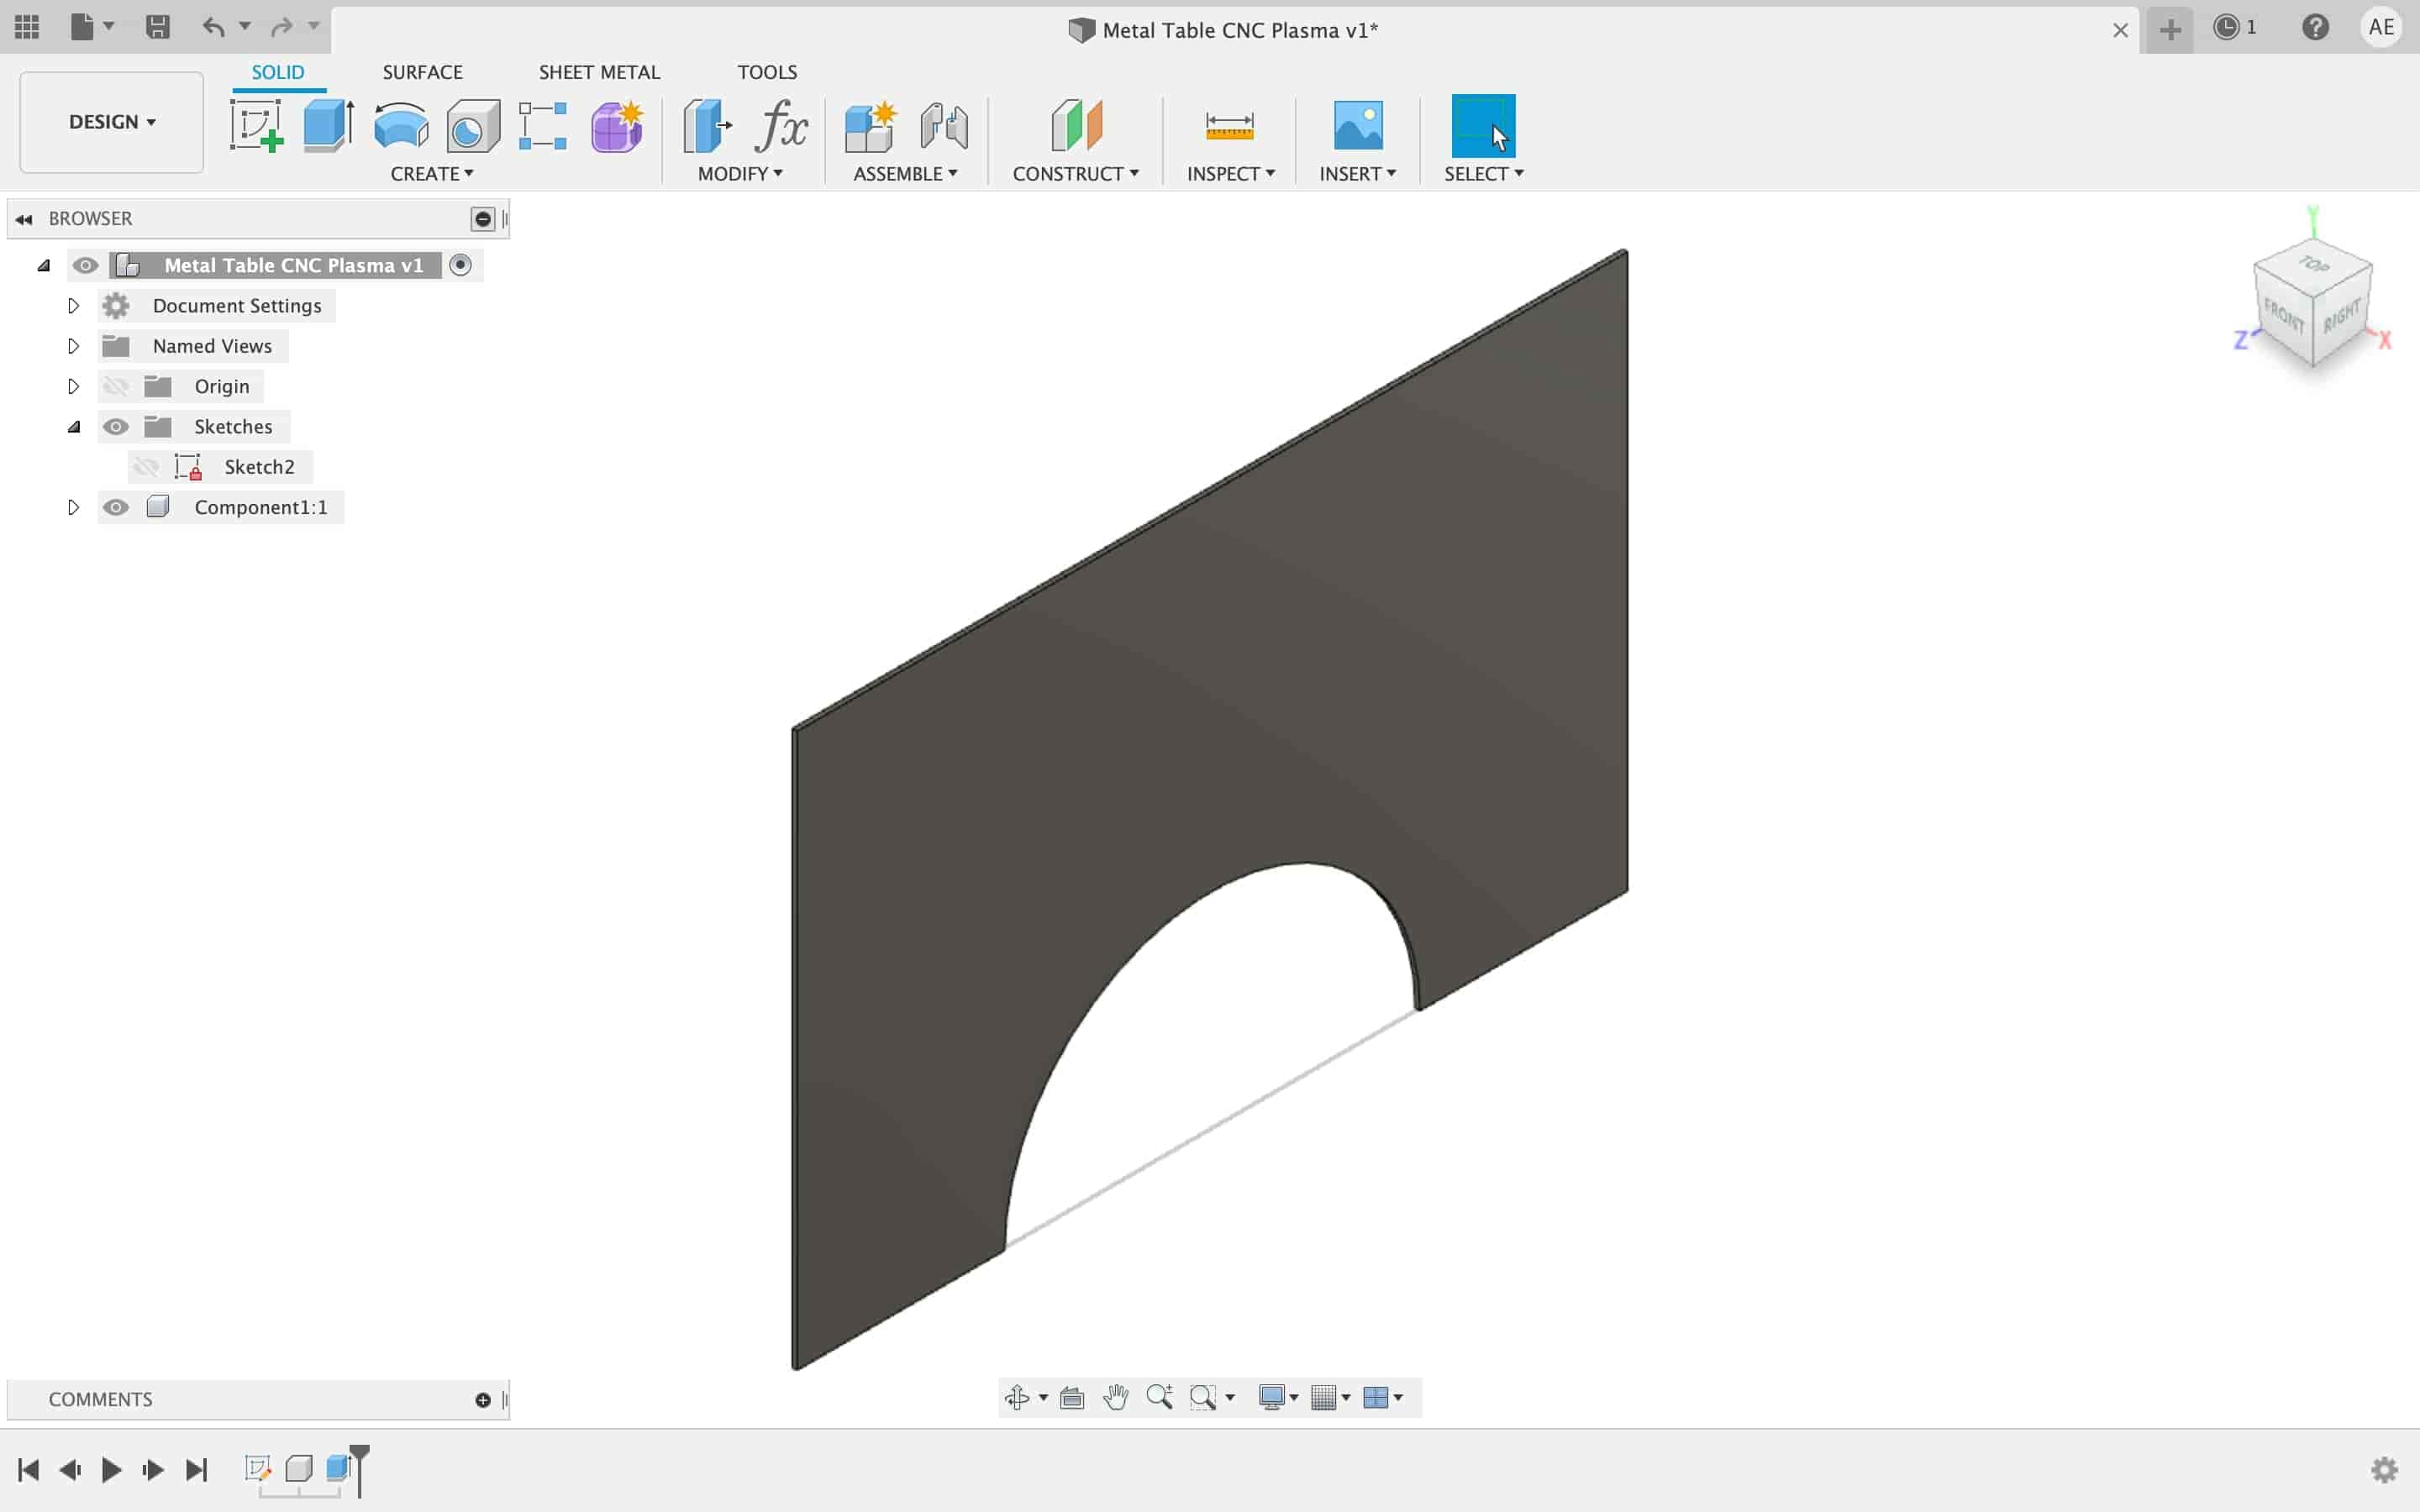
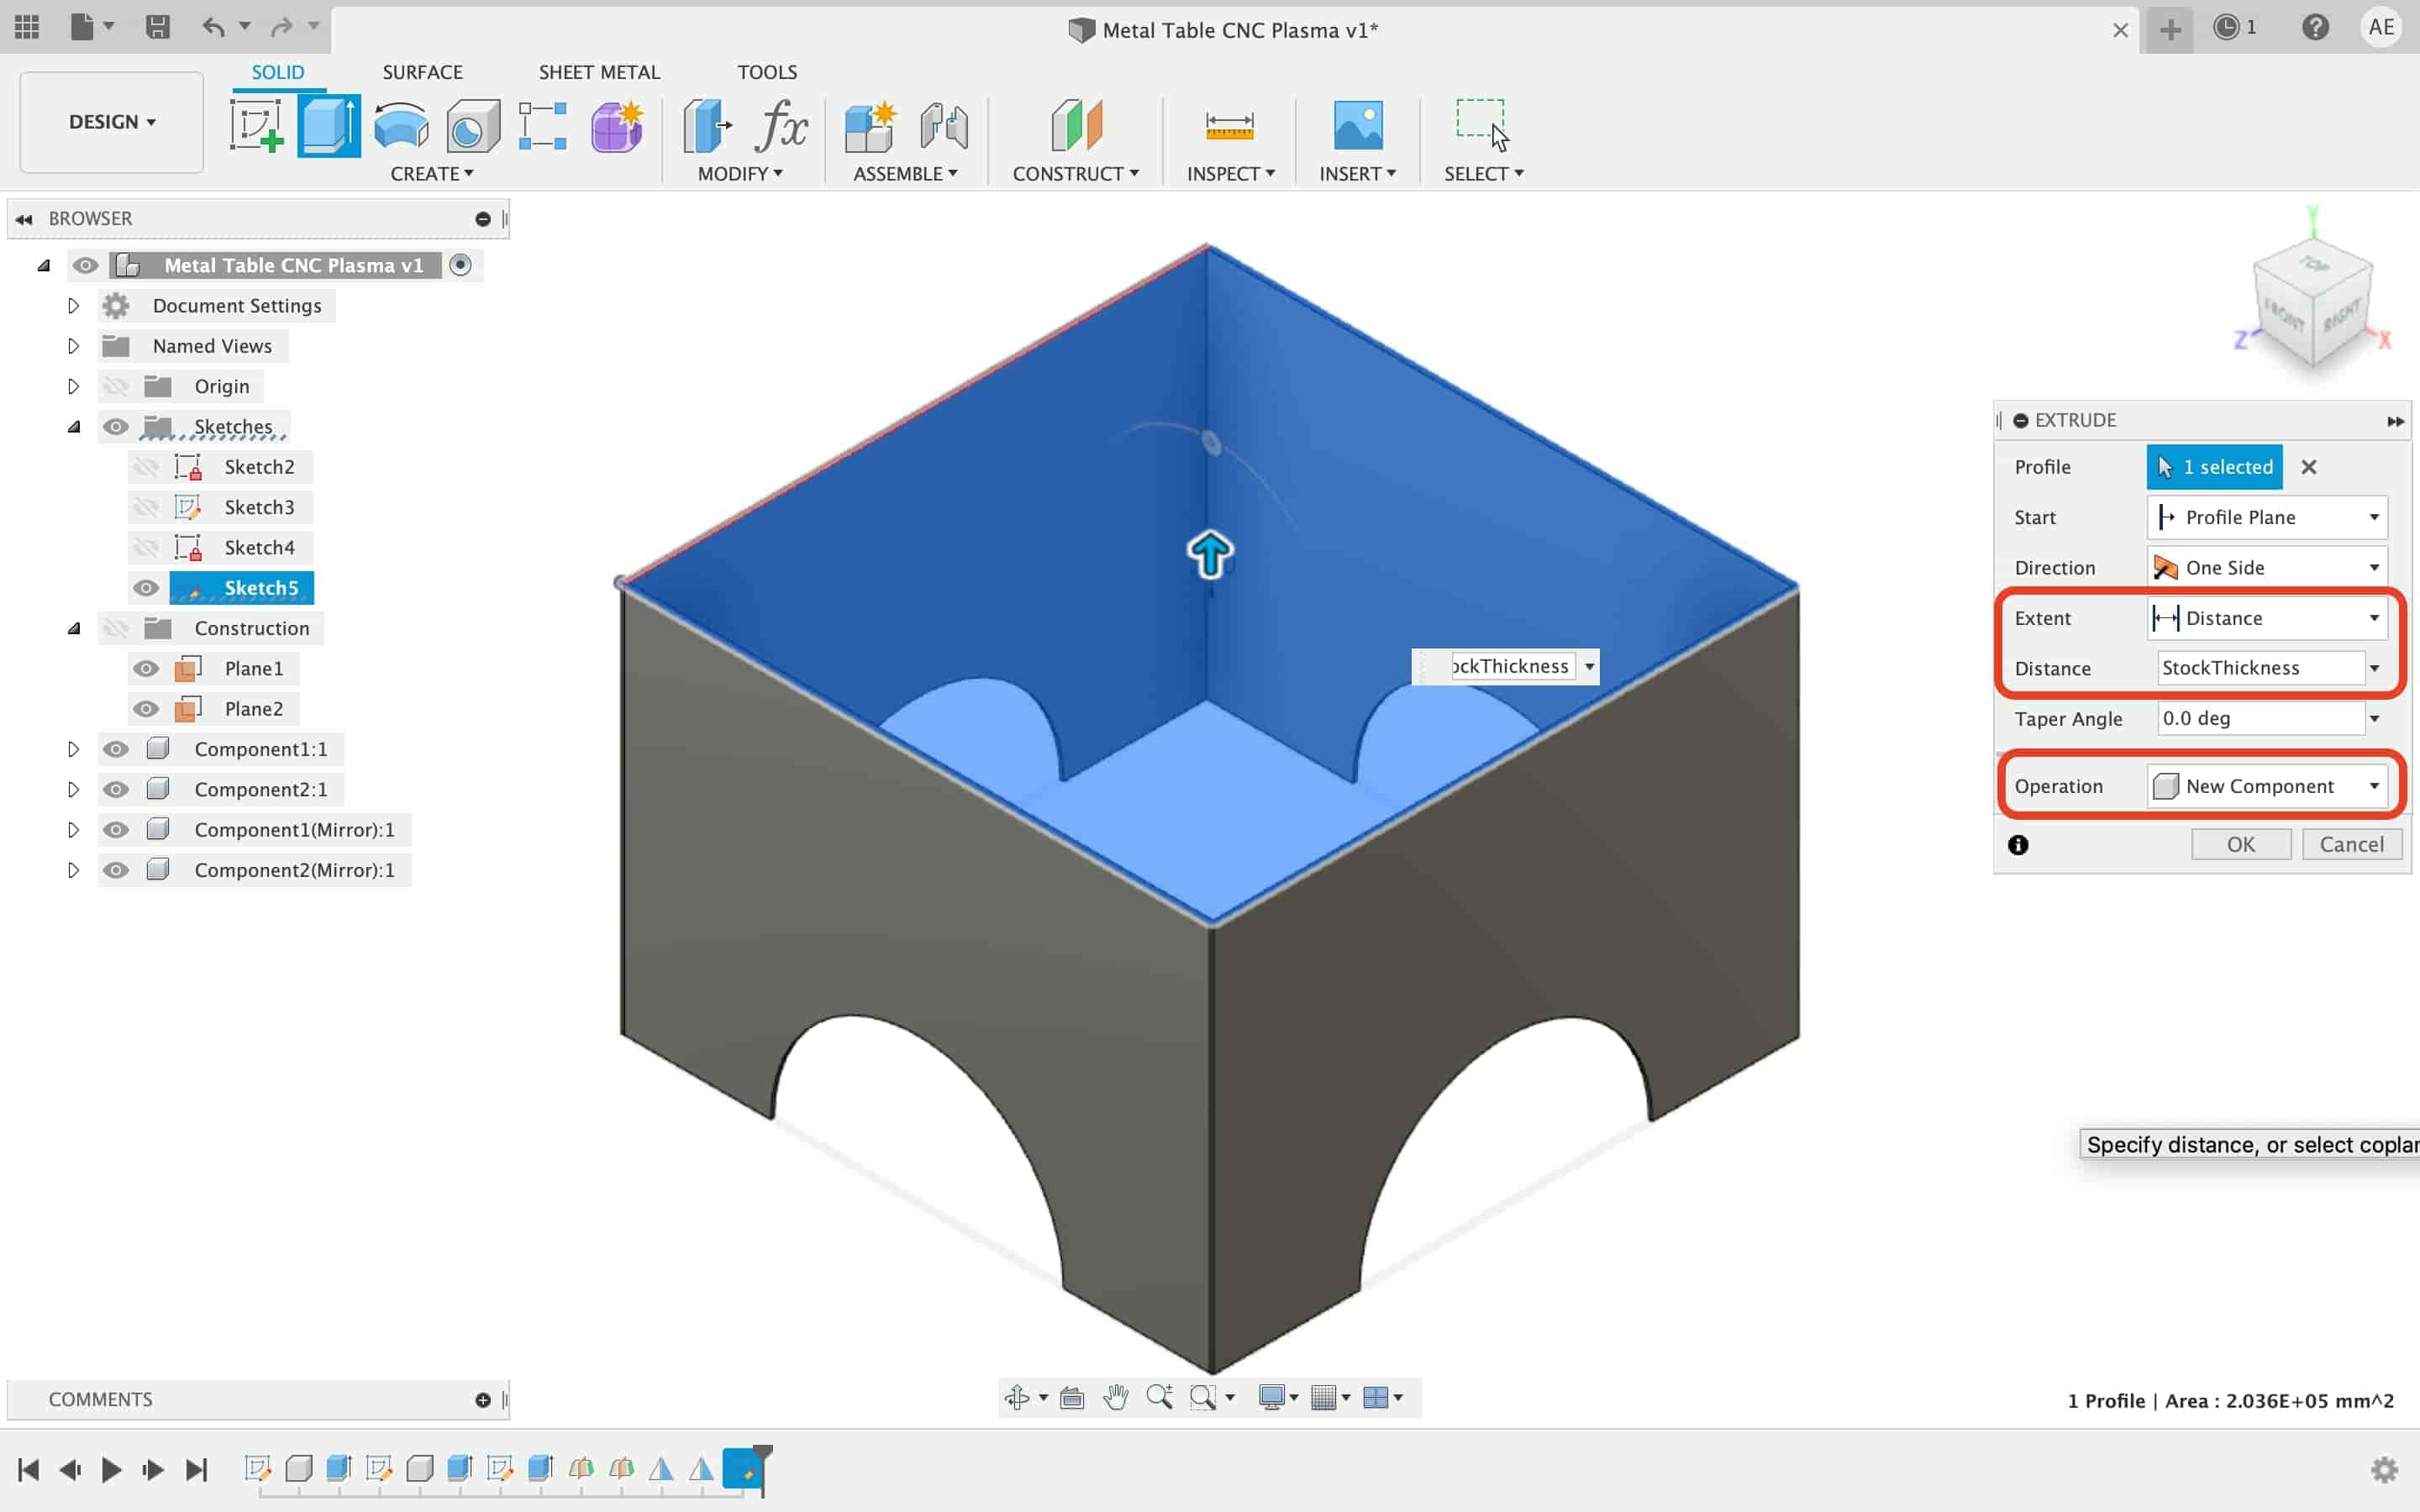
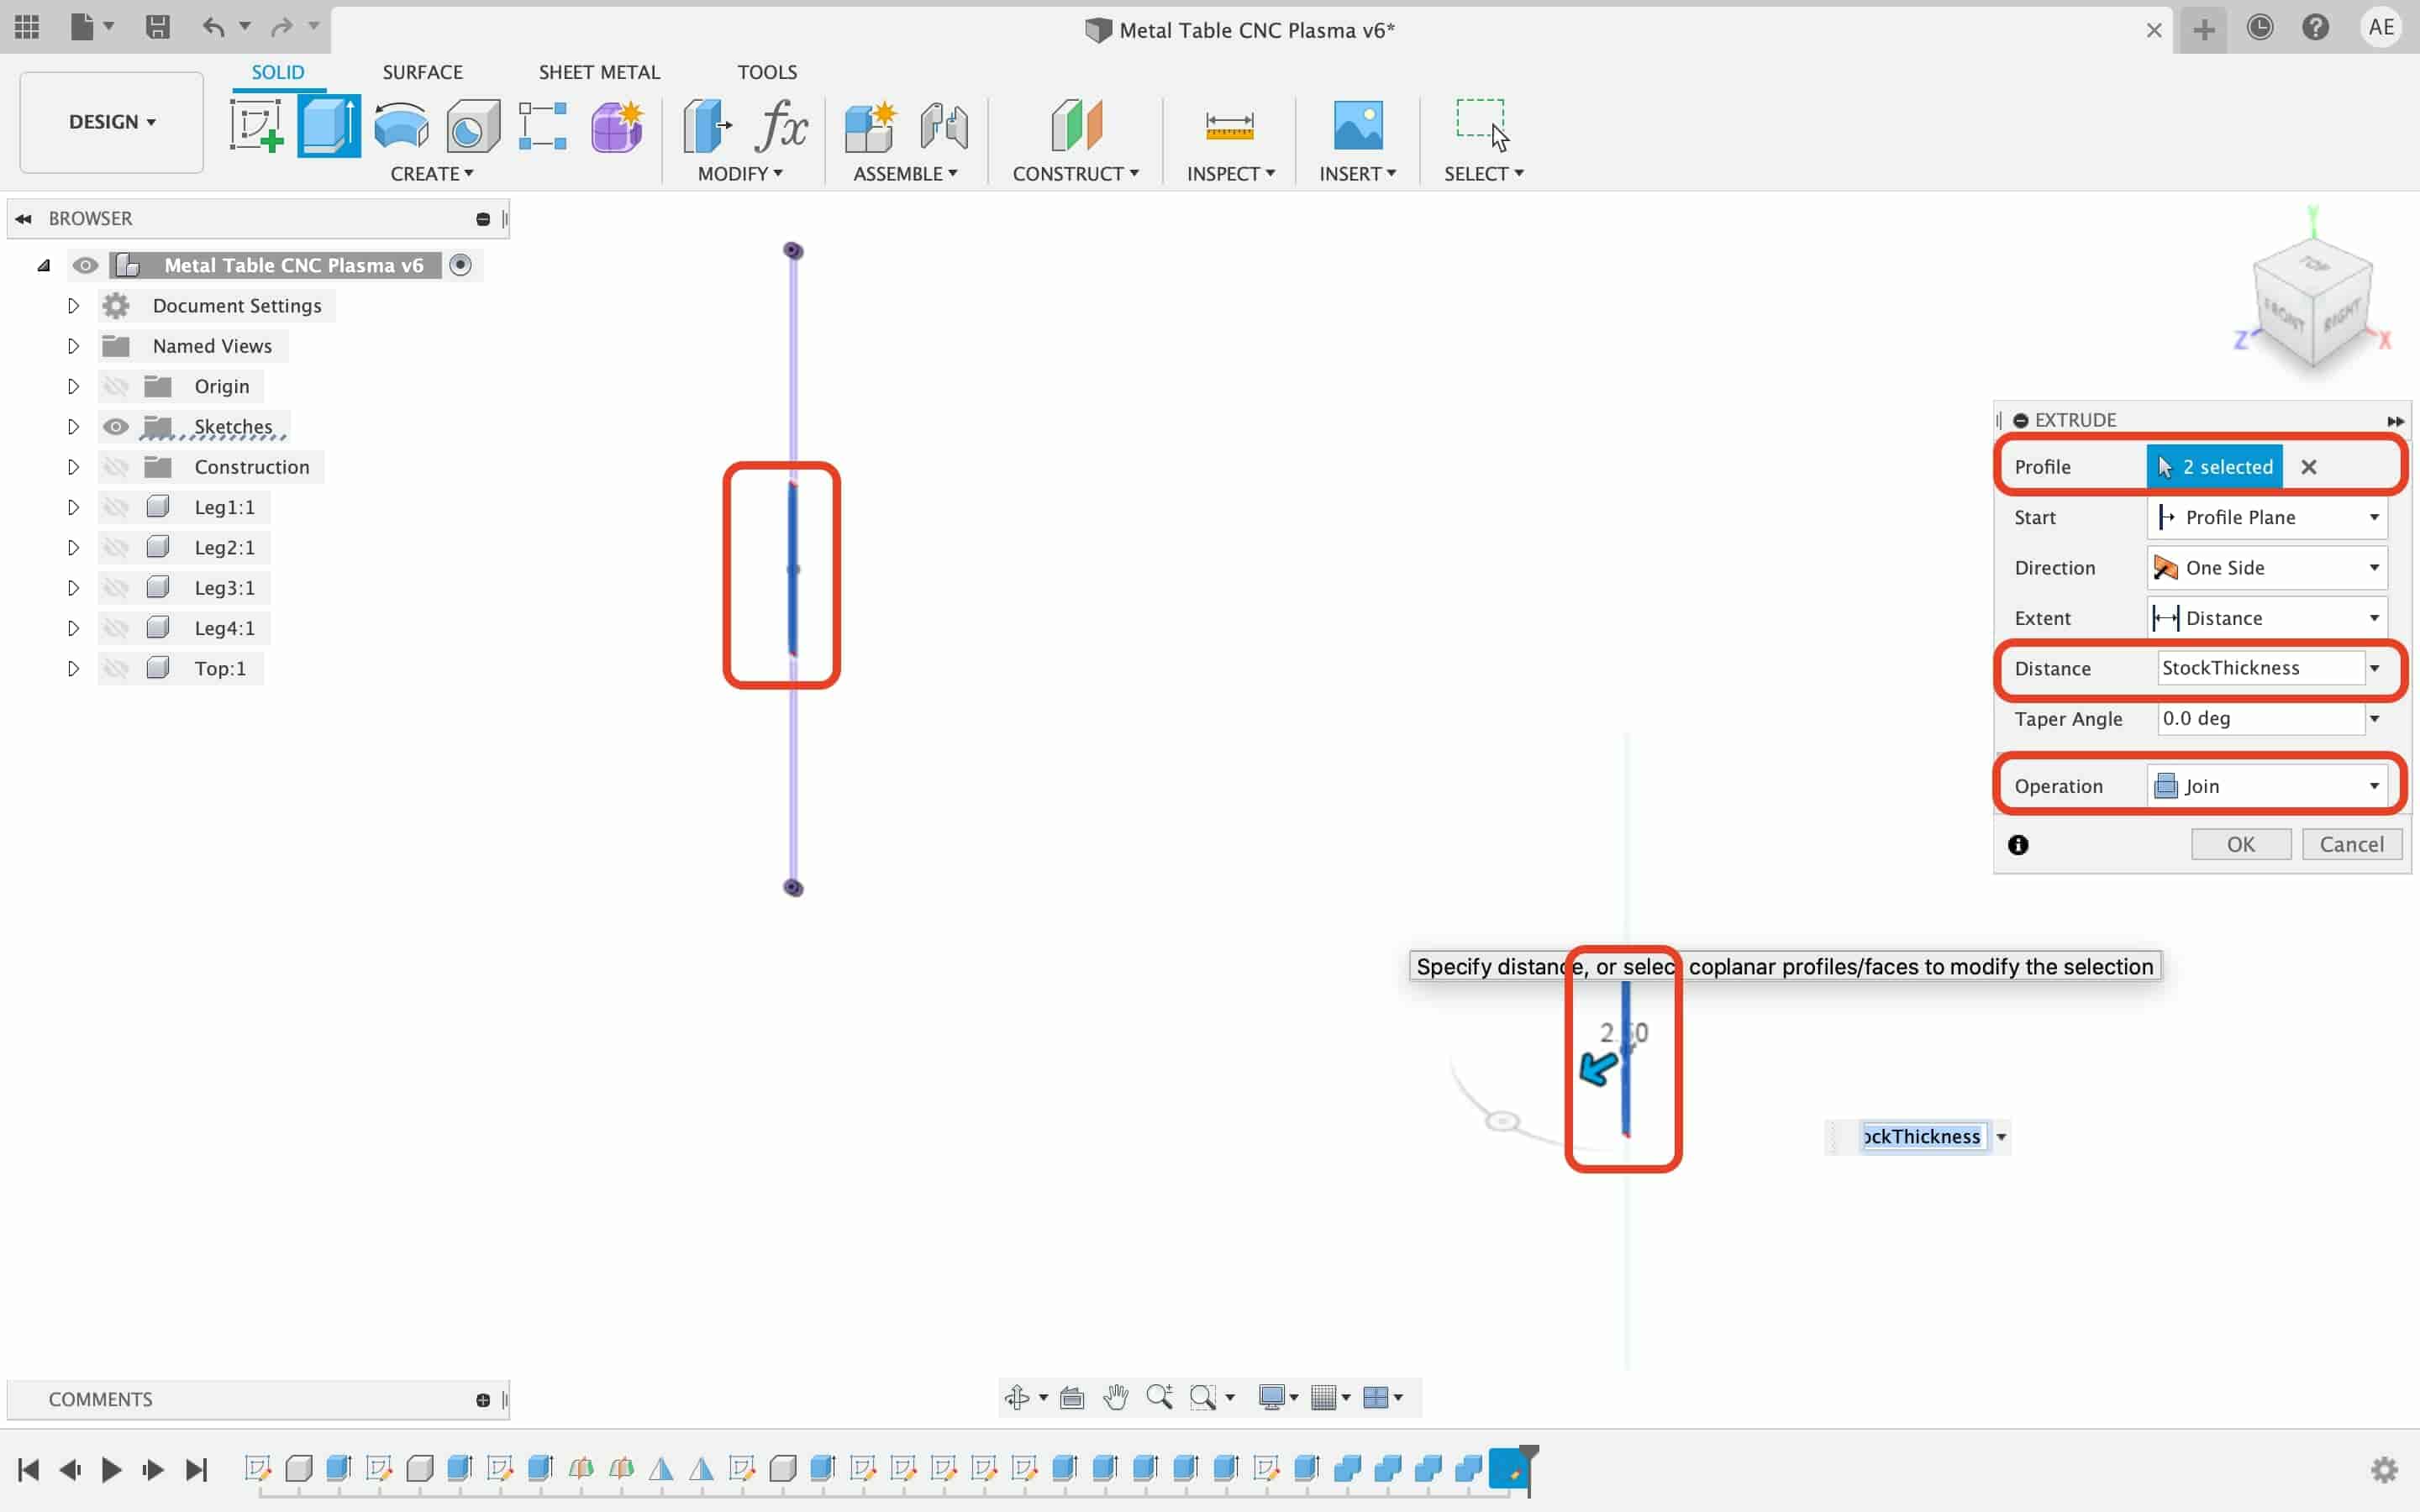
Then I extruded the table leg by the material thickness that I will cut the table parts on which is 2.5mm thickness steel.
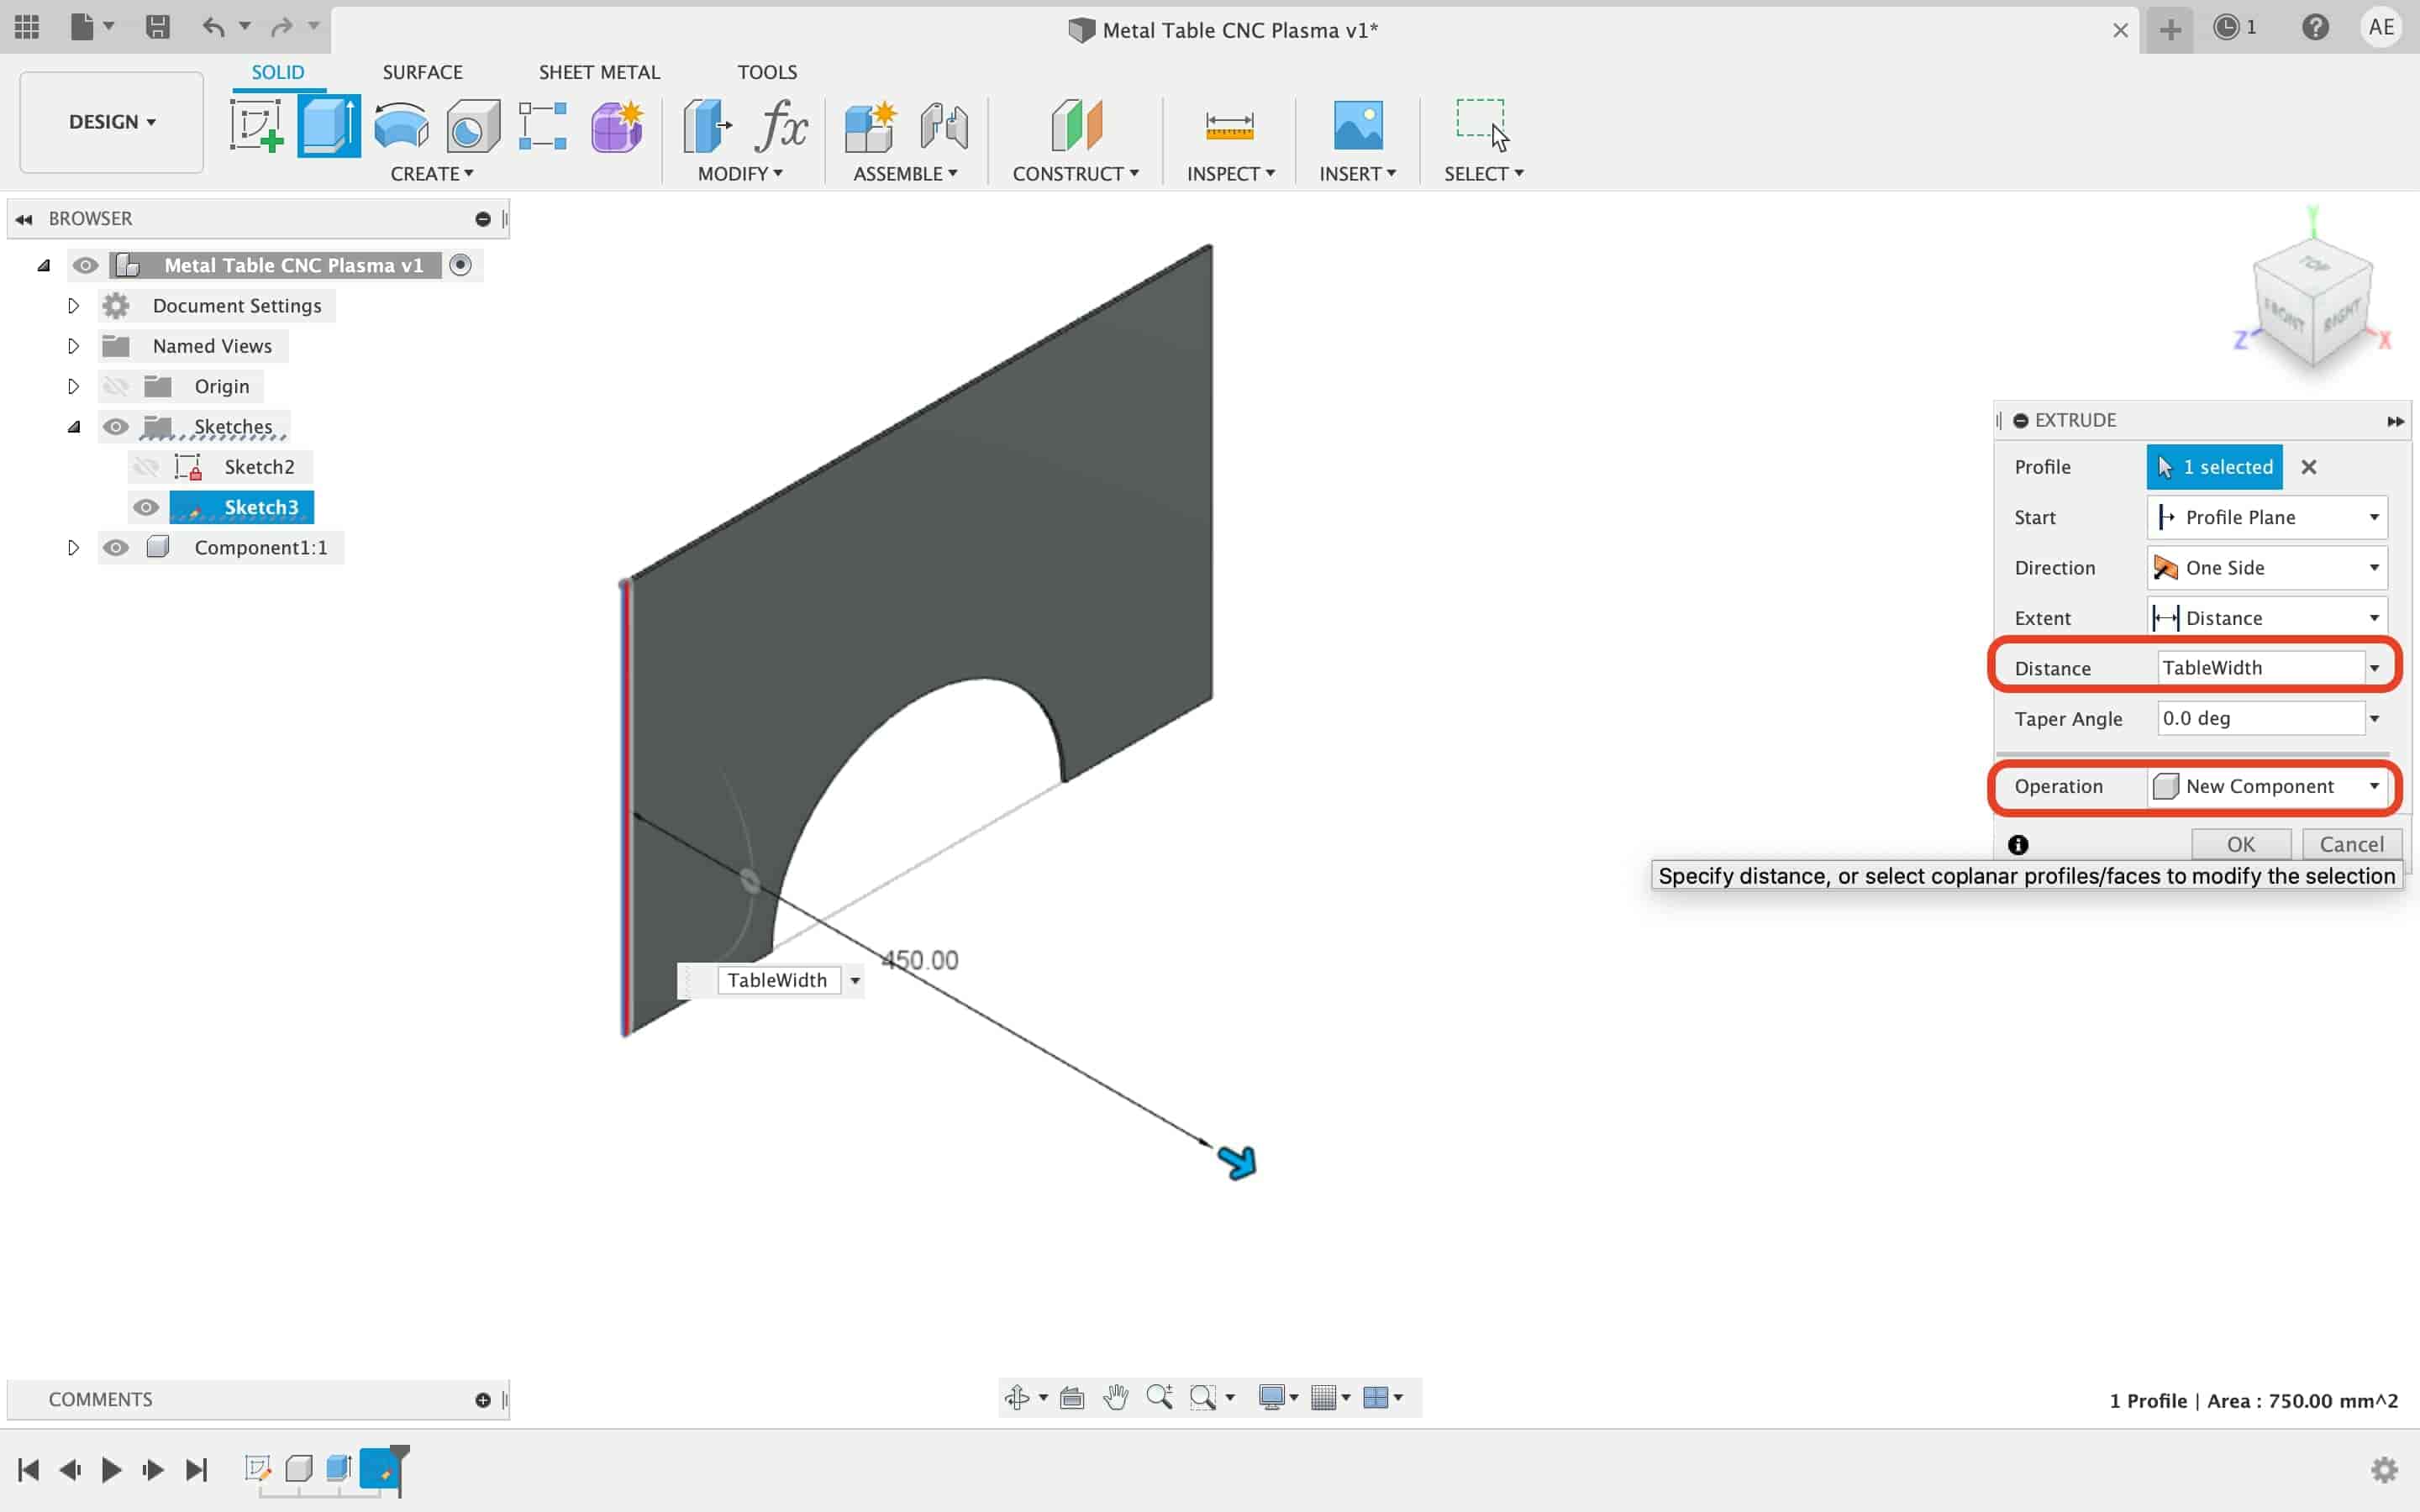
Now, we need to draw the second table leg. I draw a small 2.5mm thickness rectangle on the first leg we draw in the previous step.
Then I extruded that rectangle with 45cm.
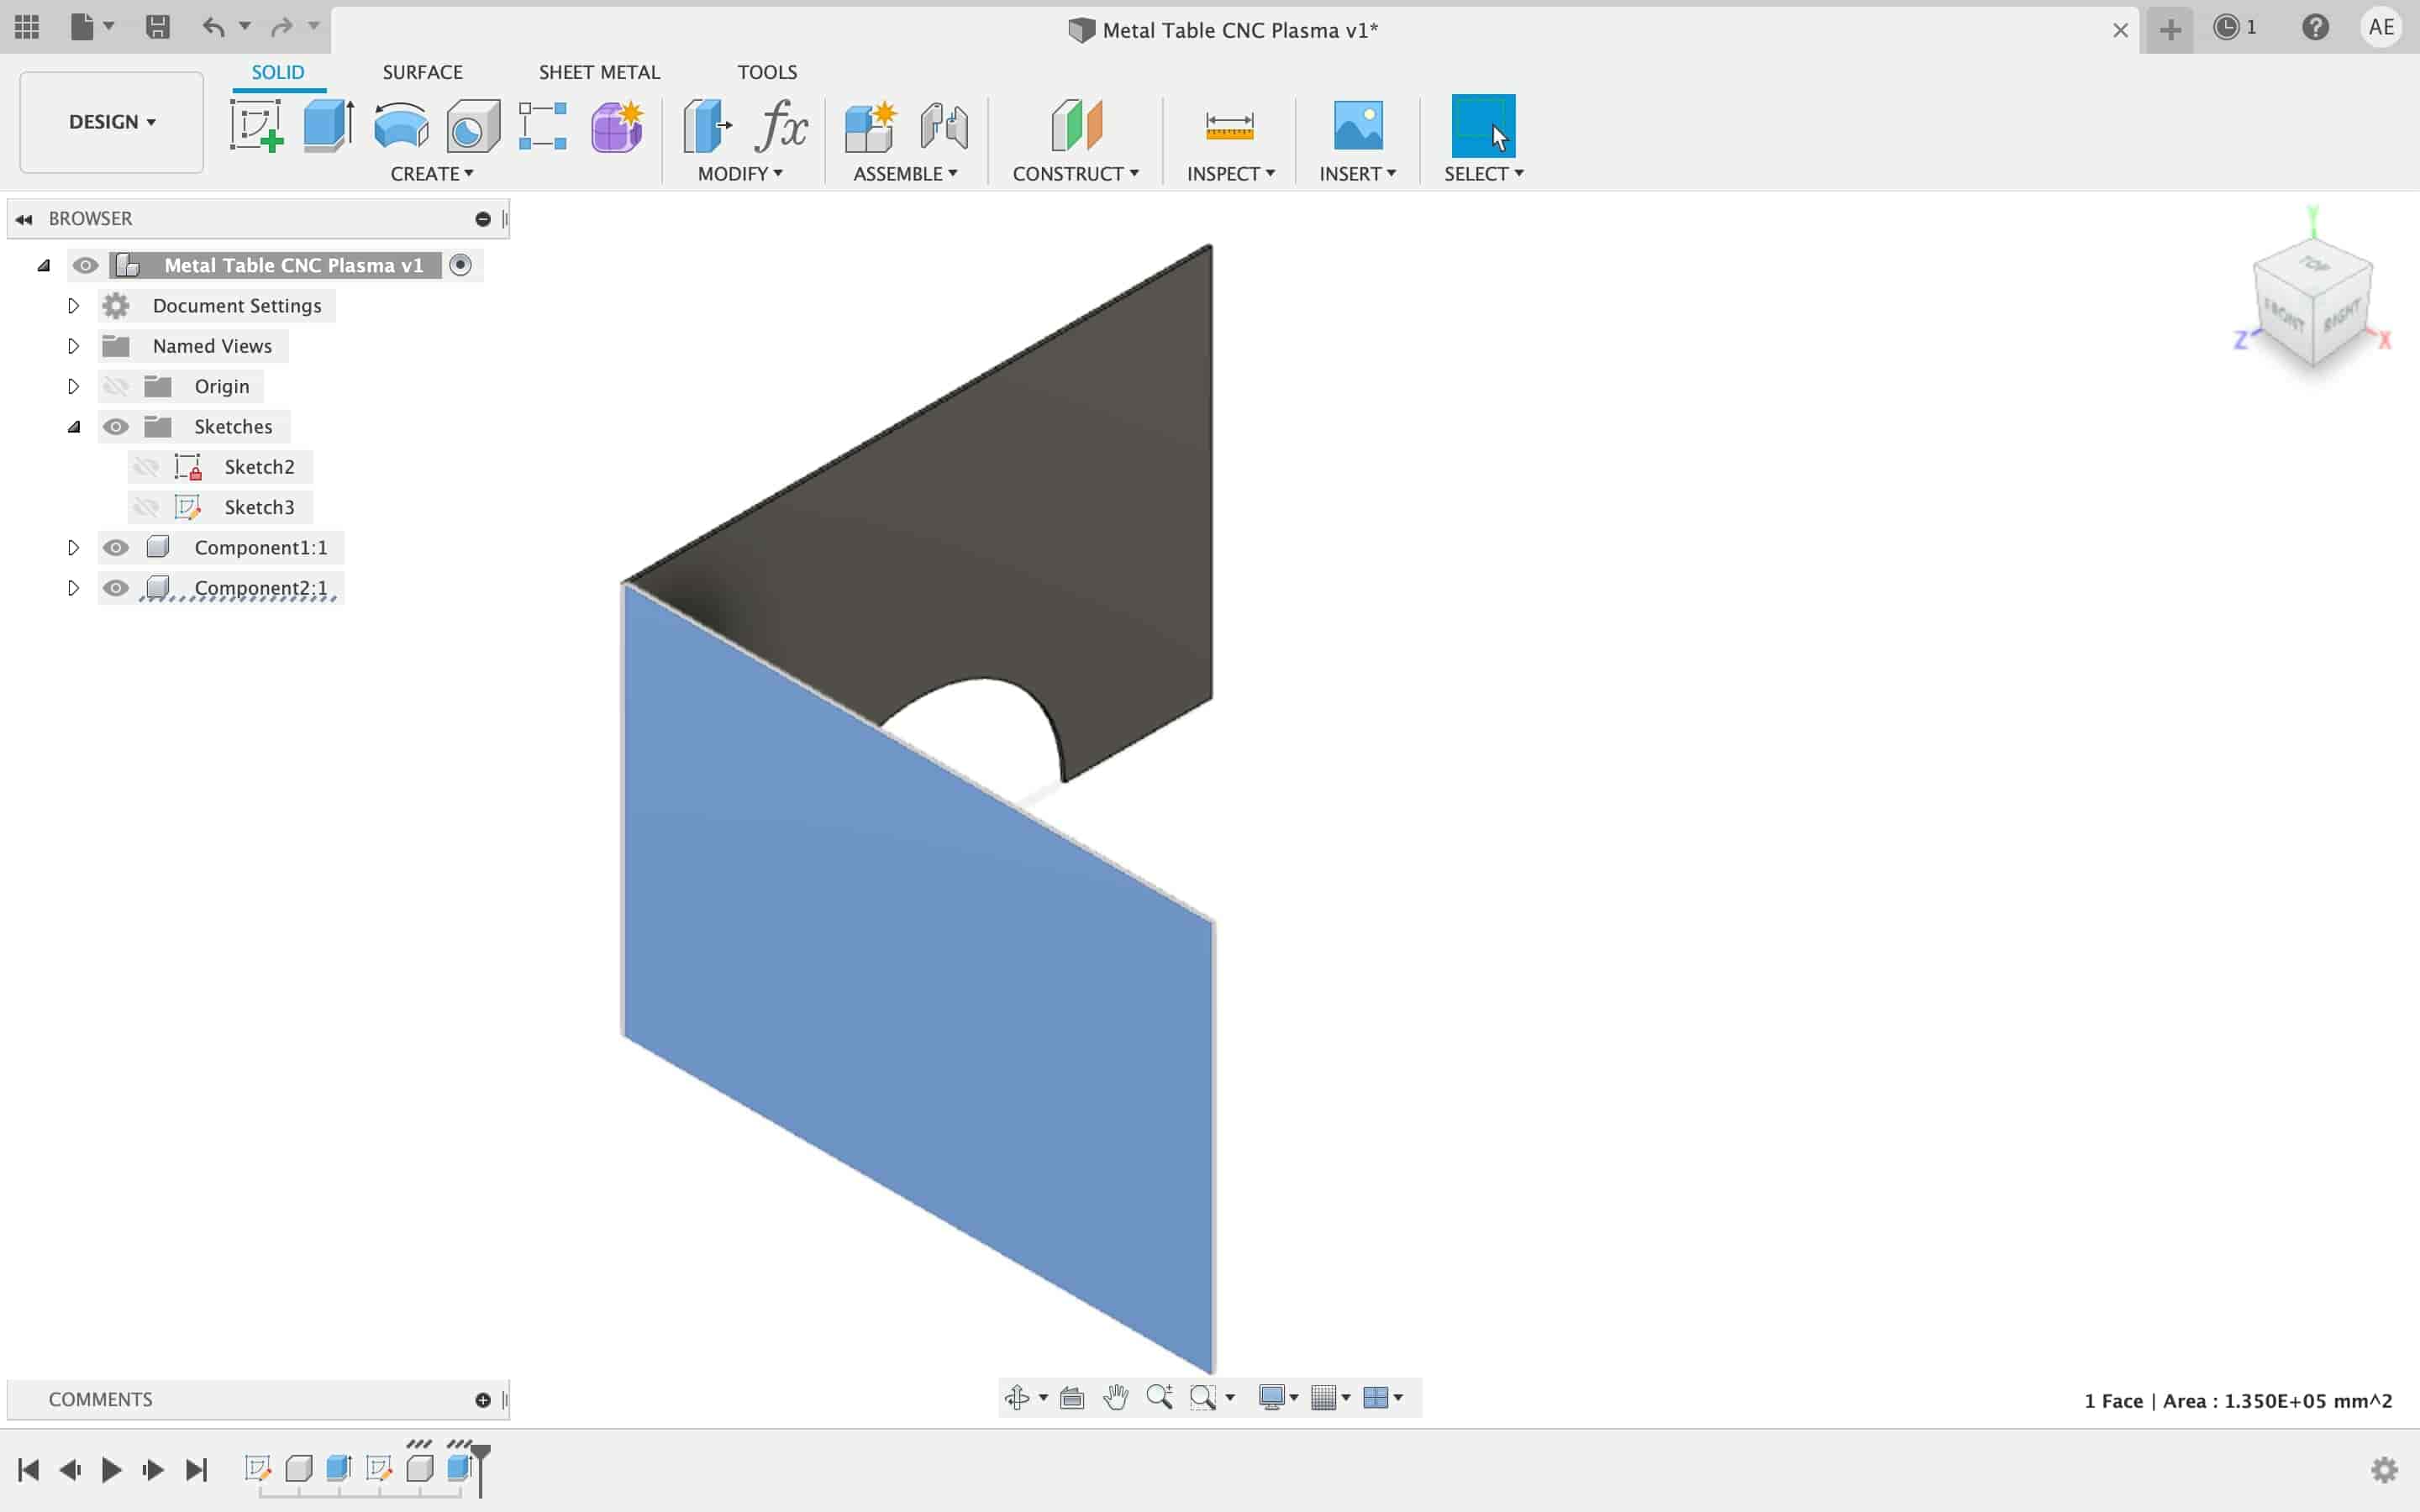
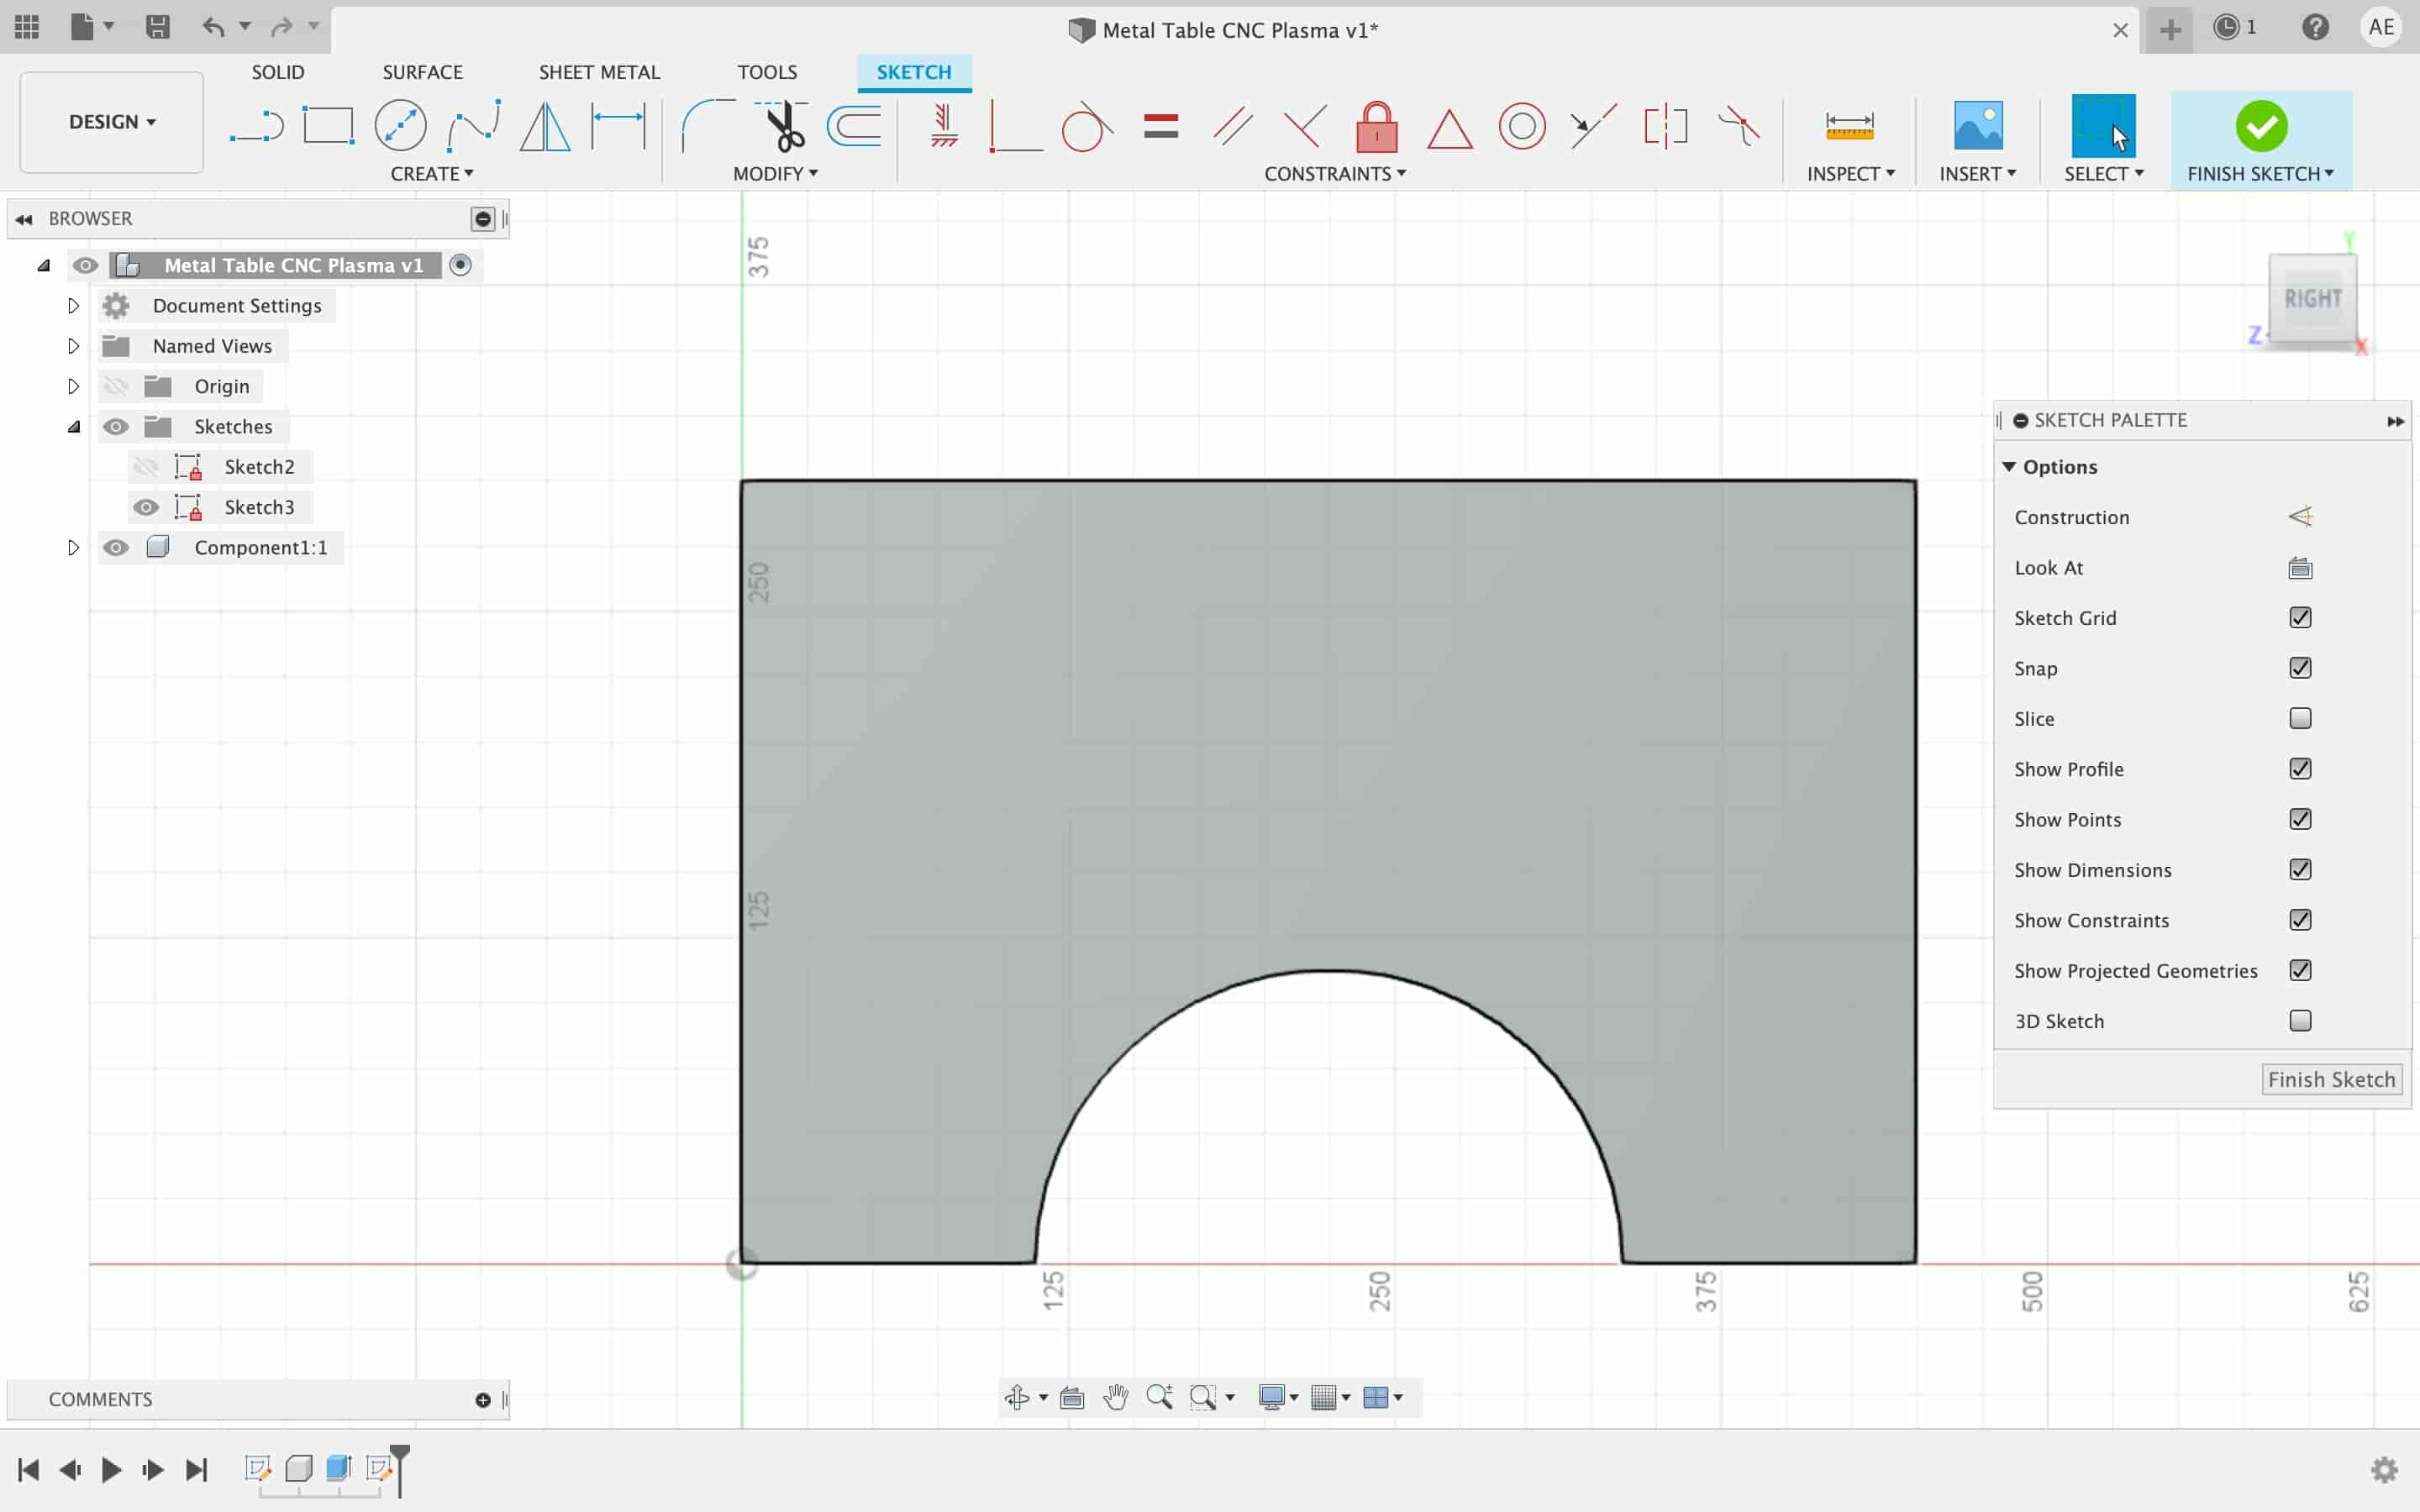
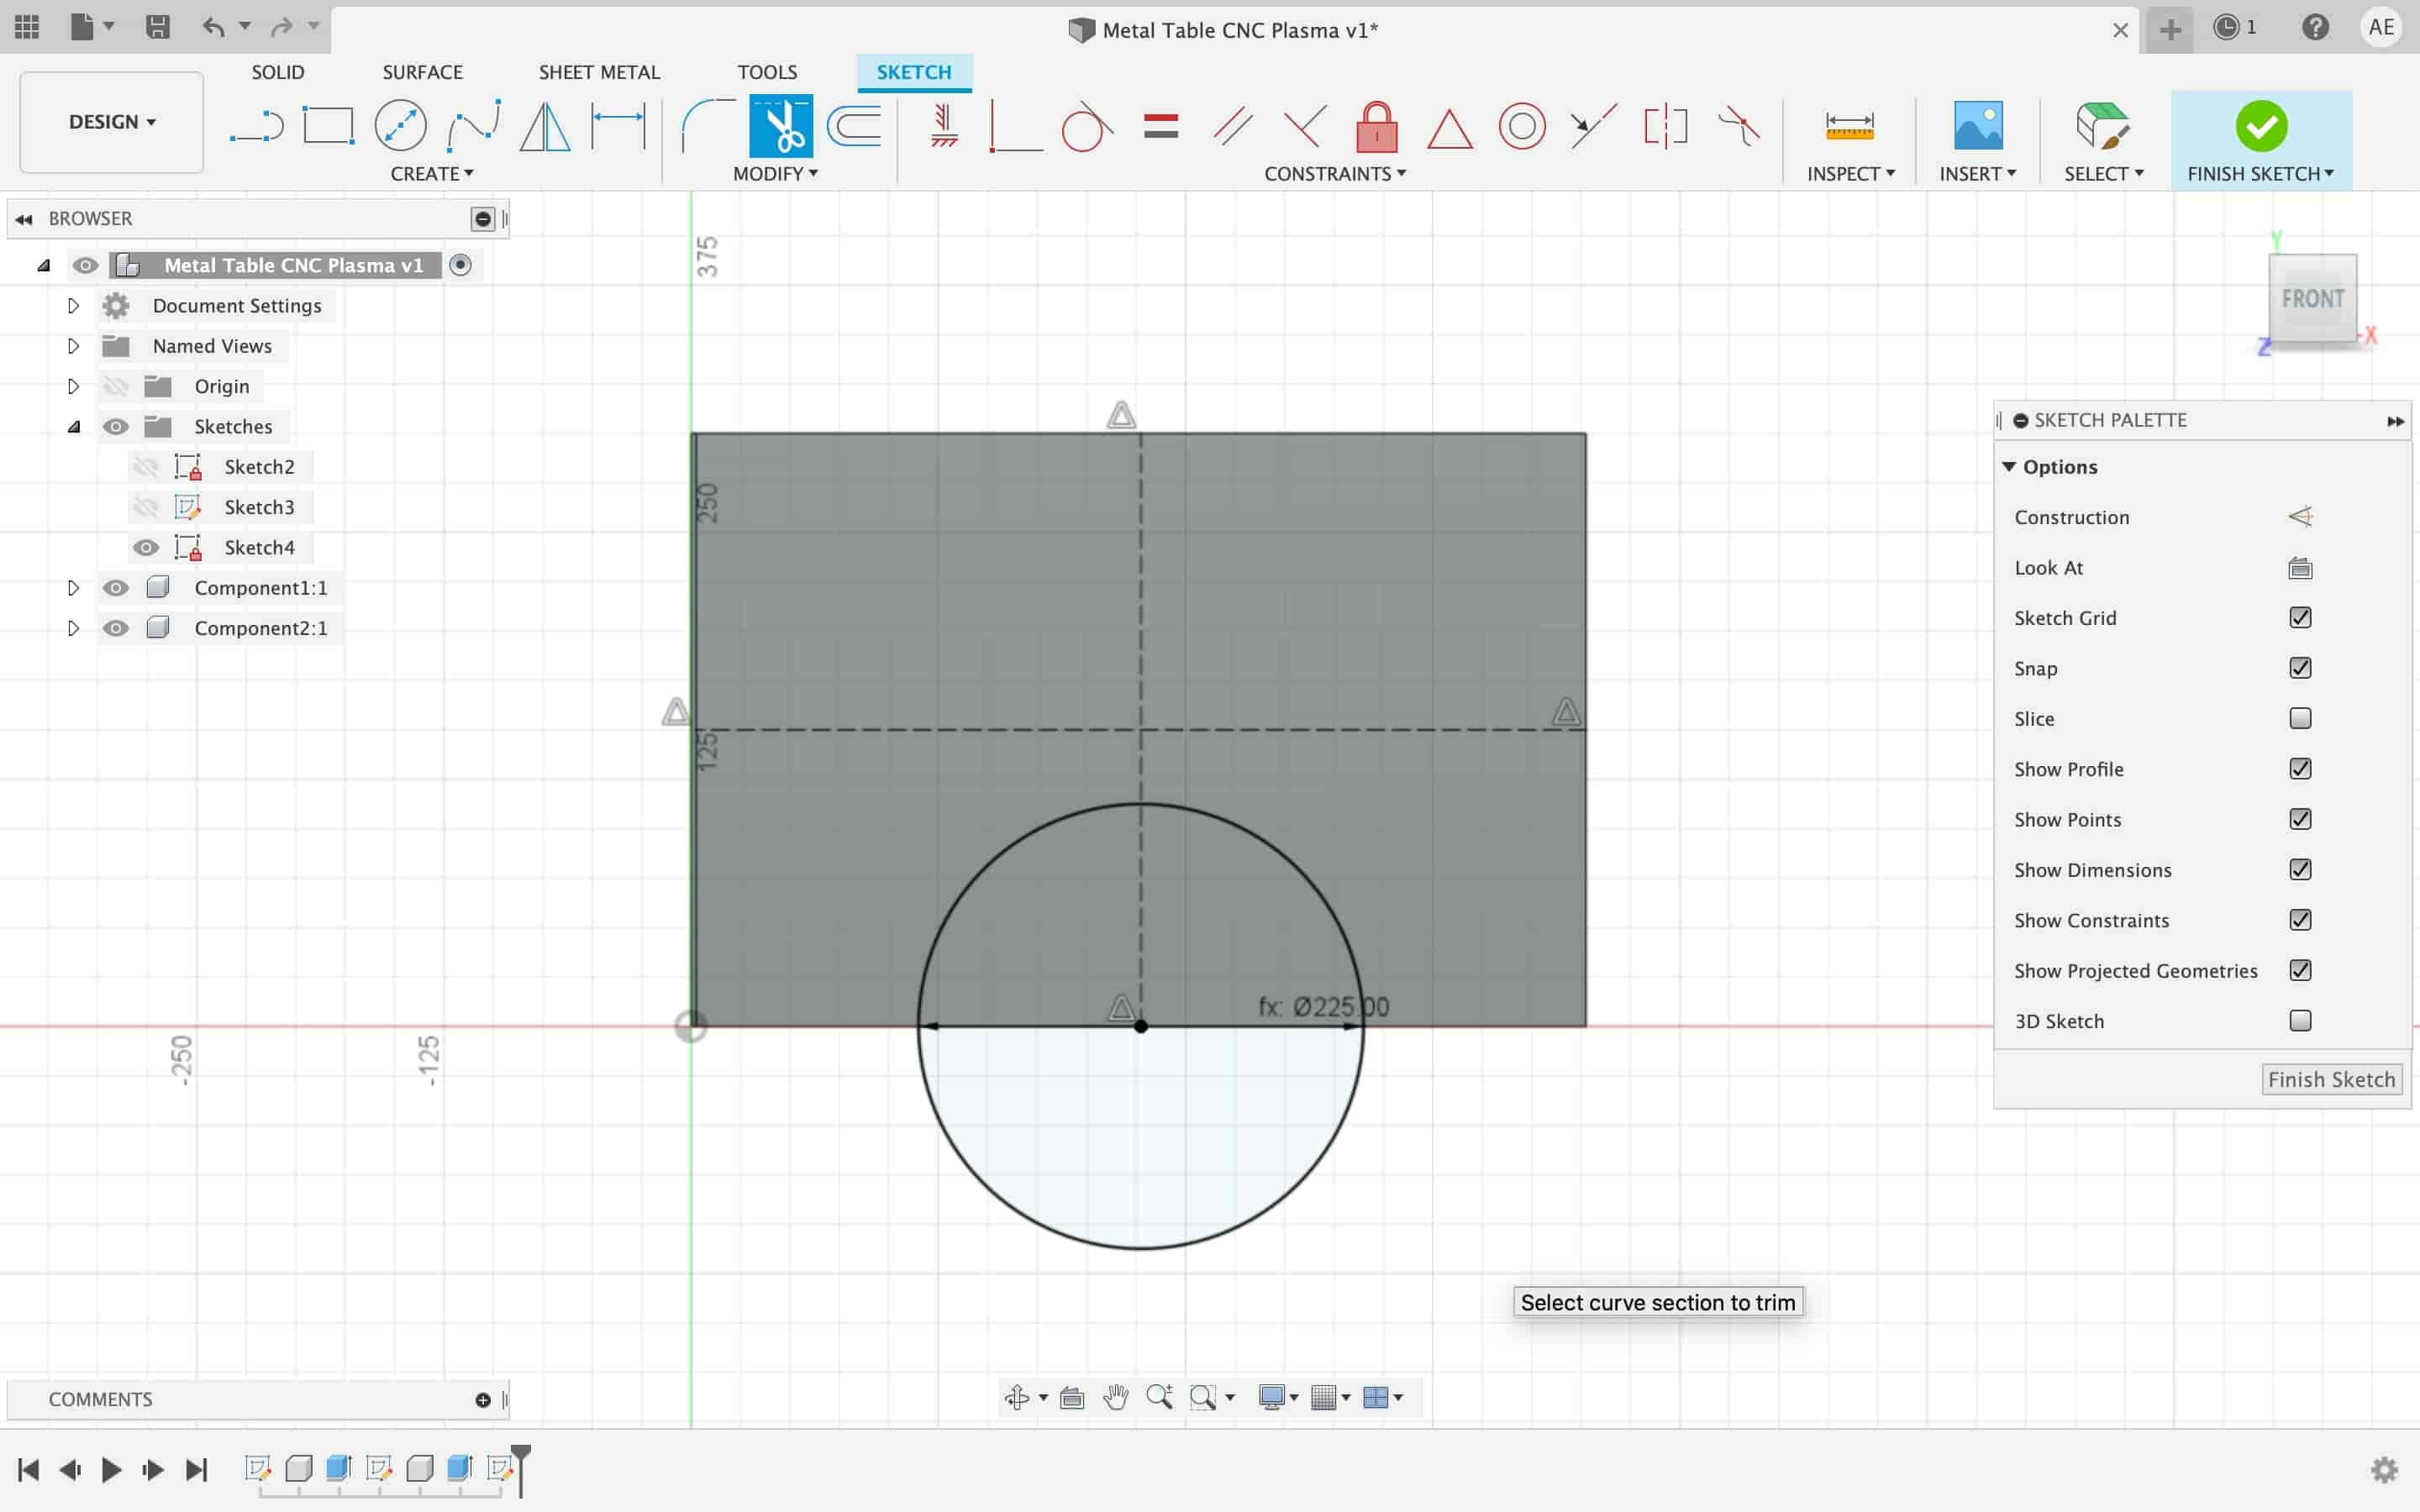
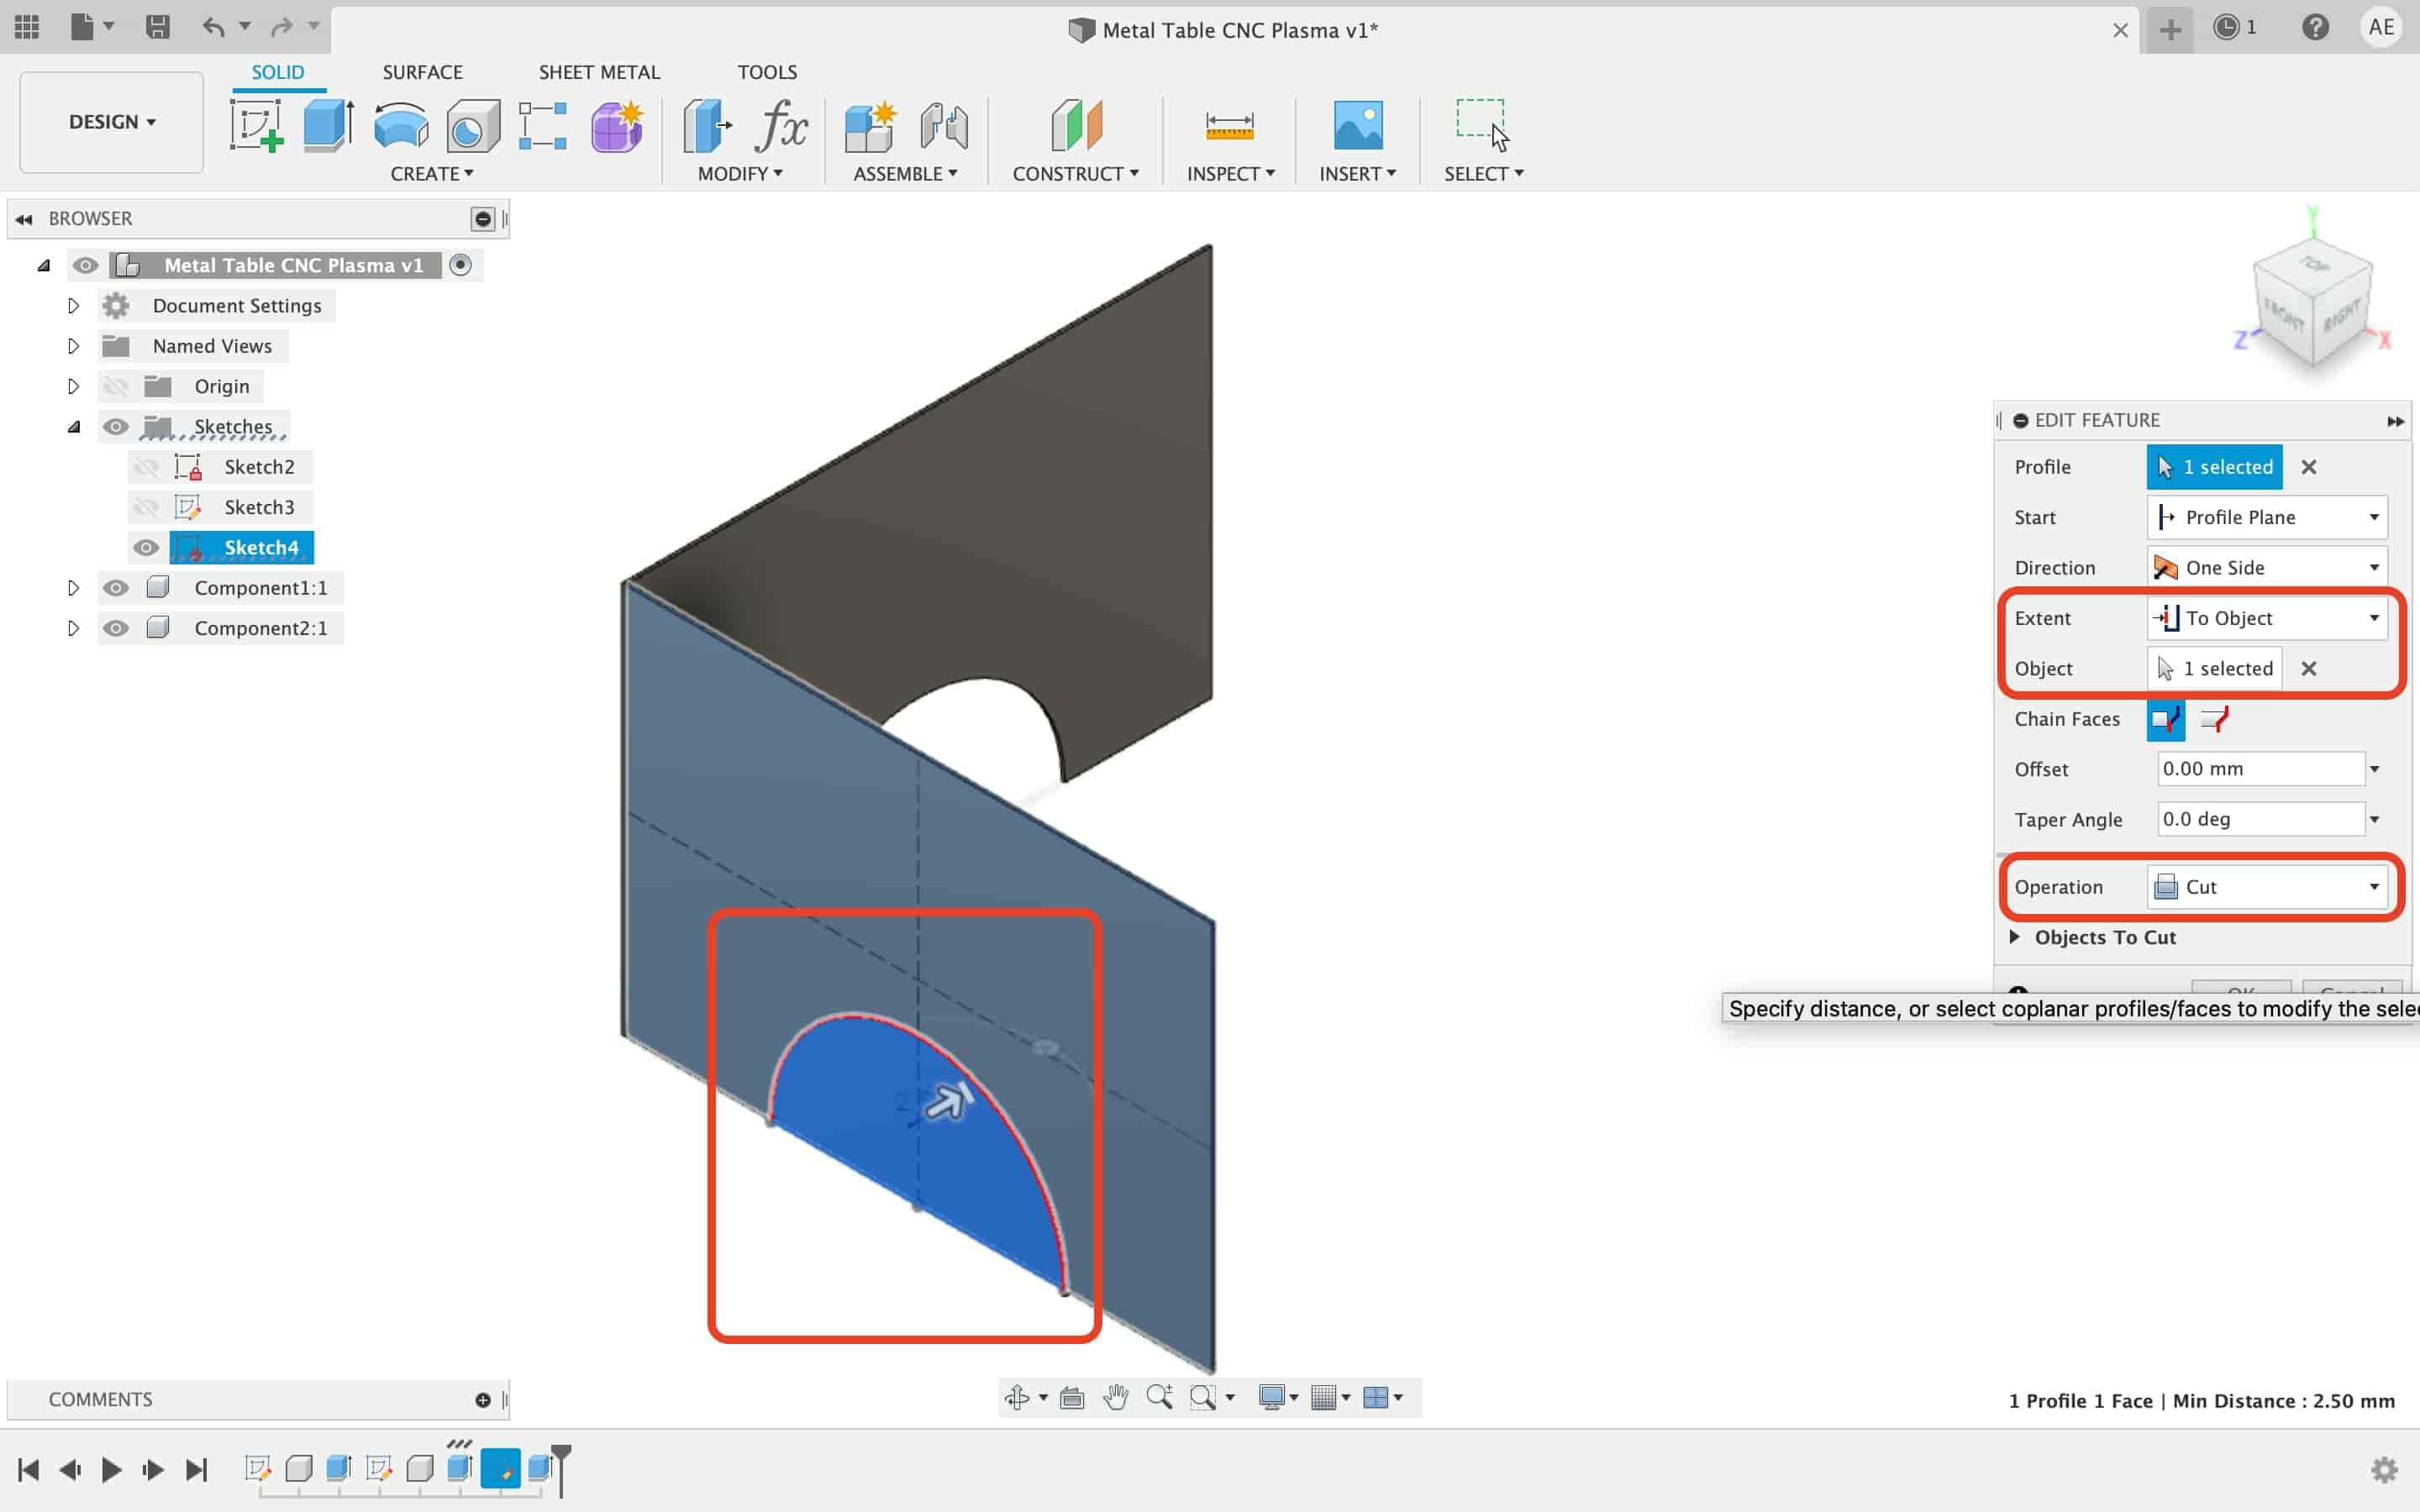
Then, we need to draw the half circle at the centre bottom of the leg. I started a new sketch and draw the half circle on it. Then, I extruded that circle through the table leg to make a cut.

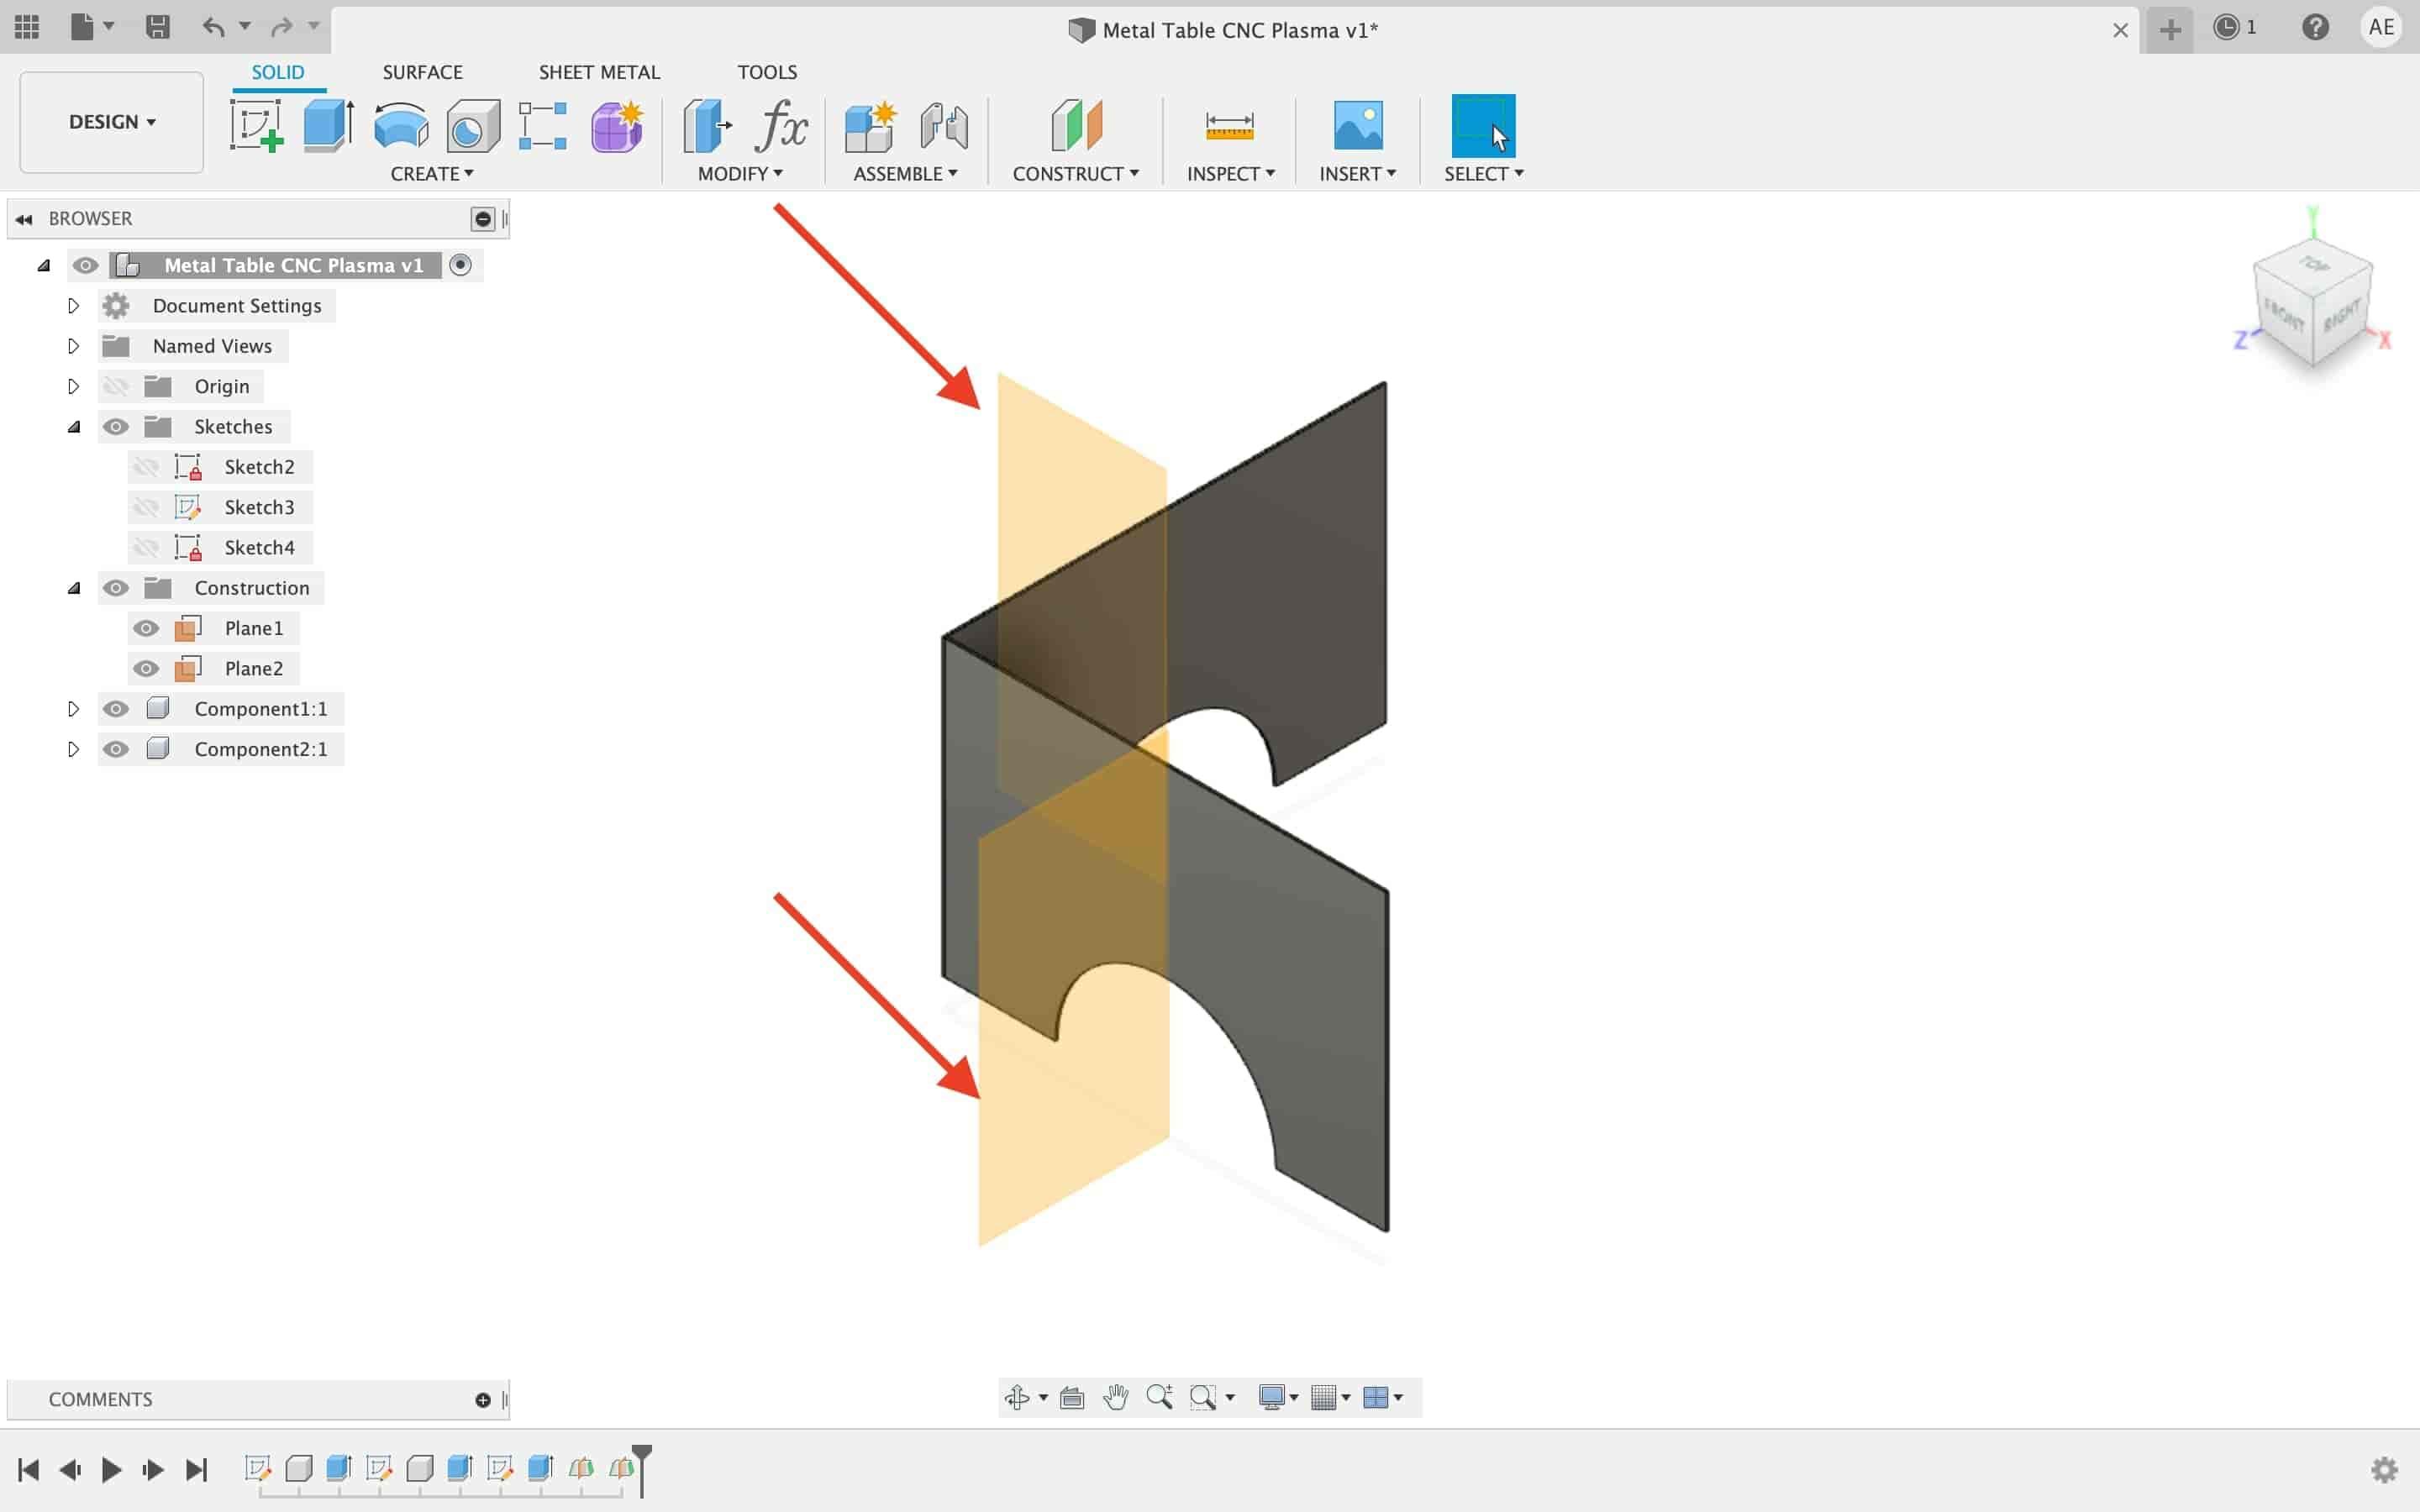
Instead of drawing the other two table legs from scratch and repeat the previous steps again. Let’s mirror the two legs that we drew before and save some energy for the fabrication work. Let’s make some construction planes. We wull use these mirror the table legs around.
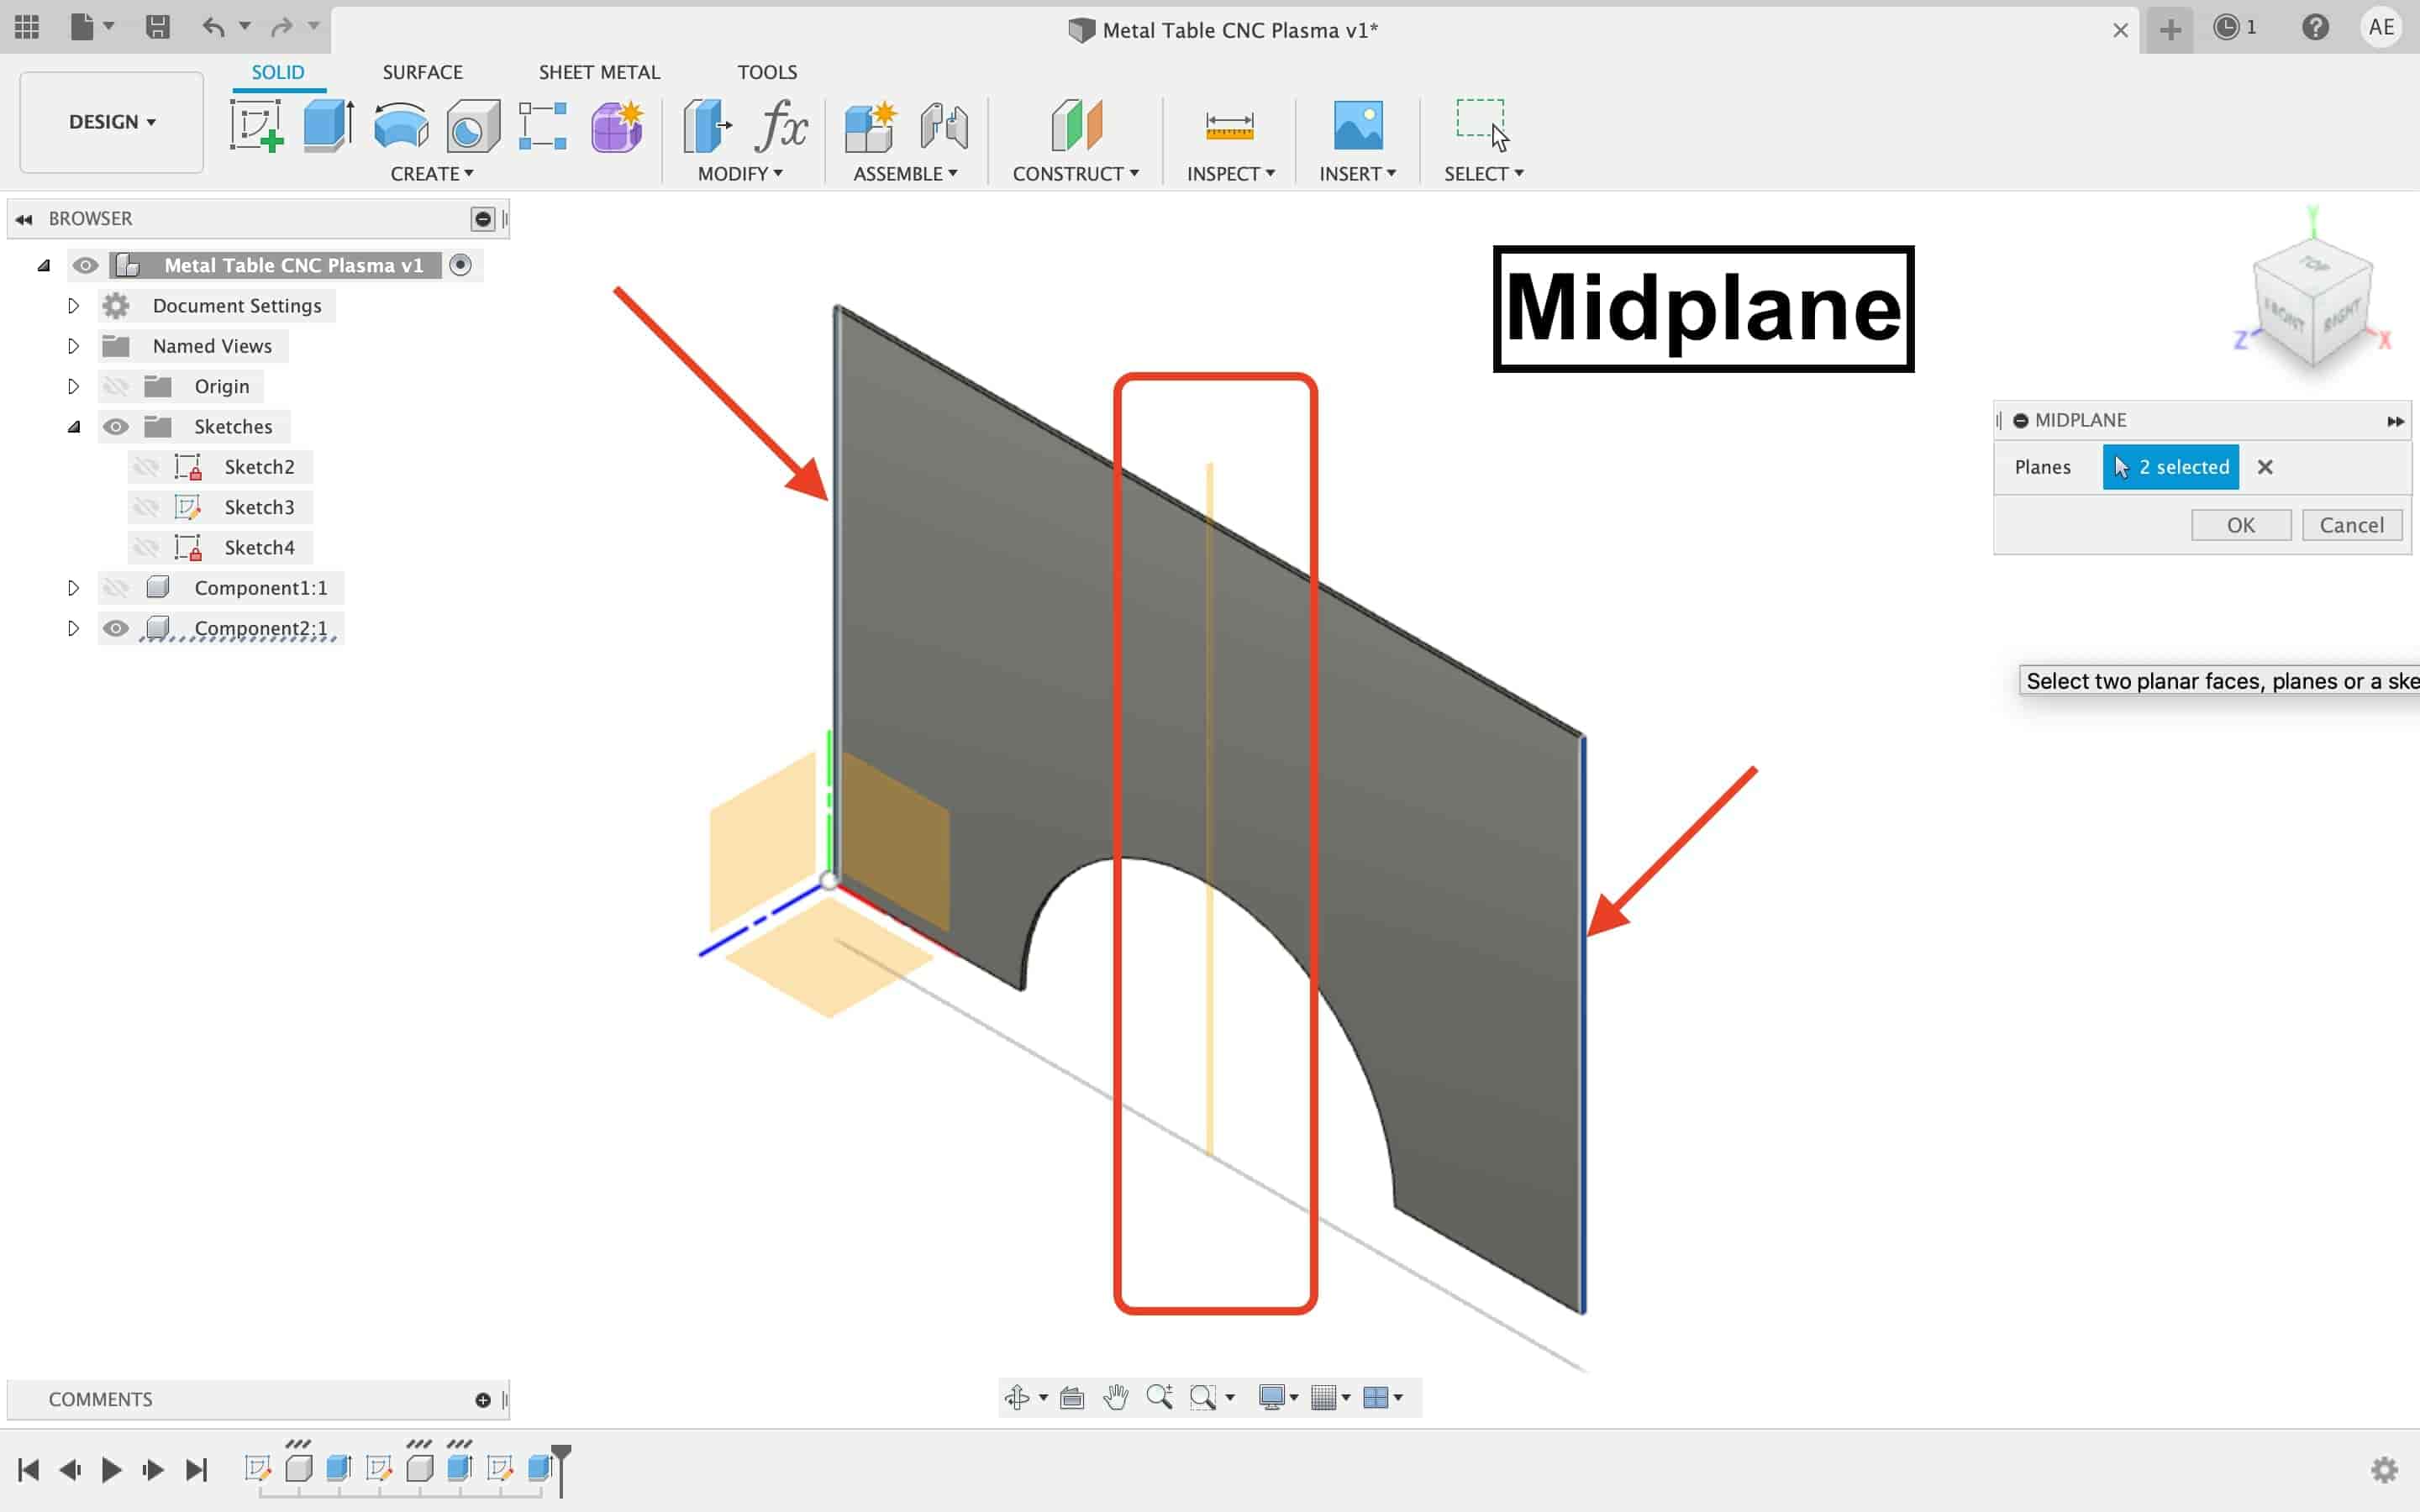
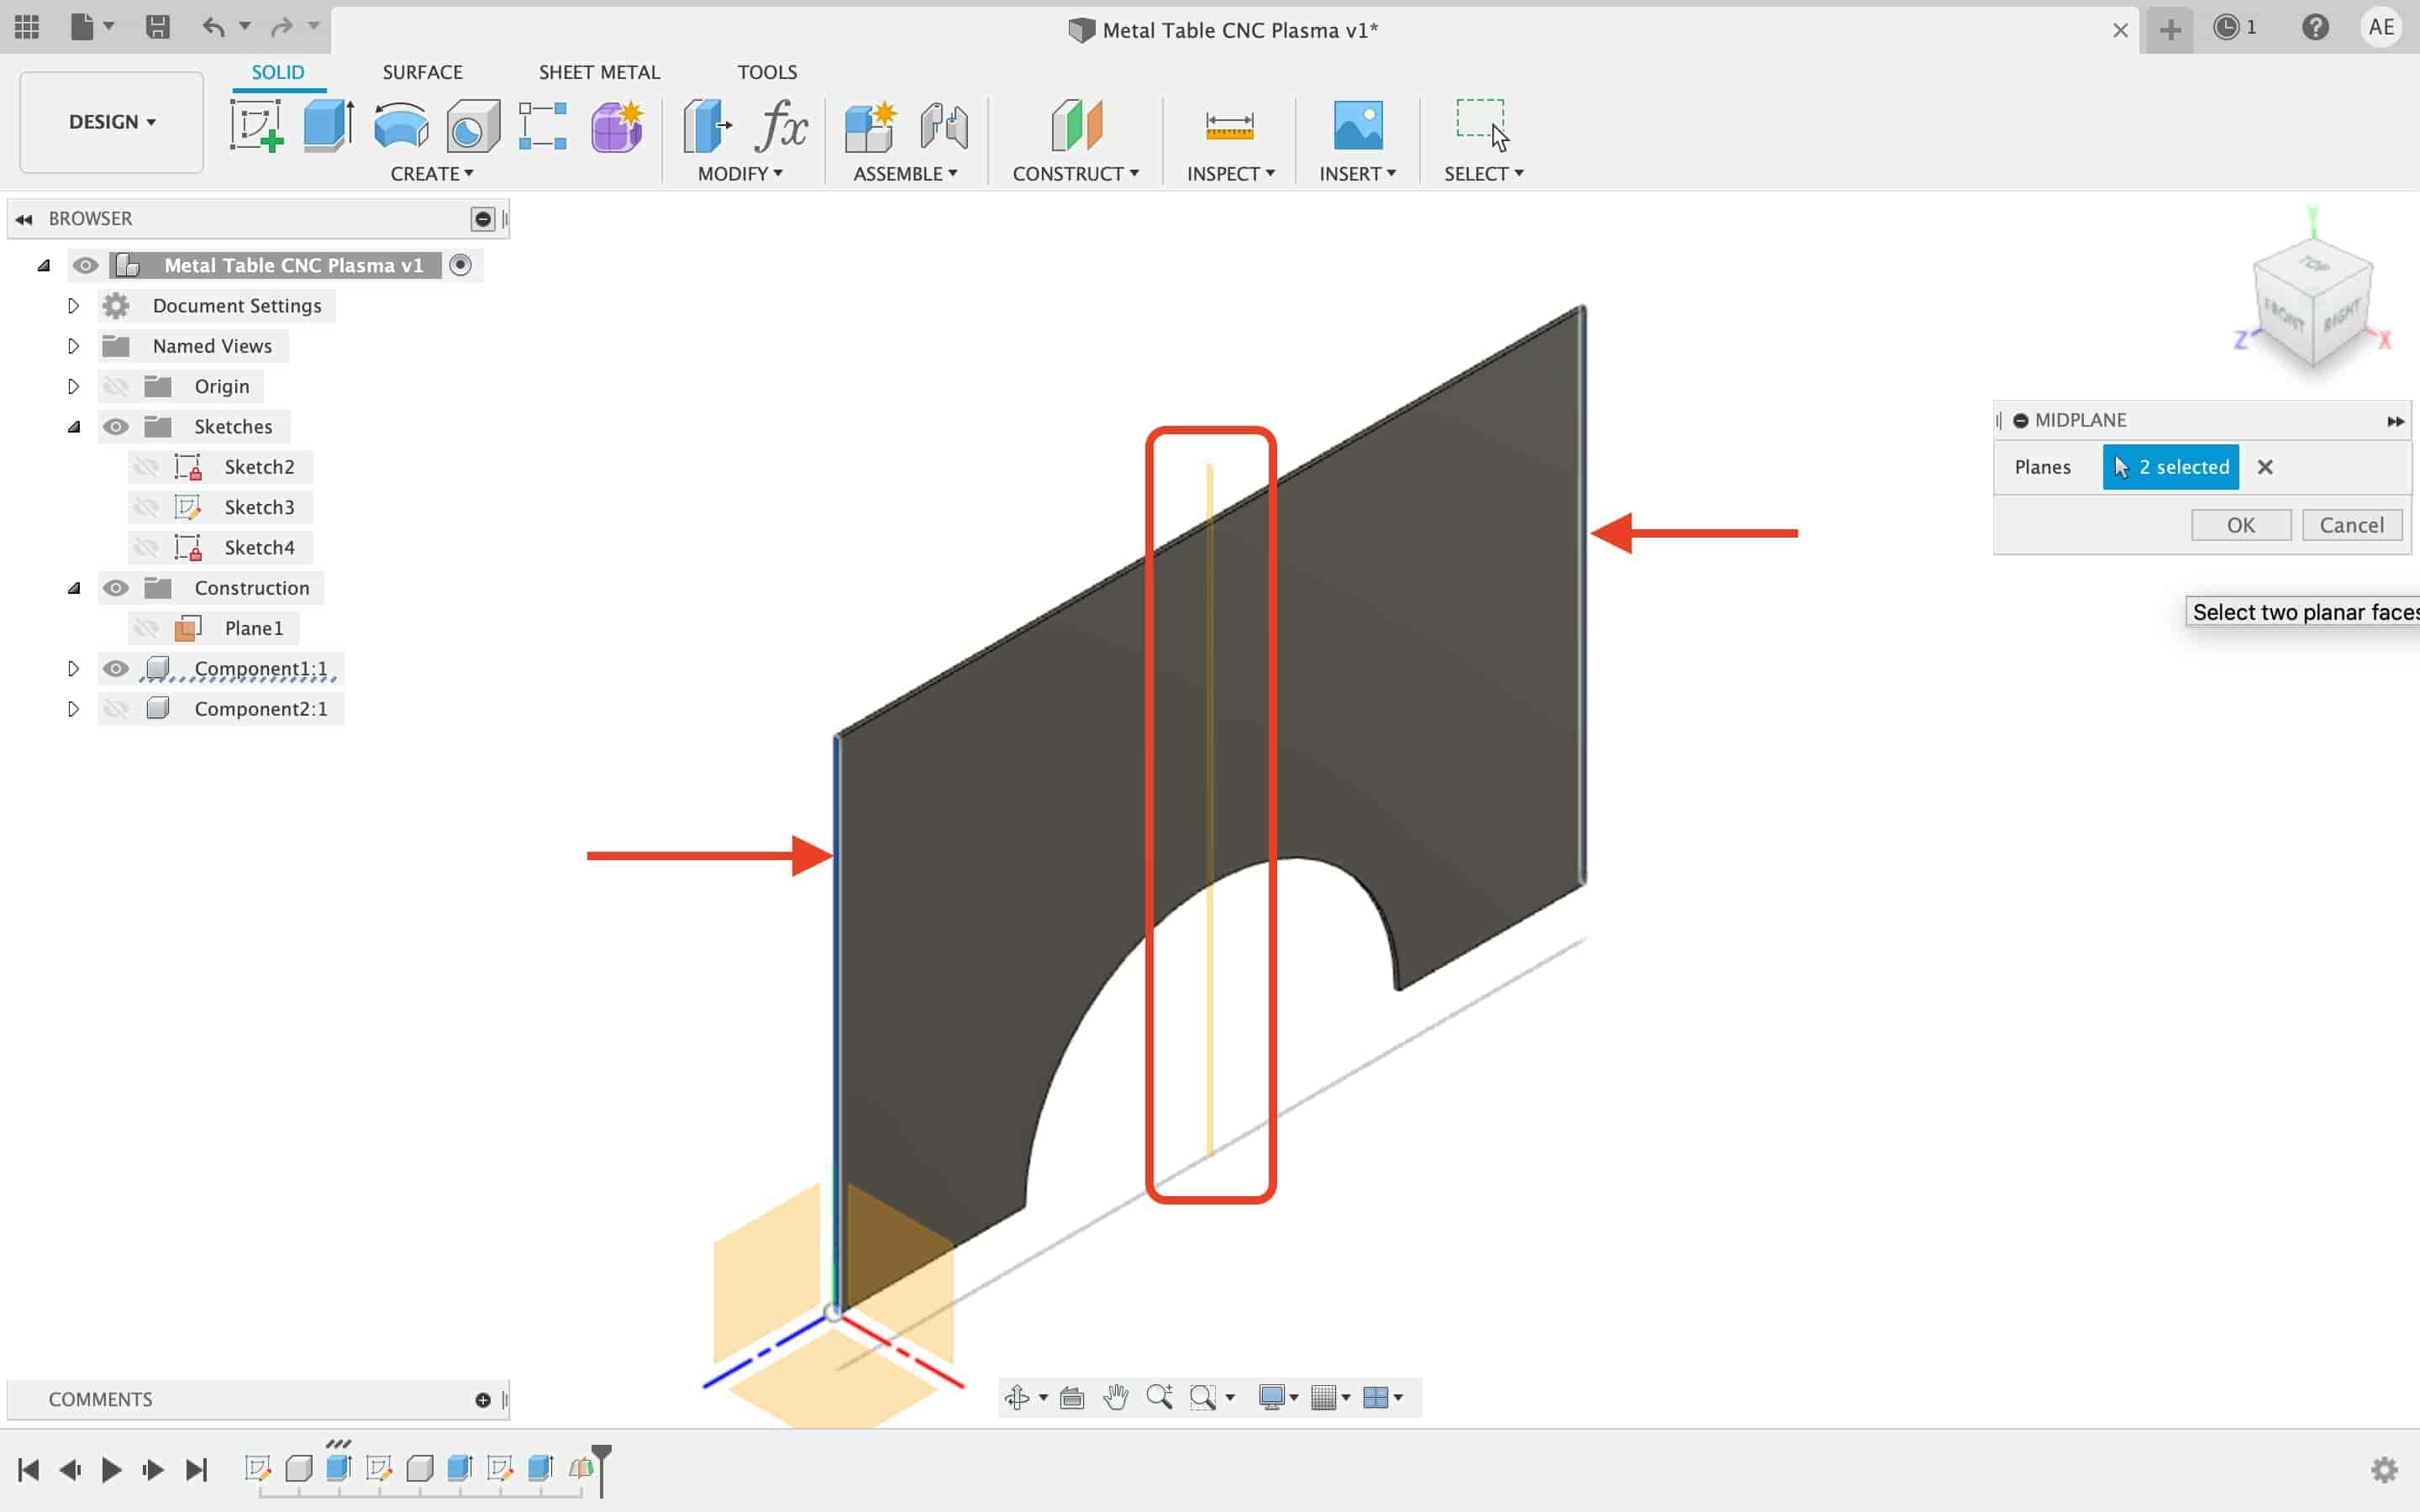
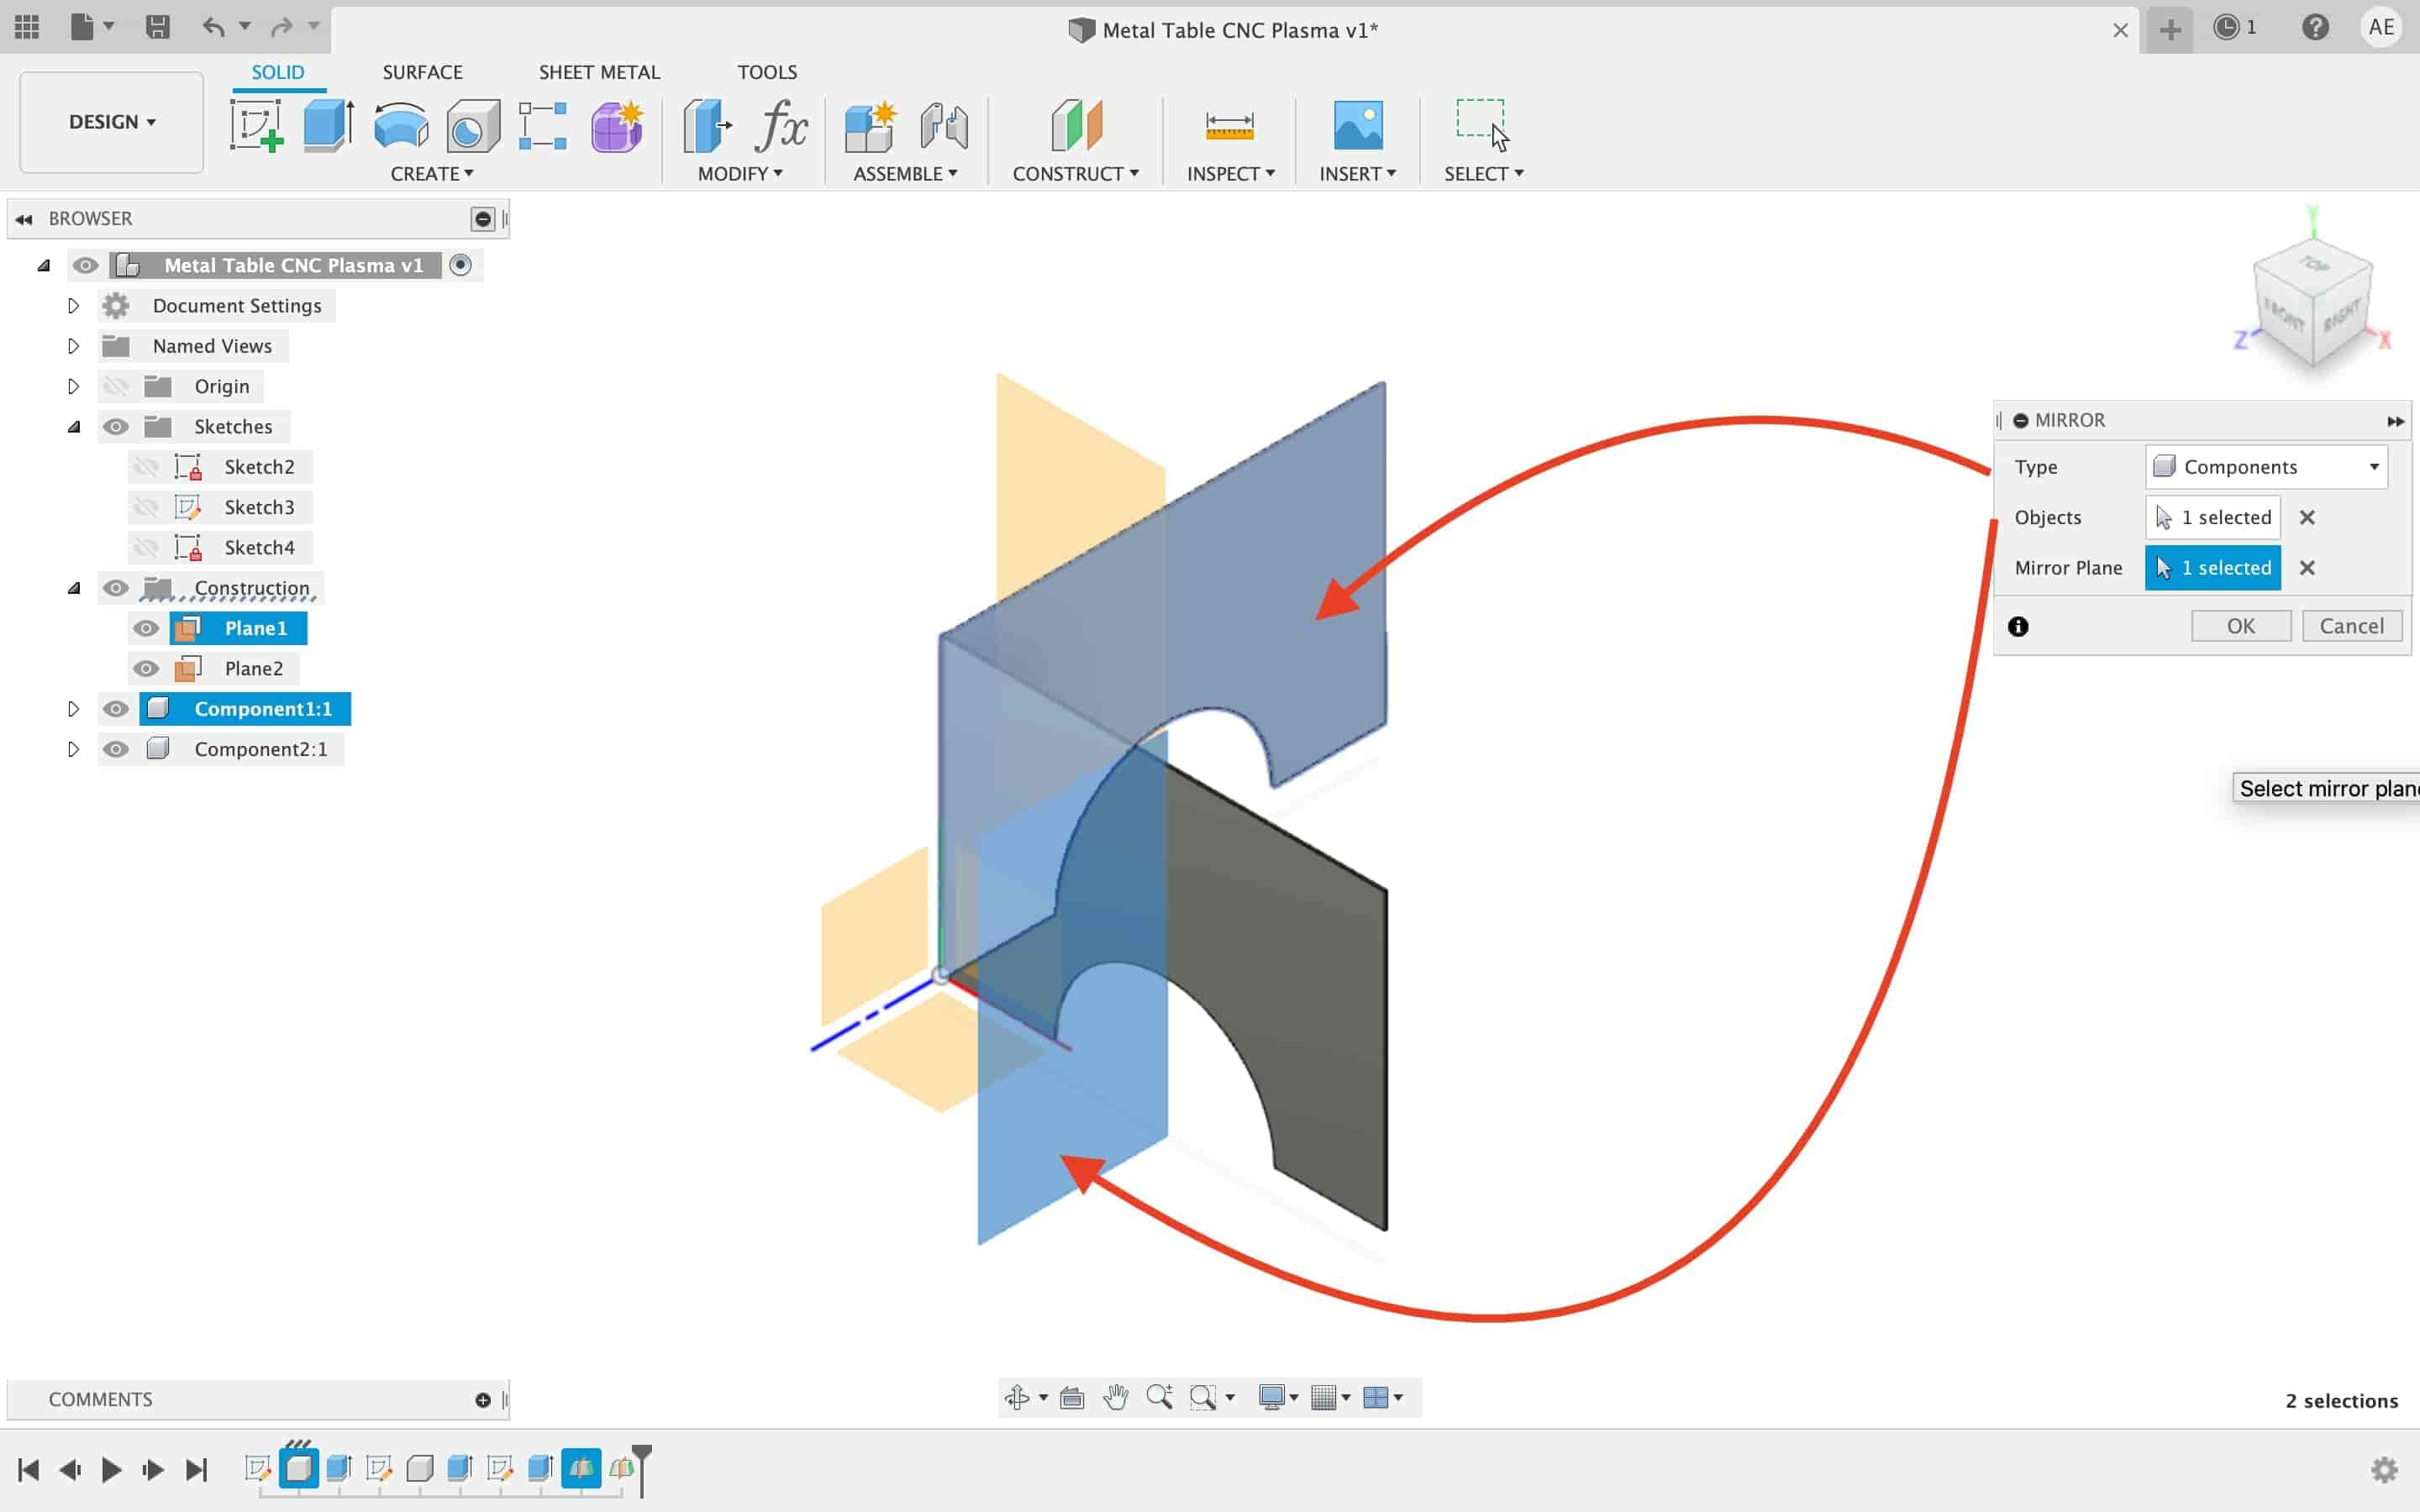
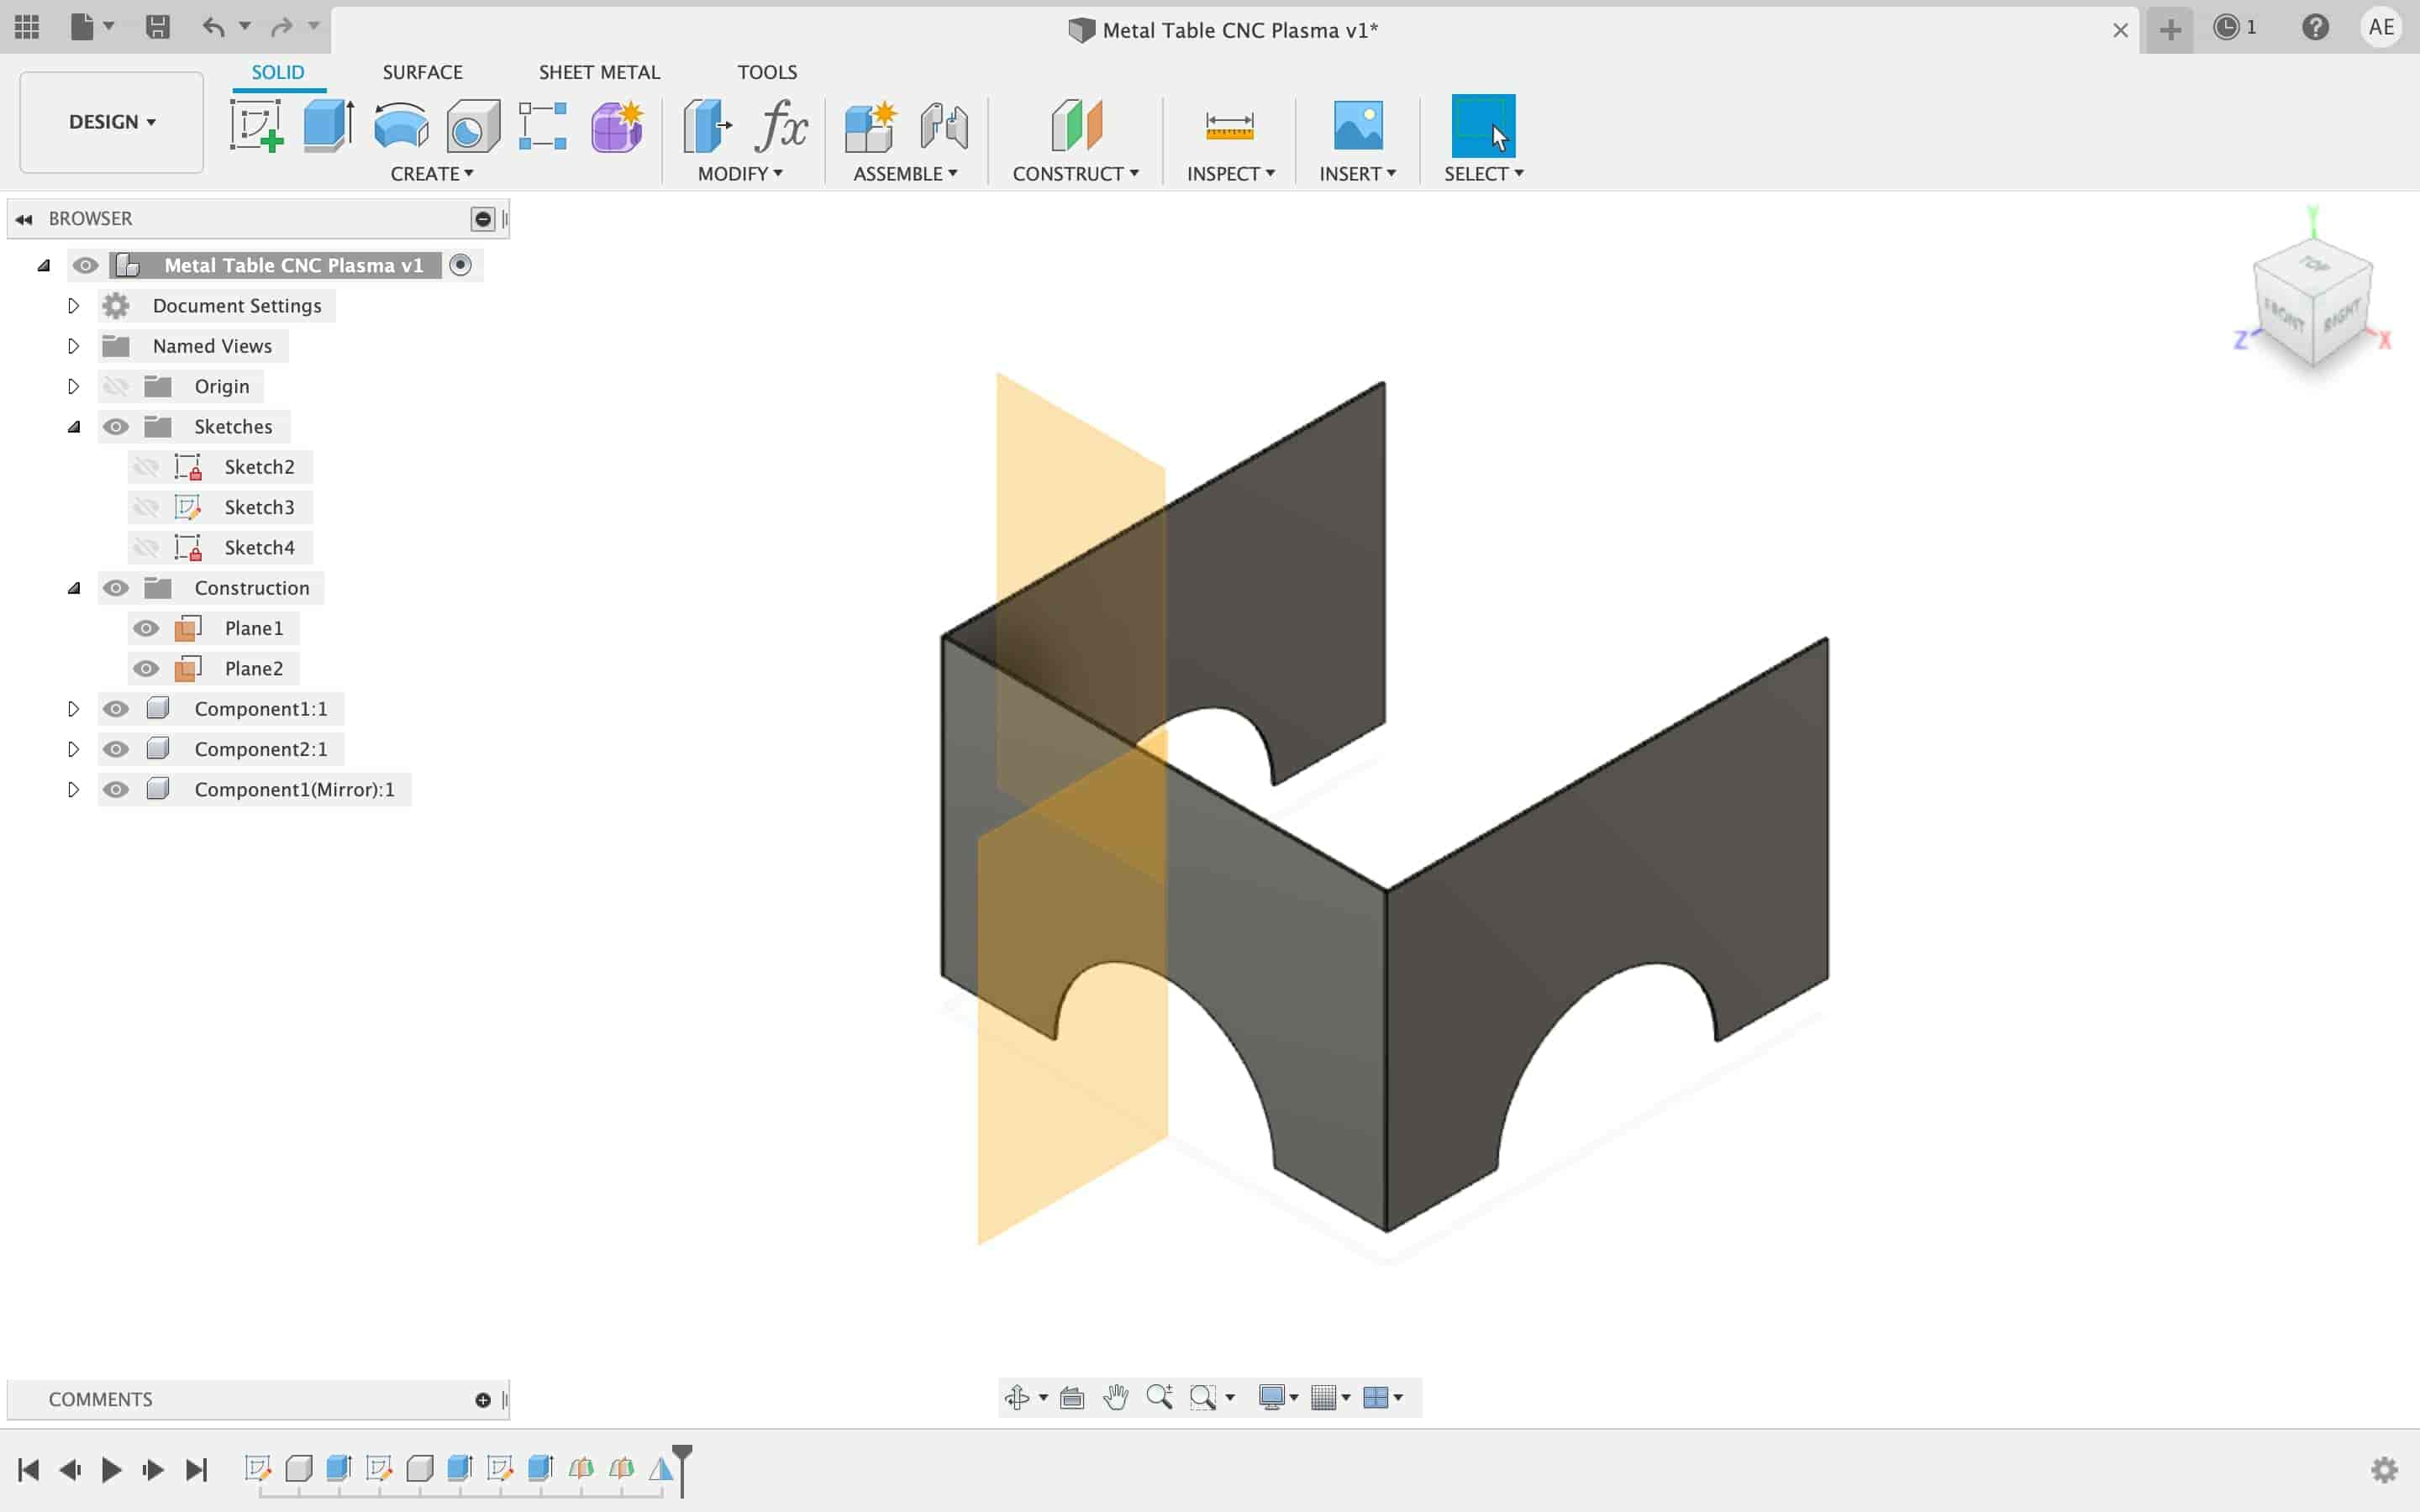
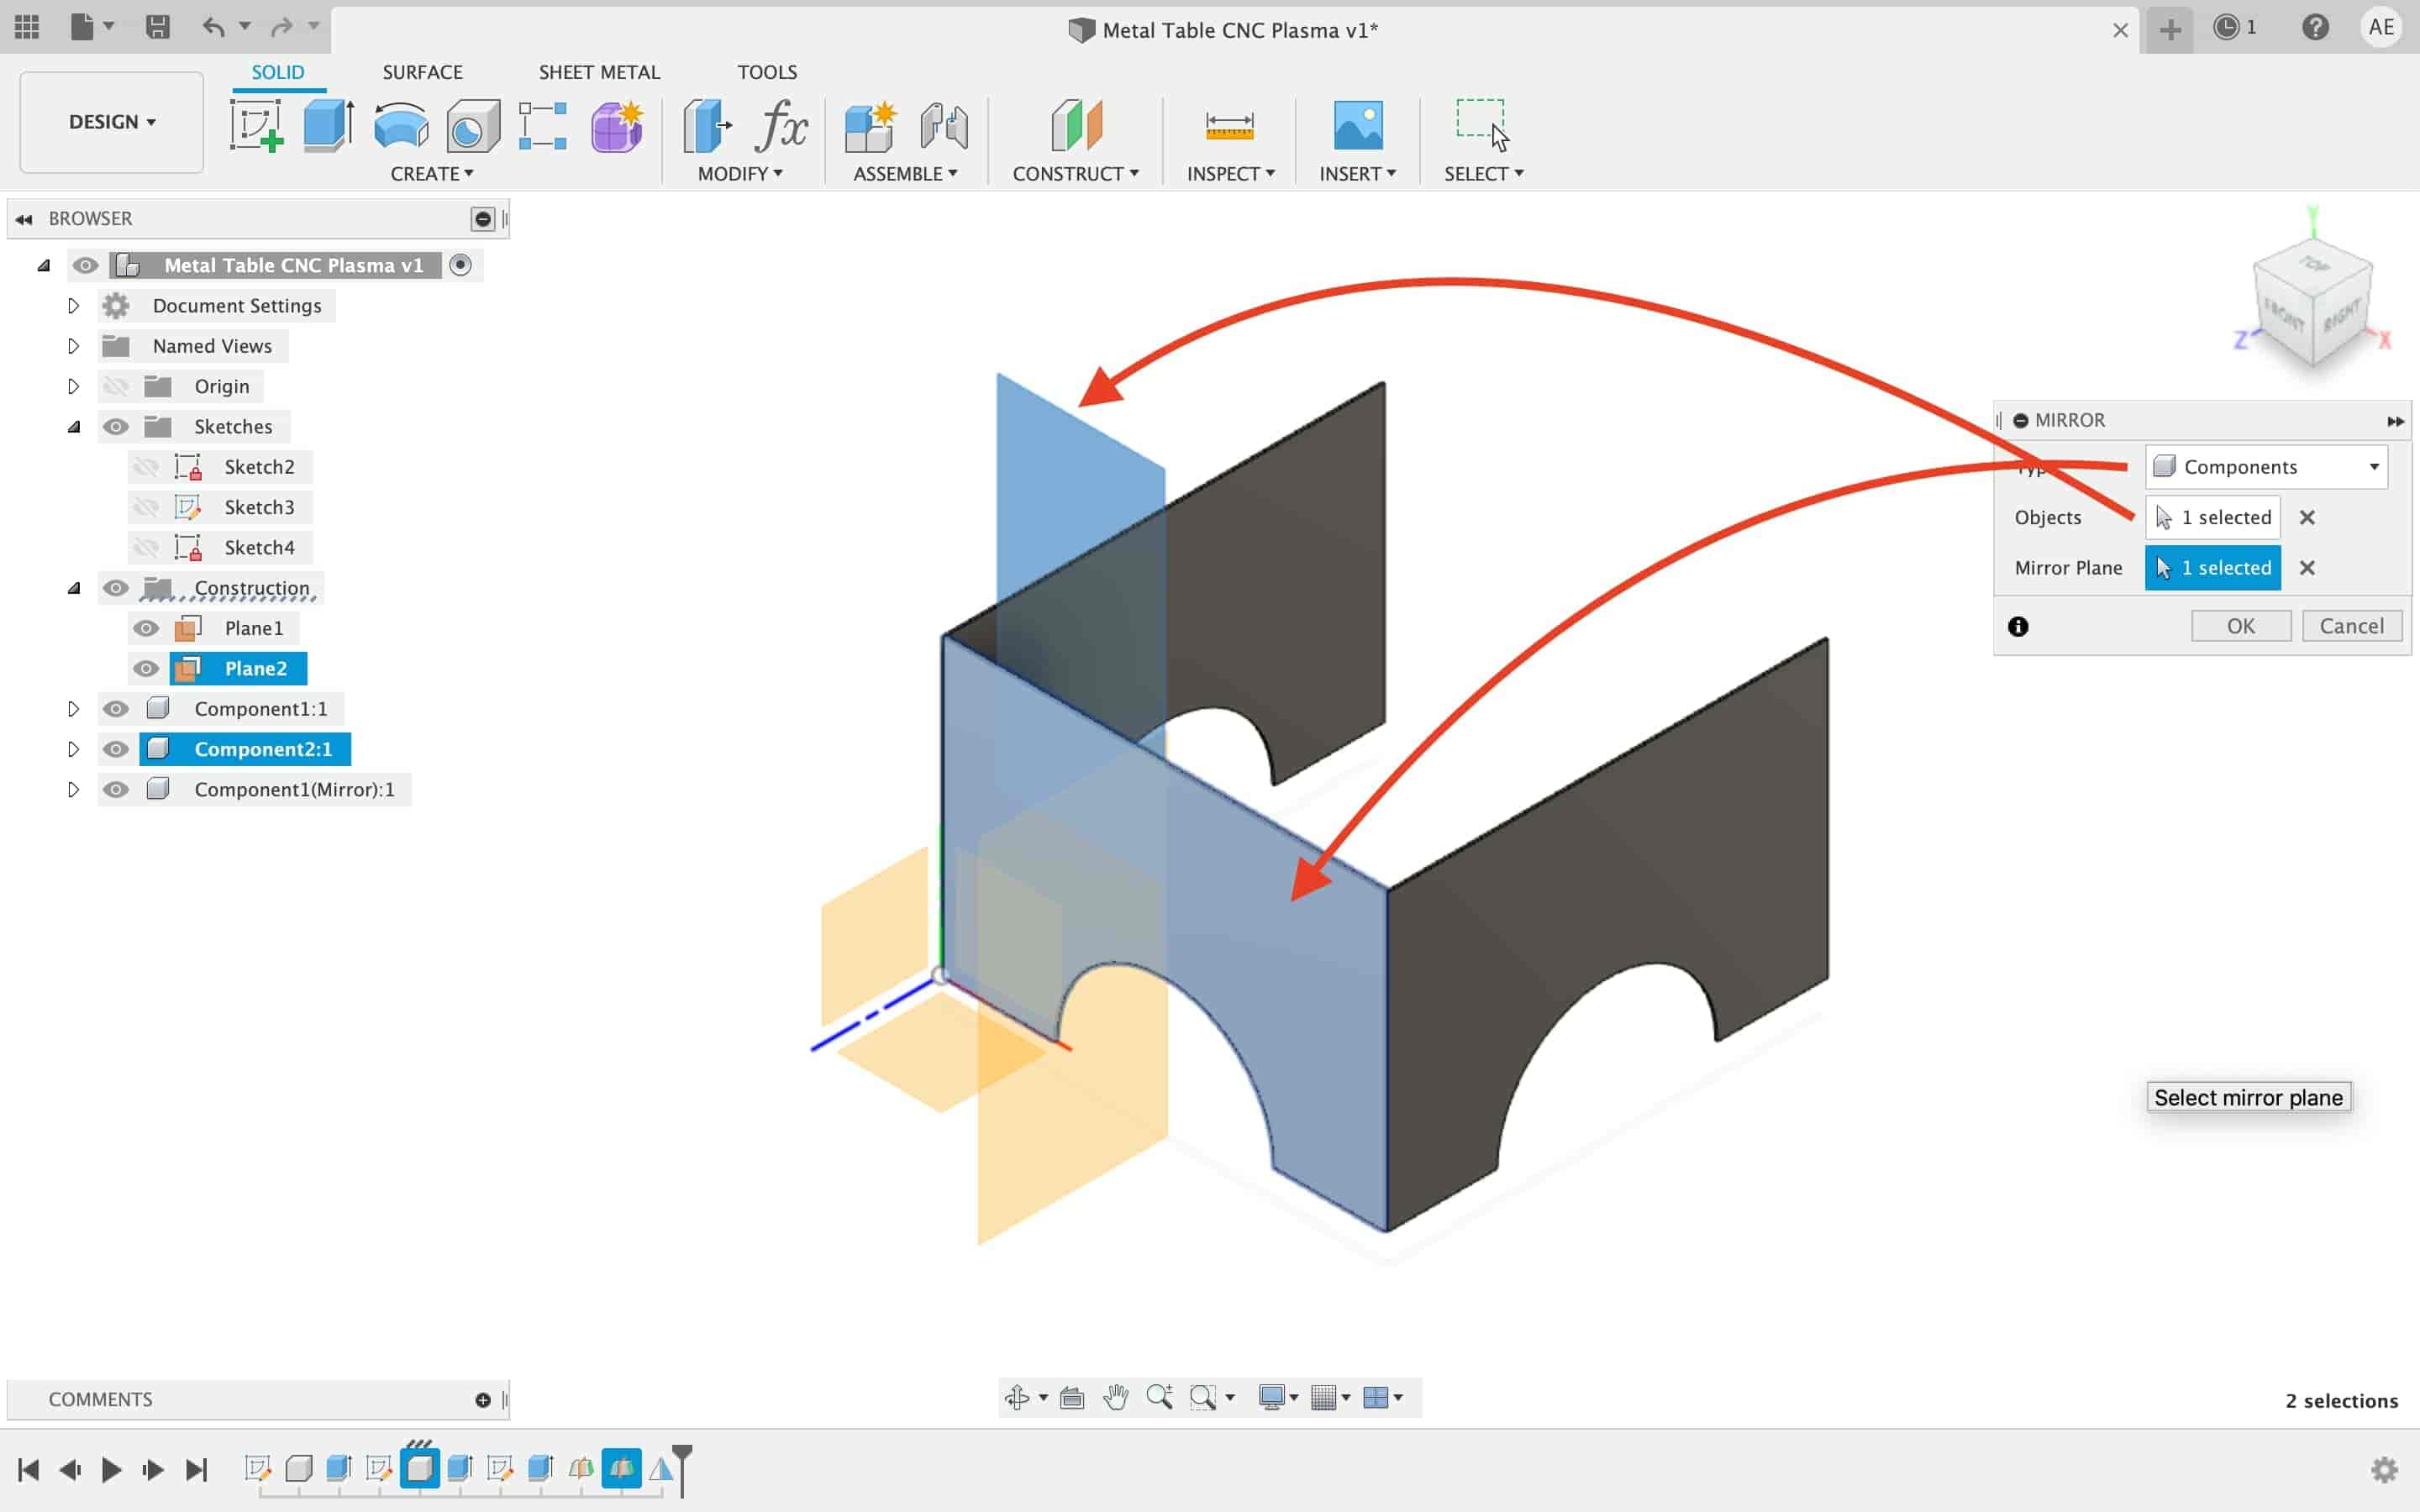
Now, let’s mirror the table legs.
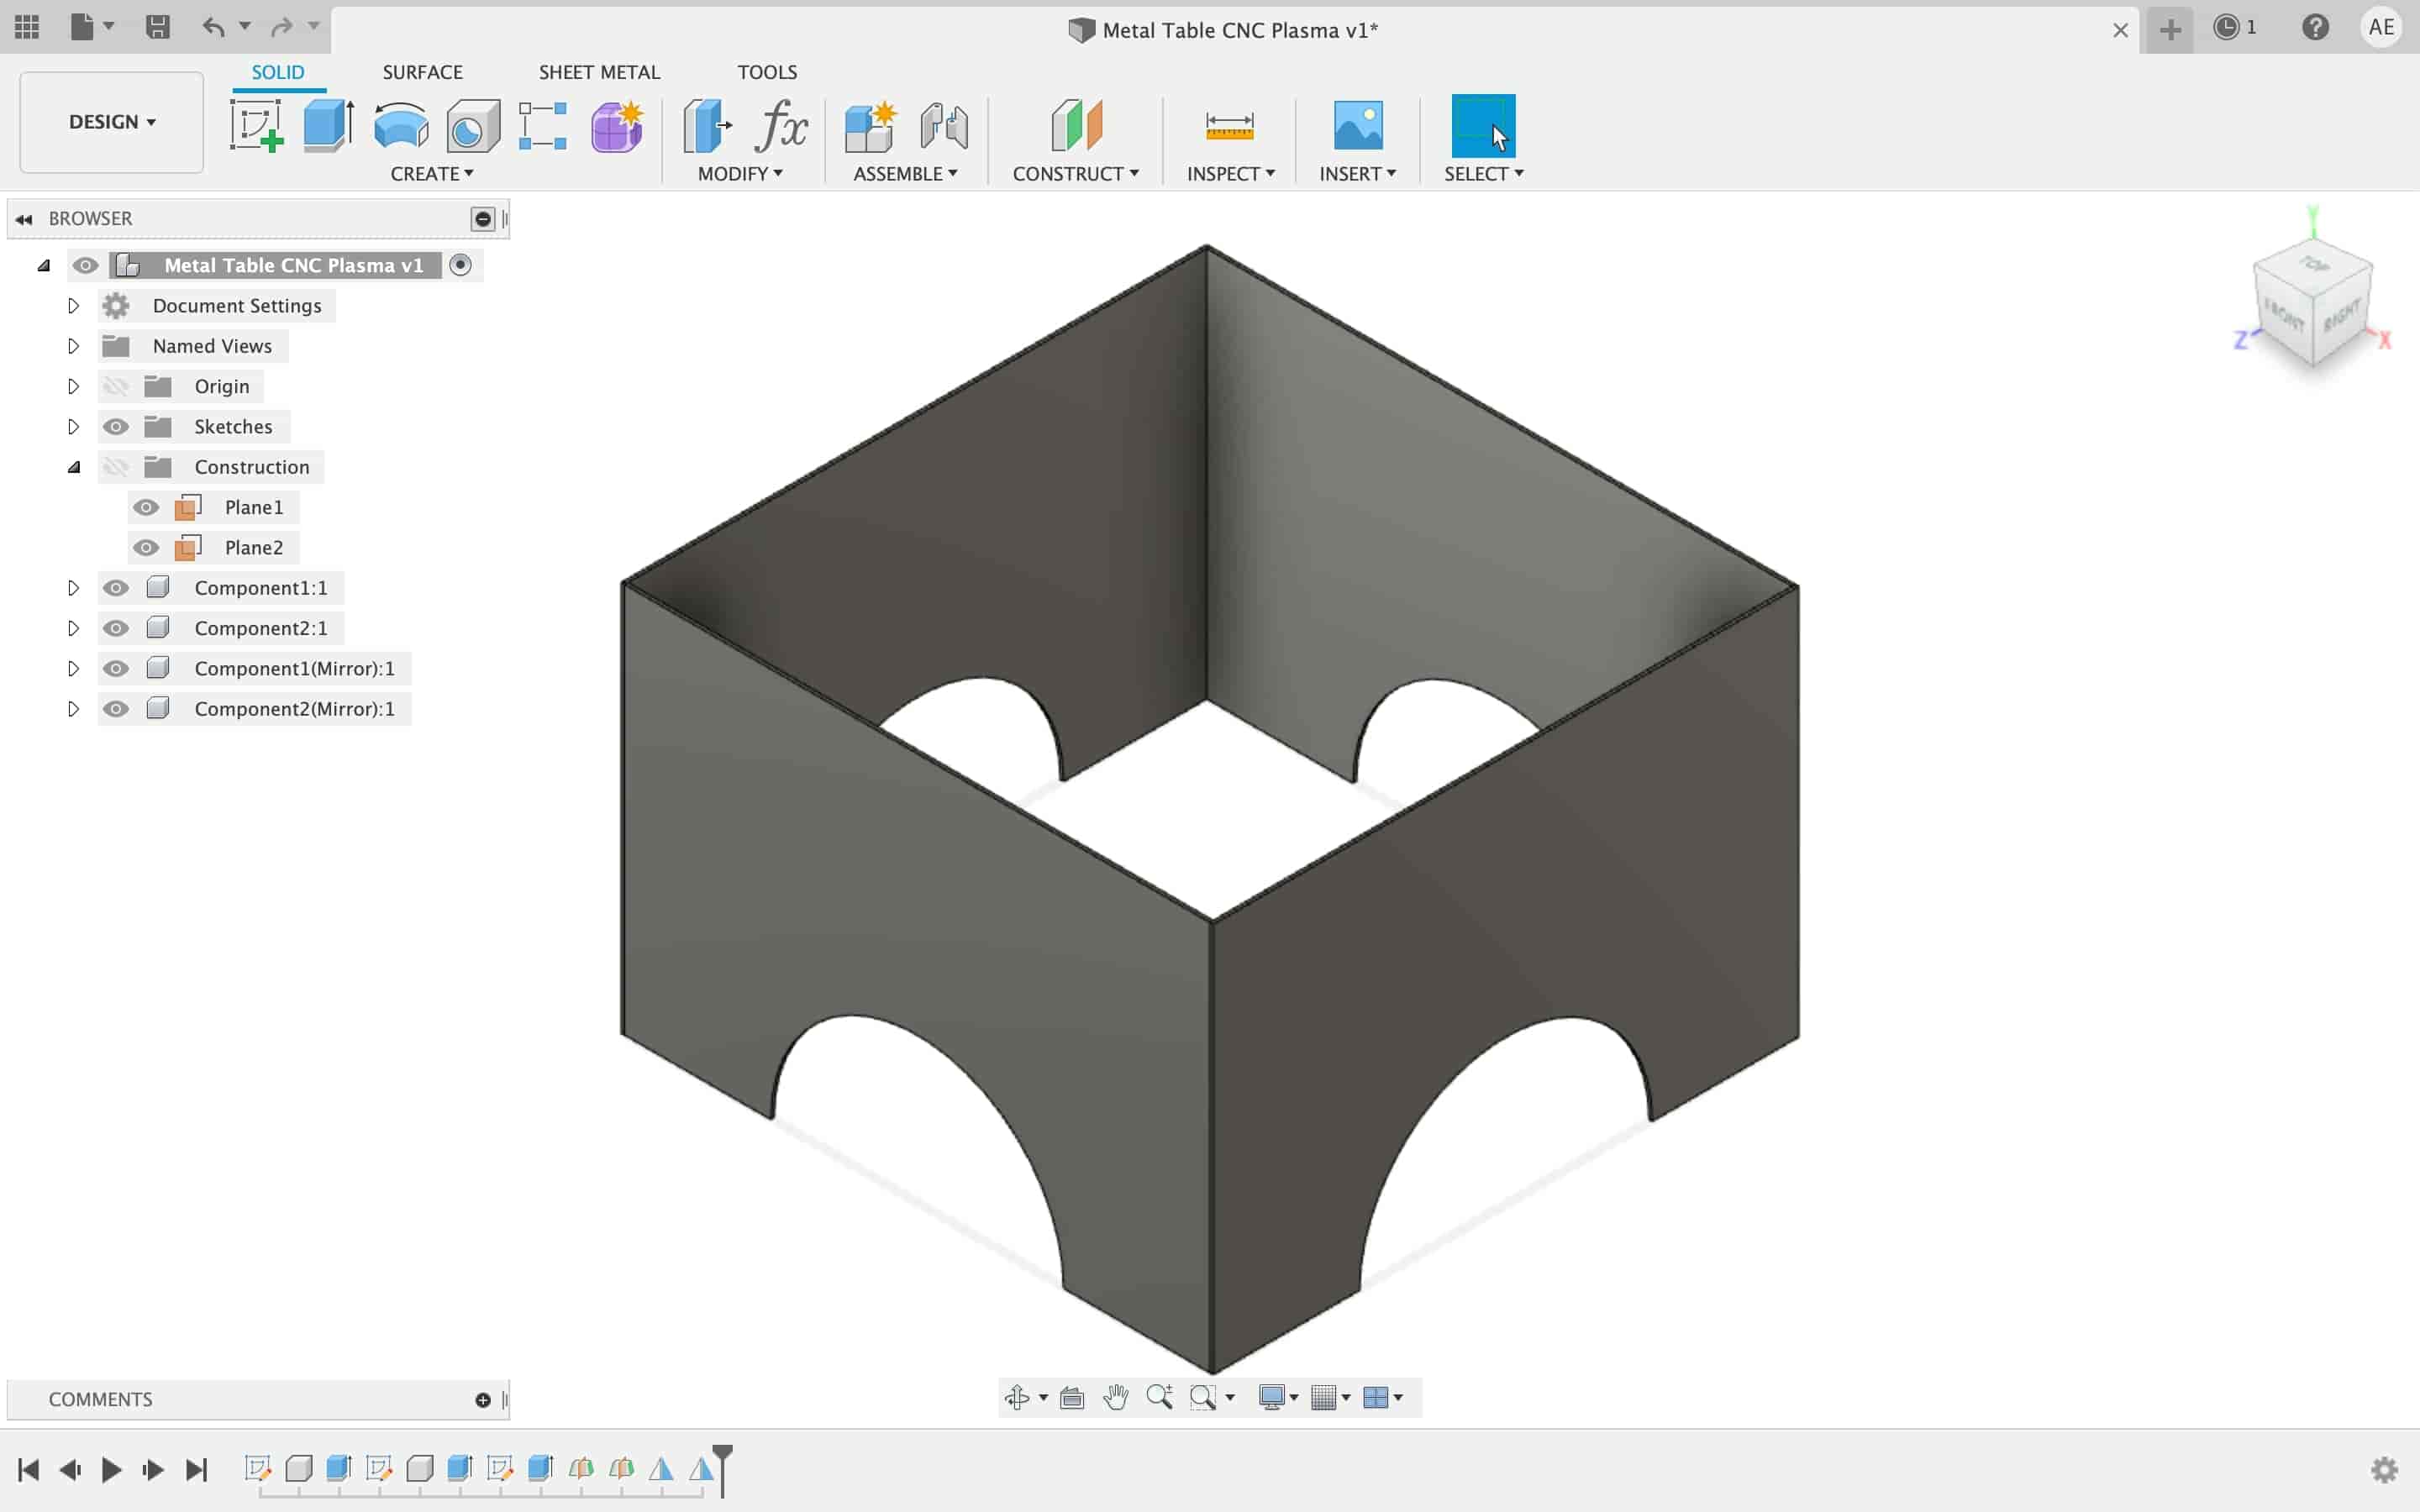
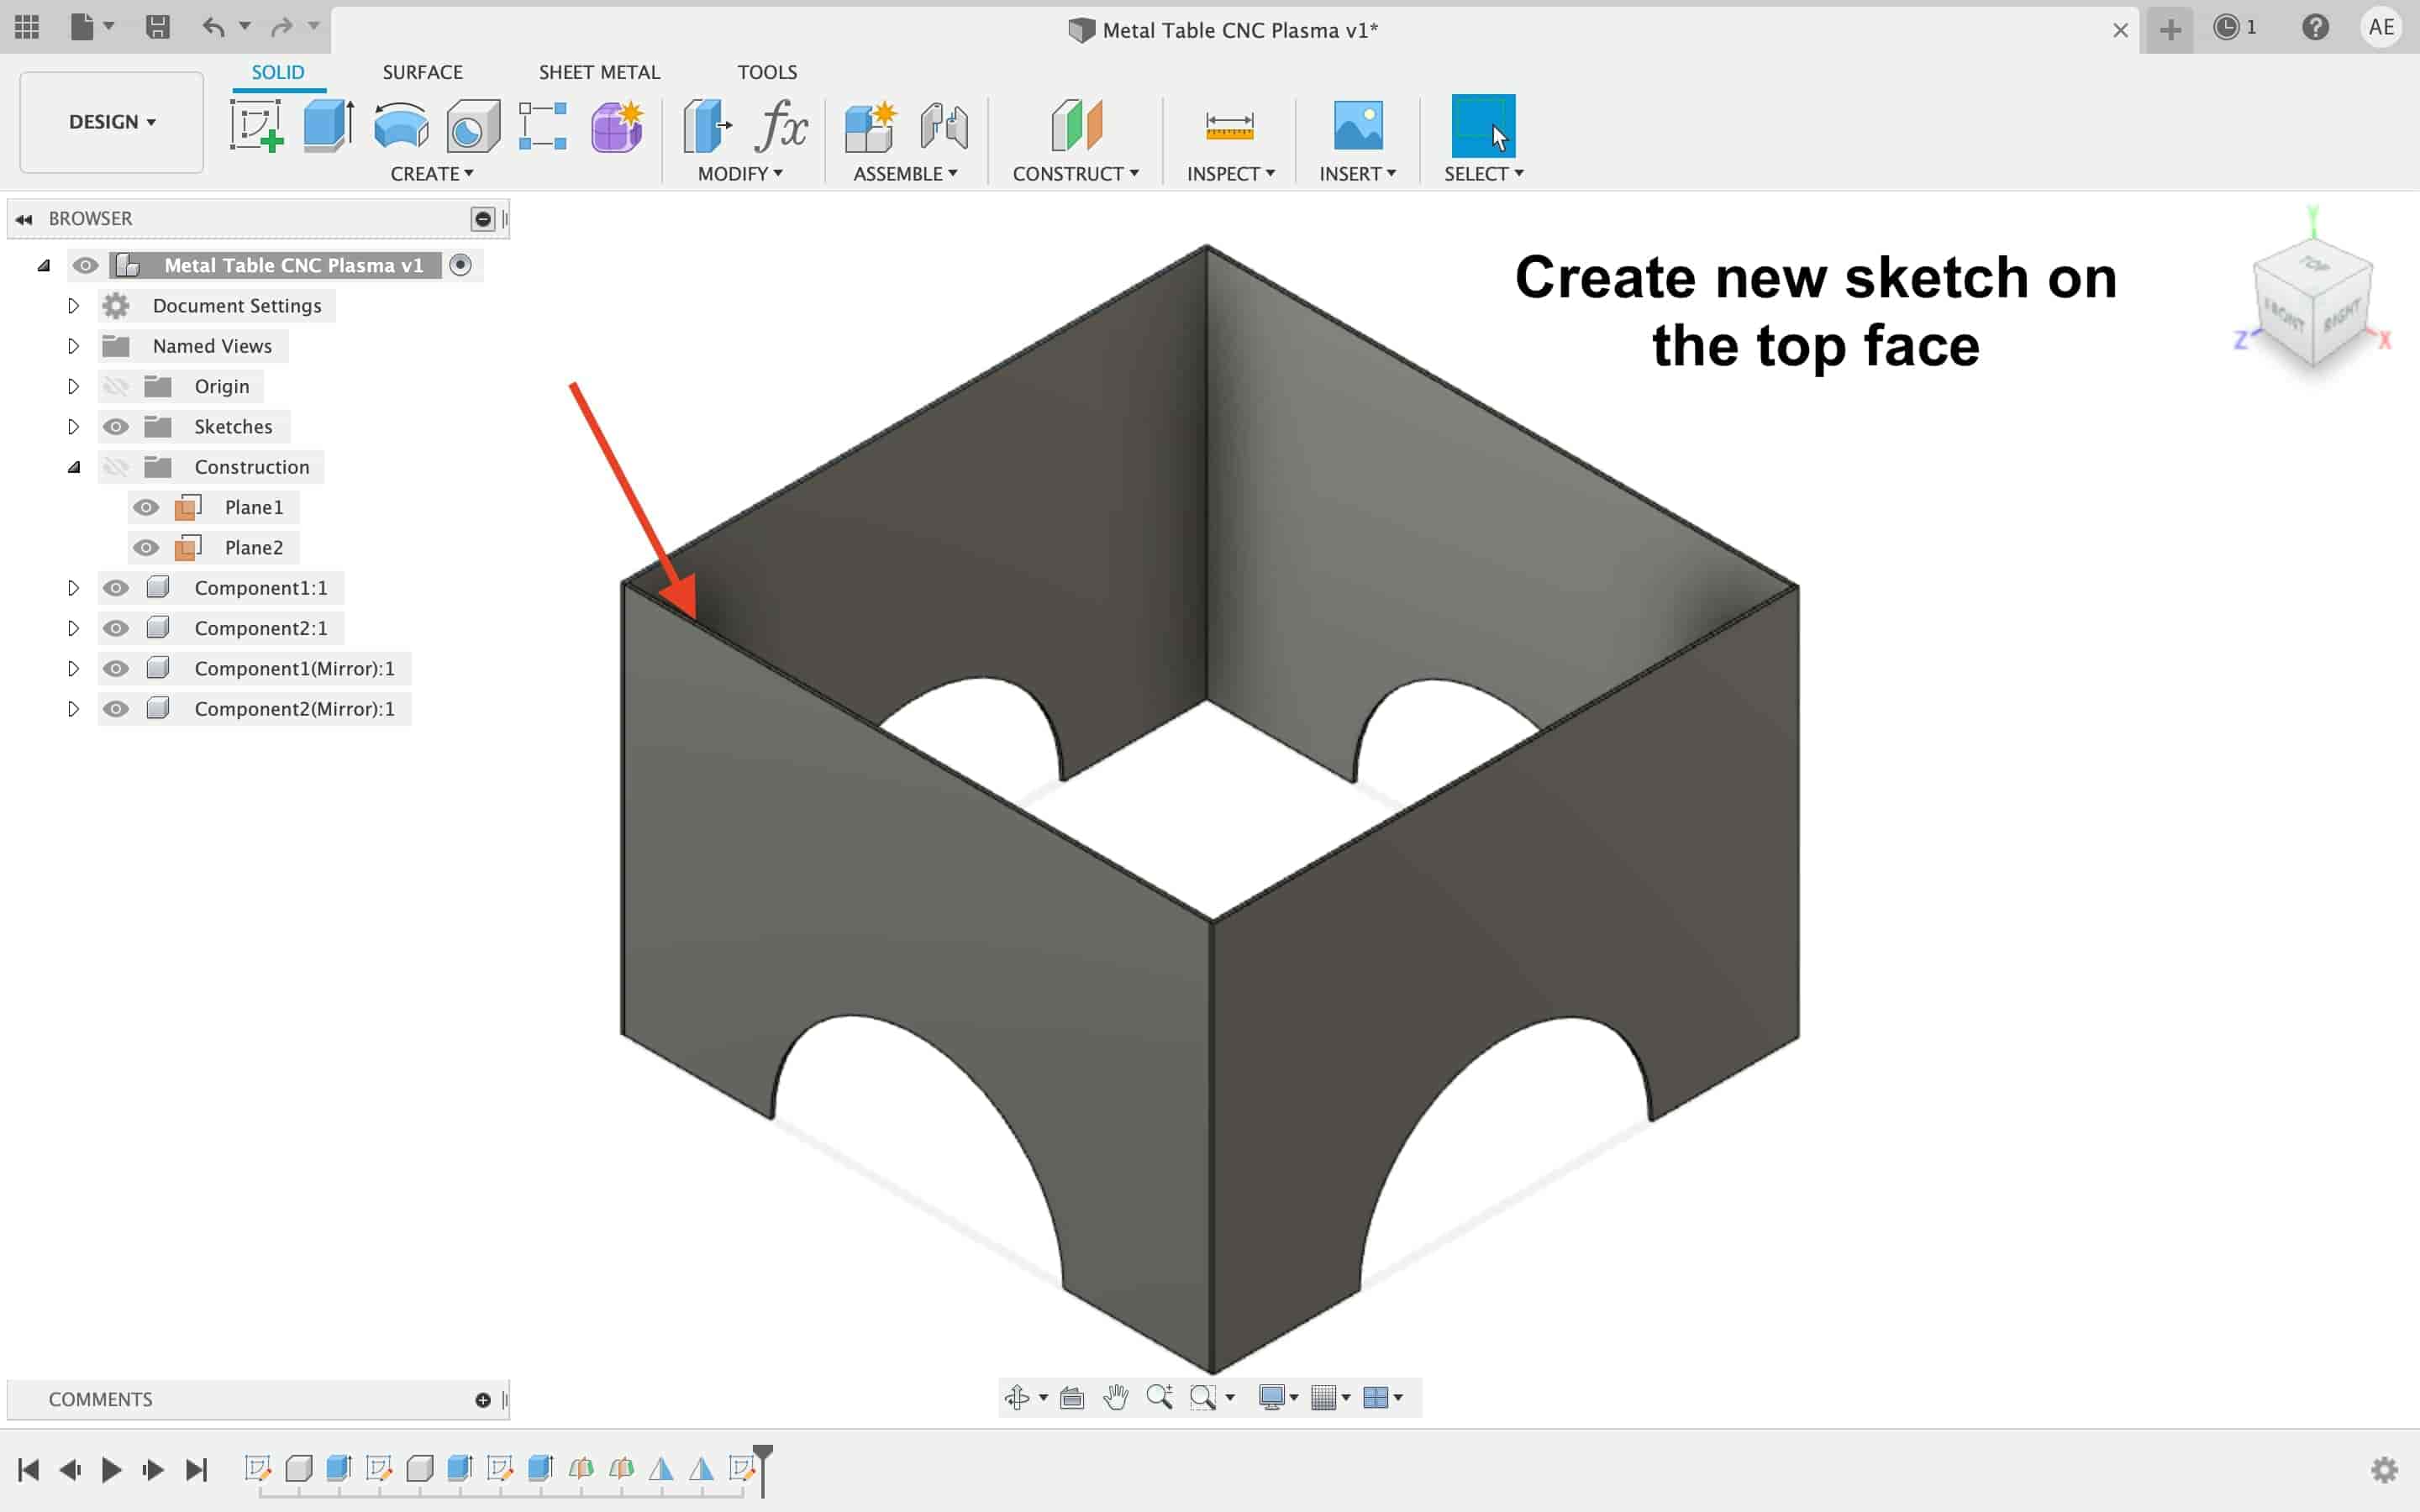
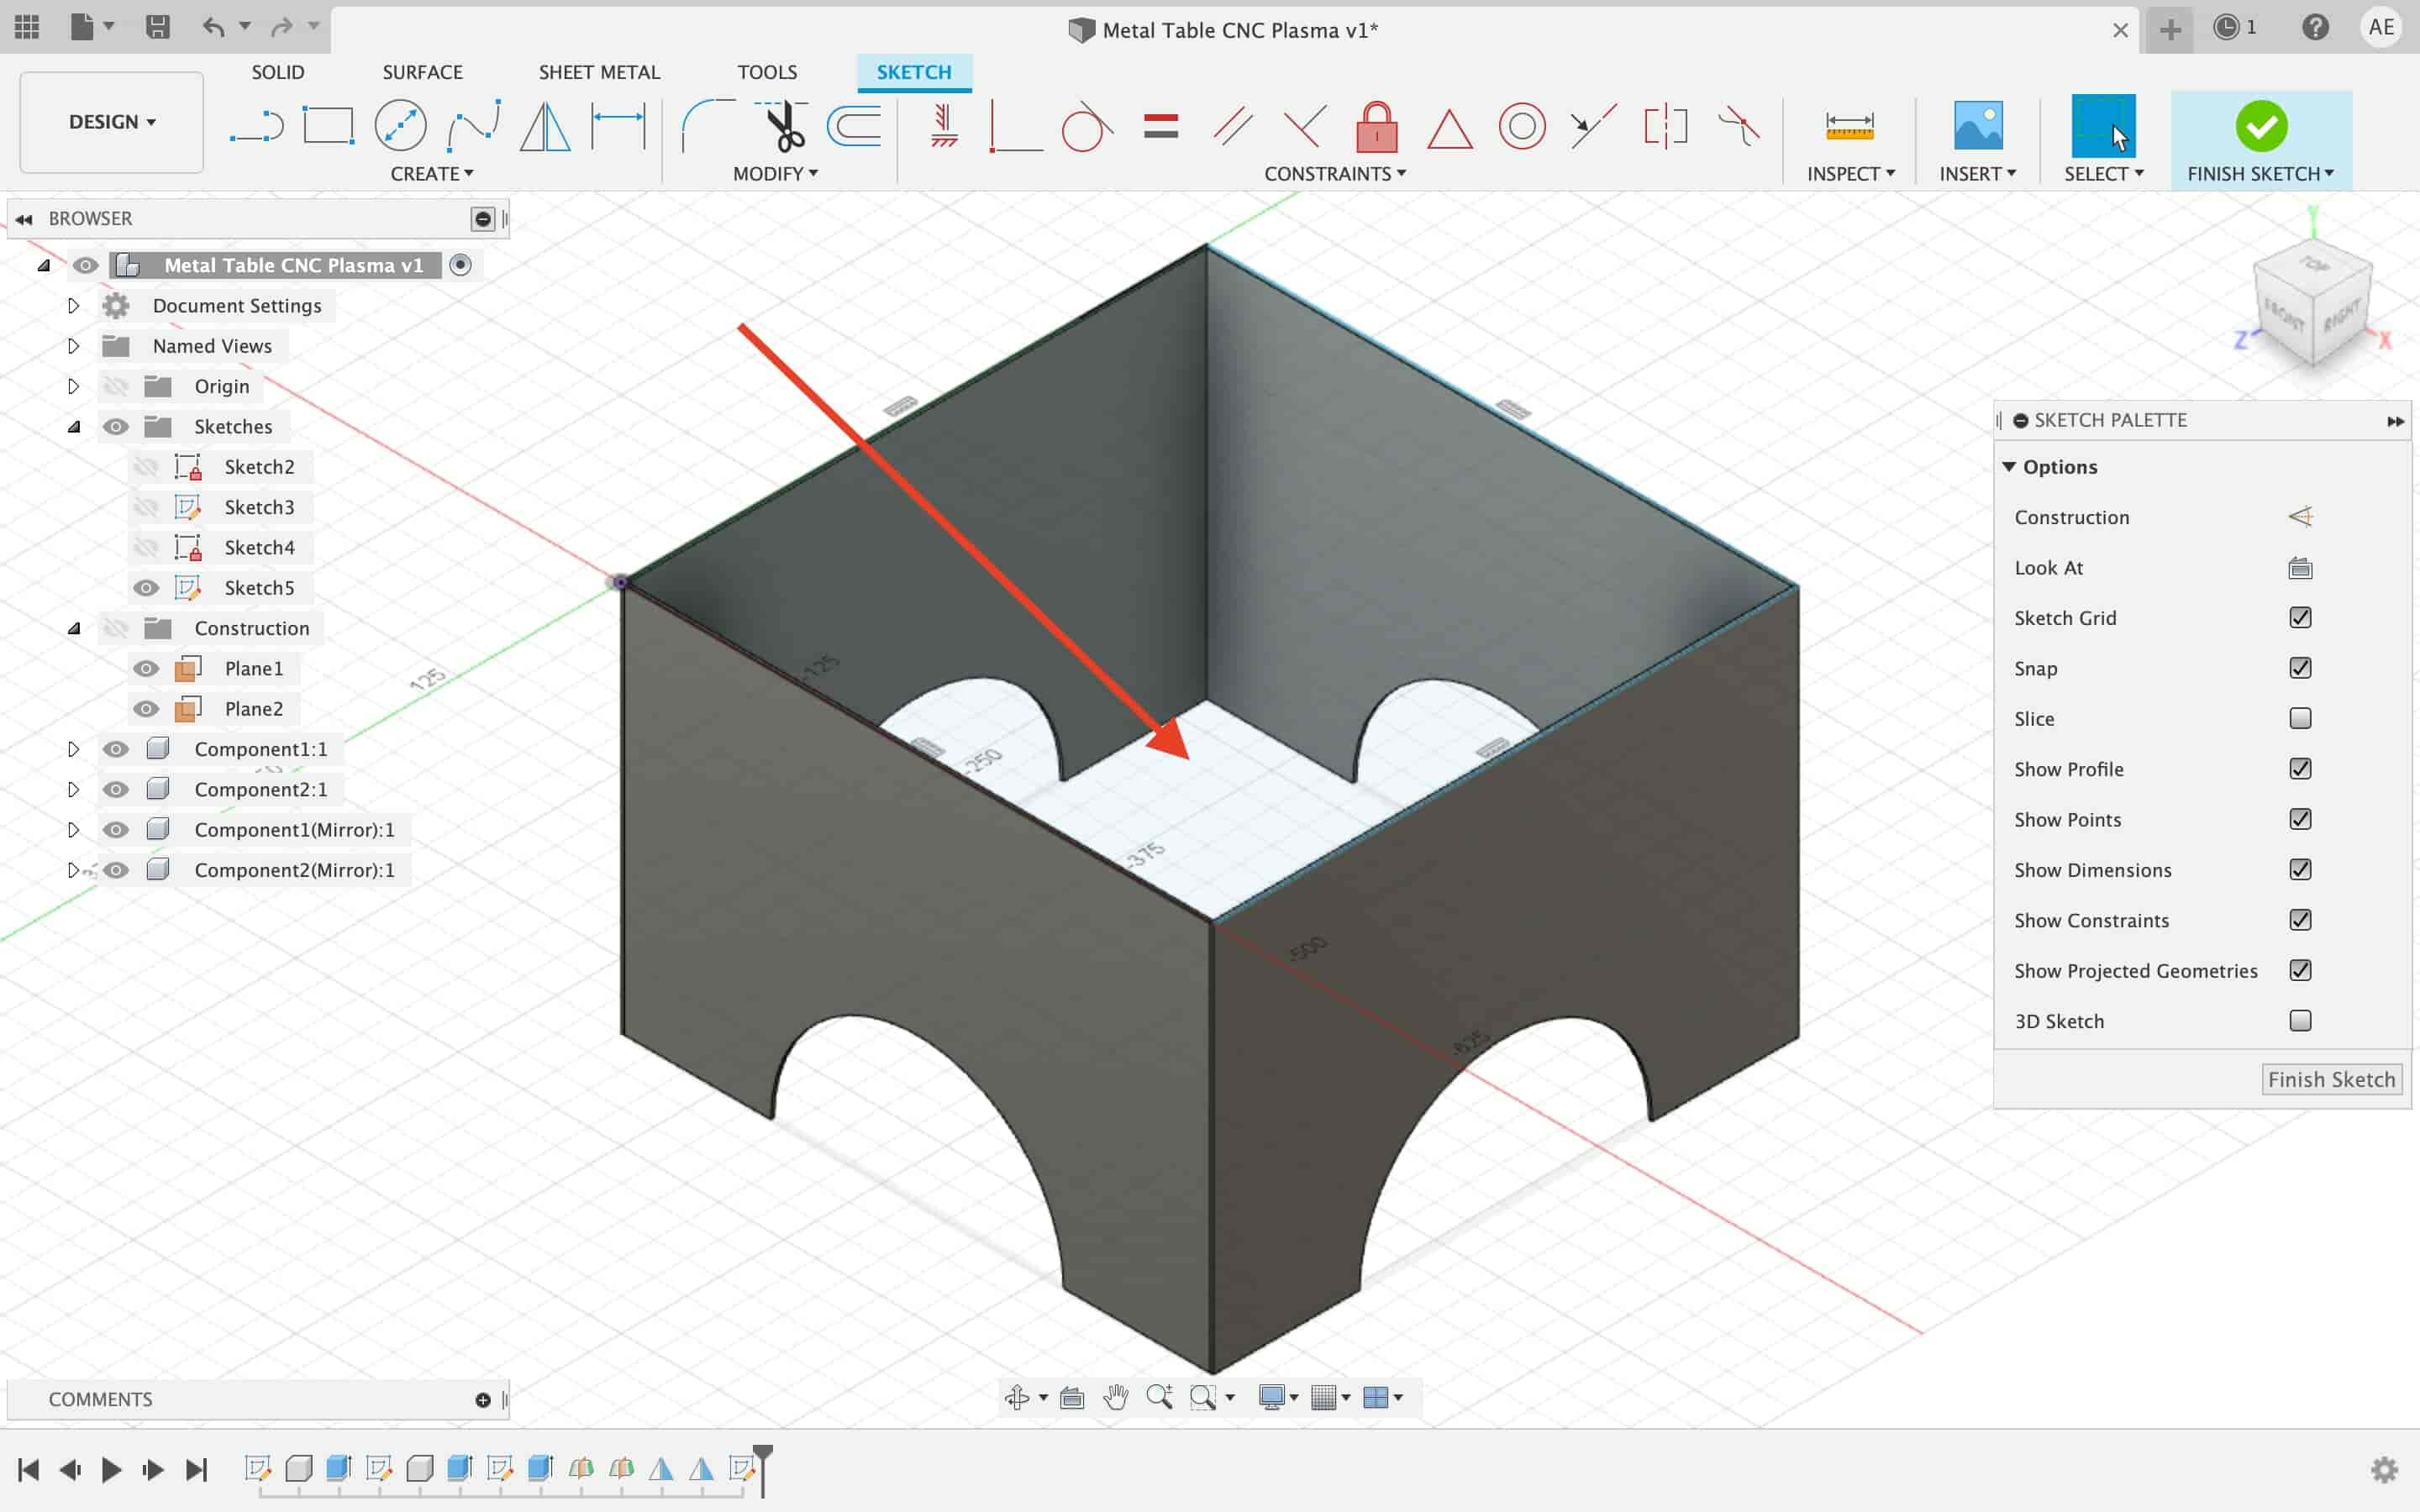
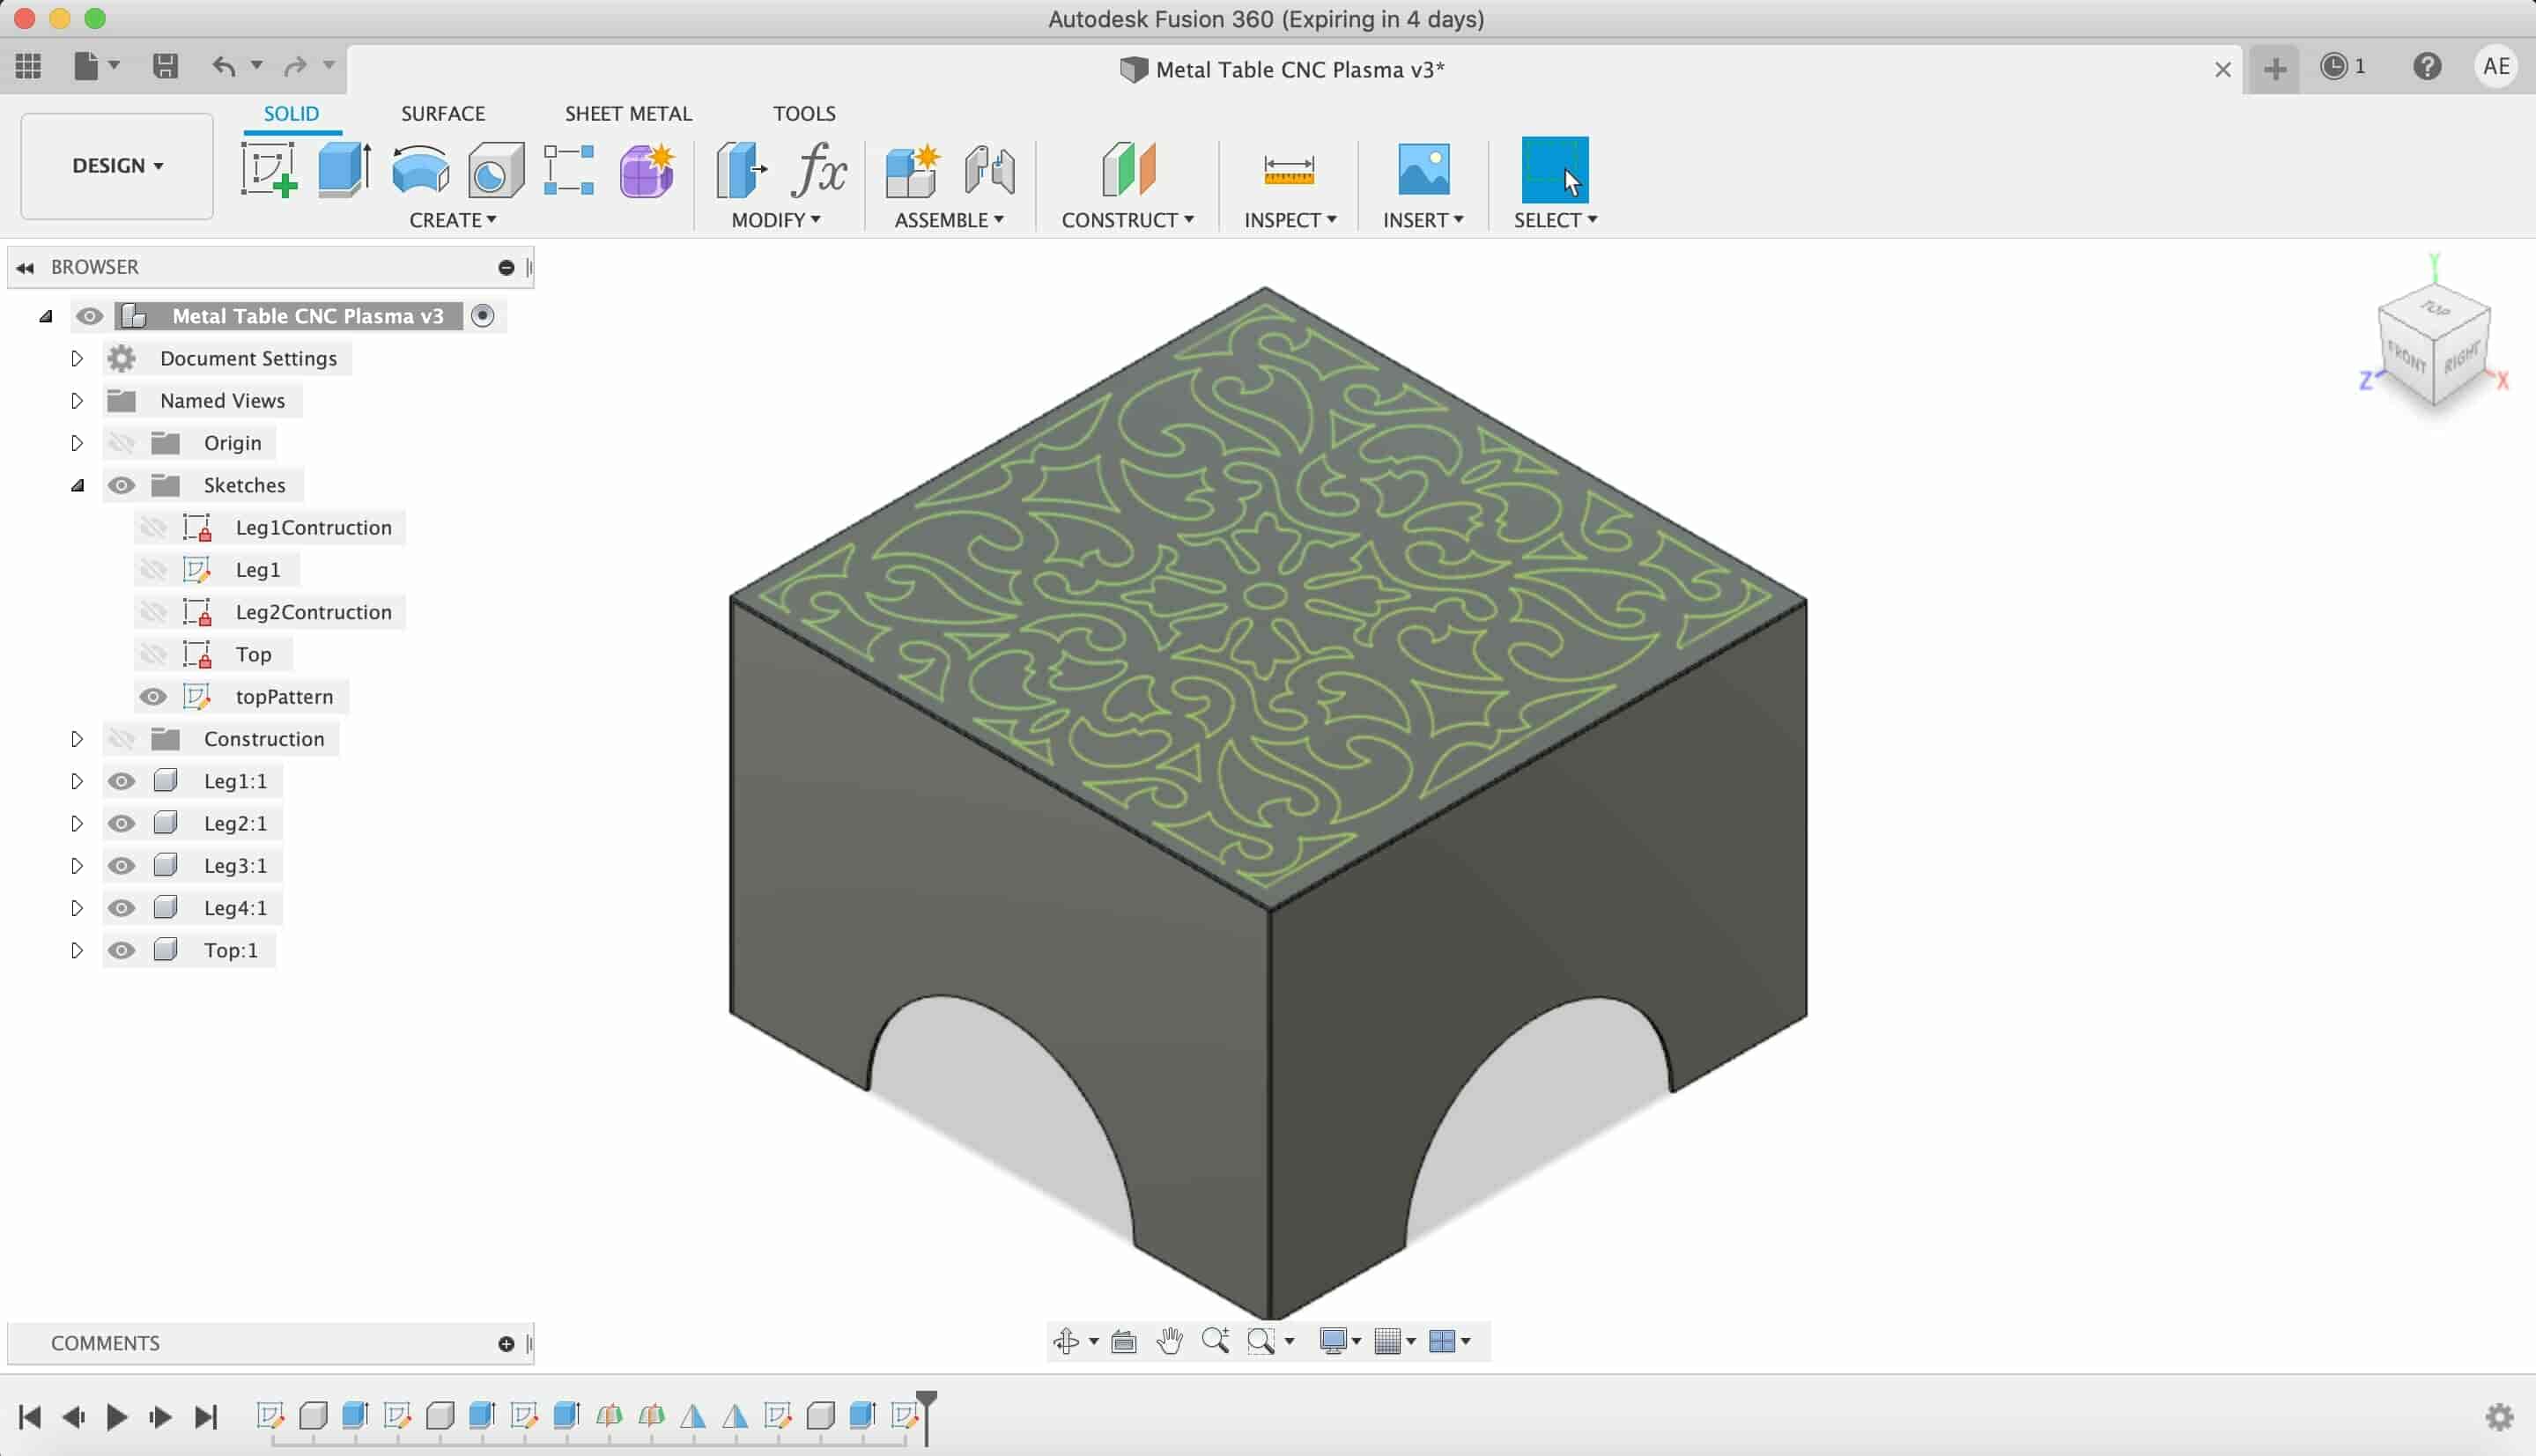
We now have all the table four legs, Let’s draw the table top part. I made a new sketch on the top of the table leg. Then, I draw a 45cm*45cm rectangle. Then, I extruded that rectangle with the material thickness(2.5mm) as a new component.

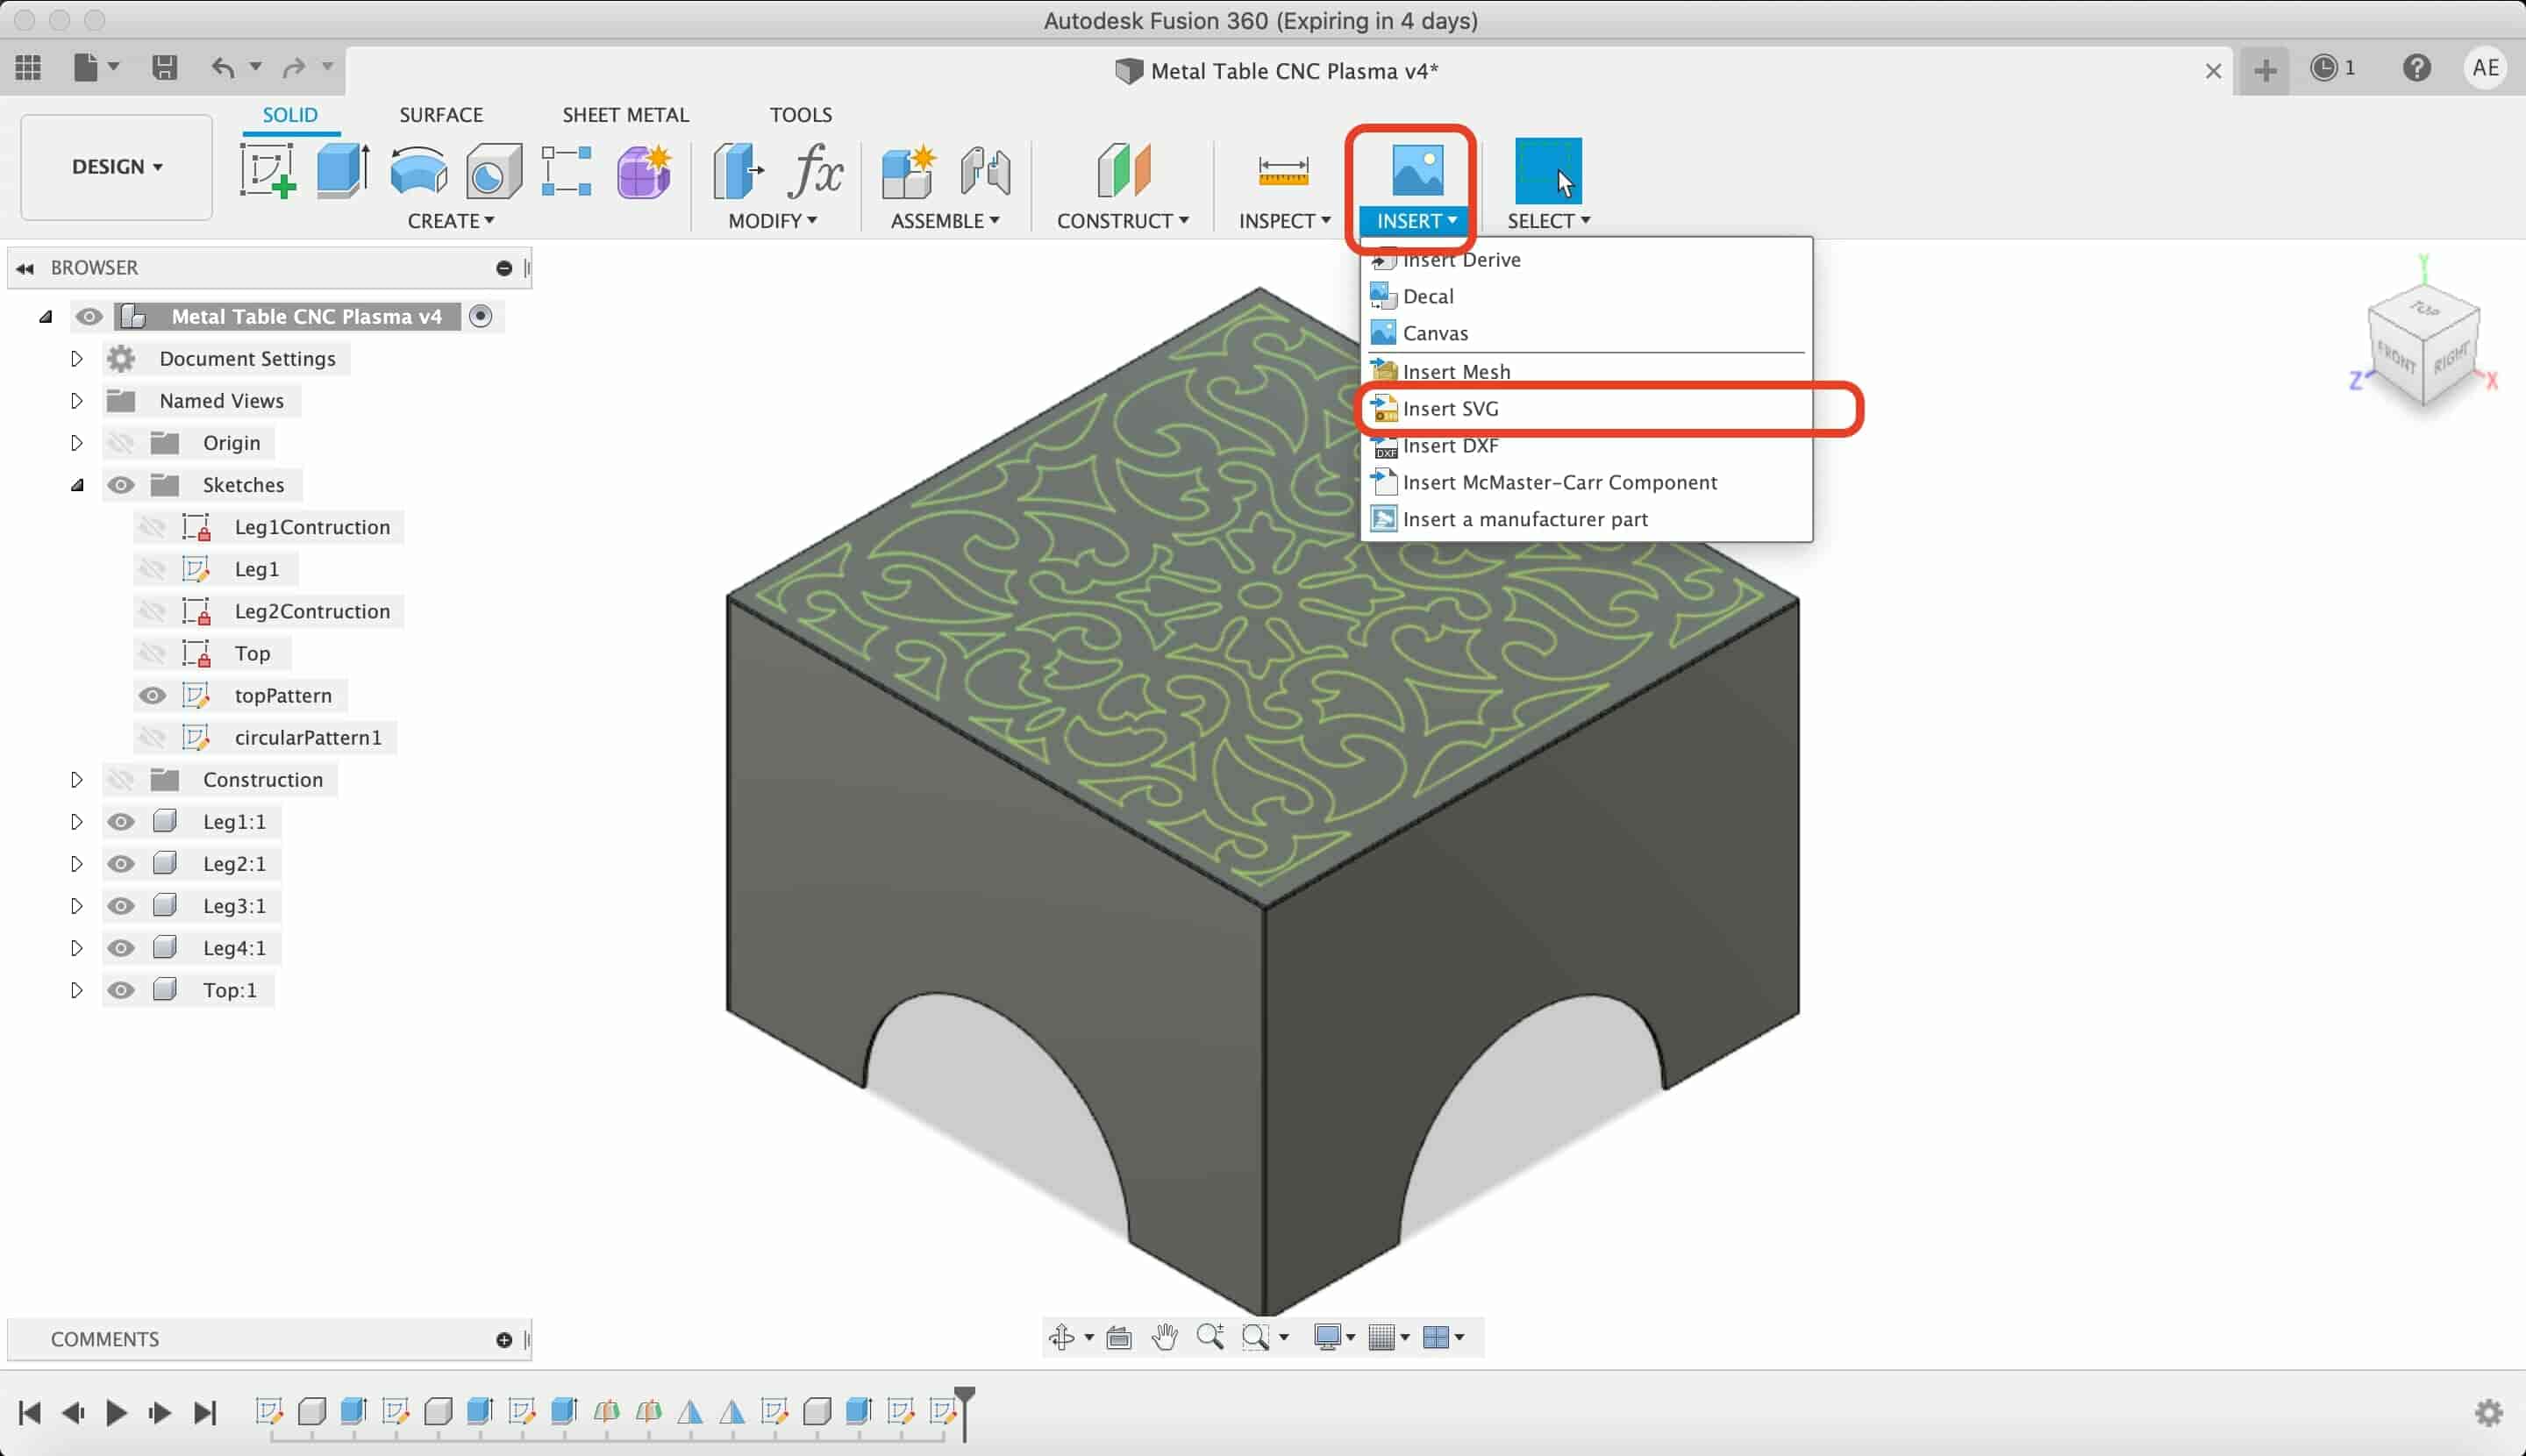
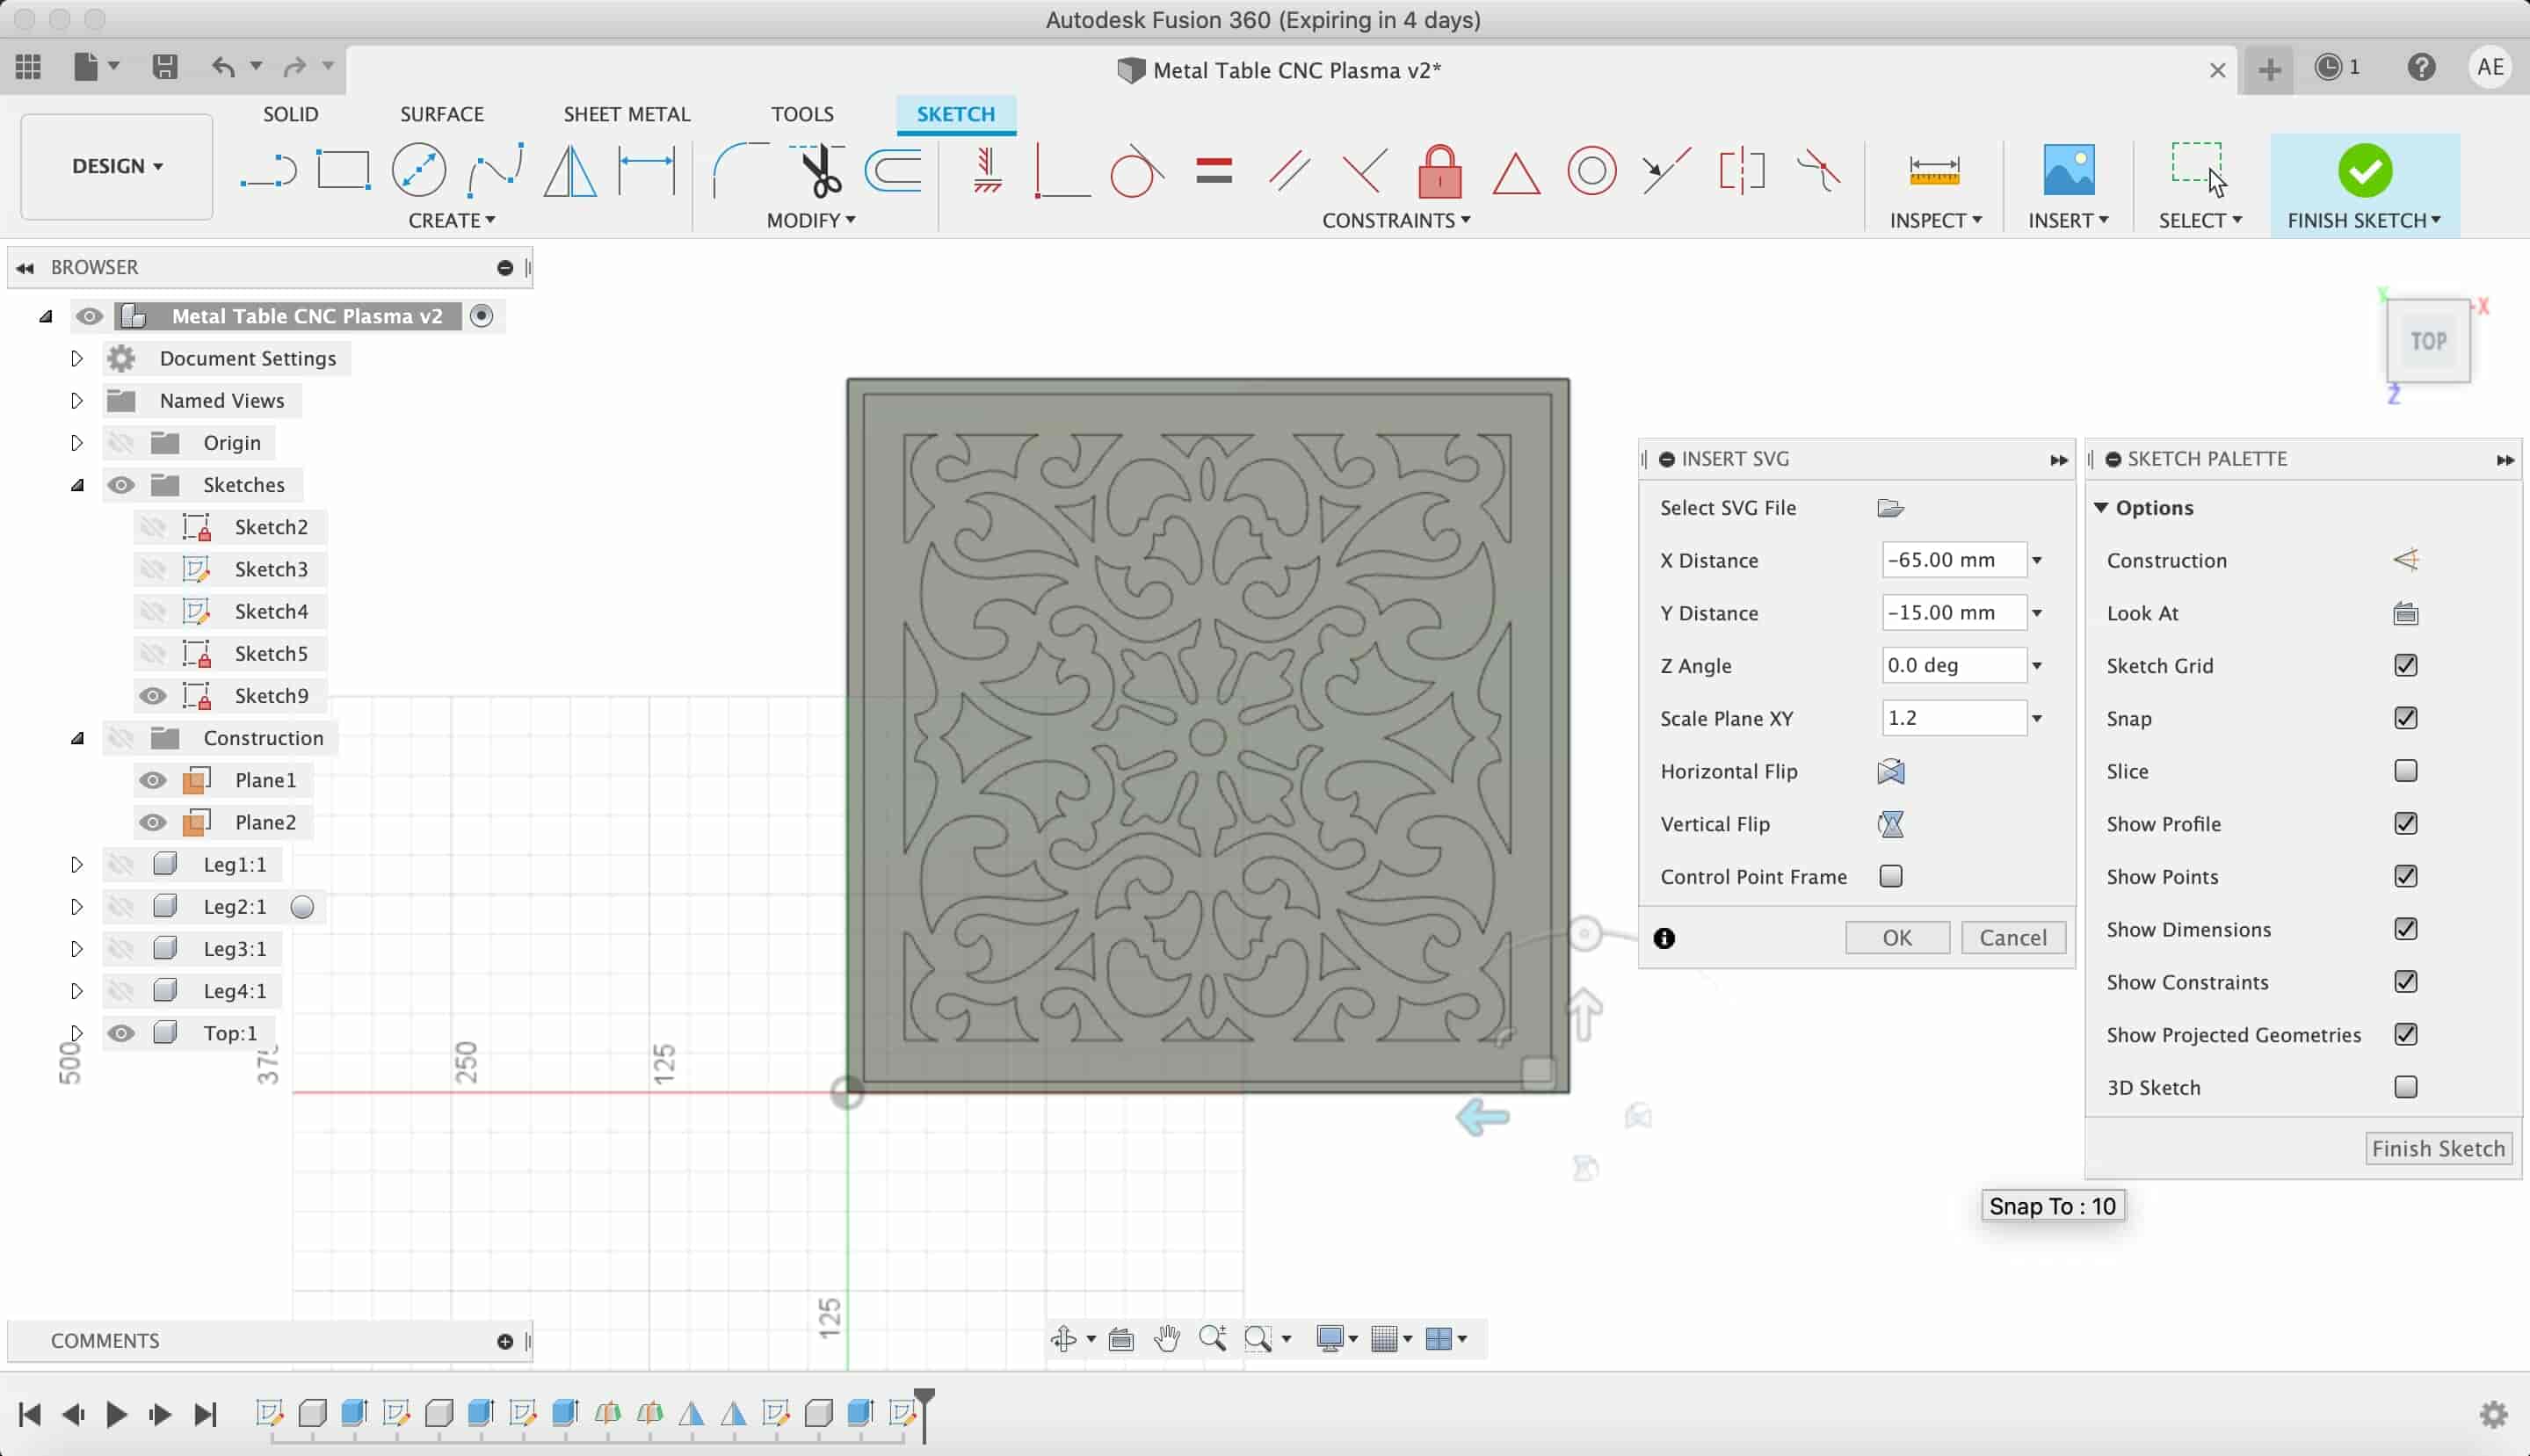
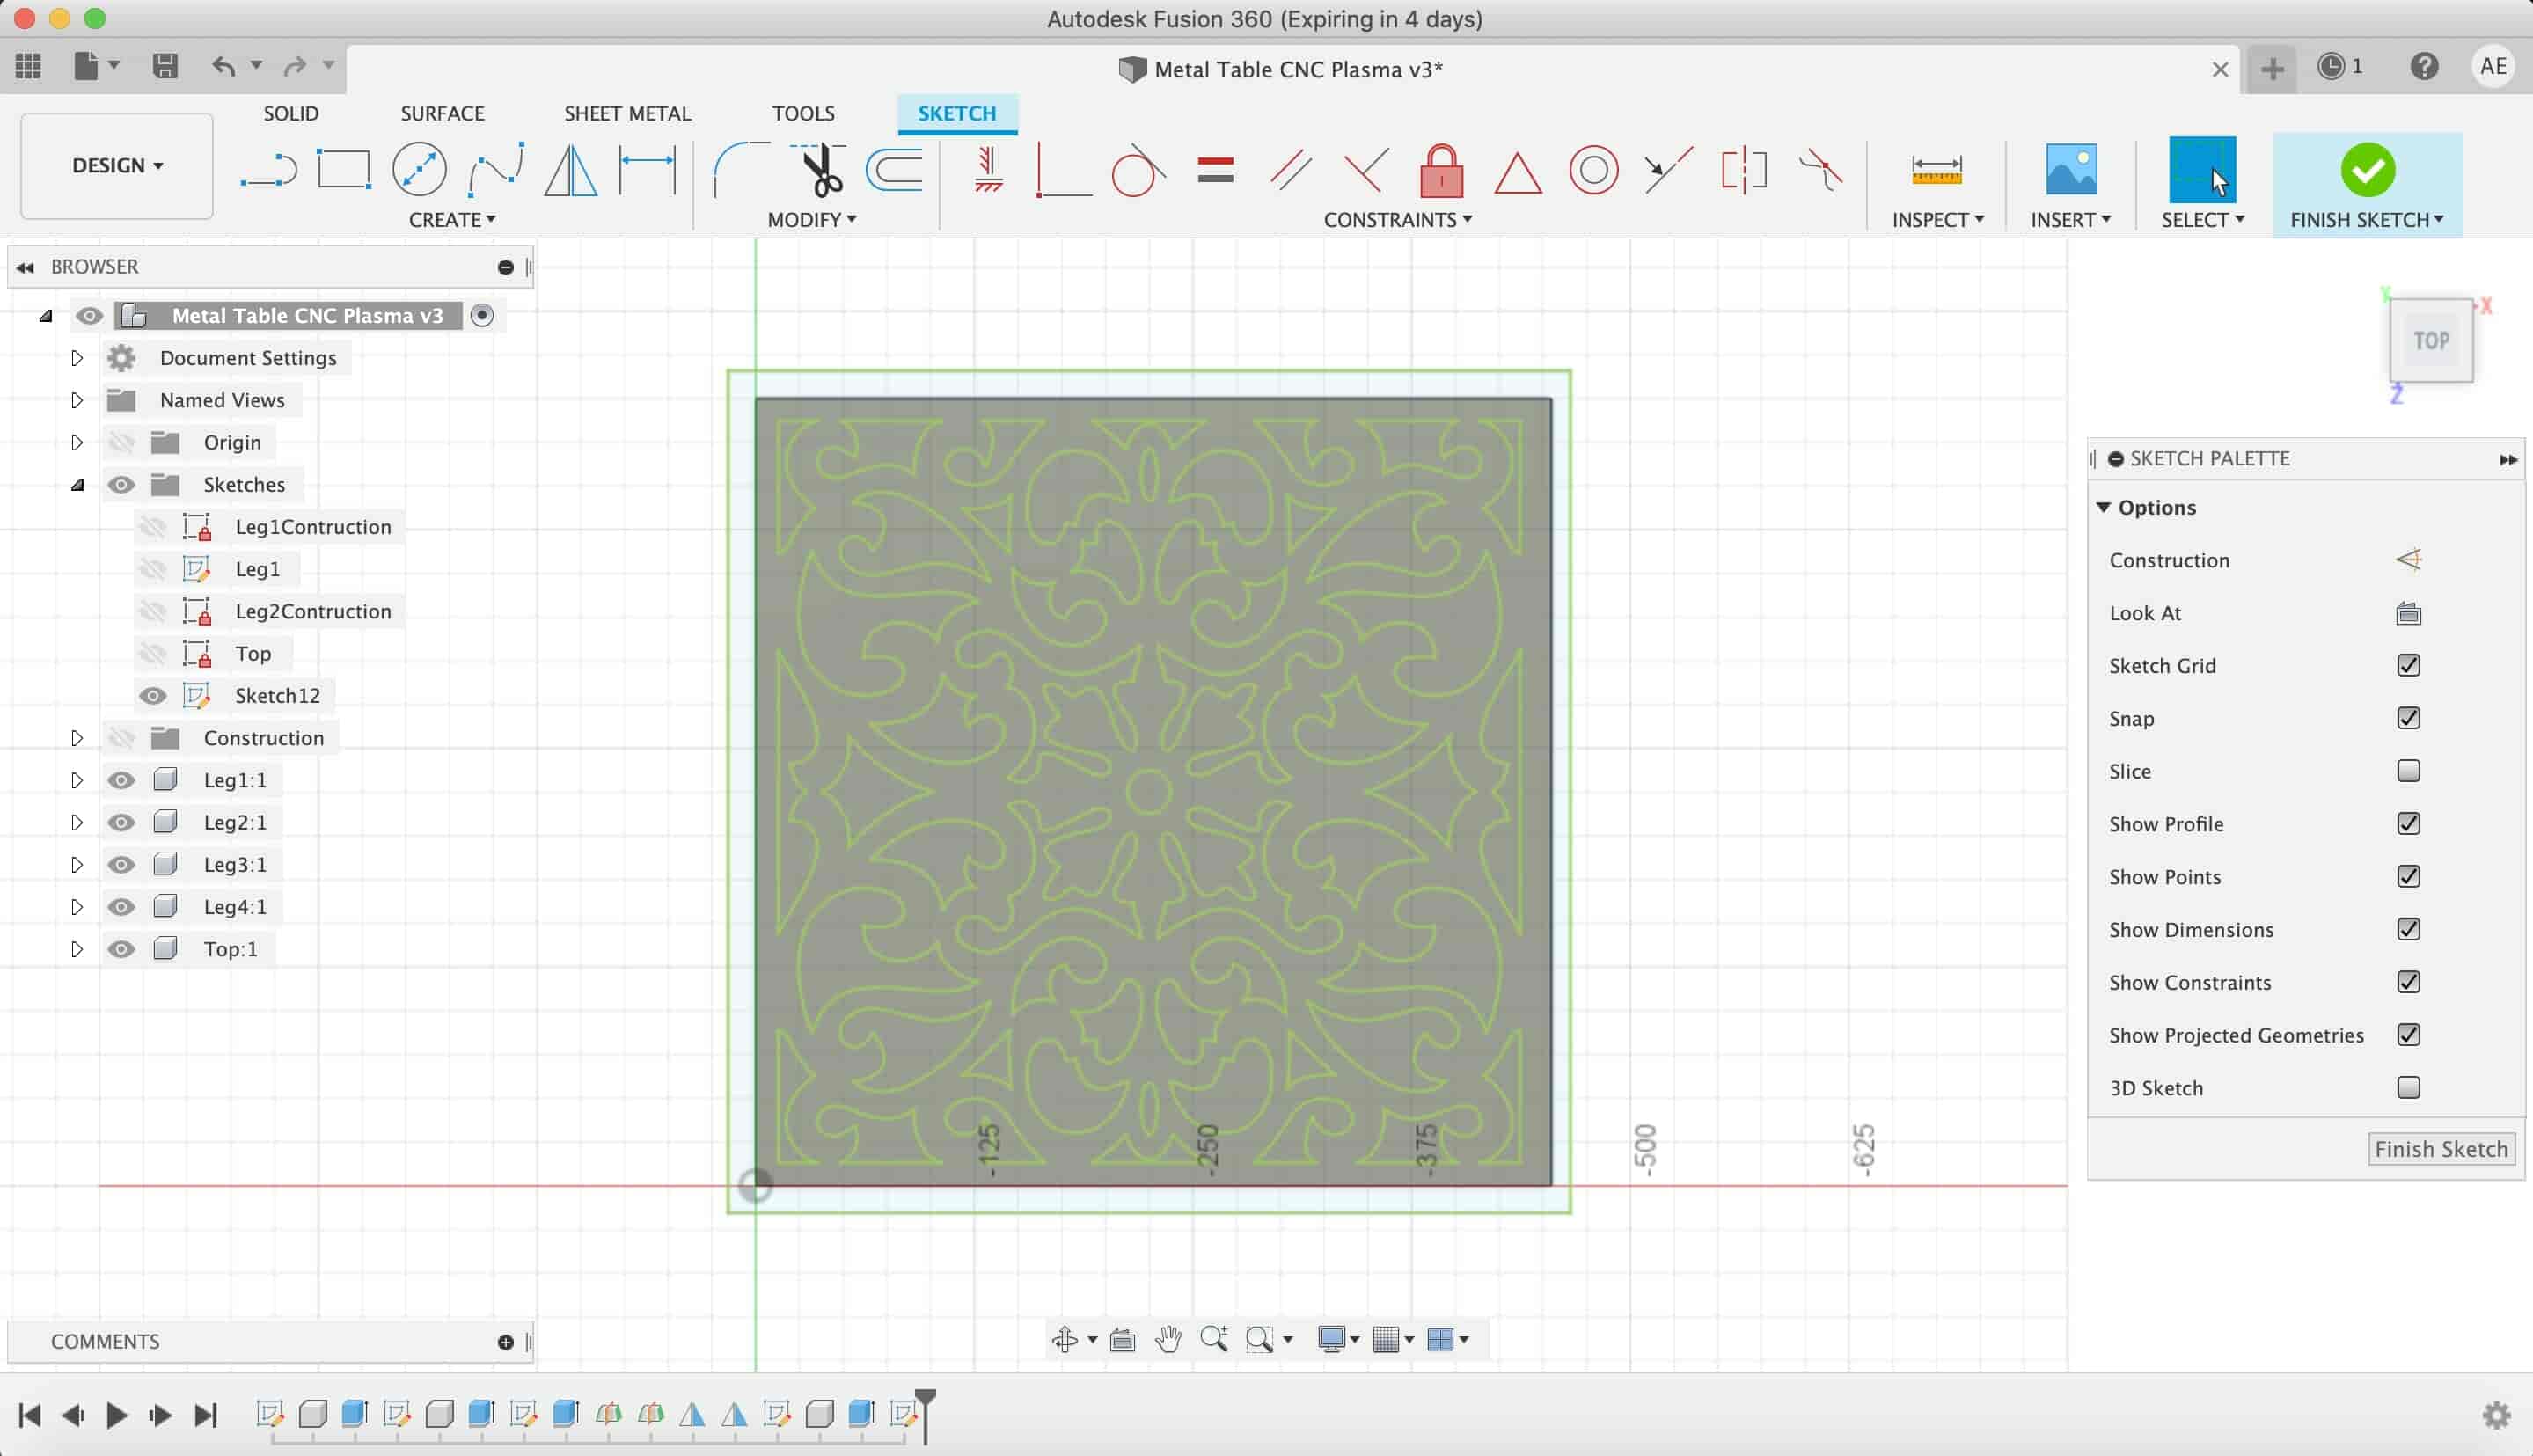
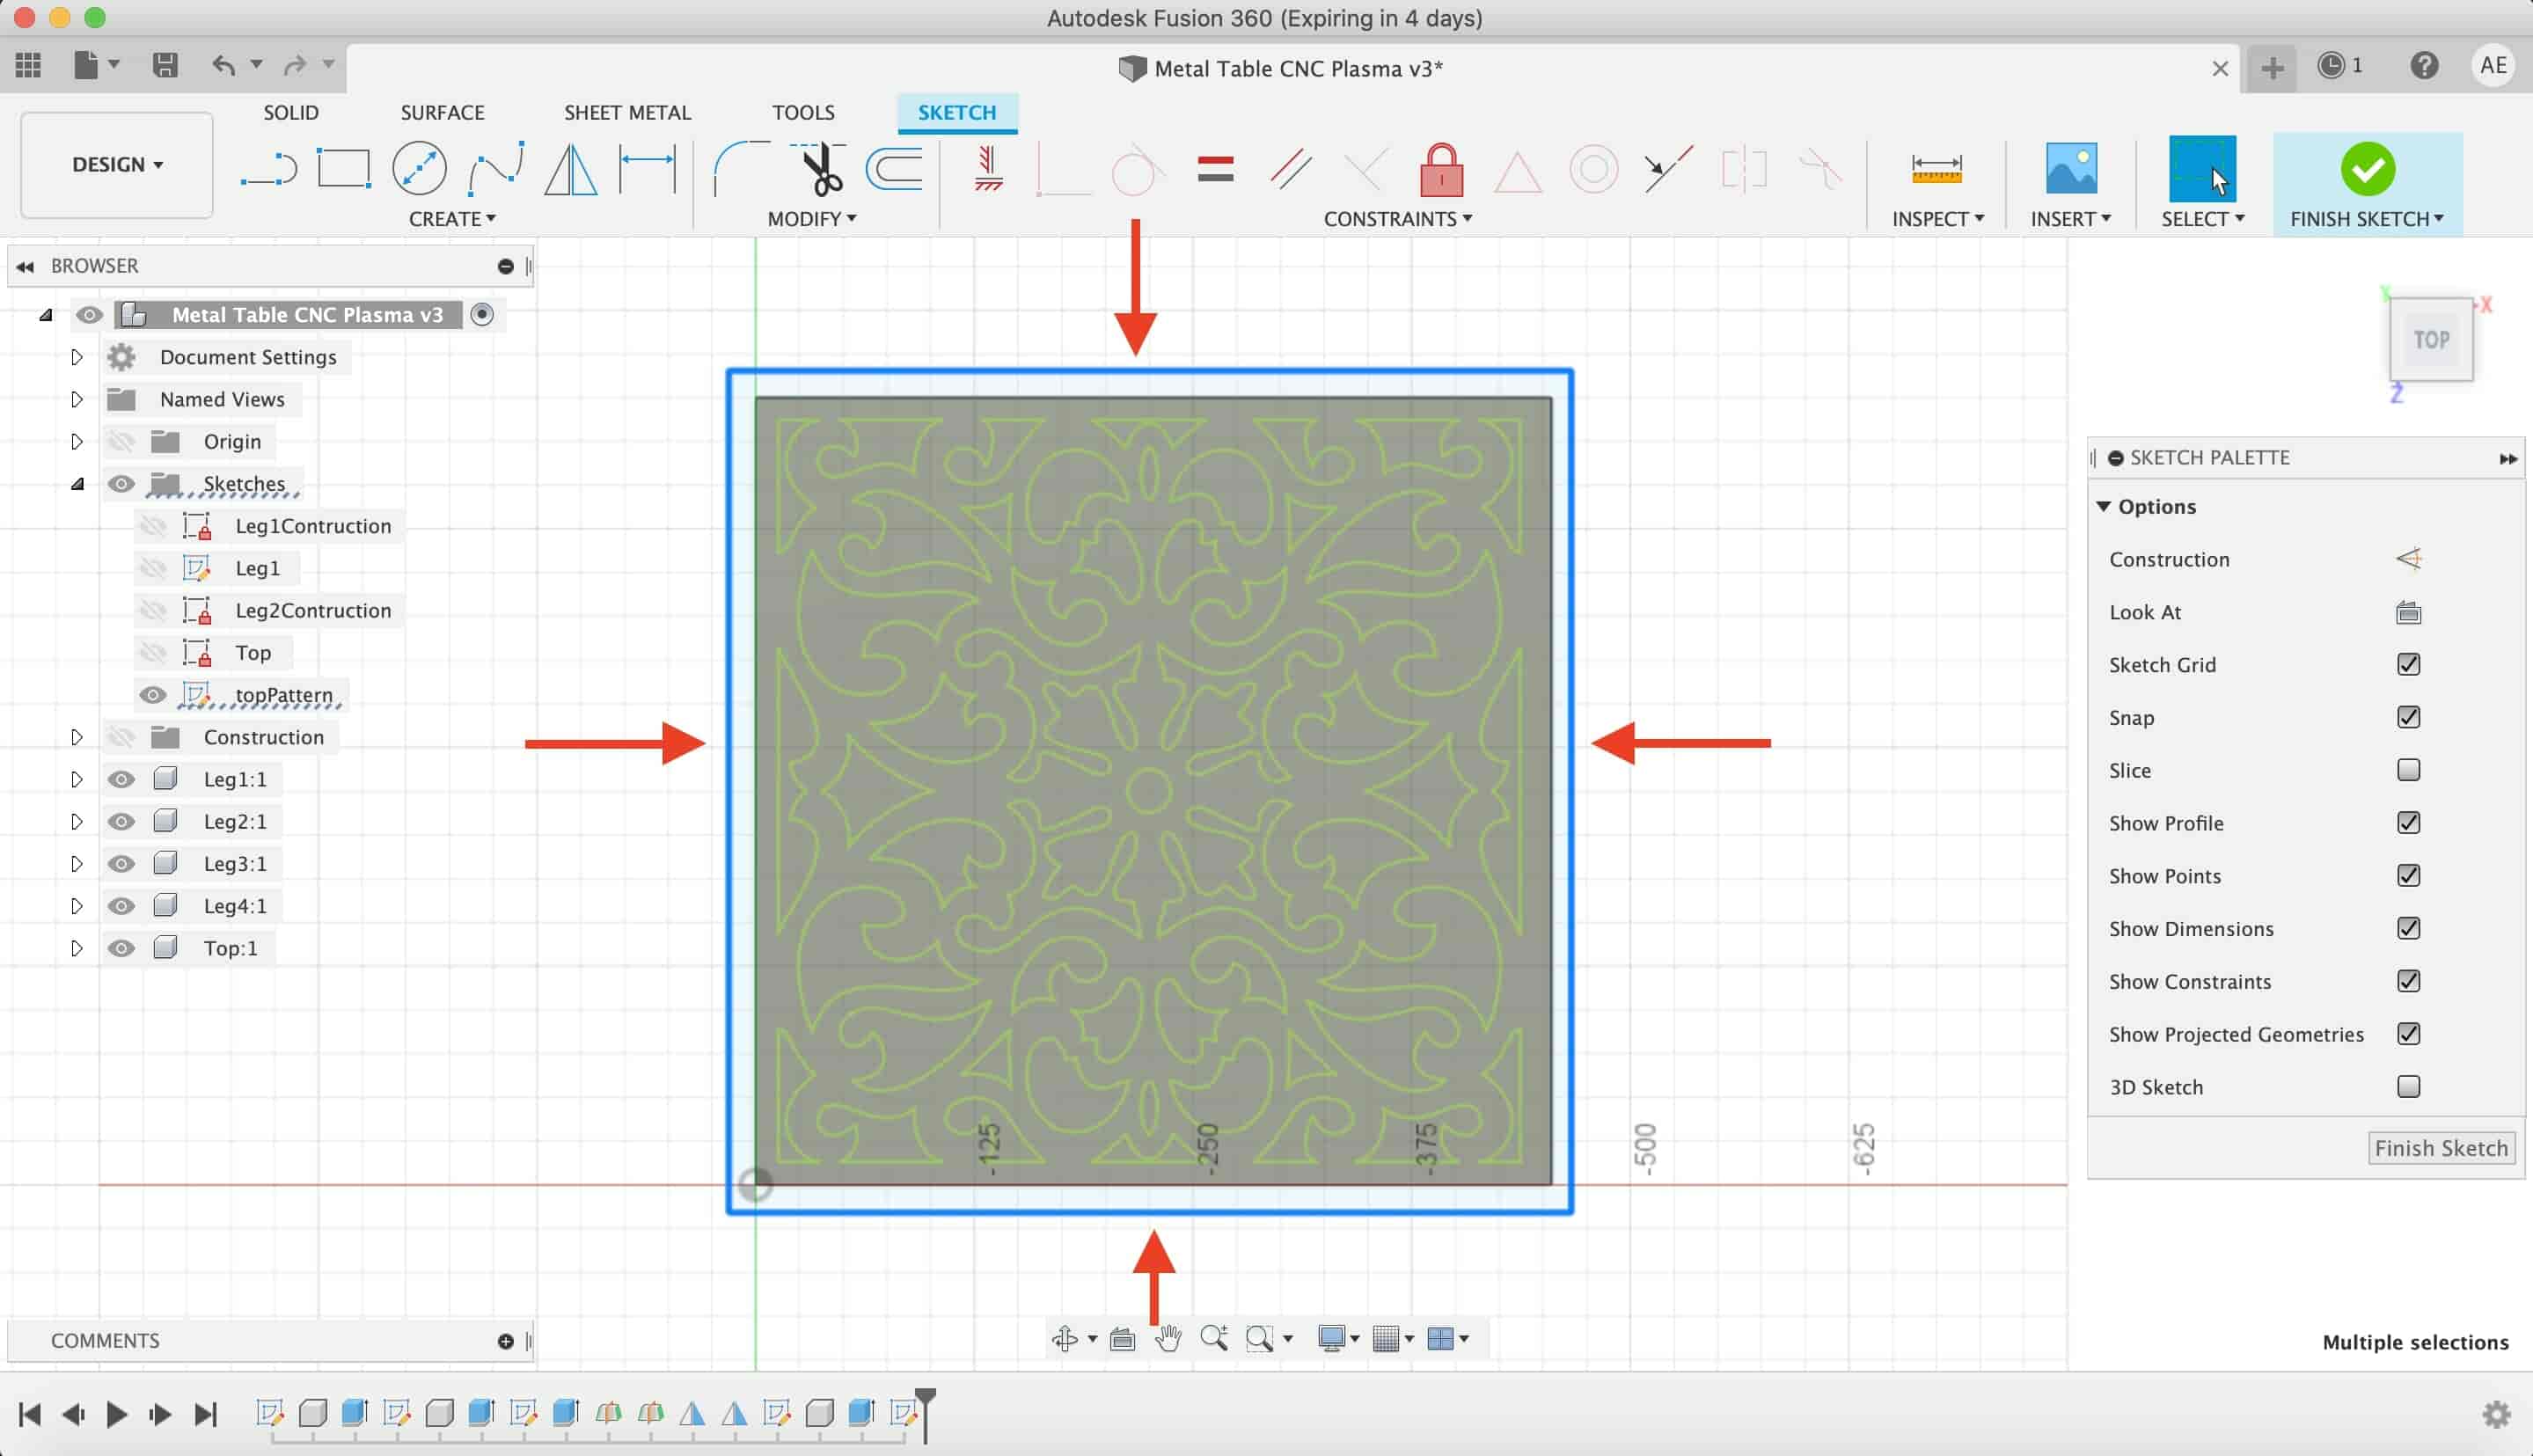
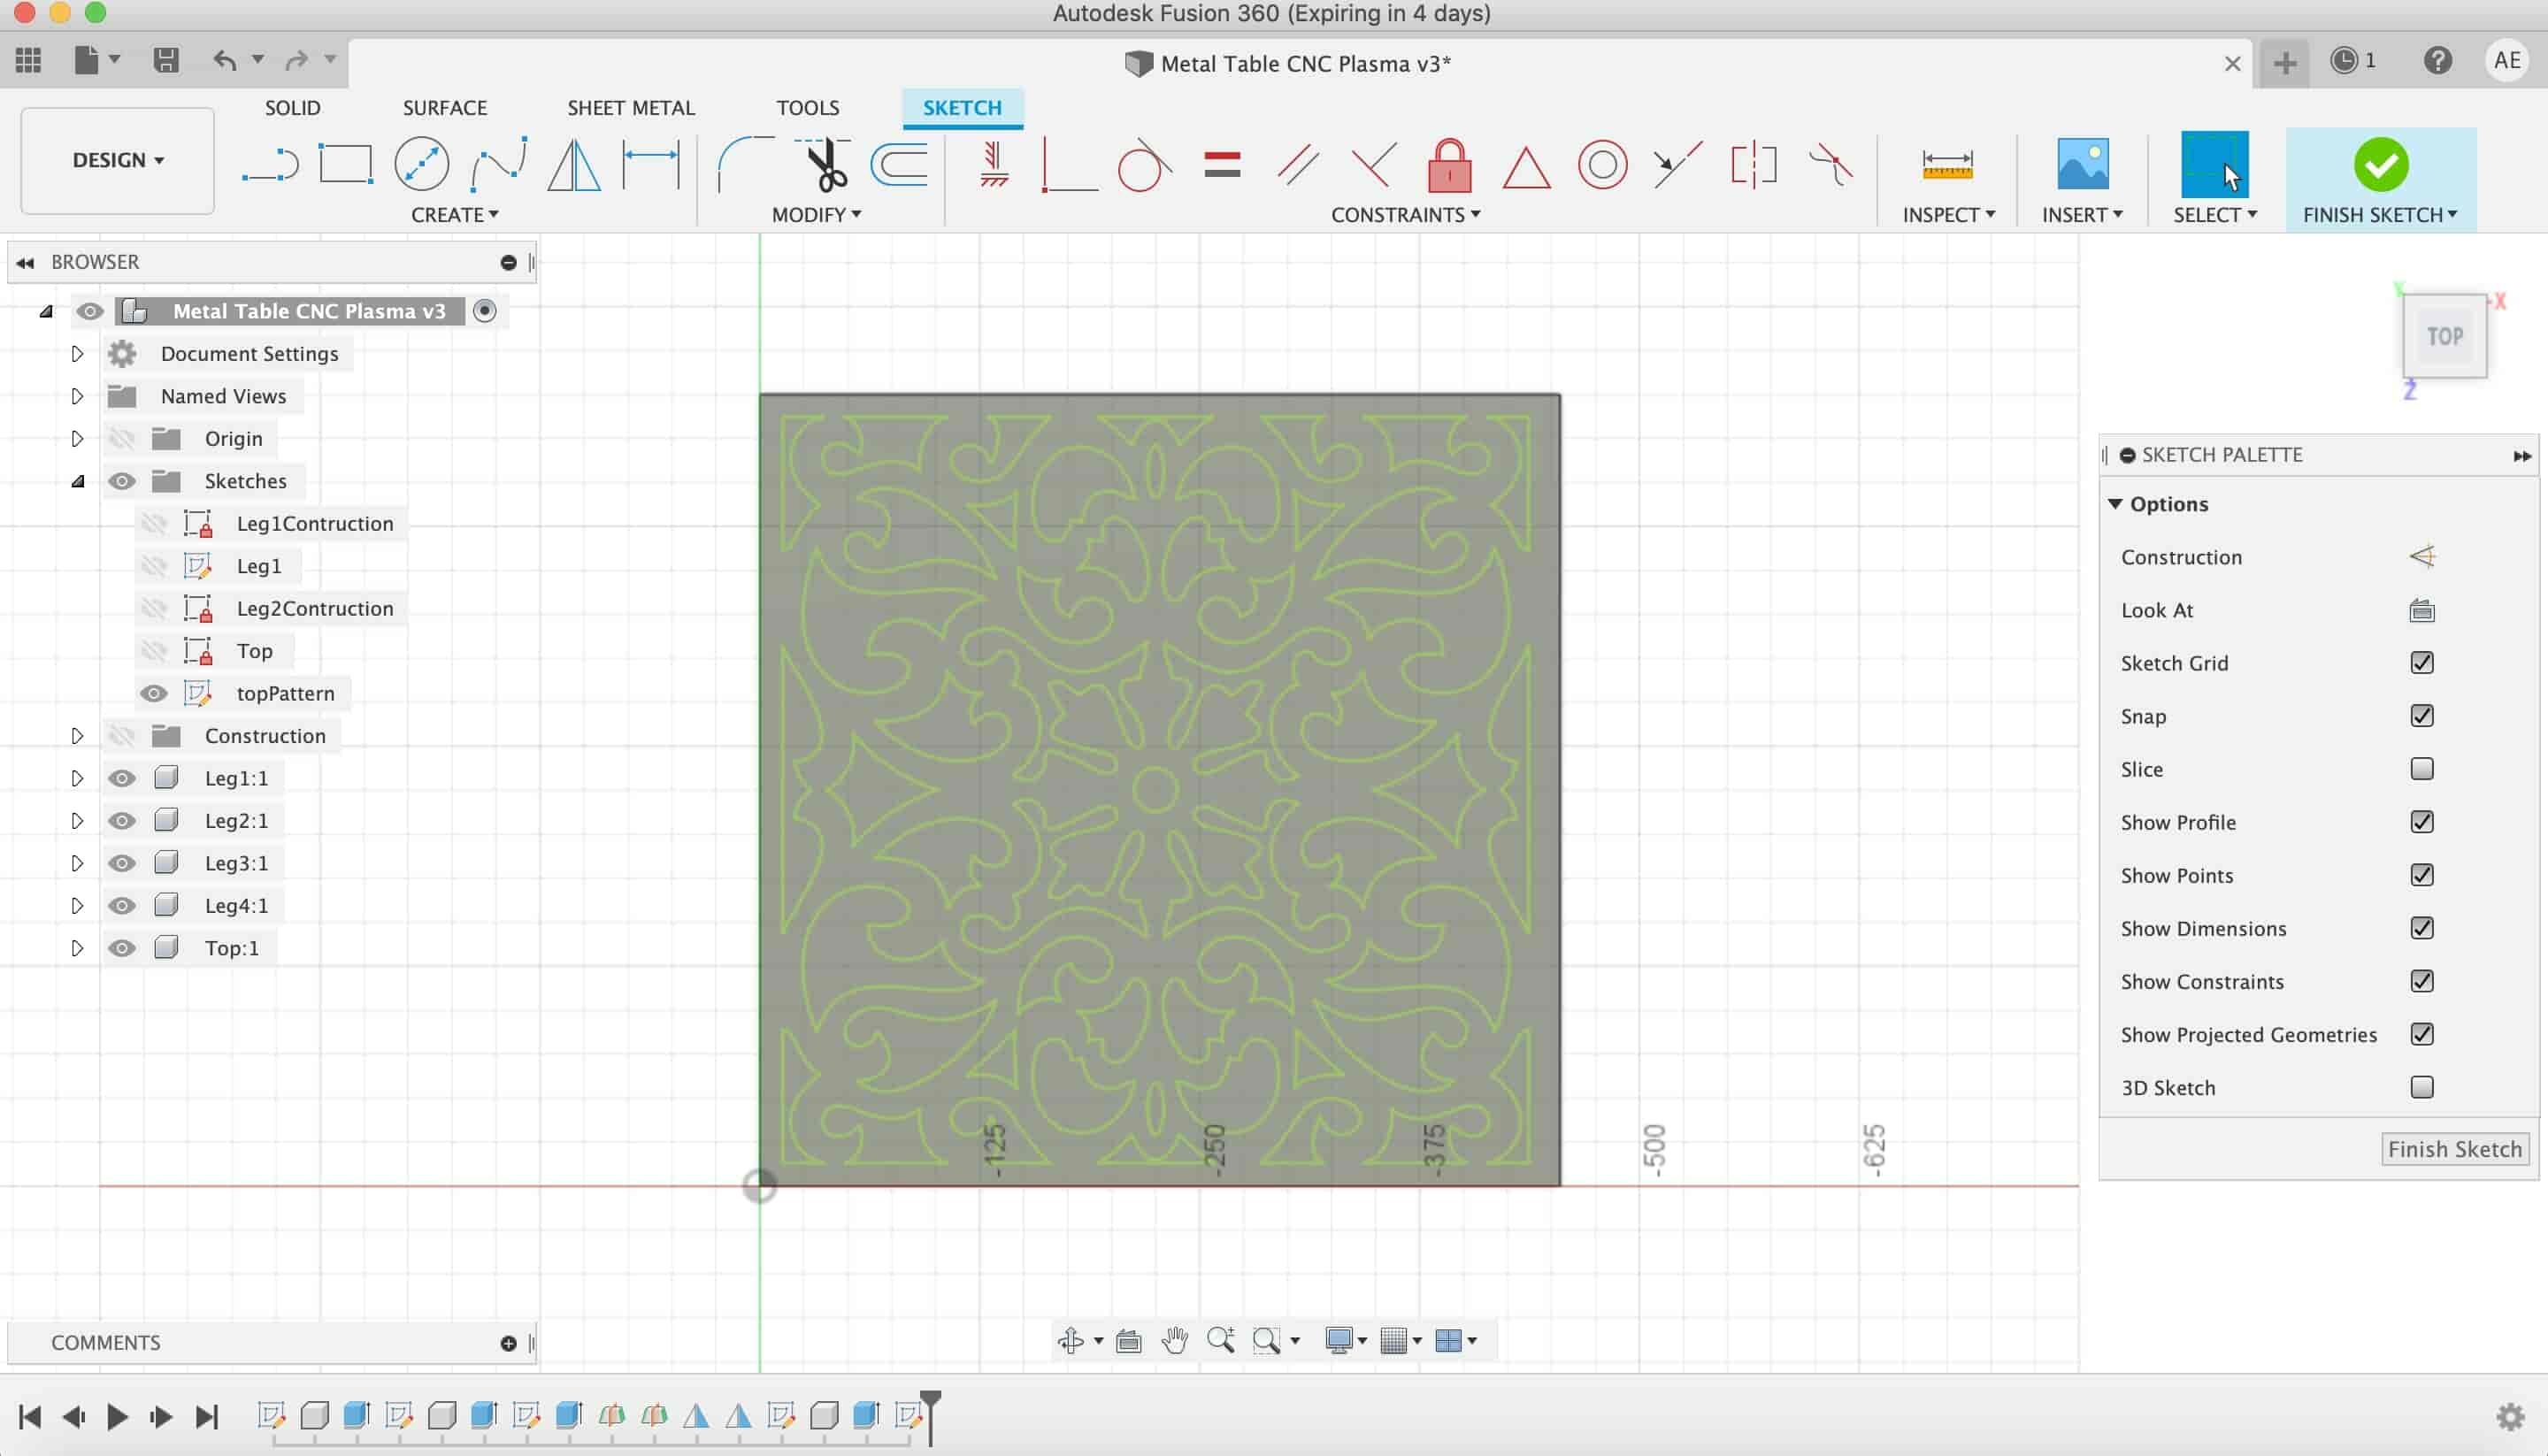
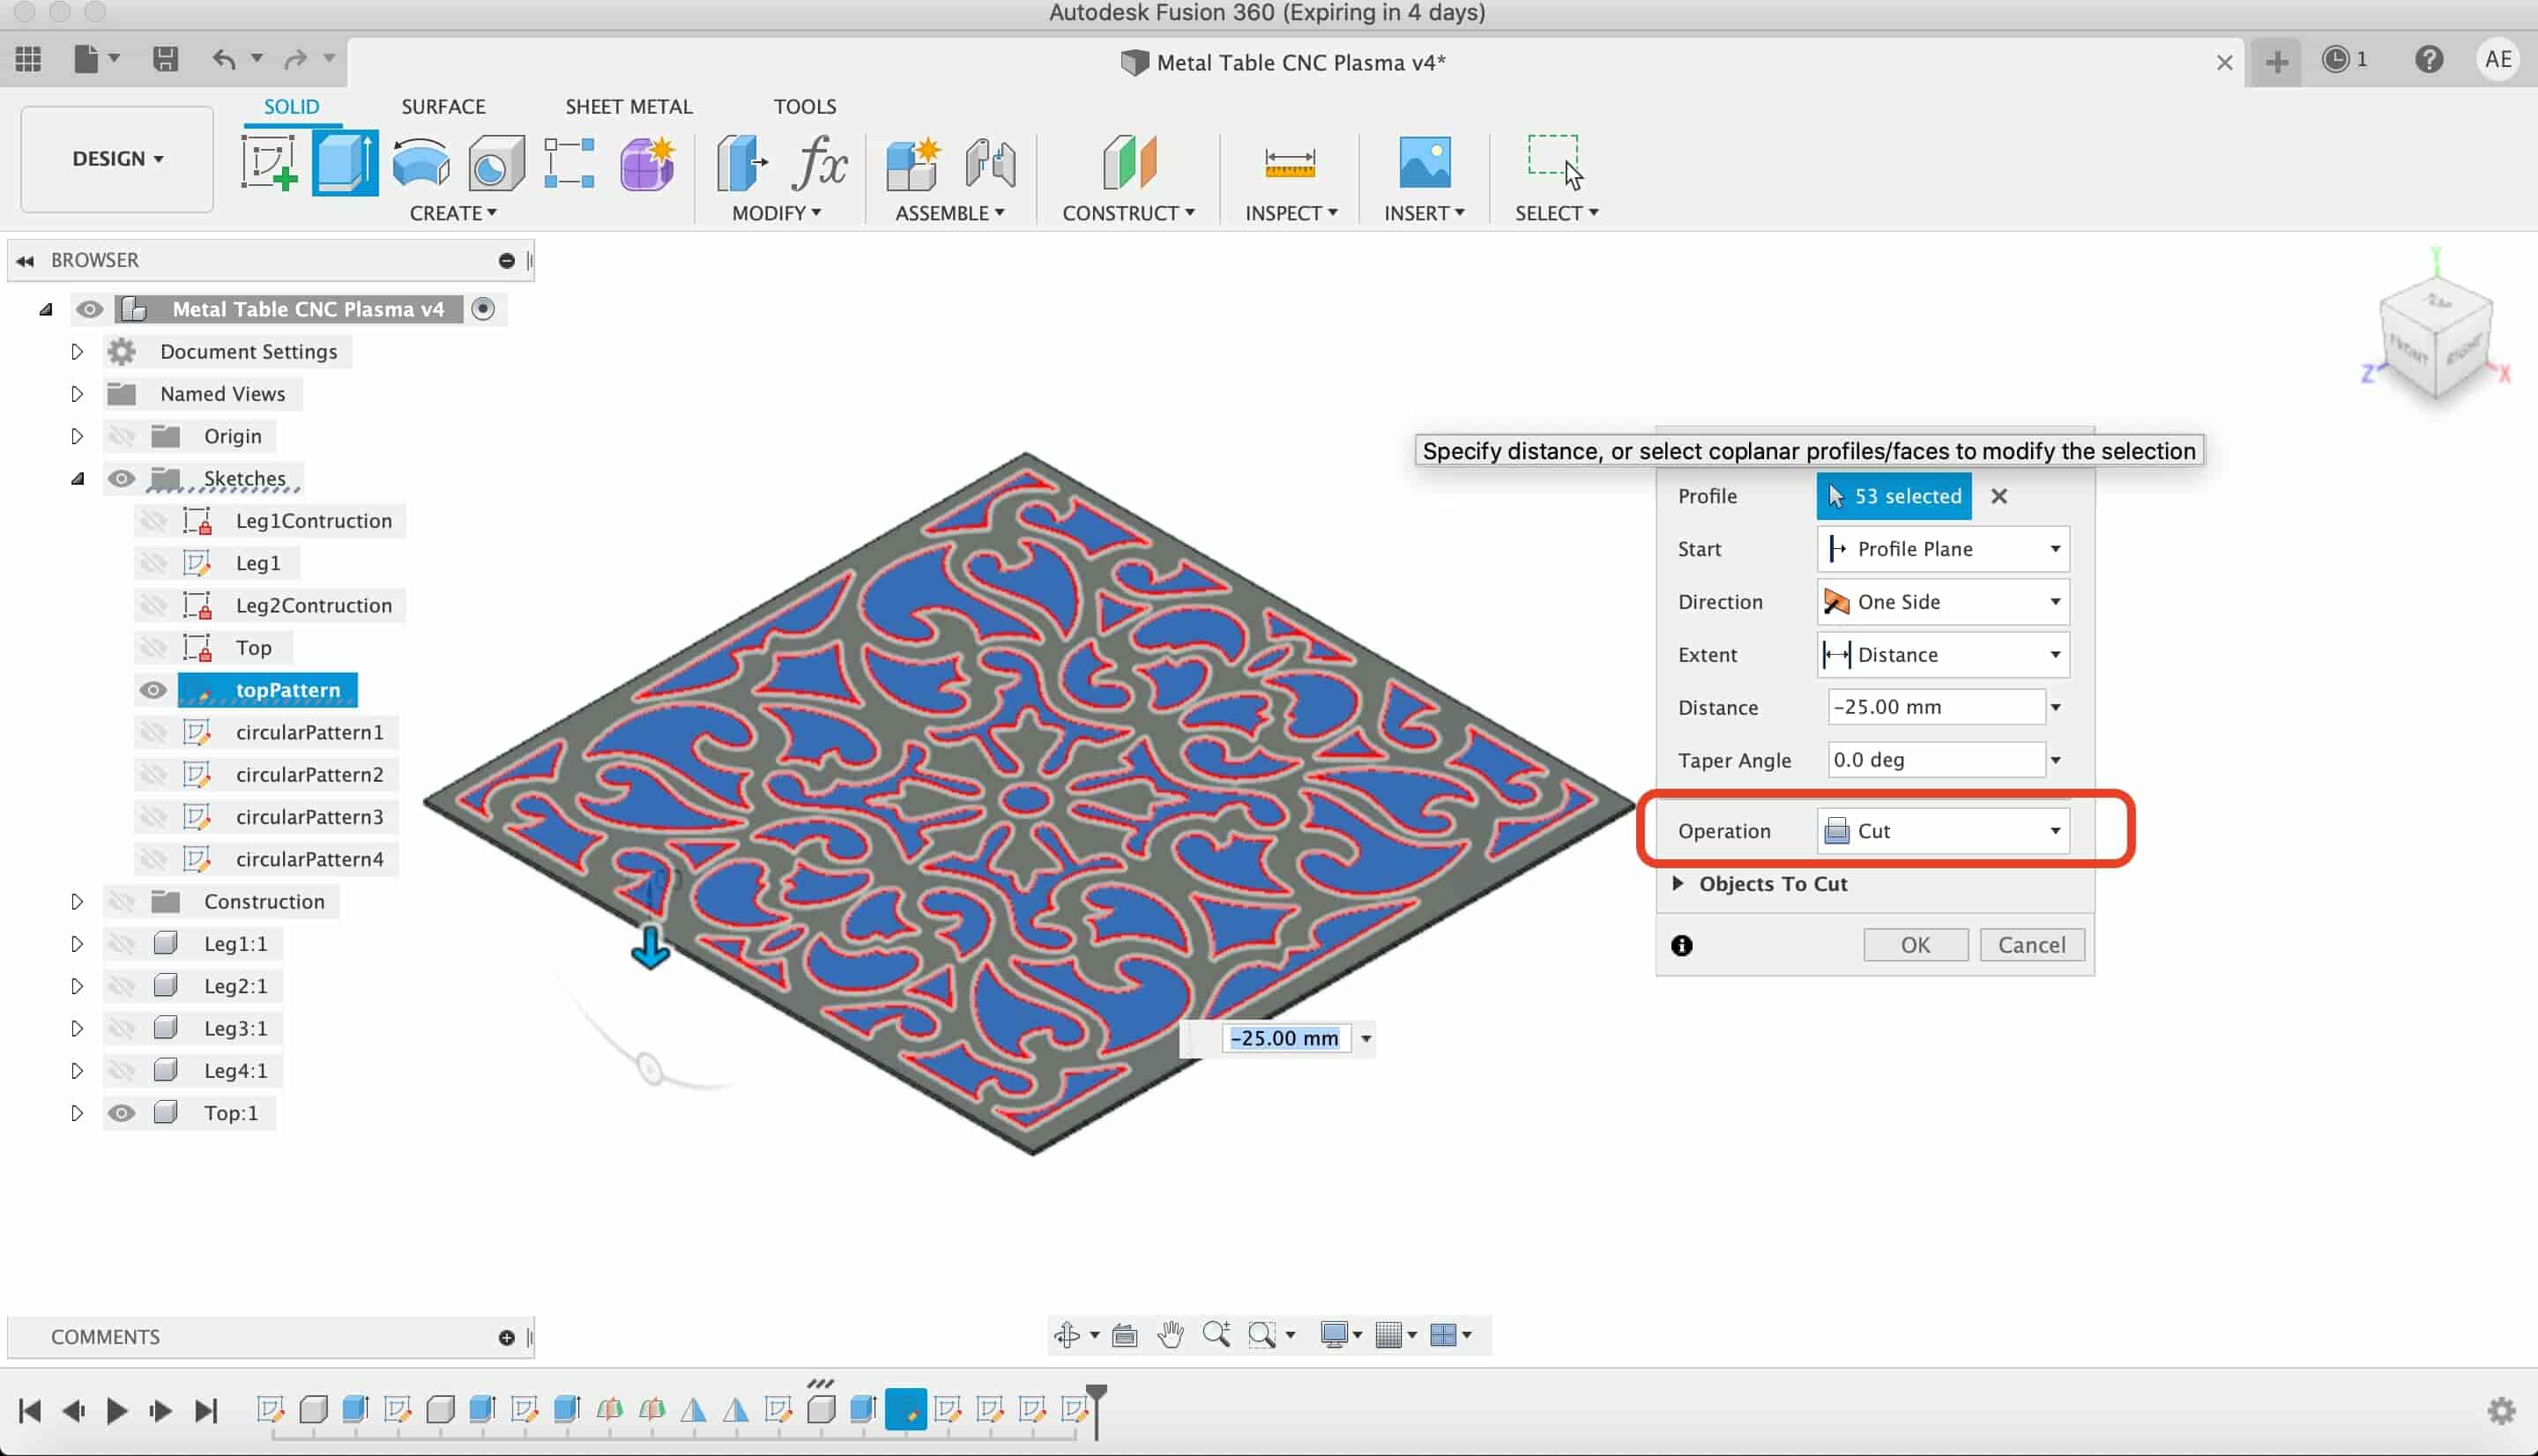
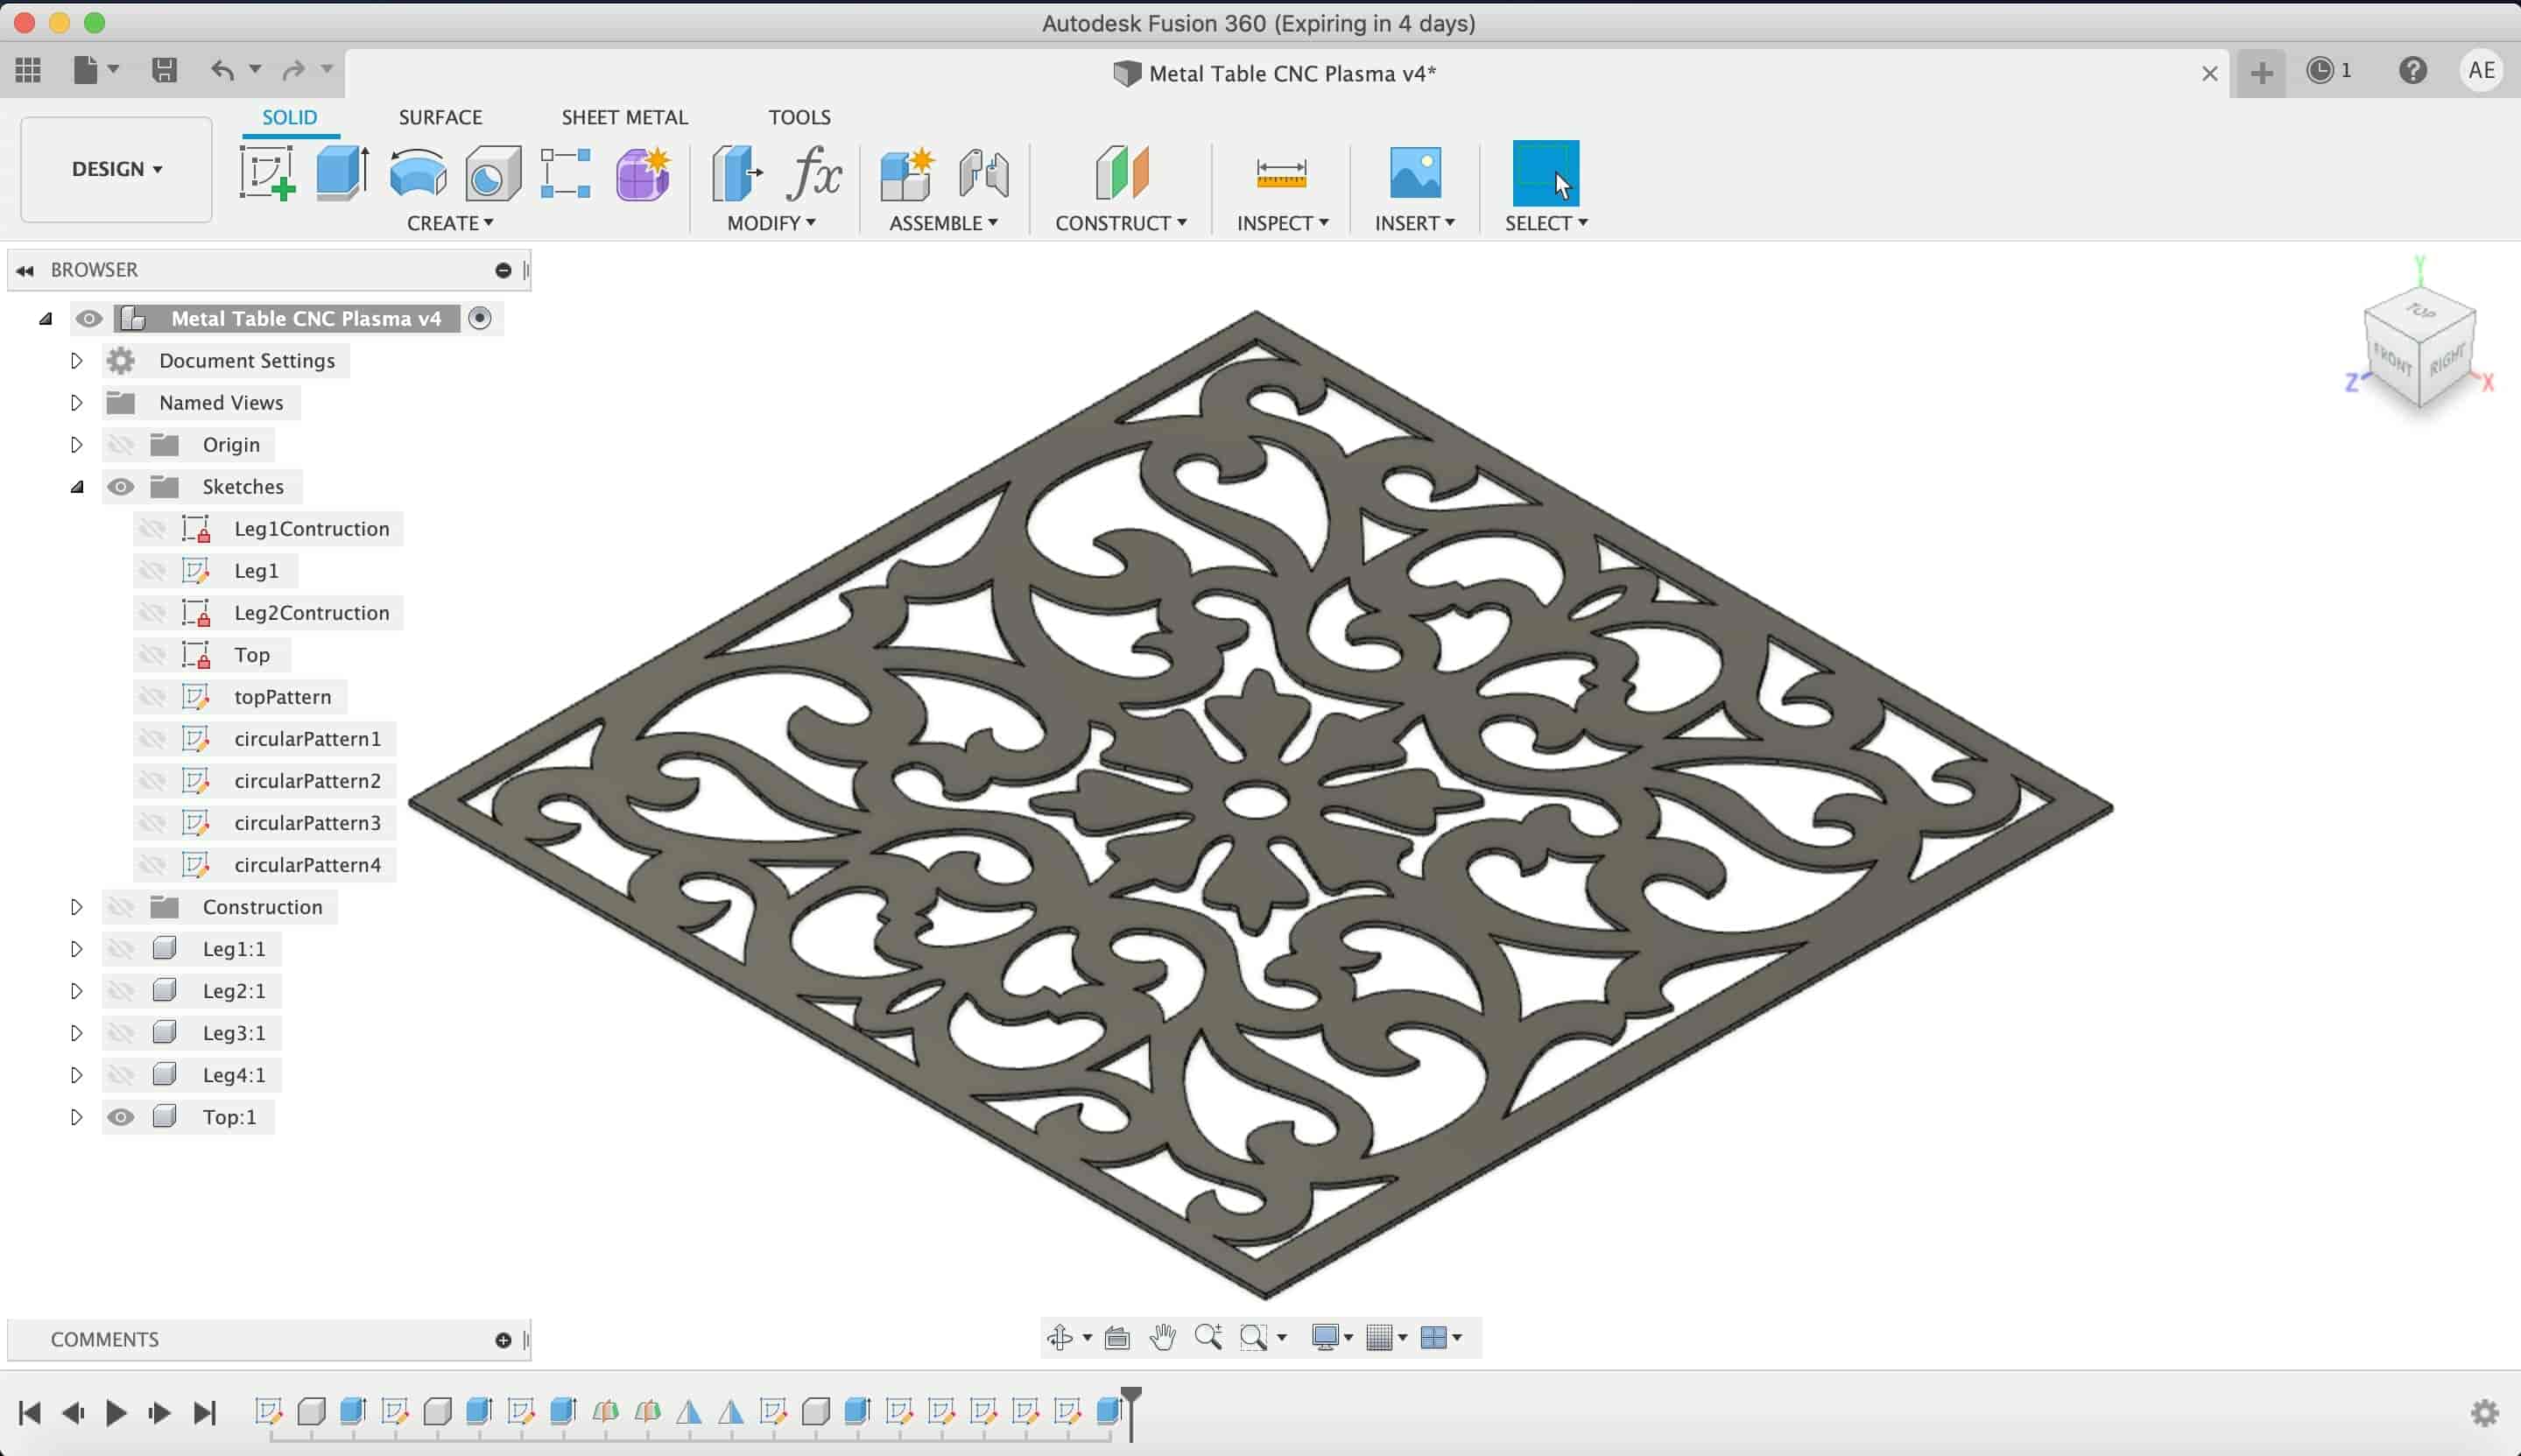
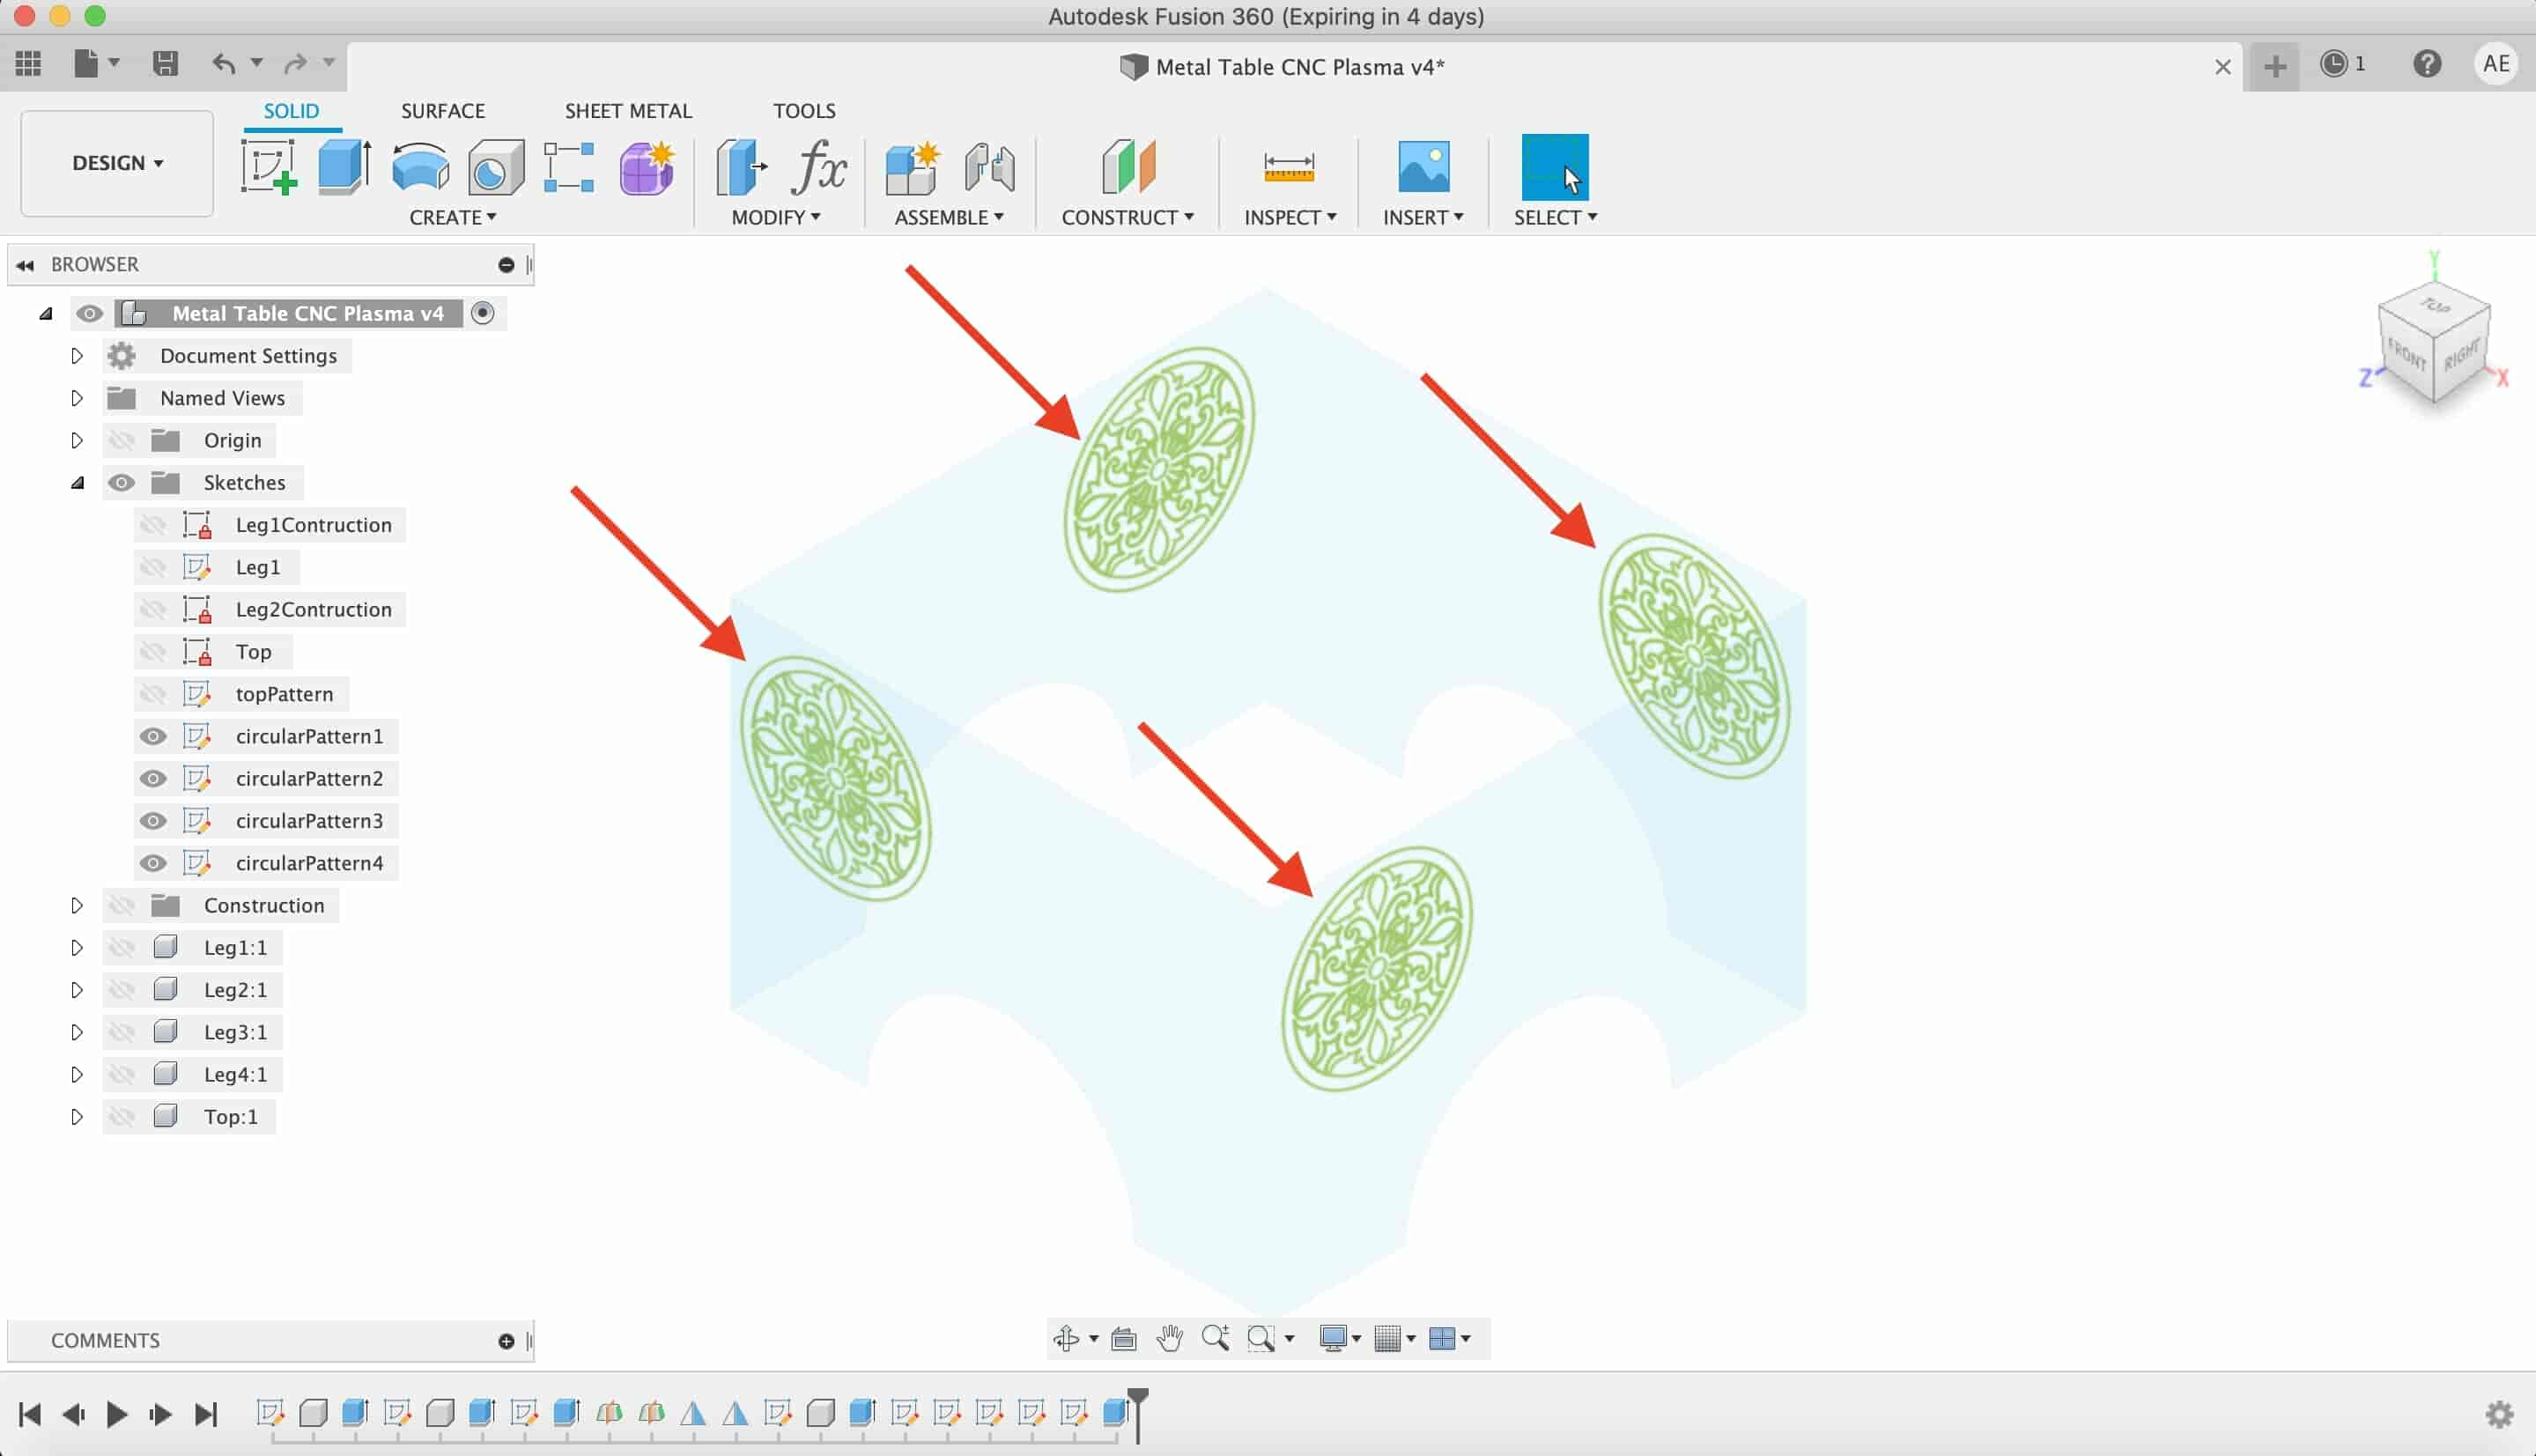
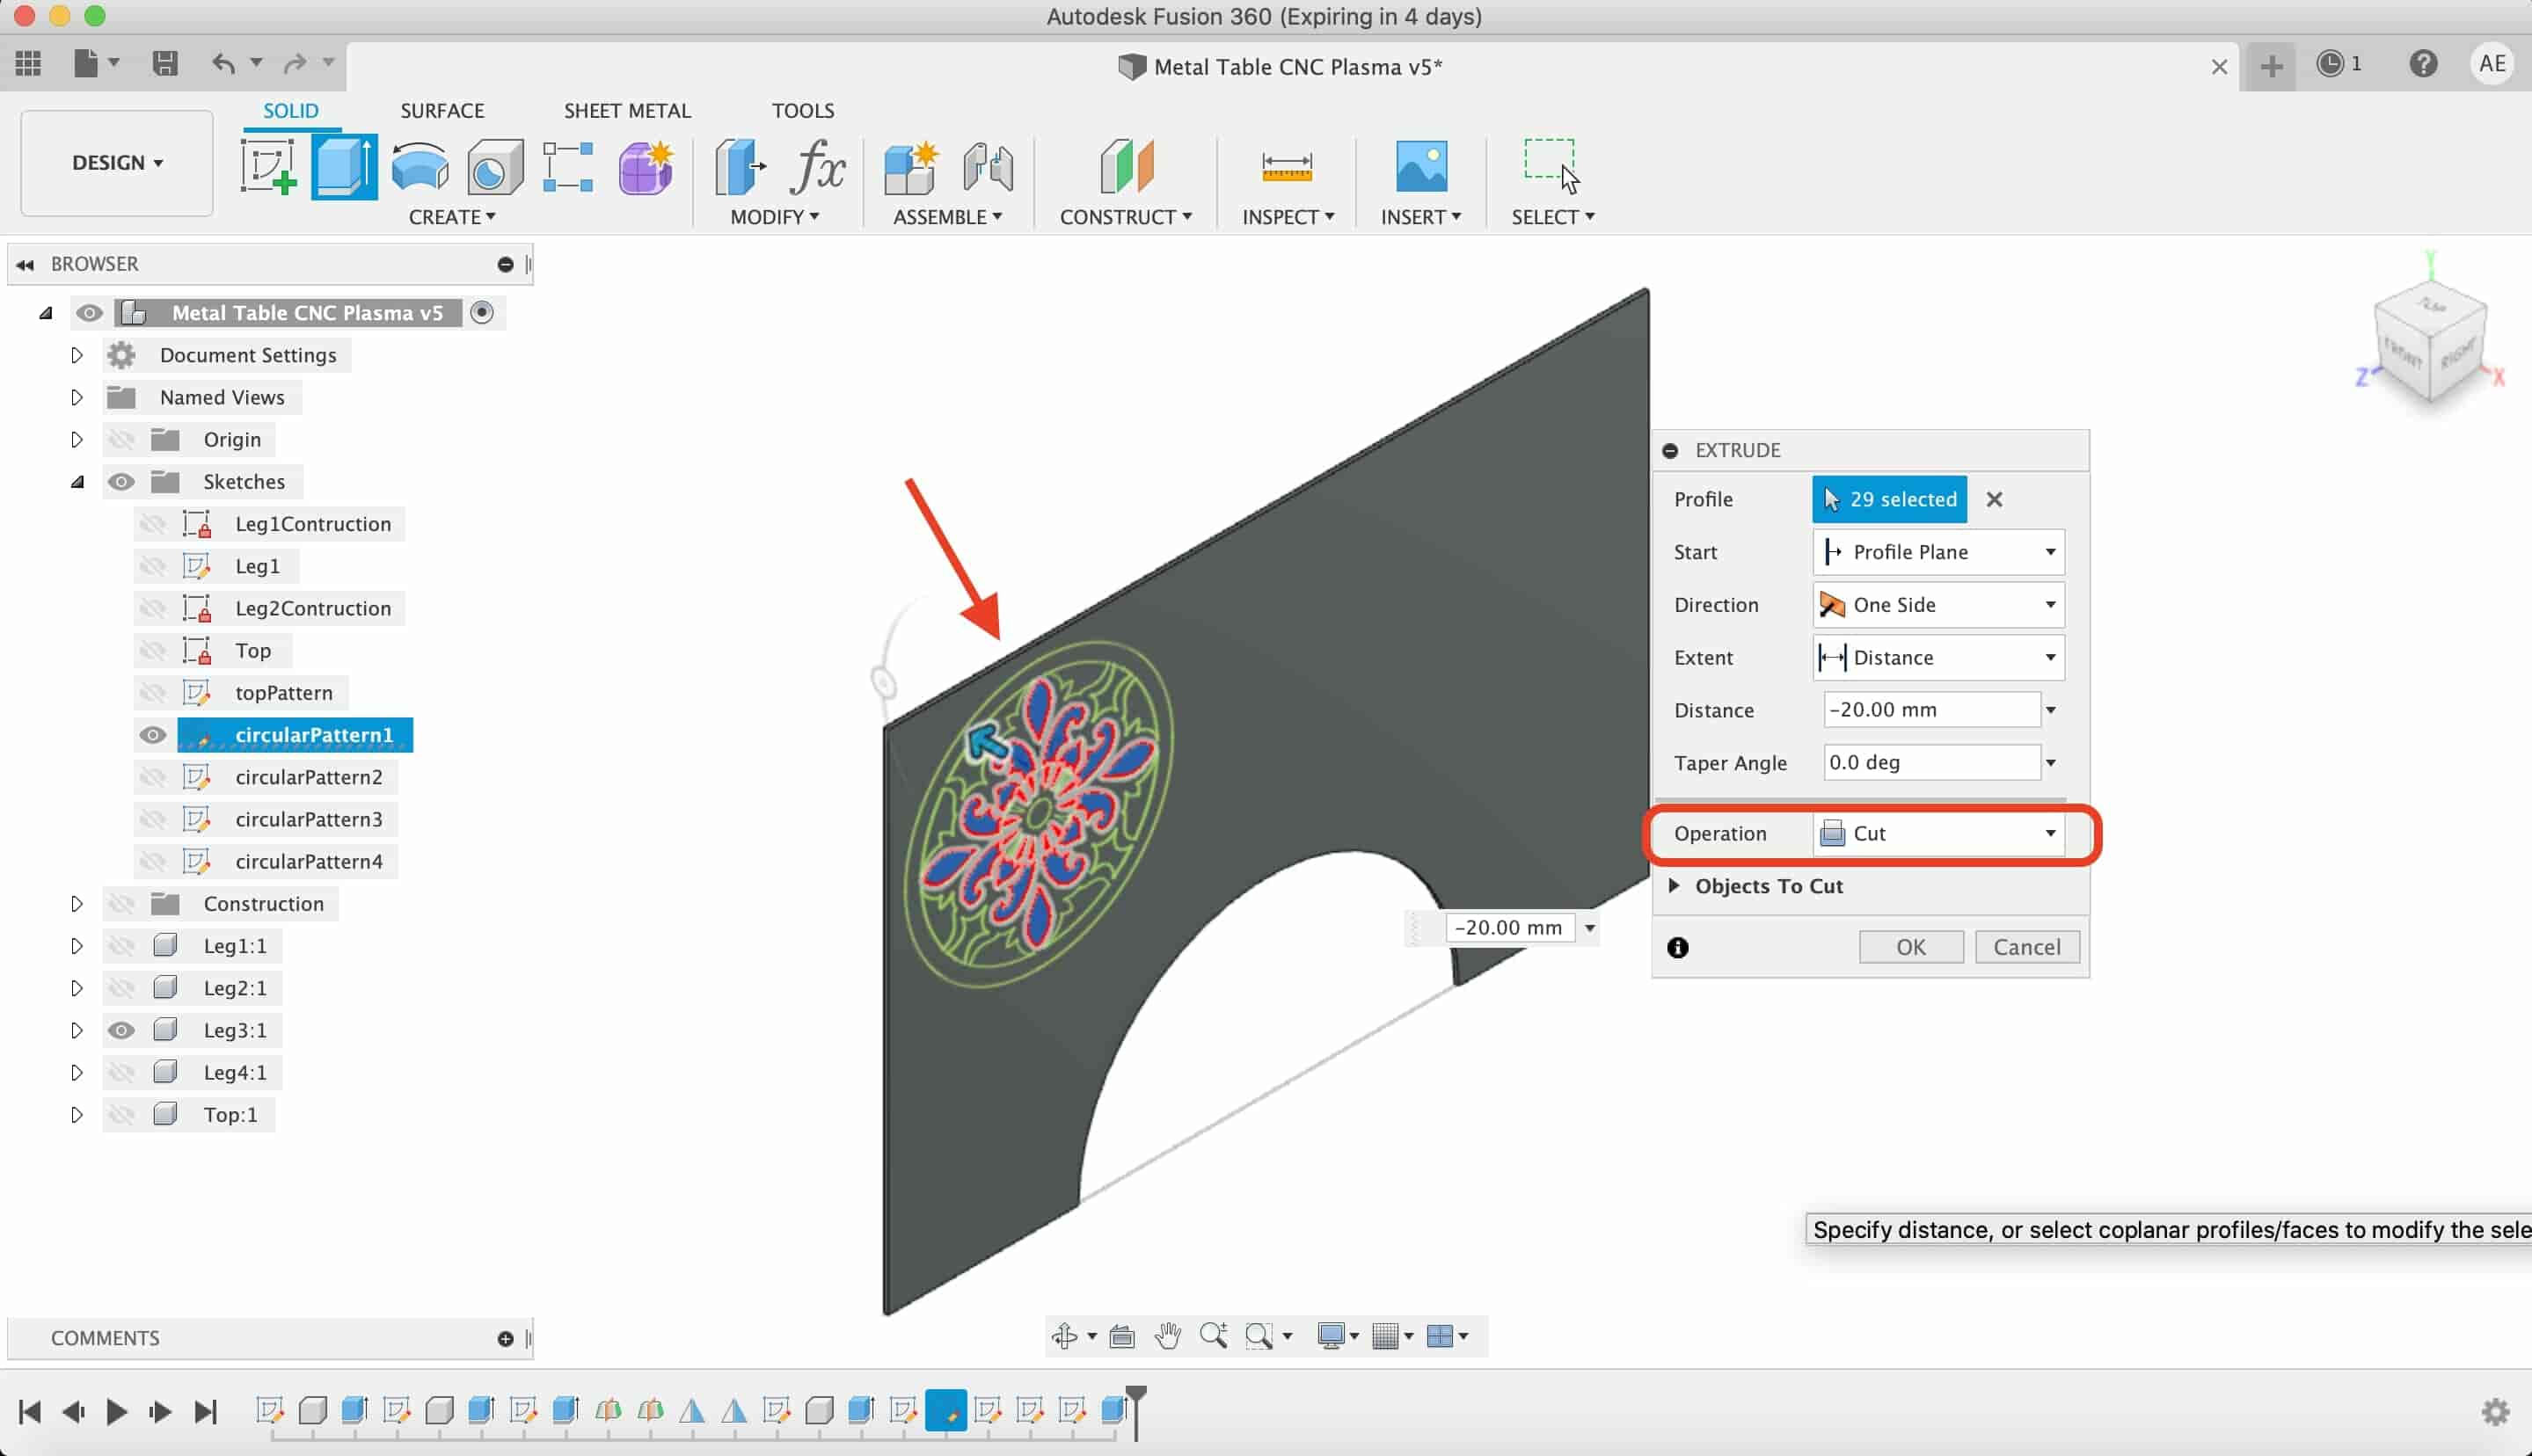
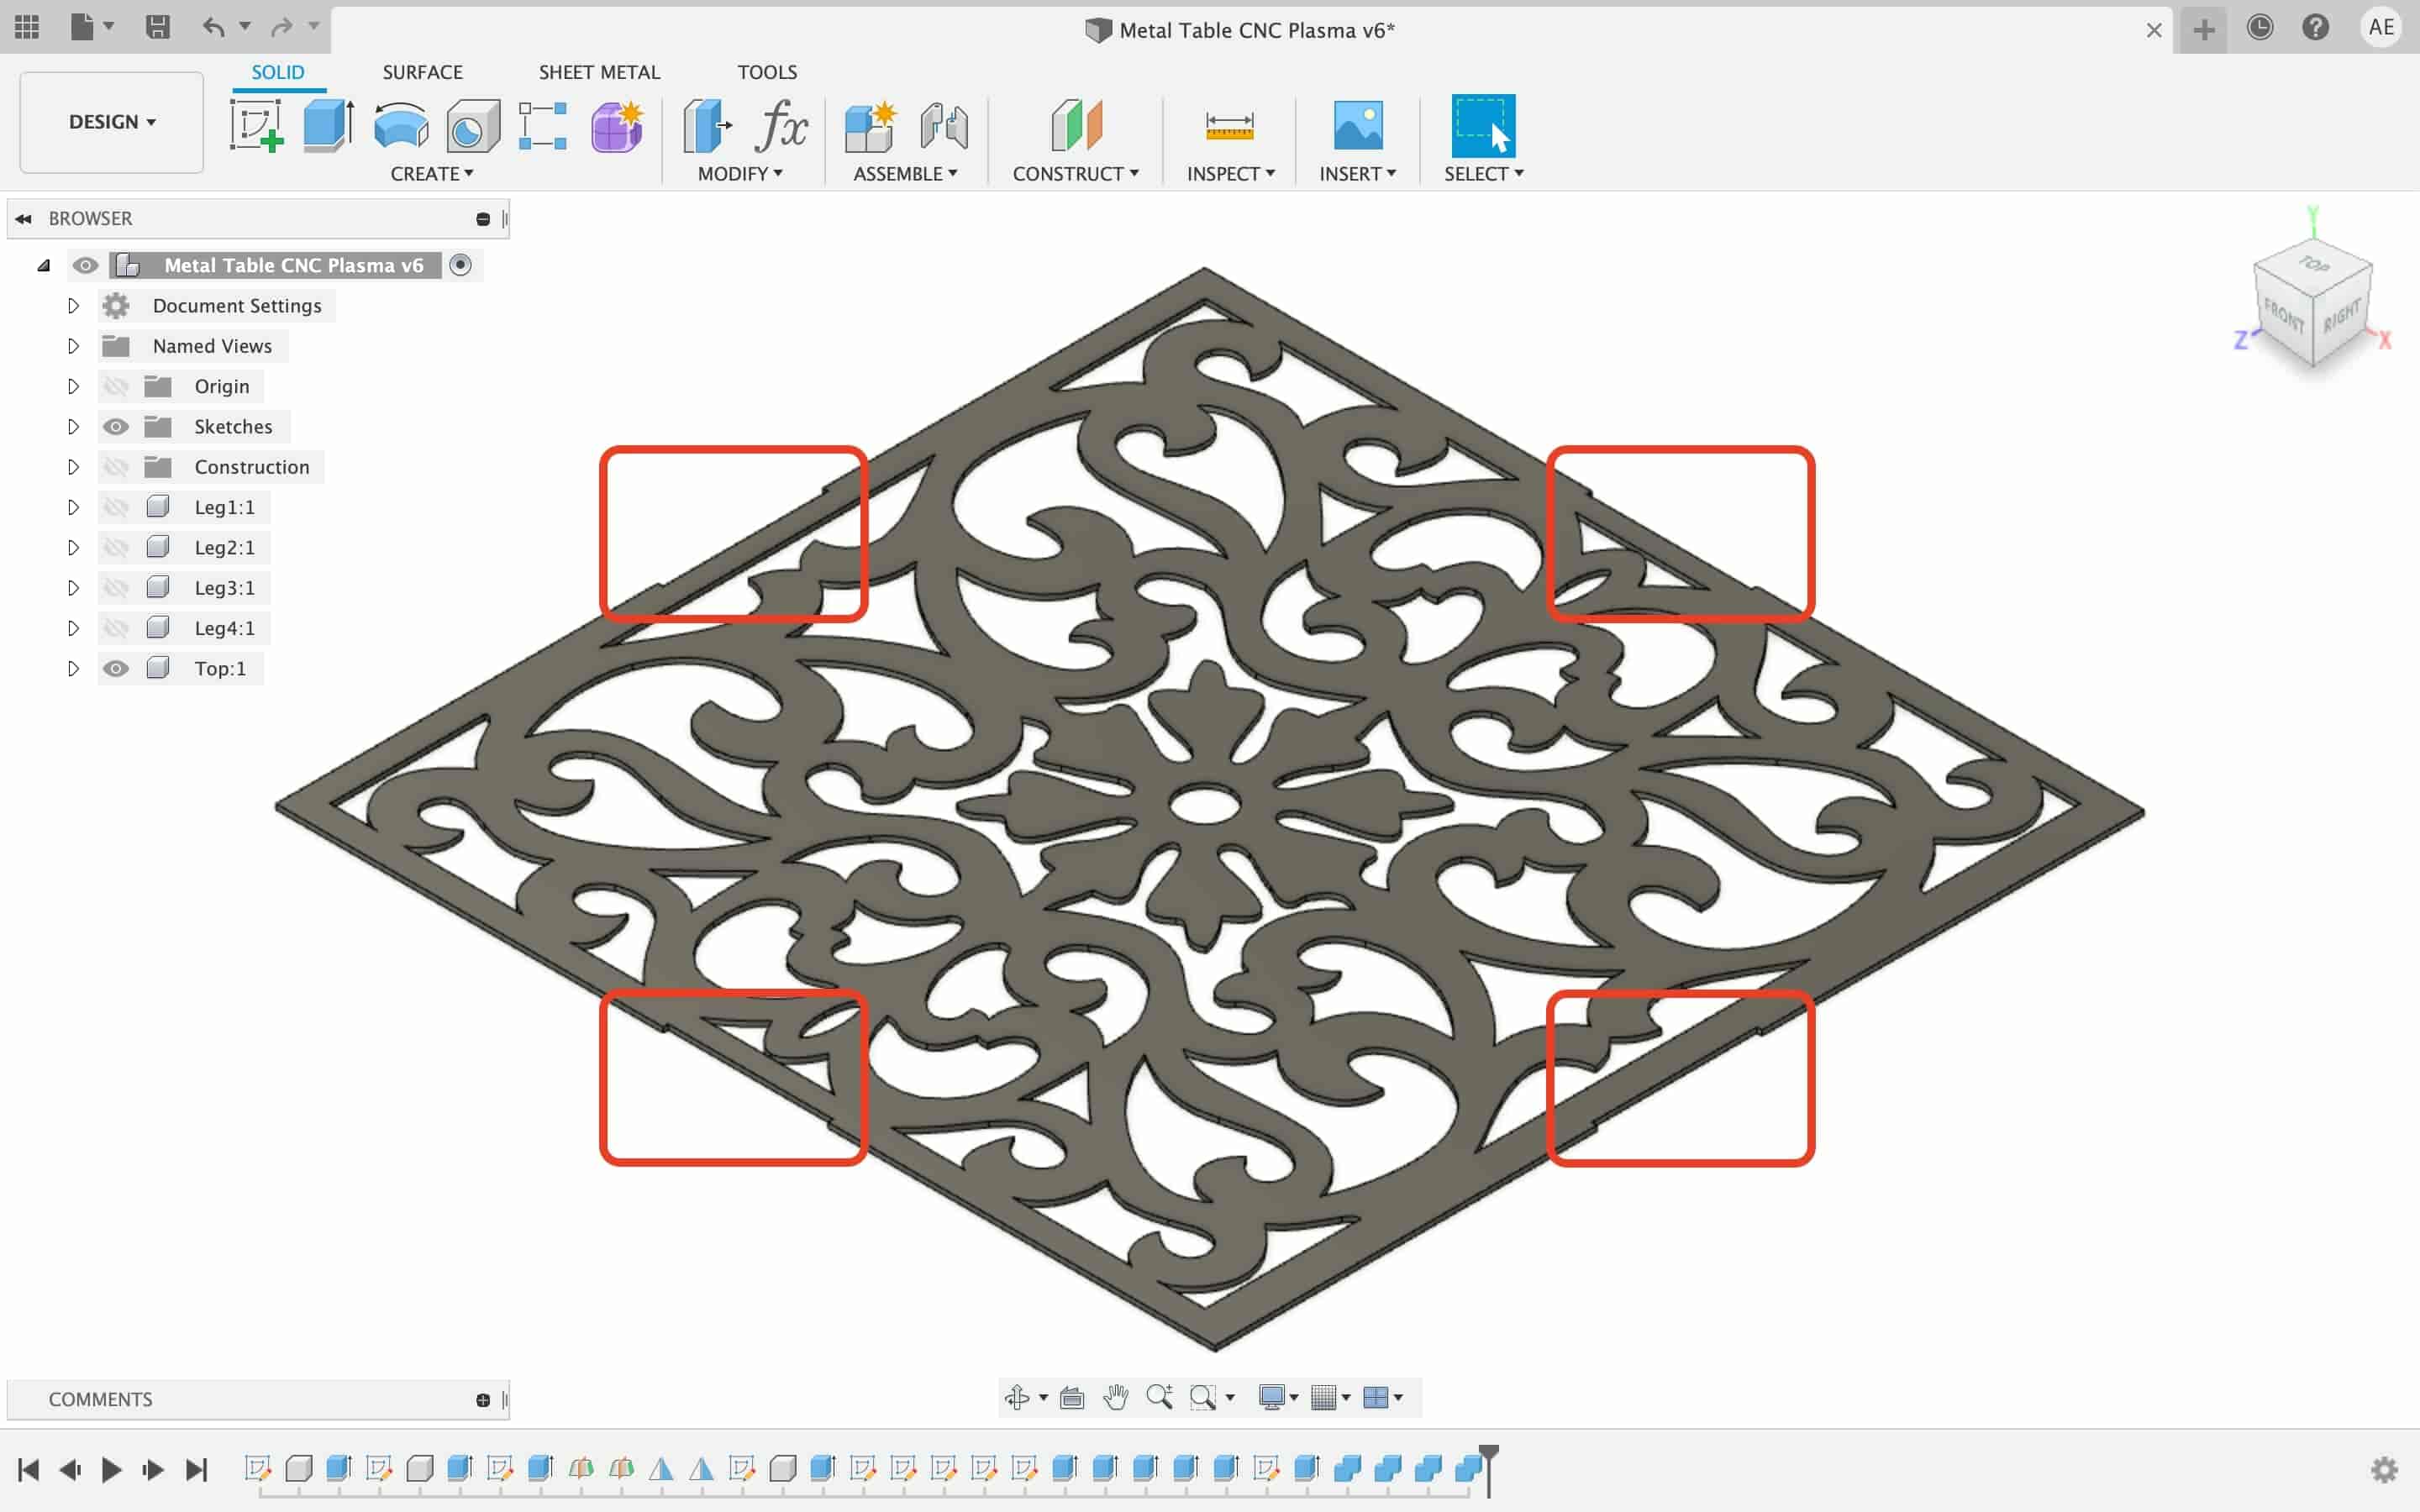
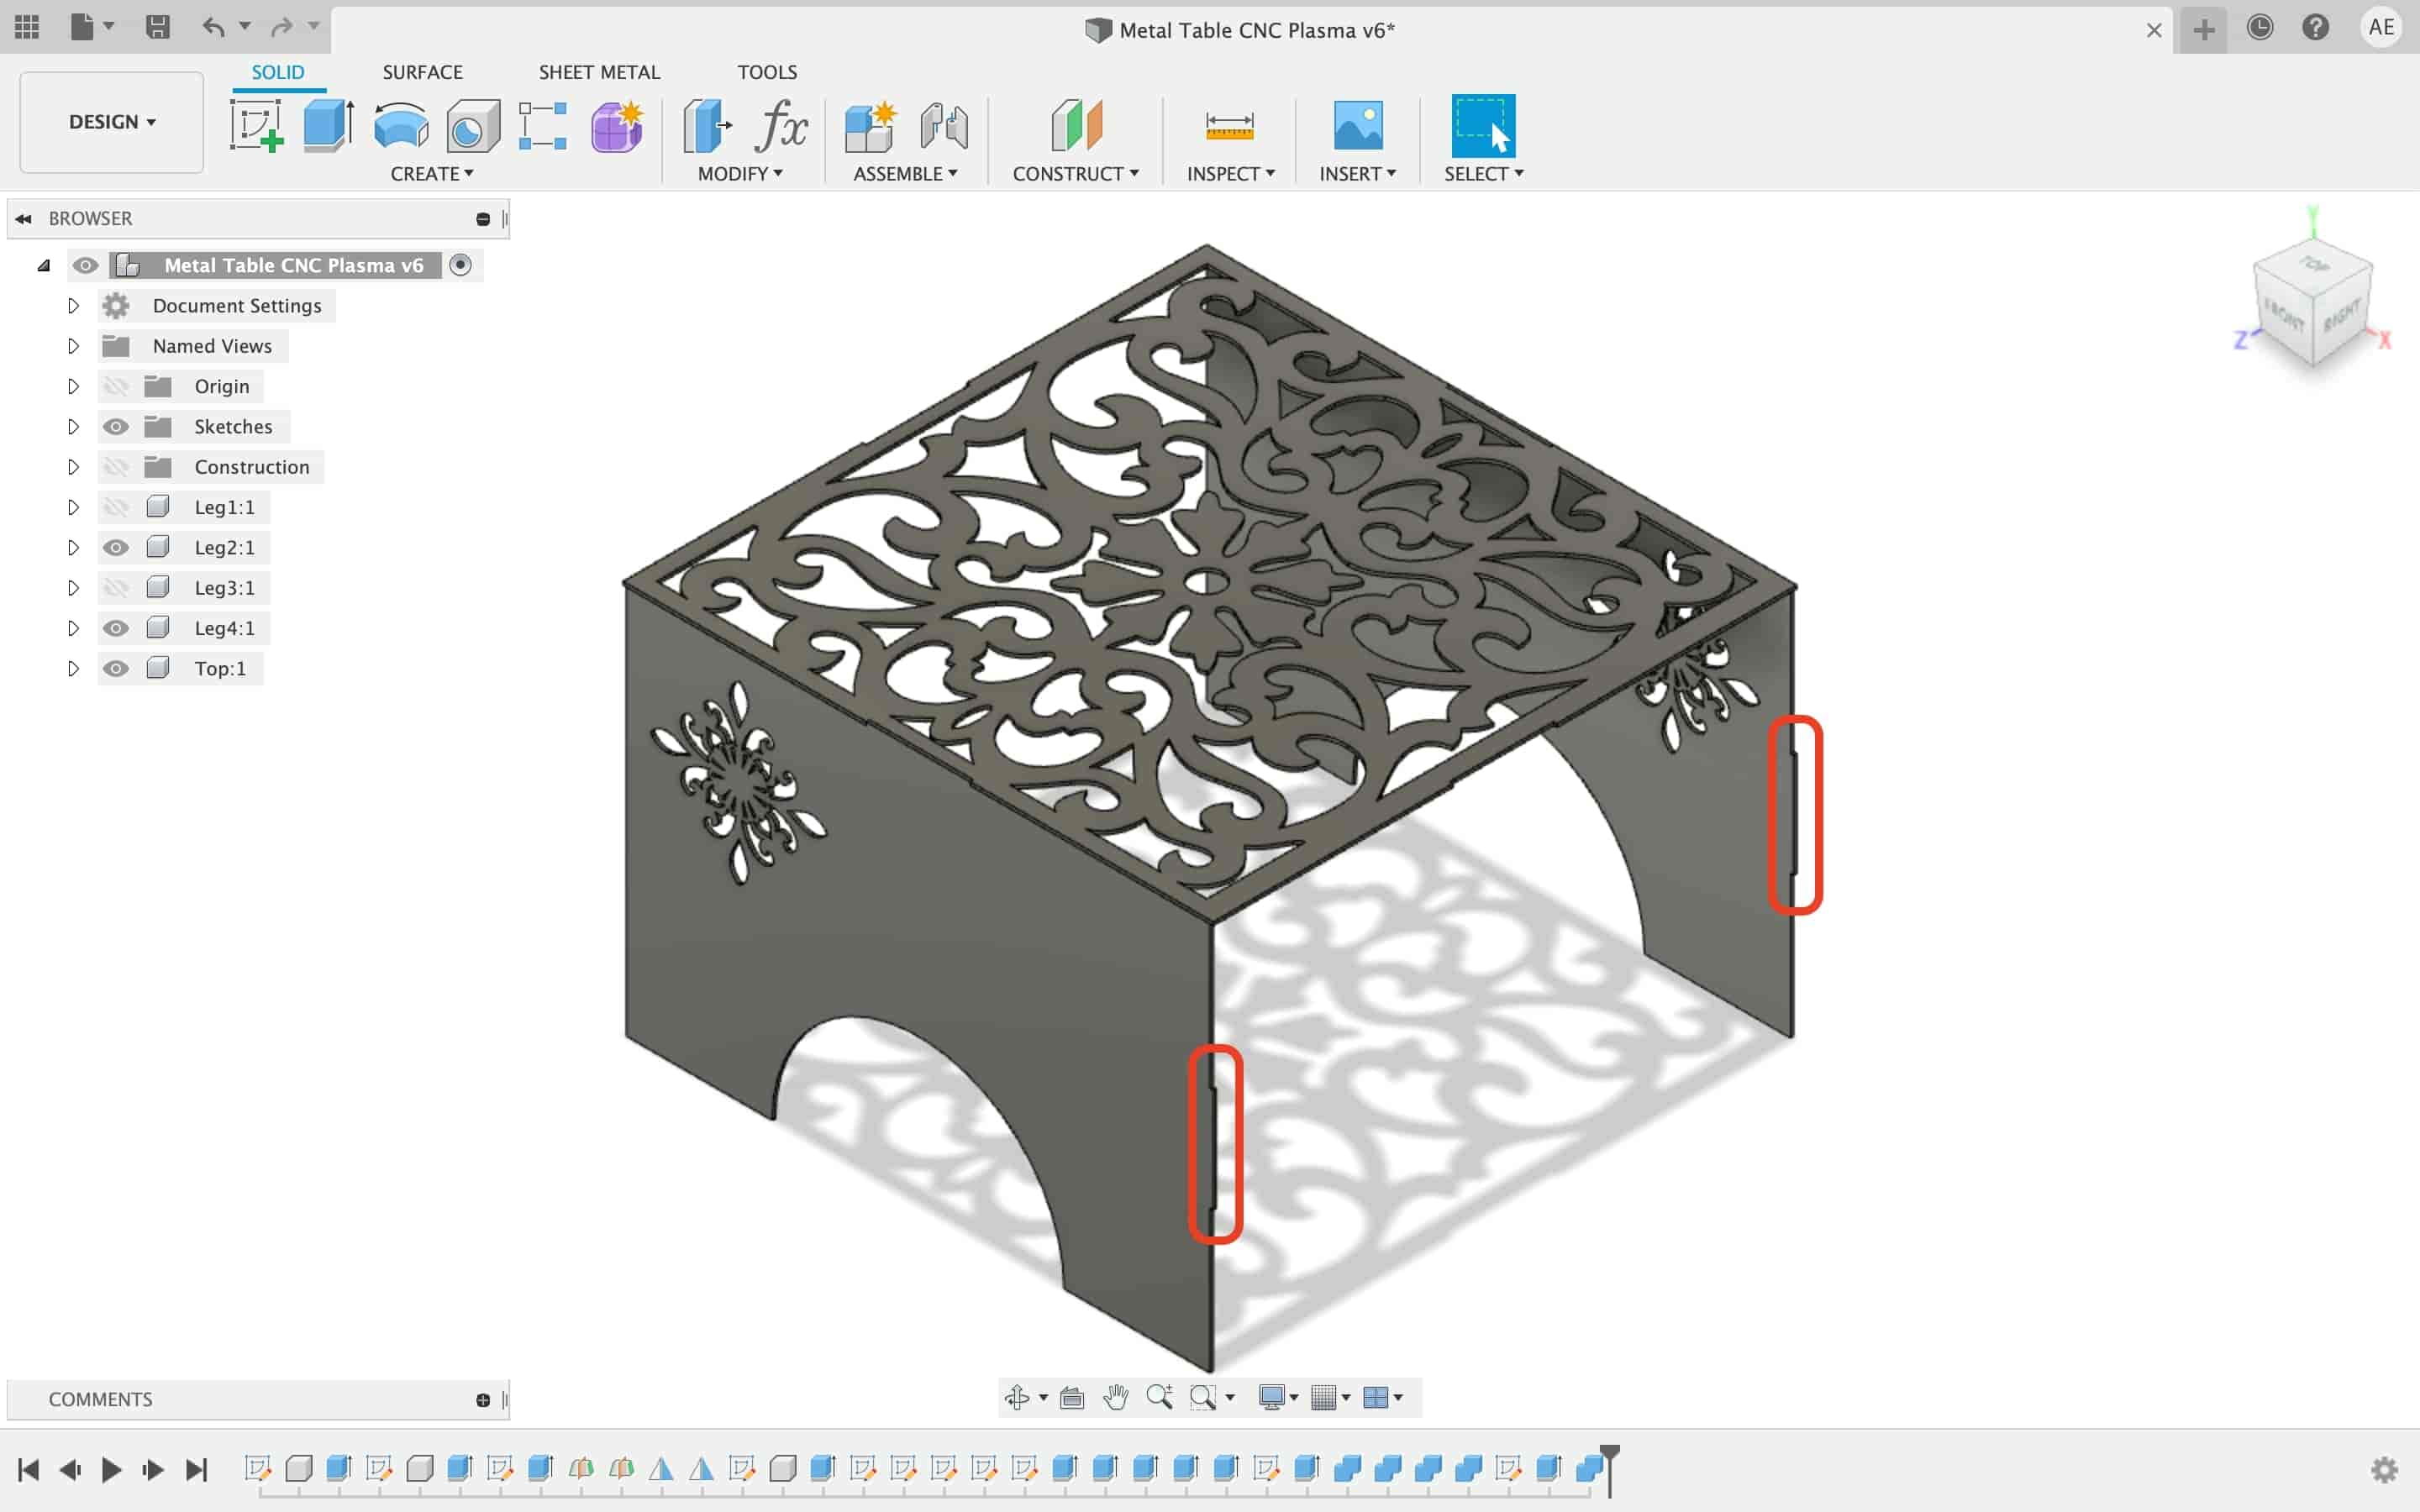
Let’s make it look cooler. I inserted a new SVG floral pattern on the top part of the table, resized and scaled it up a lil bit, and extruded it through the material to make a cut.
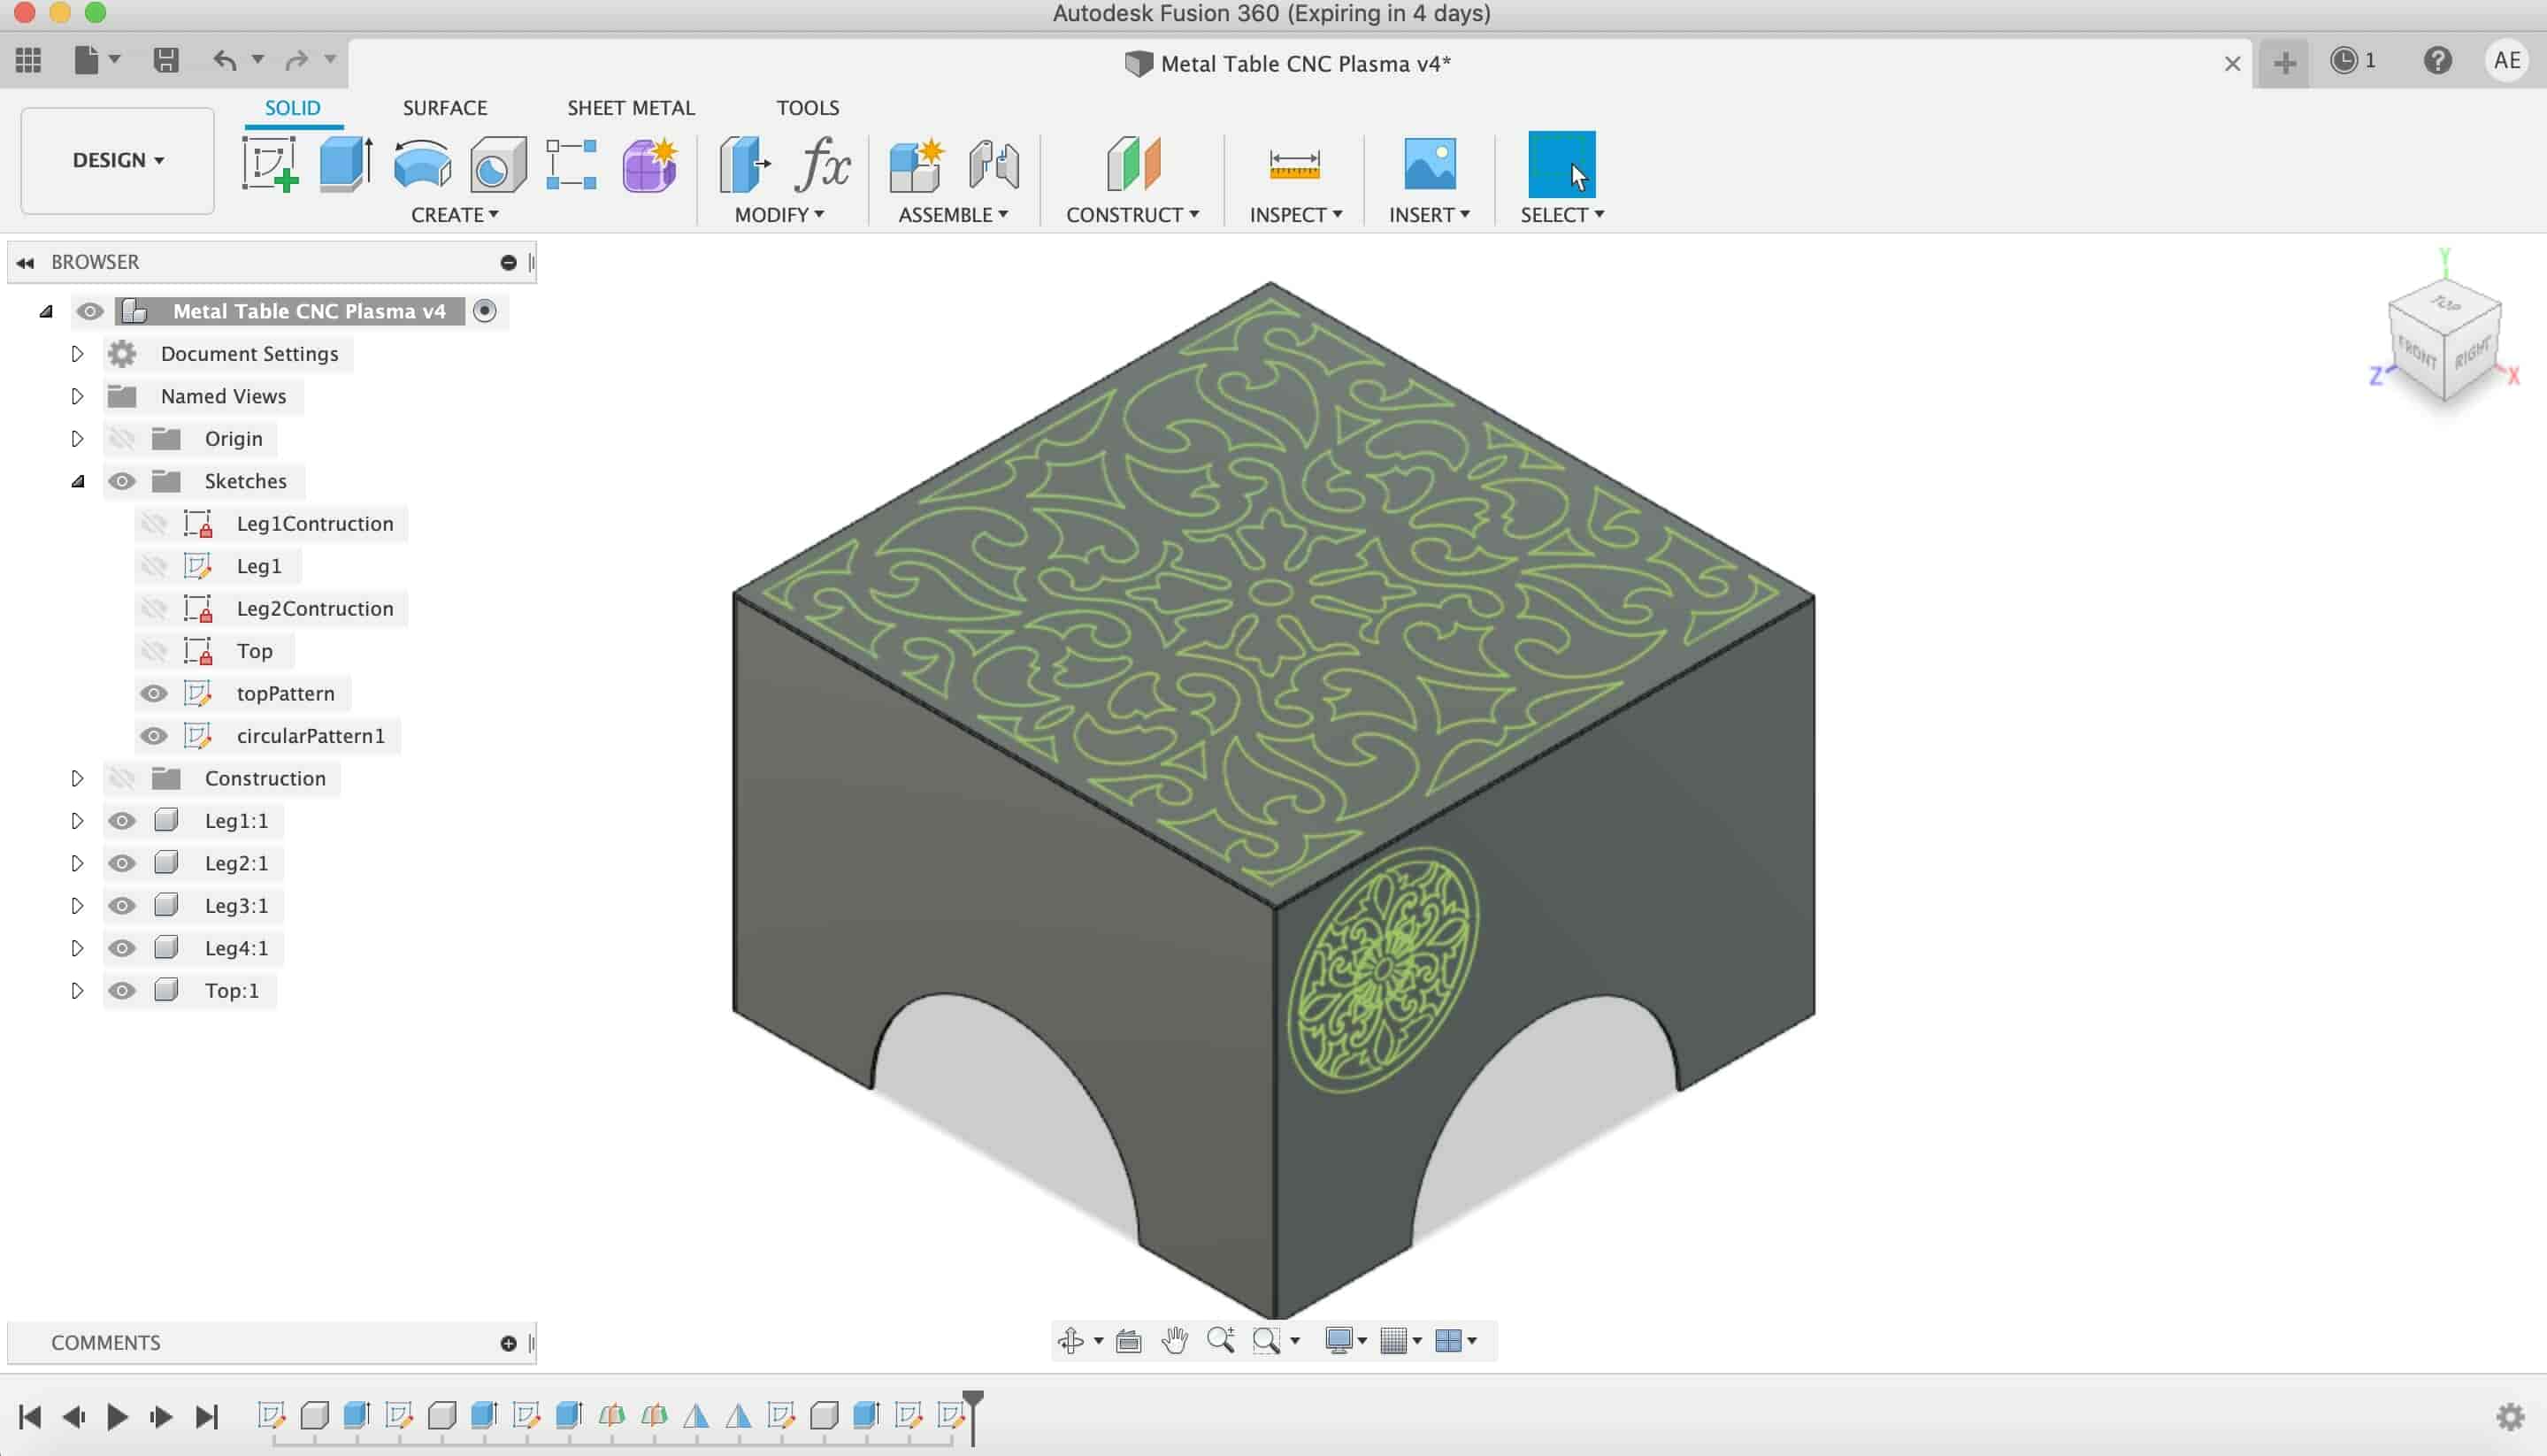
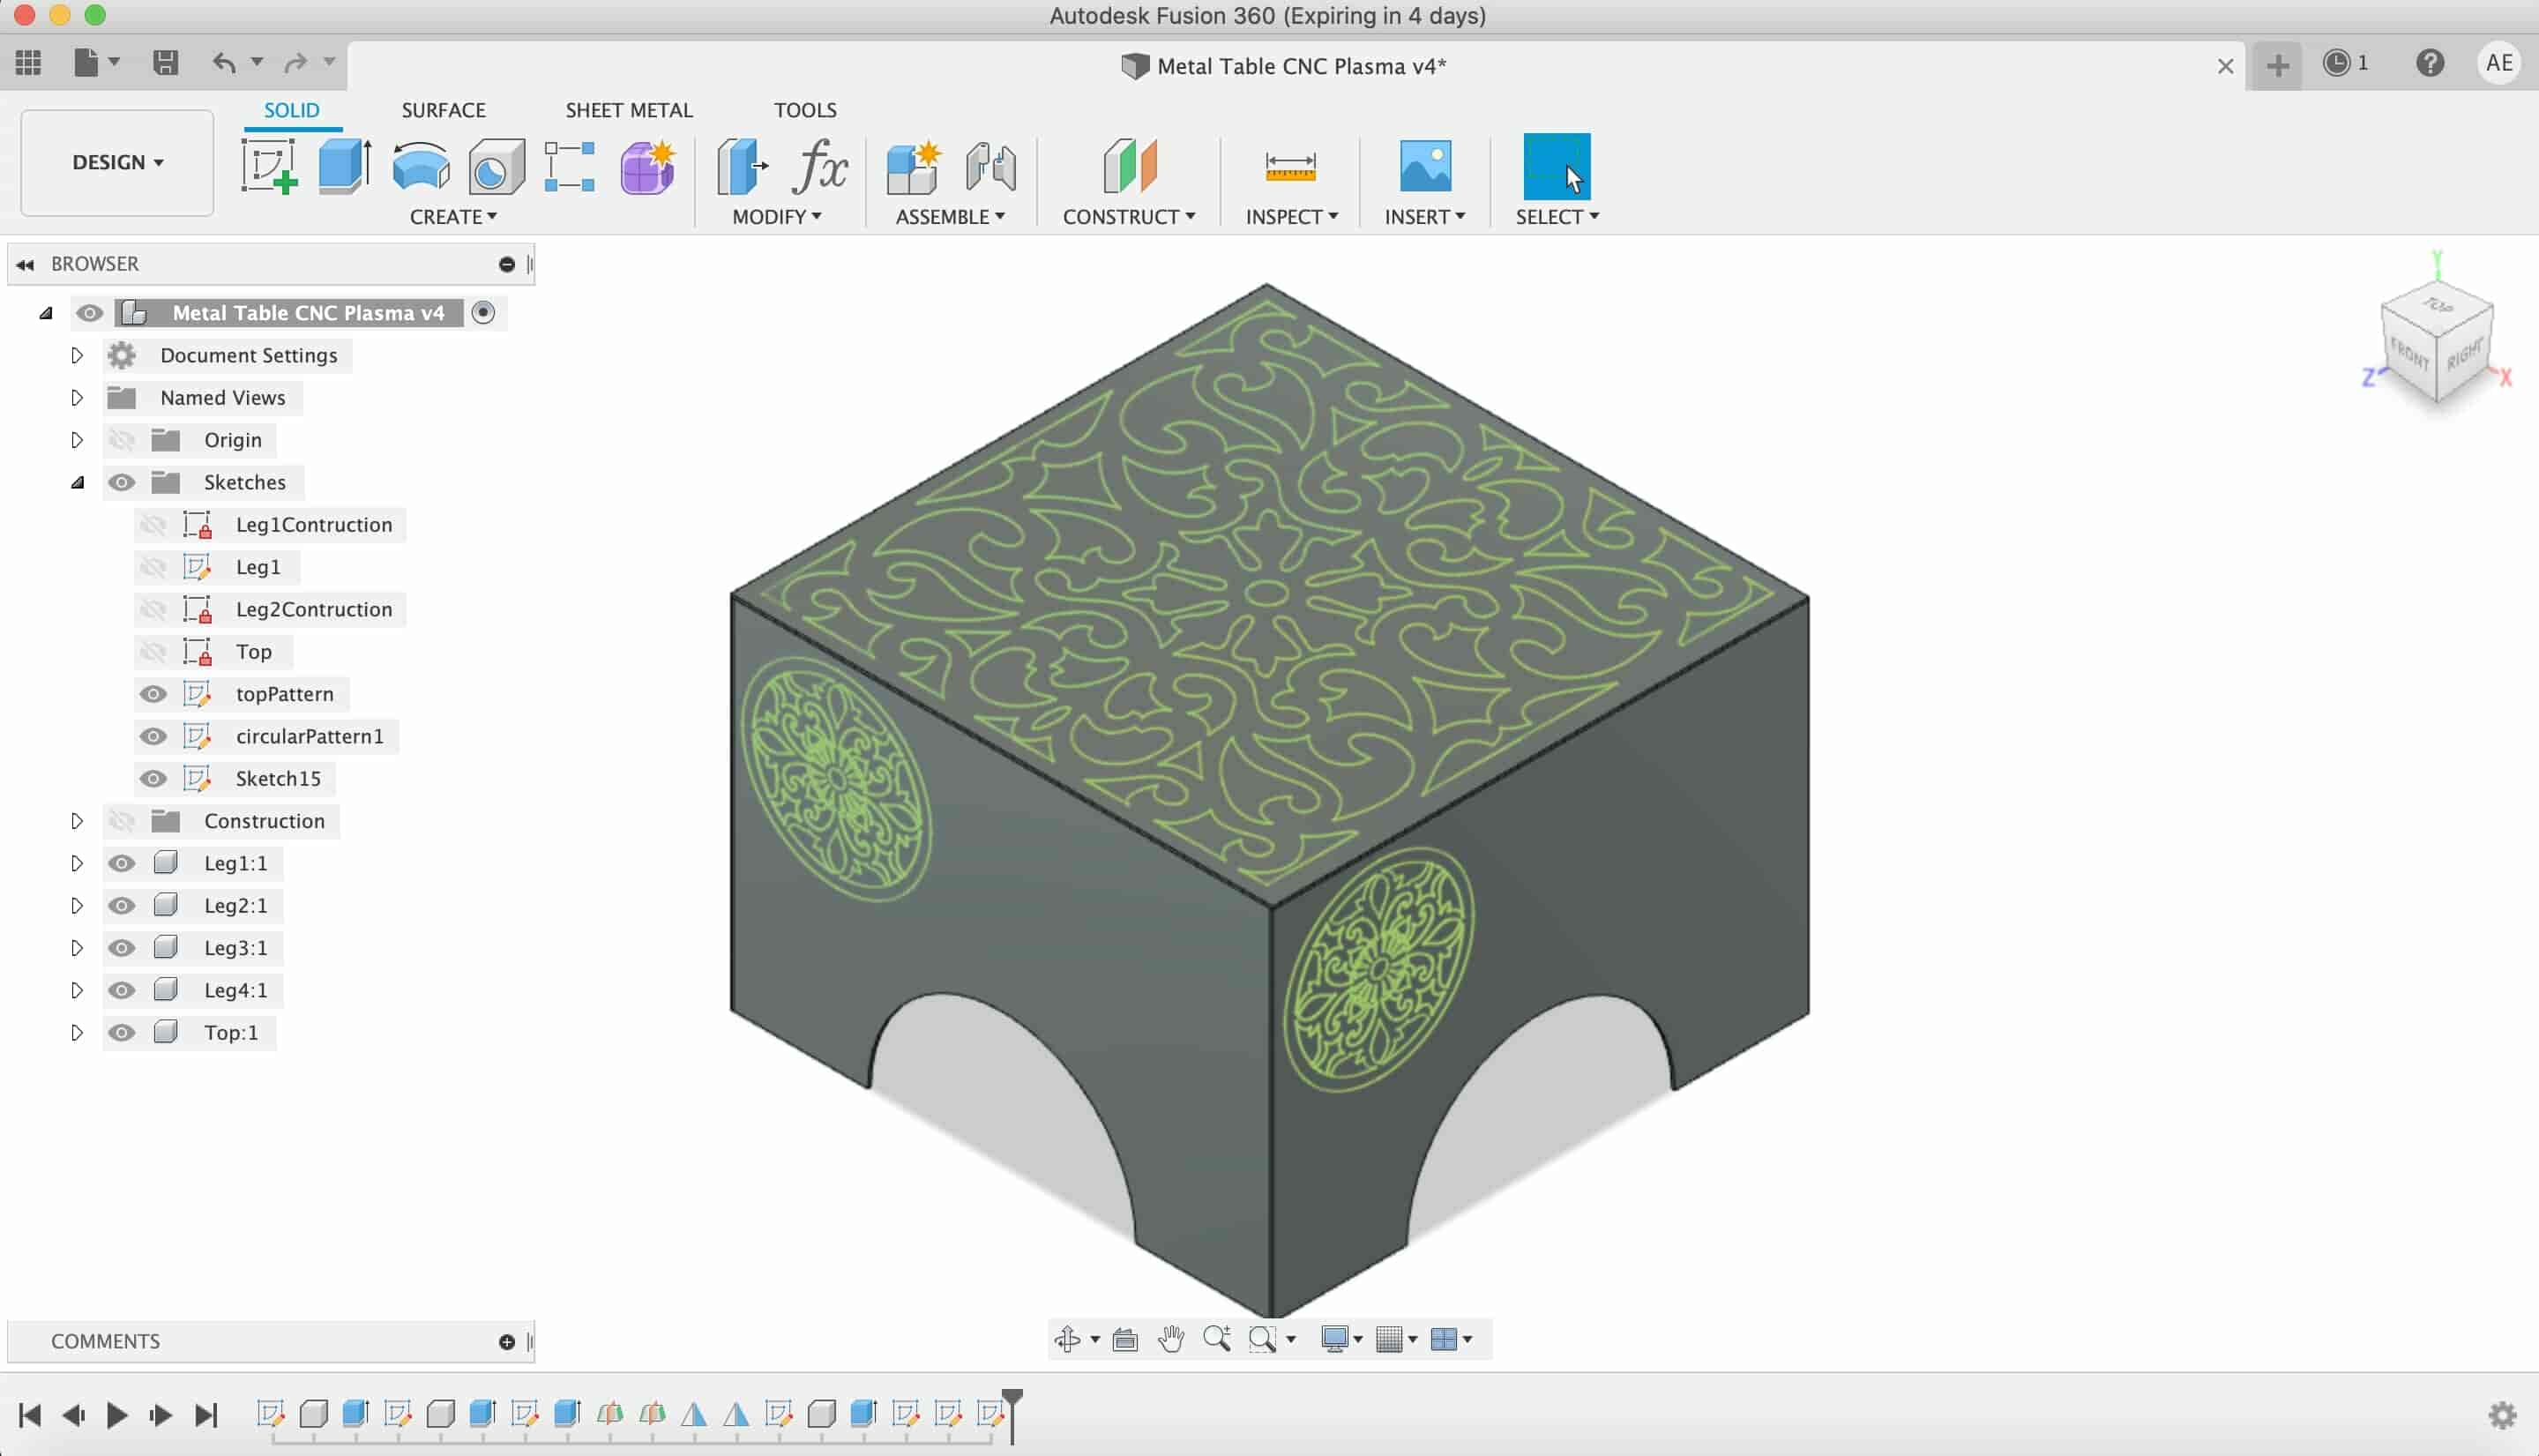
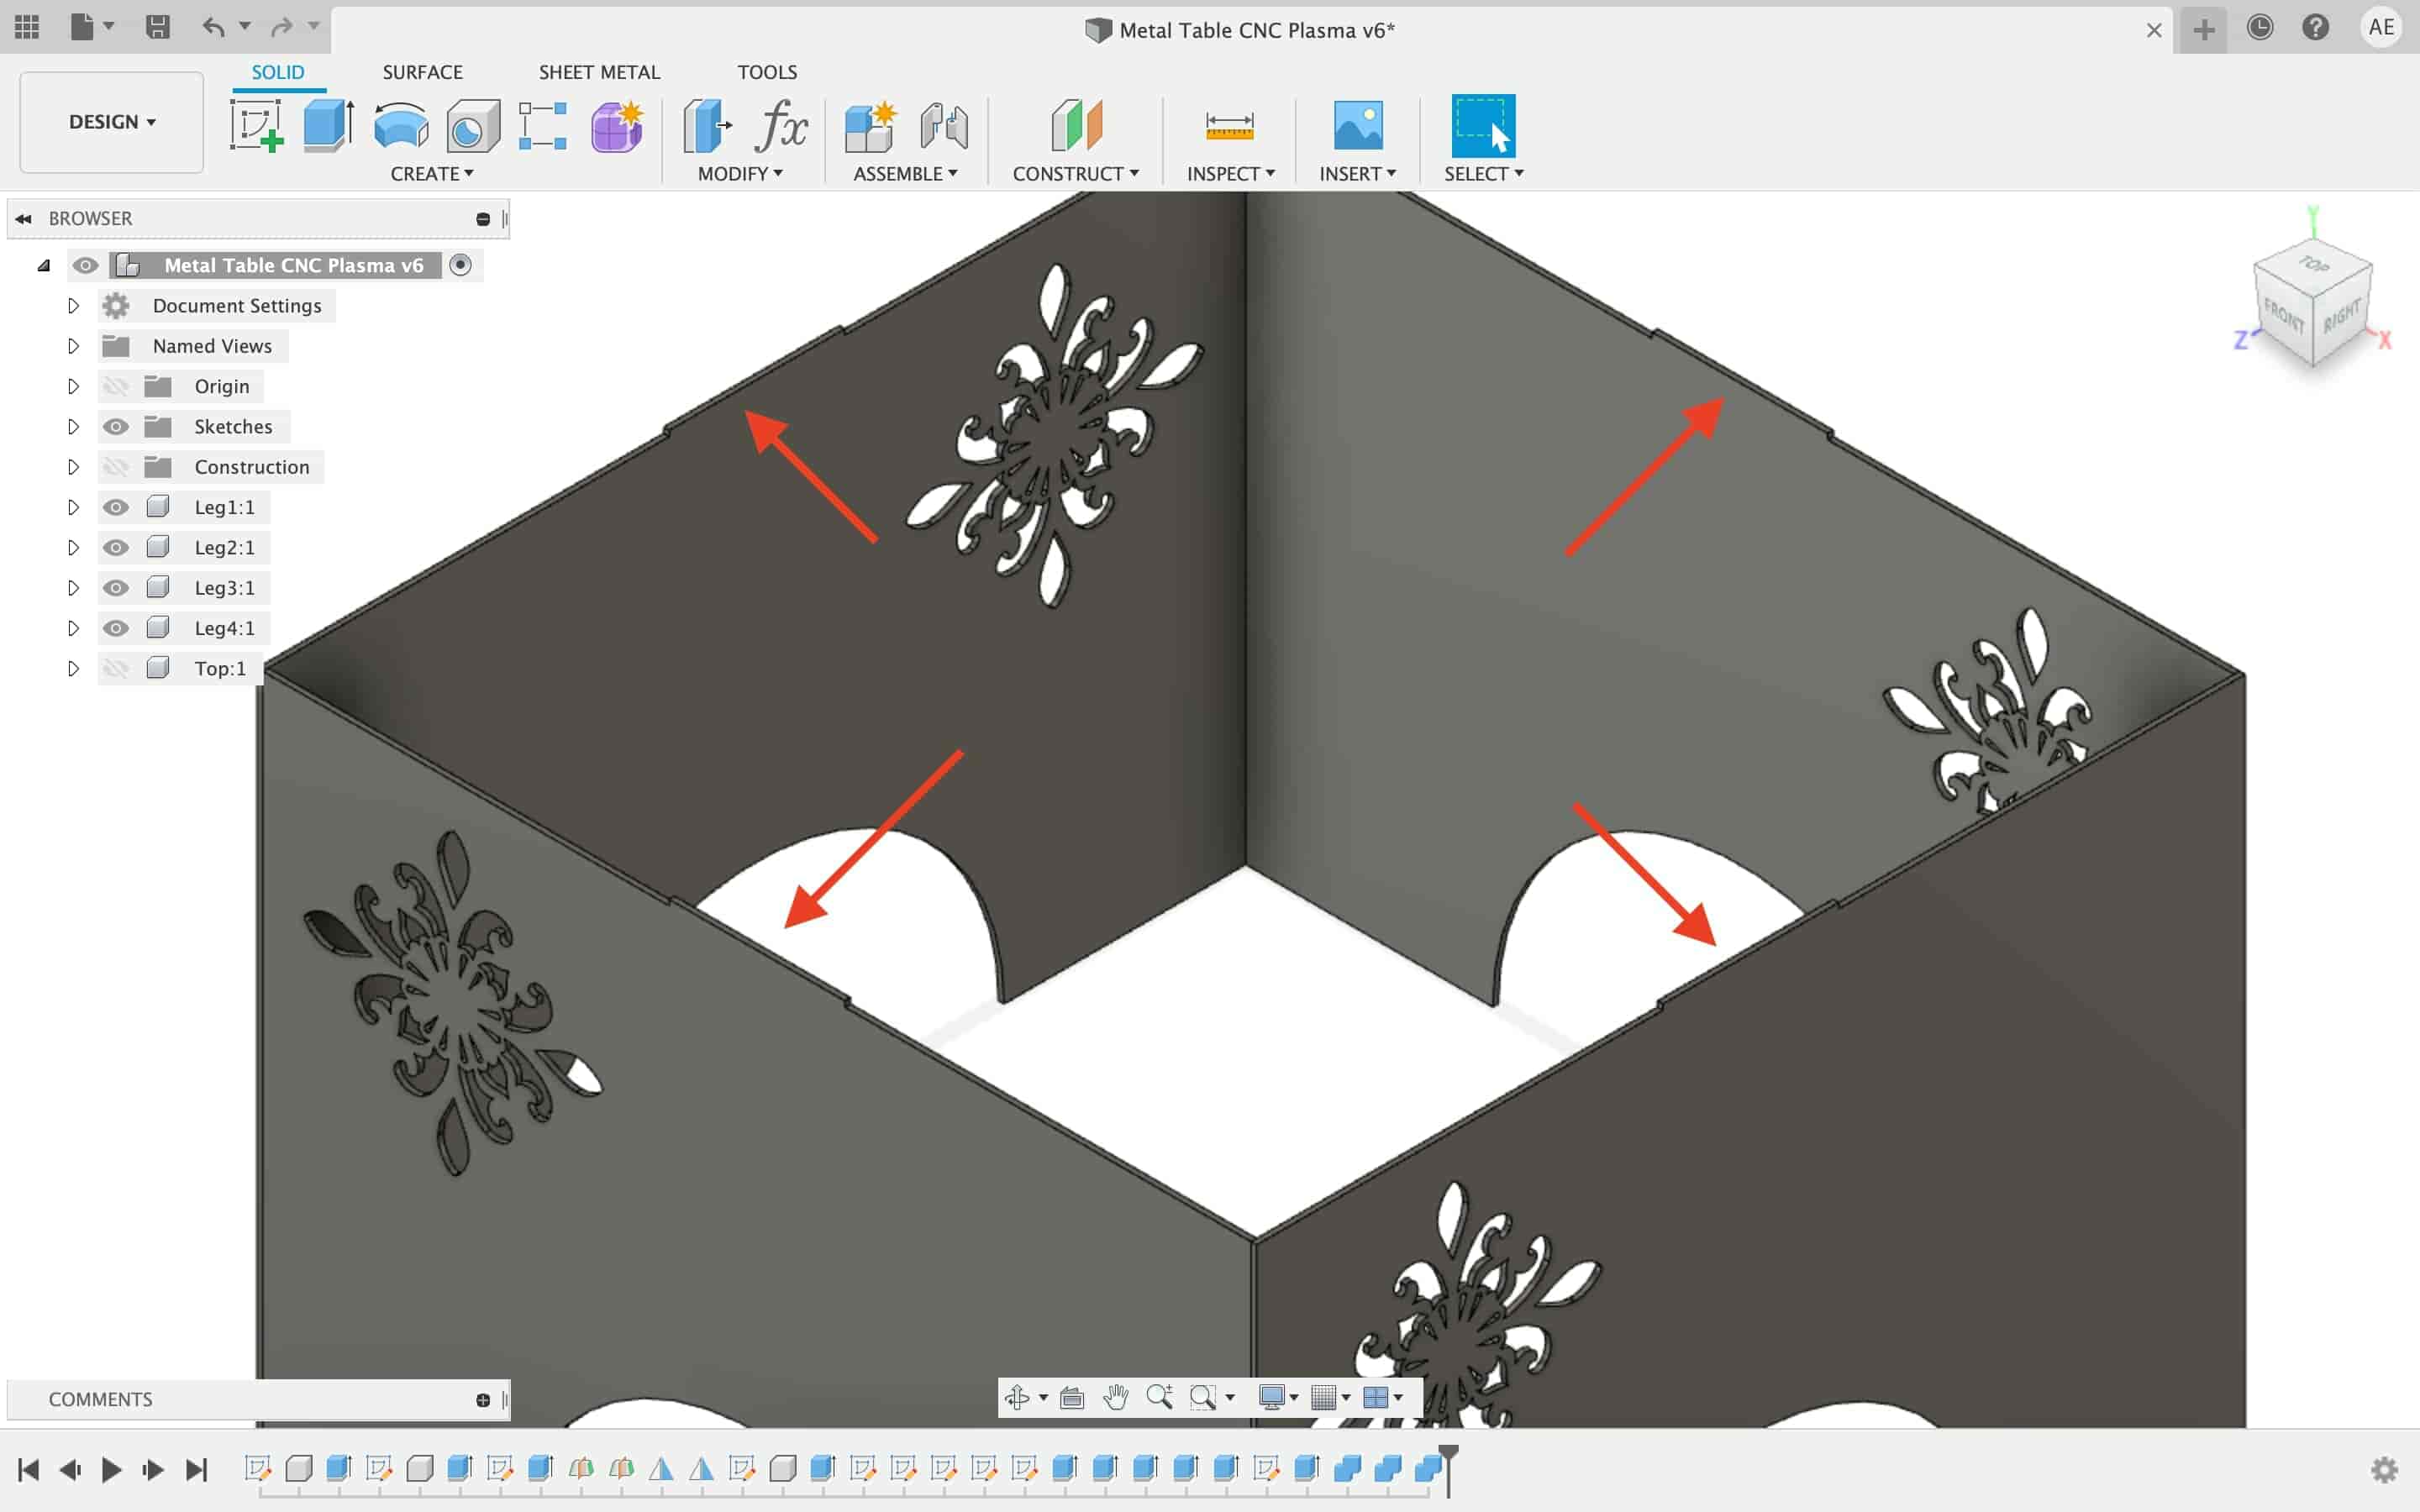
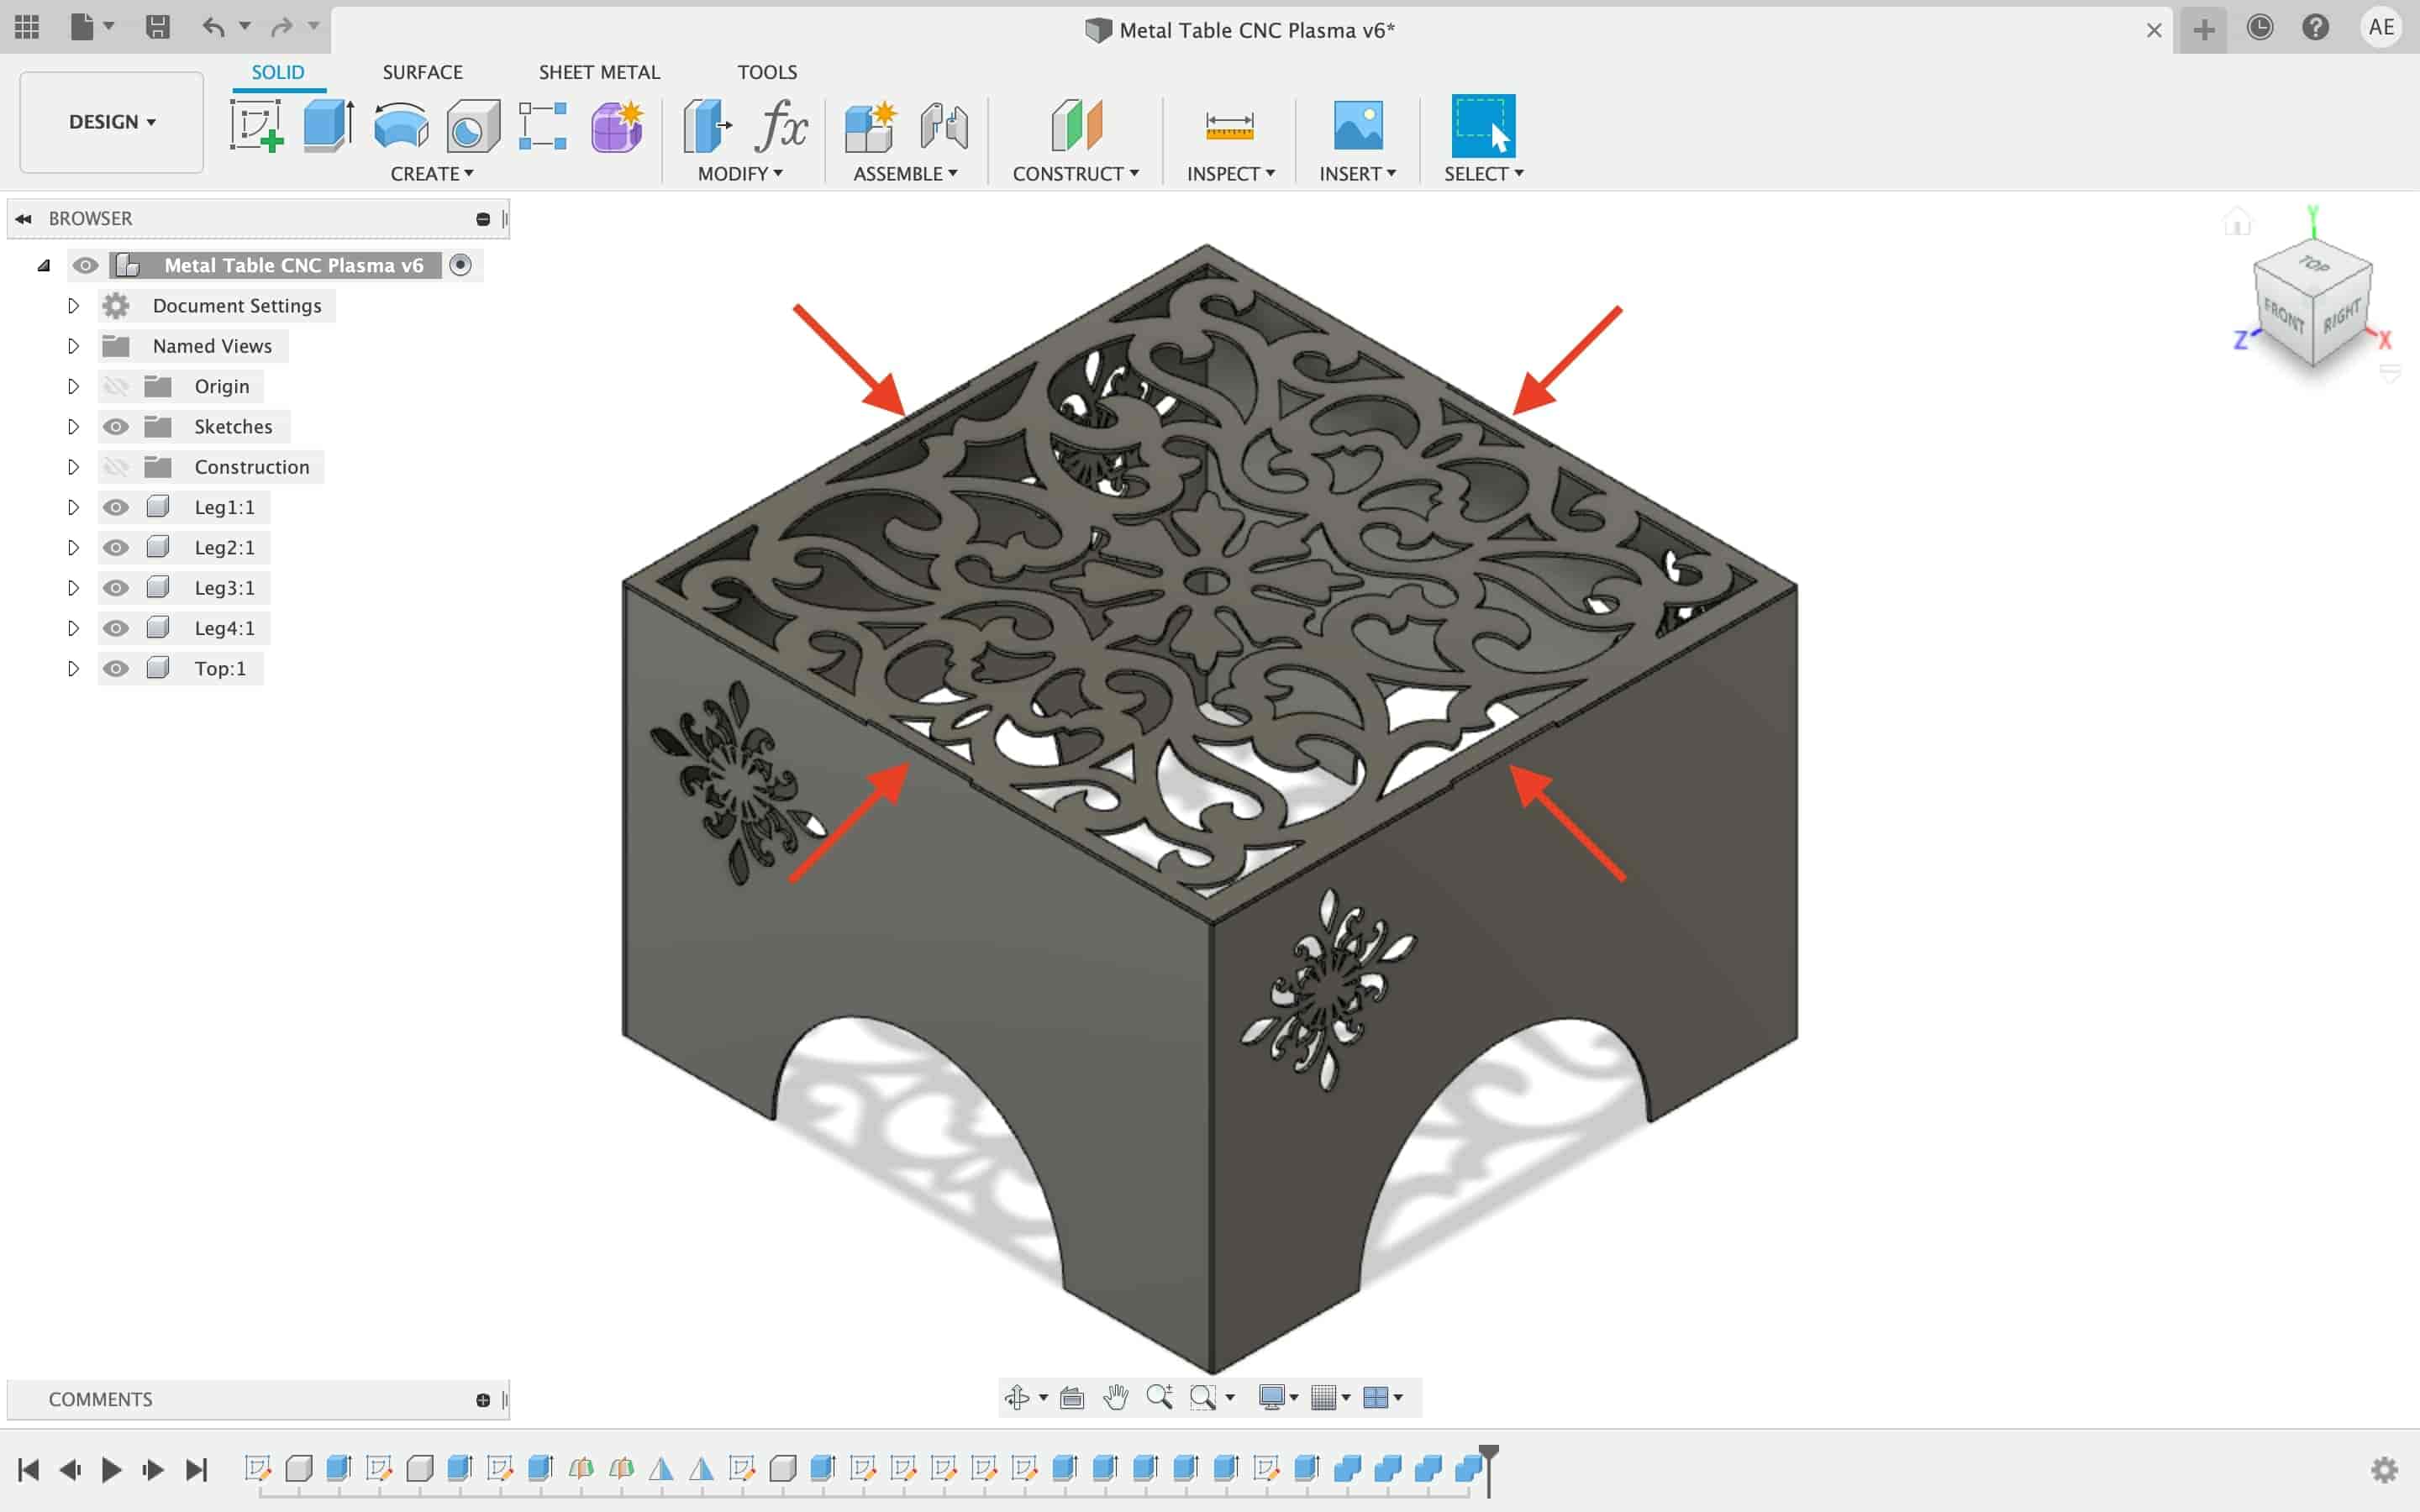
After that I added more SVG floral patterns on the table legs, resized and scaled them up a lil bit, and extruded them through the material to make a cut.
At this point, we have the table body structure but without any kind of fits. You can fabricate the design at its current state and weld these parts together, it’s all fine. But, I want to make some press fits between the table parts to make it easier for me to assemble that parts together then also weld it.
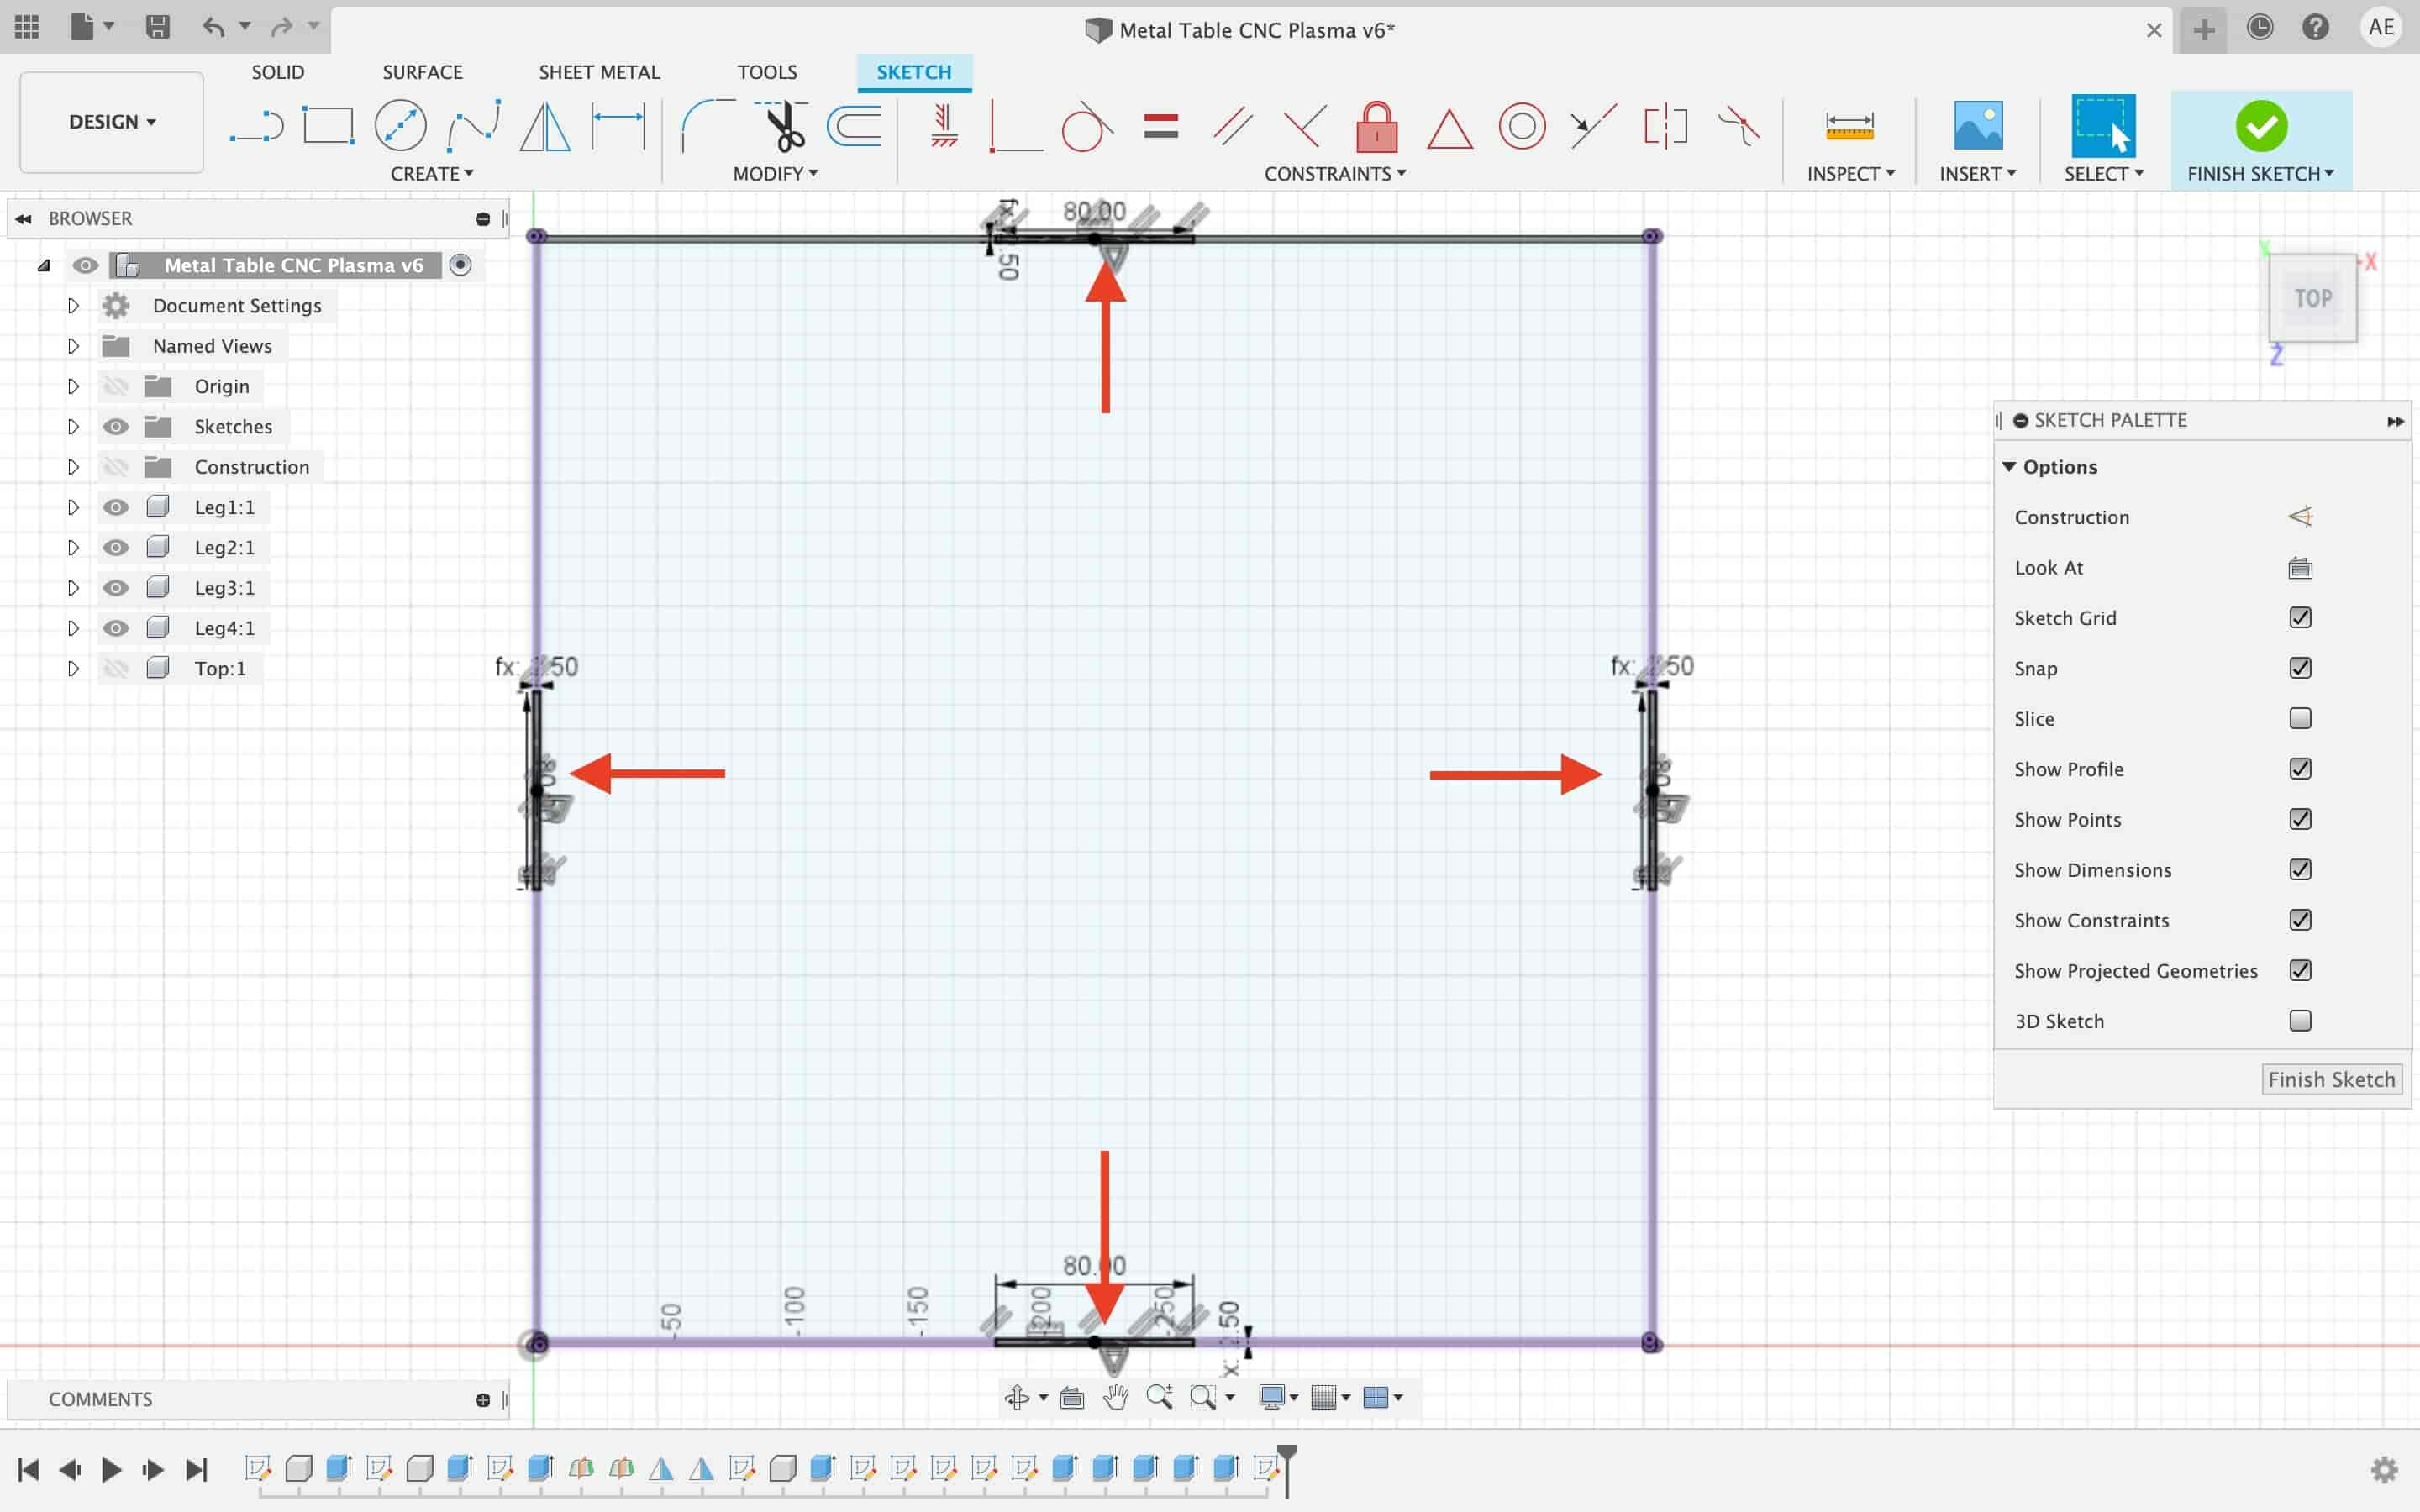
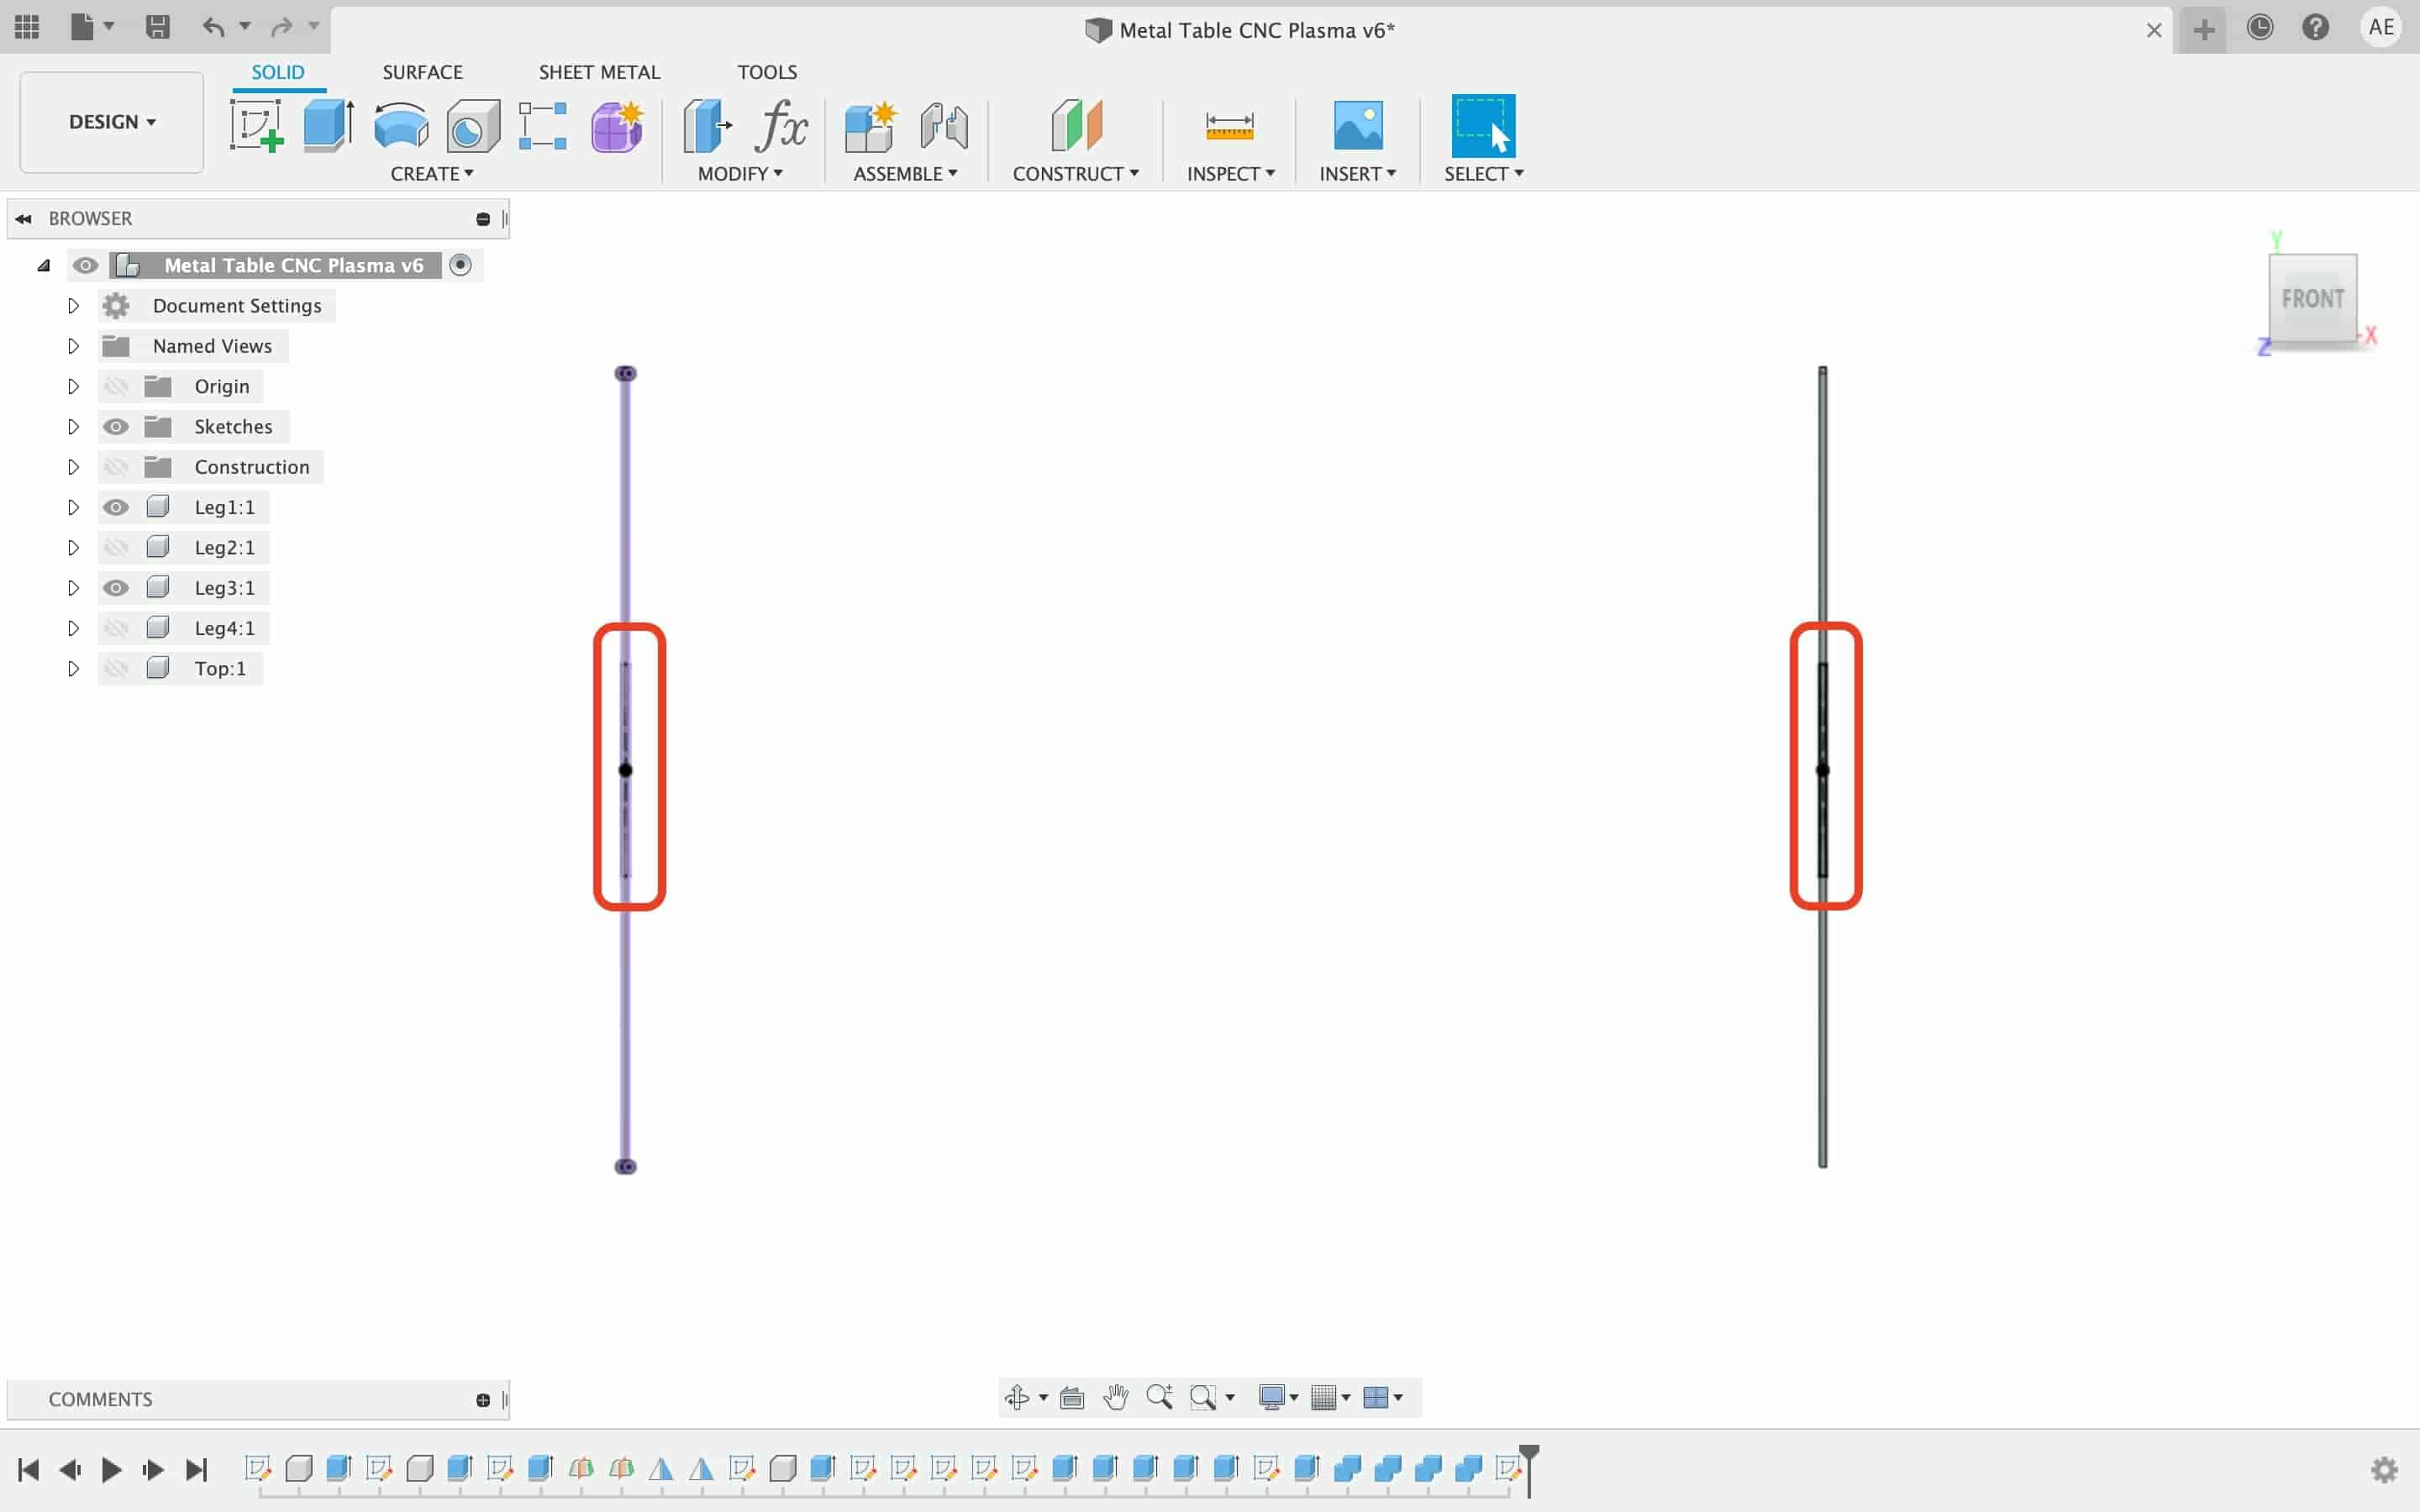
I made a new sketch on the top of the table leg and drew four rectangles, one rectangle on the center of each leg. Then I extruded these rectangle with the material thickness(2.5mm)
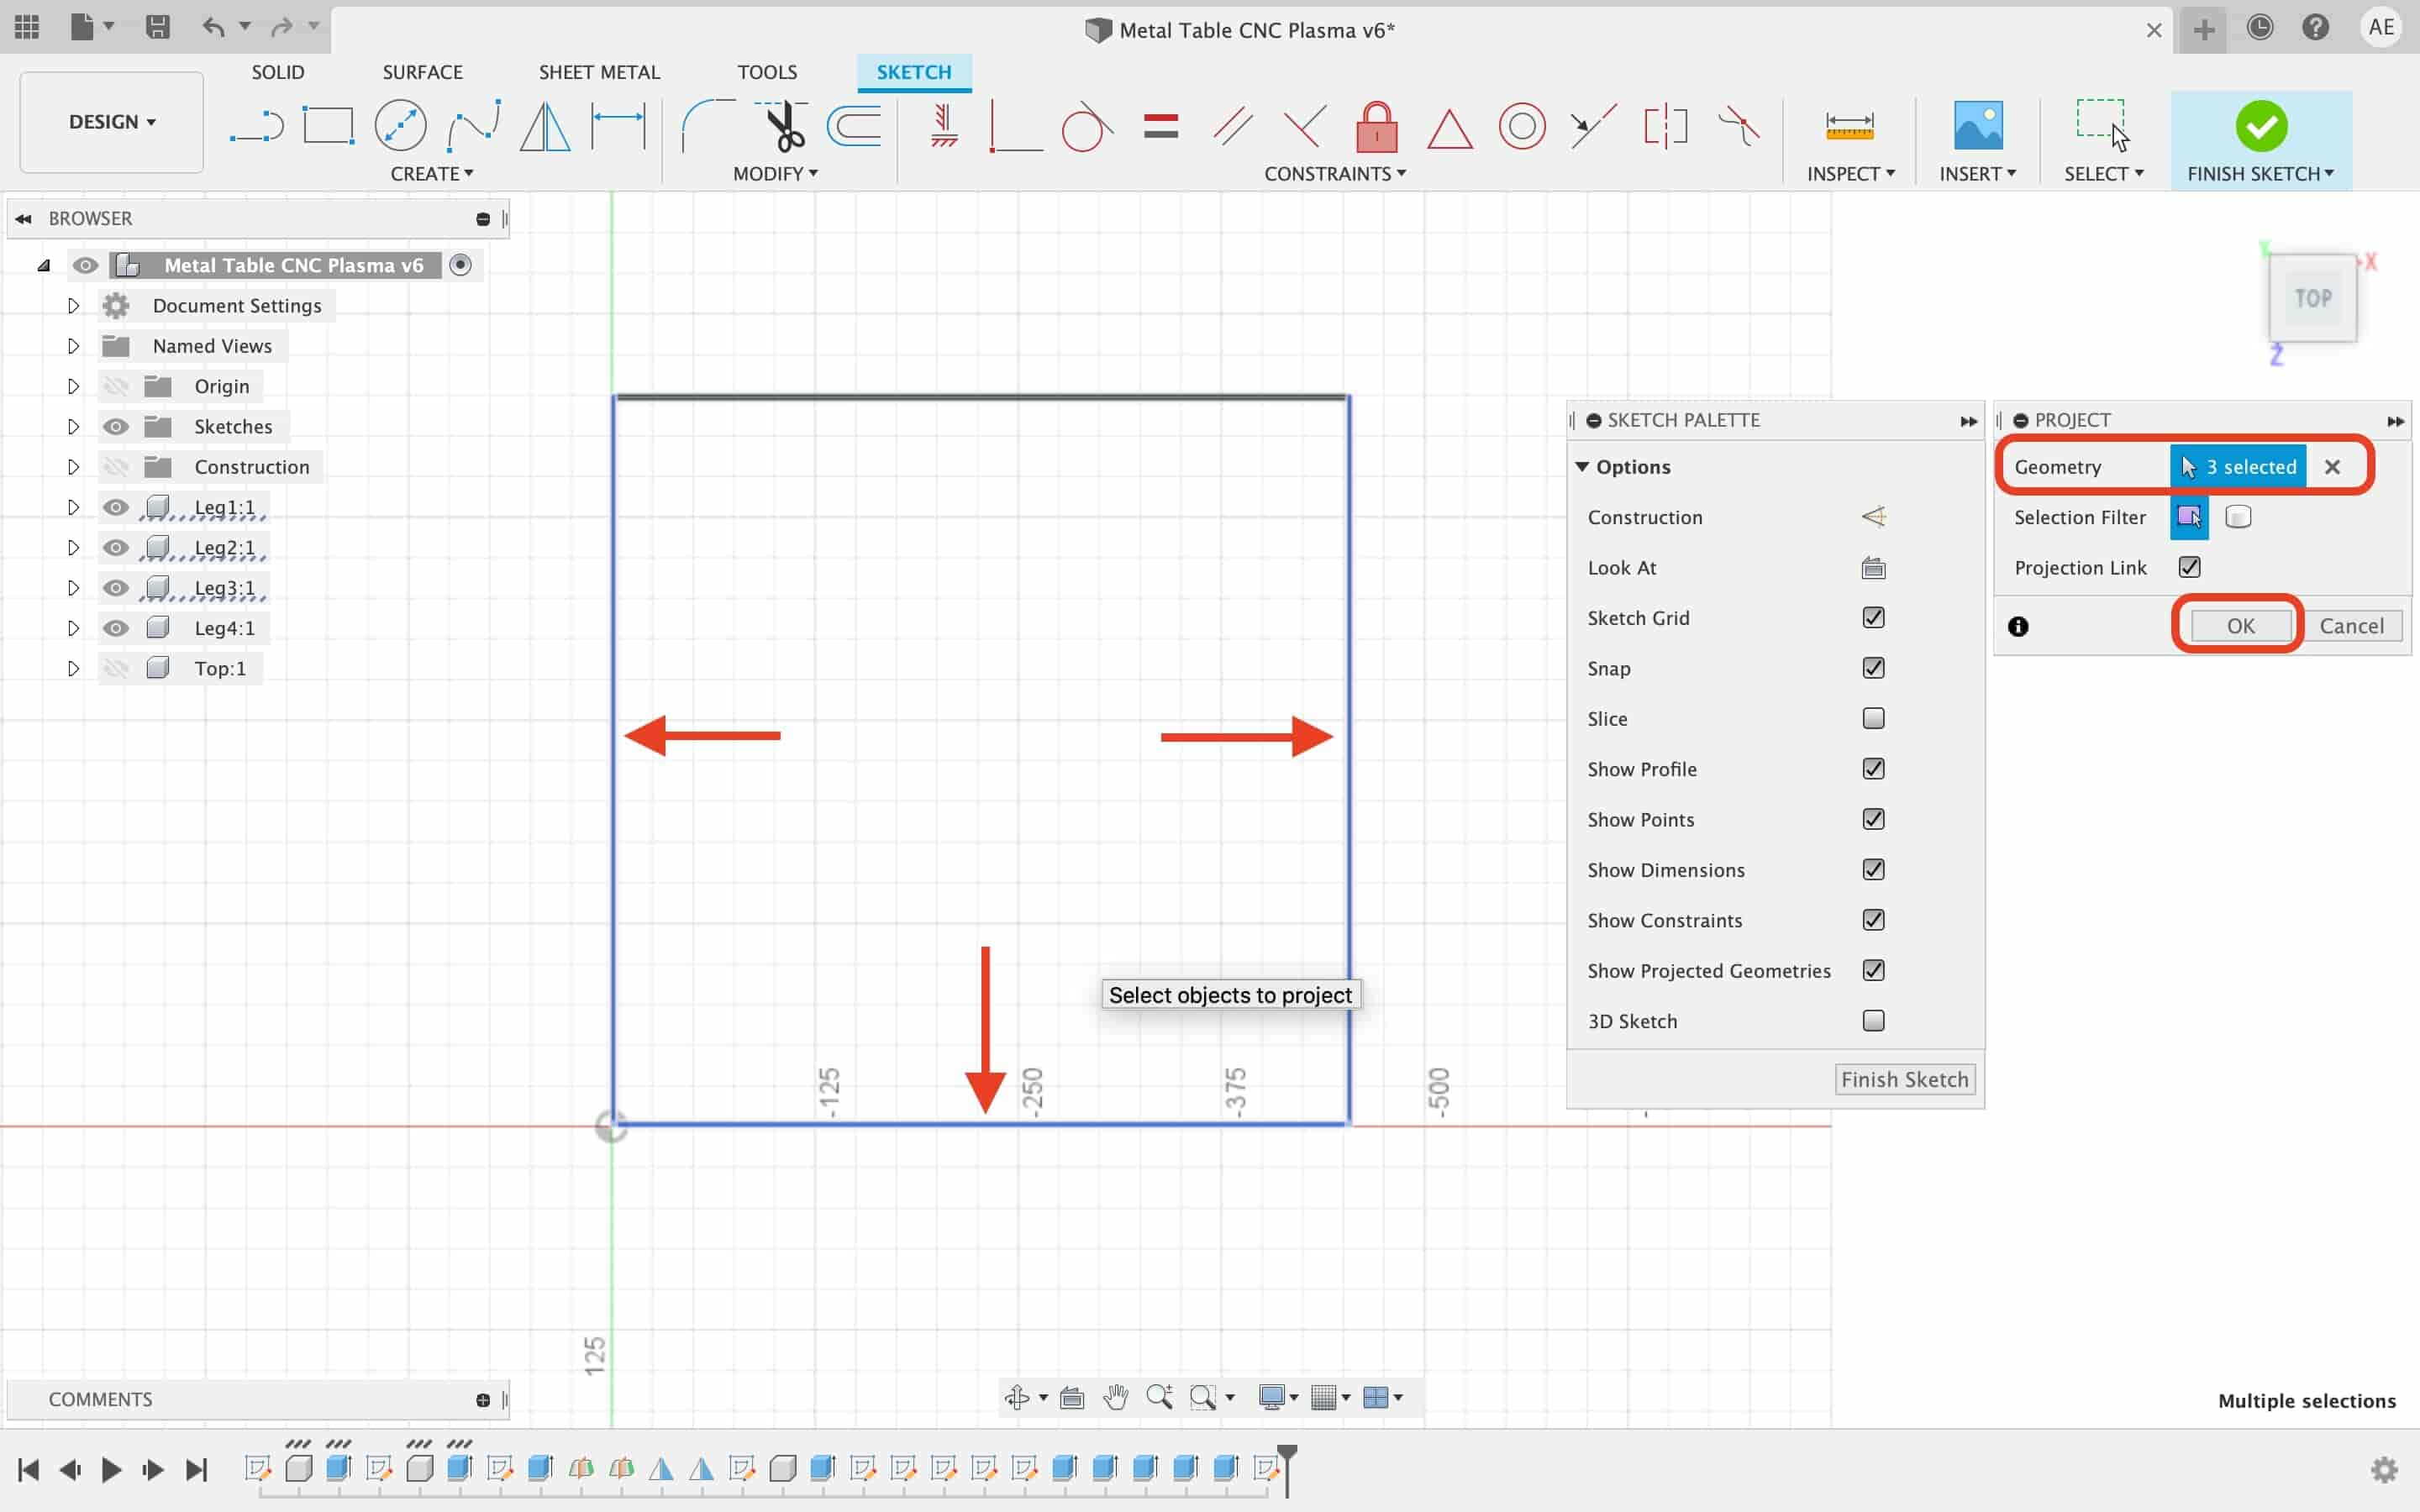

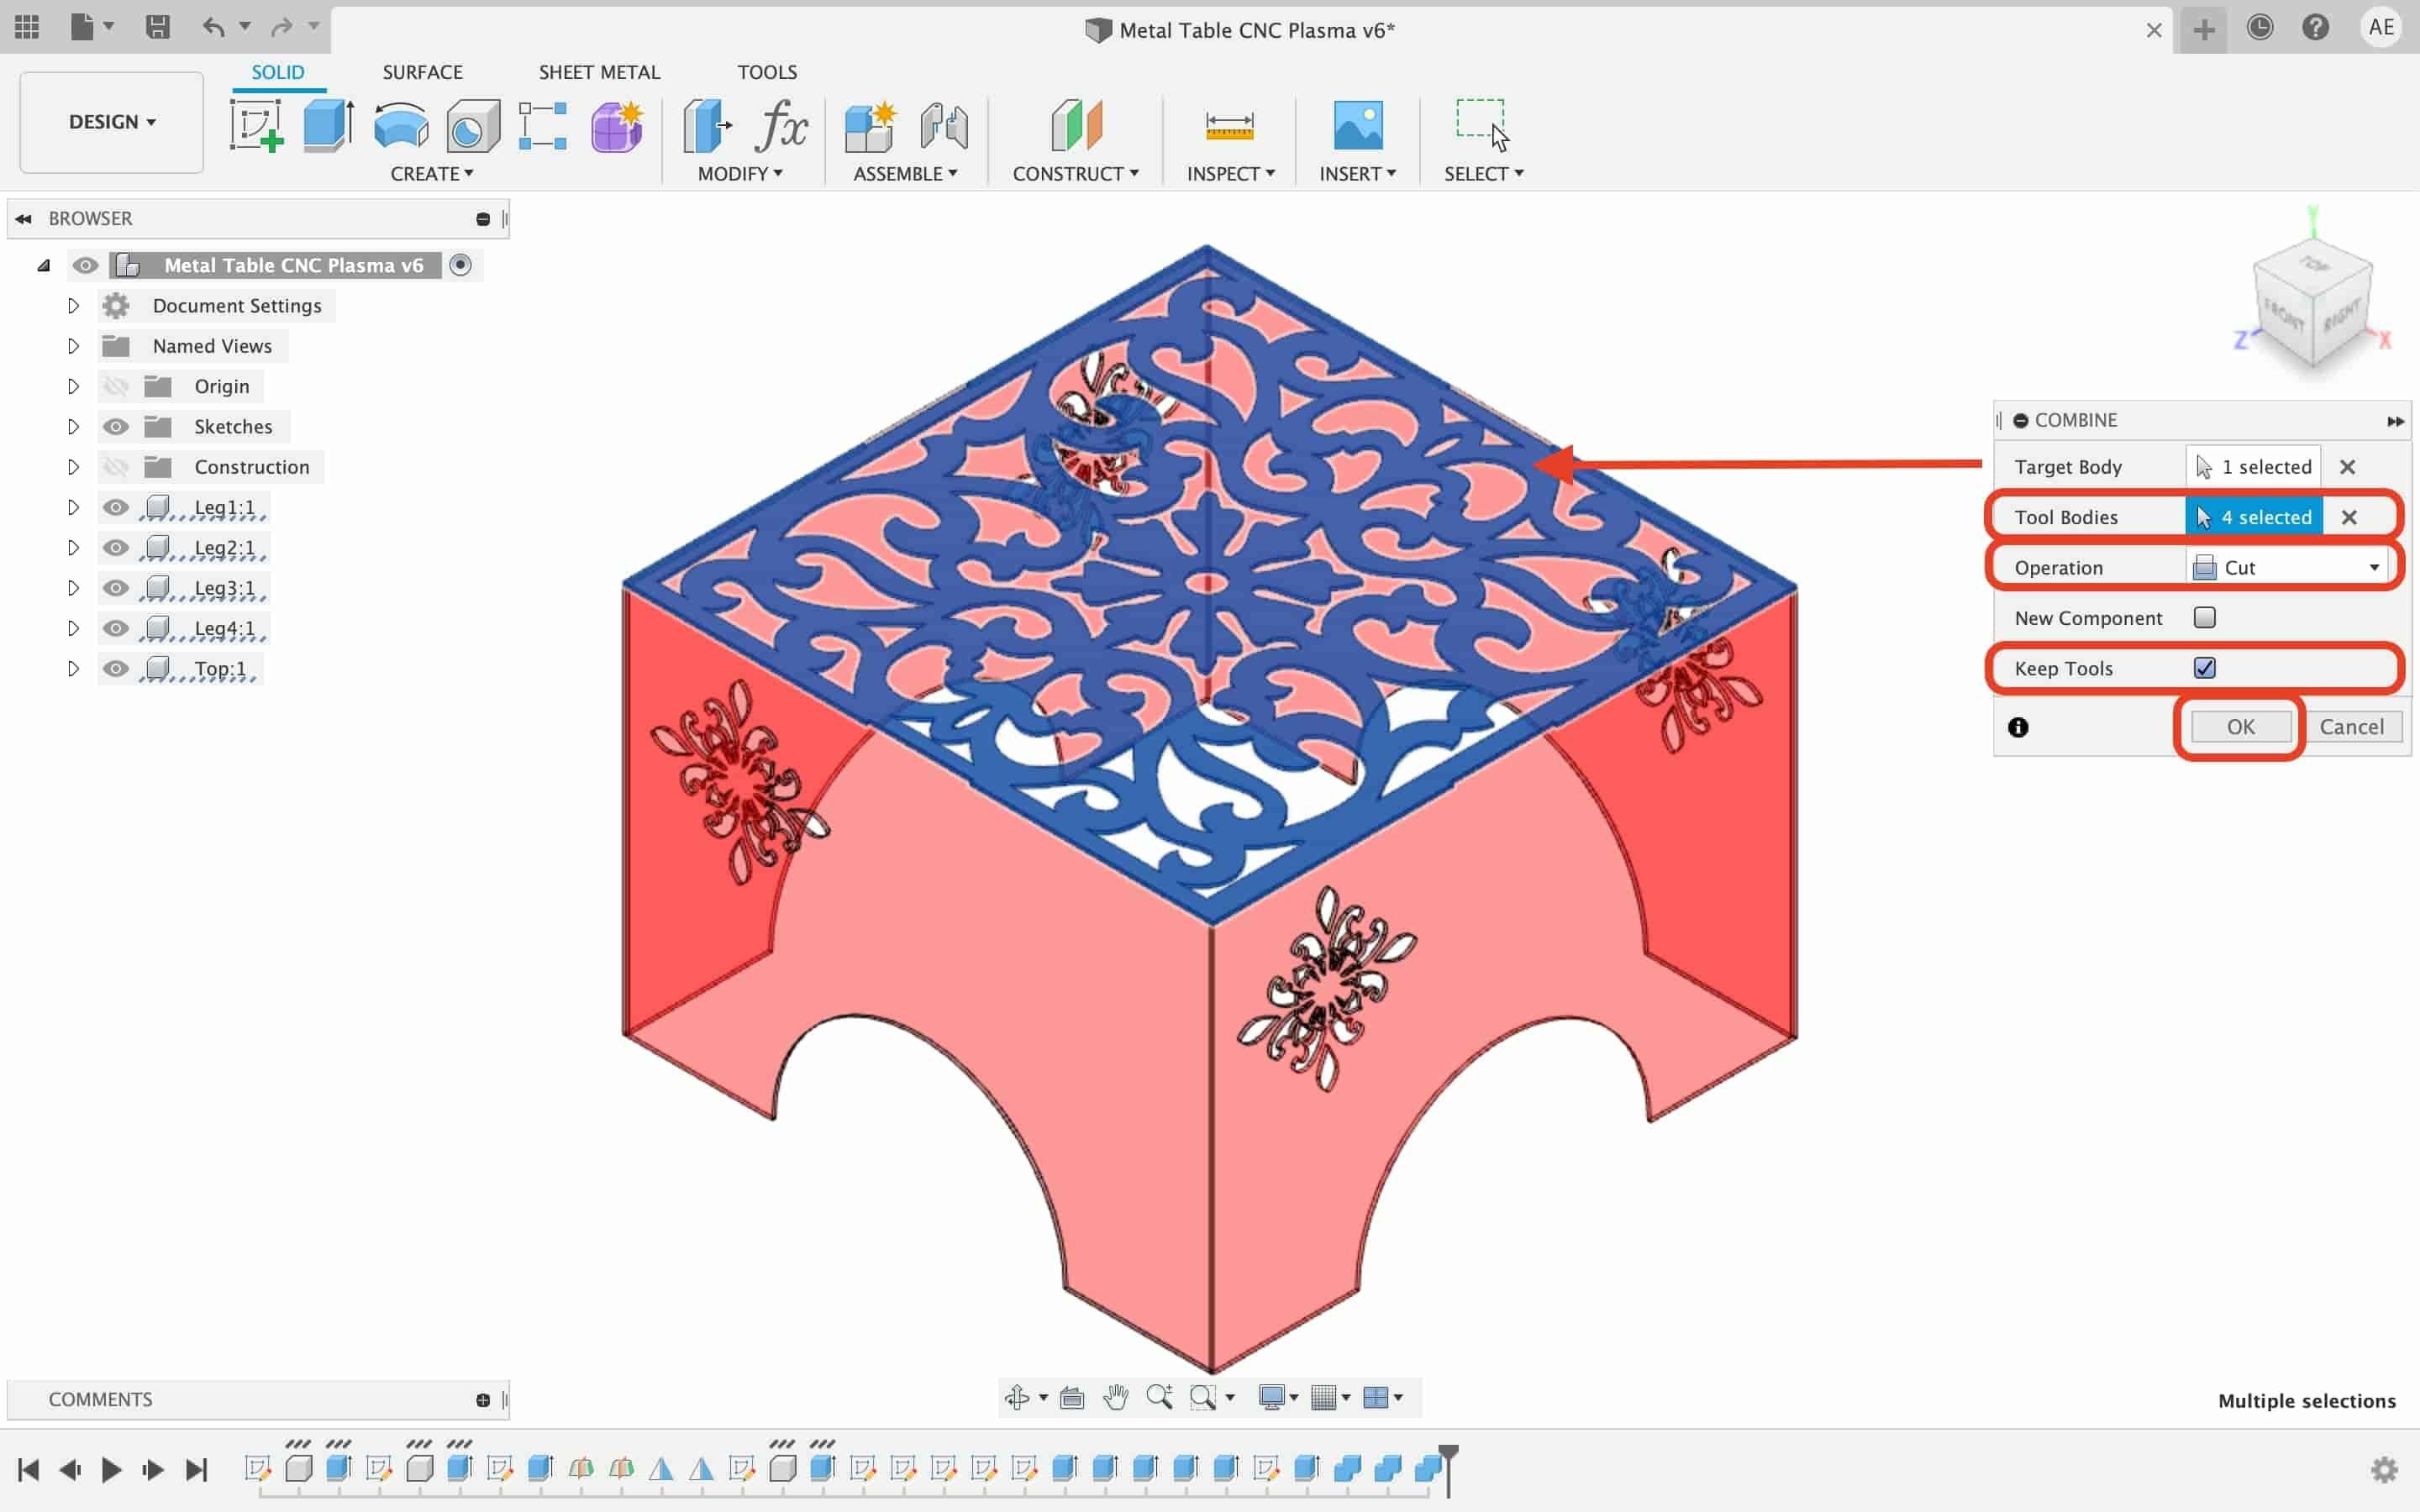
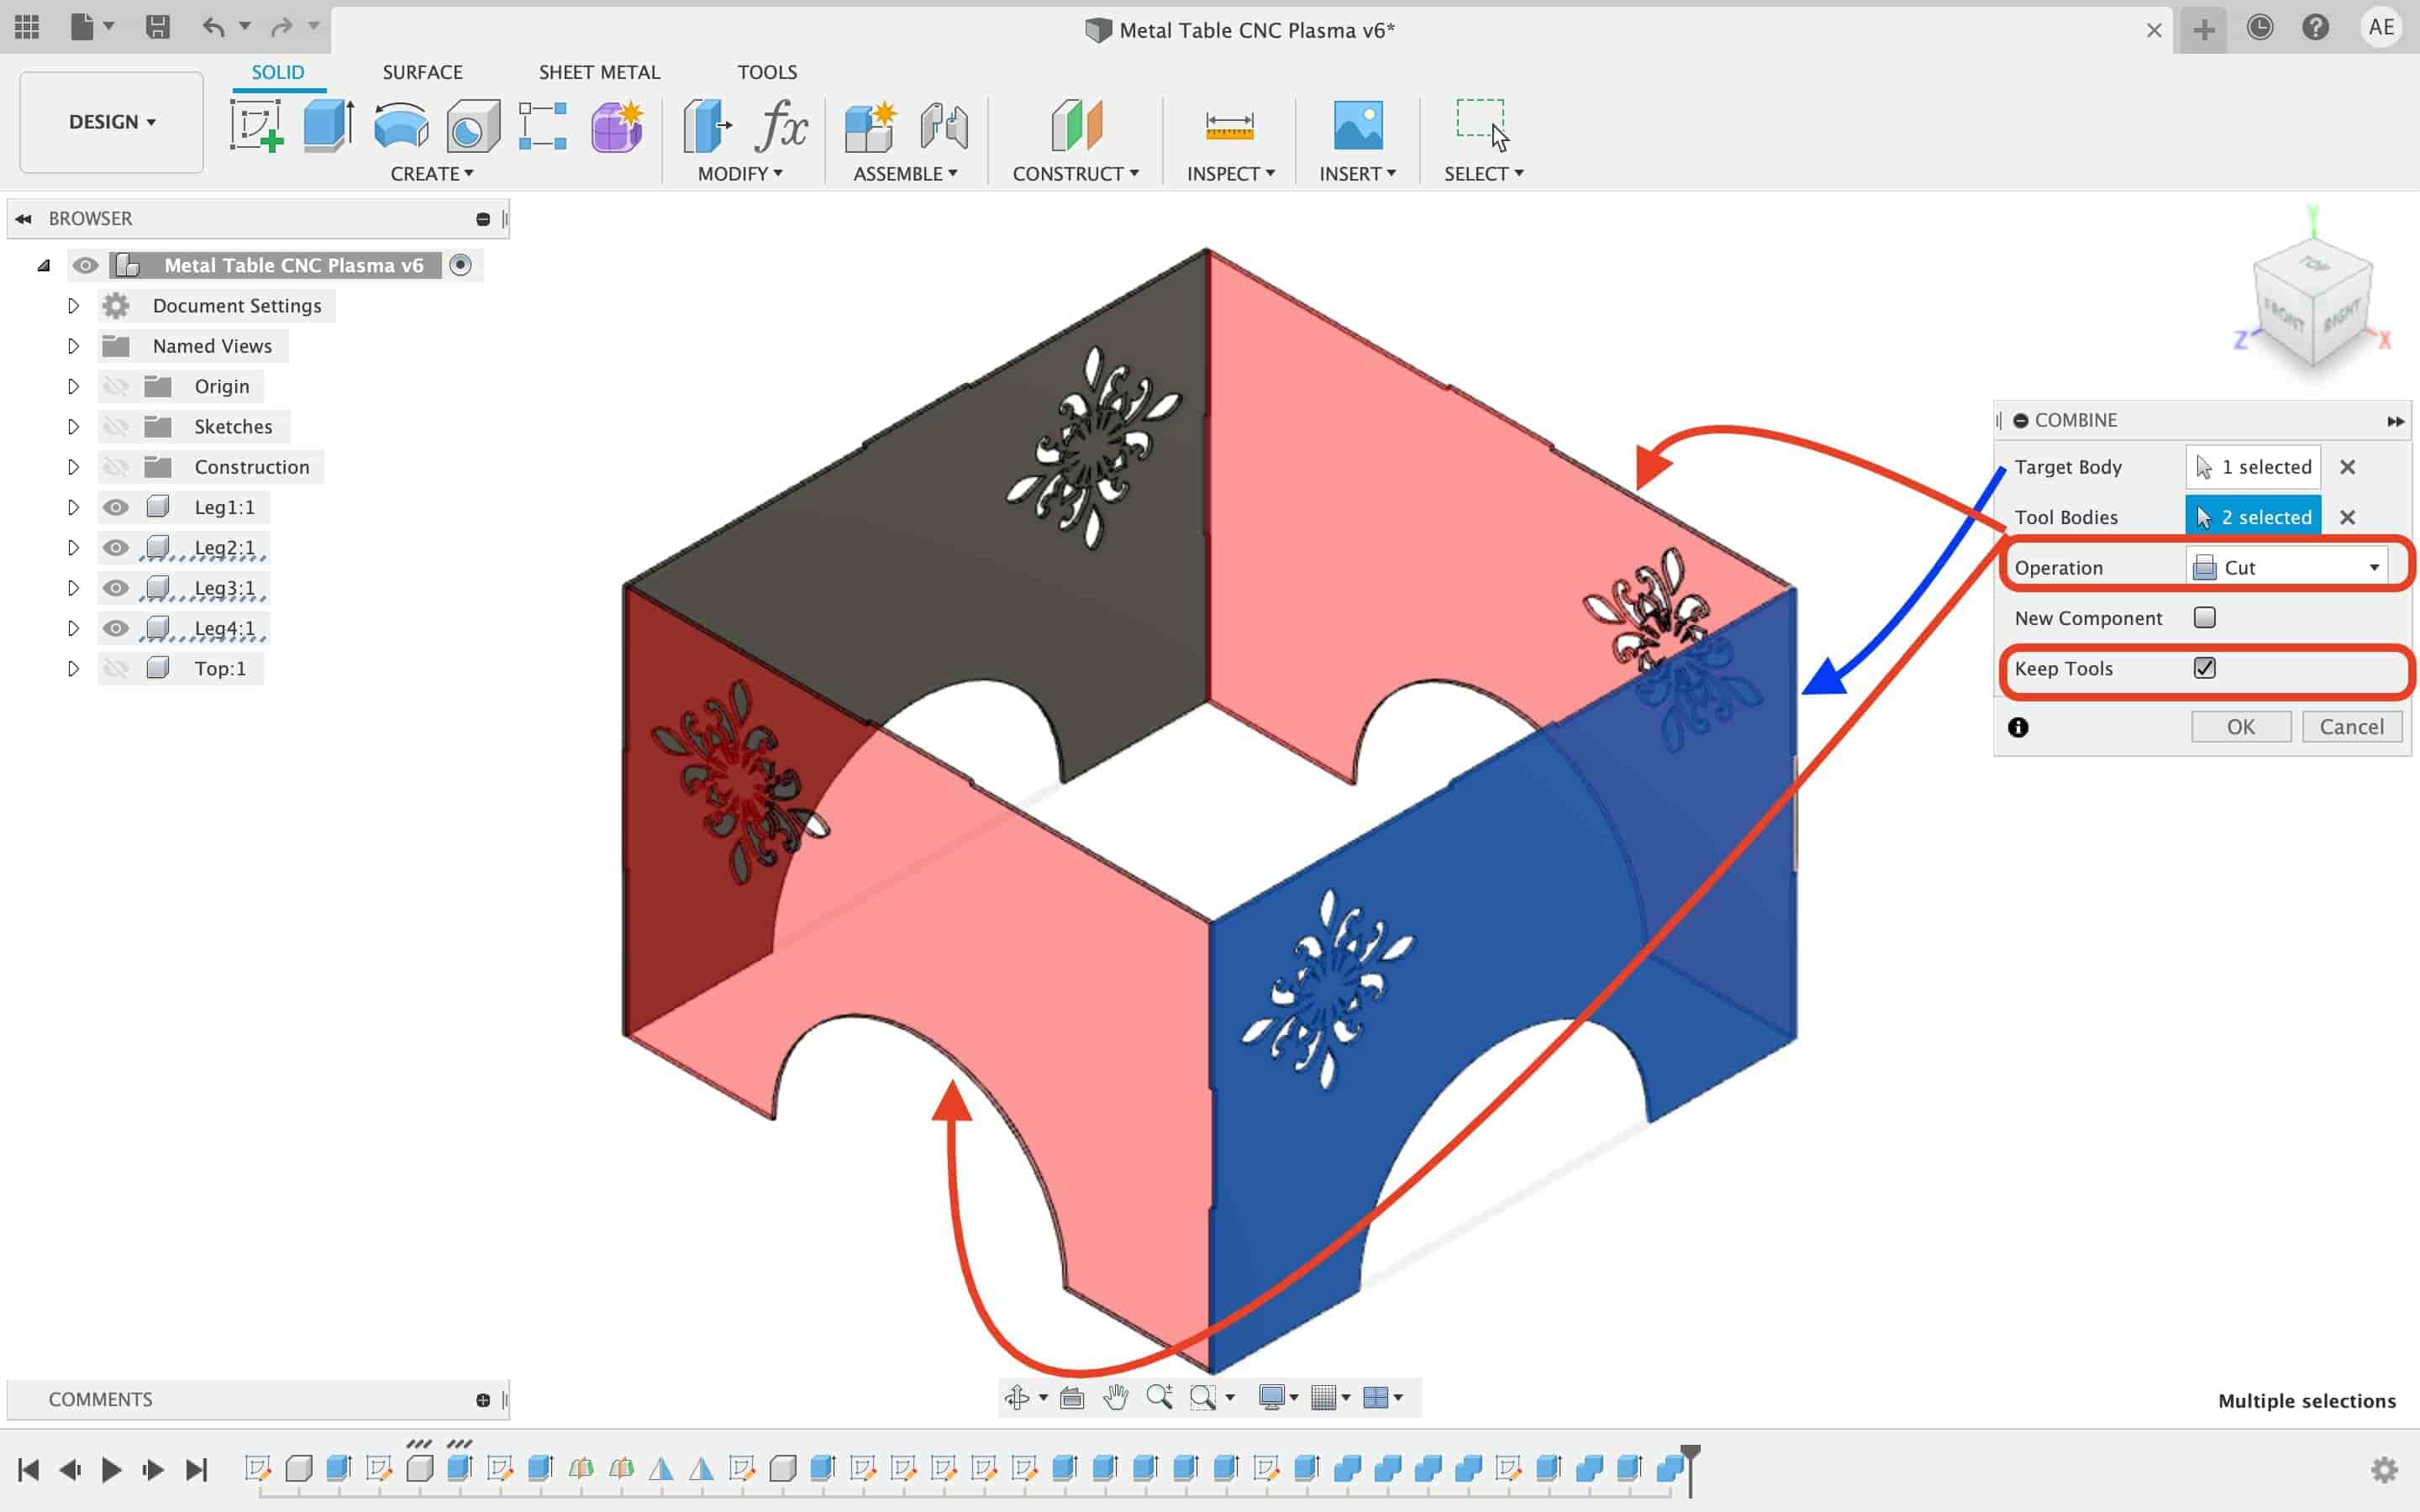
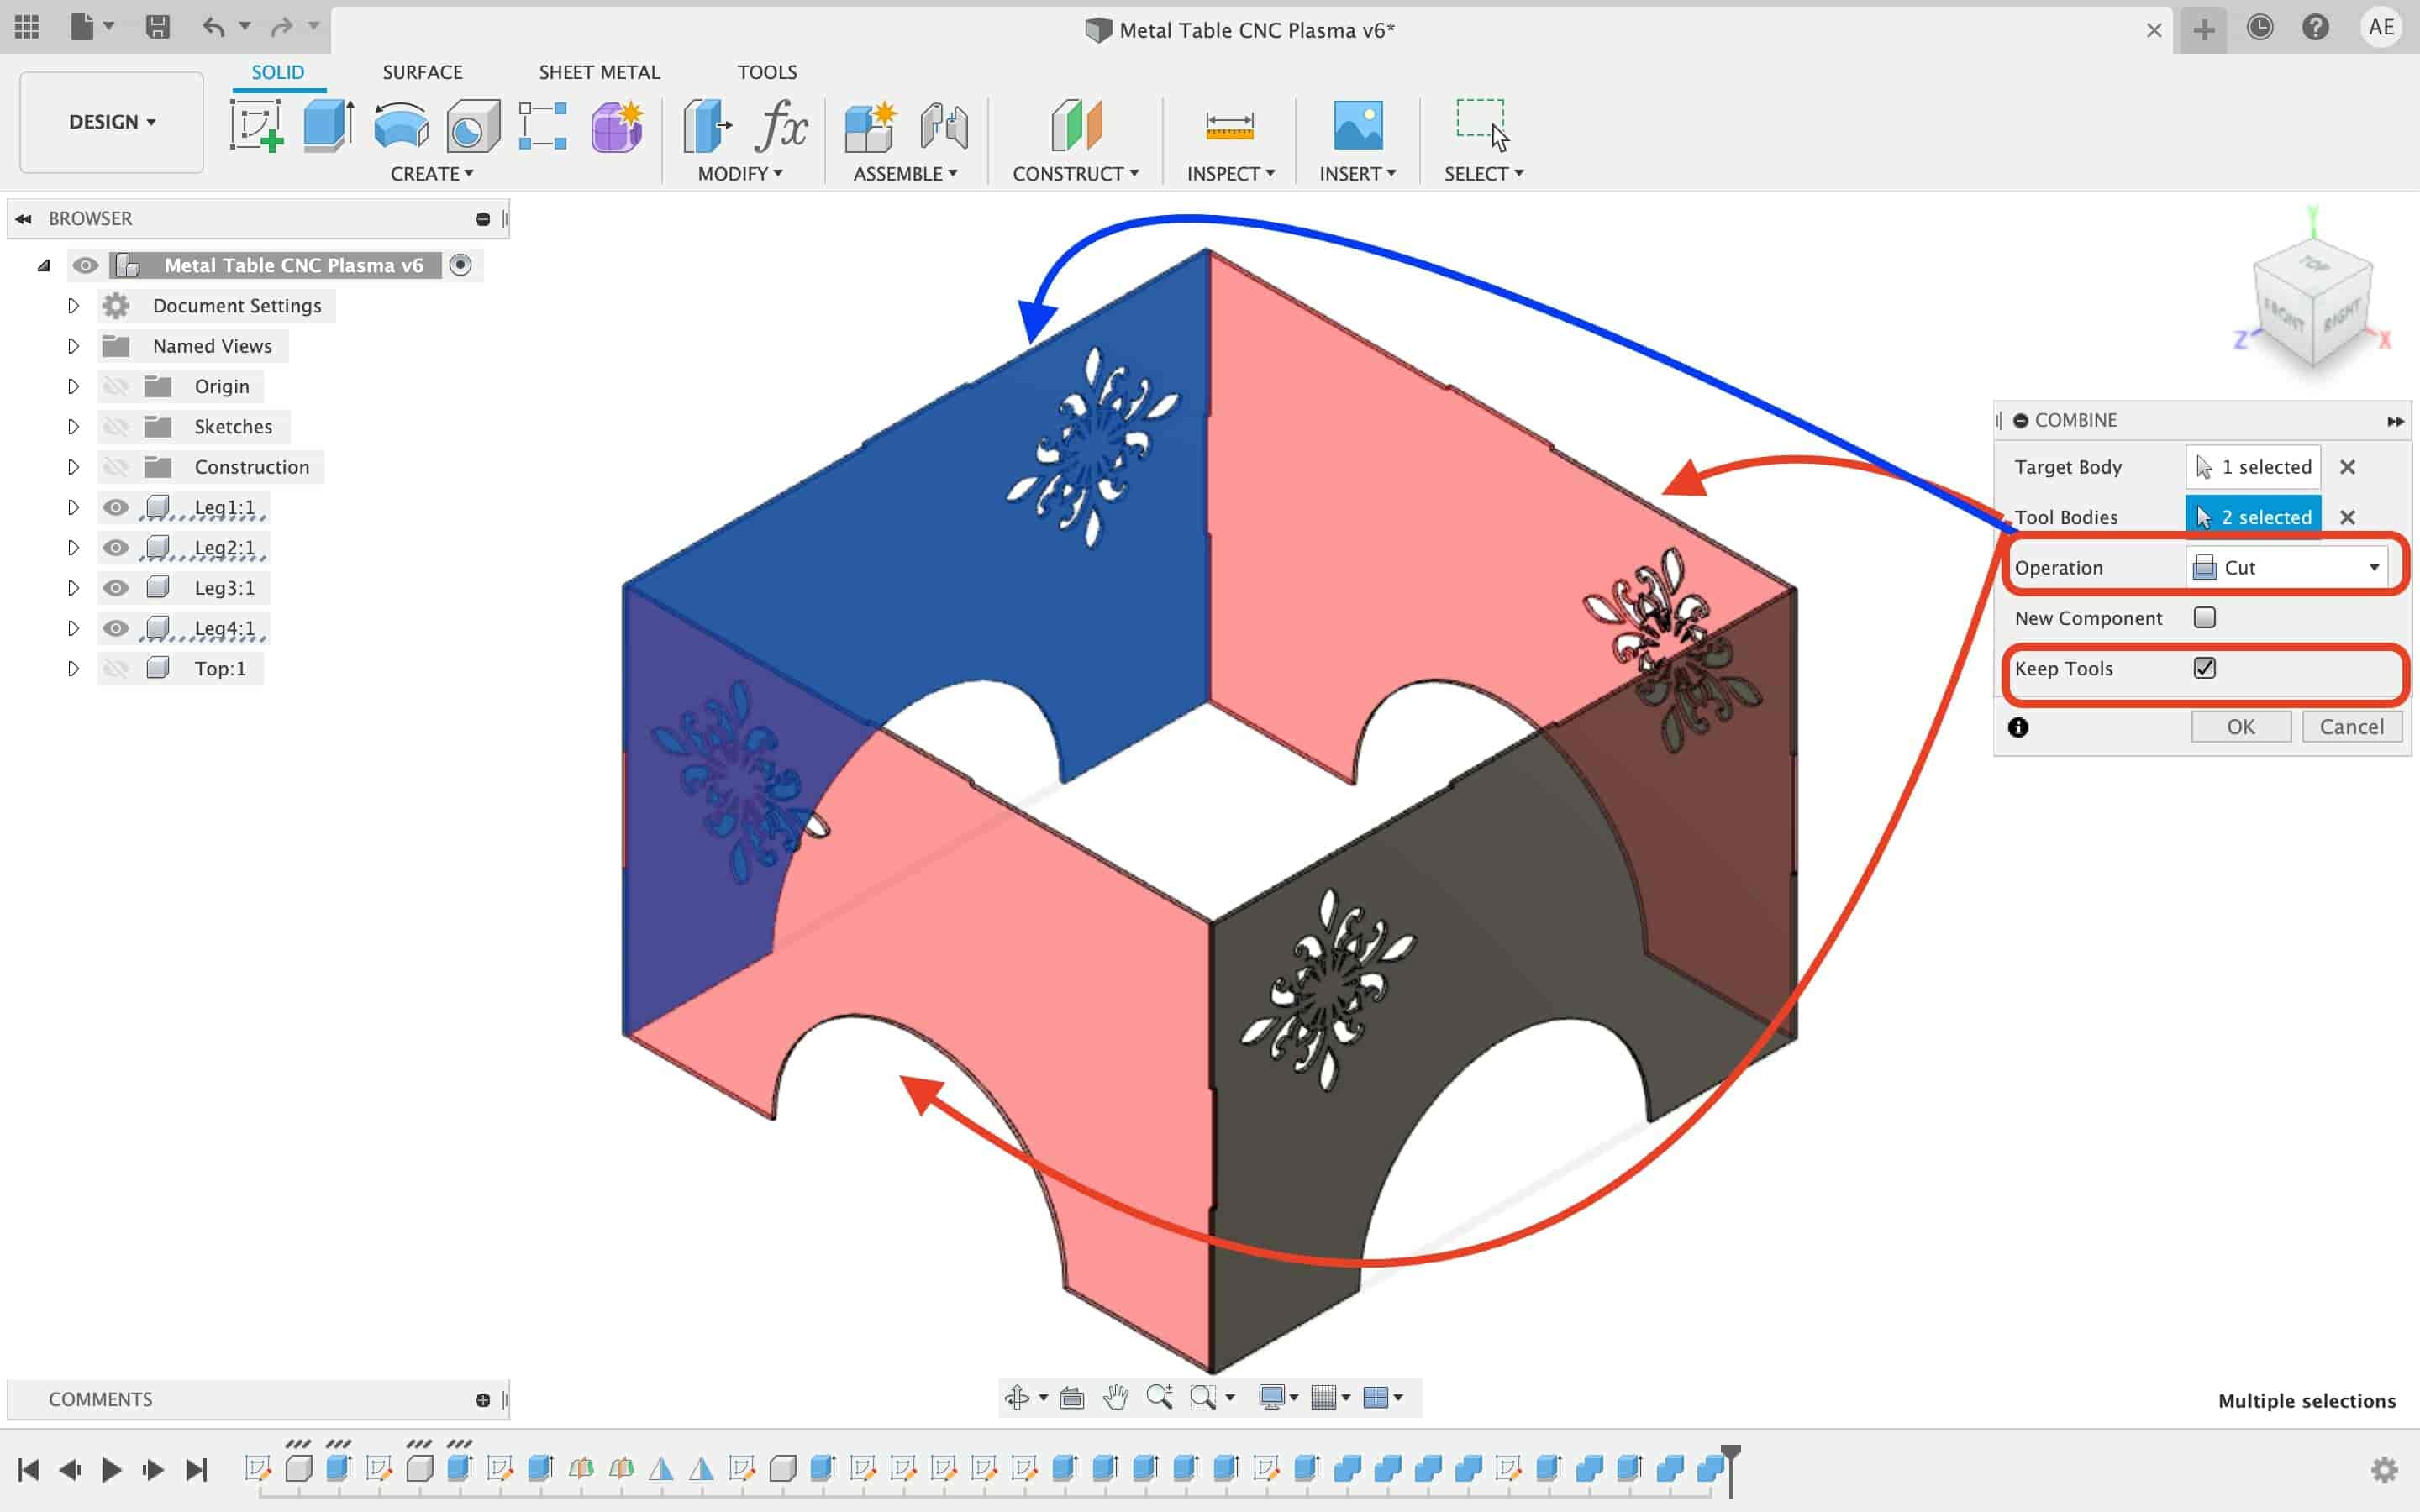
After that, I used the combine tool to cut some slots on the table top part ti fit with the table legs.
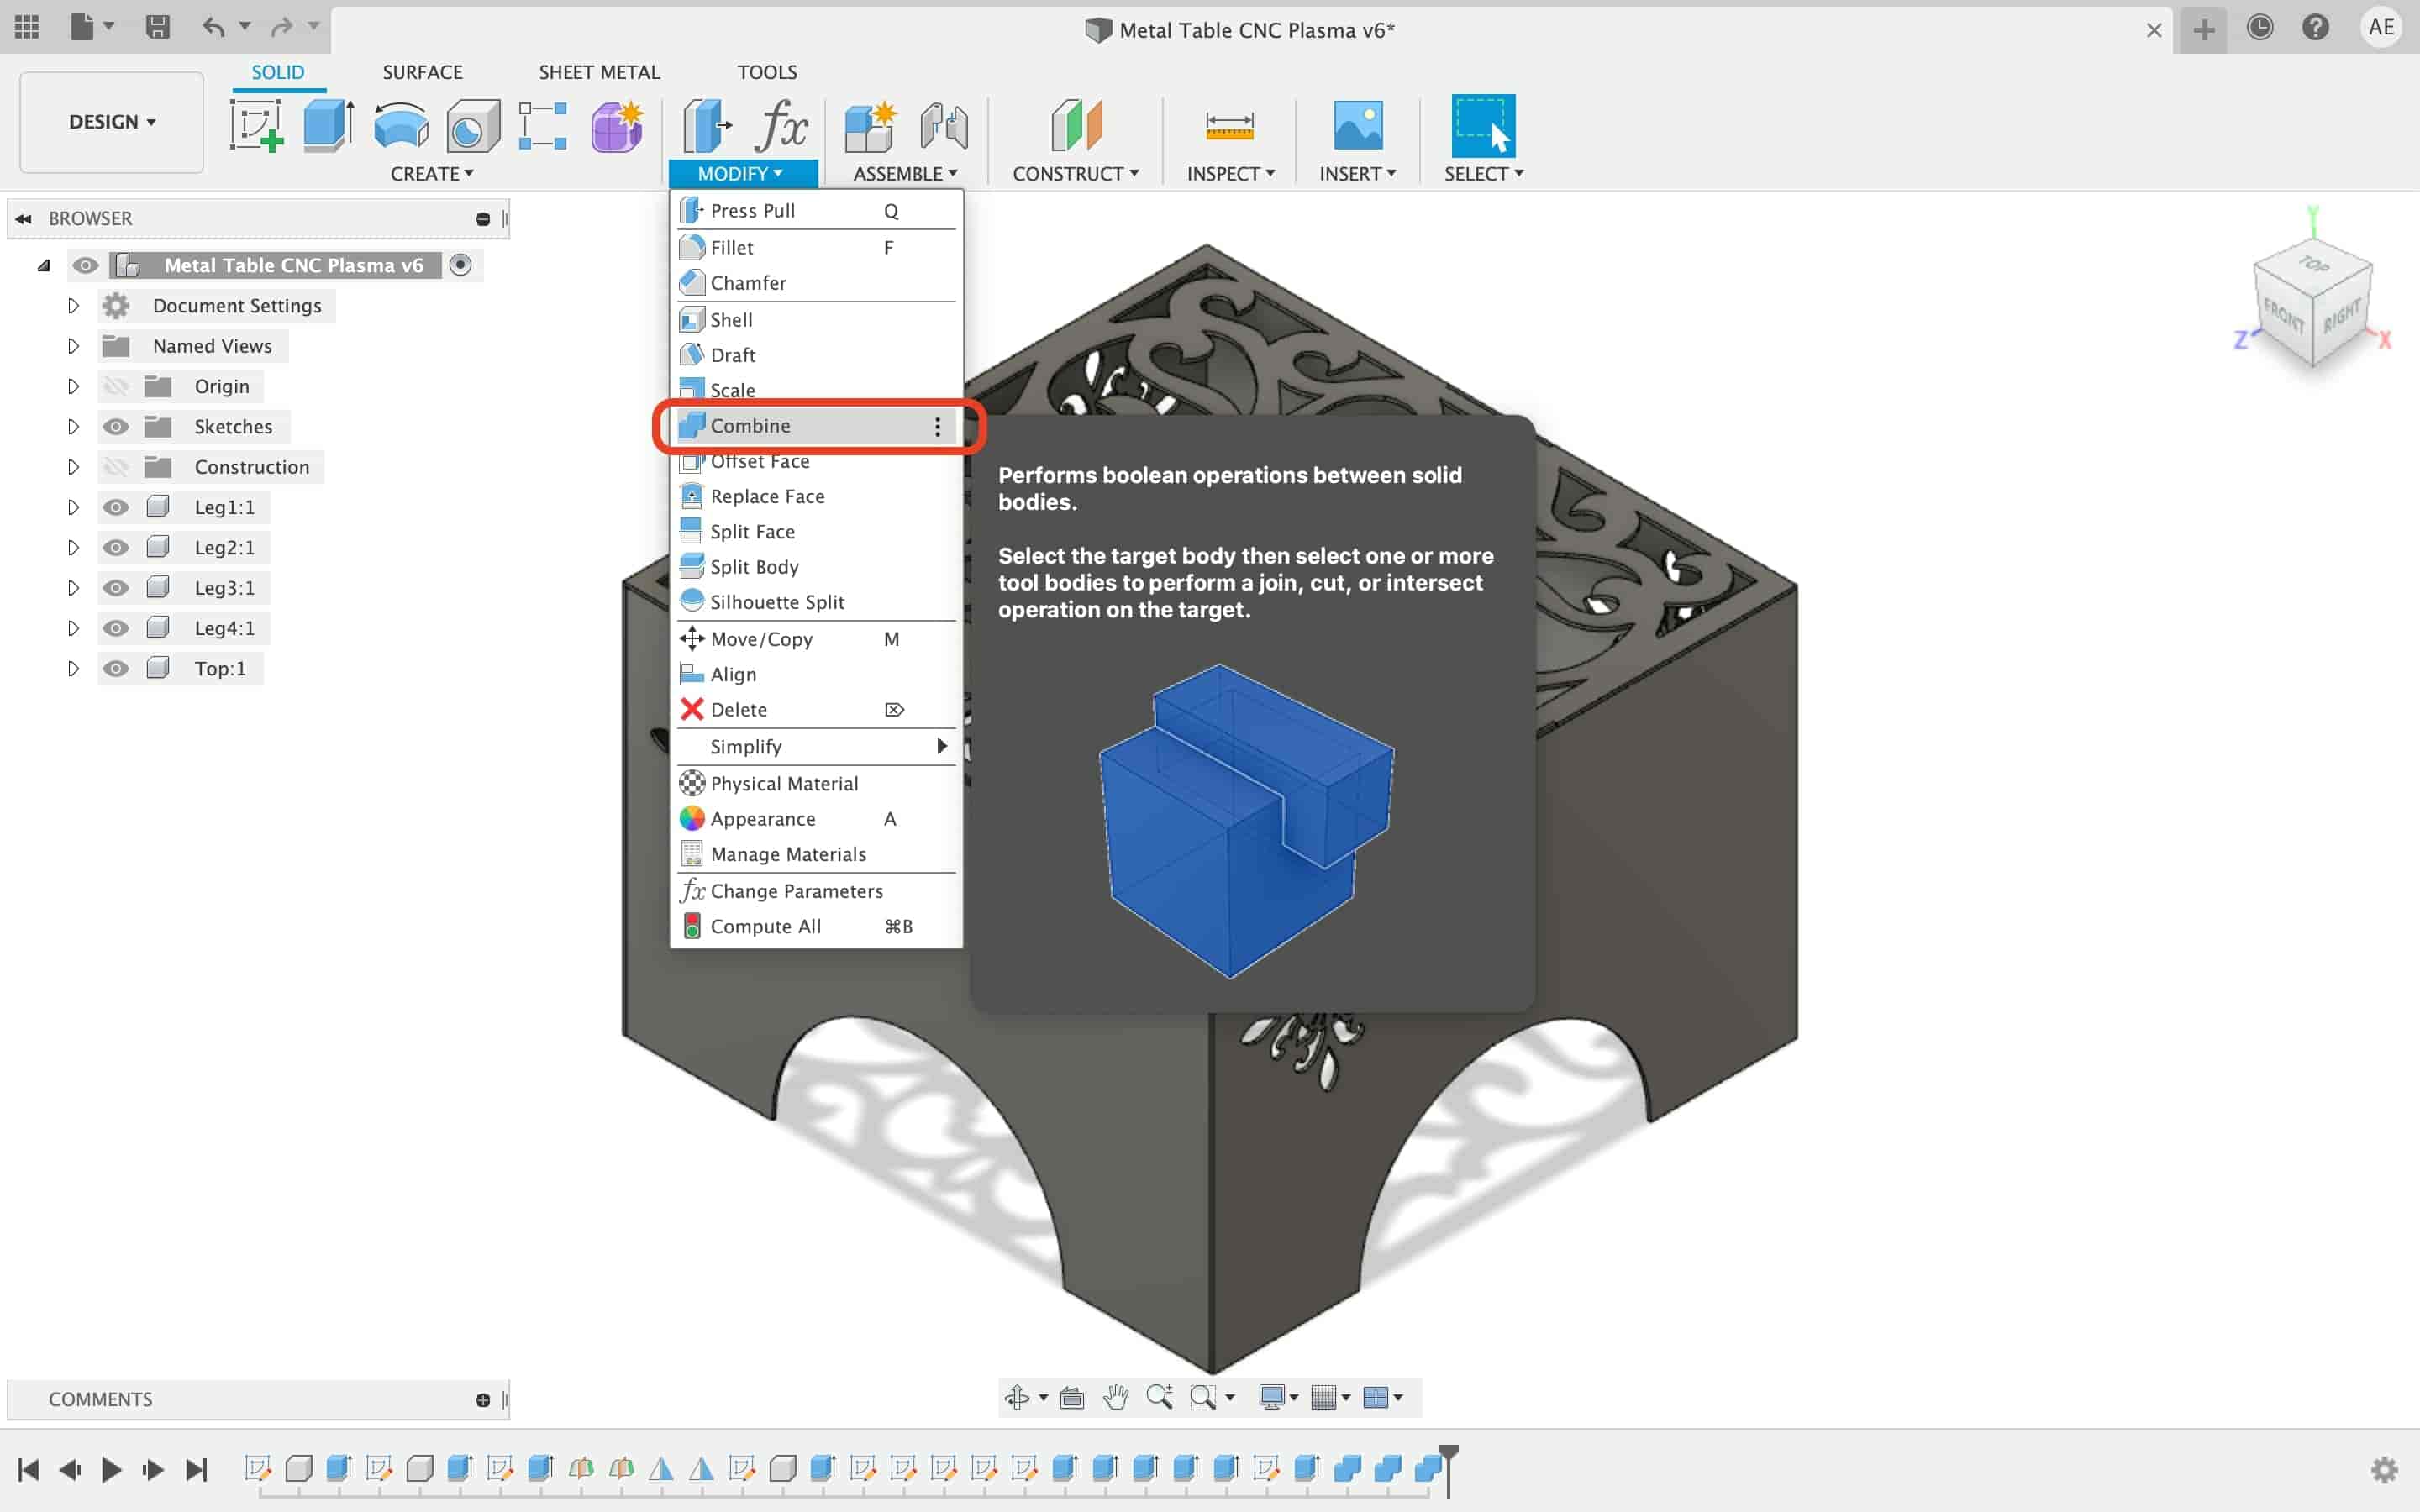
I also made some press fits between the four legs to assemble them easily.
Then, I extrude the same male fits on the opposite side of the two legs.
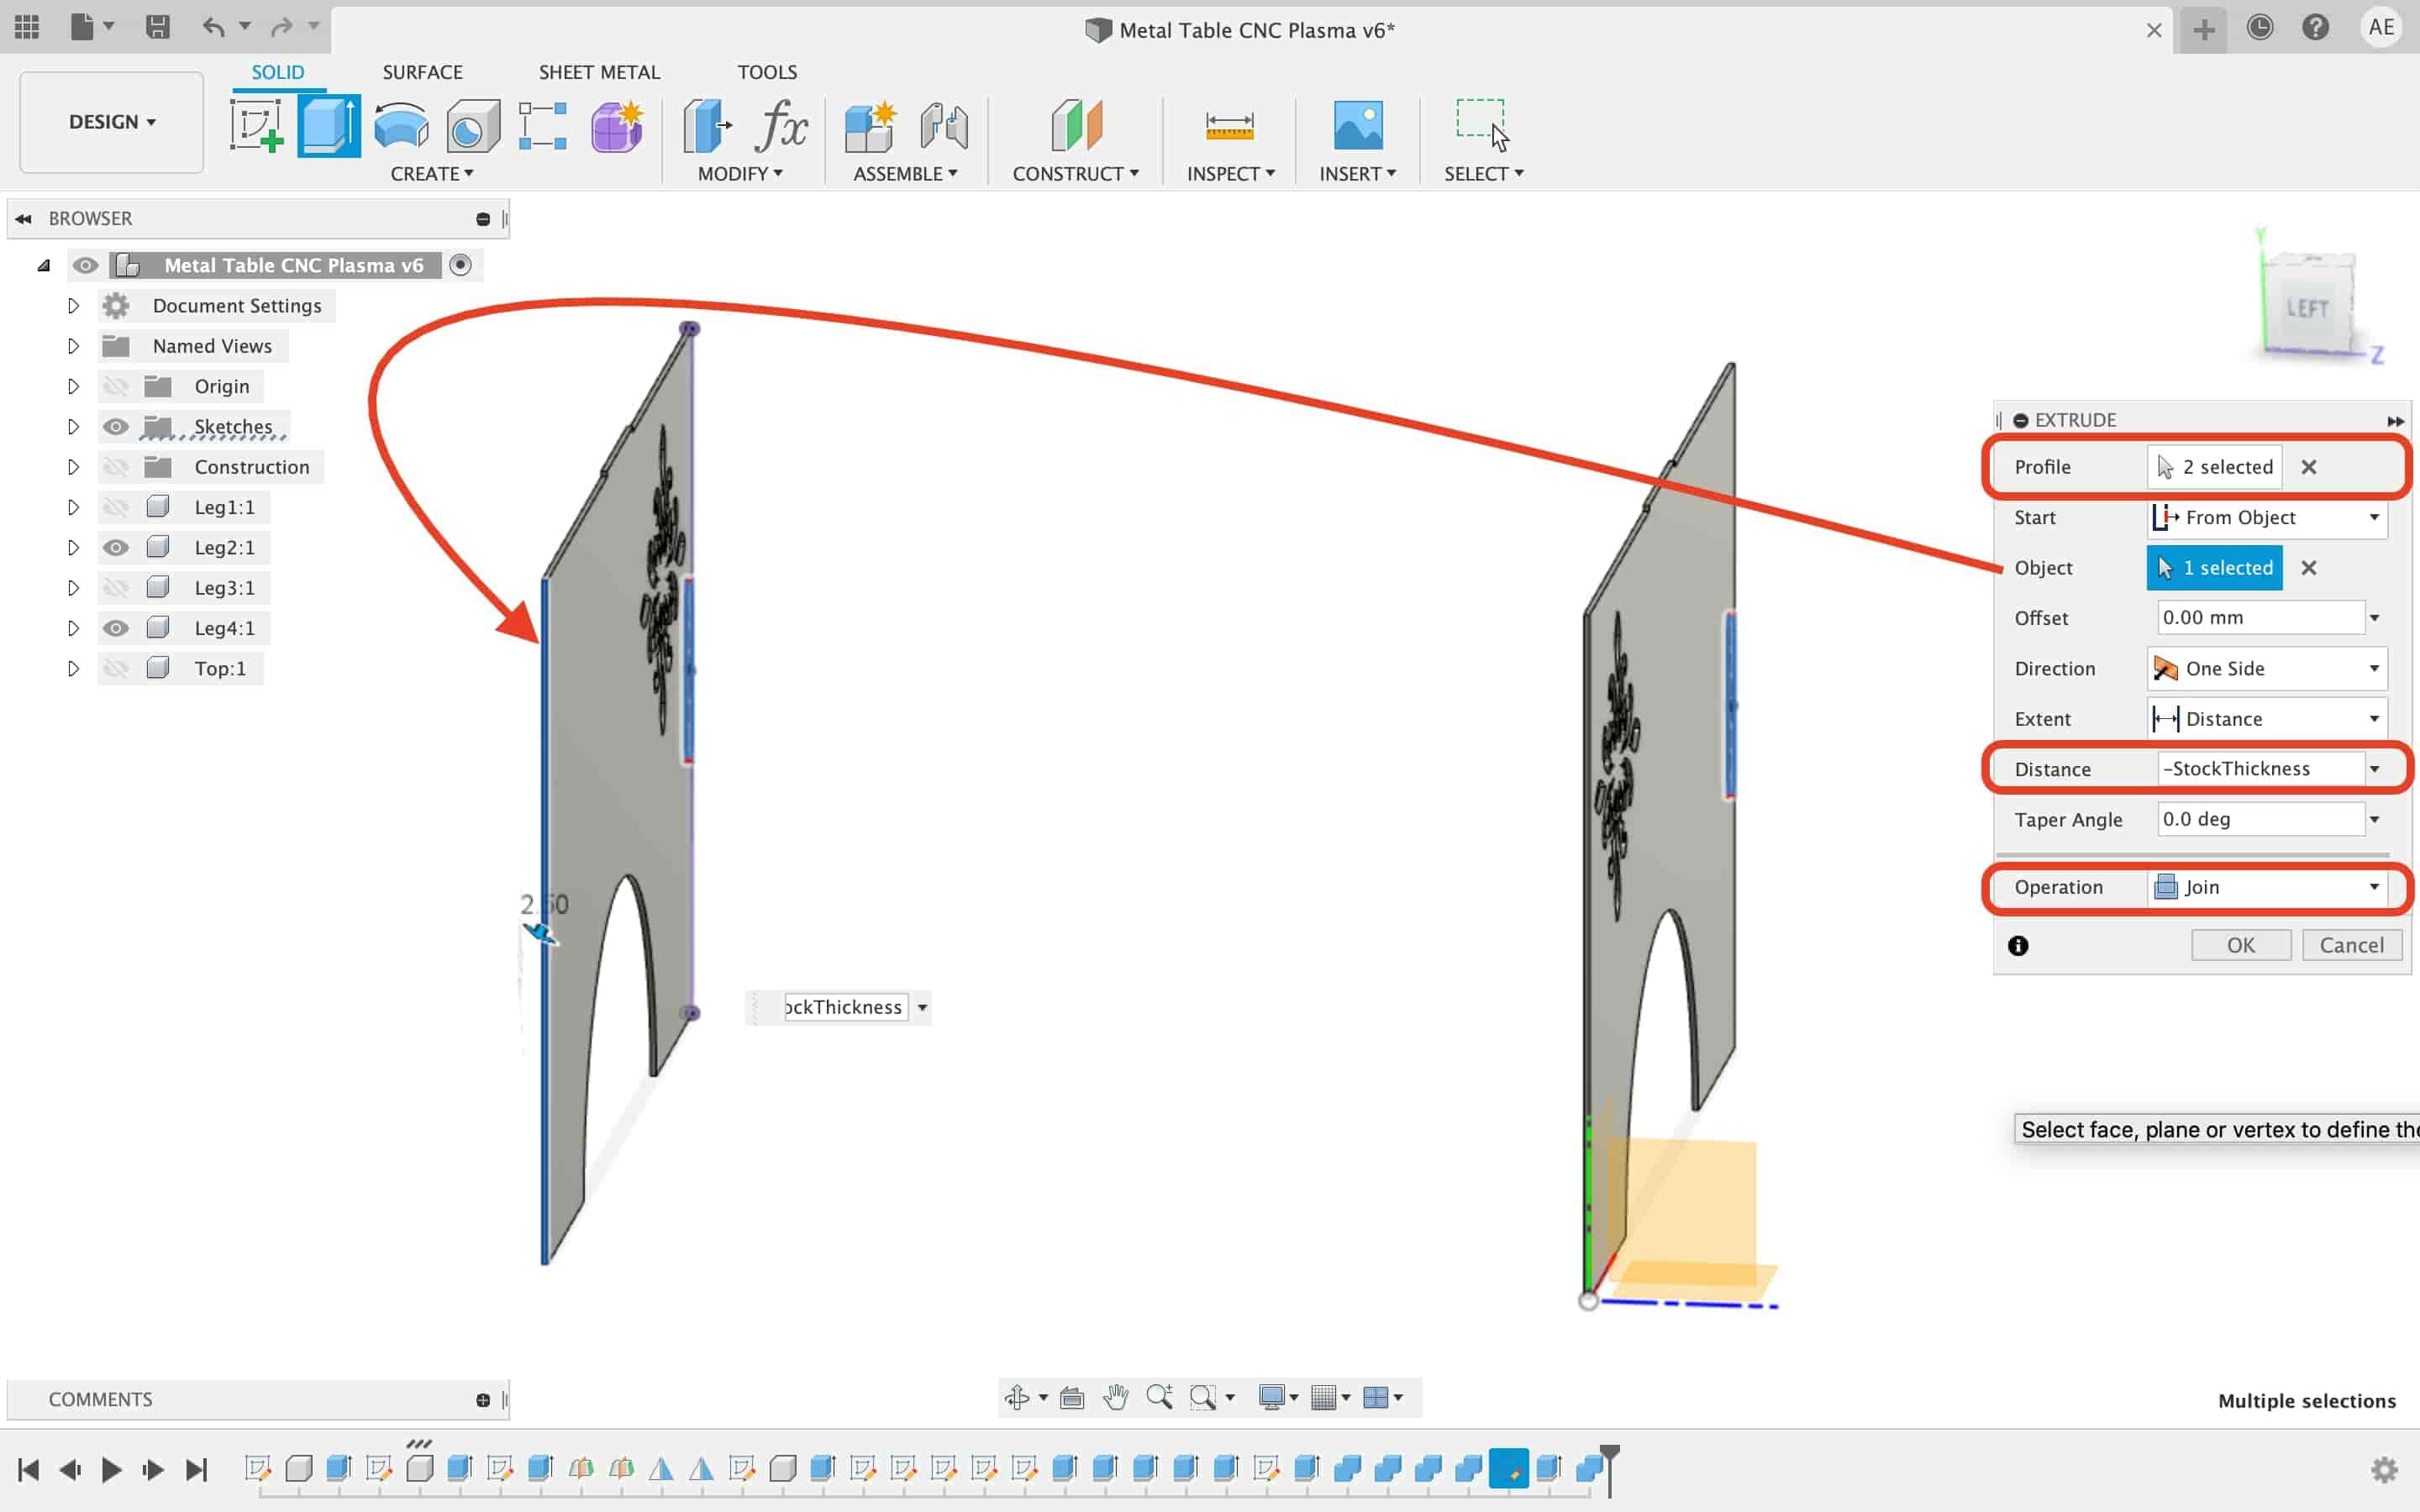
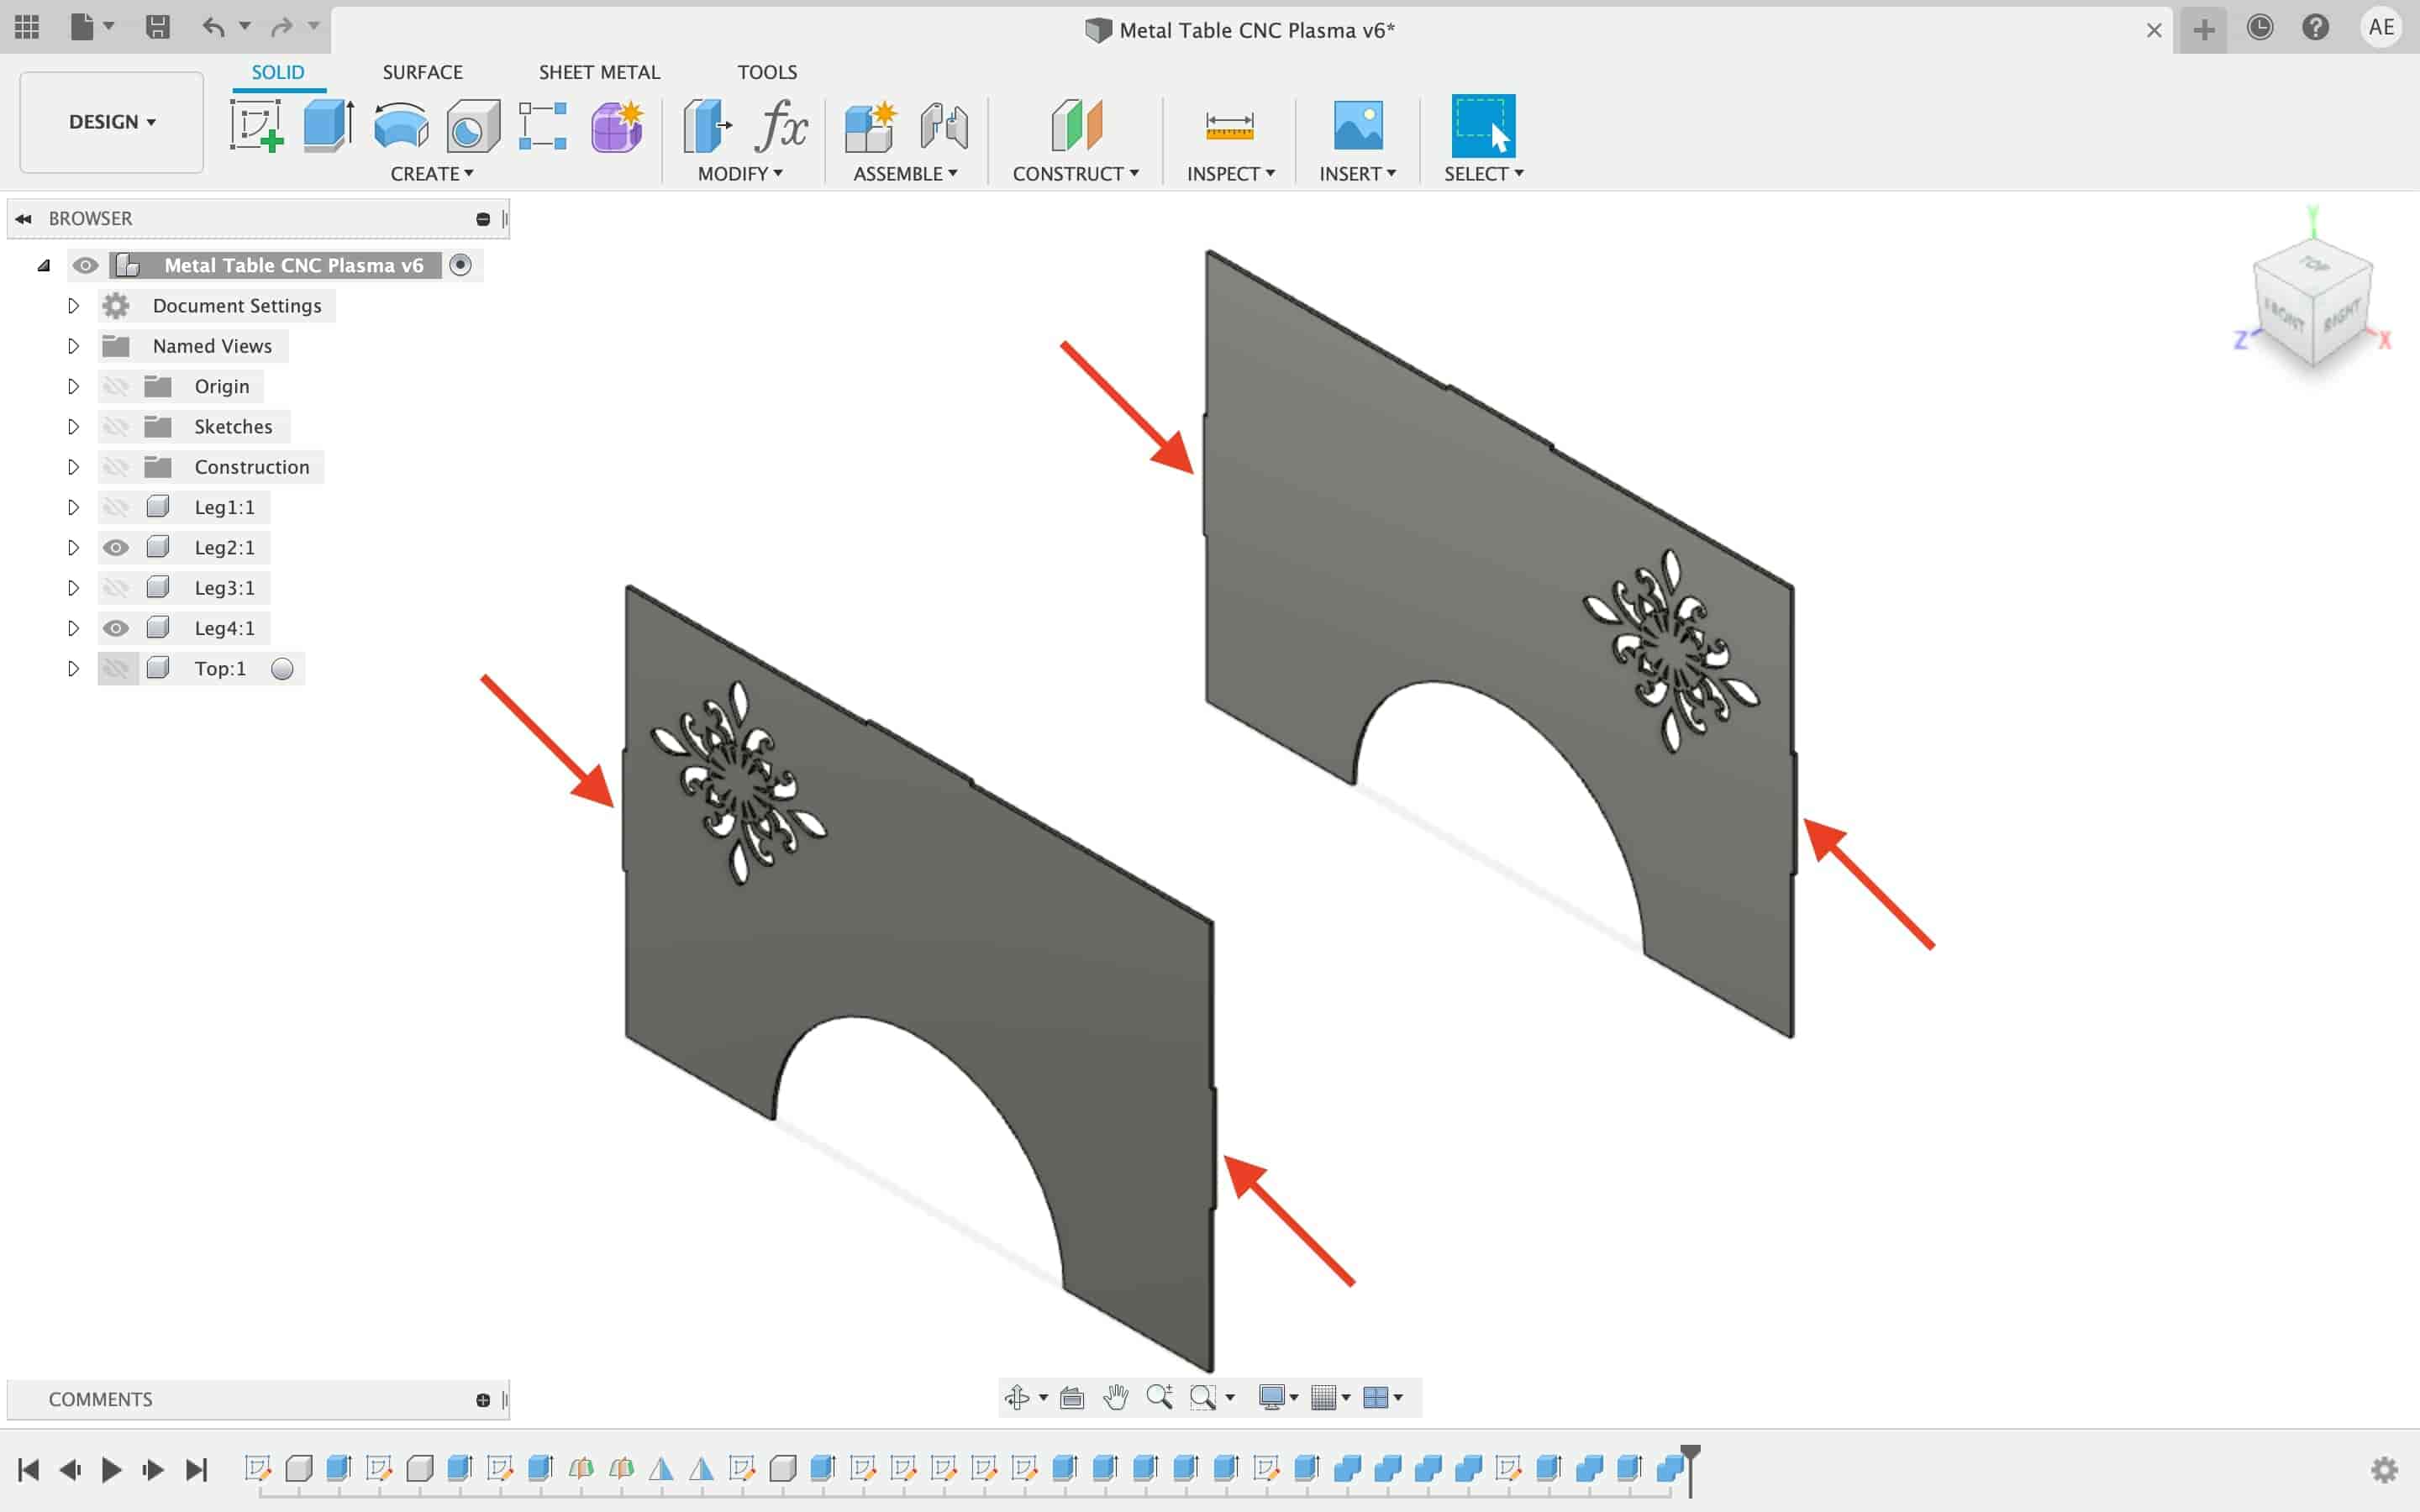
Then, I used the combine tool again to make the female slots on the legs to fit with the male slots.
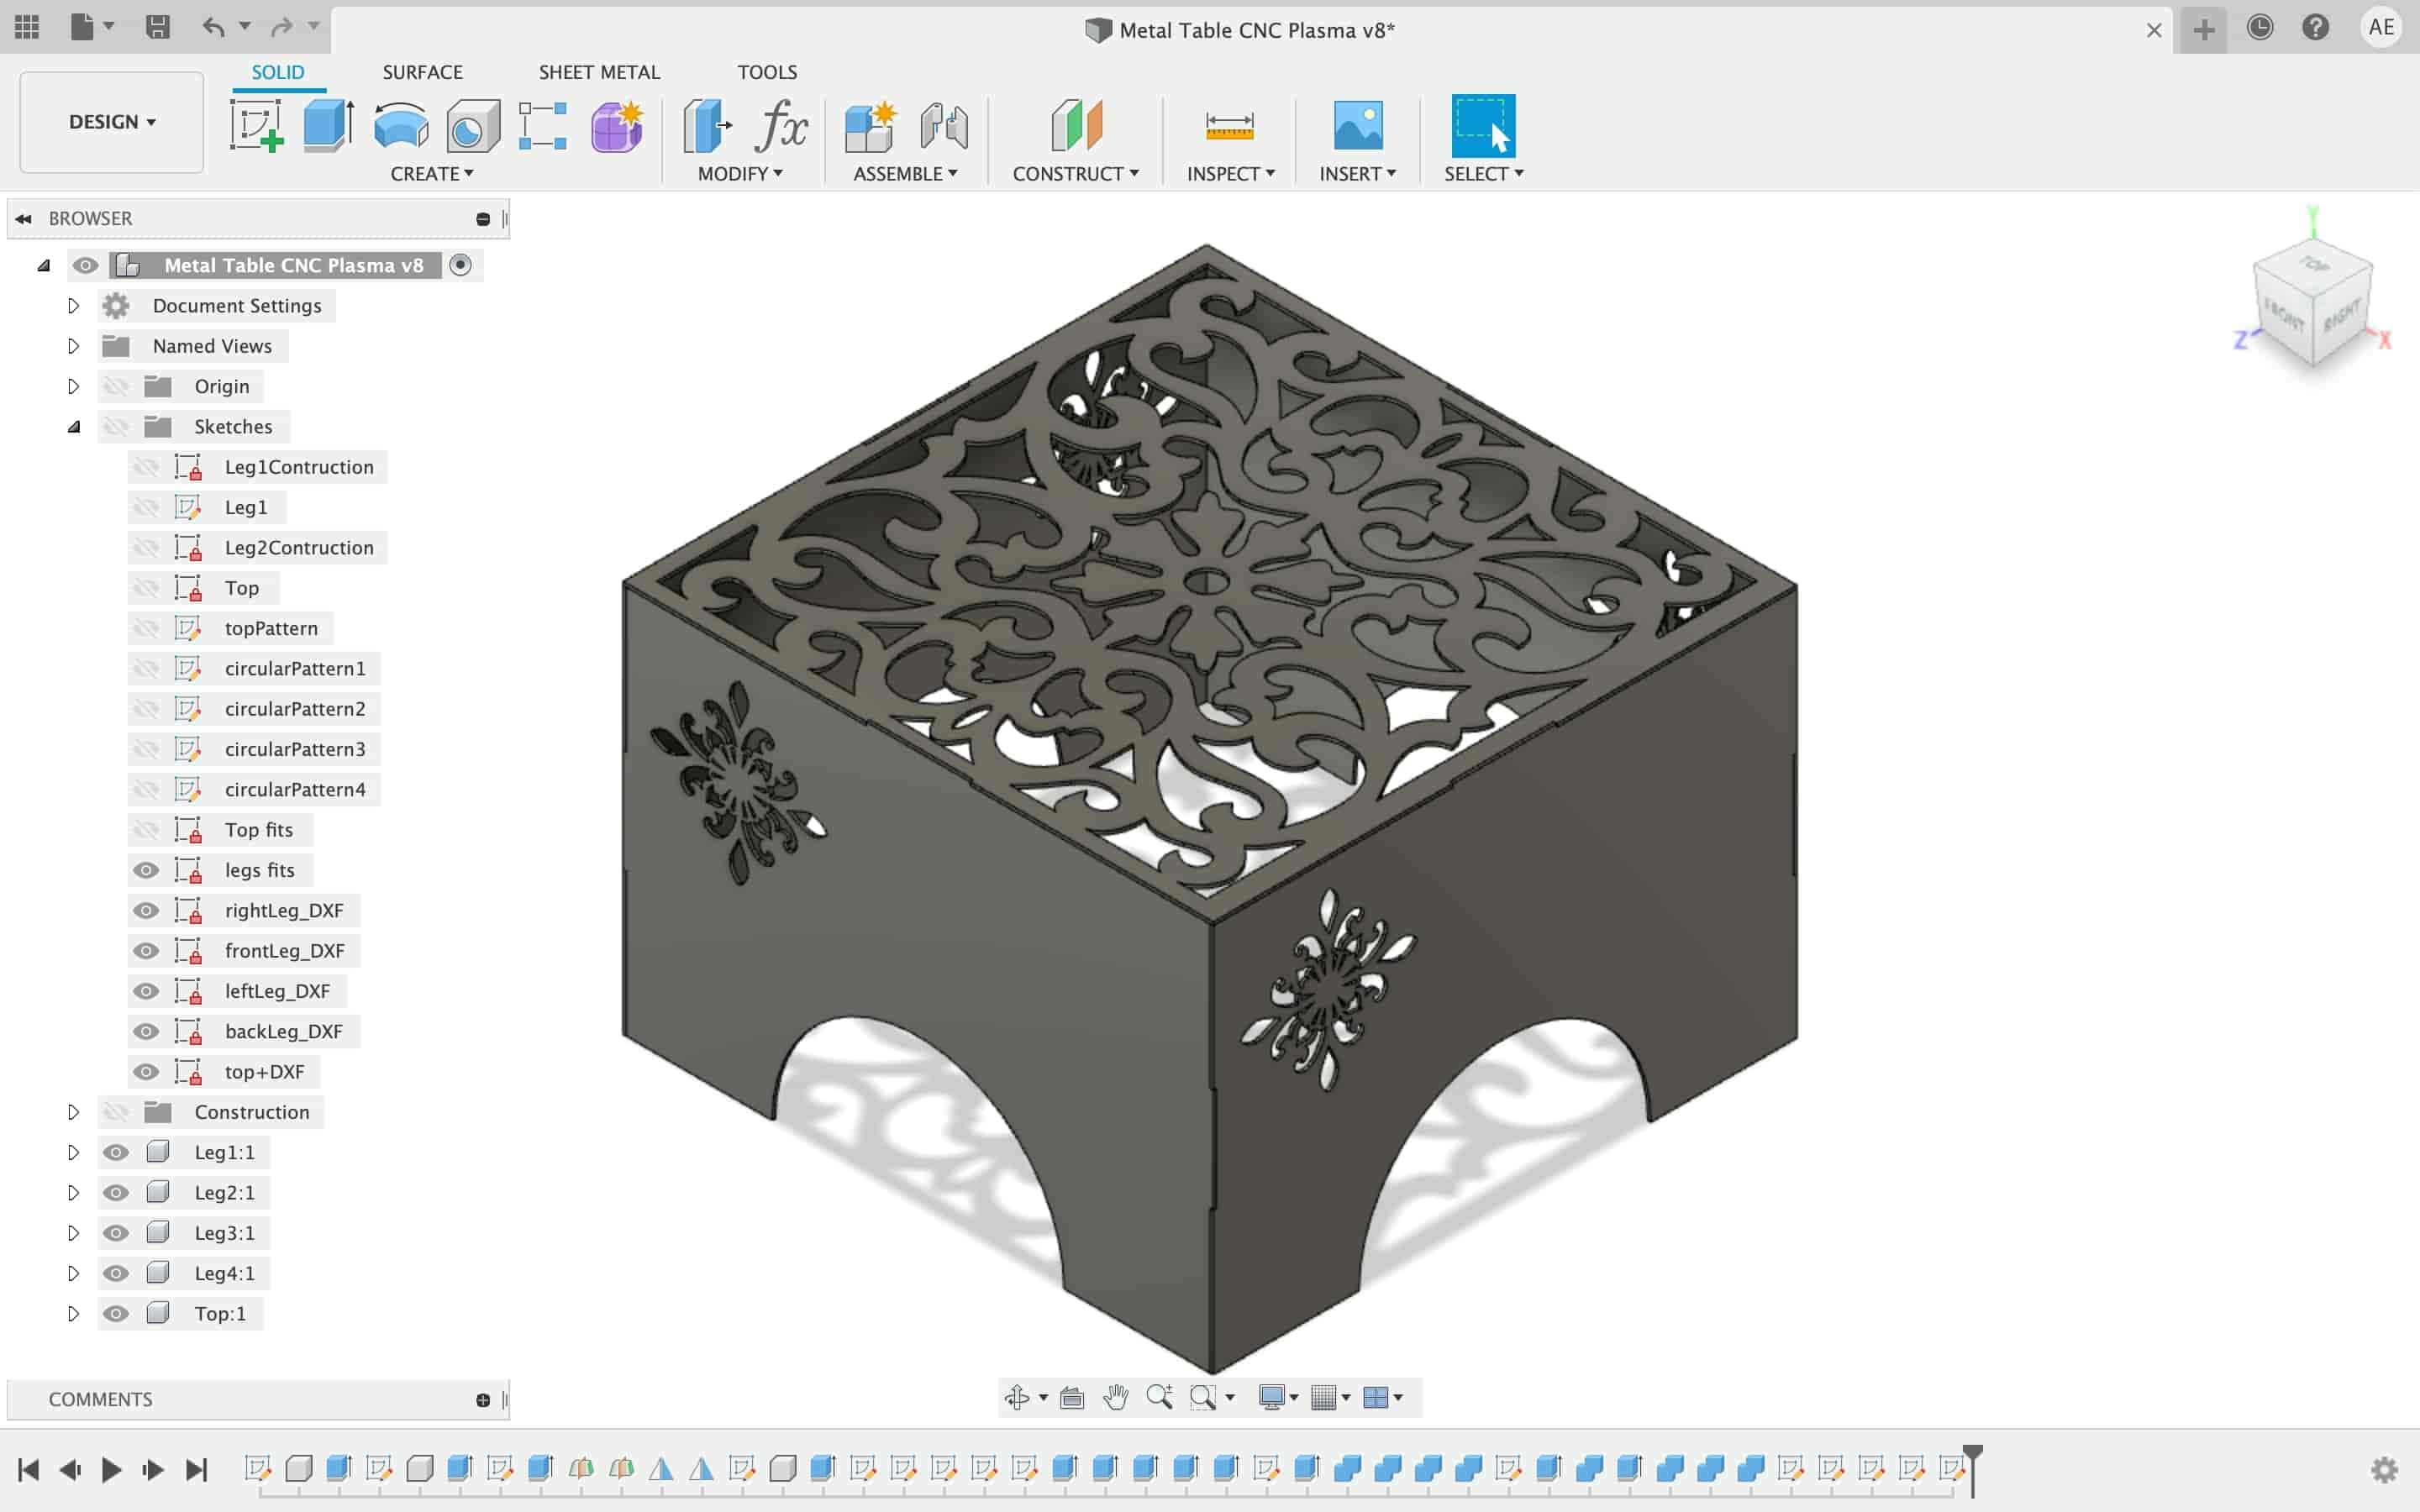
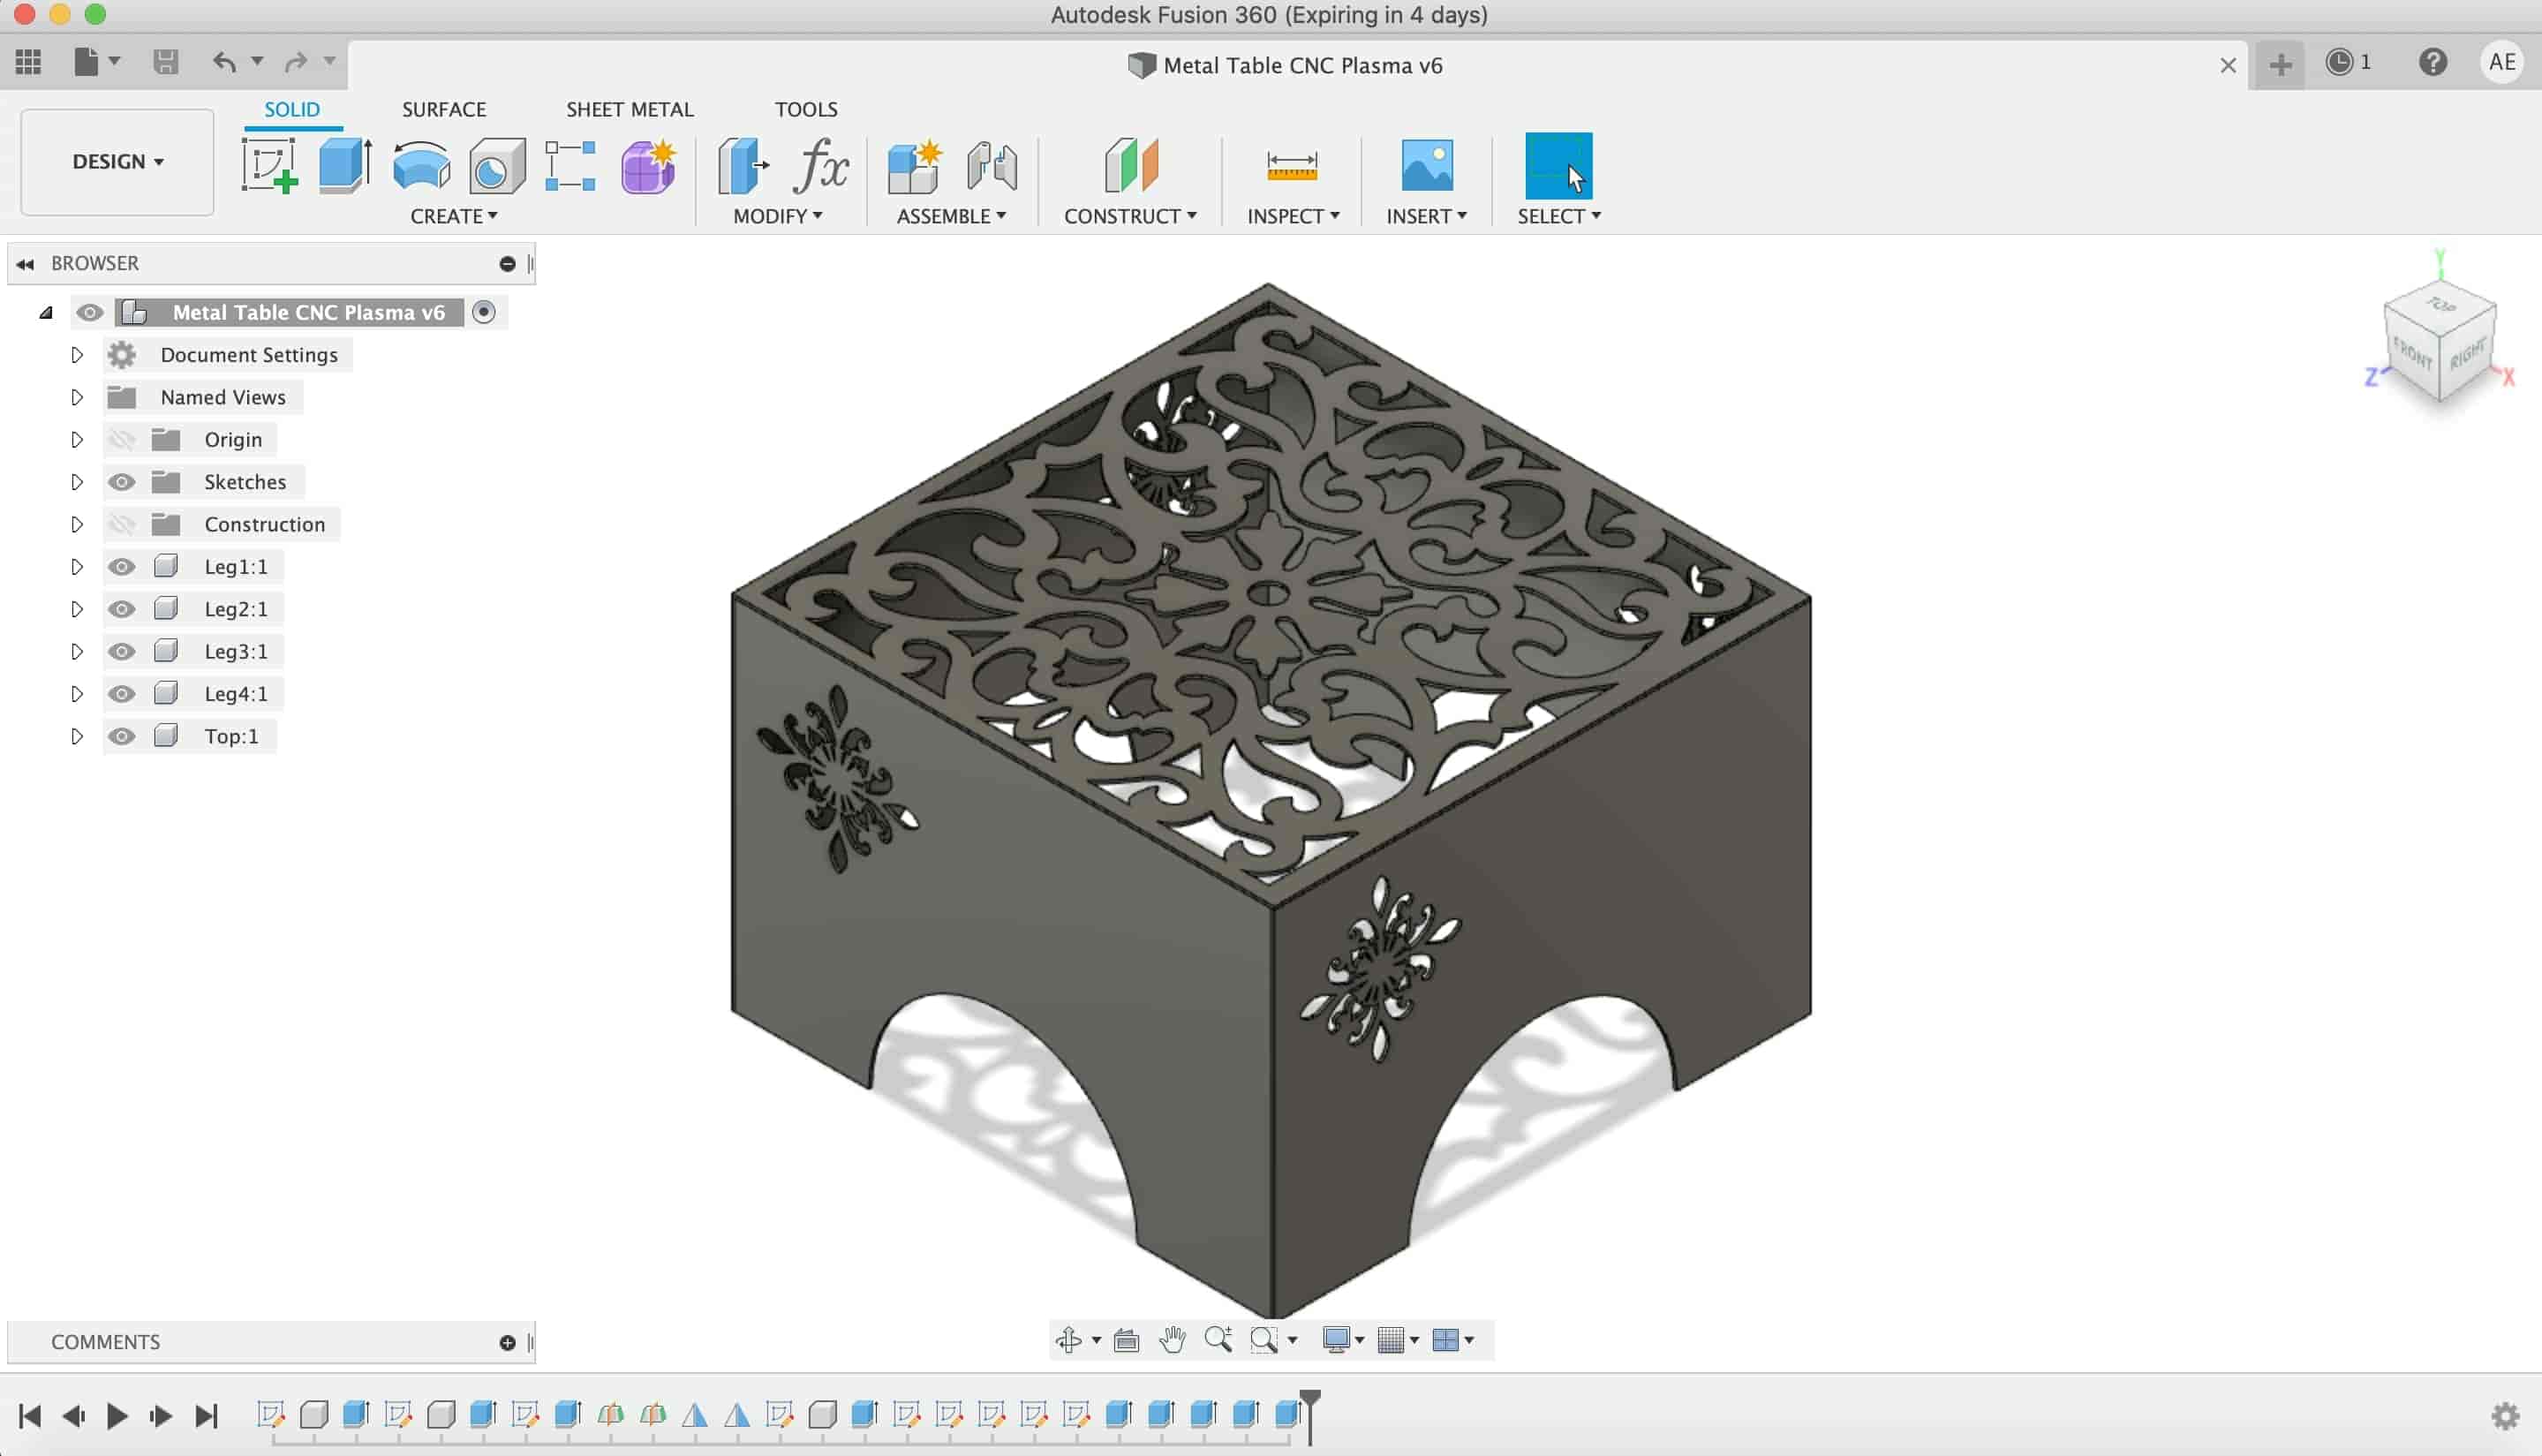
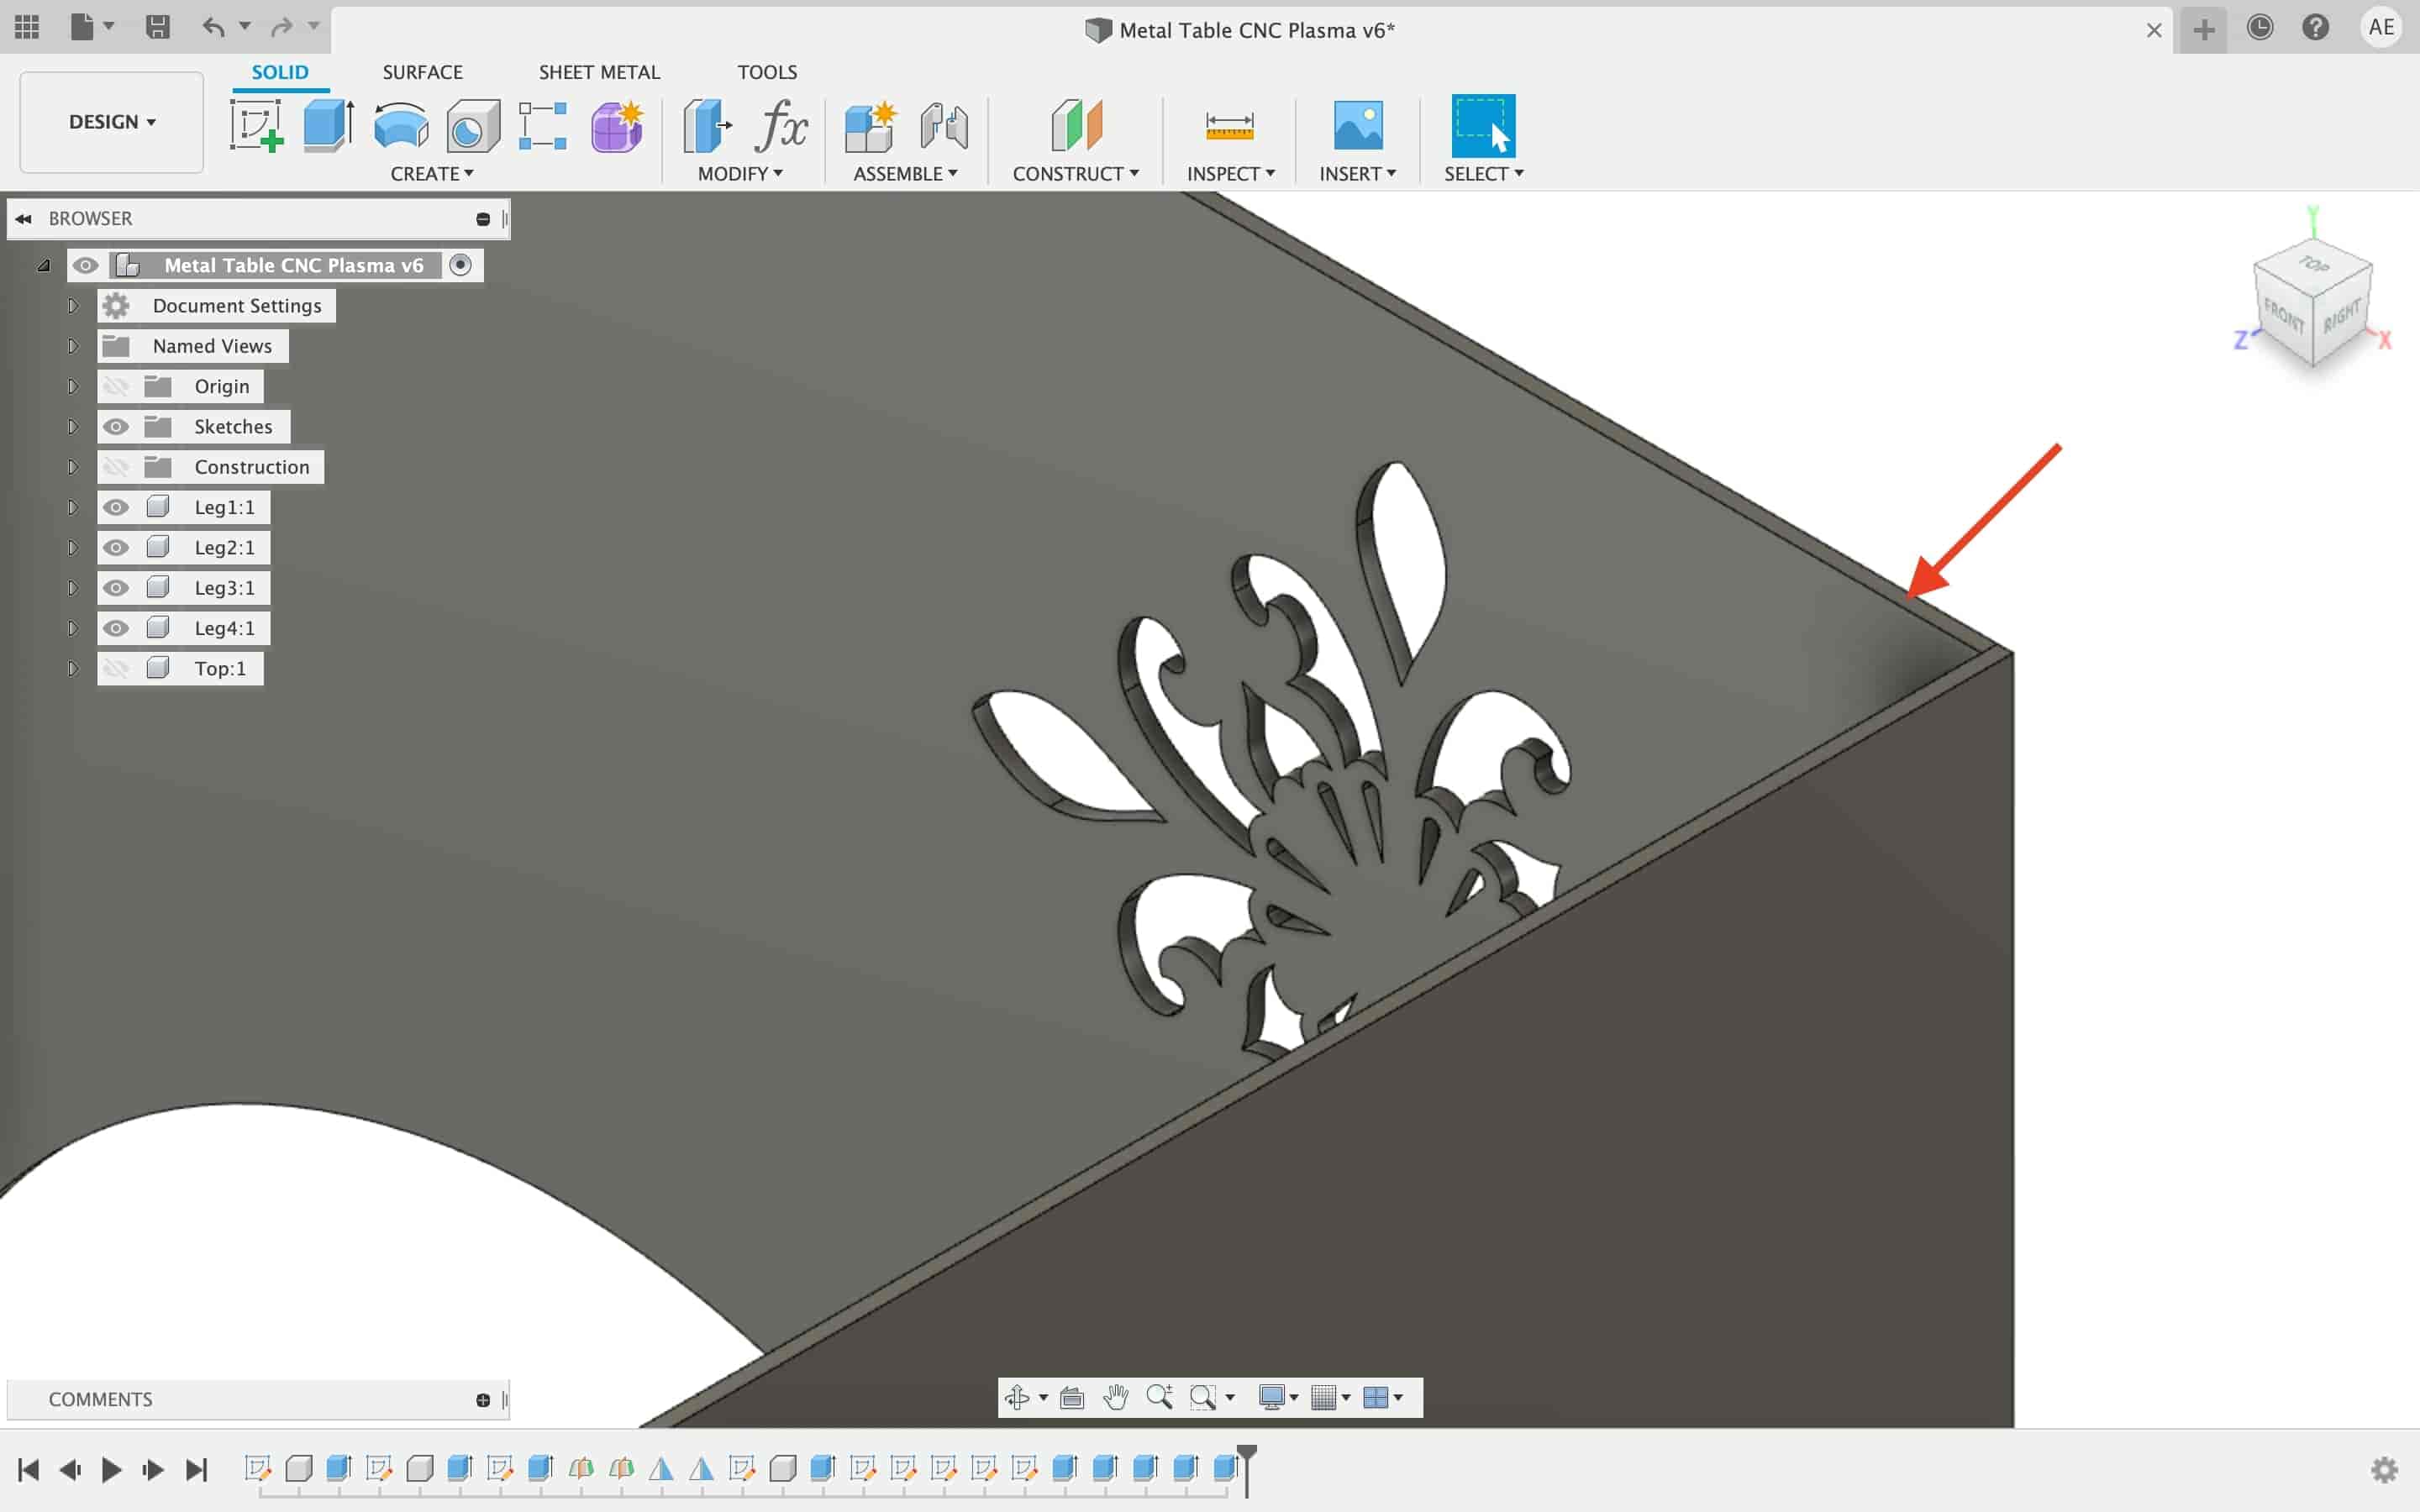
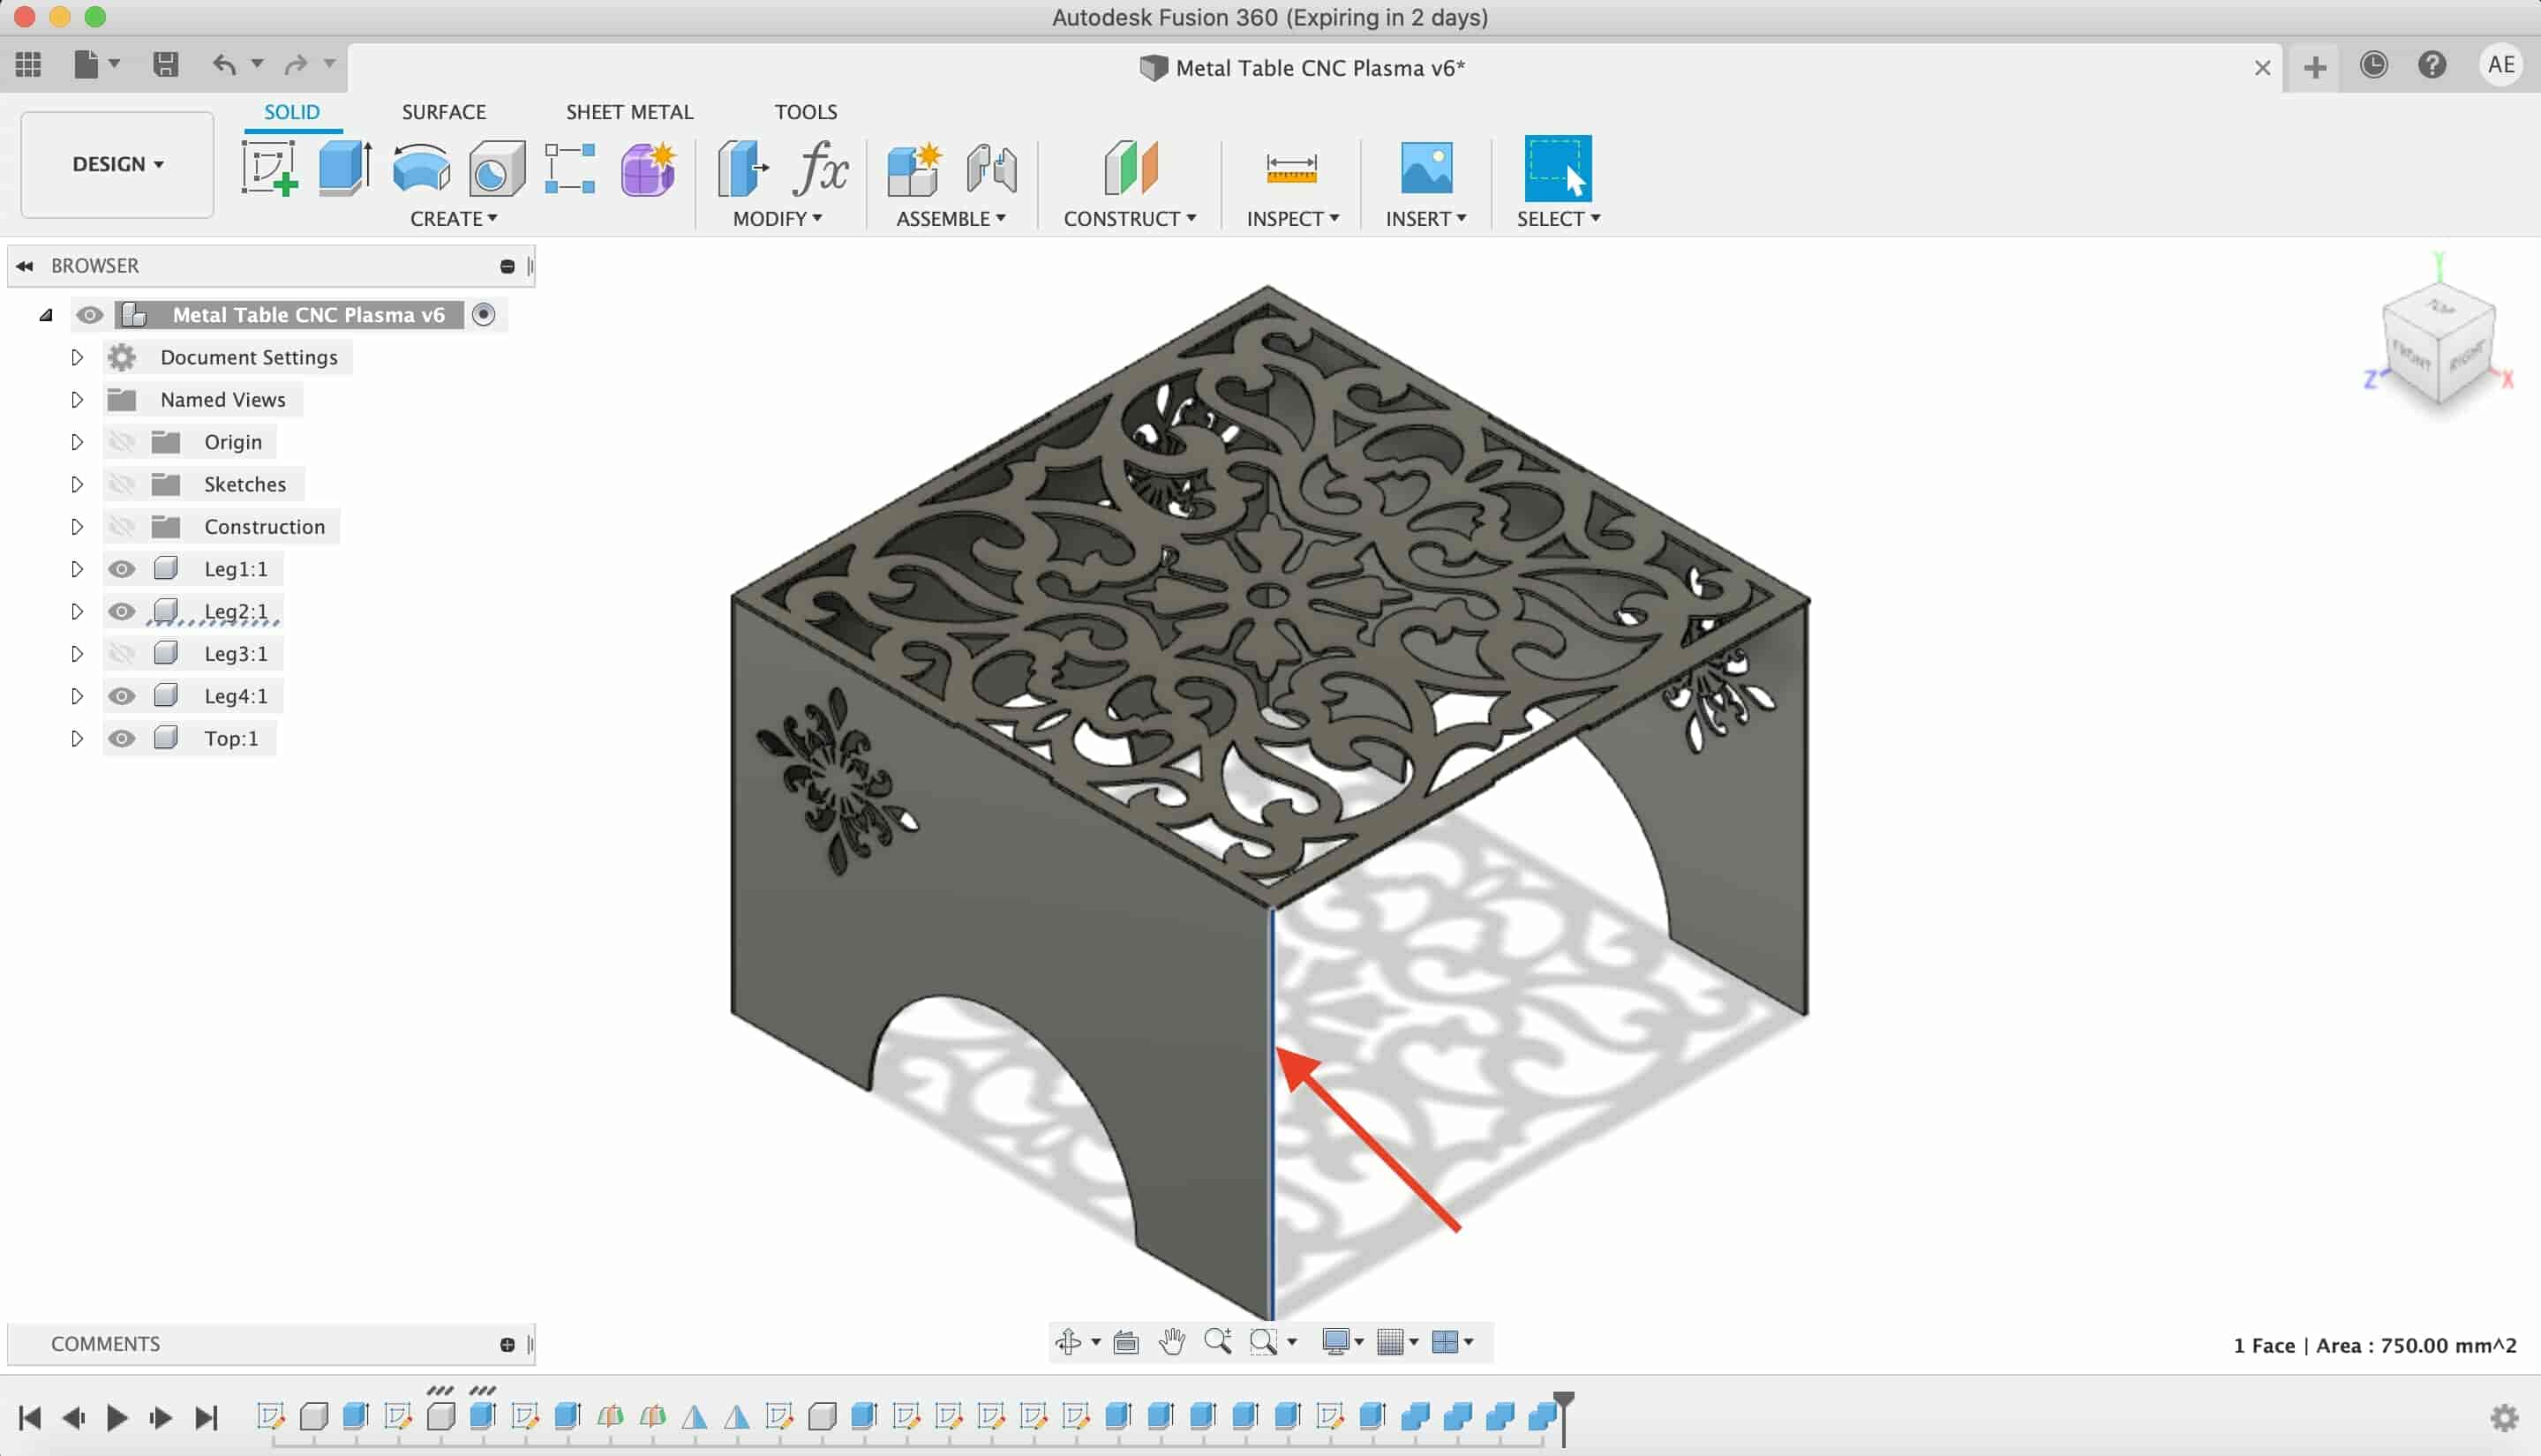
Yo! We finished the table design, but it has some sharp edges and it’s not a good thing, you can download the STP file and edit that design and fix that! I was too excited to work on the machine and that made me forget to smooth these sharp edges. But, I will remove those sharp edges later after I fabricate the table.
Now, we need to export the DXF files of each part and arrange all the DXF files on one sketch beside each other to make sure that all the parts will fit on a 1m*1m metal stock.
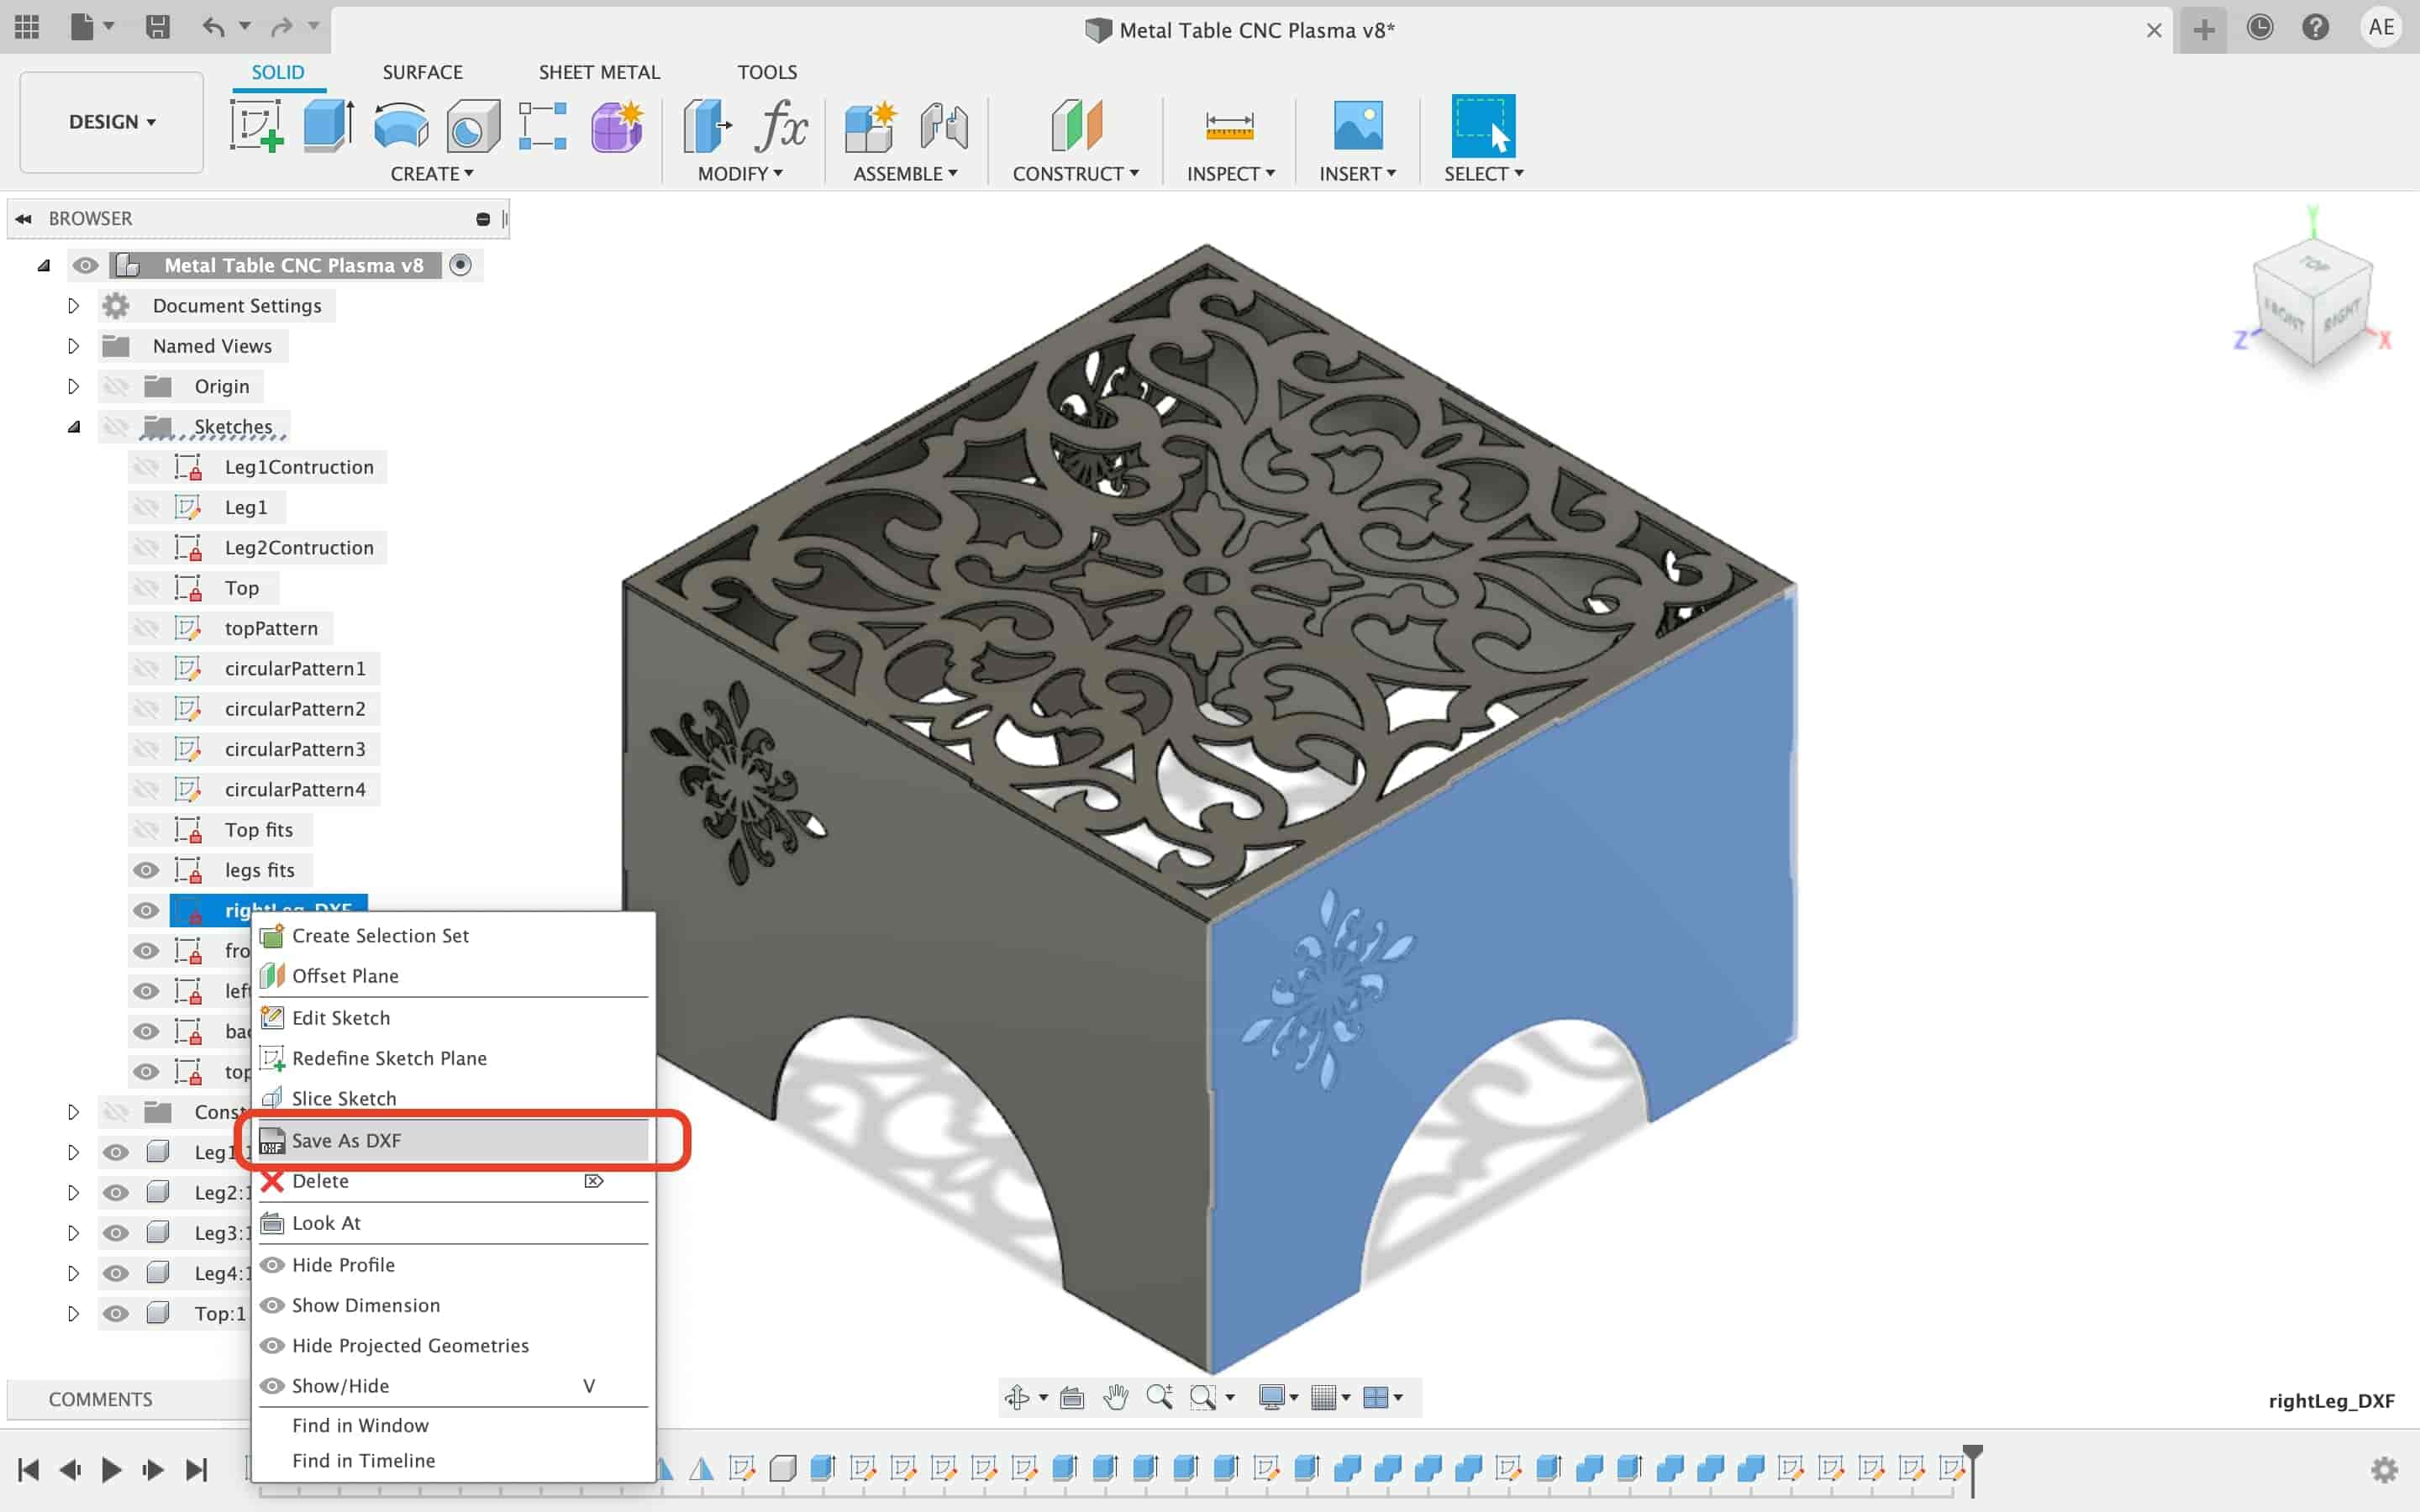
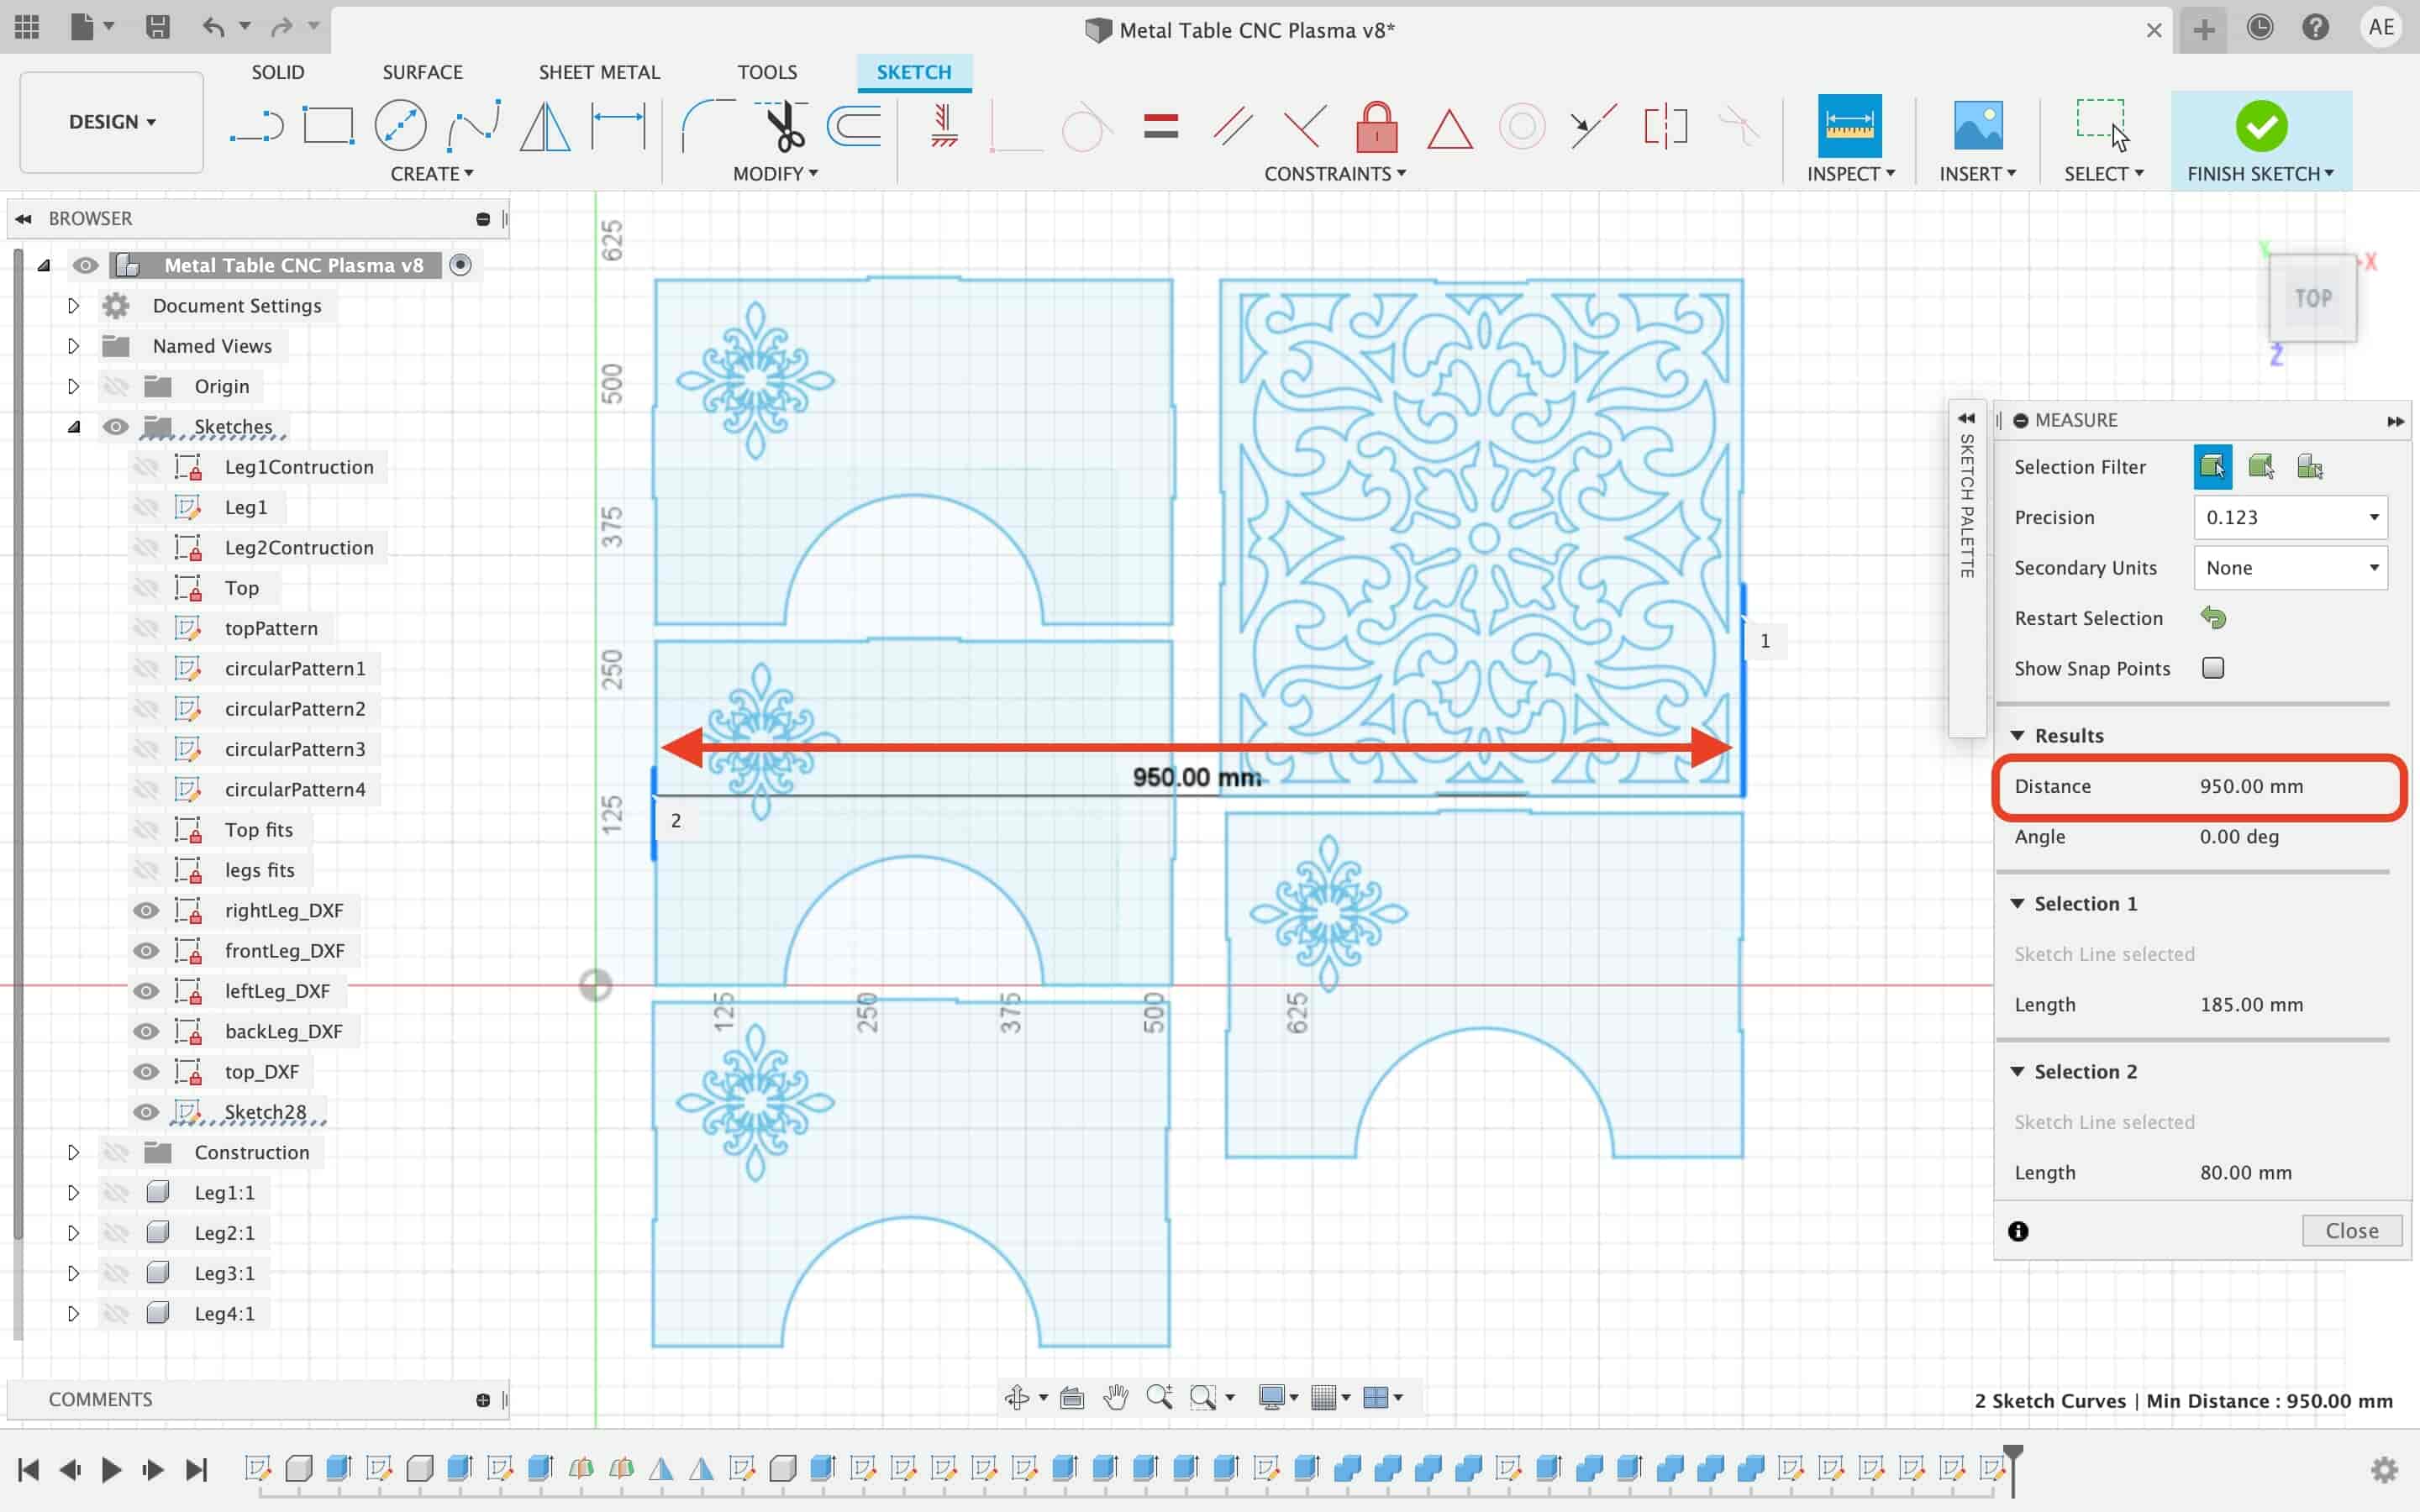
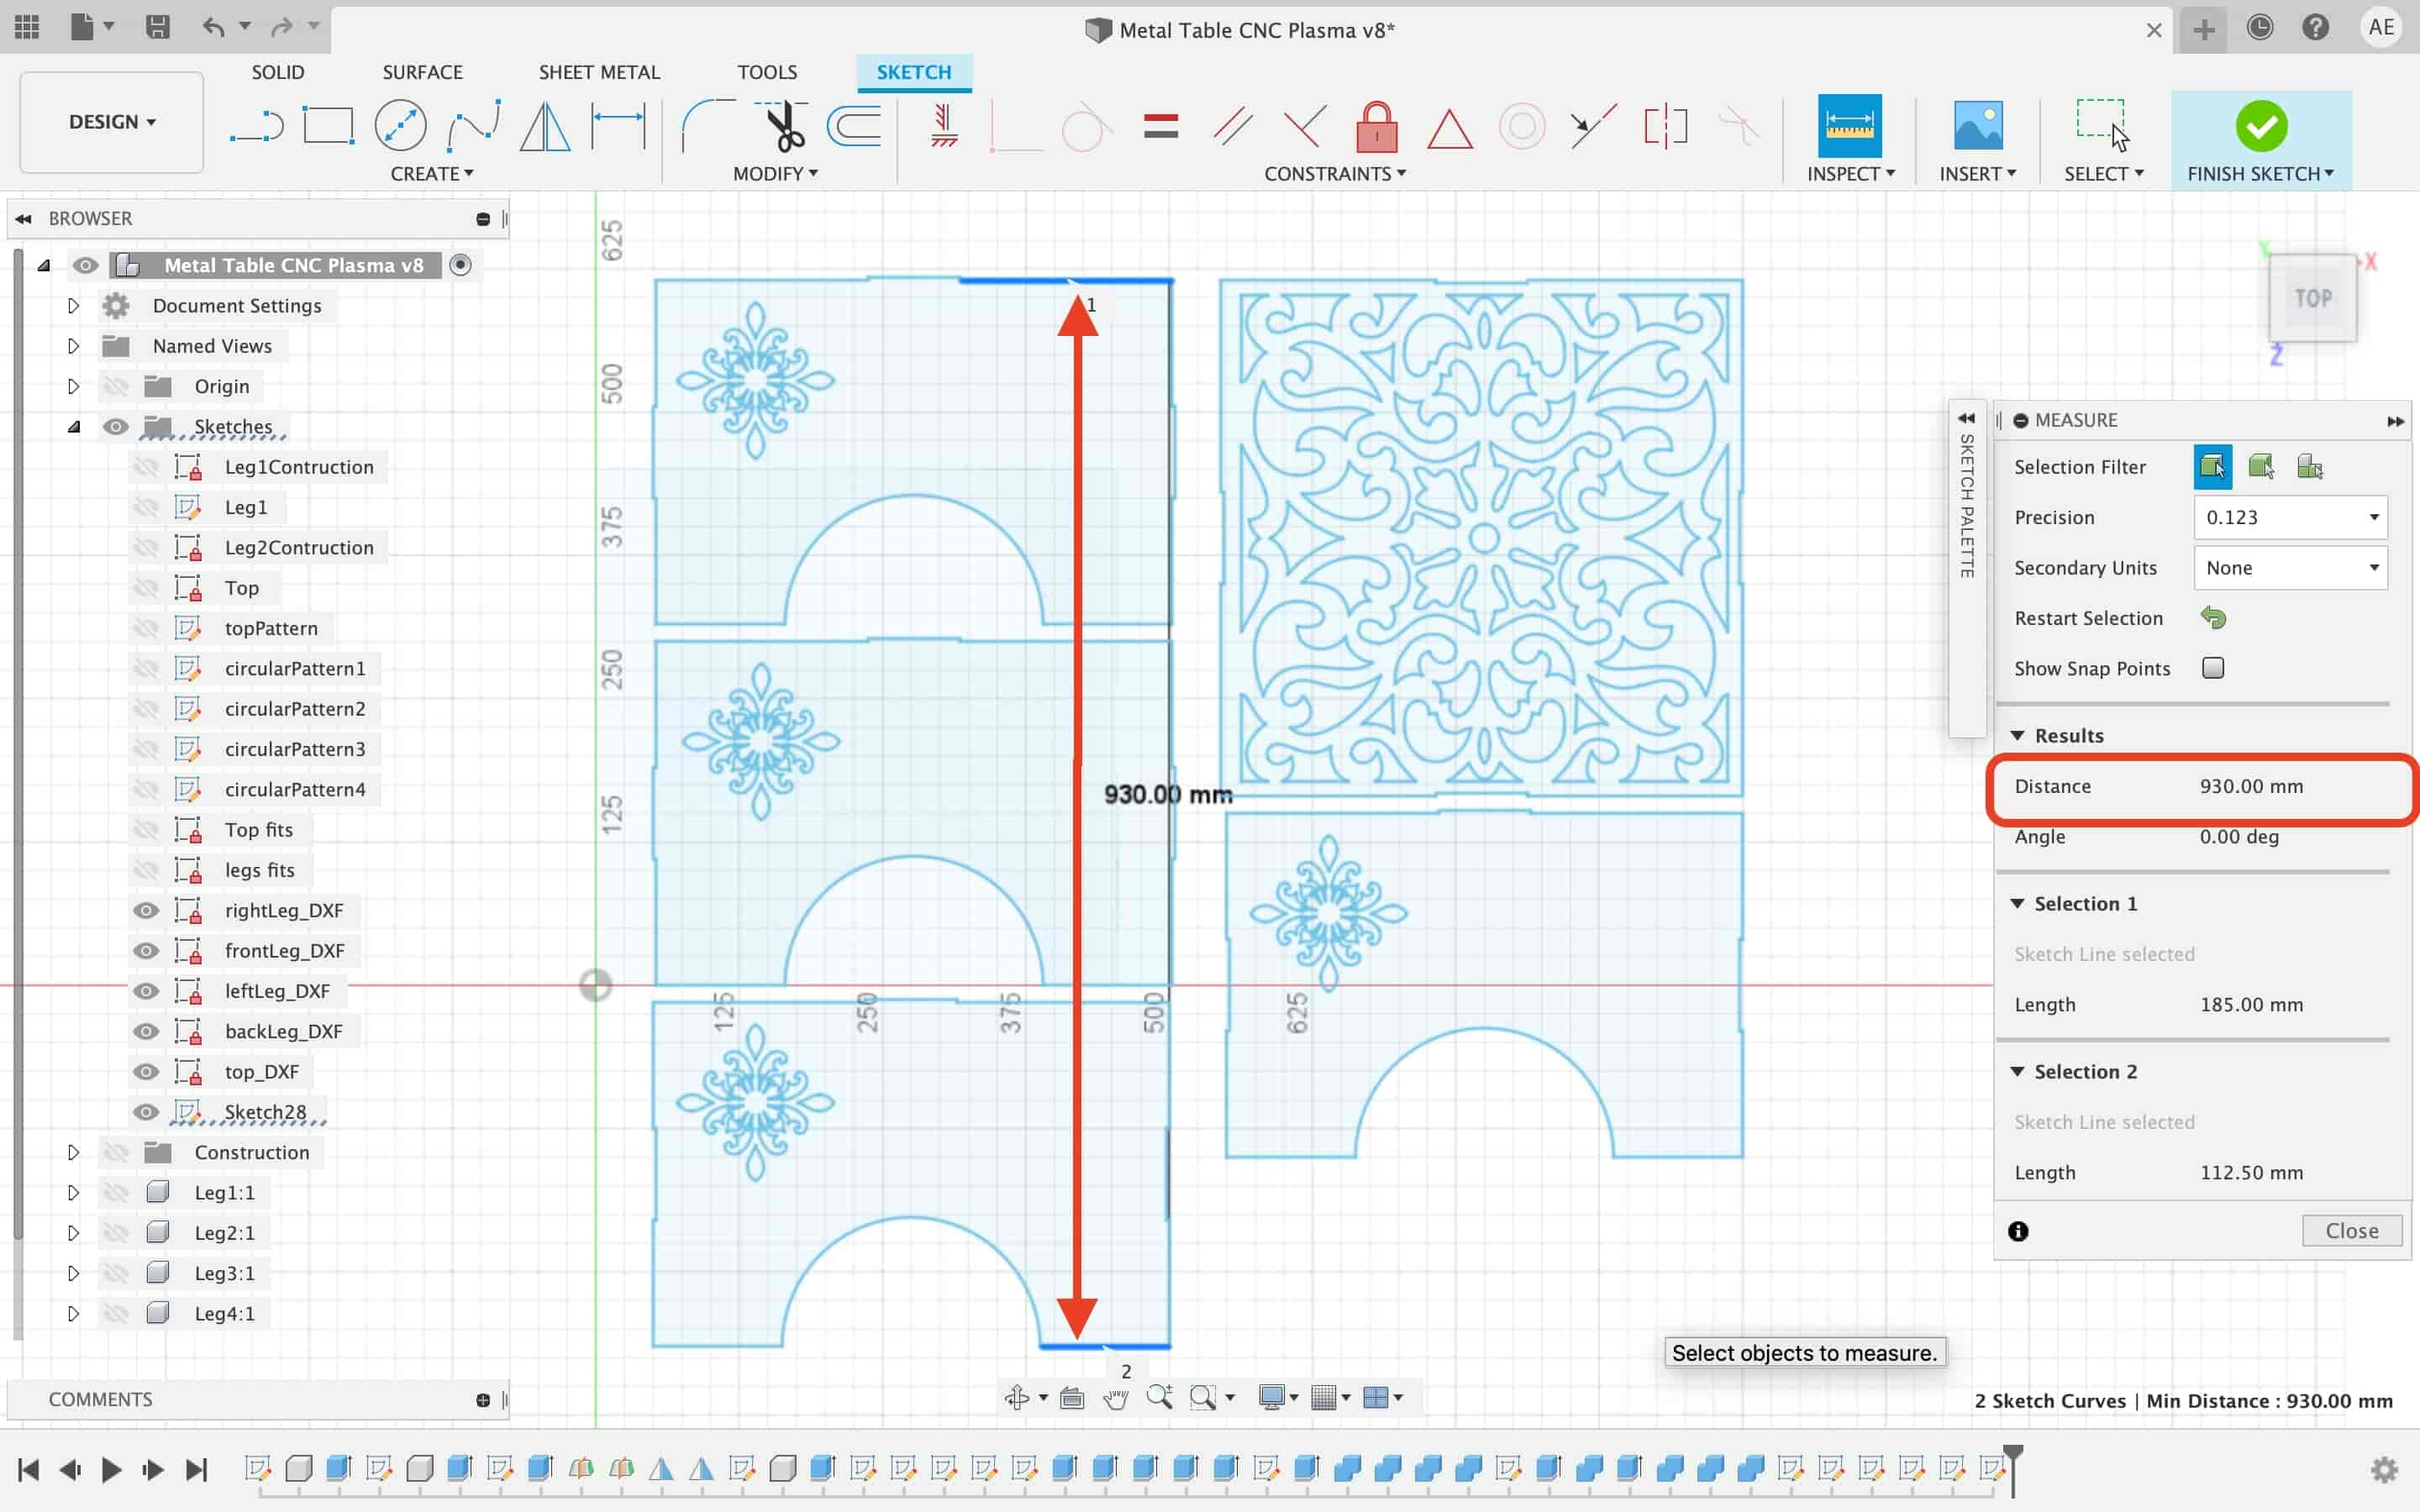
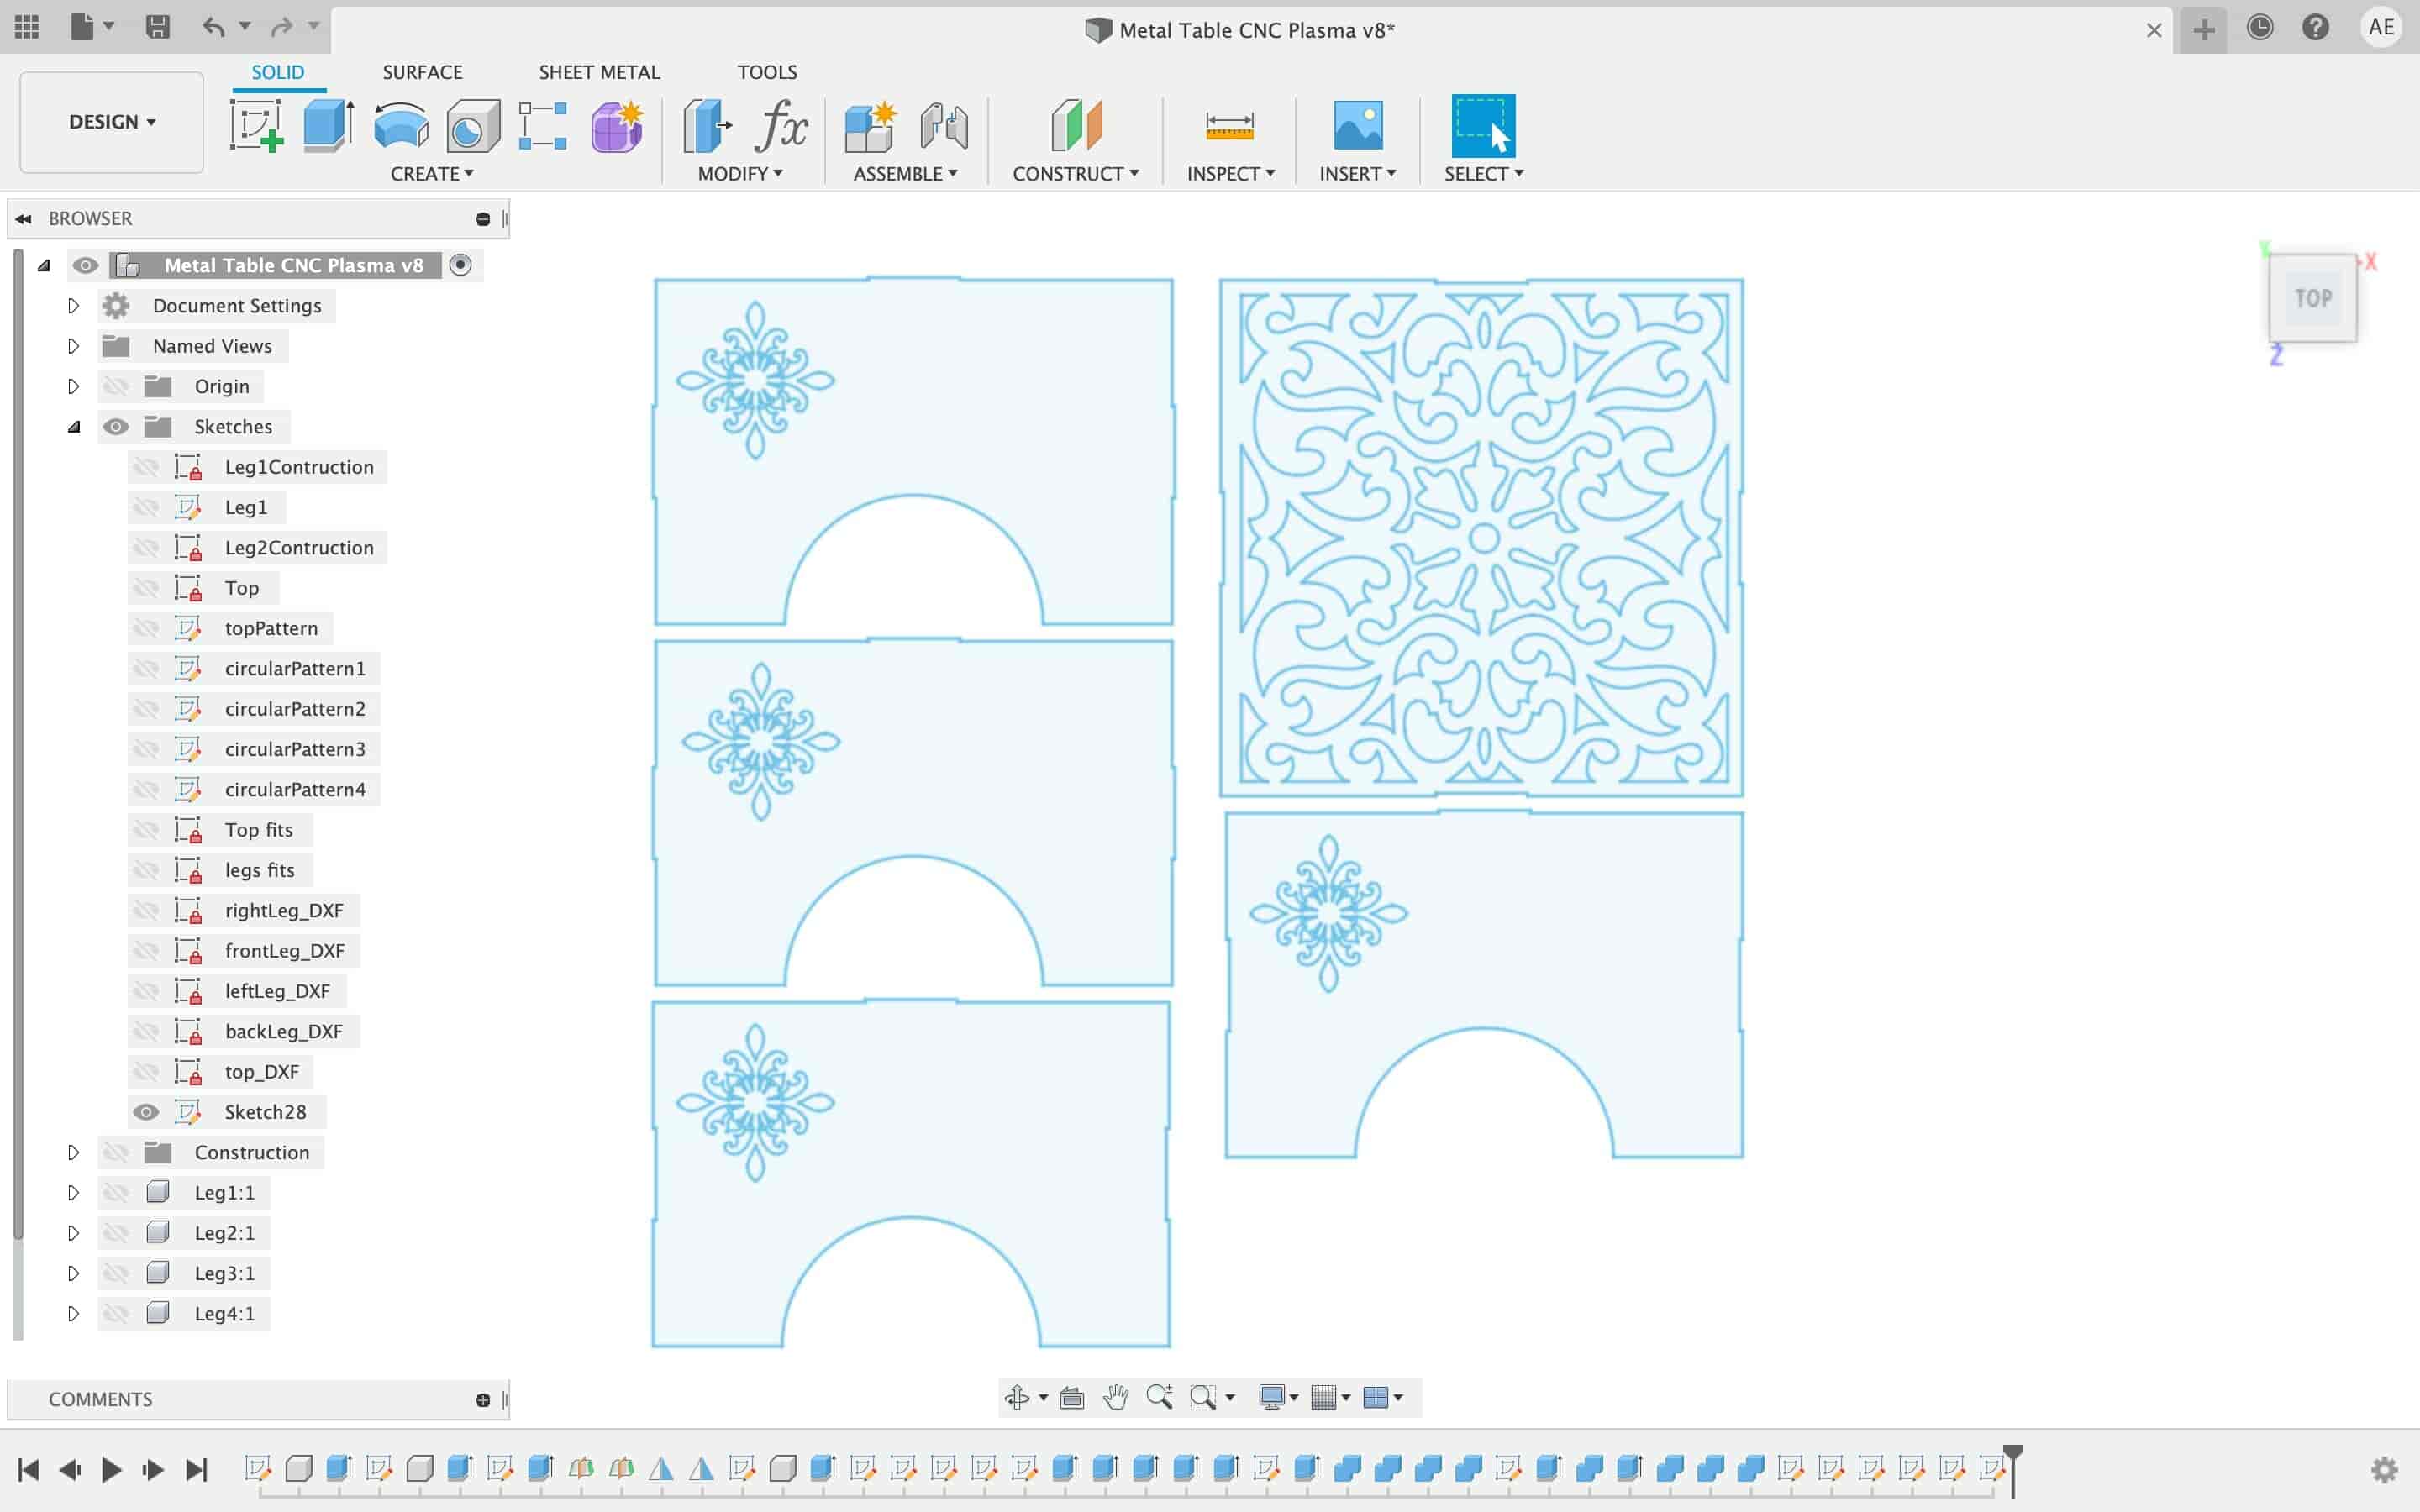
Table DXF Files Download
- Back leg DXF..
- Front leg DXF.
- Full Table DXF.
- left leg DXF.
- right leg DXF.
- Top Part DXF.
- Table Step File.
- Floral Pattern Top SVG File.
- Floral Pattern Legs SVG File.
Buying The Steel Sheet From The Local Market
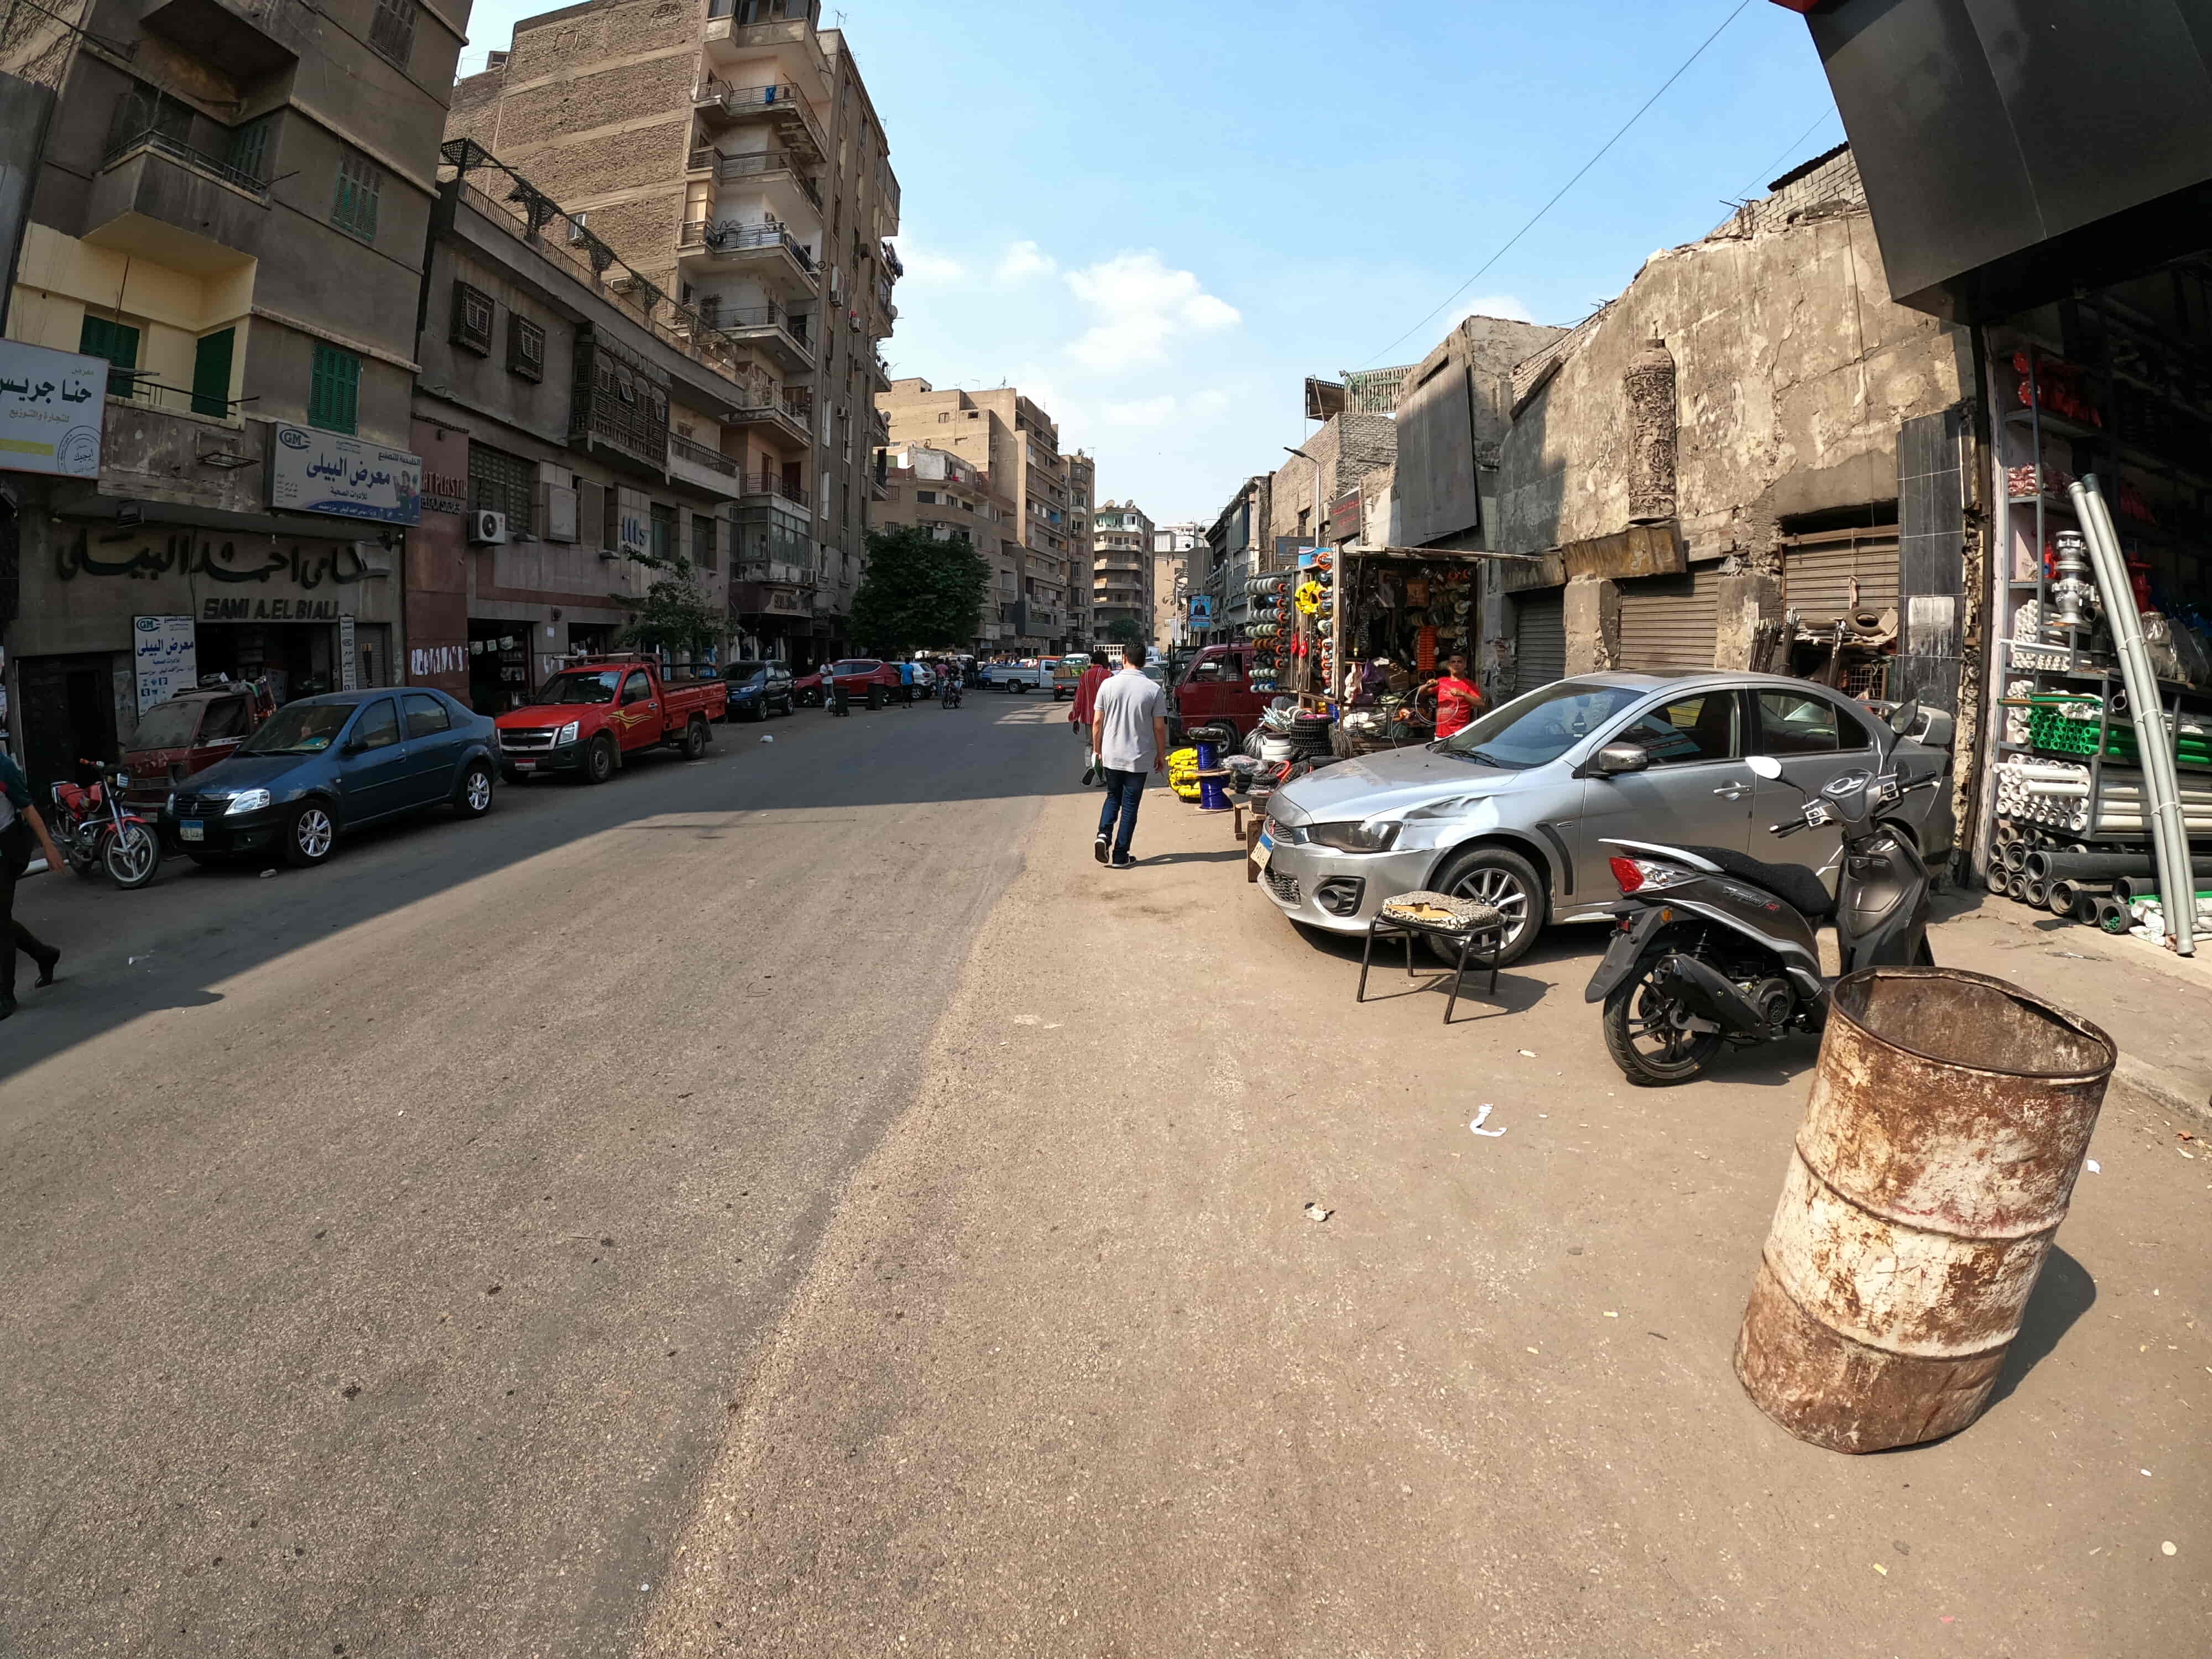
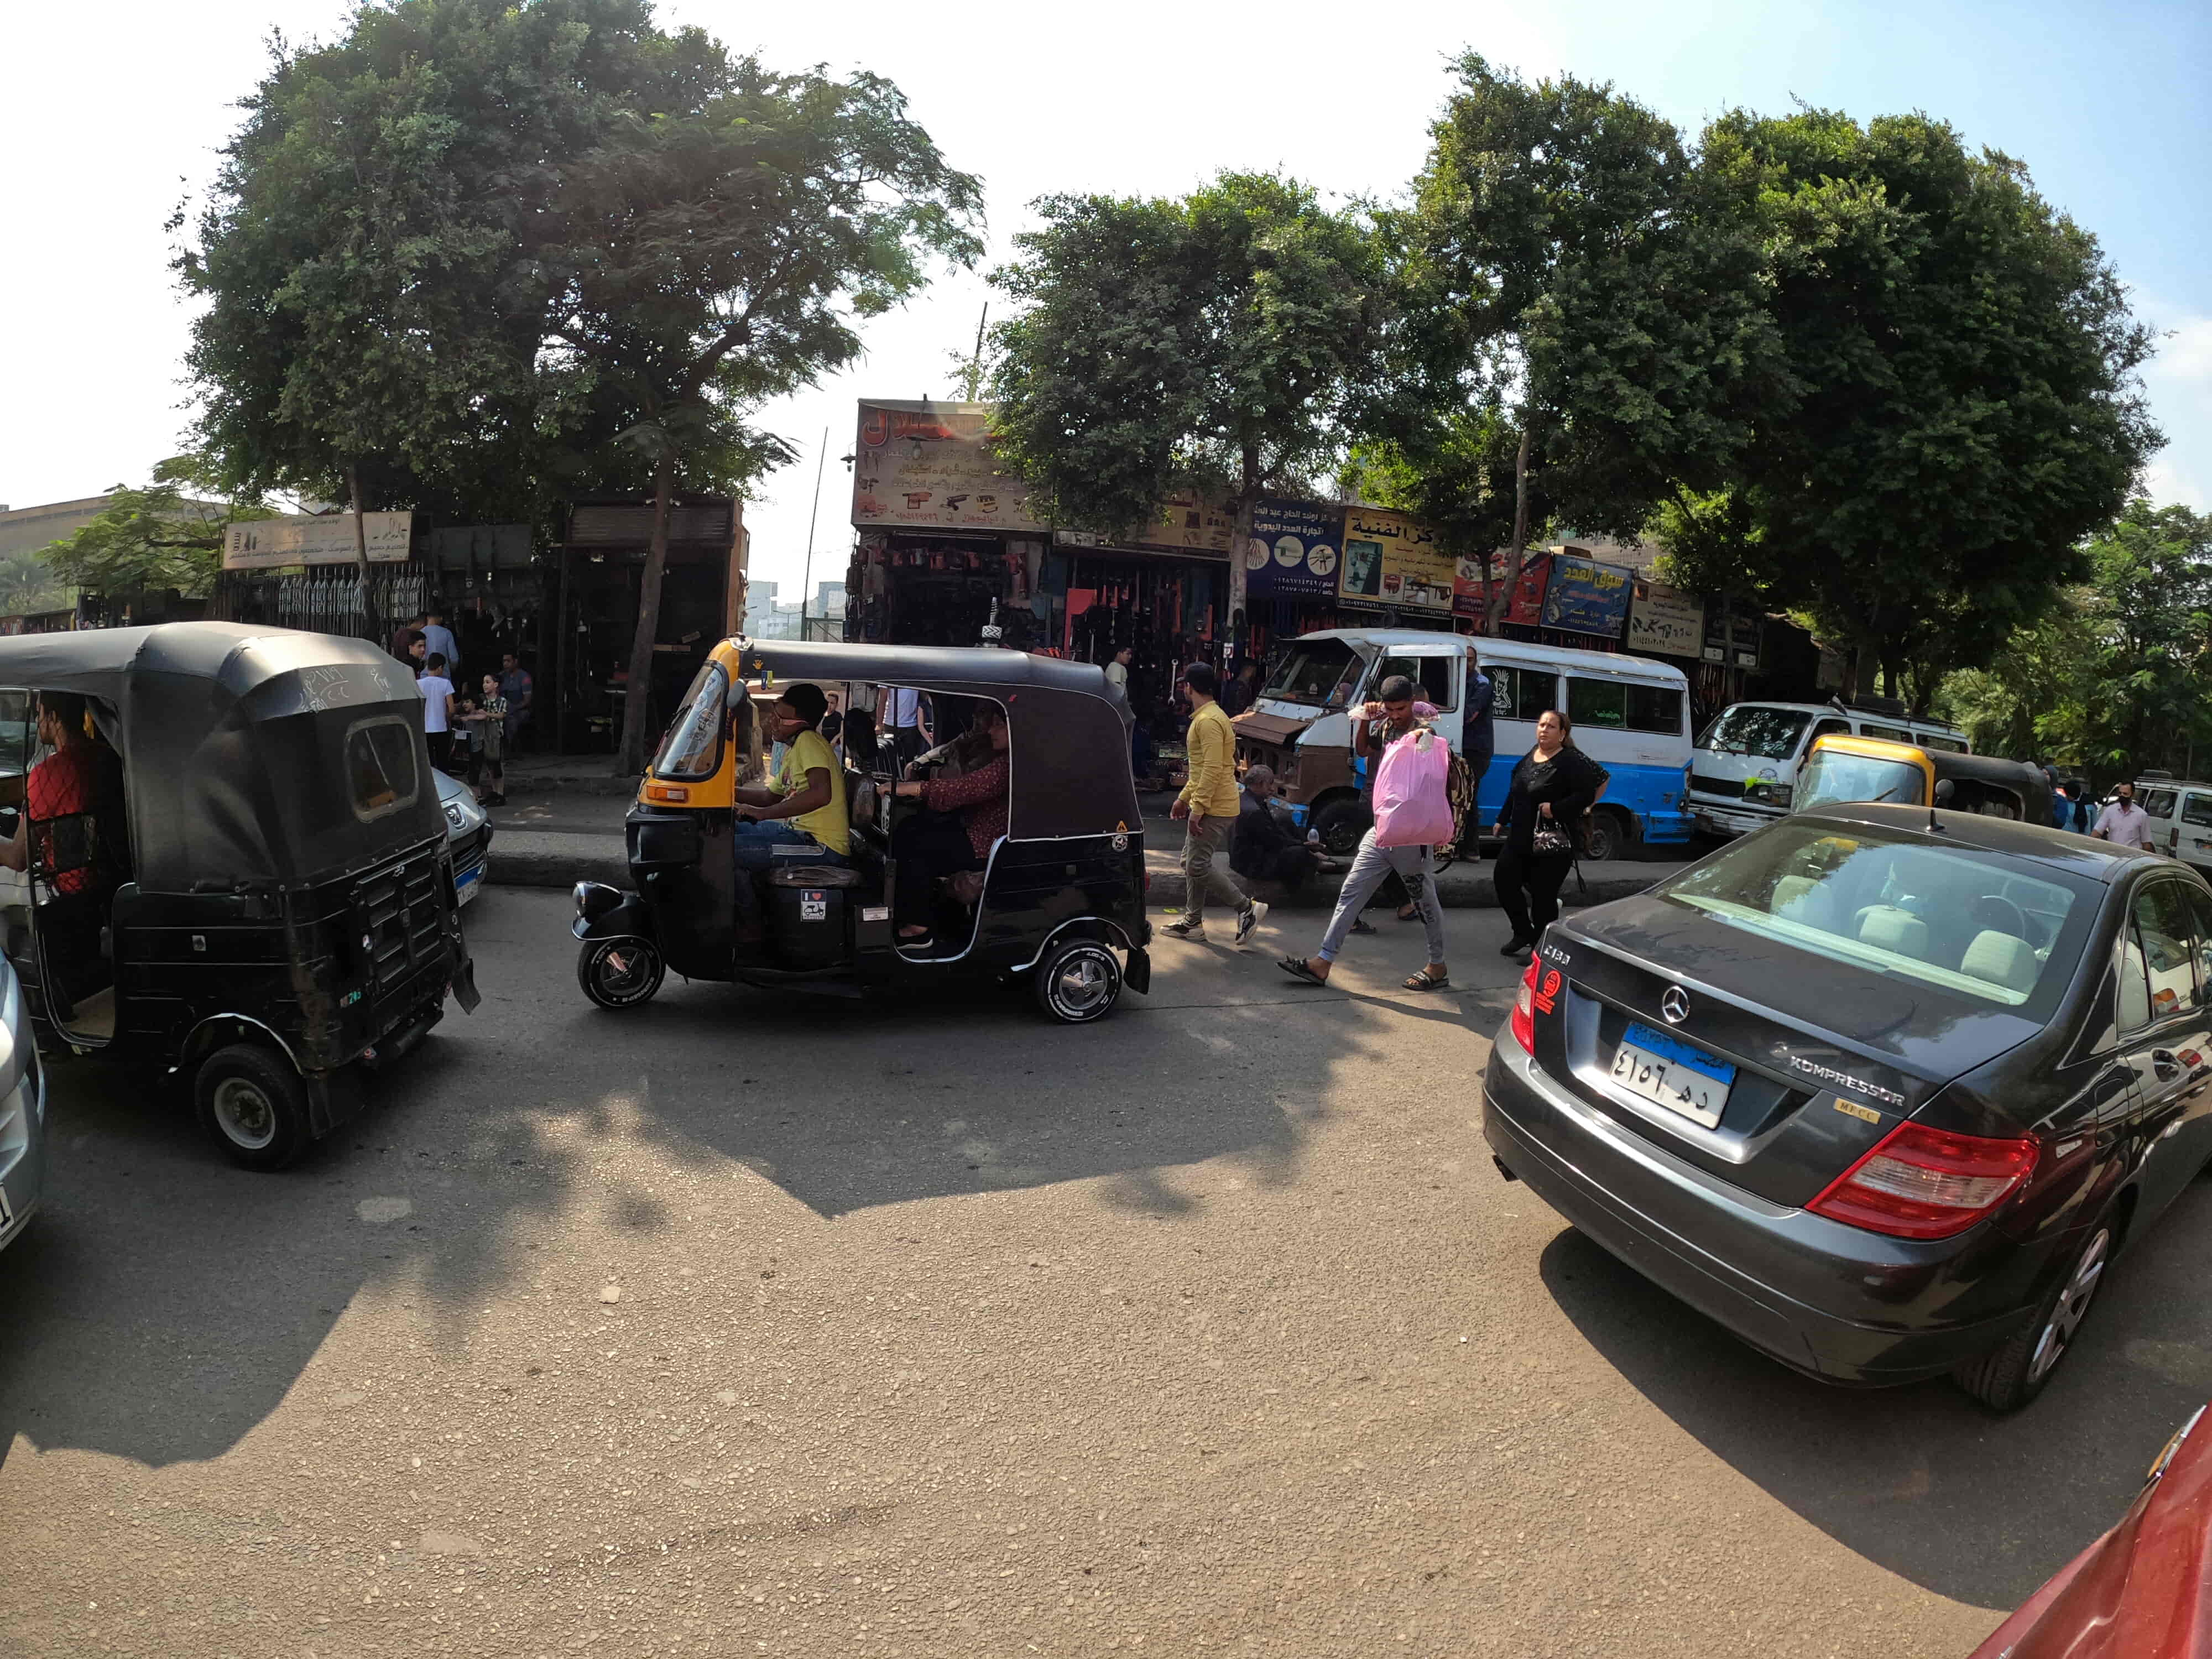
Here’s the fun part! leave your laptop screen, wear your baggy pants, wear your backpack on, and get your hands dirty in the most well-known hardware local market in Egypt “El-Sabtia” anything you want related to hardware from small screws to large production lines and machines you will find in El-Sabtia street.
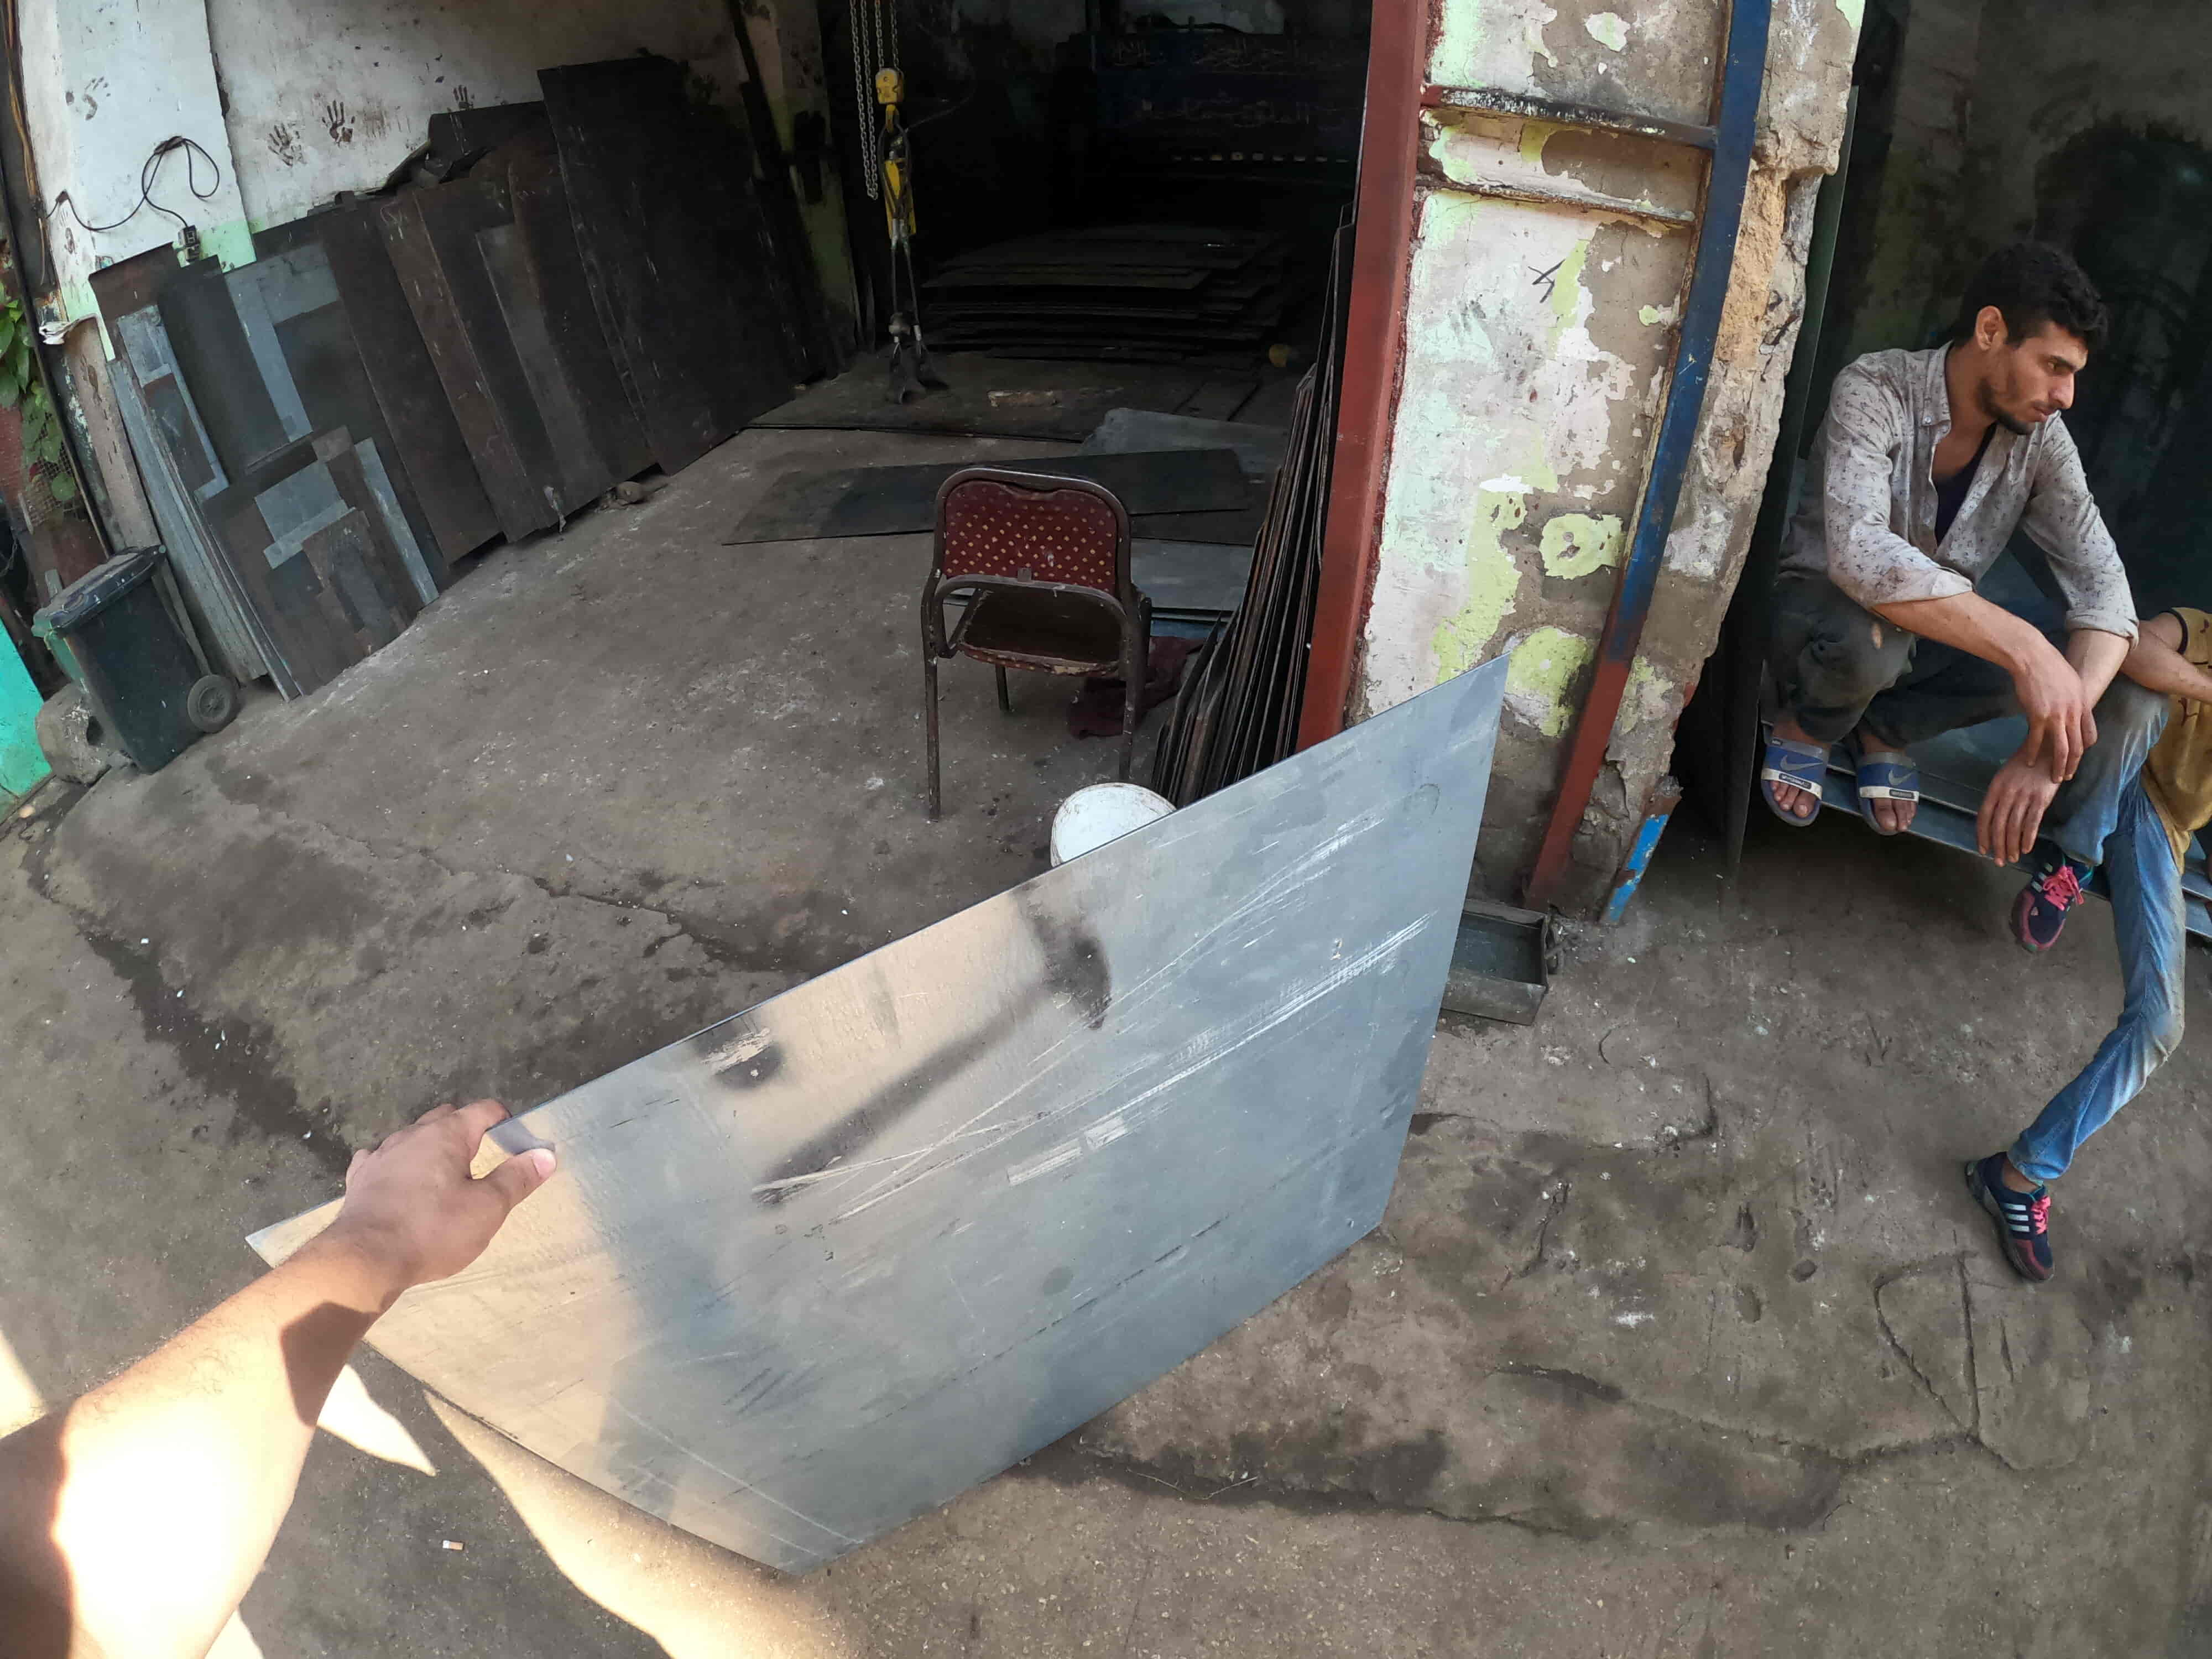
Since the working area of the torchmate4400 machine that we will cut our table on is 1.2m*1.2m, I decided to buy a 1m*1m metal sheet with 2.5mm thickness. I reached many workshops, asked them for the price of a 1m*1m sheet of steel with 2.5mm thickness, I compared all the prices together until I got the best price for a half sheet which is 350LE. Which is not bad. The 1m*1m steel sheet is very heavy, about 33kilograms. It was impossible to transport it to the makerspace where I will cut the sheet at by normal public transportations. So I take a small private pick-up truck to transport me with the steel sheet to the. I gave the driver a 250 LE from El-Sabtia to TIEC Sector B5 in the Smart Village
Note: the full steel sheet dimensions is 1m*2m. Not all the workshops in El-Sabtia are willing to cut the full sheet into two halves to give you a 1m*1m piece. They will tell you “Sorry, we only sell full sheet 1m*2m!” So, you need to search and ask for the workshop which is willing to cut the full sheet into two halves to give you a 1m*1m piece. After many hours searching for that workshop, I finally reached it and bought the half sheet with a very good price.

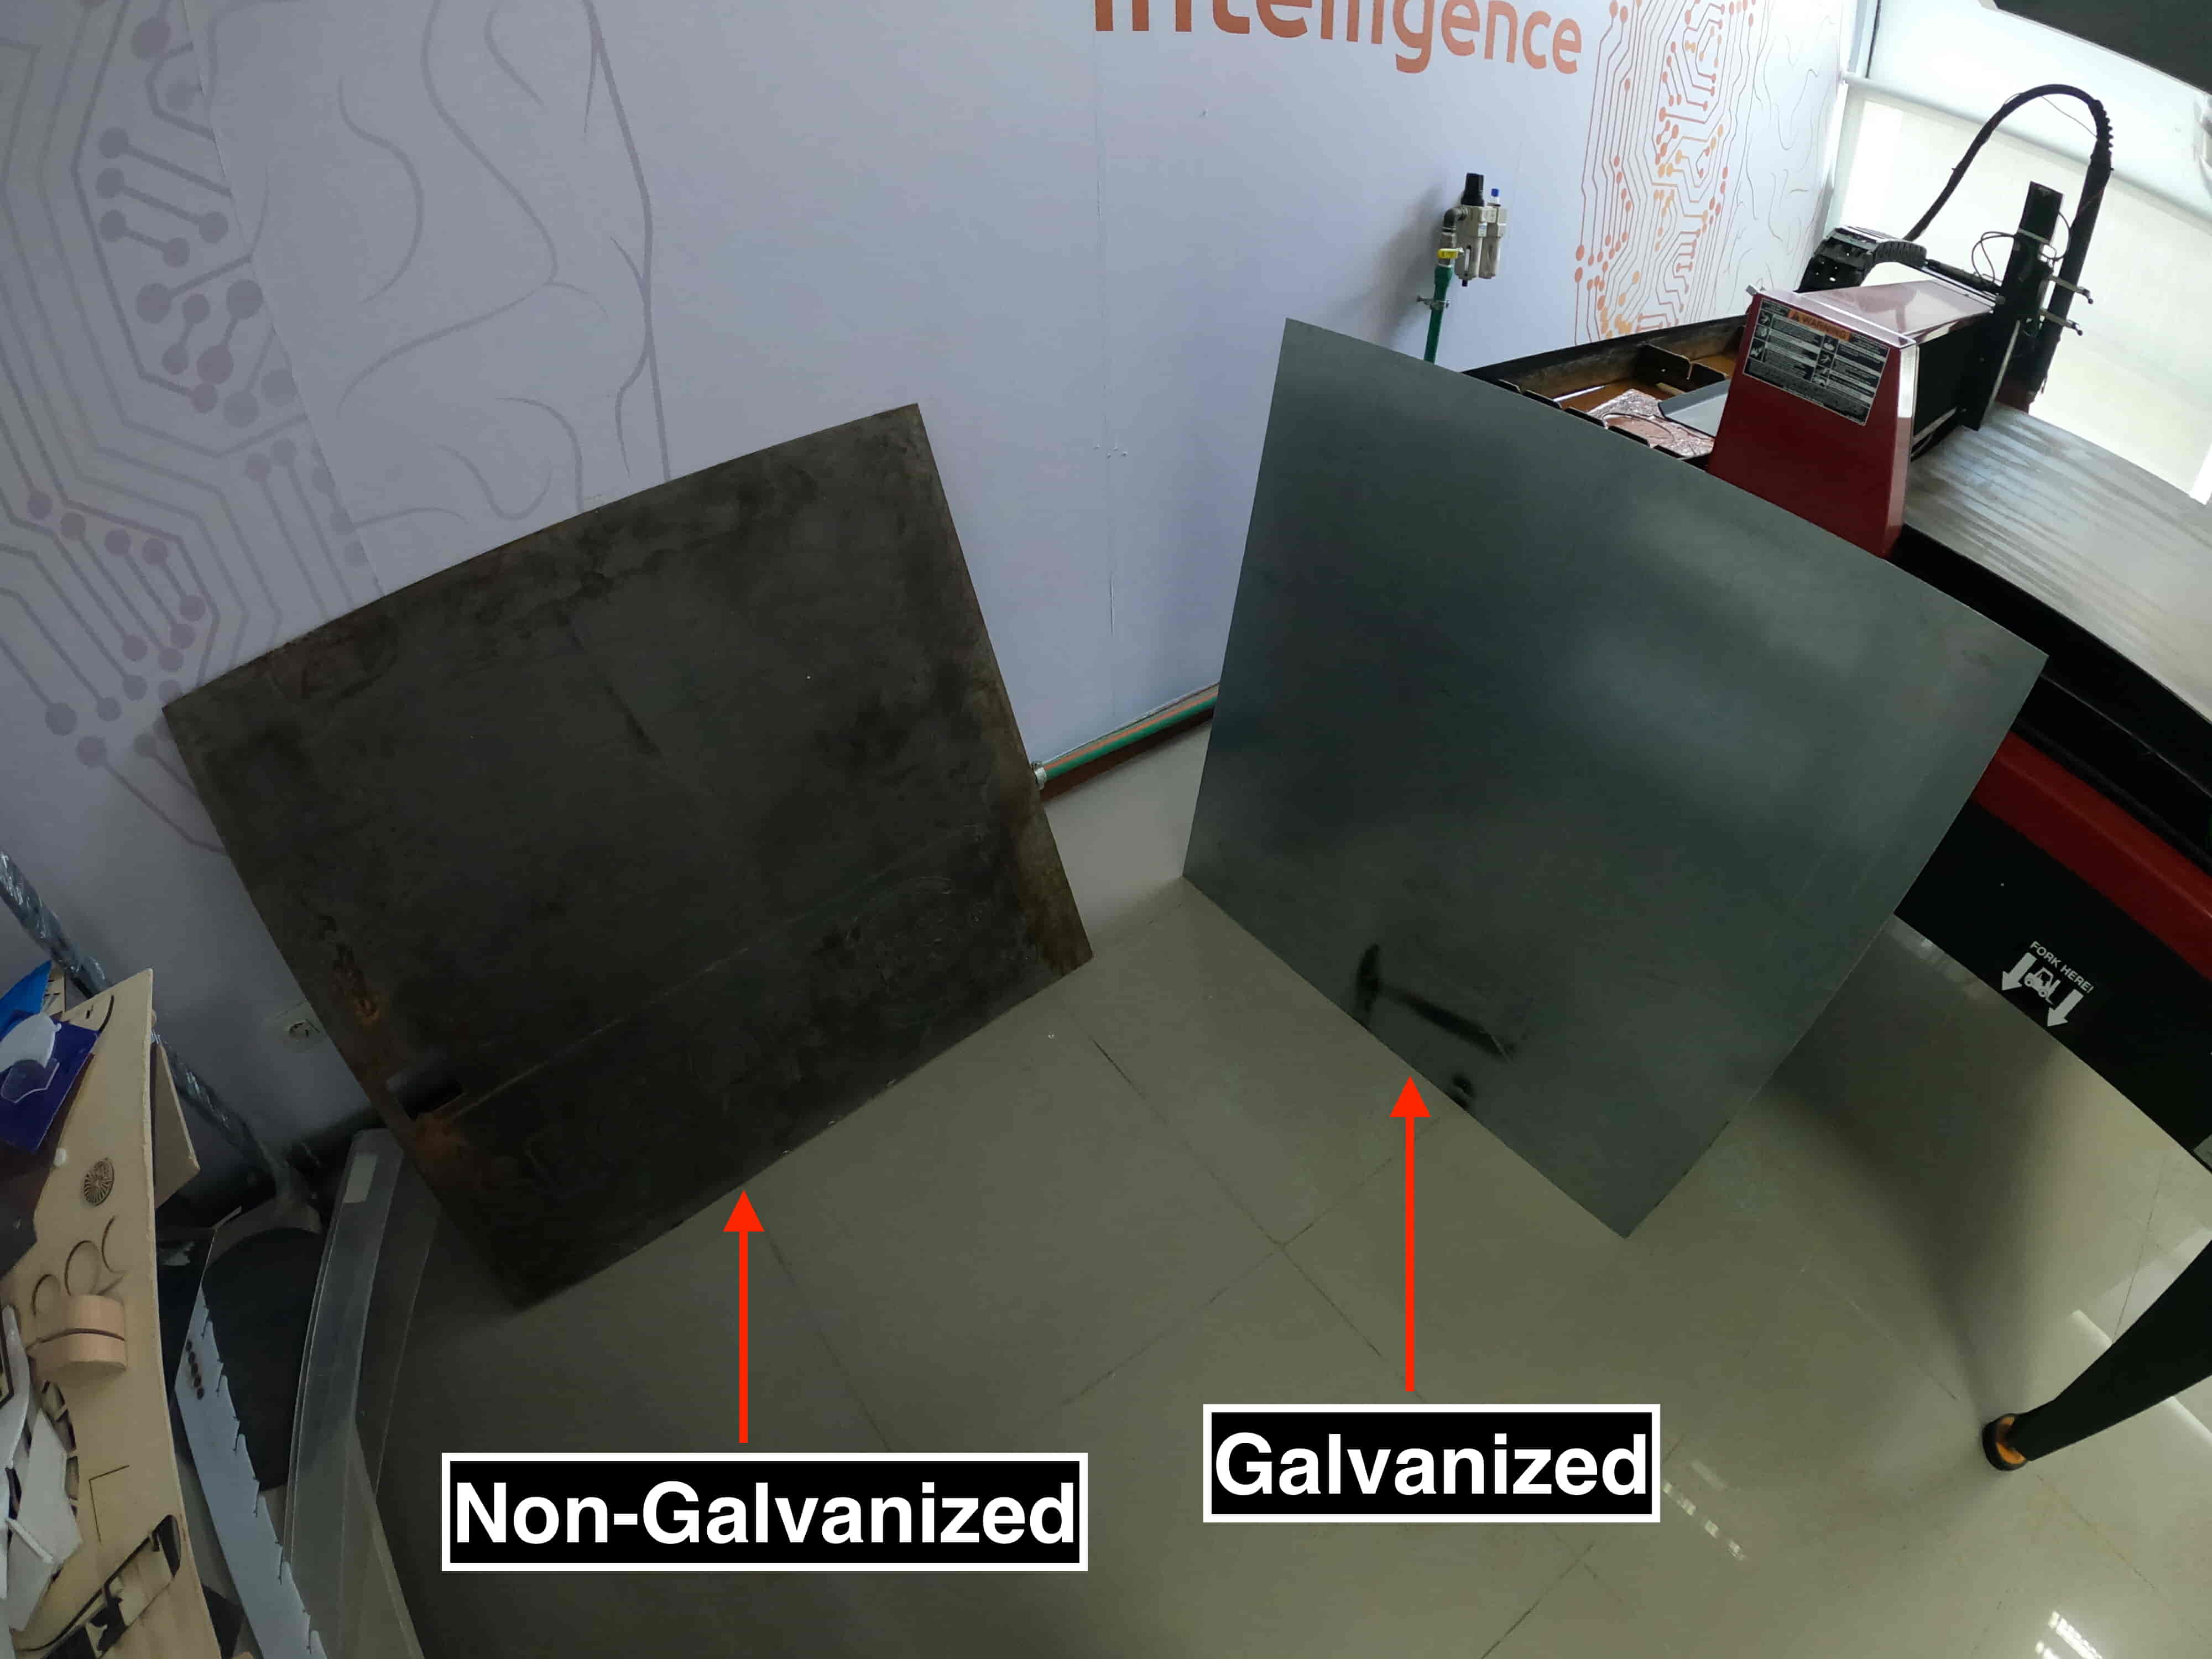
Note: Here is the thing! If you wanna buy a steel sheet that you will use later with the plasma cutter machine to cut something from it. Then, you should buy a non-galvanized steel sheet. Galvanized steel has a layer of coating that prevents it from rust and keeps it clean, but that layer of coating will produce toxic/poison fumes when you cut it on the plasma cutter machine which is not good for your health. So, for best practise if you wanna cut something in a plasma cutter machine use a non-galvanized steel to keep yourself safe from that toxic fumes.
The Fabrication Process Using The Plasma Cutter Machine
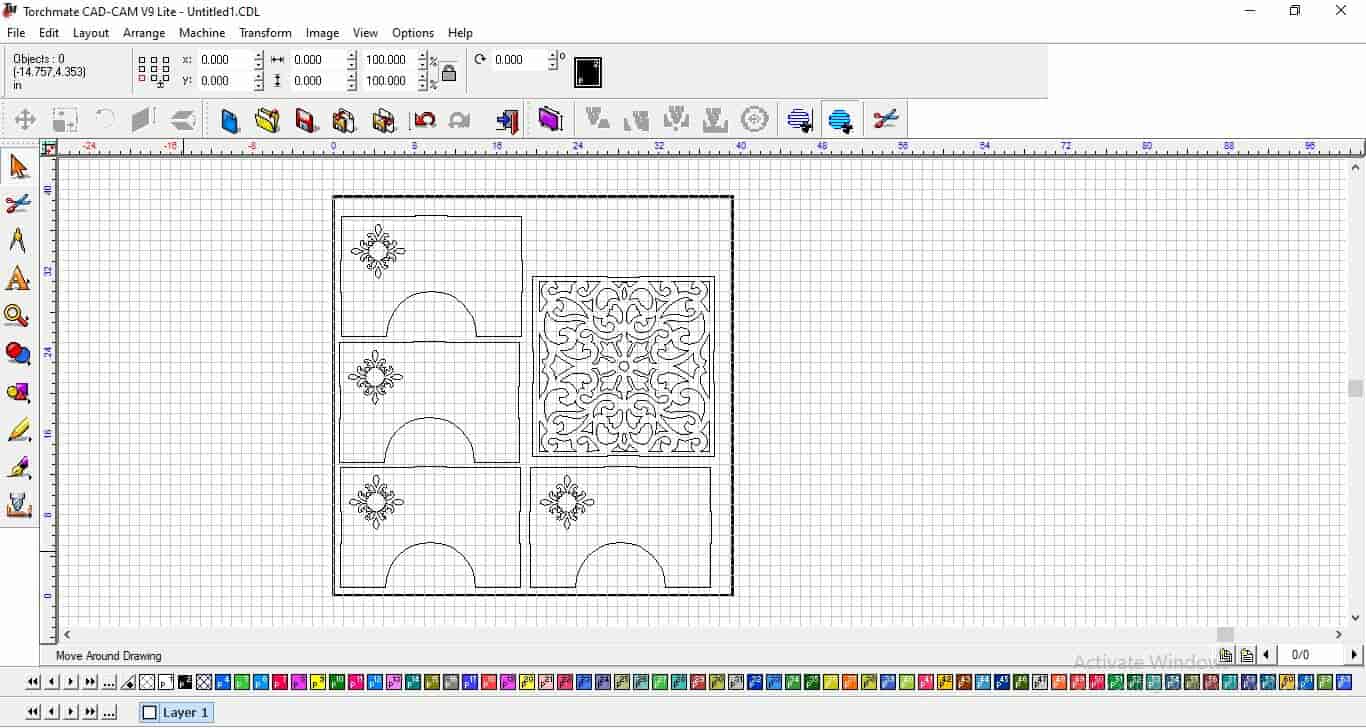
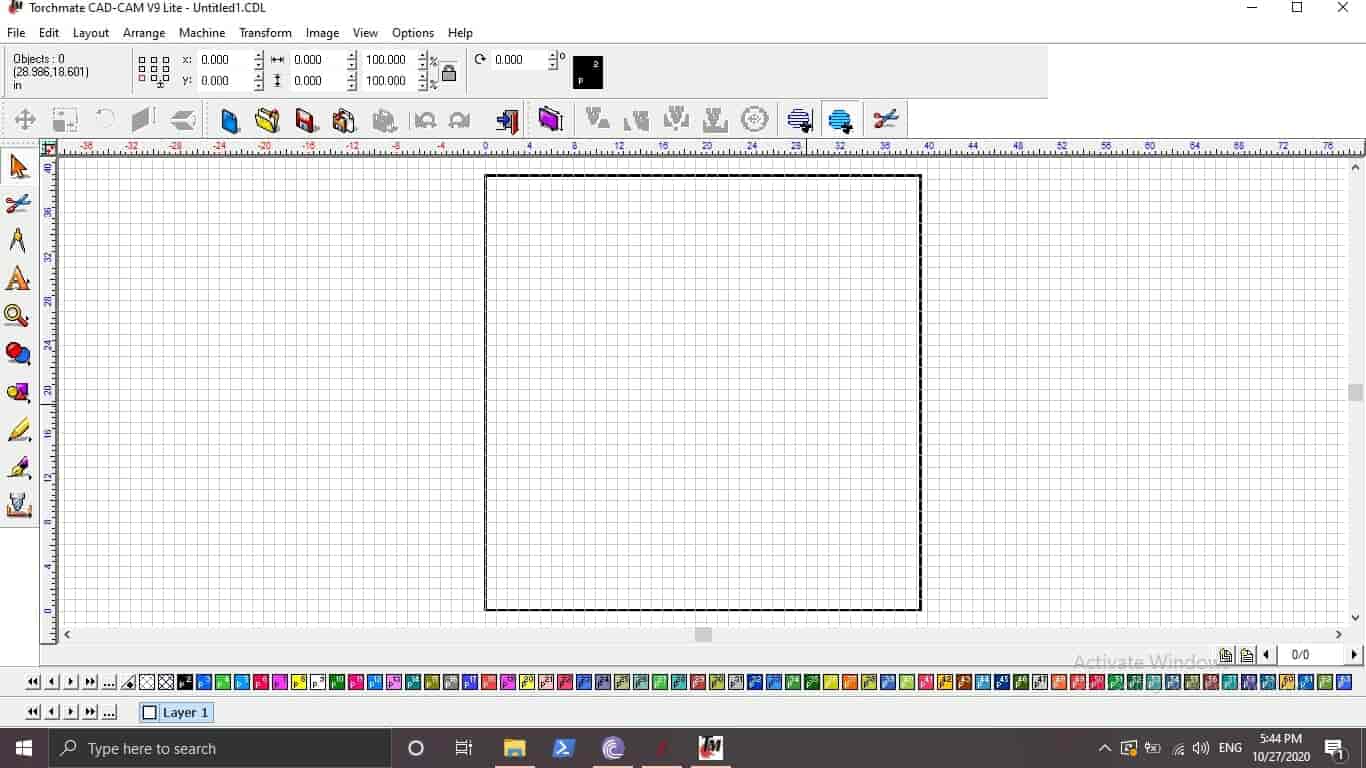
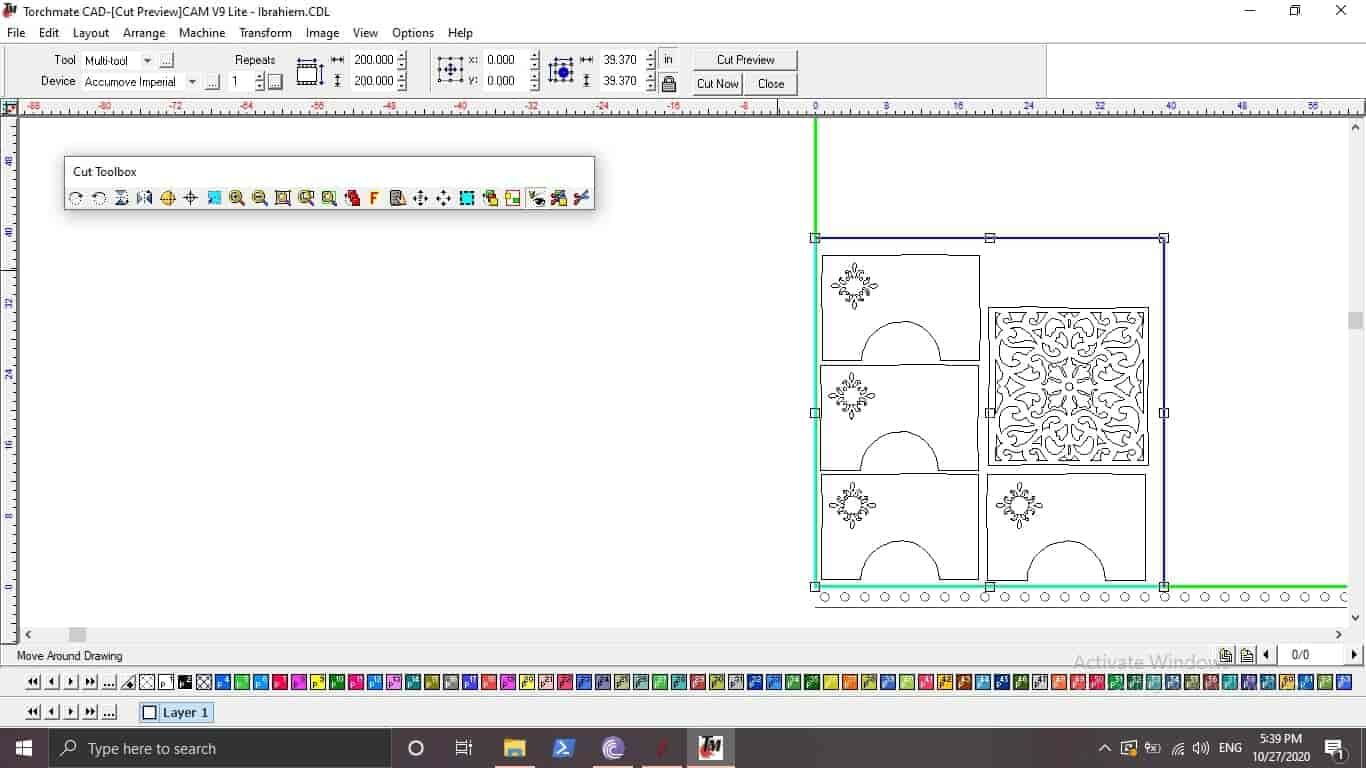
To operate the plasma cutter machine, you need to get familiar with the “TorchCAD-CAM” Software. I started a new workspace with dimensions 1.20m*1.2m(the dimensions of the machine working area).
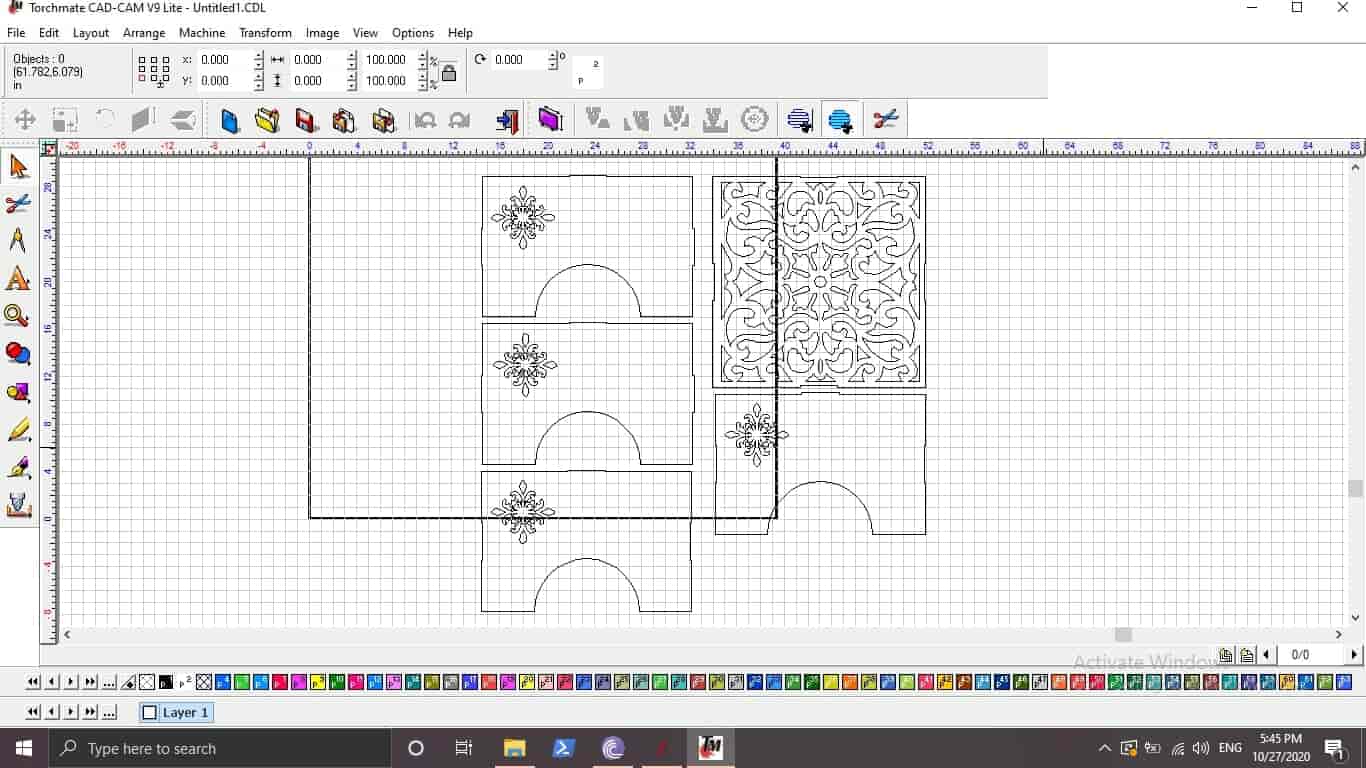
imported the DXF file inside the workspace and adjusted it’s placement inside the machine working area.
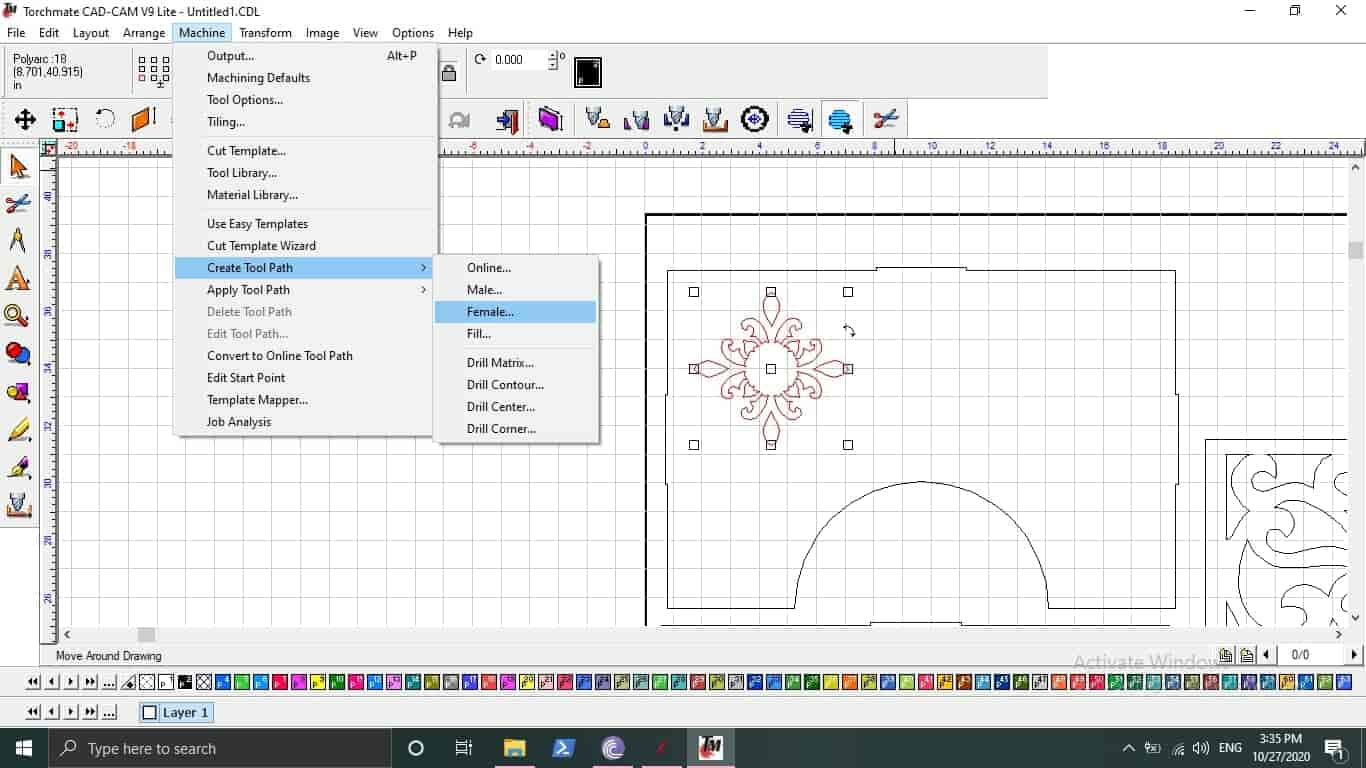
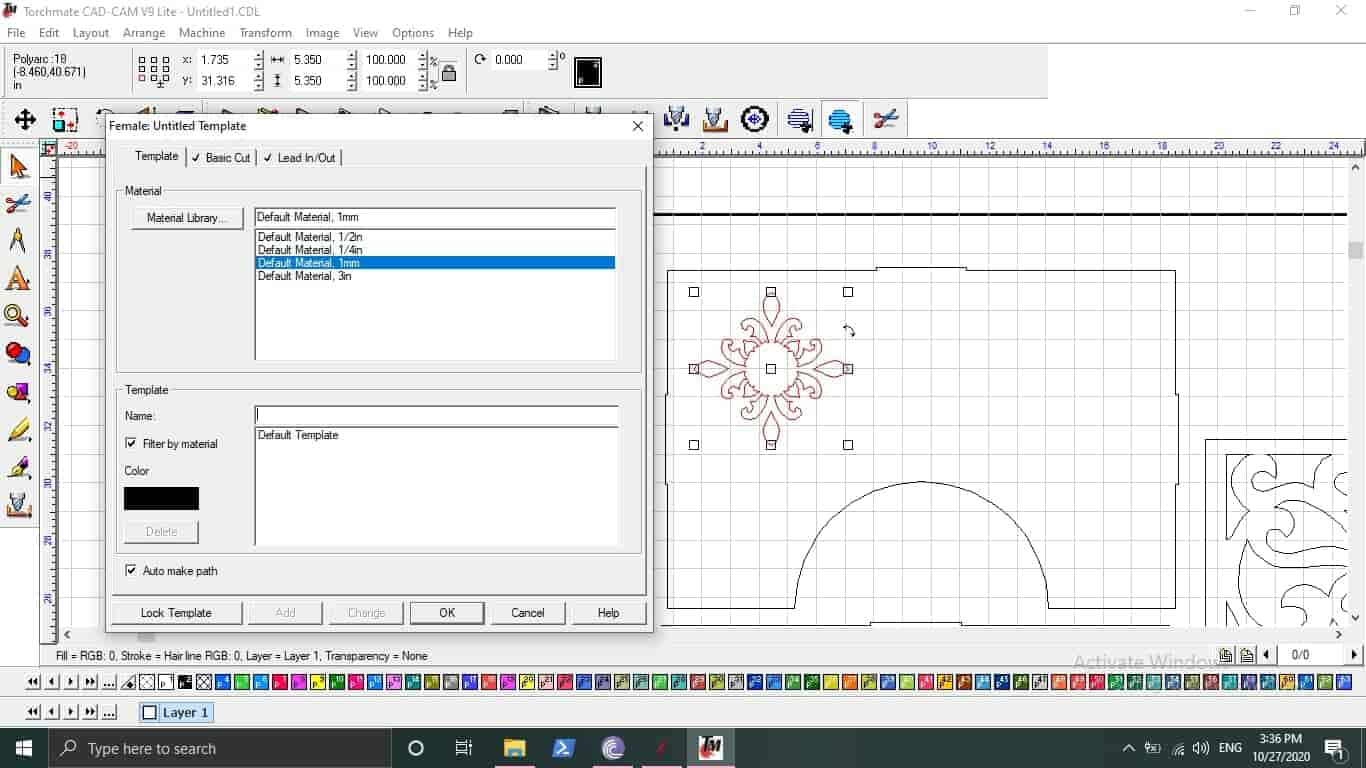
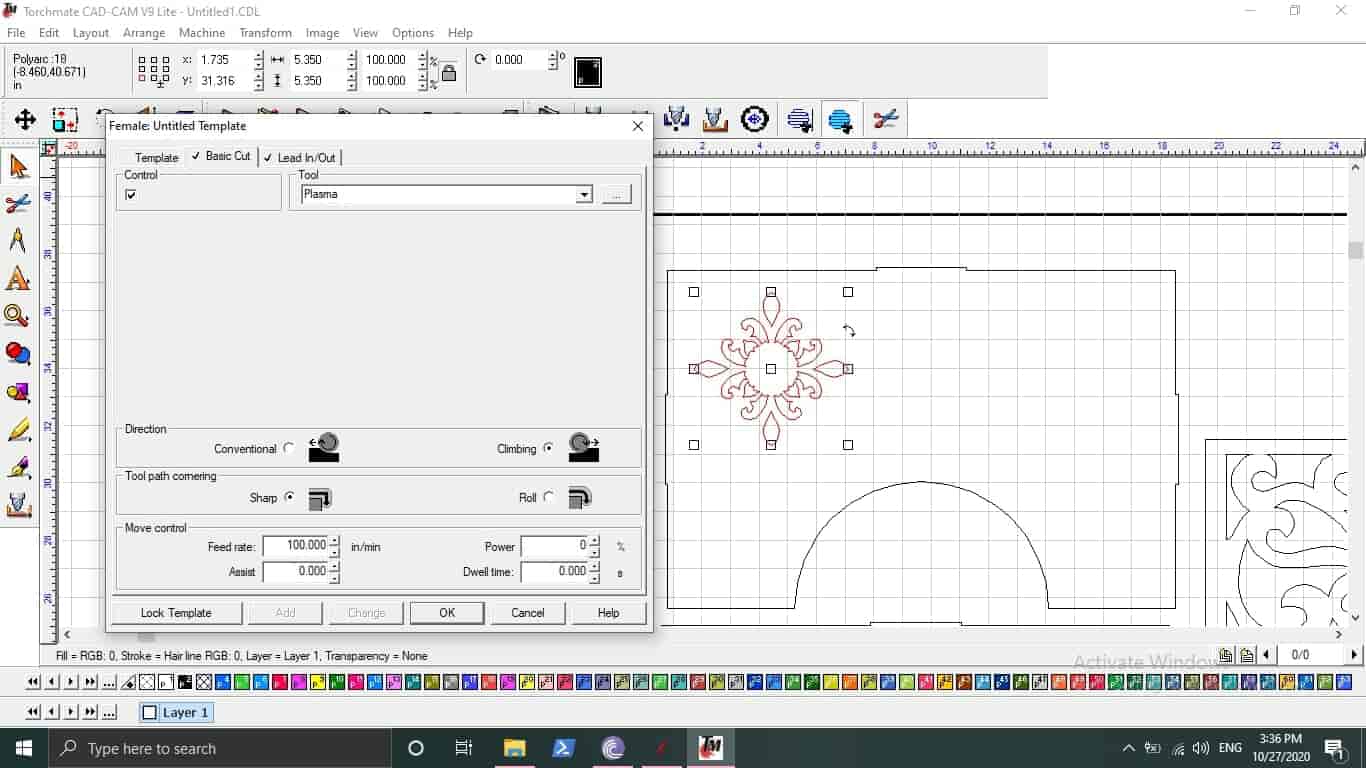
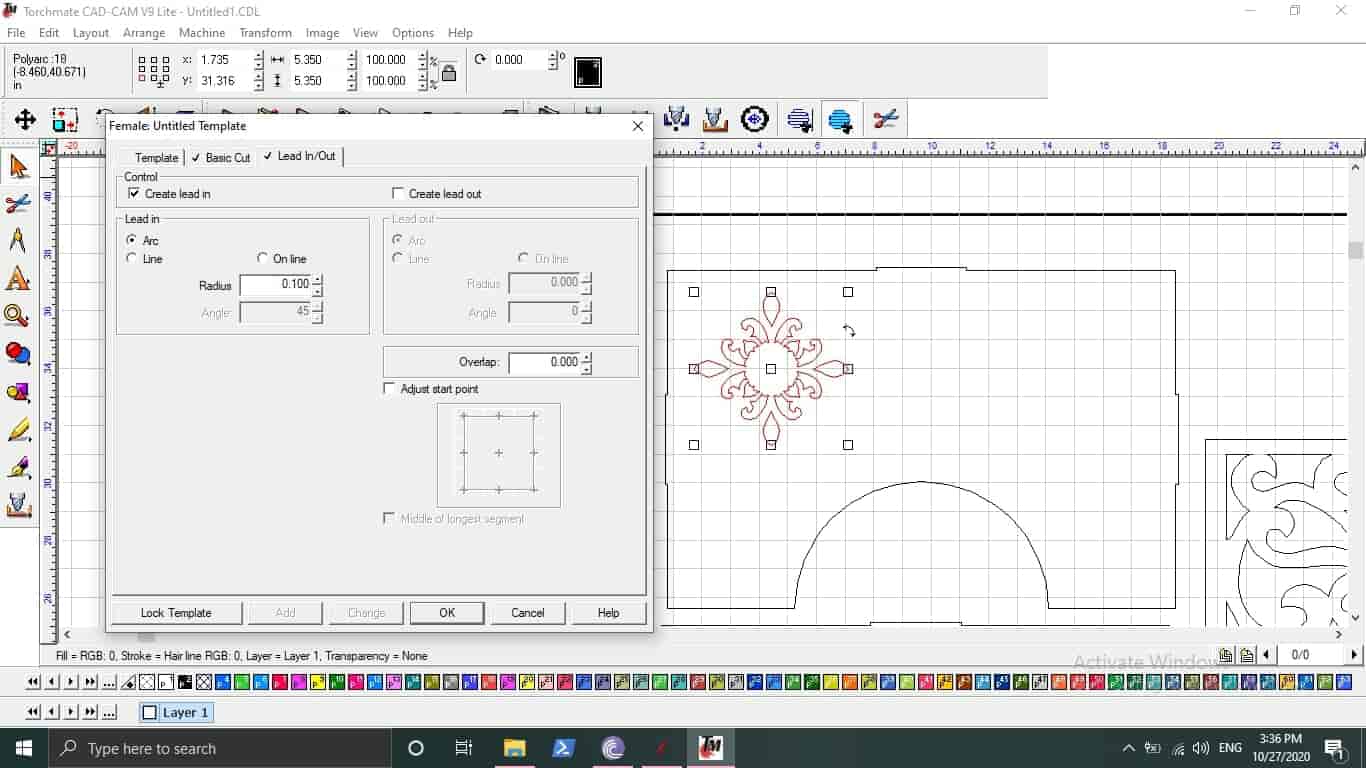
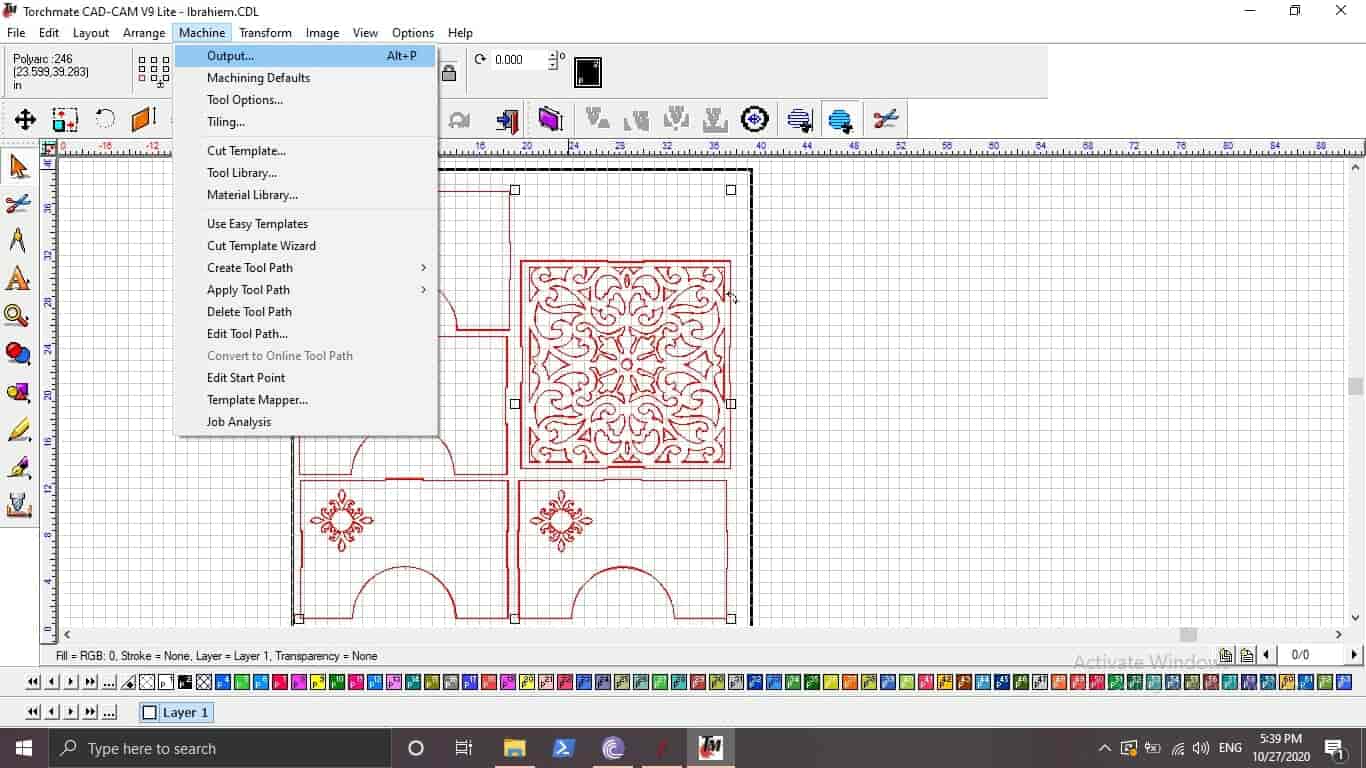
Then, I created a female toolpath for all the inside floral patterns.
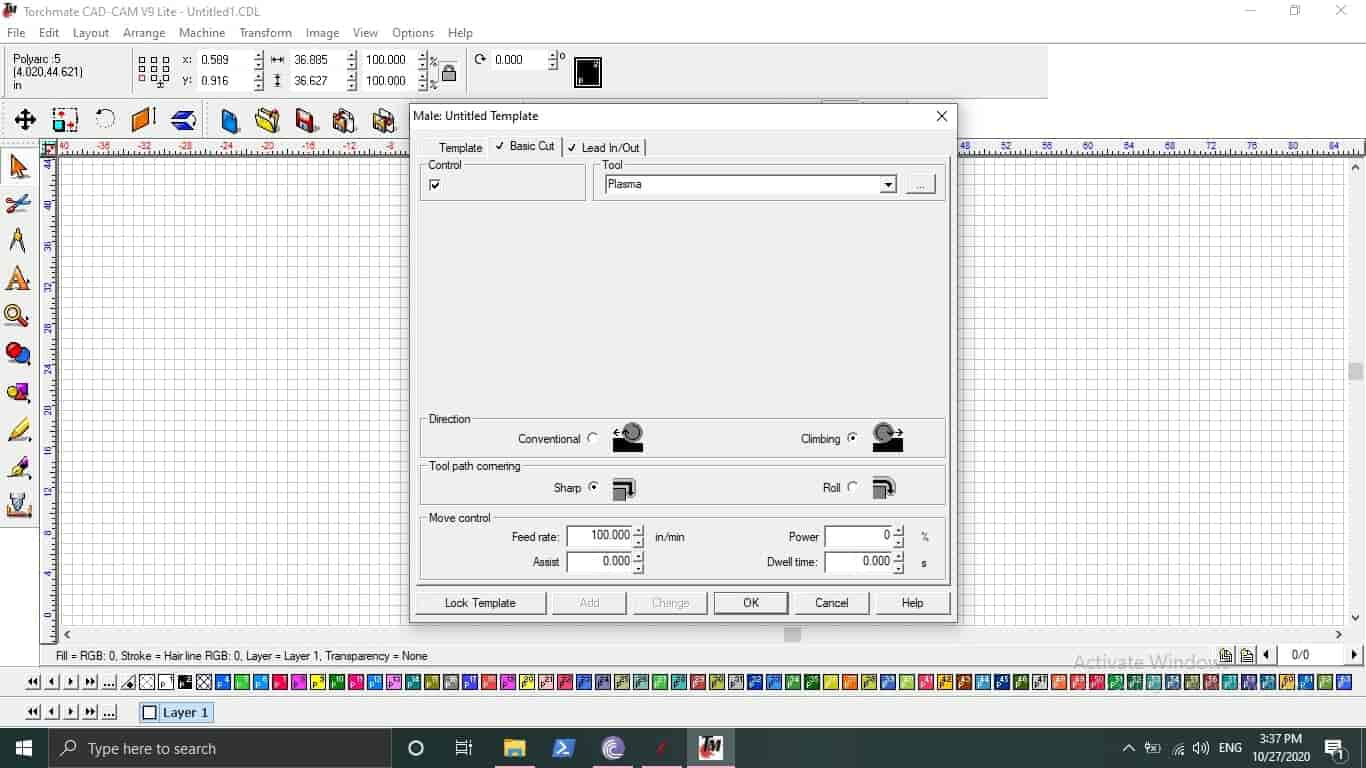
Then, I selected all the outline on the table parts and created a male toolpath.


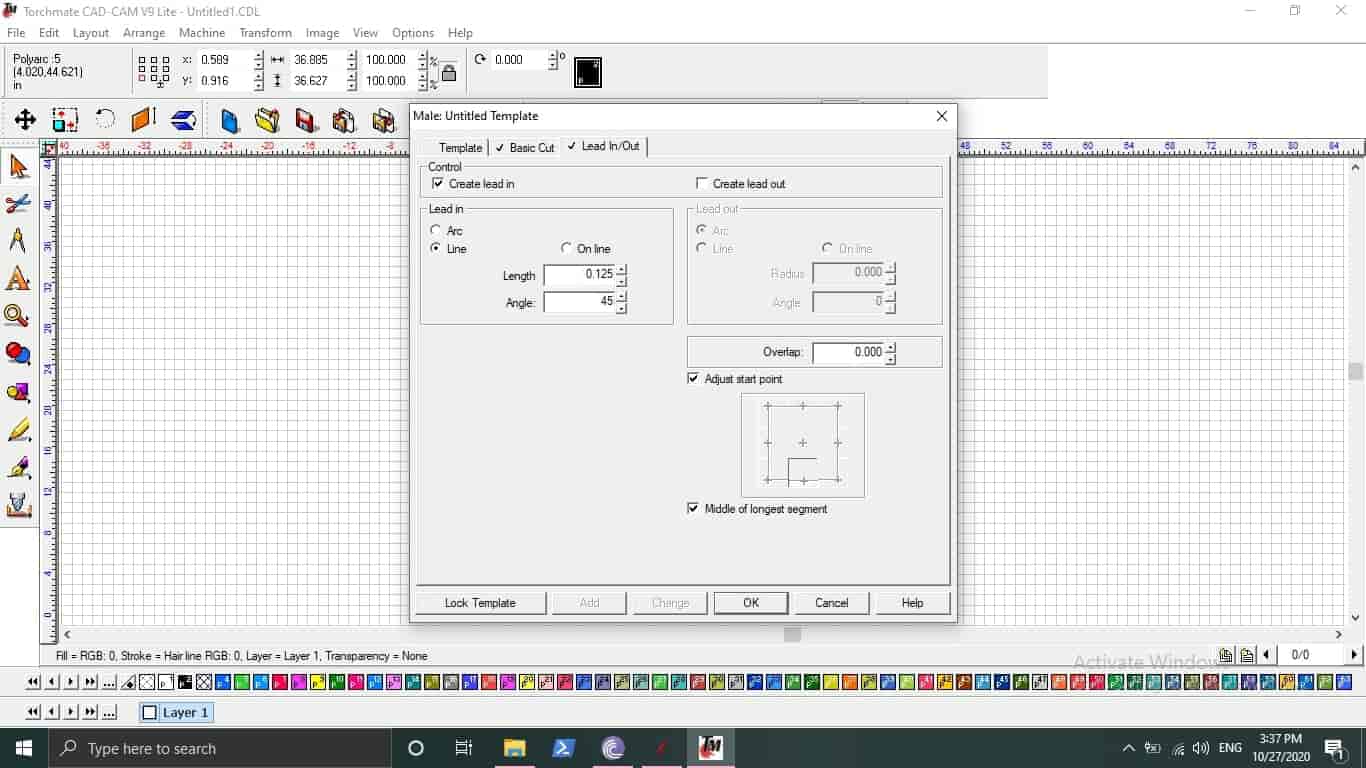
Lastly, I exported the file that we will send to the machine to cut our design.
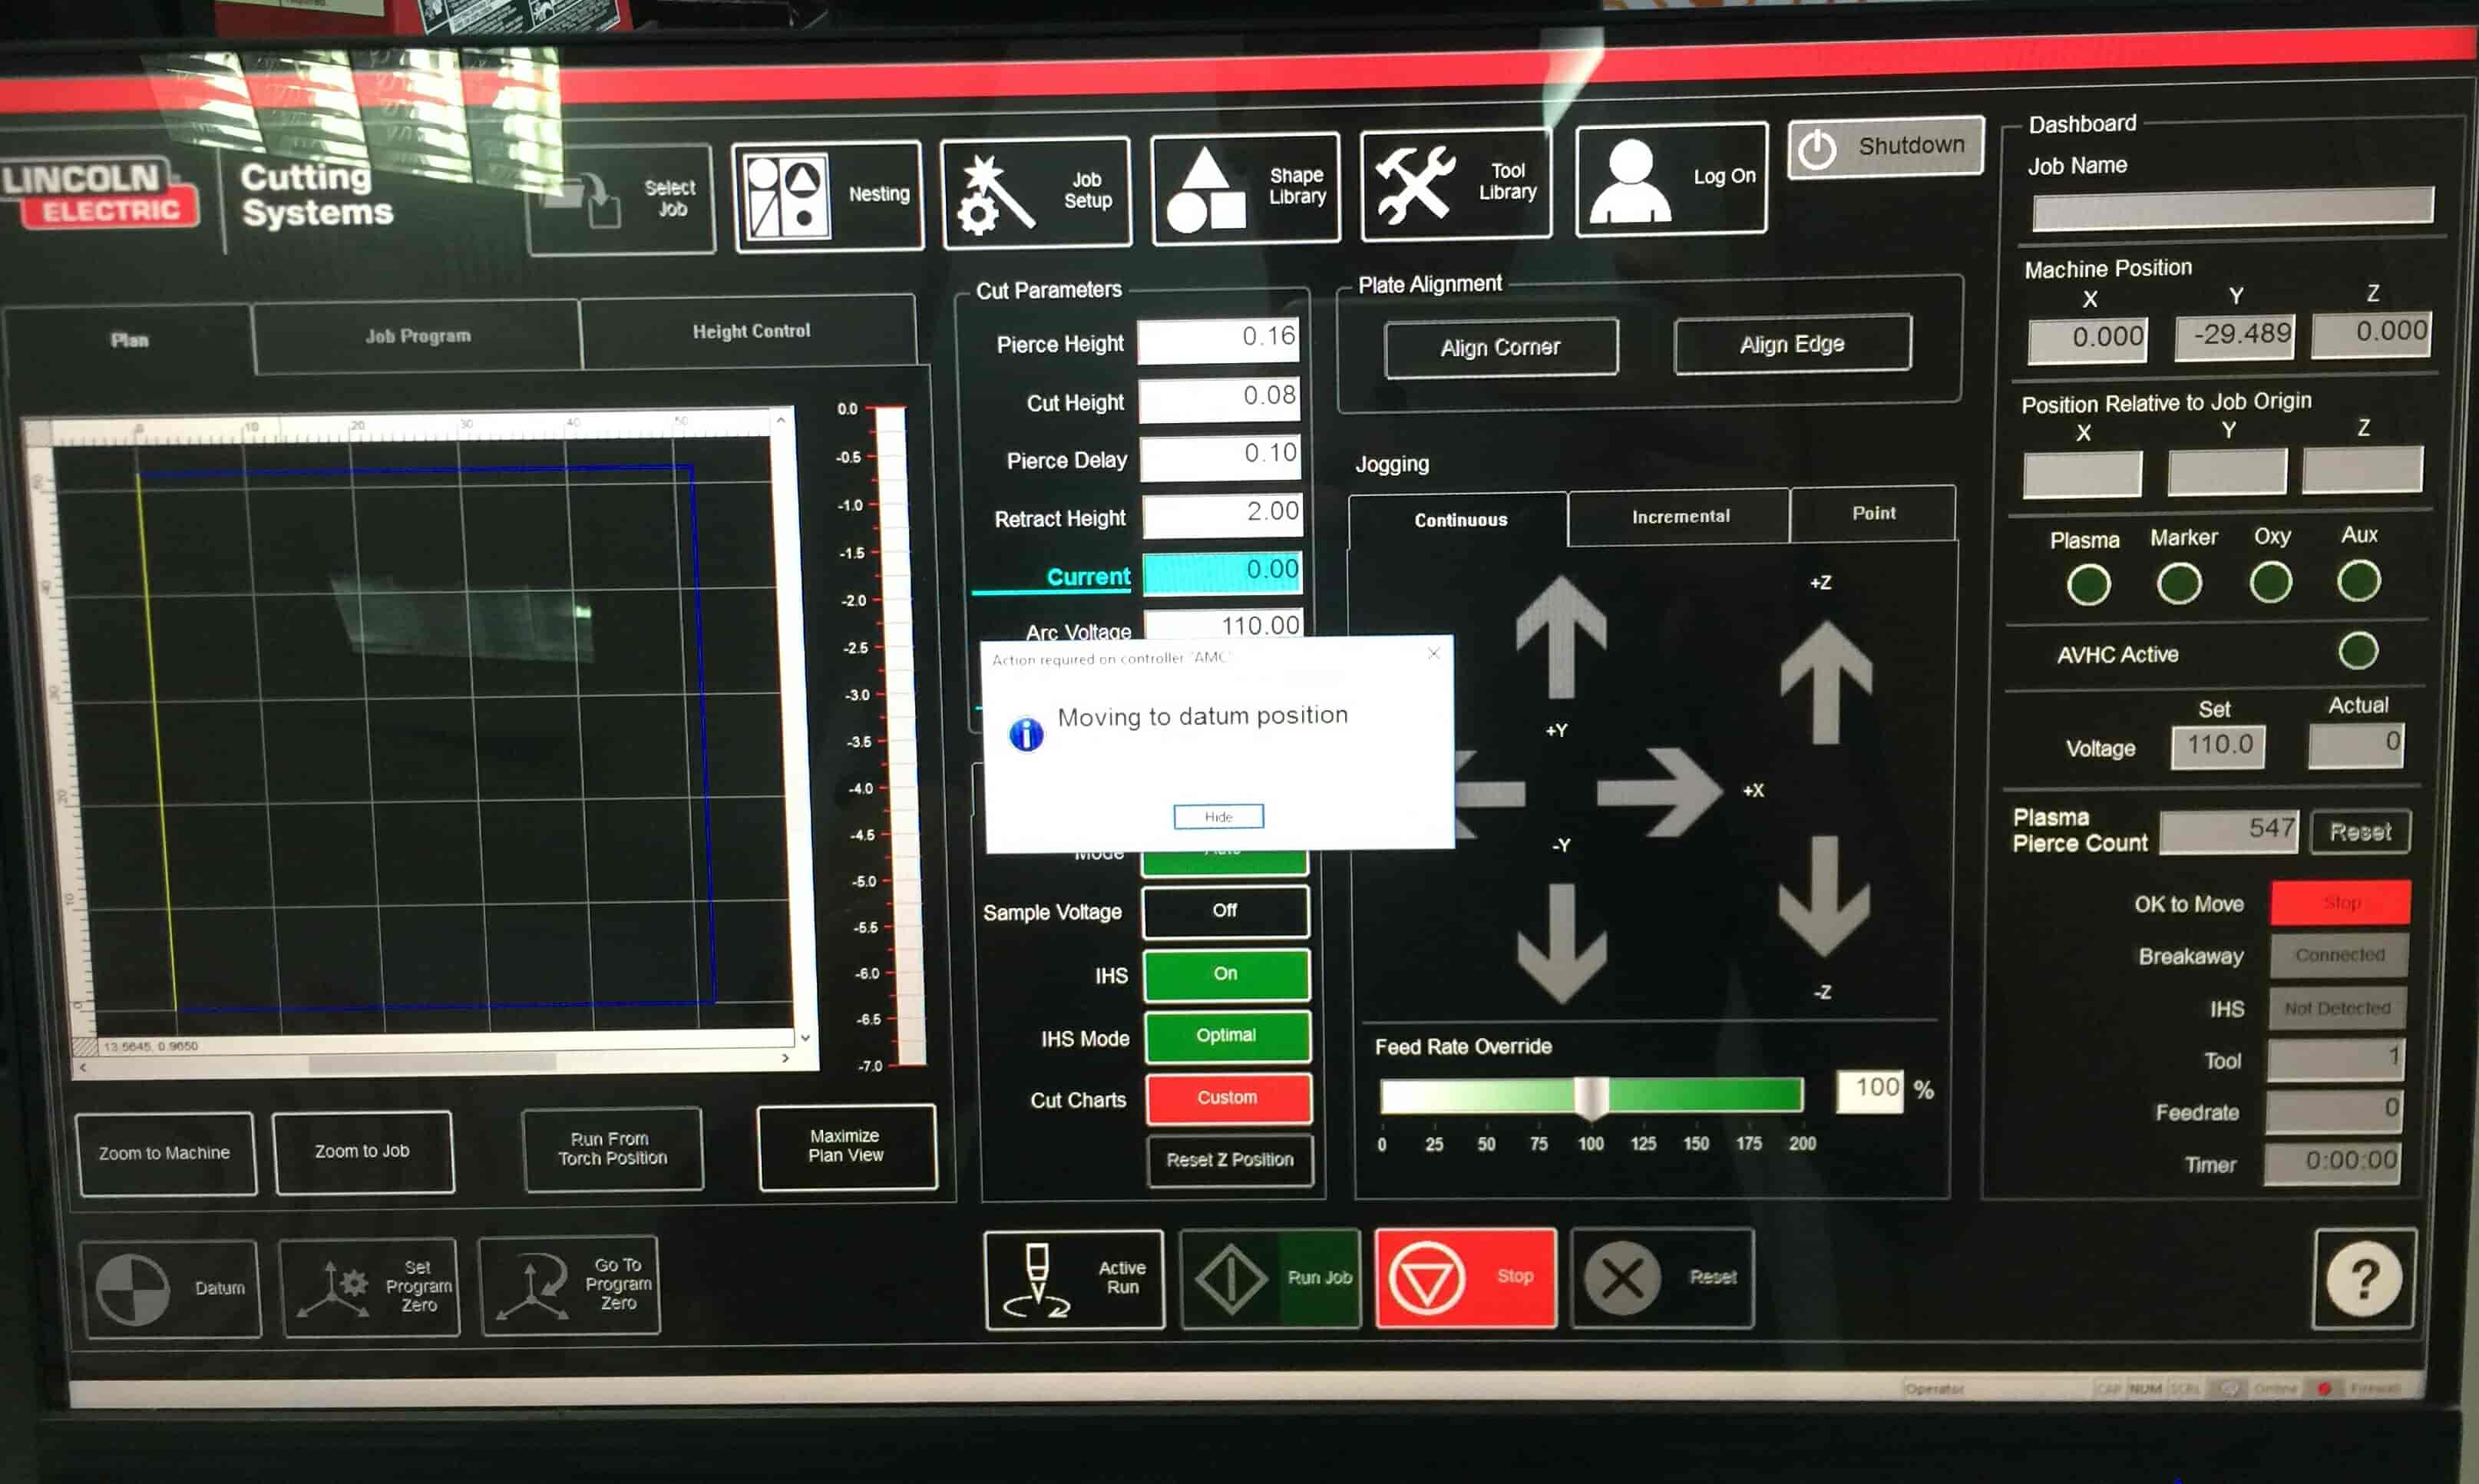
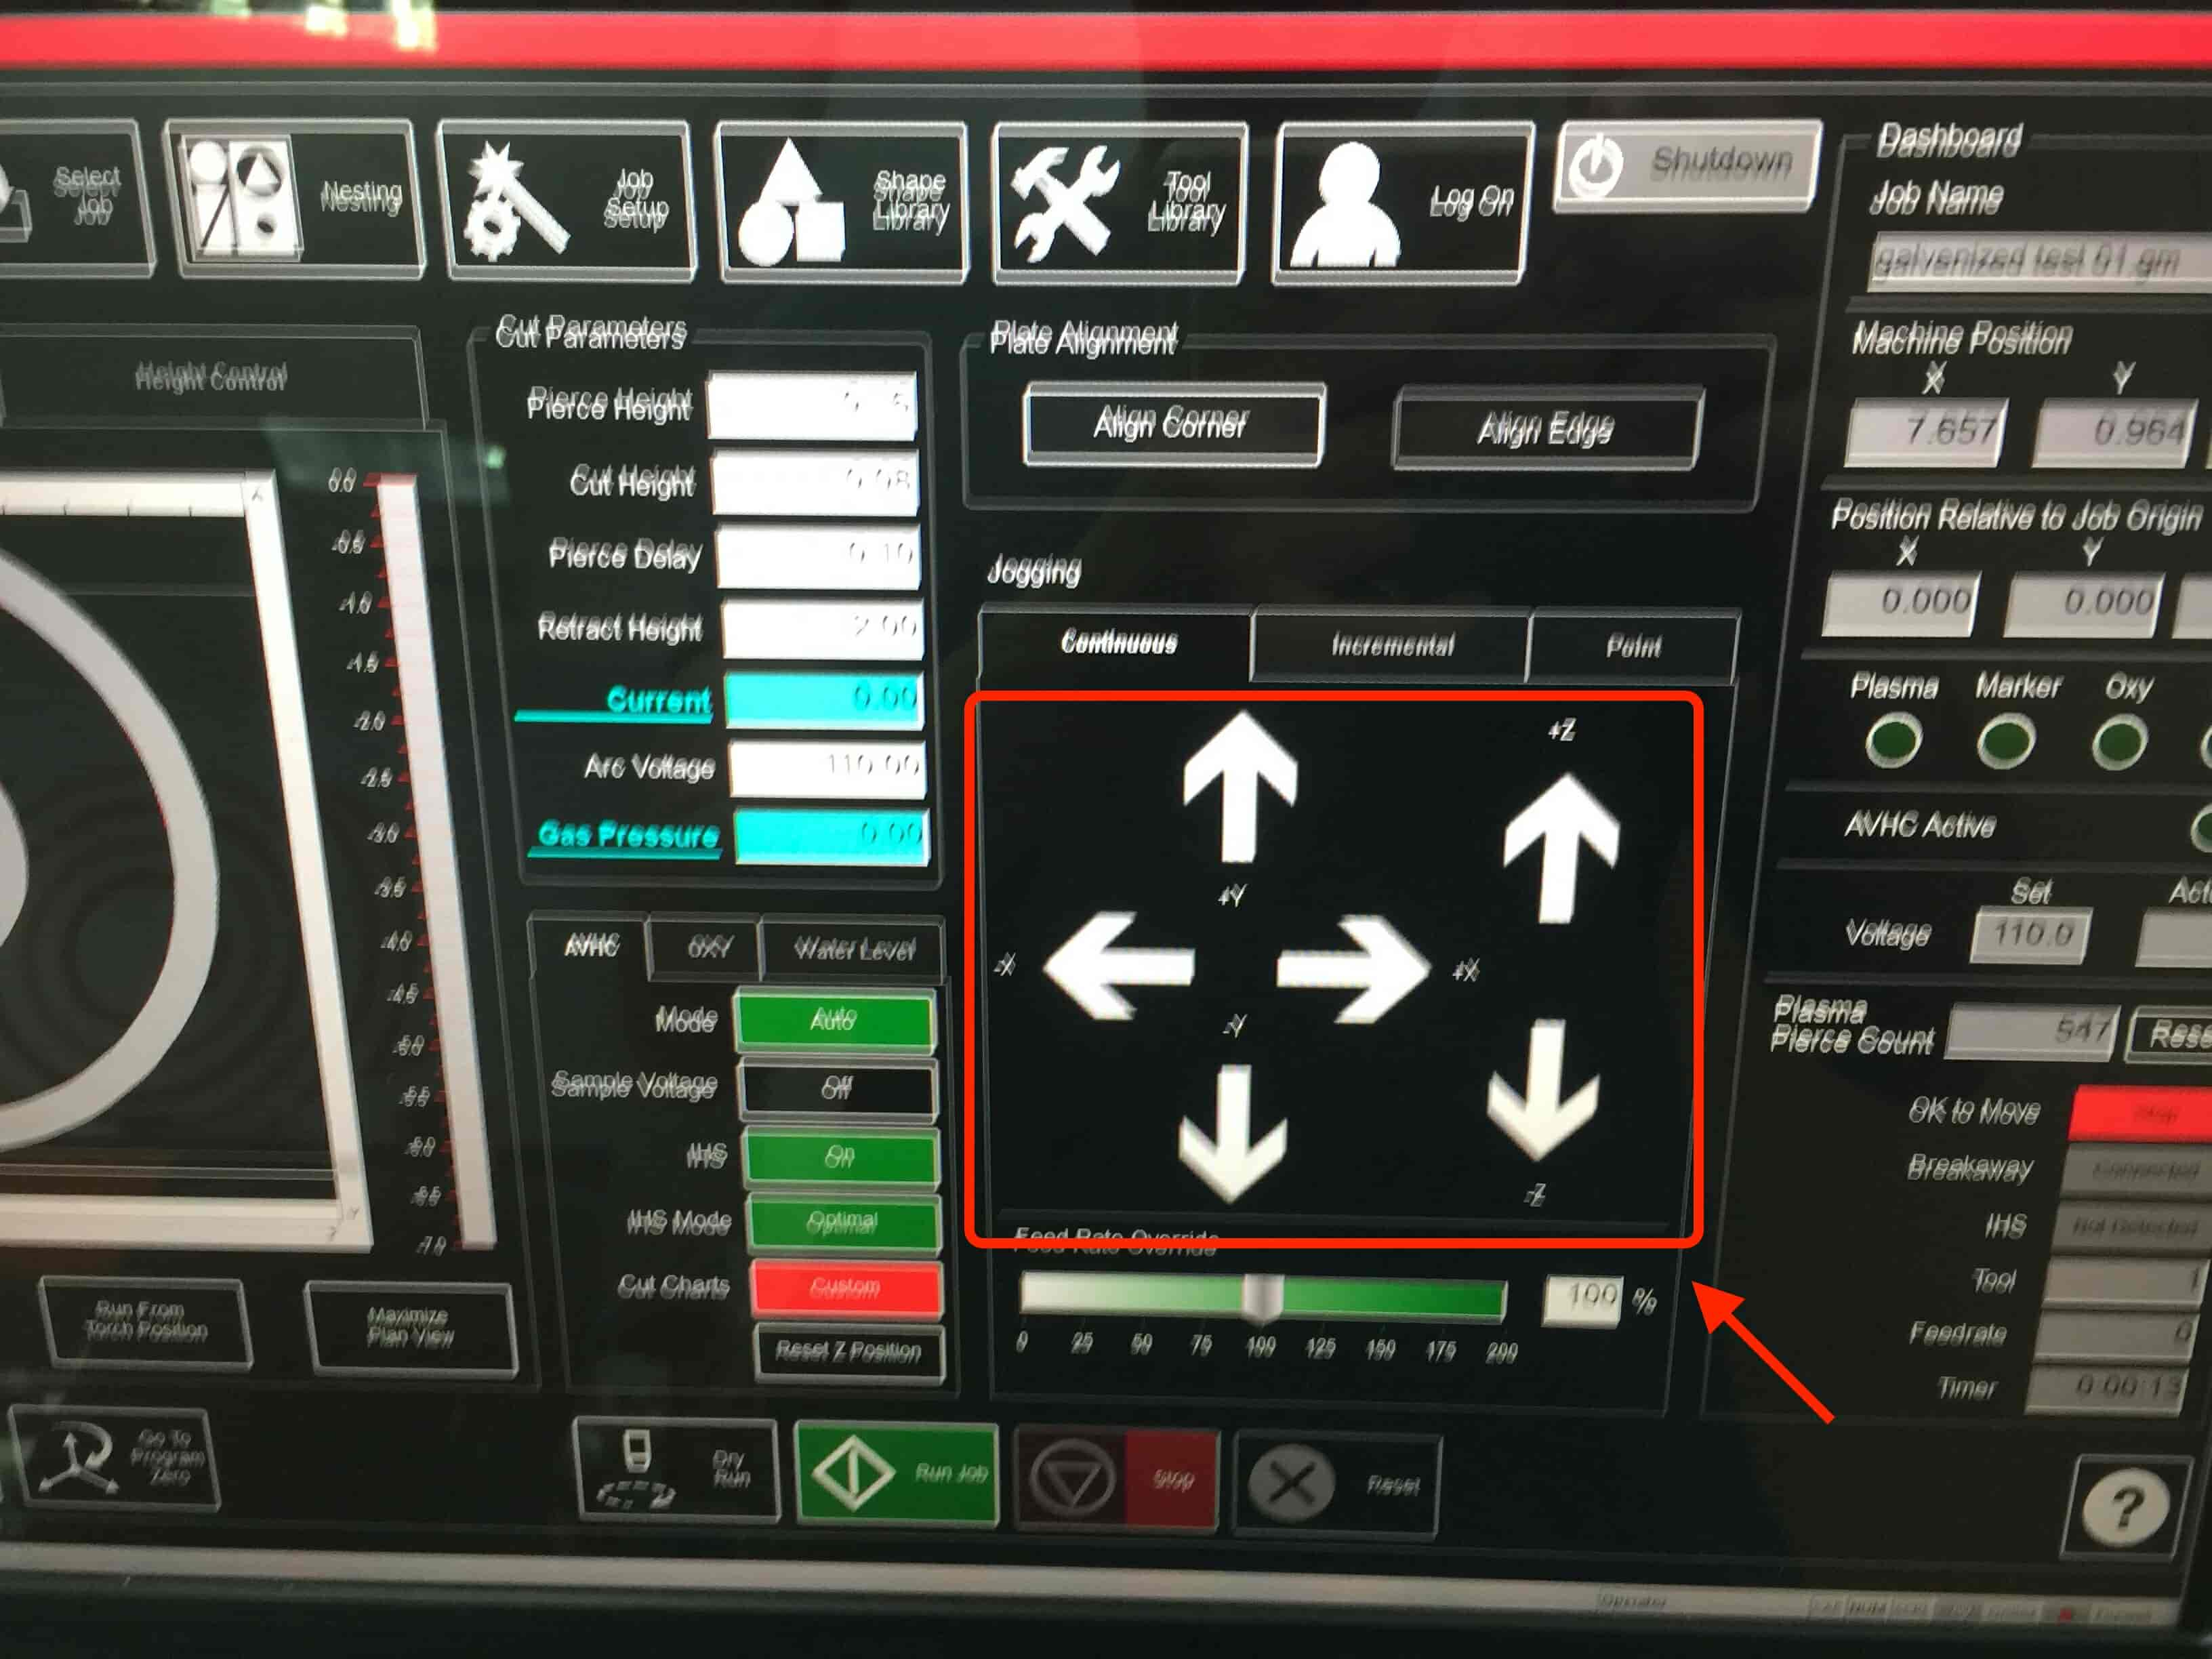
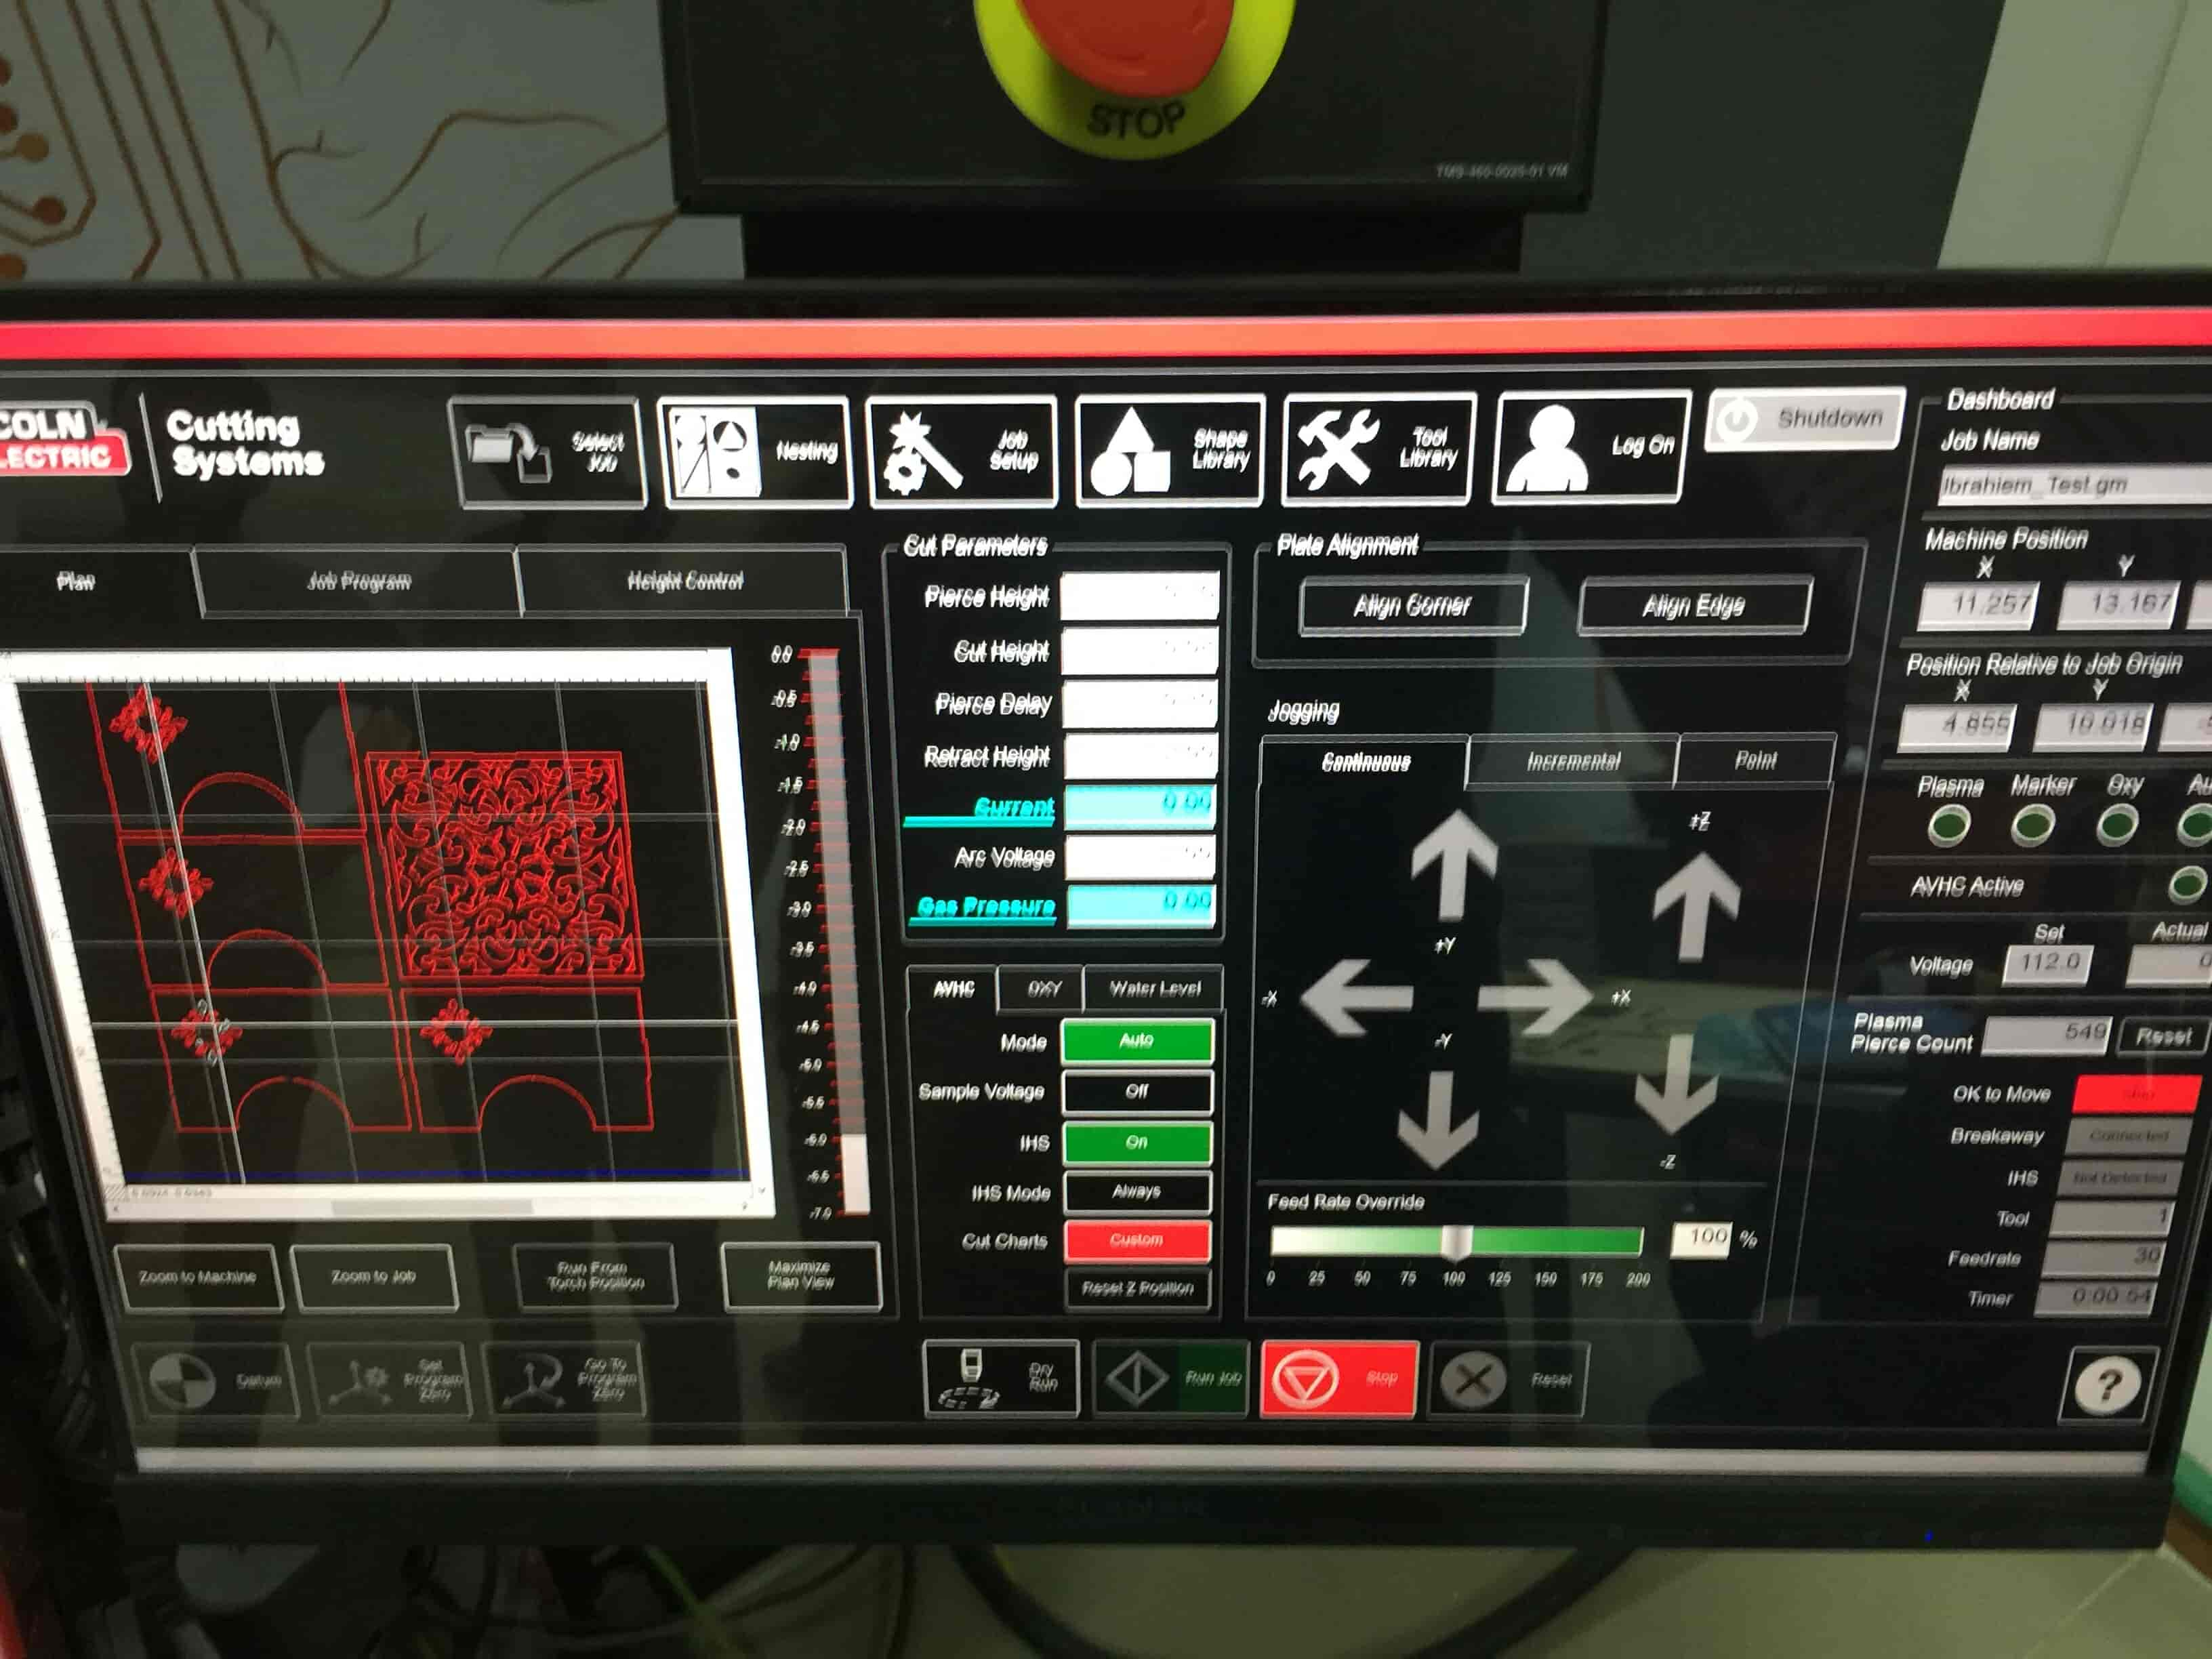
After we placed the steel sheet in the machine bed, we set the origin point of the machine head on the down left side on the steel sheet using these movement control buttons.
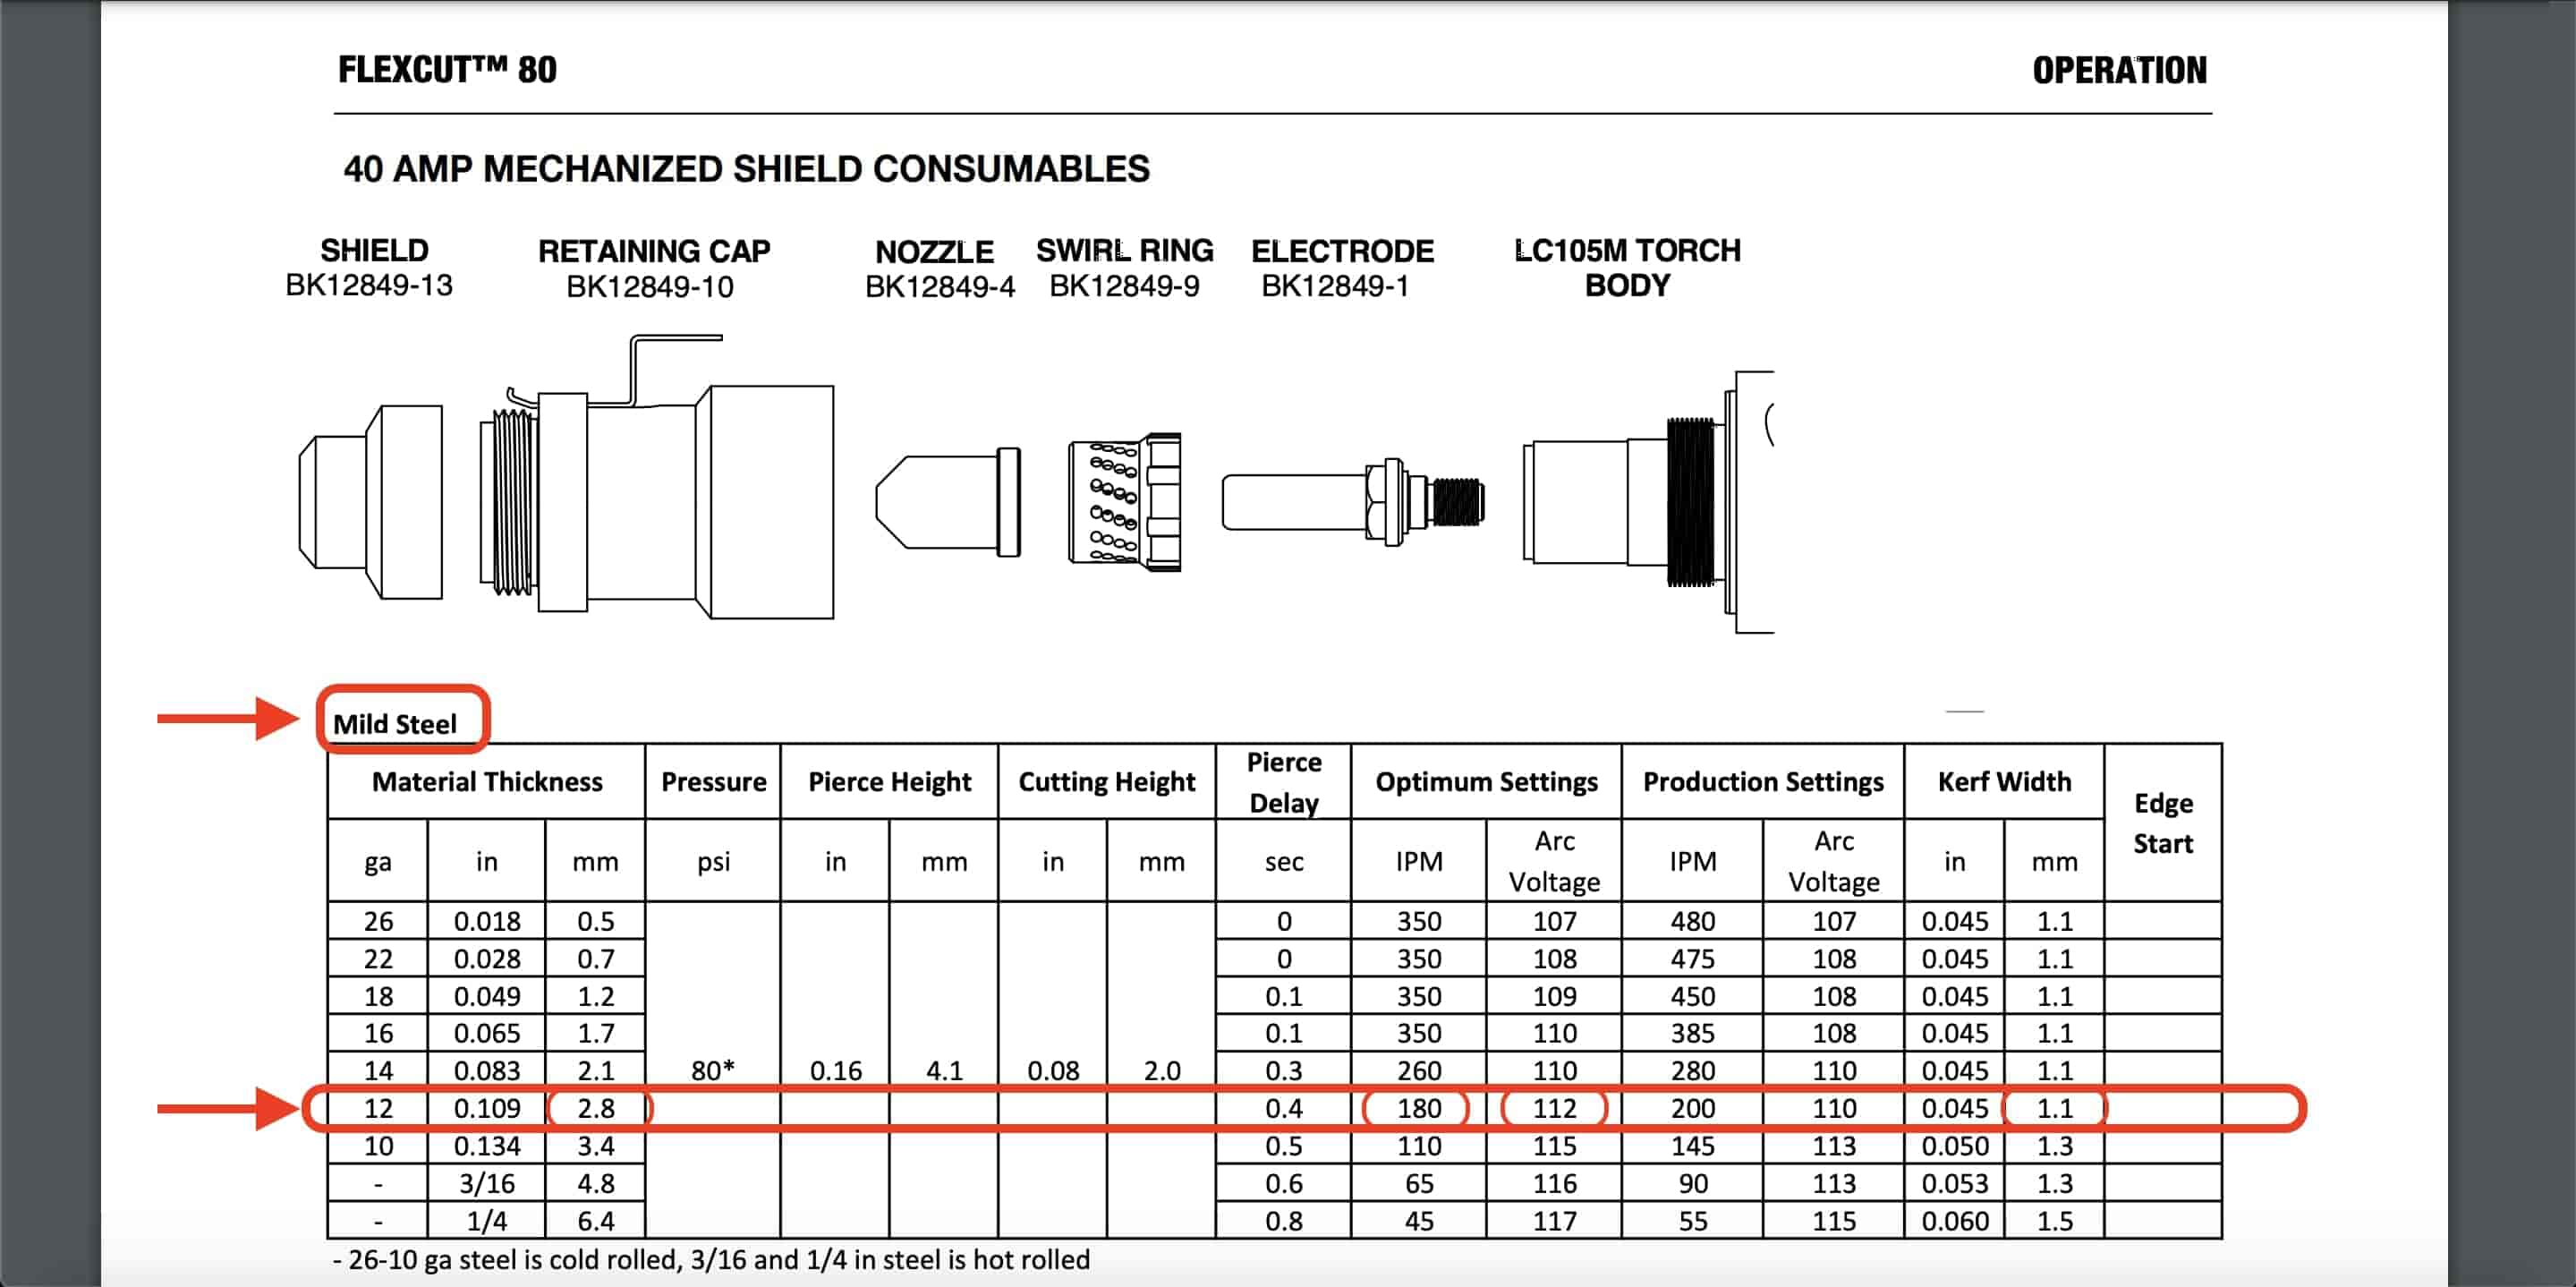
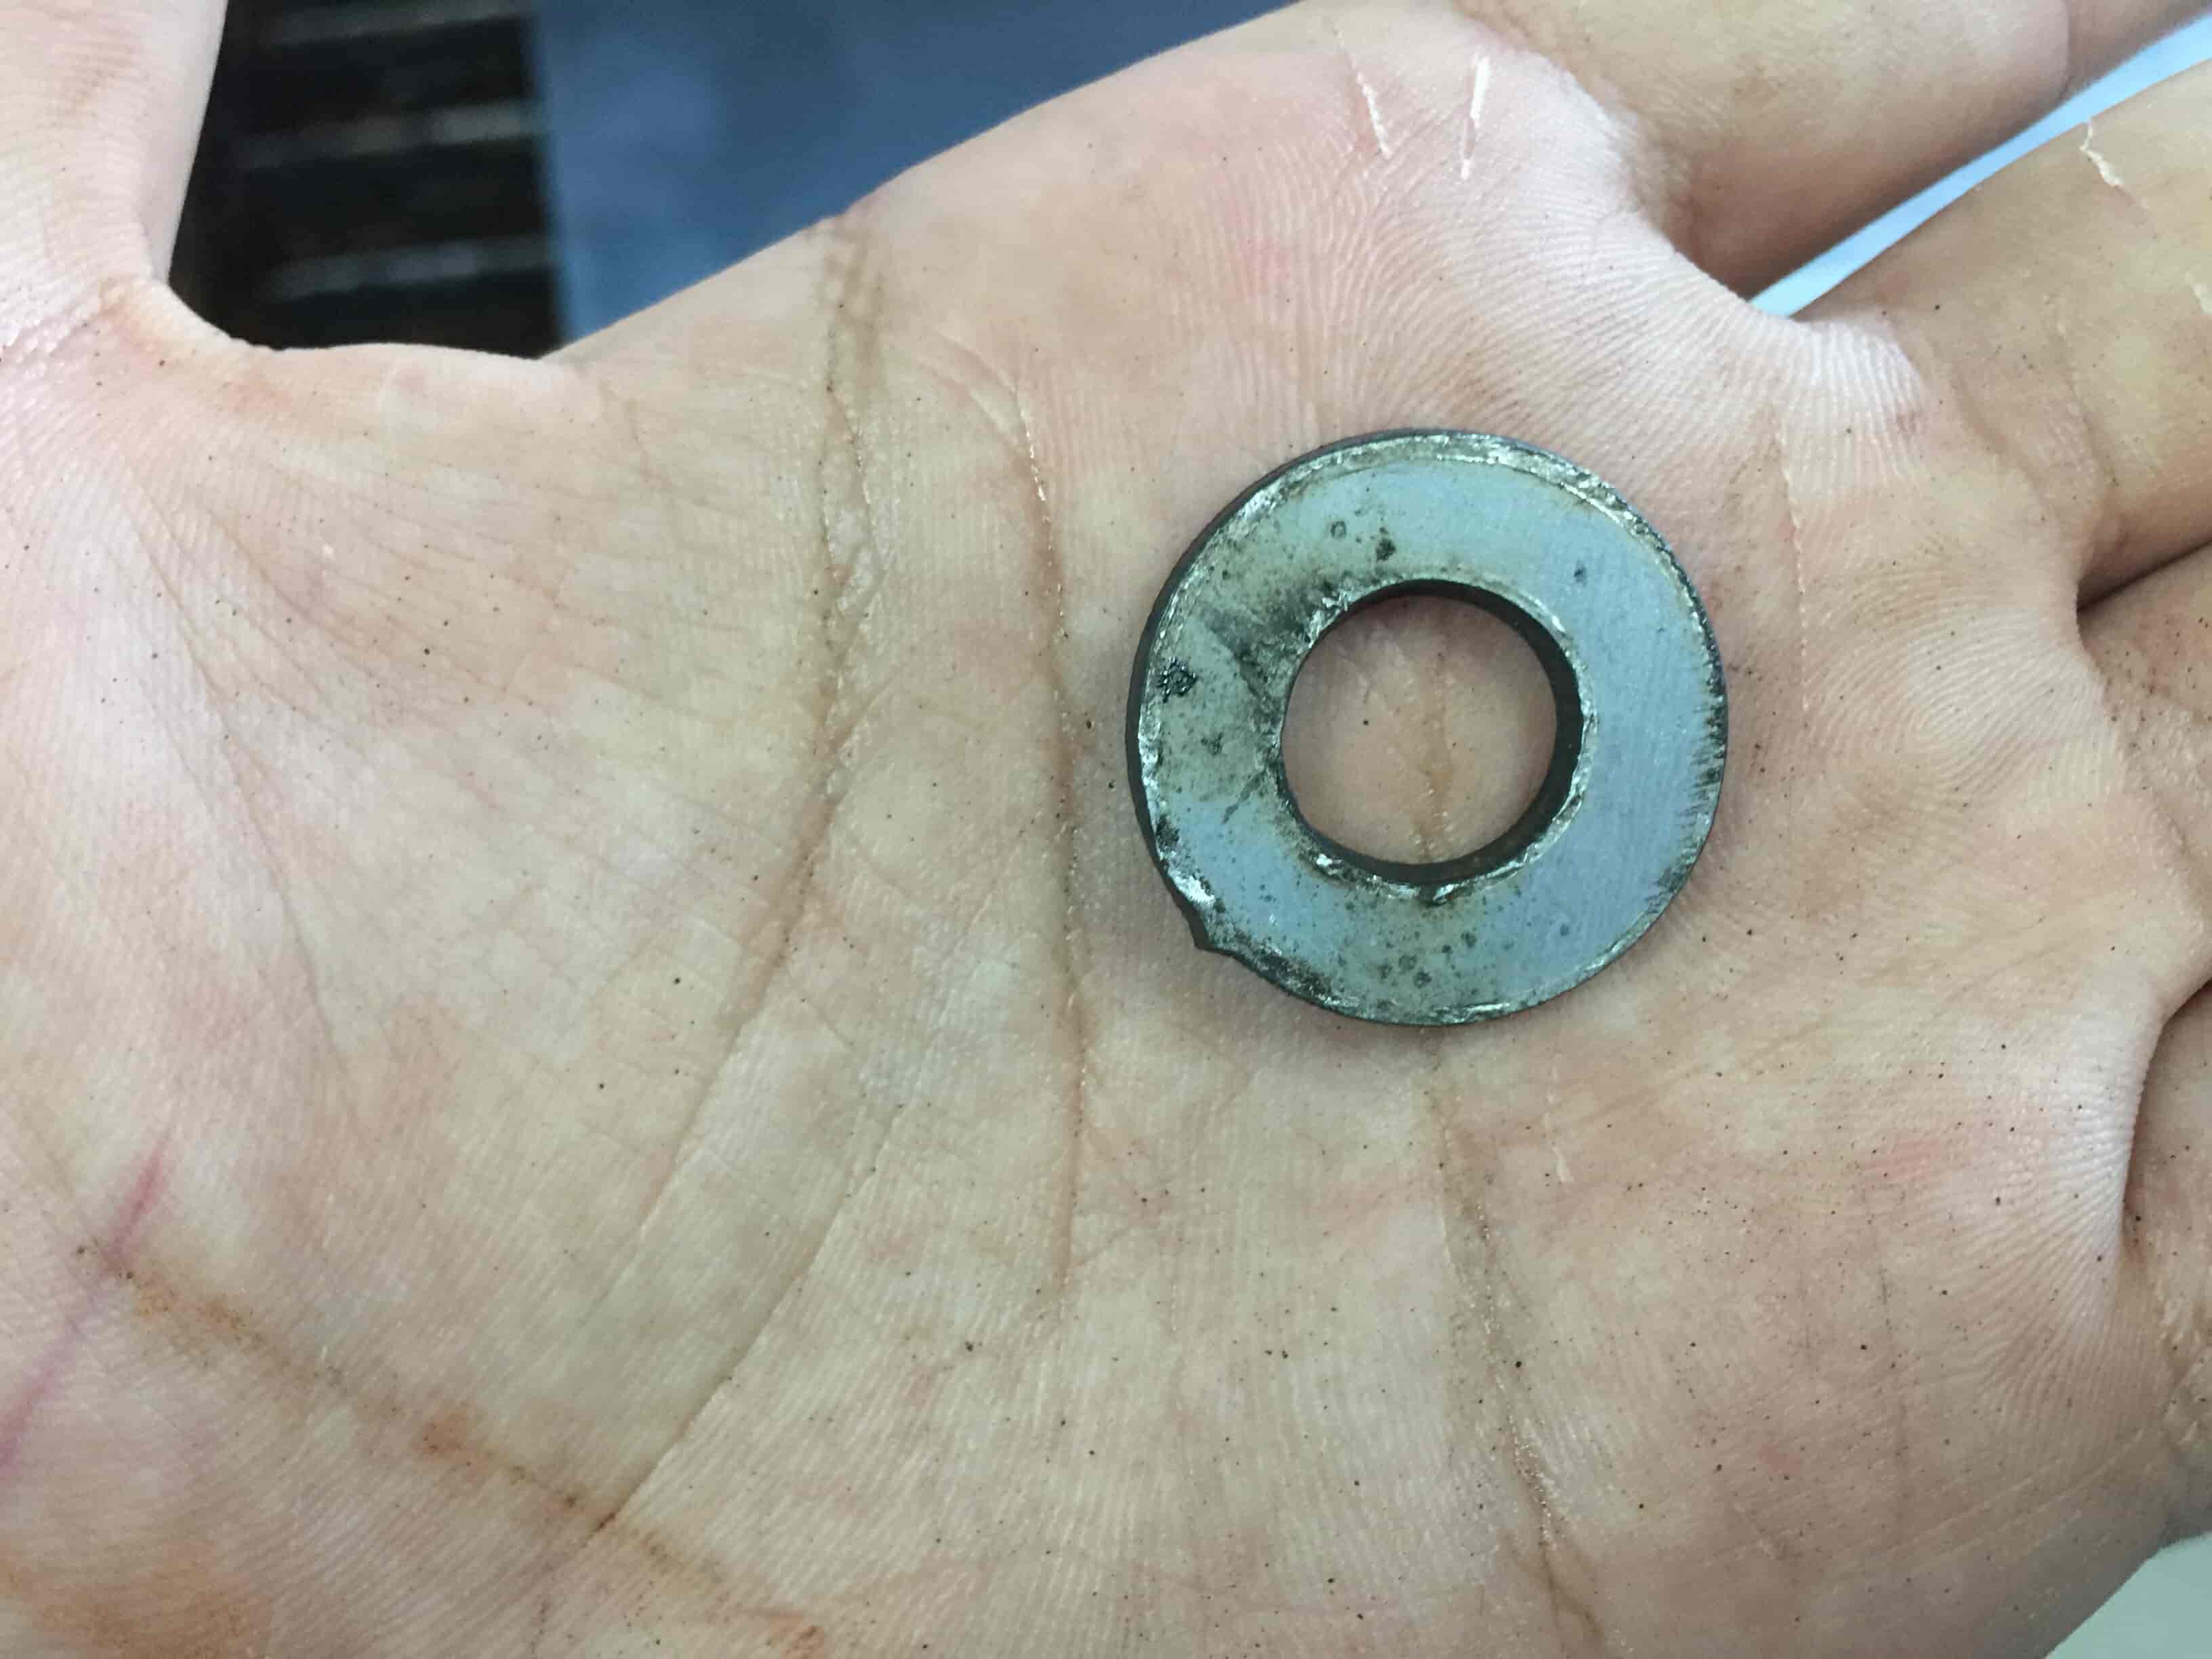
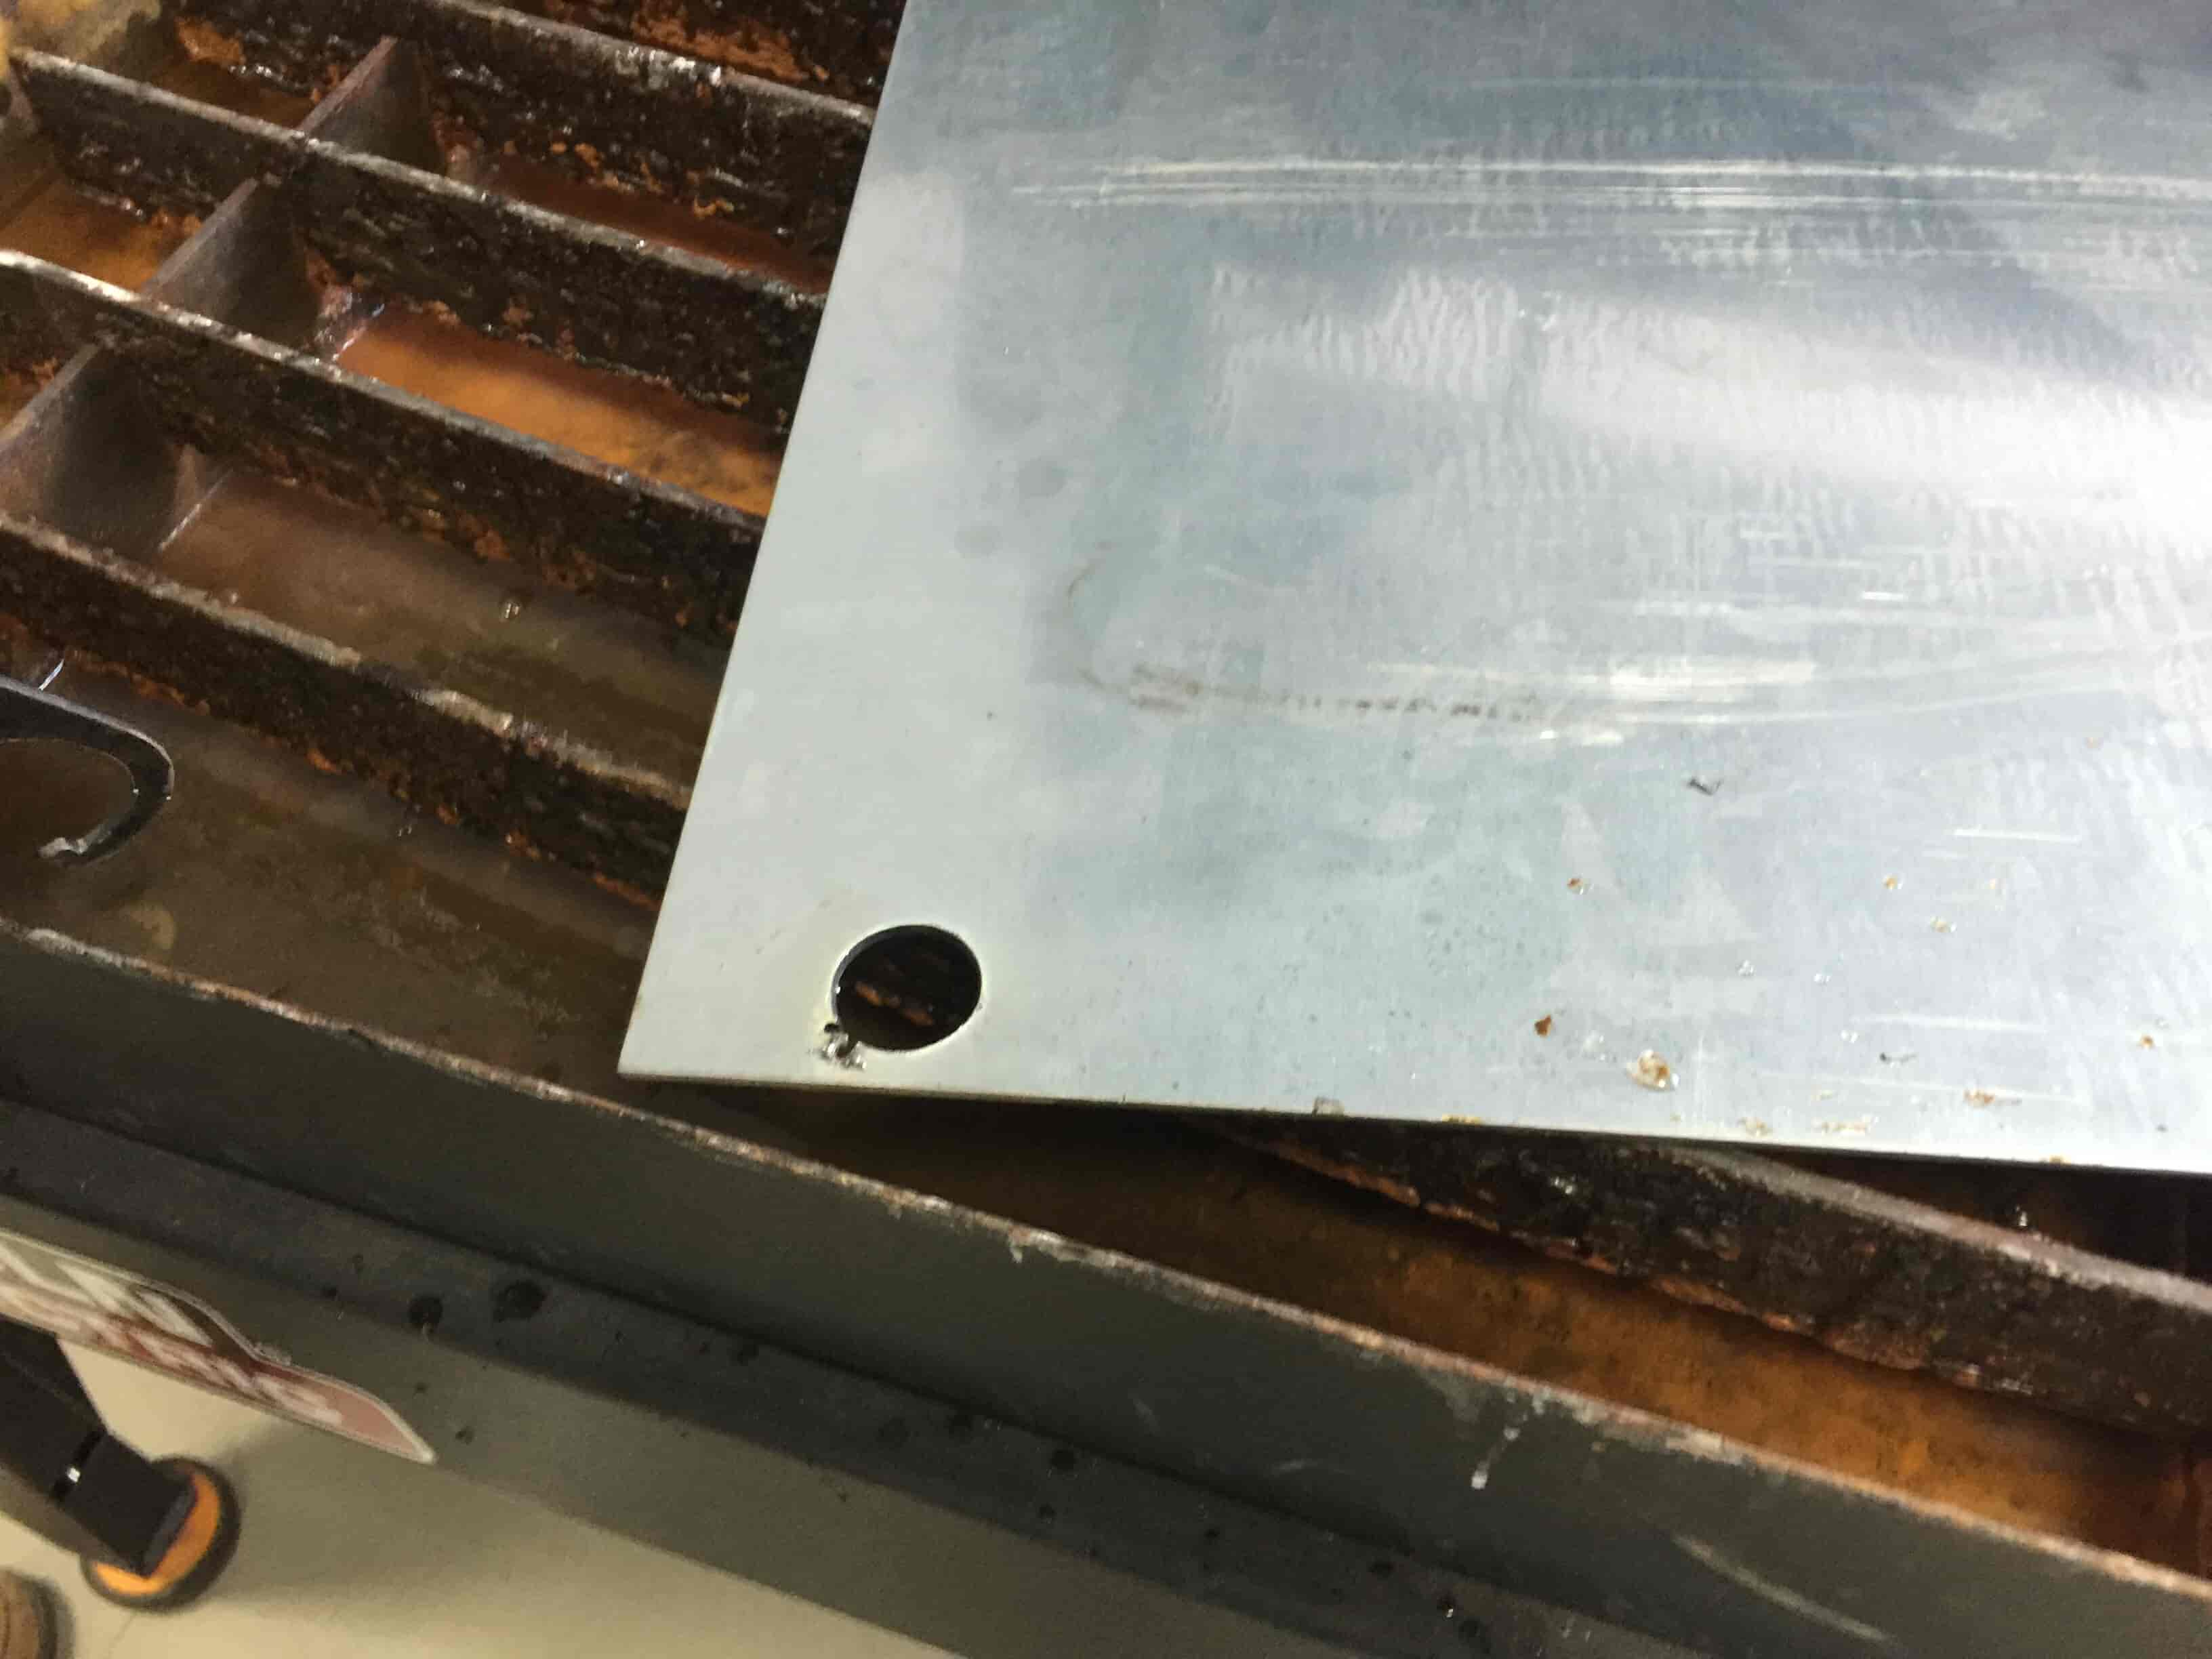
Before cutting the table parts, we opened the manual of the Flexcut80 plasma cutter to get the right cutting parameters for the steel material. and we cut a test part to see how the machine will interact with the Galvanized steel(for best practise, use a non-galvanized steel). The cut went great. But, some fumes were produced, the space is very well ventilated so we didn't face a big problem in that part.
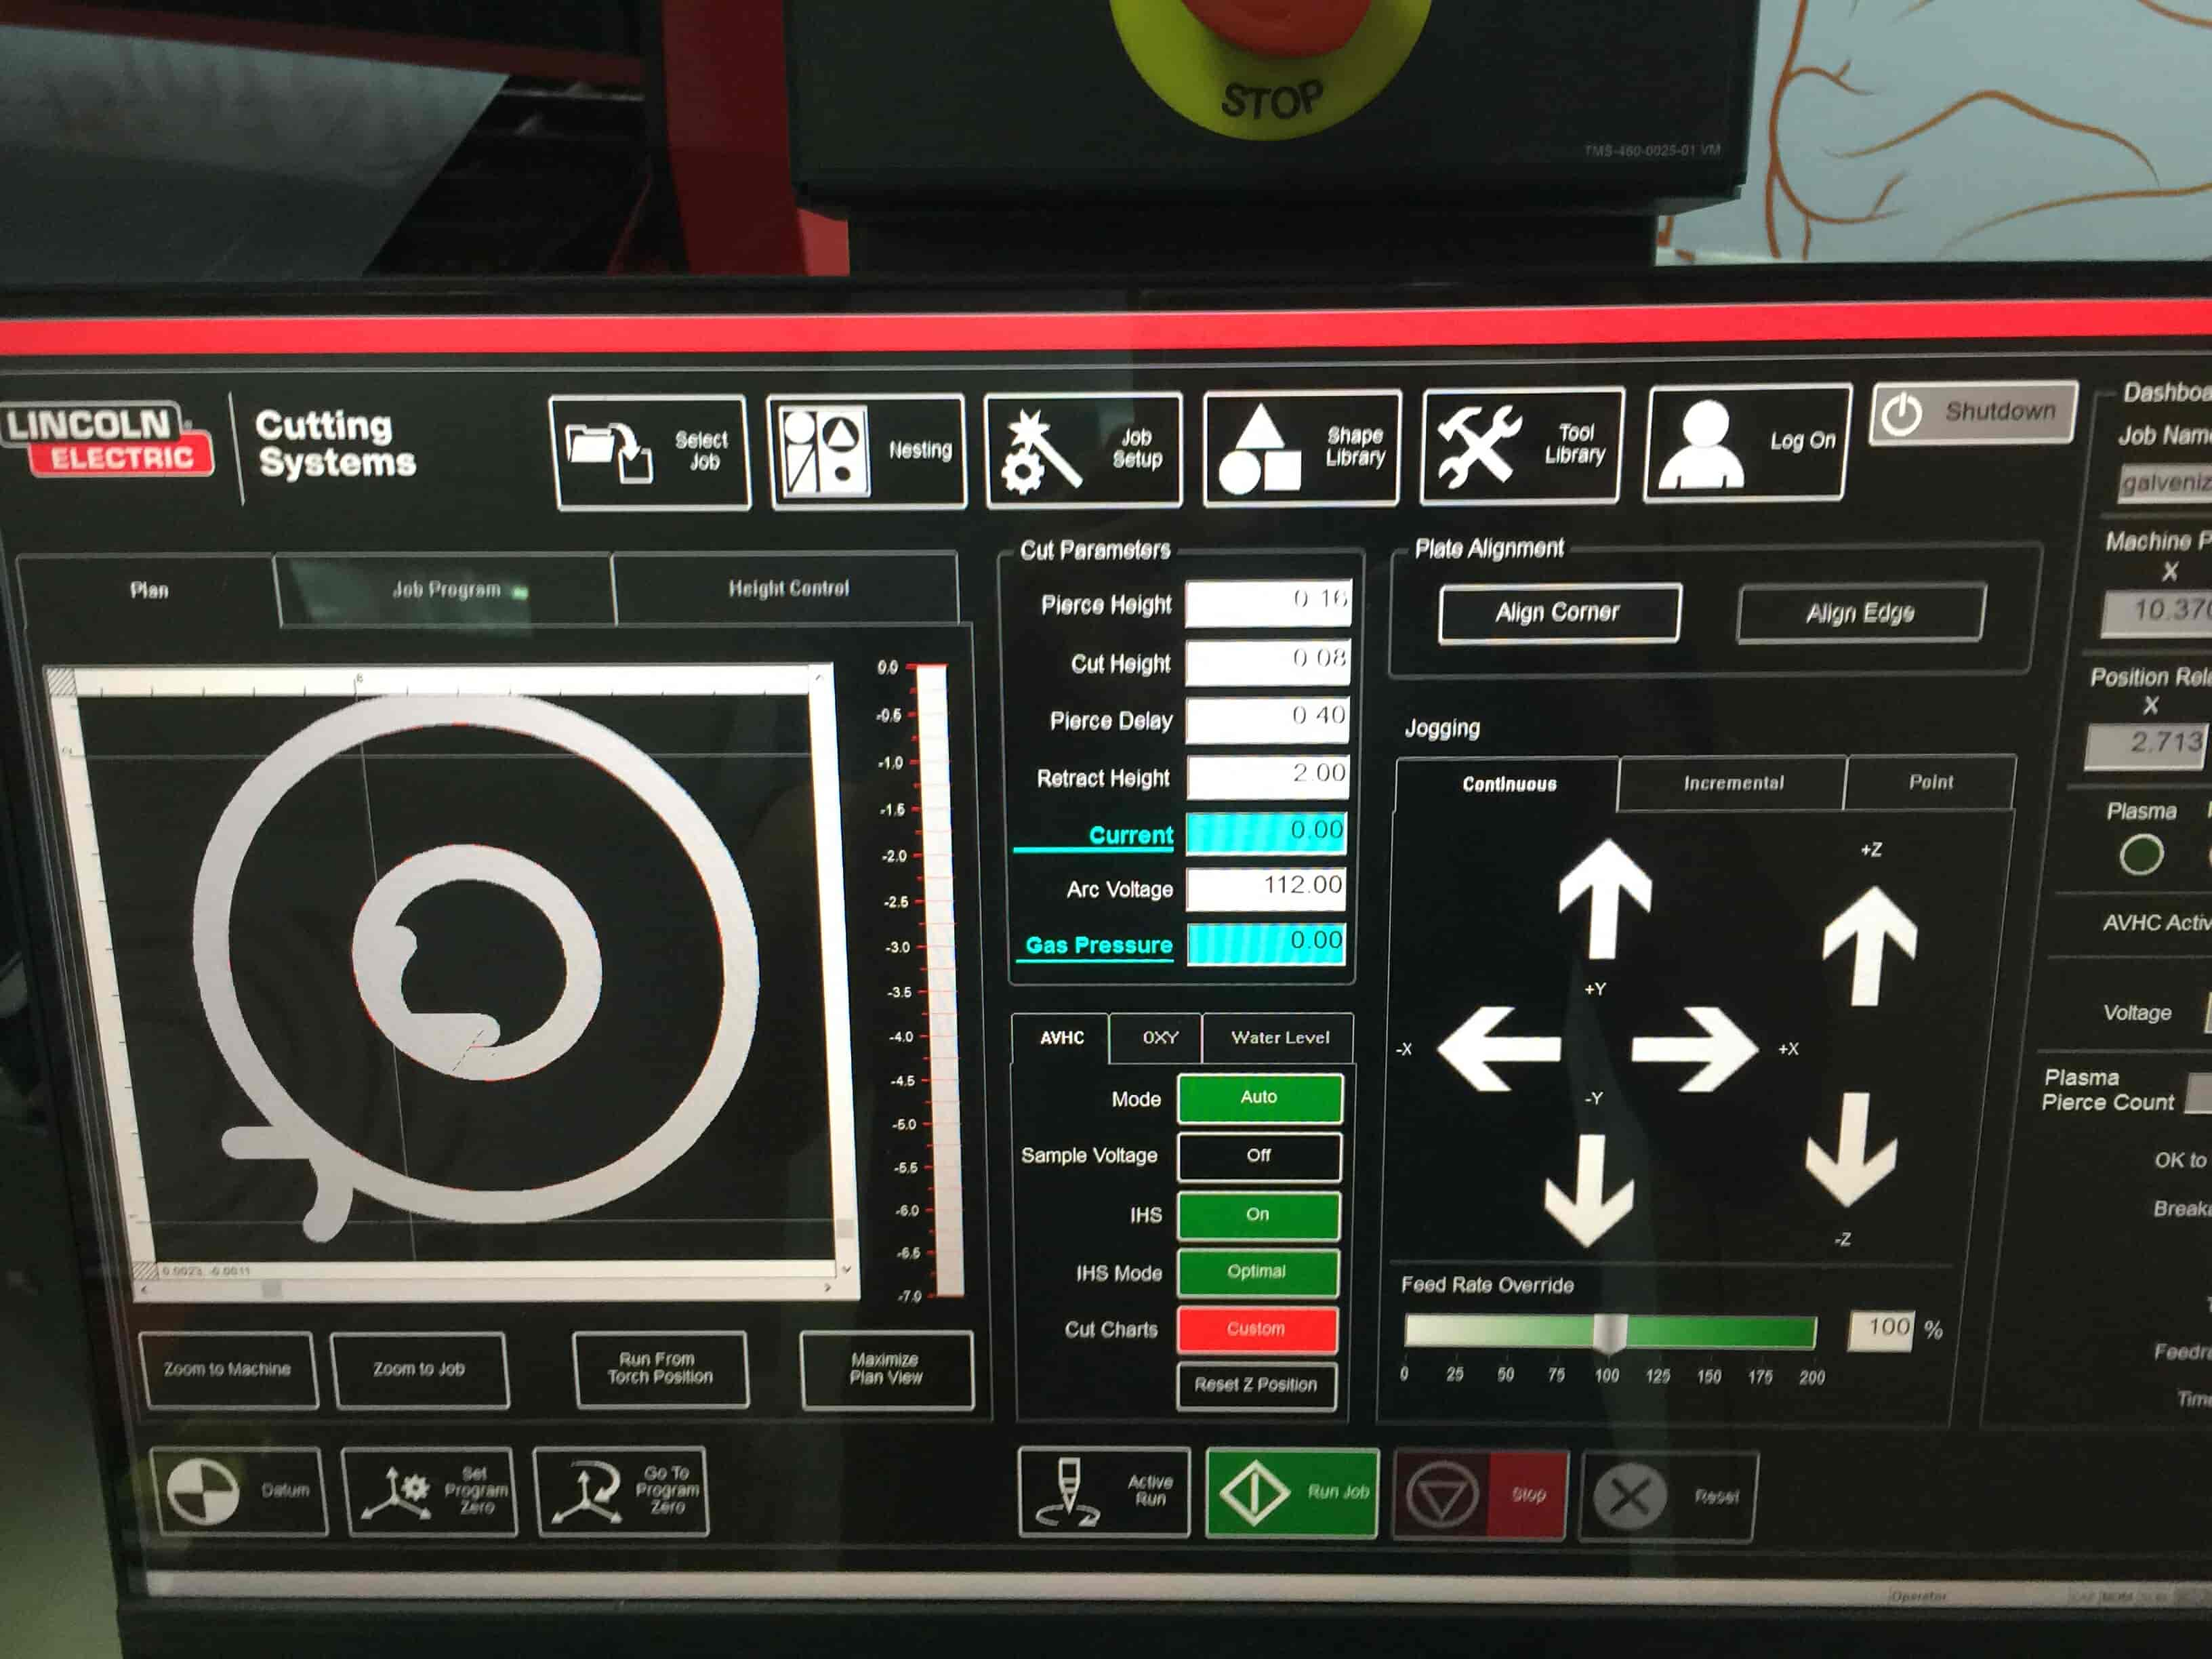
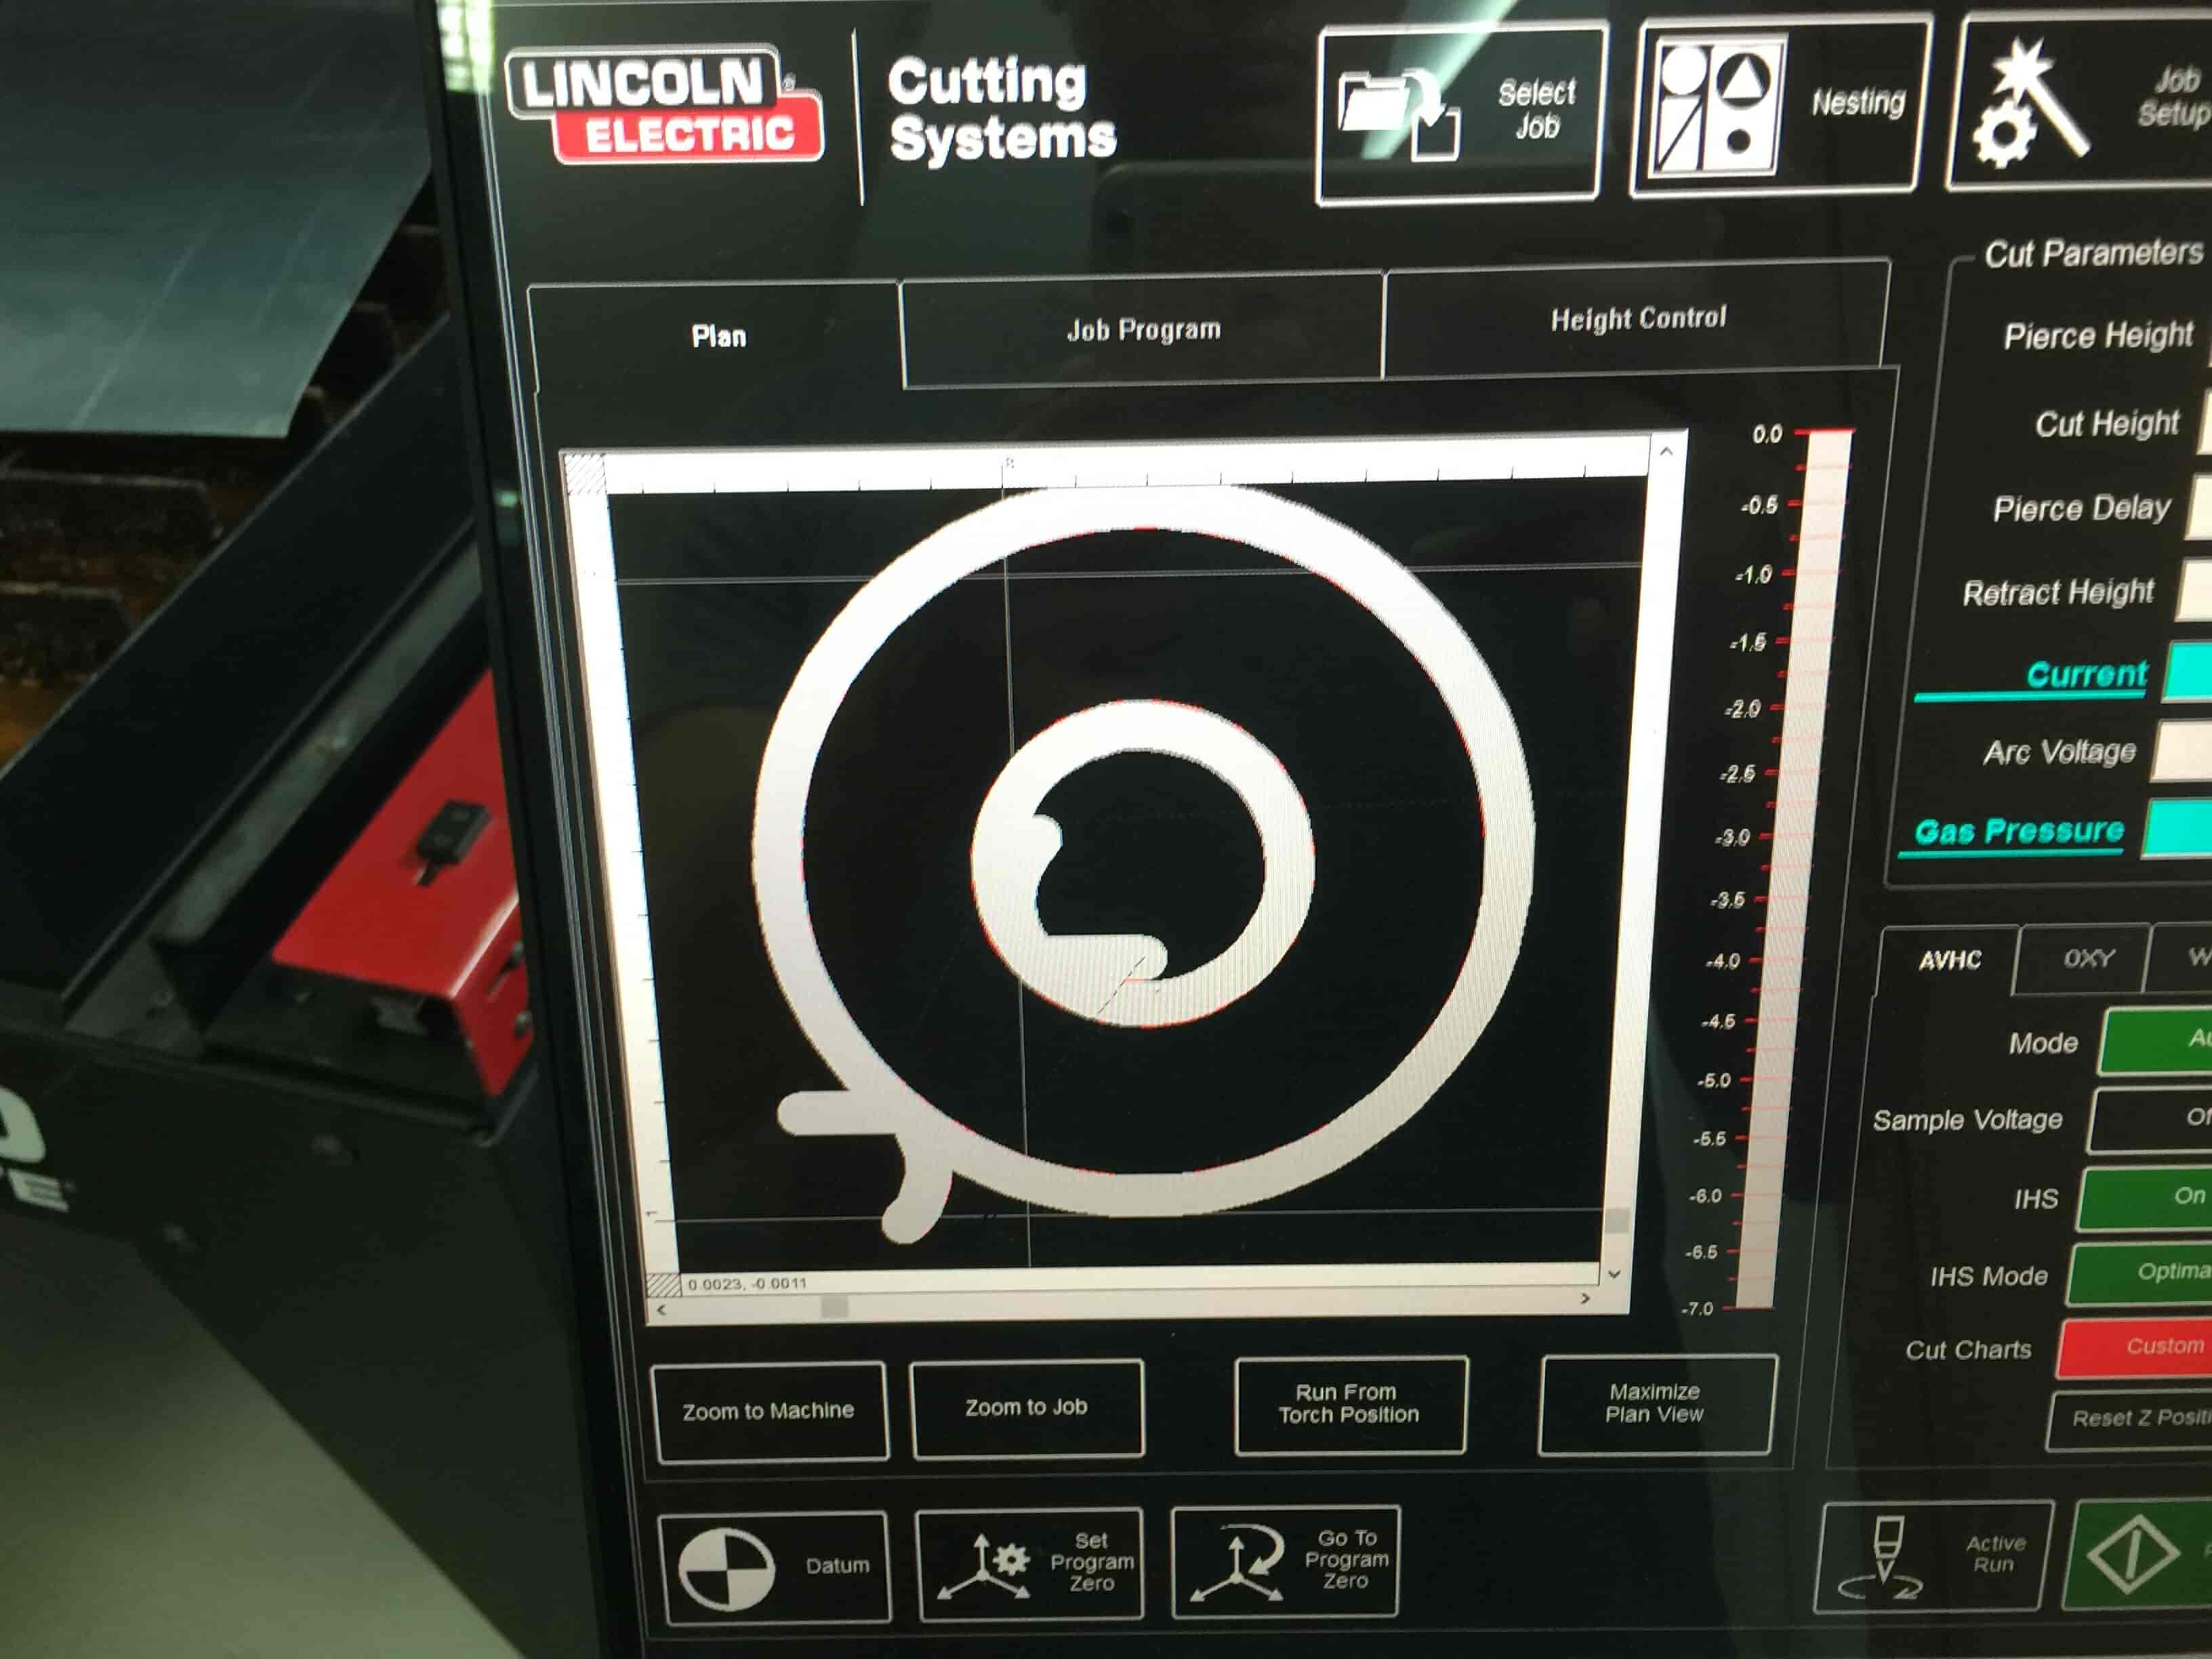
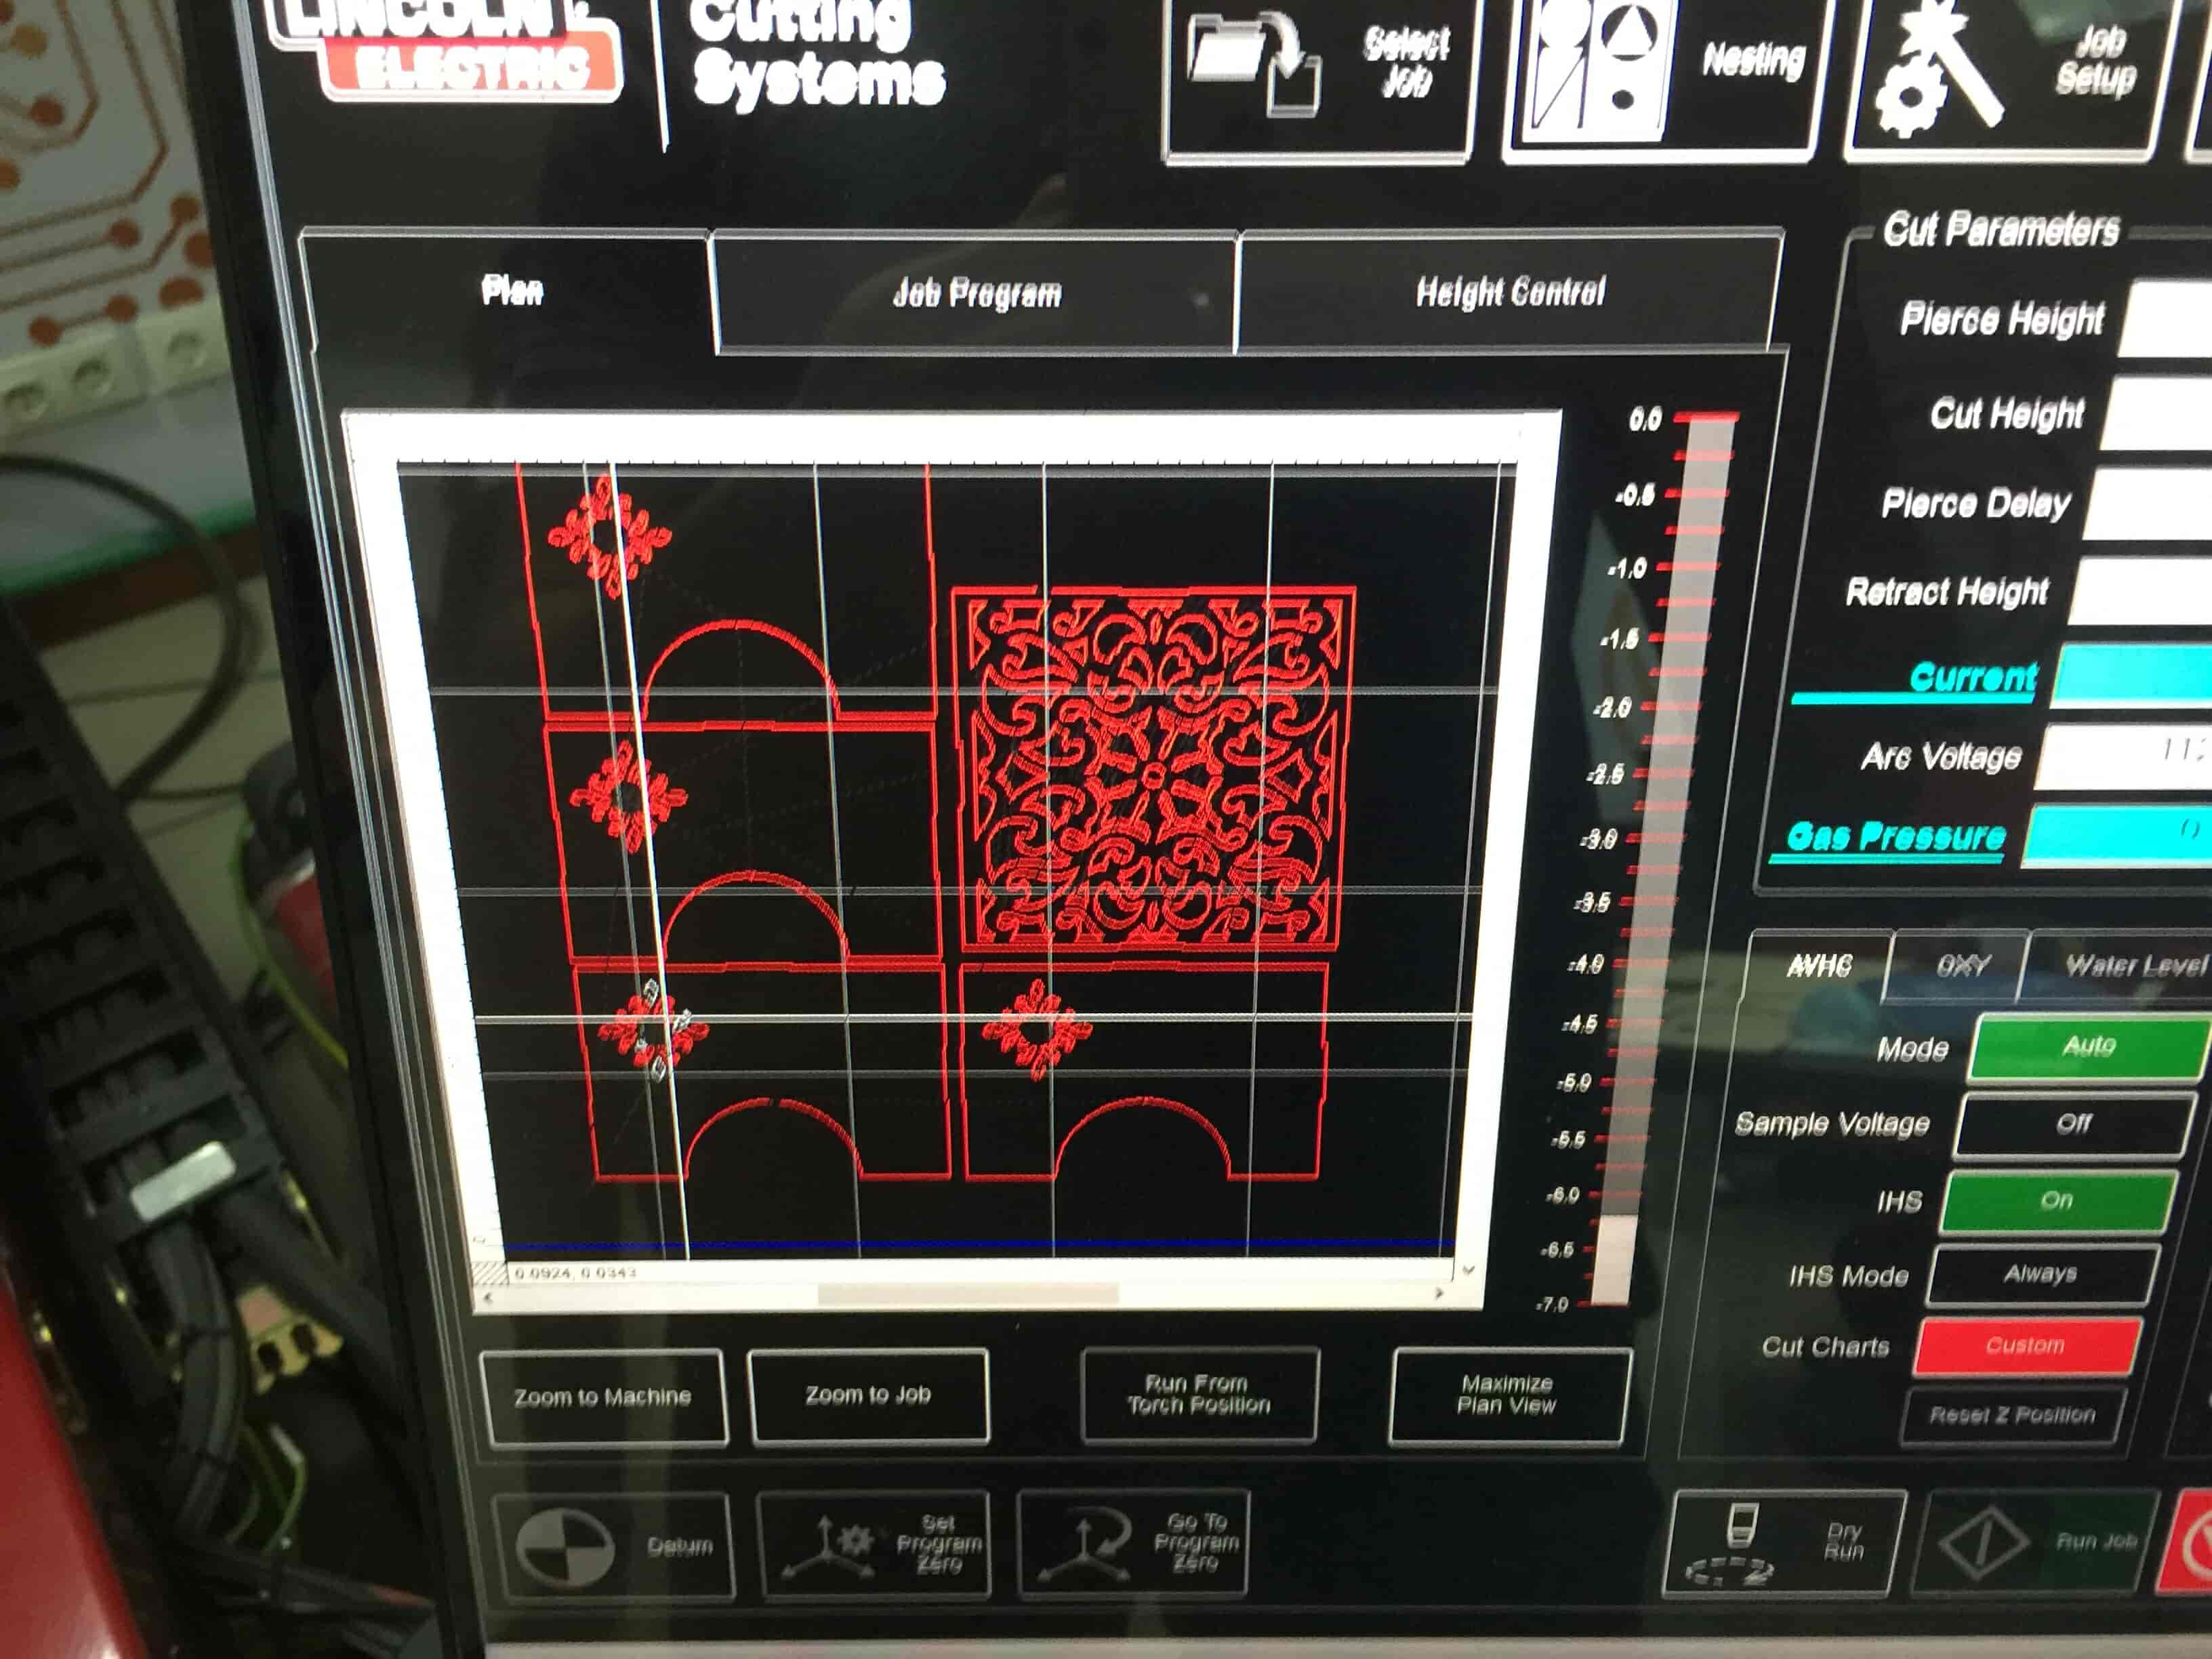
I guess we are ready to cut our table now! We inserted the table file into the machine software and started a dry cut(means, without any plasma going out of the machine) first to make sure that everything is going properly as expected.
After making sure that everything is alright, we started cutting our cool table.
The machine took 20 minutes to finish cutting our table! I was expected more than that :D
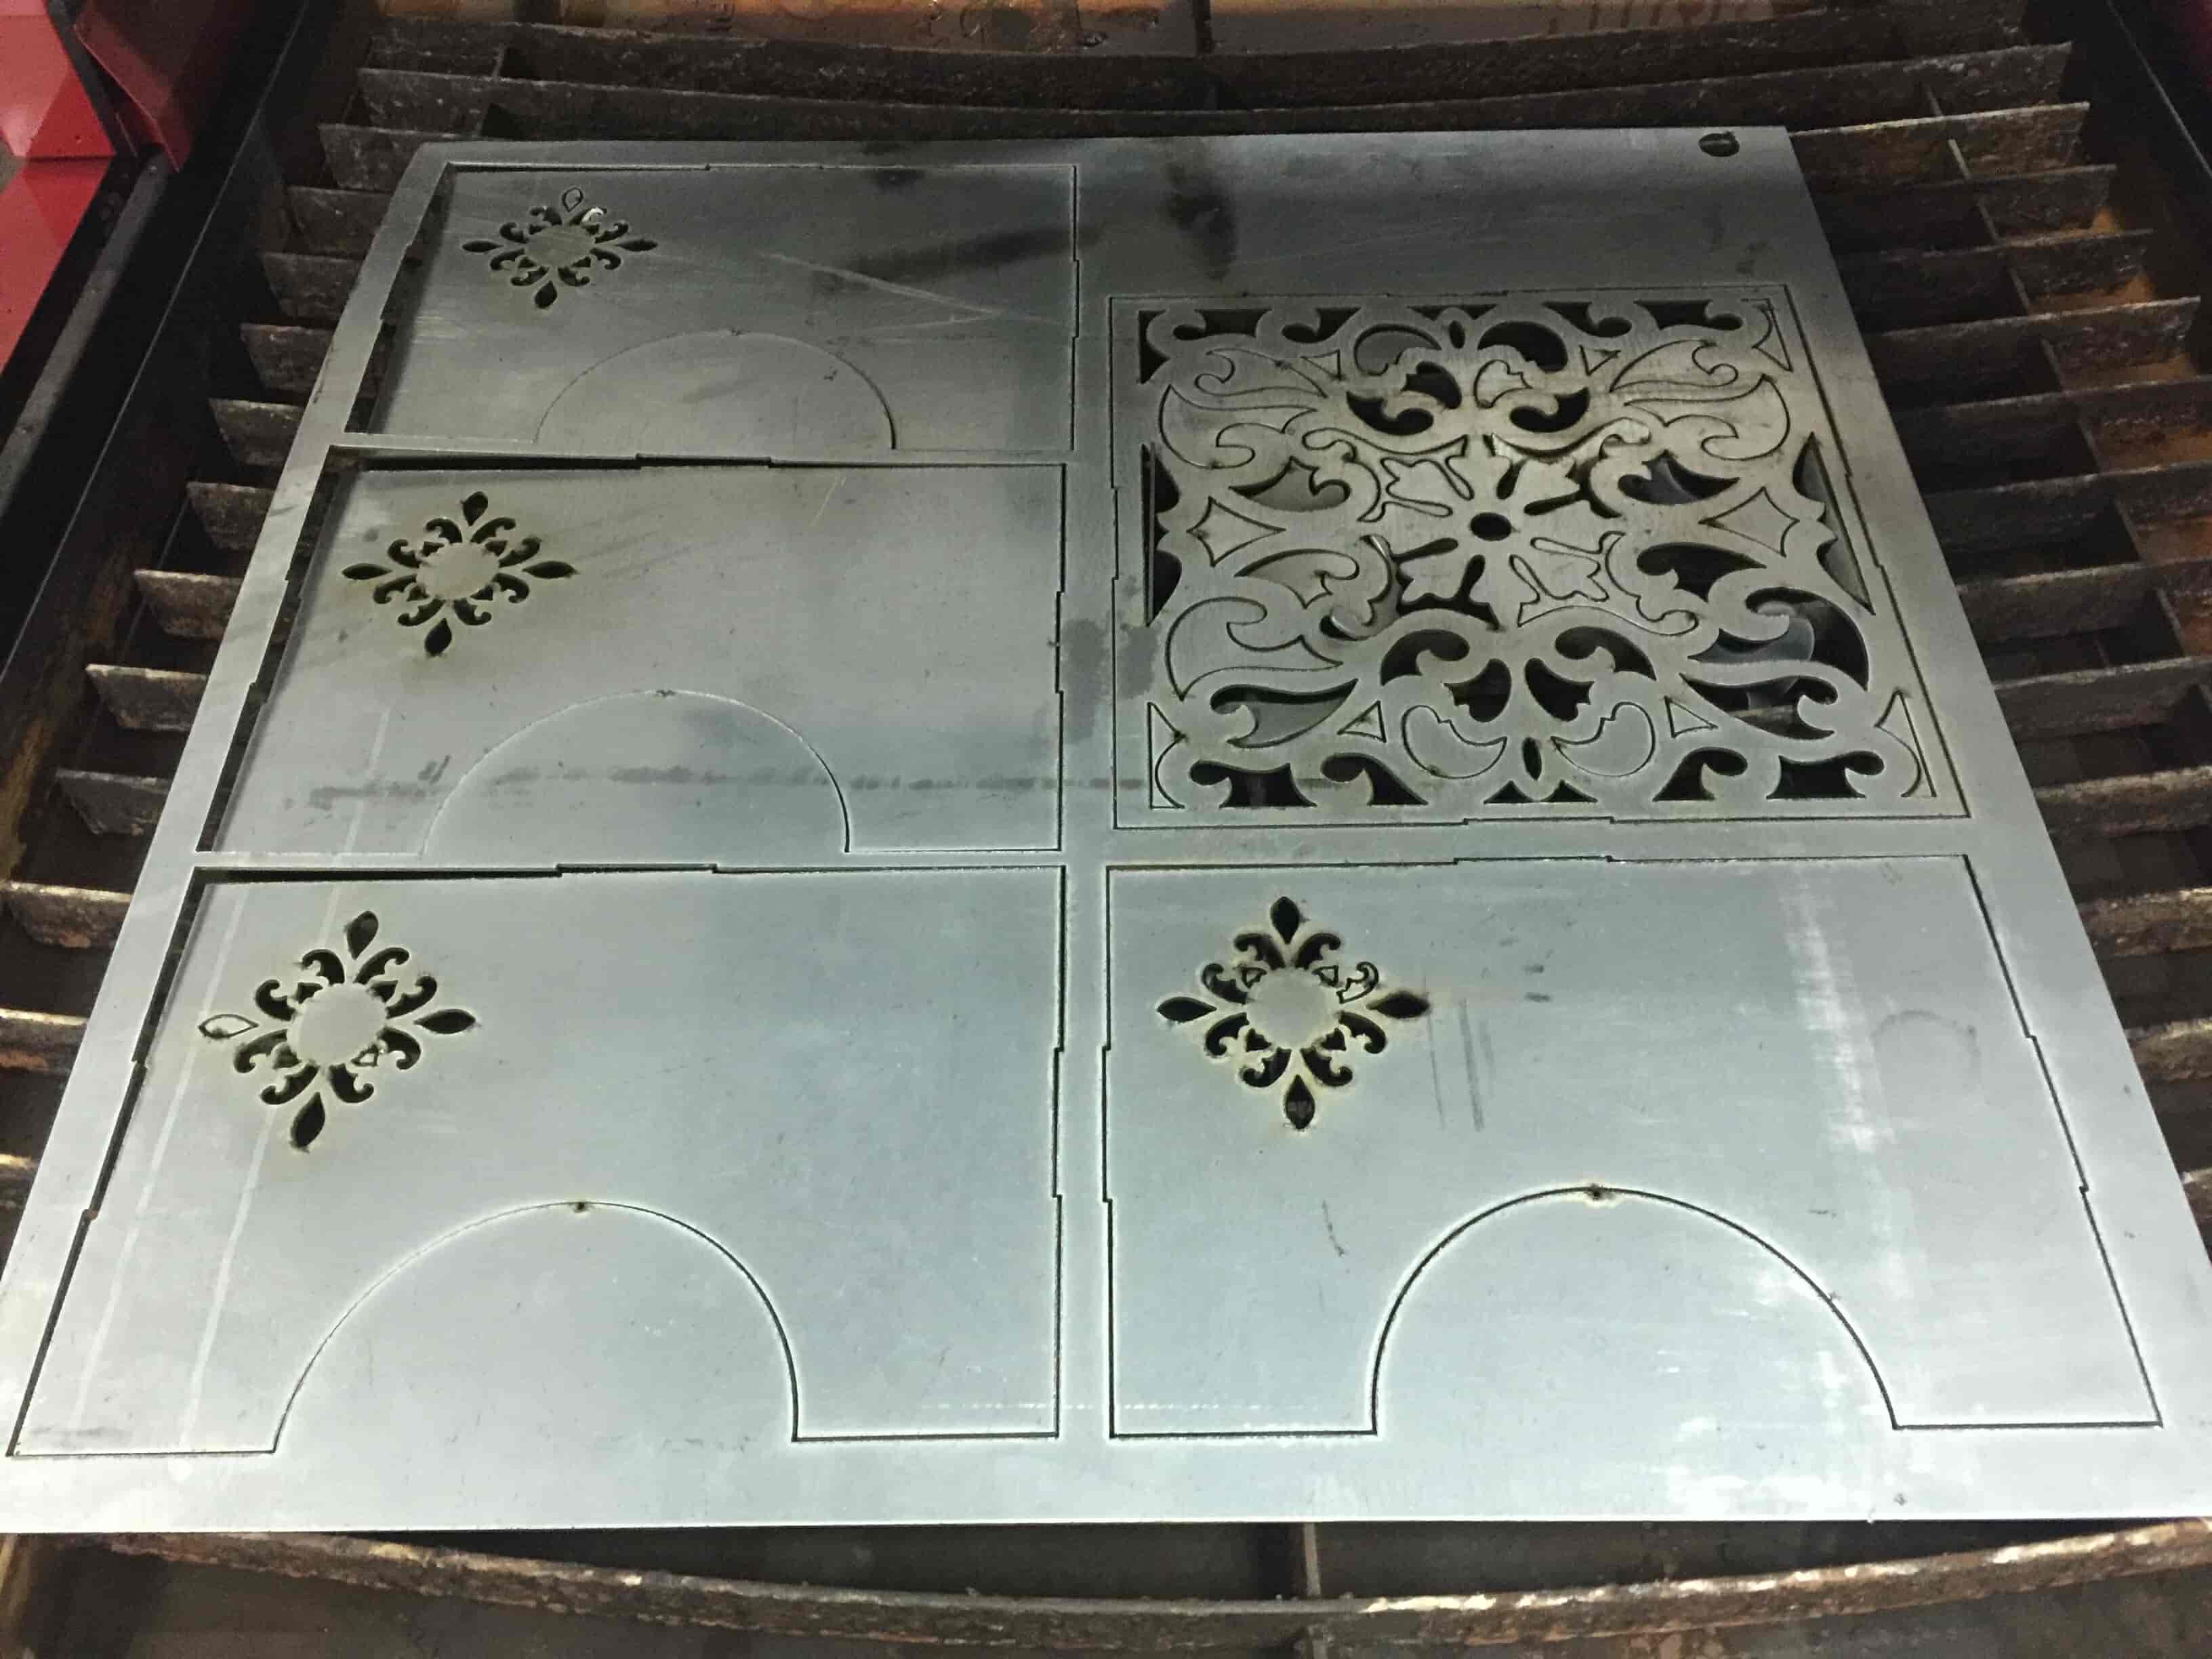
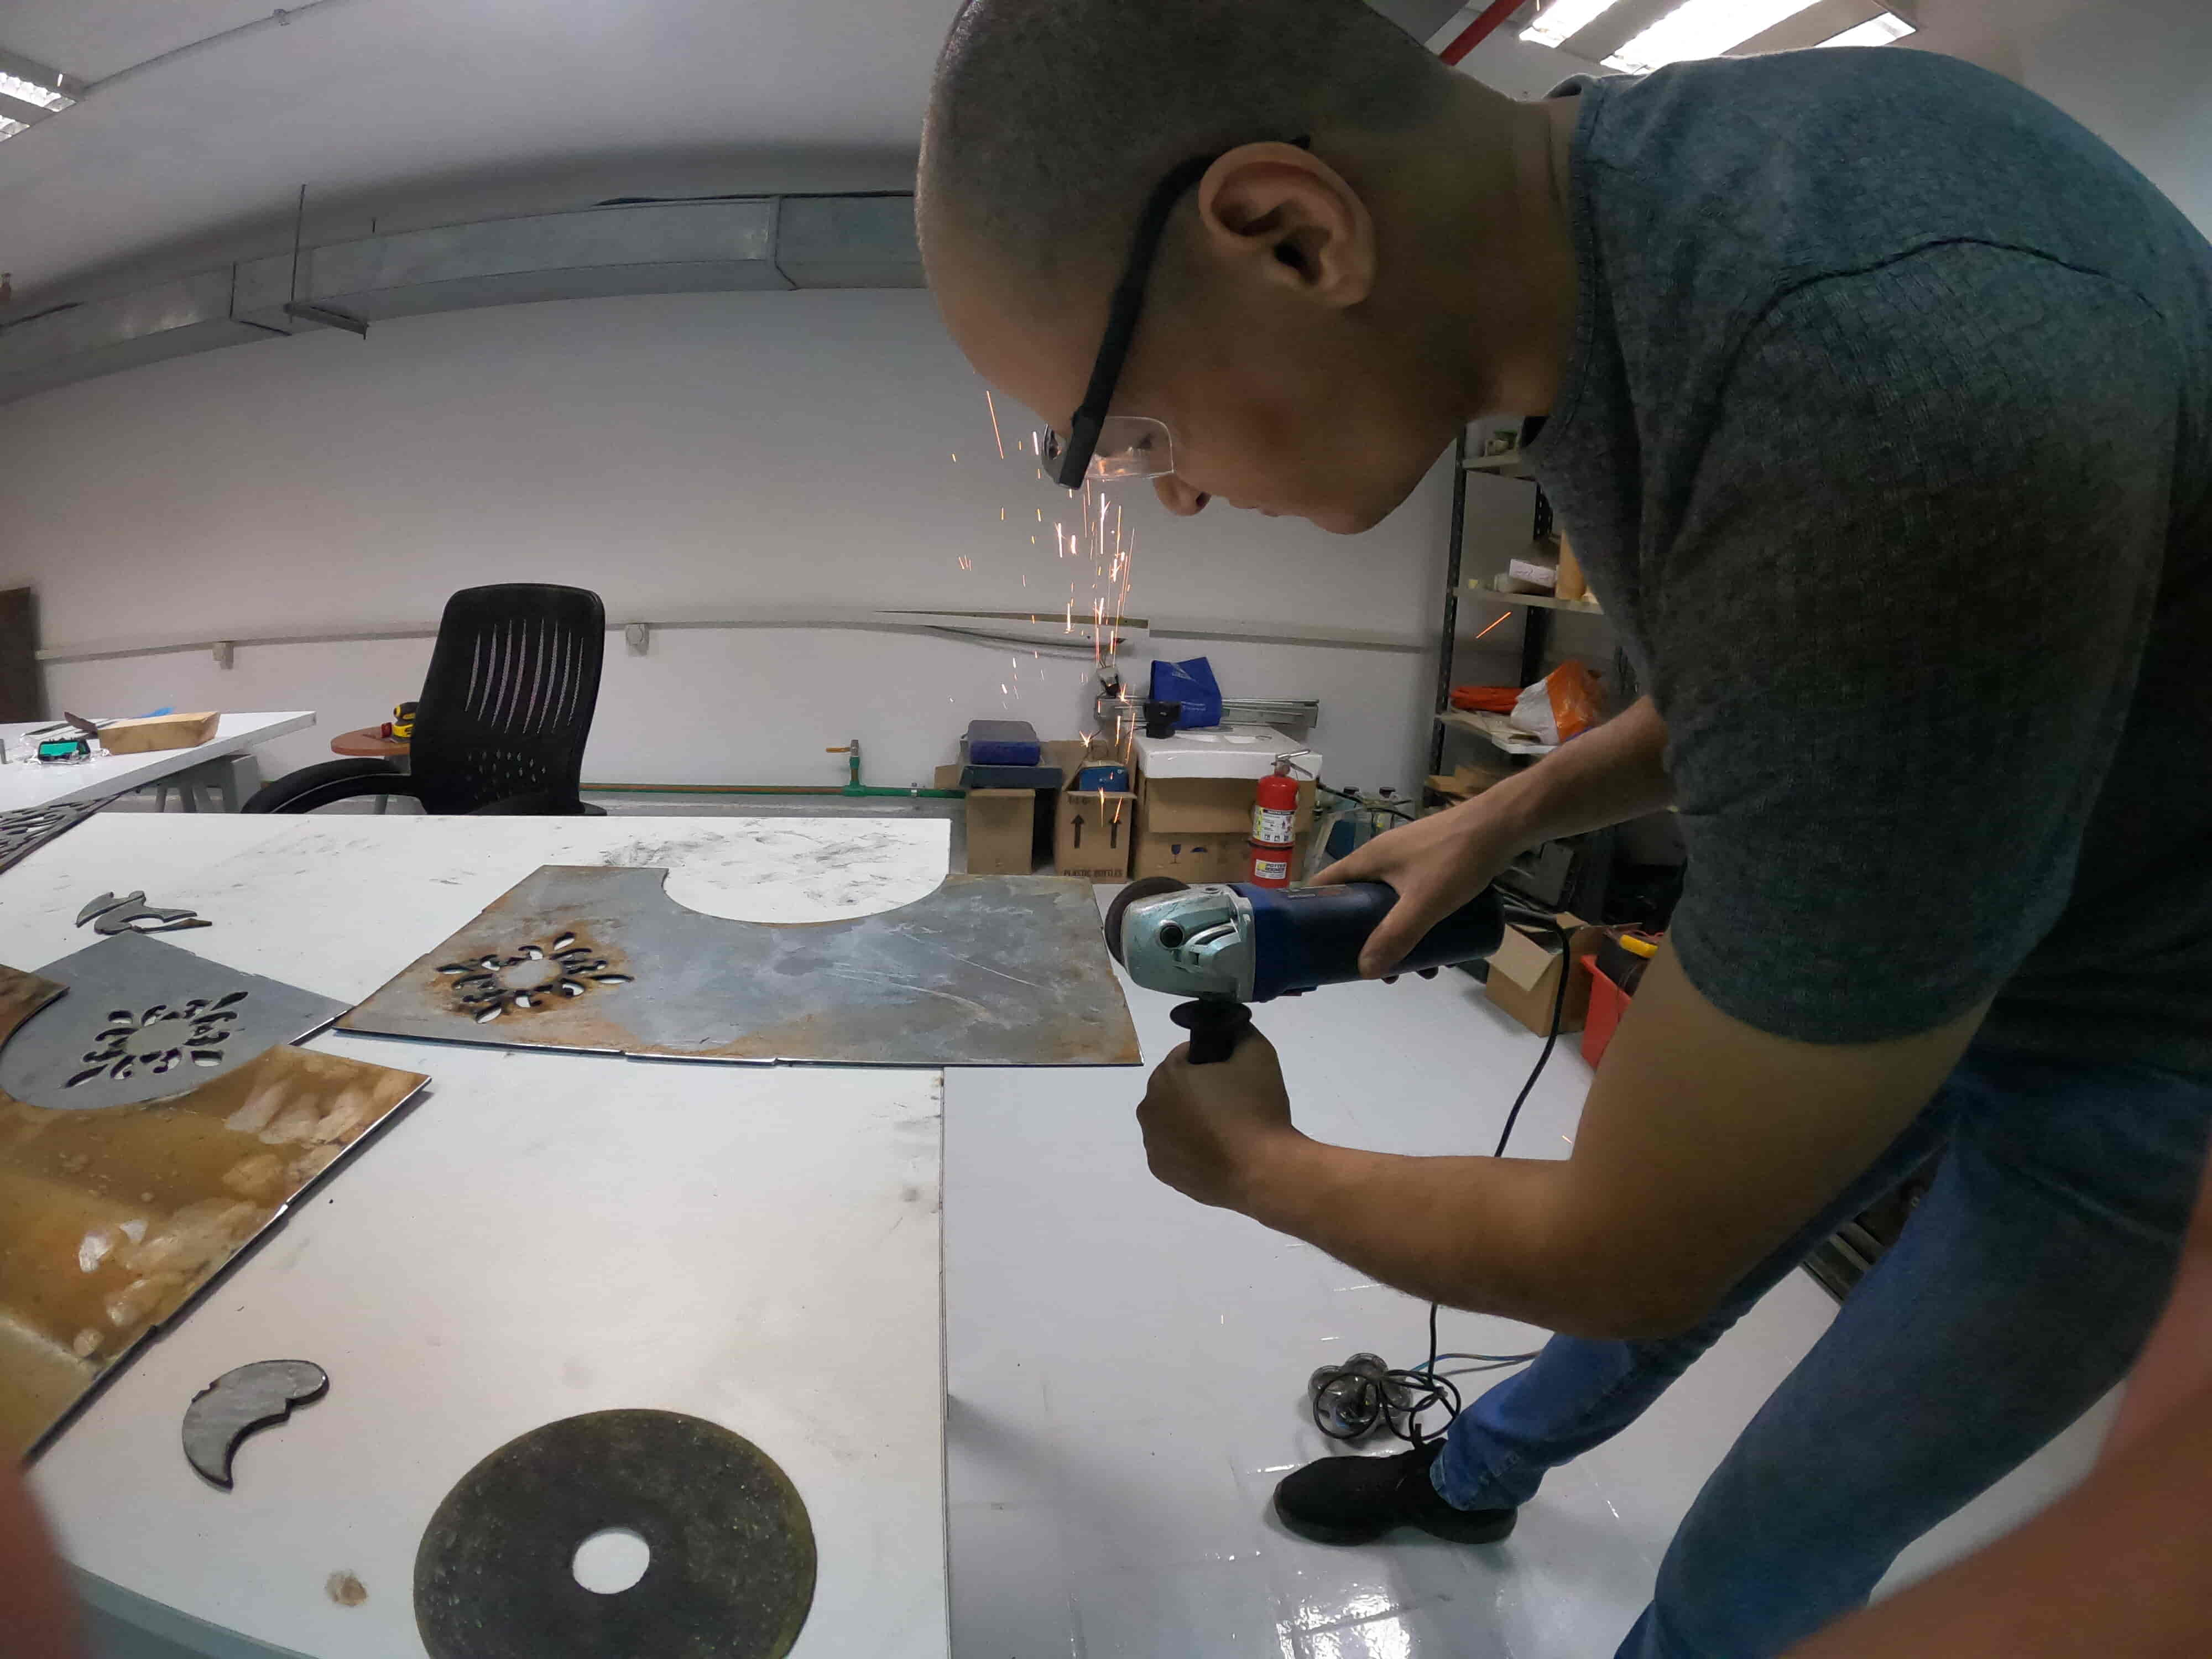
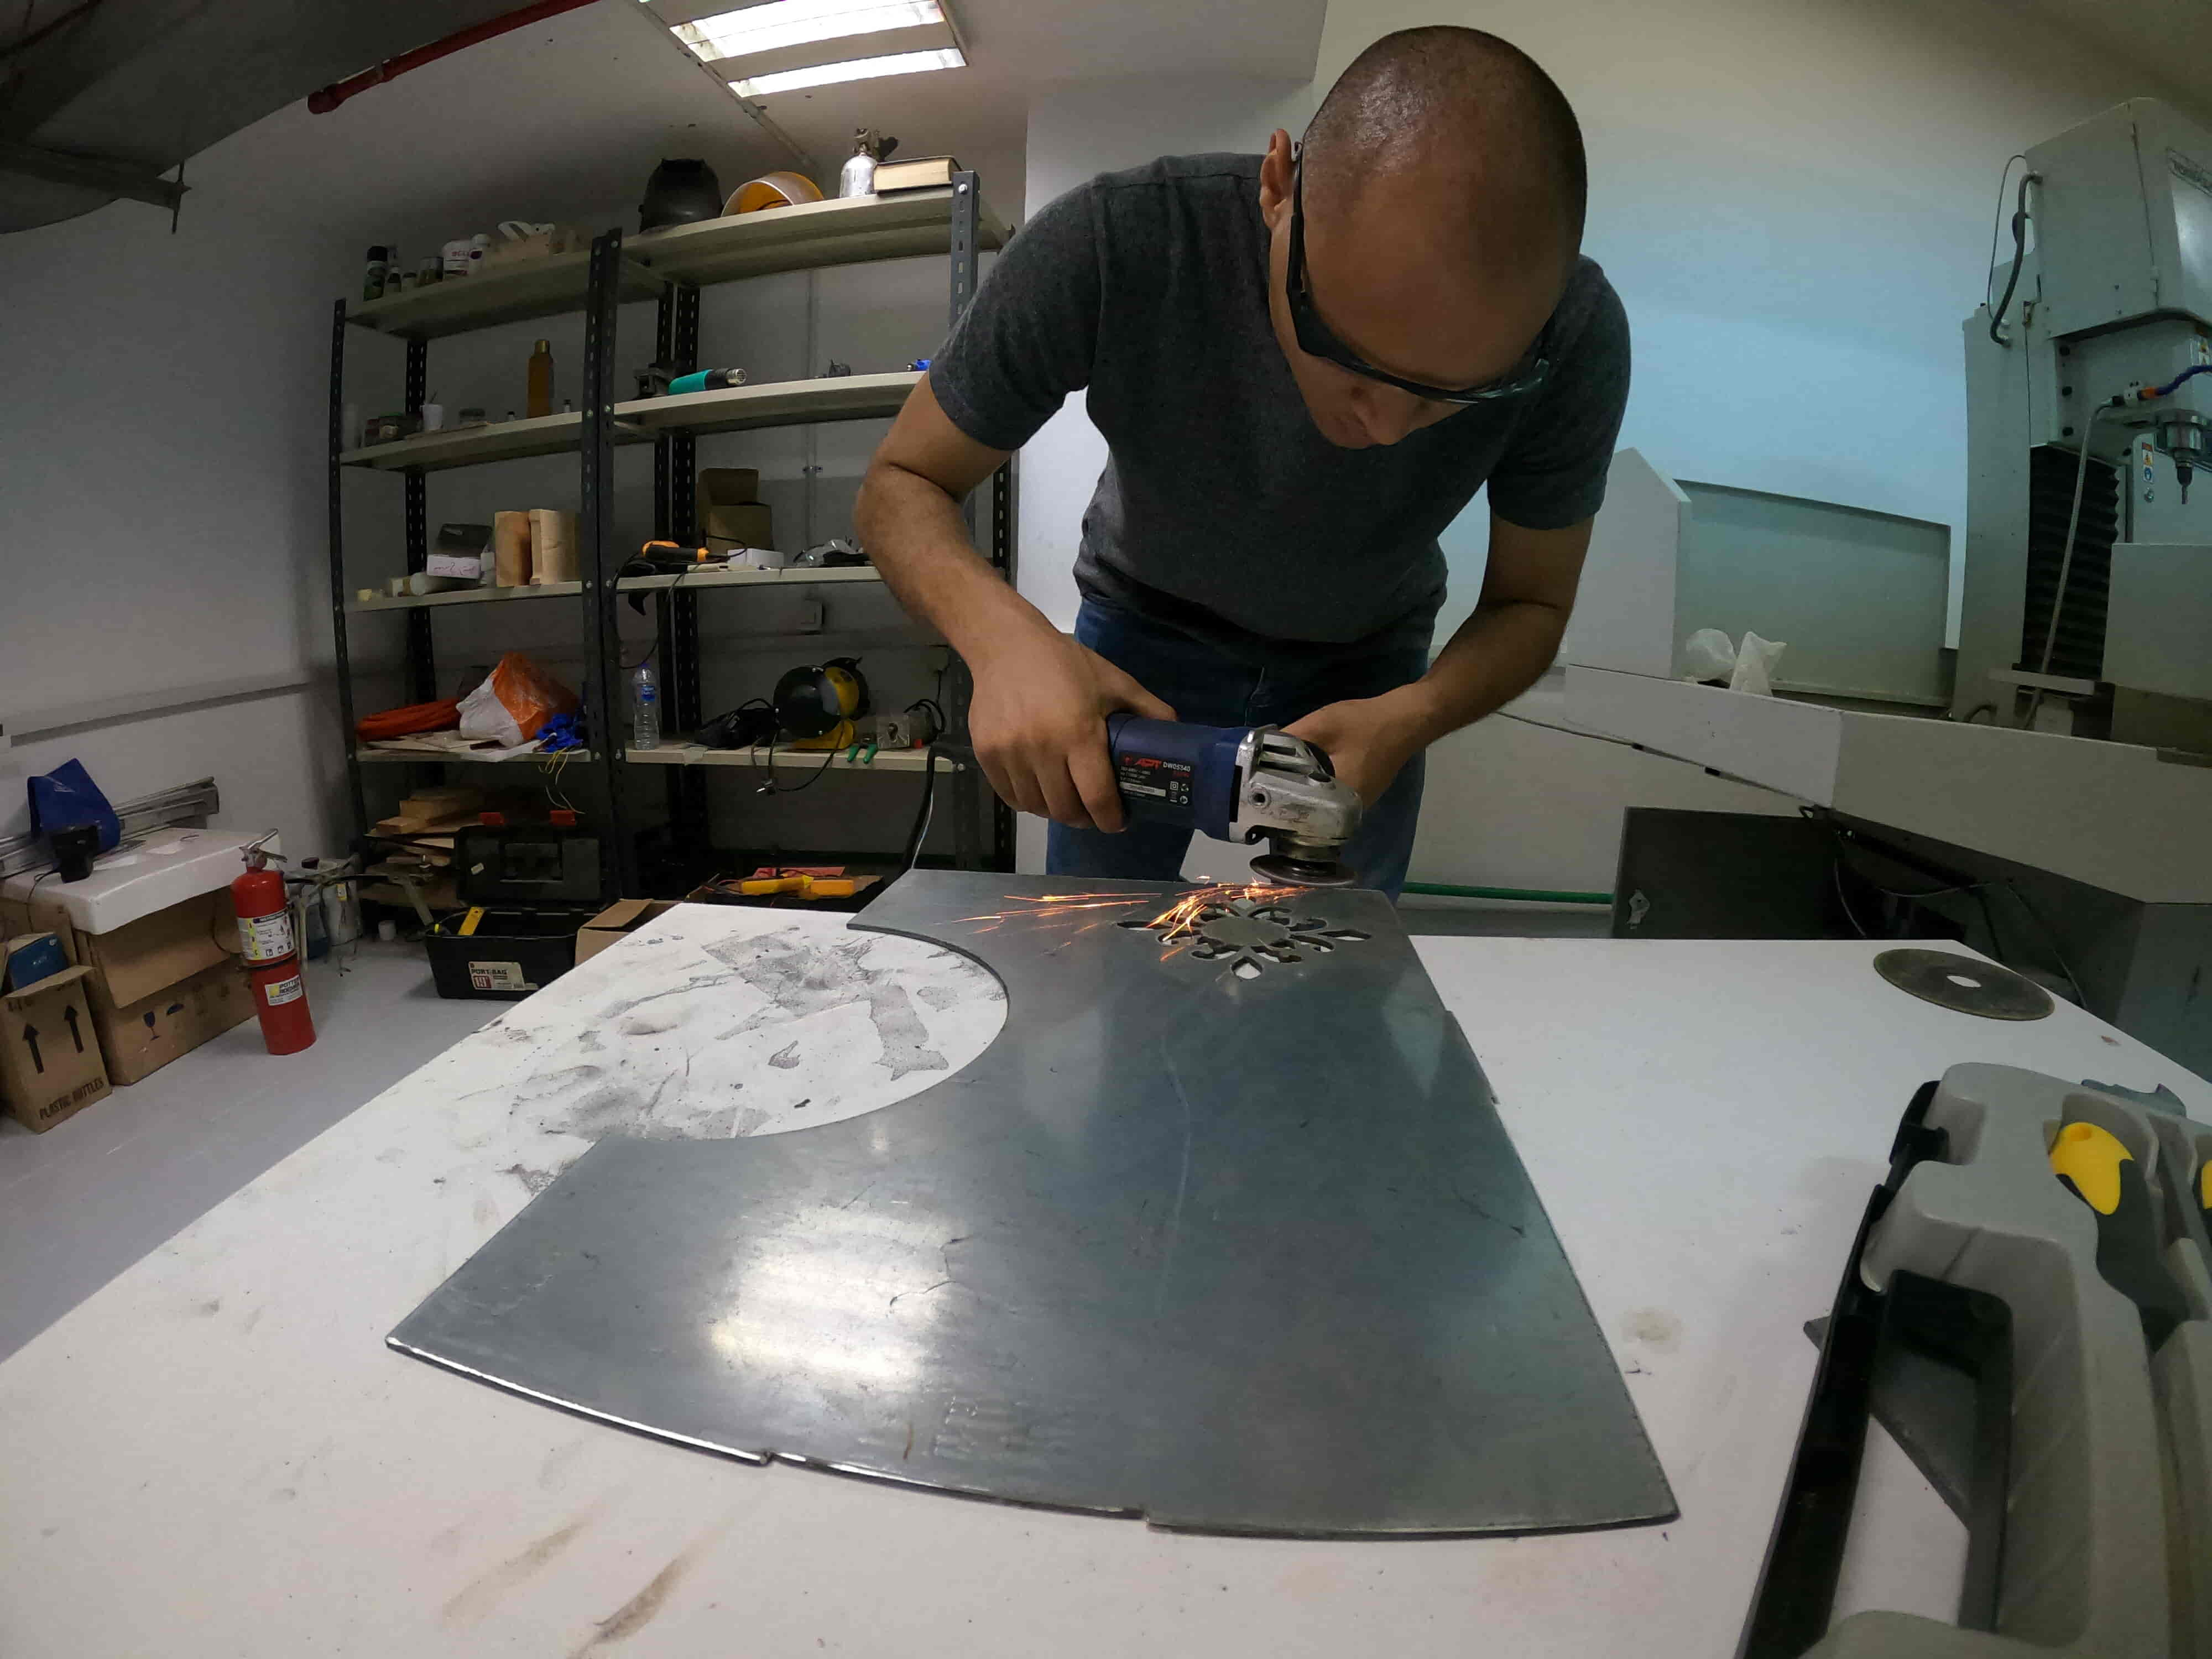
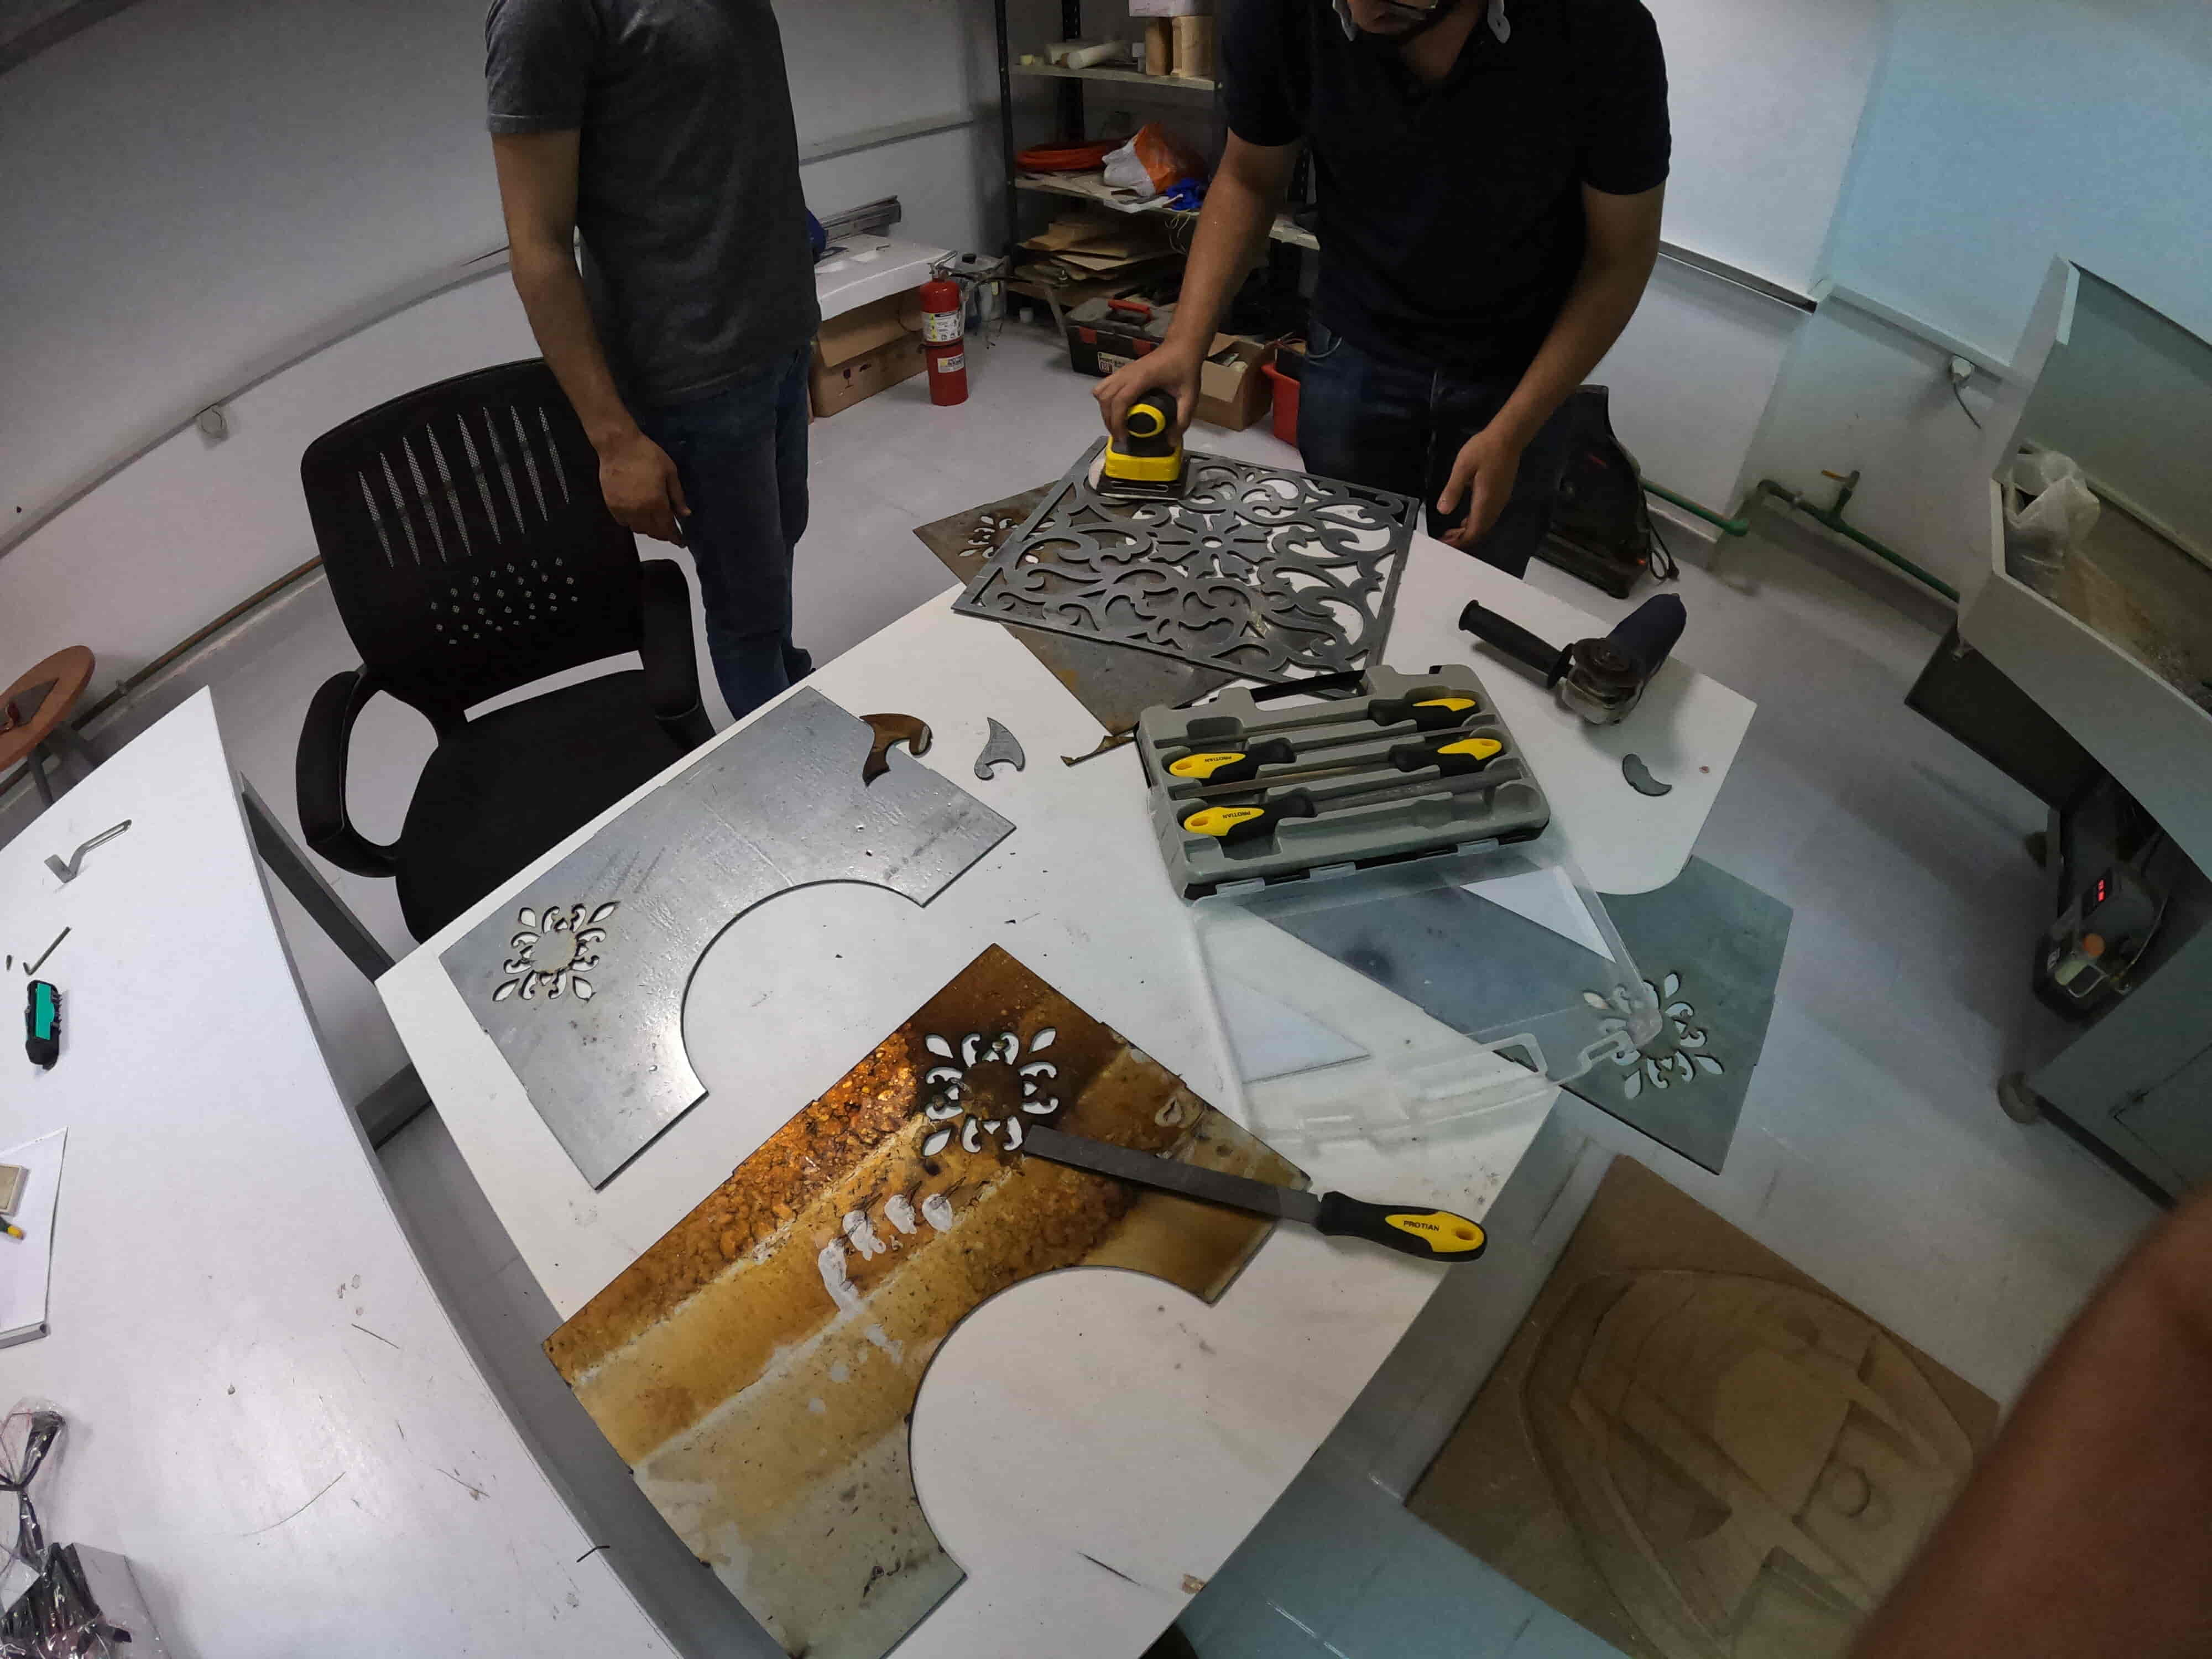
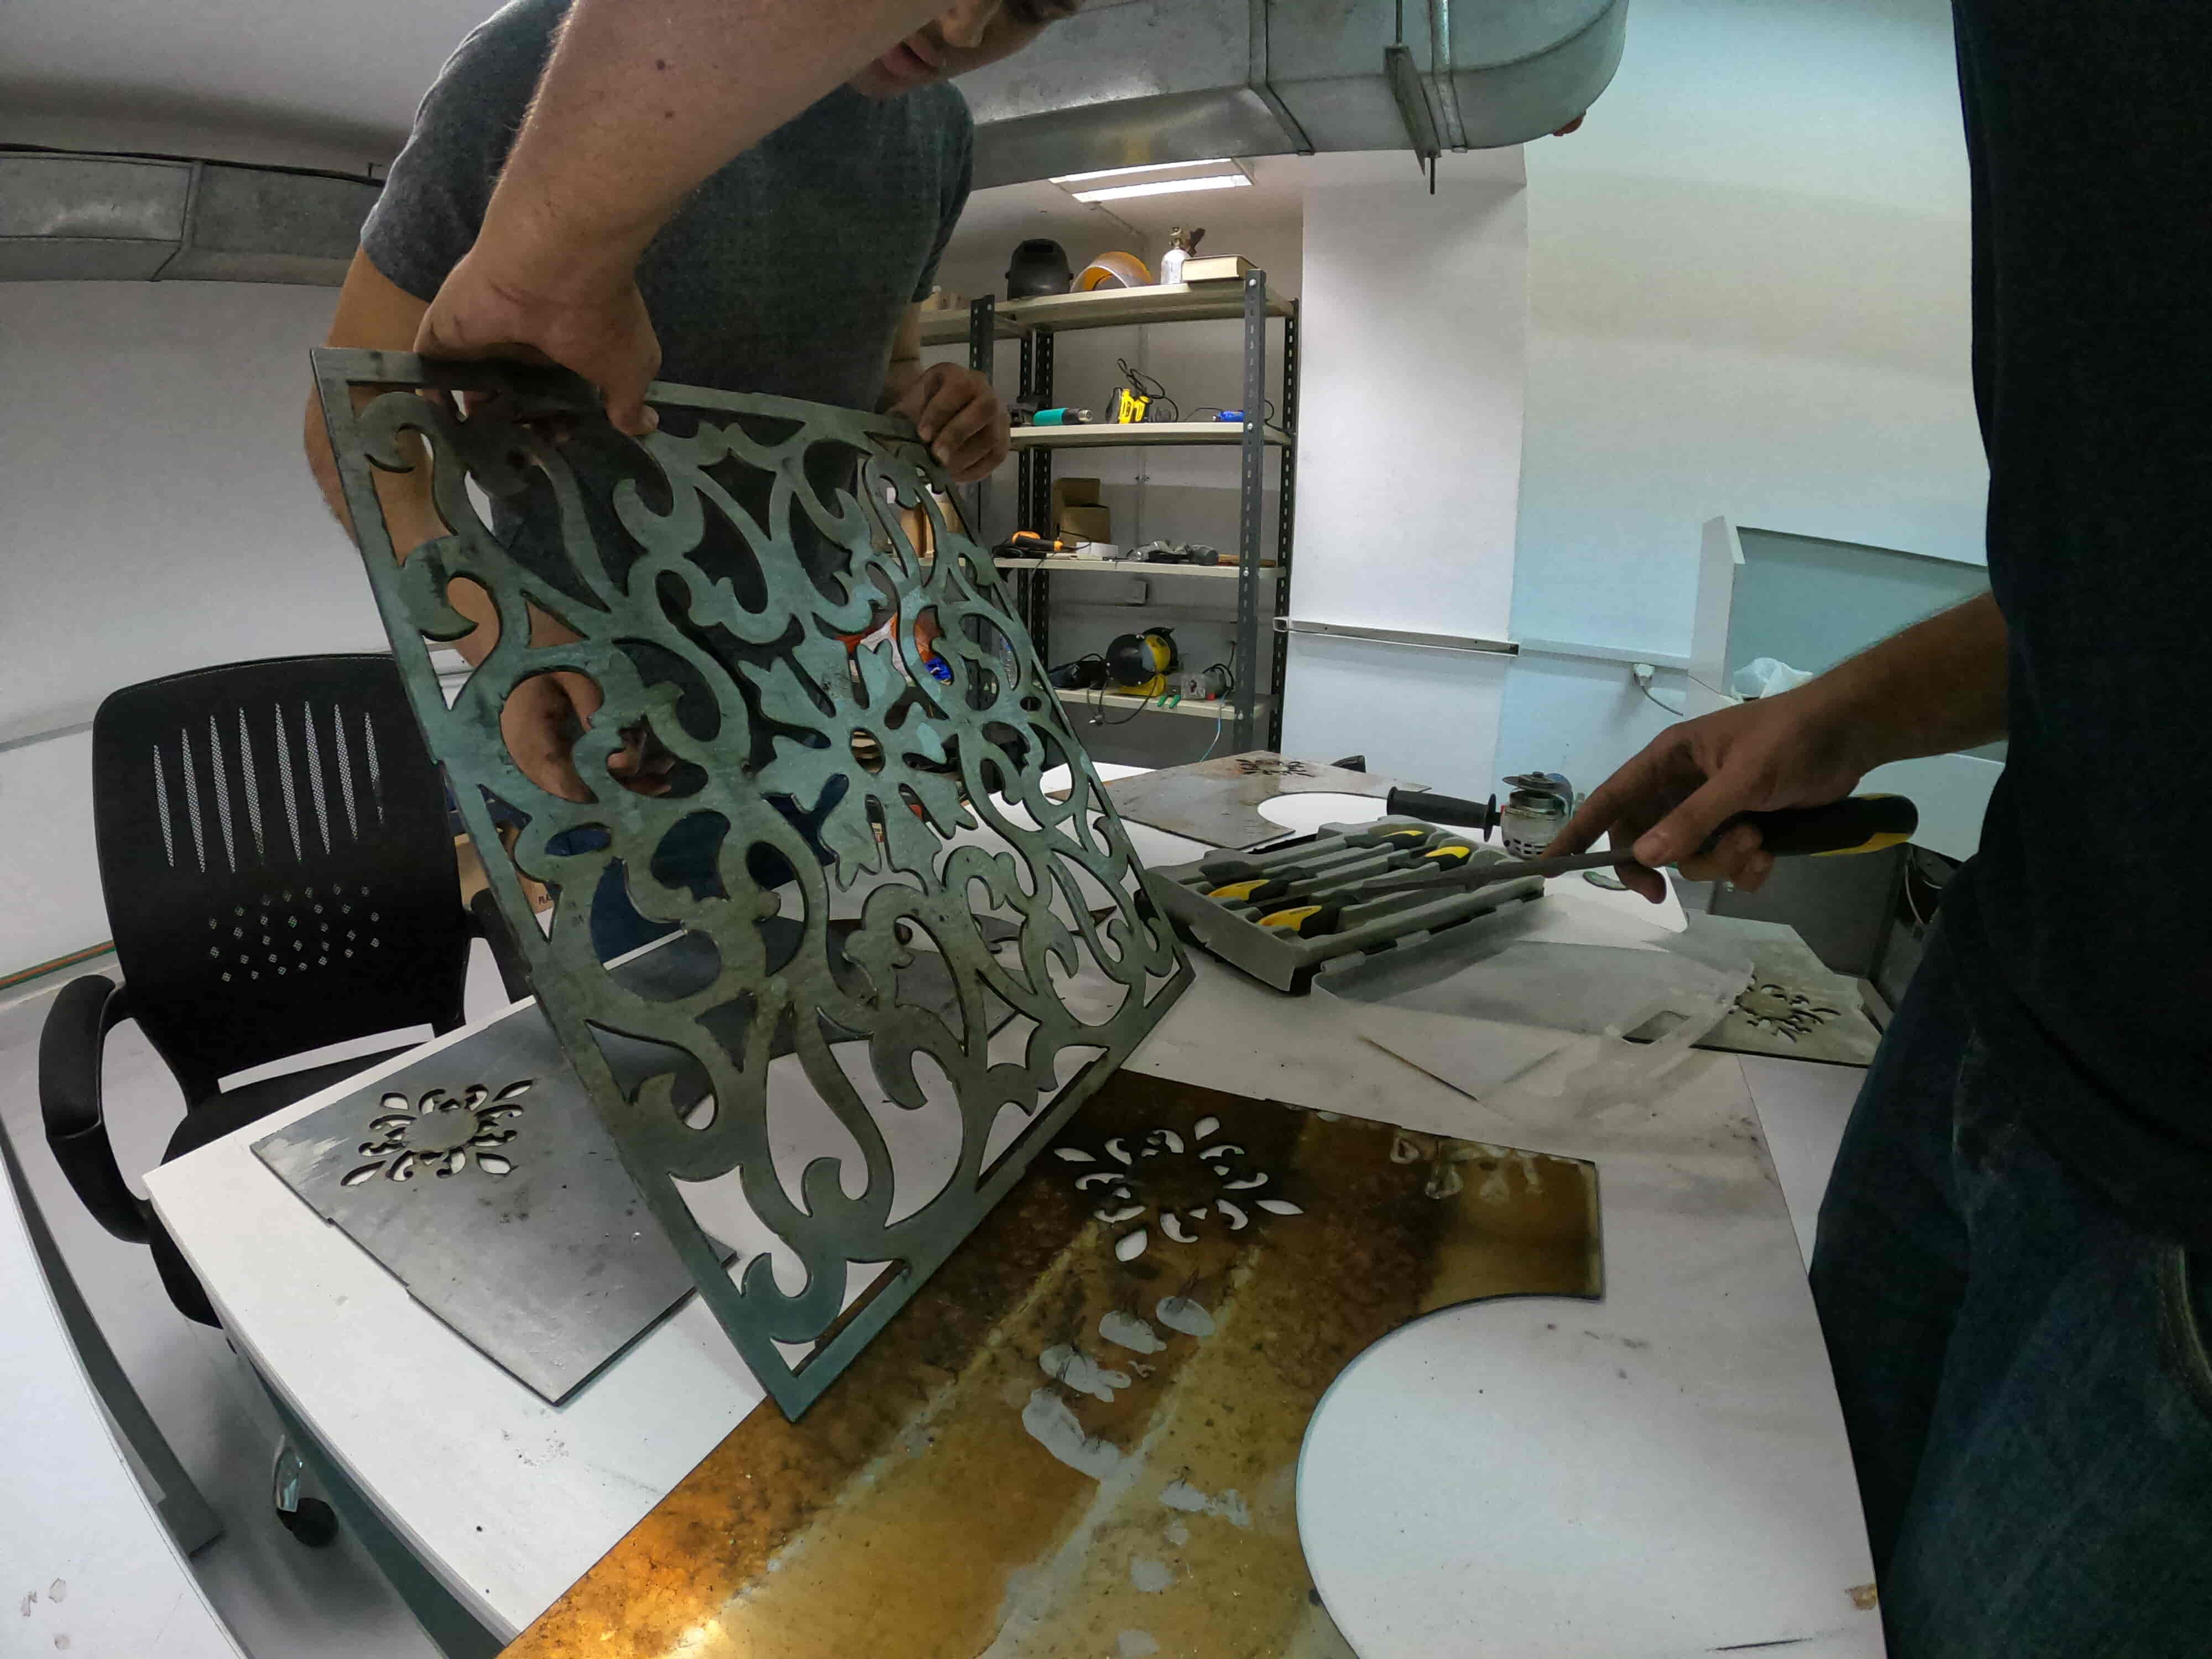
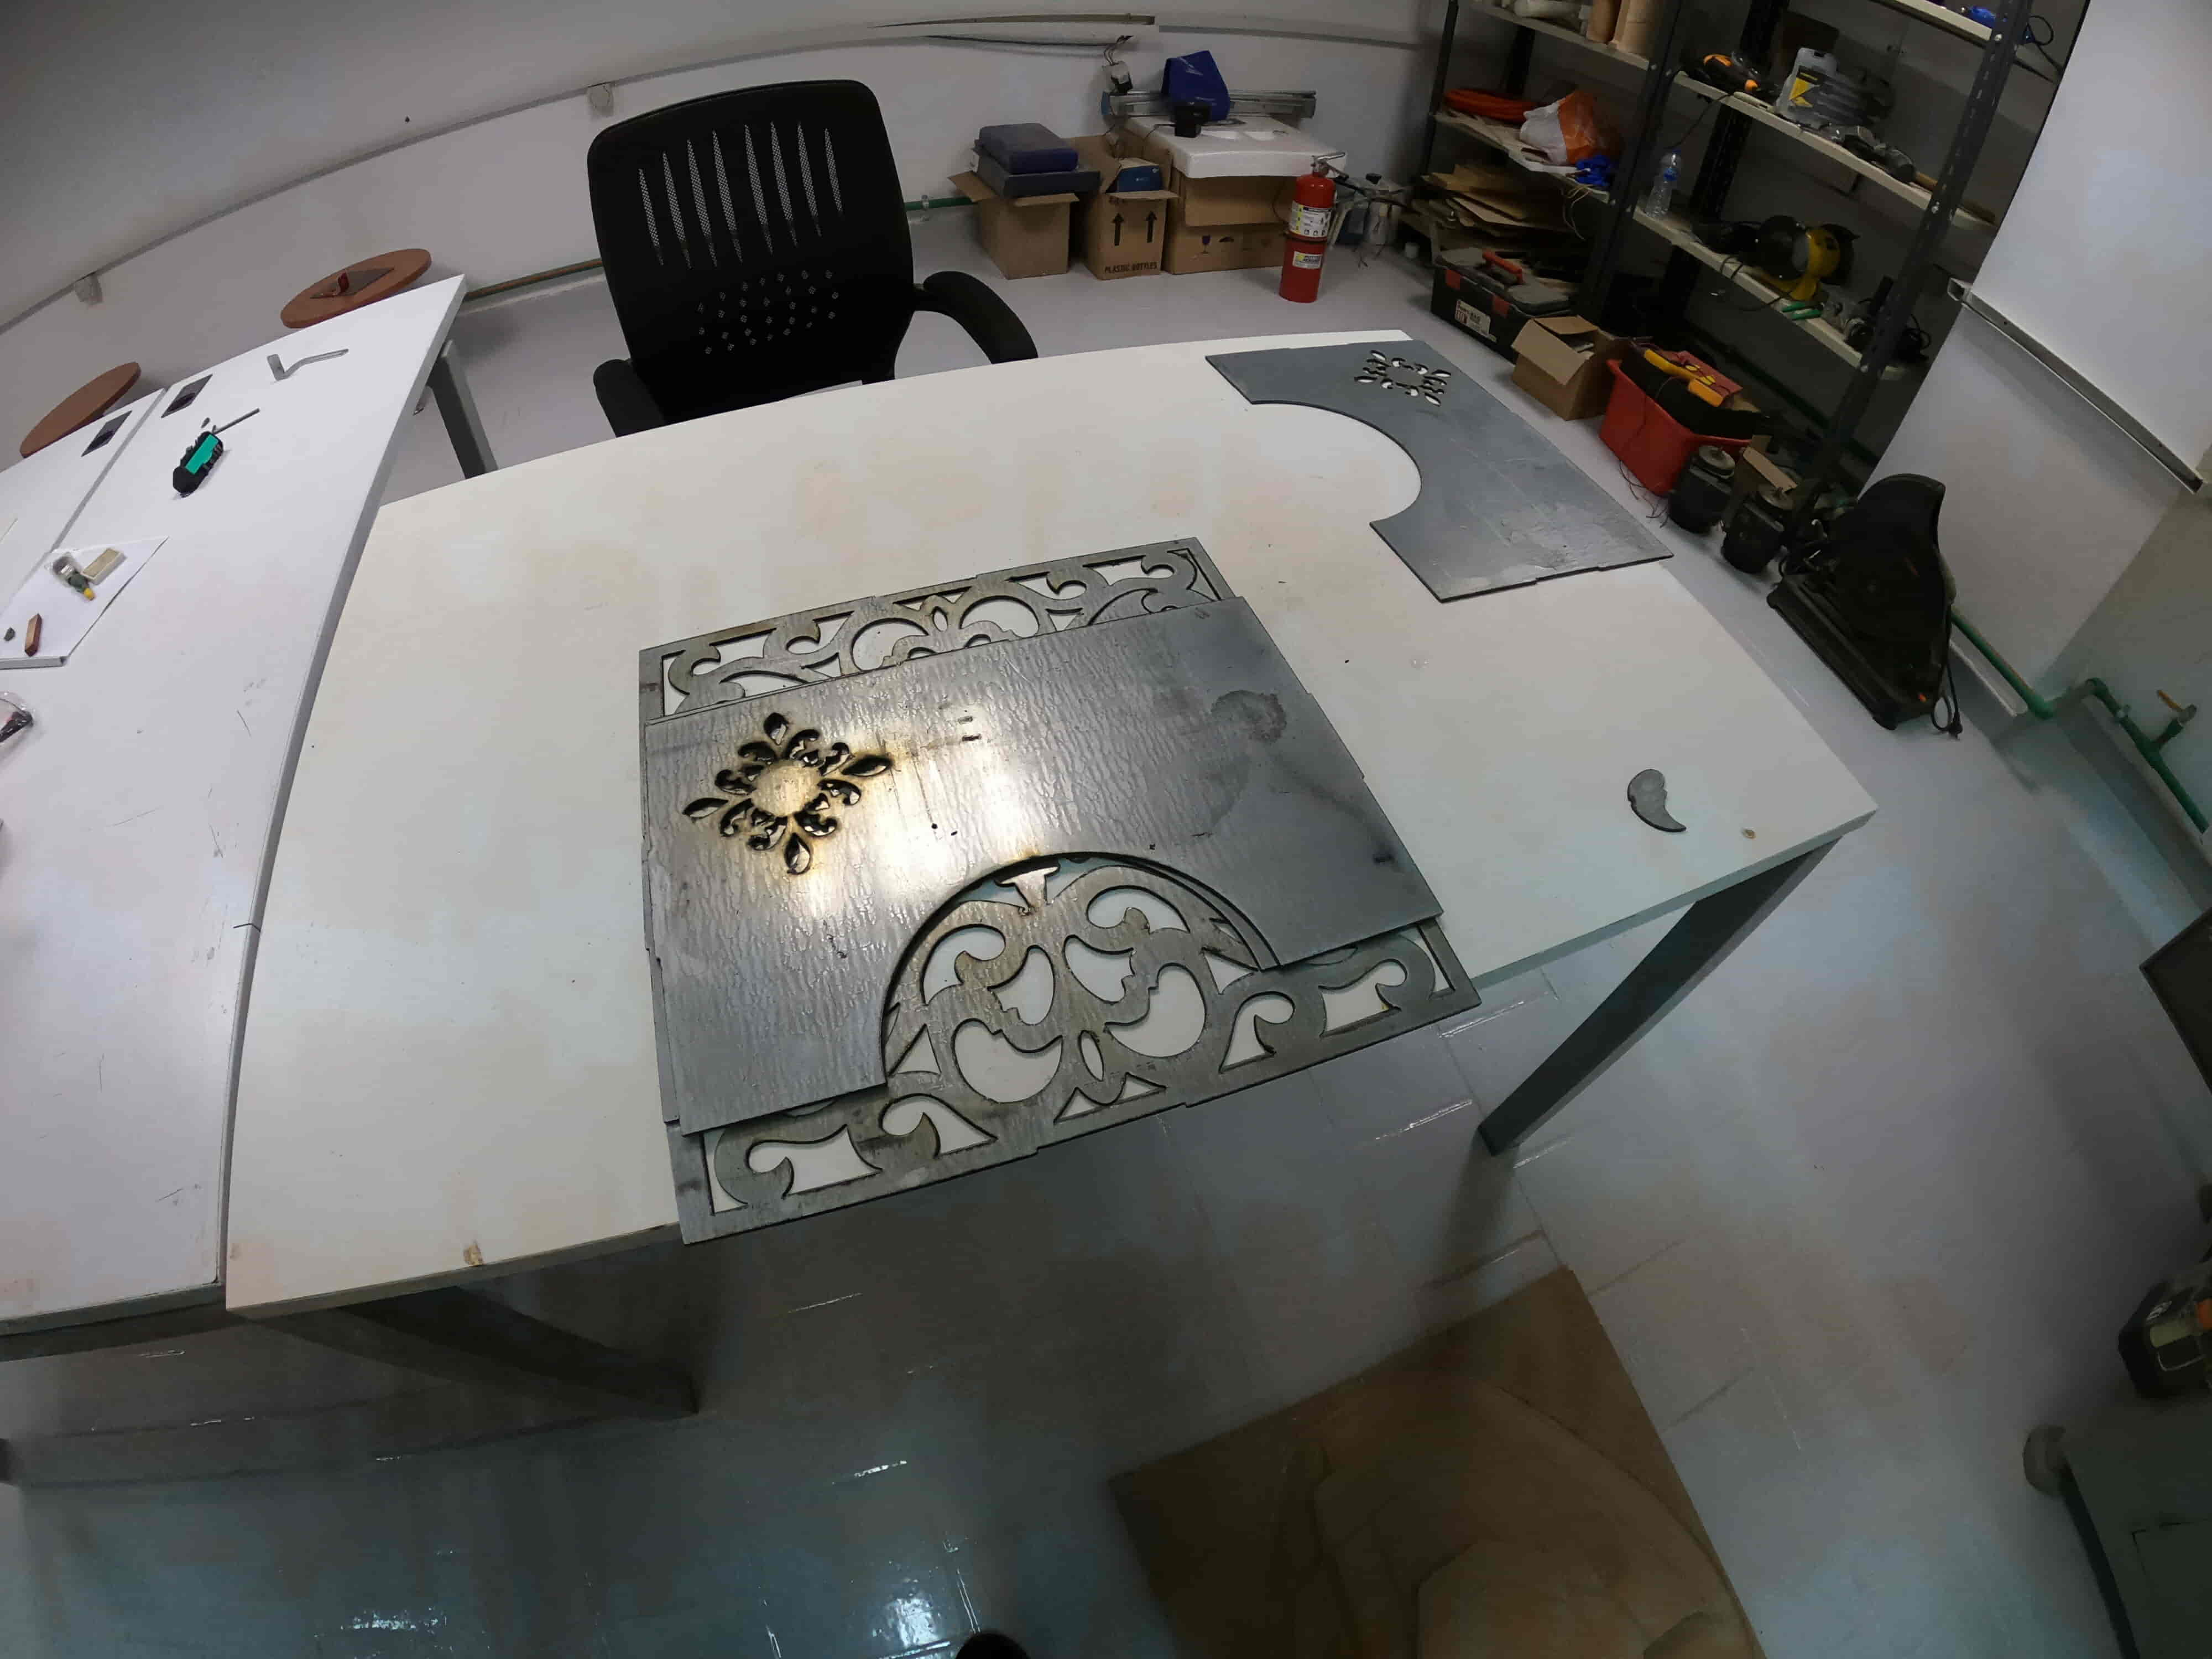
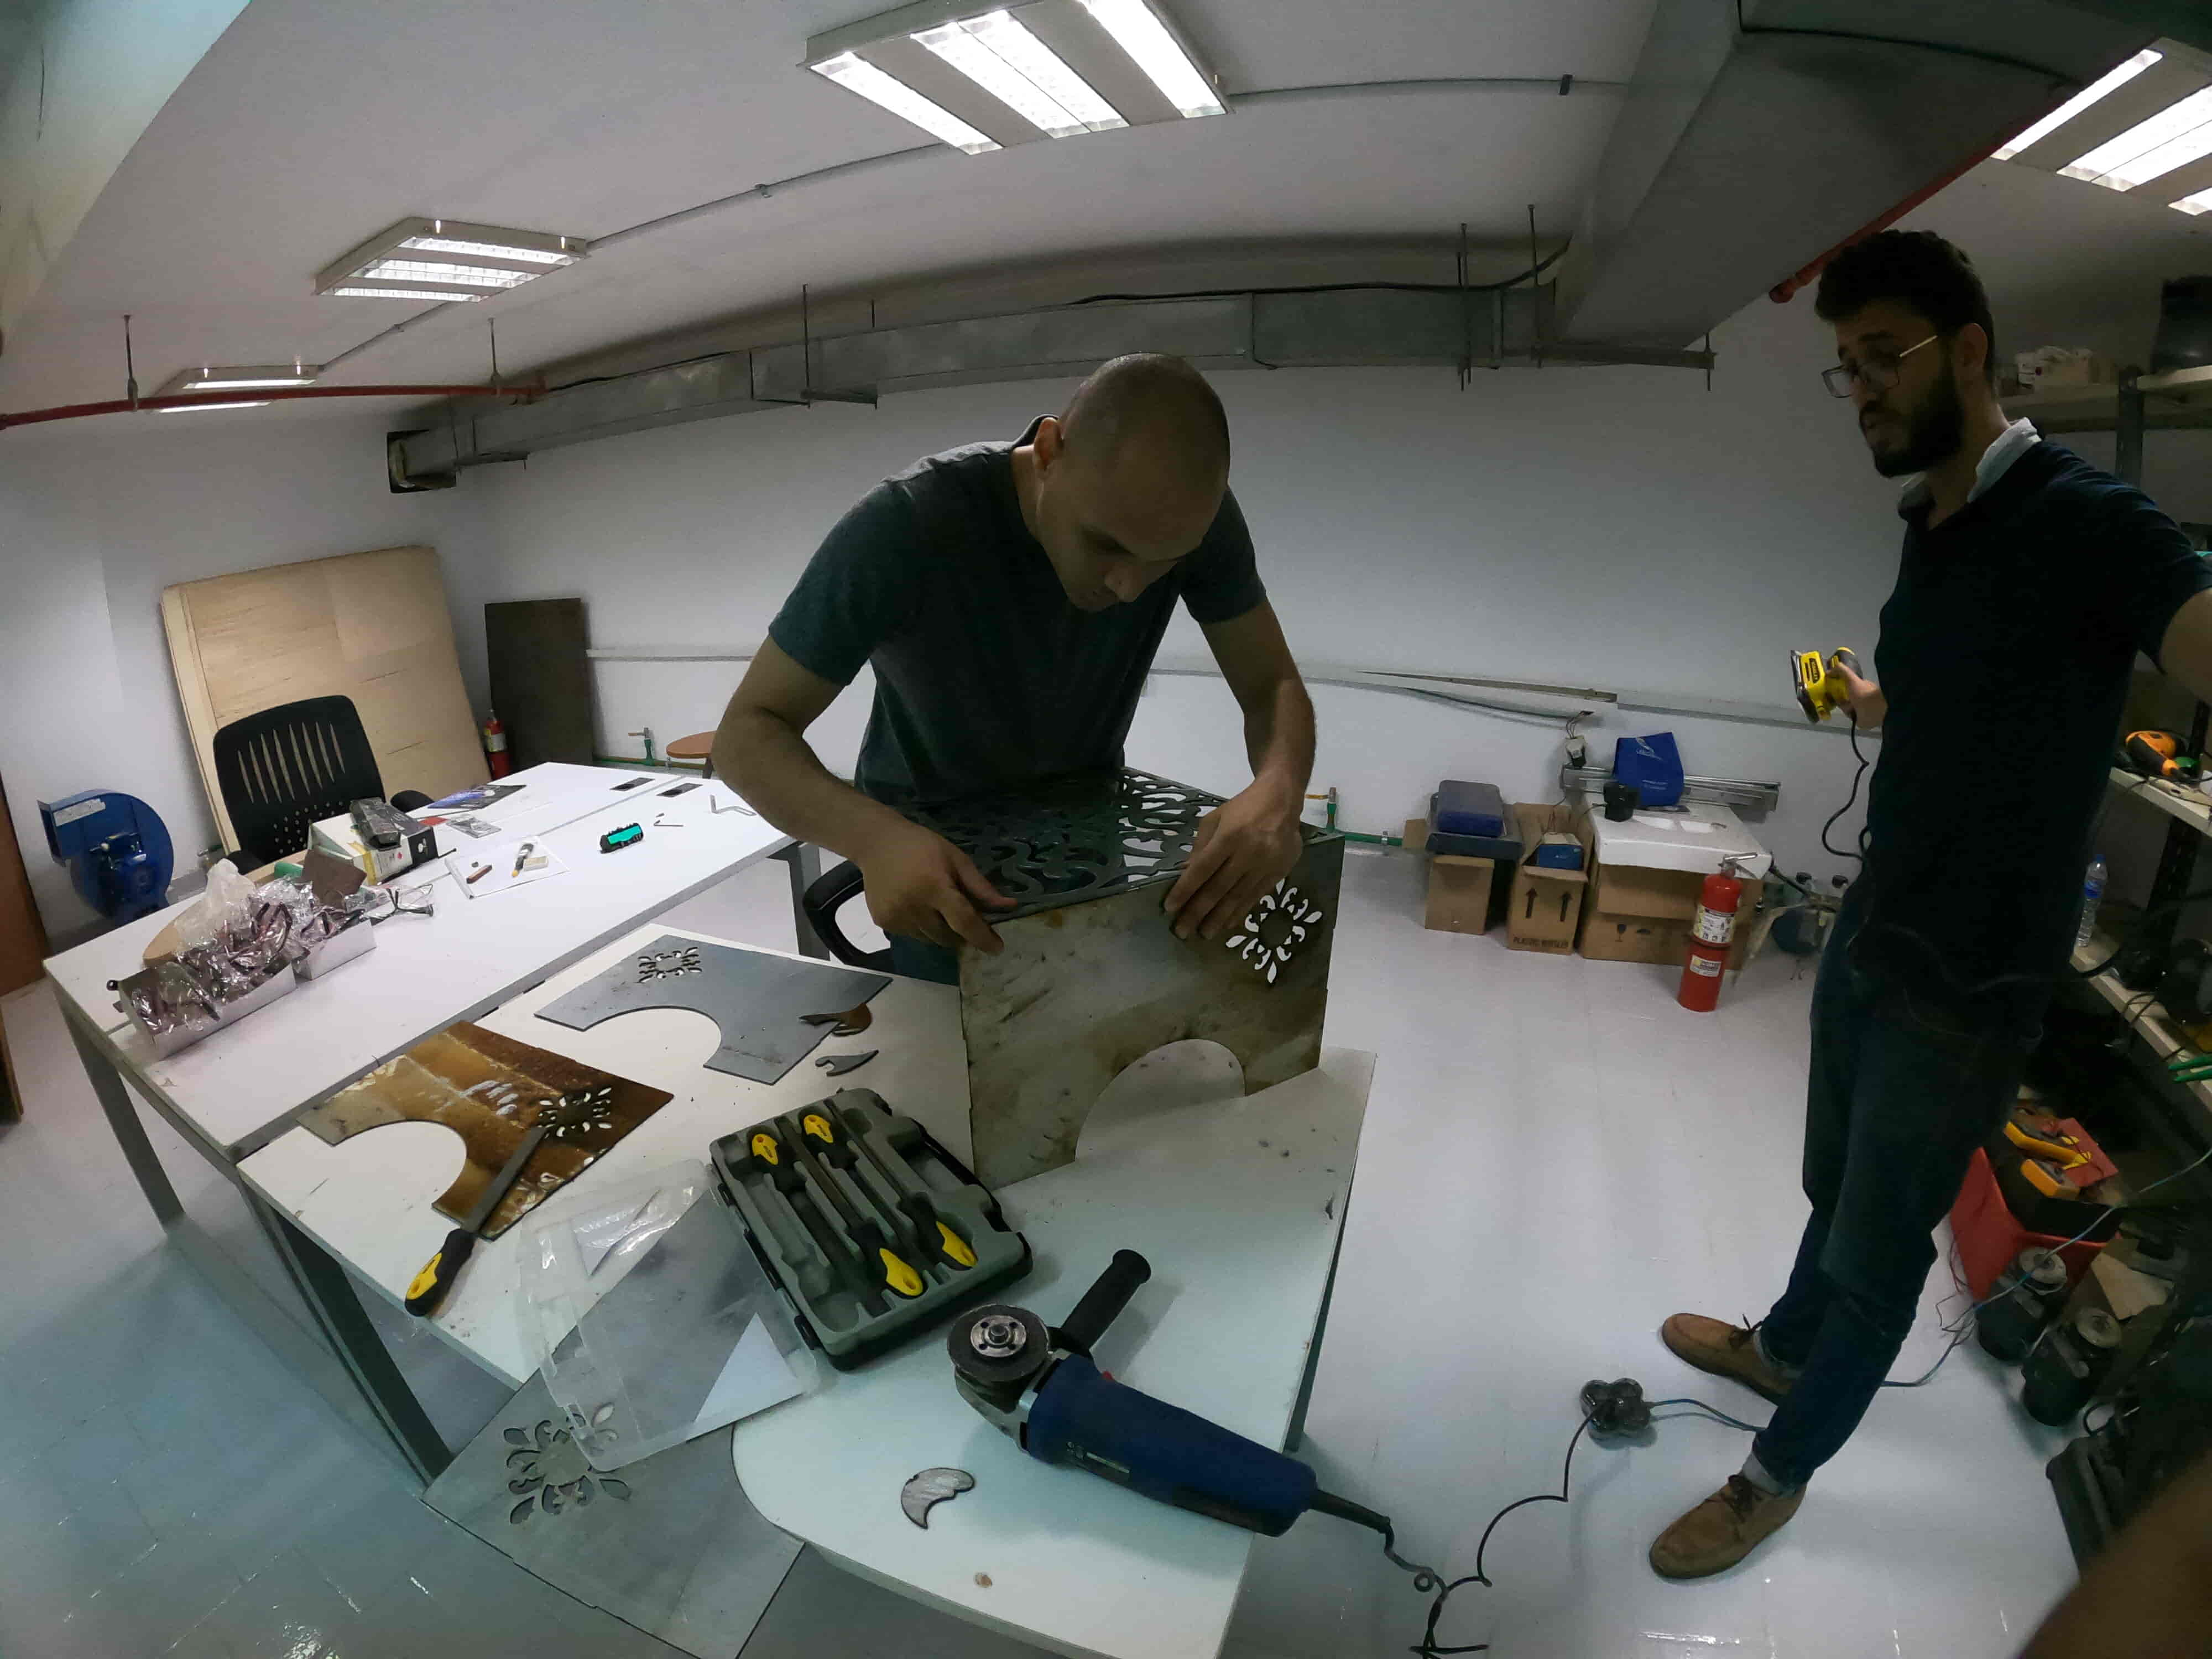
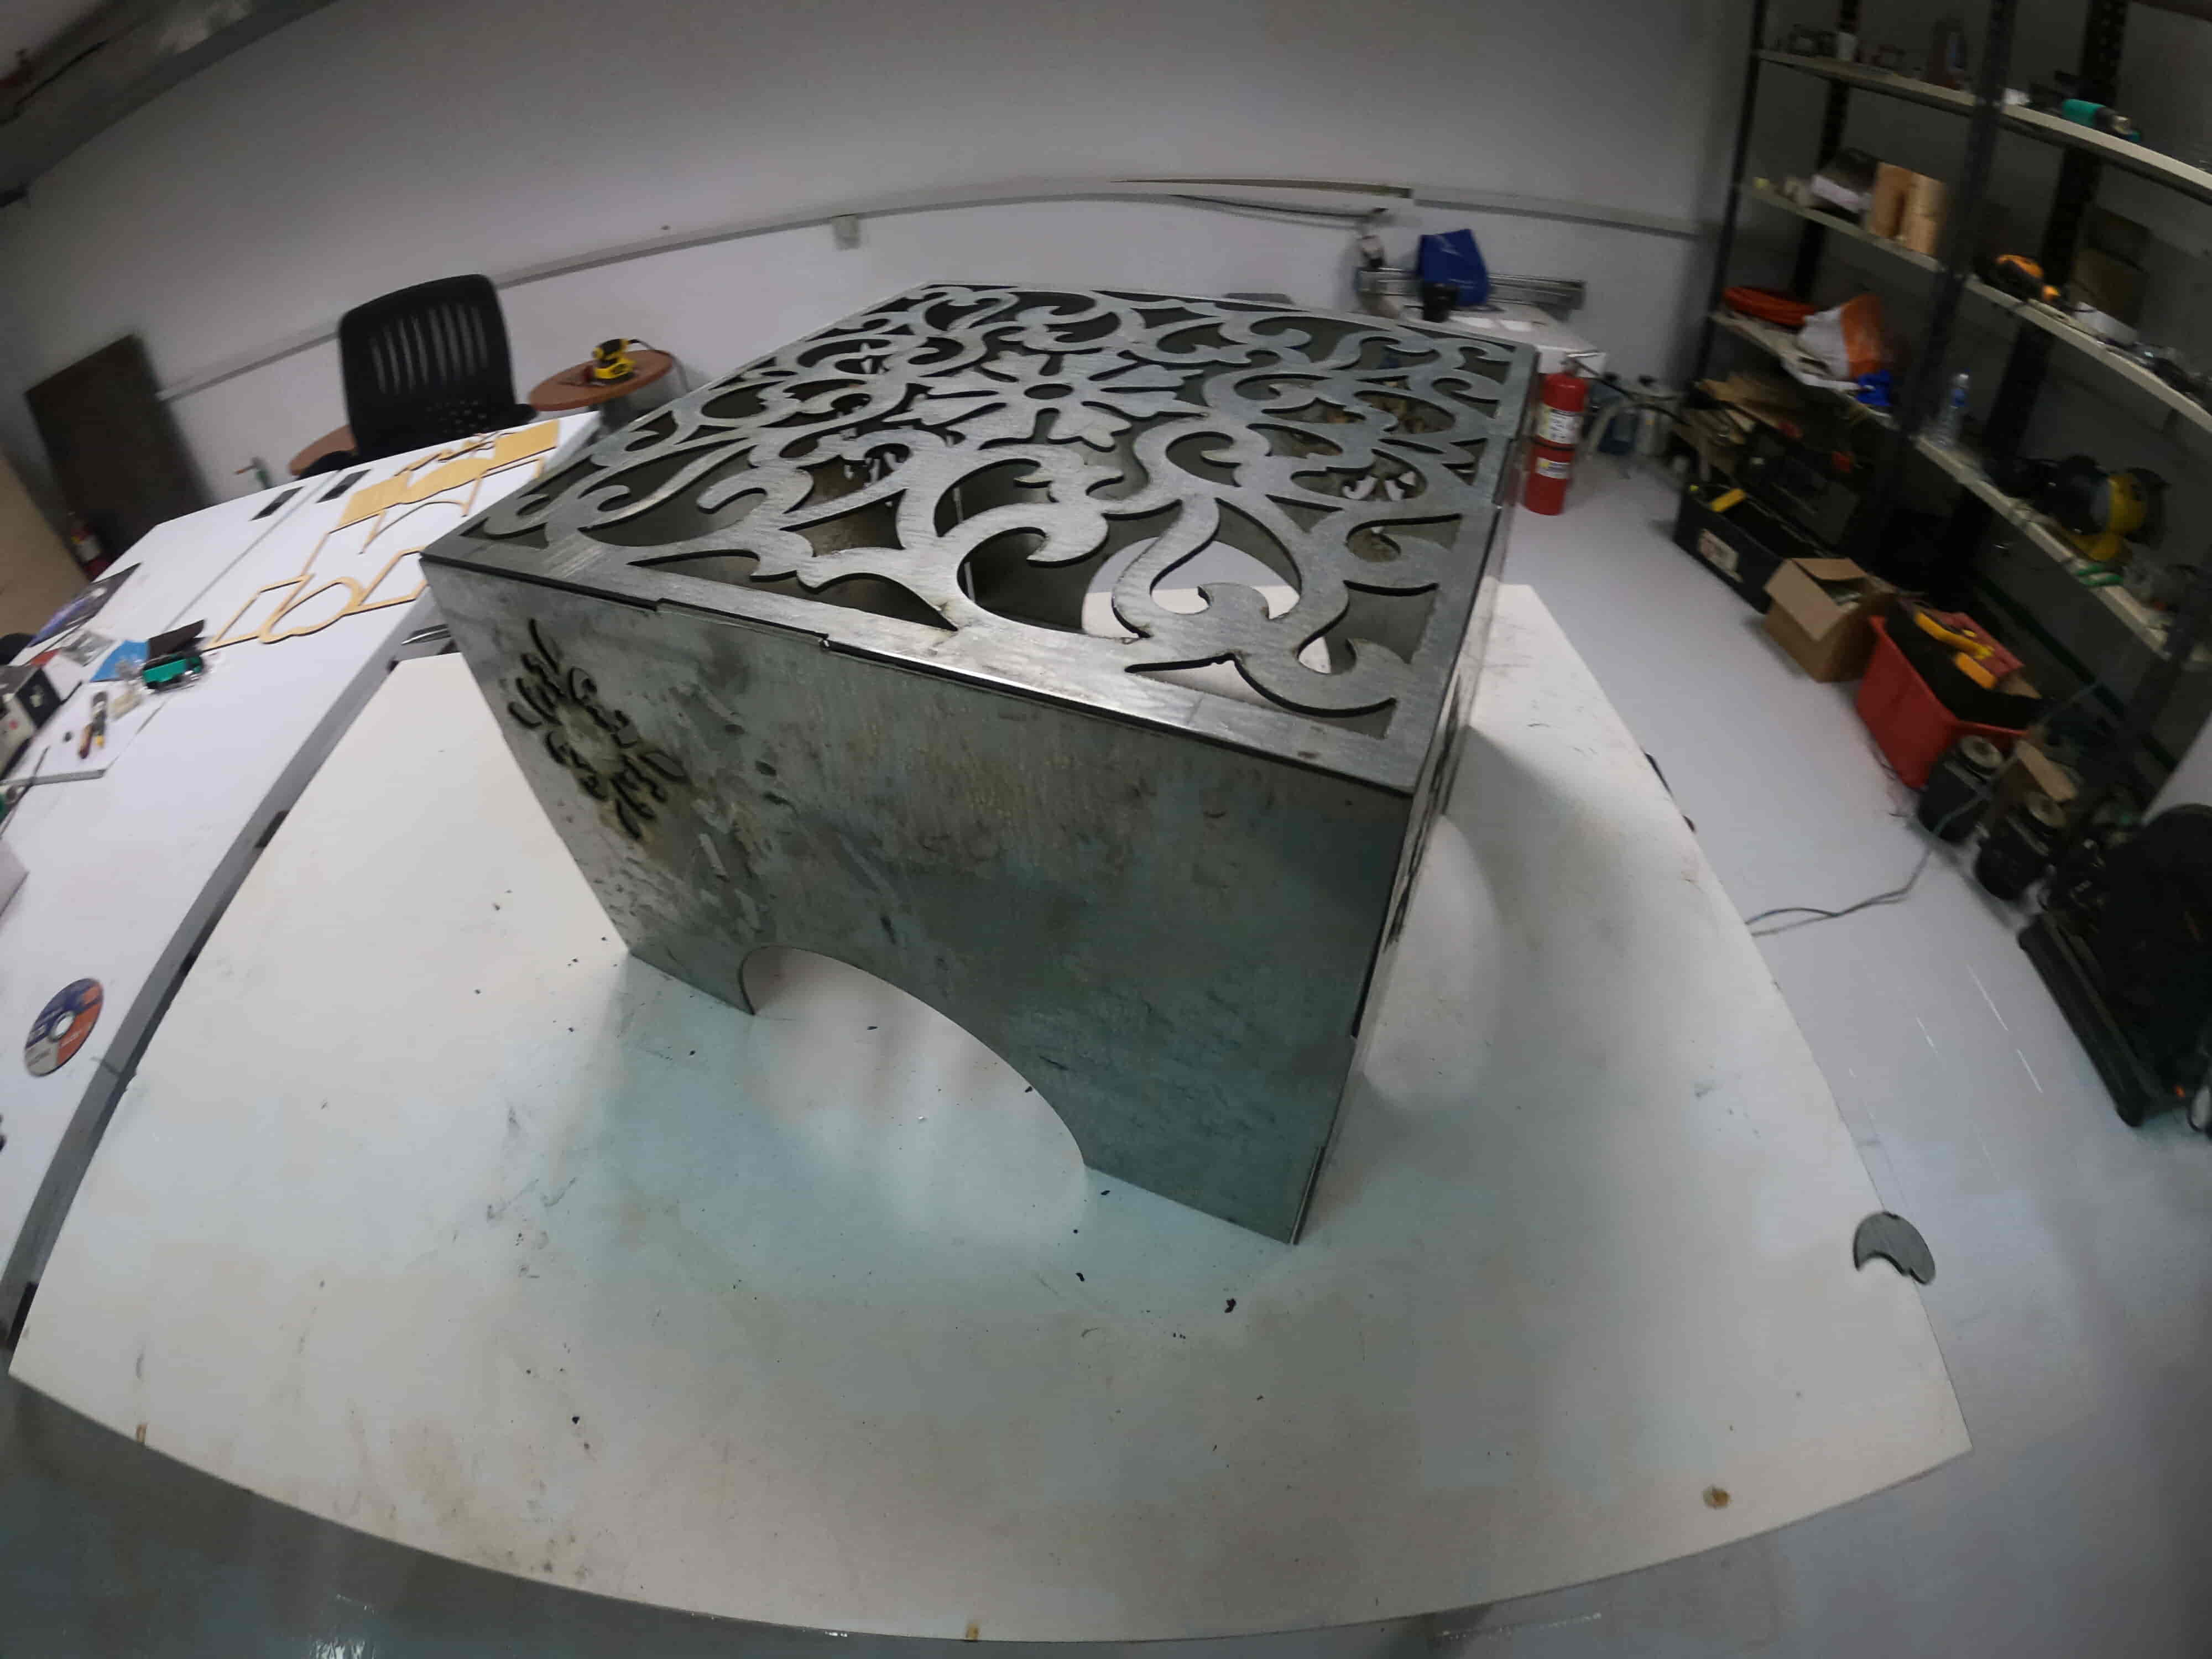
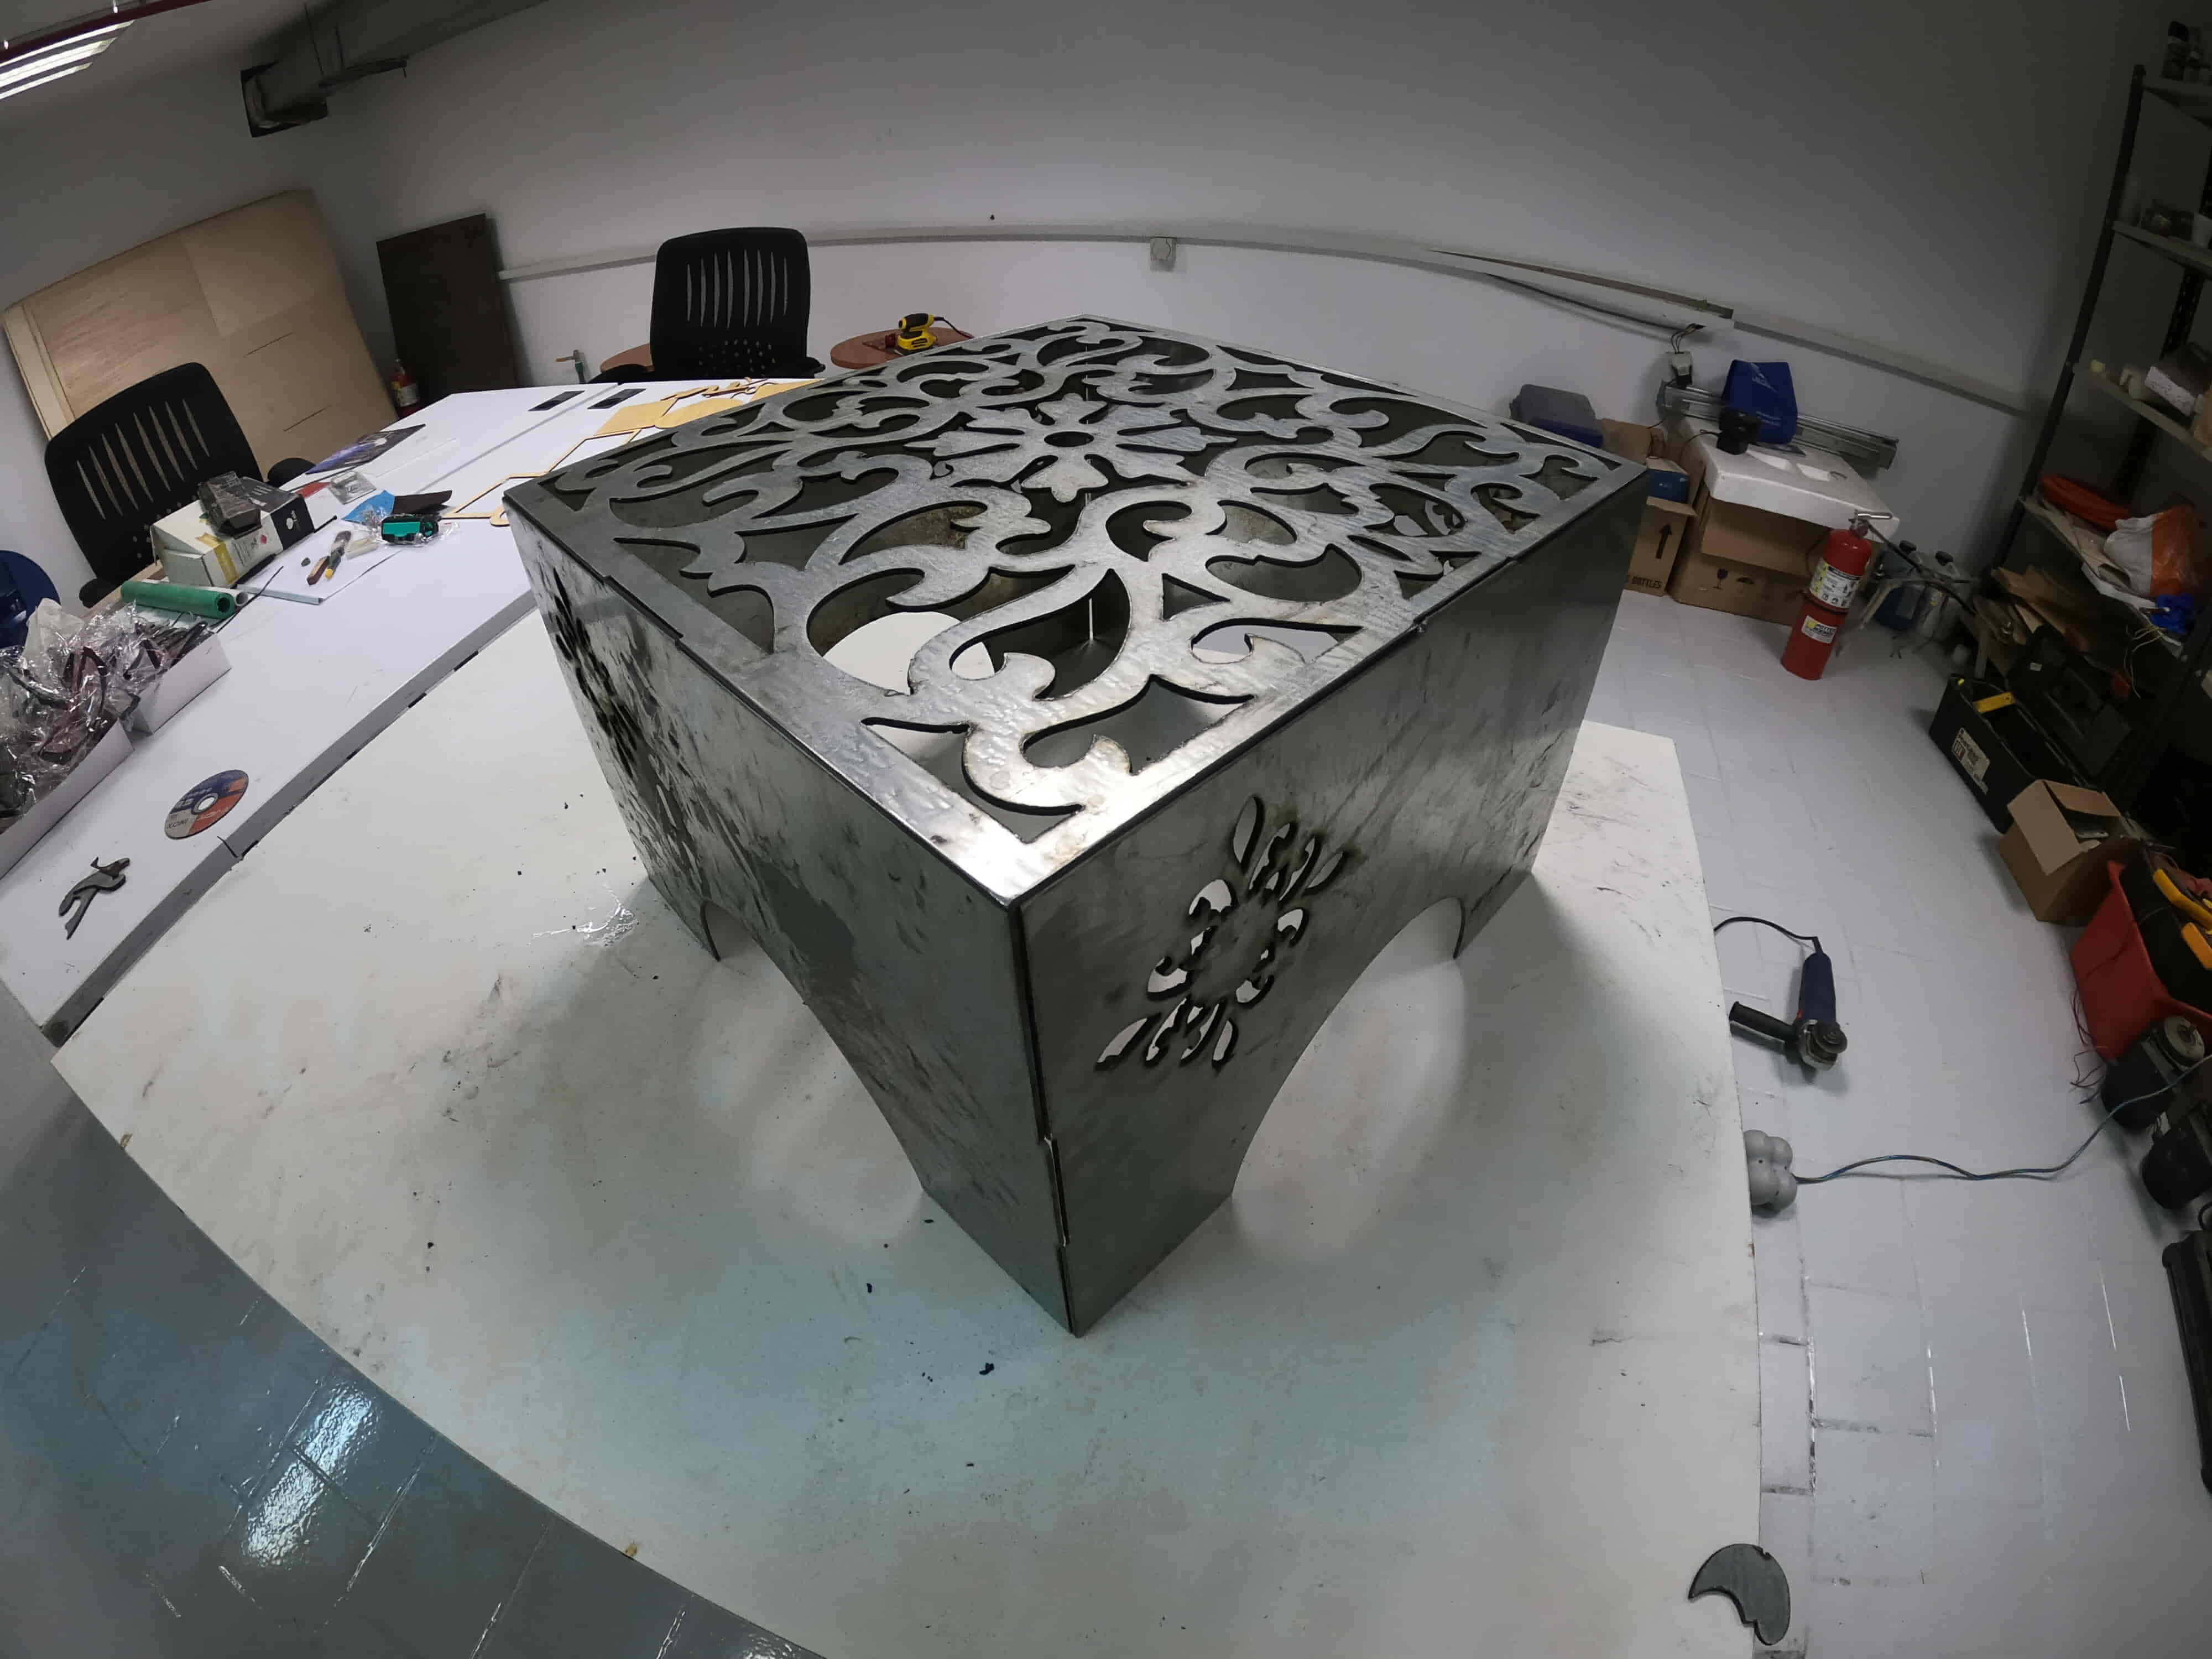
We got the table parts out of the machine bed and started cleaning them. Then, I used some power tools to clean any rough parts that resulted from the heat of the plasma cutting.
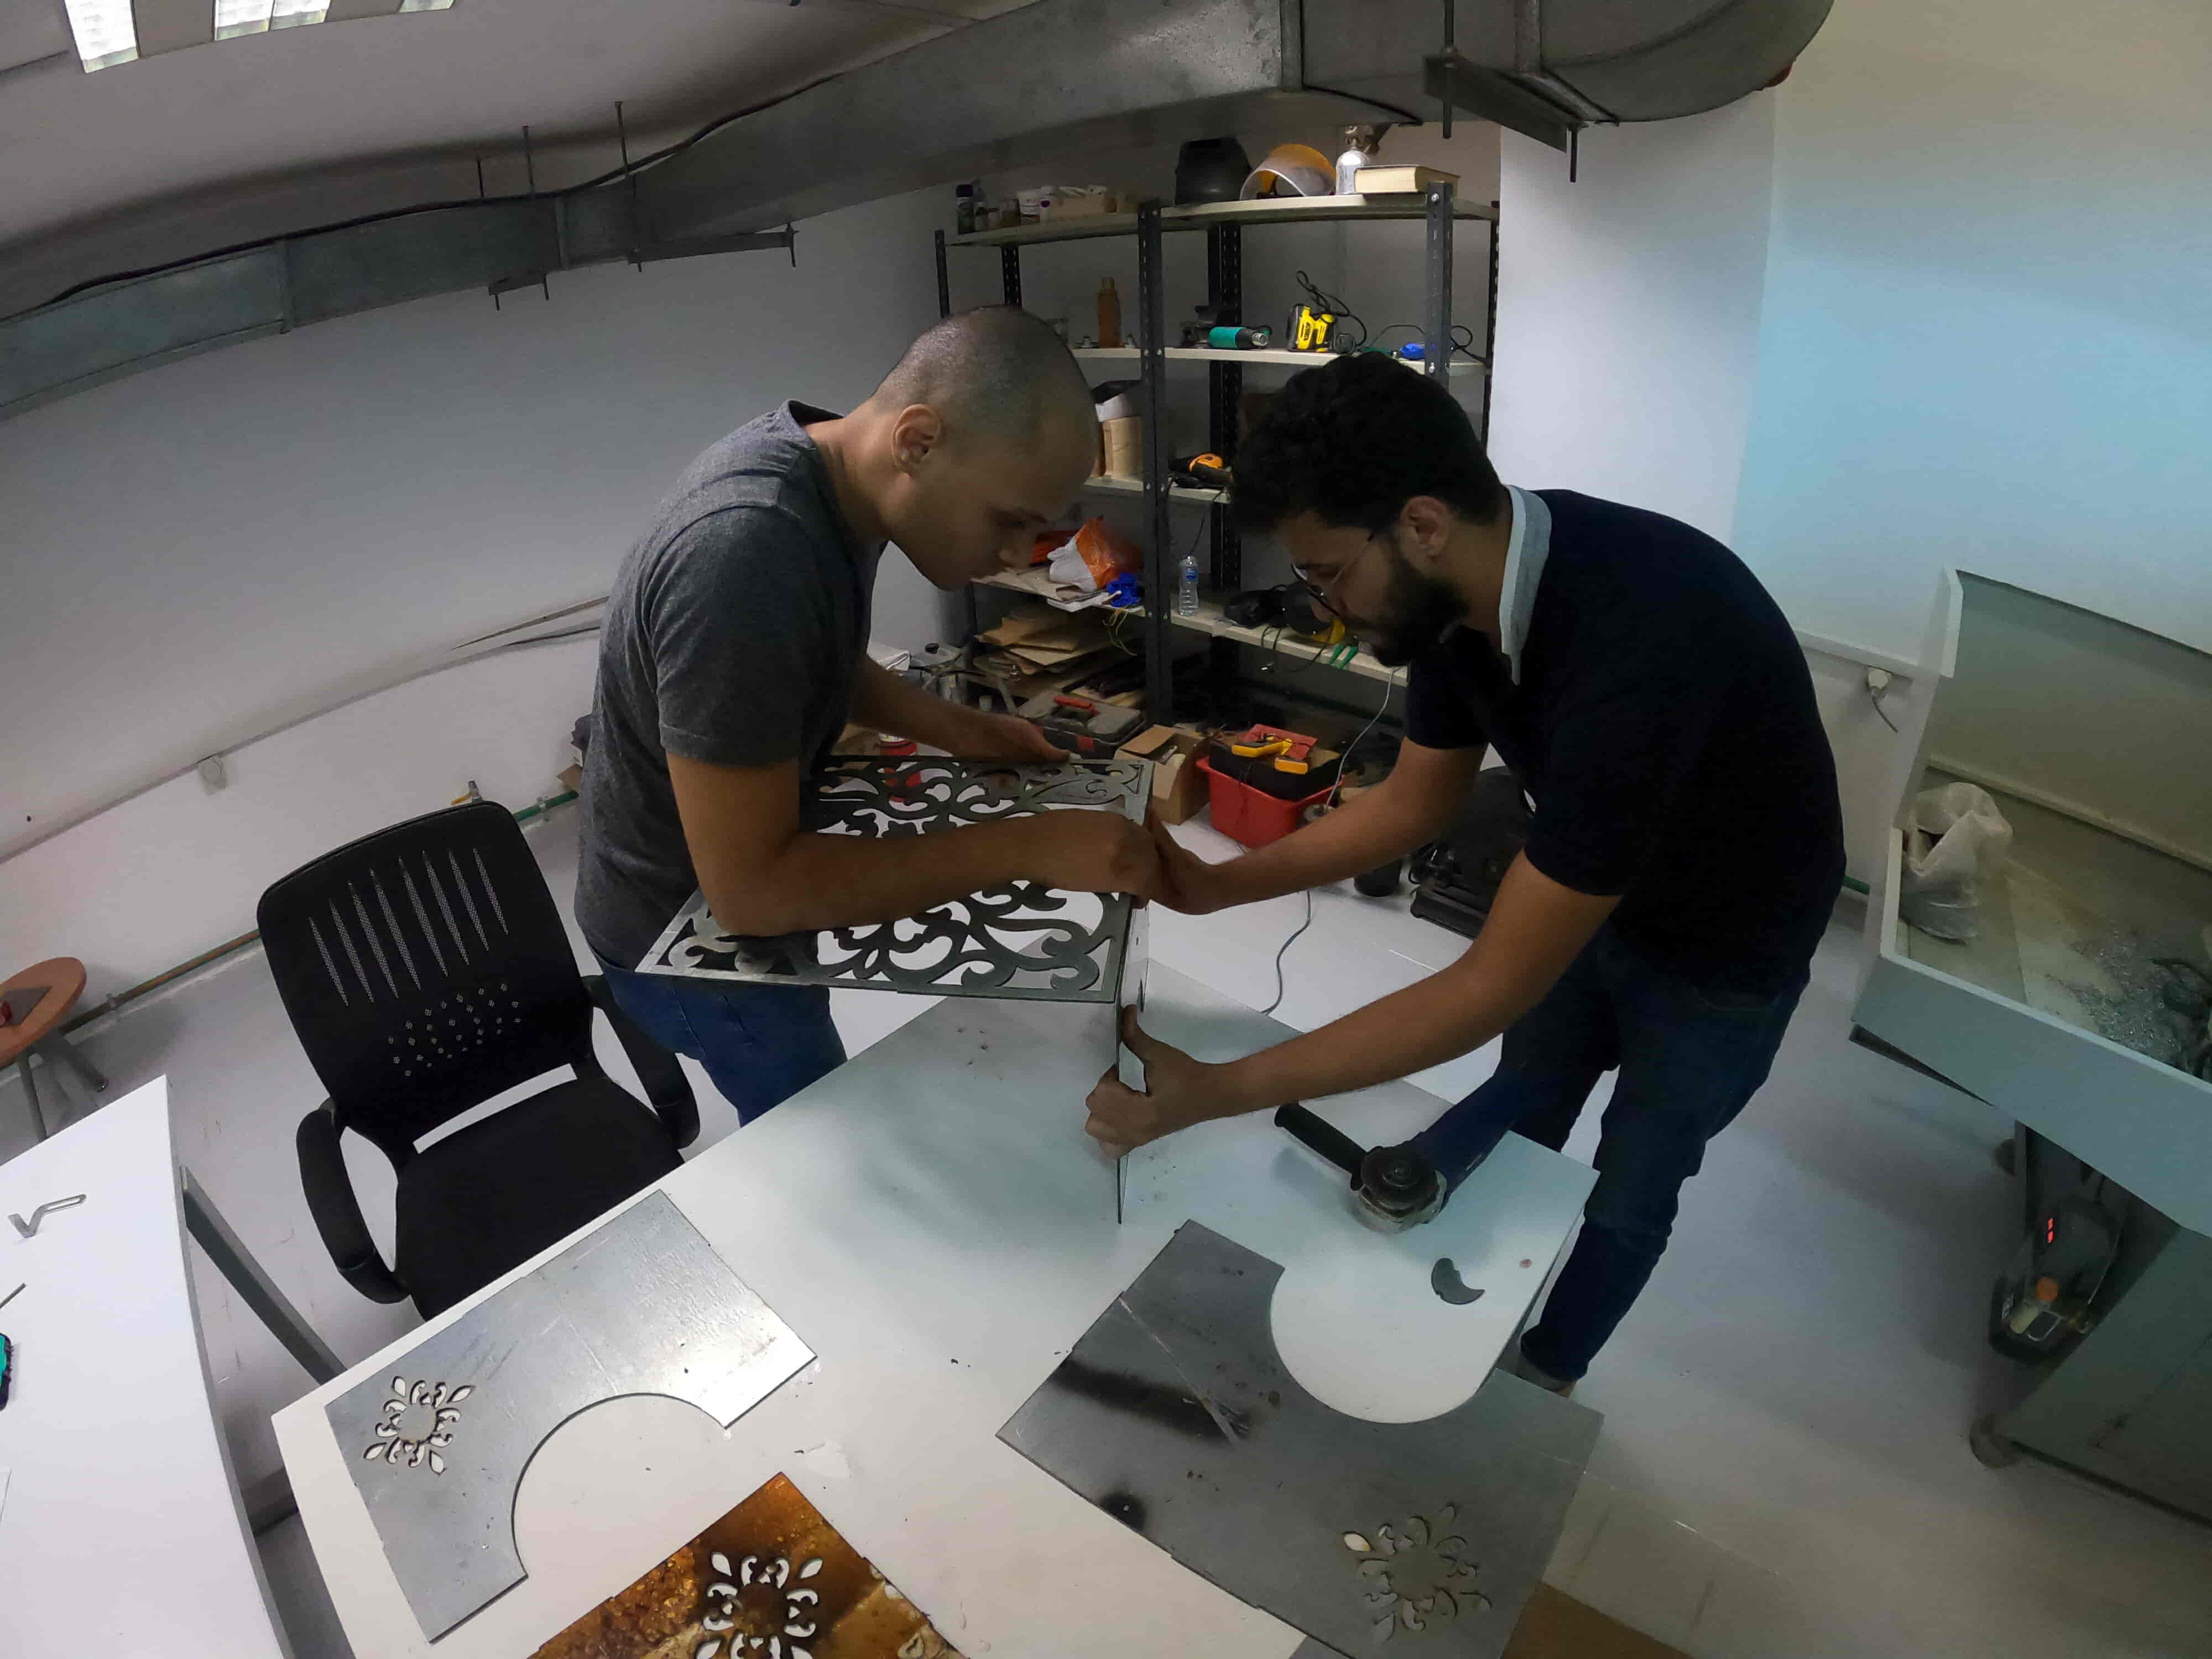
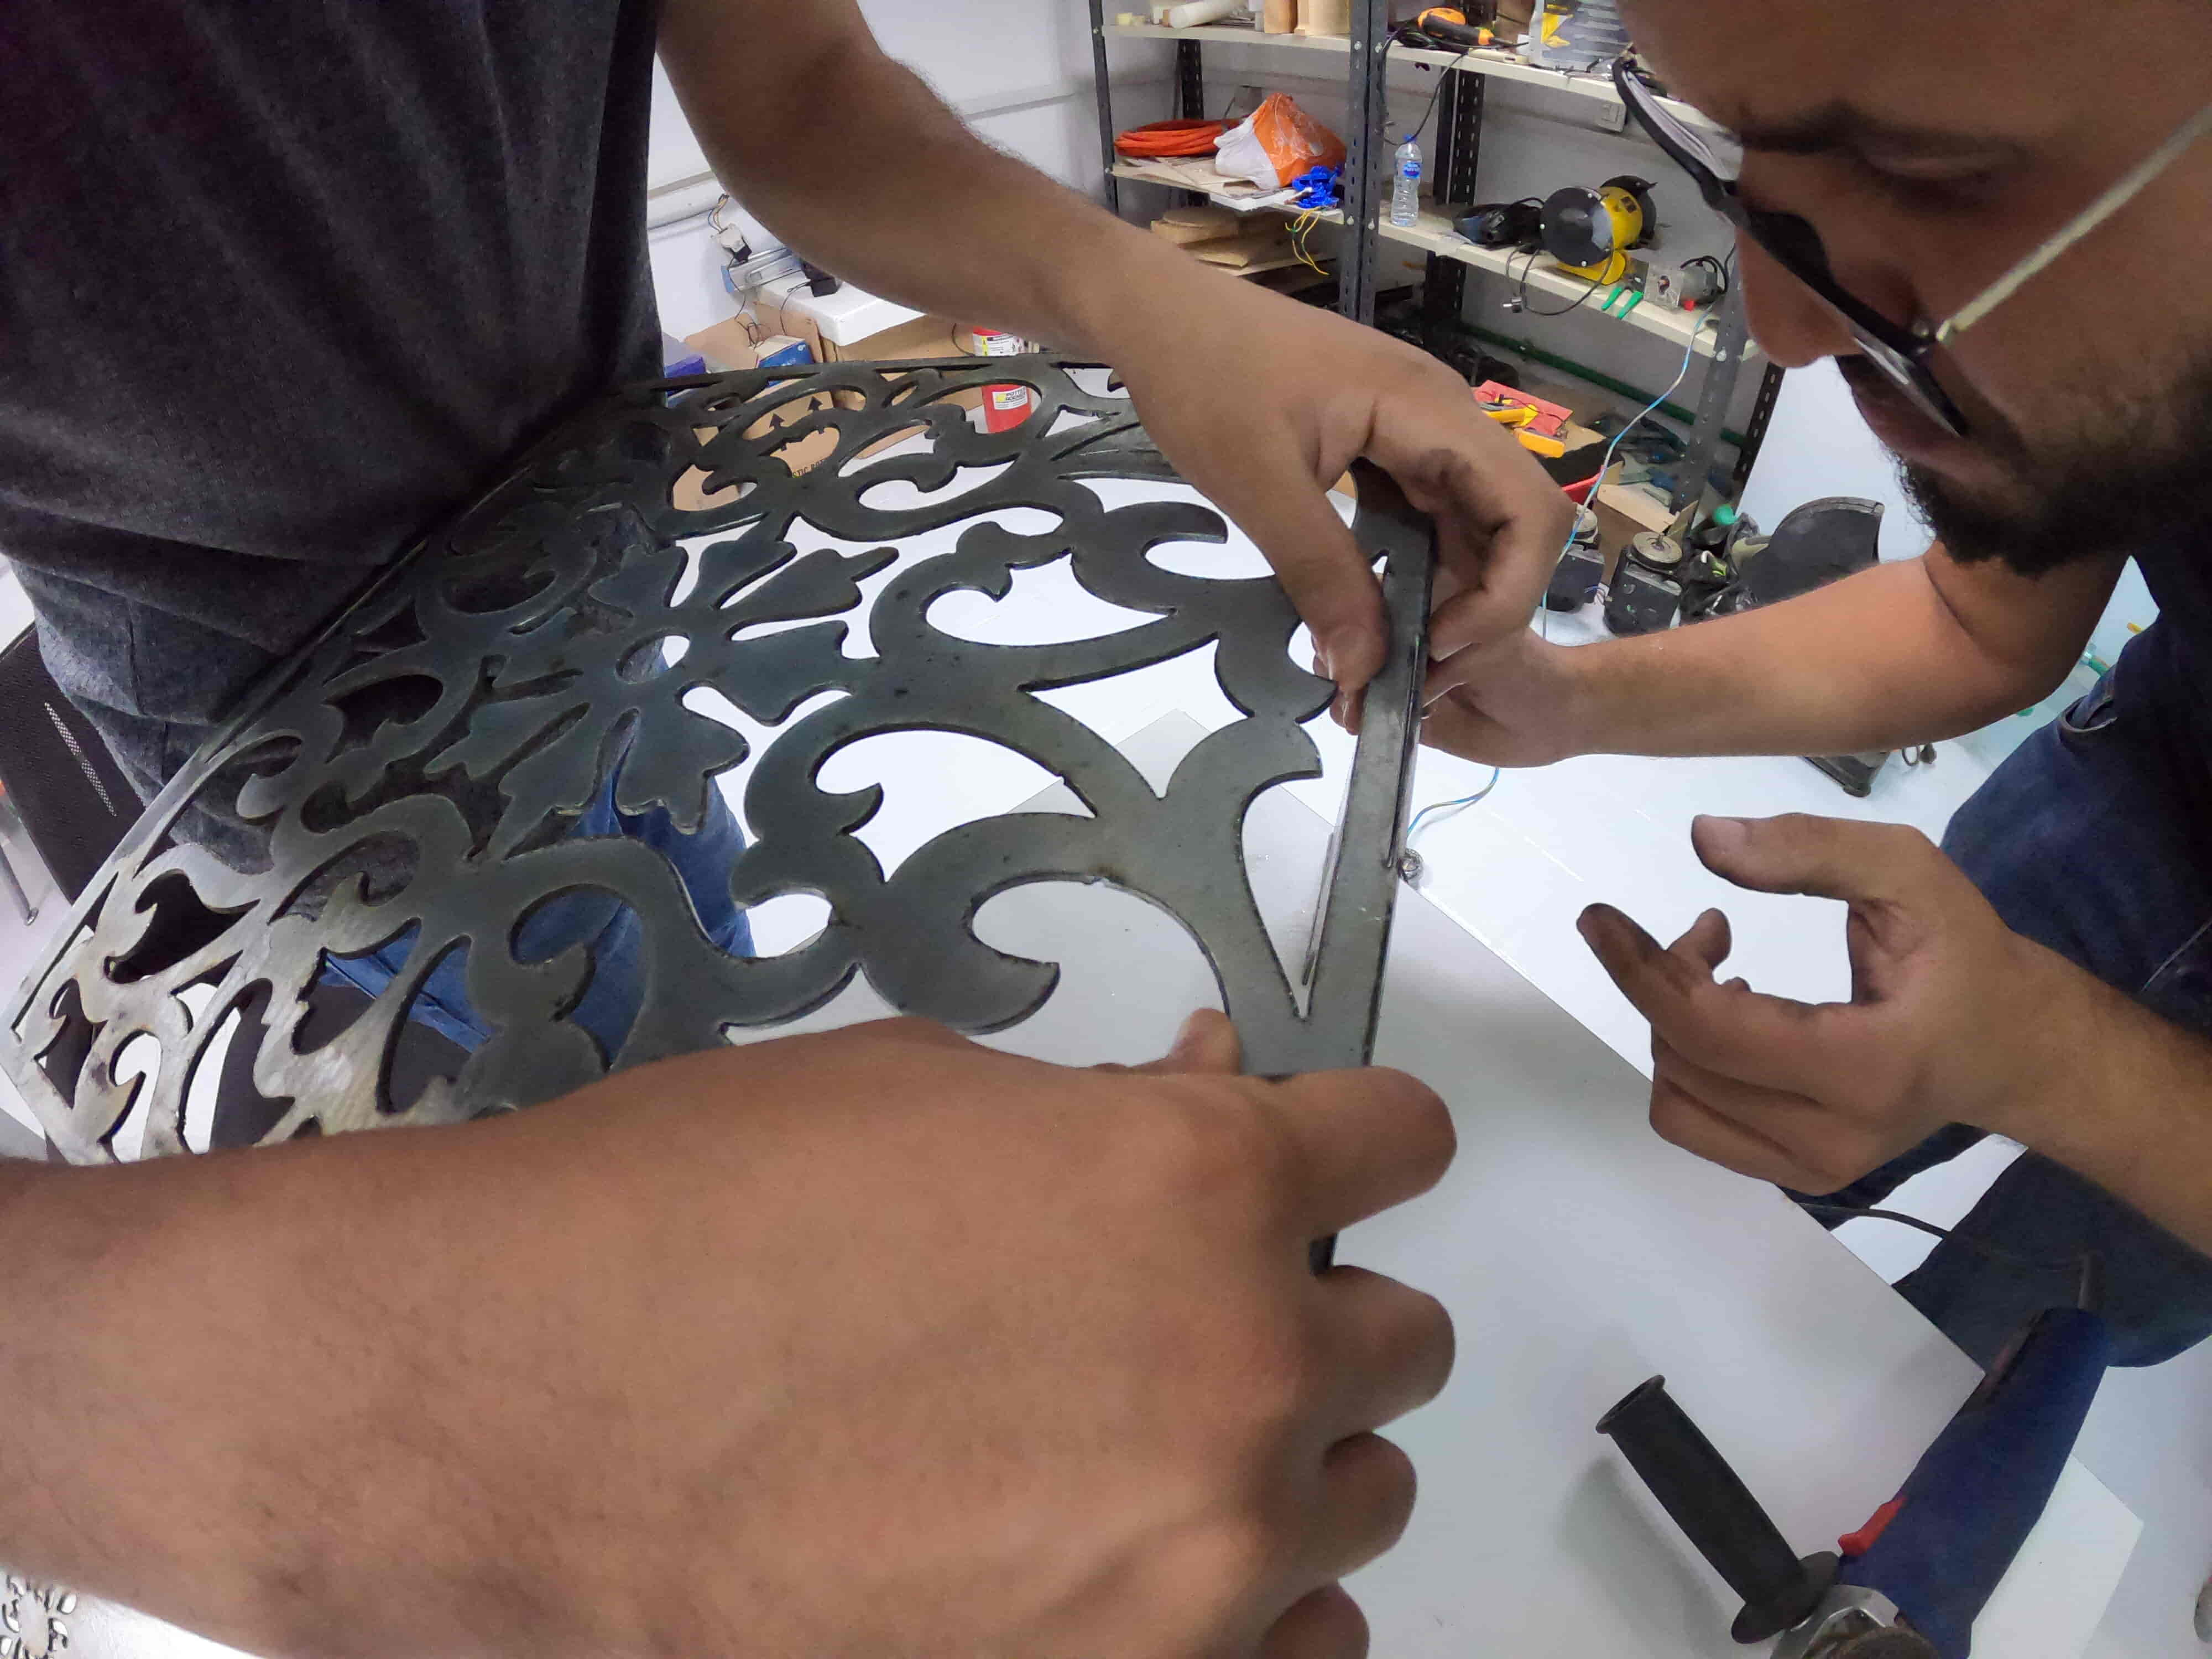
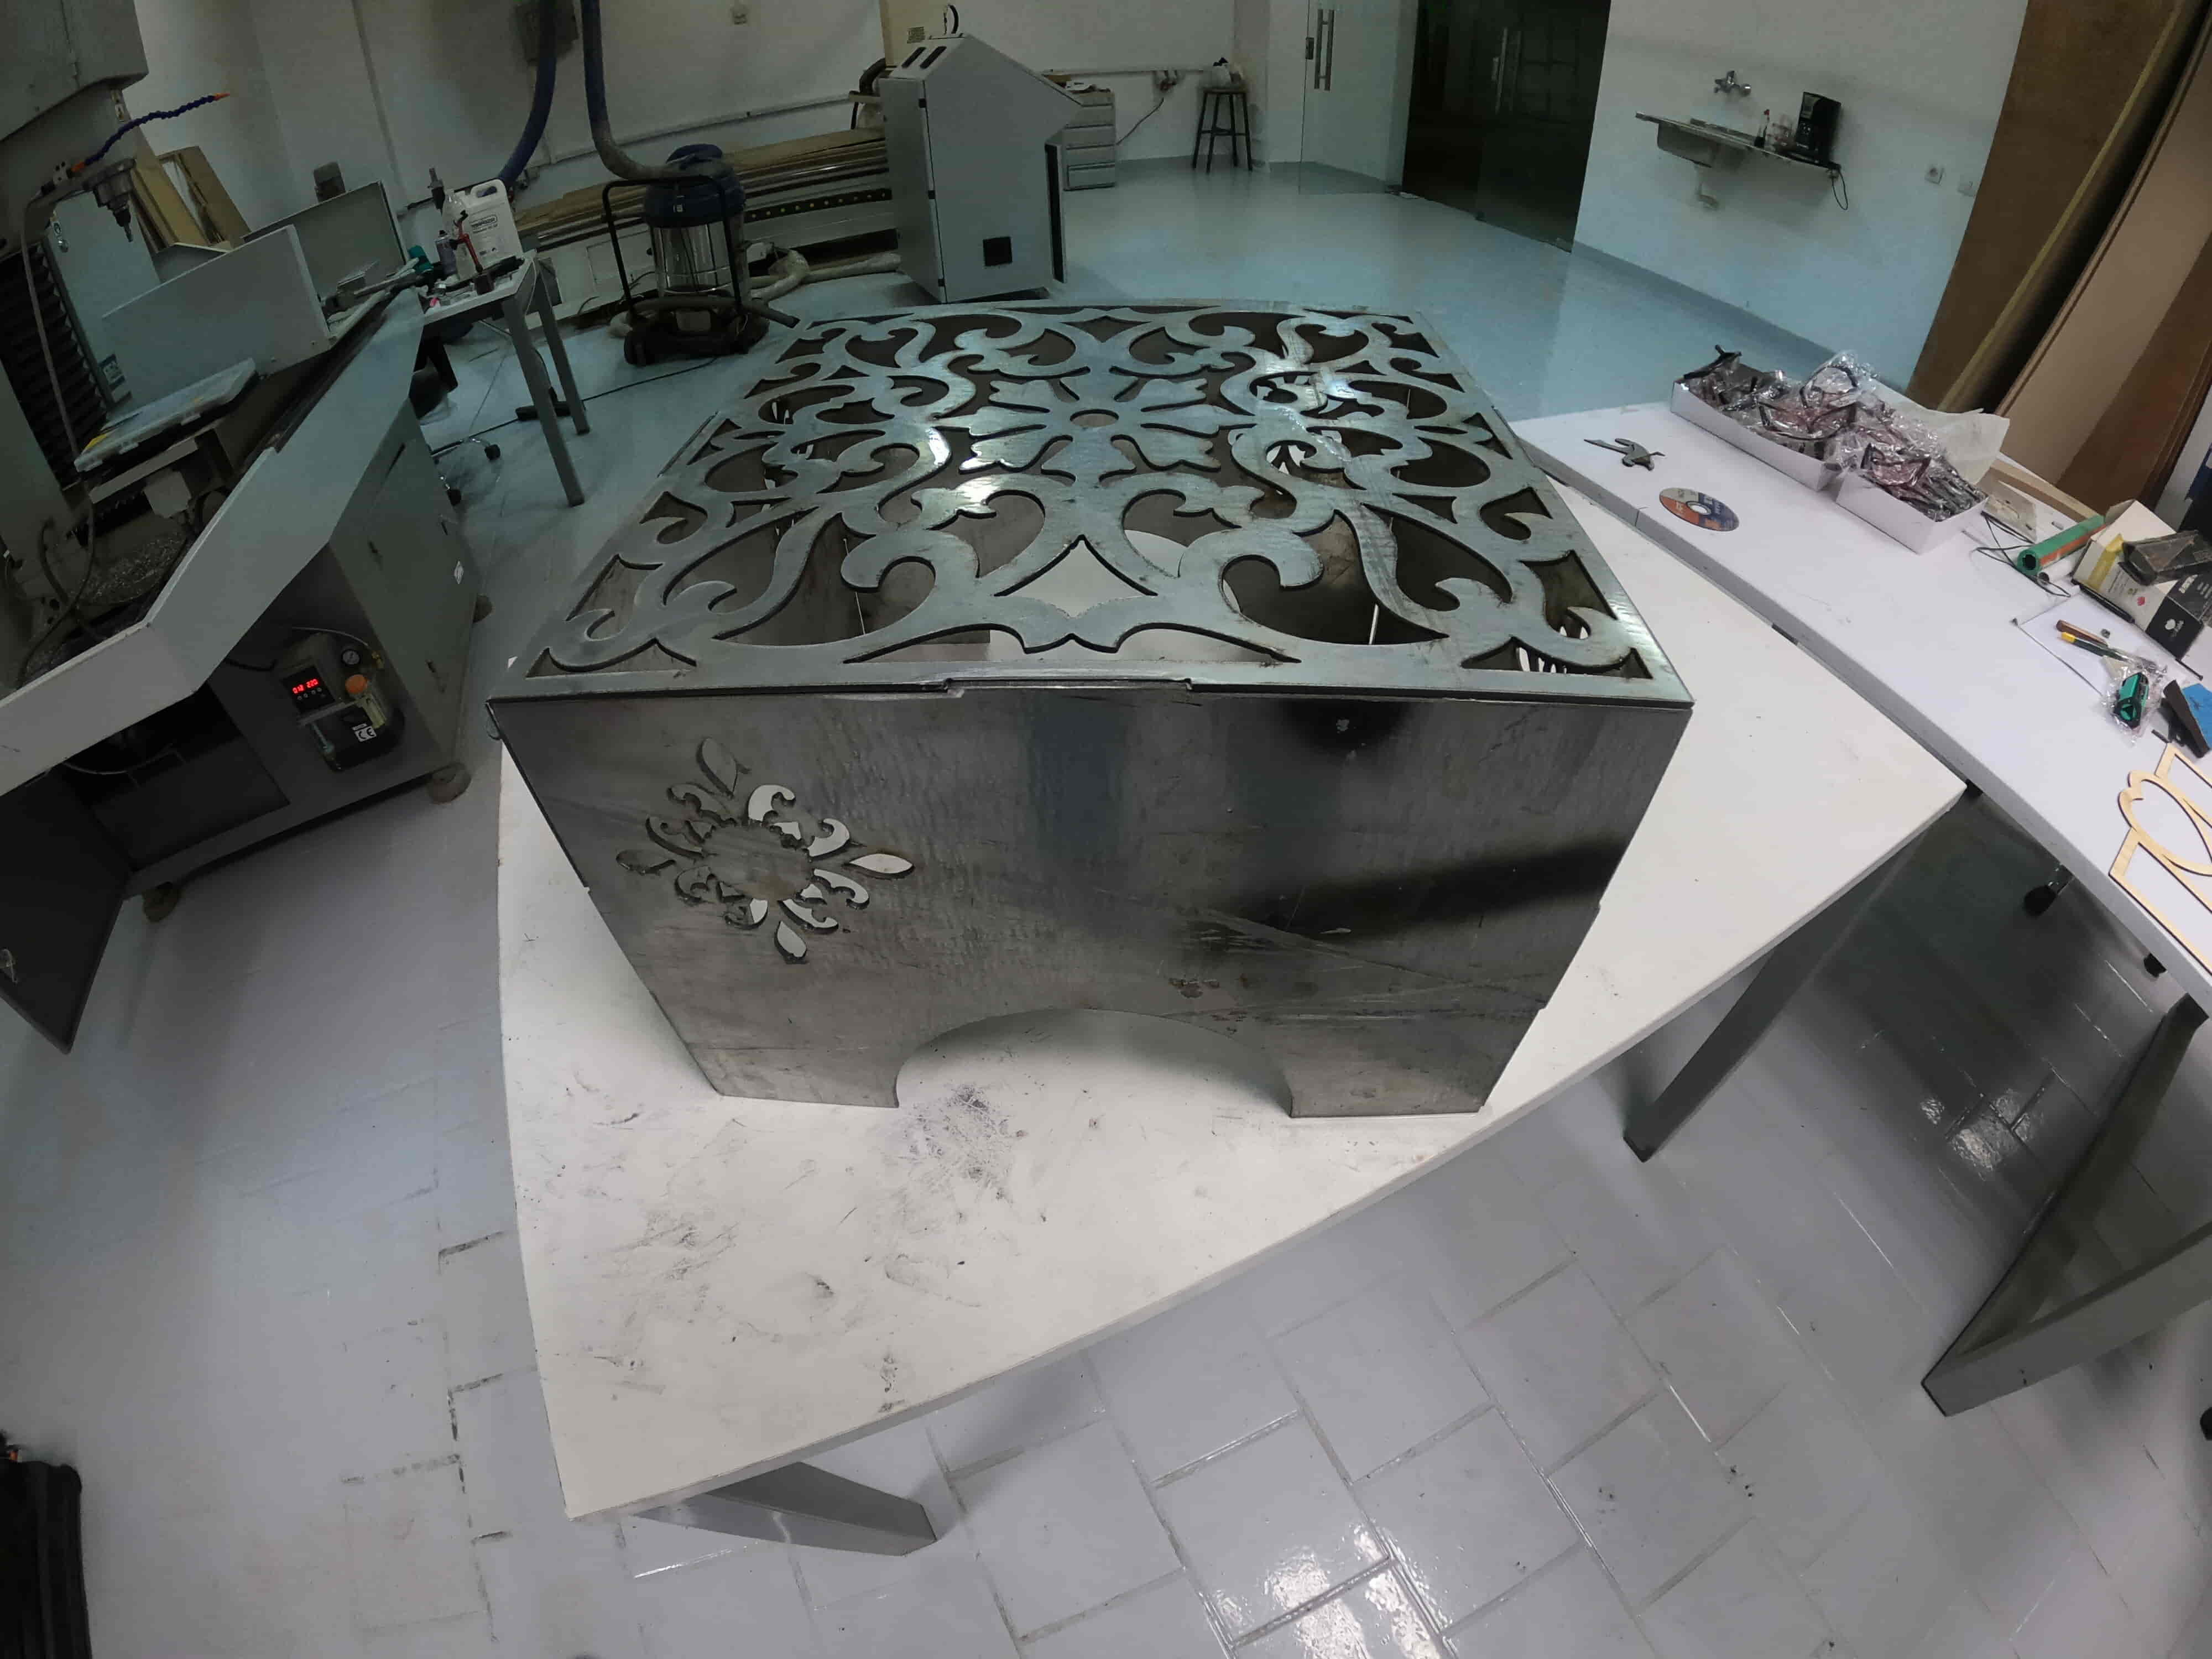
Then I started assembling the table parts together. The process went very smooth!
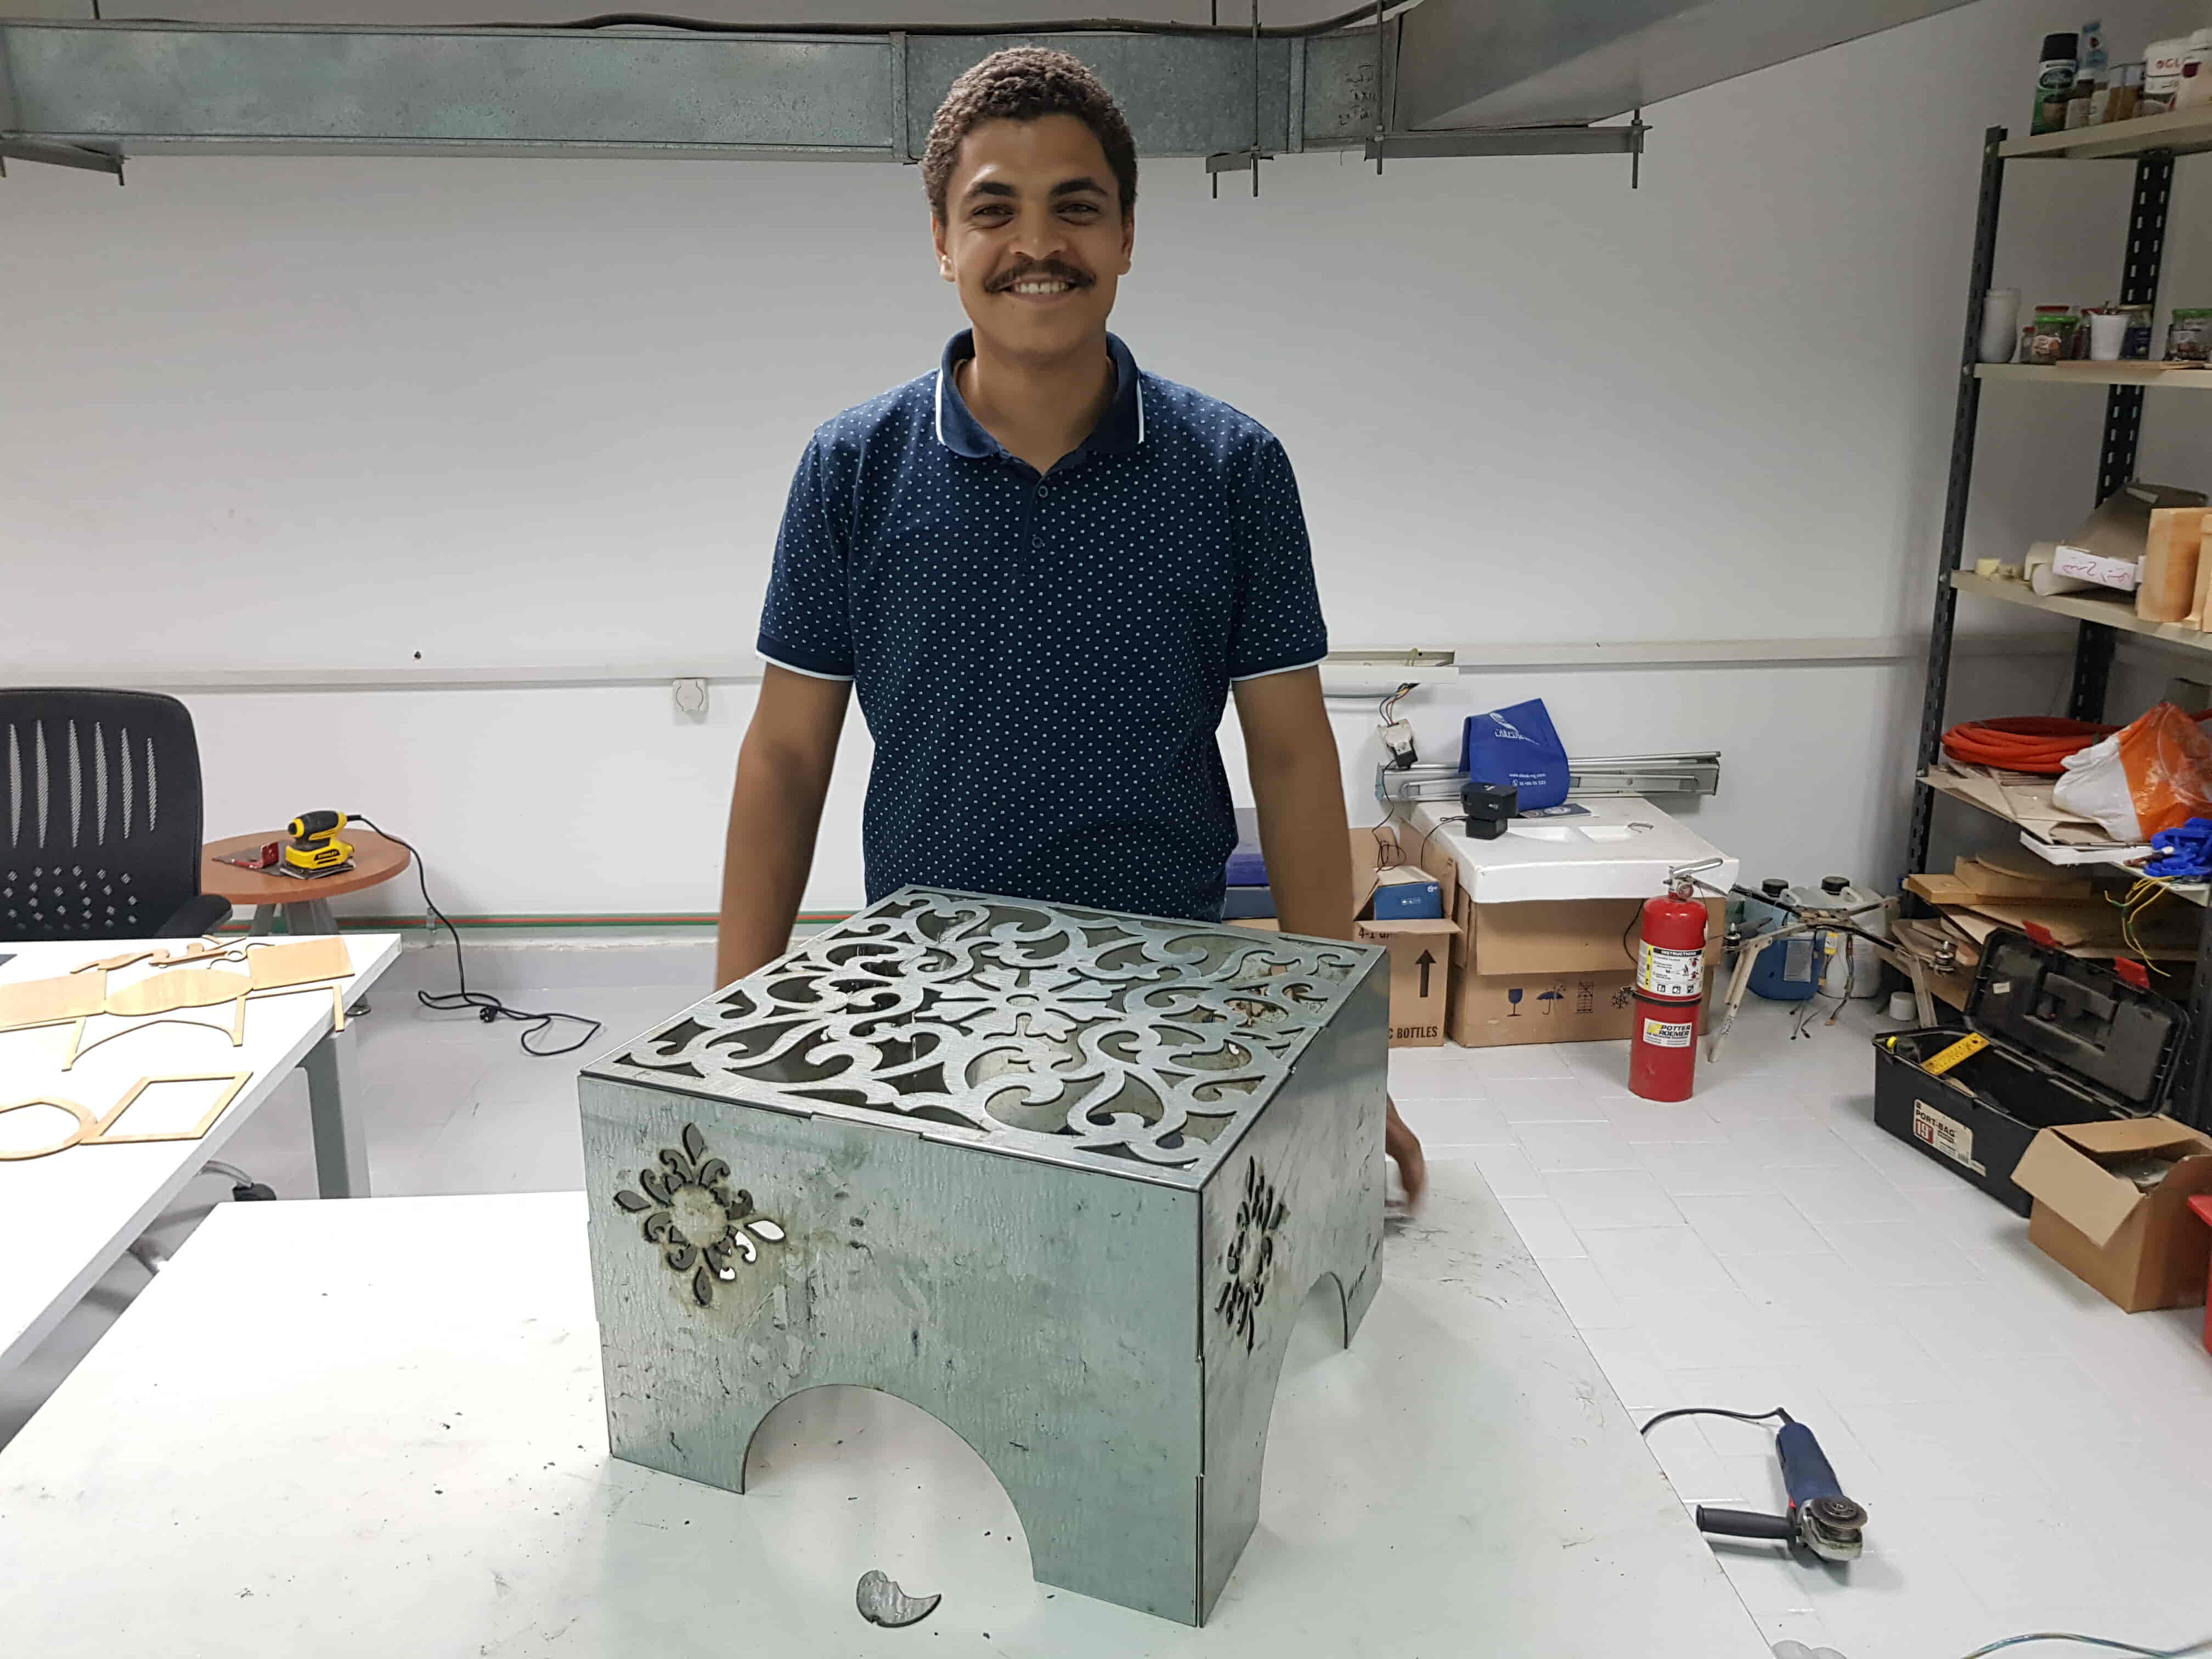
Taaadaaa! Here’s the final results
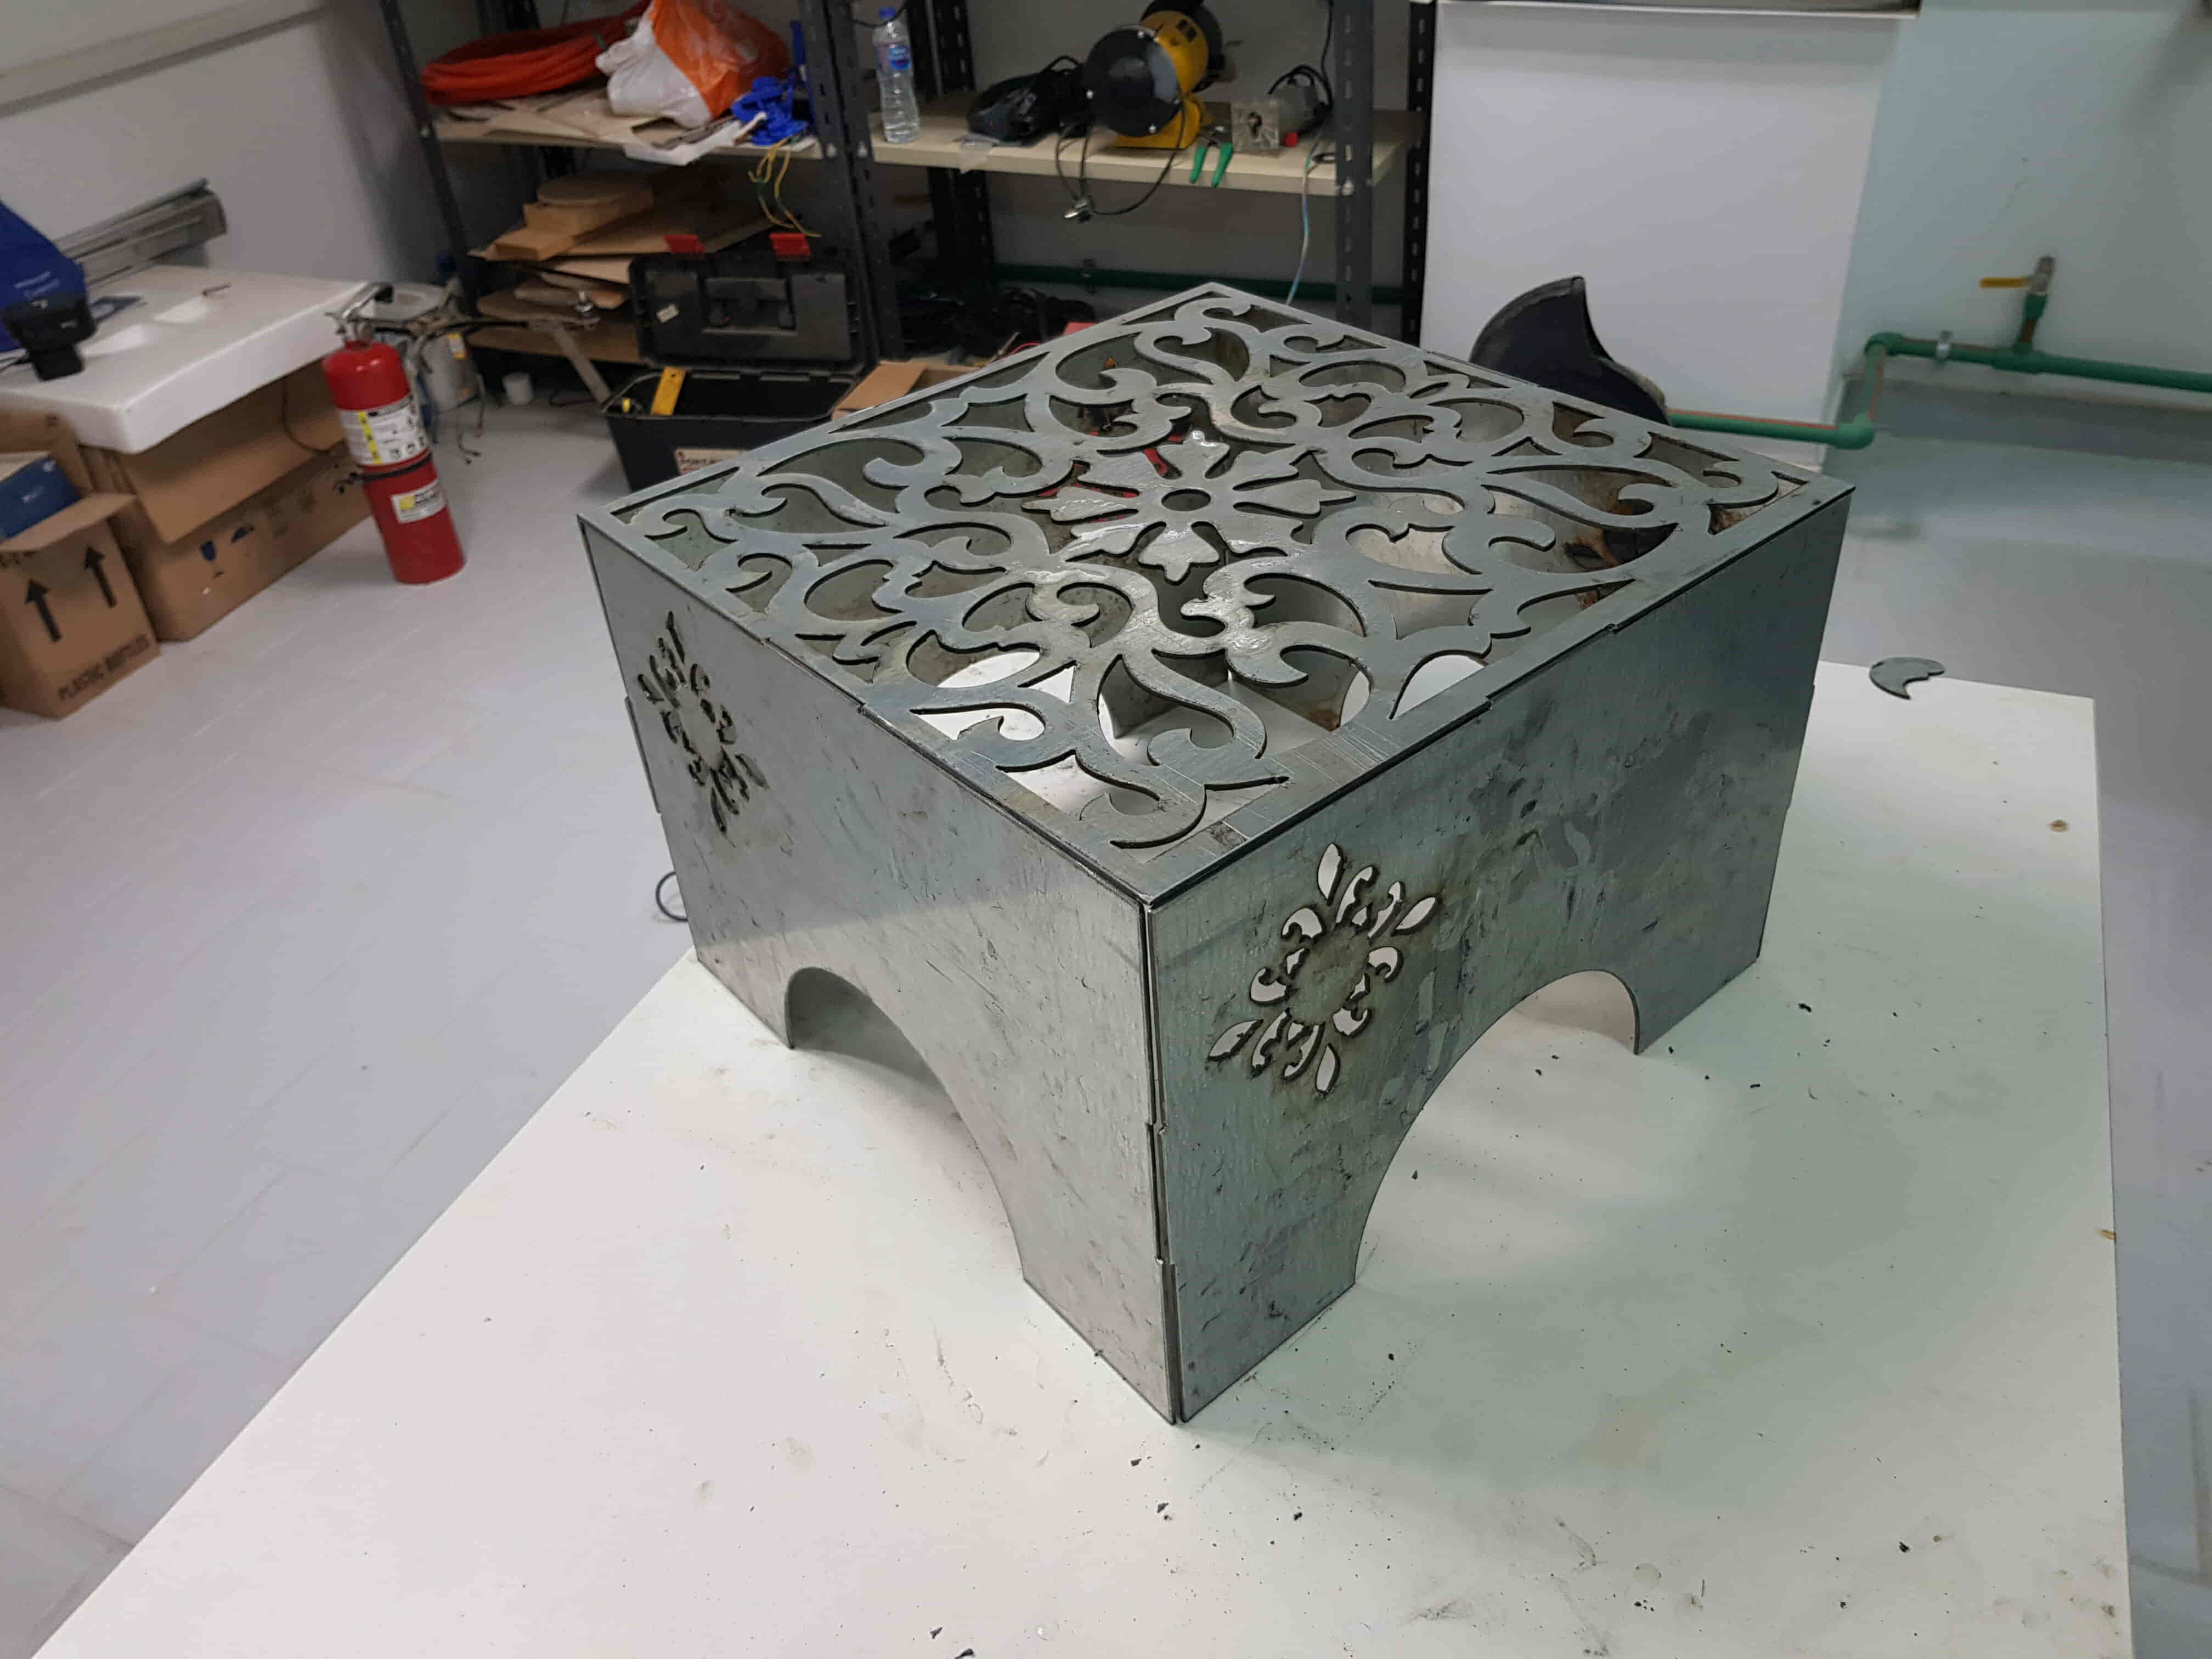

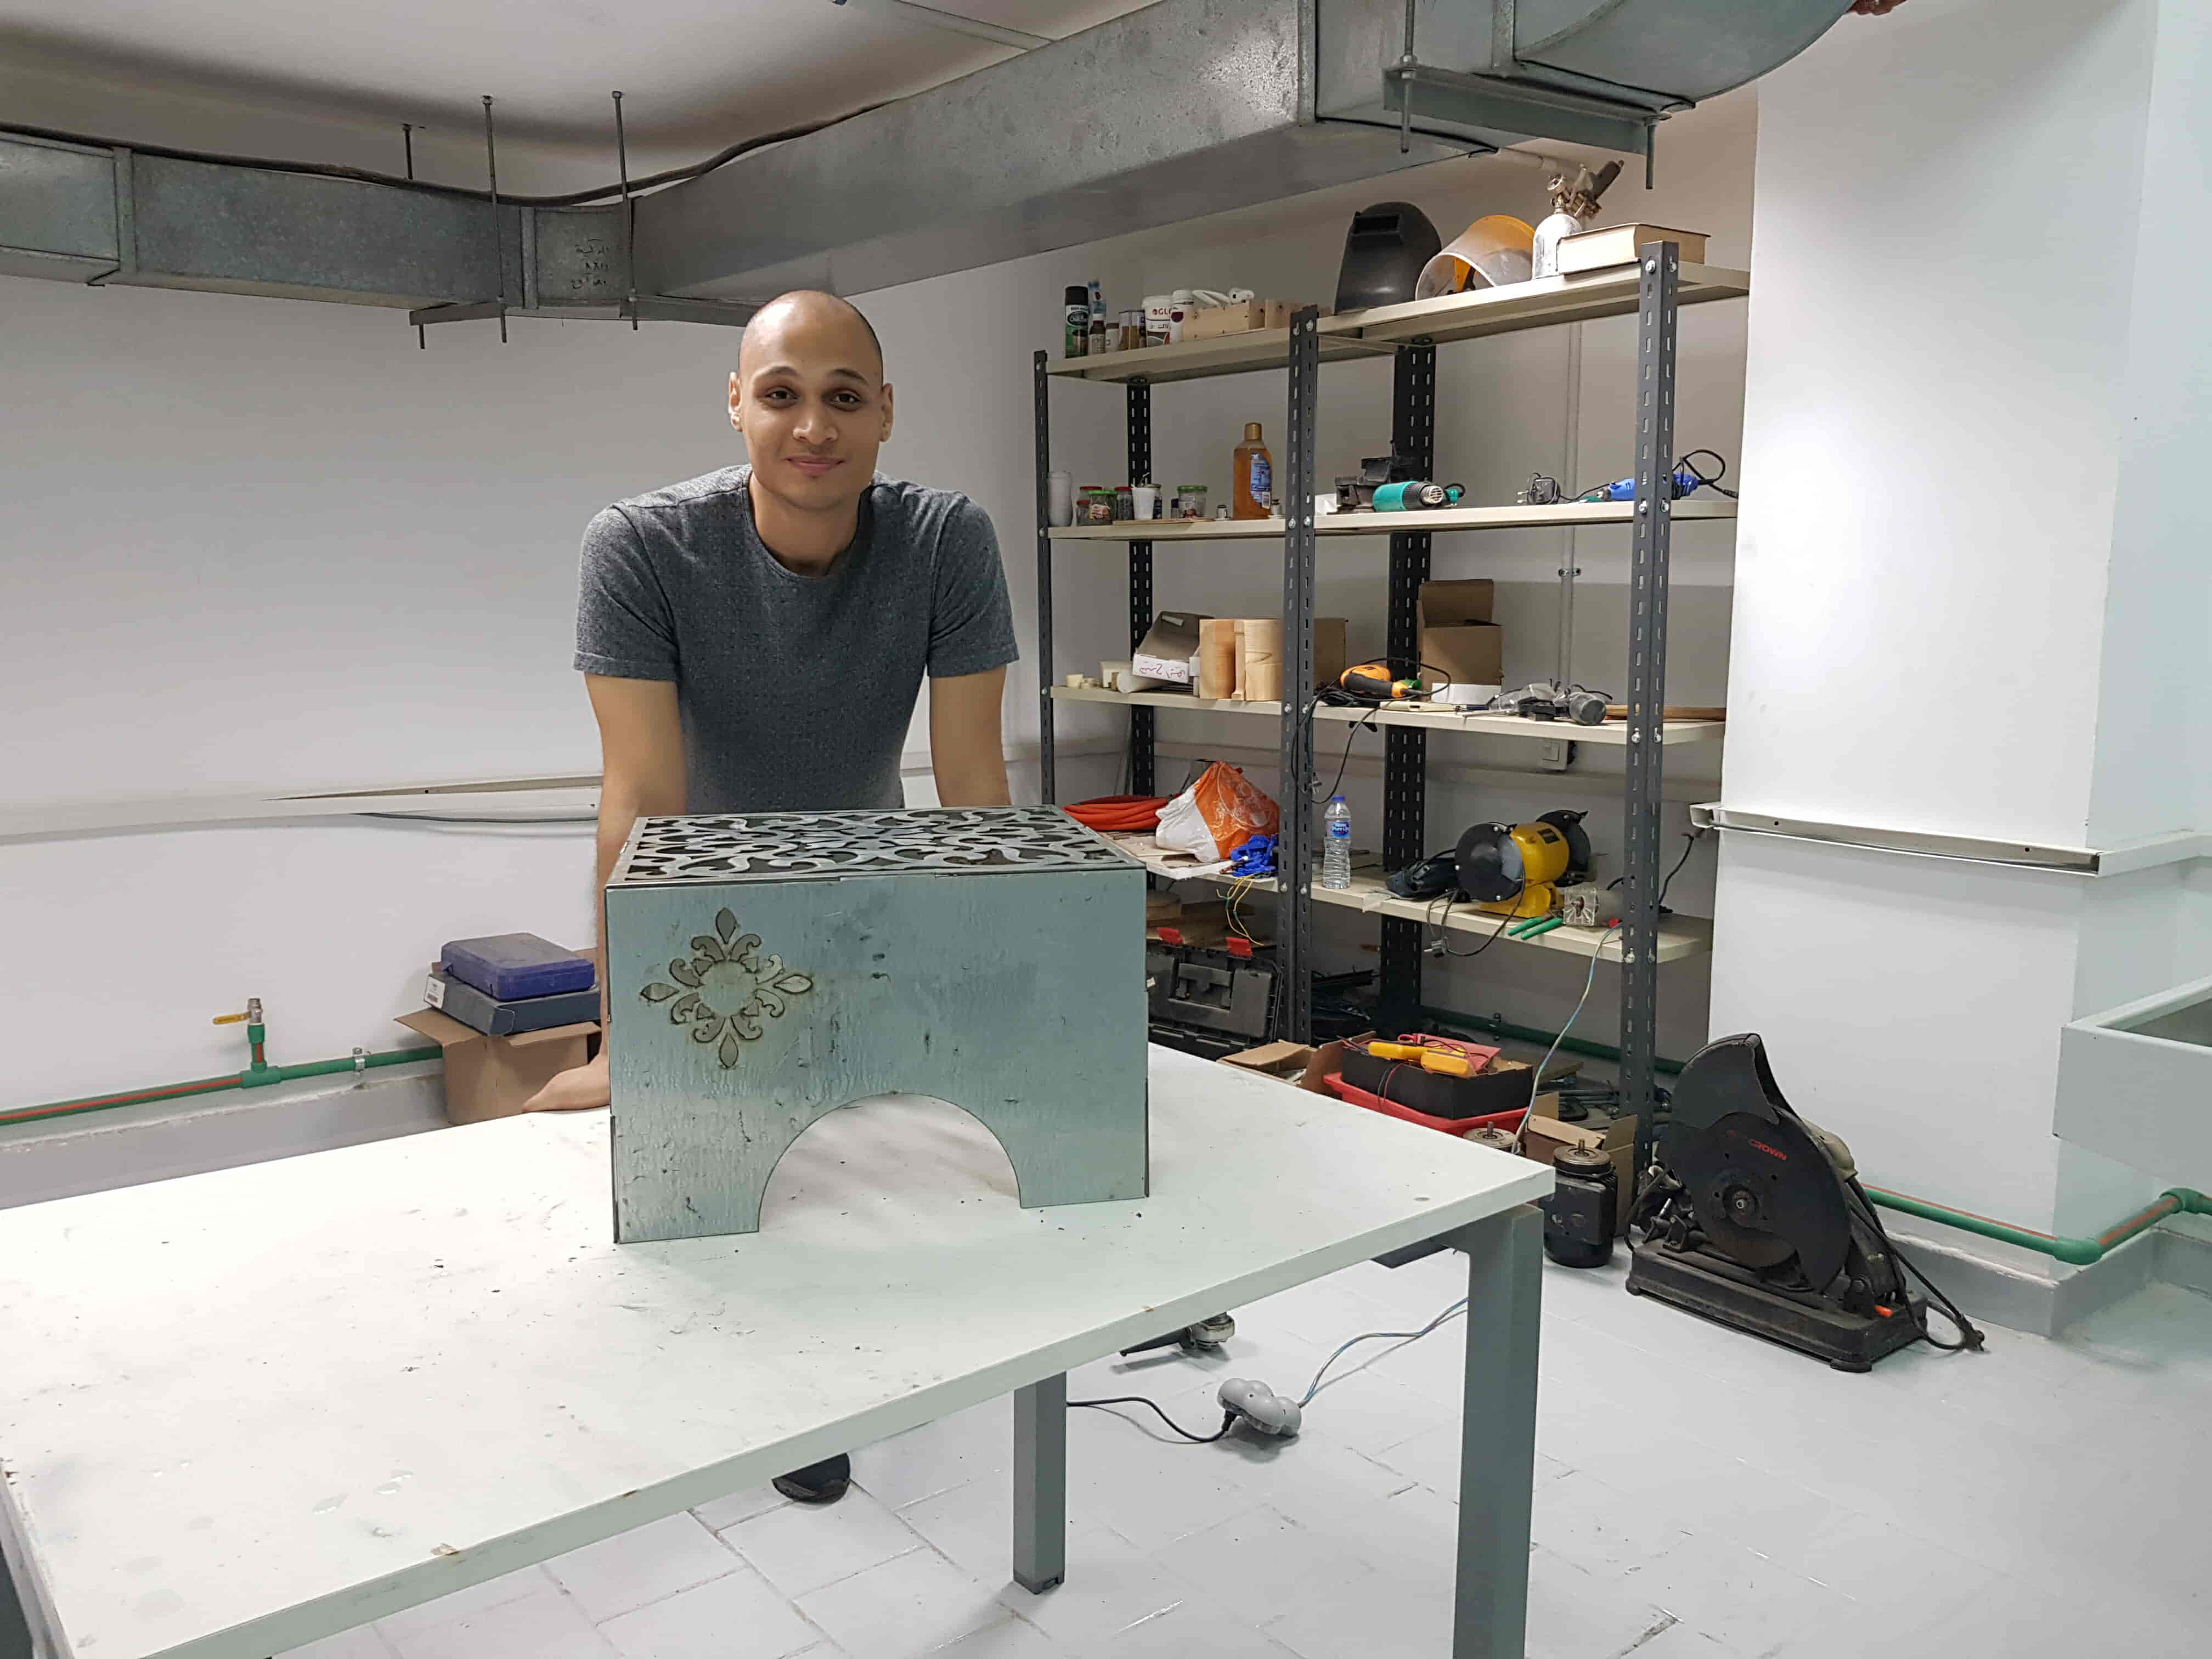
Shout out to my friend Mohamed Yousry for spending that day with me and thanks for that great photos :D
Shout out to Aser Ihab Nabil for helping me out in operating the machine and the technical knowledge that I learned from him that day.