Molding And Casting
What’s Going On
This week we are doing molds and casts yay! I was waiting for this week actually. The idea of making things with different techniques away from 3d-printing and laser cutting is very interesting and From a long time ago I wanted to try other fabrication methods. i was very excited to try molding and casting!
The Big Picture
First things first, we need a cool idea! Before anything, invest your time in choosing an idea that you can relate to, then do some draft sketching on a white paper as a proof of concept to make sure that “yeah, it’s gonna work”! It’s only the big picture without any details. We're gonna dive more deeply in the details in the next section.
- Designing the positive
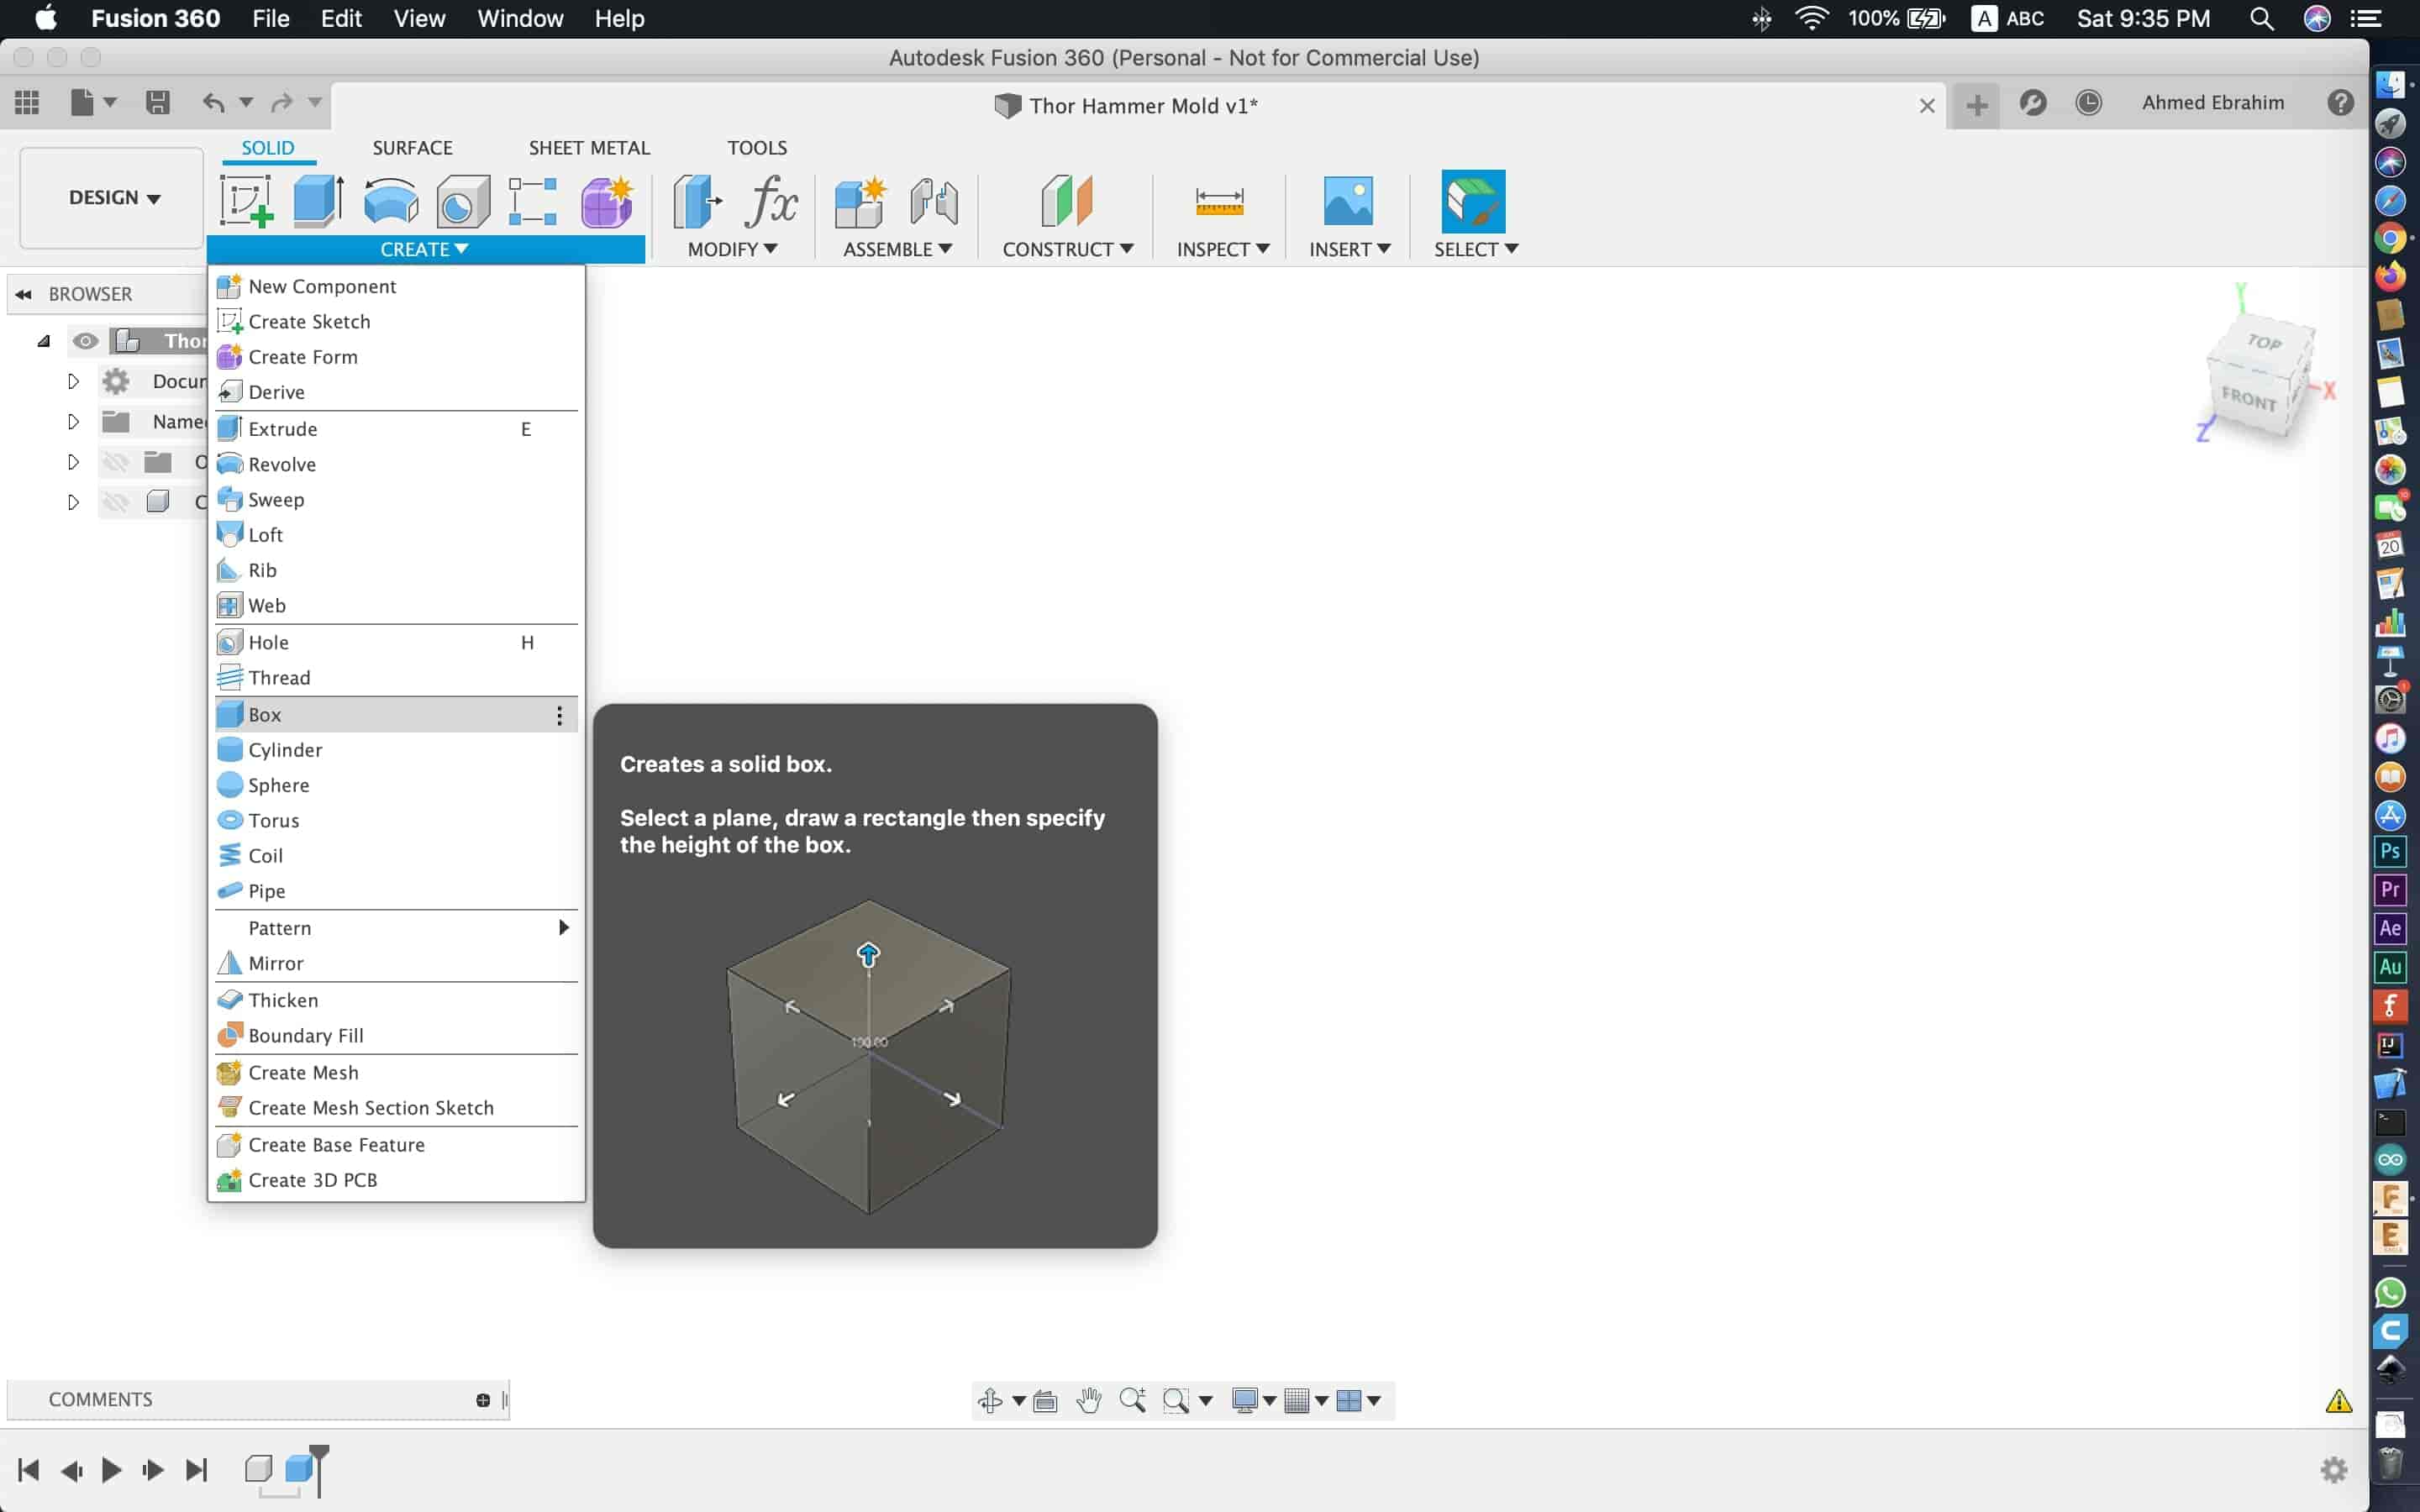
we settled on the design idea, we need to design the part that will get milled on the CNC milling machine AKA “modela”. There are two options out there, the first one is to design a 2.5D model which means 2d sketch and you gave it a thickness(extrude) just it! And it only consists of one part mold(look at pictures below). The second option(that we gonna make this week) is to design a real 3D model which means a model that has some features in the three dimensions and it must consist of two parts mold(look at pictures below). After designing the mold either if it is 2.5D(one part) or 3D(two parts), we will mill that design on a machinable wax or chemical wood using the CNC milling machine.

- Make the negative with silicon rubber
Now we have the design milled on the machinable wax or chemical wood, we need to make the mold! Which means shaping a liquid material to have the same shape as the desired model. We do this by pouring the silicon rubber after mixing it with the hardener and leave it inside the mold some time(depends on silicon rubber and hardener brand)to adopt its shape. That’s making the mold!
- Casting the model with Epoxy
Casting means pouring a liquid material into a mold. which contains a hollow cavity of the desired shape, after leaving the poured liquid inside the mold for a period of time to solidify. After your model solidifies you can take it off from the mold by ejecting or breaking it out of the mold.

Designing Thor hammer Model
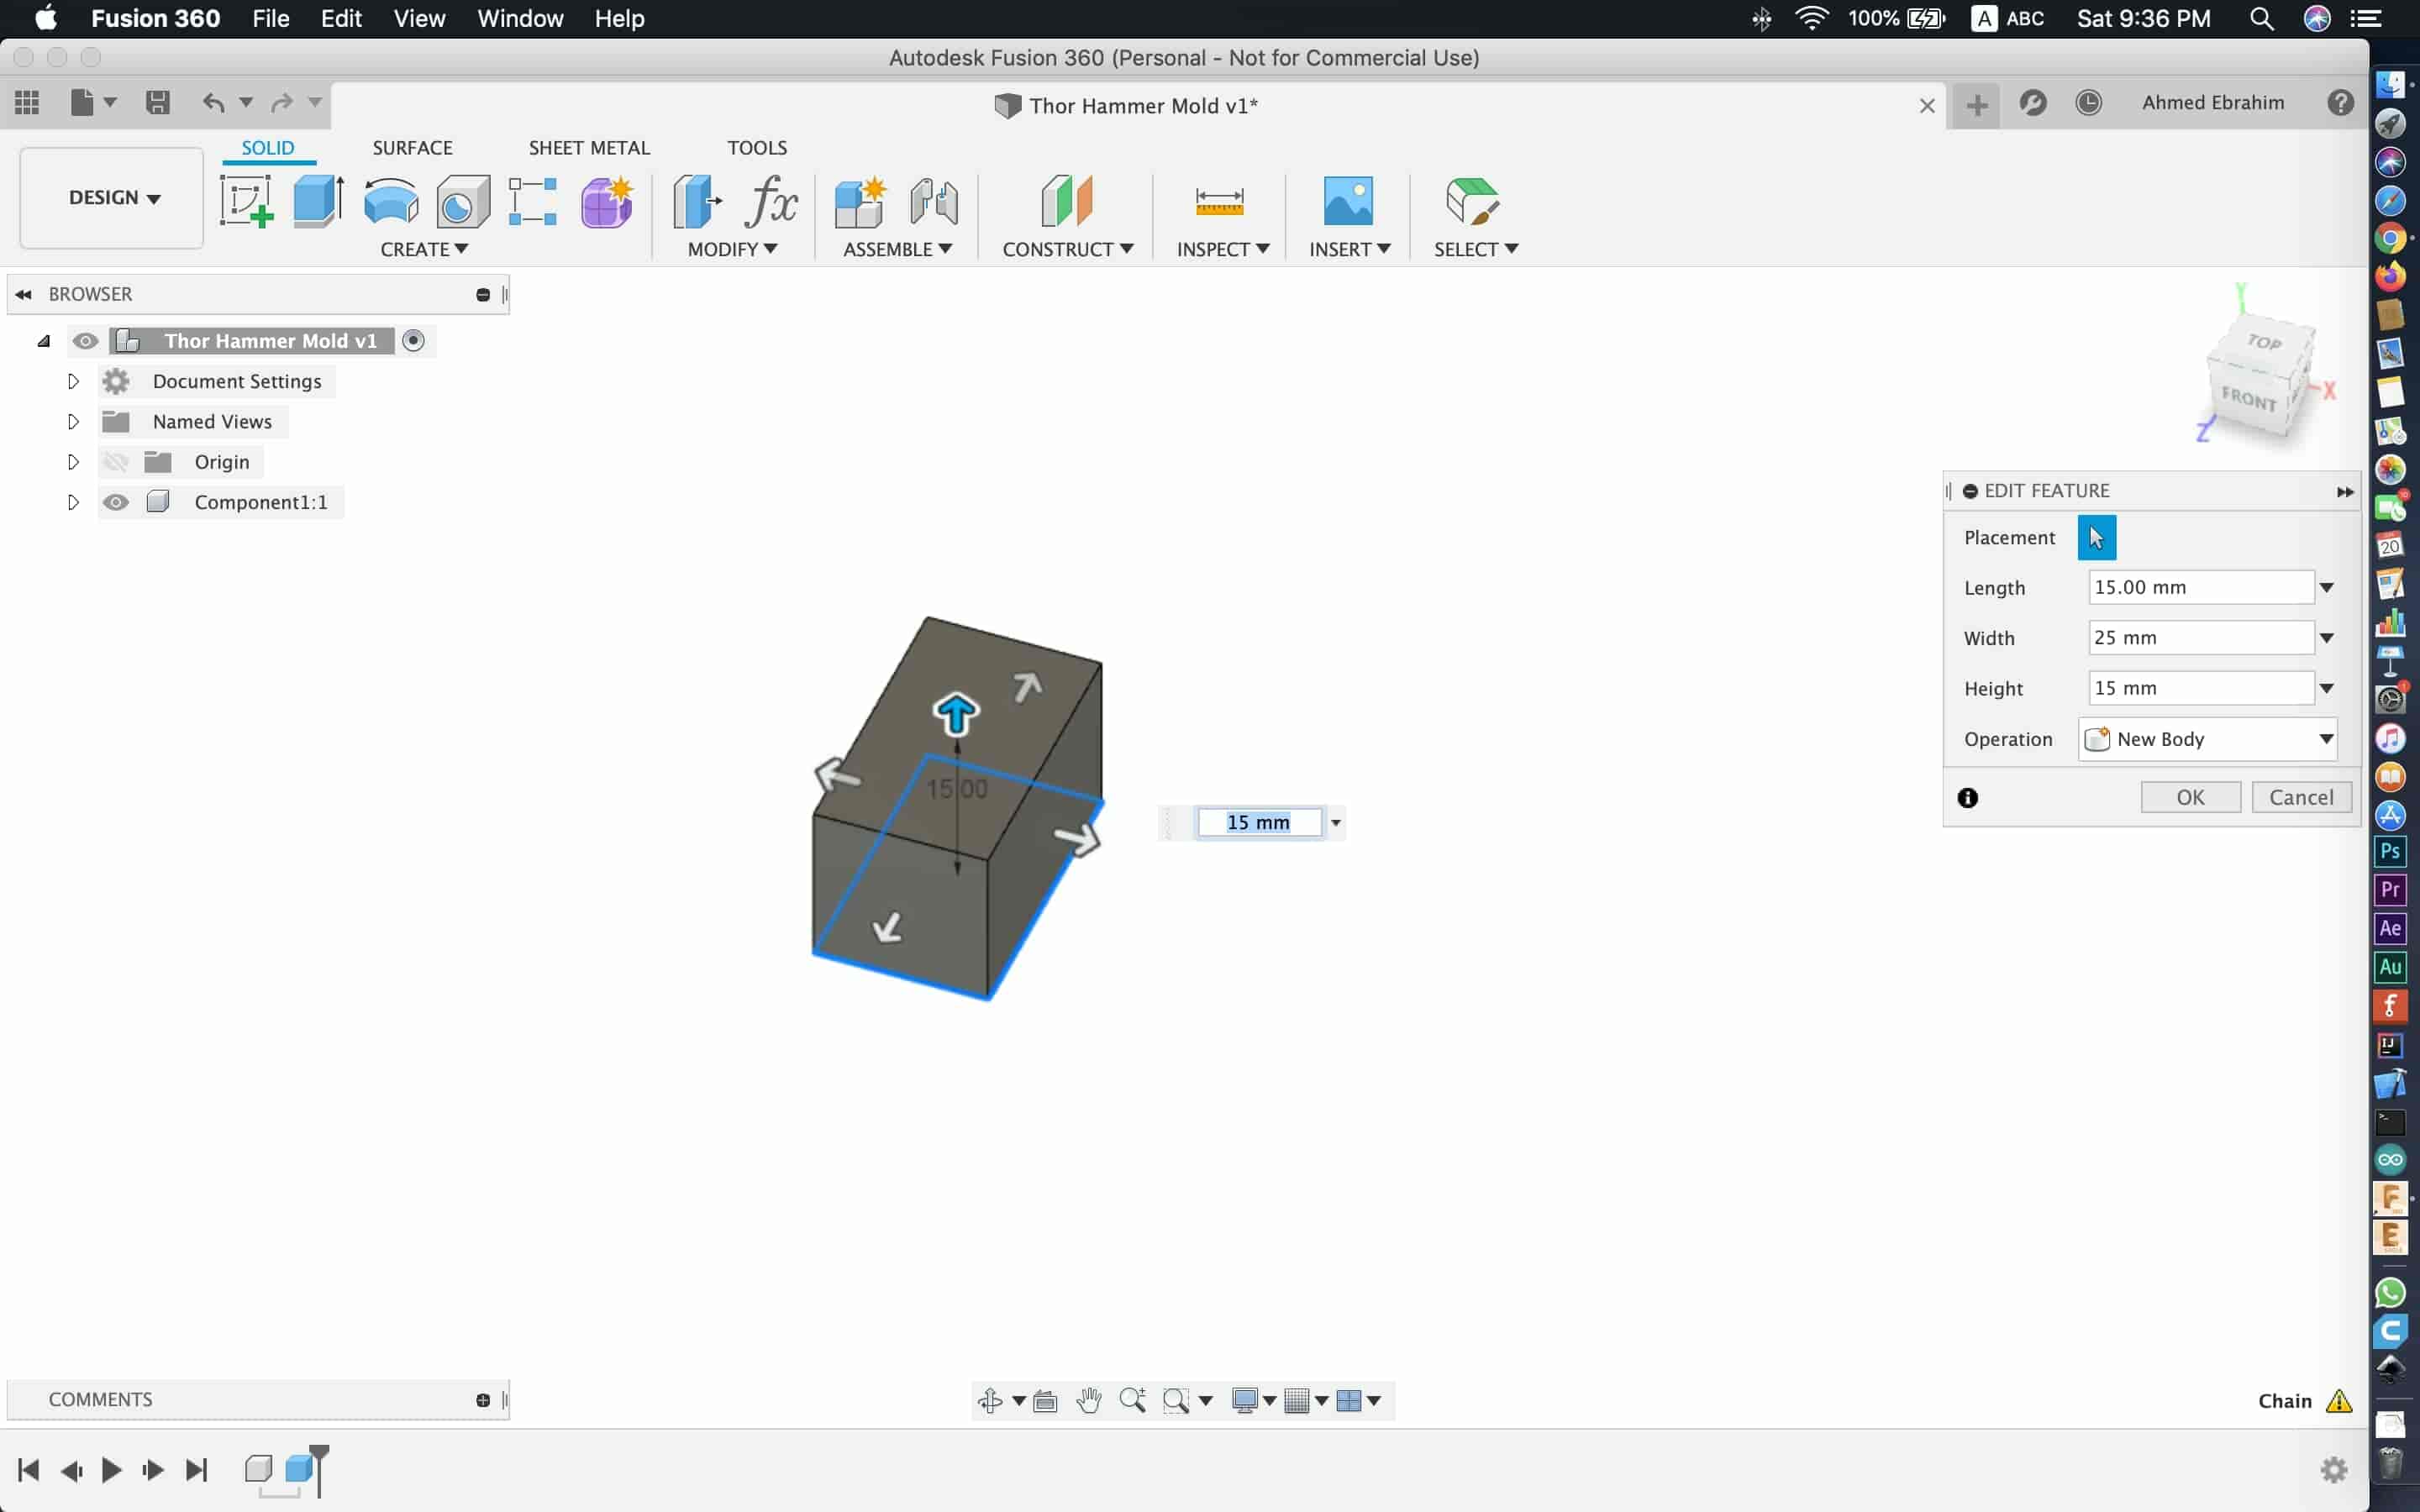
Now, we all know the big picture of how molding and casting get done and we all stand on the same ground. Let’s start designing our thor hammer model! First, we made a box with dimensions 15*25*15mm(L*W*H)
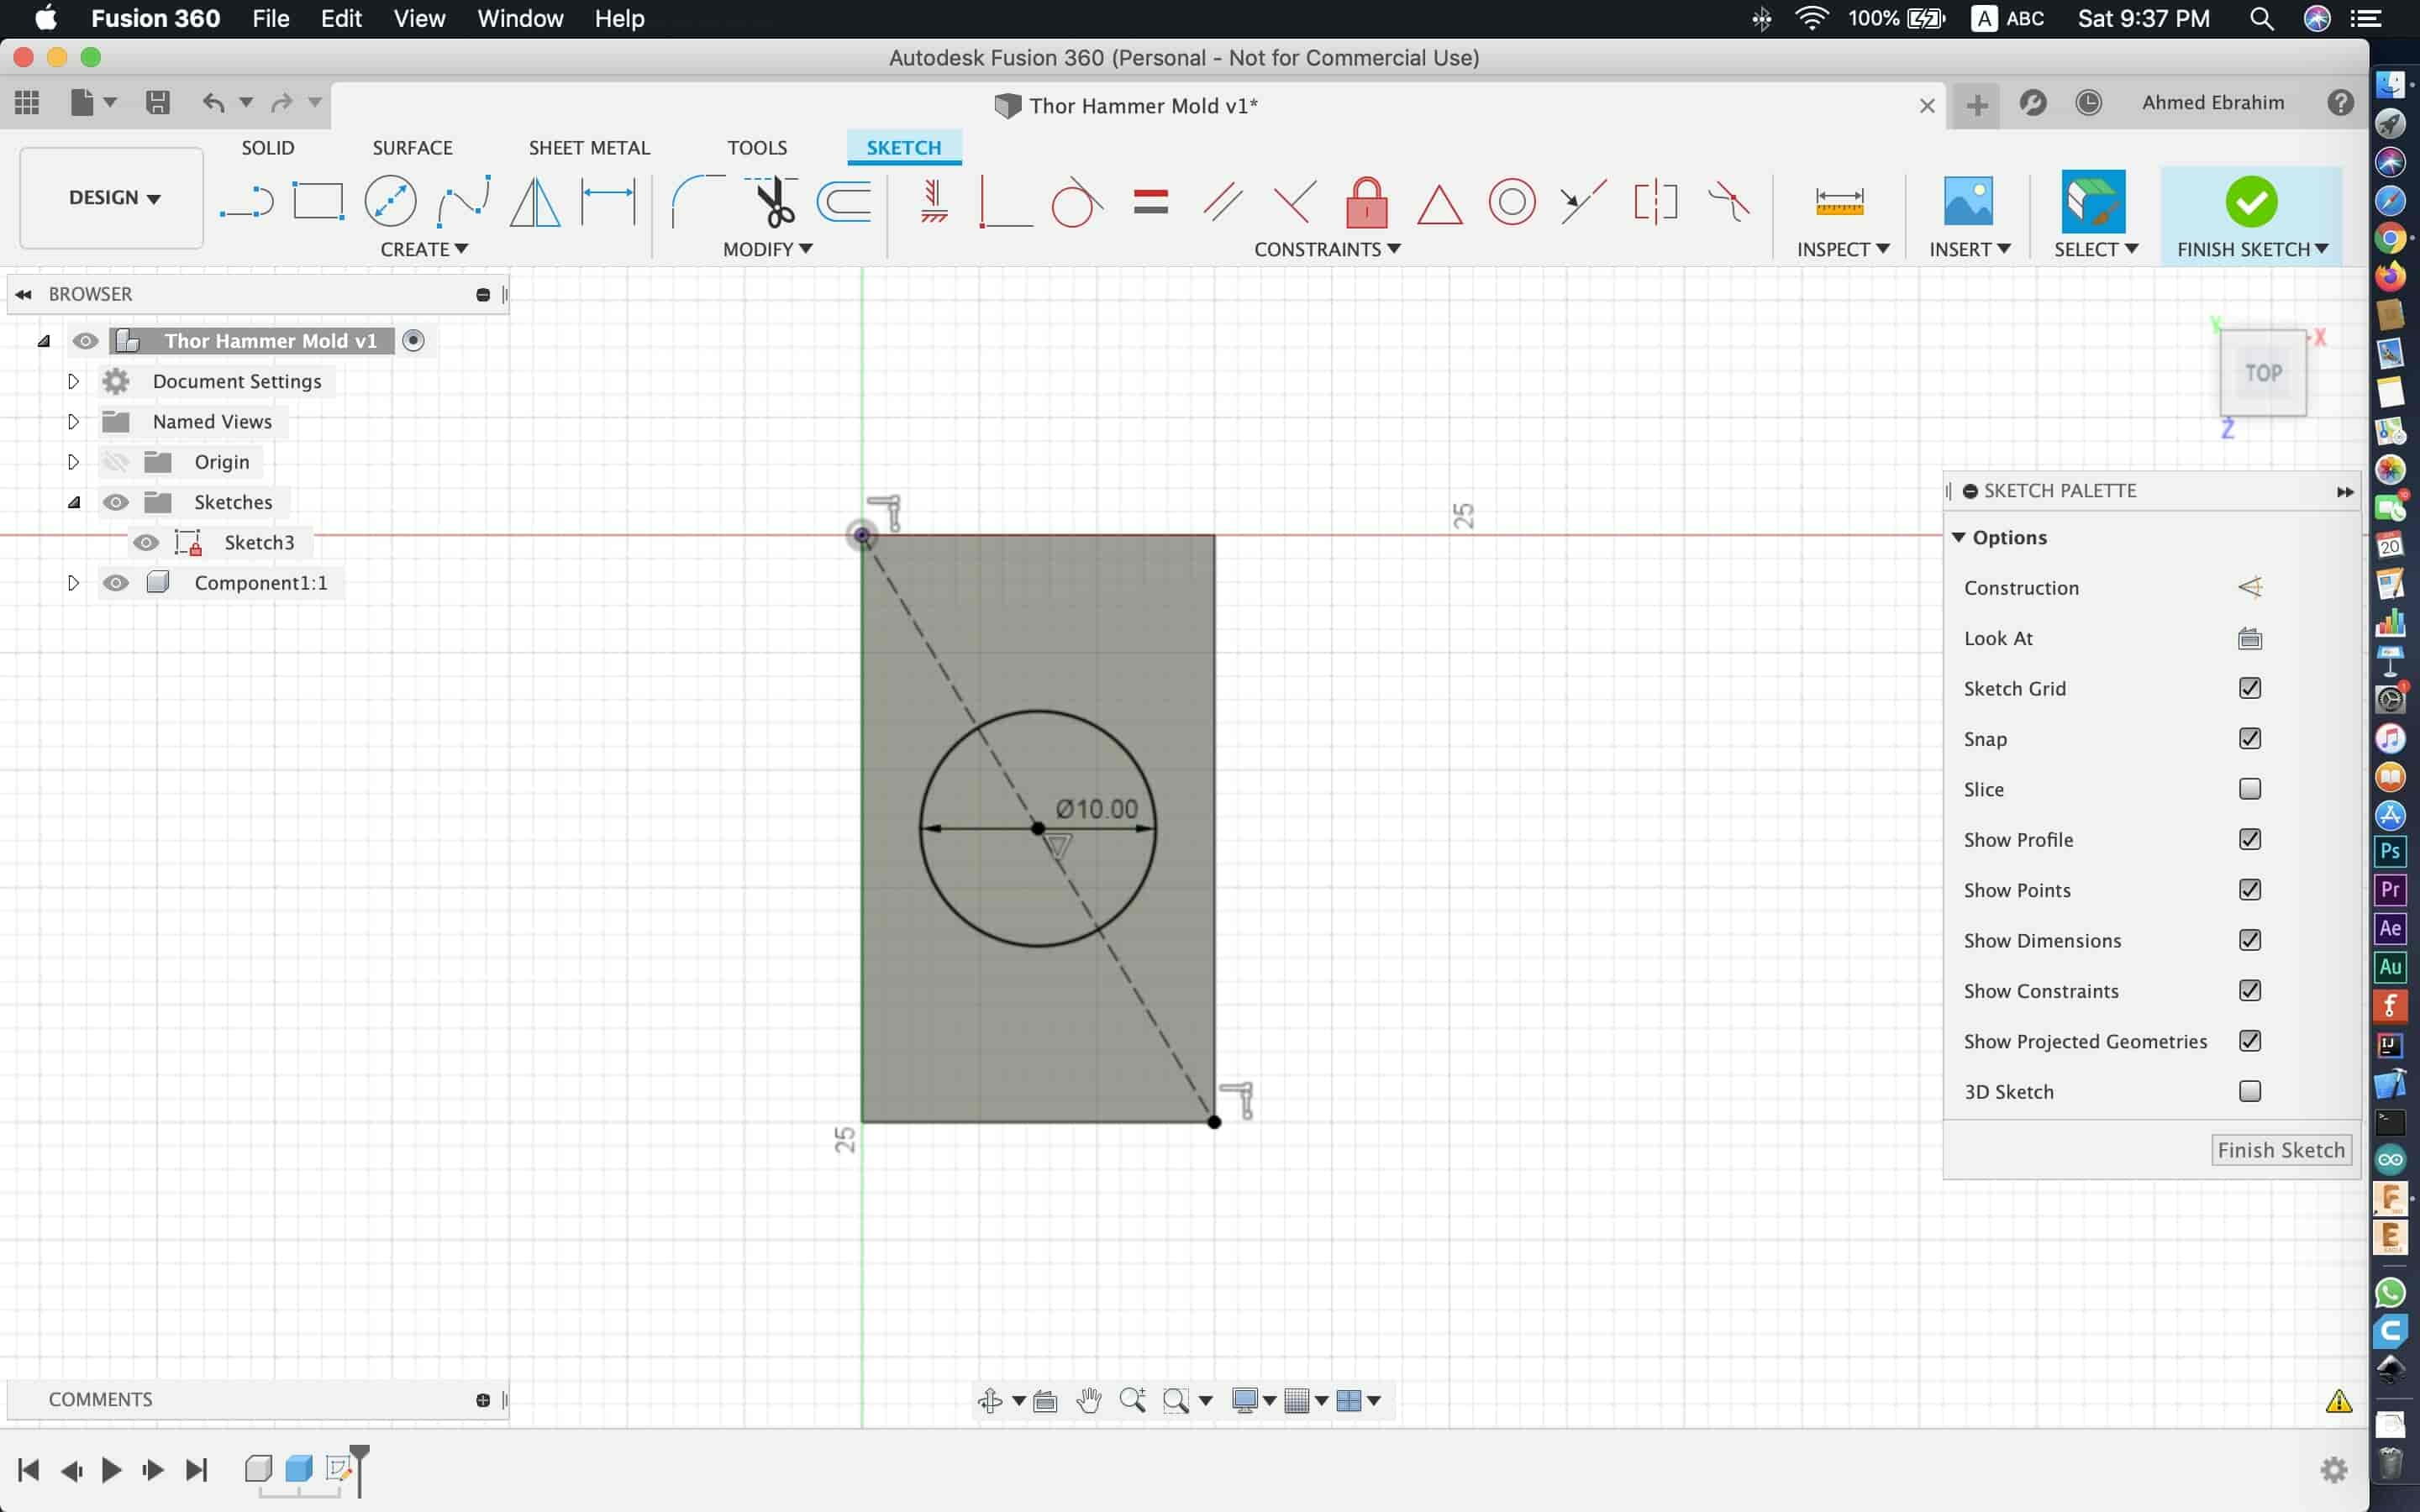
On the box top face, we drew a 10mm circle. Then, we extruded this circle with 1mm of height.

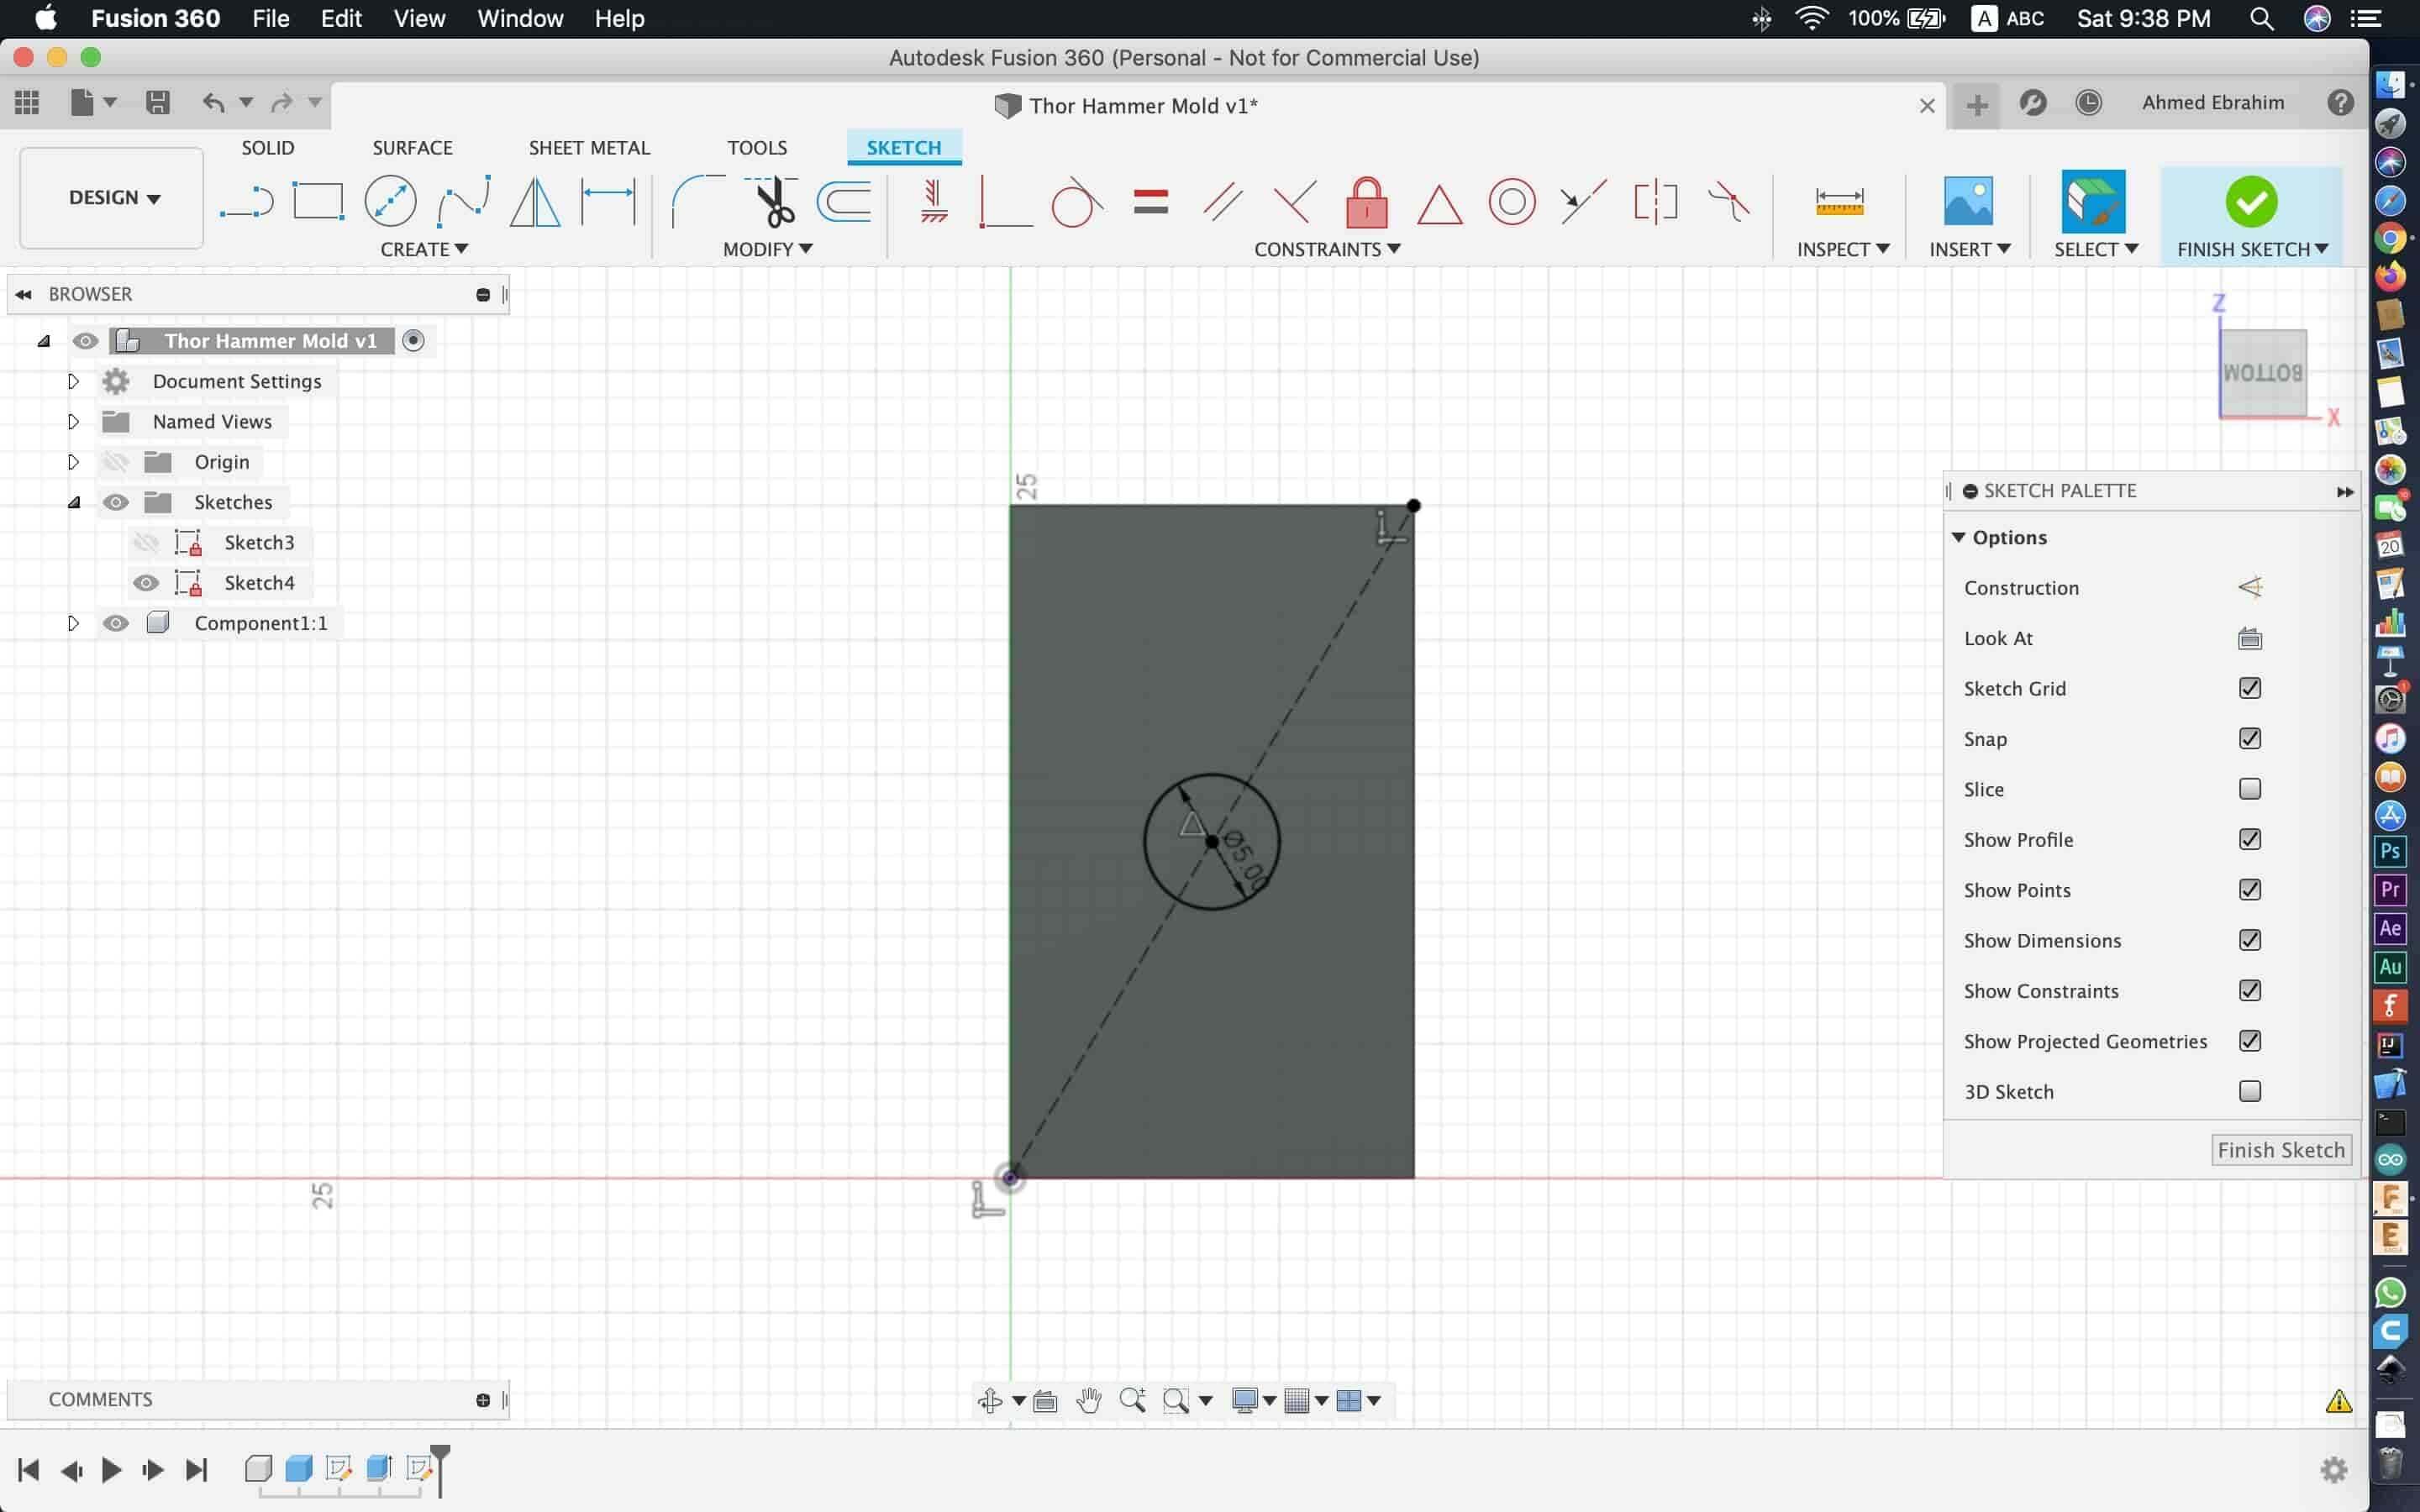
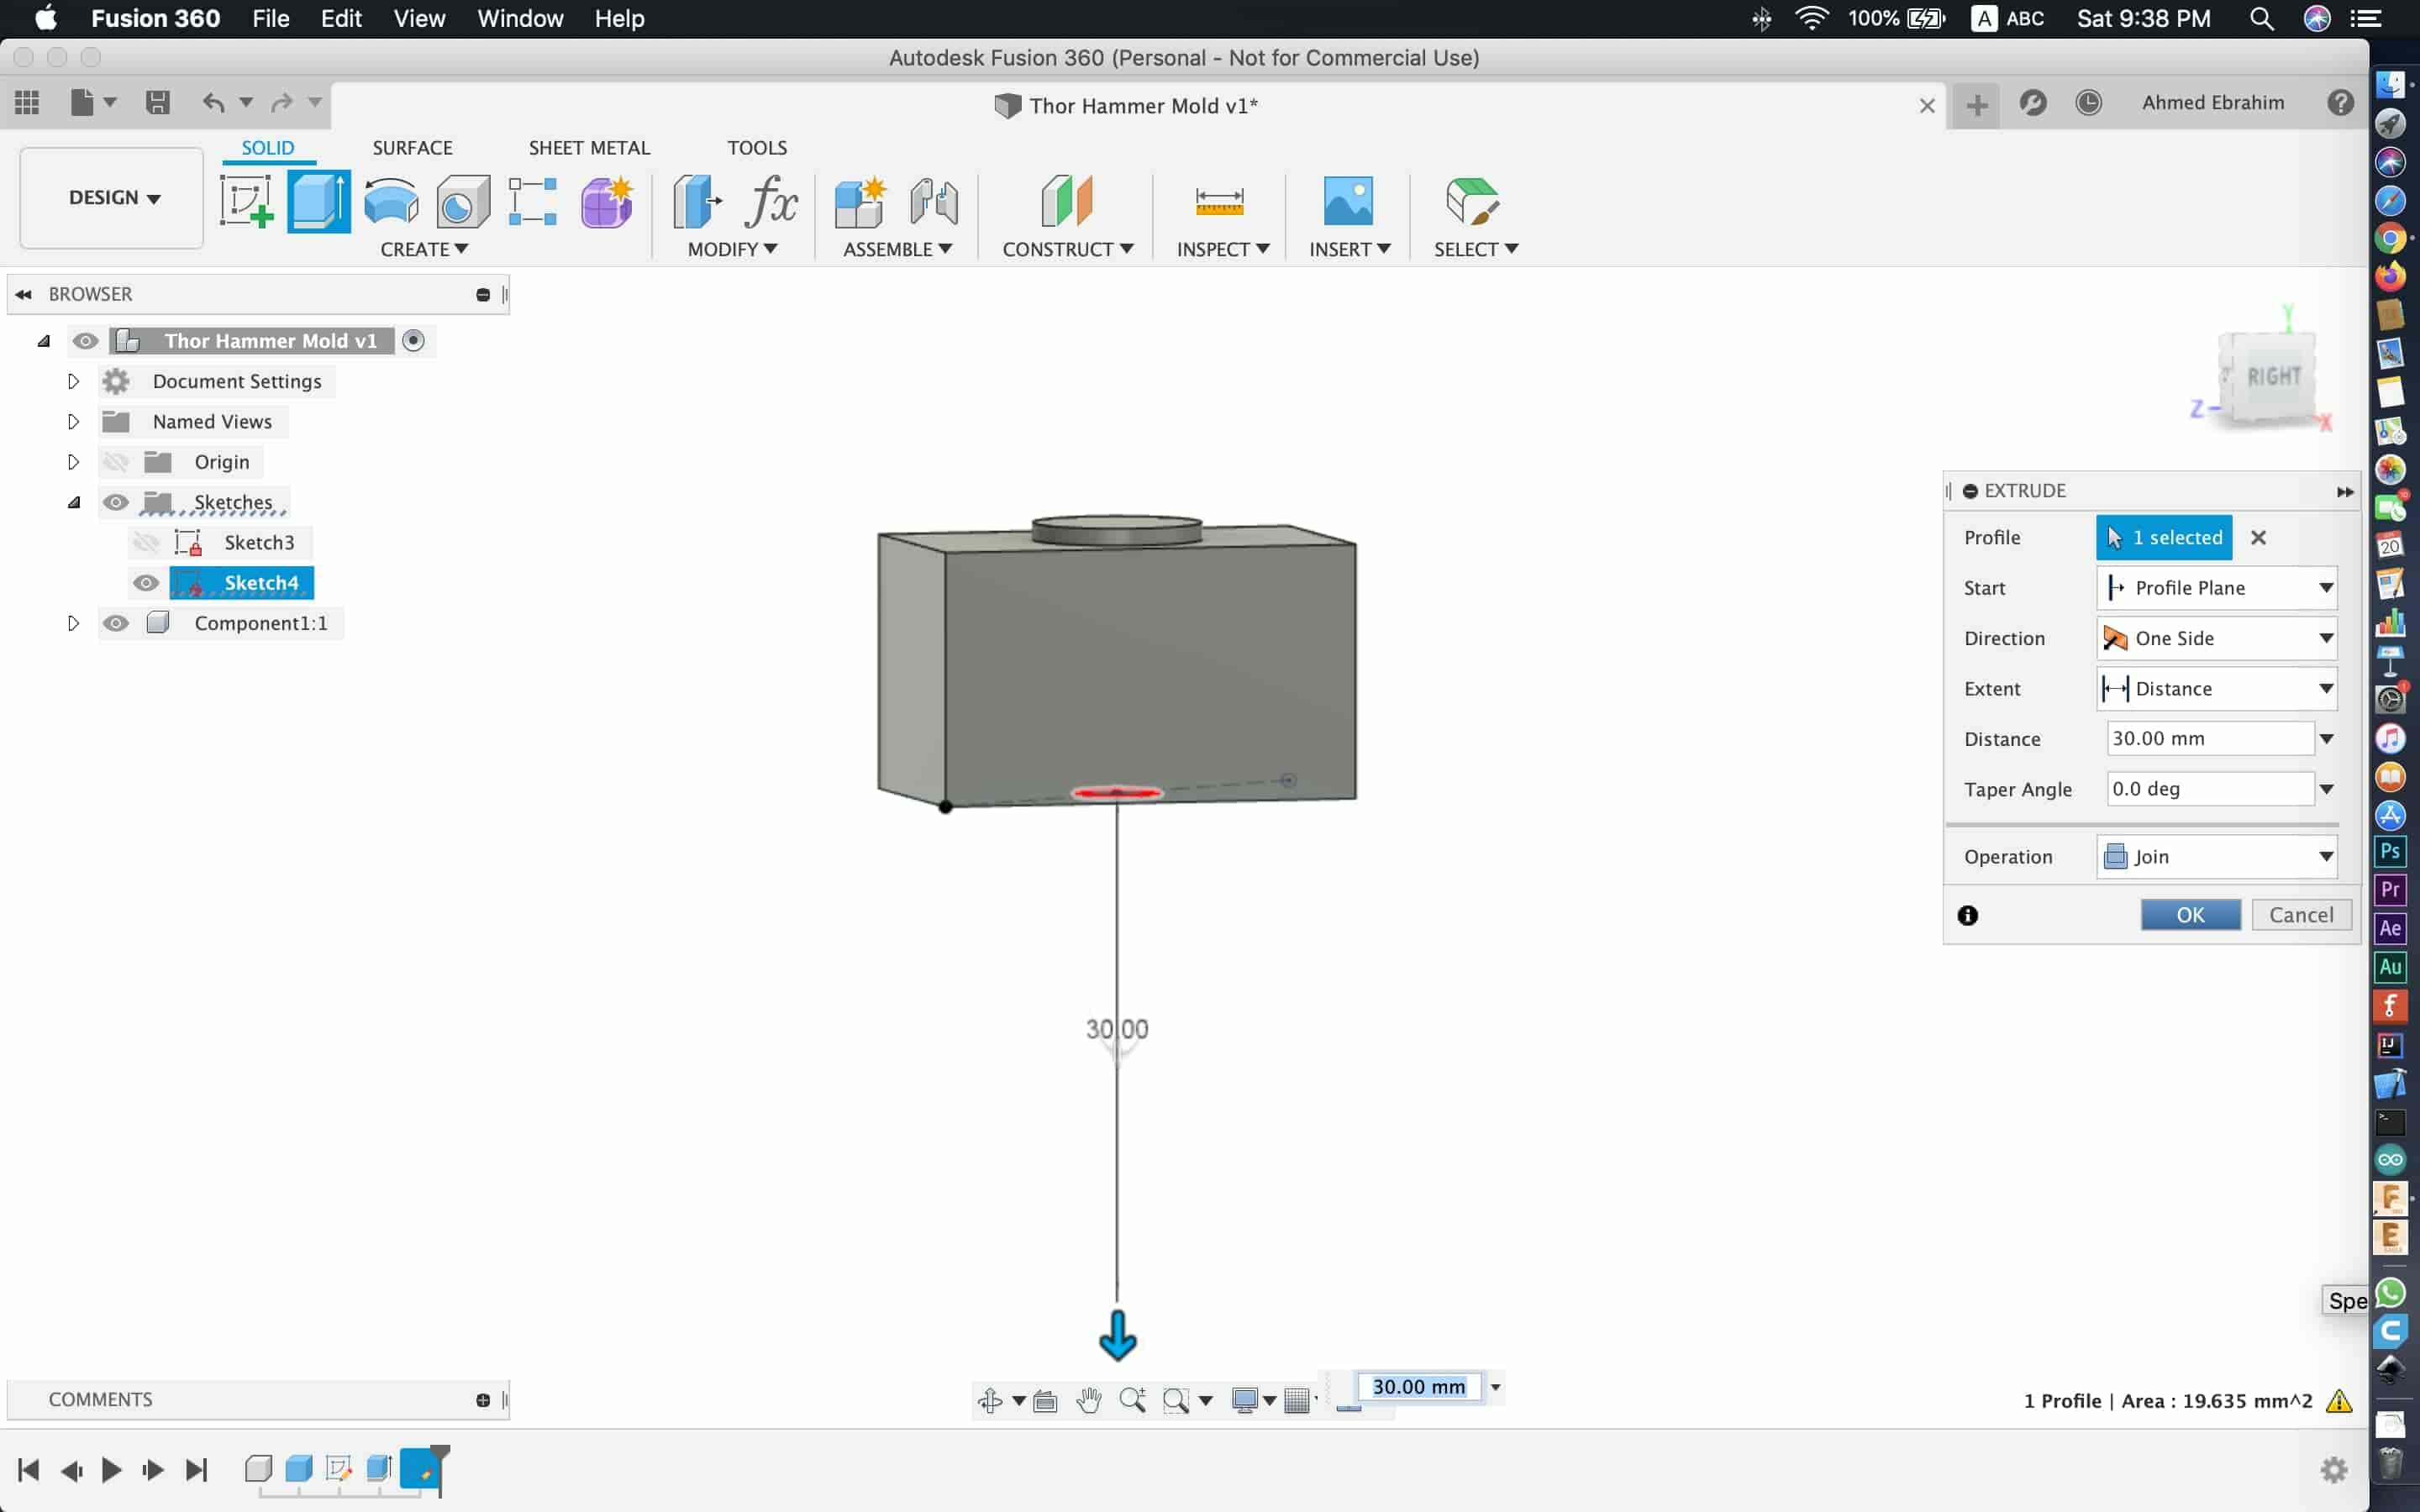
Then, We draw another circle on the box bottom face to make the handle of the hammer. And we extruded this circle with 30mm length and we joined the handle and the box together.
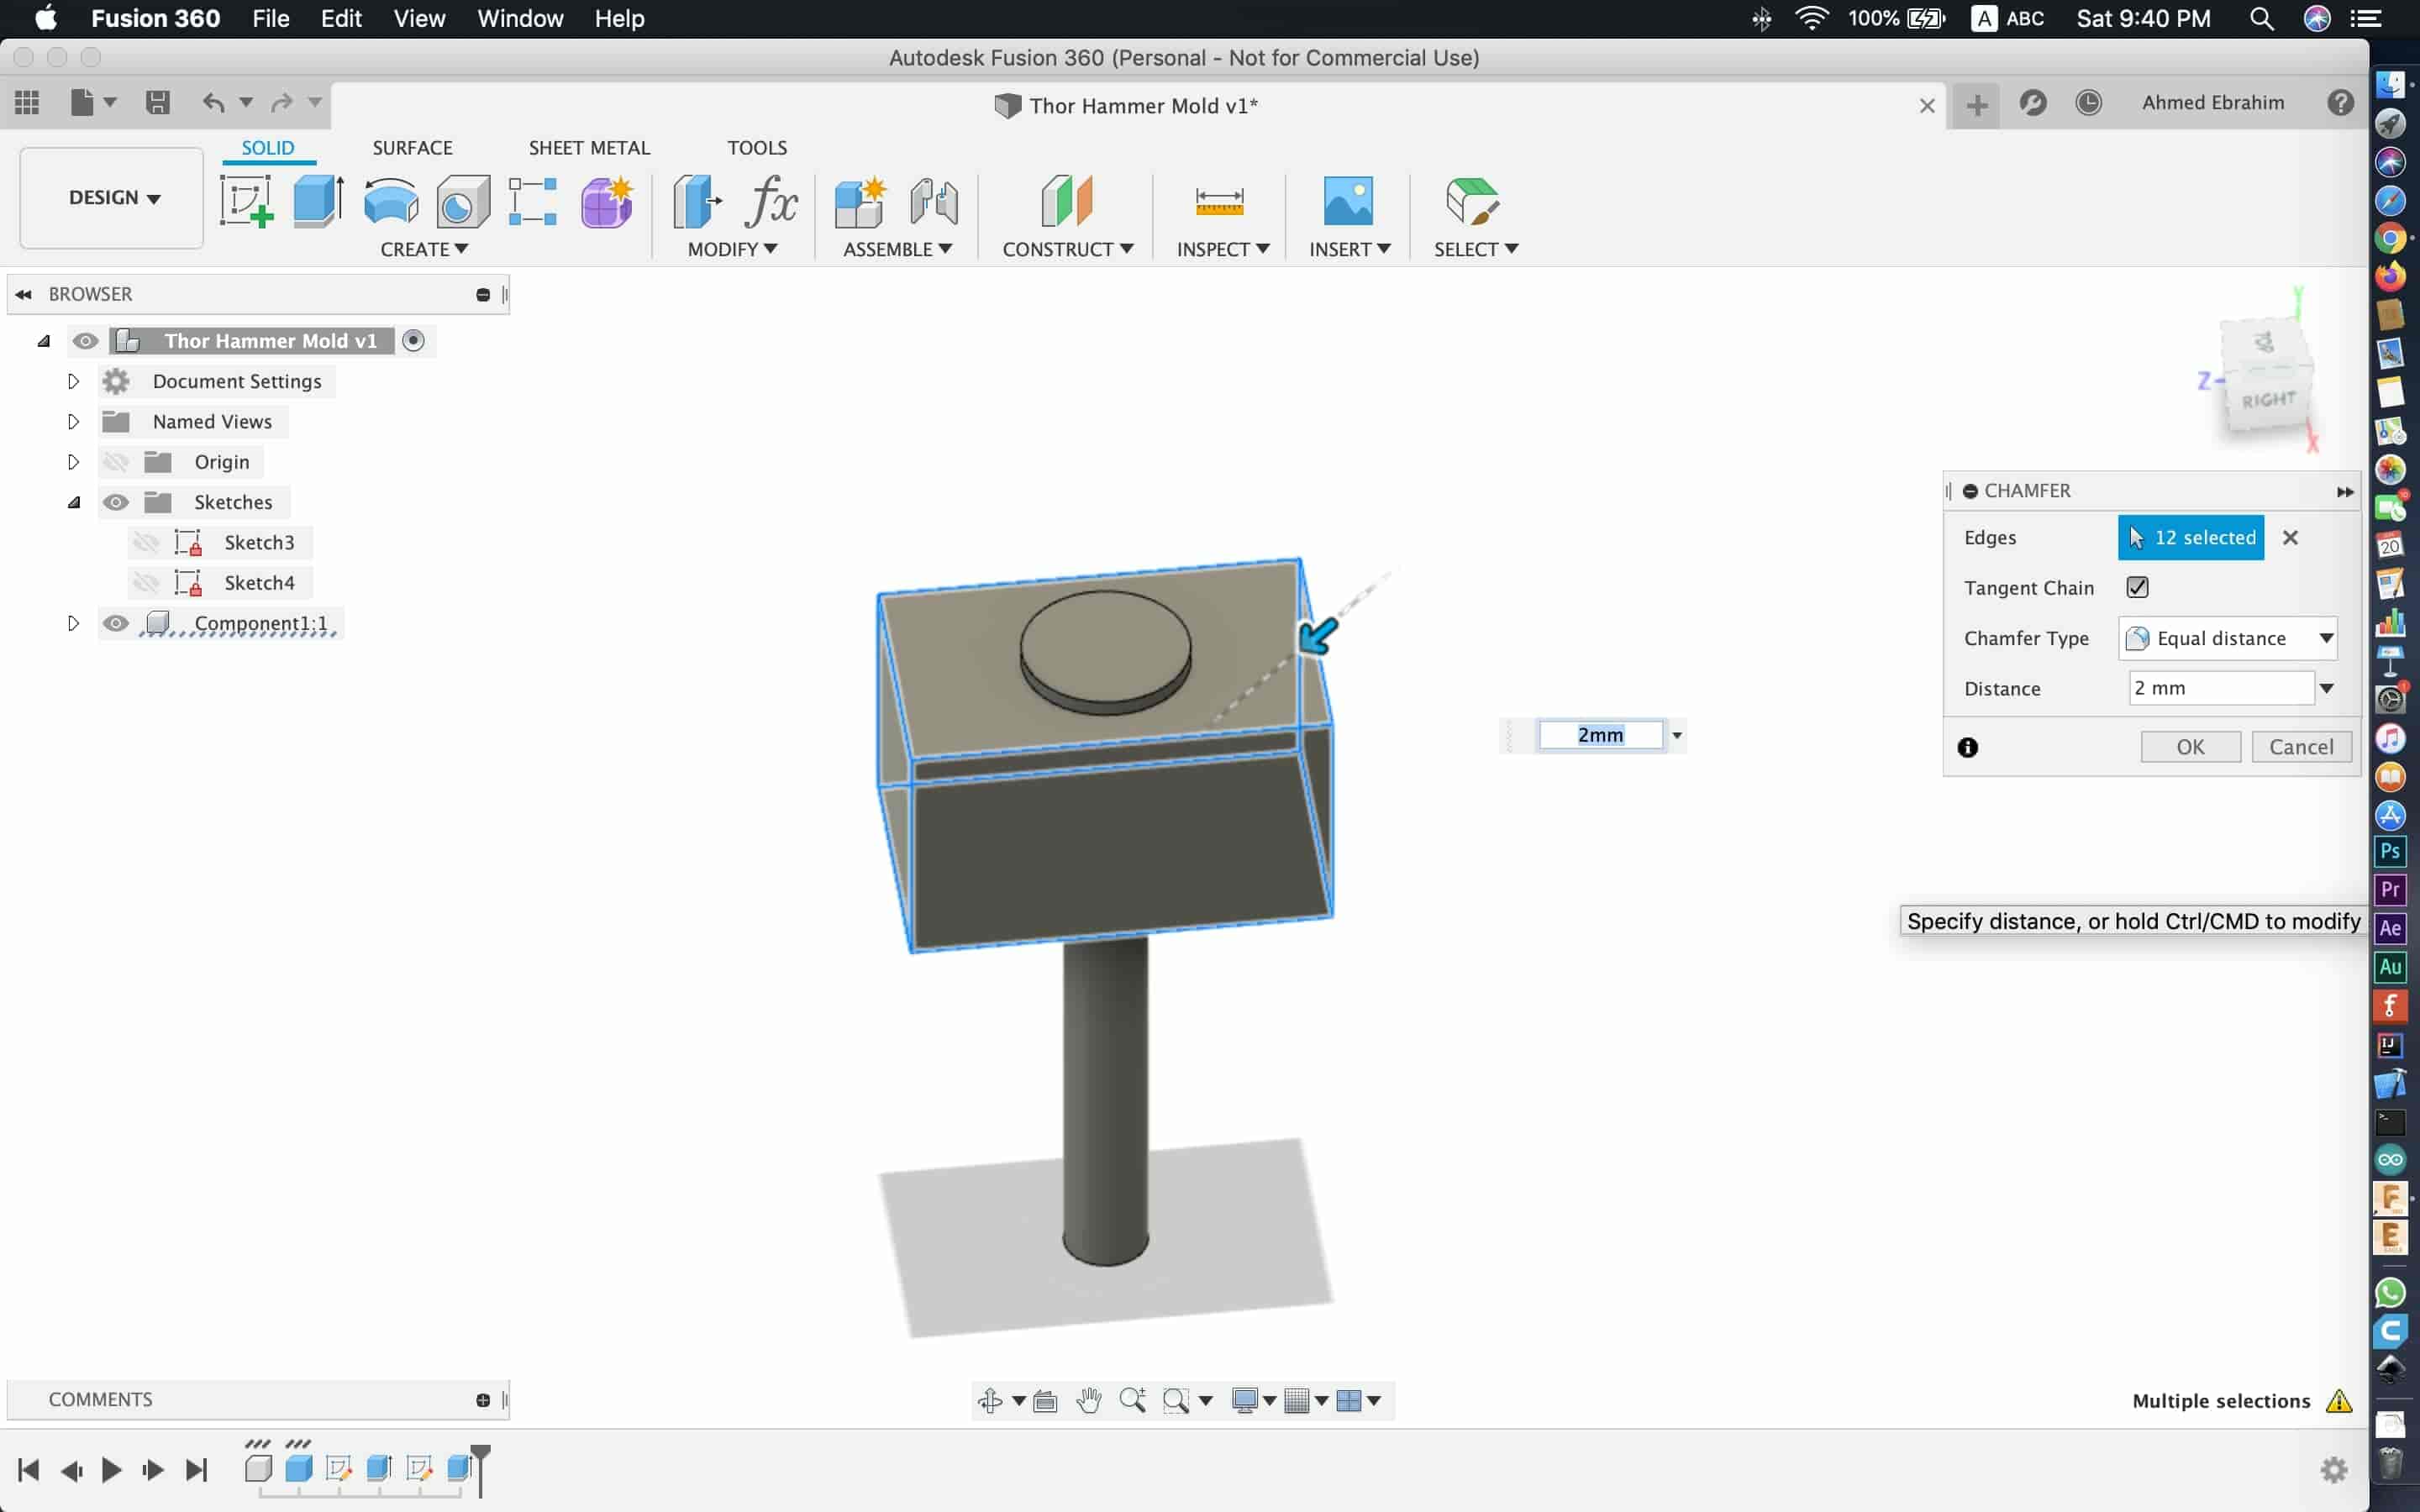
On the box edges, we made a chamfer to remove all these sharp edges and make the box looks nicer.
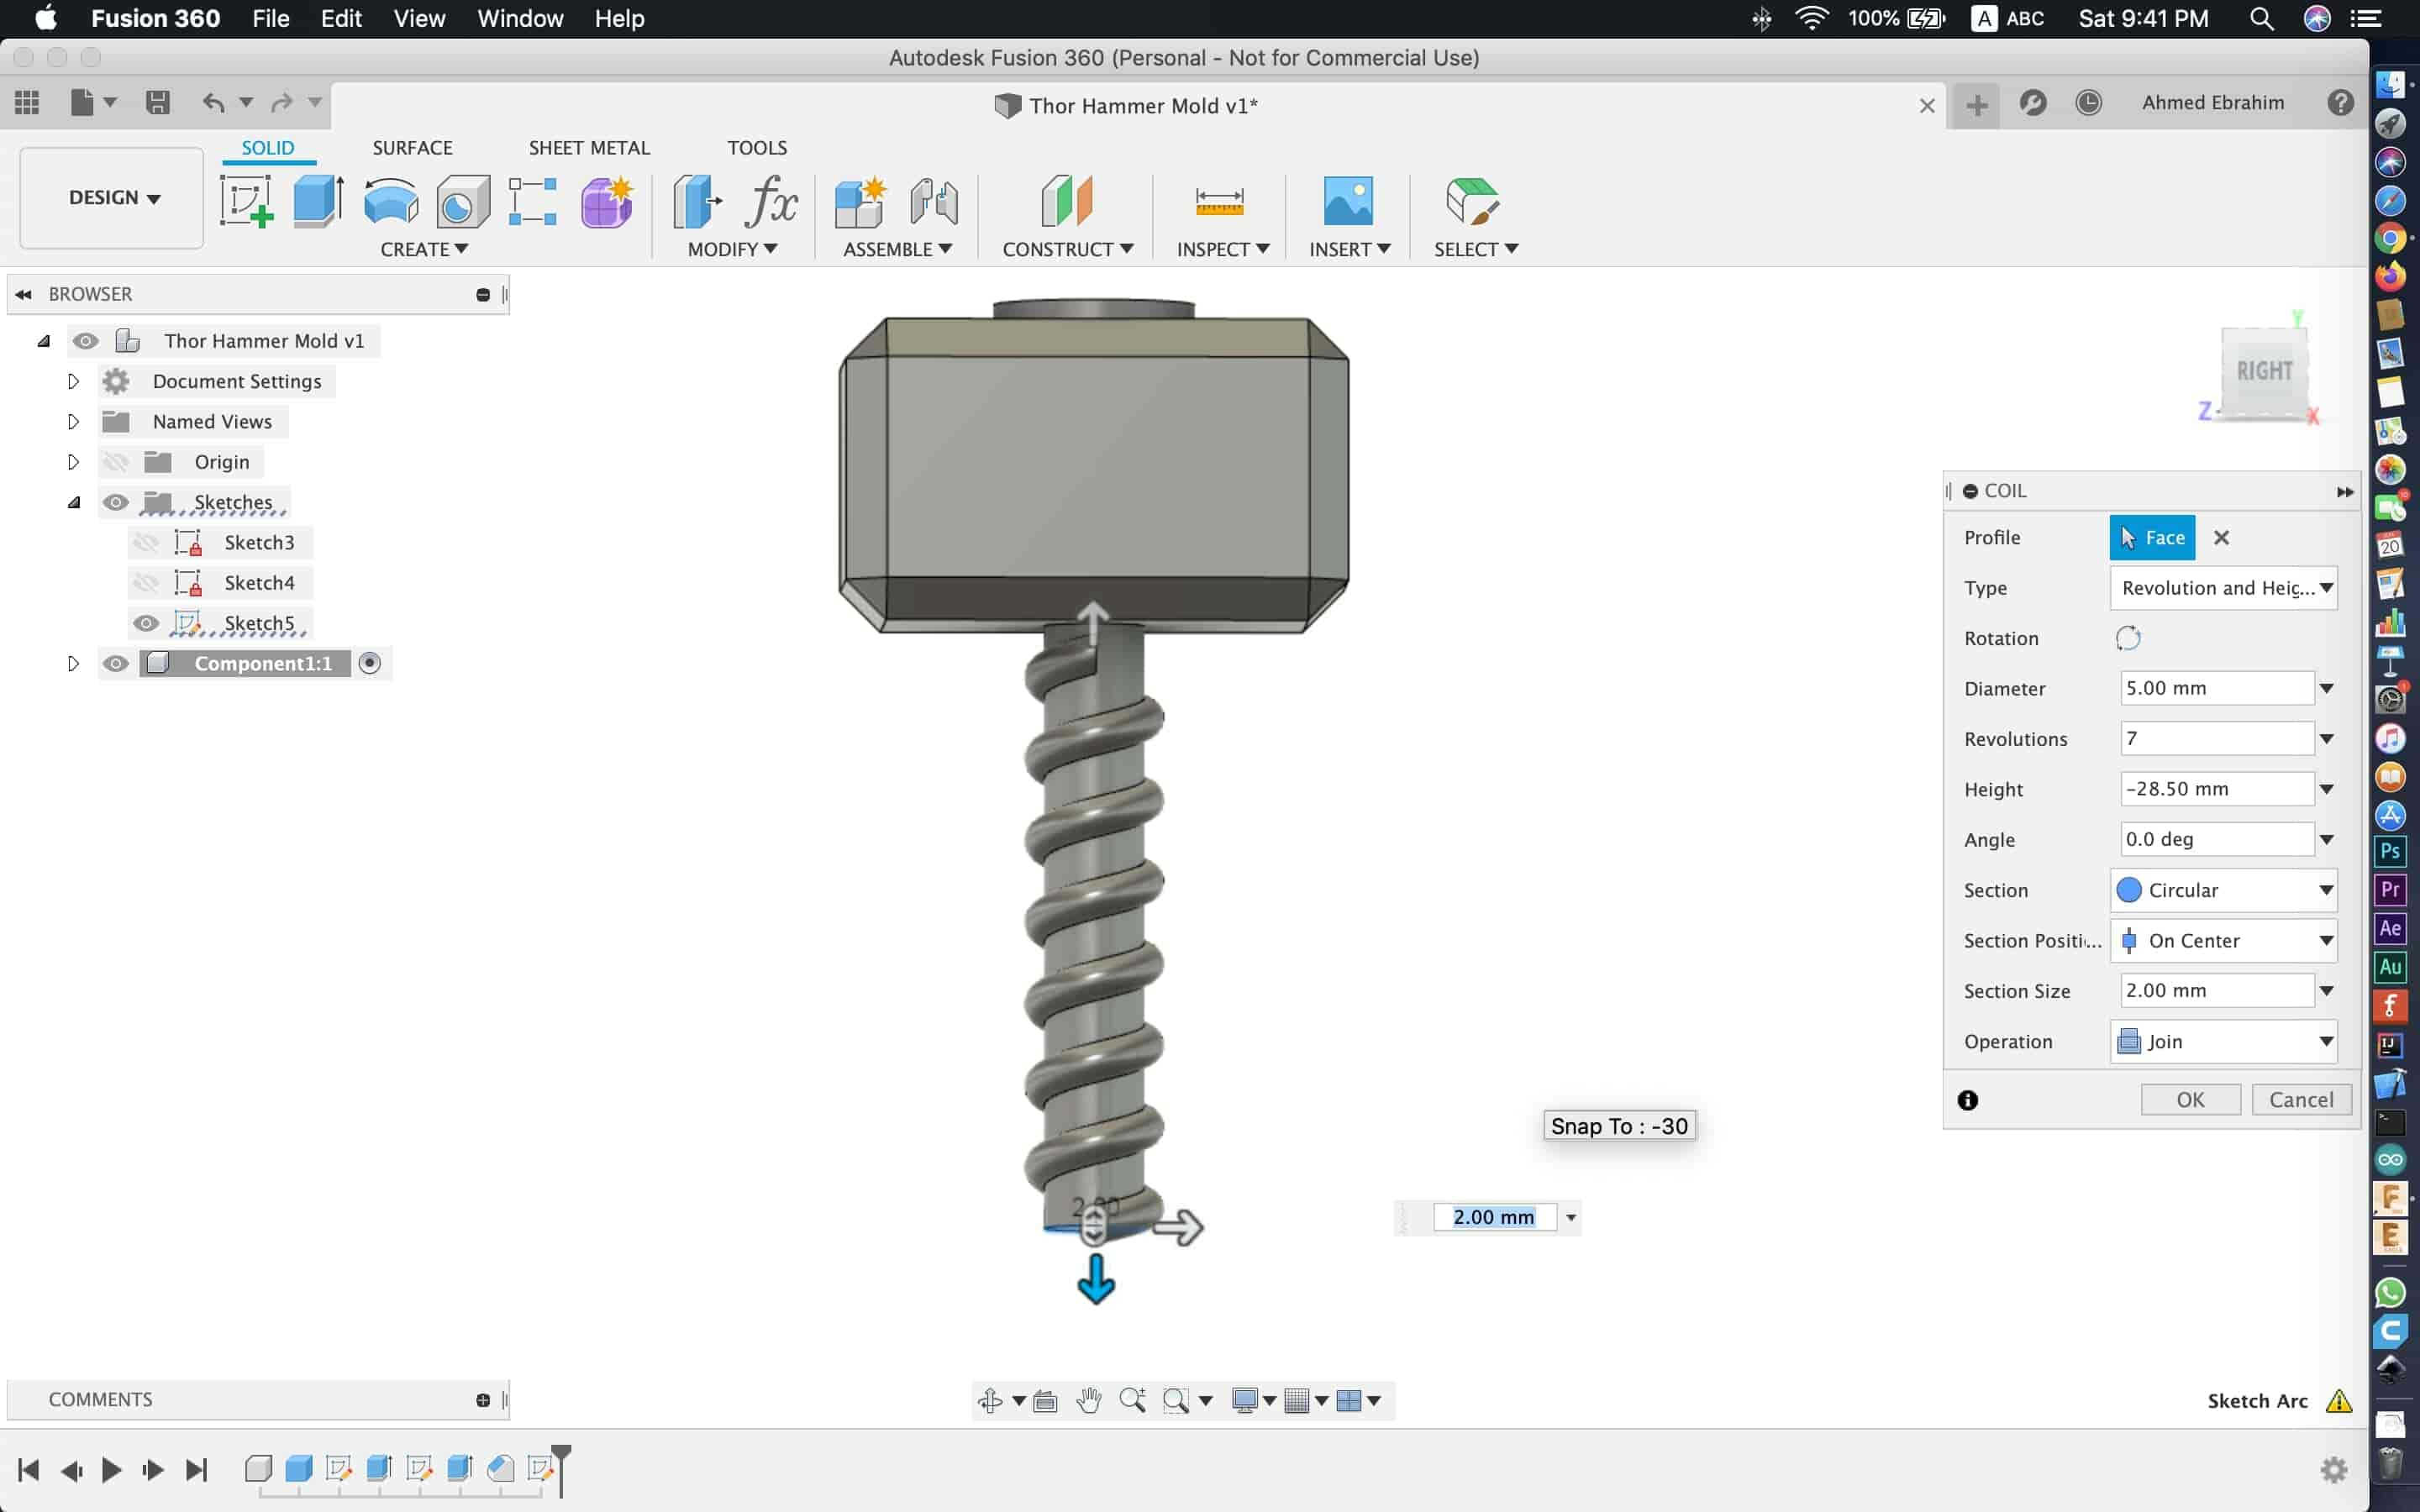
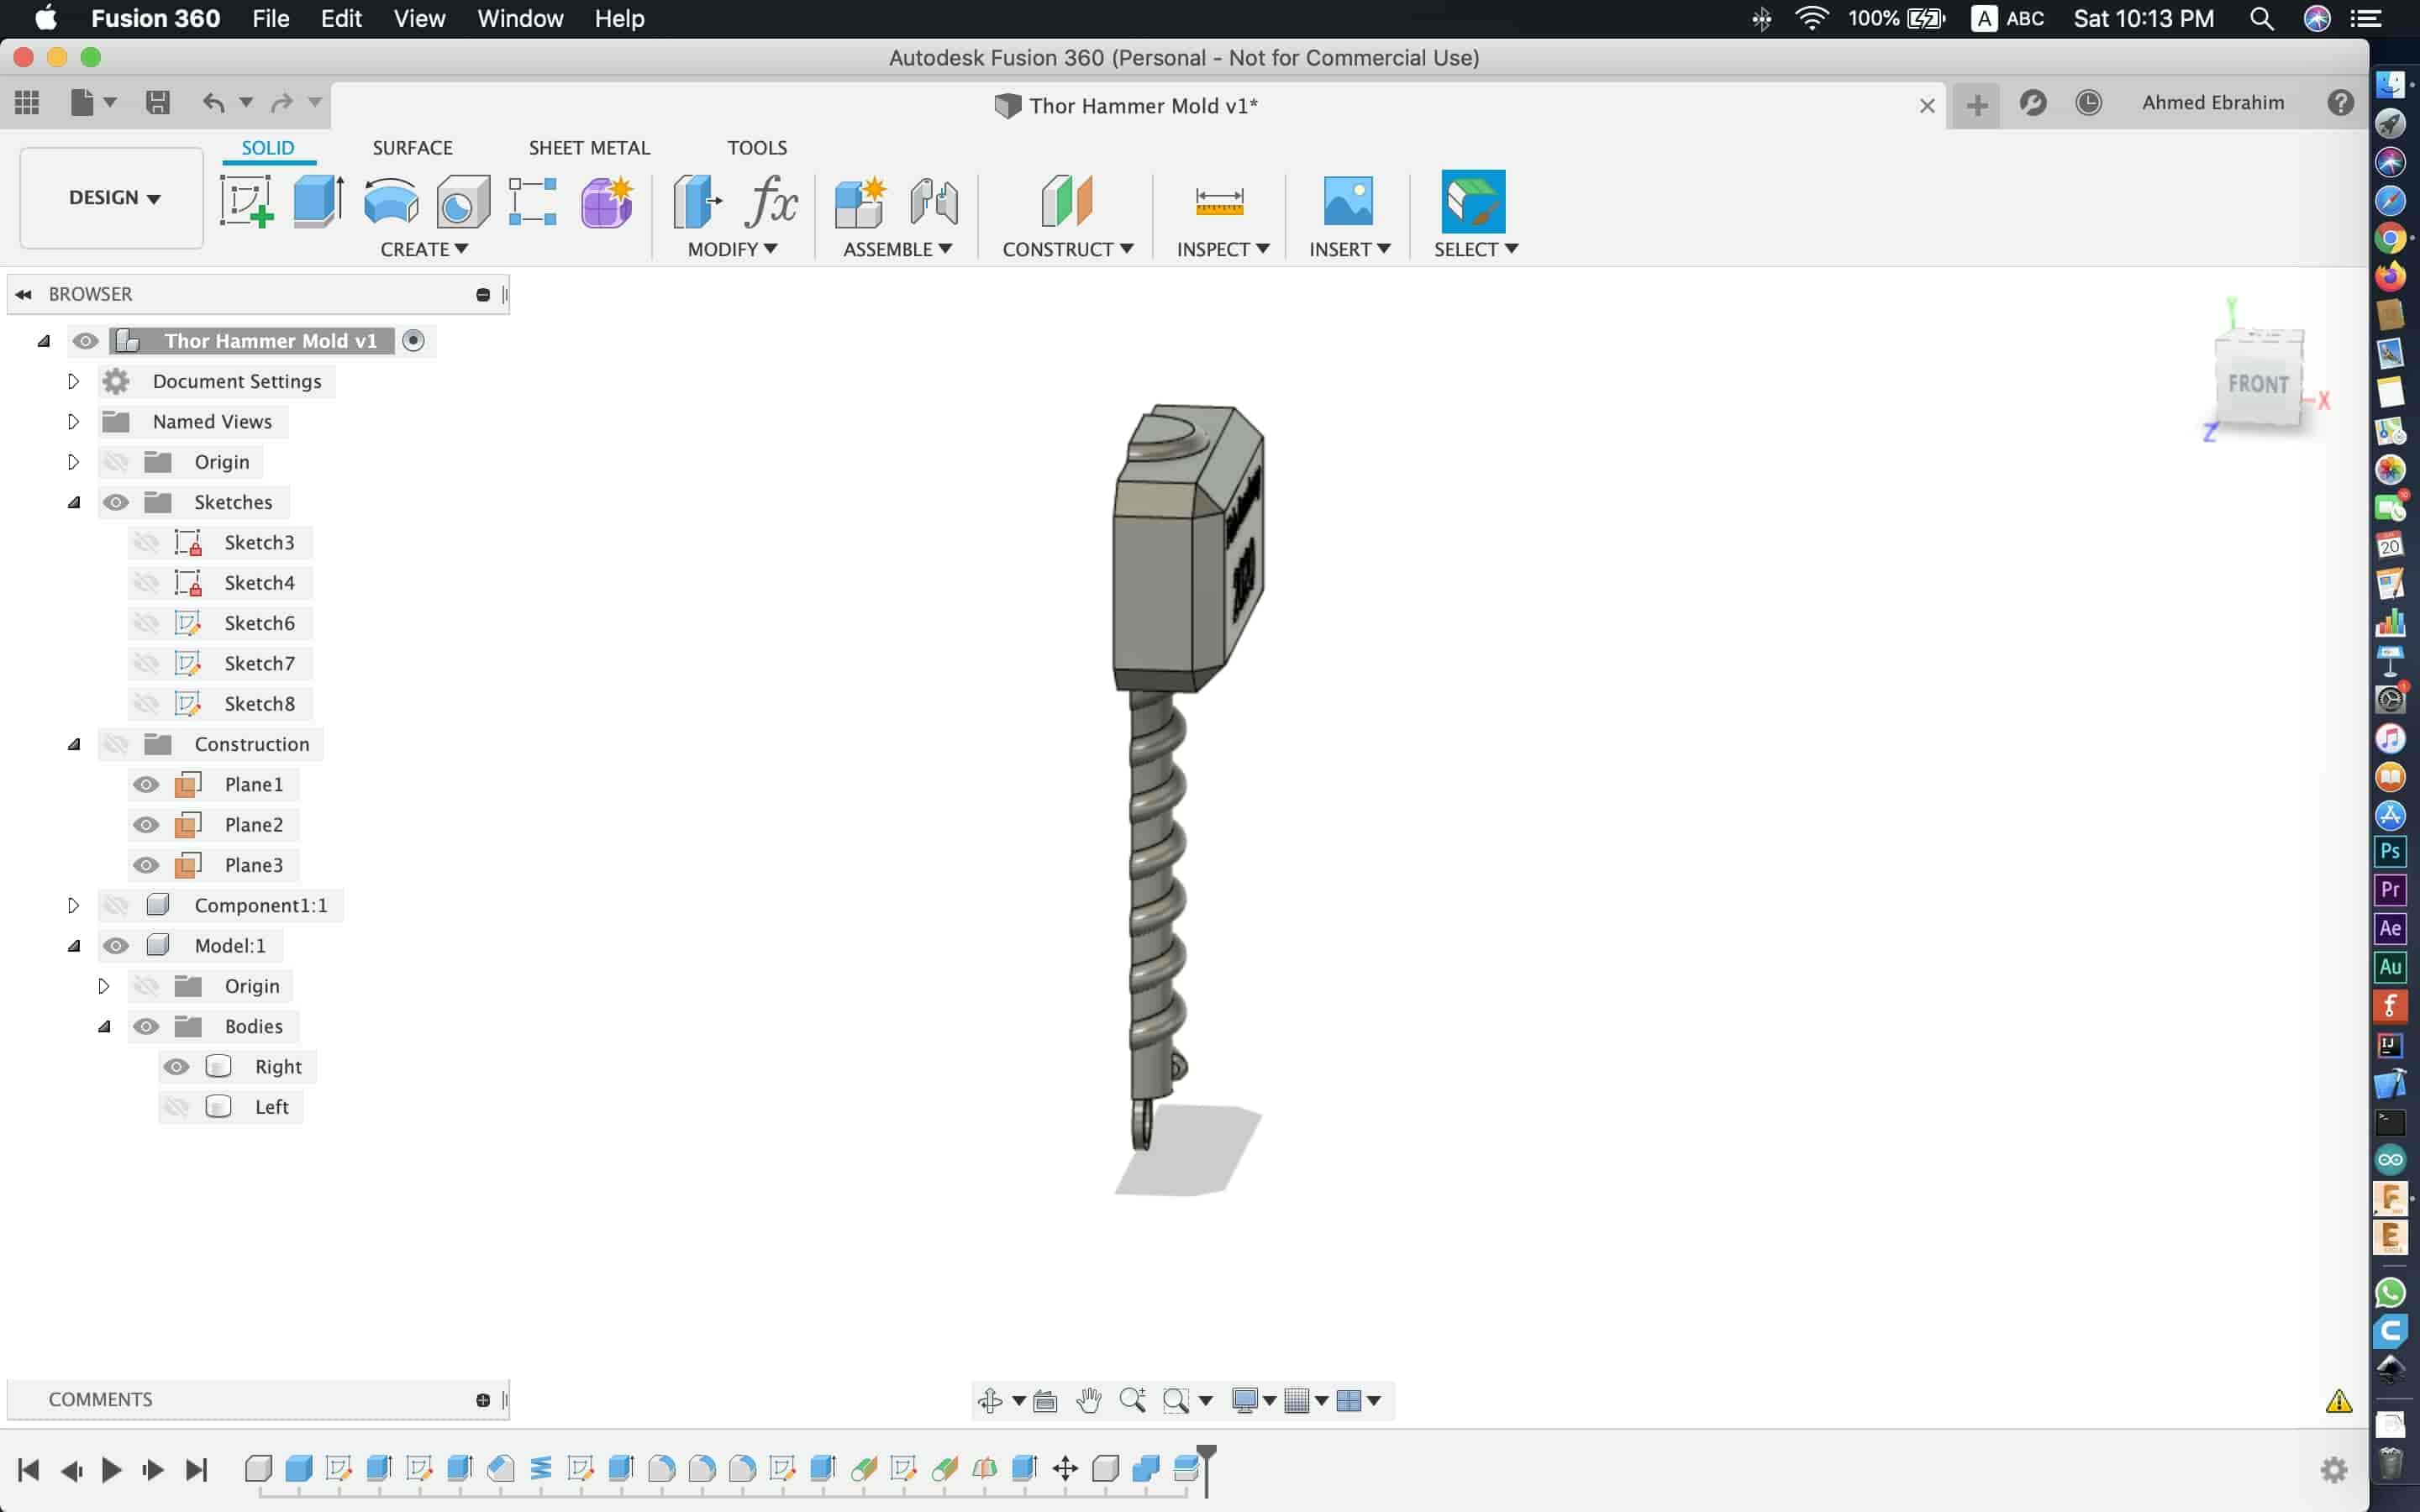
I made a coil on the hammer hand to make it look really like the thor hammer. But, I found a problem that the coil length is larger than the hammer hand itself, I have to fix that.
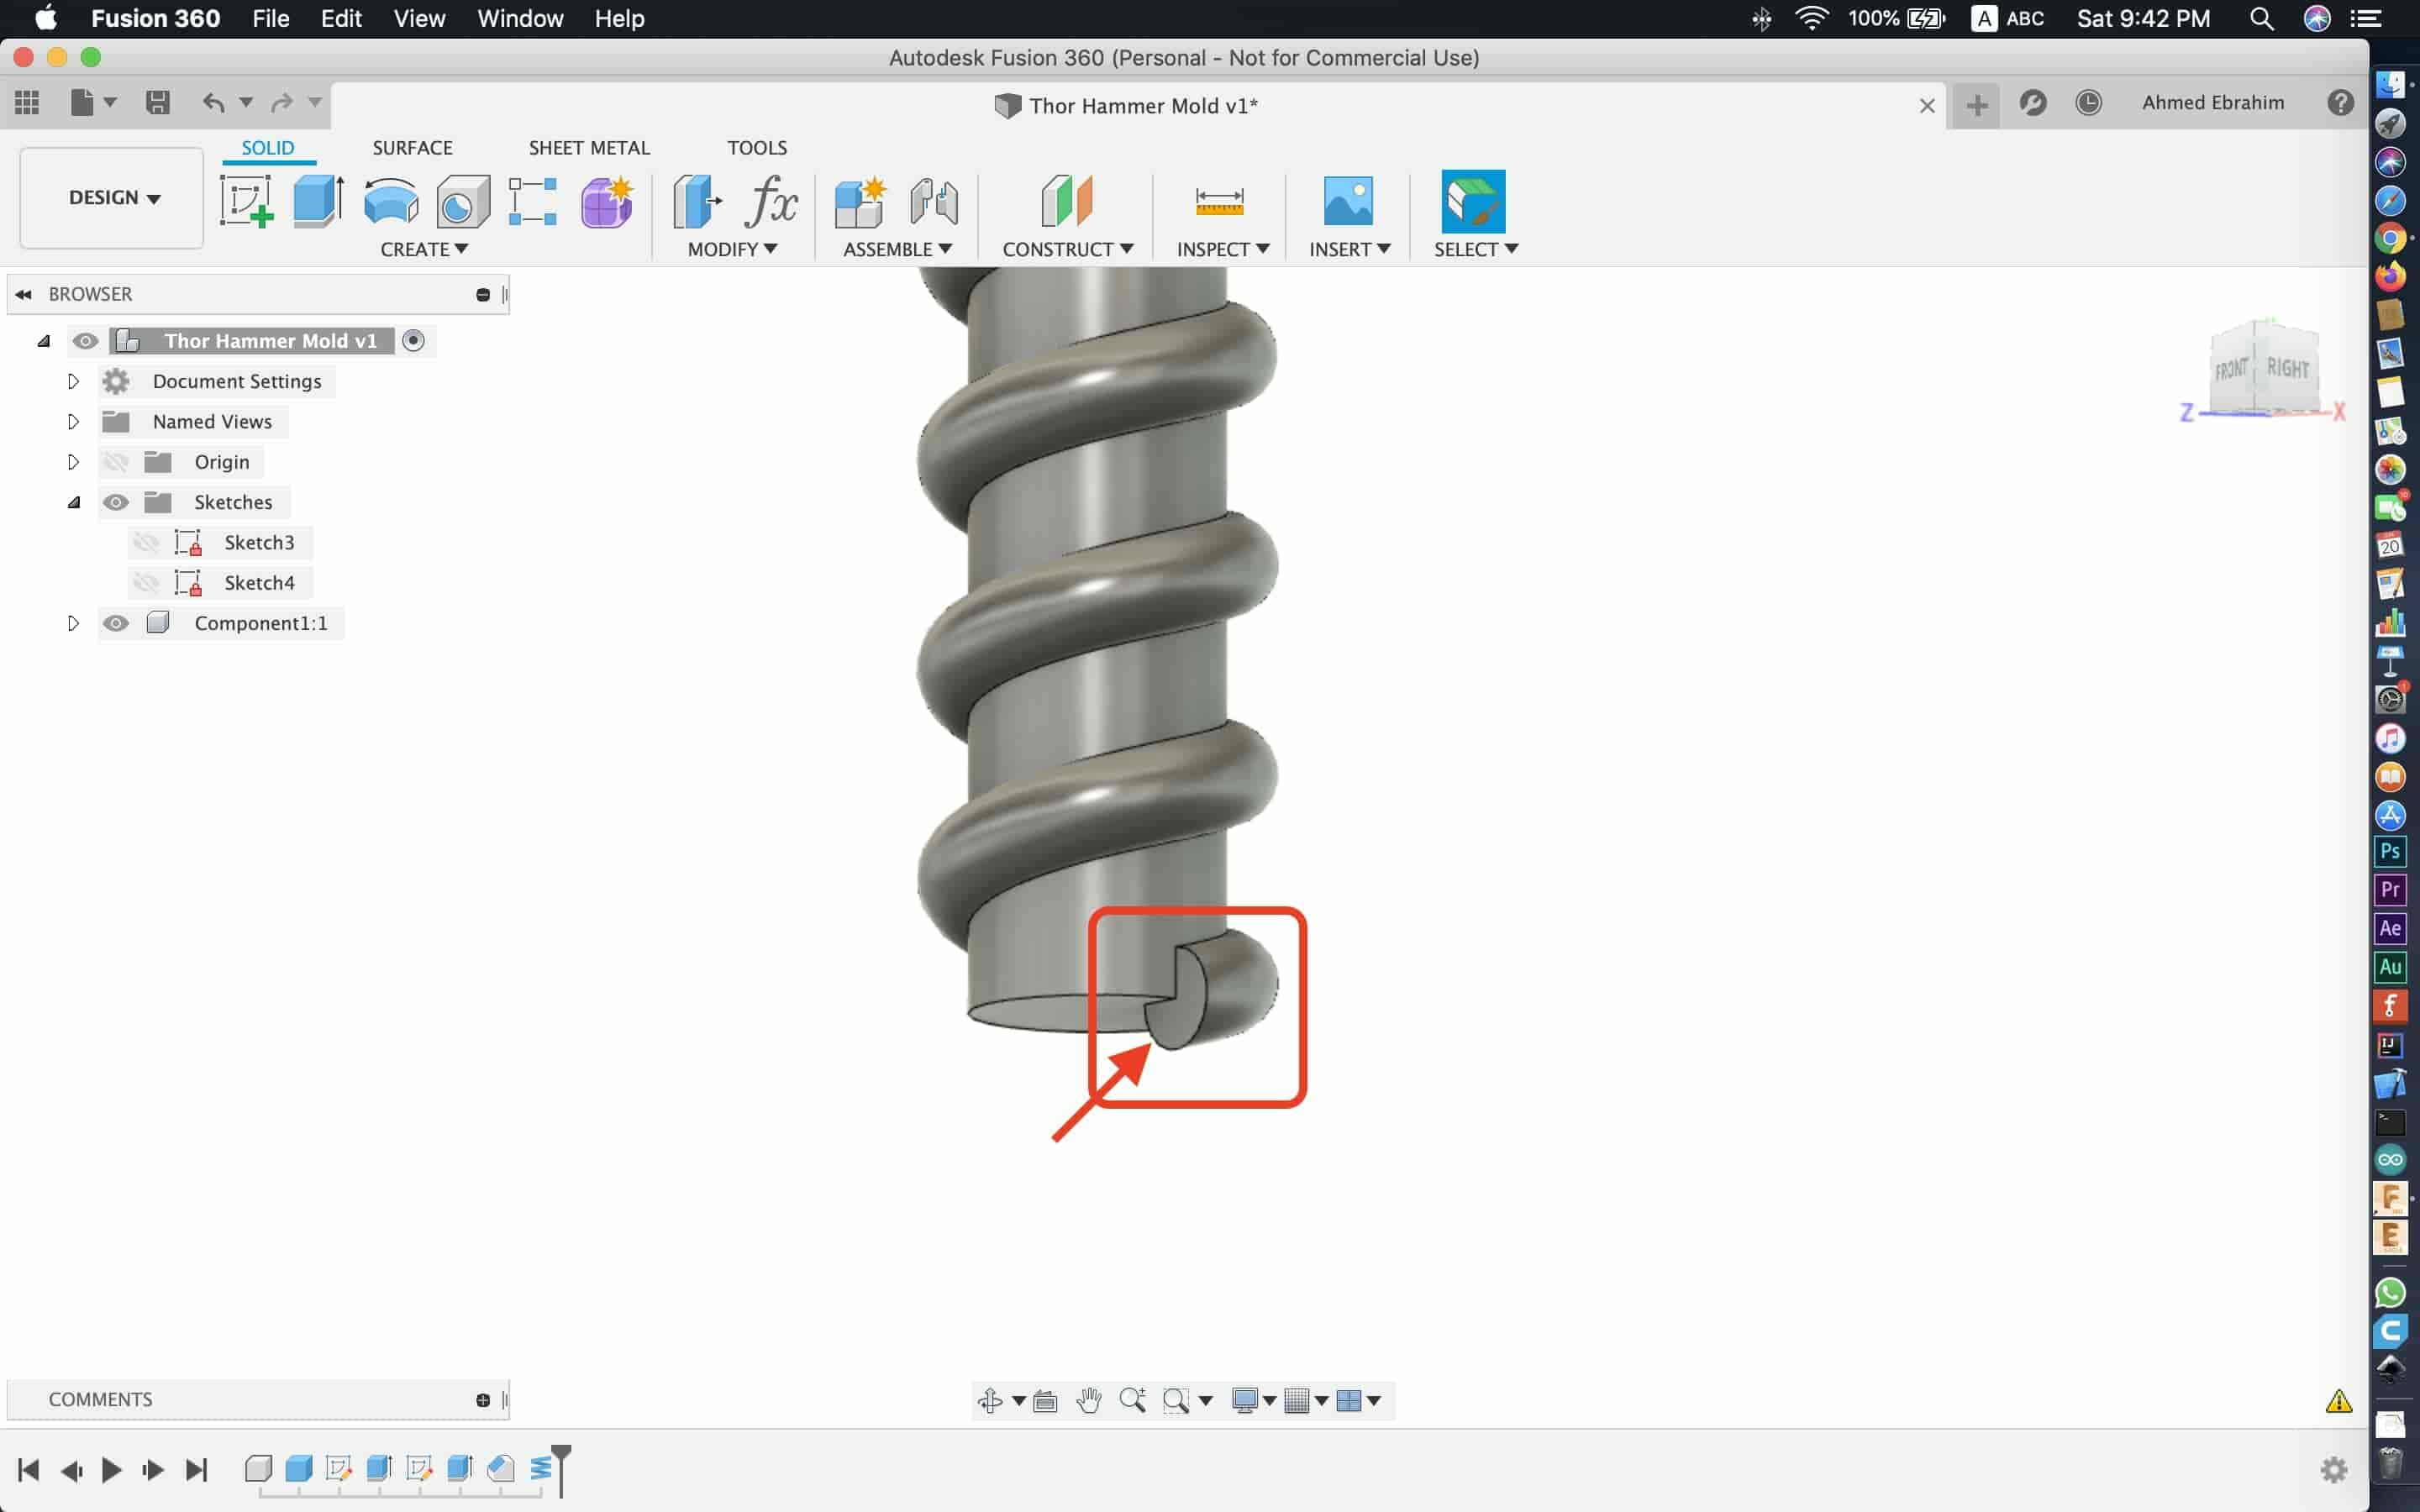
To fix that, I made a circle on the bottom of the hand itself with the same diameter size, and made an extrude to that circle to extend the hammer hand length.

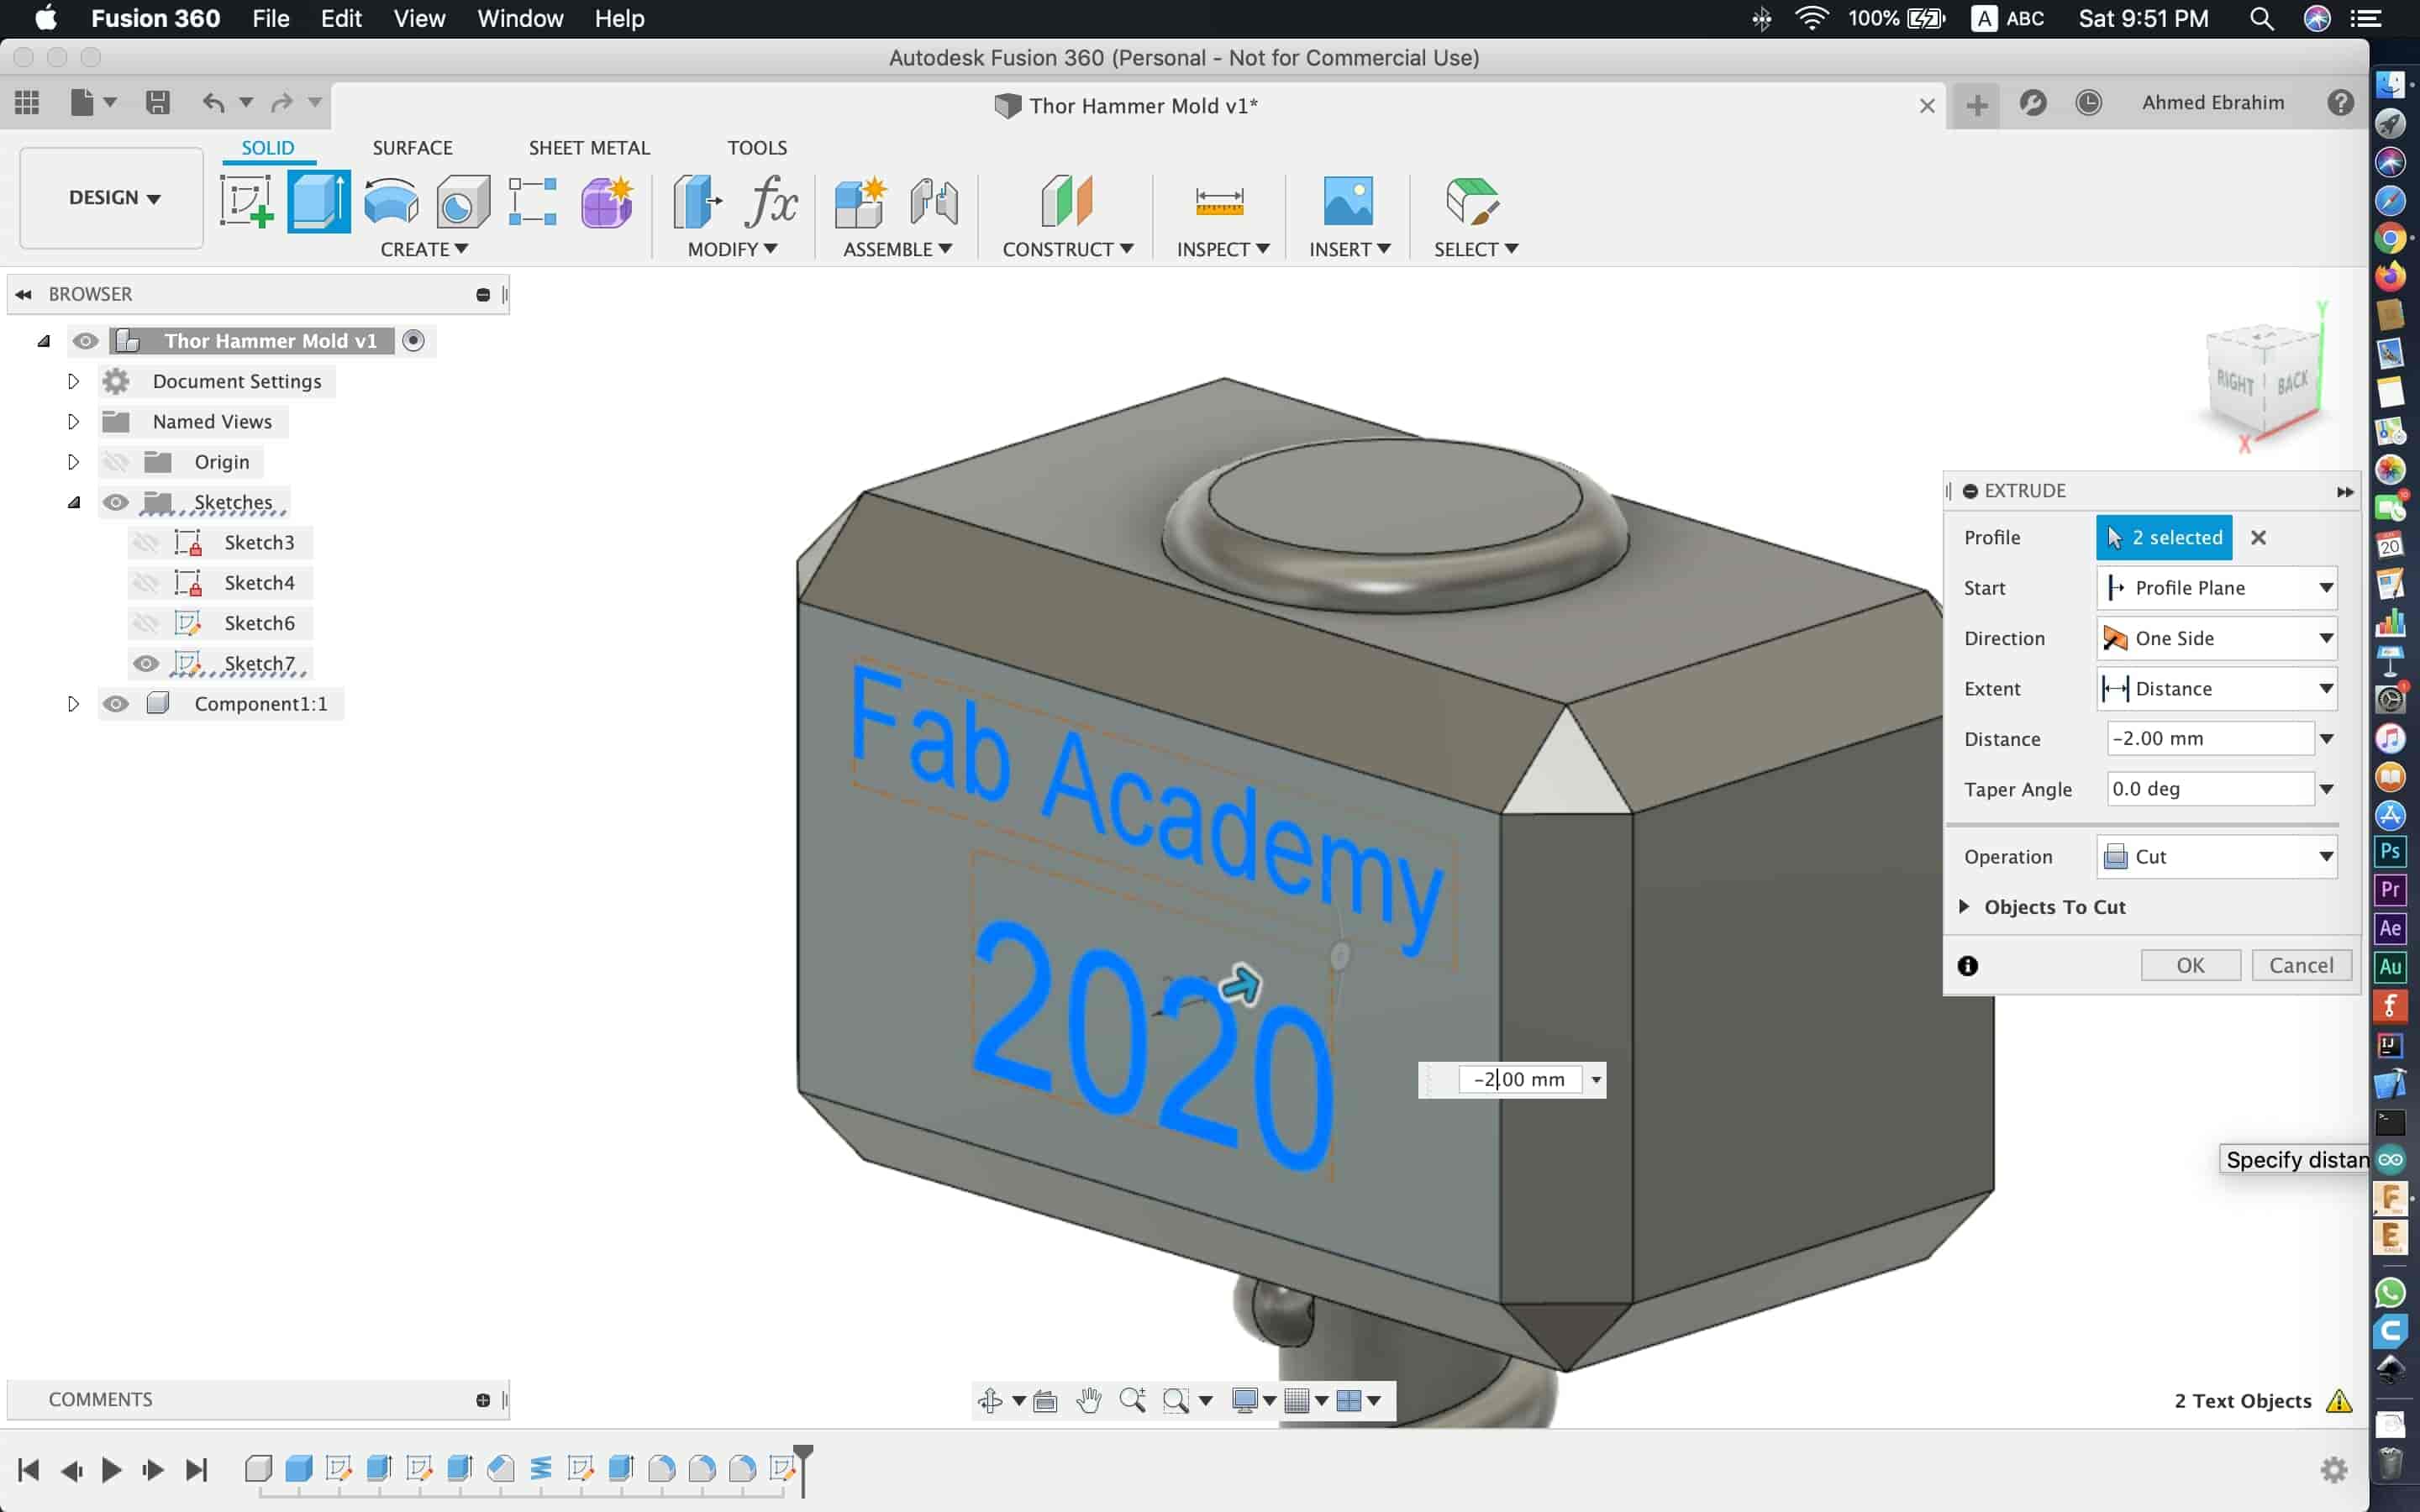
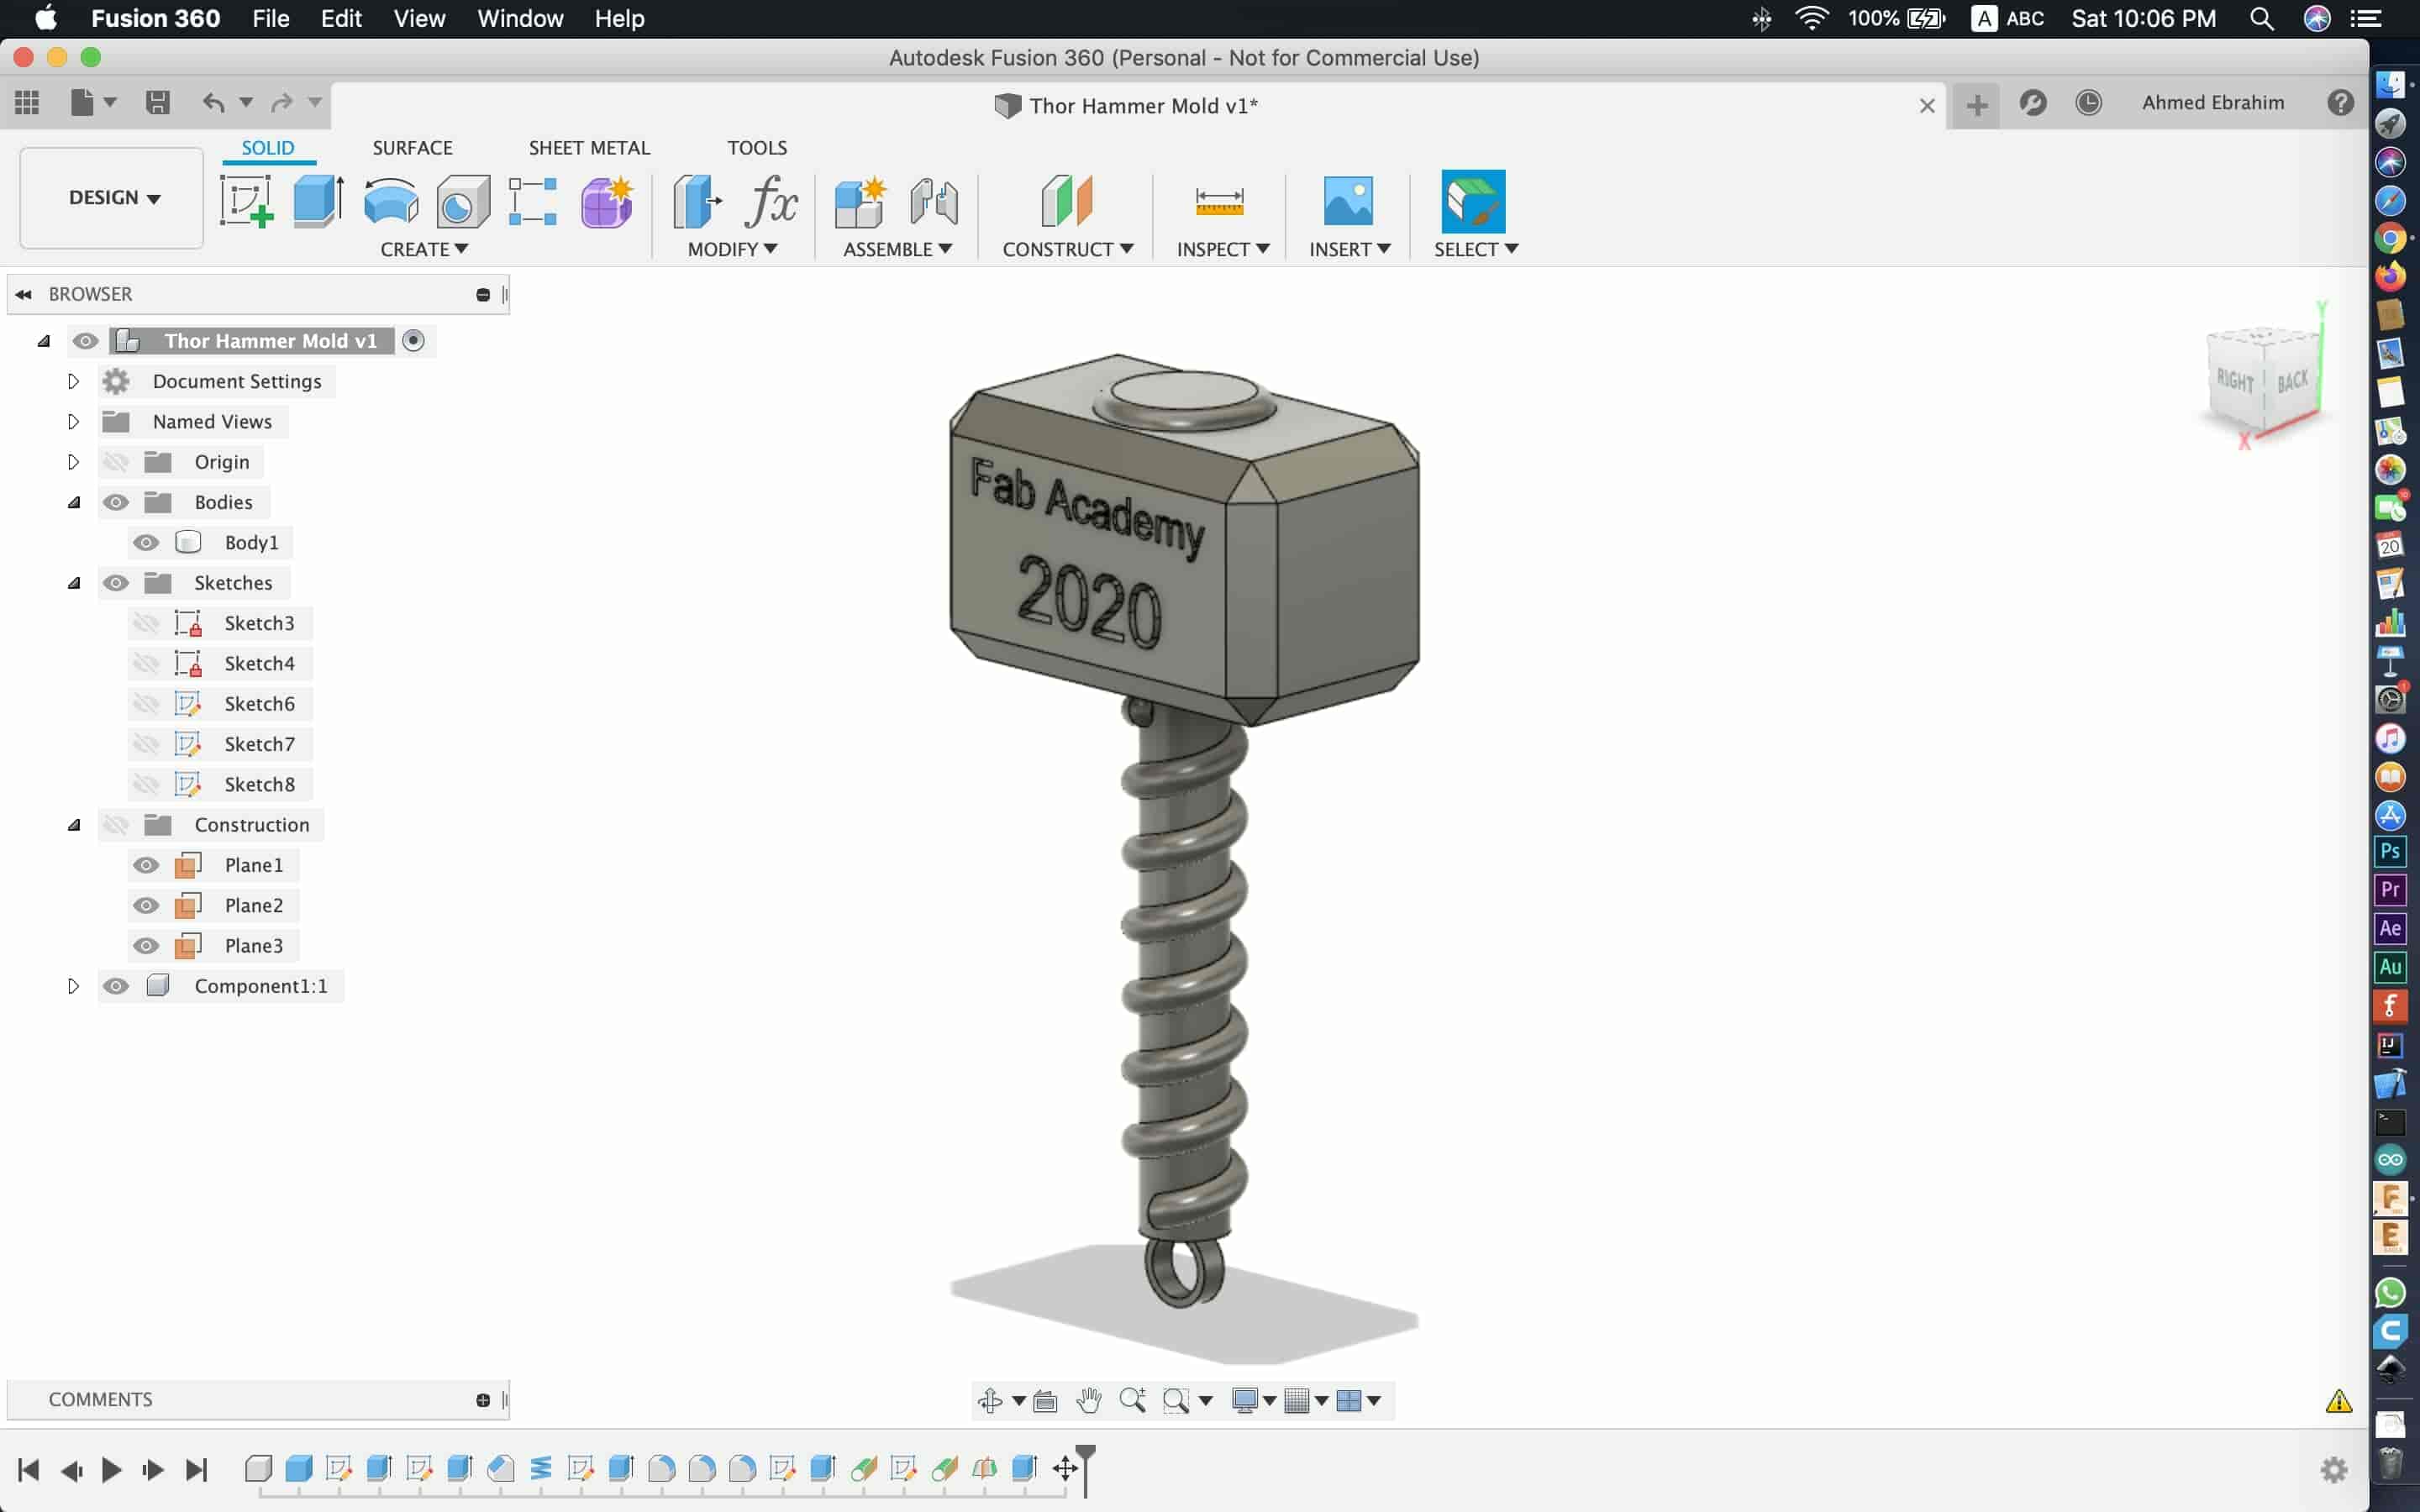
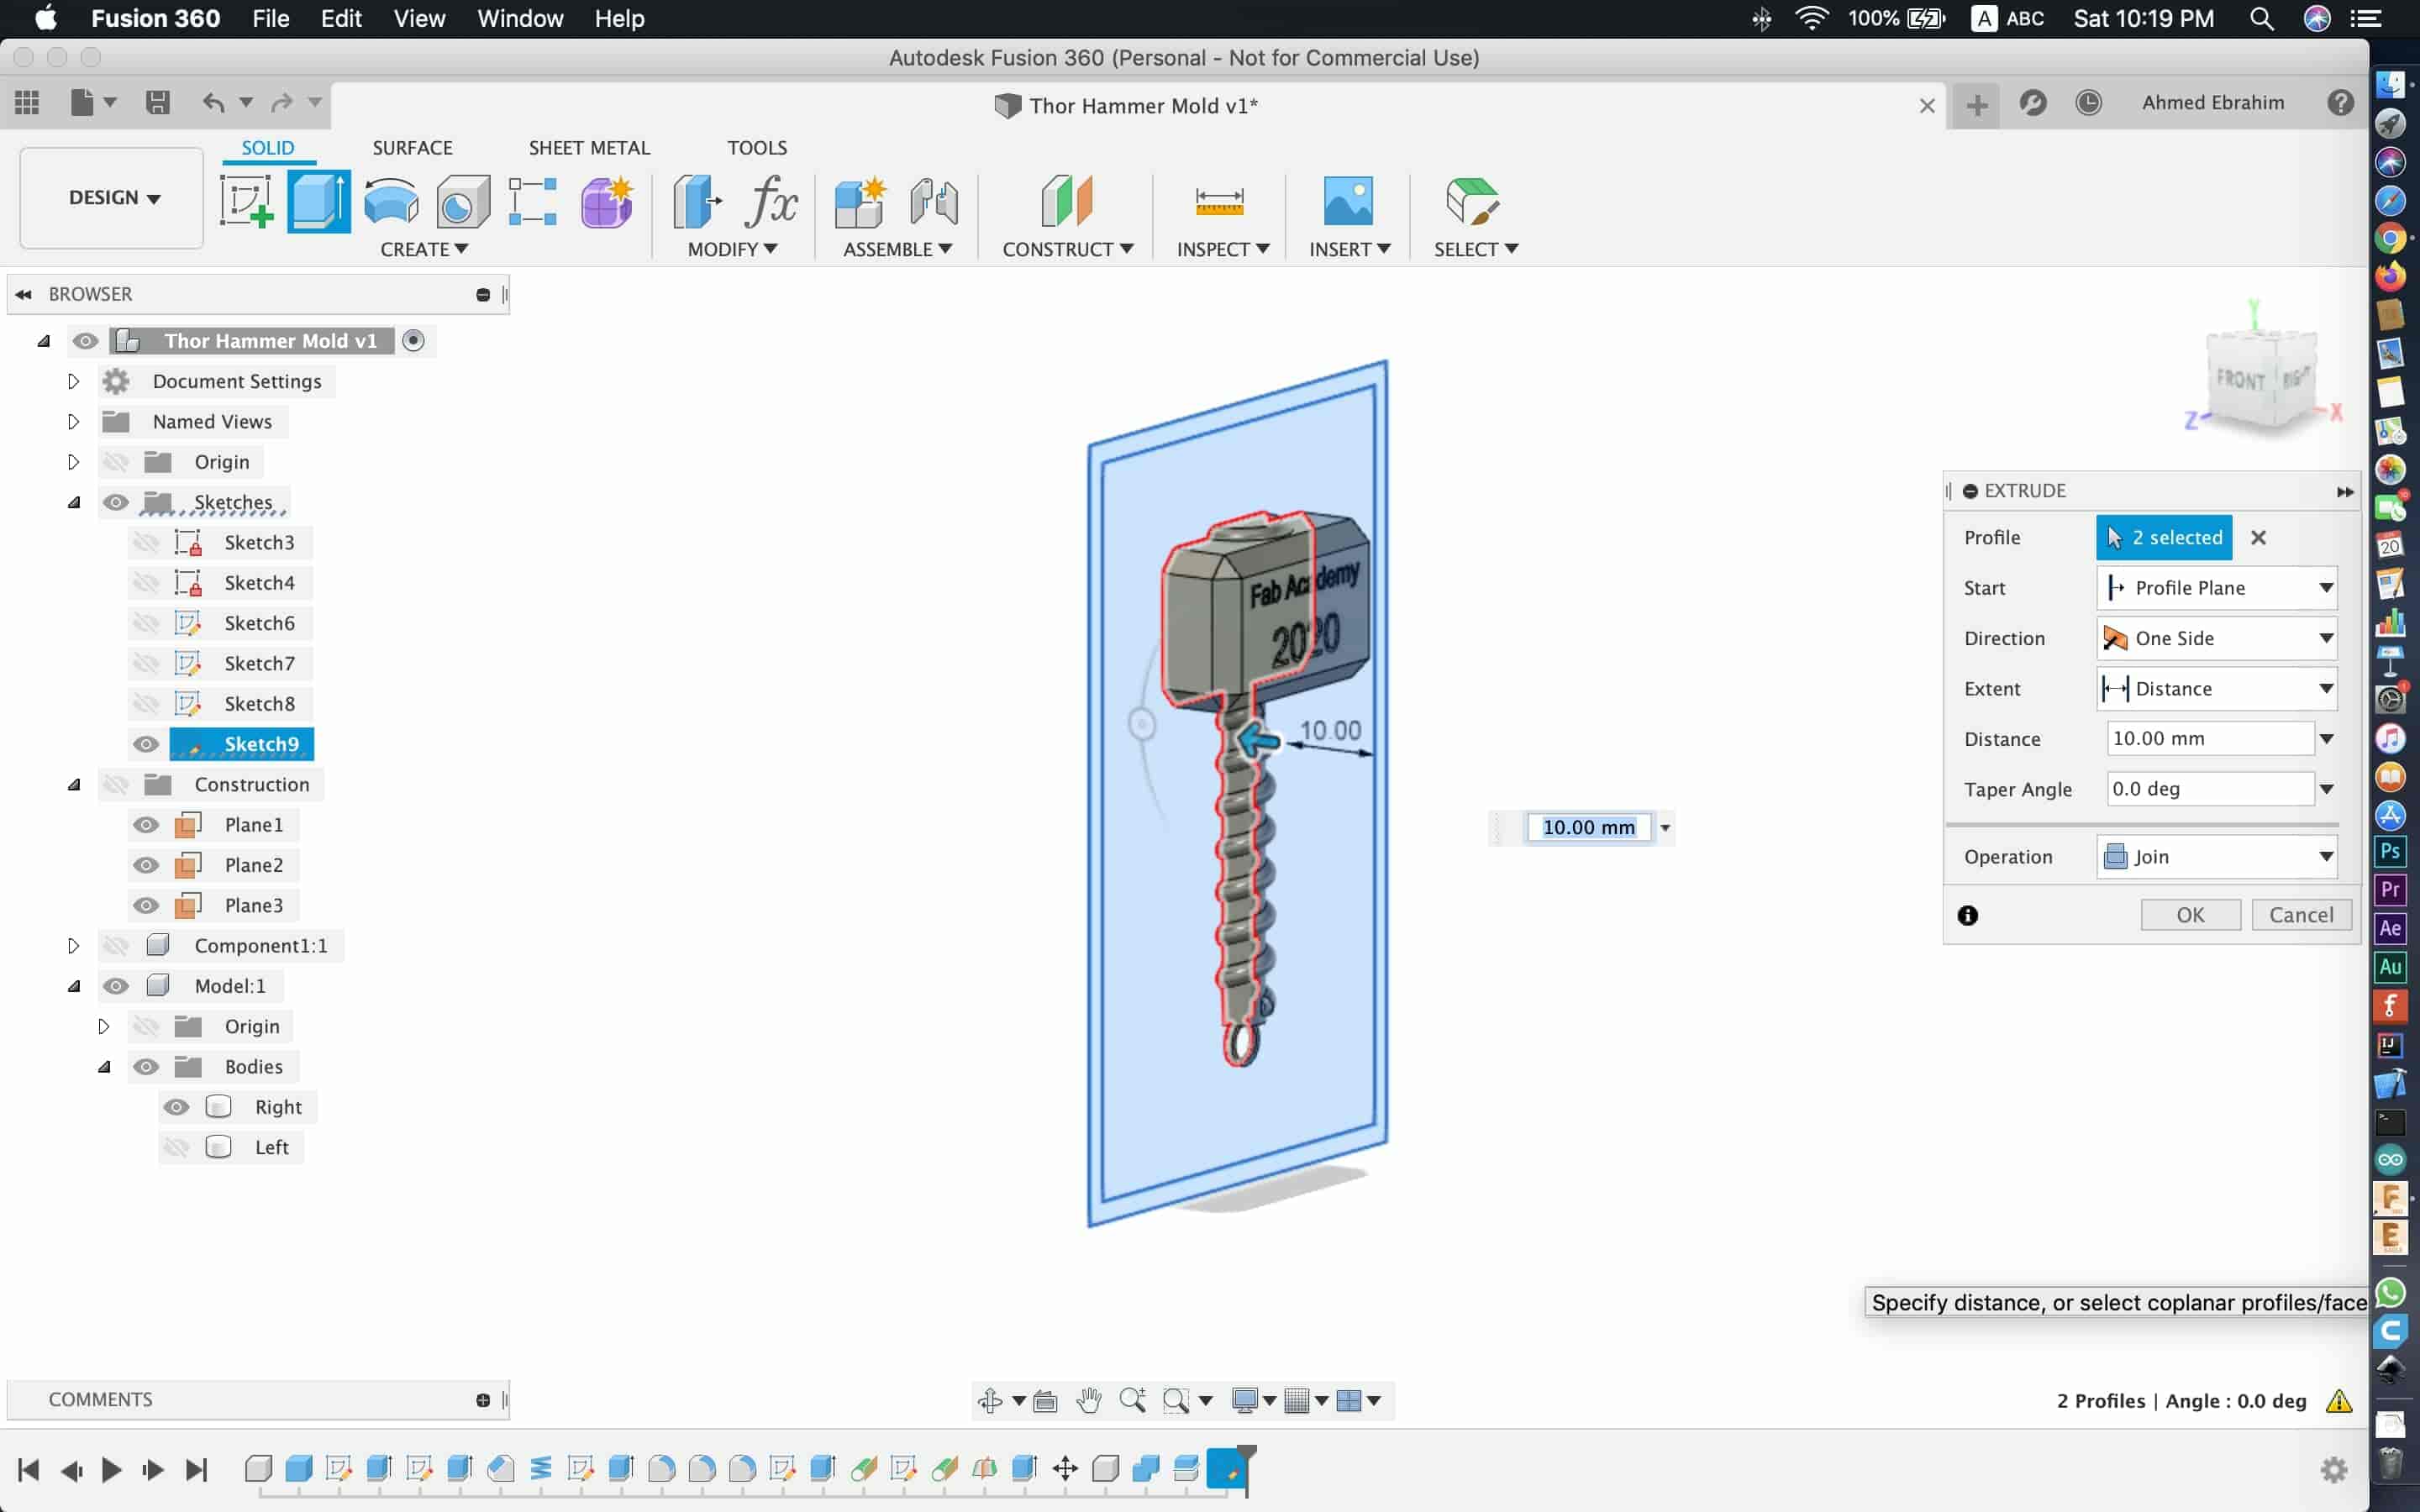
Let’s spice things up! I added the Fab academy 2020 signature :D then I extruded the text -2mm to cut into the model.
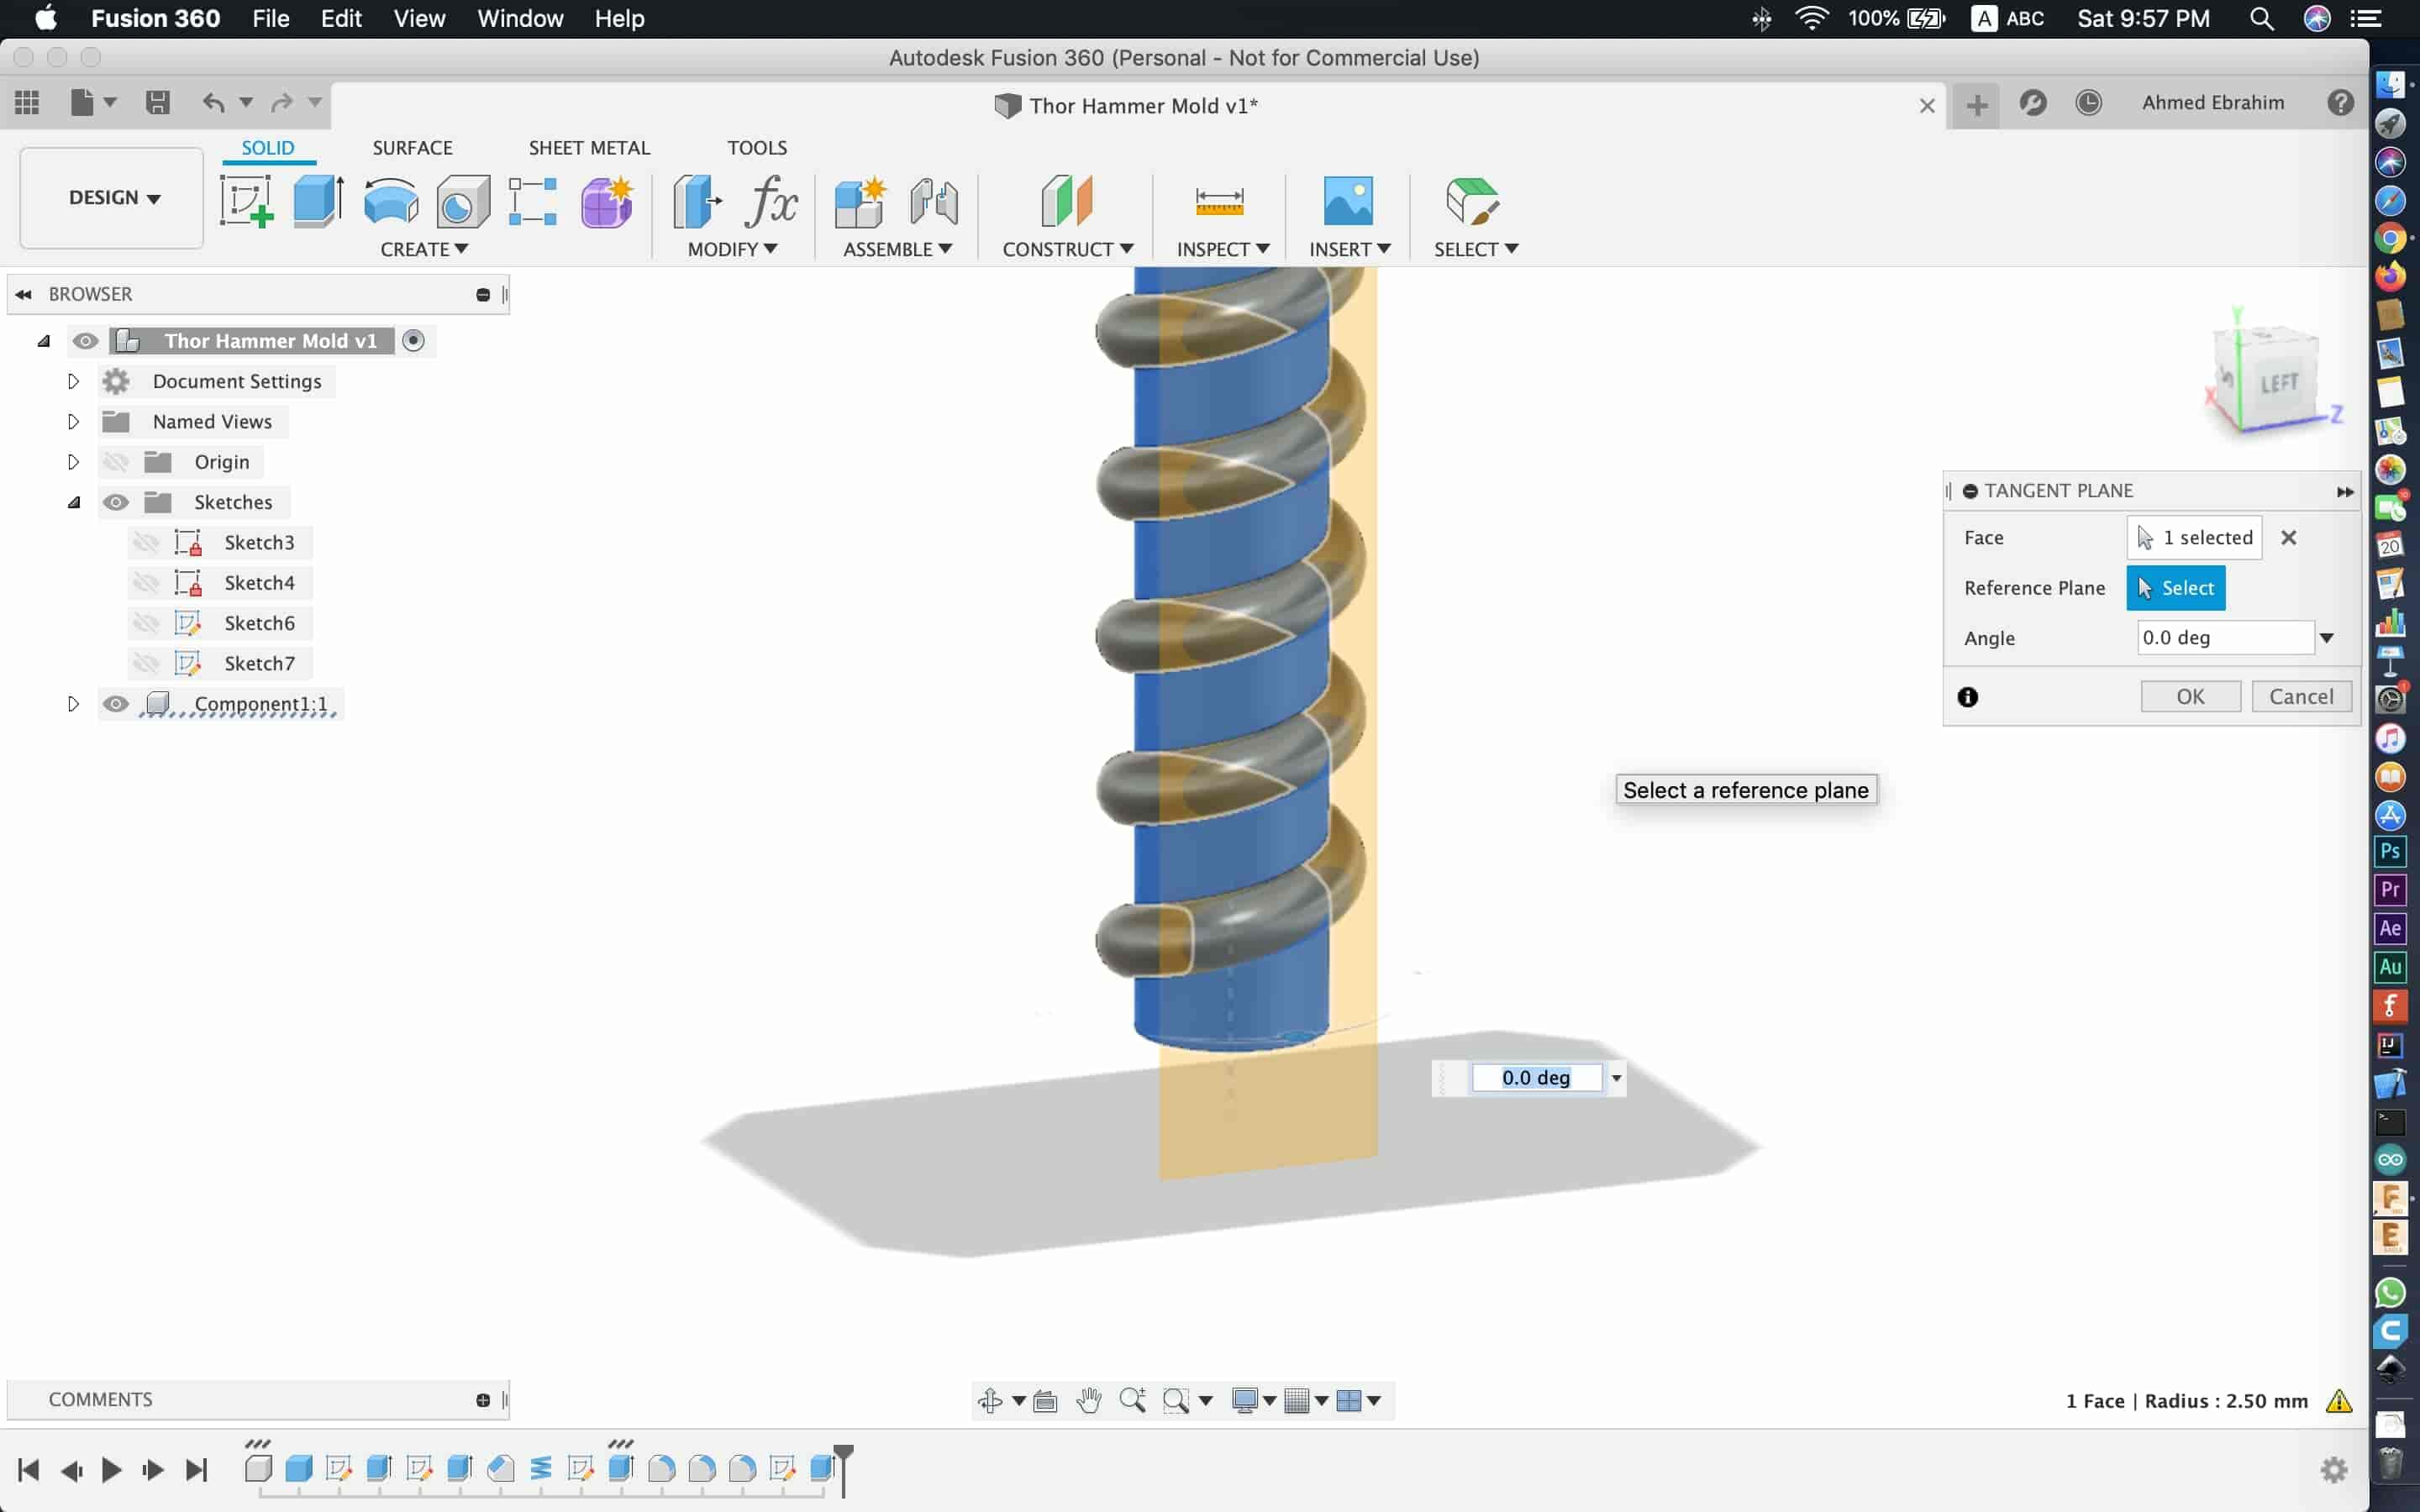
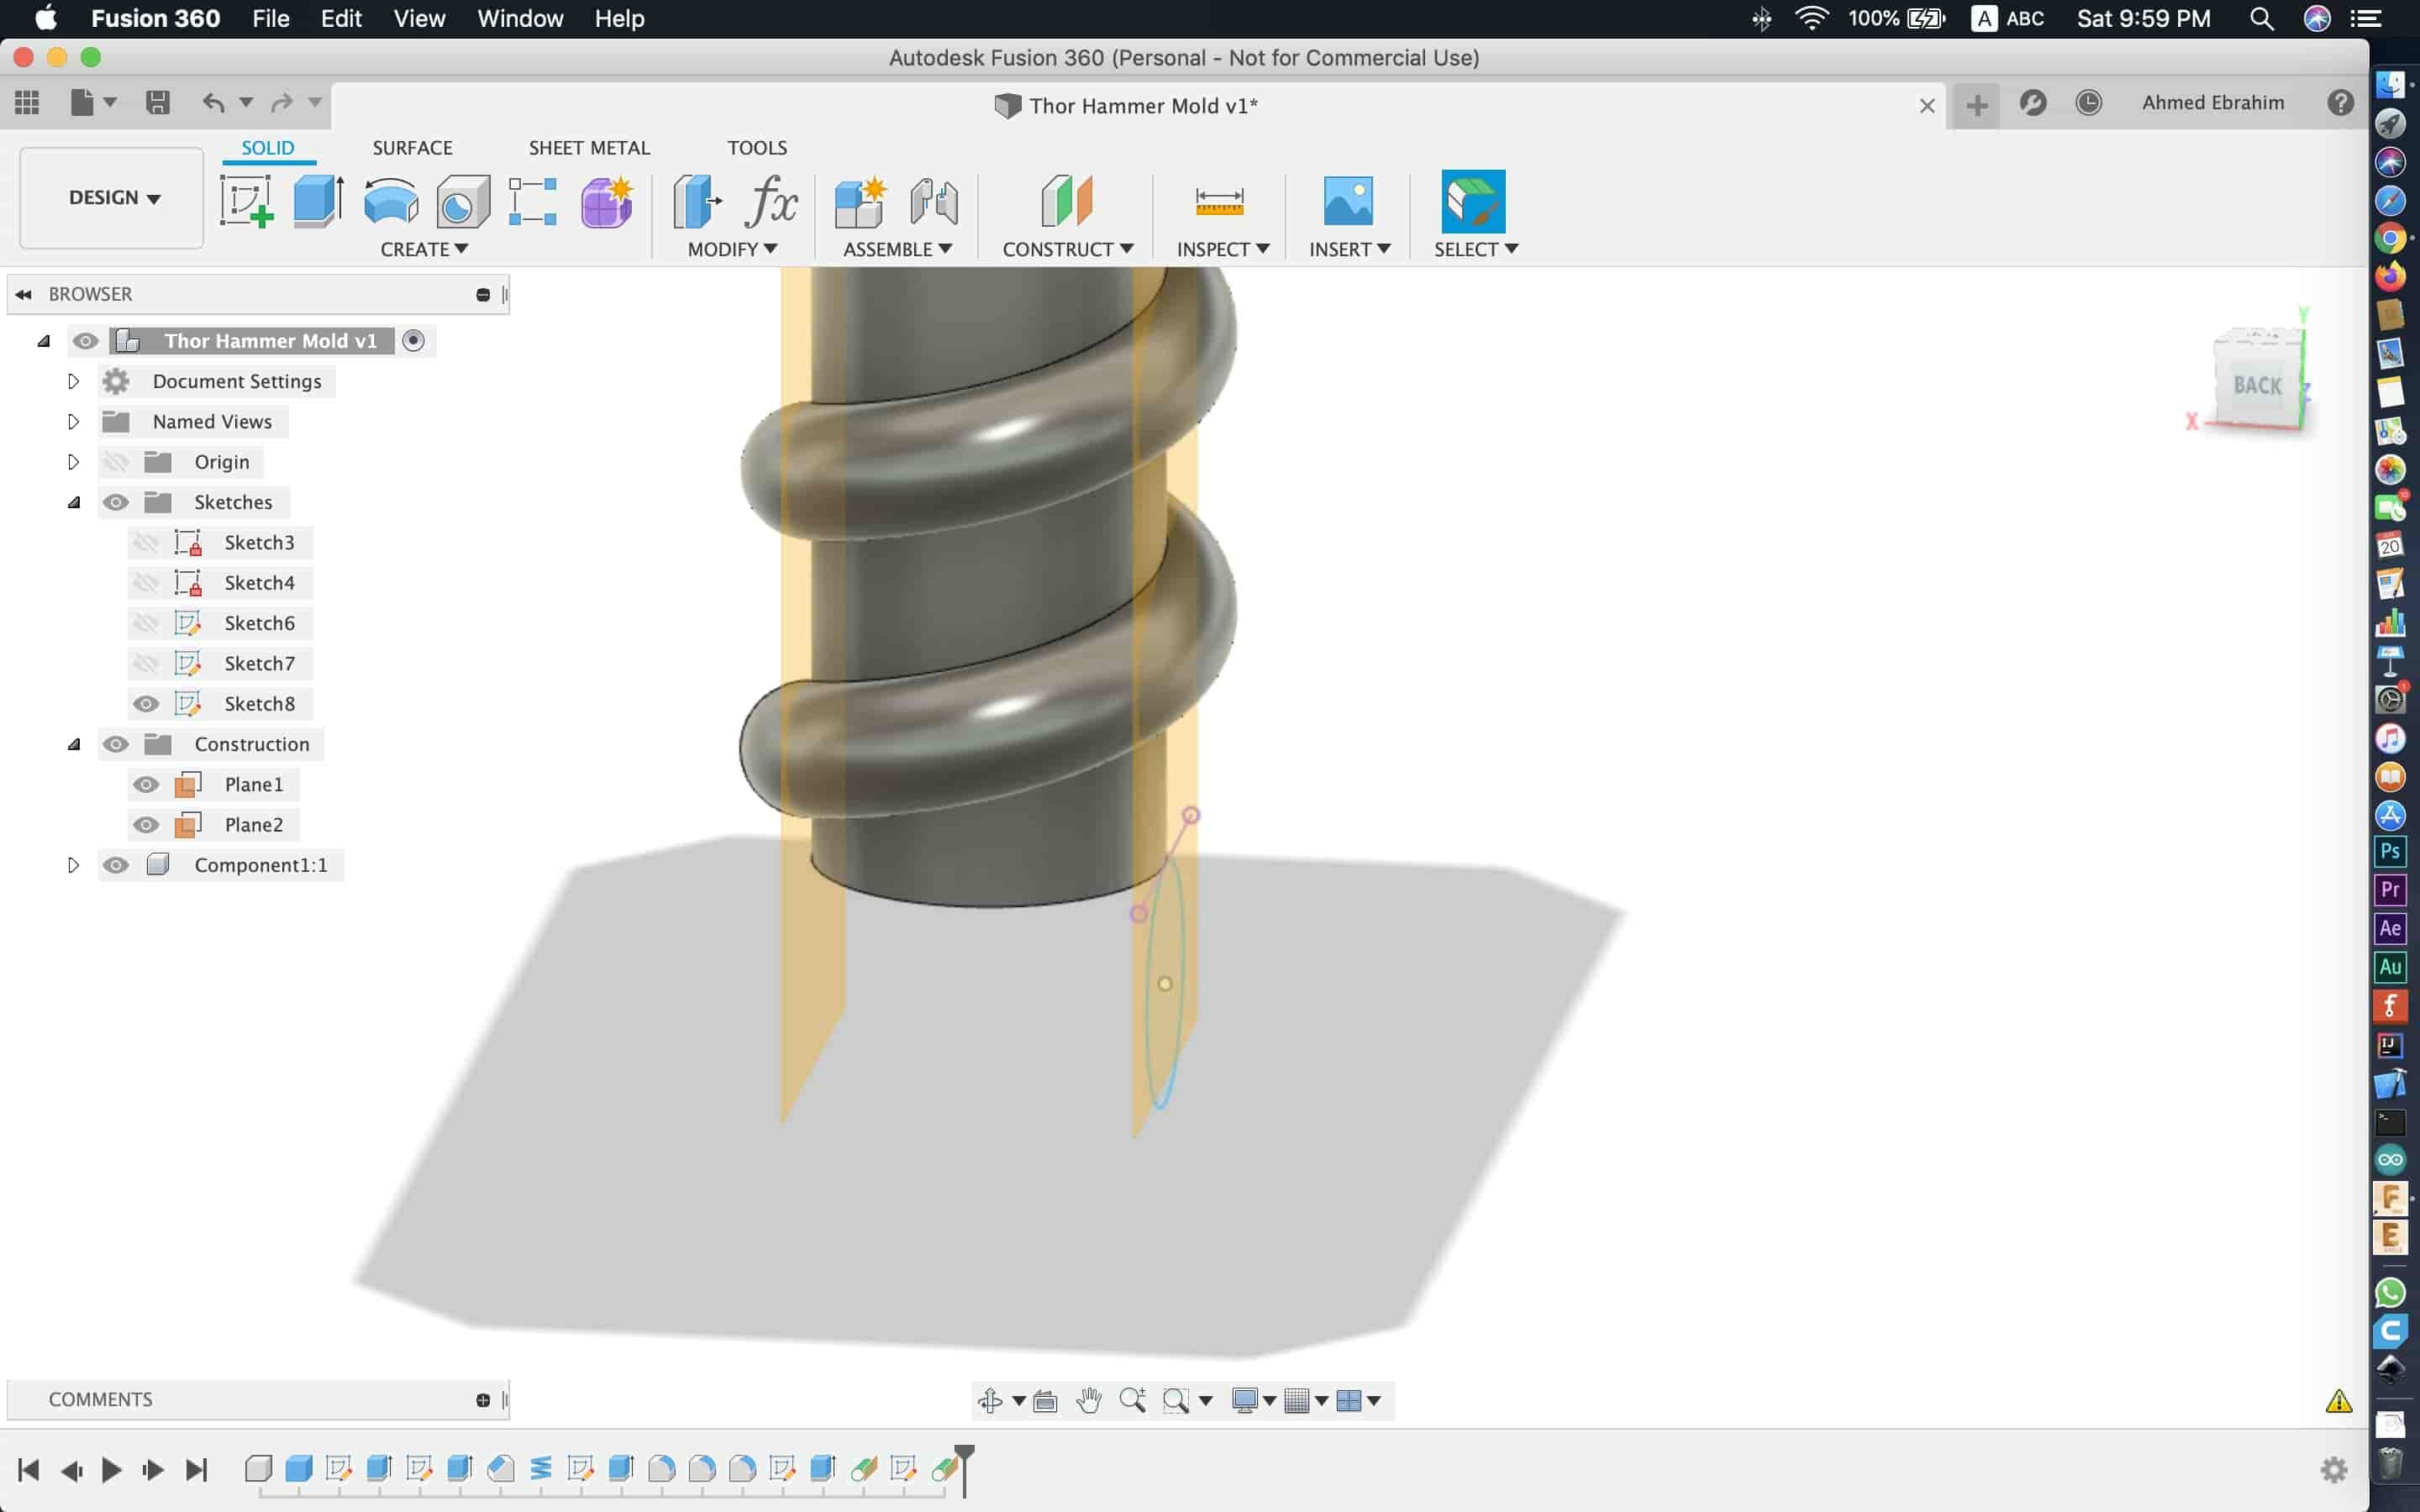
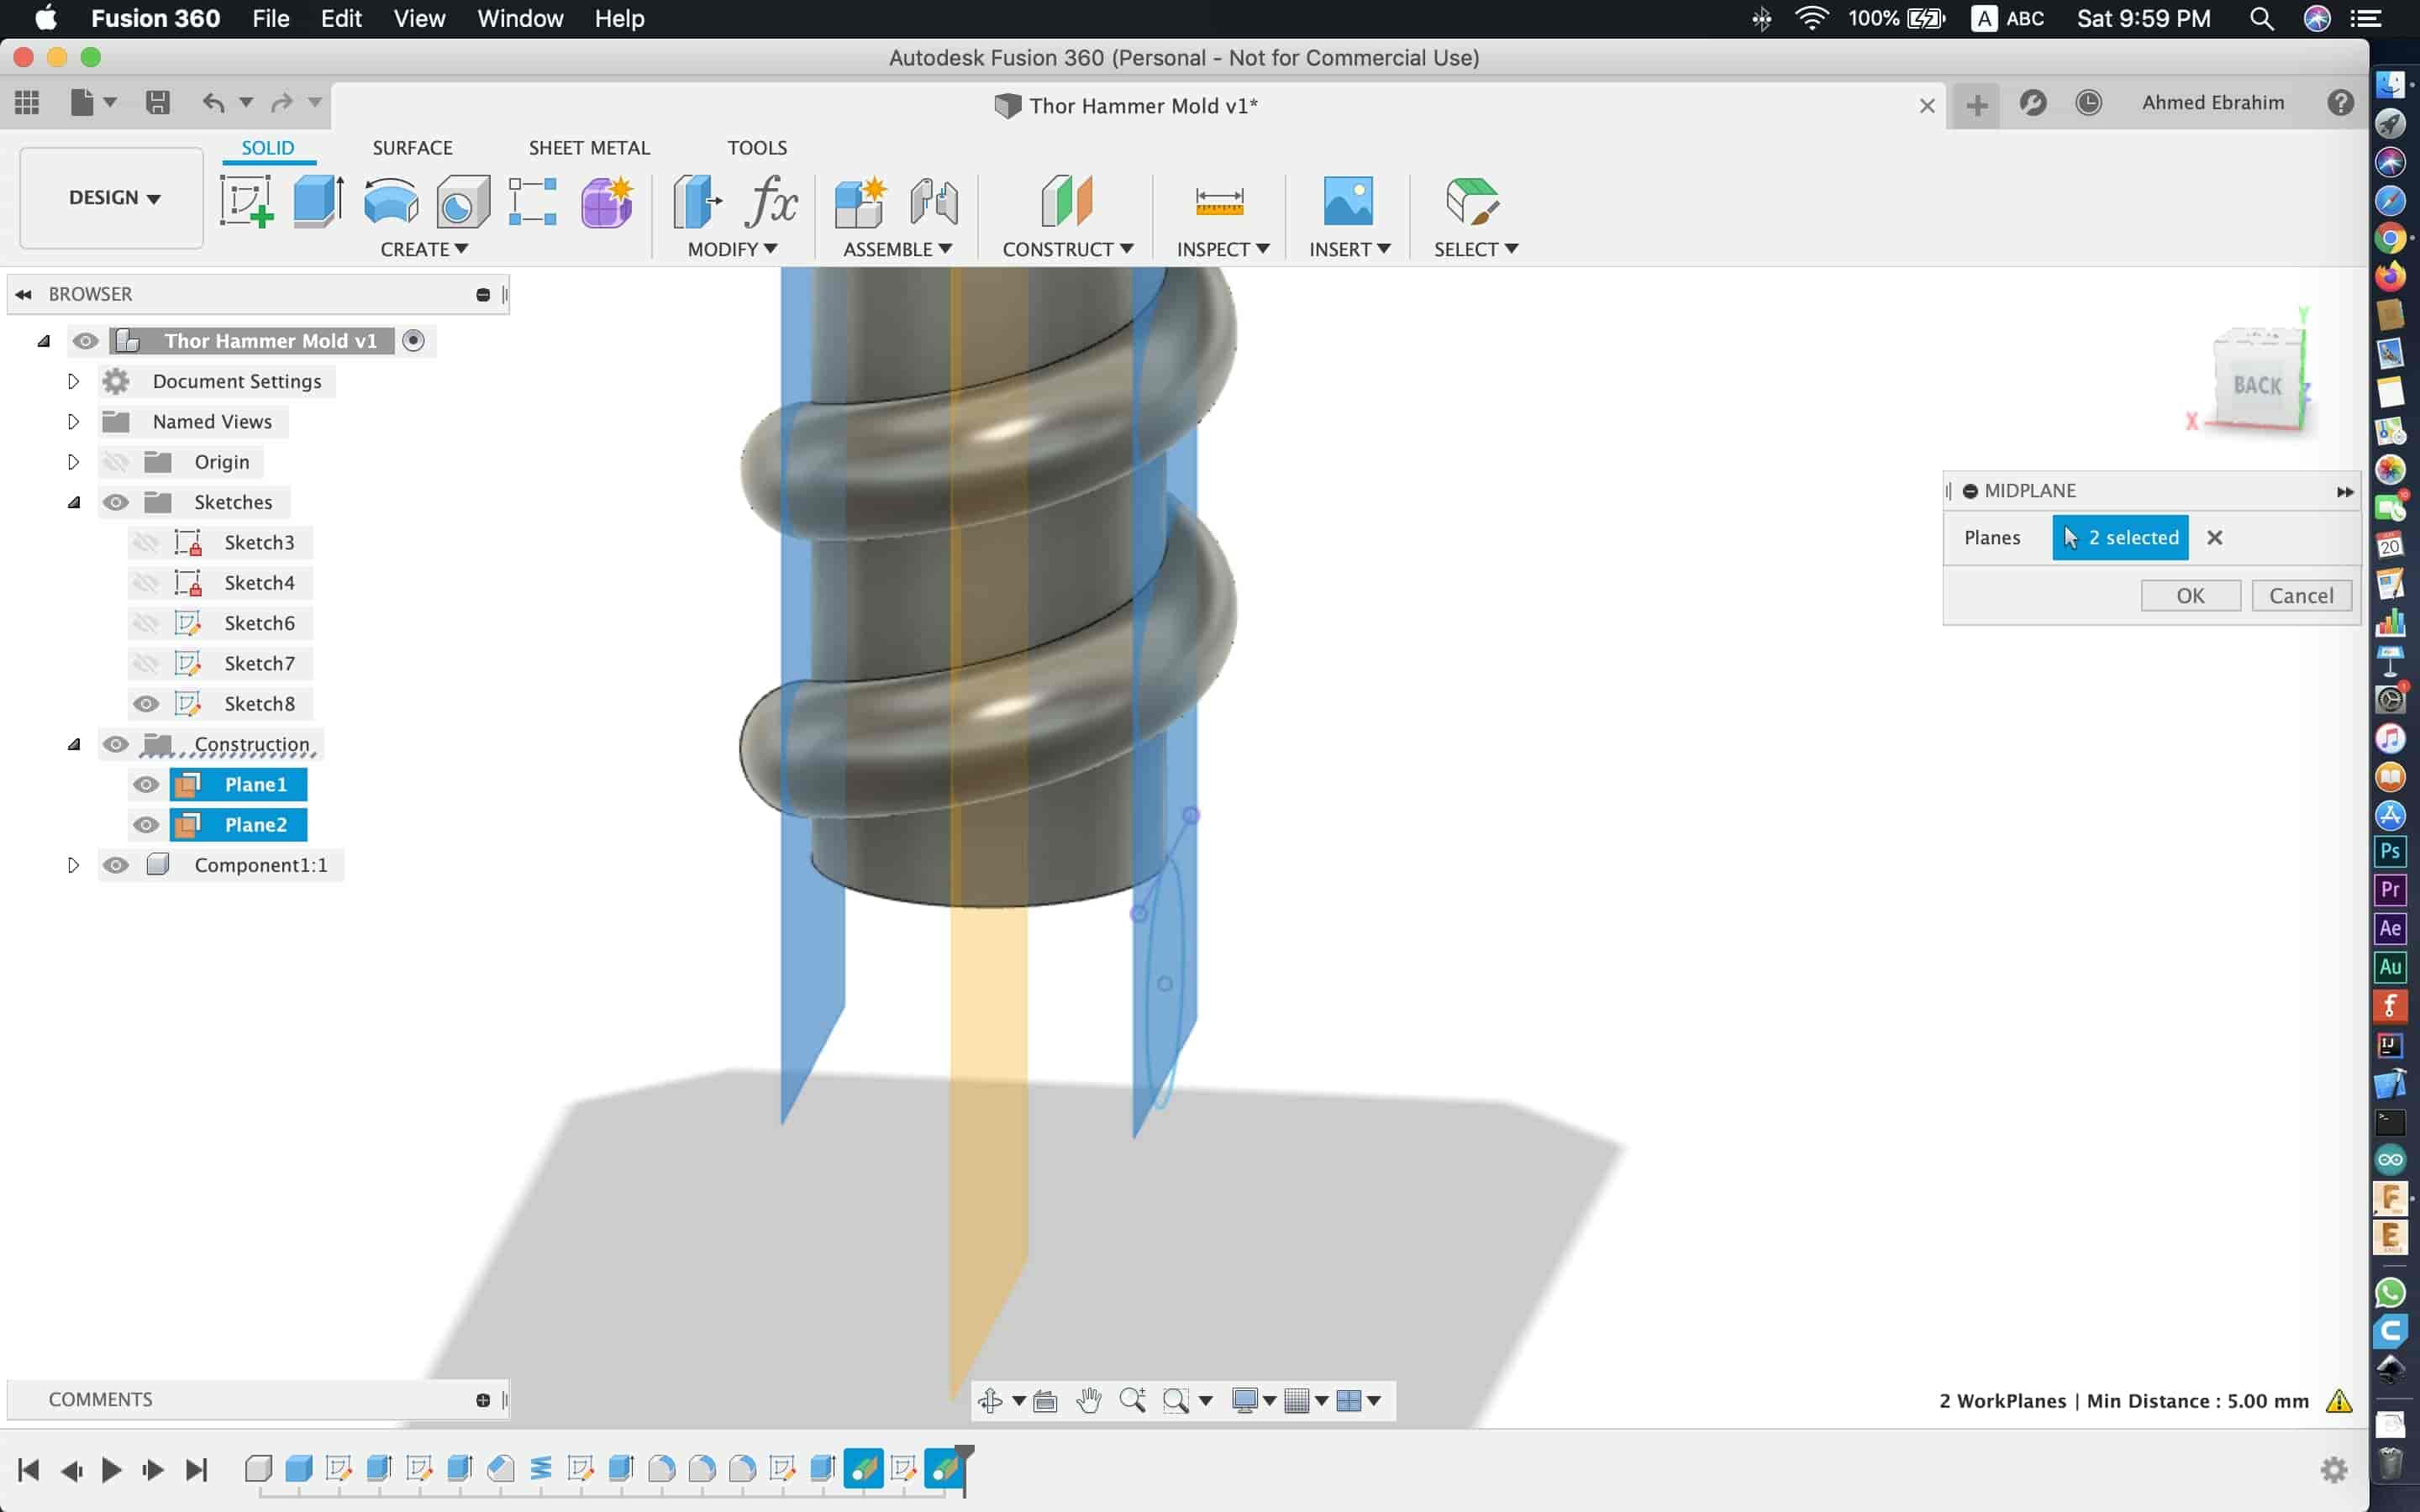
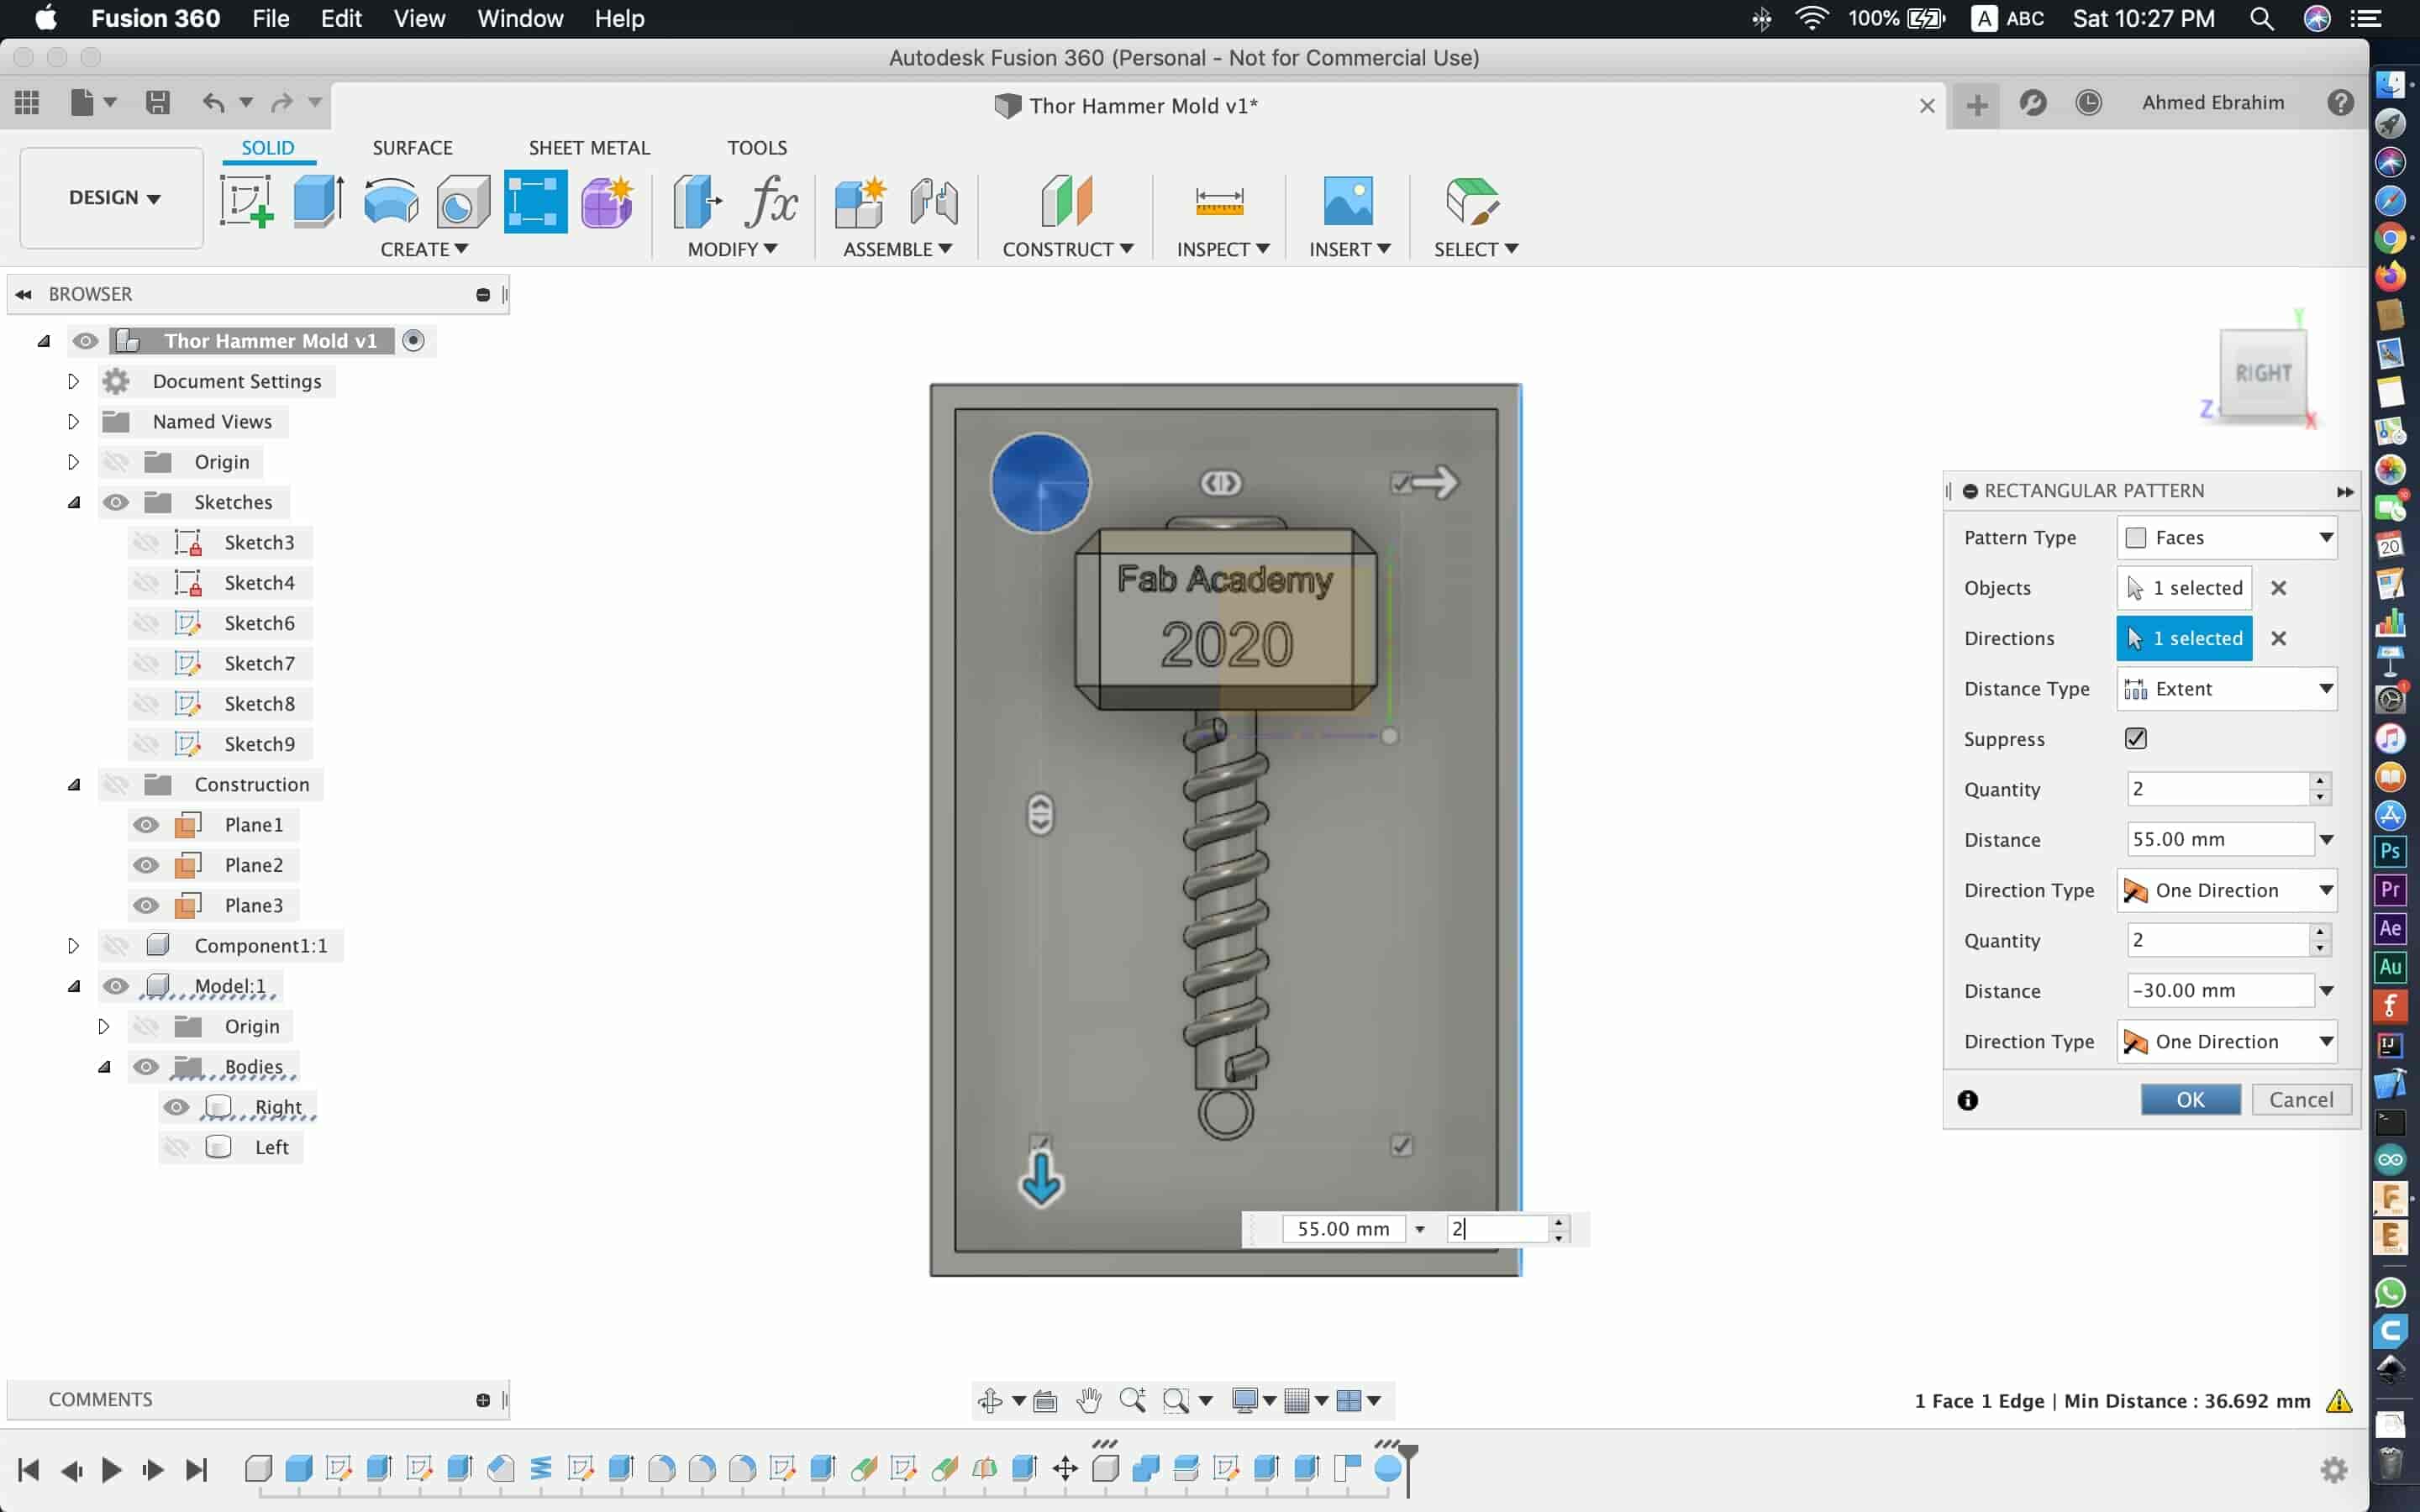
Then, I made a tangent plane to the hammer hand on both sides, then I made a midplane between those two tangent planes. We will use this midplane to split our hammer into two symmetrical halves.
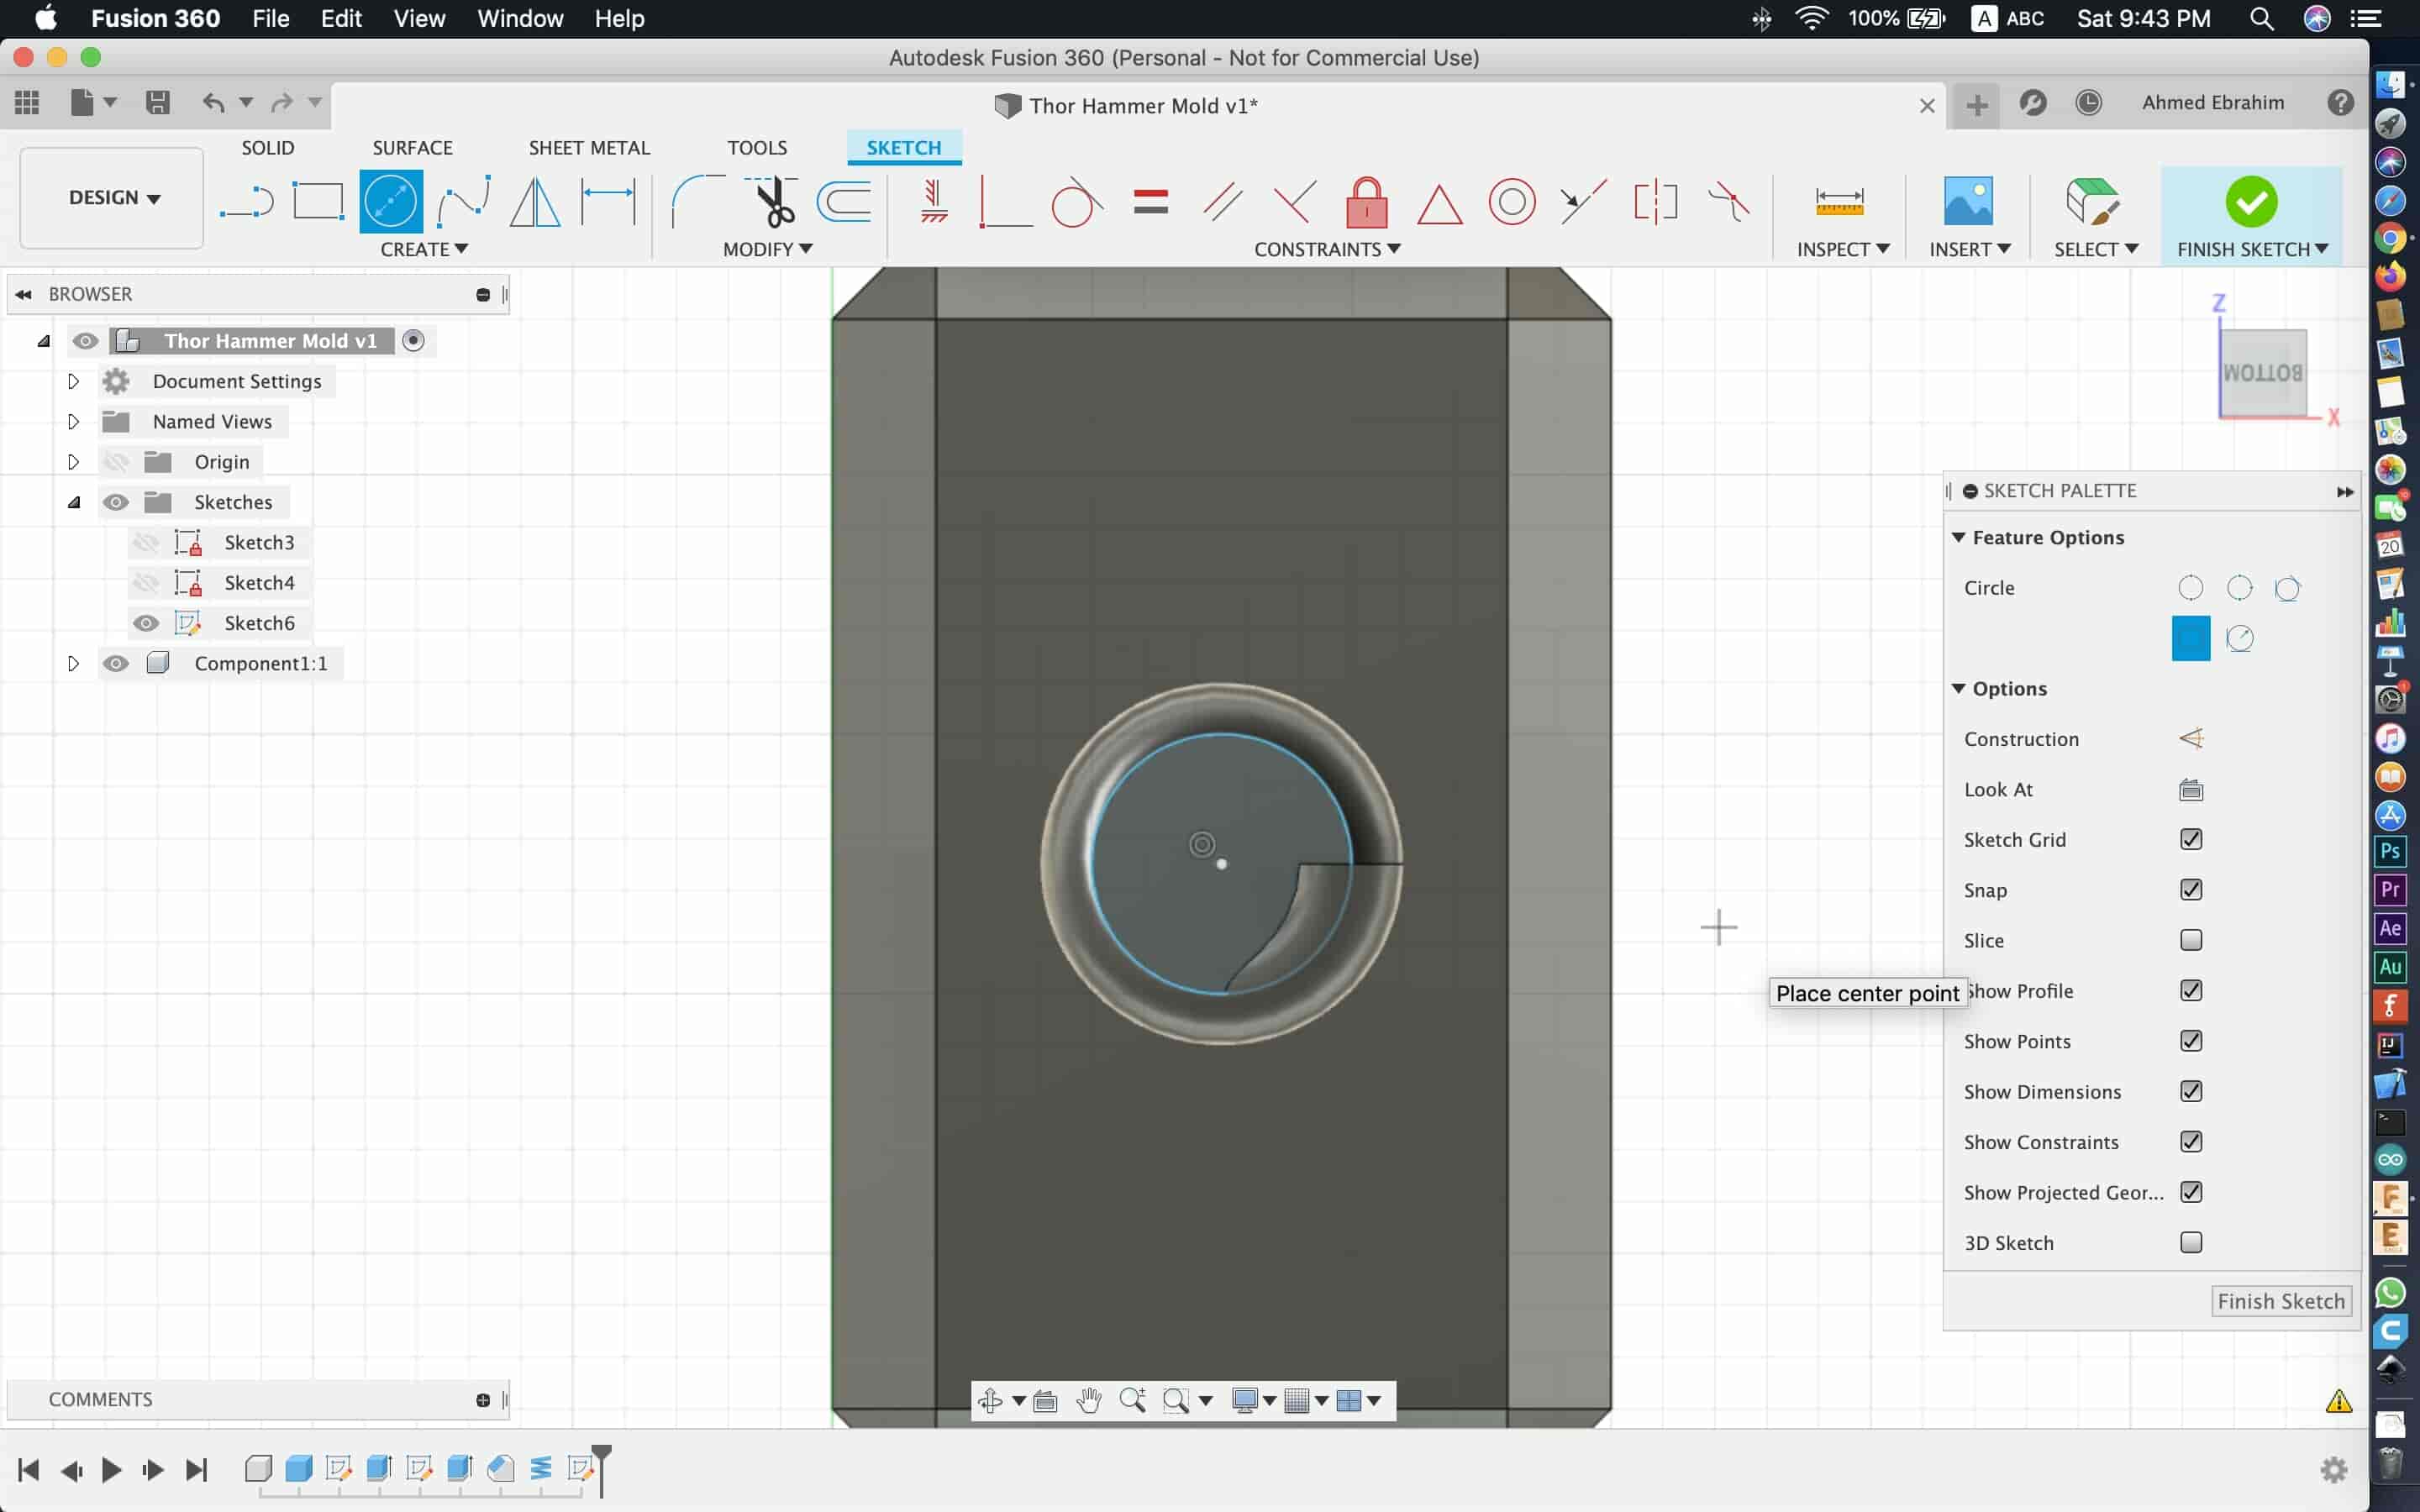
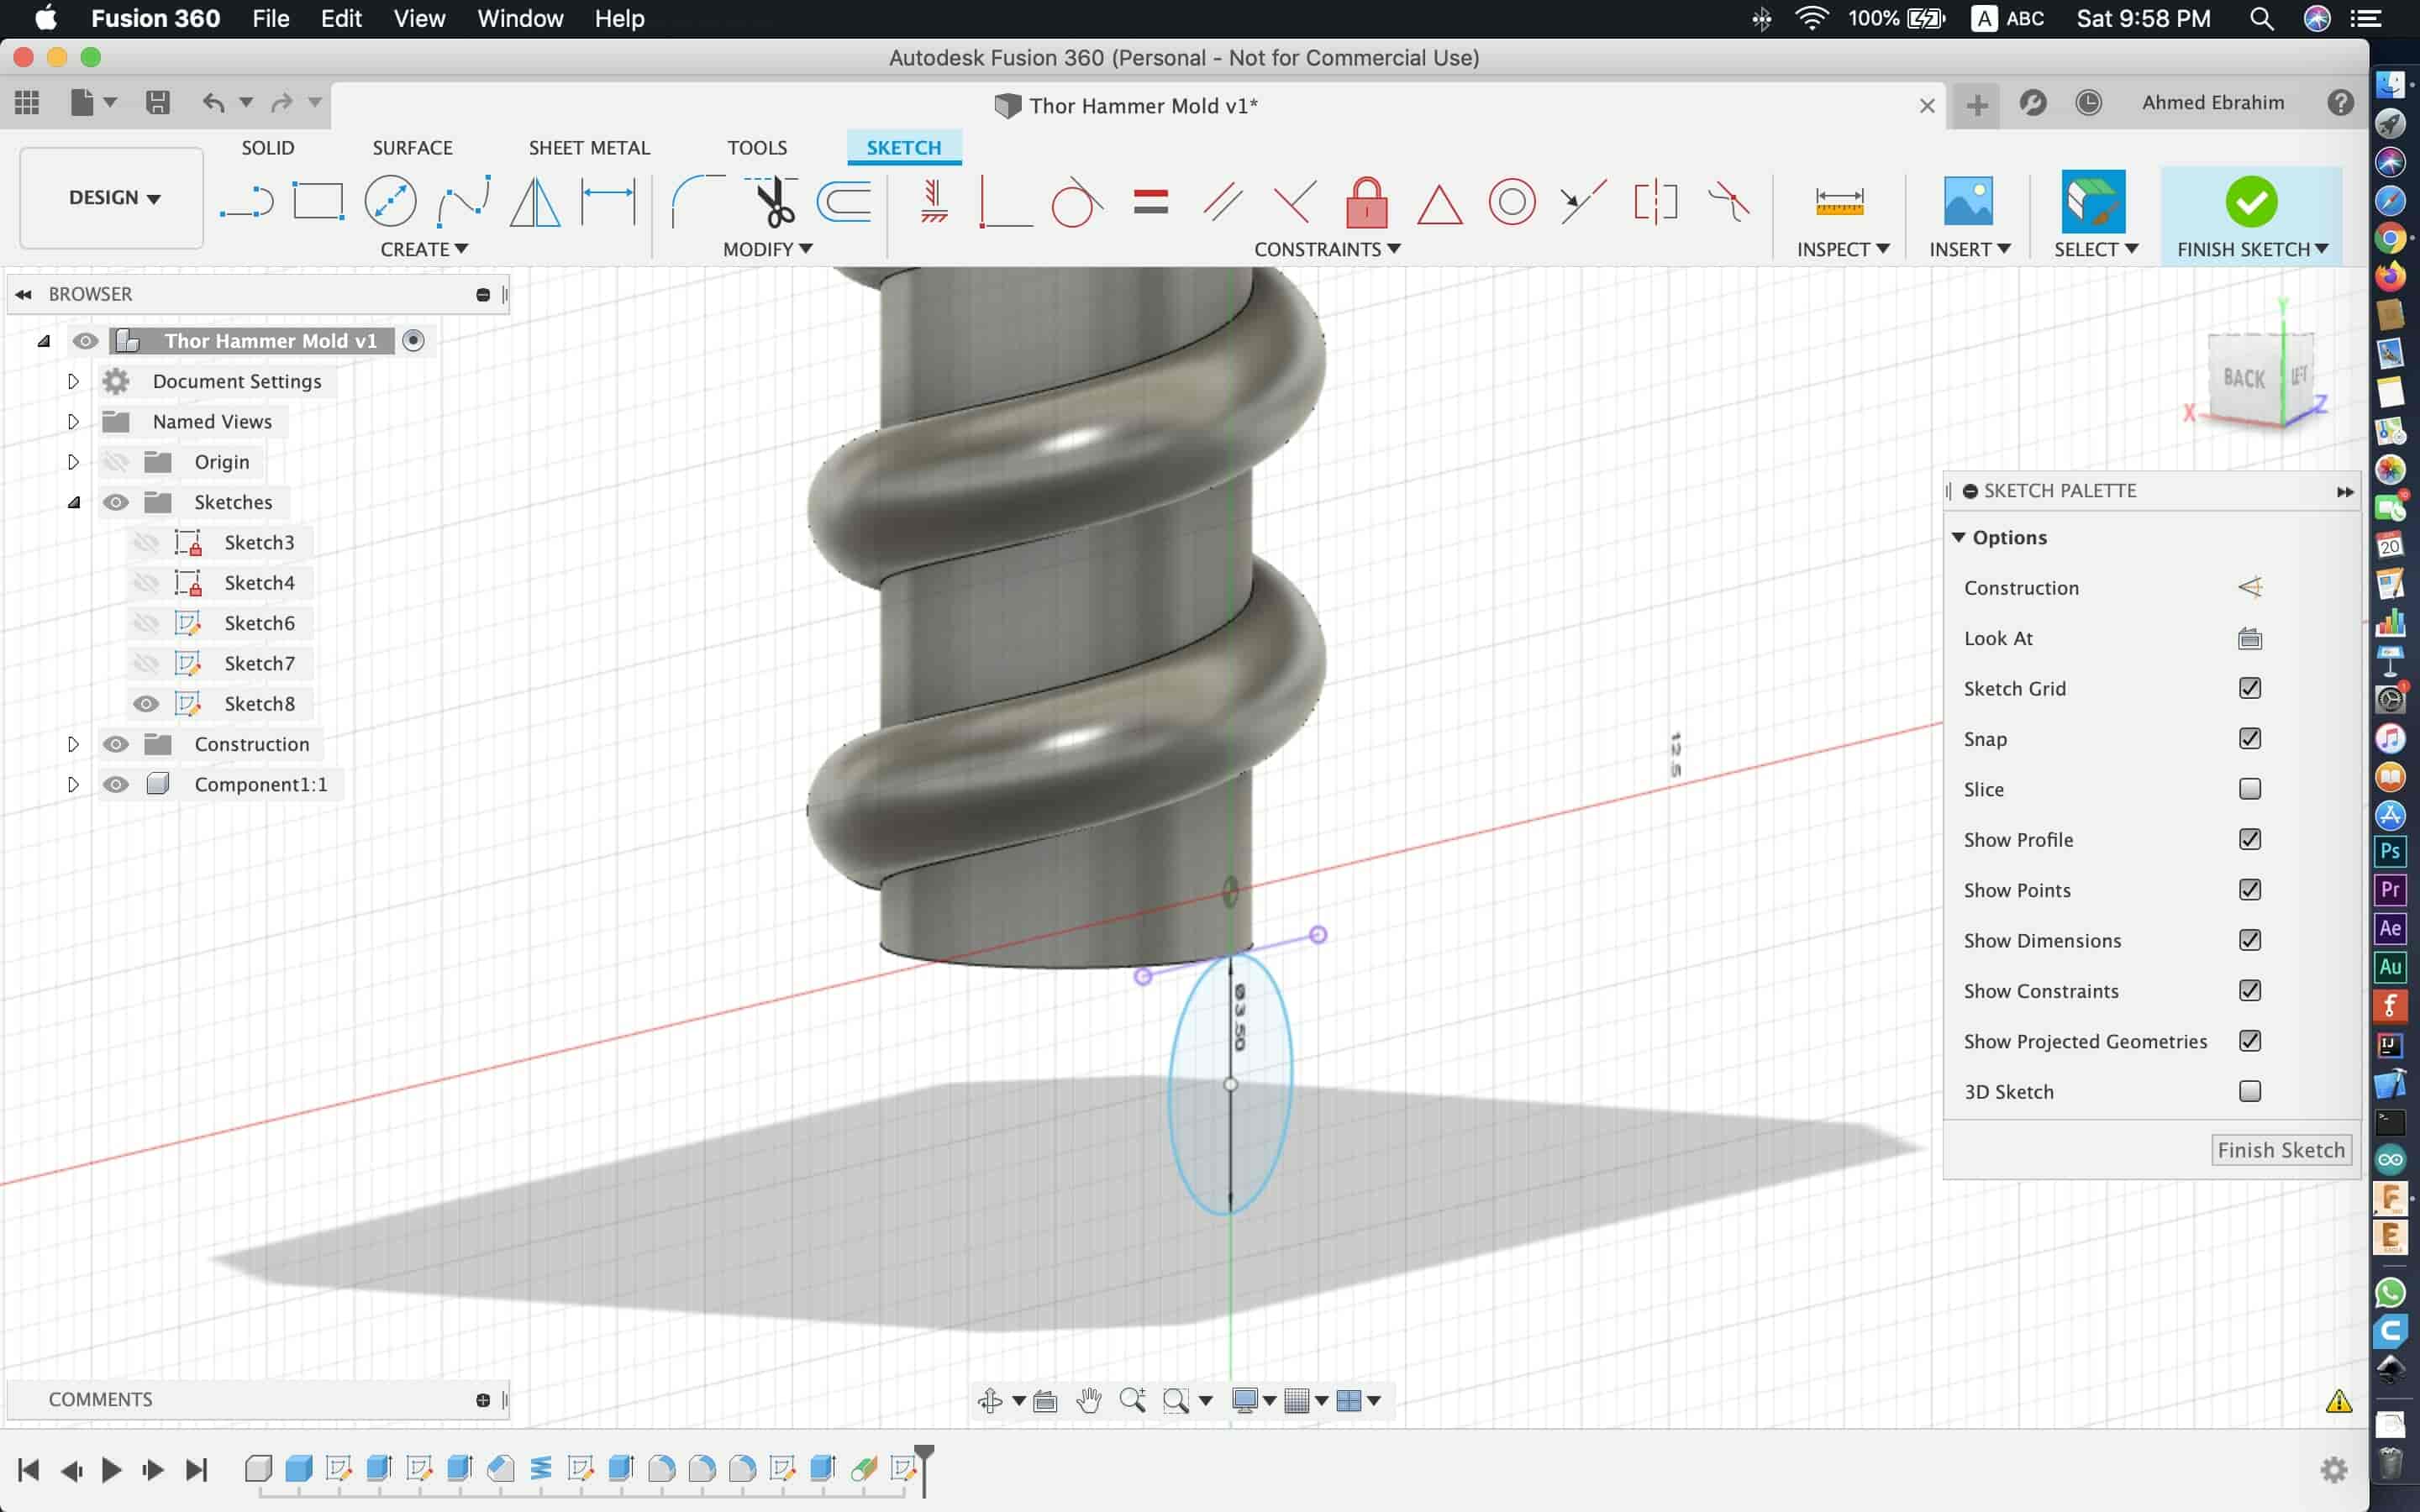
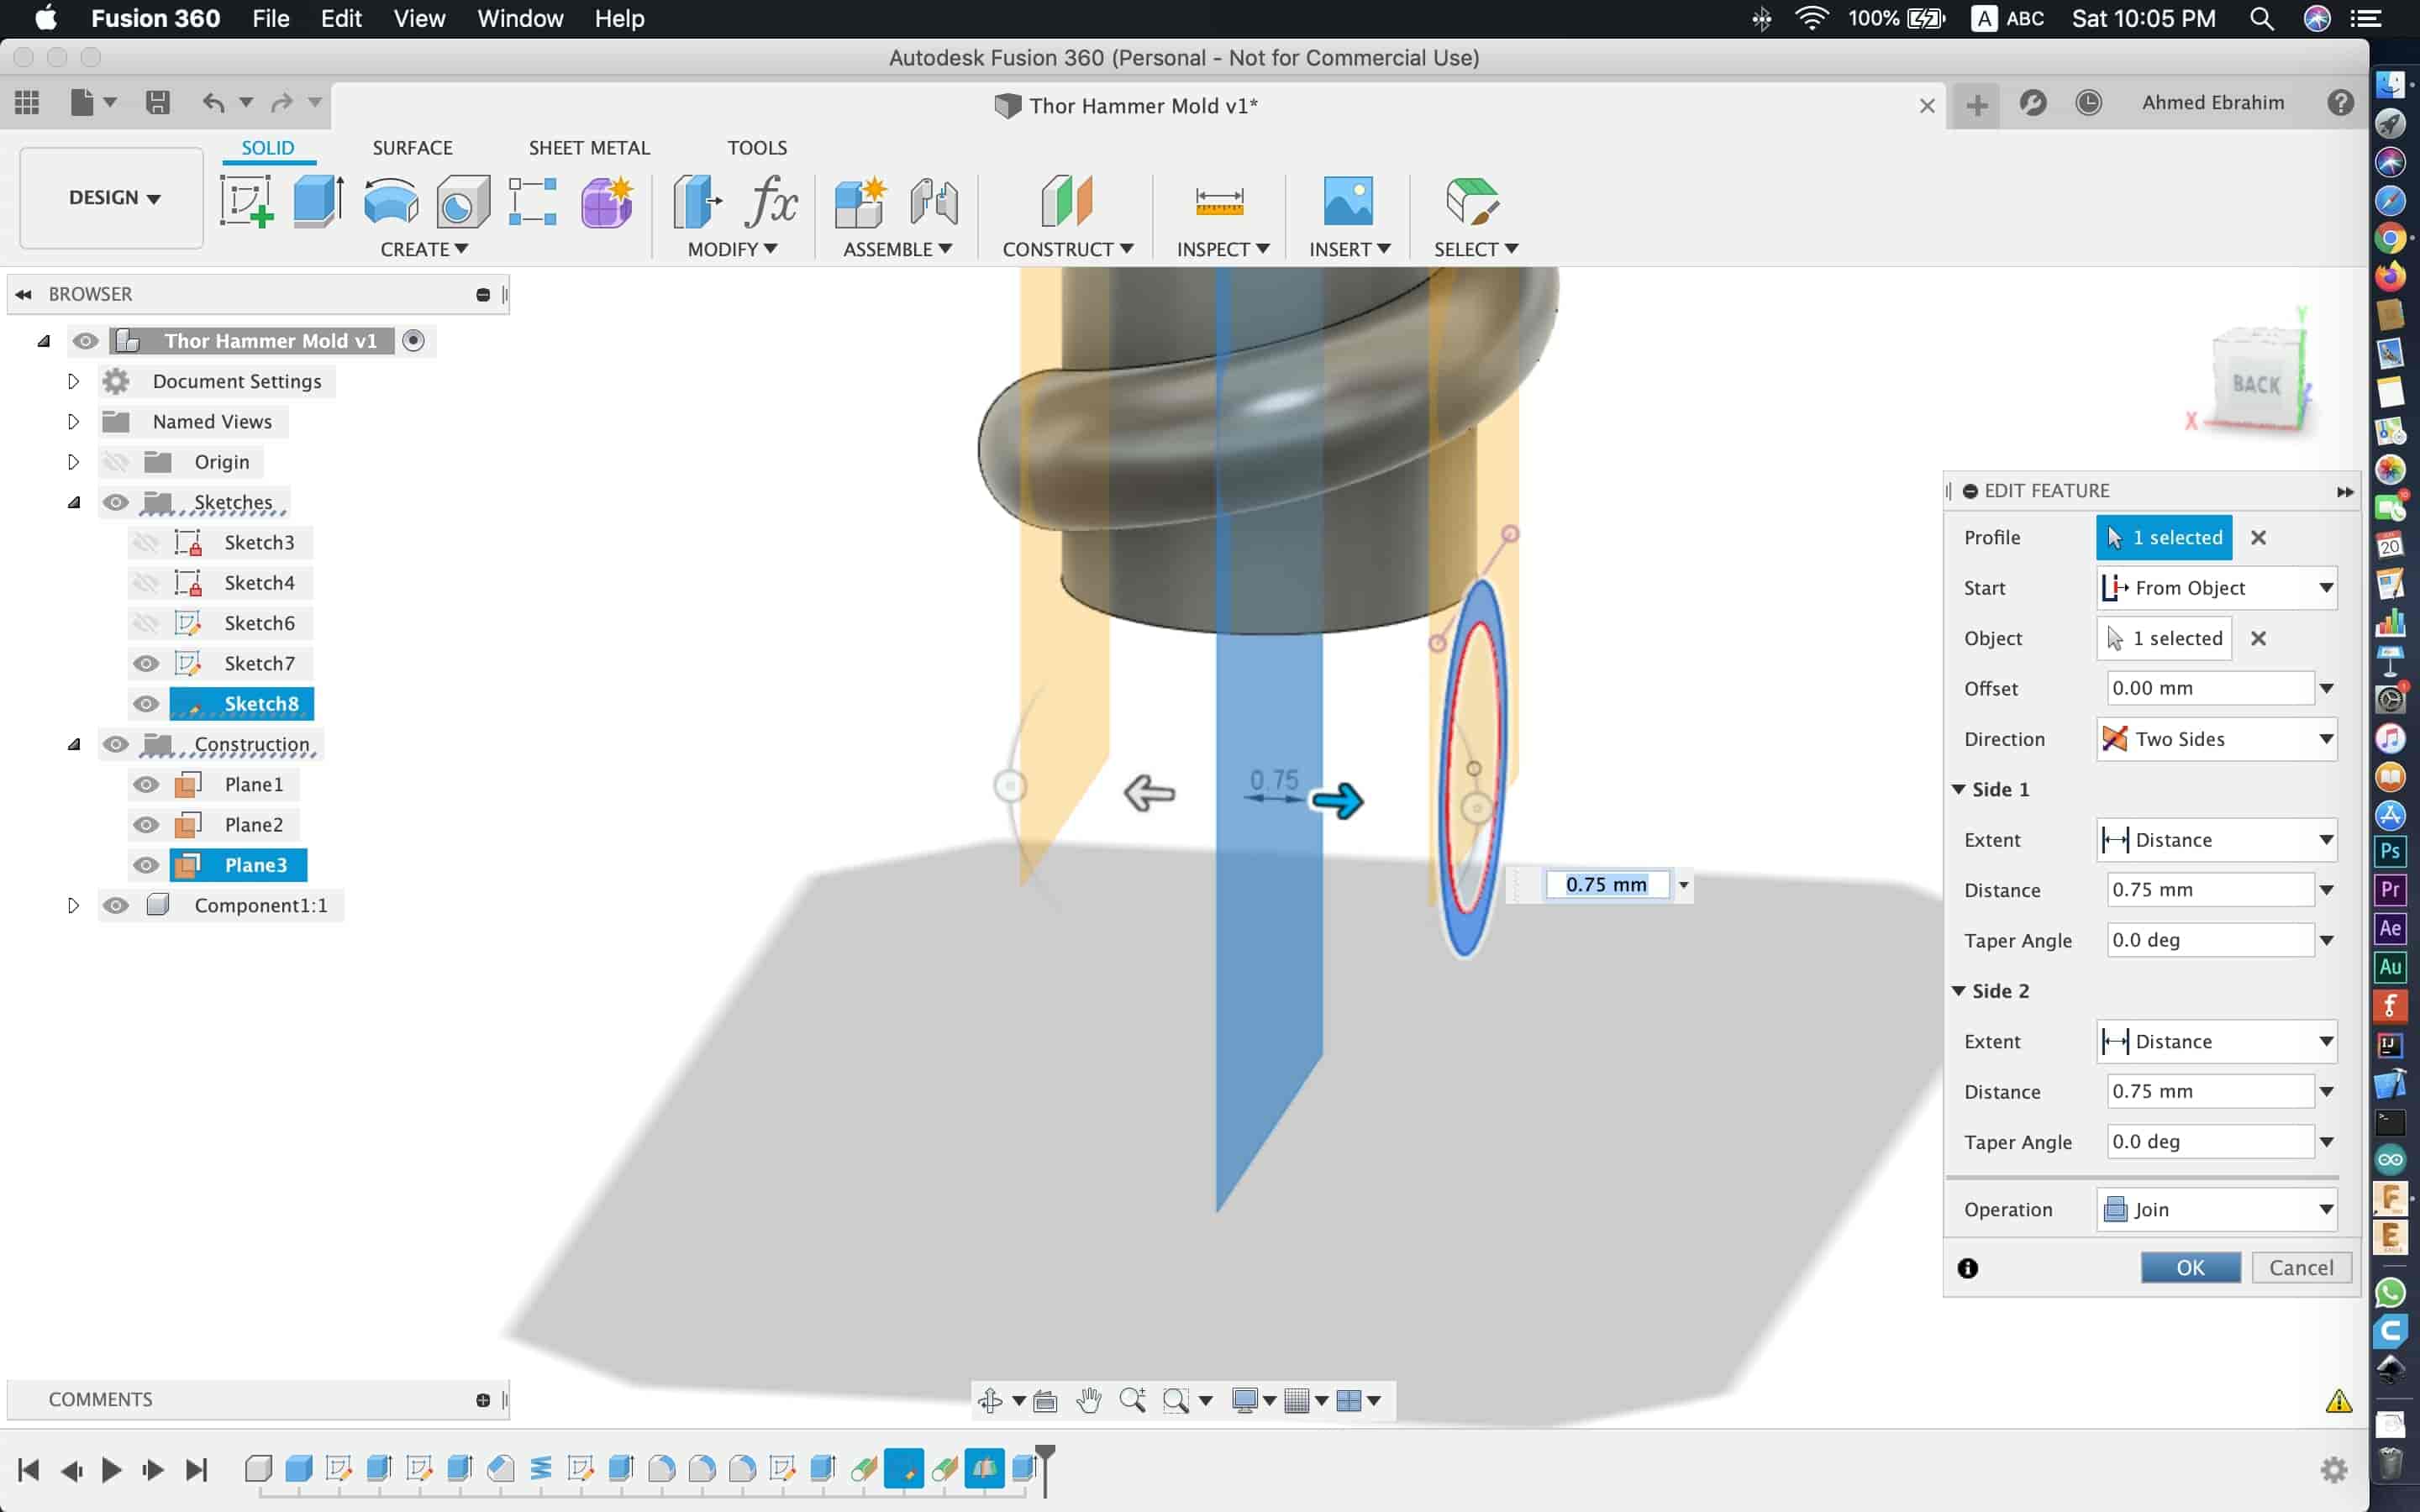
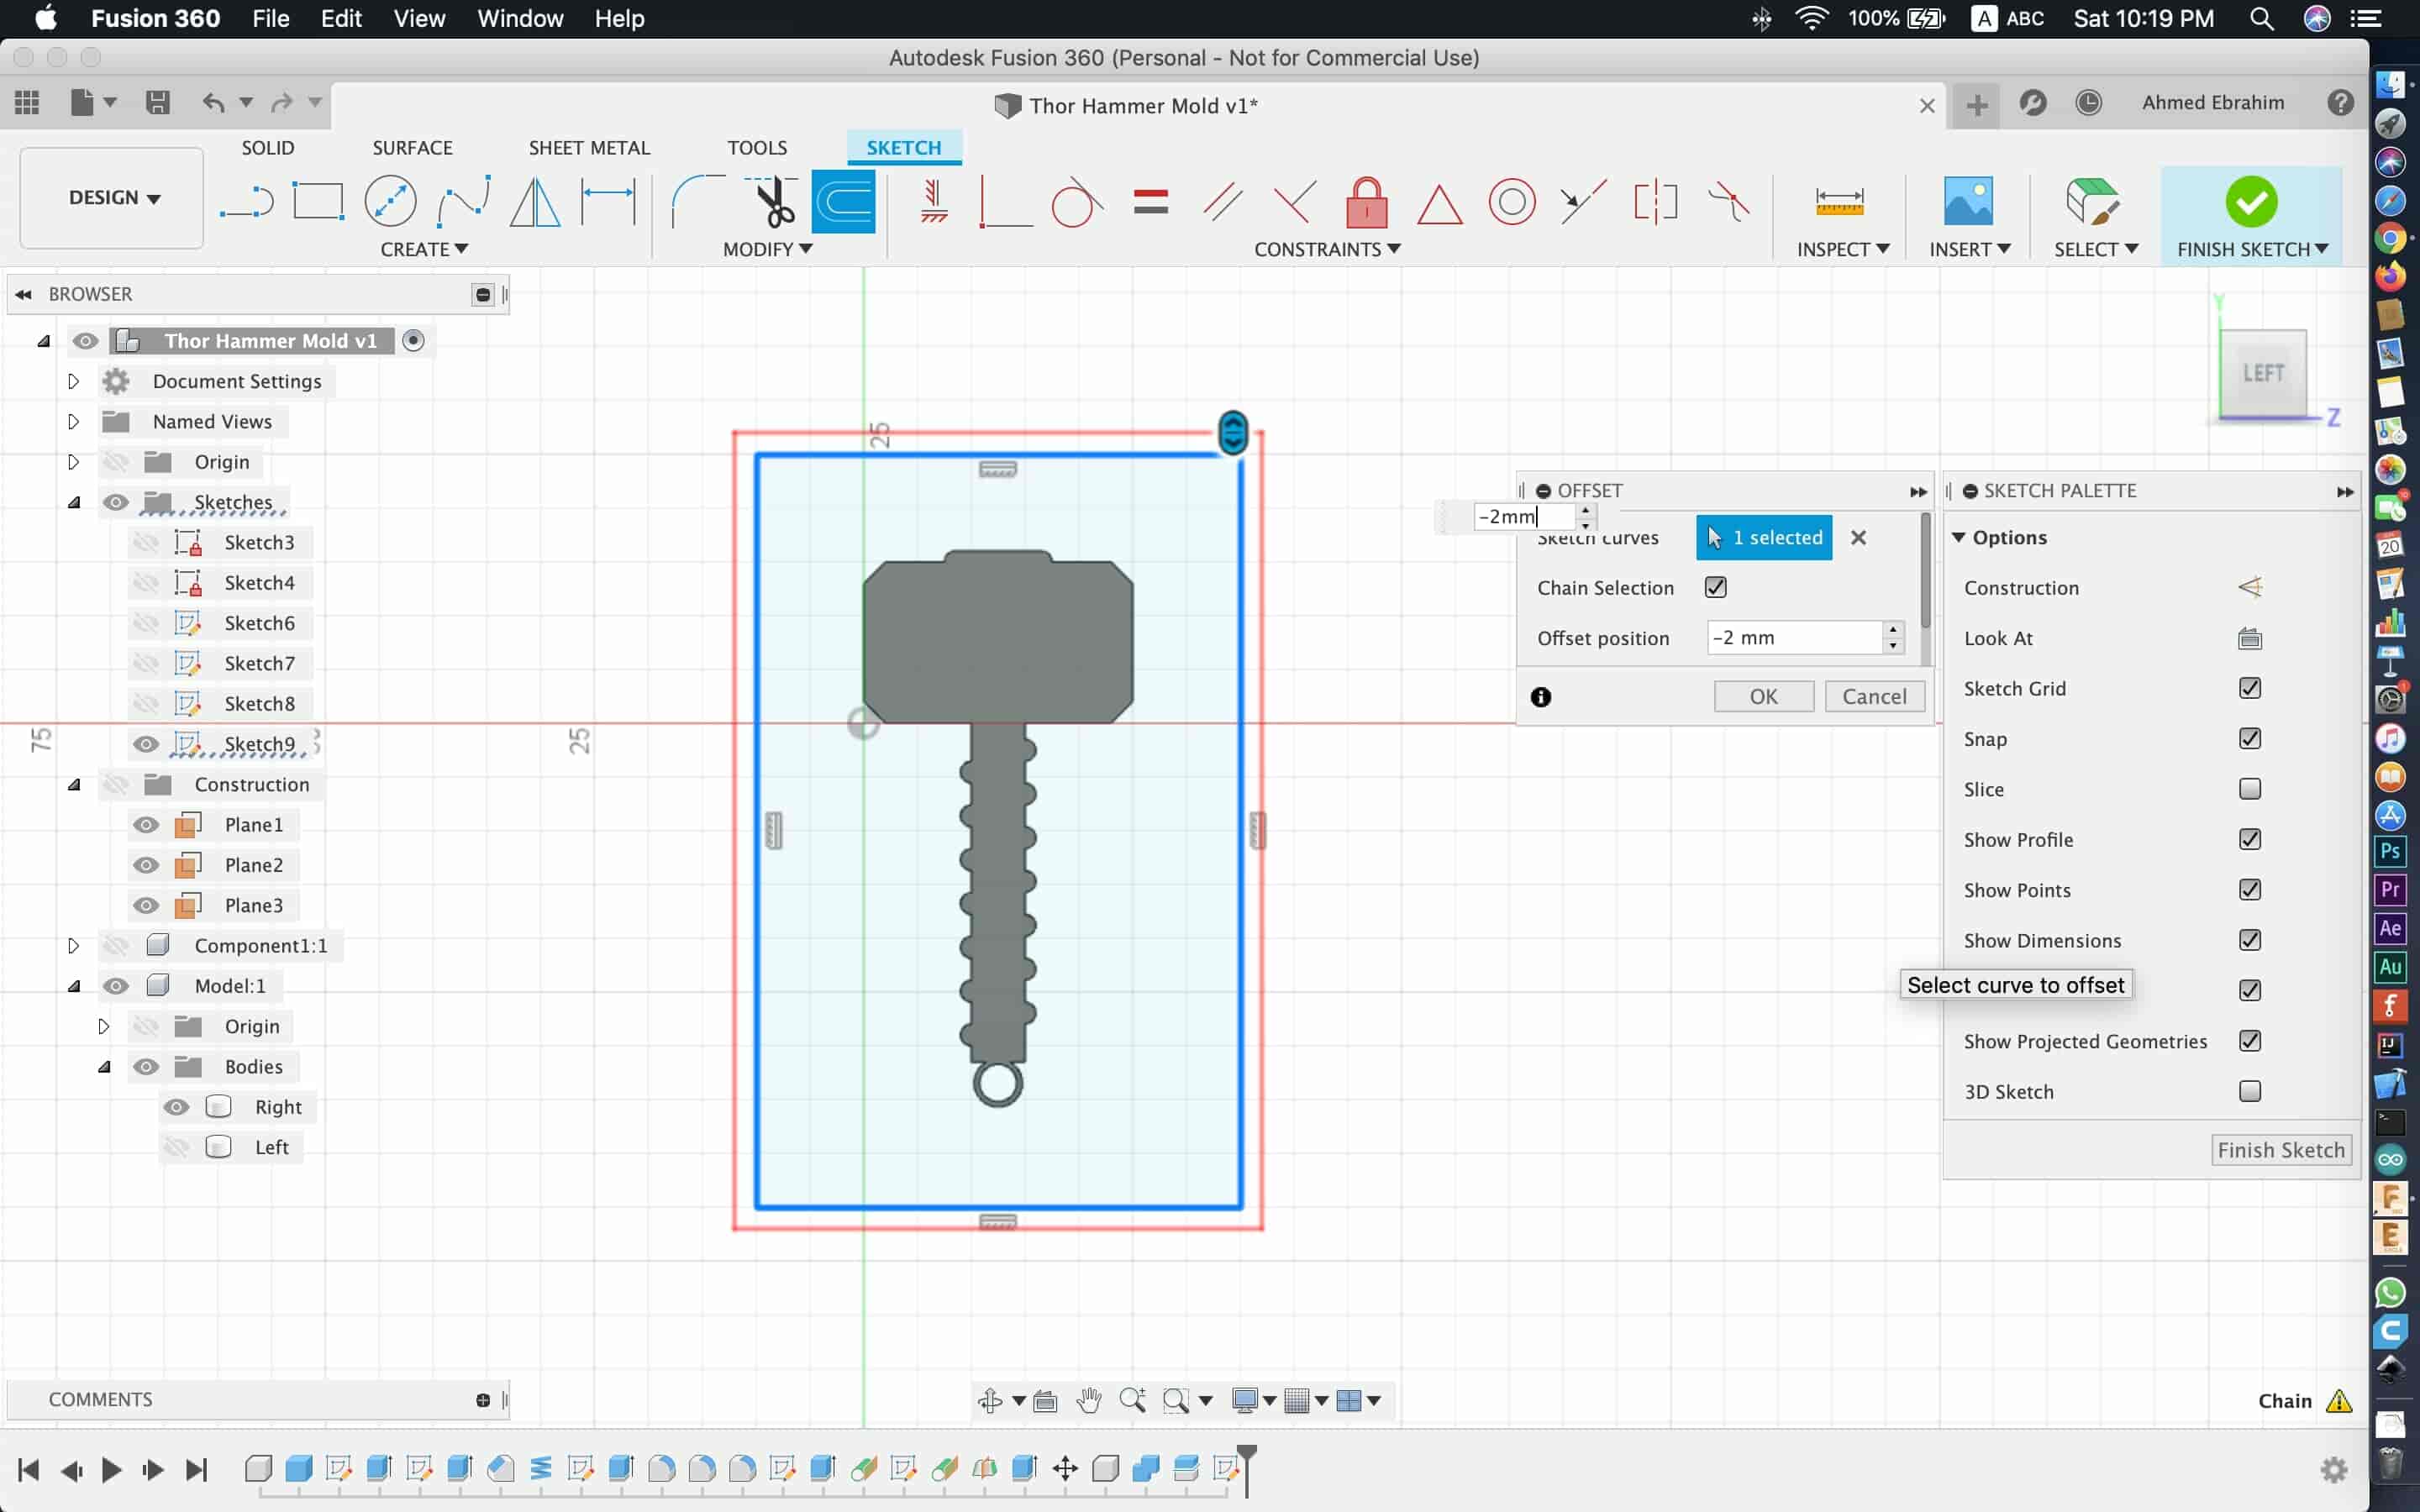
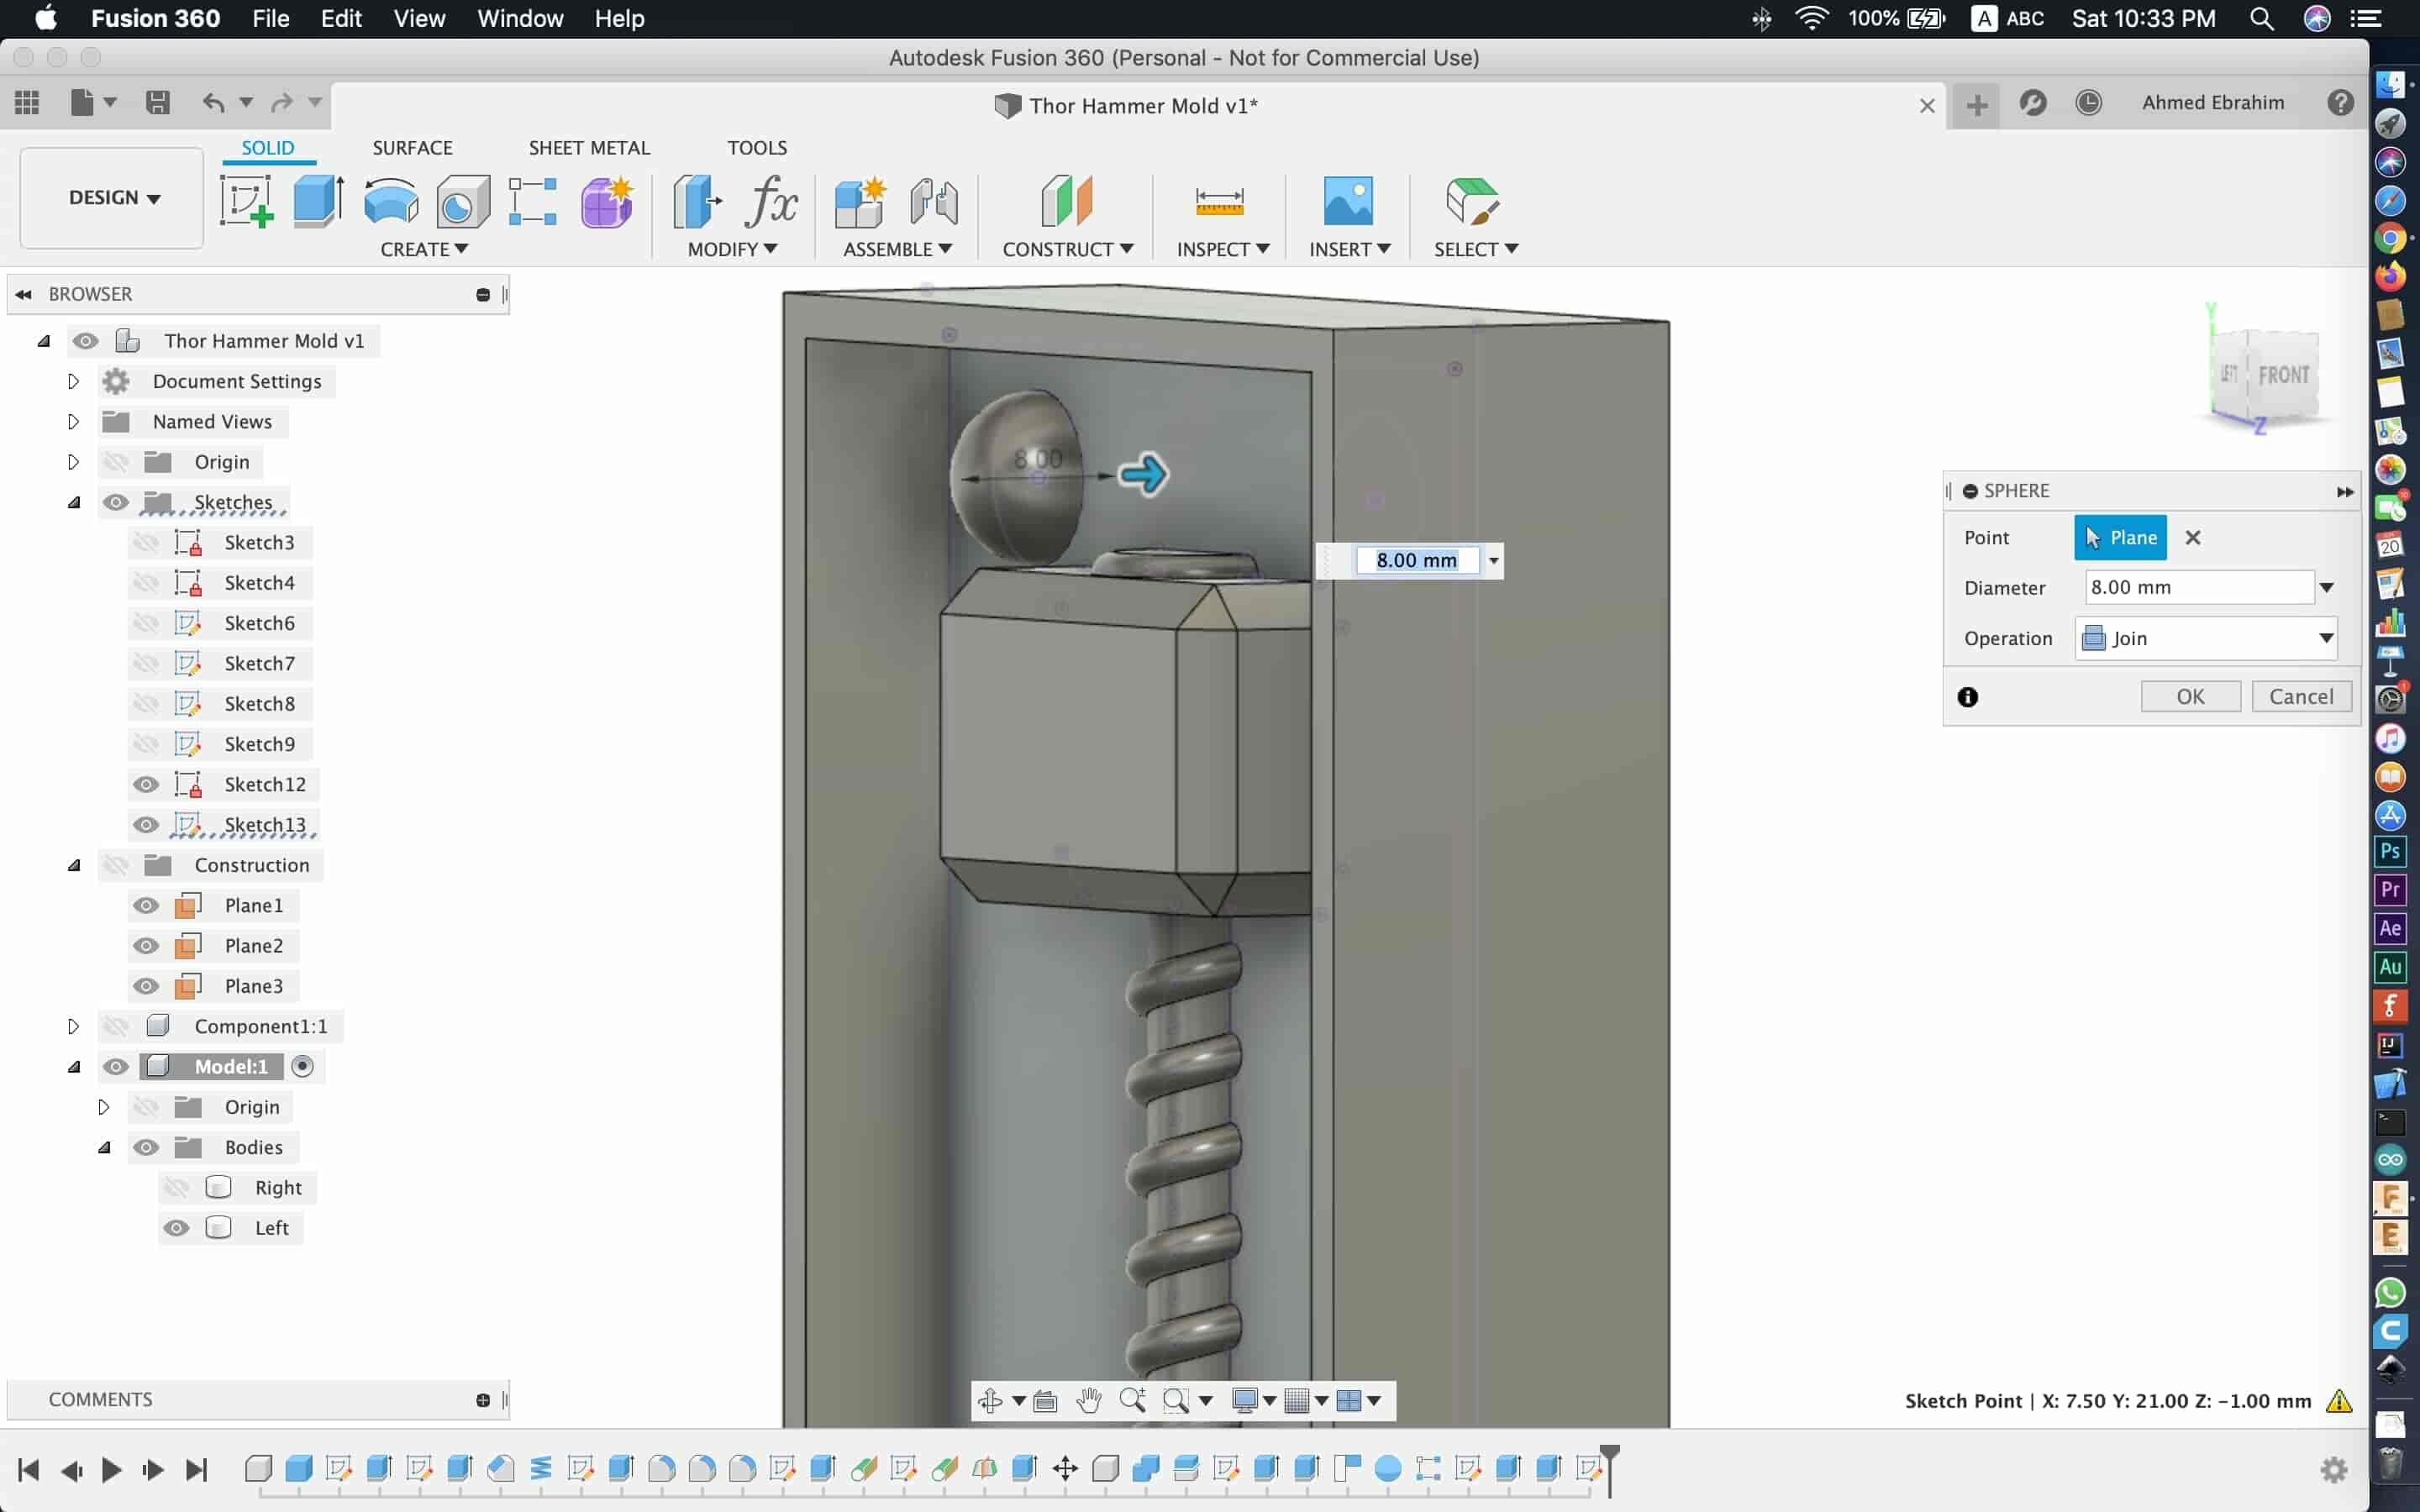
Now, I need to make the part that will hold thor hammer in my keychain. So, I made two circles: 3.5mm circle and 4.5mm circle inside each other.

Then, I extruded that circle starting from the midplane that we made before from the two sides symmetrically.
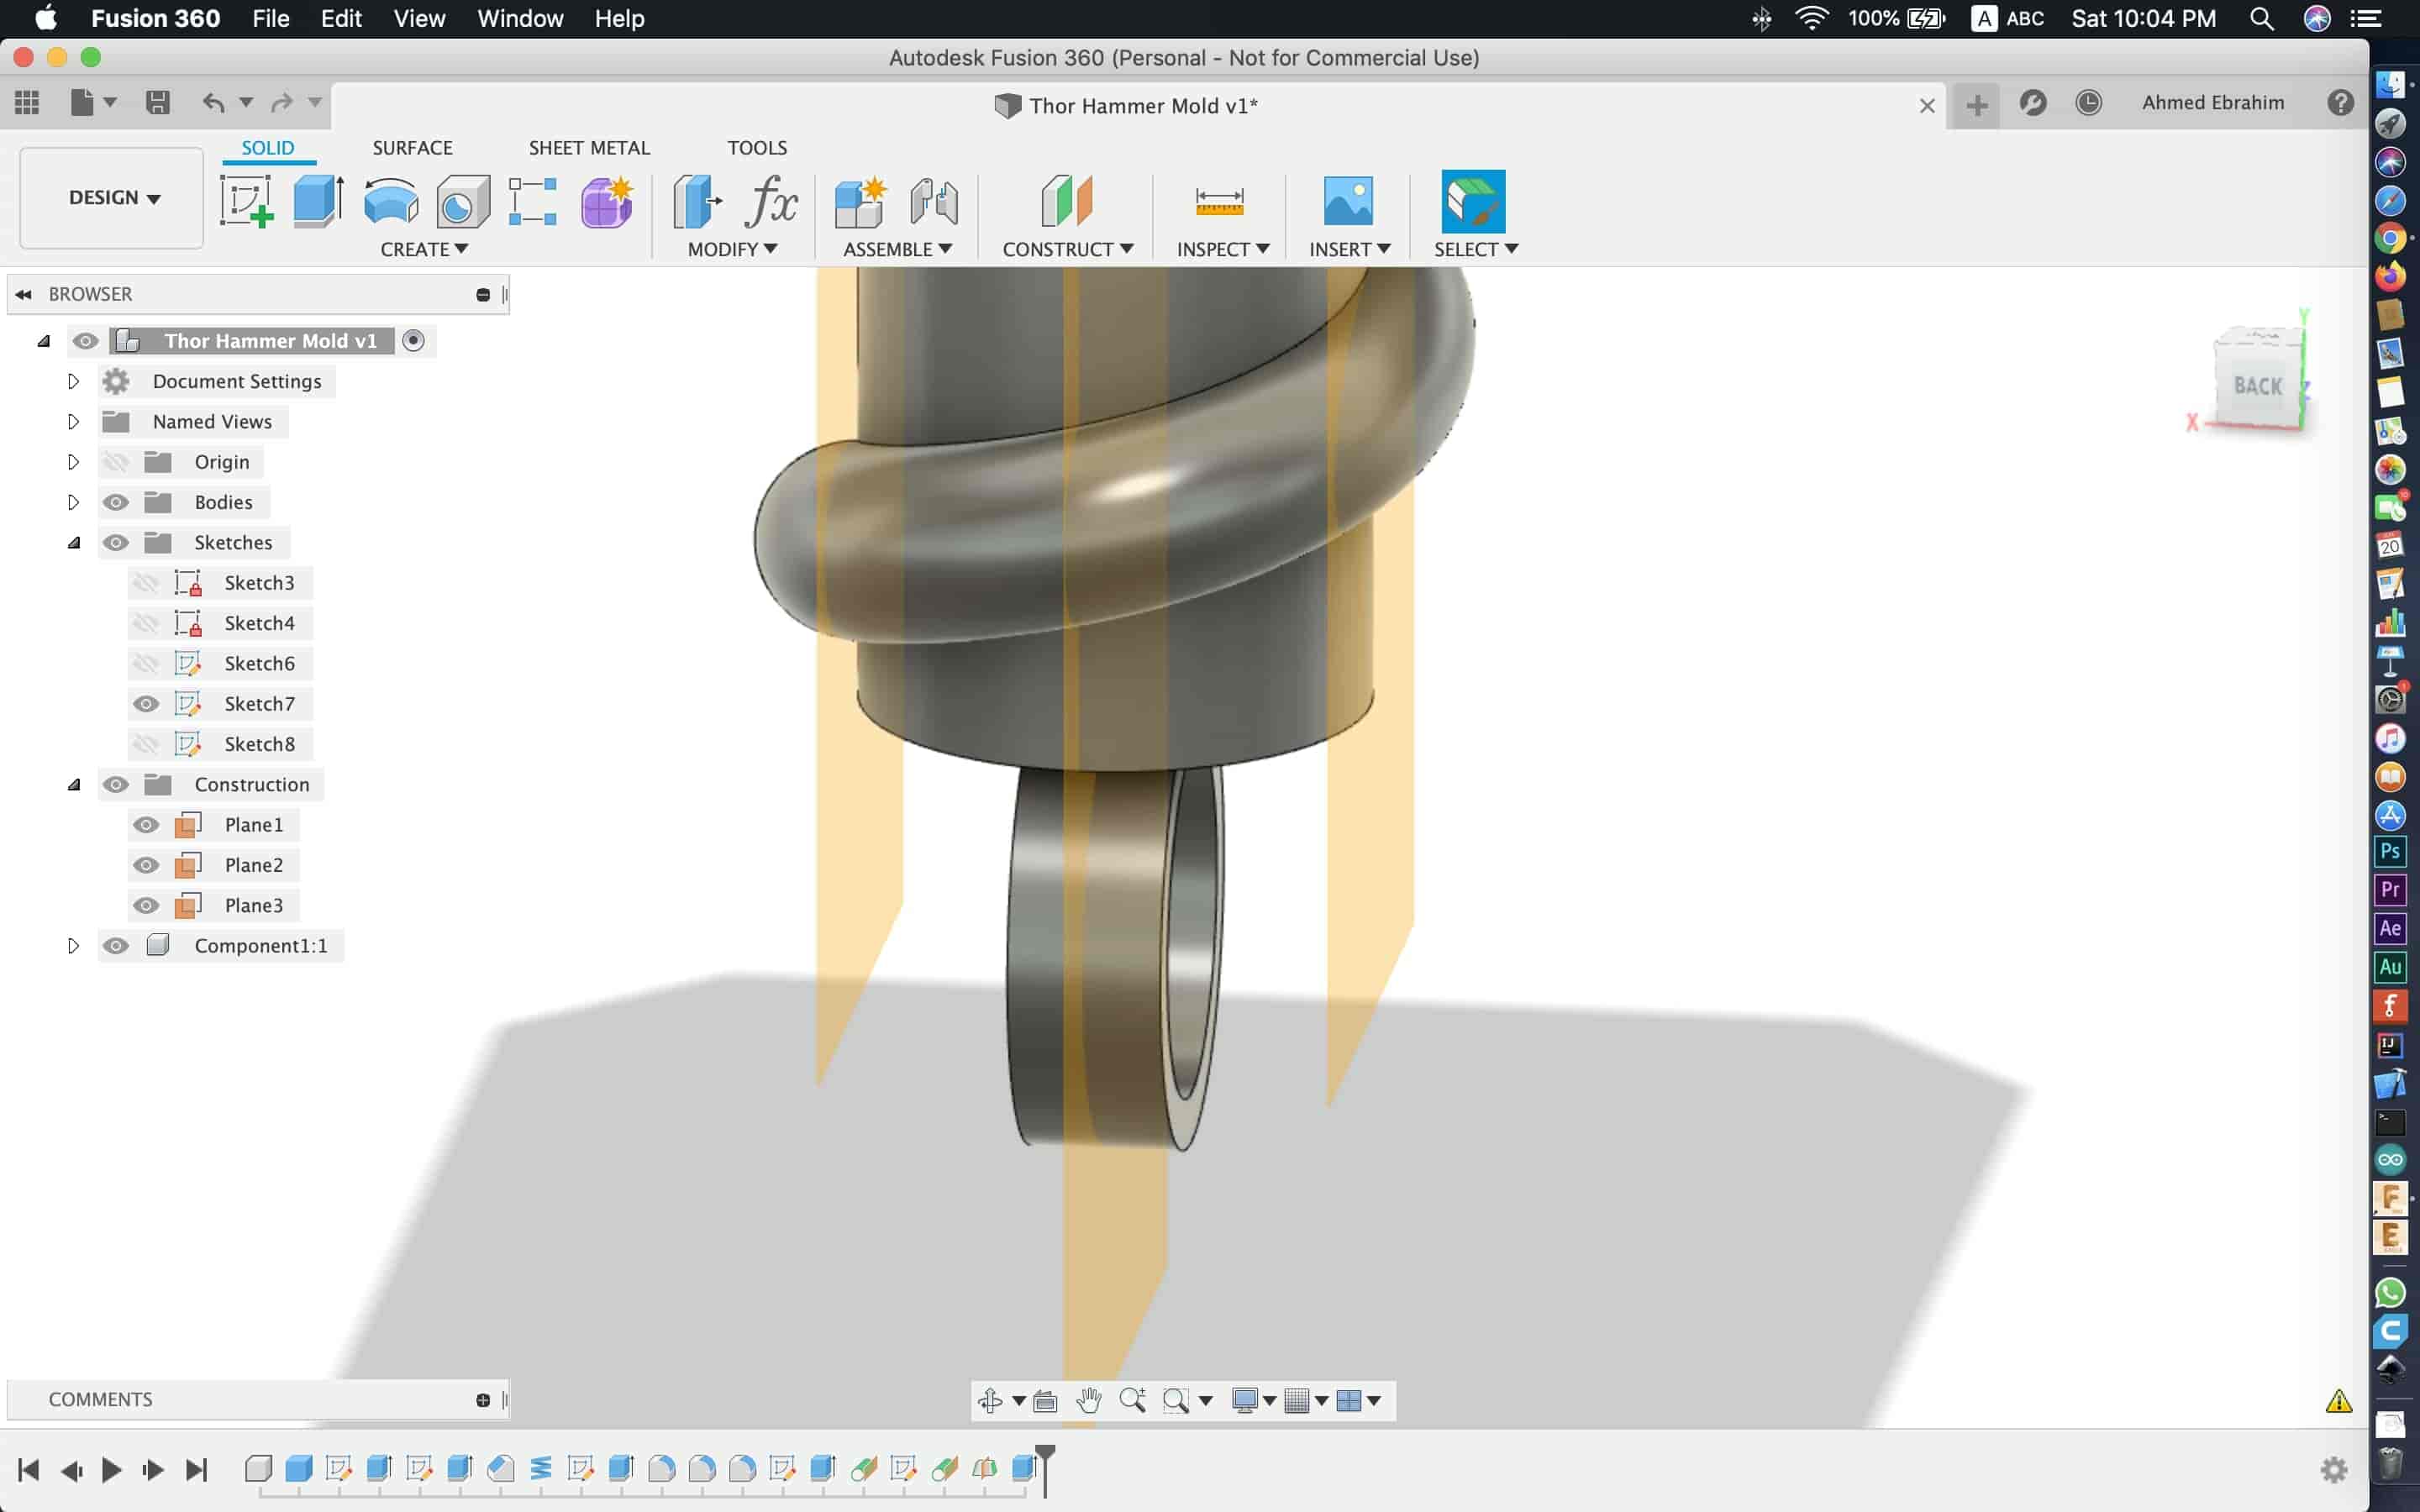
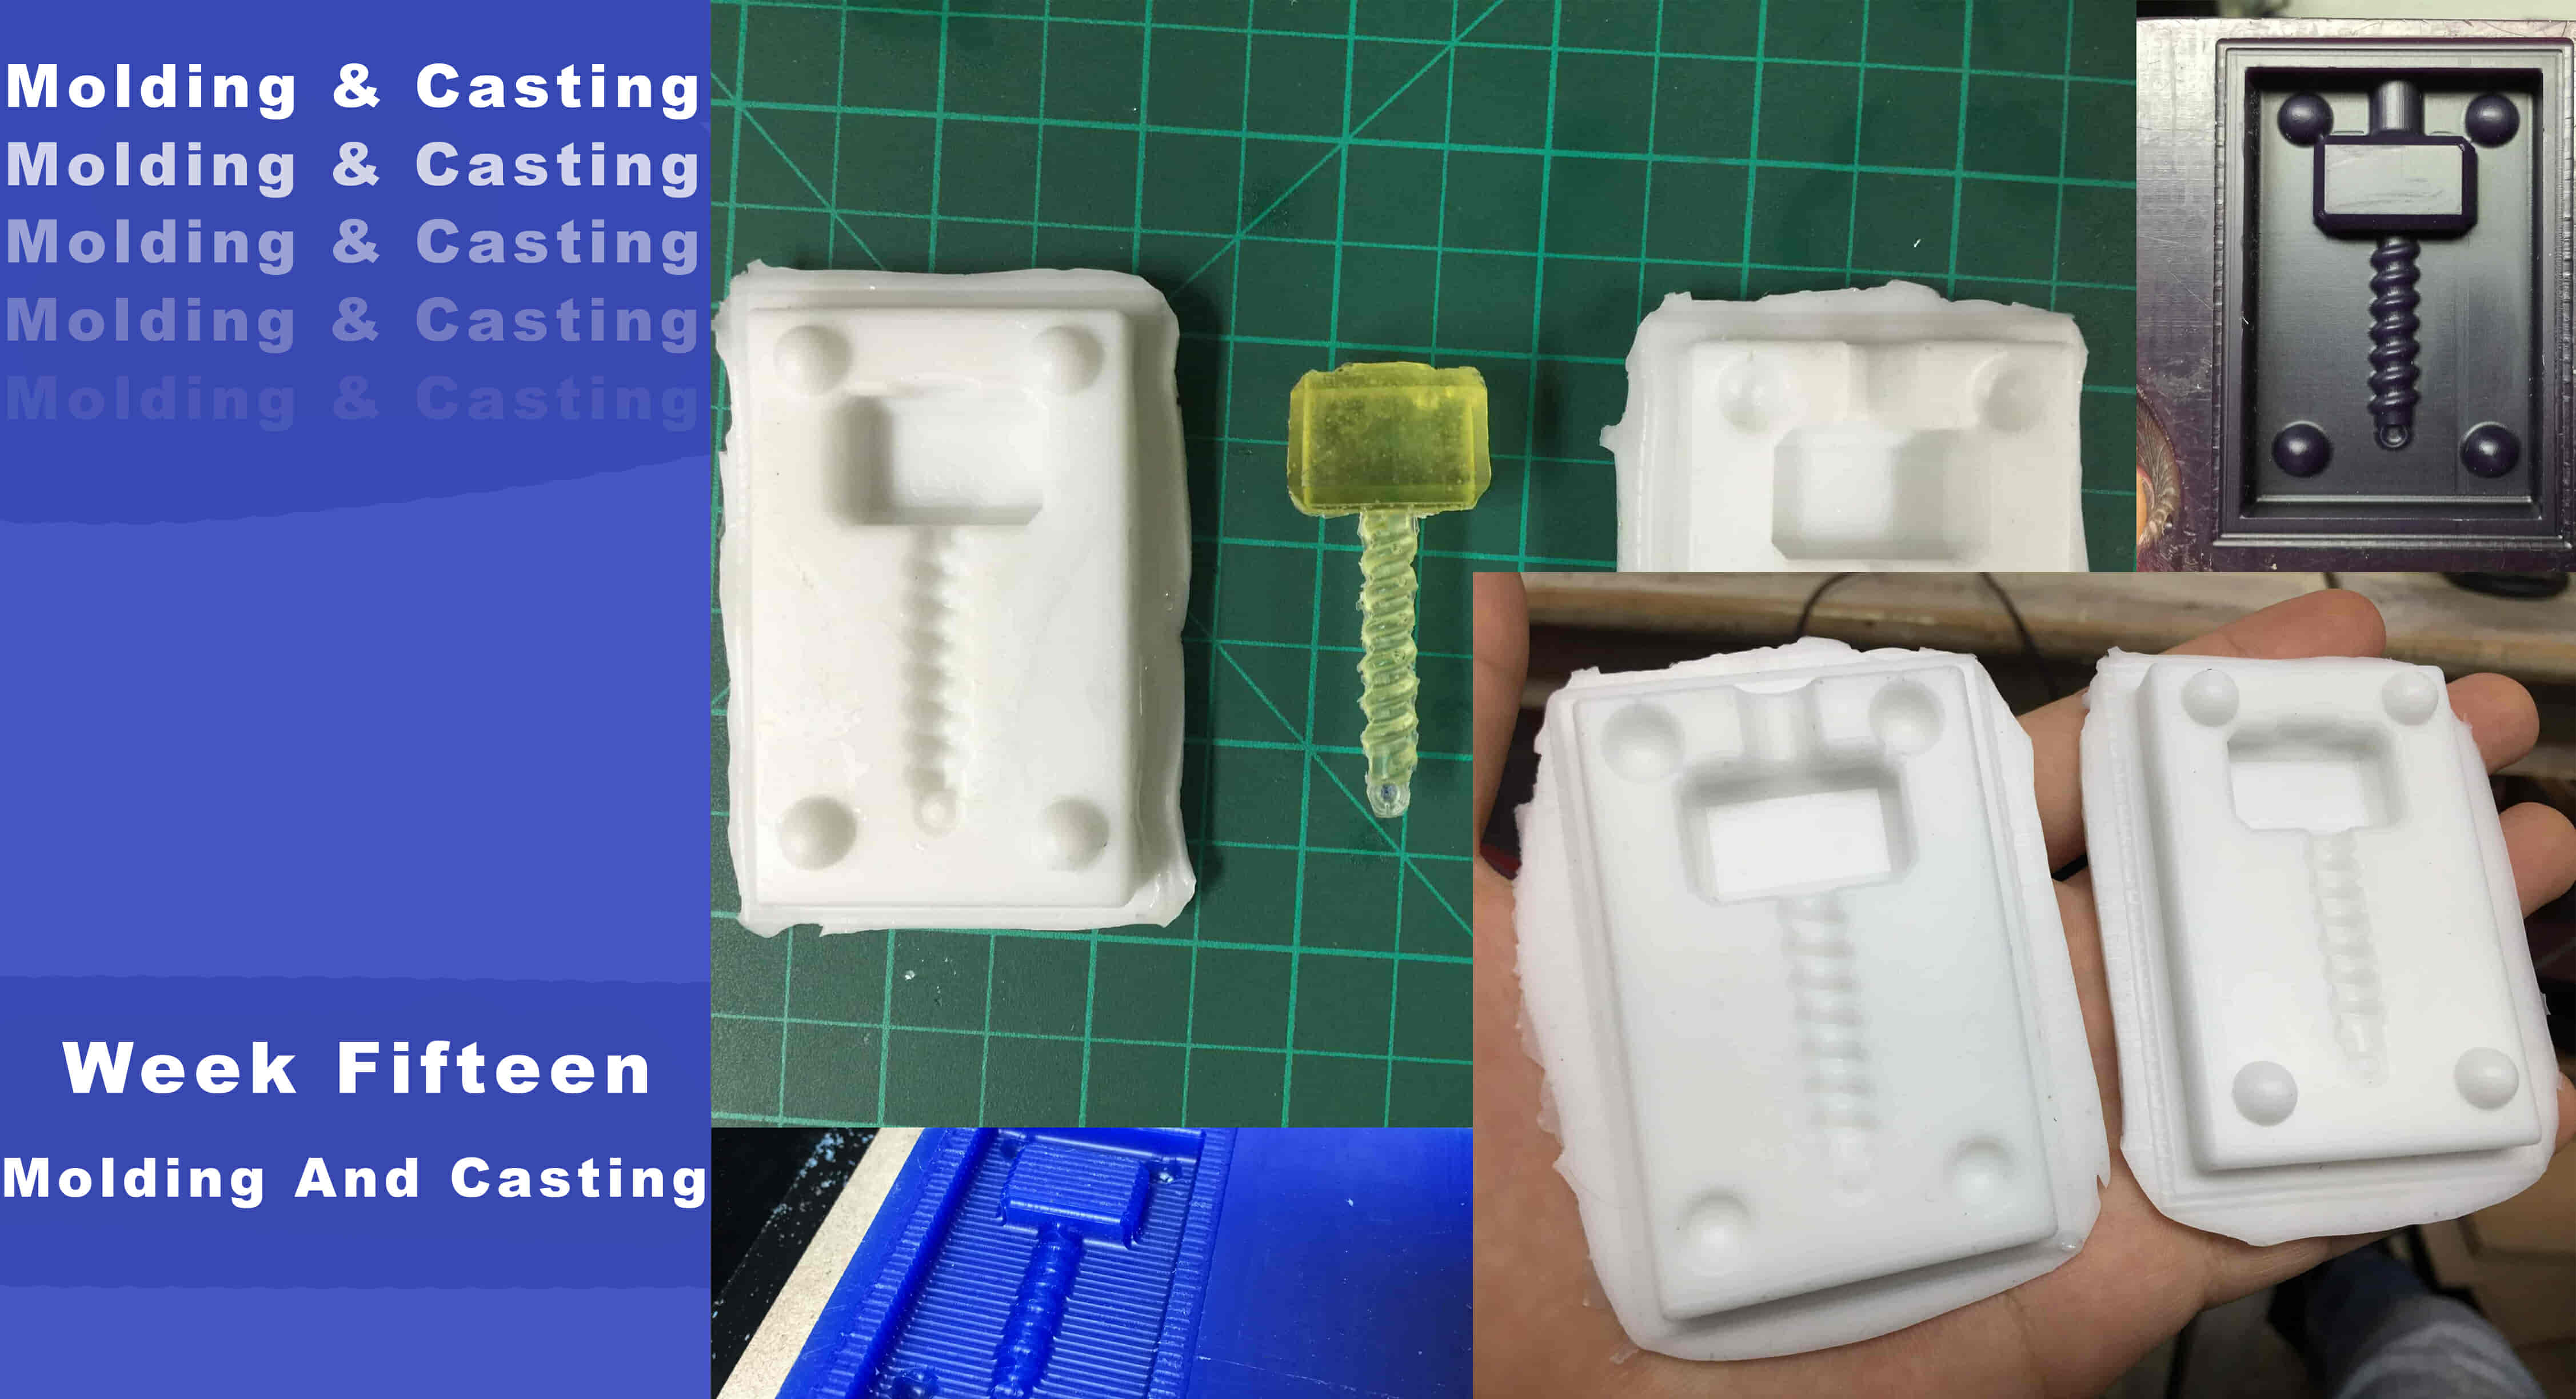
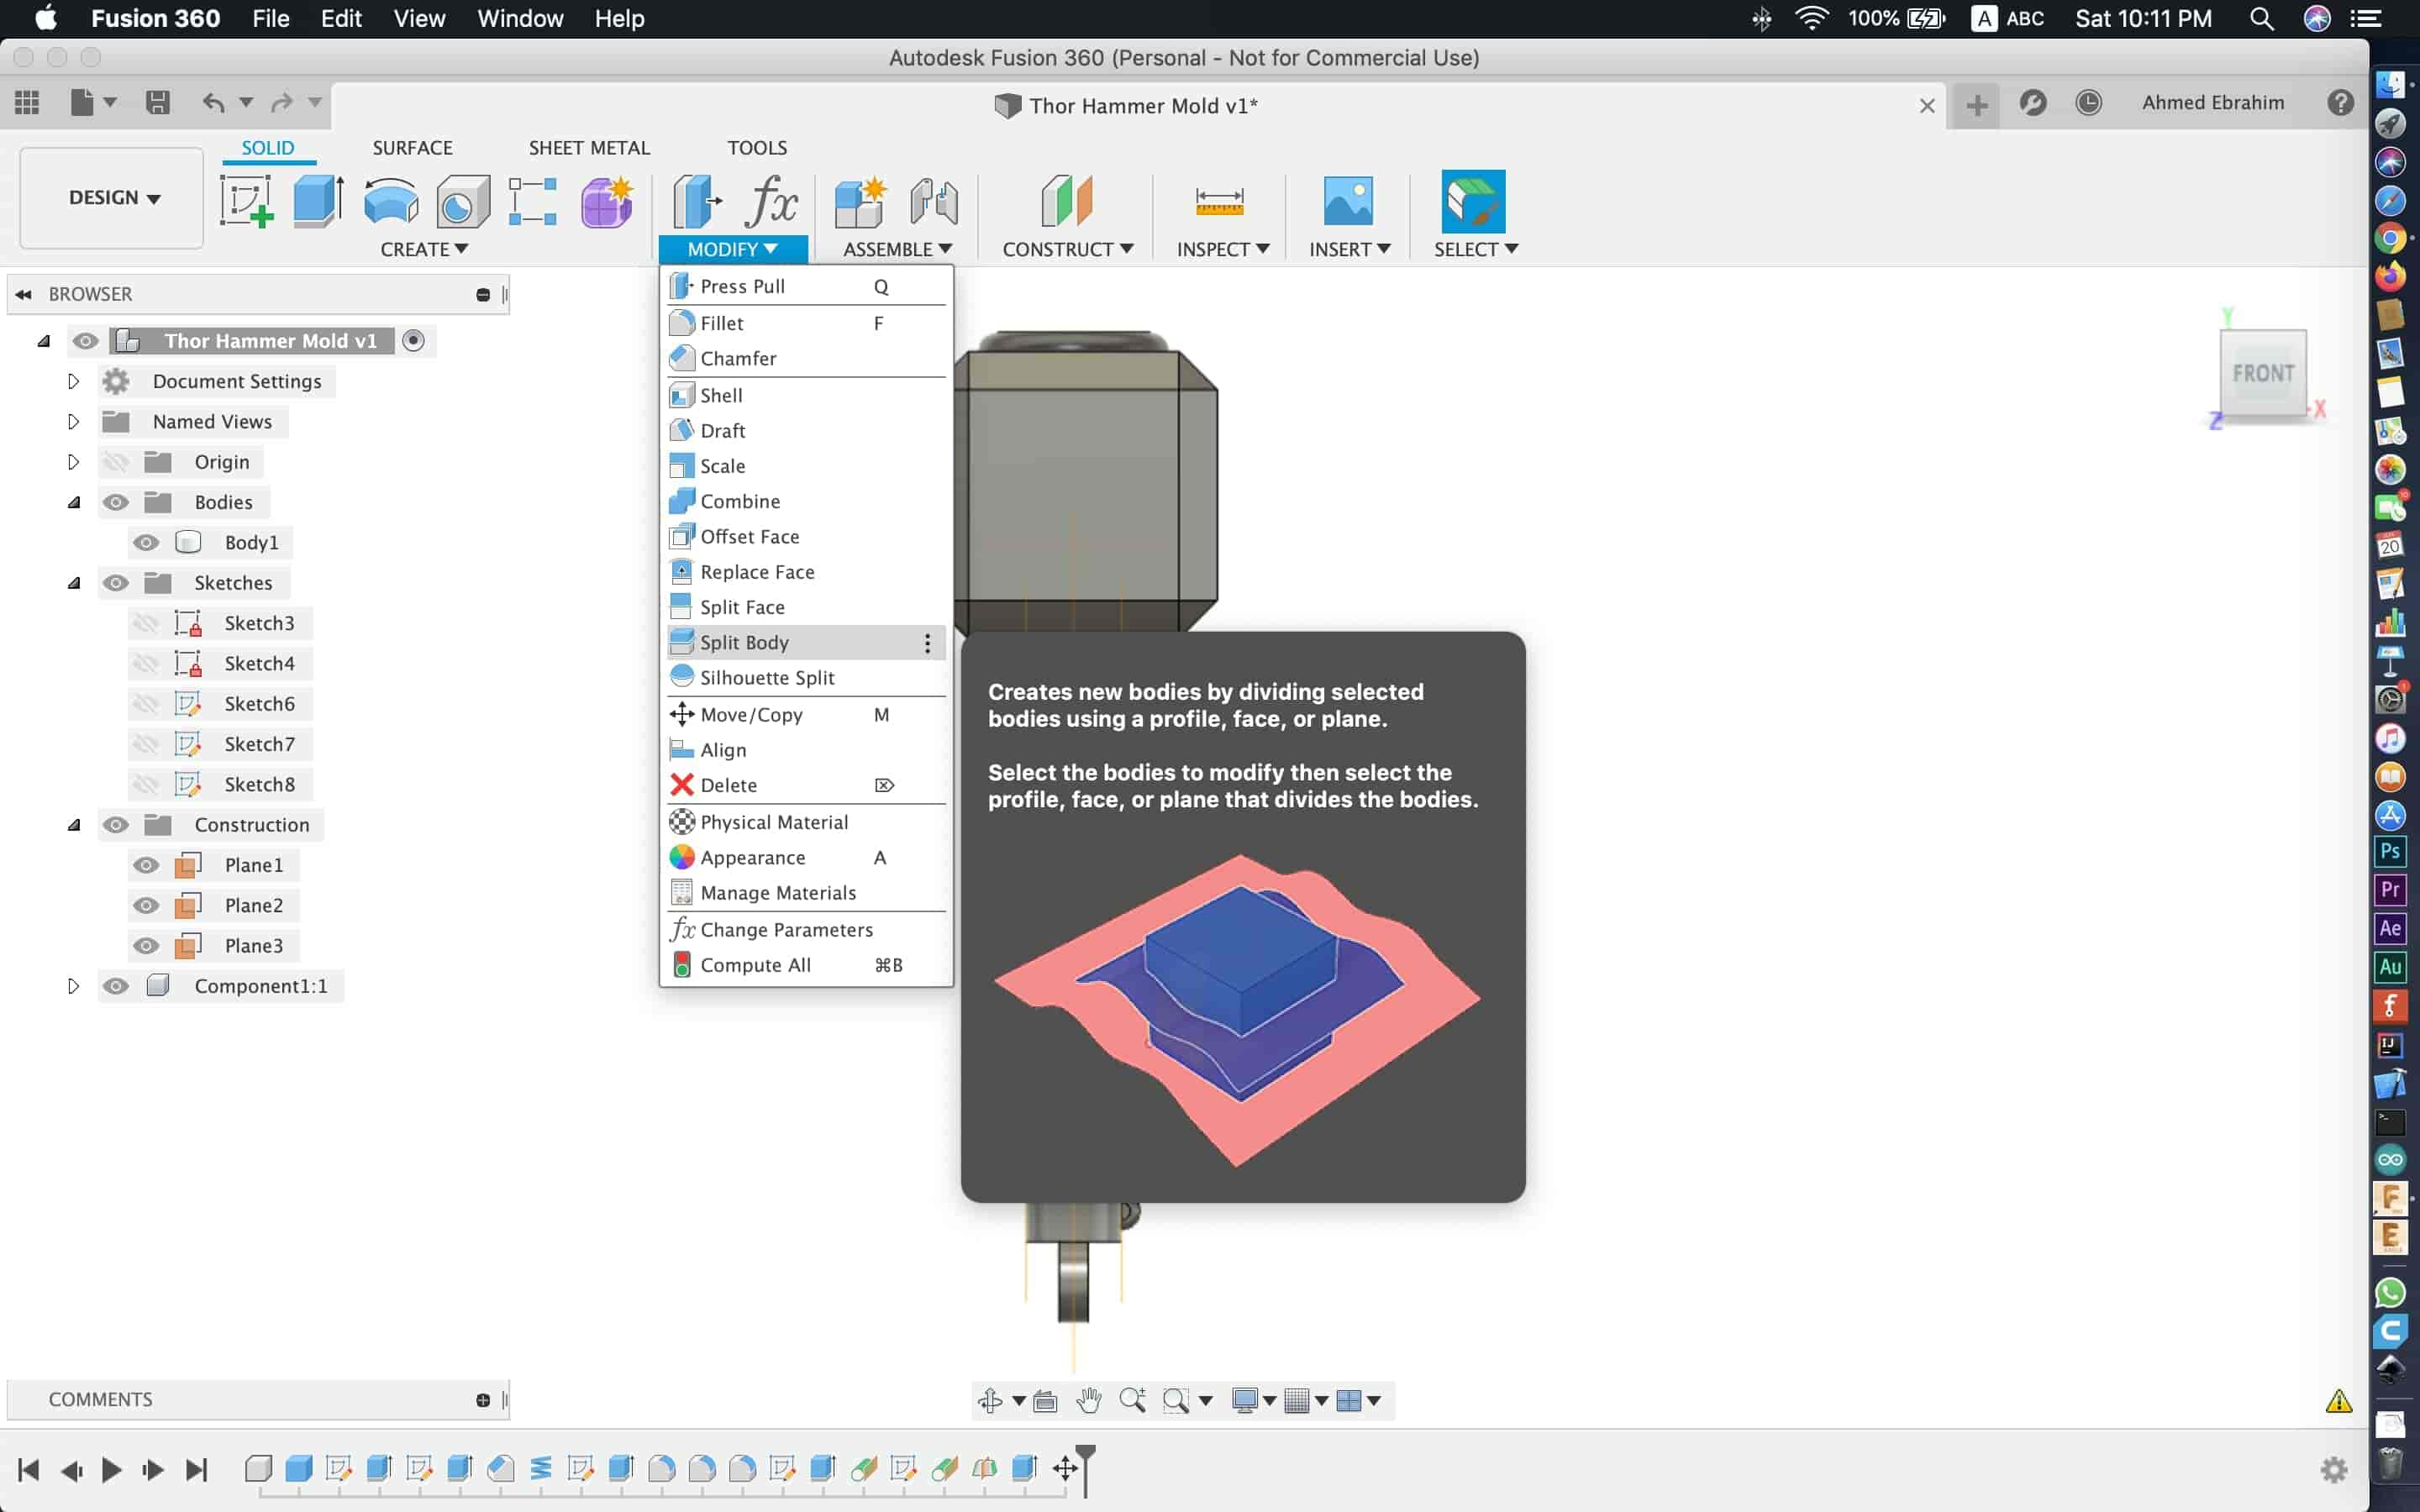
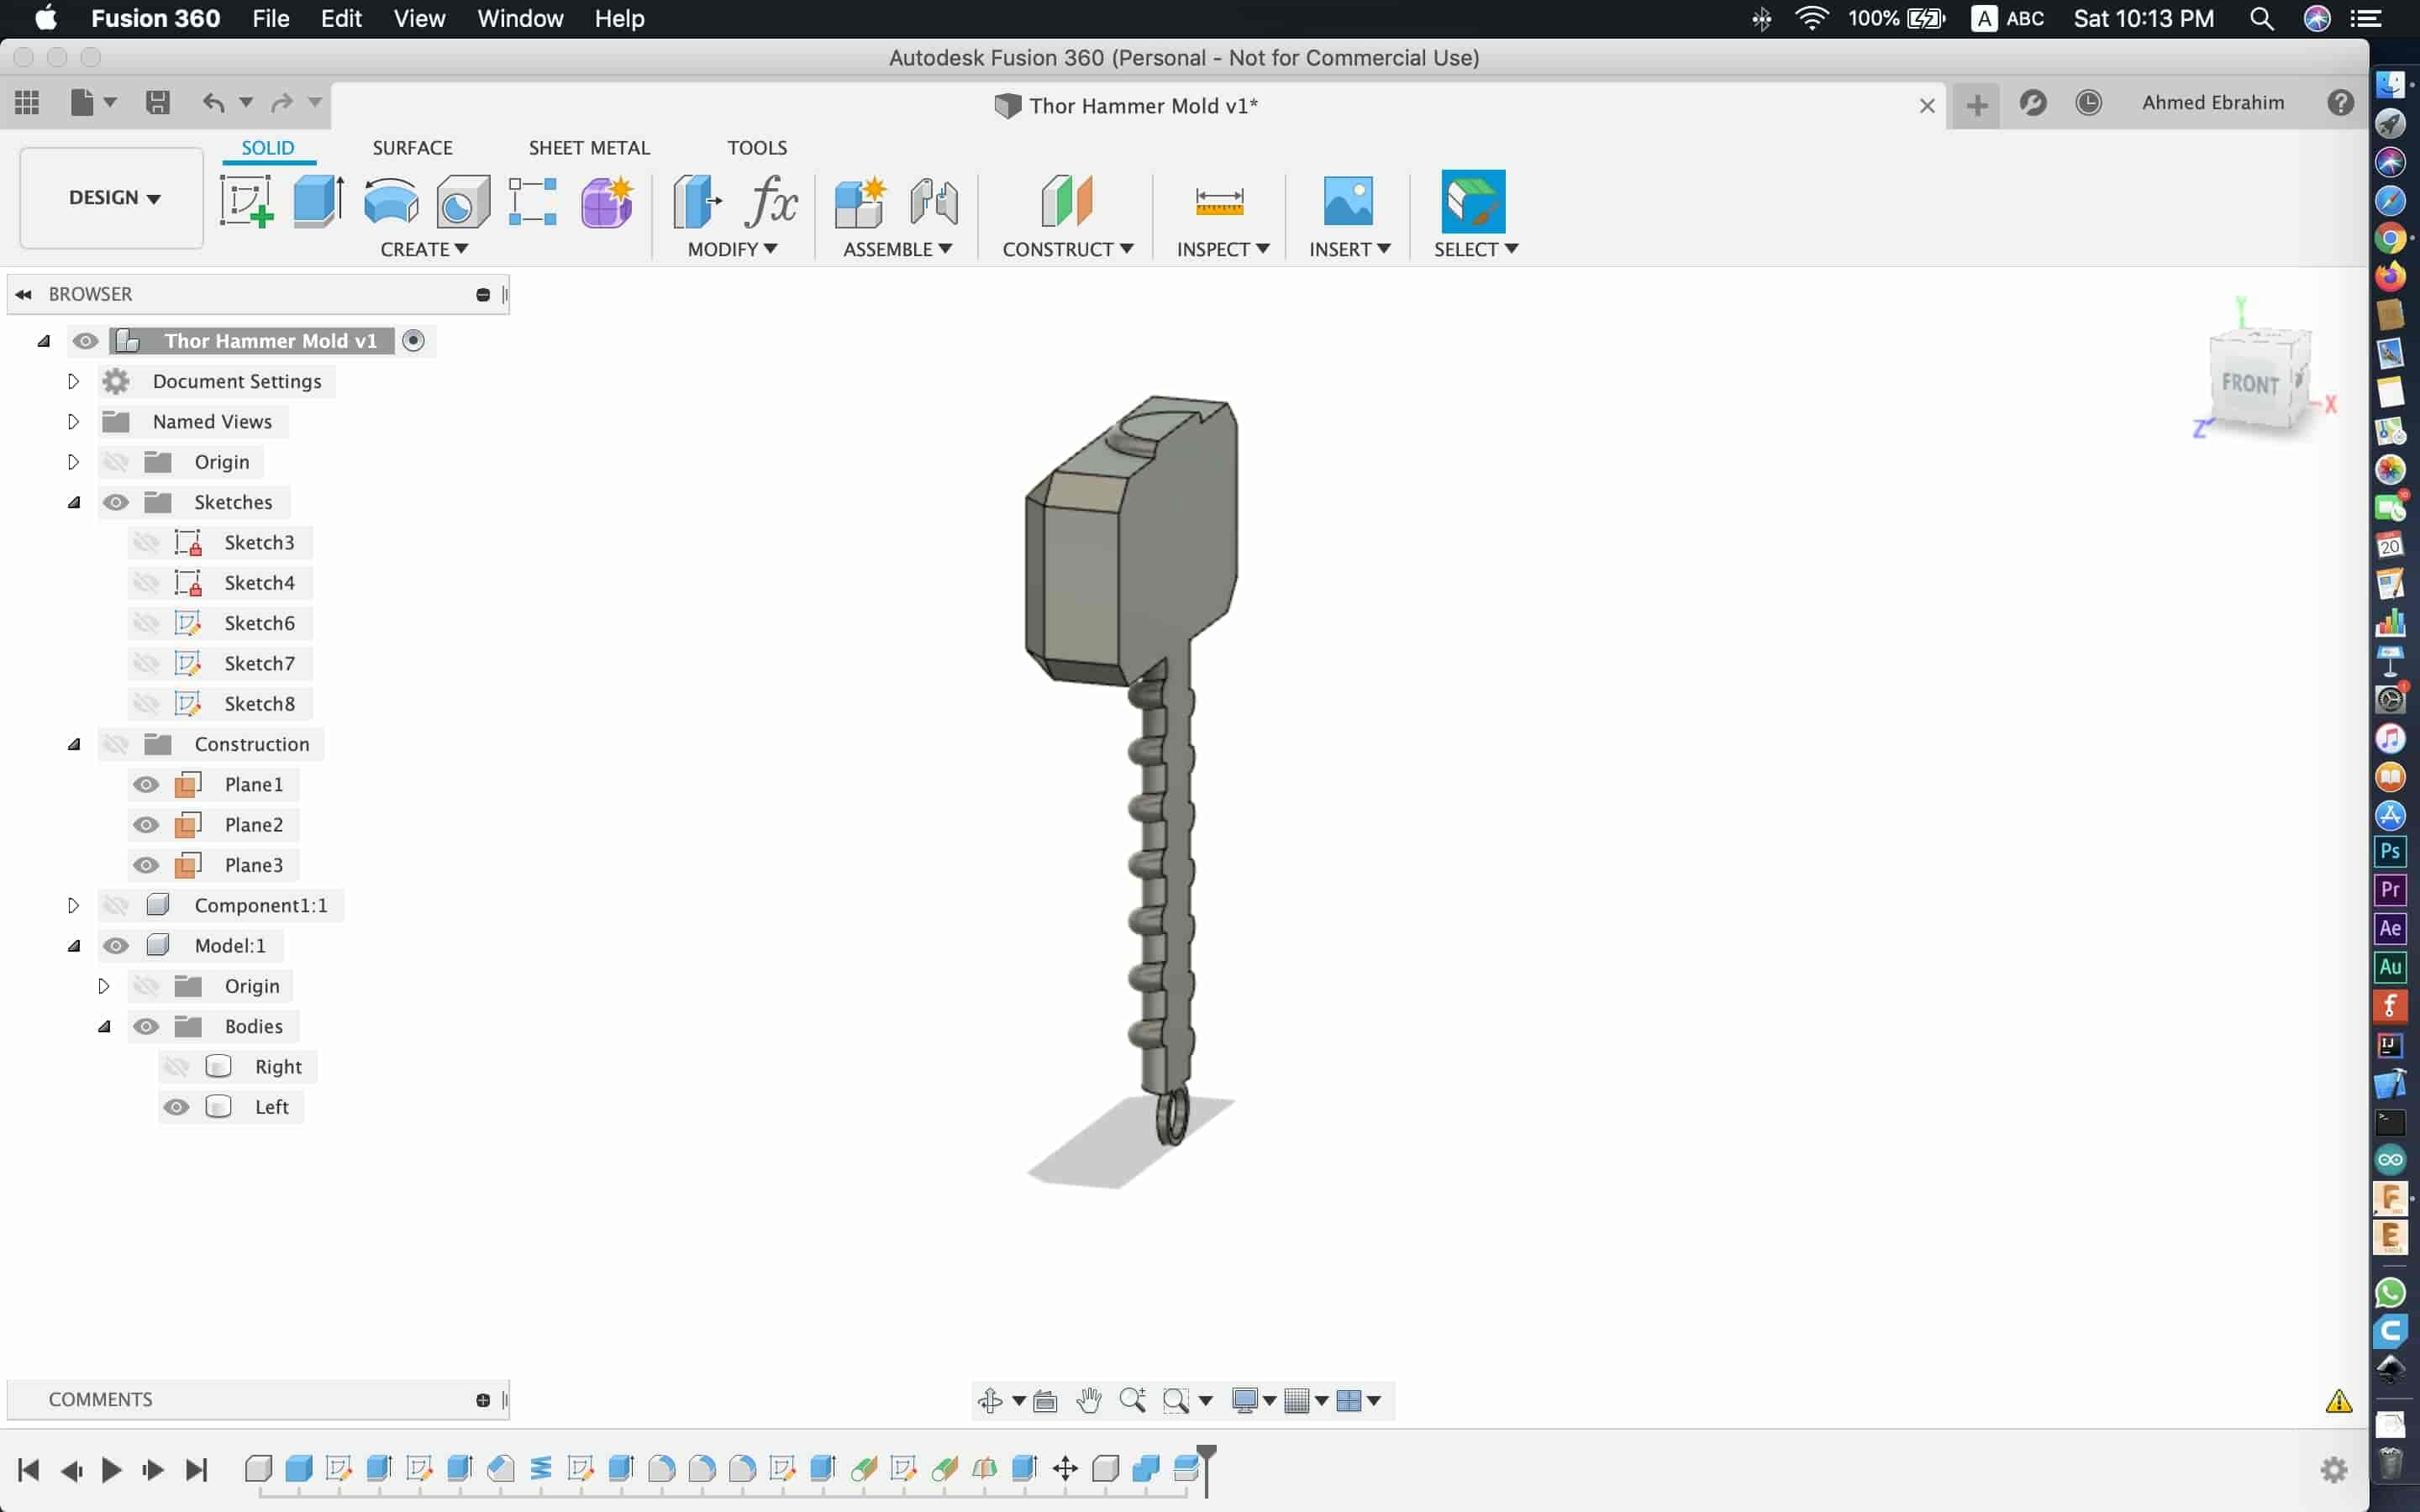
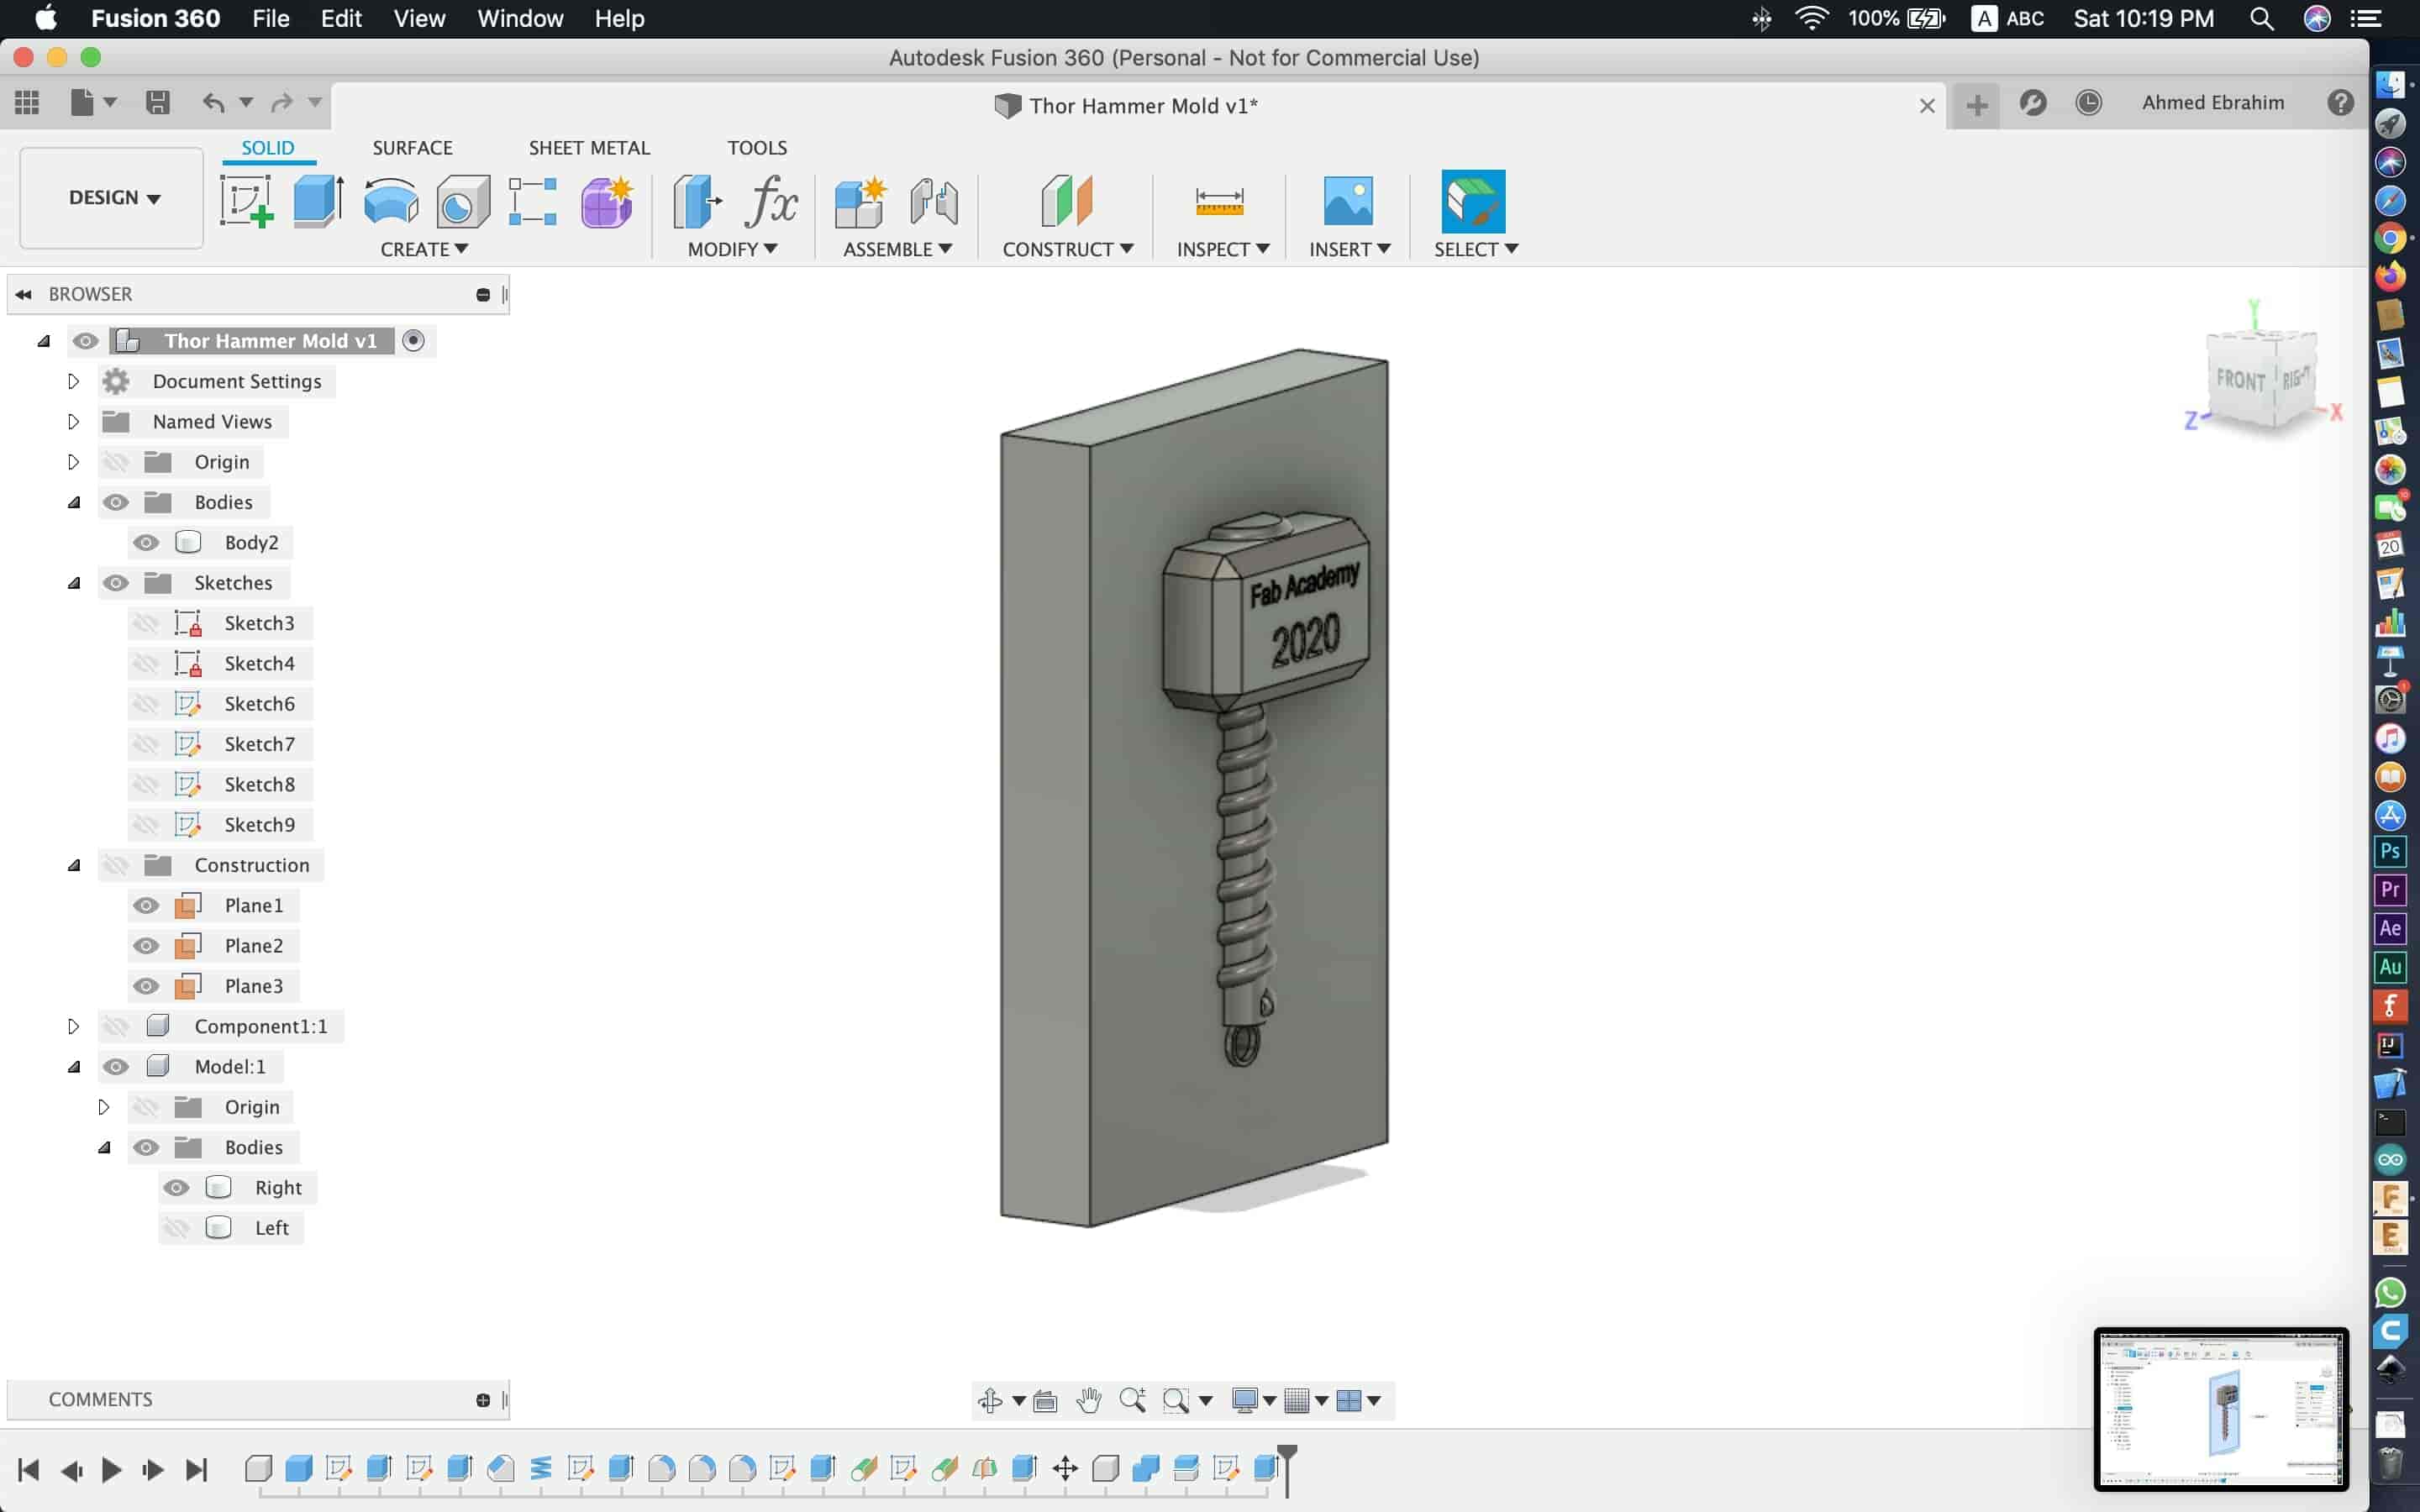
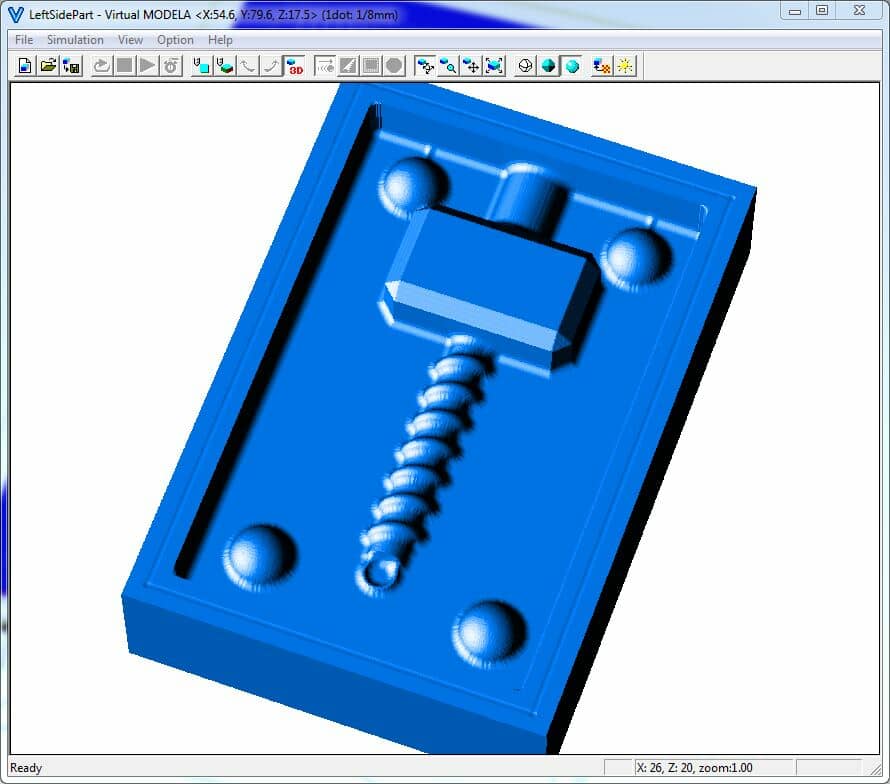
Look! We designed a super cool thor hammer! The next step is to split that thor hammer into two halves and make the mold design.
Now,Let’s select the split body tool from the modify menu. Then we're gonna select the body that we need to split and the midplane that we made before as the split tool.
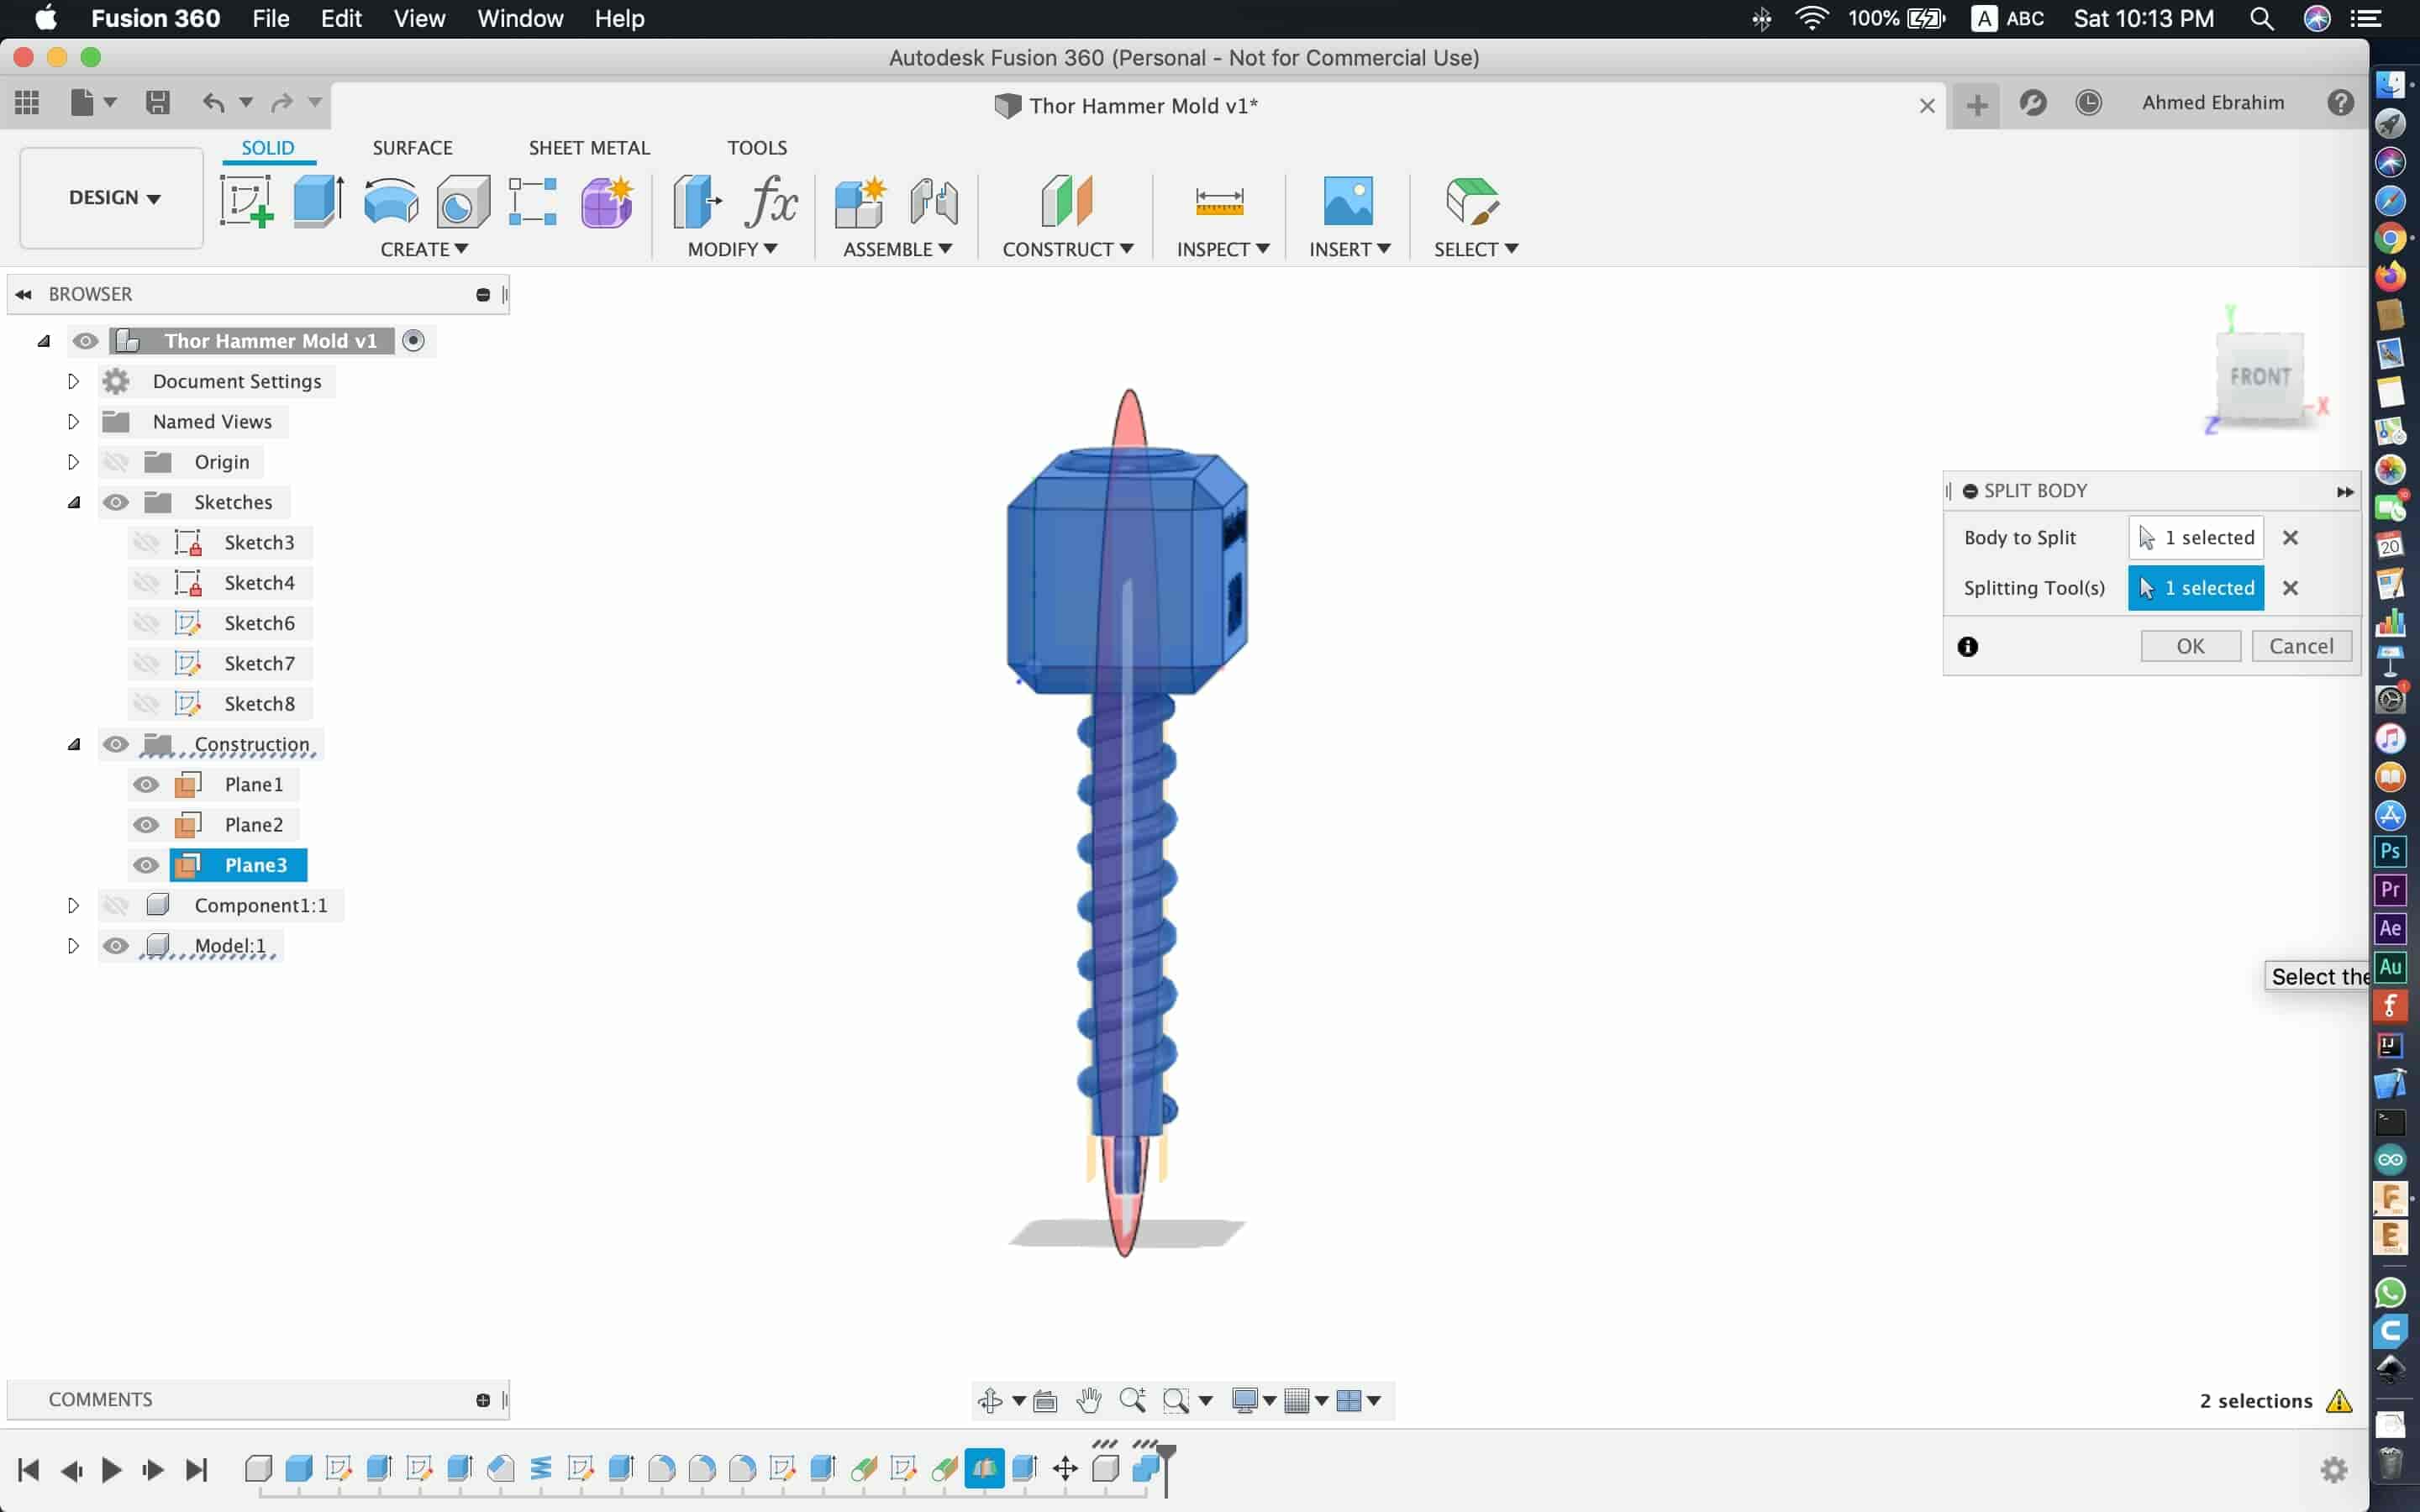
The result is as we expected, the thor hammer is split into two symmetrical halves. And that is what we need!
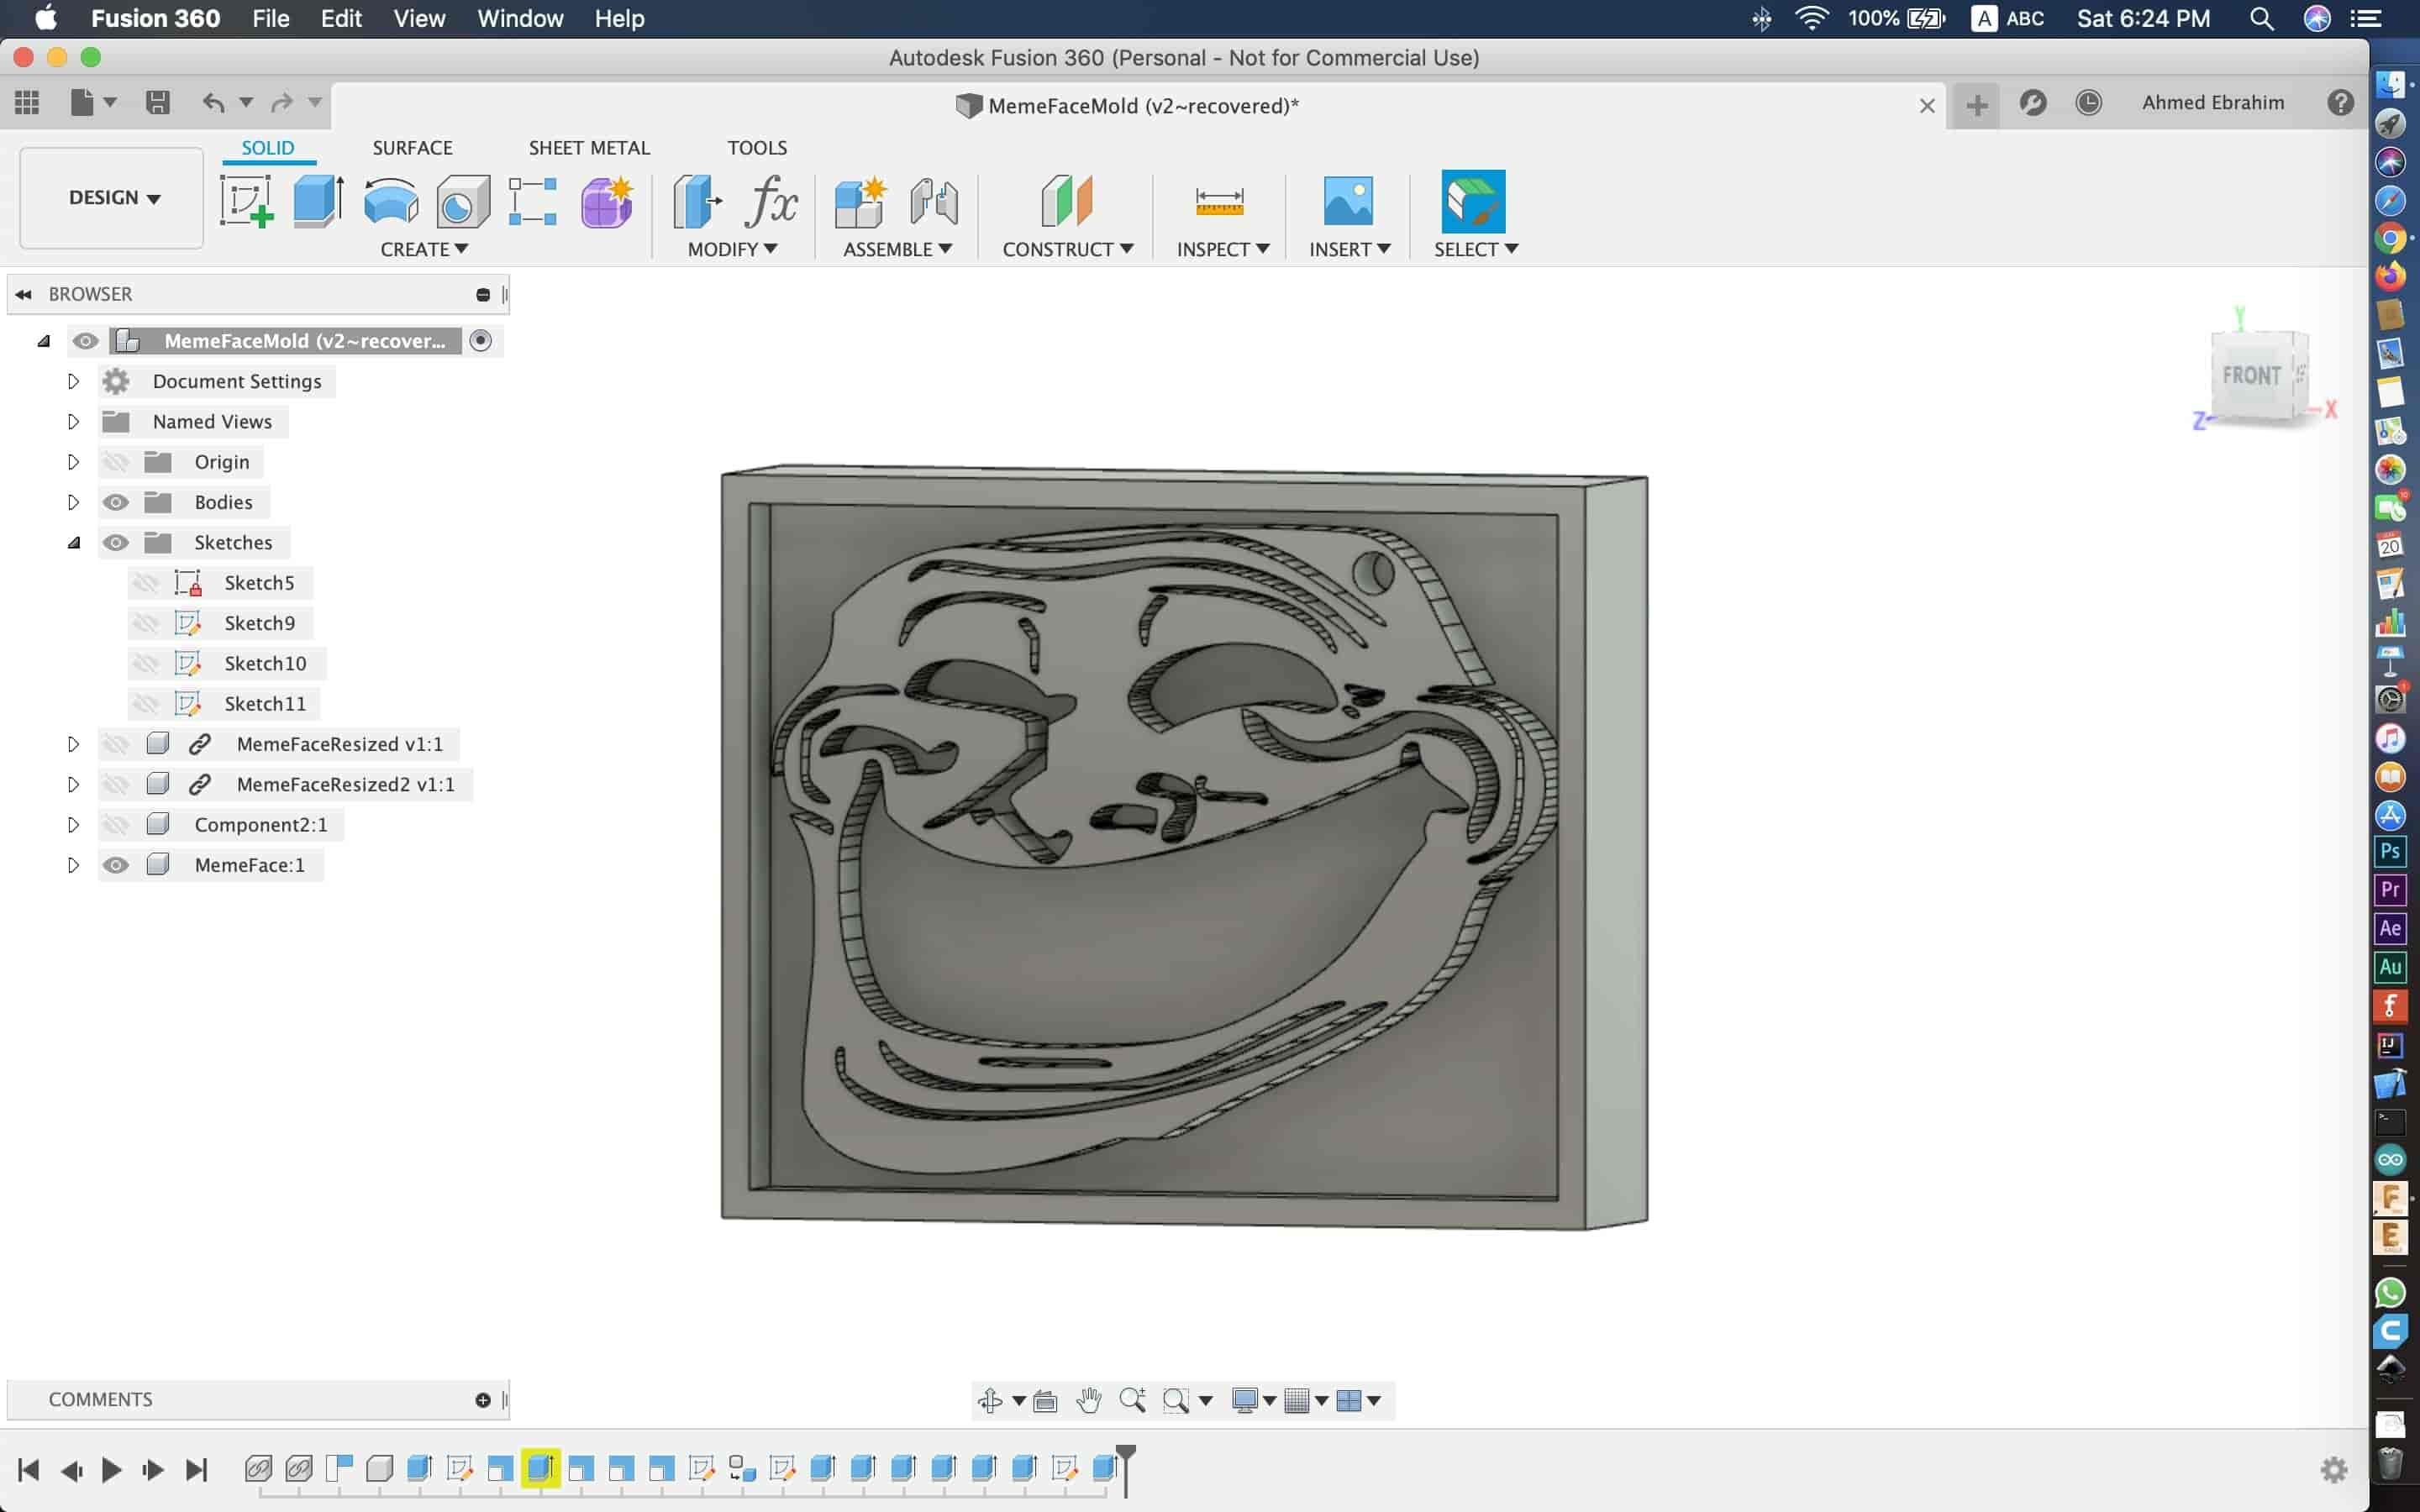
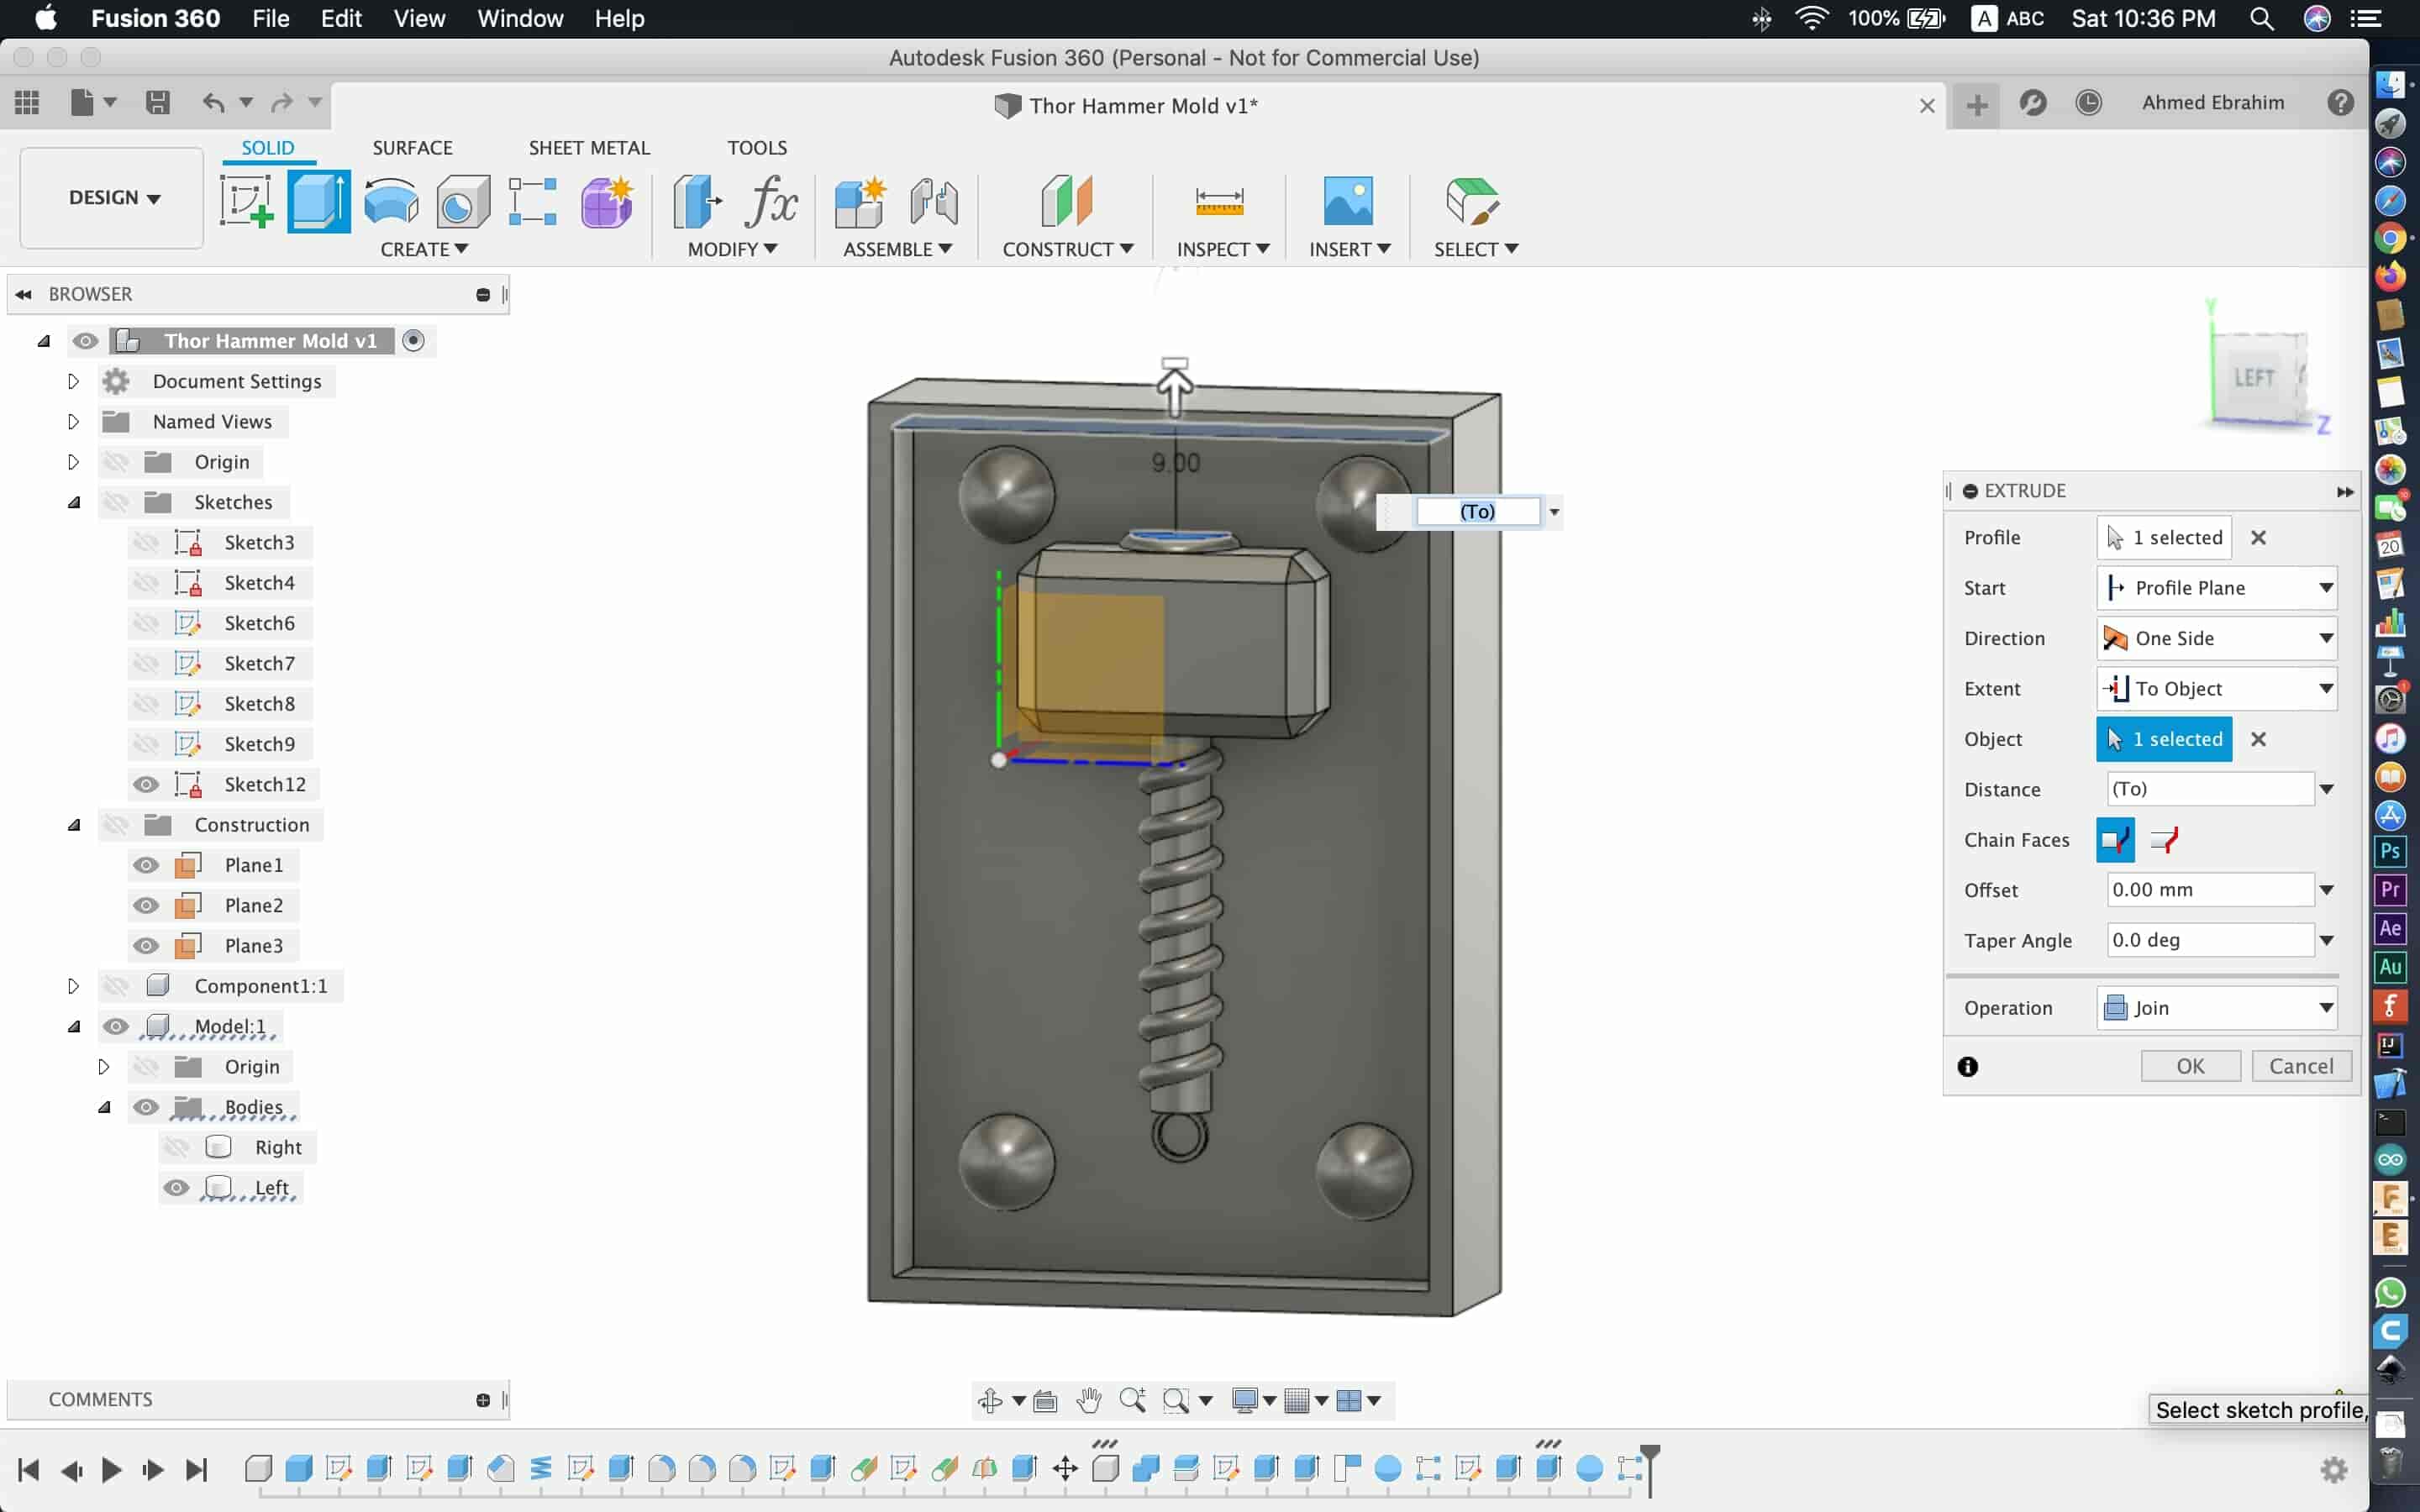
On the bottom face of the first half, we made a sketch and drew two rectangles inside each other. Then, we extruded two rectangles with 10mm. Then, we extruded the rectangle outer frame with 7.5mm(until it reaches the hammer top face).
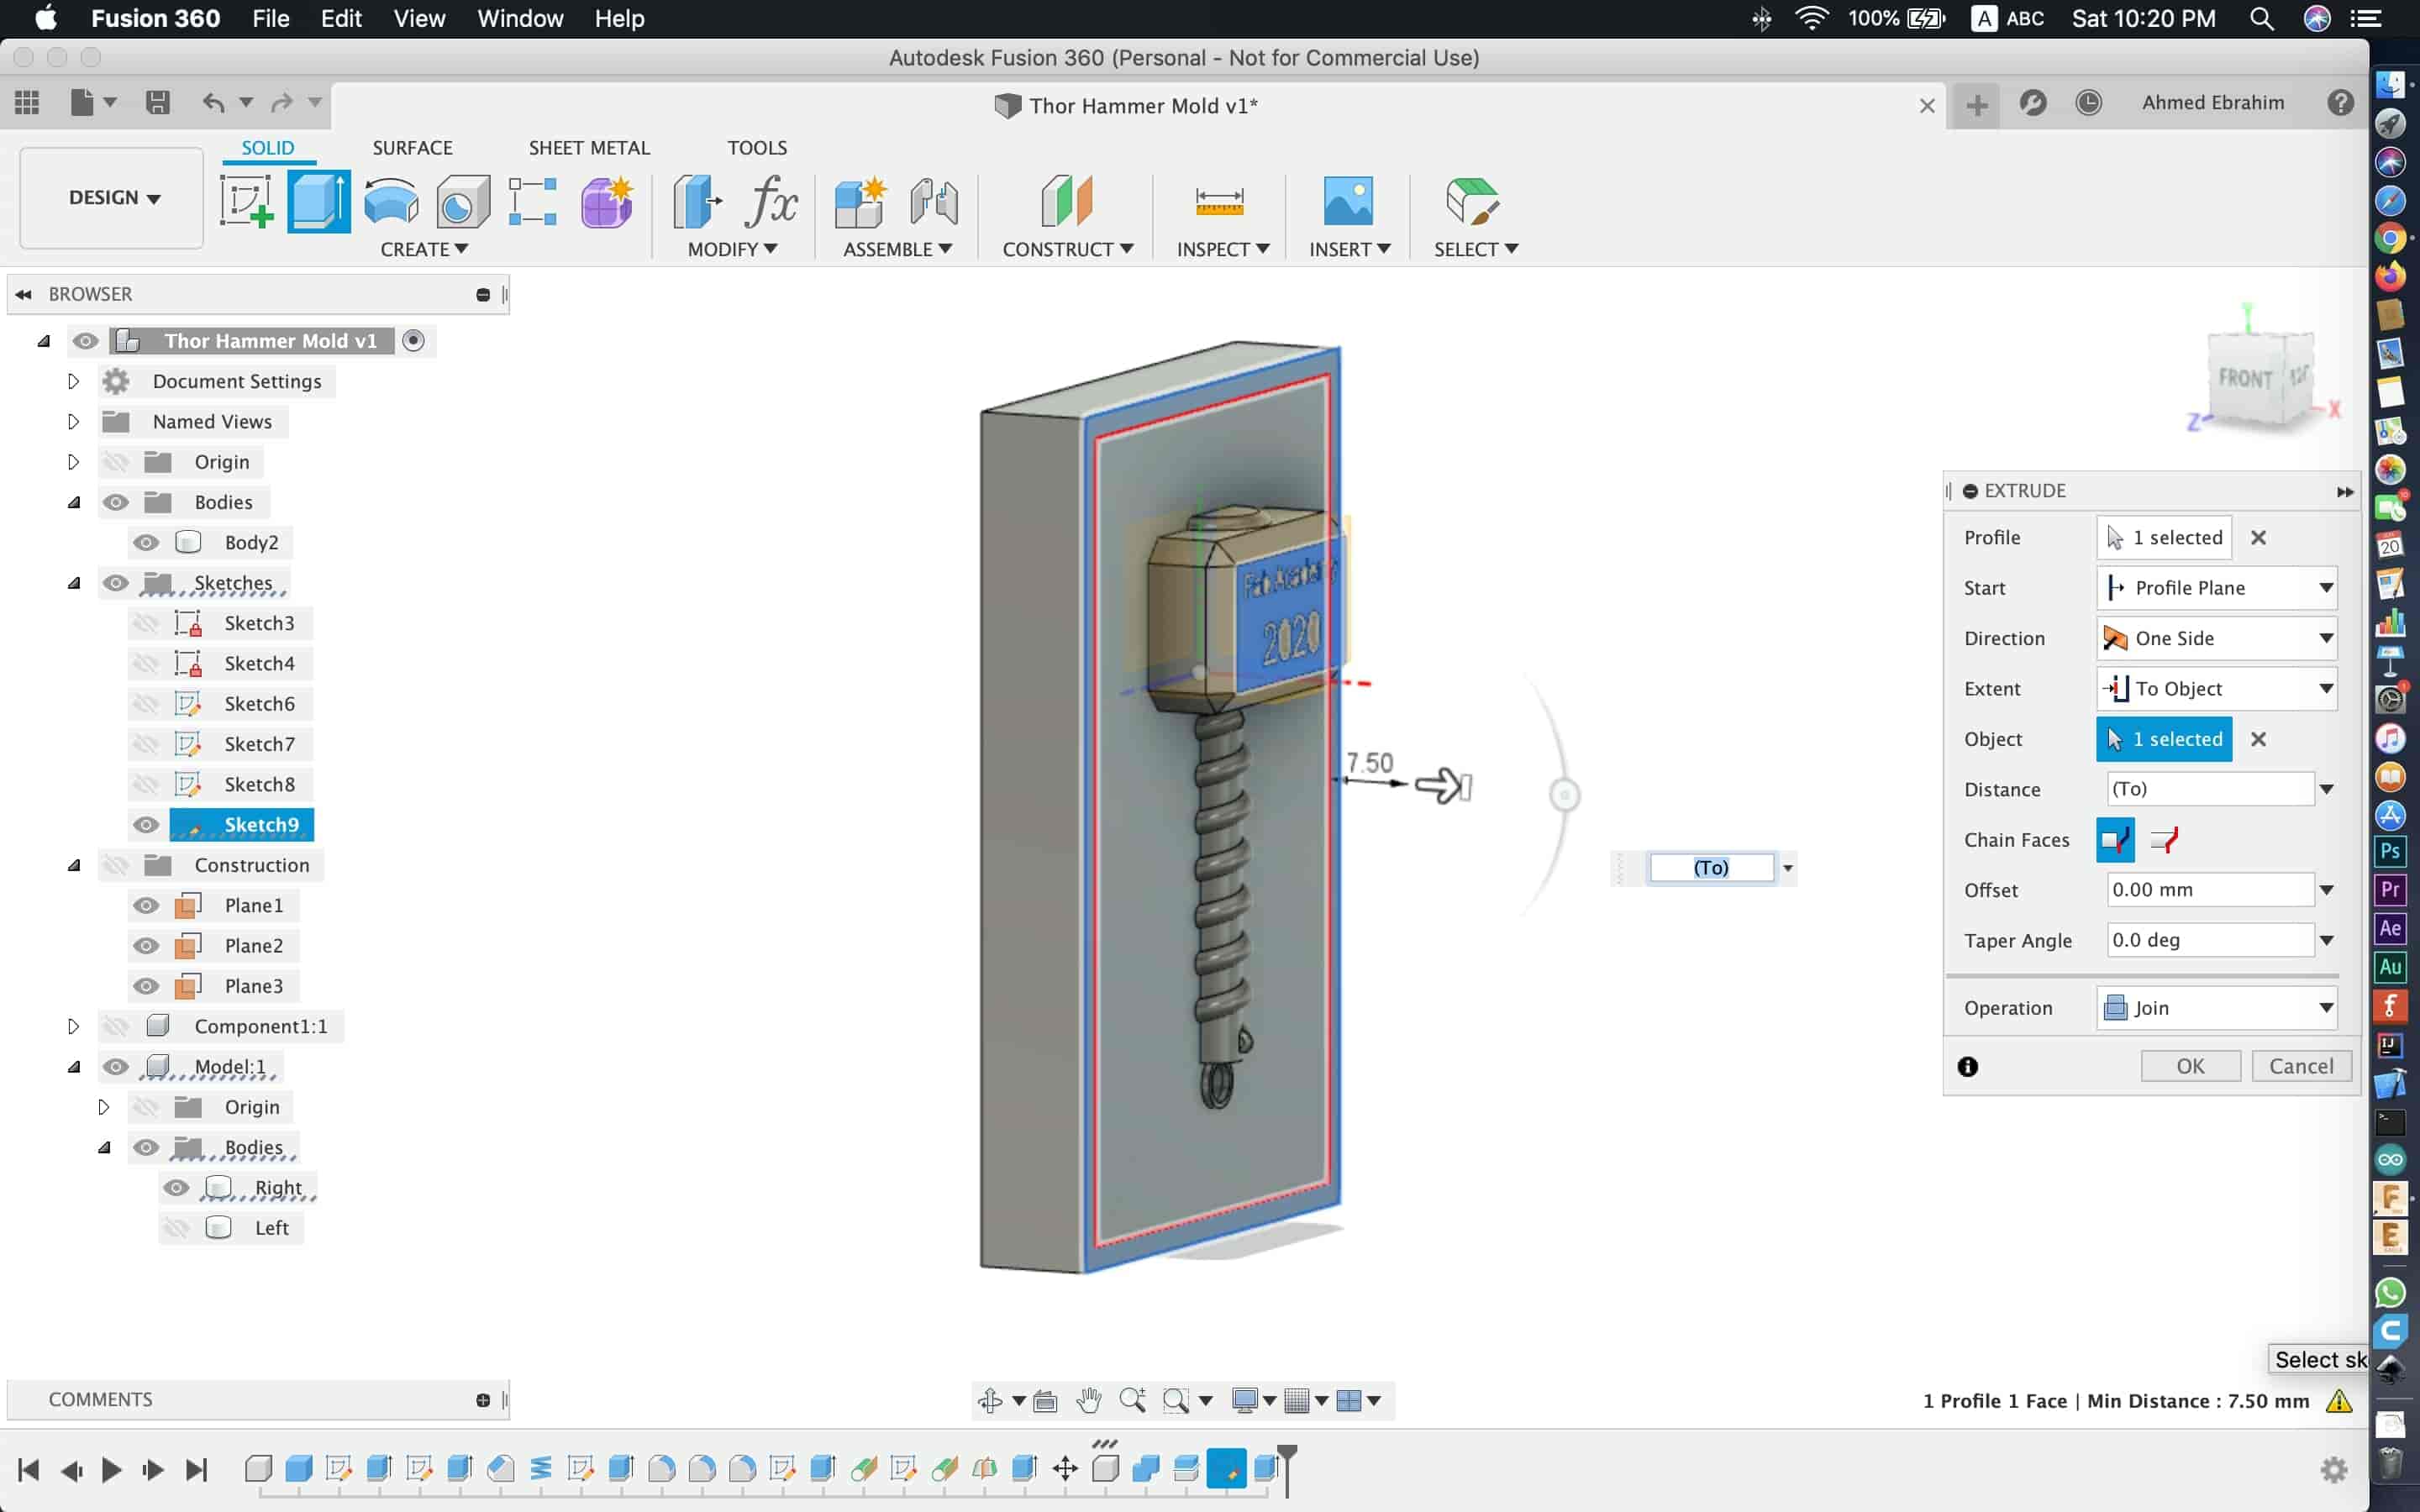
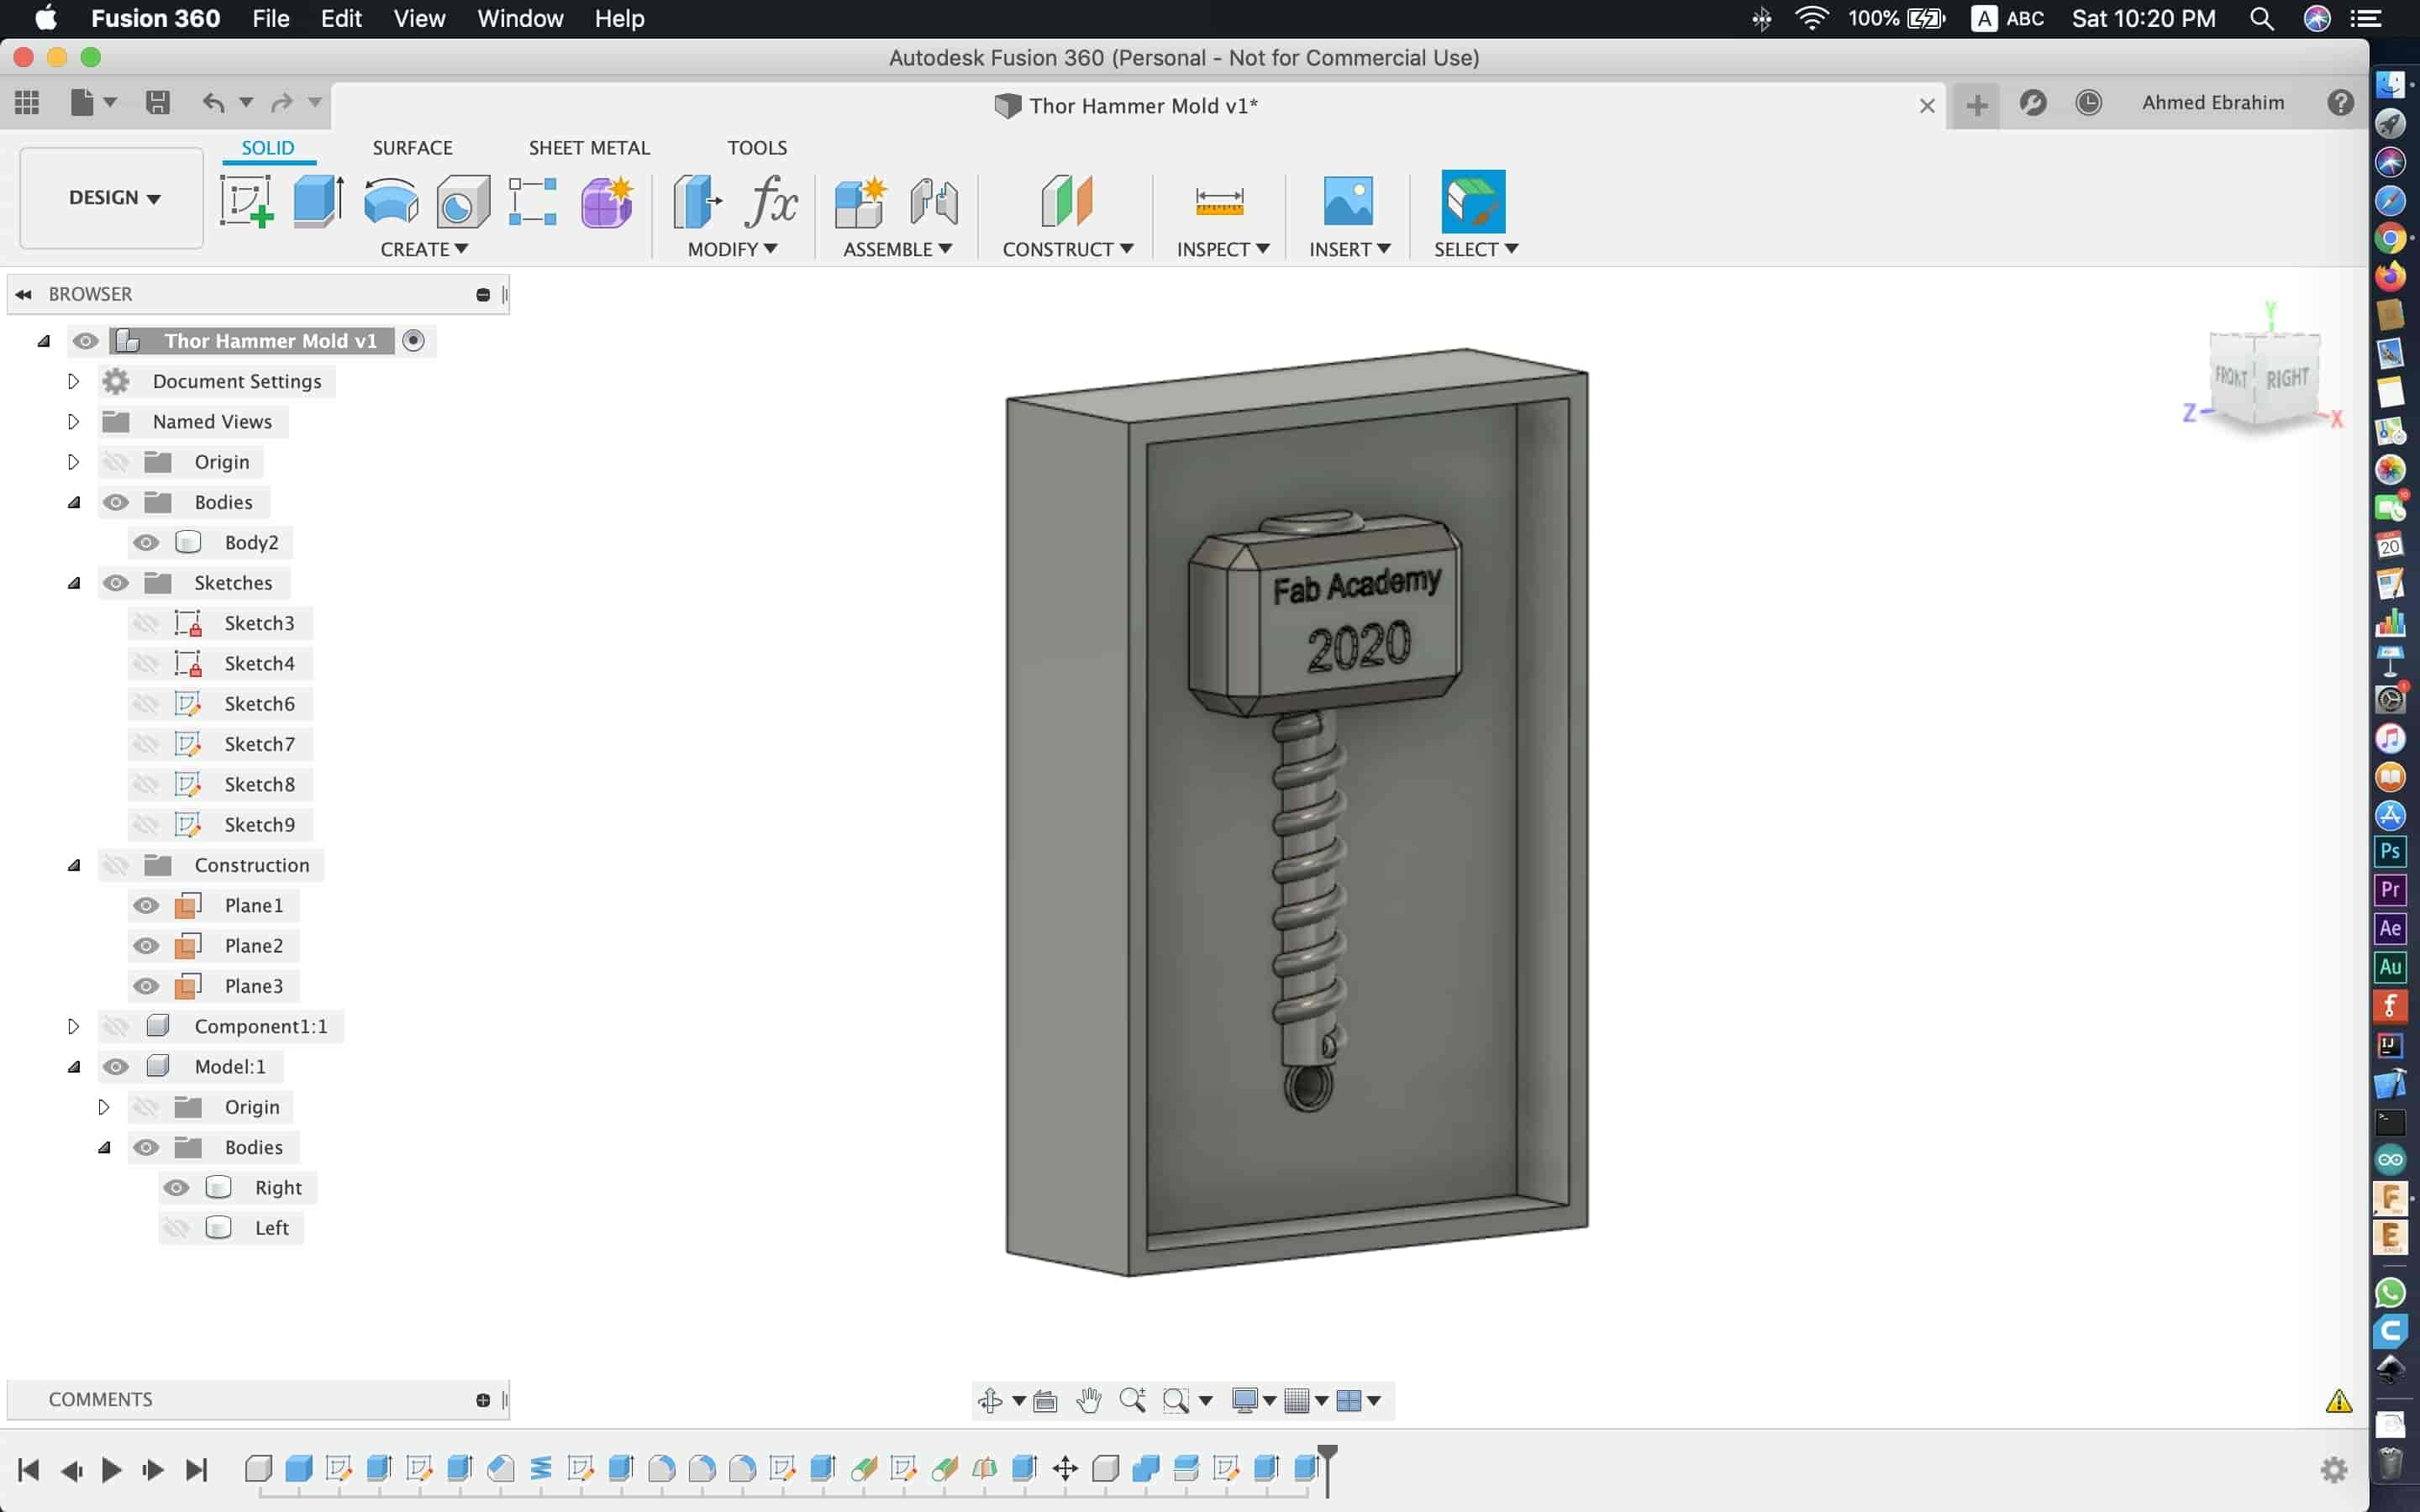
Then, we made four female pins that will keep the two halves in place without moving.
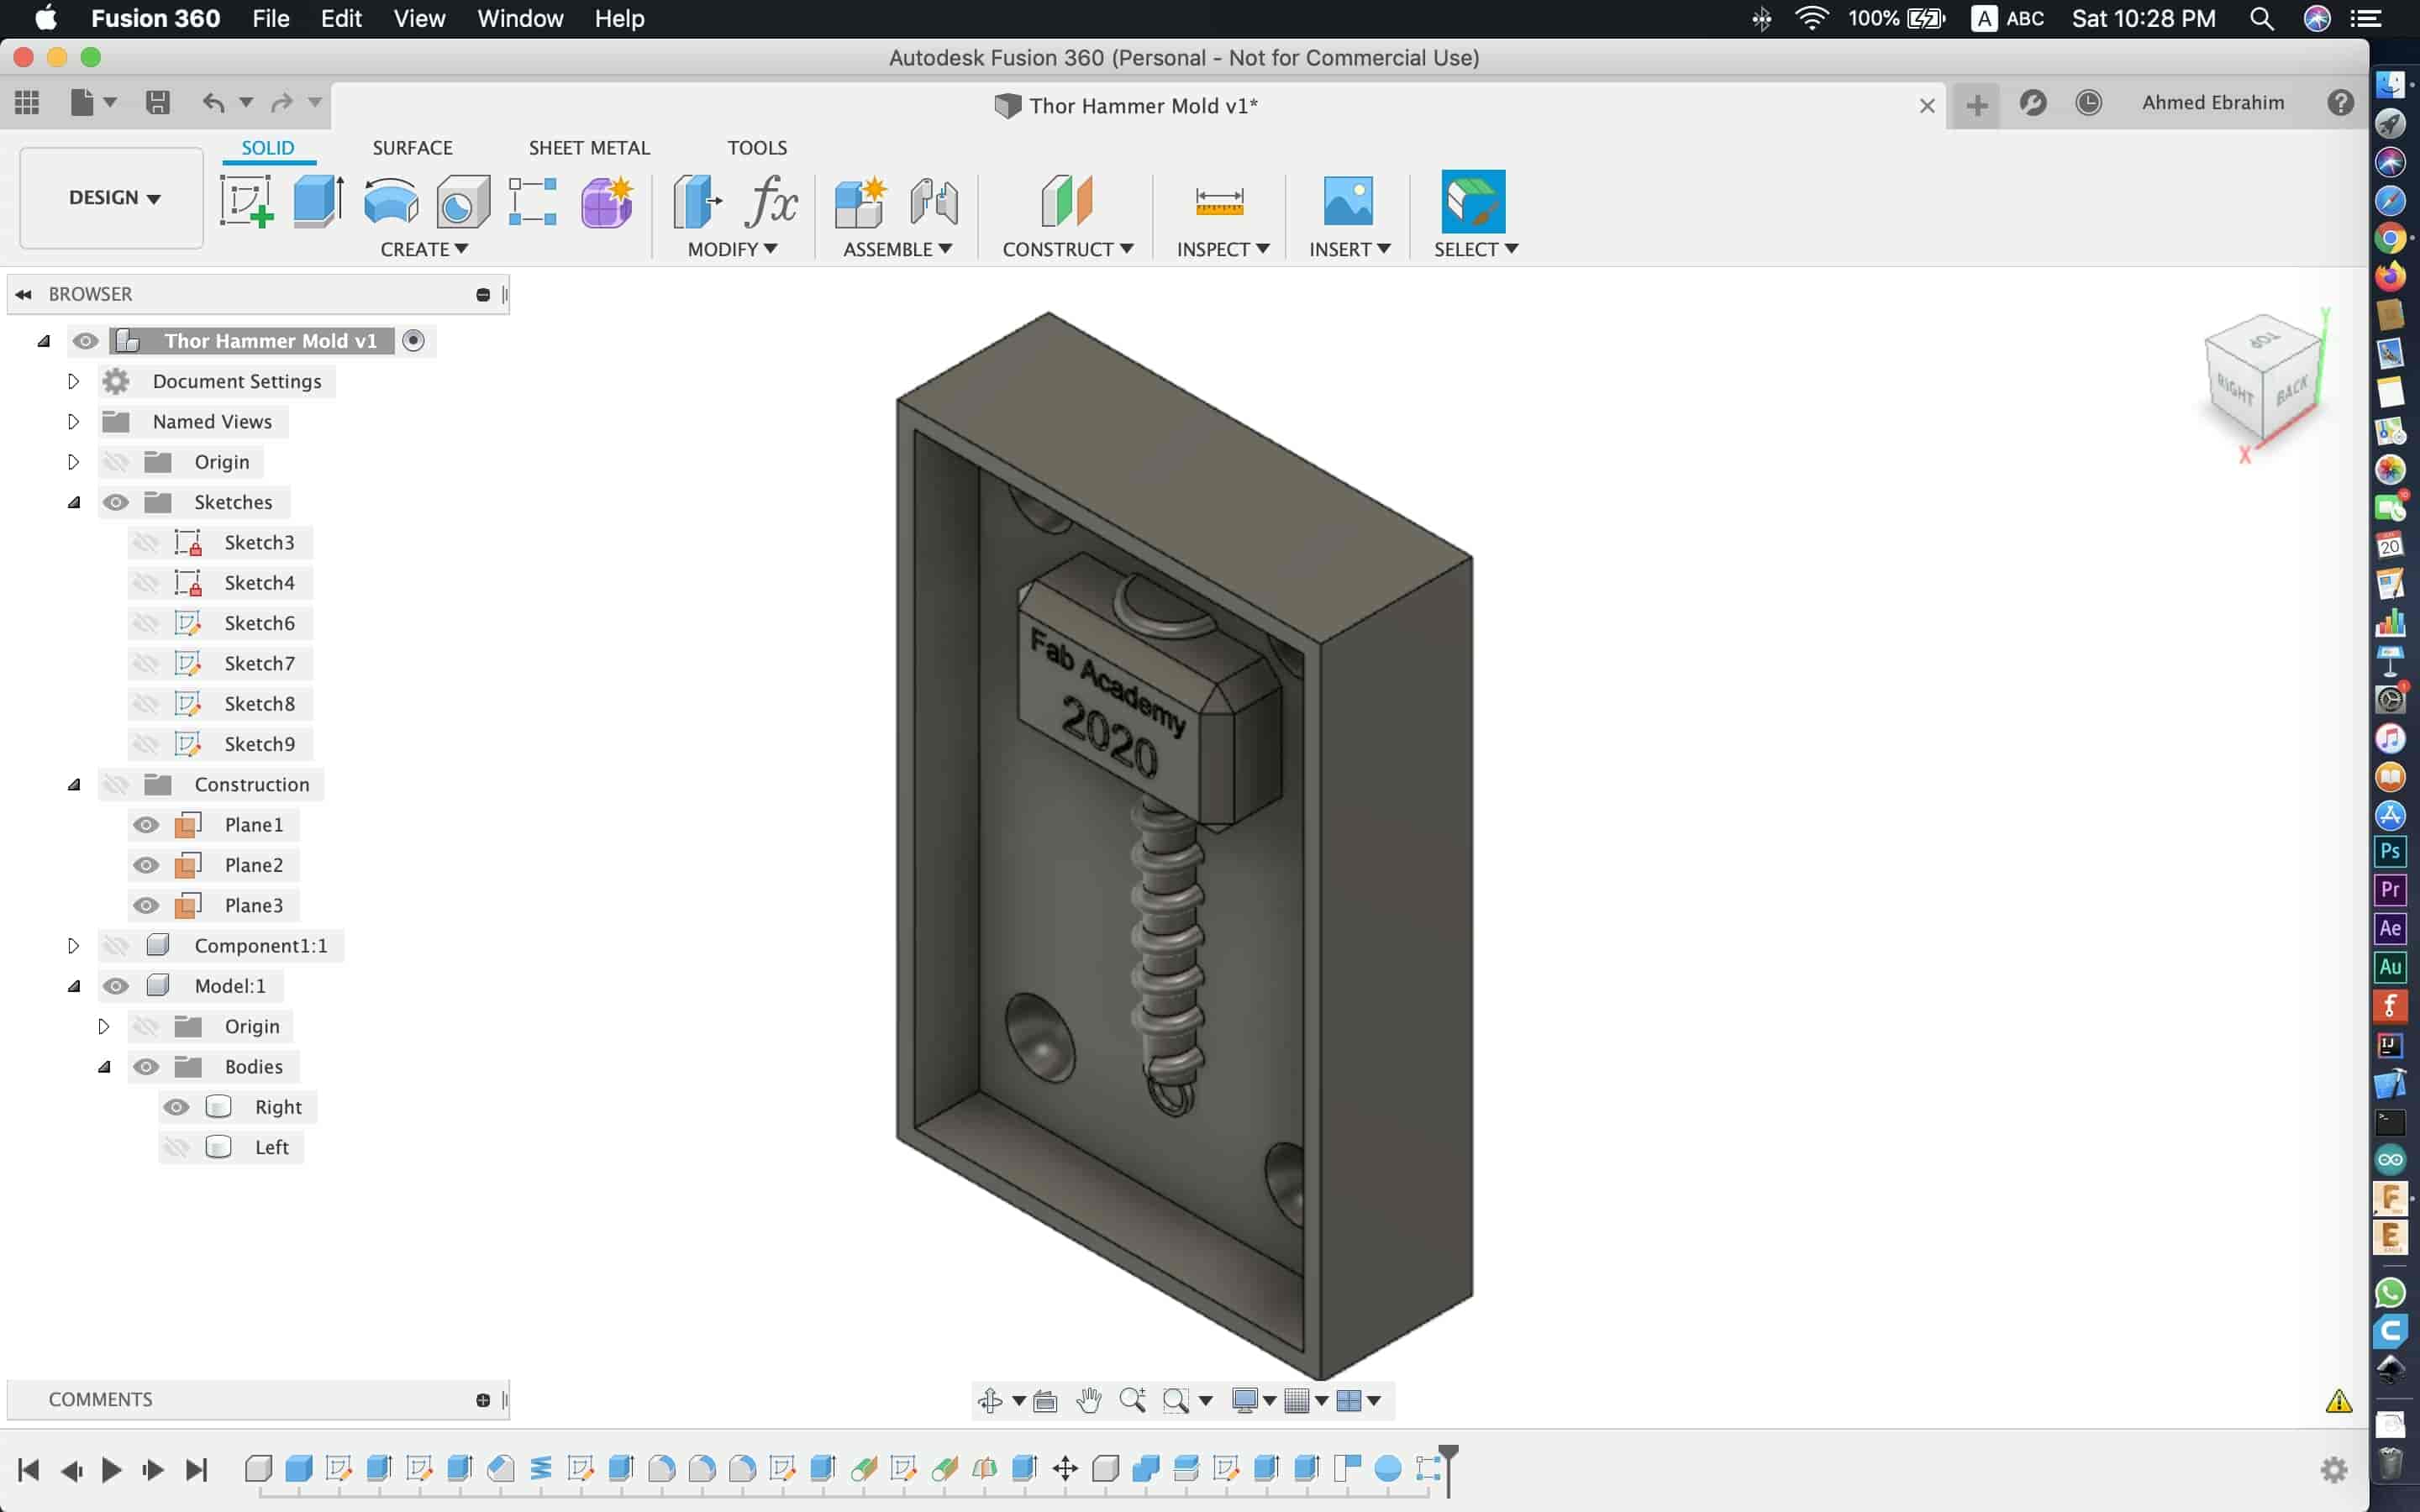
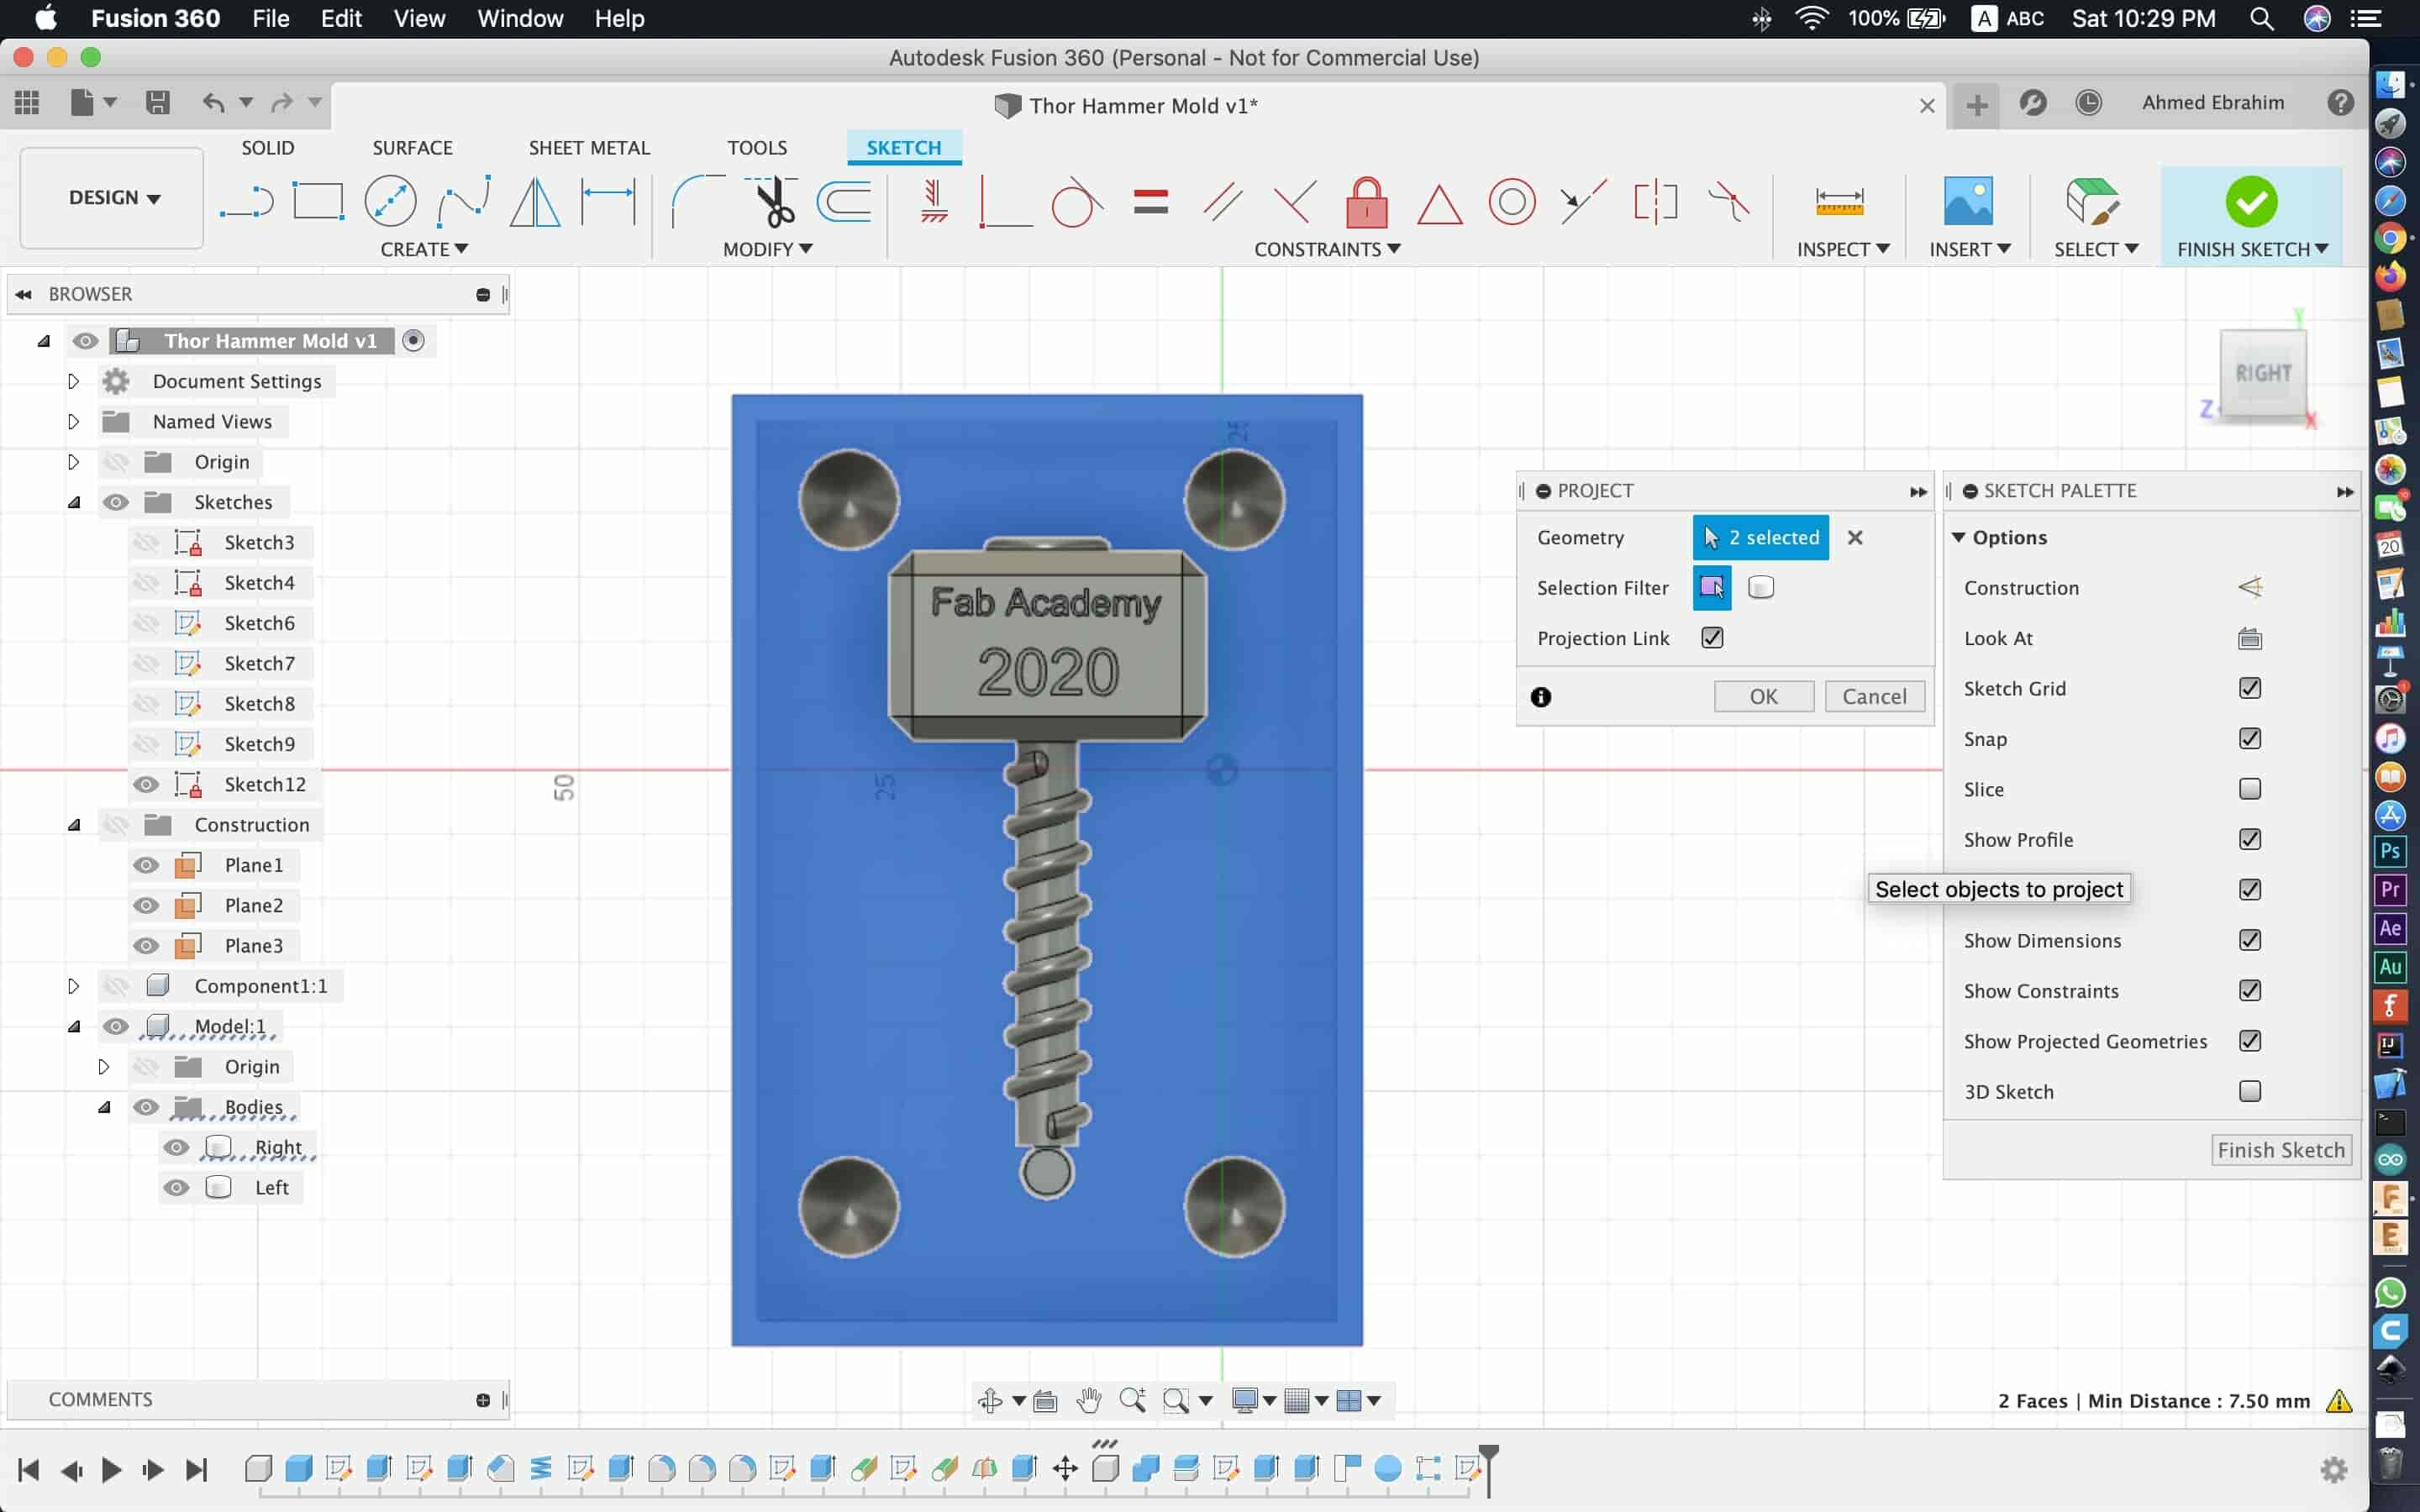
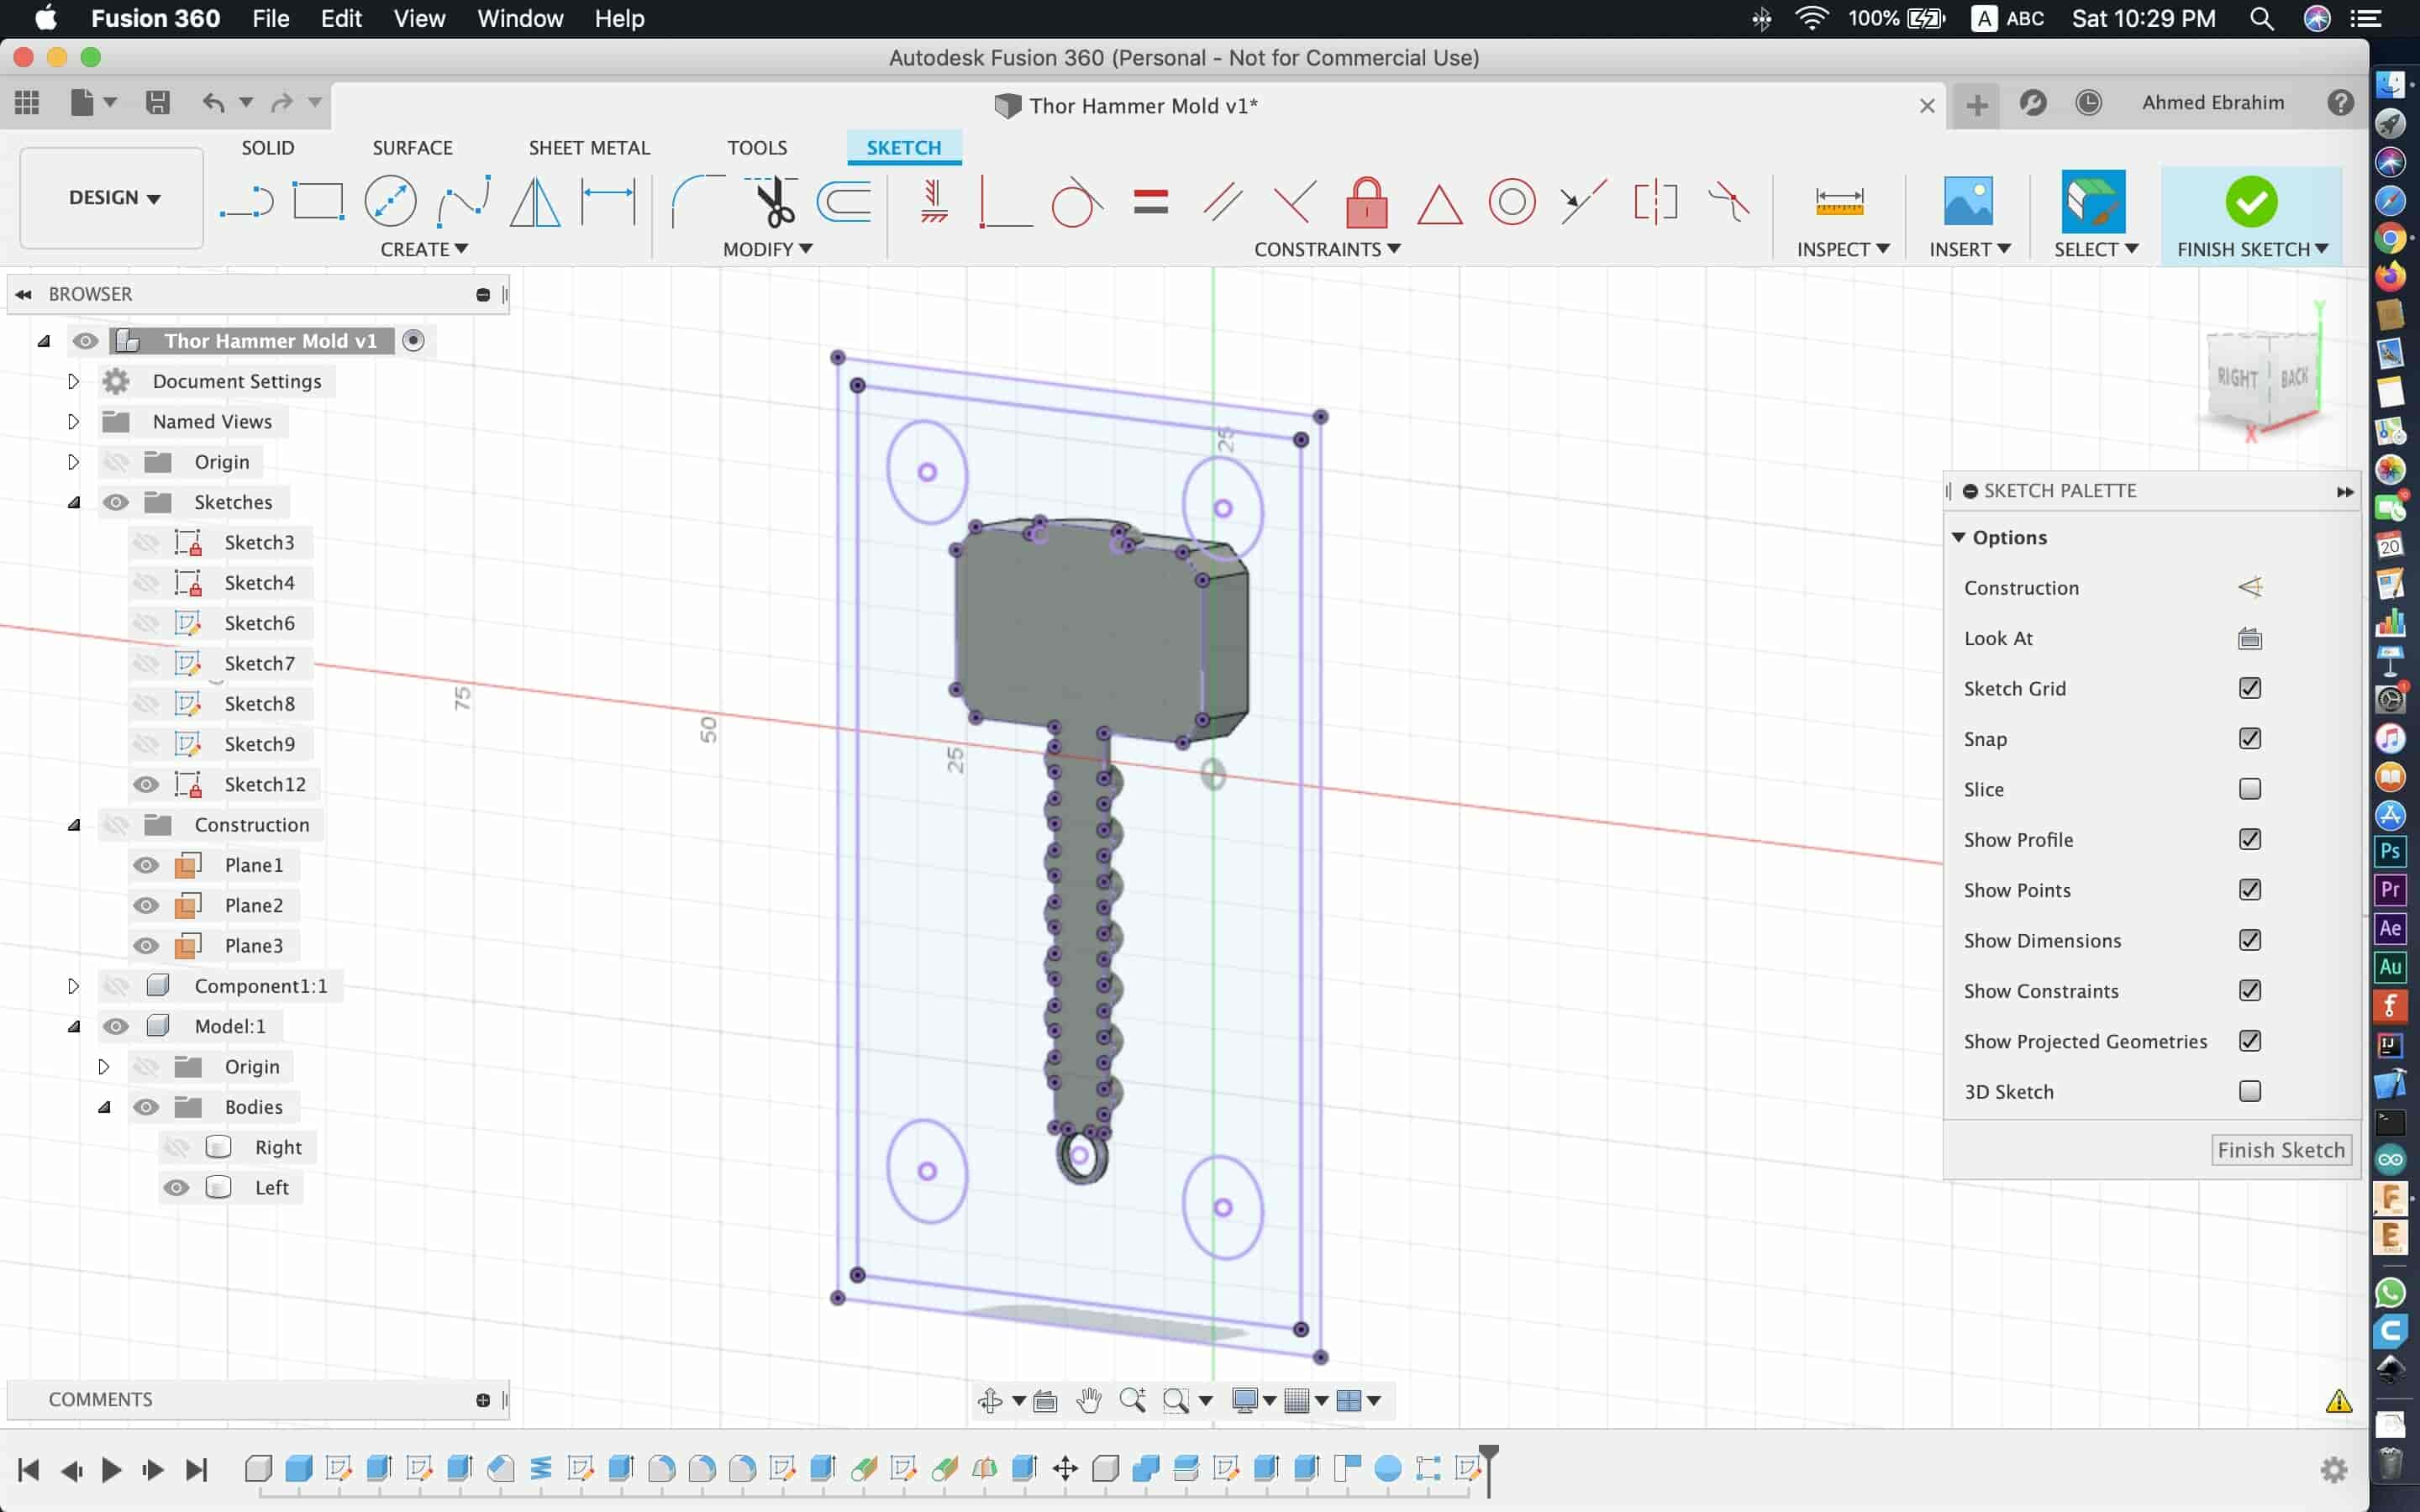
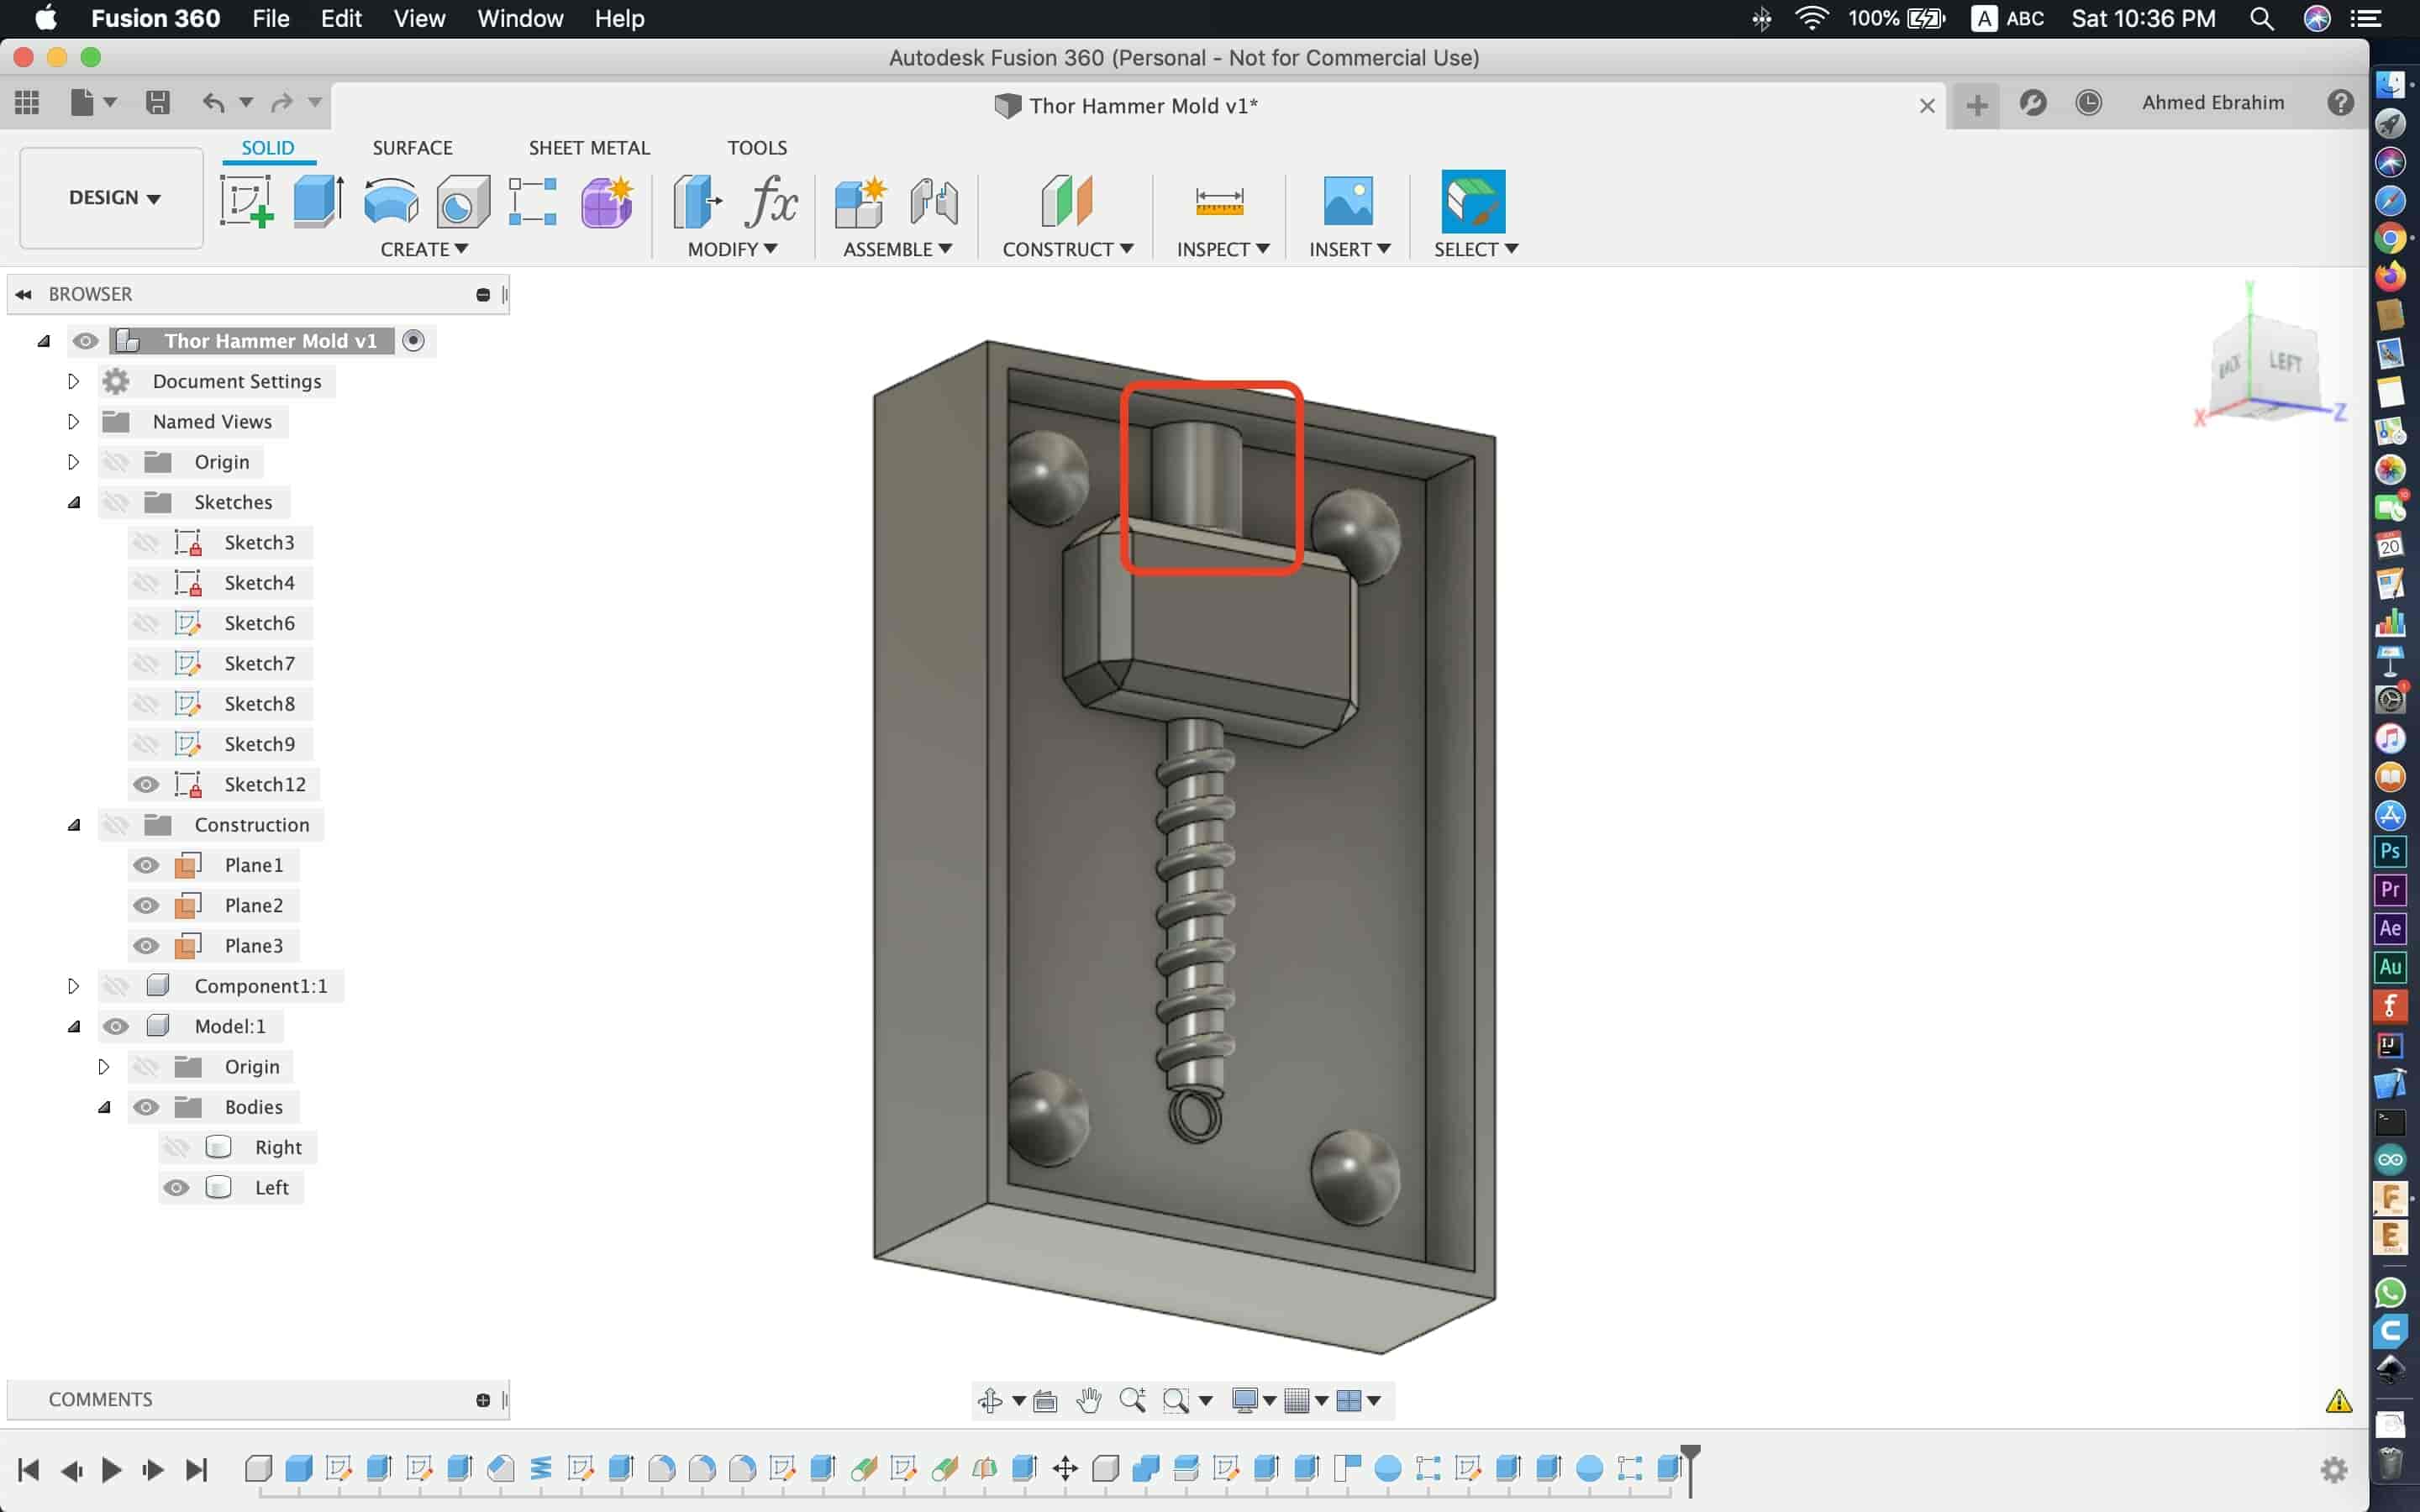
To make the same rectangle around the second half of the hammer, we projected the sketch that we drew before on the first half bottom side on the second half bottom sketch, then we extruded it like the previous step. The only difference is that we make male pins.
In the last step, we made a vein from the top of the model to be able to pour the resin liquid inside our mold easily.
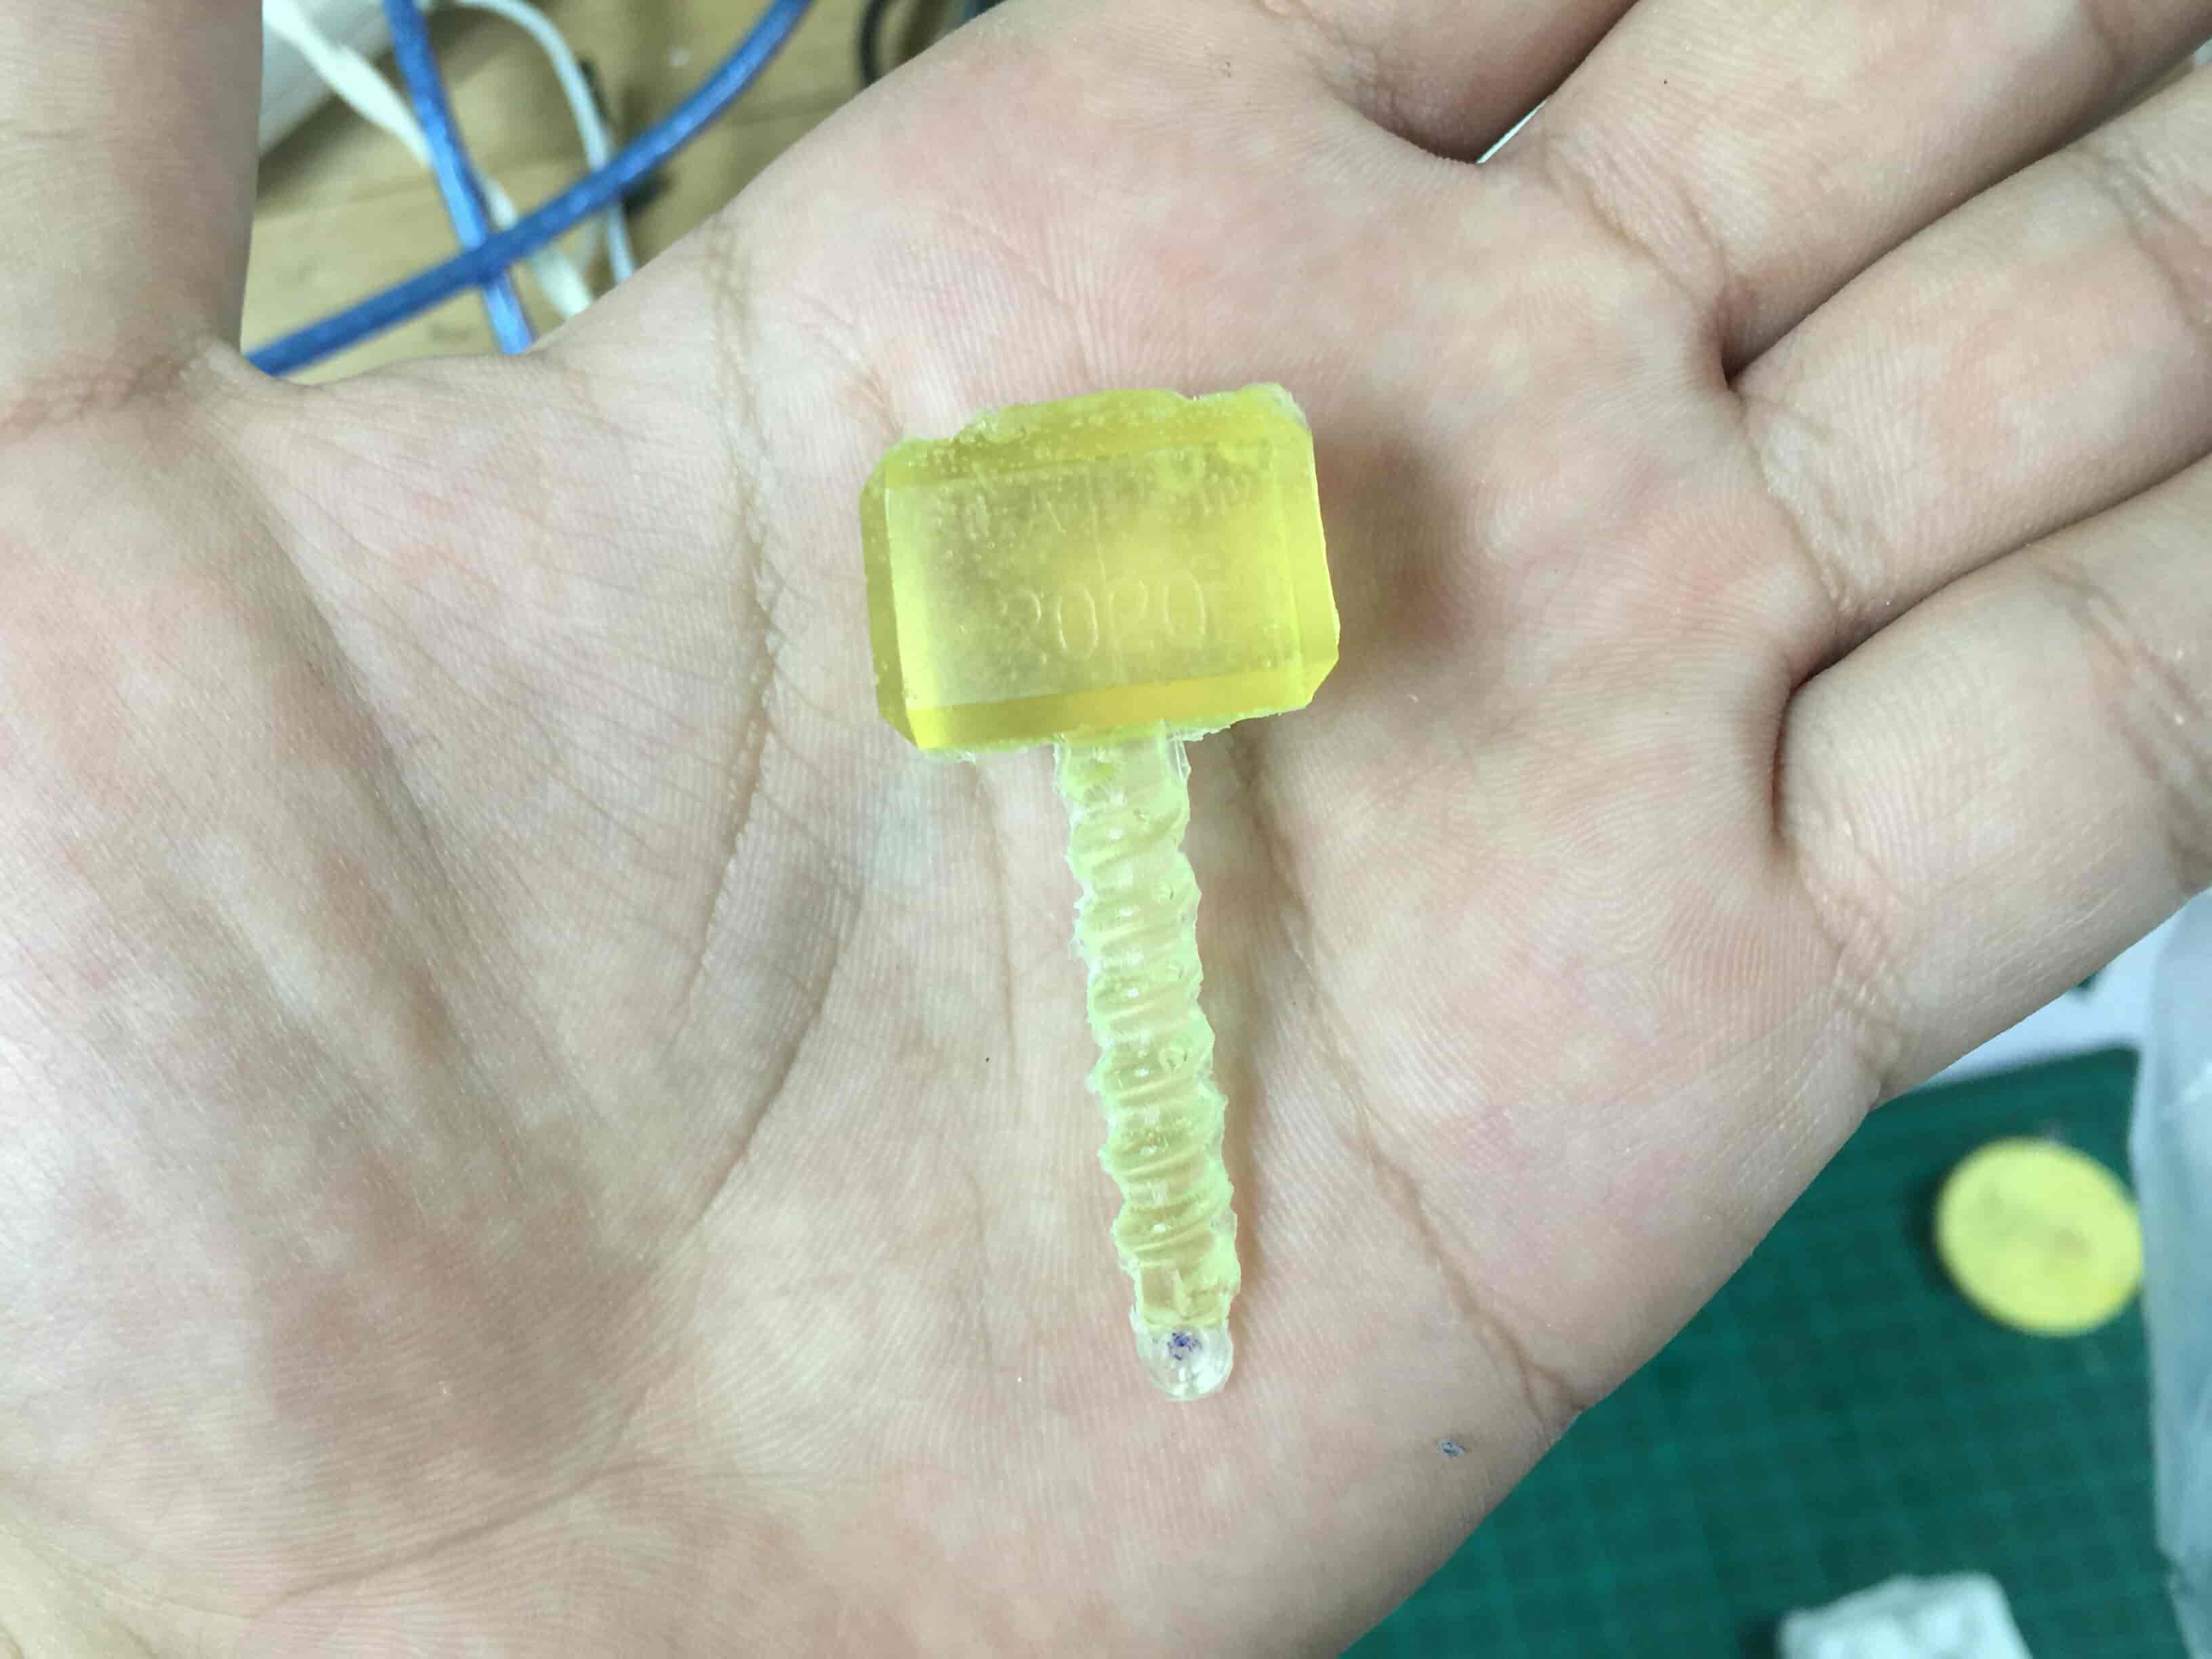
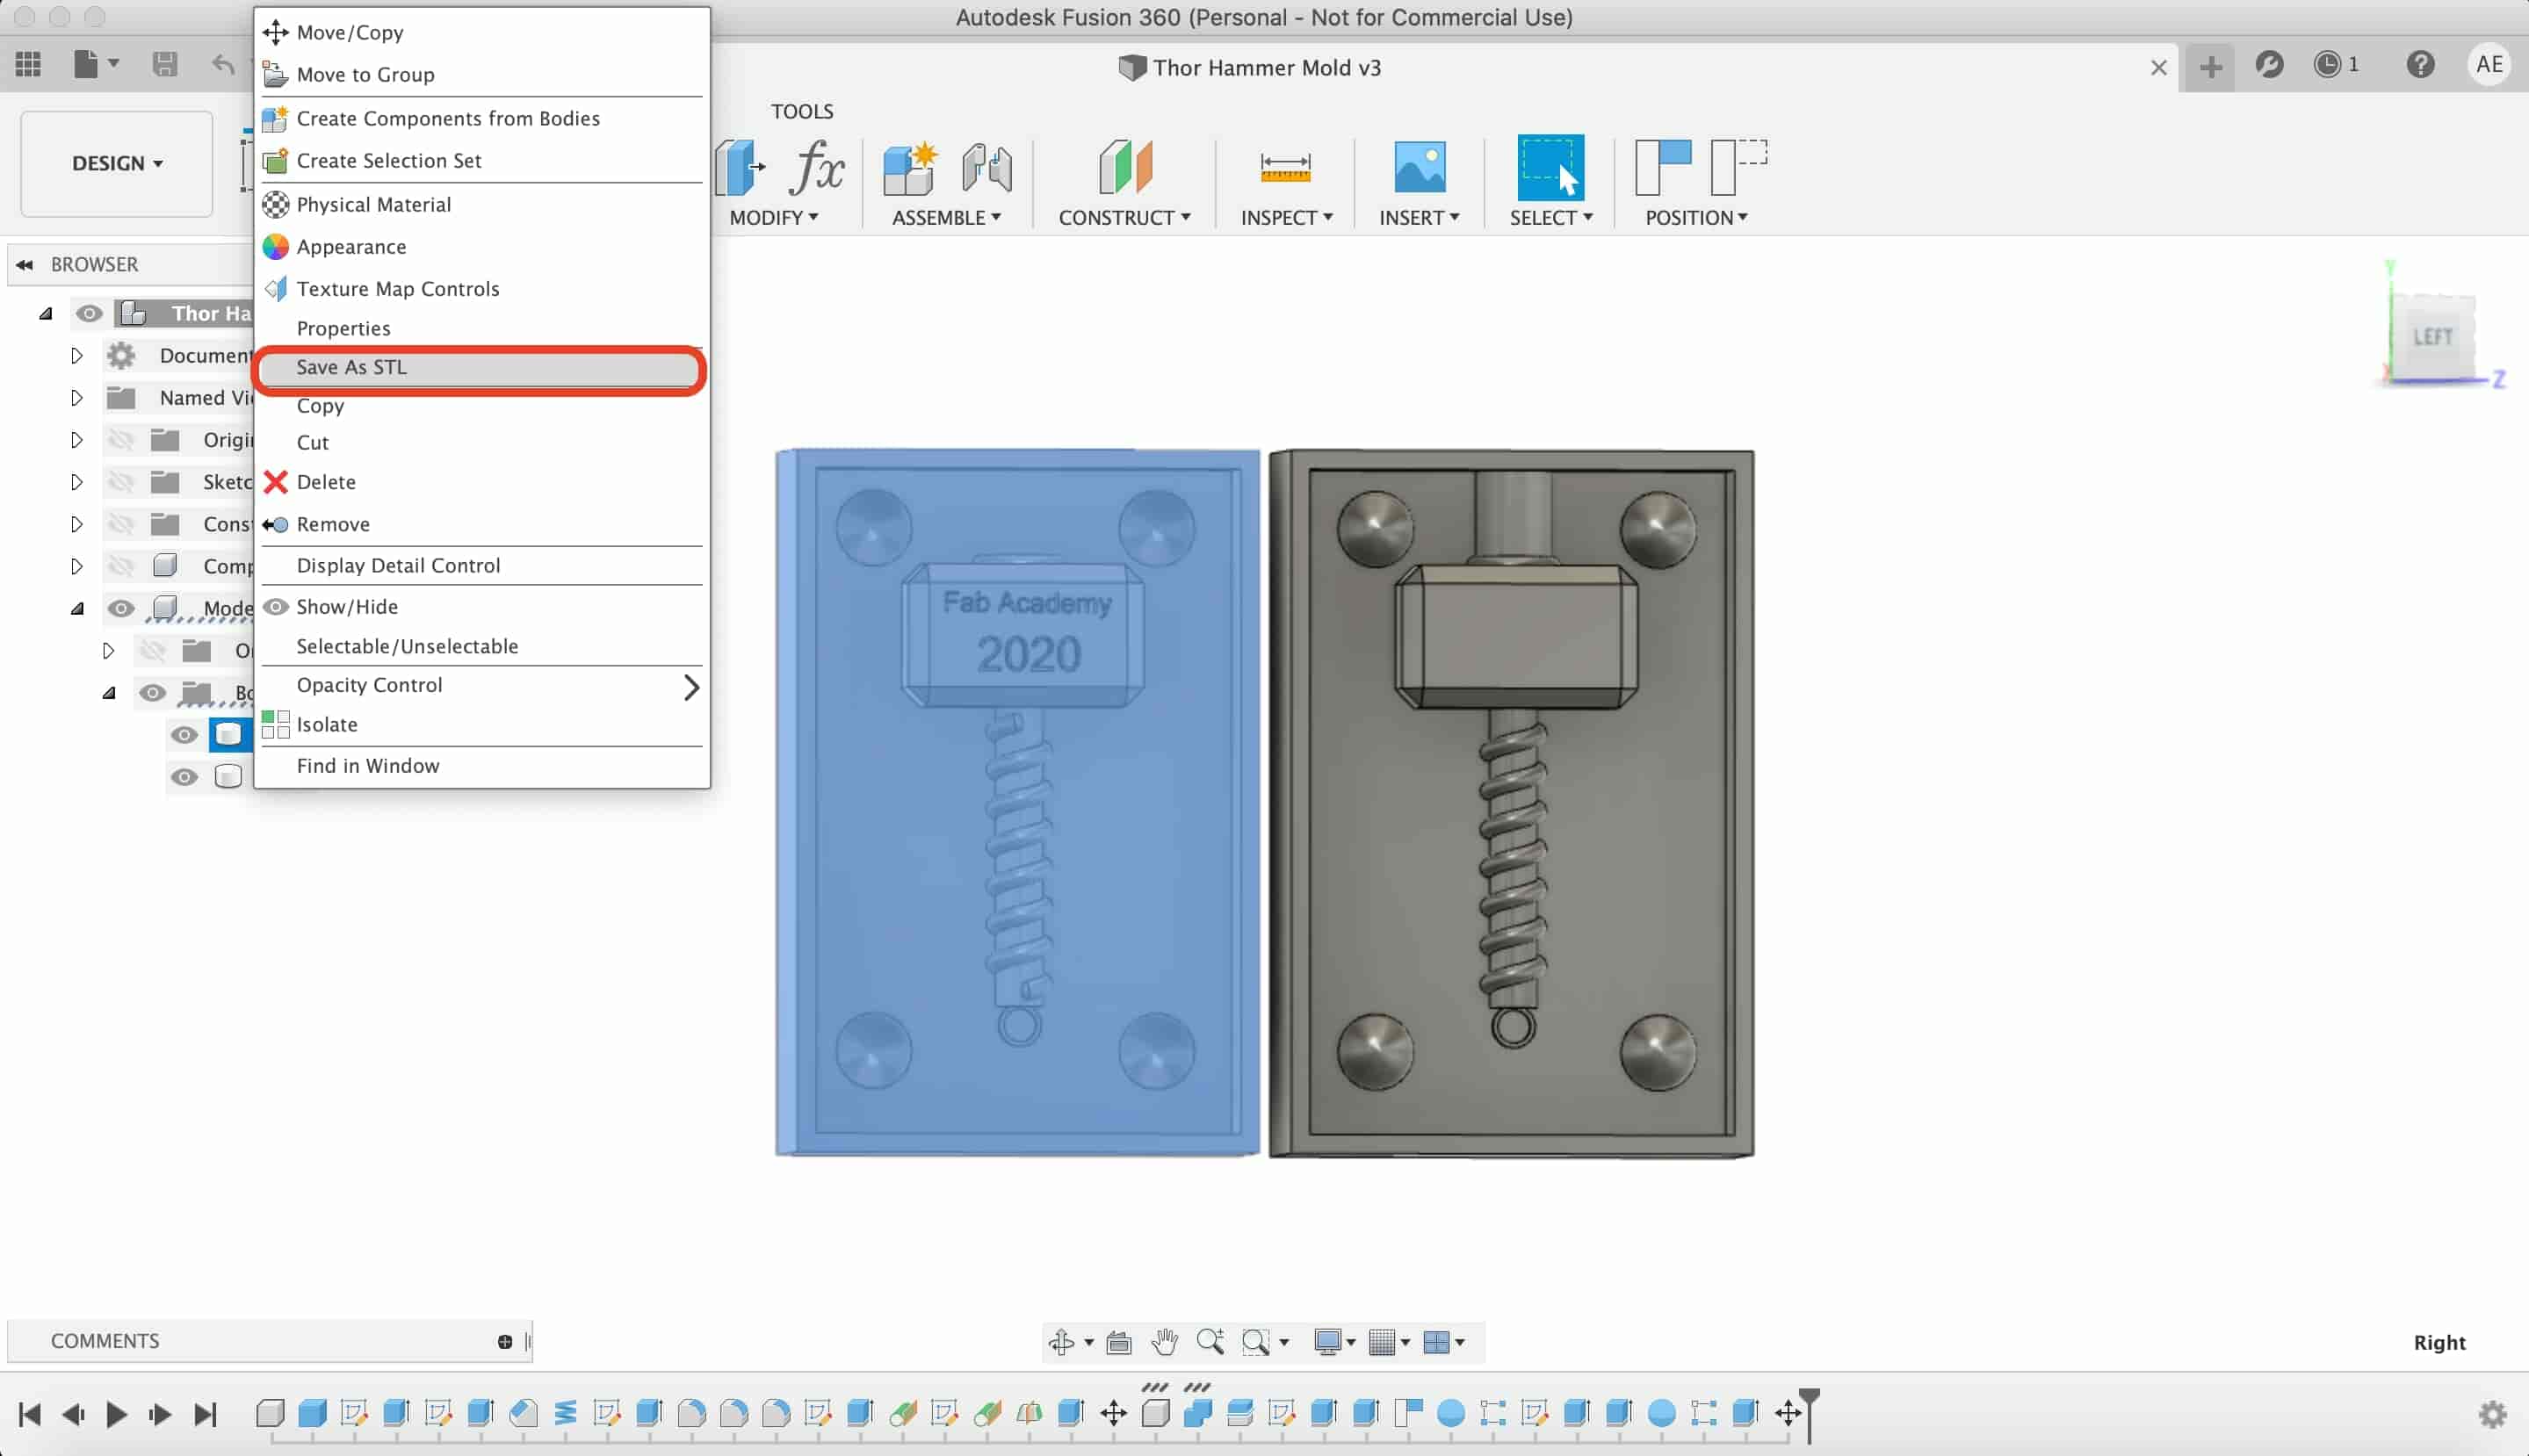
And now, we finished the design, Here’s the model!
After finishing the model design, we need to export each part as an STL file to be able to import them to the CAM software that we are gonna use later with the modela.
Mold Design STL Files Download
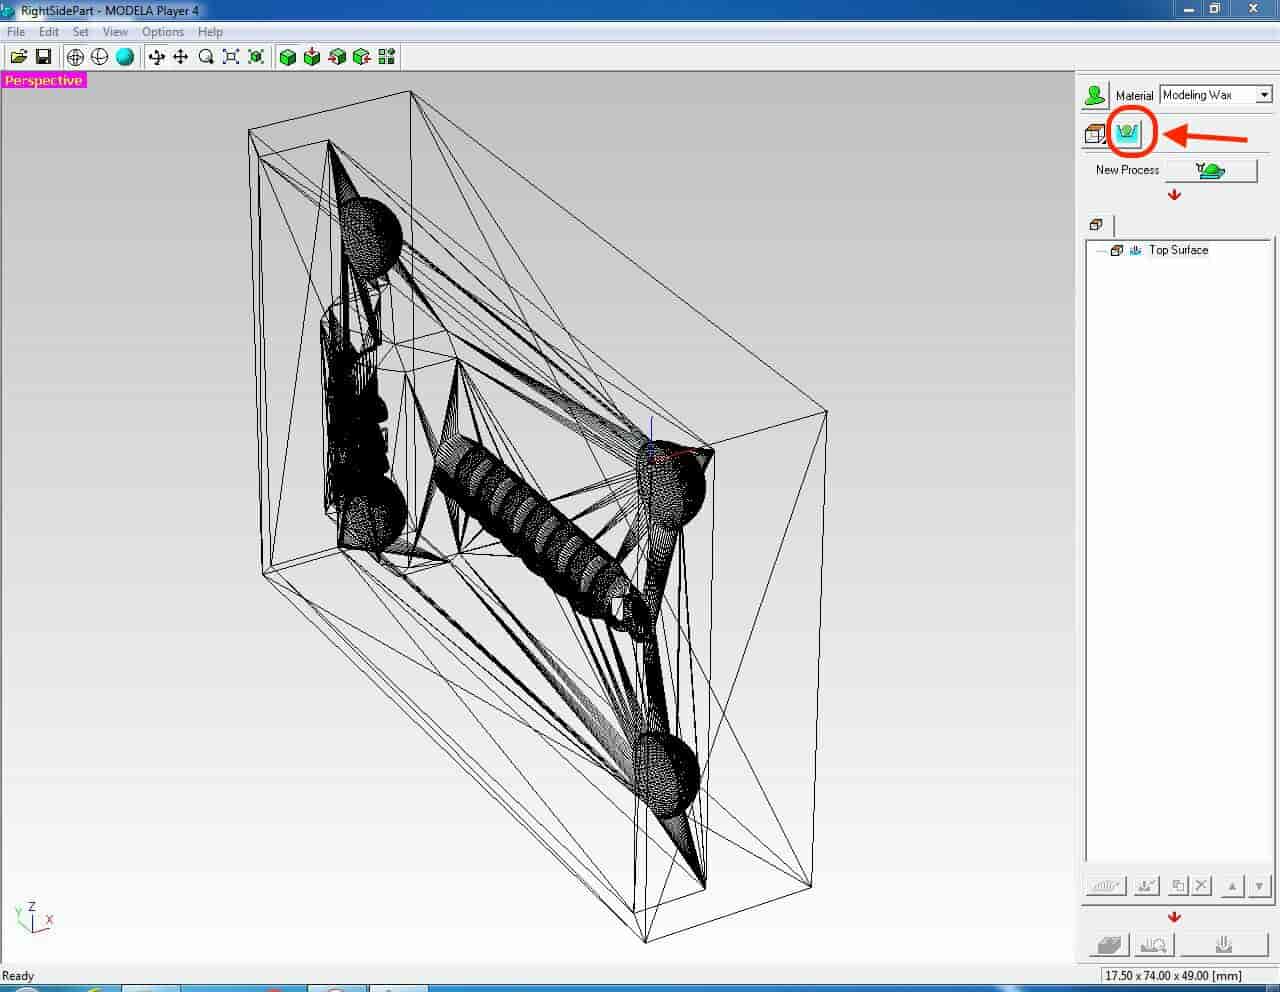
Machining The Thor Hammer On The Machinable Wax
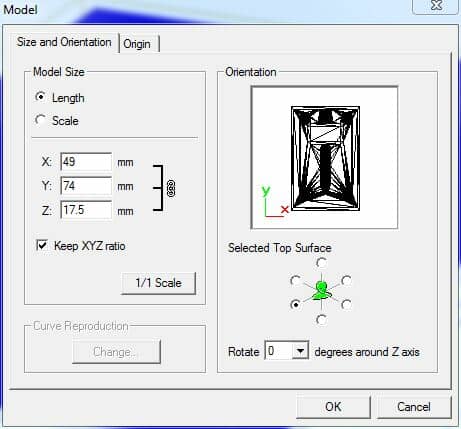
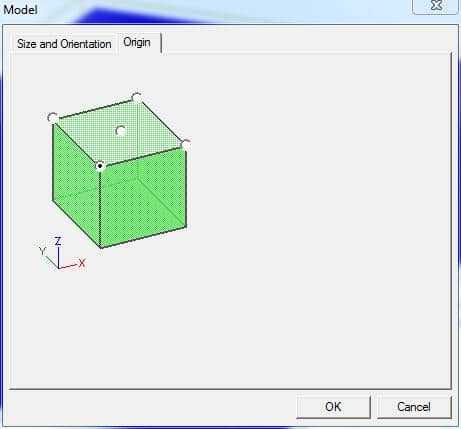
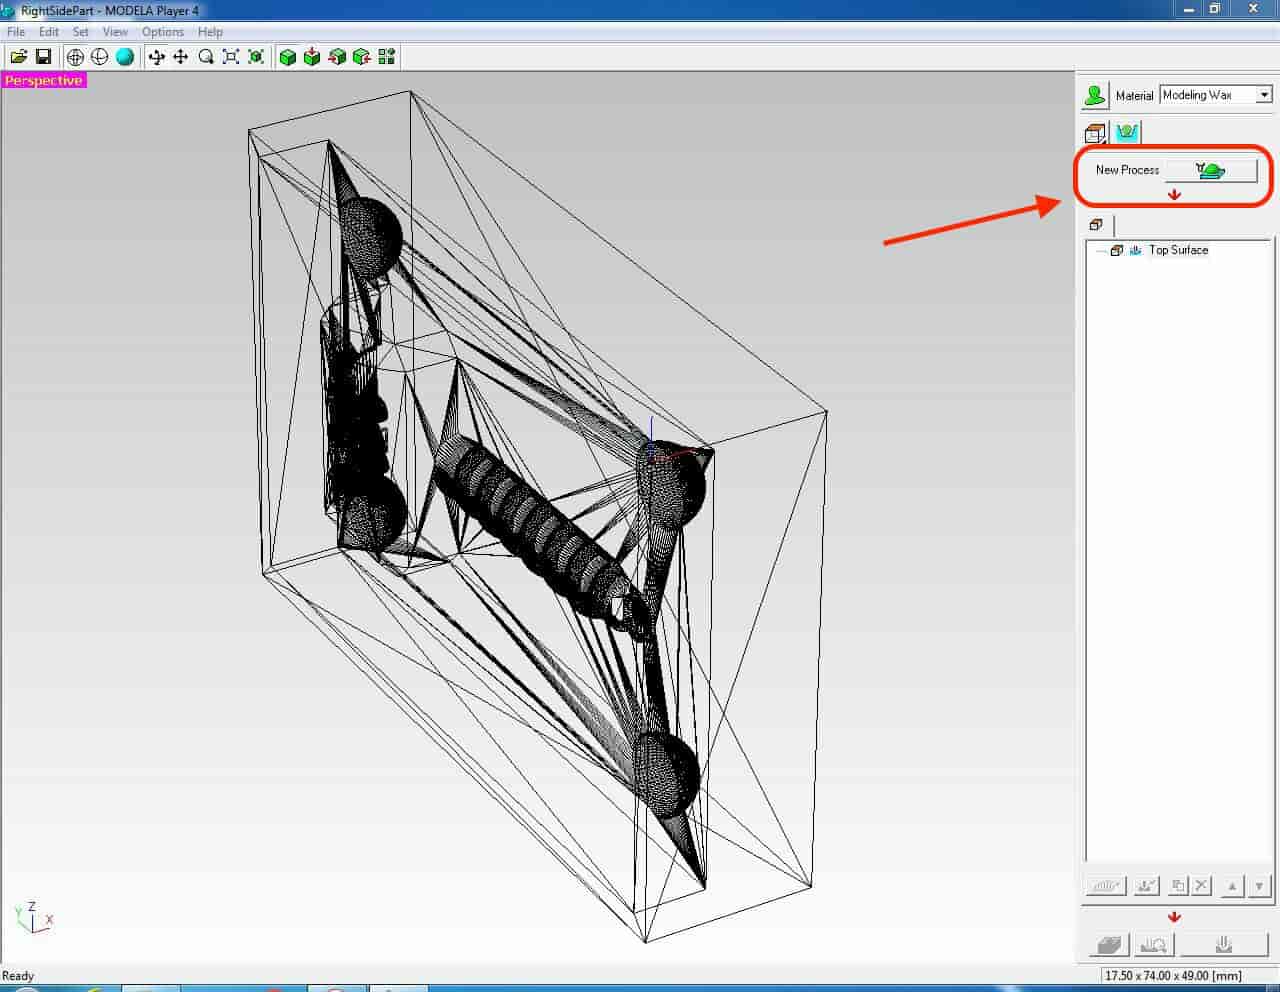
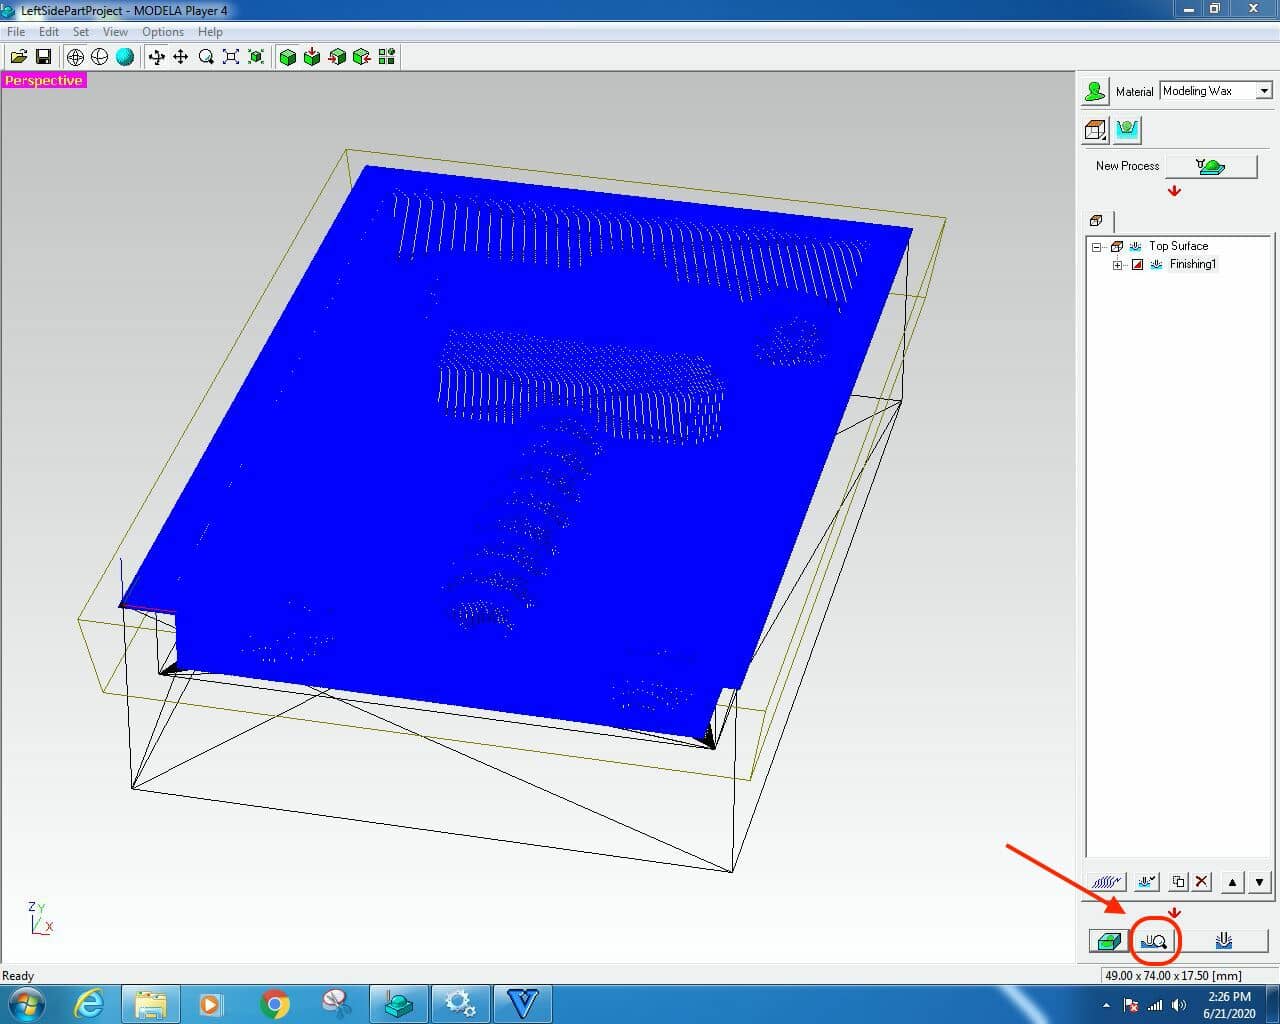
To machine the mold on the Machinable Wax, we are gonna use the Modela Player CAM software. First, we need to import the STL file that we exported from Fusion360 in the previous step. And, From the “Model” button we gonna check the model dimensions if anything went wrong or if we need to scale the model up or down. Then, we're gonna set the orientation of the model to the top surface. Lastly, we need to set the origin point of the model, I selected it at the bottom left corner.
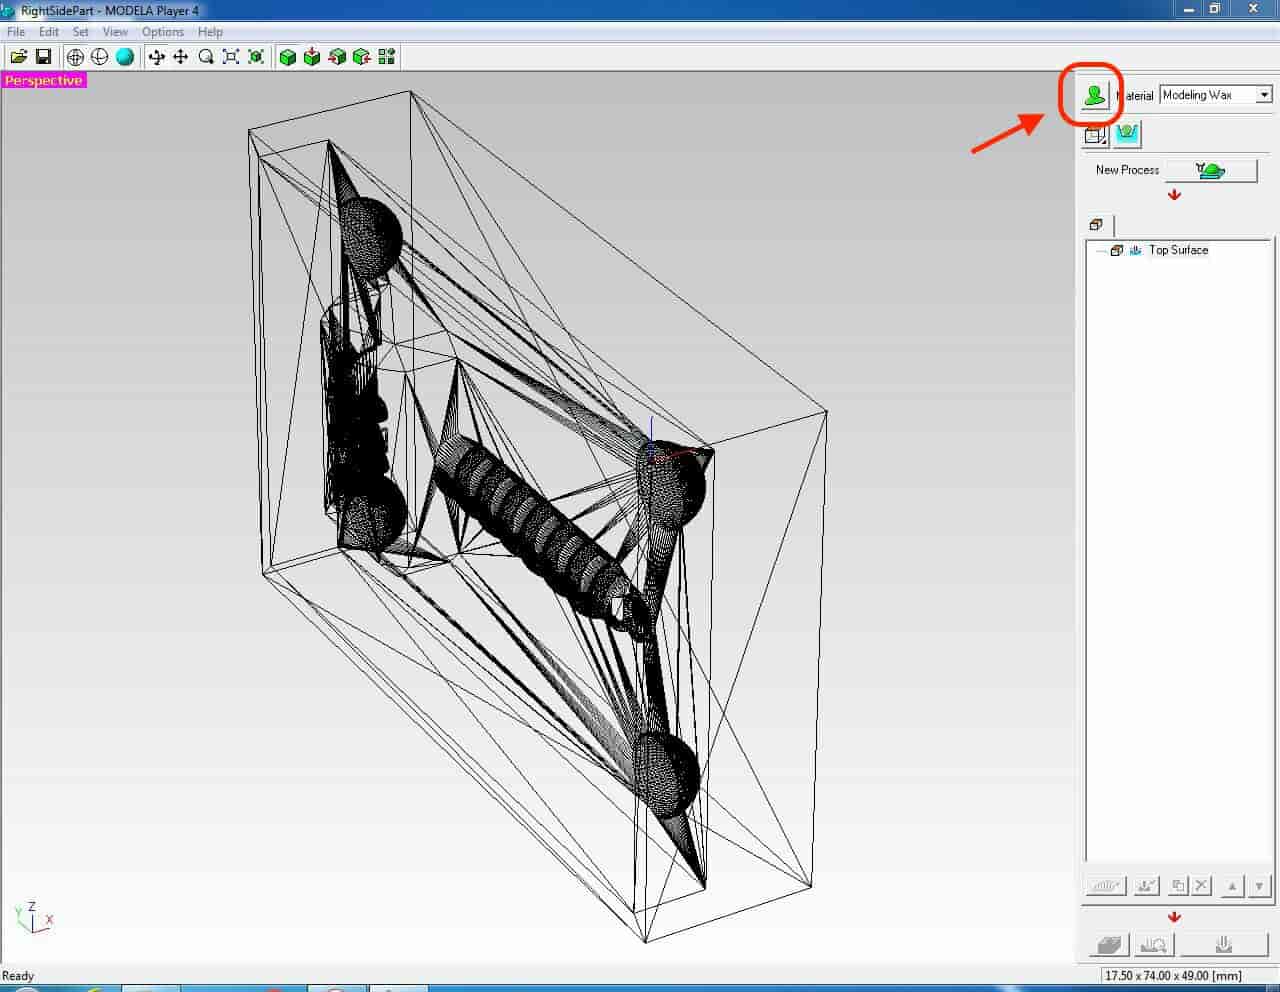
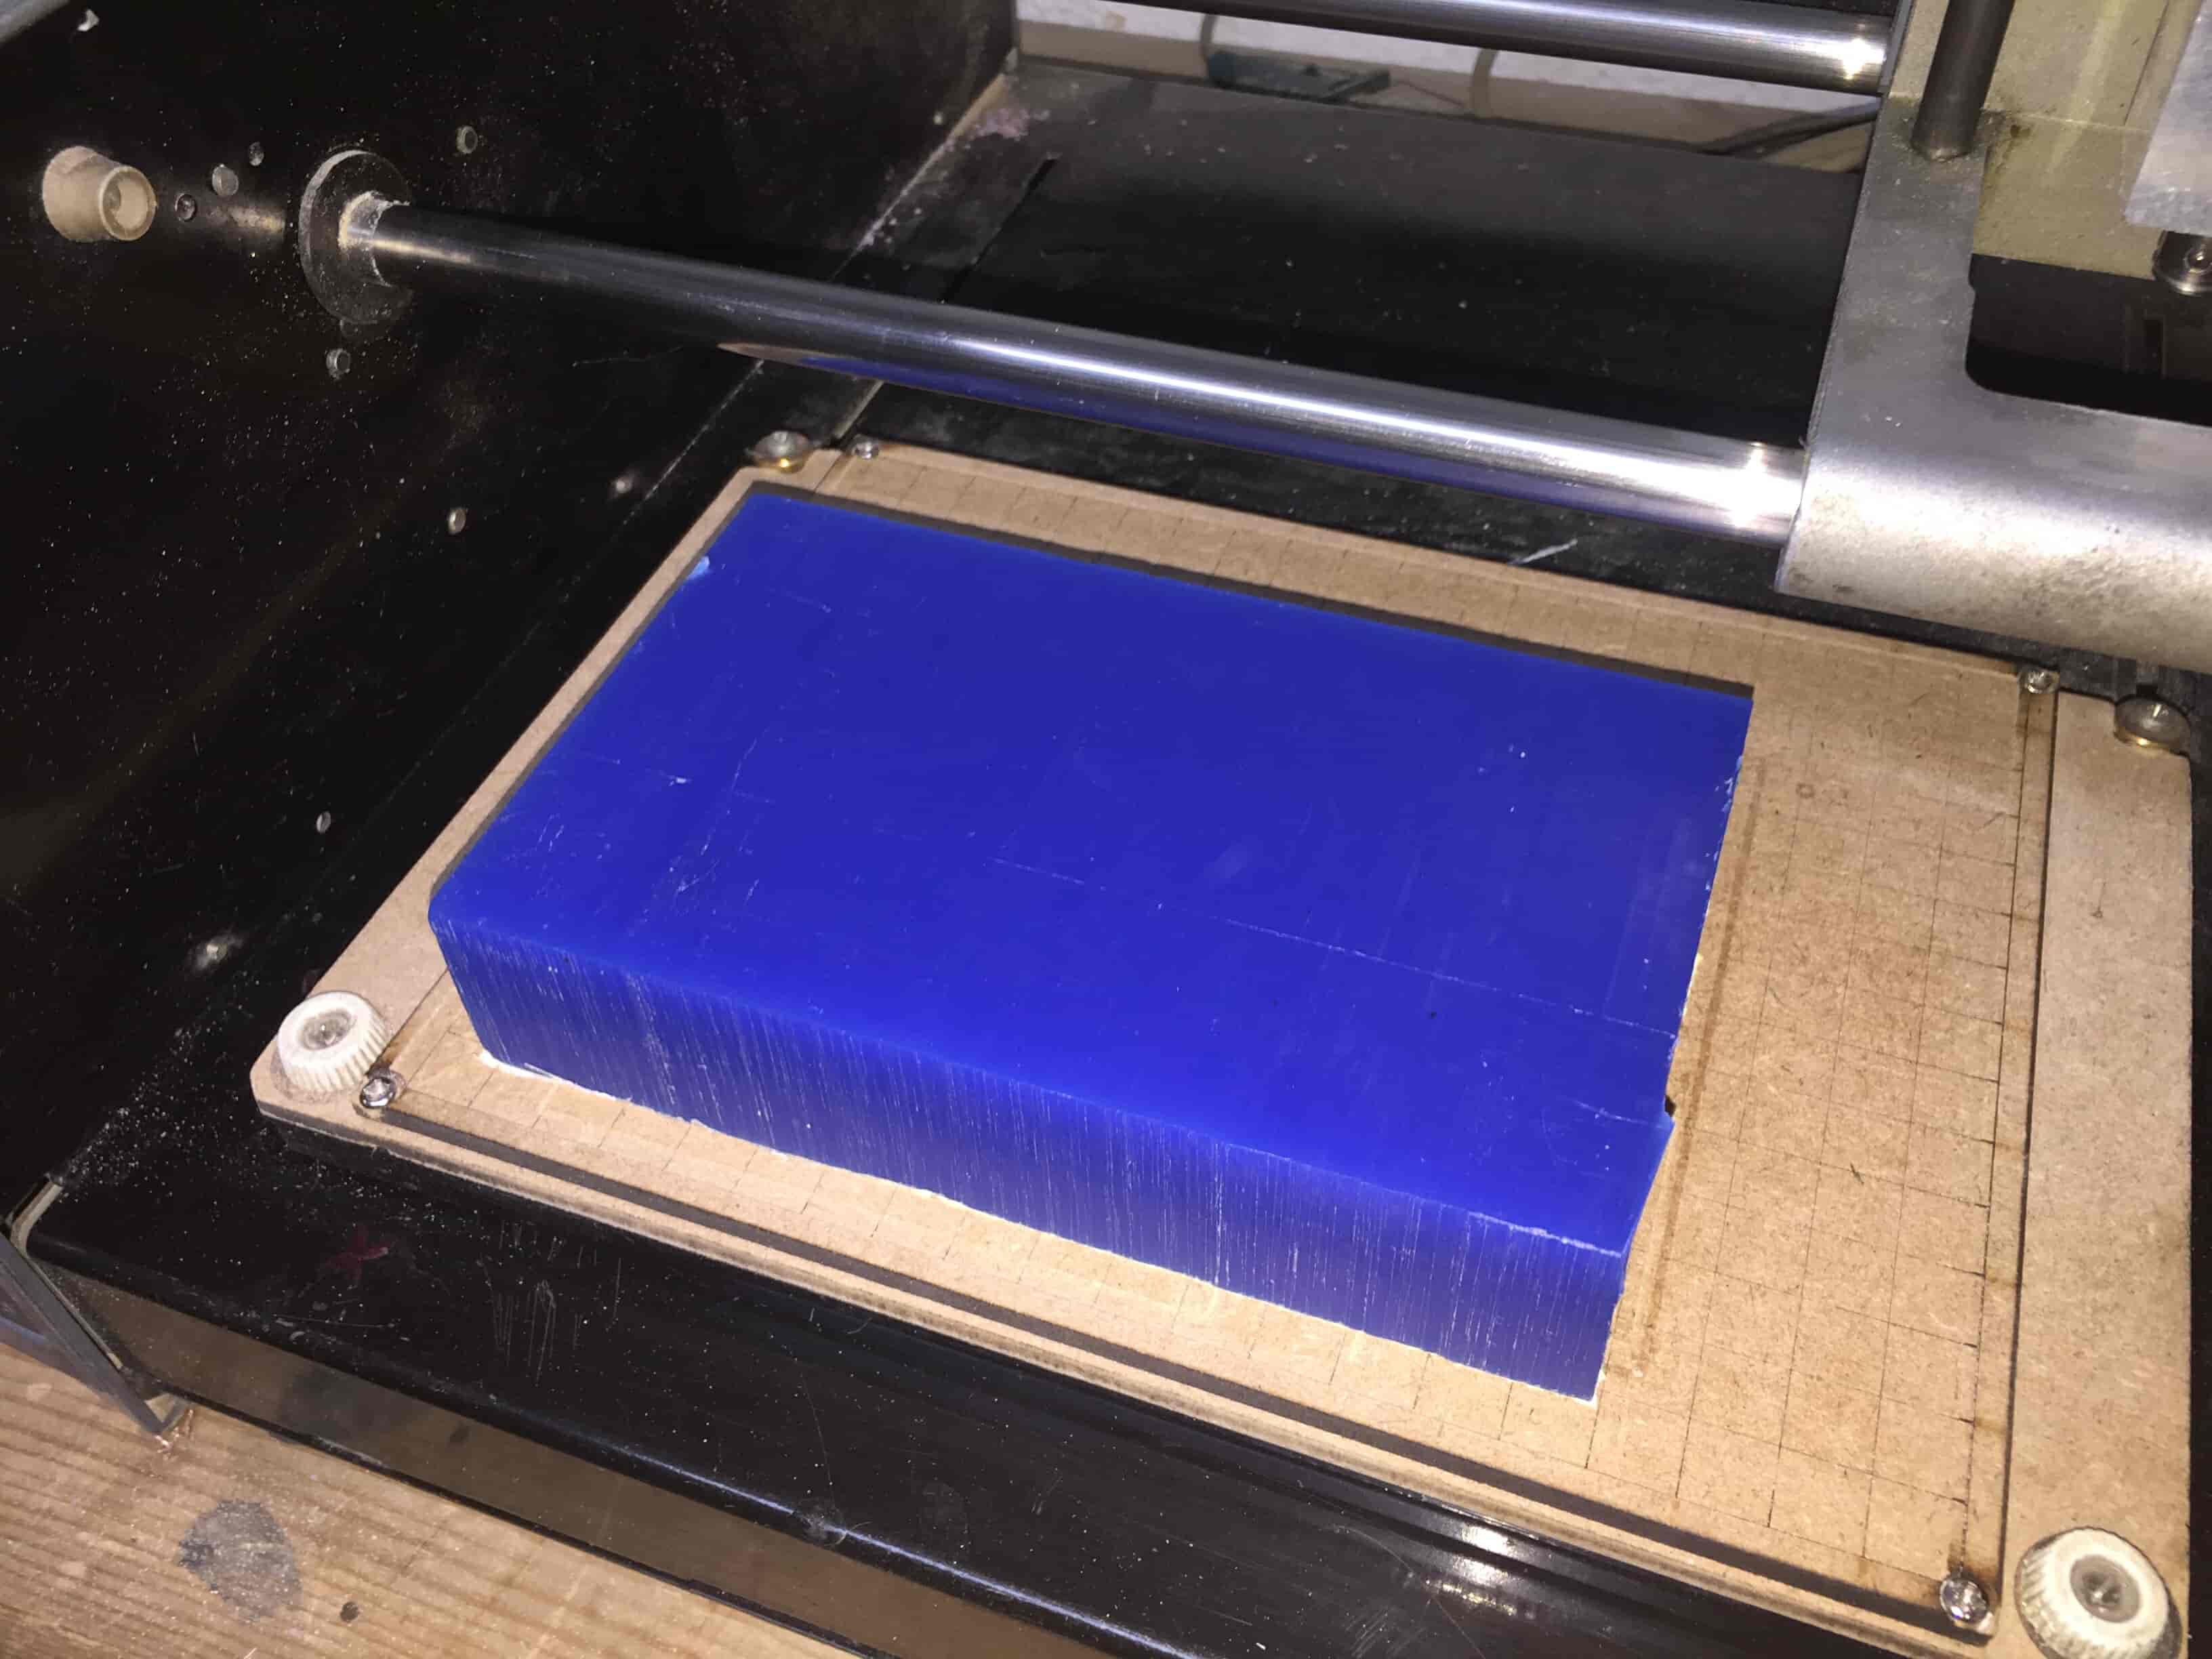
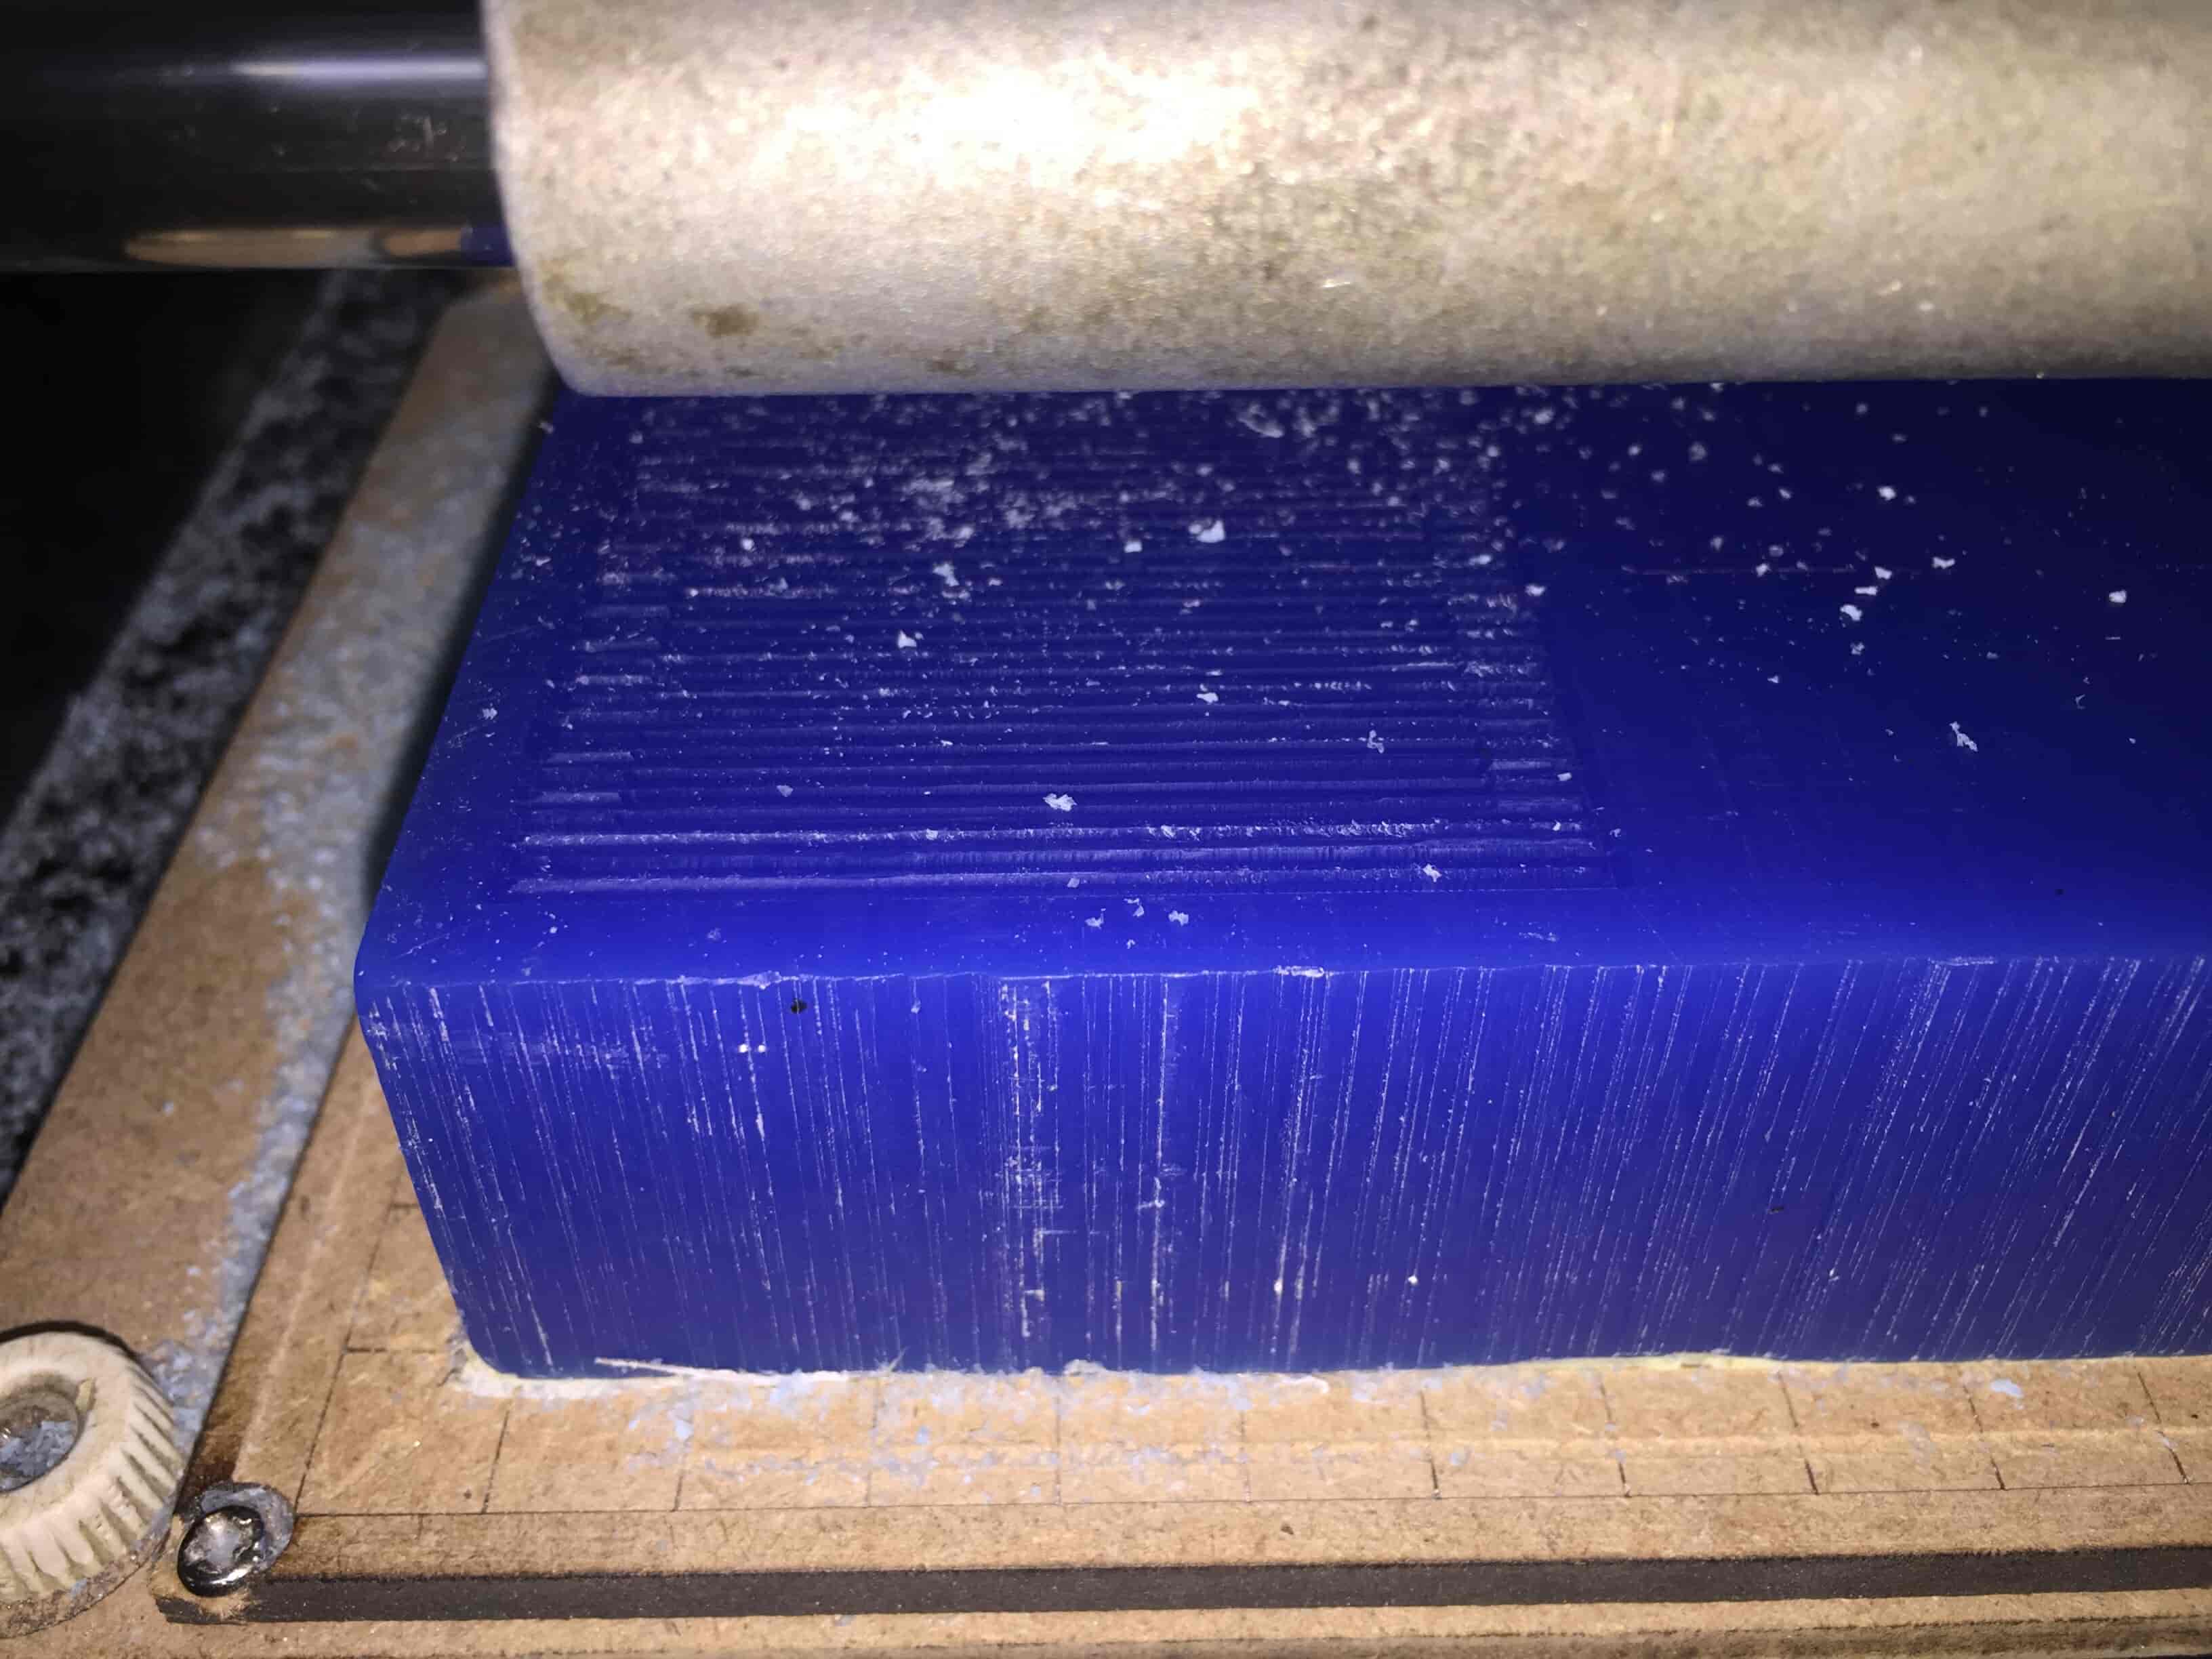
It’s very important to select the right material that you're gonna machine on the modela. In my case, I’m using a machinable wax block as I mentioned before.
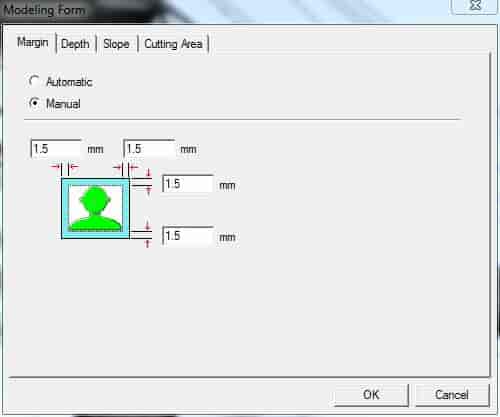
After that, we need to set some other parameters, click on the model form button. Set the margin to “manual”, and set it’s value to 1.5mm is enough to make the casting process easier later.
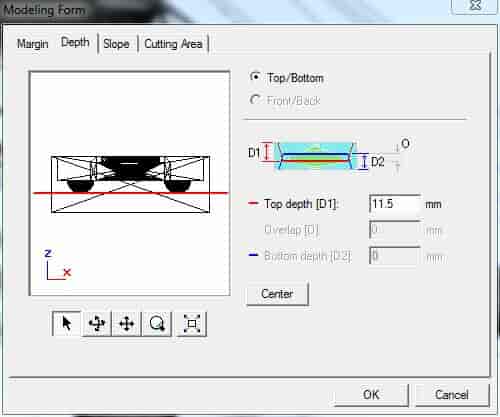
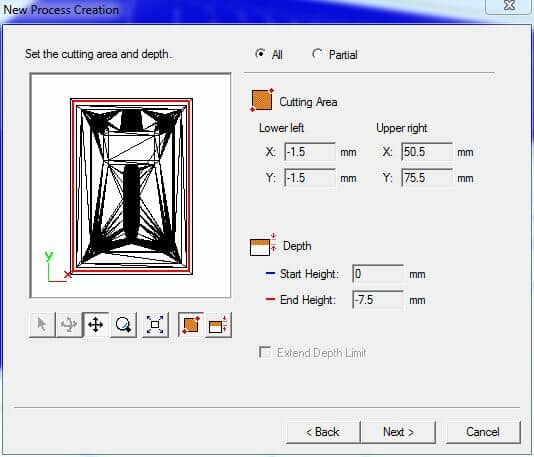
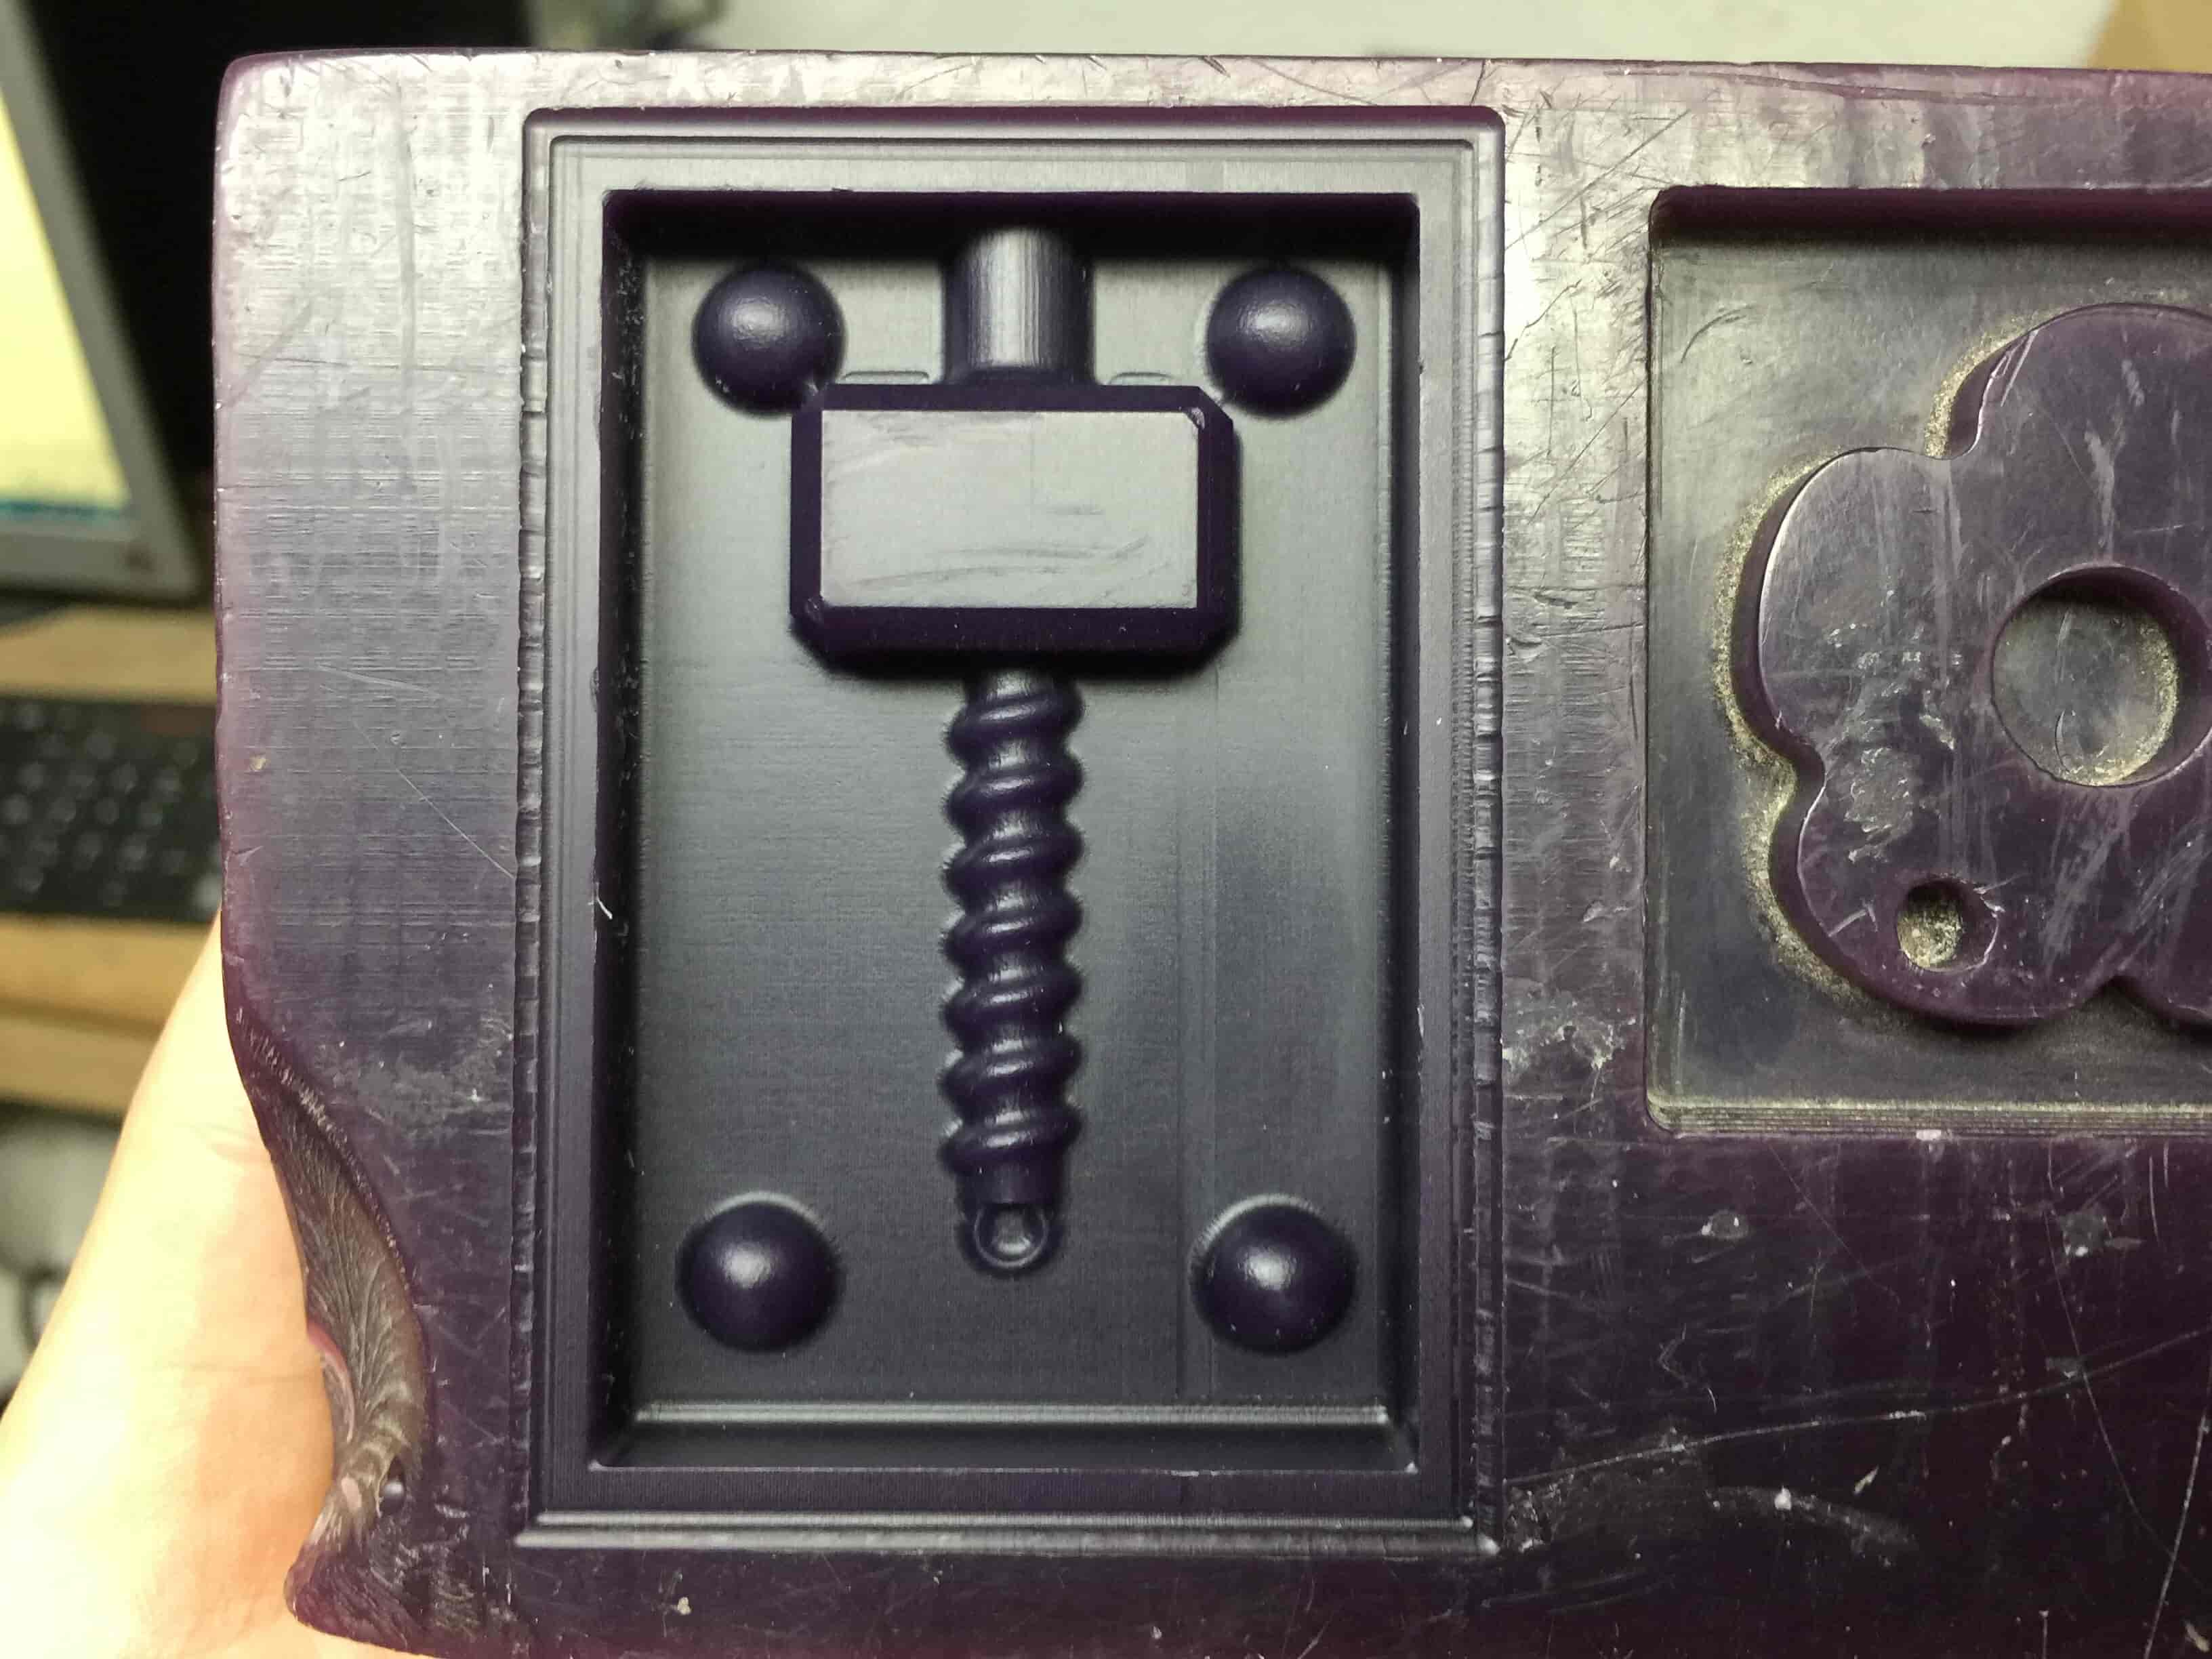
A very important part here is to set the depth of the cutting process correctly according to the depth of the model that we designed on Fusion360 before. In my case, the cutting depth of my model is 11.5mm in the first half of the model. The depth between the top wall and the hammer base is 7.5mm but we need to put the female pins in our consideration too, the depth of the pins is 4mm(8mm/2). So 7.5mm+4mm = 11.5mm which is the total depth of the mold.


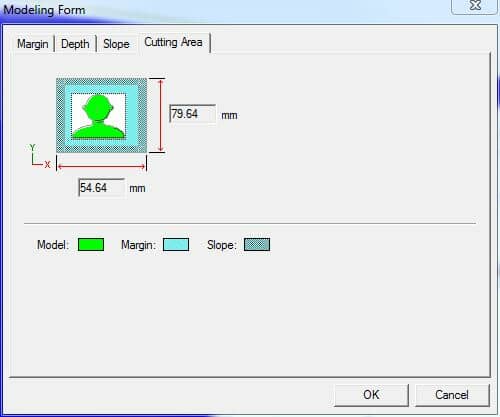
In the slope menu, I set the top slope to 10 degrees that make the edges more smooth with no sharp edges. That makes the resin pouring later in the casting process easier and also to remove the mold from the wax easily. The cutting area indicates the full area of the model that will get machined. If everything is fine press “Ok” and proceed to the next steps.

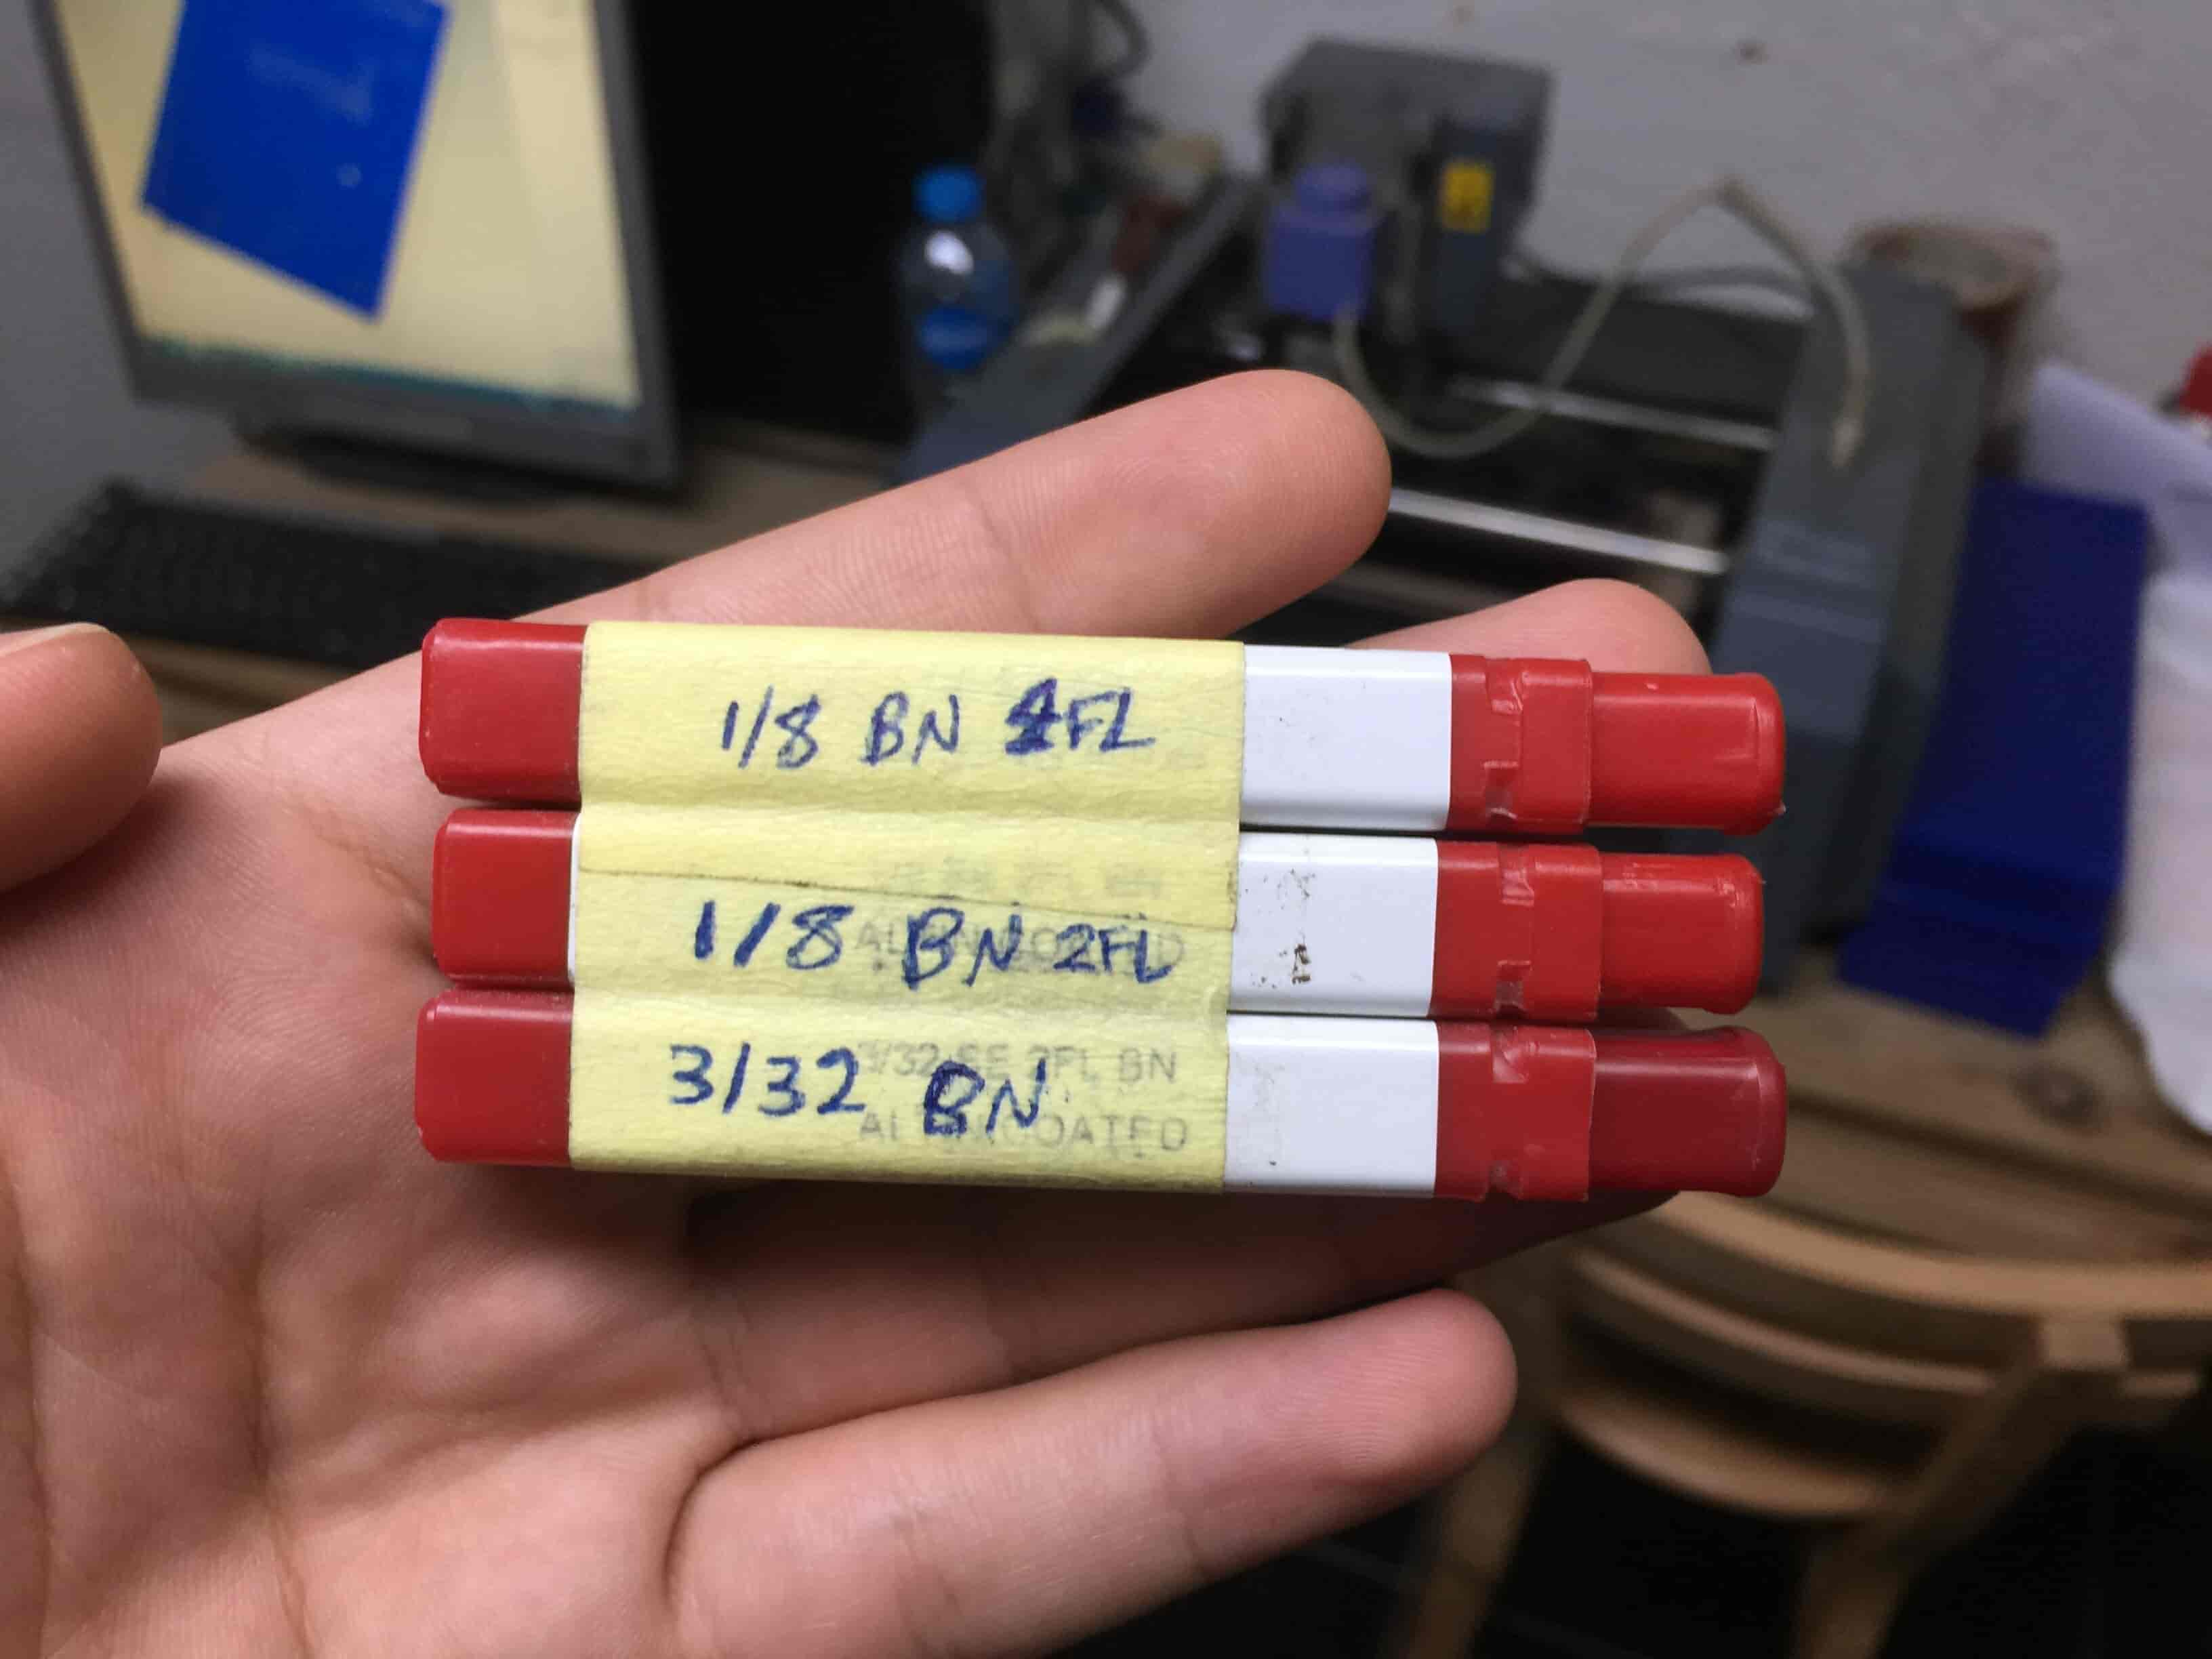
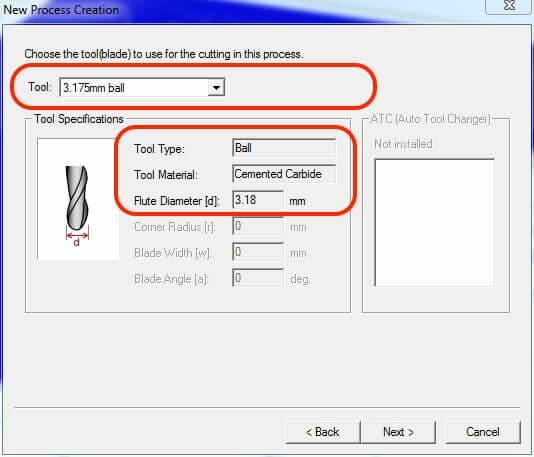
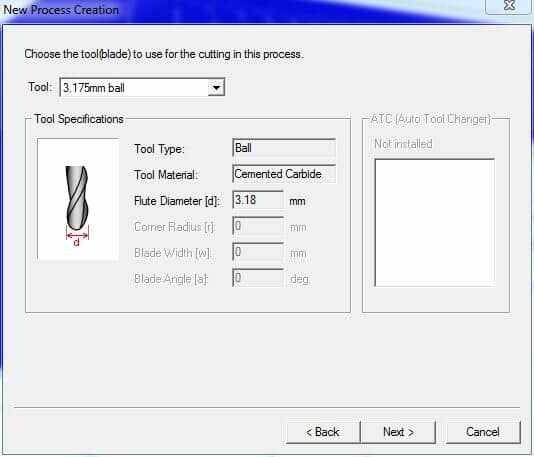
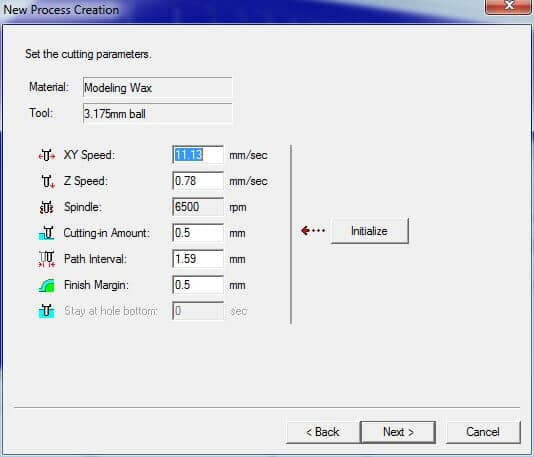
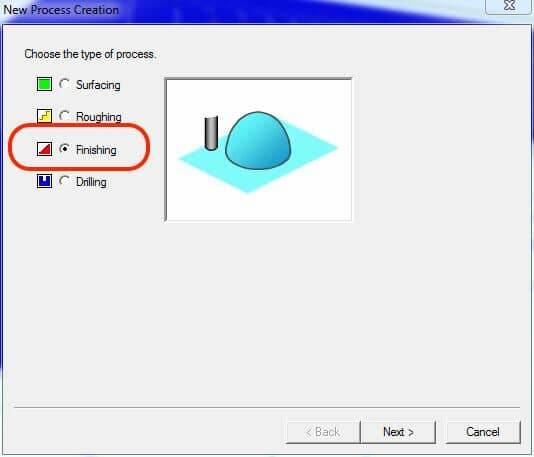
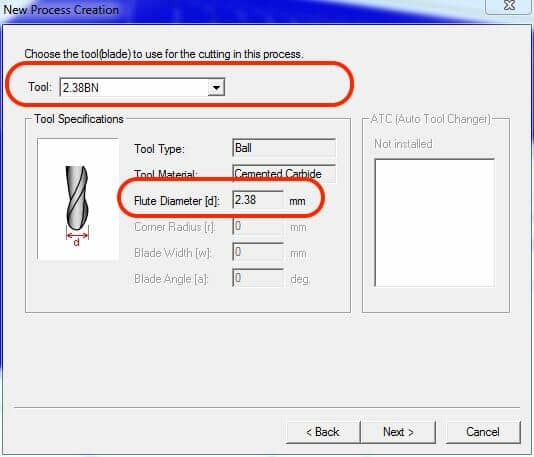
The machining process will be divided into two phases, the first phase is “roughing” which means removing the larger as many chunks of material as possible. In this step we are gonna use the 1/8inch(3.175mm) ball nose end mill. But, in the finishing process we will use the smaller end mill 3/32inch(2.38mm).
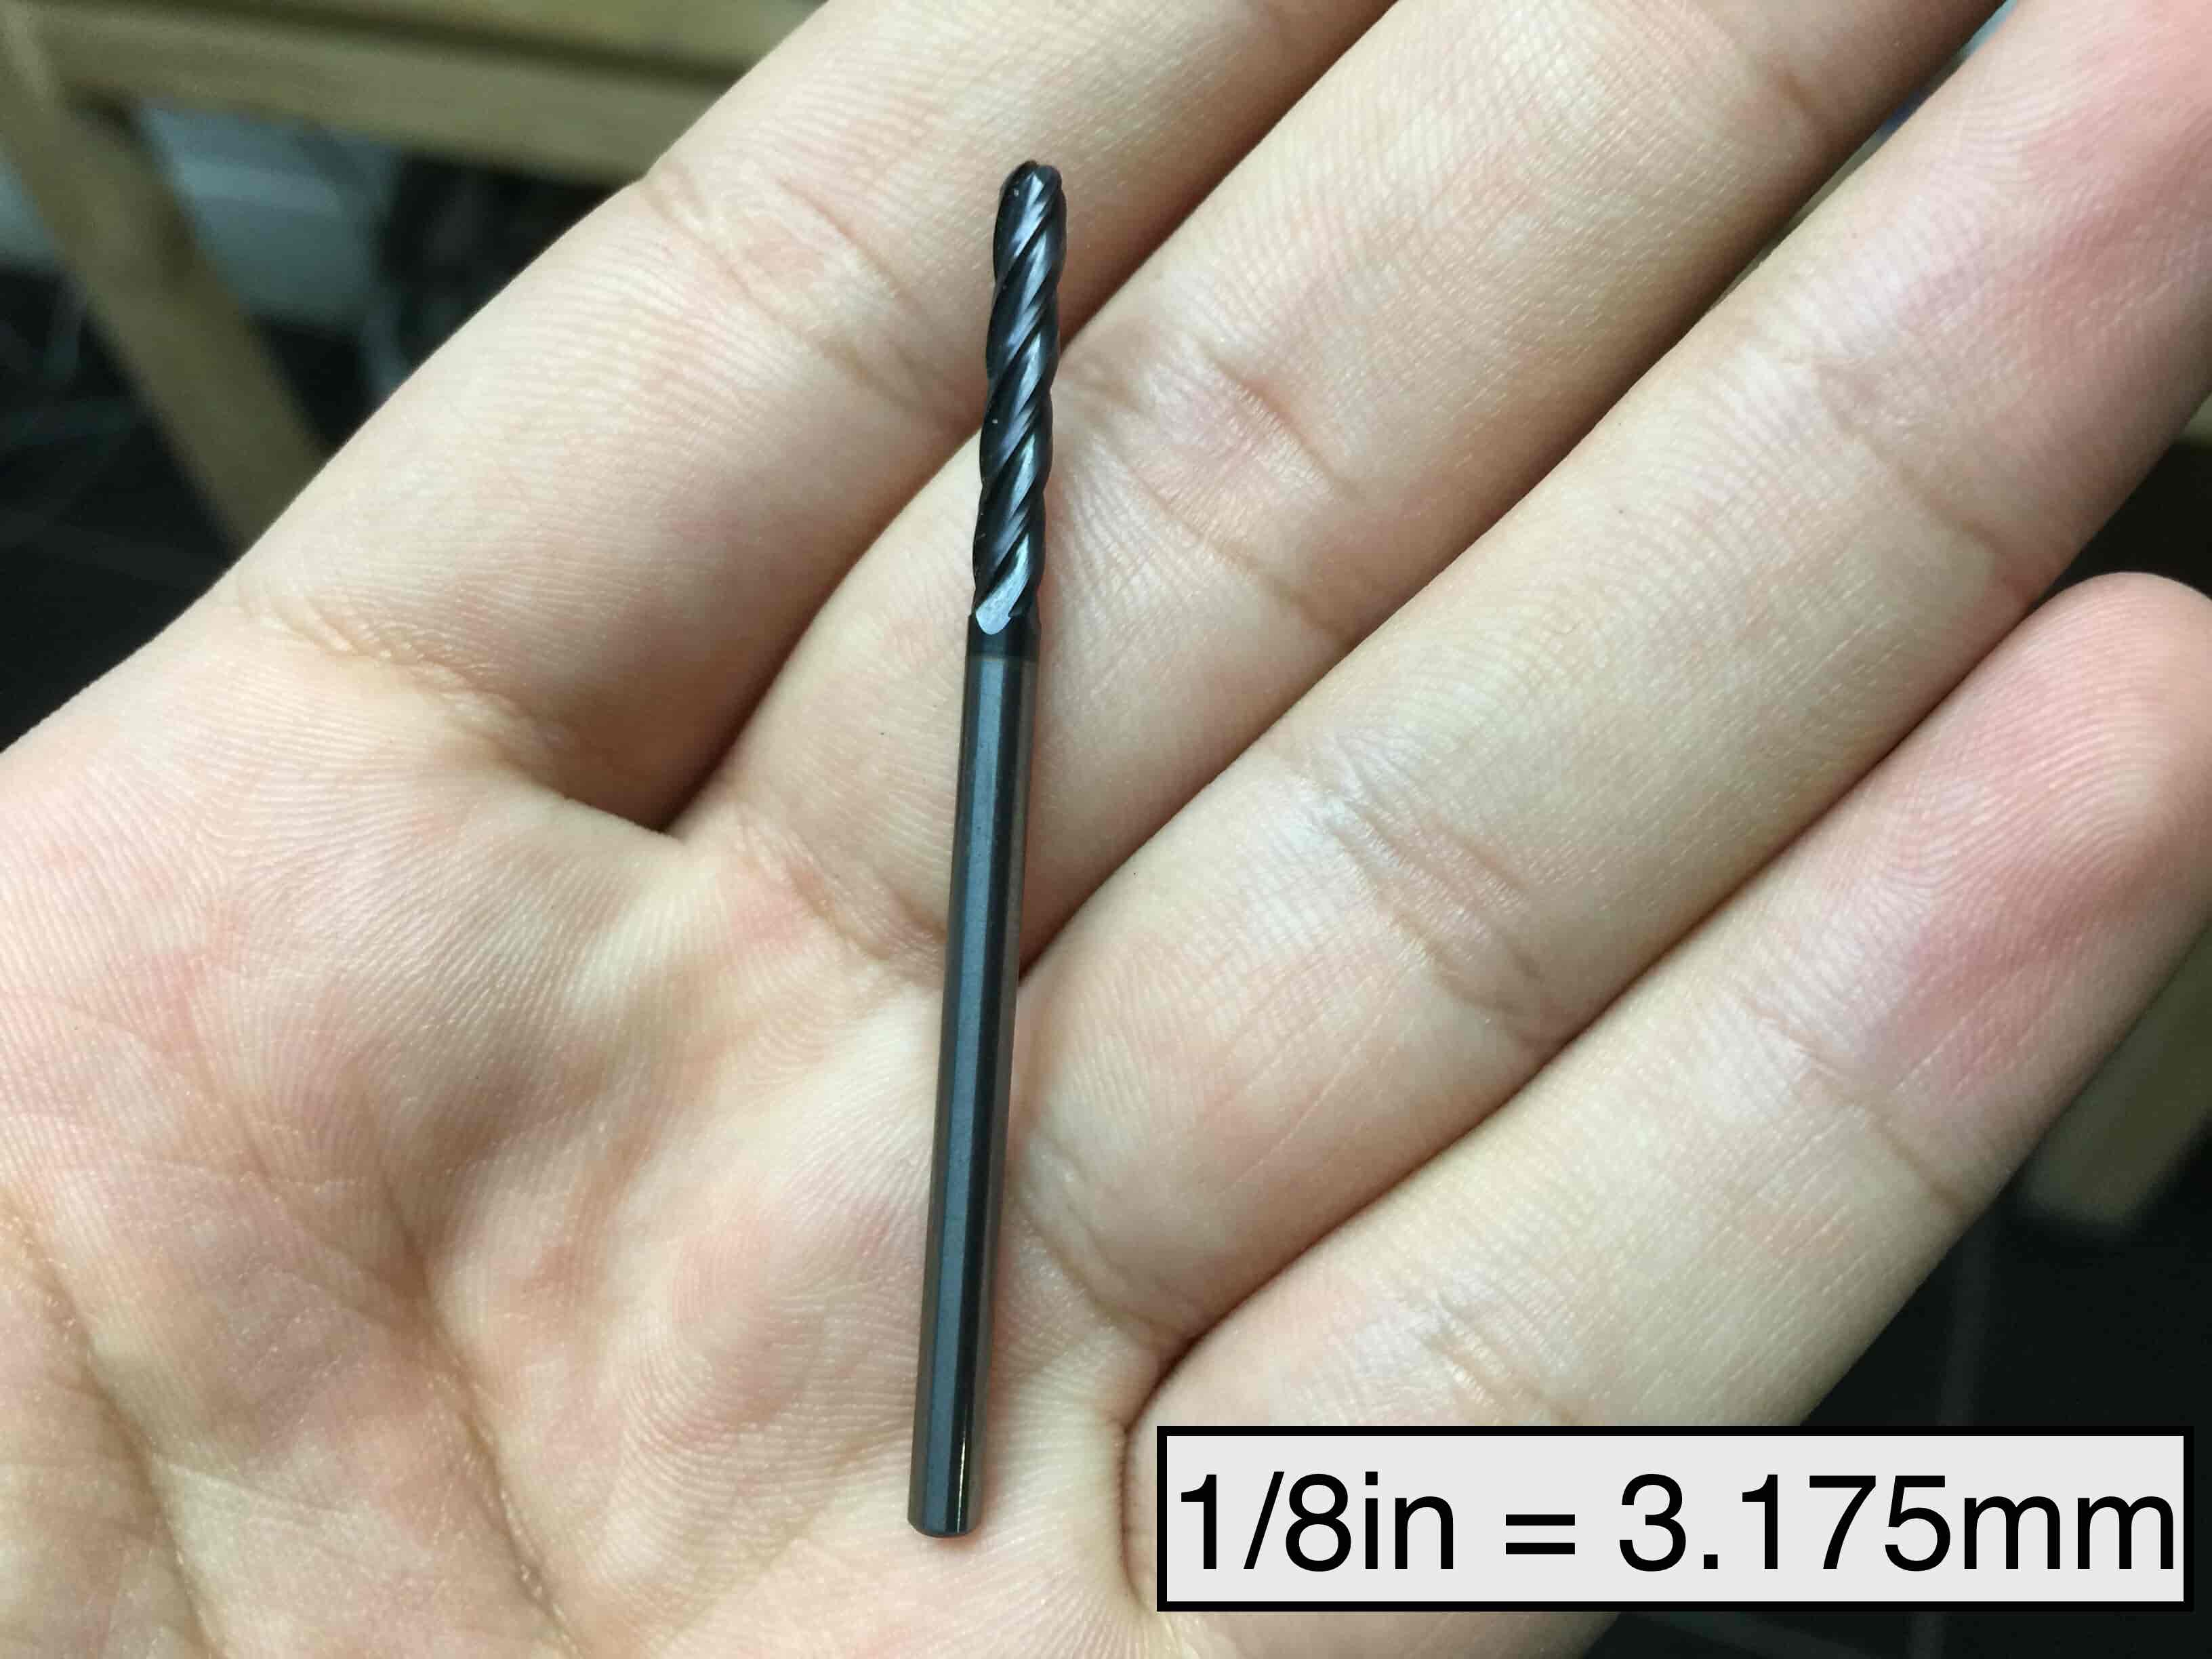

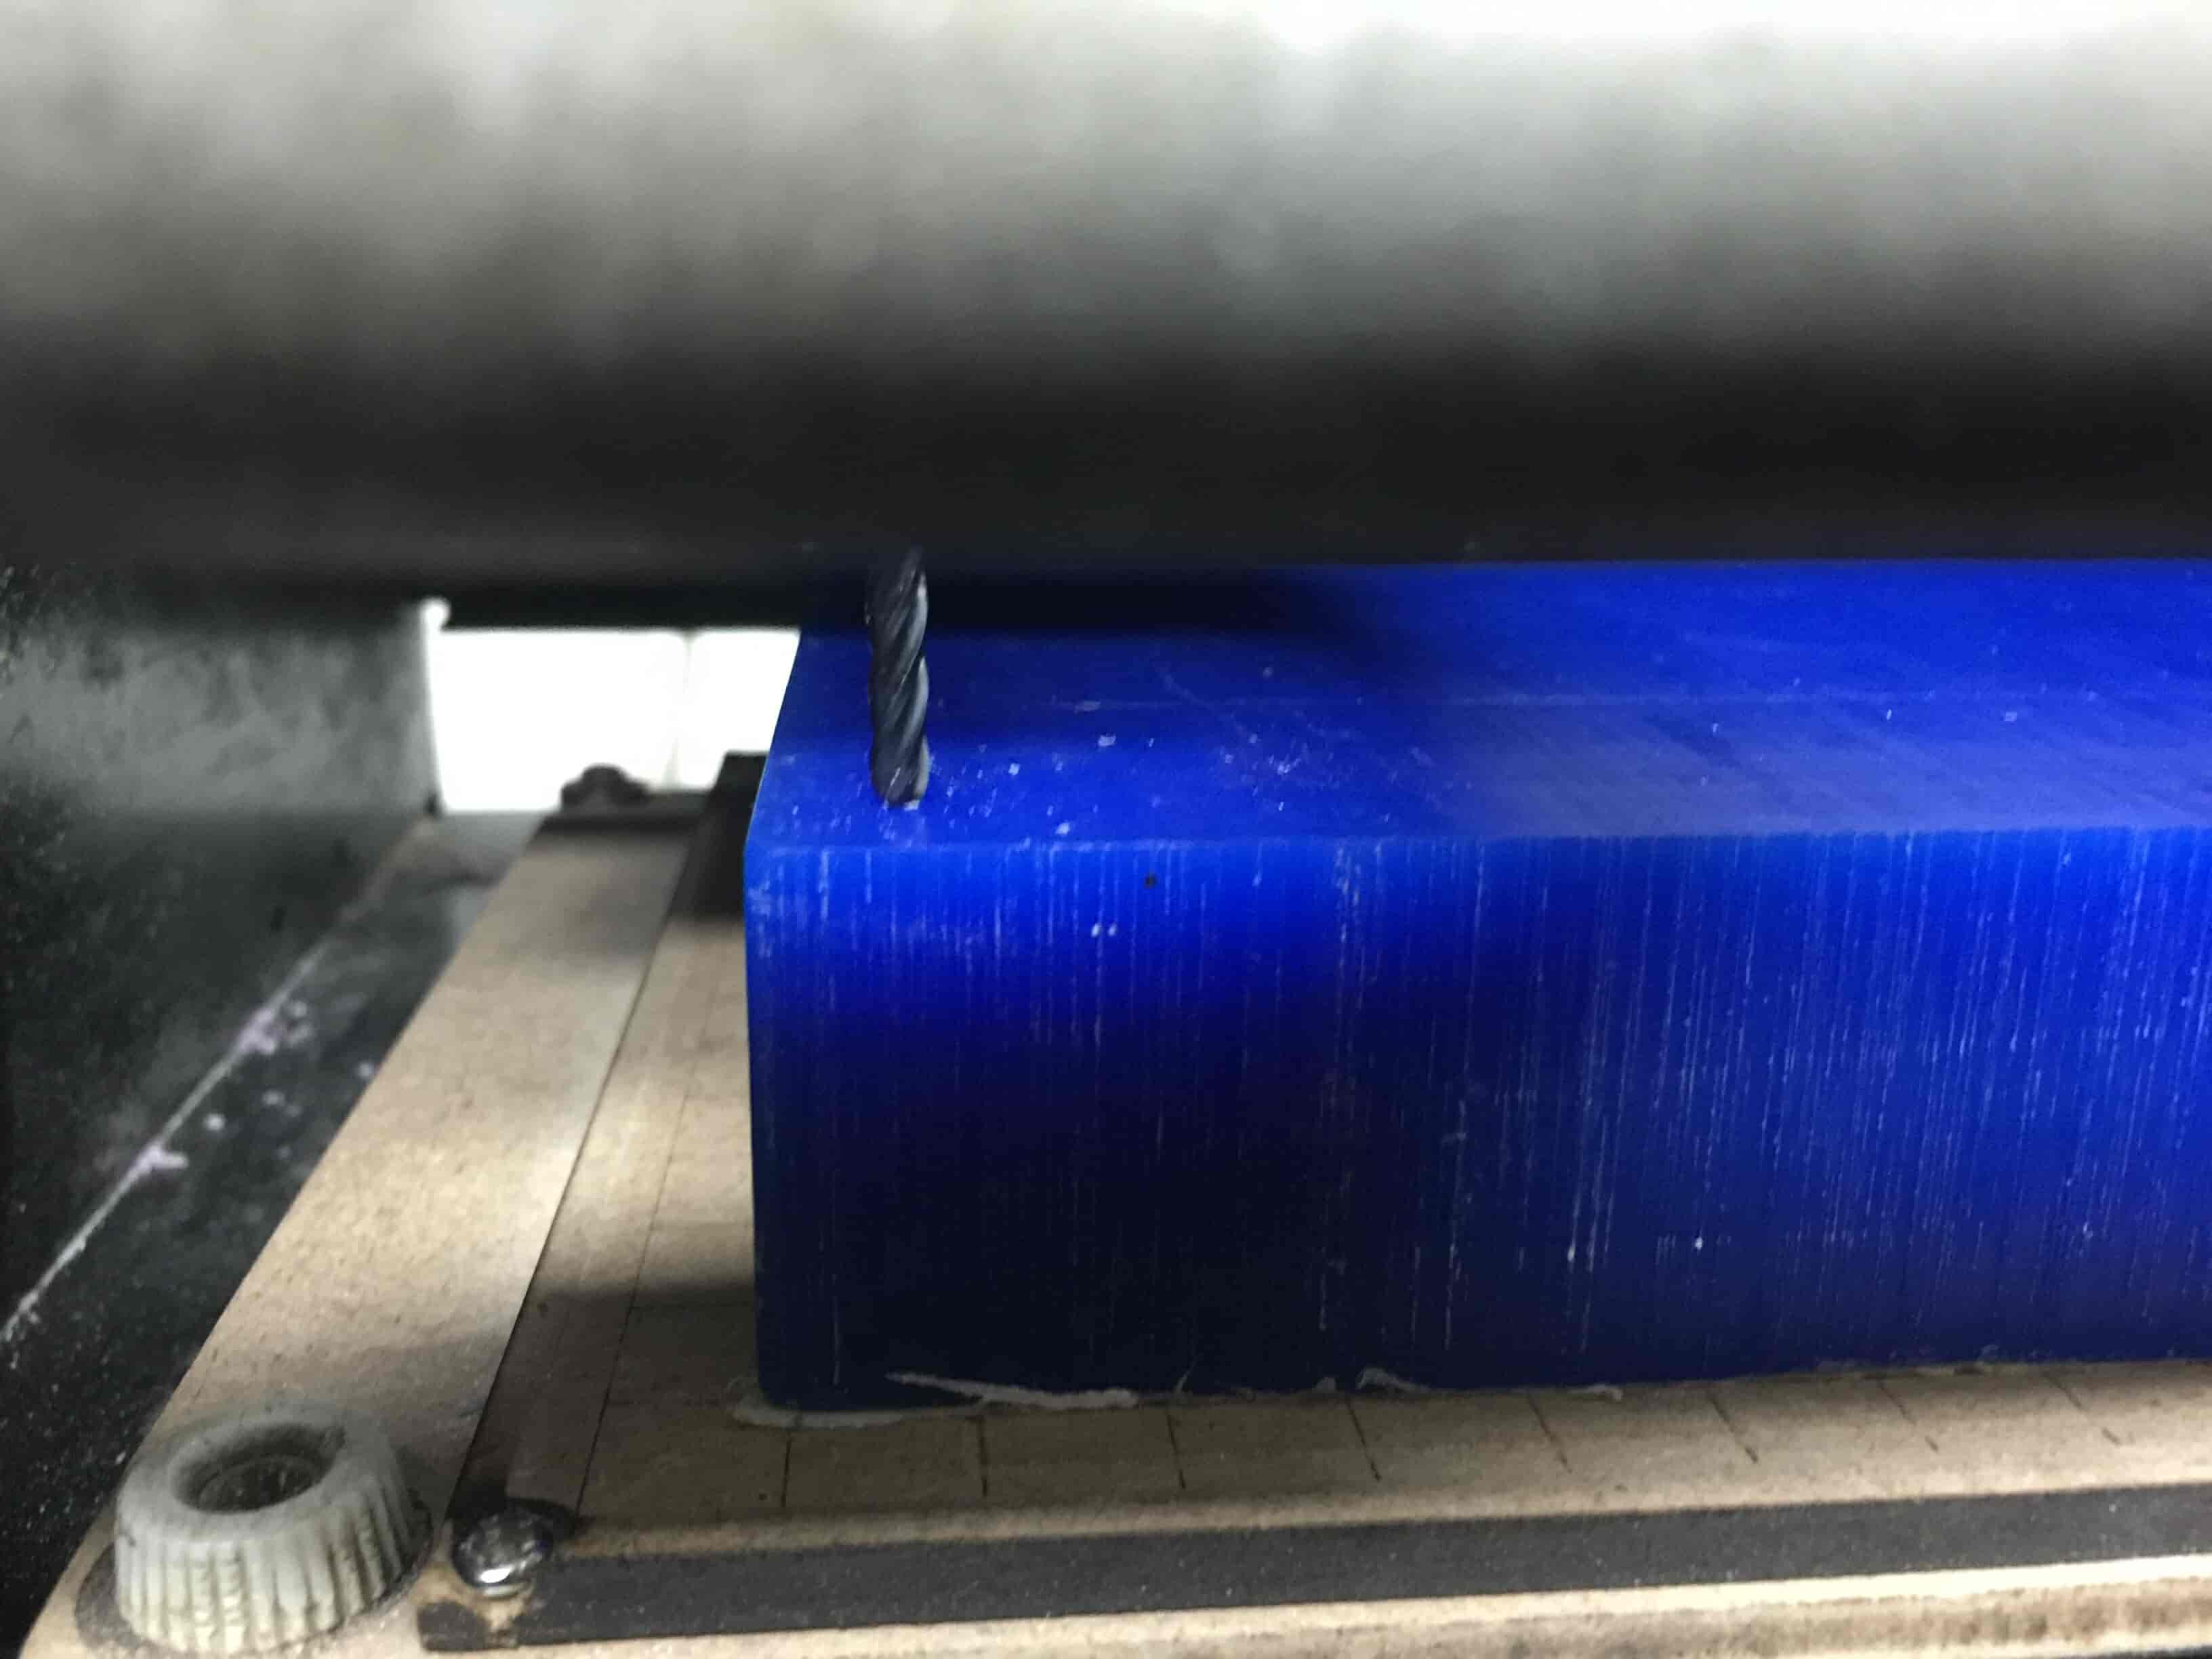
Now lets install the 3.175mm end mill in the machine collet and secure it well with the allen key. Then,
After that, we need to fix the machinable wax block on the machine bed and secure it with double face tape.
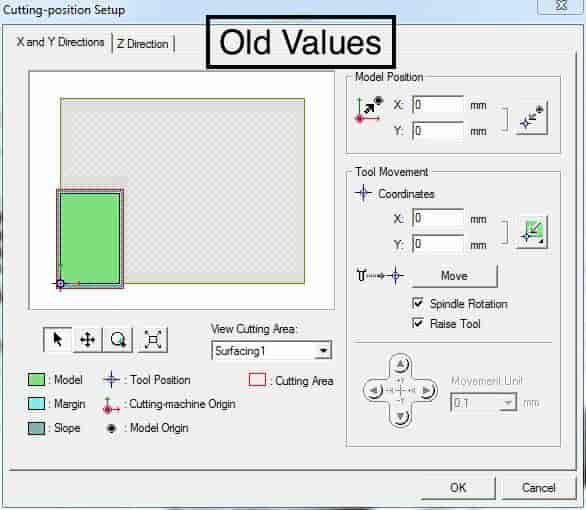
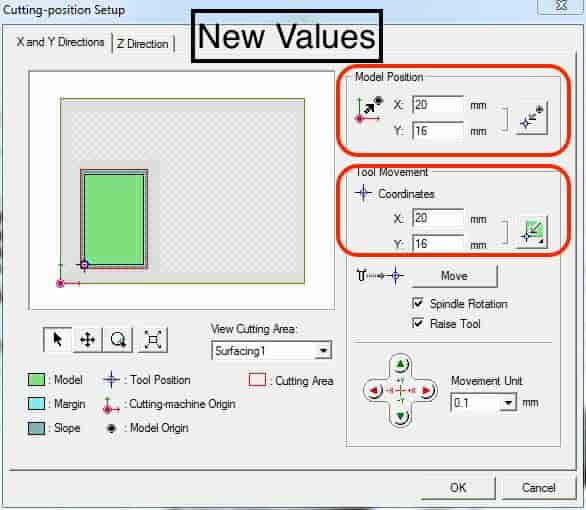
Let’s set the origin of the machine tool on the material block. Open the cutting setting, move the tool in the x, y axis until you reach the desired position, then set the x, y axis of the model position to the values of the tool position
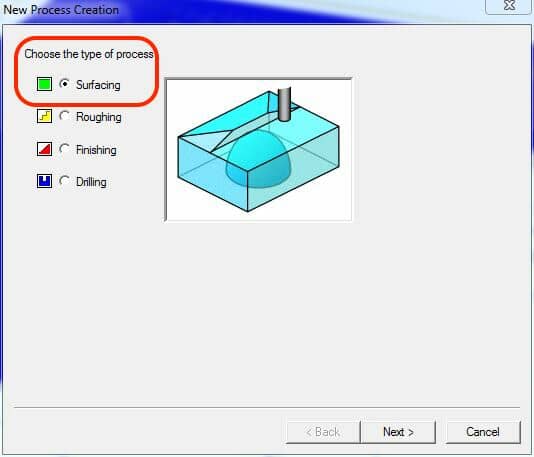
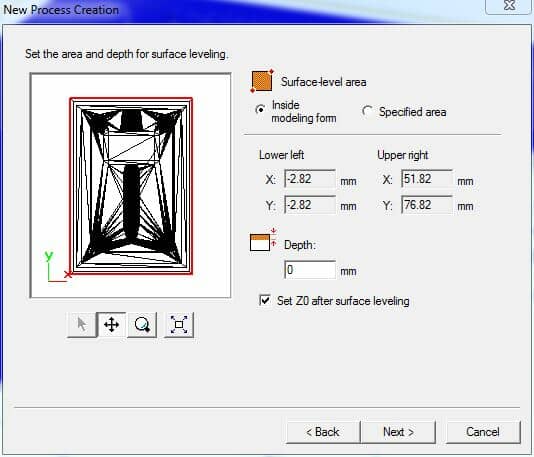
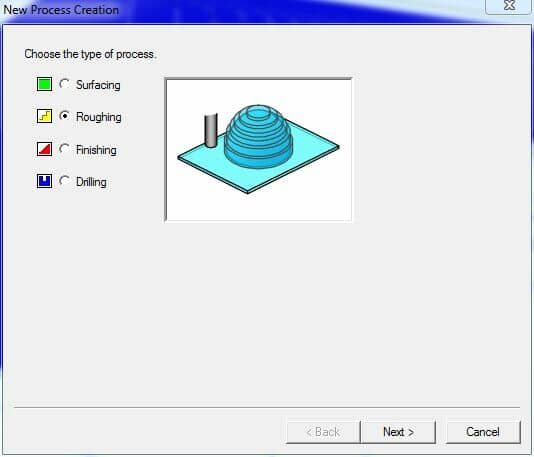
After setting the tool origin and securing the material block on the machine bed, We're gonna start with the Surfacing process to make sure that the machinable wax block is flat and all the same height. First, press the “New Process” button. And select the “Surfacing” as the type of the process. We need to select the proper tool that we're gonna use in the surfacing process. In my case, I’m using the 3.175mm ball nose end mill.
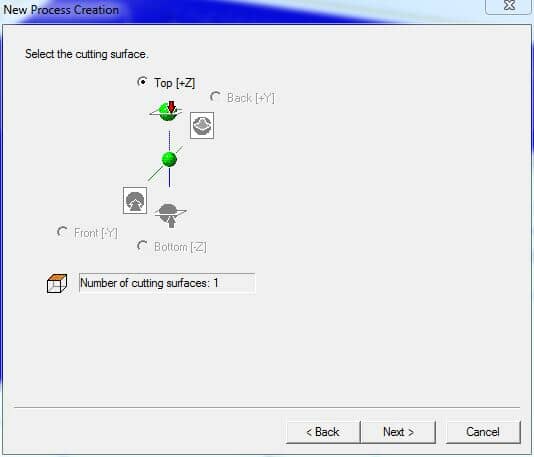
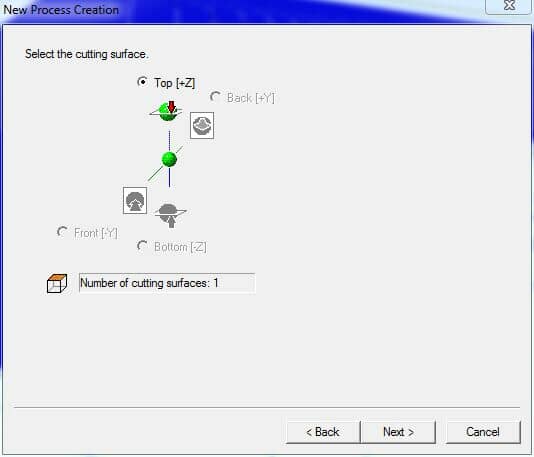
Then select the top surface as the cutting surface.
Now, we need to select the tool that we’re gonna use, which in my case is the 3.175mm ball nose end mill.
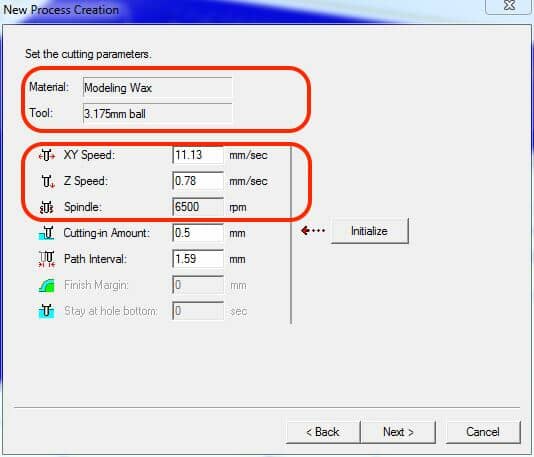
Set the cutting parameters. Actually, I left these values as it’s without changing anything.
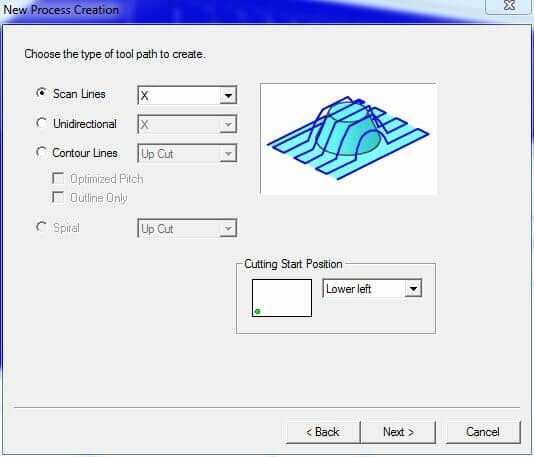
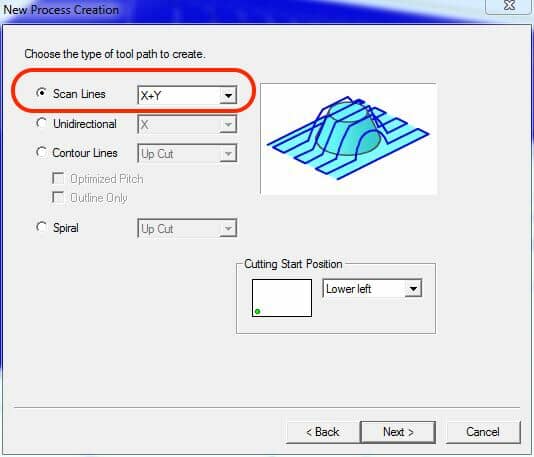
In this step, we are choosing the cutting path which defines how the tool will move during the process. I chose the X -axis as the scan lines. If X and y it will consume more time and it's surfacing anyways so it doesn't matter if the finishing is good.Then press next.

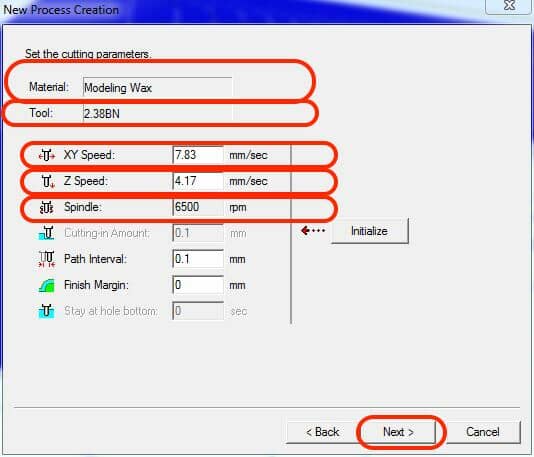
Now, set the material that we’re gonna to cut and set the cutting speed, ....
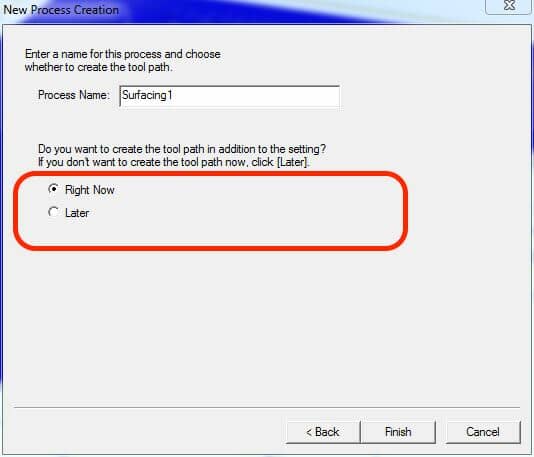
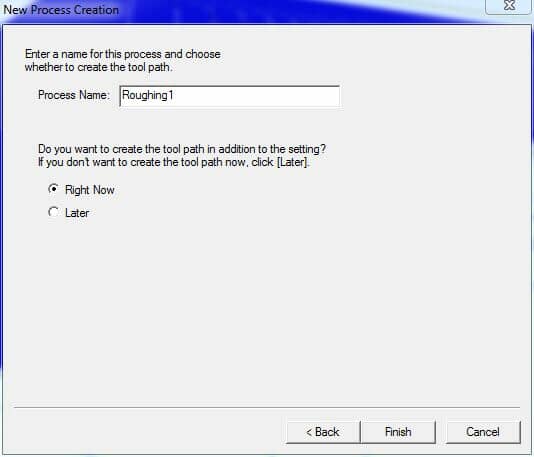
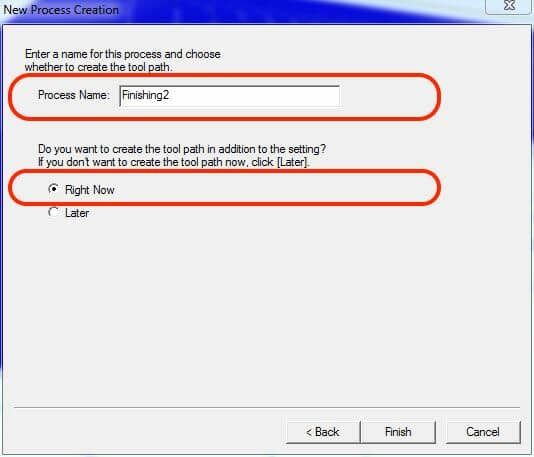
Lastly, give the process a name if you want. Or you can leave it’s default name, and select if you want to start this process right now or add it to the queue. In my case, I selected “right now” to start the process right away after I press the “finish” button.
After finishing the surfacing process, let’s make the roughing process. From the “New Process” button select the process type as “Roughing” and set the top as the cutting surface.
Then, we’re gonna select the tool diameter which we will use in this process. In my case, it’s a 3.175mm ball nose end mill.
Set the cutting area and depth, I didn't change the default values here. Then, I chose the scan lines to be in the X-axis only. Since it's a roughing process. So, I don’t care about the finish here. We will do the finishing process later separately.
Set the material type and set the movement speed. Then, give the process a name or leave the default name as it’s. Then start the process.
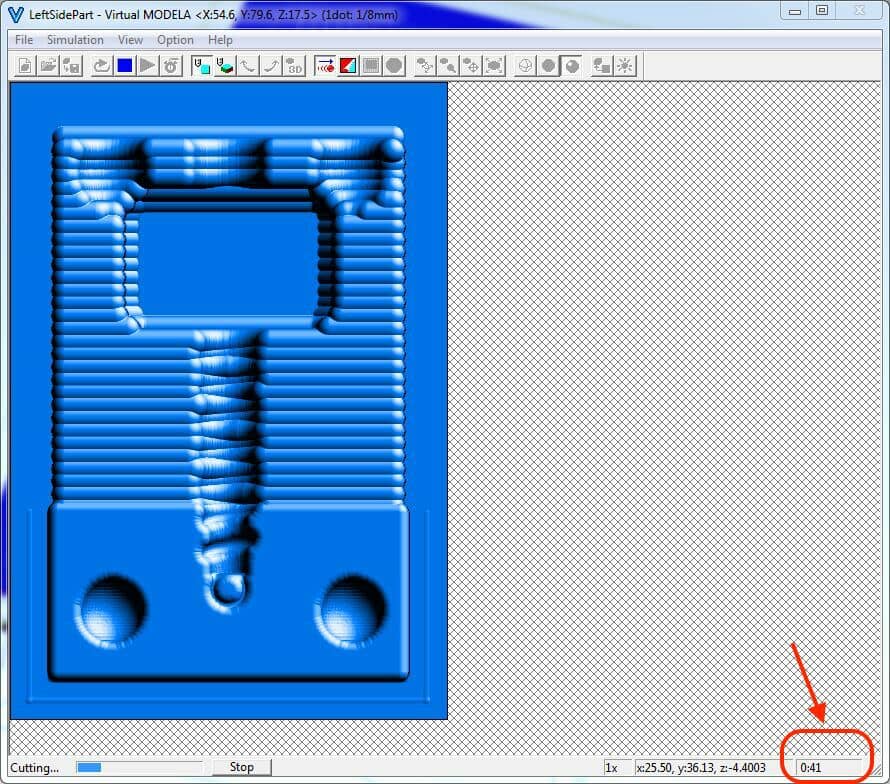
You can view a simulation for the process on the modela player. Clock on the Preview button. Also, you can see the estimated time that this process will take.
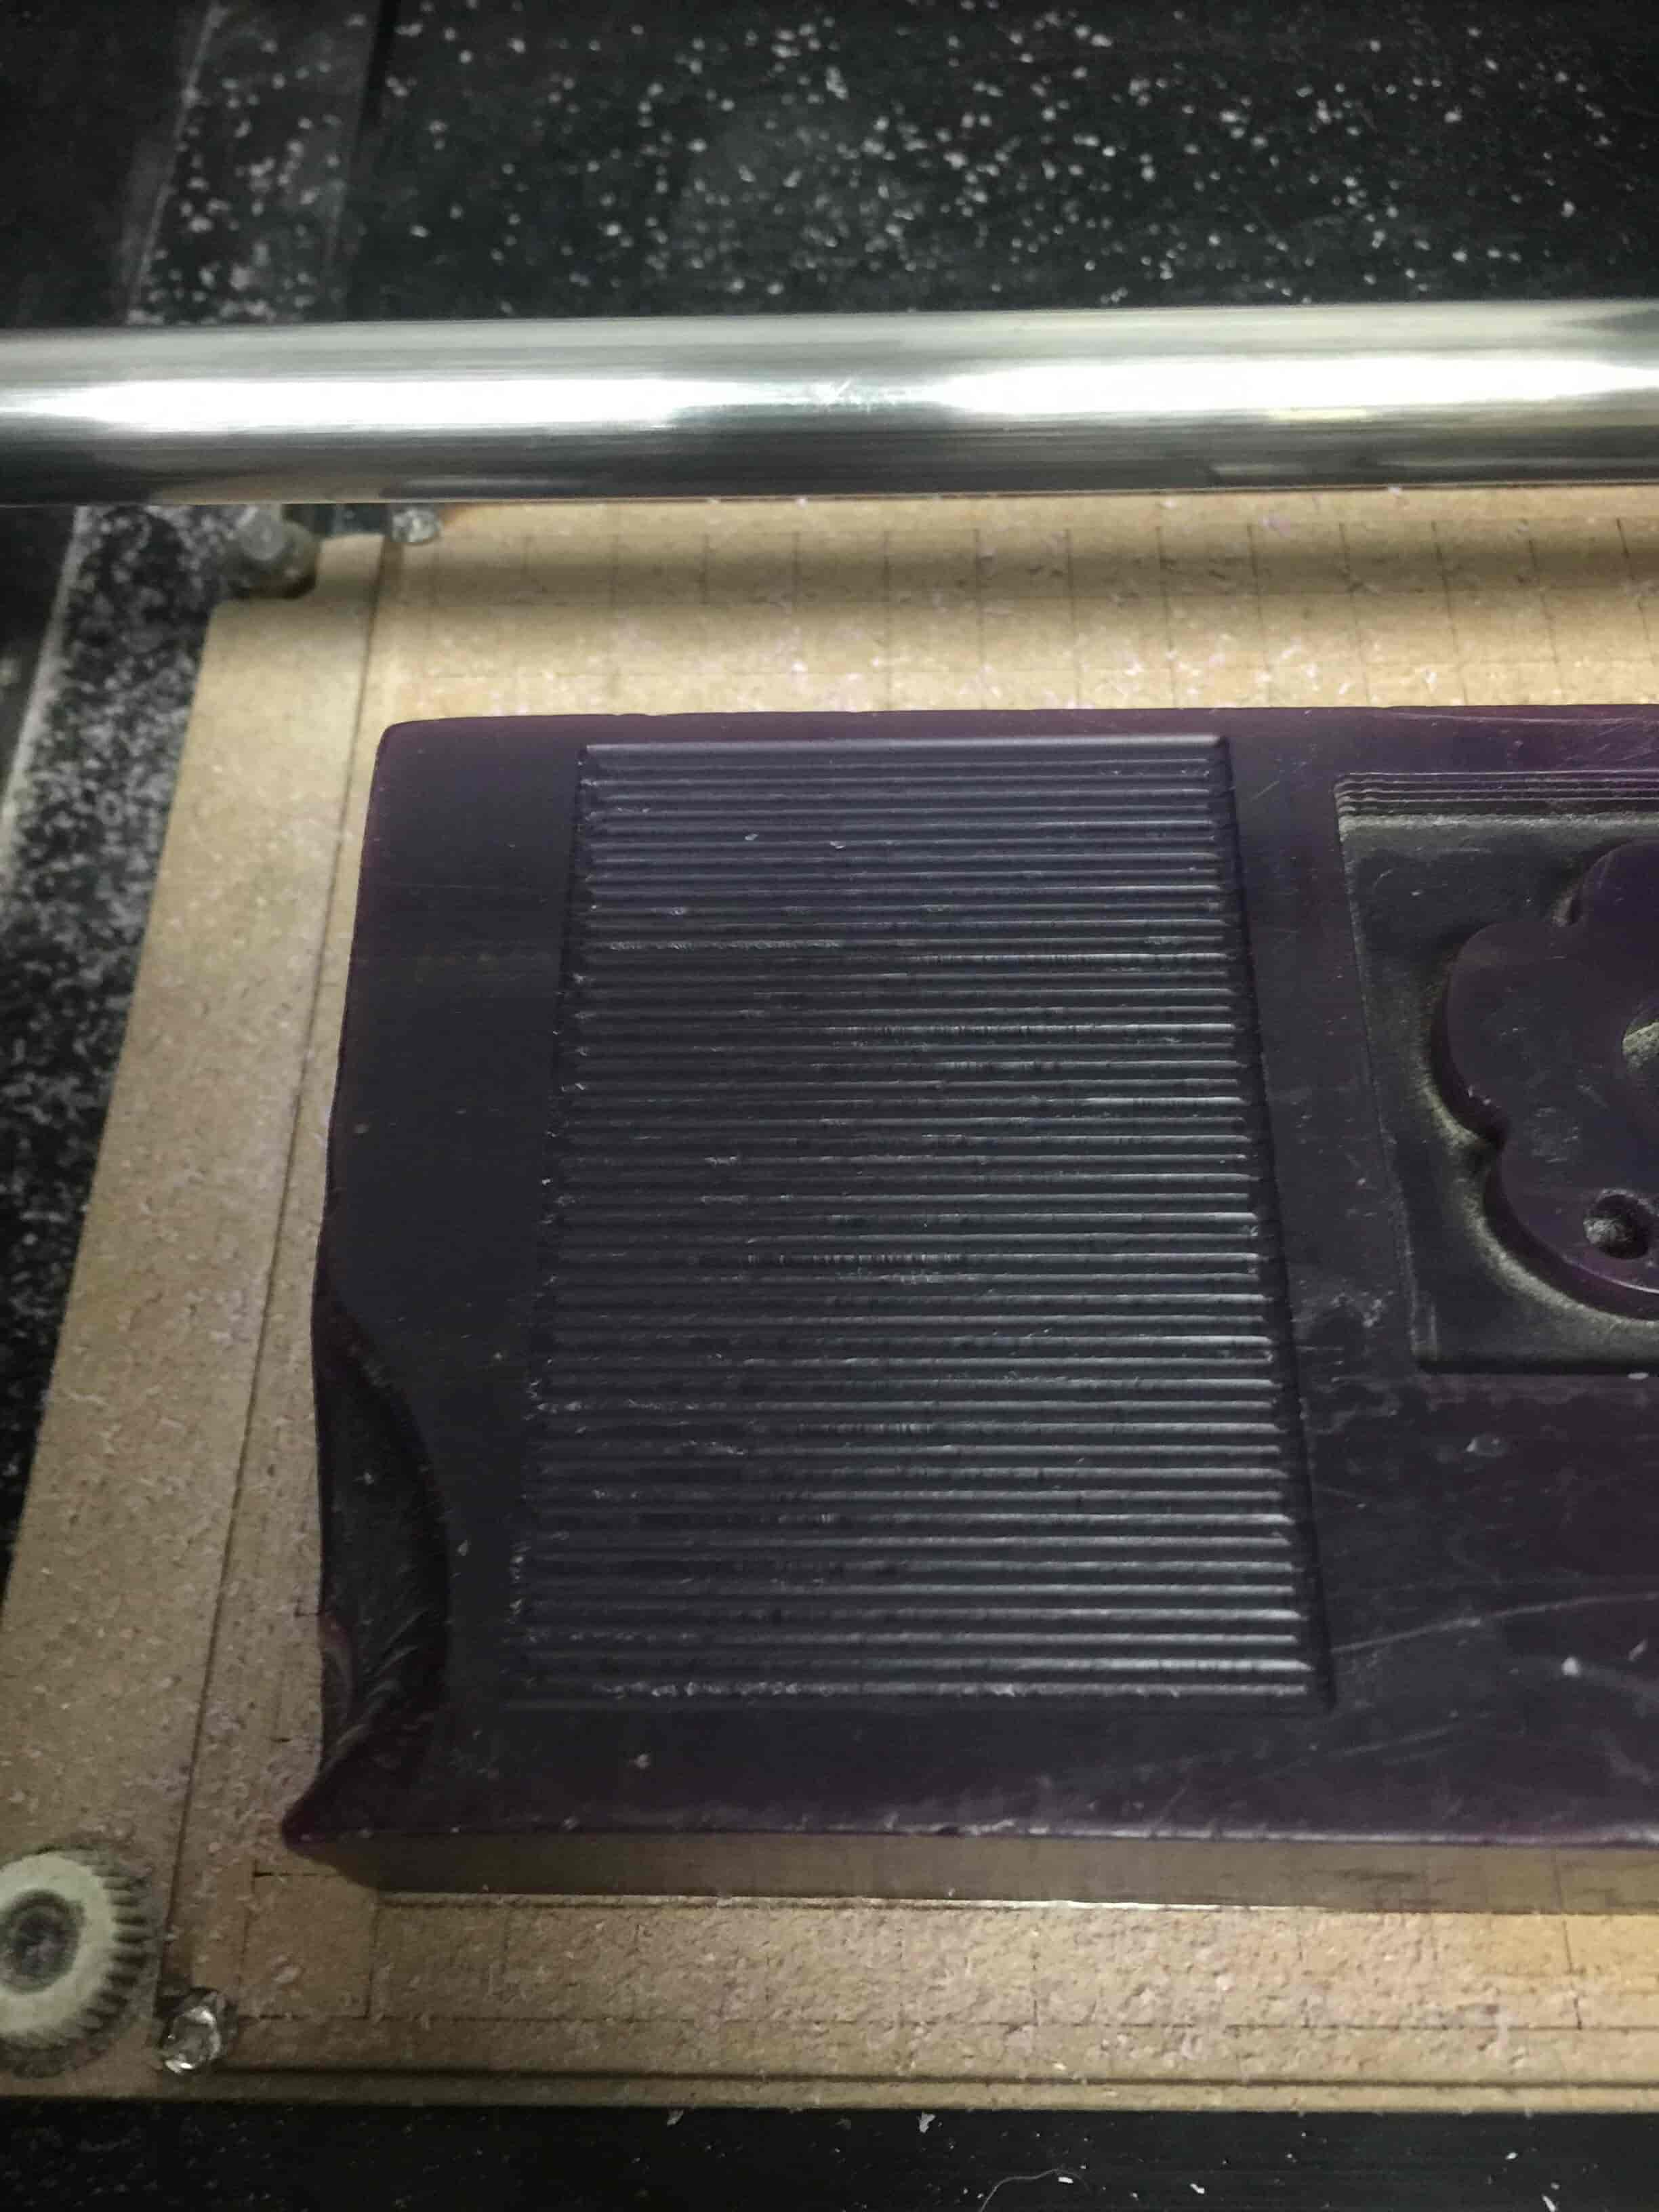
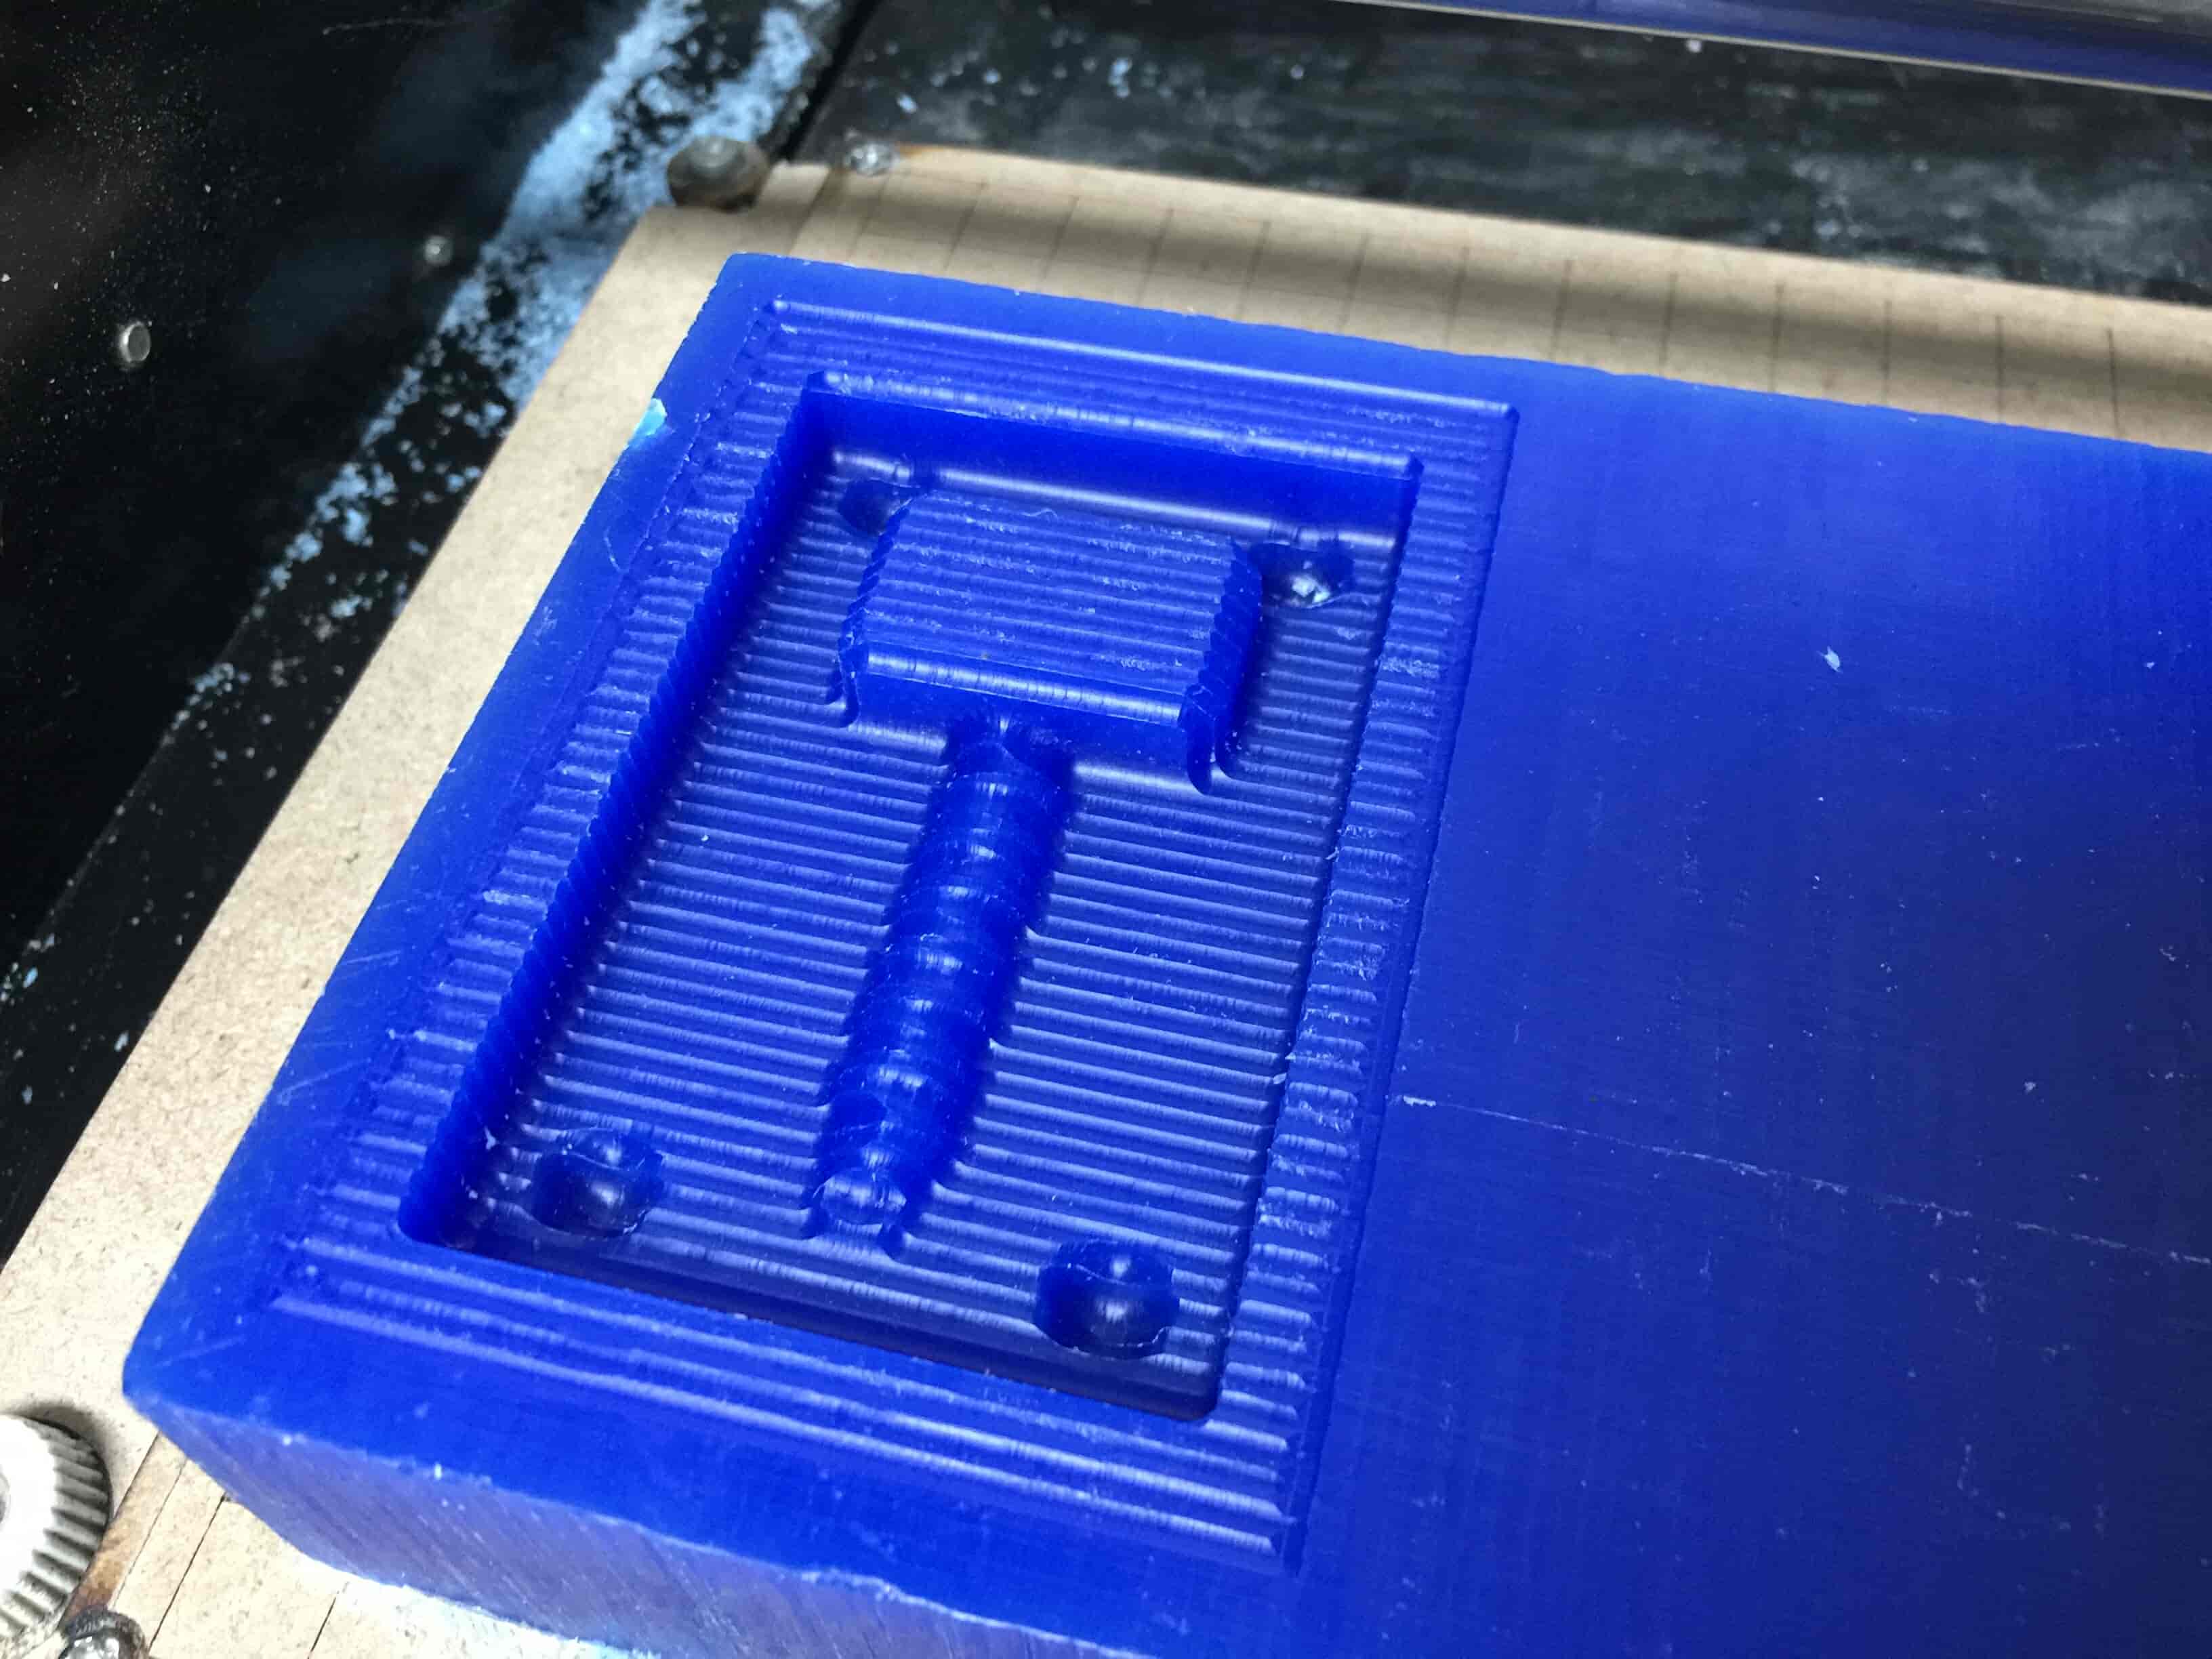
Here is the model after finishing the roughing process.
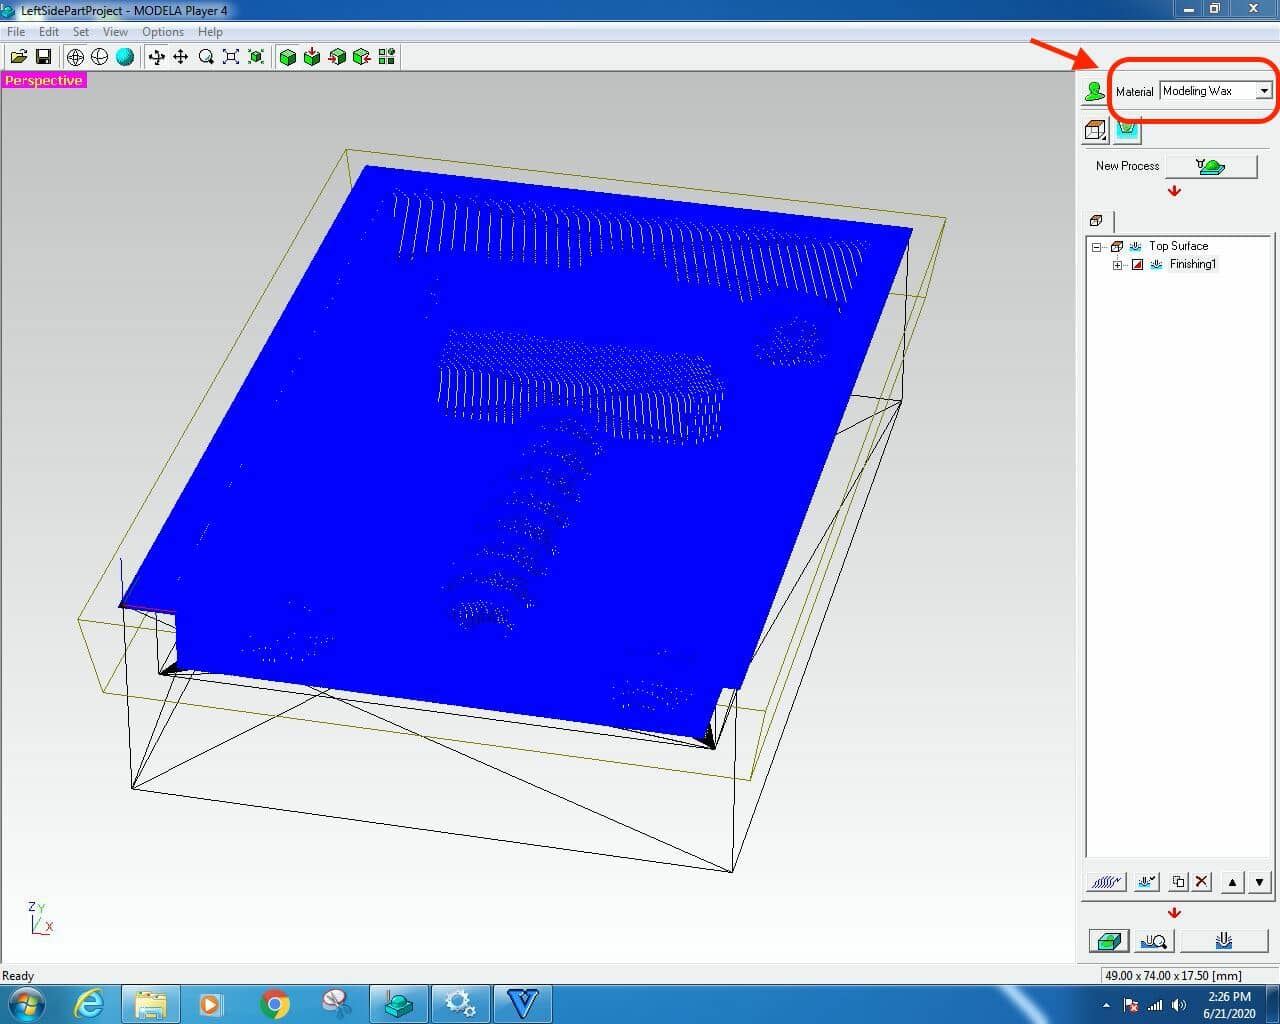
After finishing the roughing process. We will repeat the same previous create new process steps again. But, instead of choosing the 3.175mm end mill, we will choose the 2.38mm end mill, and select the process as Finishing not Roughing.


Also from the preview button you display a simulation for the “Finishing” process.
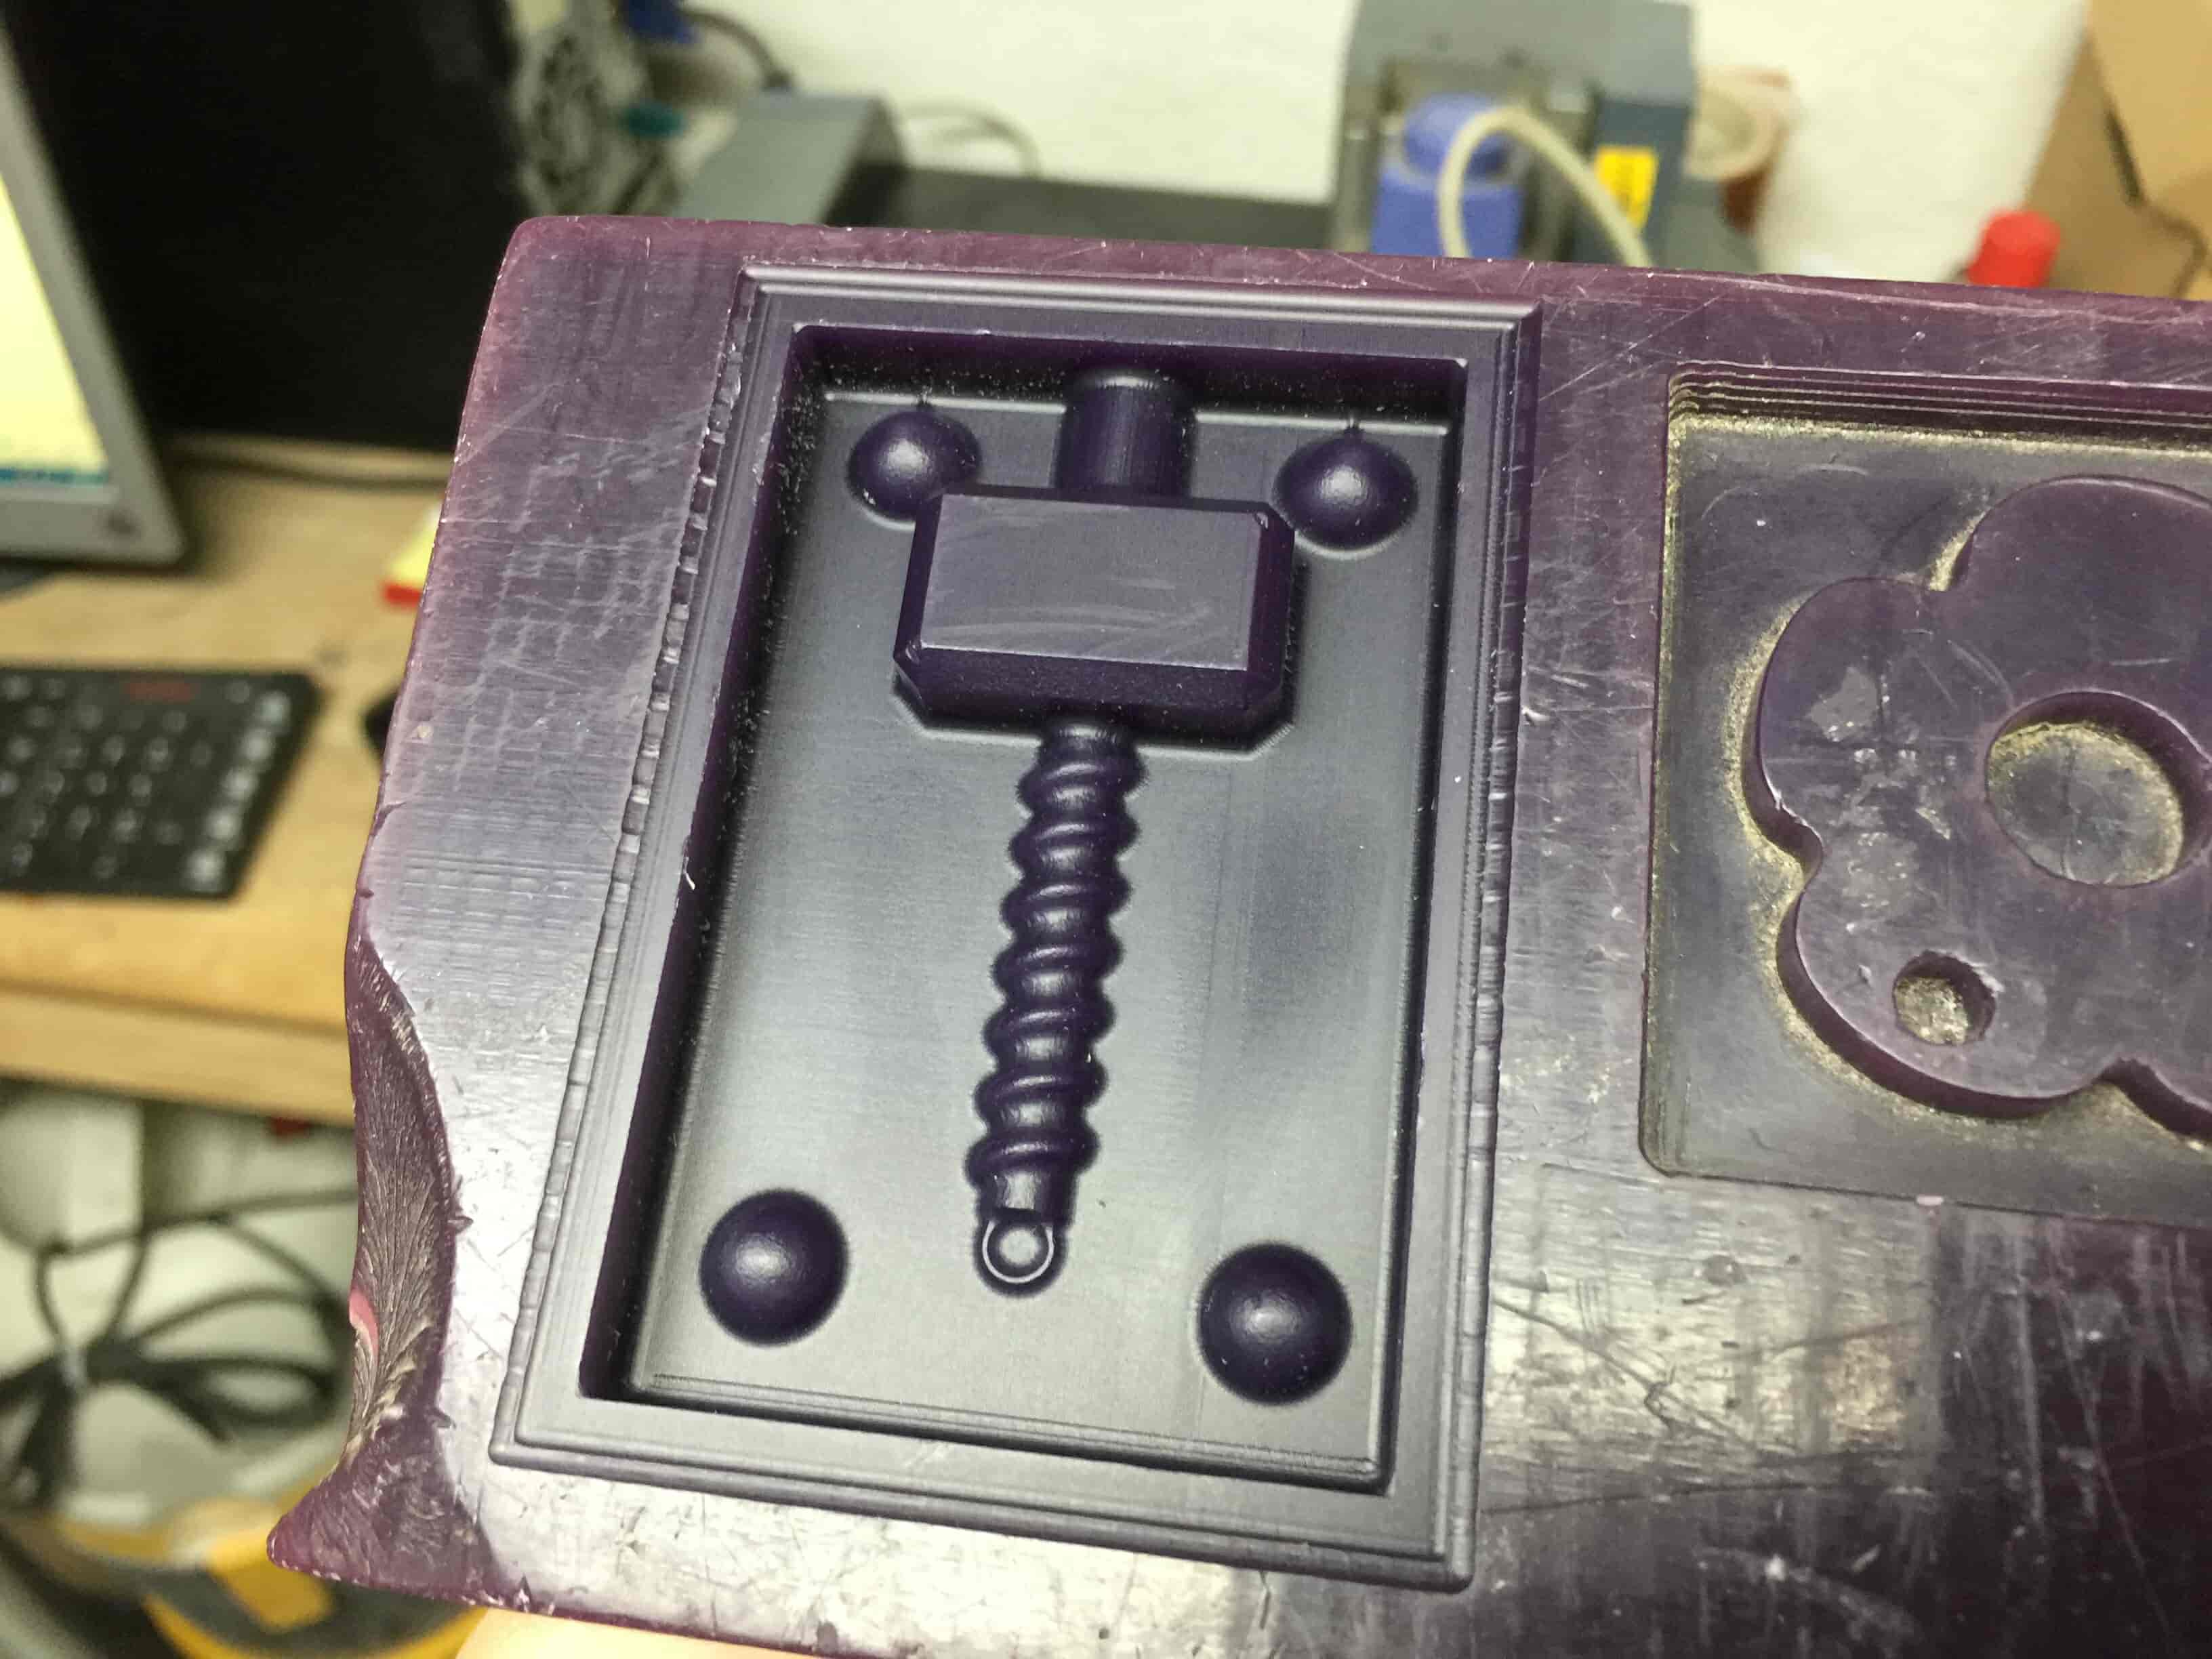
And here’s the final results. And of course, we're gonna repeat the same steps with the model second half.
The Molding Section
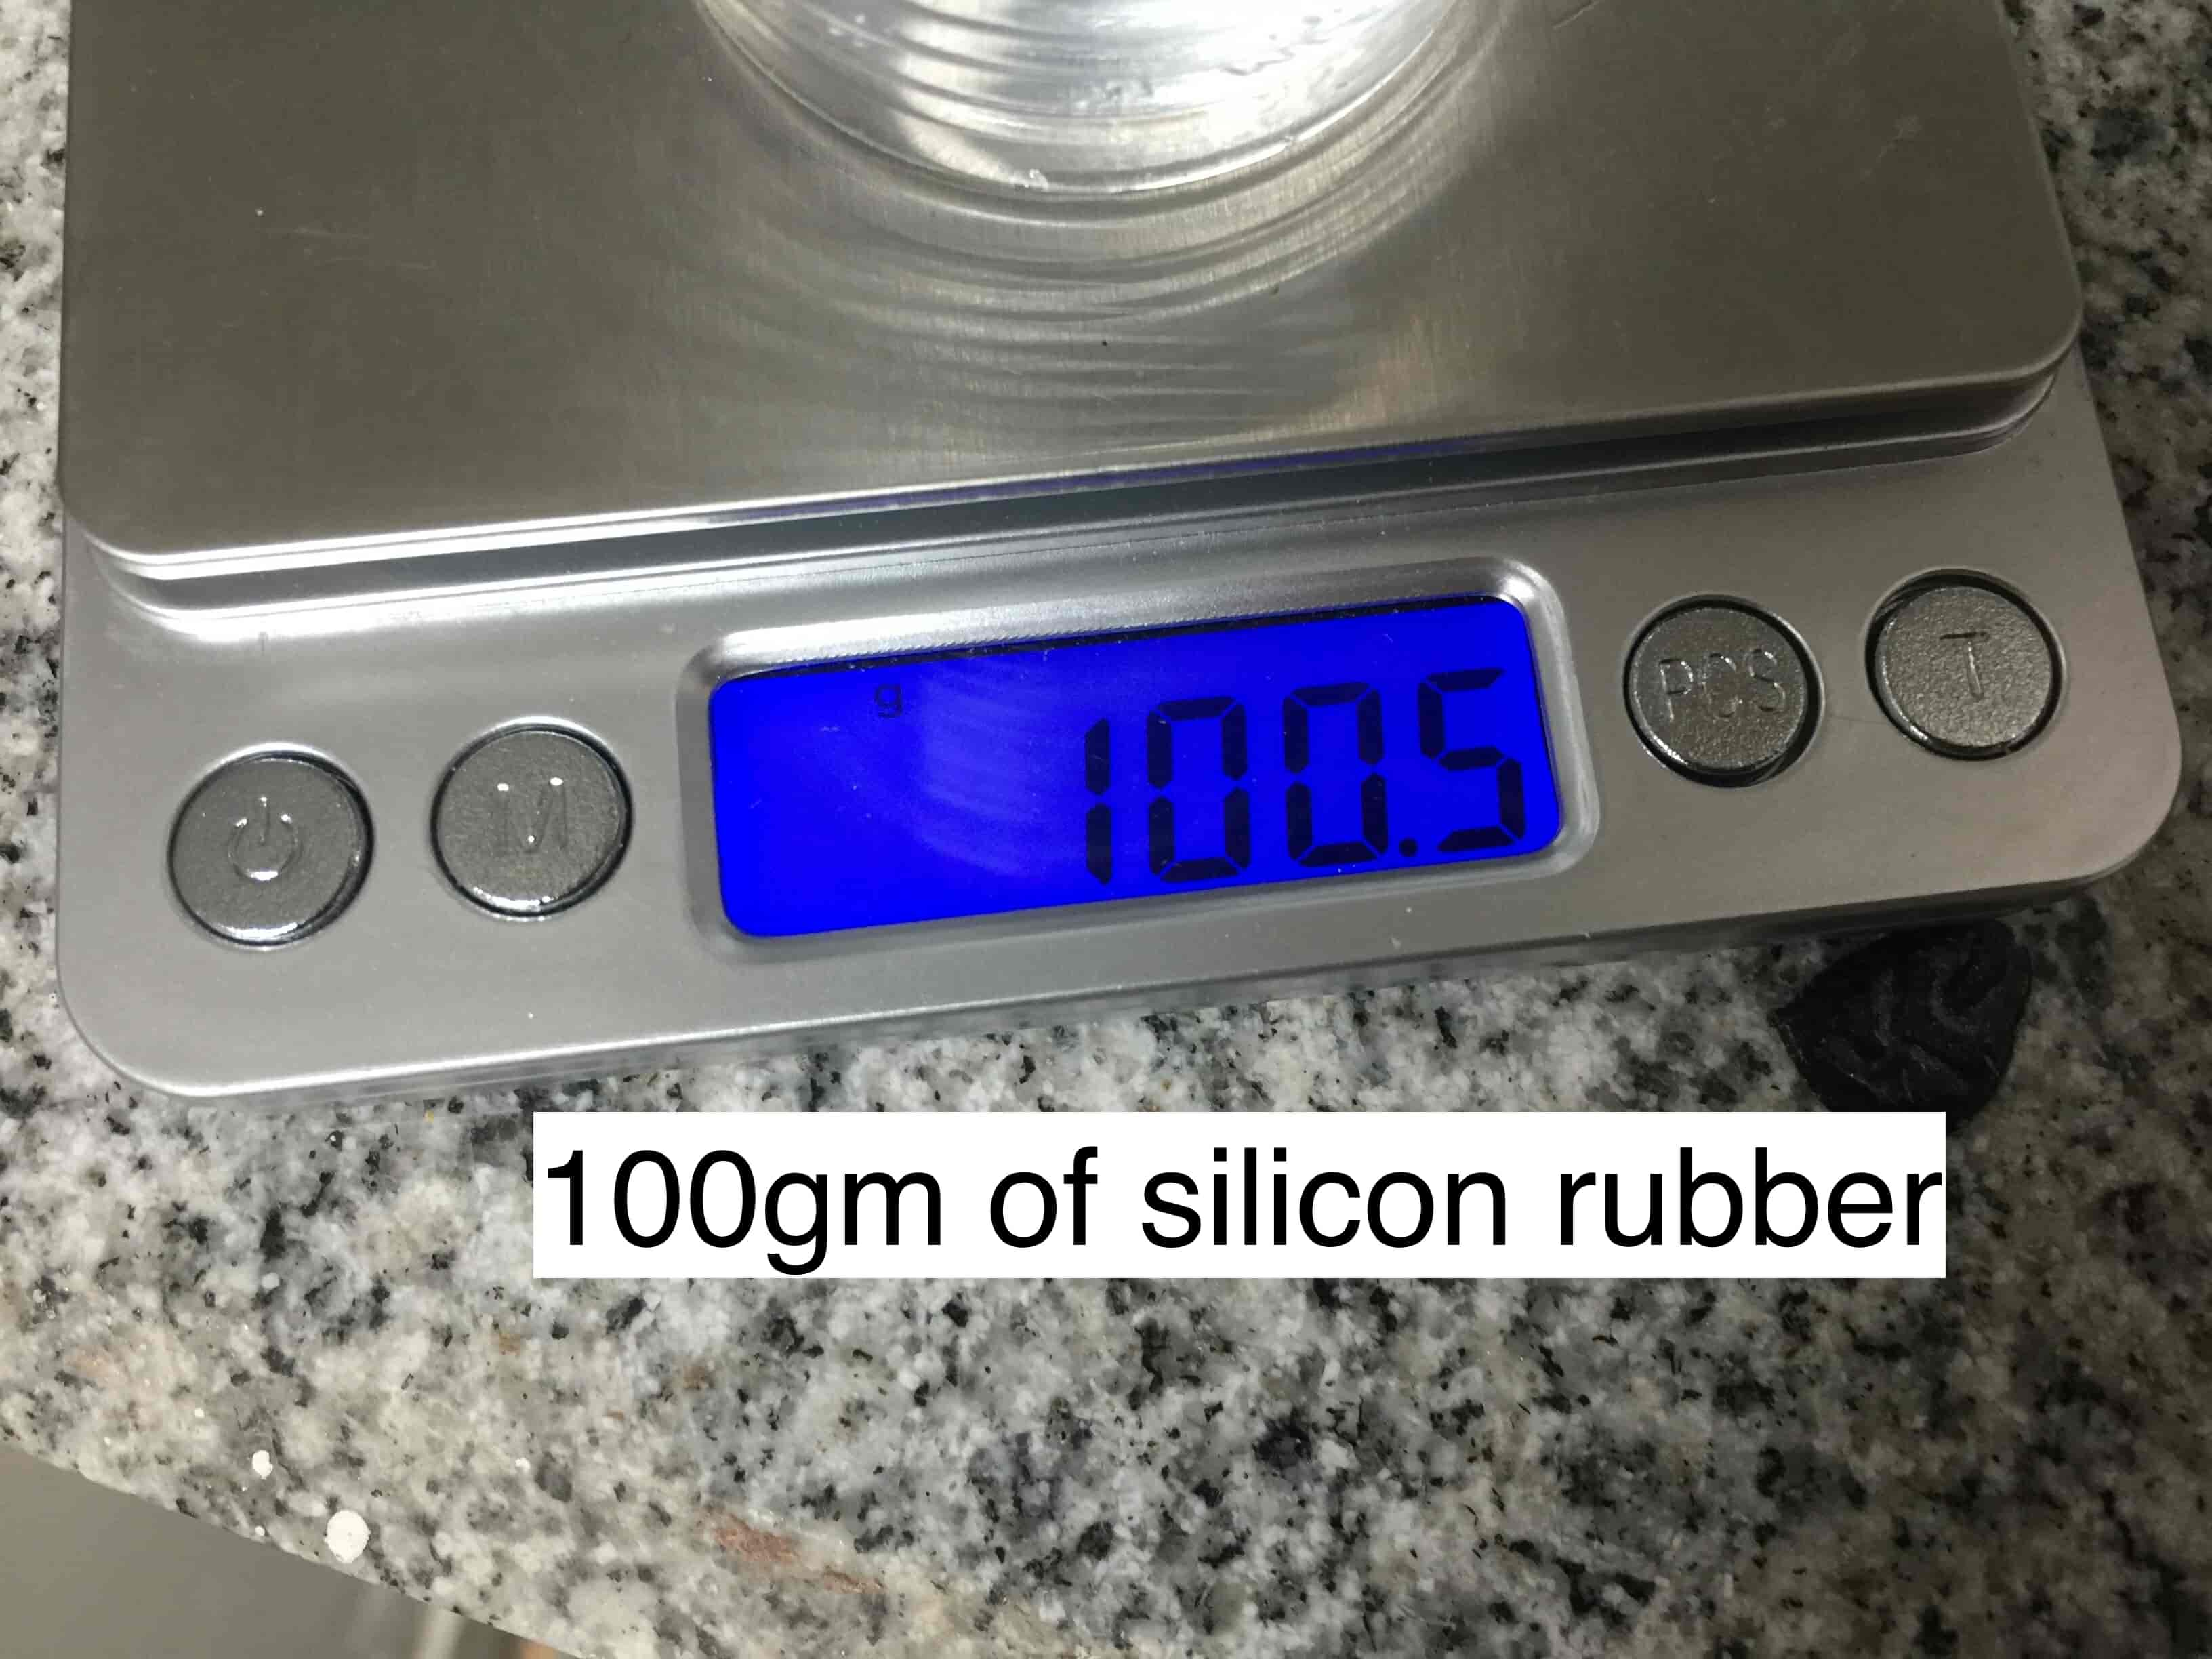
For molding I’m gonna use a silicon rubber, a hardner, a cup, and any wood or plastic stick to mix the silicon rubber with the hardener.

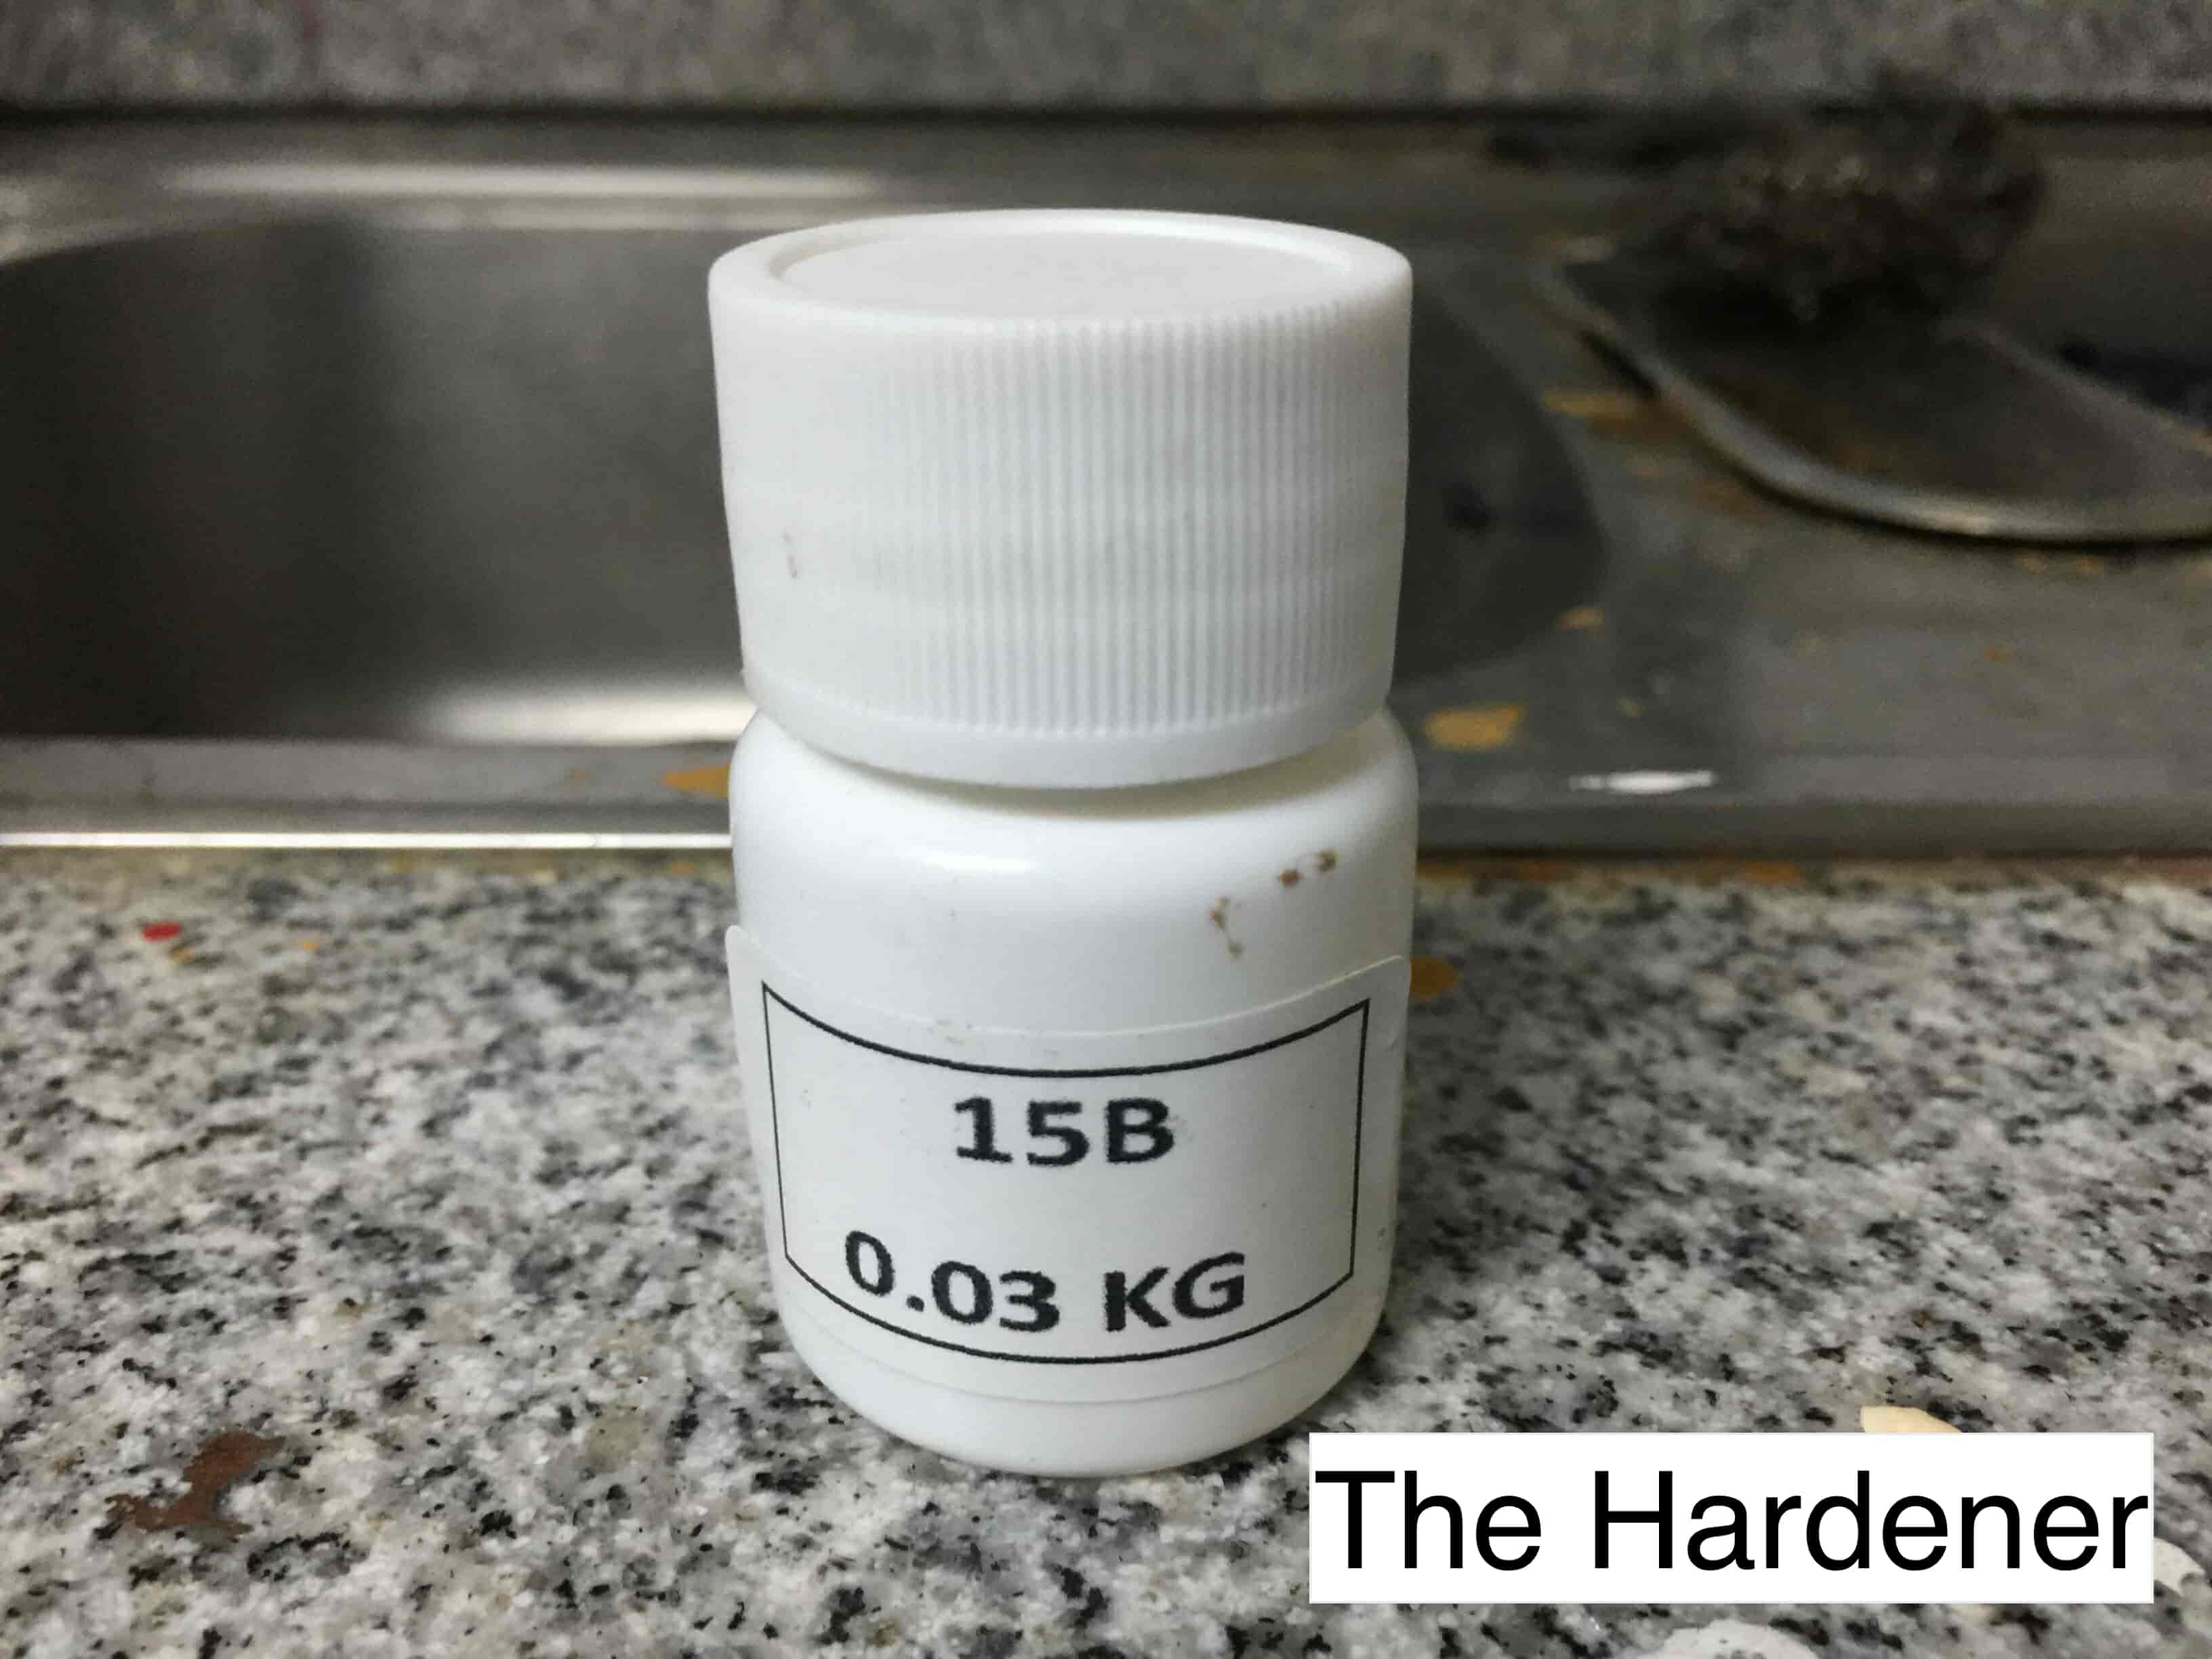
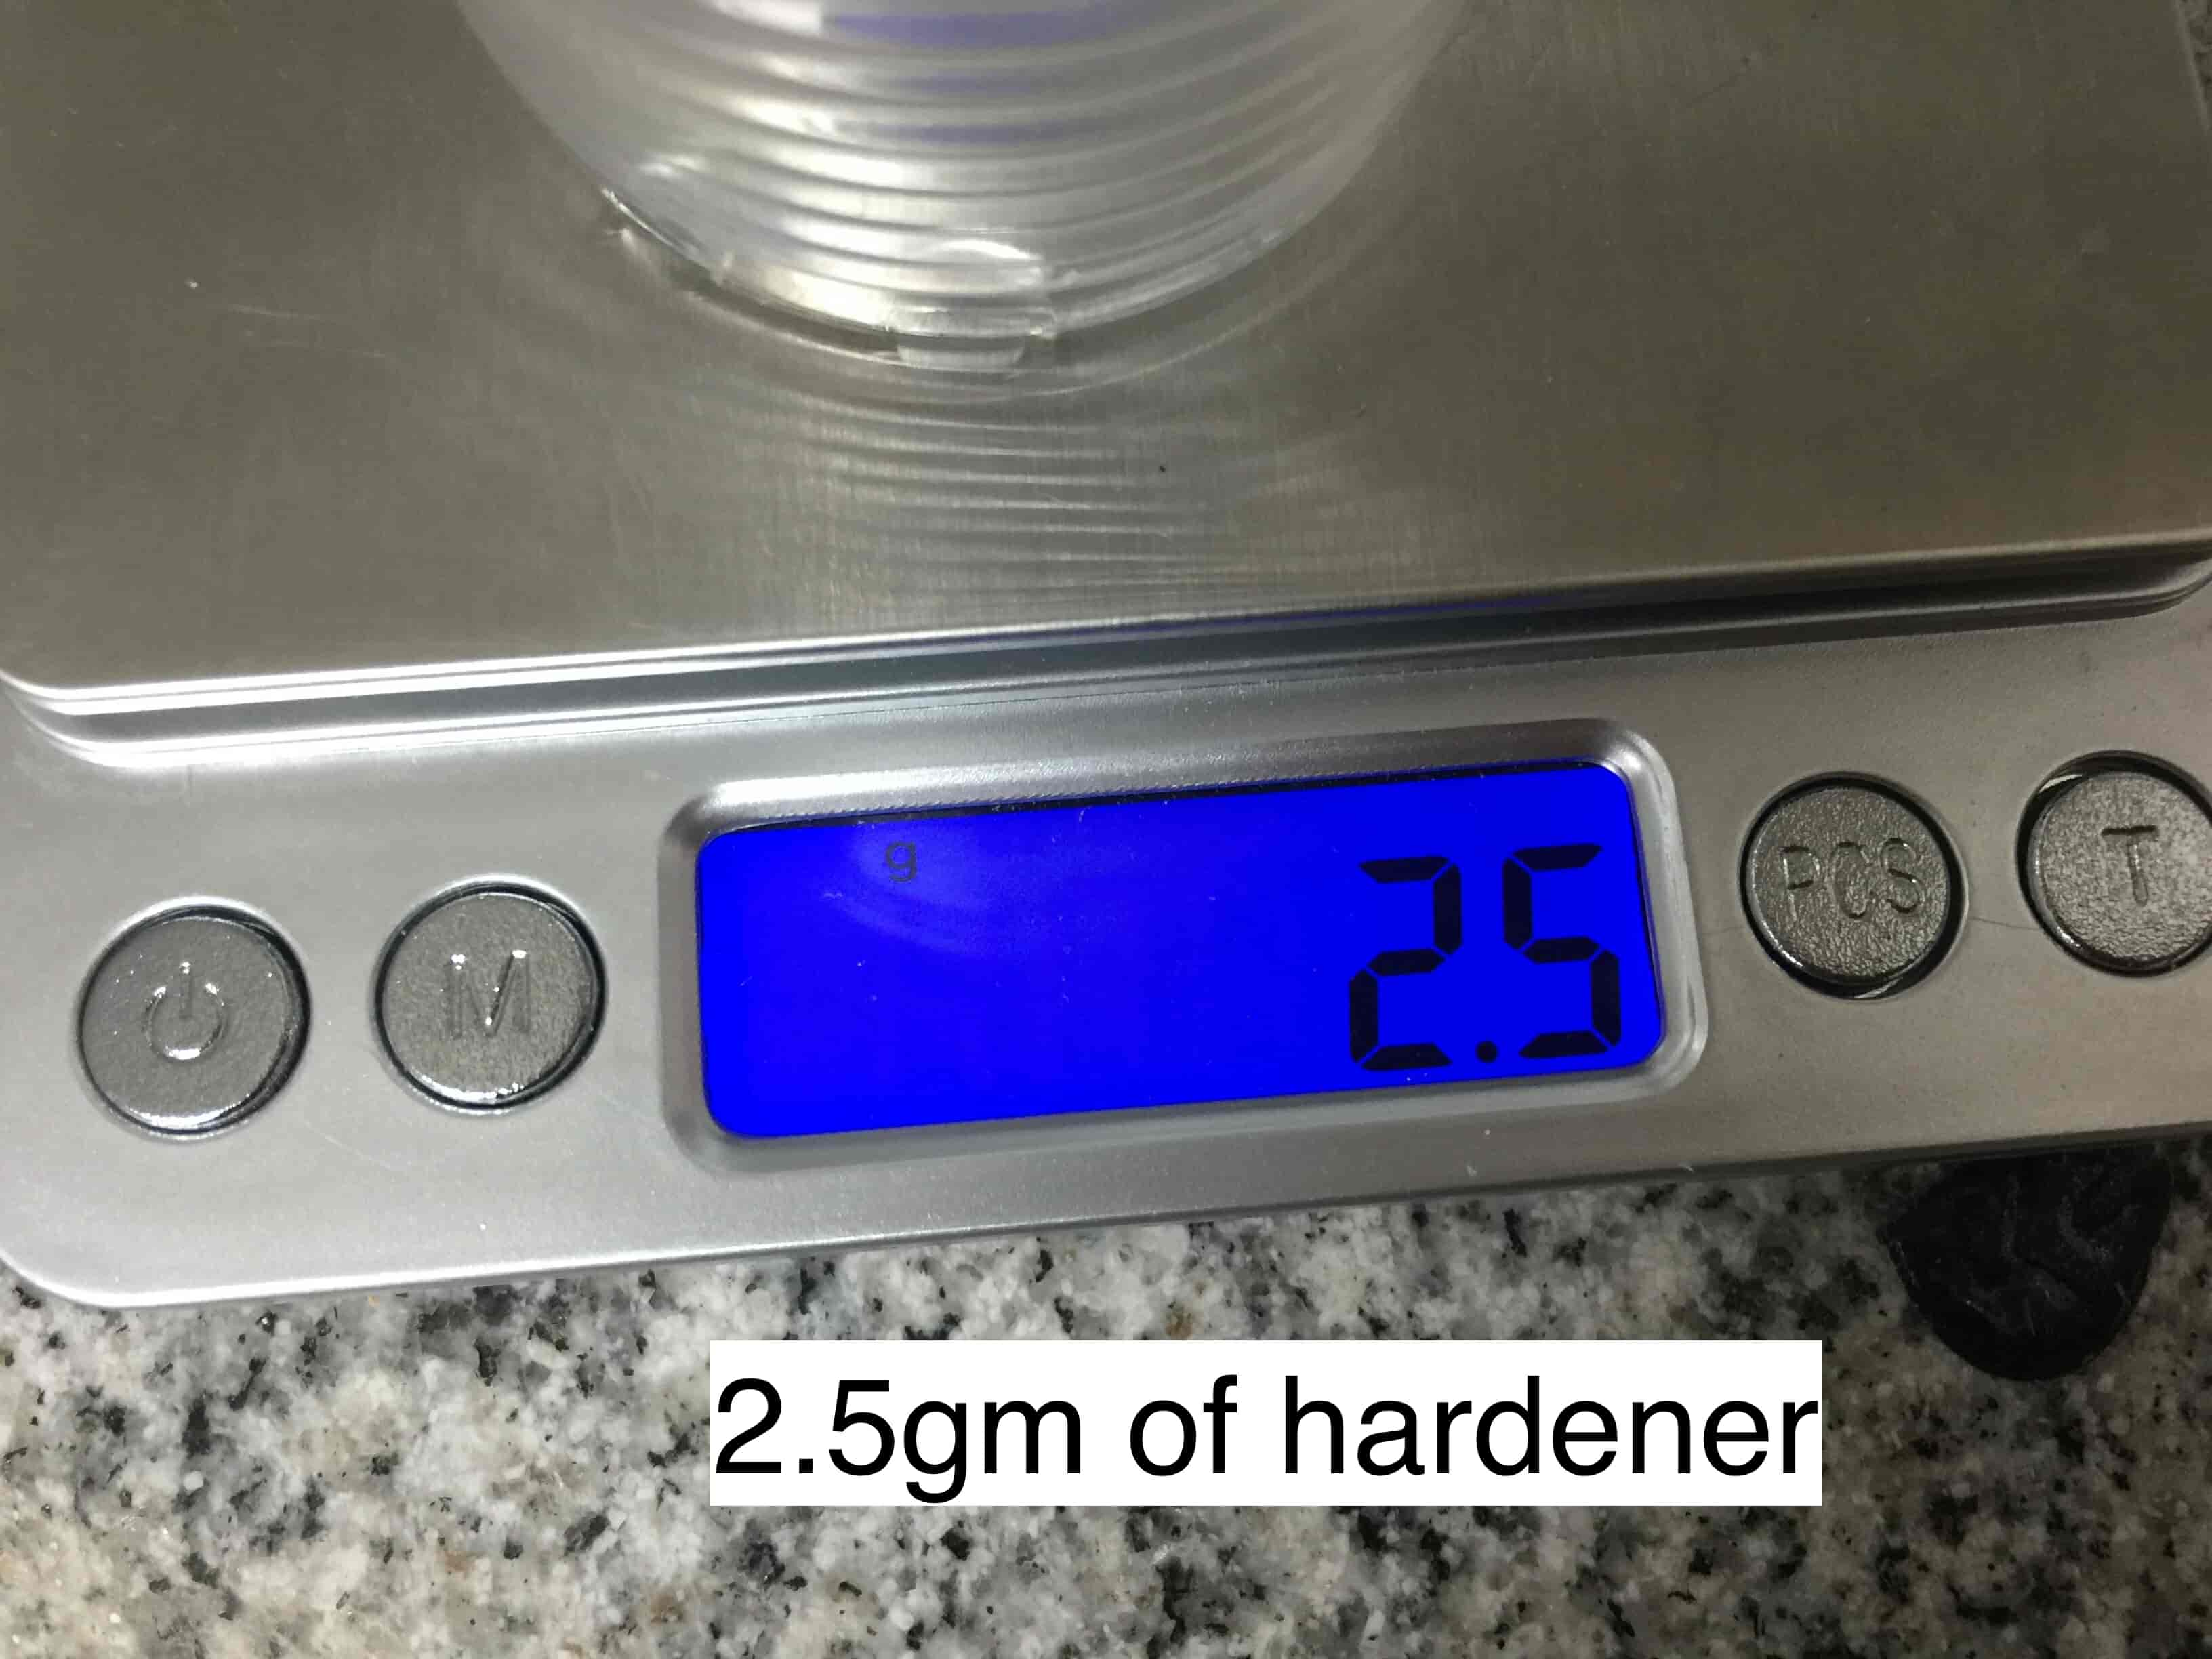
According to the silicon rubber and the hardener datasheet, I put 2.5gm of the hardener for each 100gm of silicon rubber. Later I realised that 2.5mm of hardener is too much, If you are using the same brand of the silicon rubber and the hardener I recommend you to put only 1gm of the hardener for each 100gmm of silicon rubber.

Then, I poured 2.5gm of hardener in the same cup. NOTE: If you are using the same brand of the silicon rubber and the hardener that I use, I recommend you to put only 1gm of the hardener for each 100gmm of silicon rubber.
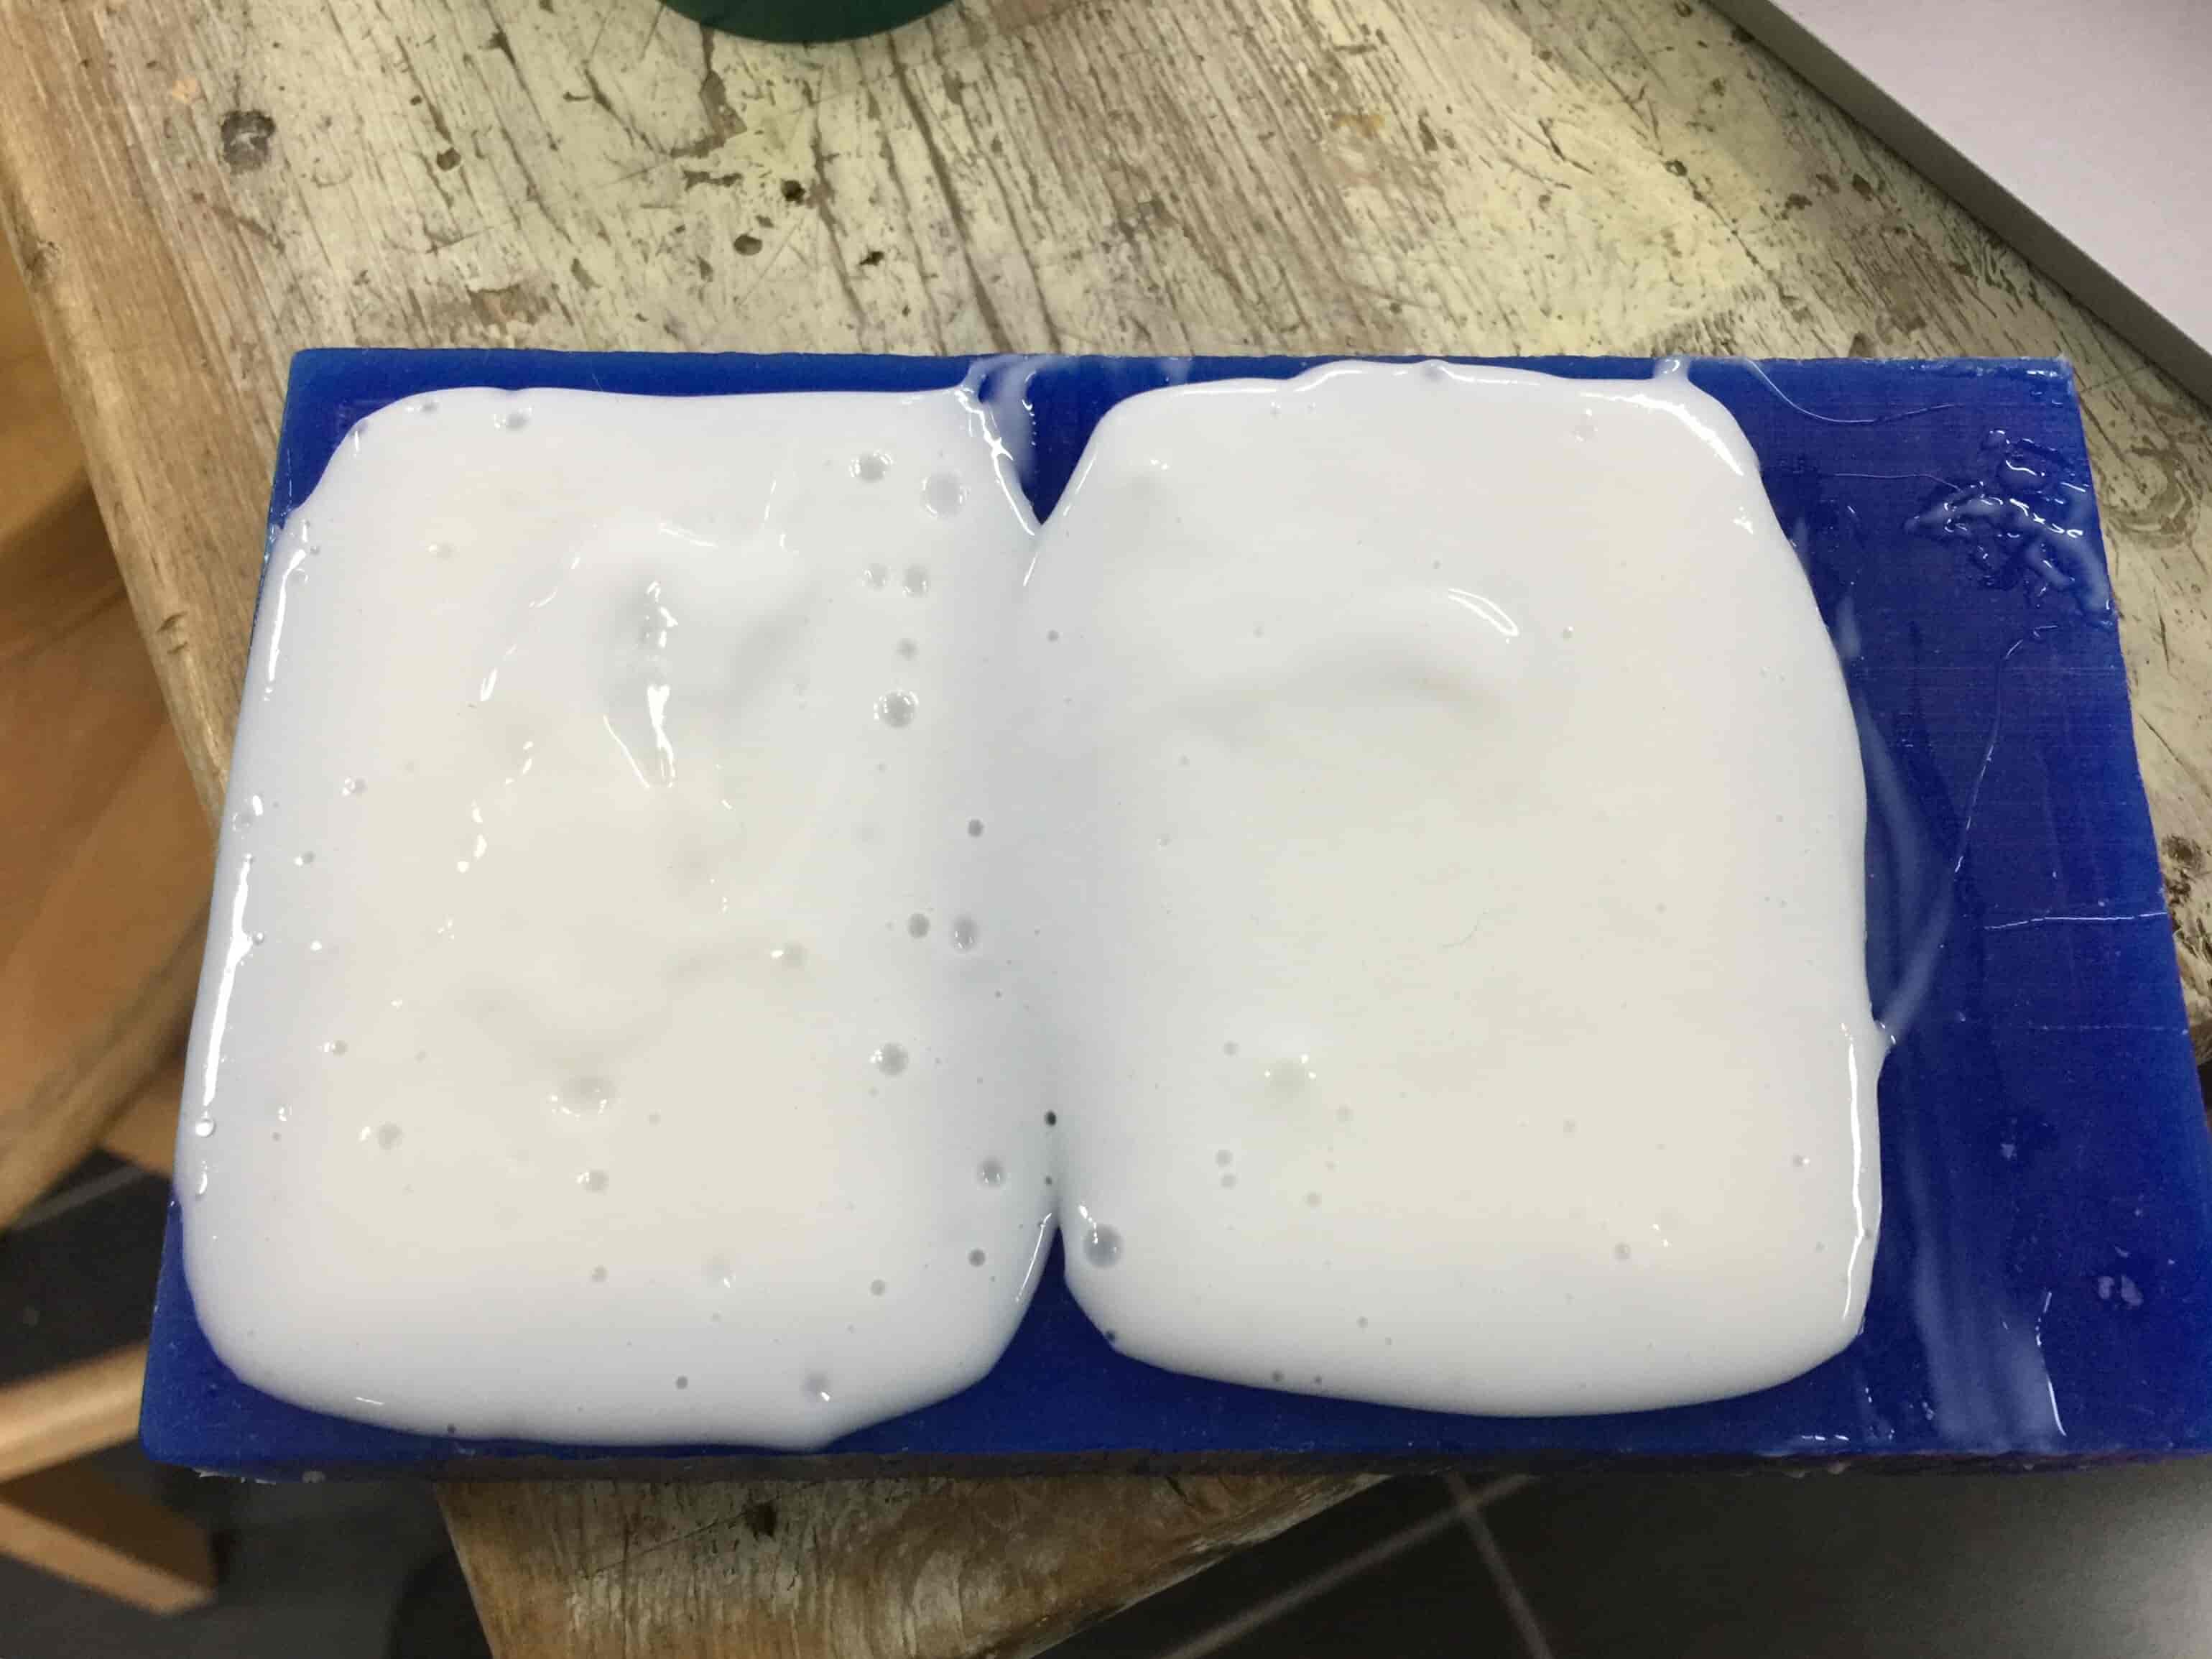
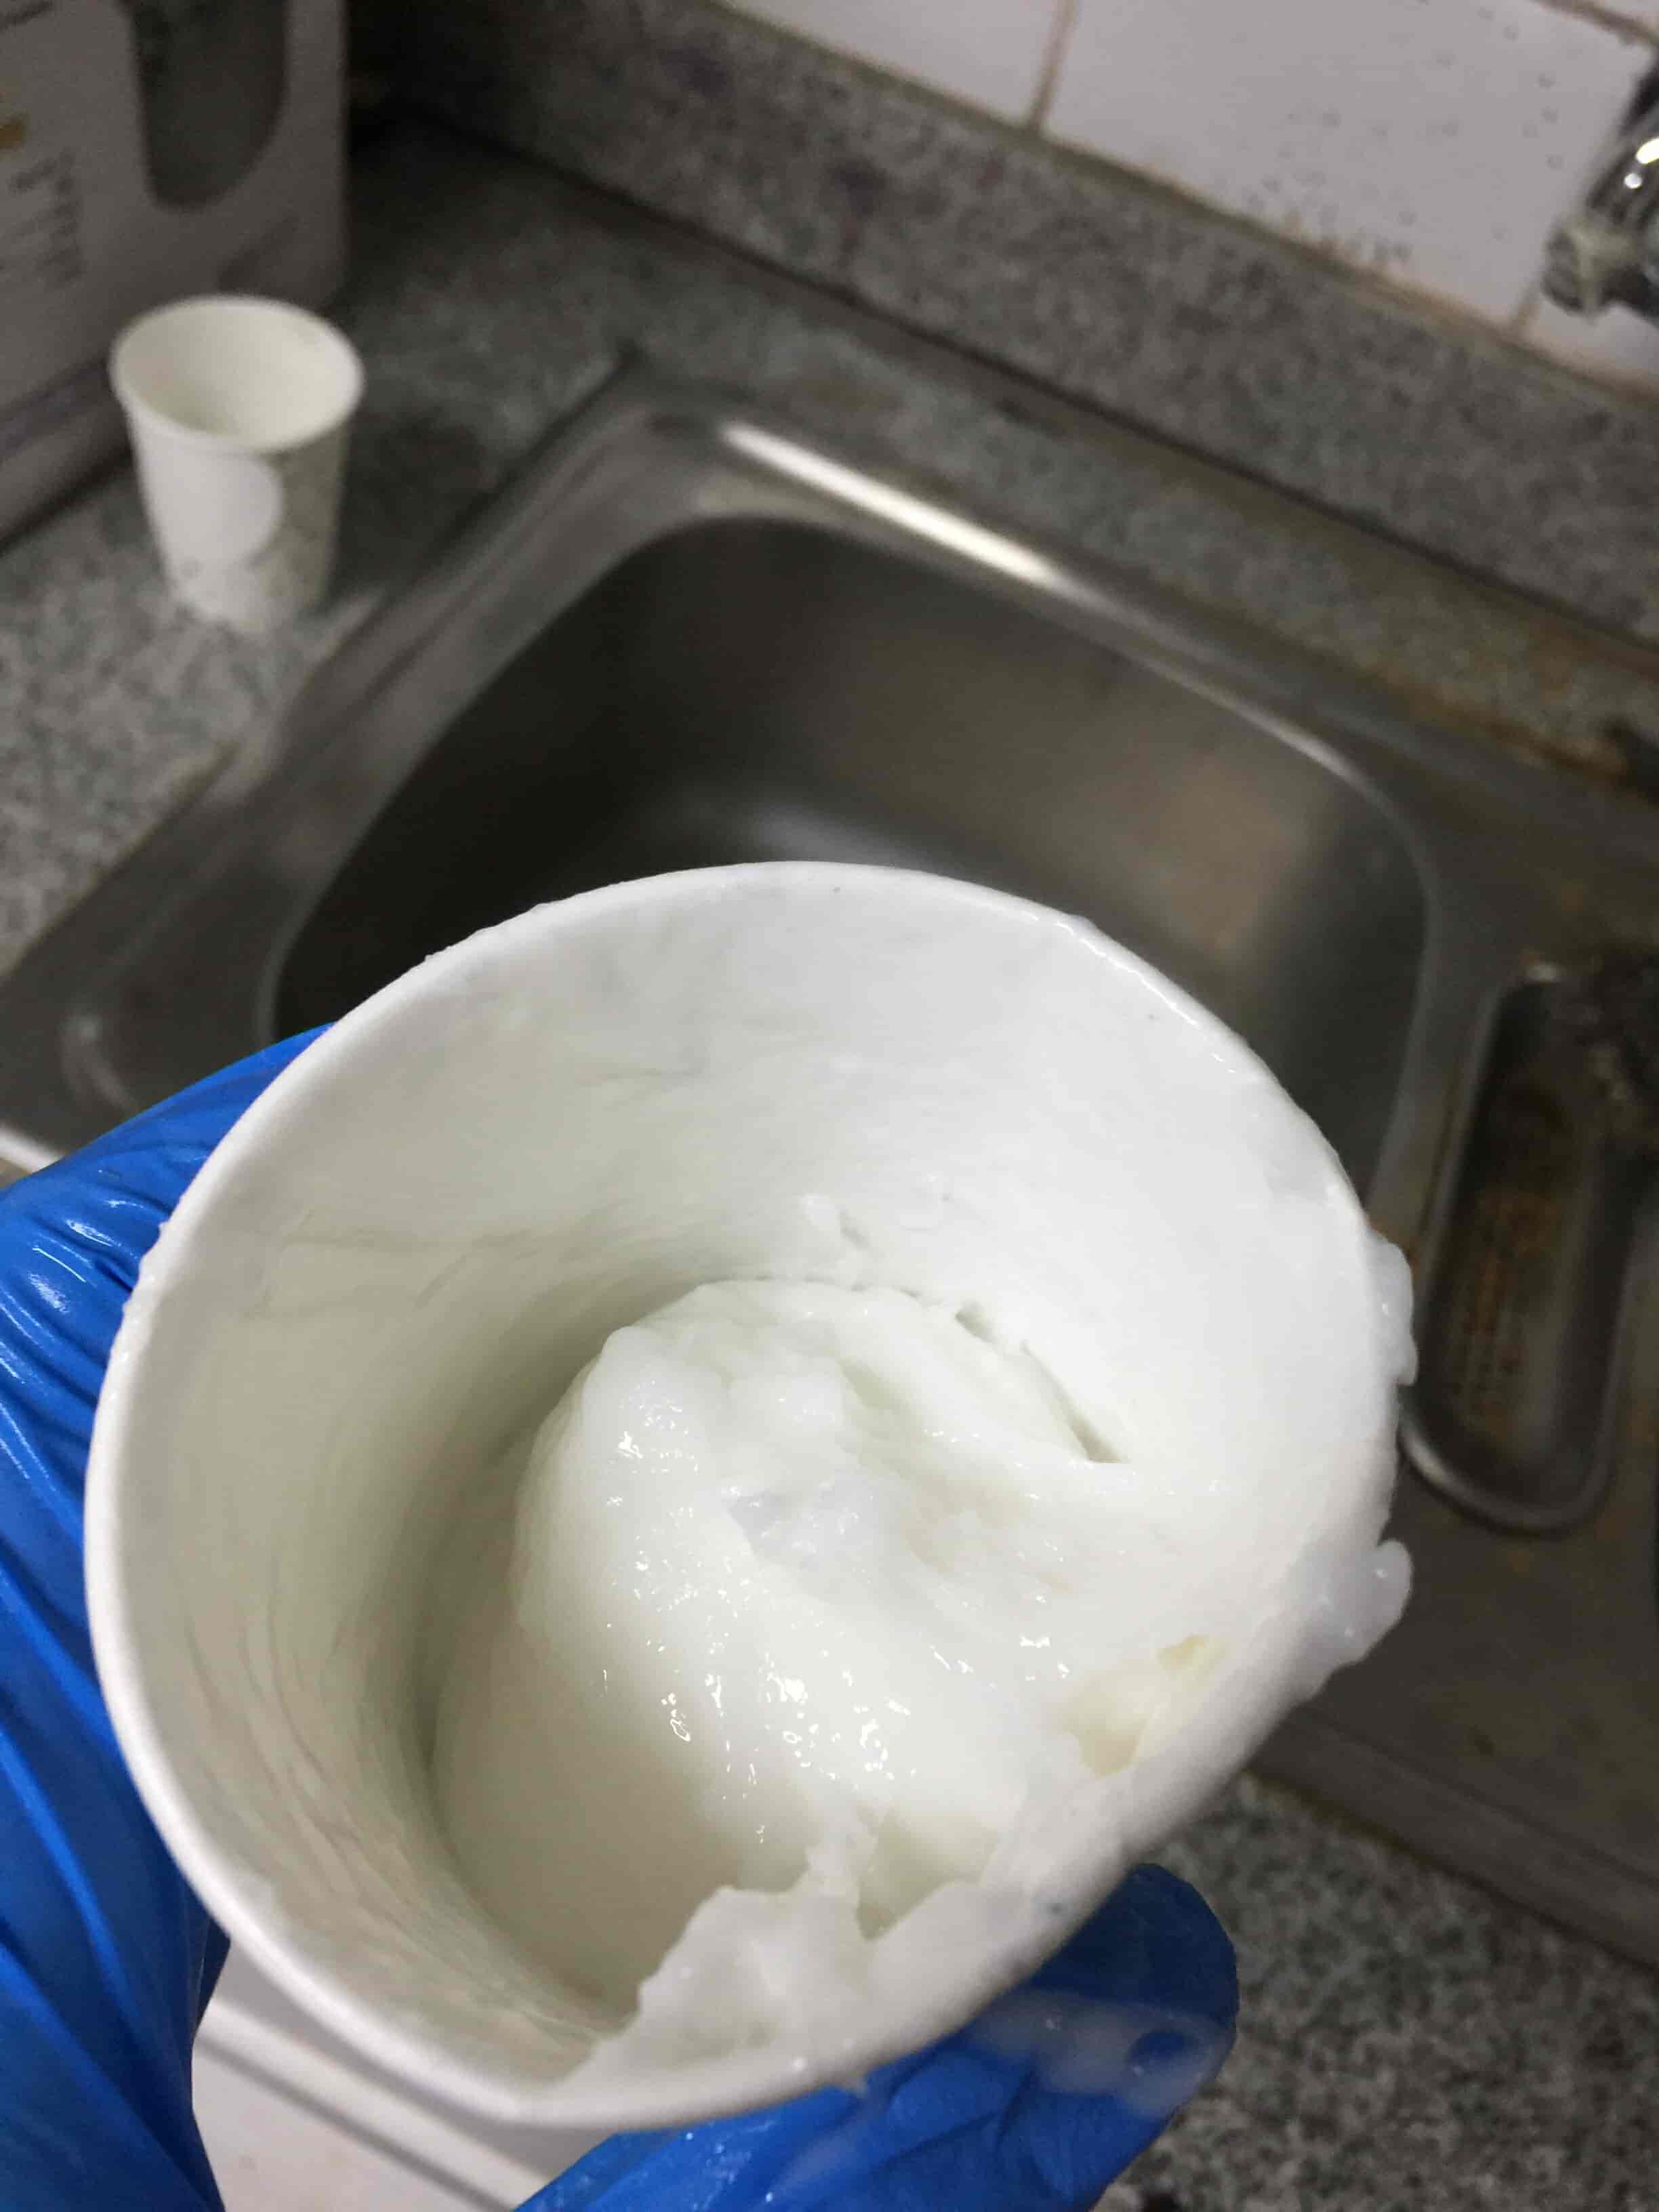
Then, mix the silicon rubber and hardener together for a couple of minutes.
Now, we need to pour that silicon rubber in the wax, pouring should be very slow from one side with an angle to give the silicon the ability to spread in the area smoothly.
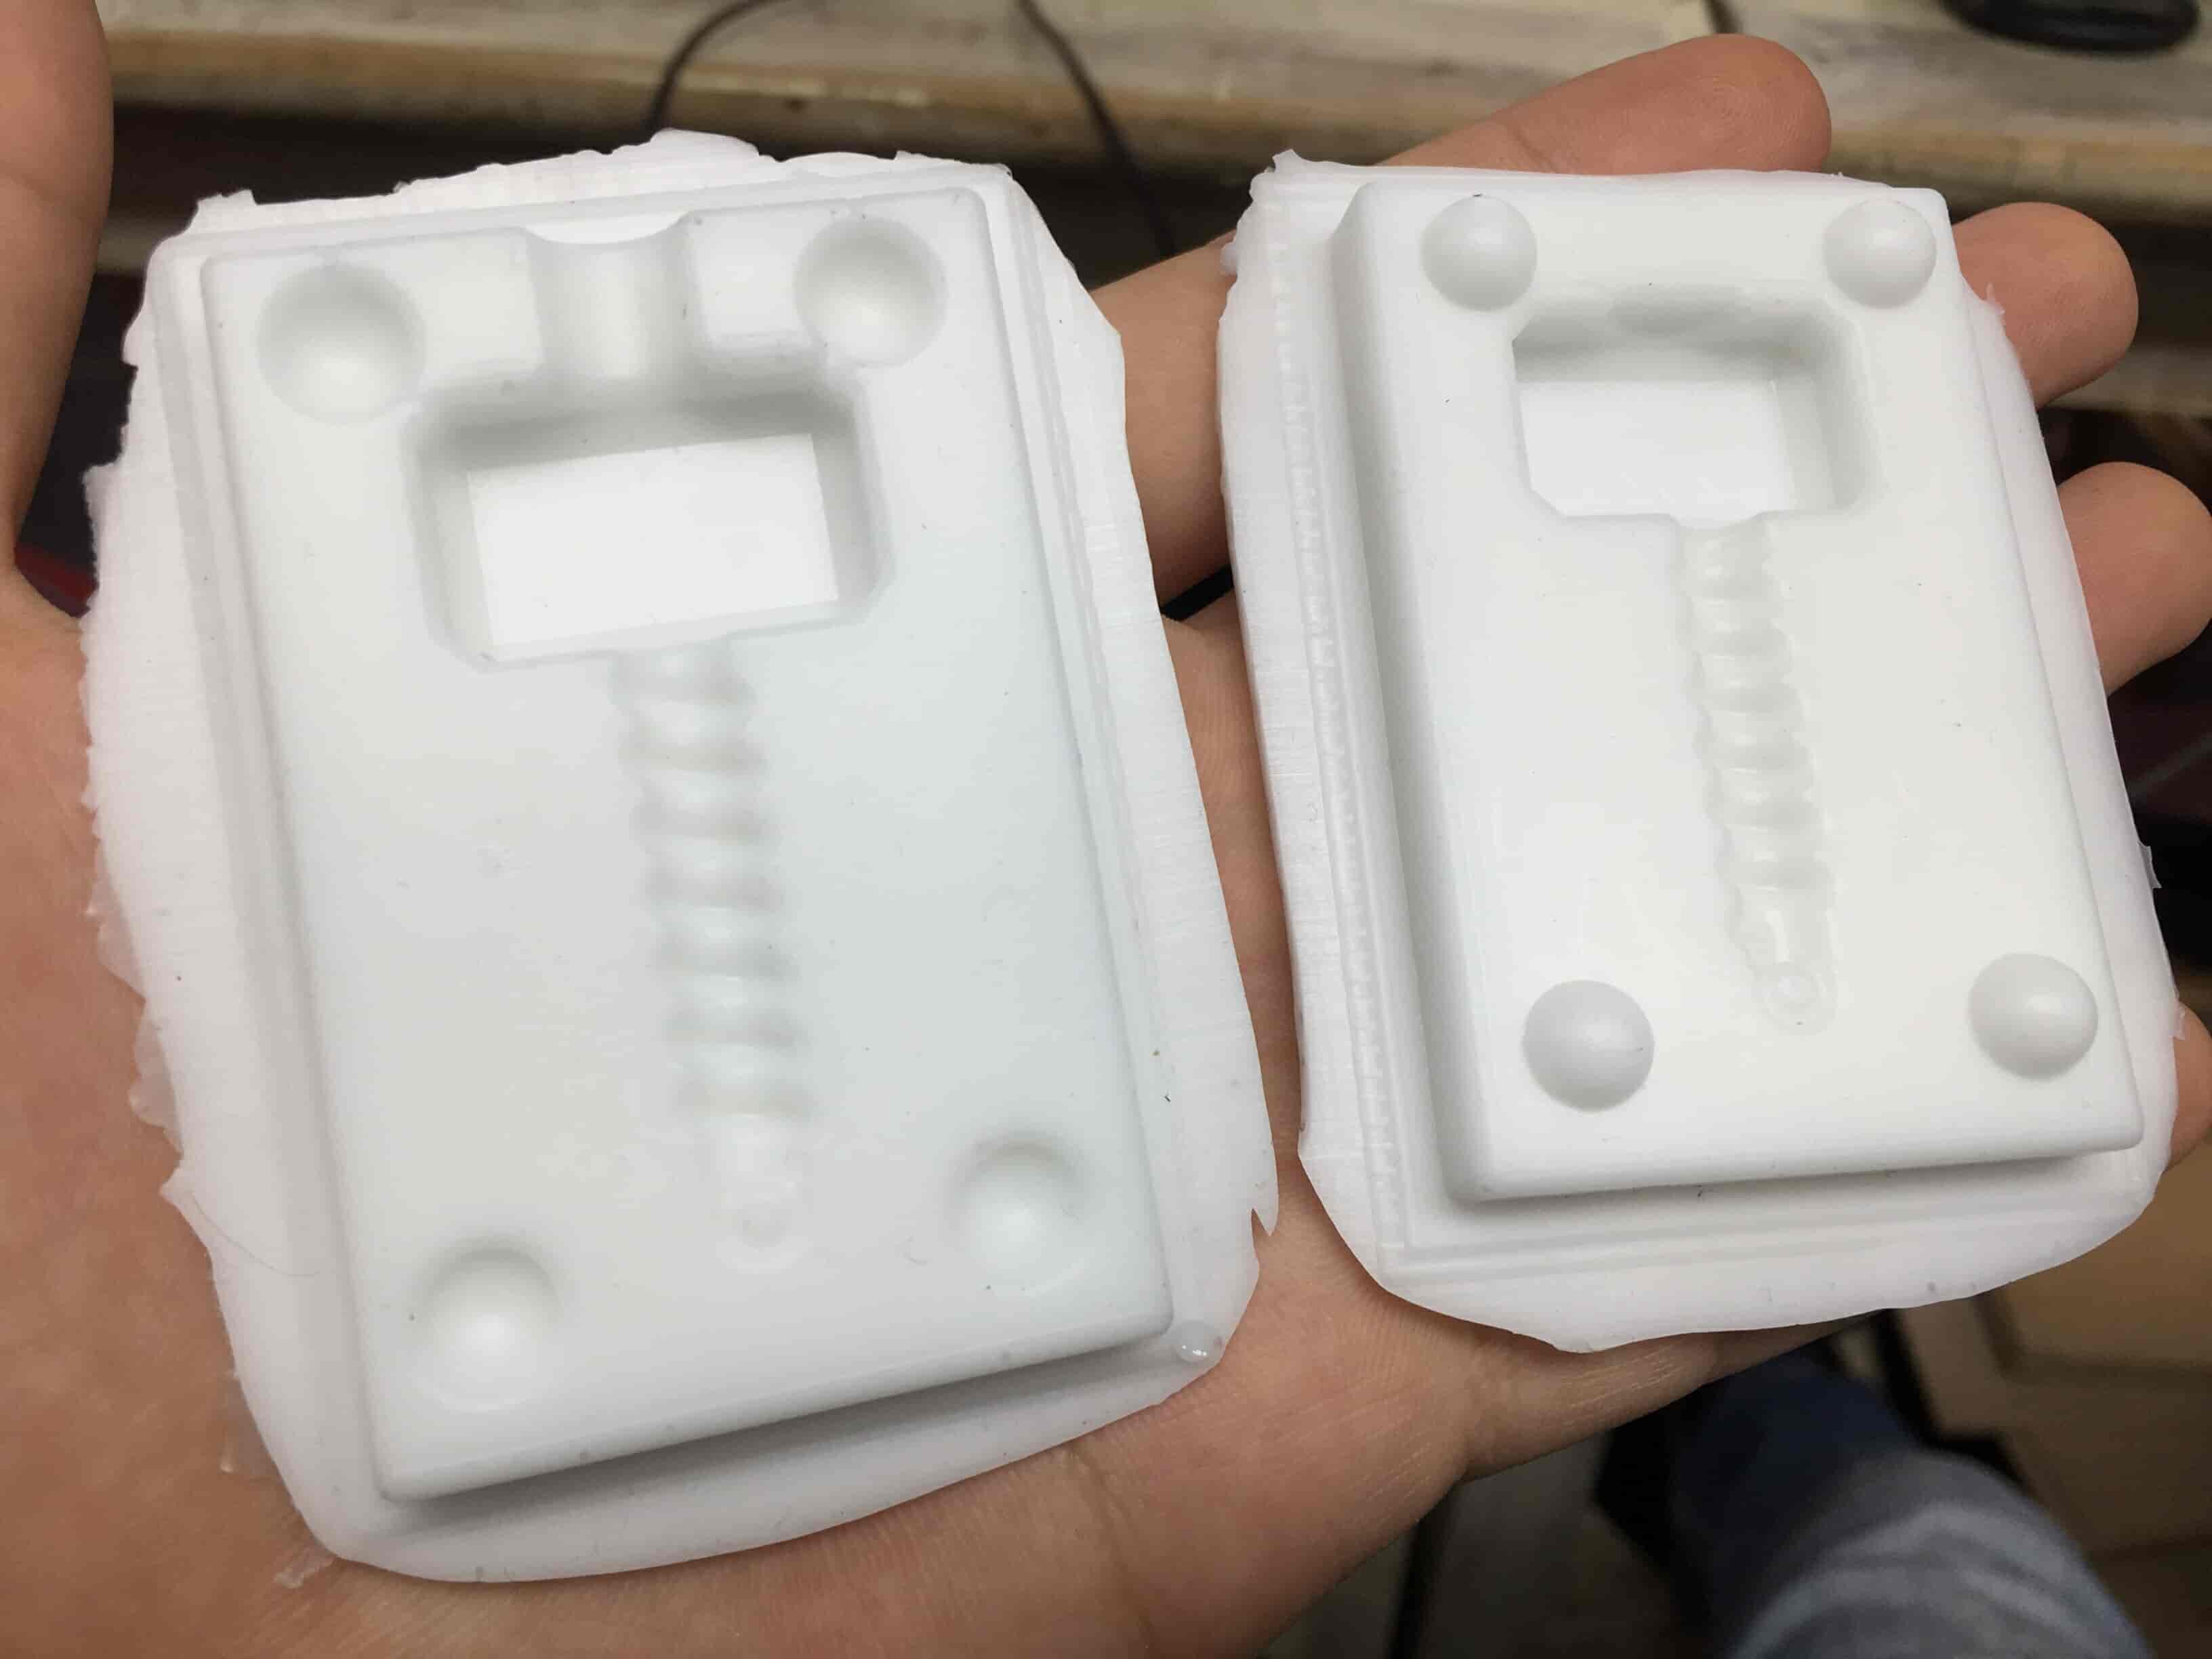
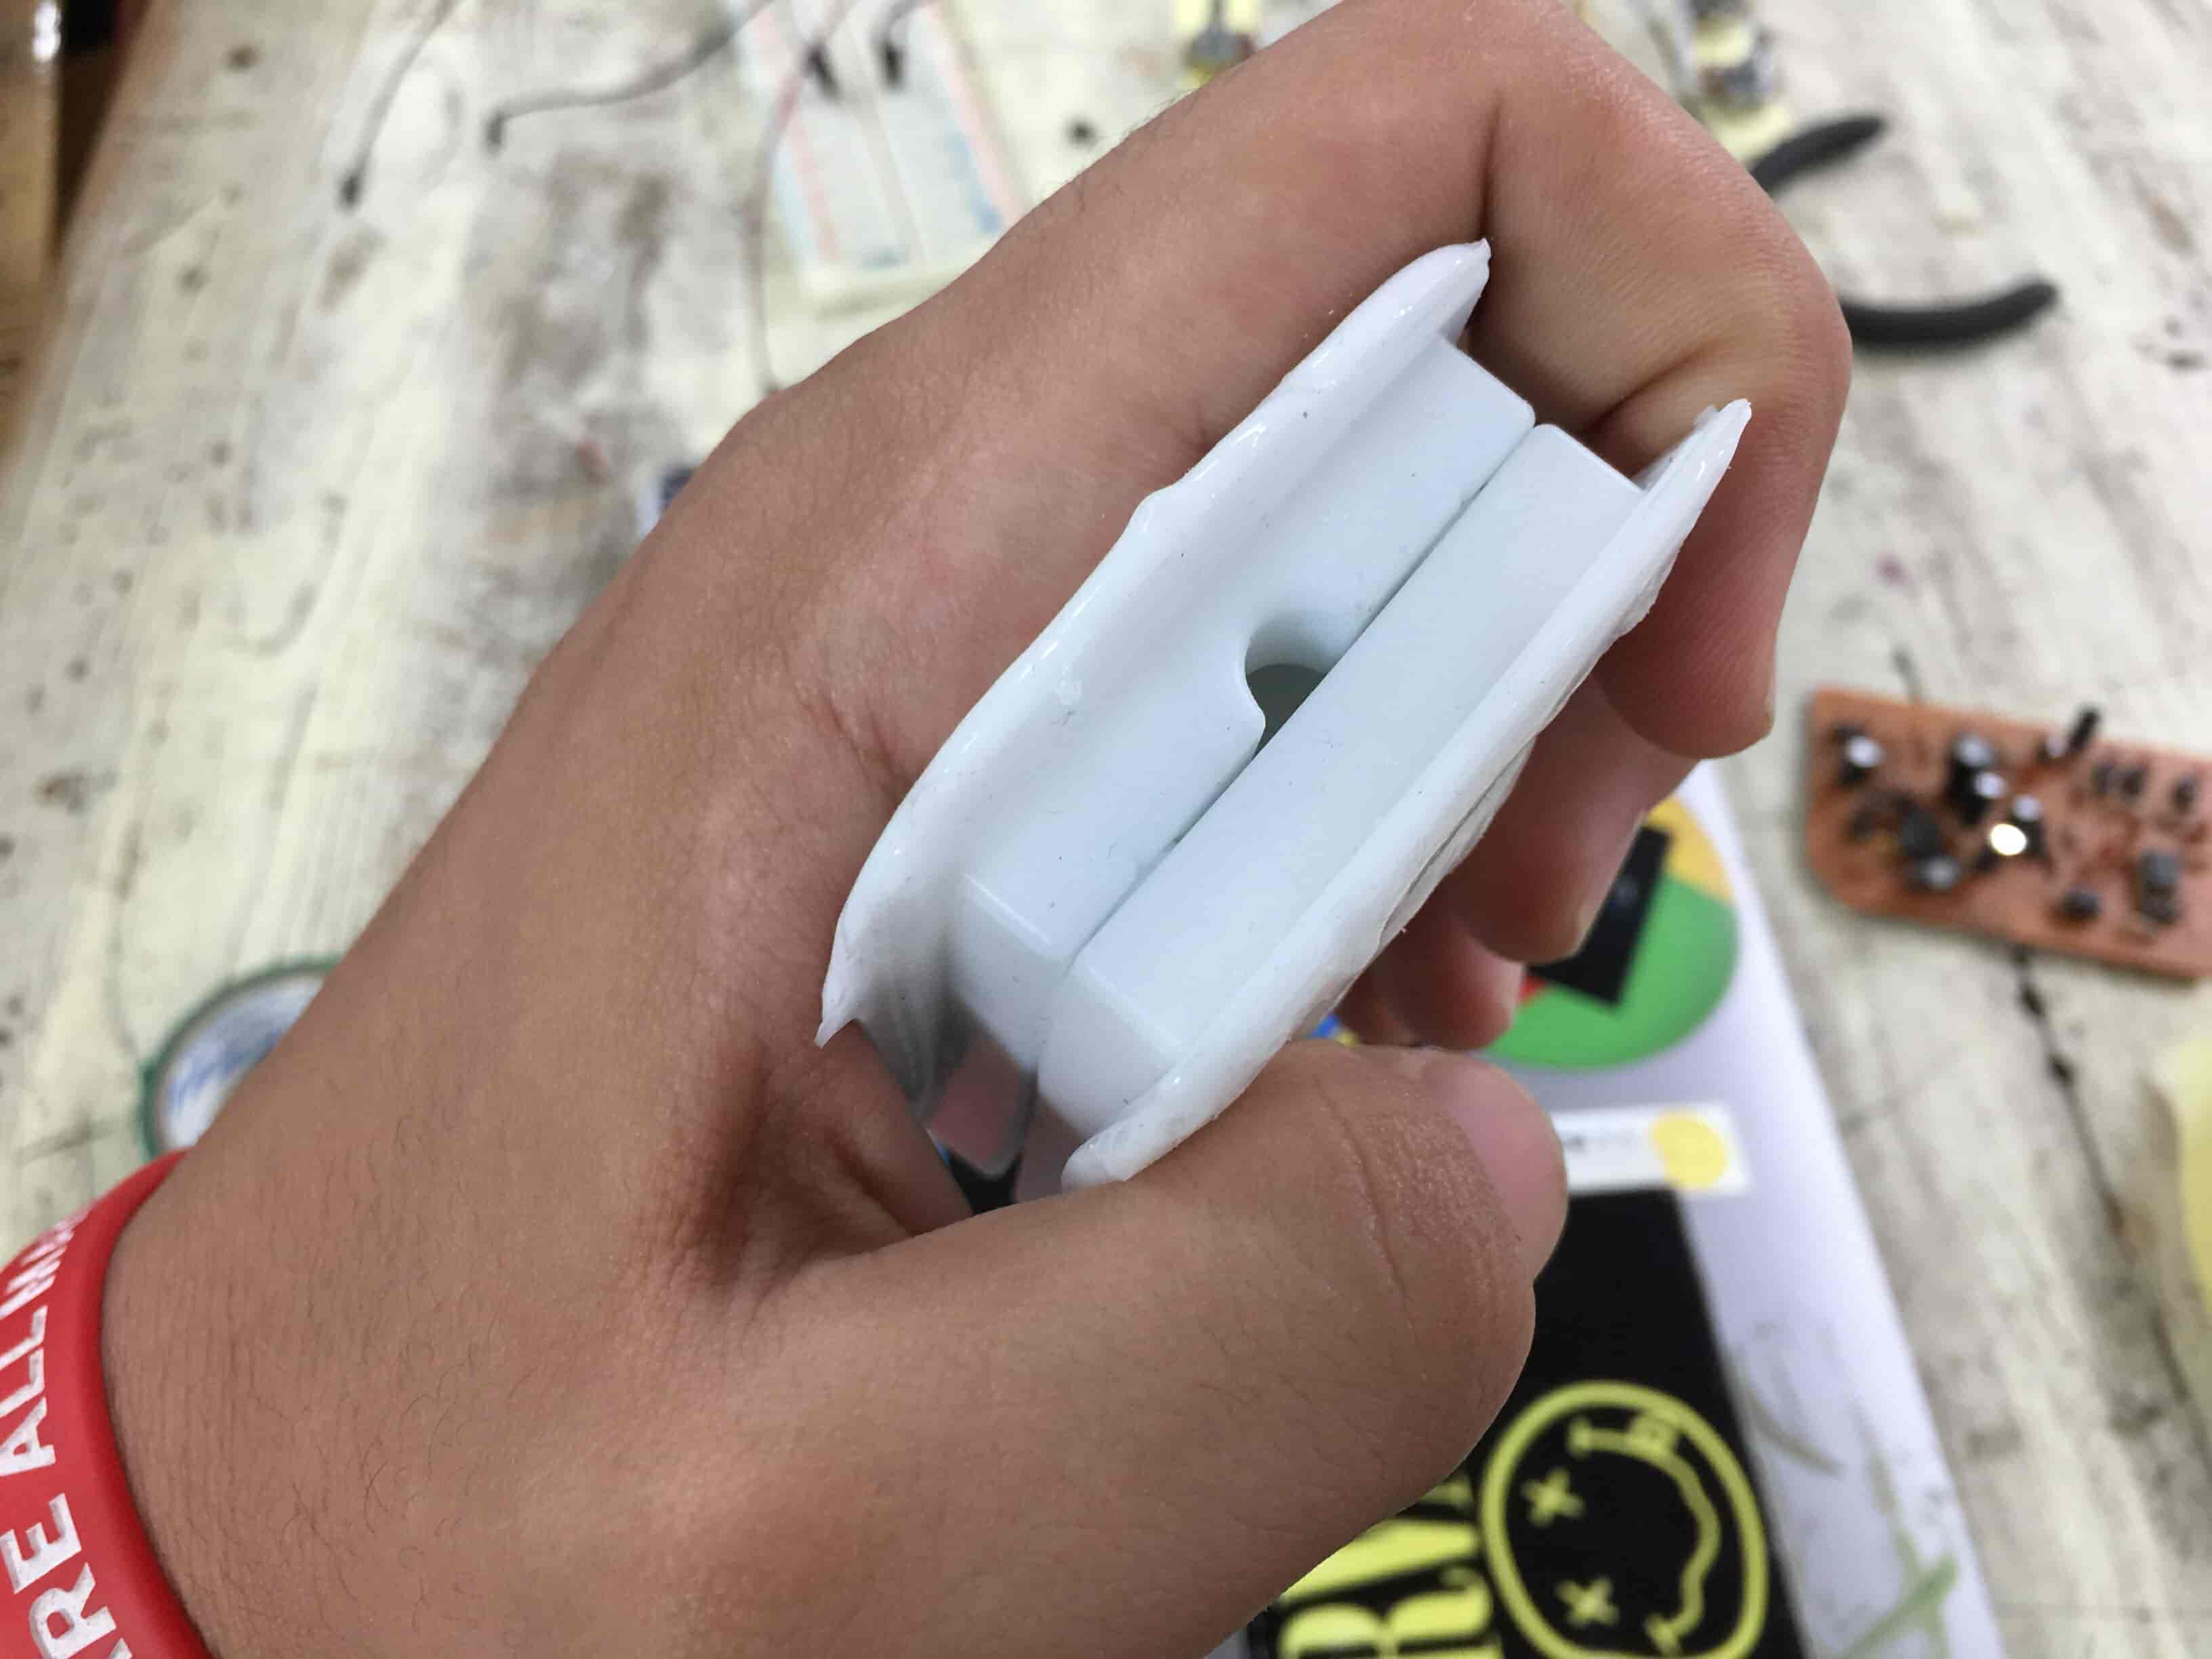
I returned home and left the mold to dry. The next day, The silicon dried and I removed it from the wax. The mold is perfectly aligned and everything looks fine.

The Casting Section
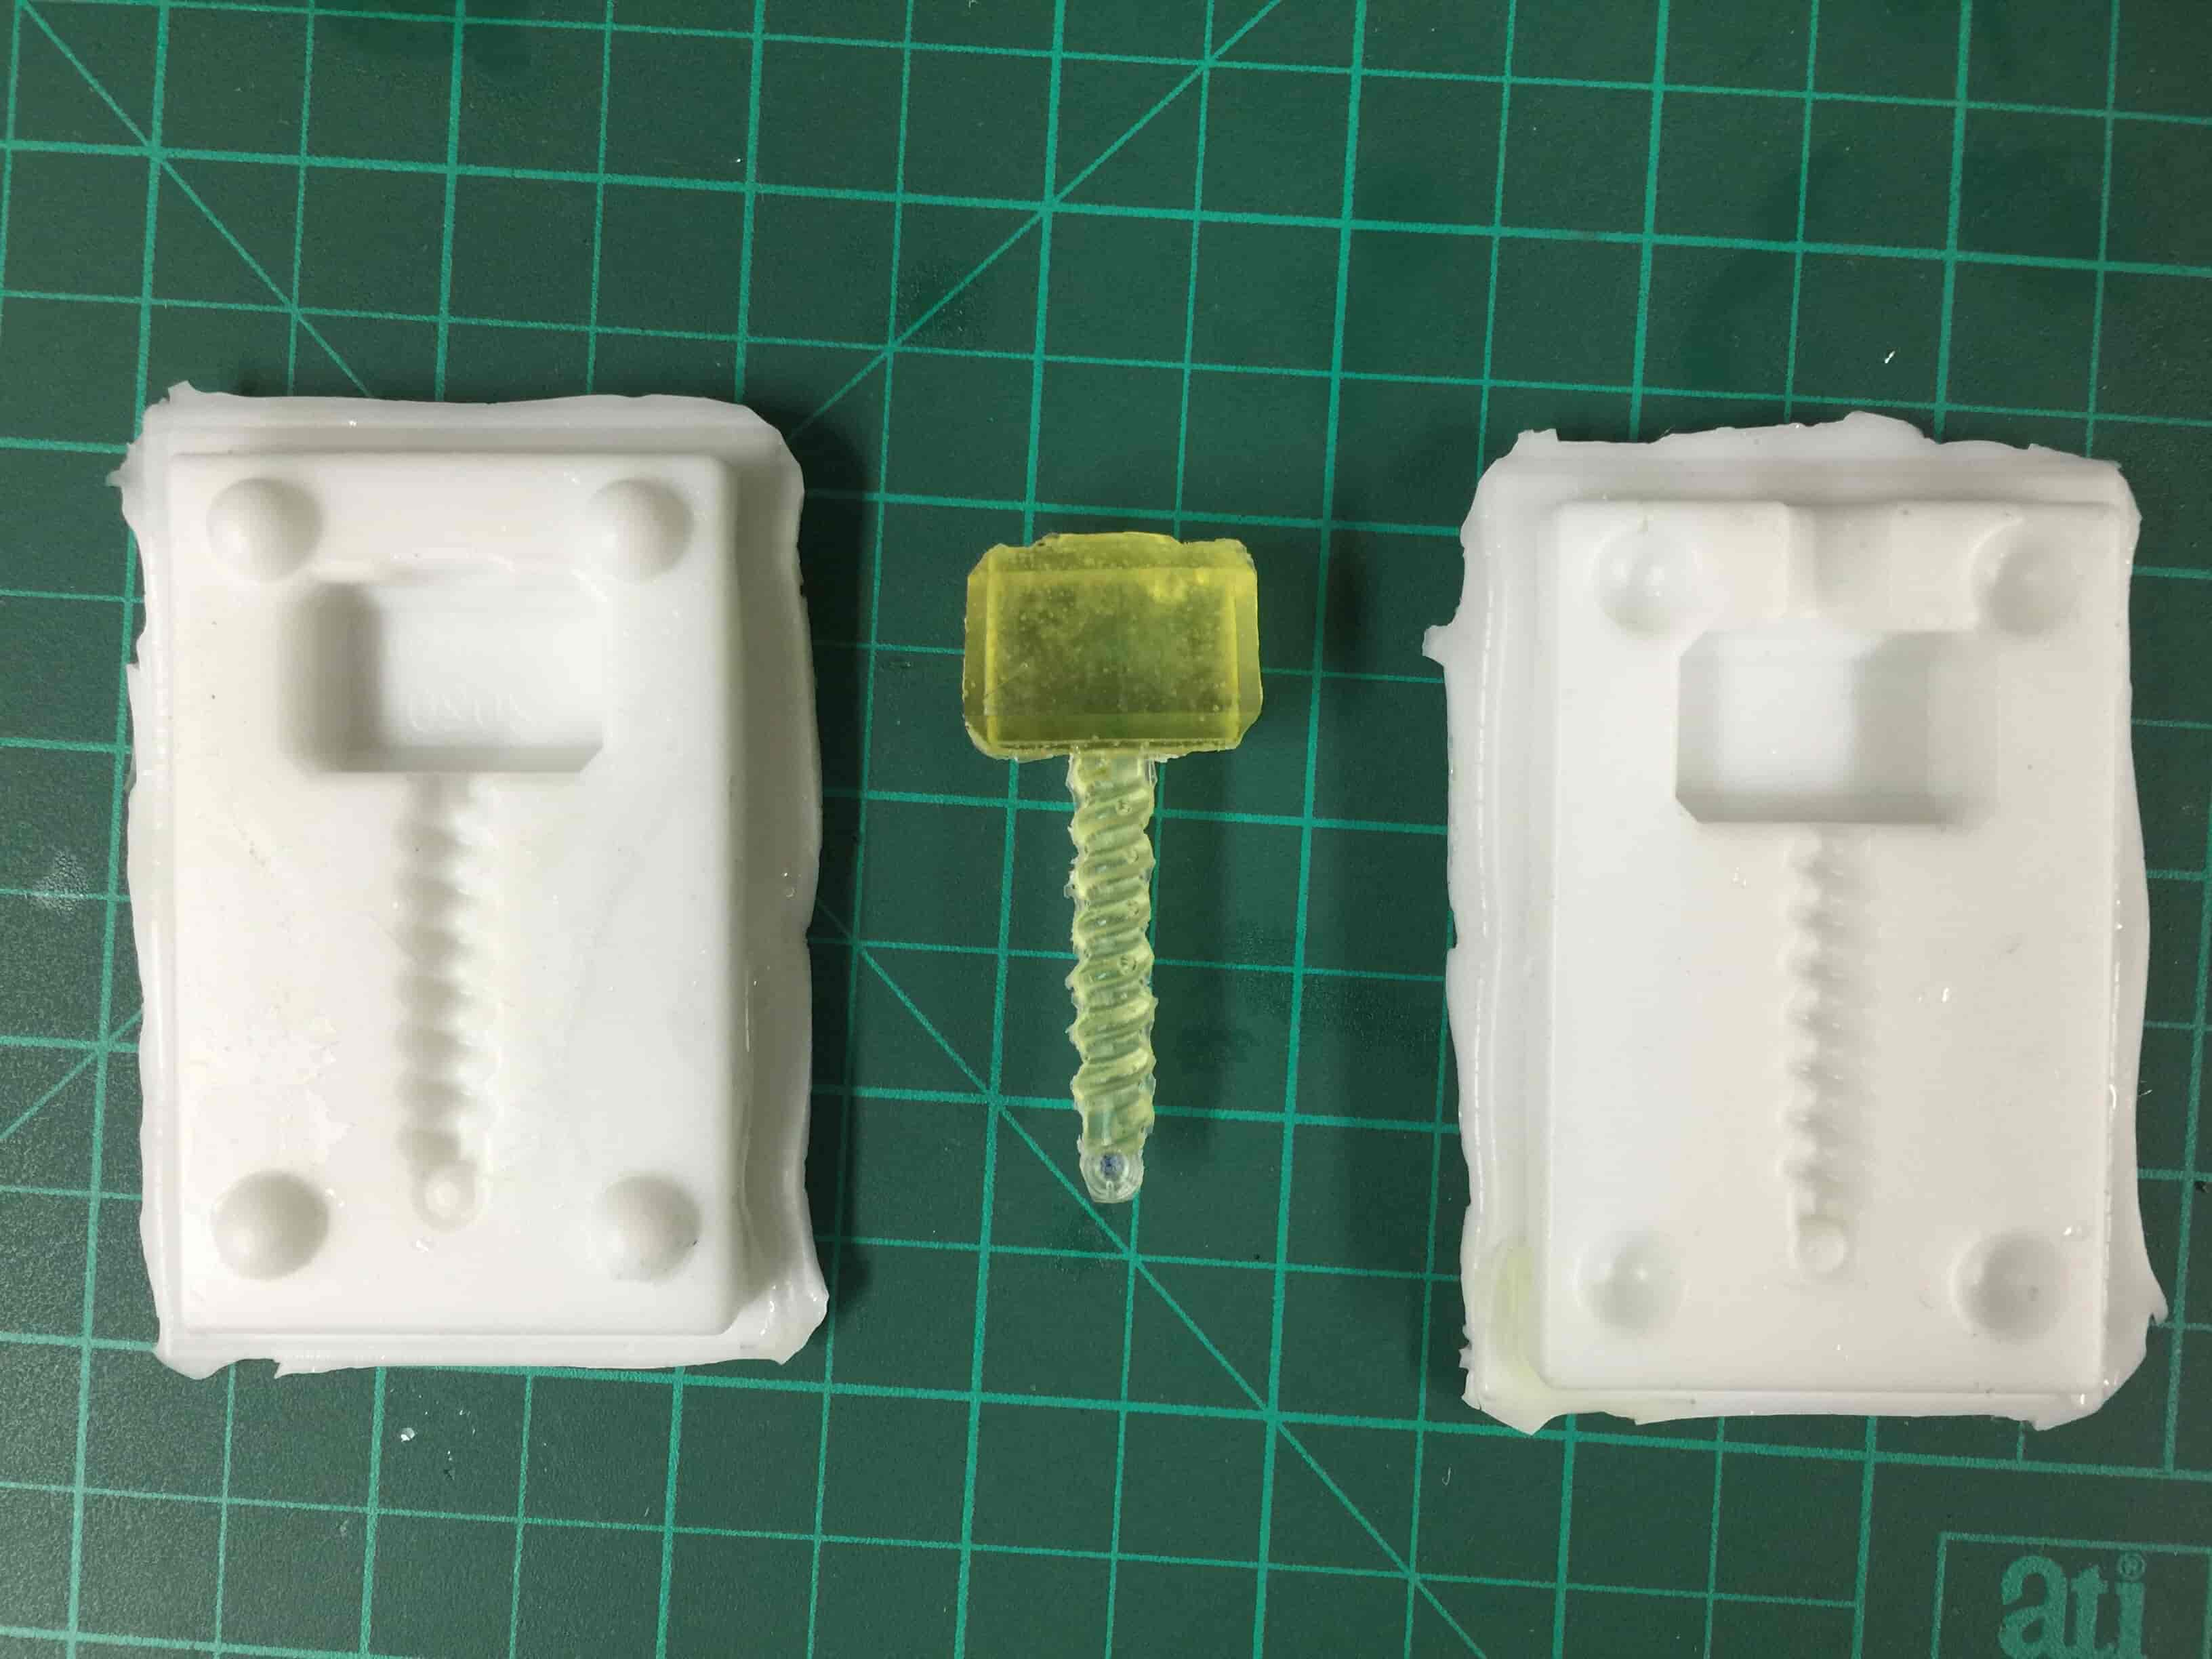
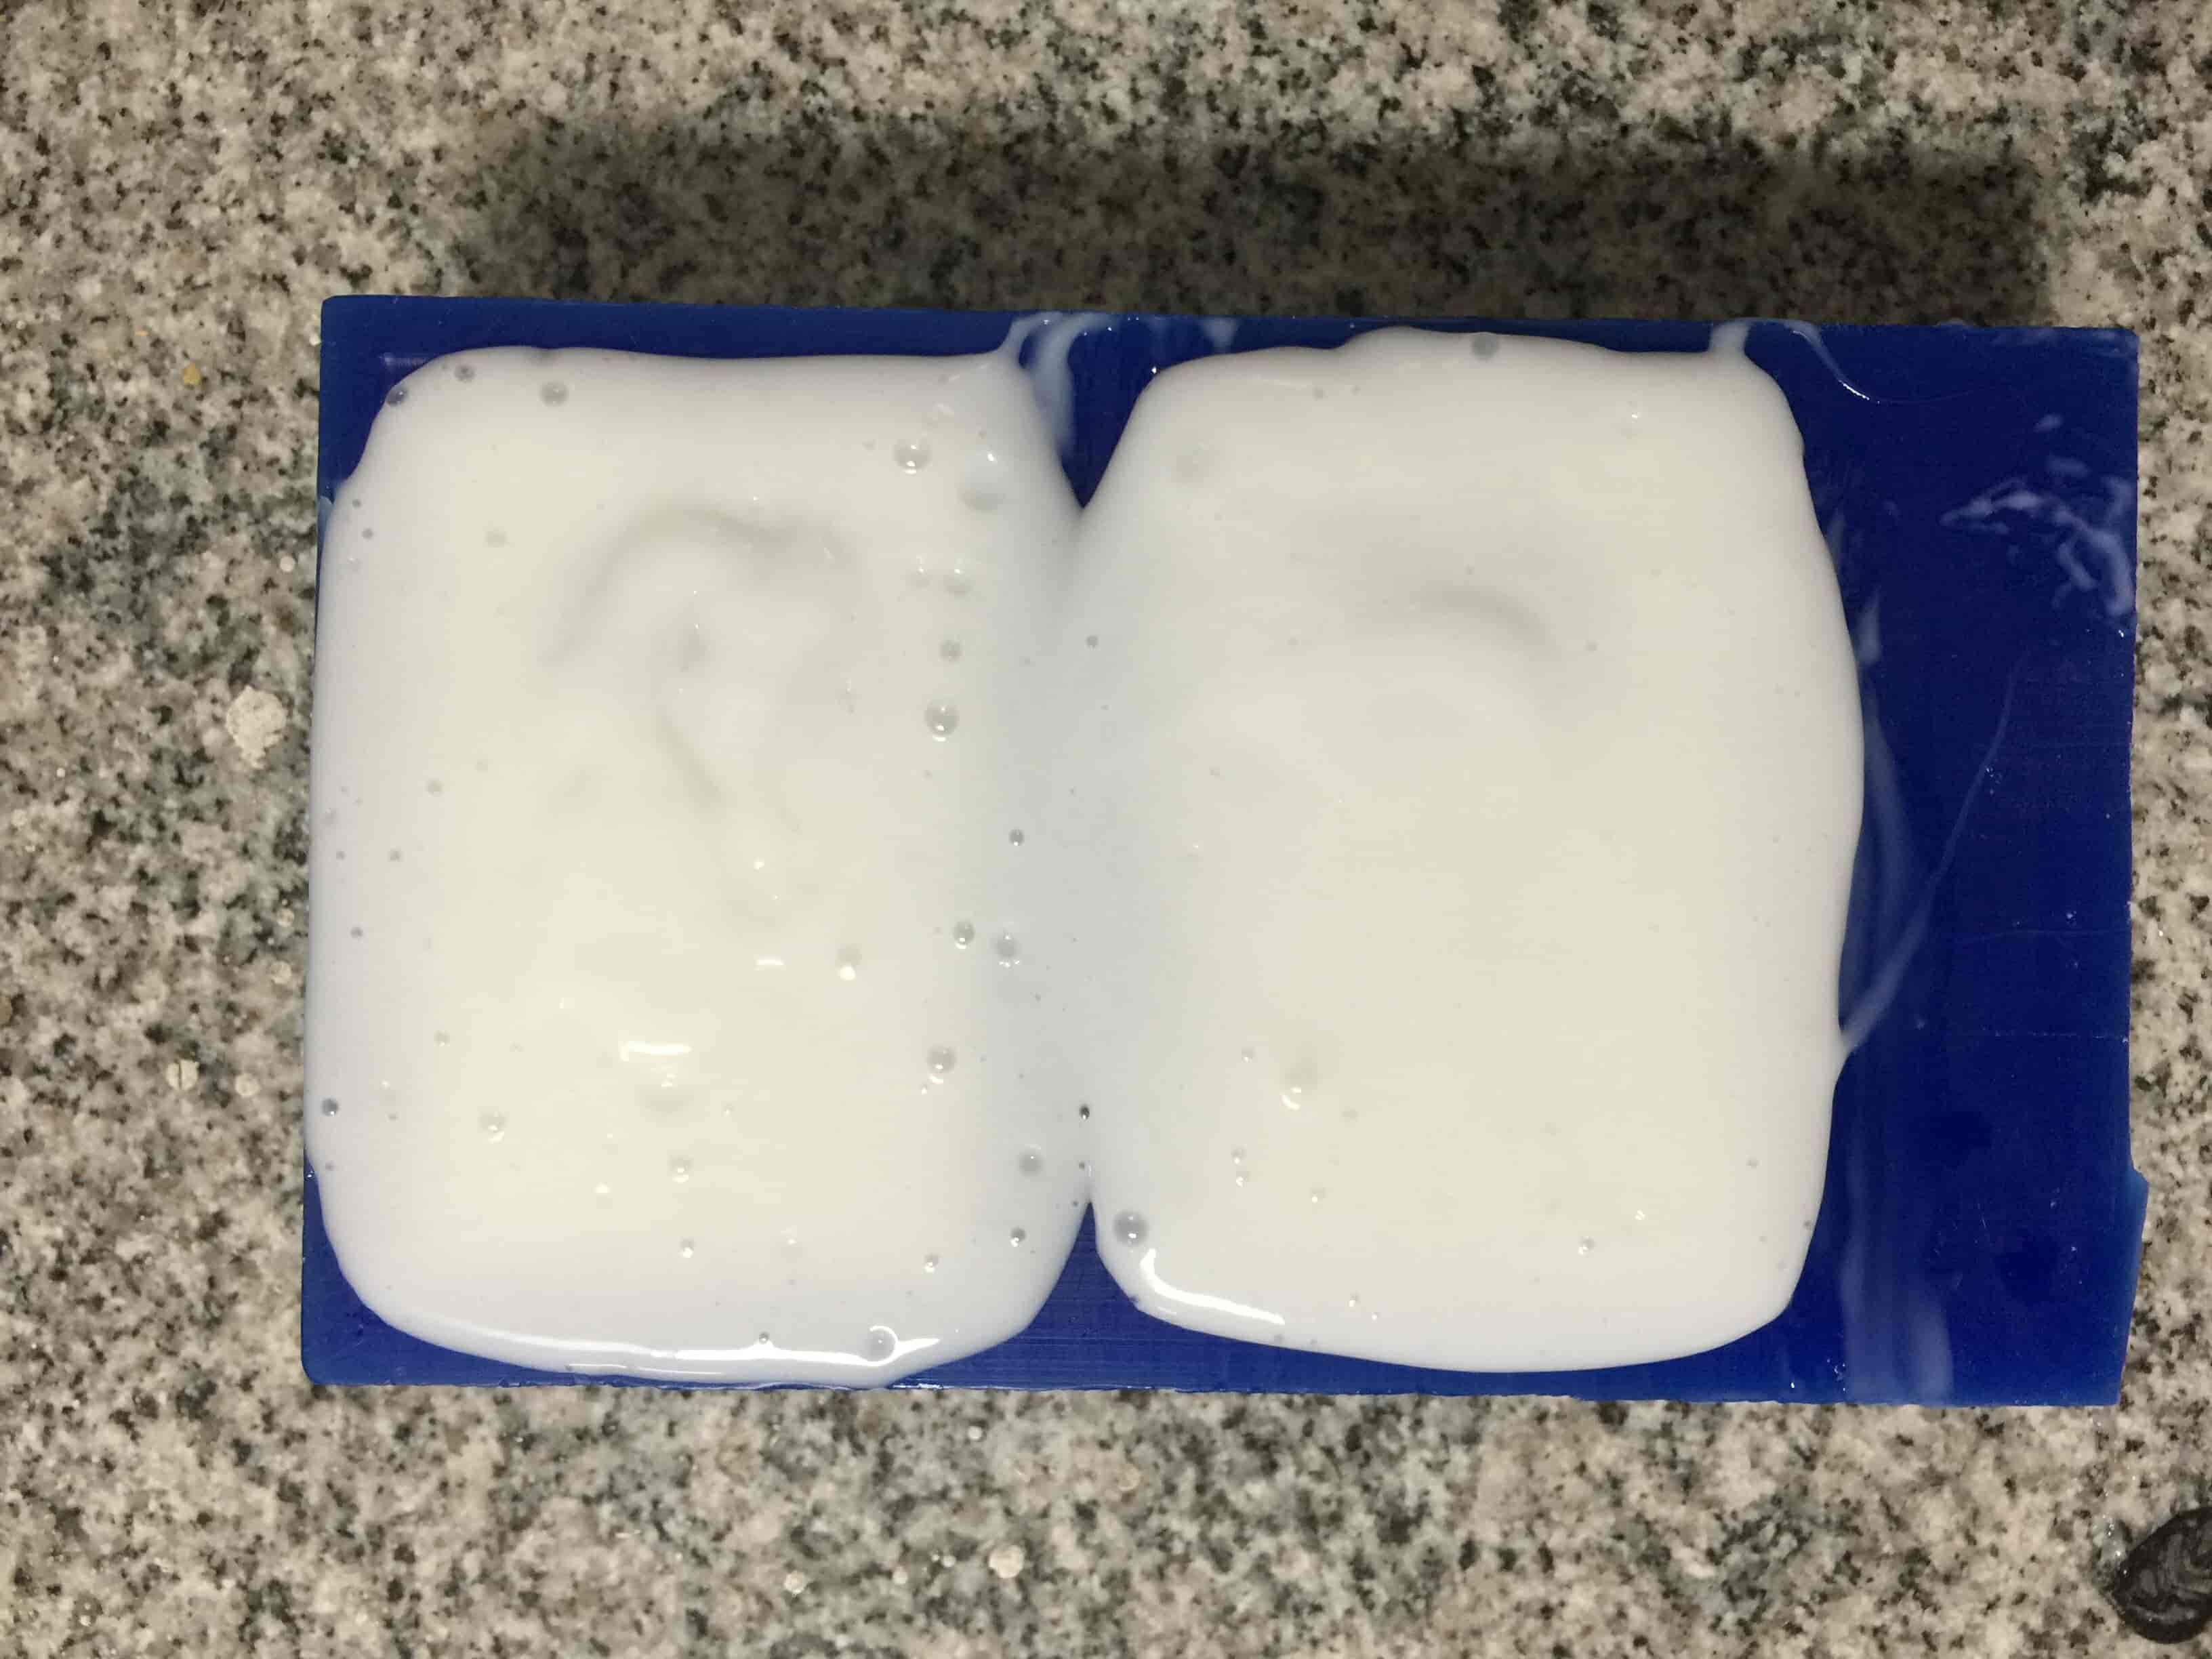
Now, we have the mold in our hand baby! Let’s do the casting process. We’re gonna use an Epoxy resin and Epoxy hardener from CMB Egypt. Same as the molding process, we need to mix the Epoxy resin and the Epoxy hardener with a specific ratio according to the brand you are using. In our case and according to the datasheet, the ratio between the resin and the hardener is 2A:1B(Where A: is the Epoxy Resin, B: is the Epoxy hardener) For example: if you put 50gm of Epoxy resin, you will need to put 25gm of Epoxy hardener.

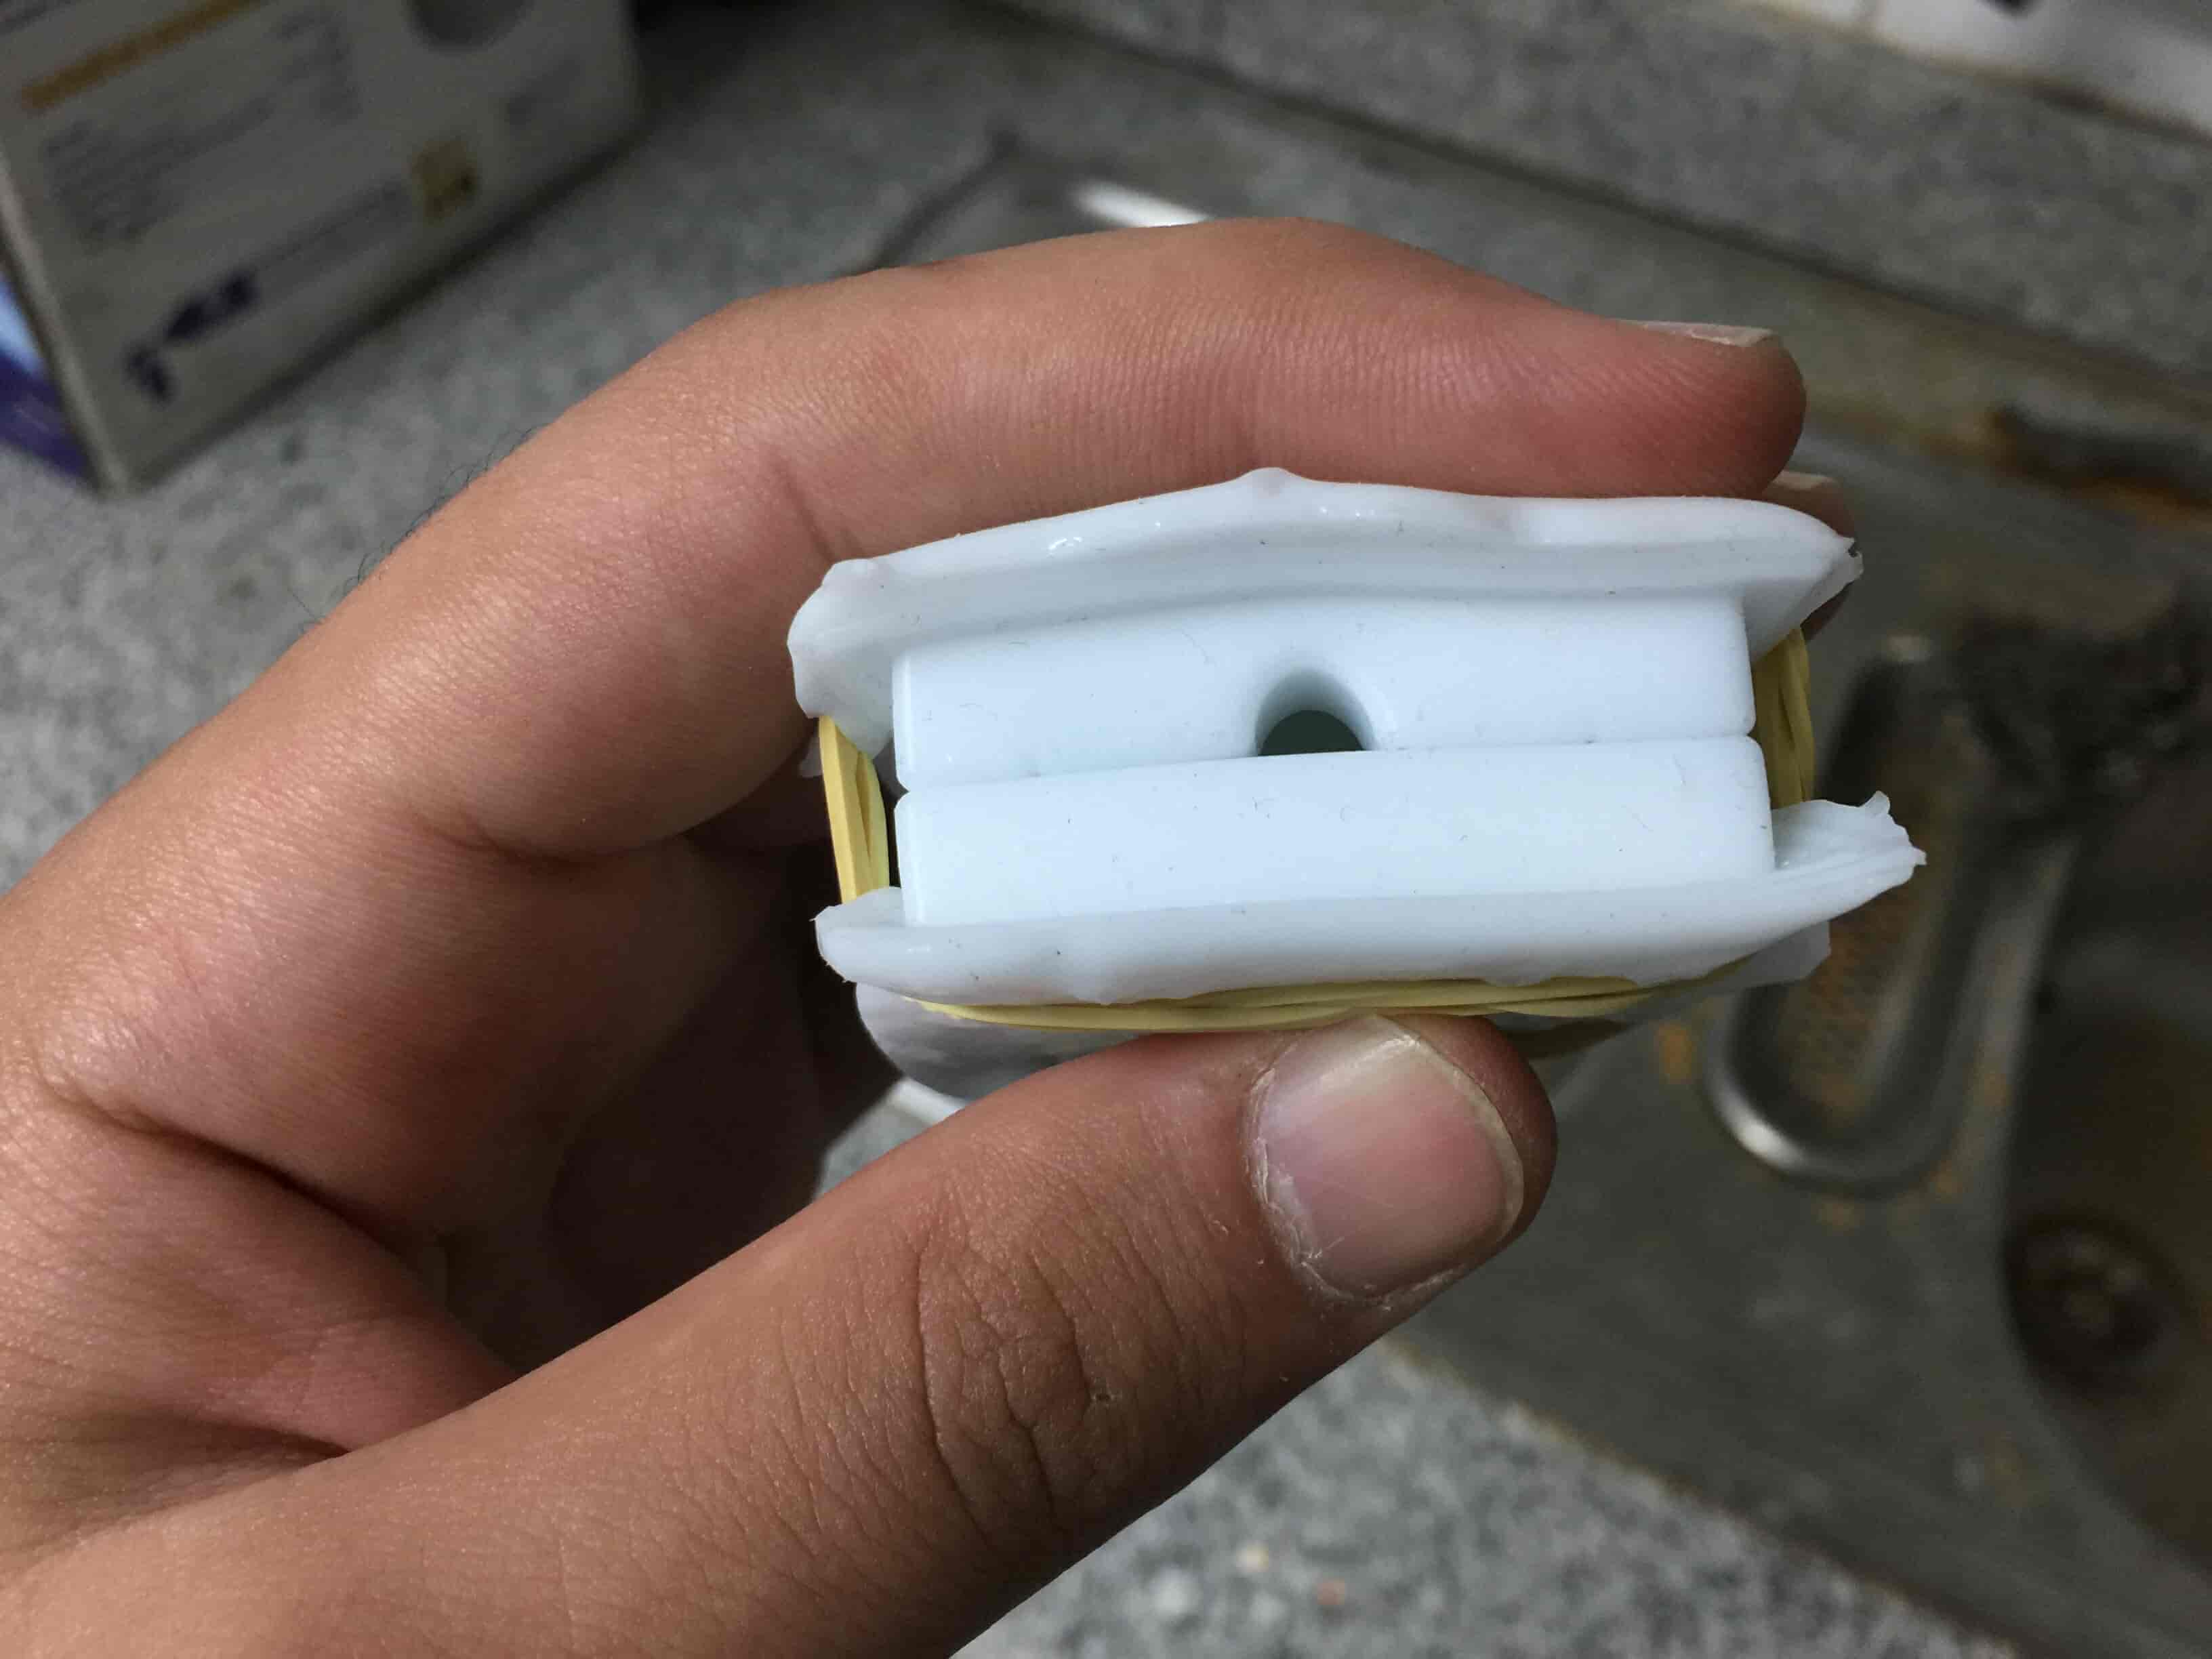
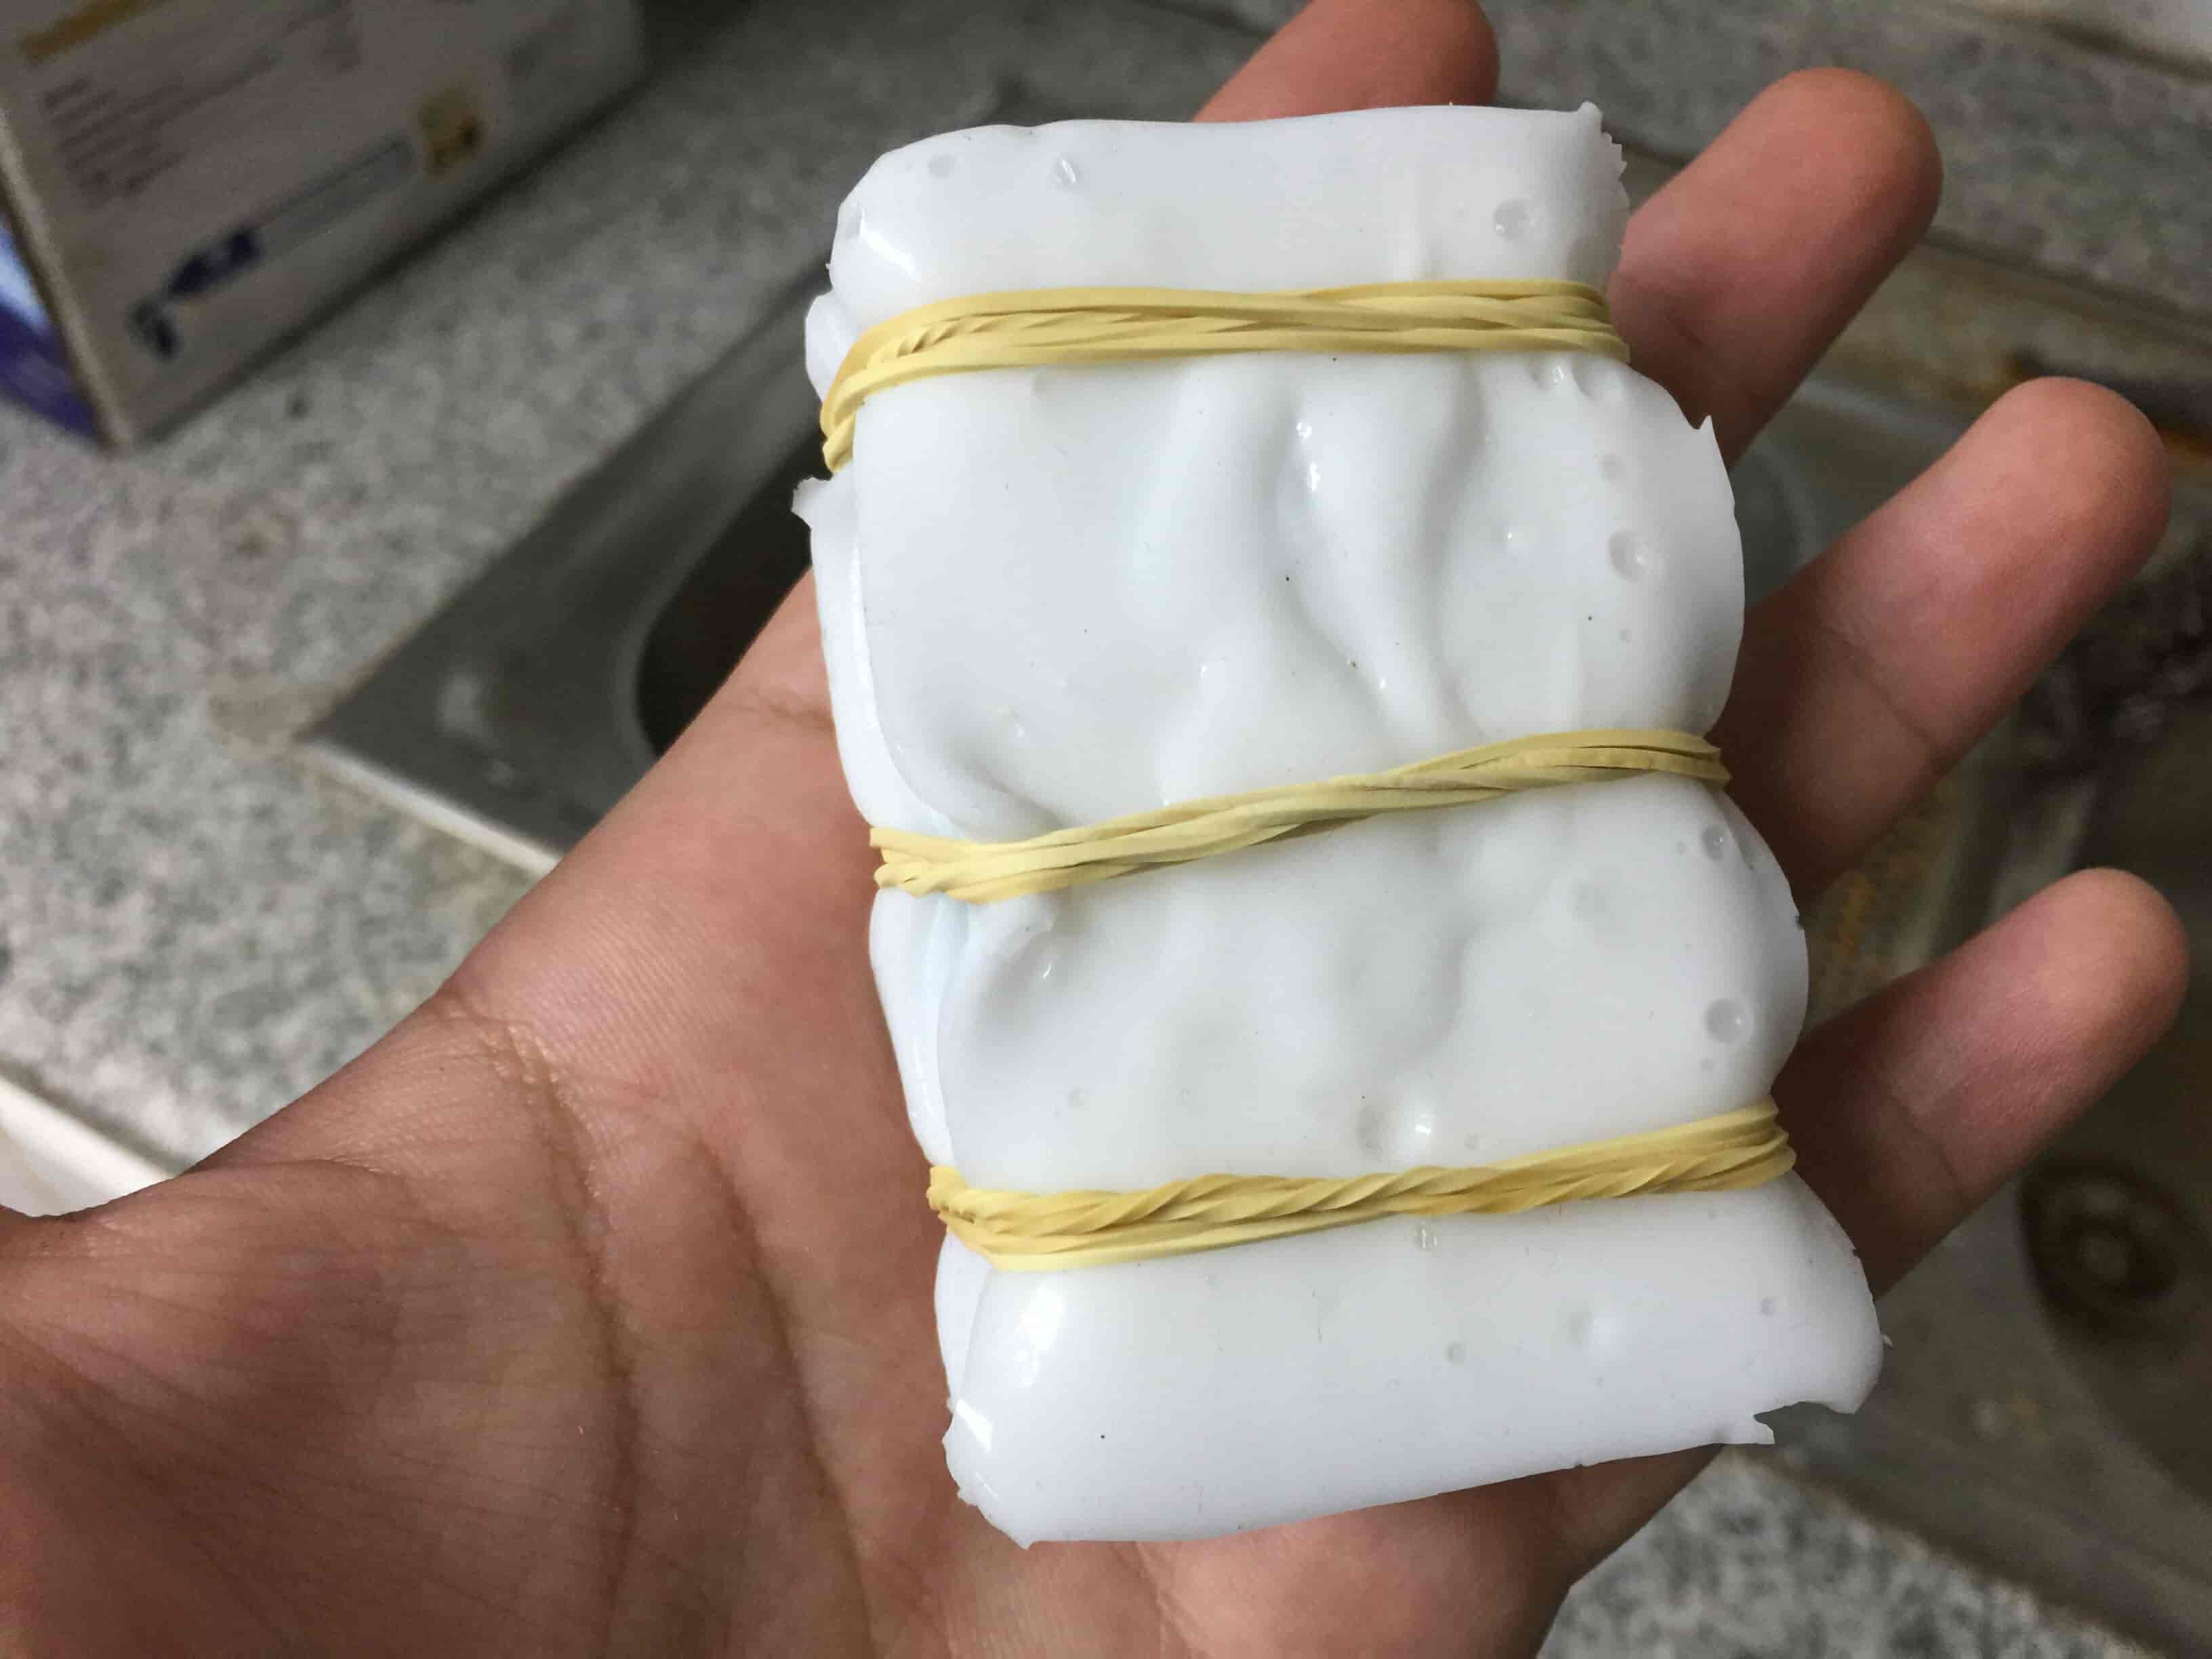
First we need to fix the two parts mold together with a rubber band or anything. Then I started pouring the mix inside the mold until I made sure that it’s fully filled up. Then I left it for a couple of hours to dry.
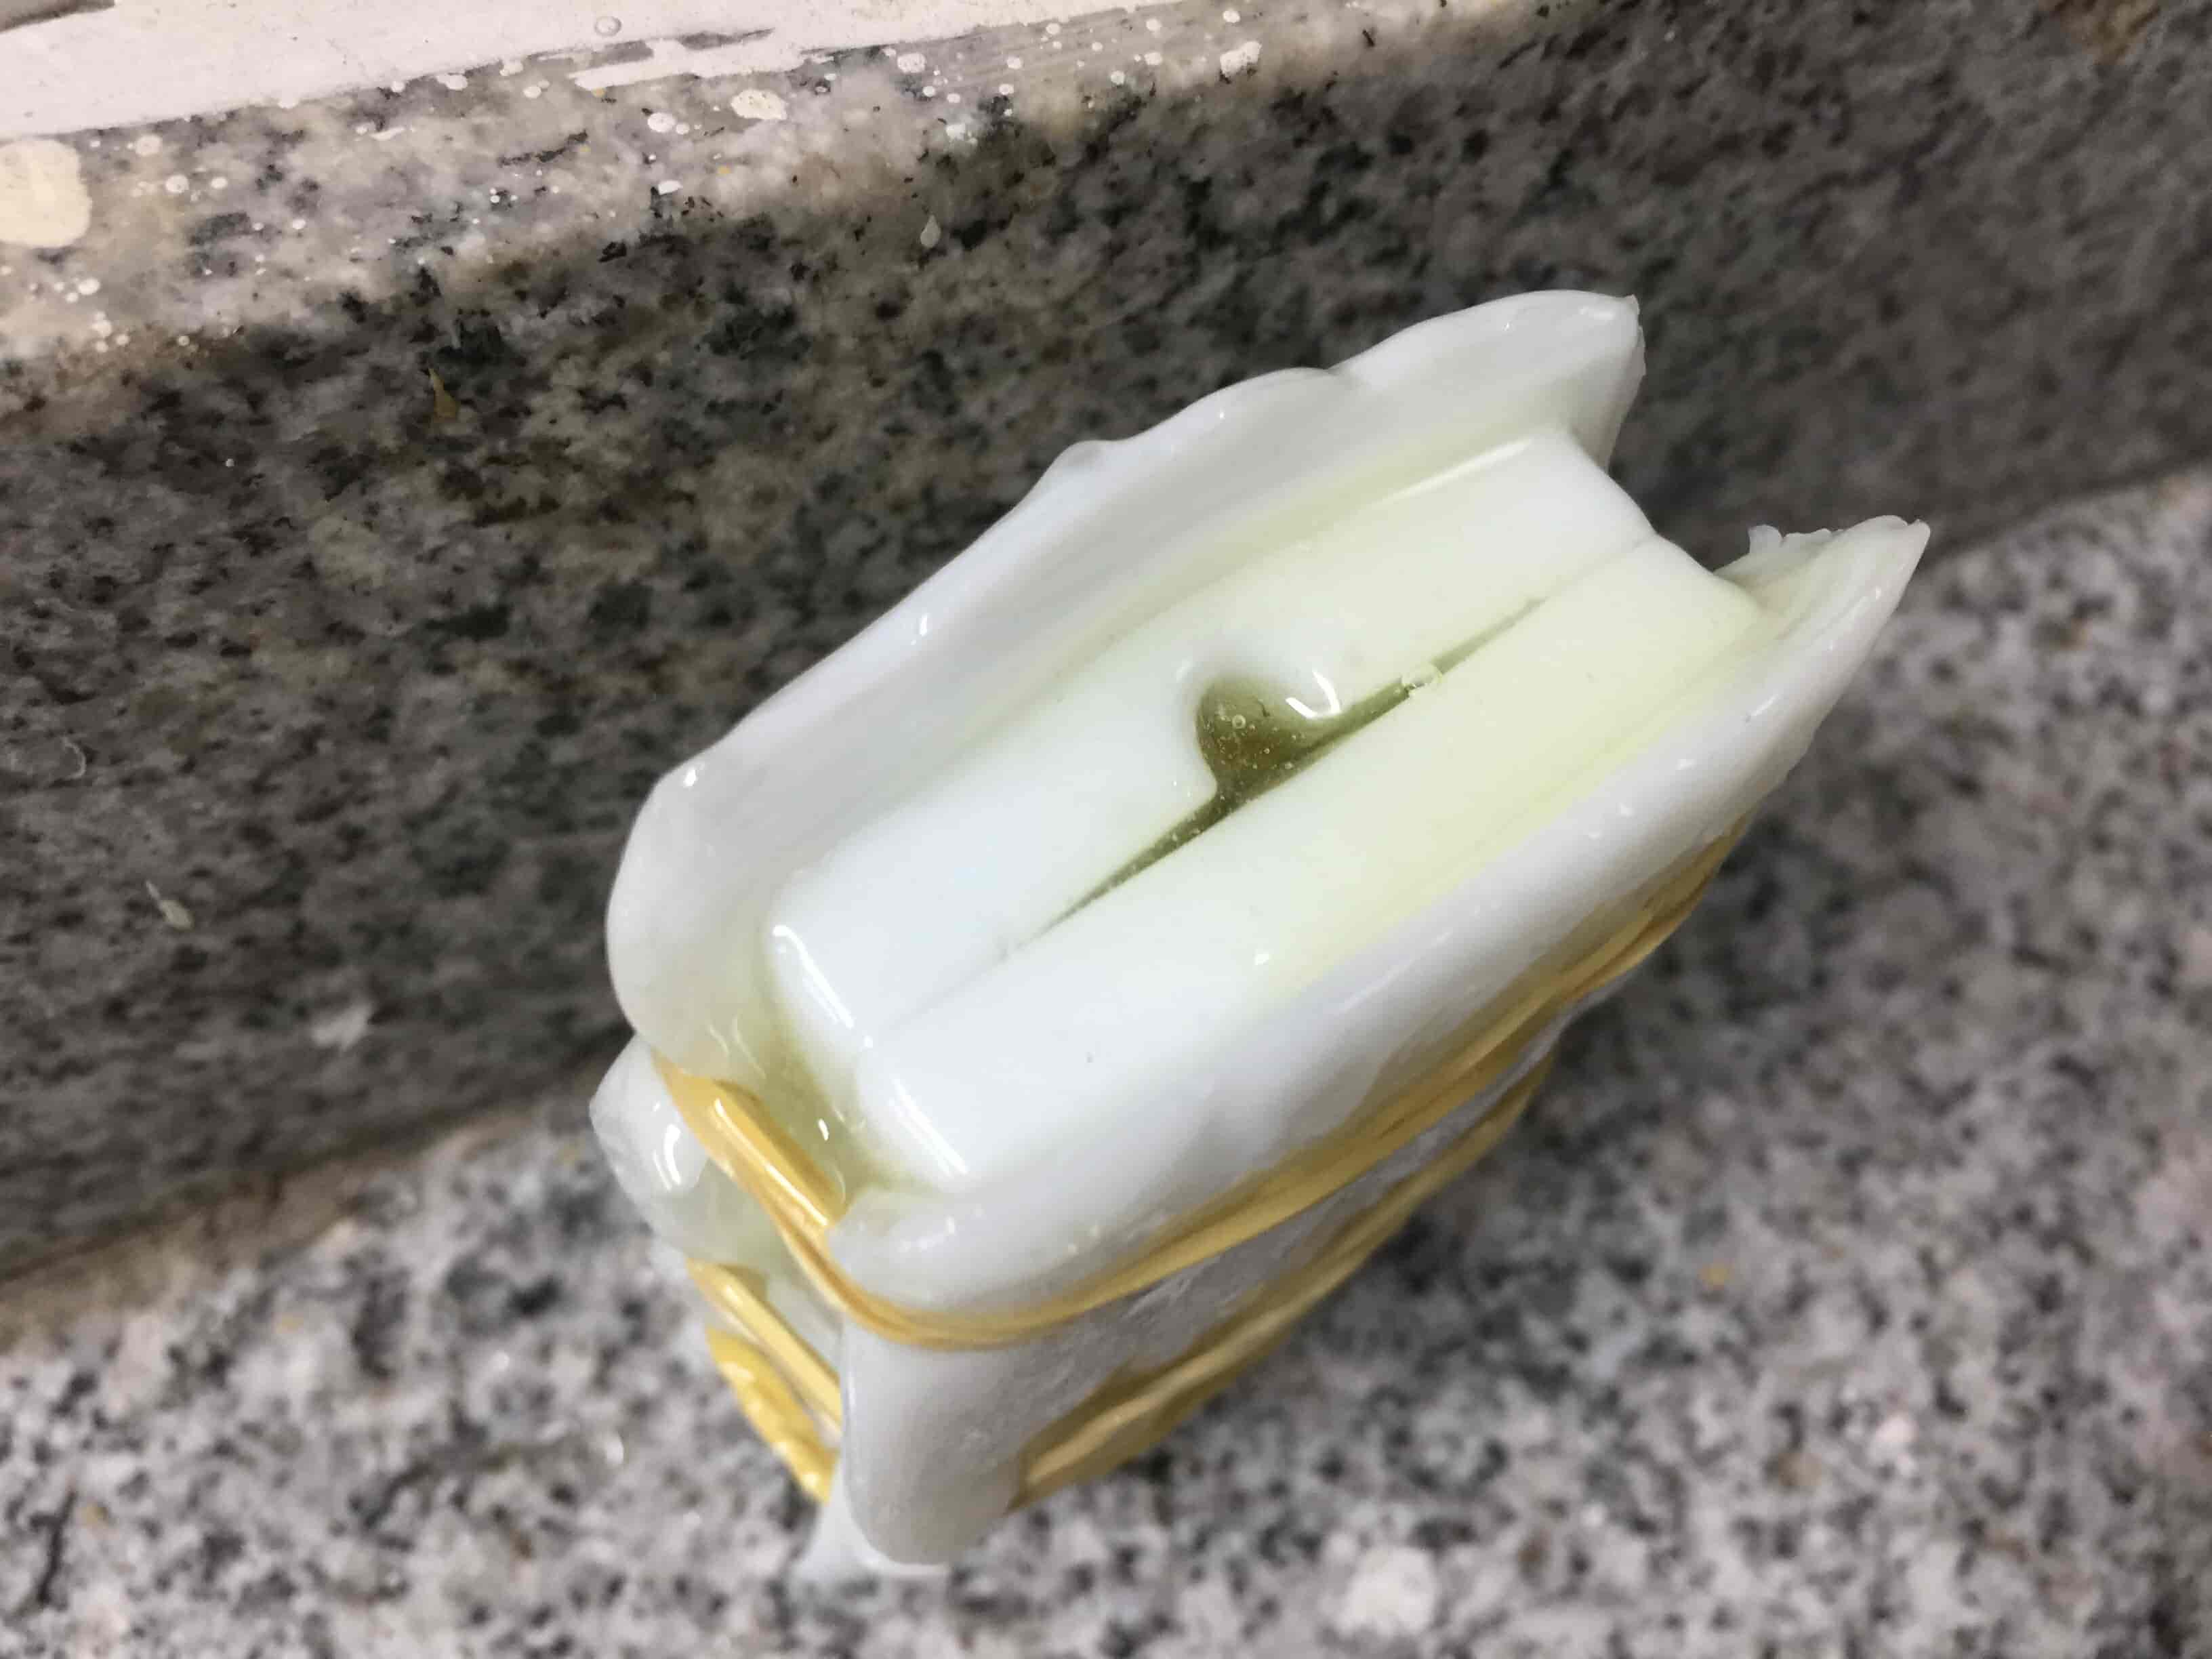
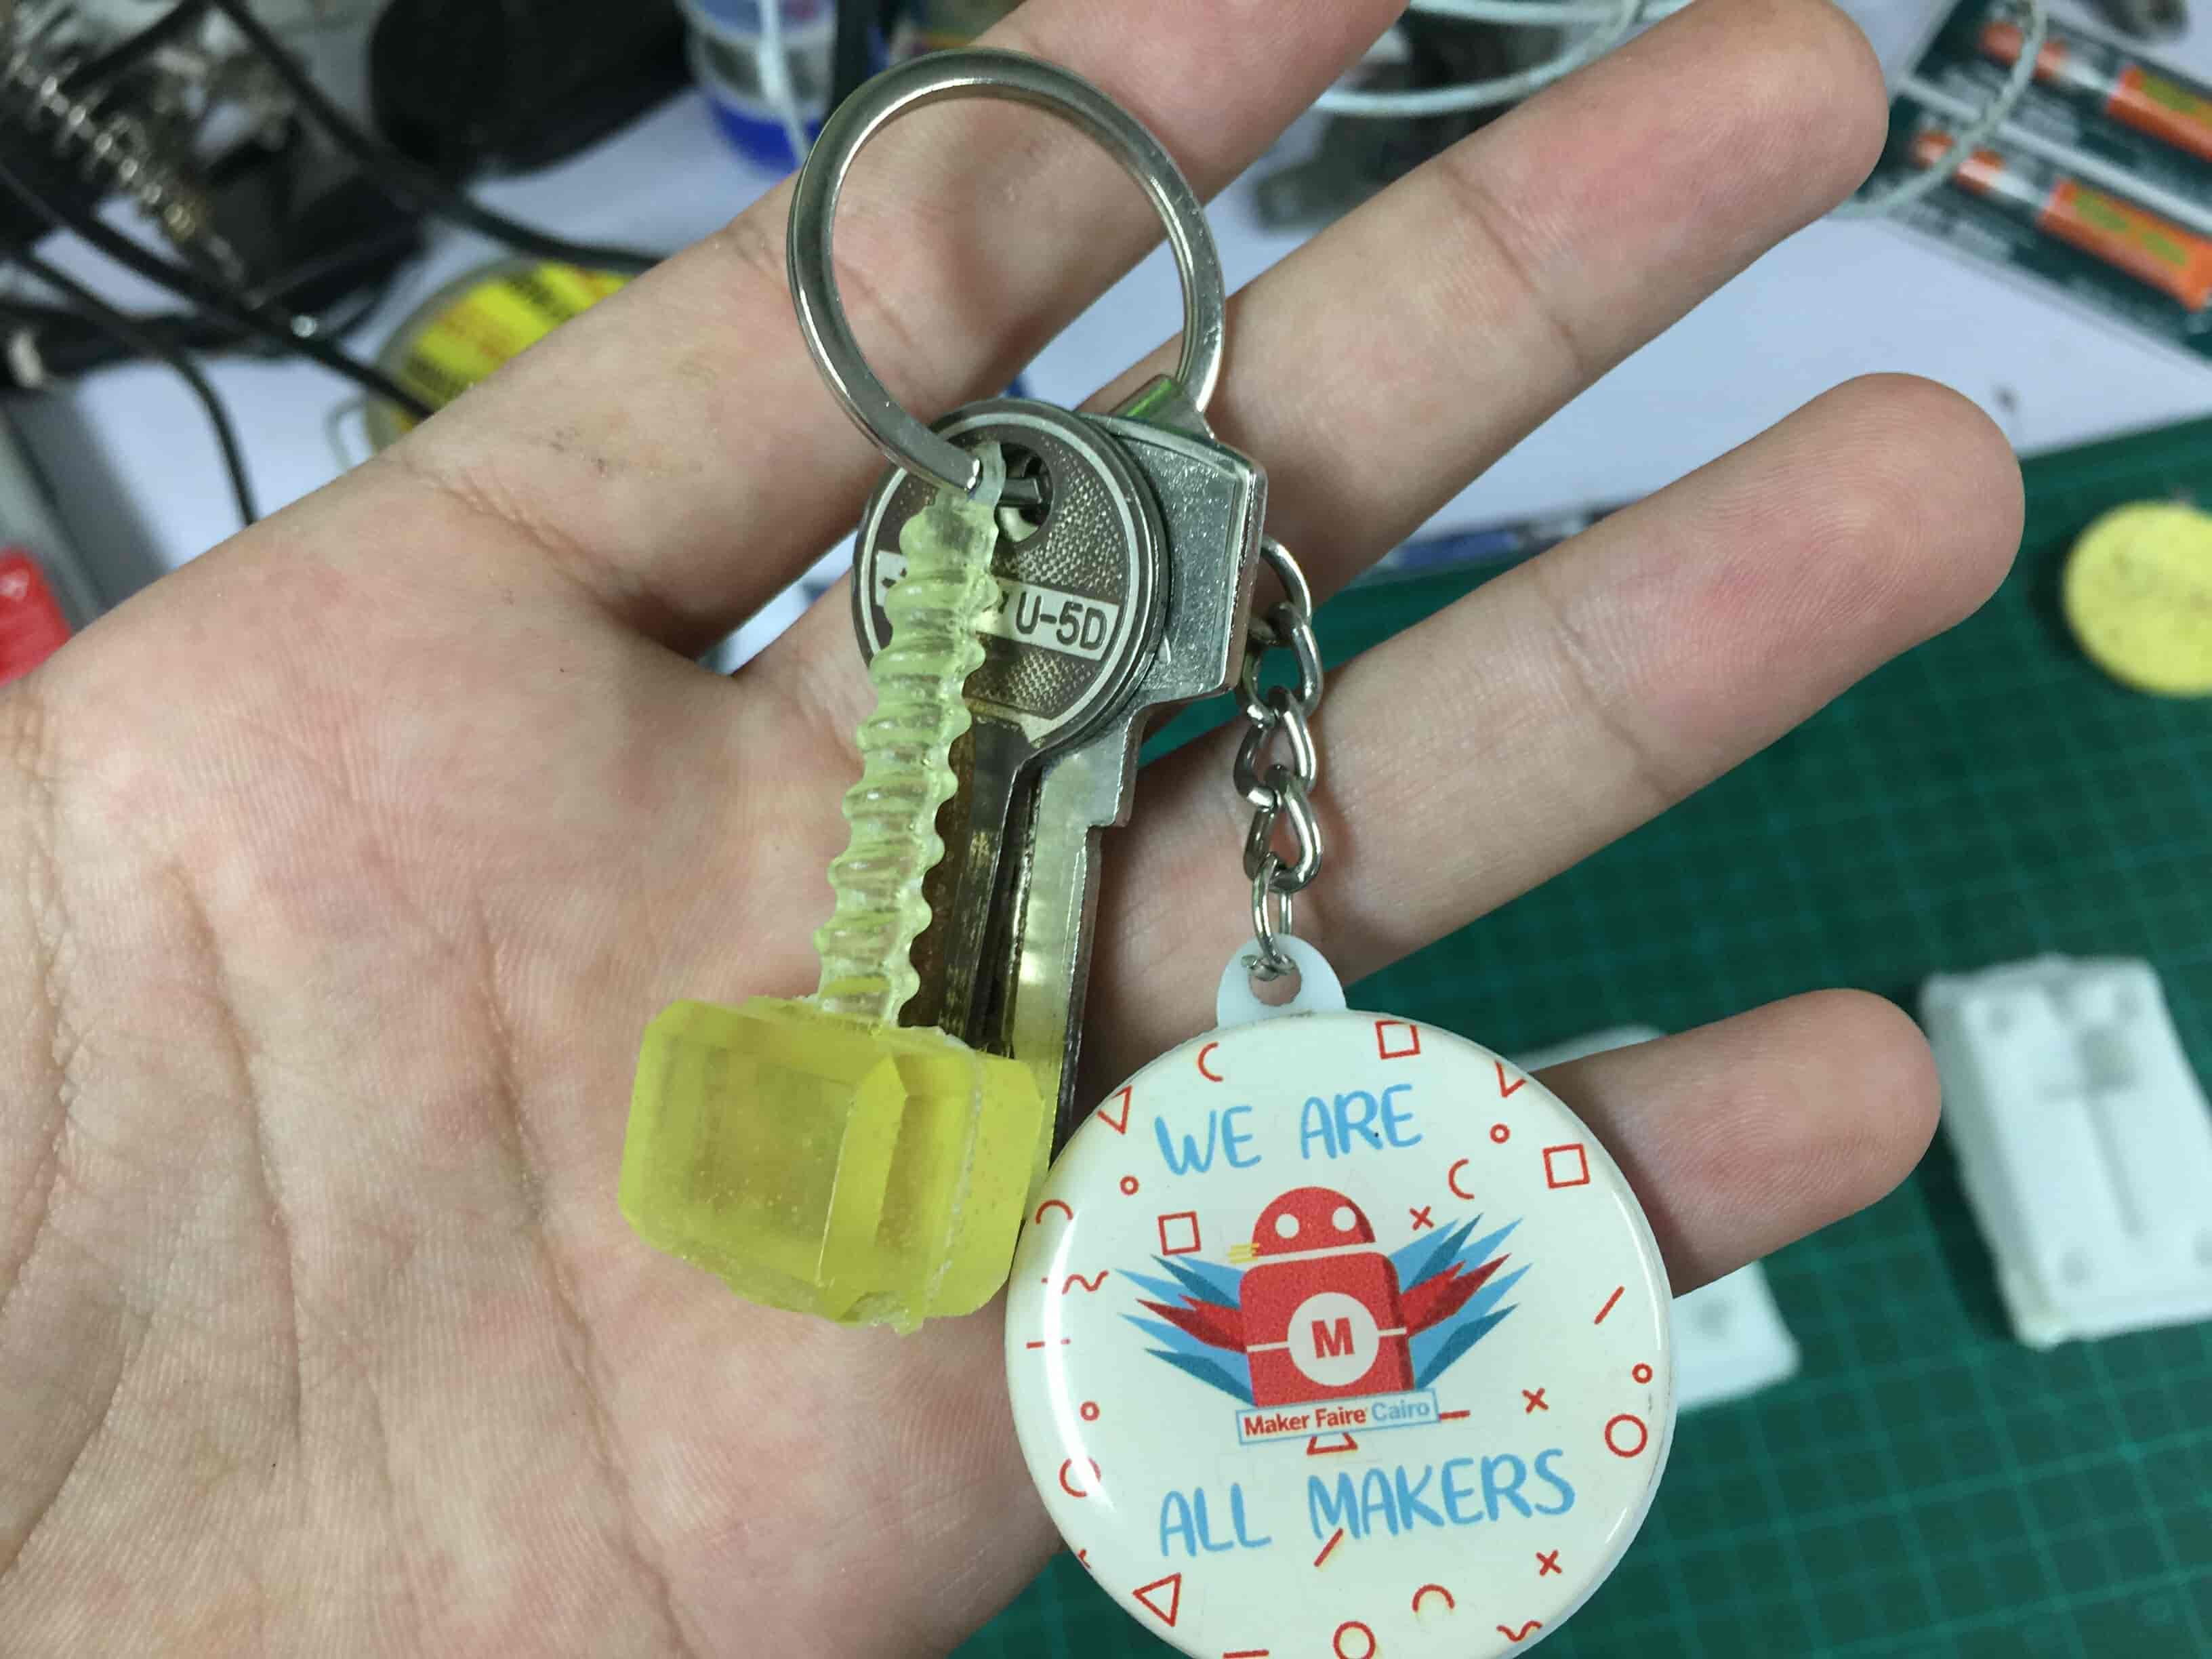
And here’s the final result!