02
Assignments
Group Assignments (1)
-
Test the design rules for your printer(s).
-
Document your work and explain what are the limits of your printer(s) (in a group or individually).
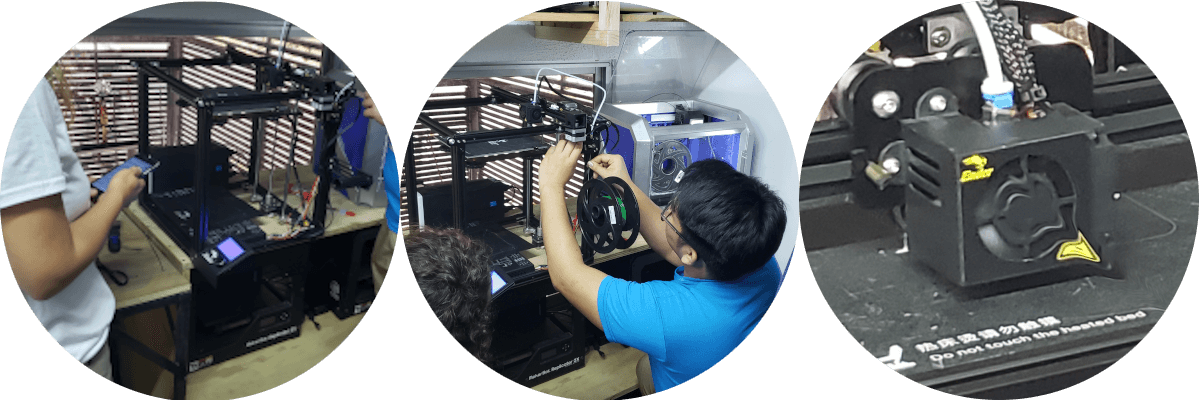
For the group assignment visit the partner page Roberto Broce (3D Scanning and Printing) This week we will use the 3D Ender-5 (Creality) printer, which uses ABS, PLA and TPU filaments, whose dimensions are as follows:
- Size of the machine: (450 mm. x 450 mm. x 450 mm.).
- The work area or bed is ( 200 m.m. x 0200 m.m.) or 40,000 mm2.
Individual Assignments (2)
PRINT (1/2)
-
Design and 3D print an object (small, few cm3, limited by printer time) that could not be easily made subtractively
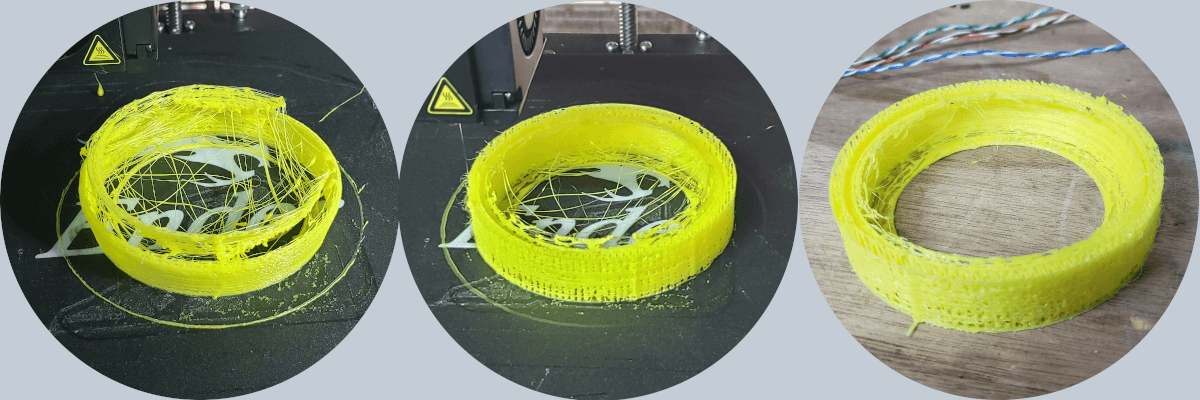
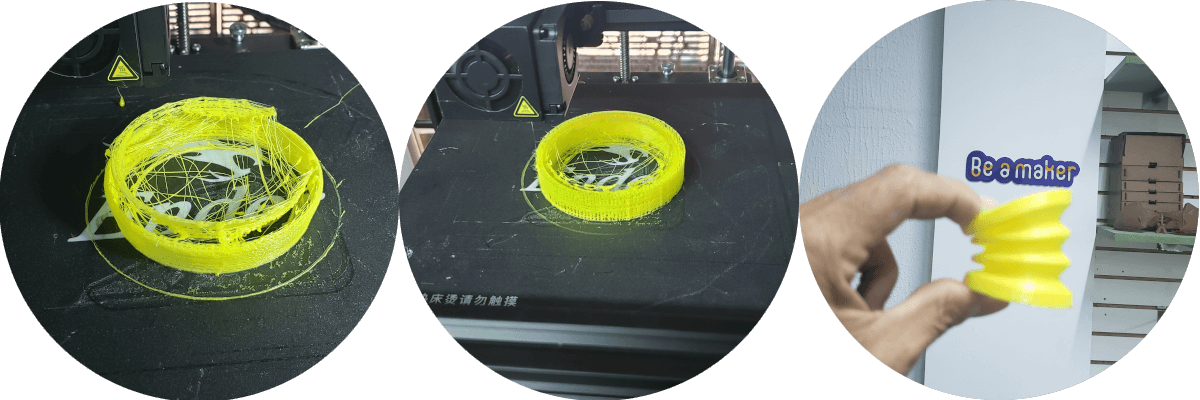
For this topic I wanted to start testing 3D printing with TPU filament, since my final project comprises a high percentage of the outer cover of this material in principle.
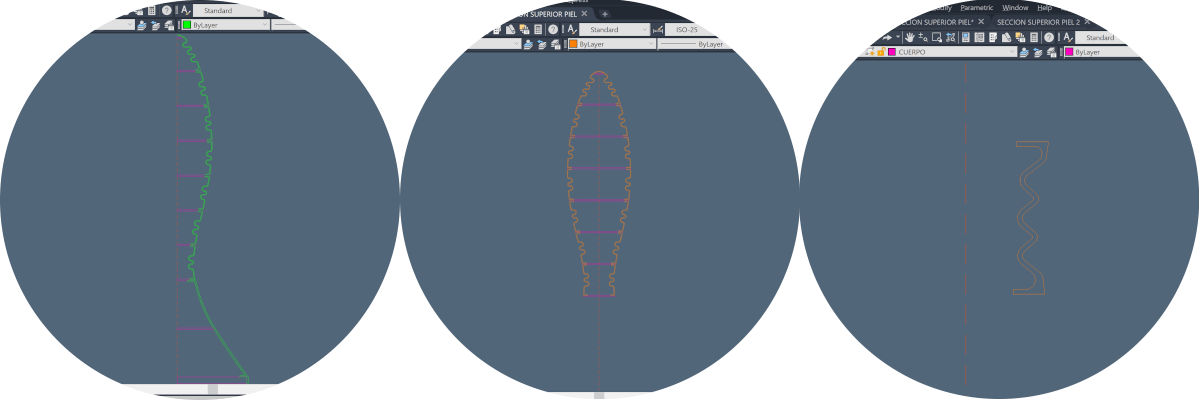
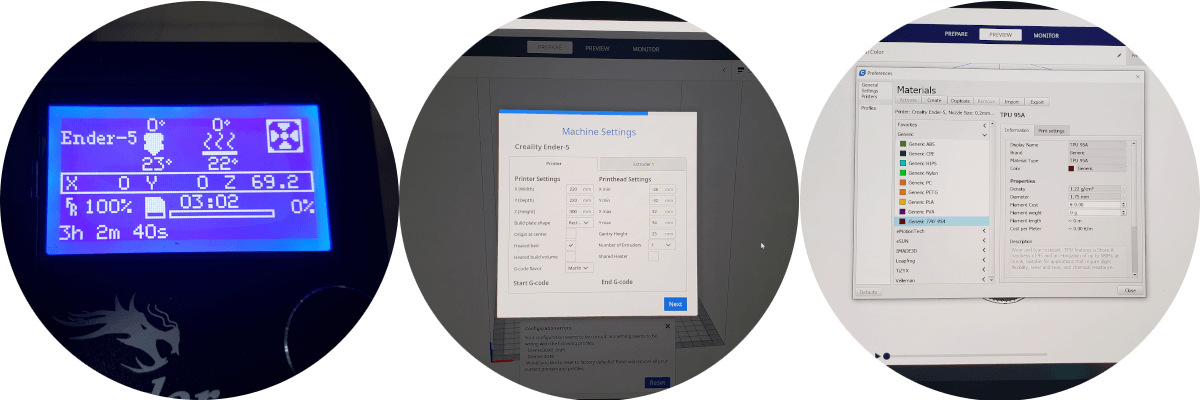
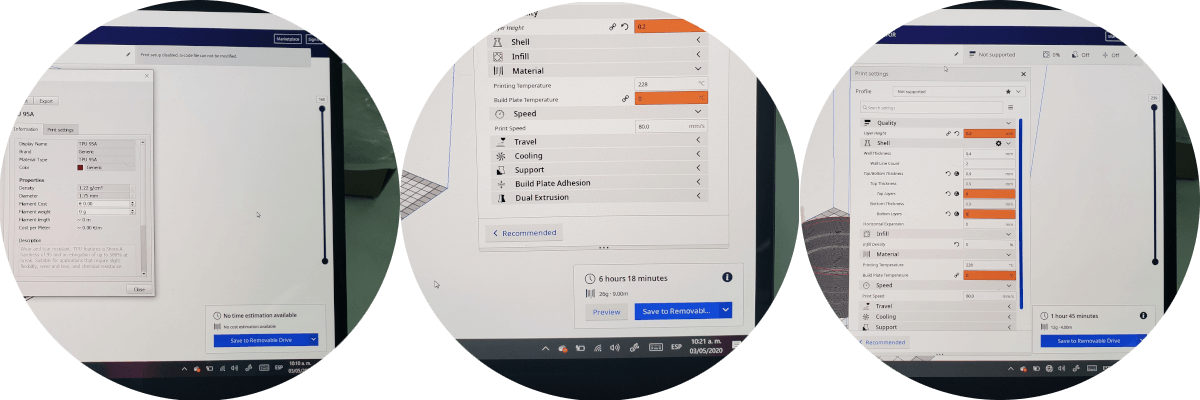
For 3D printing with the latest model, I had to make changes at the design and modeling level, taking into account the factors of torsional stresses, flexion and shear. In the preparation place the parameters:
- Layer Height: 0.15 mm.
- Wall Thikness: 1 mm.
- Infill Density: 30 %.
- Infill Pattern: Triangles.
- Printing Temperature: 225°.
- Build Plate temperature: 30°.
- Speed Print: 15 mm/s.
- Enable Retraction: 0.
- Fan Speed: 100%.
- Suppport Overhang Angle: 0.
- Build Plate Adhesion Type: Brim.
- Printing time: 5:09 h.
- Filament: 66 gr.
Print (2/2)
For this exercise I decided to use the Lithophane technique, because it seemed to me a very interesting and different technique, for which I was looking for an image of my own, since I was going to make a gift; just like my first experience practicing this week.
Prepare the .jpg image by editing it in Gimp and exporting it as .png.
Bring the image to 3dp.rocks (Lithophane) inserting it and setting the parameters until you get a model suitable for me.
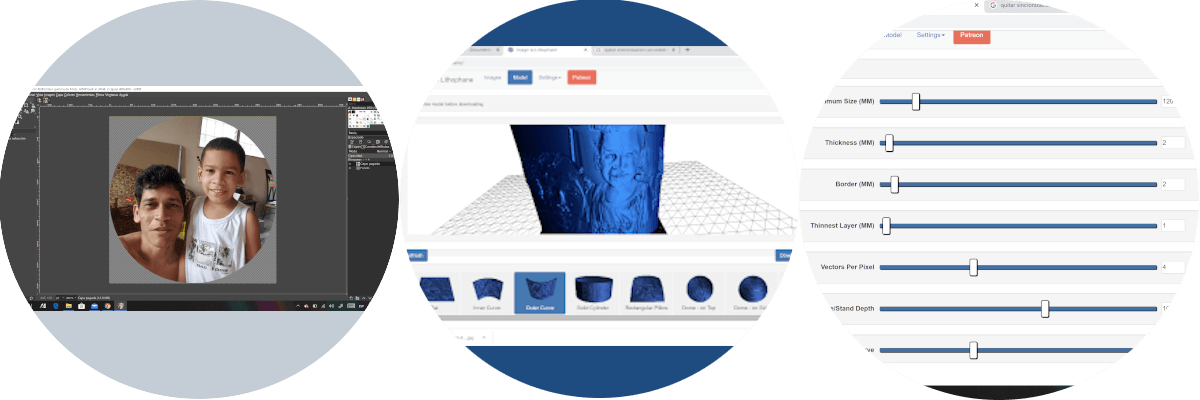
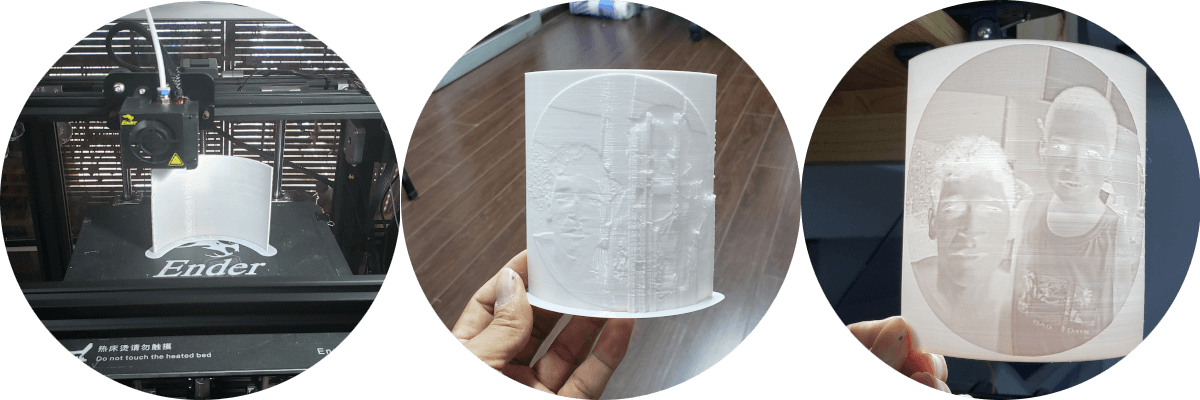
After this, the file was downloaded as .stl This file was configured in Ulimaker Cura to print in Ender Creality 5.

For the printing process, we can only wait for the final product to come out, but not before changing to the appropriate filament according to the parameters given to the file in the Ultimaker, levels the printer plate and sets the starting temperature so that the extruder it gets warmer.
Scan (2)
-
3D scan an object, try to prepare it for printing (and optionally print it)
In this exercise I made a couple of attempts with the Kinect Xbox 360, but I did not do very well in the scanning attempts, so recording that there is a Sense 3D scanner in the Faculty of Architecture and Design, which was purchased several years ago, but It was connected and unused so I decided to revive it, I made the contact 3D Systems Software Support and almost instantly the equipment was up and running.
With Kinect, a series of photos is taken (a minimum of 40 photos is recommended), to generate a mesh of points and each photo can be edited before proceeding to generate the 3D model. This procedure generates a file folder for each photo taken with its own characteristics.
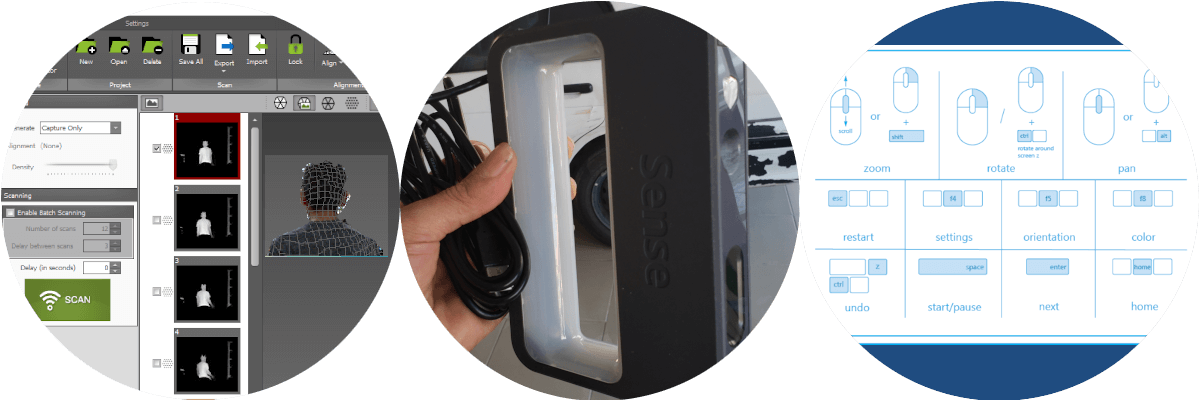
My daughter agreed to be my model and the truth was that everything went very well, except that the scanner takes the reflections of light that reach the model, we had to create a closed set species to make the sign, in fact it took a lot little time.
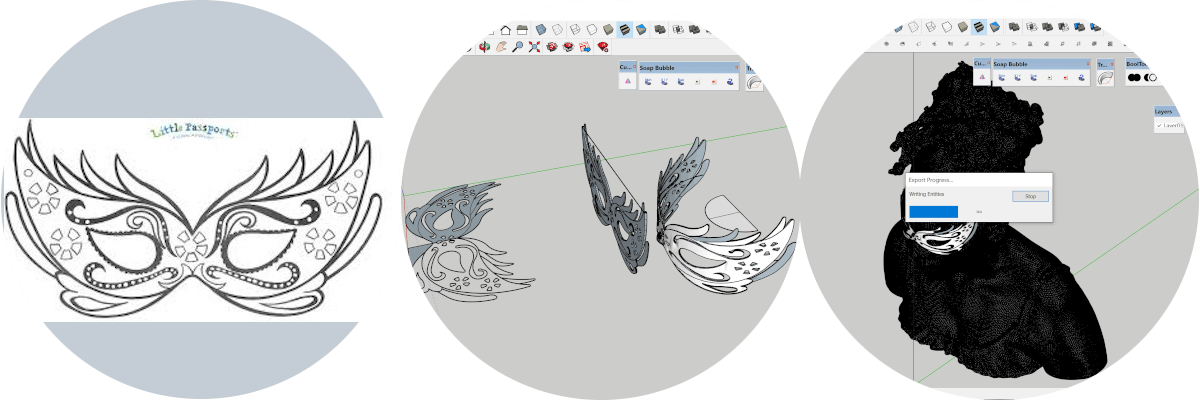
To change the scanned model a bit, we decided to download a mask image and create the volume of it. I tried several softwares, but it was difficult to fold the 3D model of the mask, until it occurred to me to use SketchUp with a plugin called Shape Bender and it really was simple, although first I tried with TrueBend and due to the position of the translation axis I couldn't, although first I tried with TrueBend and due to the position of the translation axis I couldn't.
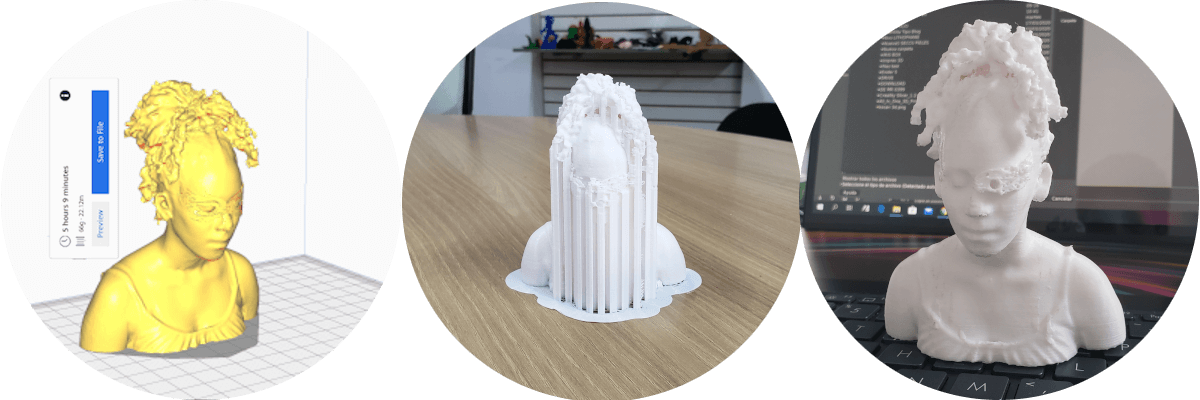
For 3D printing with the latest model, I had to make changes at the design and modeling level, taking into account the factors of torsional stresses, flexion and shear. In the preparation place the parameters:
- Layer Height: 0.15 mm.
- Wall Thikness: 1 mm.
- Infill Density: 30 %.
- Infill Pattern: Triangles.
- Printing Temperature: 200°.
- Build Plate temperature: 30°.
- Speed Print: 60 mm/s.
- Enable Retraction: Y.
- Fan Speed: 100%.
- Suppport Overhang Angle: 50.
- Build Plate Adhesion Type: Brim.
- Printing time: 5:35 h.
- Filament: 74 gr.
Inconveniences - Delays
- The inconveniences presented in the printing of the Scan 1 were null in the Lithophane, because it is an excellent presentation technique, however I tried to print the skin of my final project and it was impossible, regardless of the 3D printer I used, including Ender 3, the Ender 5, the Dremel 3D40 and finally the Makerbot Replicator 2, the latter gave me better results, but they were not satisfactory. I am changing the section of the skin to see if it got better results, although I already lost the account of the changed files.
- In the scan I did not improve my situation with the assignment because with the Kinect XBOX 360, the light did not matter, the distance to the target, the results were disastrous, even use a rotating platform and even served as a model and nothing at all.