Project Management (WEEK 2)
This week I have started working with Git Bash , Gitlab ,MkDocks Template ,Markdown Language , HTML Language . plus i have start using tools for documentation as well
IMPORTANT NOTE : ALL OF MY IMAGES ARE POP UP IMAGES , IF YOU HAVE ANY PROBLEM READINGS THOSE IMAGES , PLEASE CLICK ON THEM AND THEY WILL ENLARGE AUTOMATICALLY AND YOU CAN READ THEM EASILY
Git
GitLab is a web-based DevOps lifecycle tool that provides a Git-repository manager providing wiki, issue-tracking and CI/CD pipeline features, using an open-source license, developed by GitLab Inc. The software 2 was created by Ukrainians Dmitriy Zaporozhets and Valery Sizov, and is used by several large tech companies including IBM, Sony, Jülich Research Center, NASA, Alibaba, Oracle, Invincea, O 'Reilly Media, Leibniz-Rechenzentrum (LRZ), CERN, European XFEL, GNOME Foundation, Boeing, Autodata, NVIDIA, and SpaceX.
The code was originally written in Ruby, with some parts later rewritten in Go, initially as a source code management solution to collaborate with his team on software development. It later evolved to an integrated solution covering the software development life cycle, and then to the whole DevOps life cycle. The current technology stack includes Go, Ruby on Rails and Vue.js.
It follows an open-core development model where the core functionality is released under an open-source (MIT) license while the additional functionality is under a proprietary license.
GitLab is considered the first Ukrainian unicorn valued more than $1 billion
Starting with Git and Web Development
Step 1 : Installing GIT
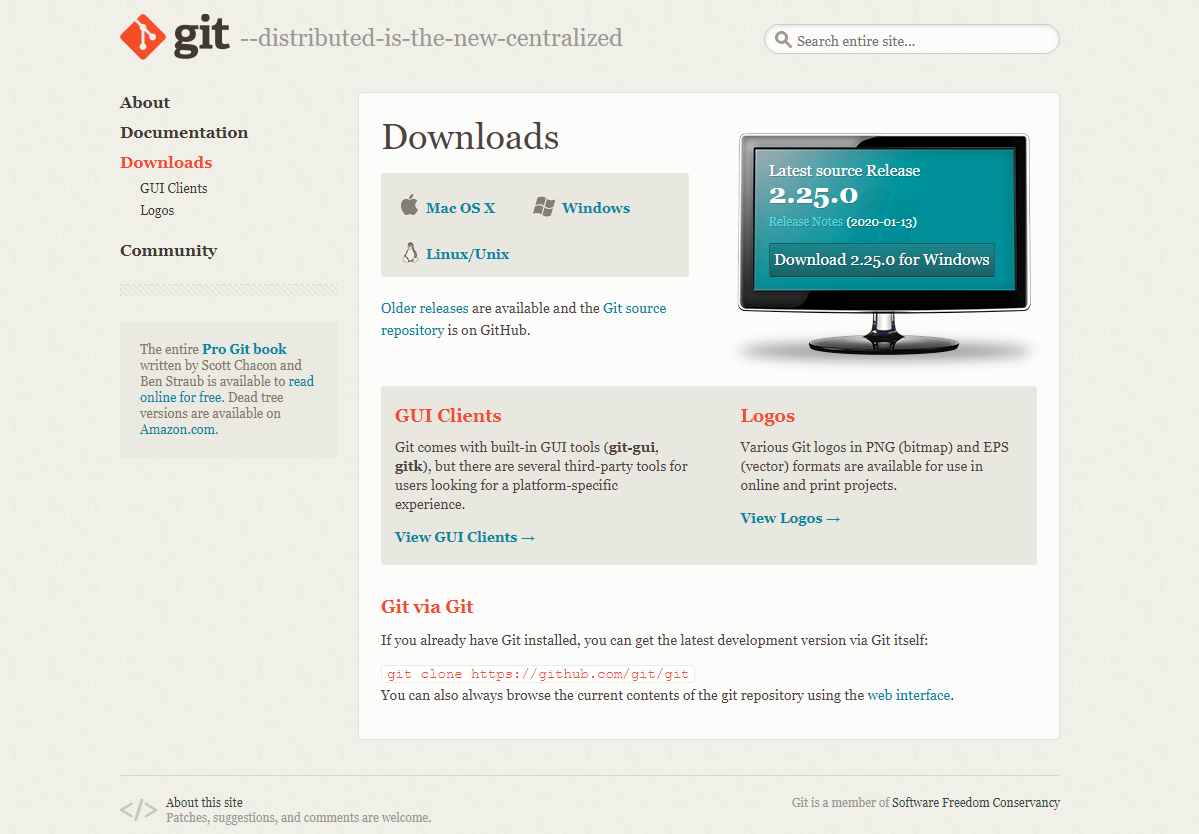
* Before getting started you need to download GIT bash Through this You will be guided to the official page of GIT and you can download the Original software from there.
* Once you have downloaded the software , please make a folder in your system ,(somewhere you have plenty of spcae and it should be a liitle bit organised) because for next 6 months this place is going
to be the place where you are going to add the photos , video and downloadable files you are going to take while documentation
* and change the name of folder to your name
Step 2 : Configure Git
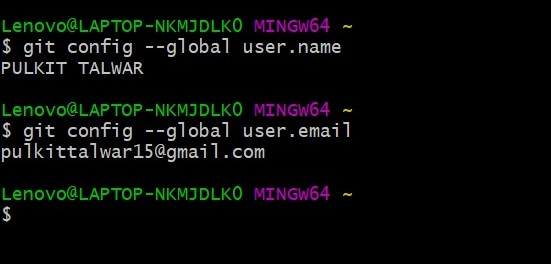
Pls open git bash in your system after installing
* Add your user detail 's like Name and Email id
                                             $ git config --gloabl user.name "PULKIT TALWAR"

 $ git config --global user.email "pulkittalwar15@gmail.com"
Step 3 :Defining path
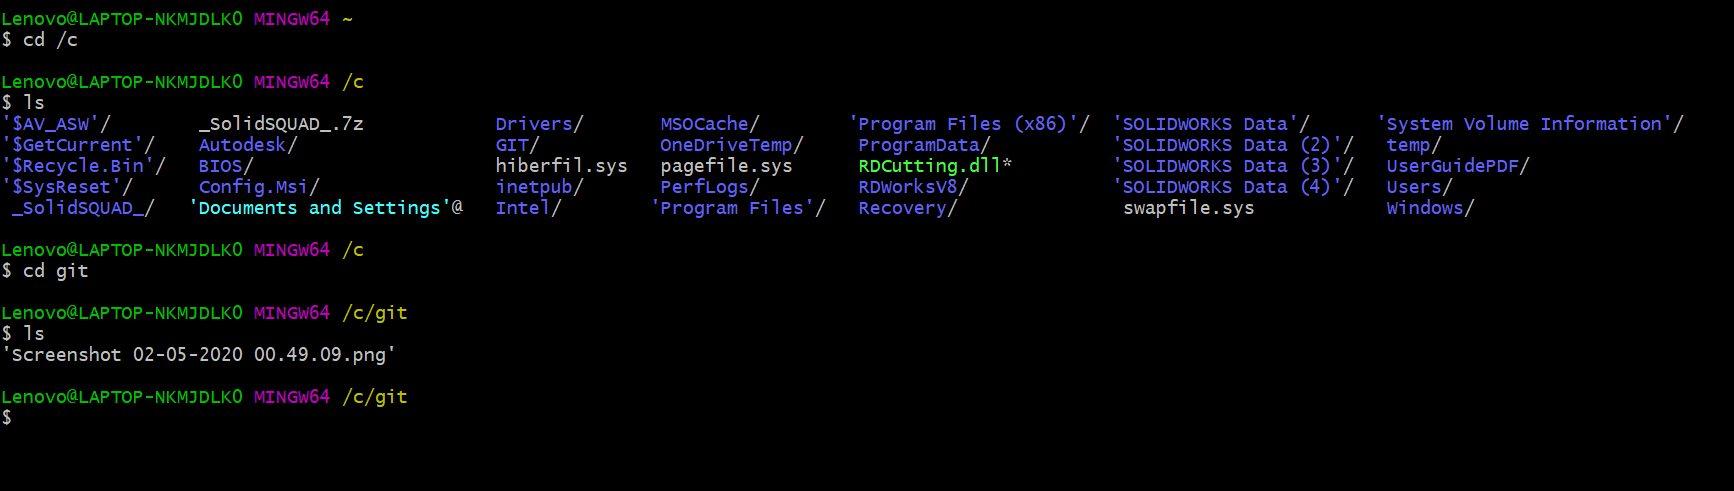
After the folder is made , you need to follow these steps
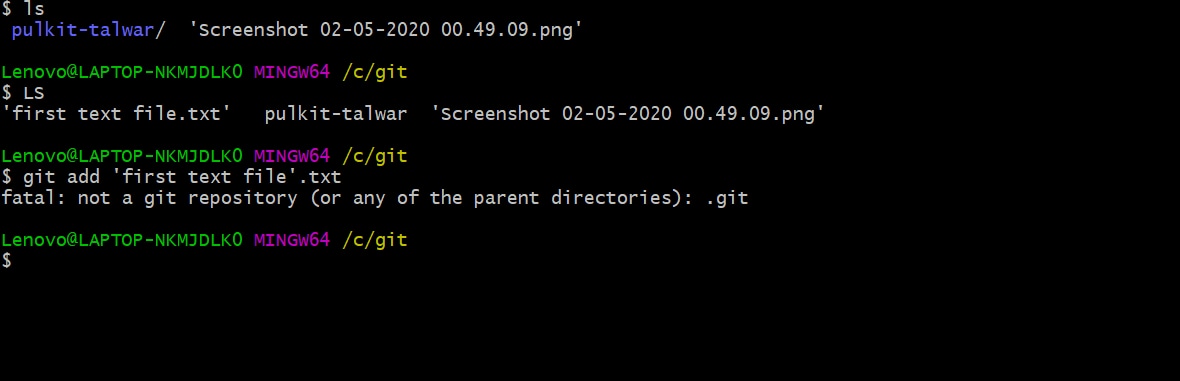
1. Open Git bash in your system
2. Enter this command cd/c ,cd stands for change database and /c is the directory where you have made your folder ,it can vary person to person that where he/she has added there
folder
3. Then next command is ls, ls stands for listen , when this is enter it will show you all the folder in that directory
4. Then next xommand is cd git , by giving this command you have selected that specific folder
5.Then next command is ls, Again giving this command the git bash will show what files this forlder have , in my case there is a screenshot
This process we did unti now is called defining path to the folder
Step 4: Clone and checking folder

* Commands for clonning the repository
                                                $ git clone https://gitlab.fabcloud.org/academany/fabacademy/2020/labs/akgec/students/pulkit-talwar.git

 $ git config --global user.email "pulkittalwar15@gmail.com"
well cloning here meant by making a copy of the repository , which is made for you by fab academy team , when we clone we got a set of some pre -configured file from the our gitlab
Step 5 : Creating text file
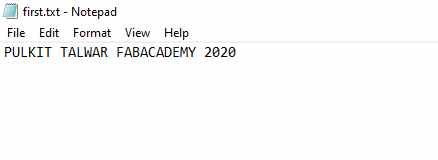
For testing purpose you are required to create a text file
* RIGHT CLICK ON MOUSE > NEW > CREATE TEXT document
* Write whatever First comes in your mind
* Name it first.txt ( or anything you like )
The purpose of creating a file was to initiate a link btw our local repository and our gitlab repository , because at this point we only have a oneway link to our gitlab repository by adding some file the link will be 2 - way and whatever we change locally will bechanged online when the files are added
Step 6 : Add text file
* Now for testing, that can you push a file to your Git repository only, we are require to add and push the created file online
* write this command in your Git bash with the file name which you have given
$ git add first.txt
Well here adding means you have made a change in your local repository now you want that change to be made similarly to your online page
Step 7 : Commit

After adding the selected file you need to commit it
* you need to add the name of the file with this specific command $ git commit -m"first".txt
Step 8 : Checking Status and Push
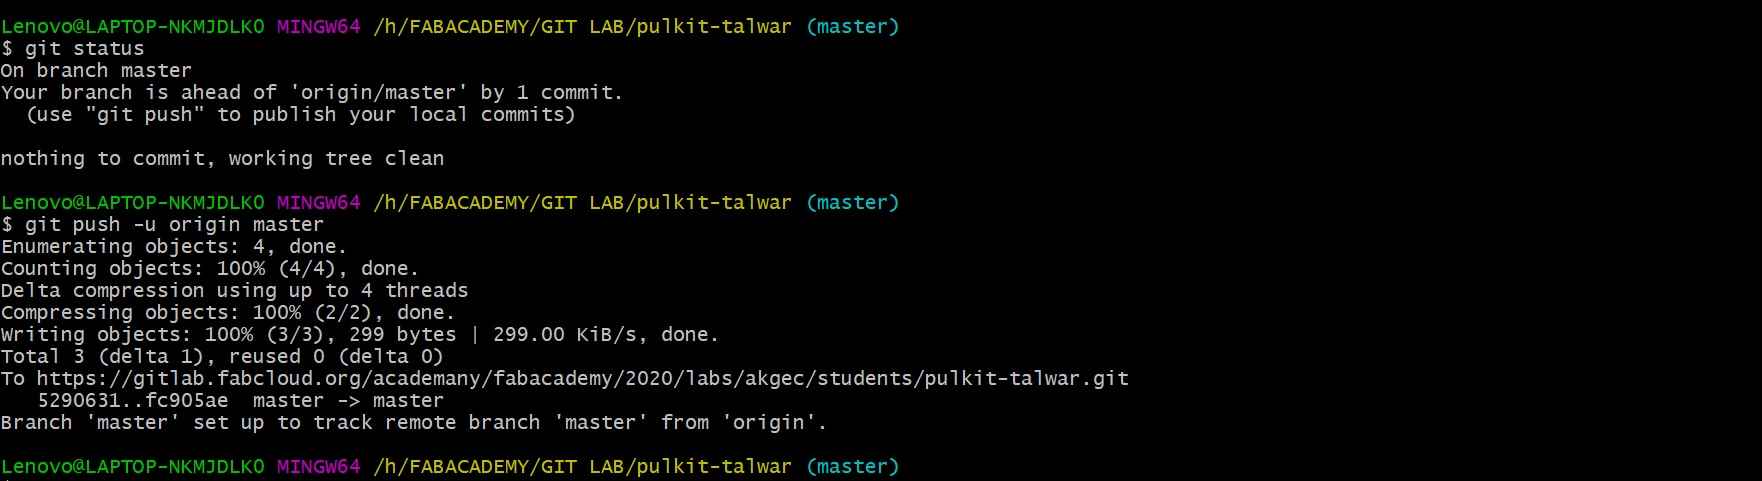
*Before finally pushing the file online you need to check the status for that input this command
$ git status
*and after that push the file online to your Git repository by inputing these commands$ git push -u origin master

For more information you can click on this and learn more about Git commands
Cheat Sheet
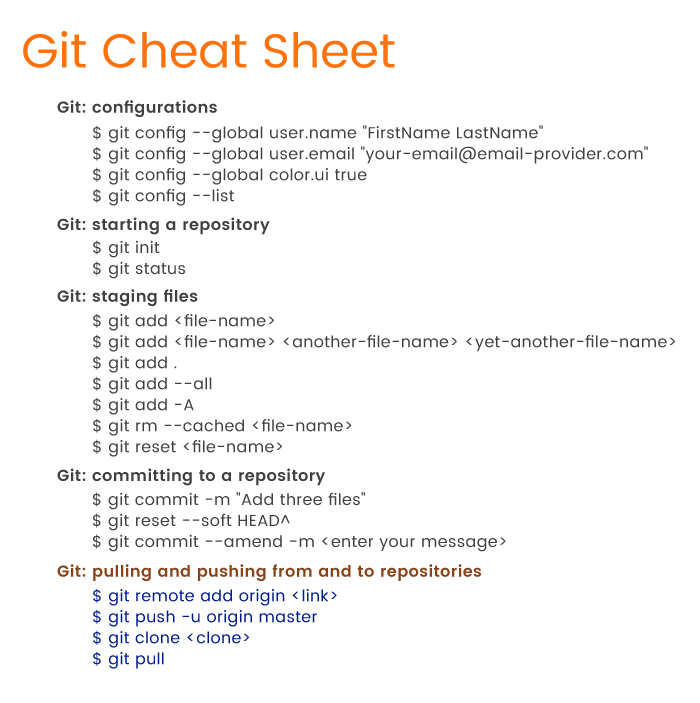
This is an cheat sheet and it have variouse basic commands which can be used to operate Git Bash
Website Development
Installation of Source Code Editor
Visual Studio Code is a source-code editor made by Microsoft for Windows, Linux and macOS. Features include support for debugging, syntax highlighting, intelligent code completion, snippets, code refactoring,and embedded Git. Users can change the theme, keyboard shortcuts, preferences, and install extensions that add additional functionality. The source code is free and open-source, released under the permissive MIT License. The compiled binaries are freeware for any use. In the Stack Overflow 2019 Developer Survey, Visual Studio Code was ranked the most popular developer environment tool, with 50.7% of 87,317 respondents claiming to use it.
You can download it through this
IMPORTANT NOTE : You need to download only Visual Studio Code , not the Visual Studio's as there is so no use of it , that software isheavy and not going to be use din anyway
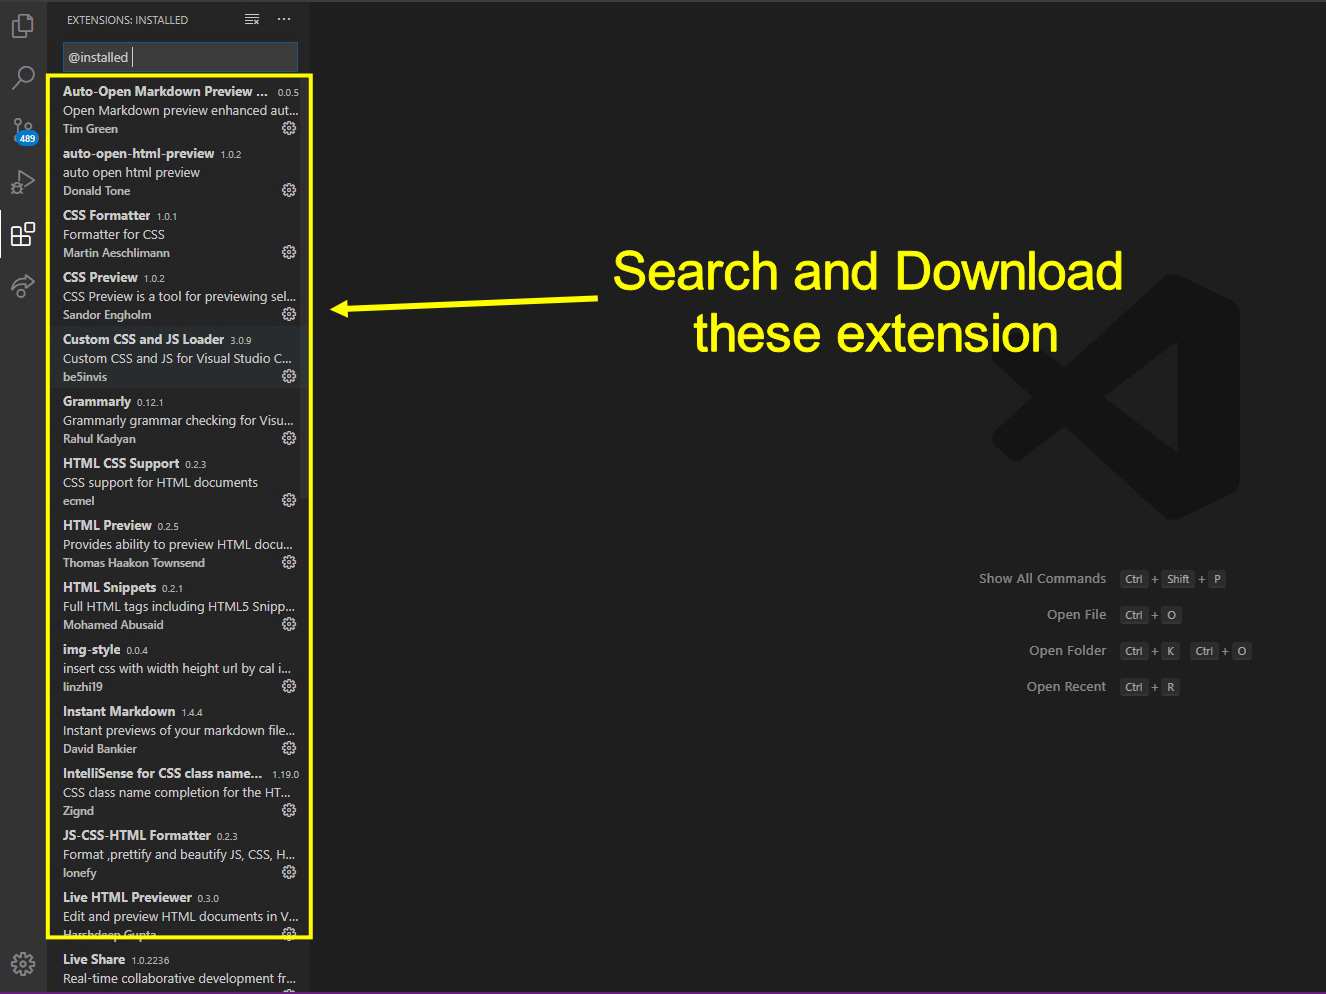
* After Downloading is completed open the Visual Studio Code
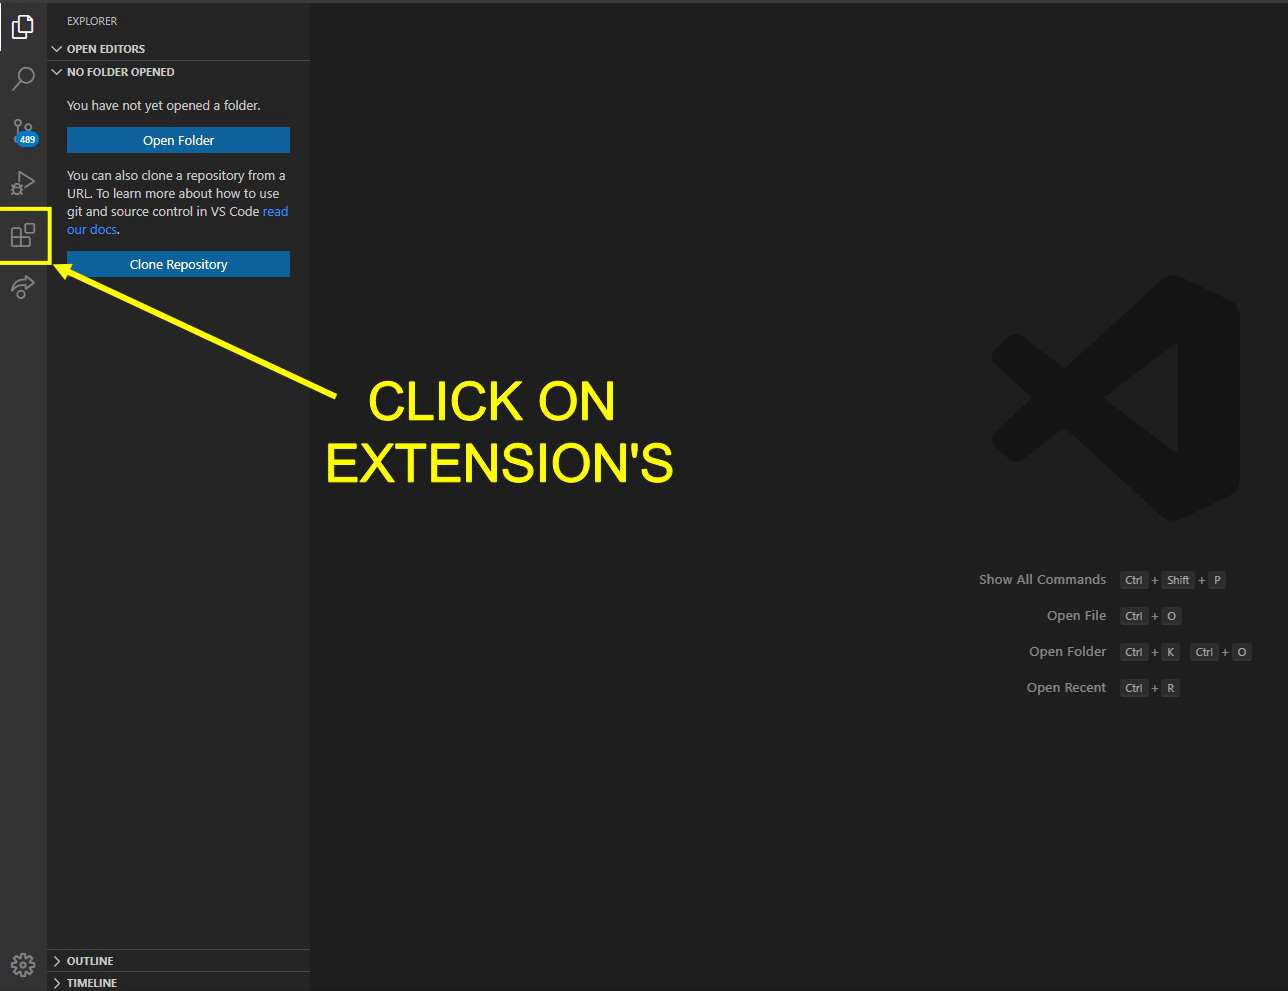
* Then click on the "EXTENSIONS TAB " in the top right column
* And download then given Extension's in the image
There are 2 Different ways in which you can easily work on website
1. By using the MK DOCKS template (Standard Way)
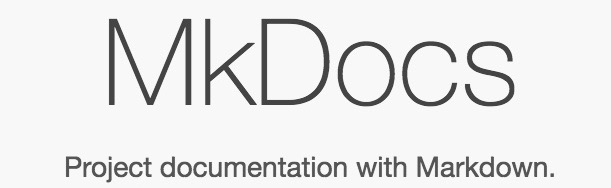
* MkDocks is a standard Documentation series of template , which is provided to us by FAB academany in partial made state for our initial working
* MkDocs is a fast, simple and downright gorgeous static site generator that's geared towards building project documentation. Documentation source files are written in Markdown, and configured
with a single YAML configuration file
For more information you can click on this and learn more about MkDocks
You need to learn MARKDOWN LANGUAGE to write basic code for deigning your site in MkDocks
Through this You can get to a tutorial for MARKDOWN Language
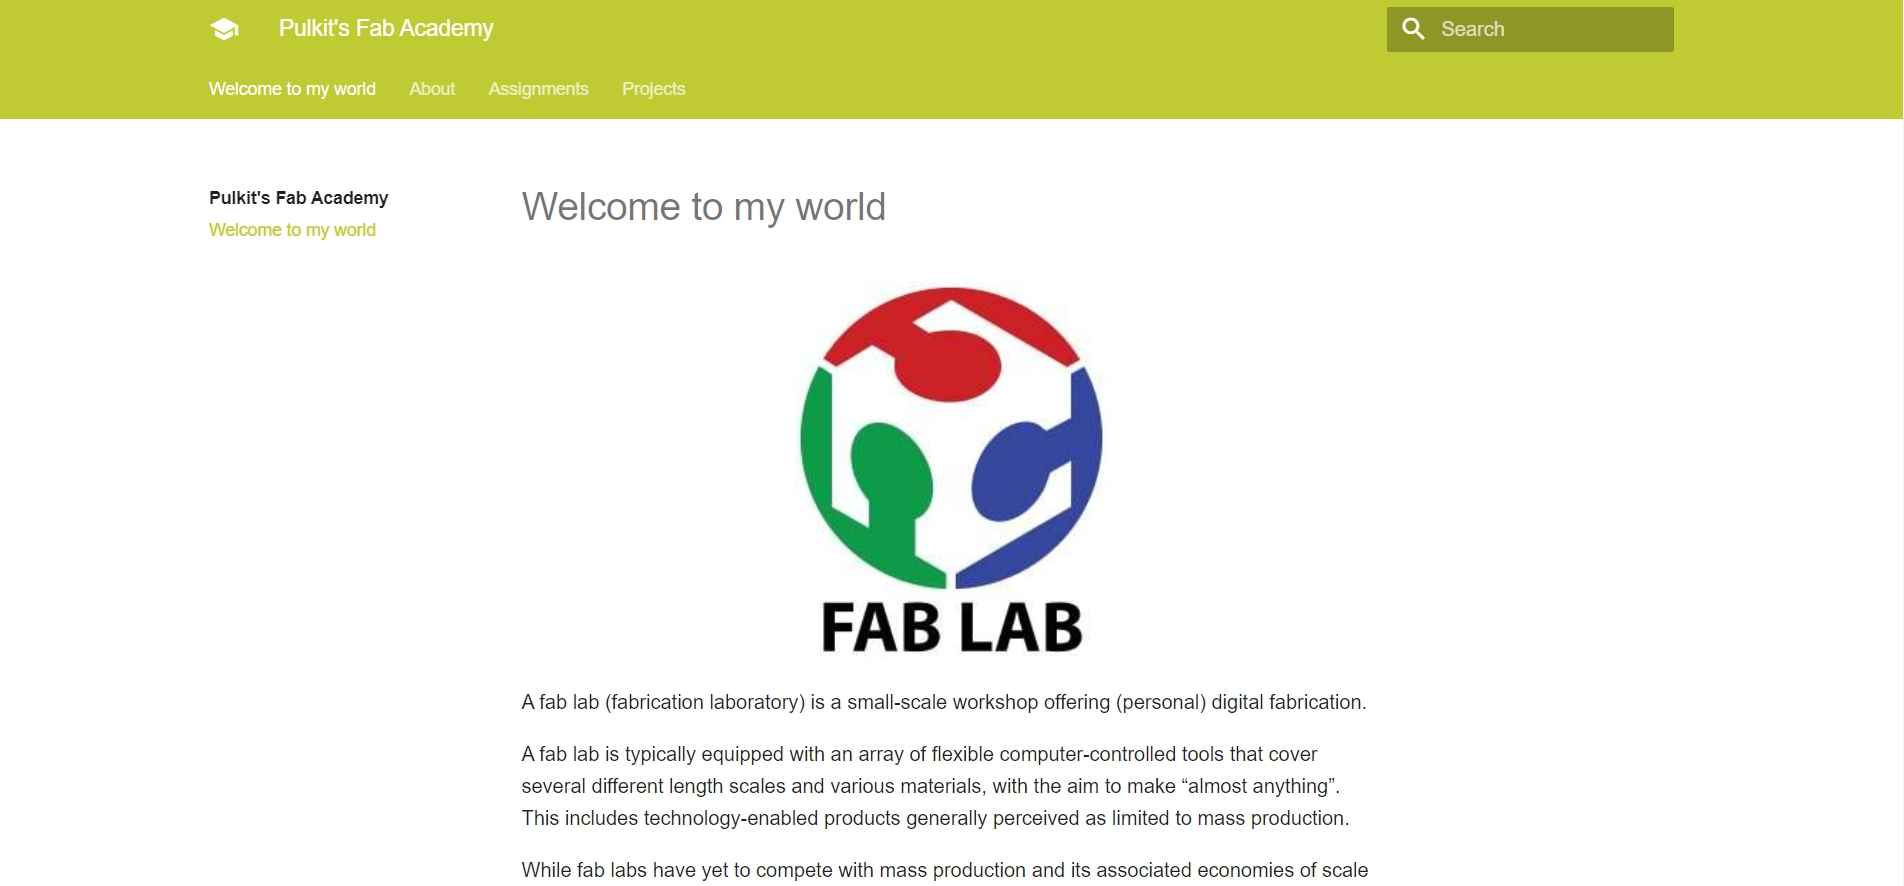
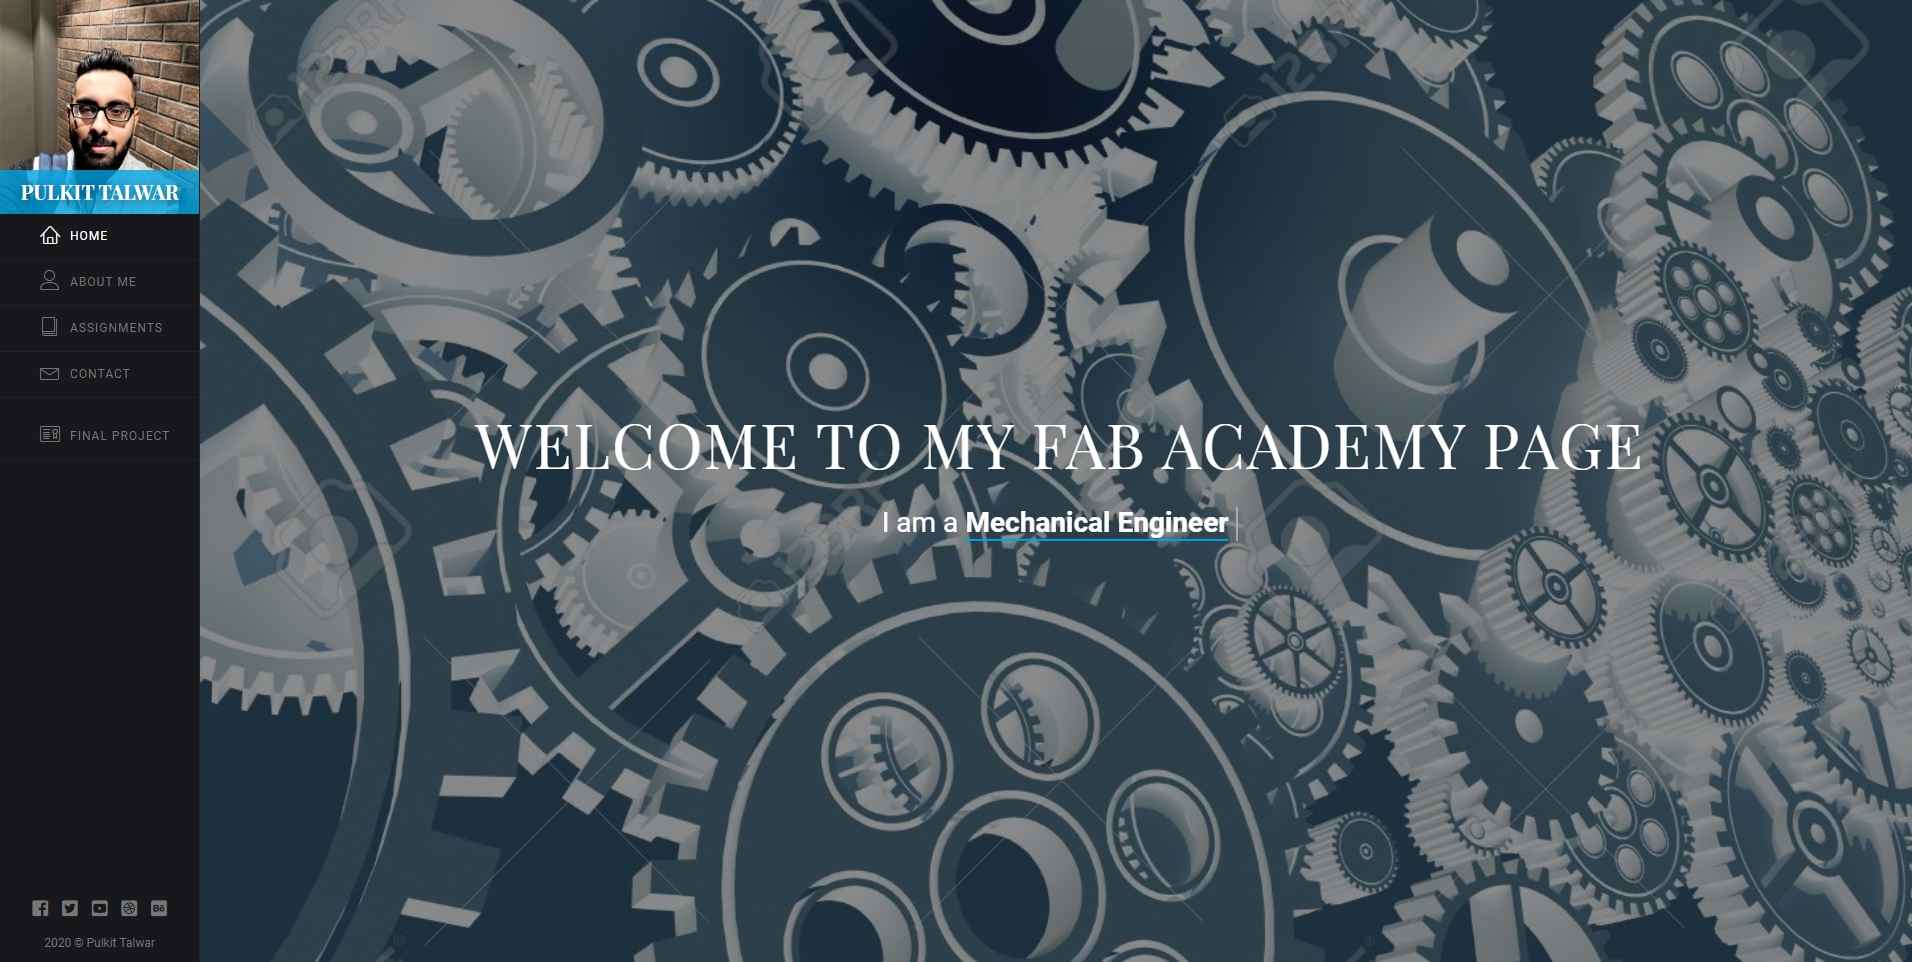
Learning Outcome
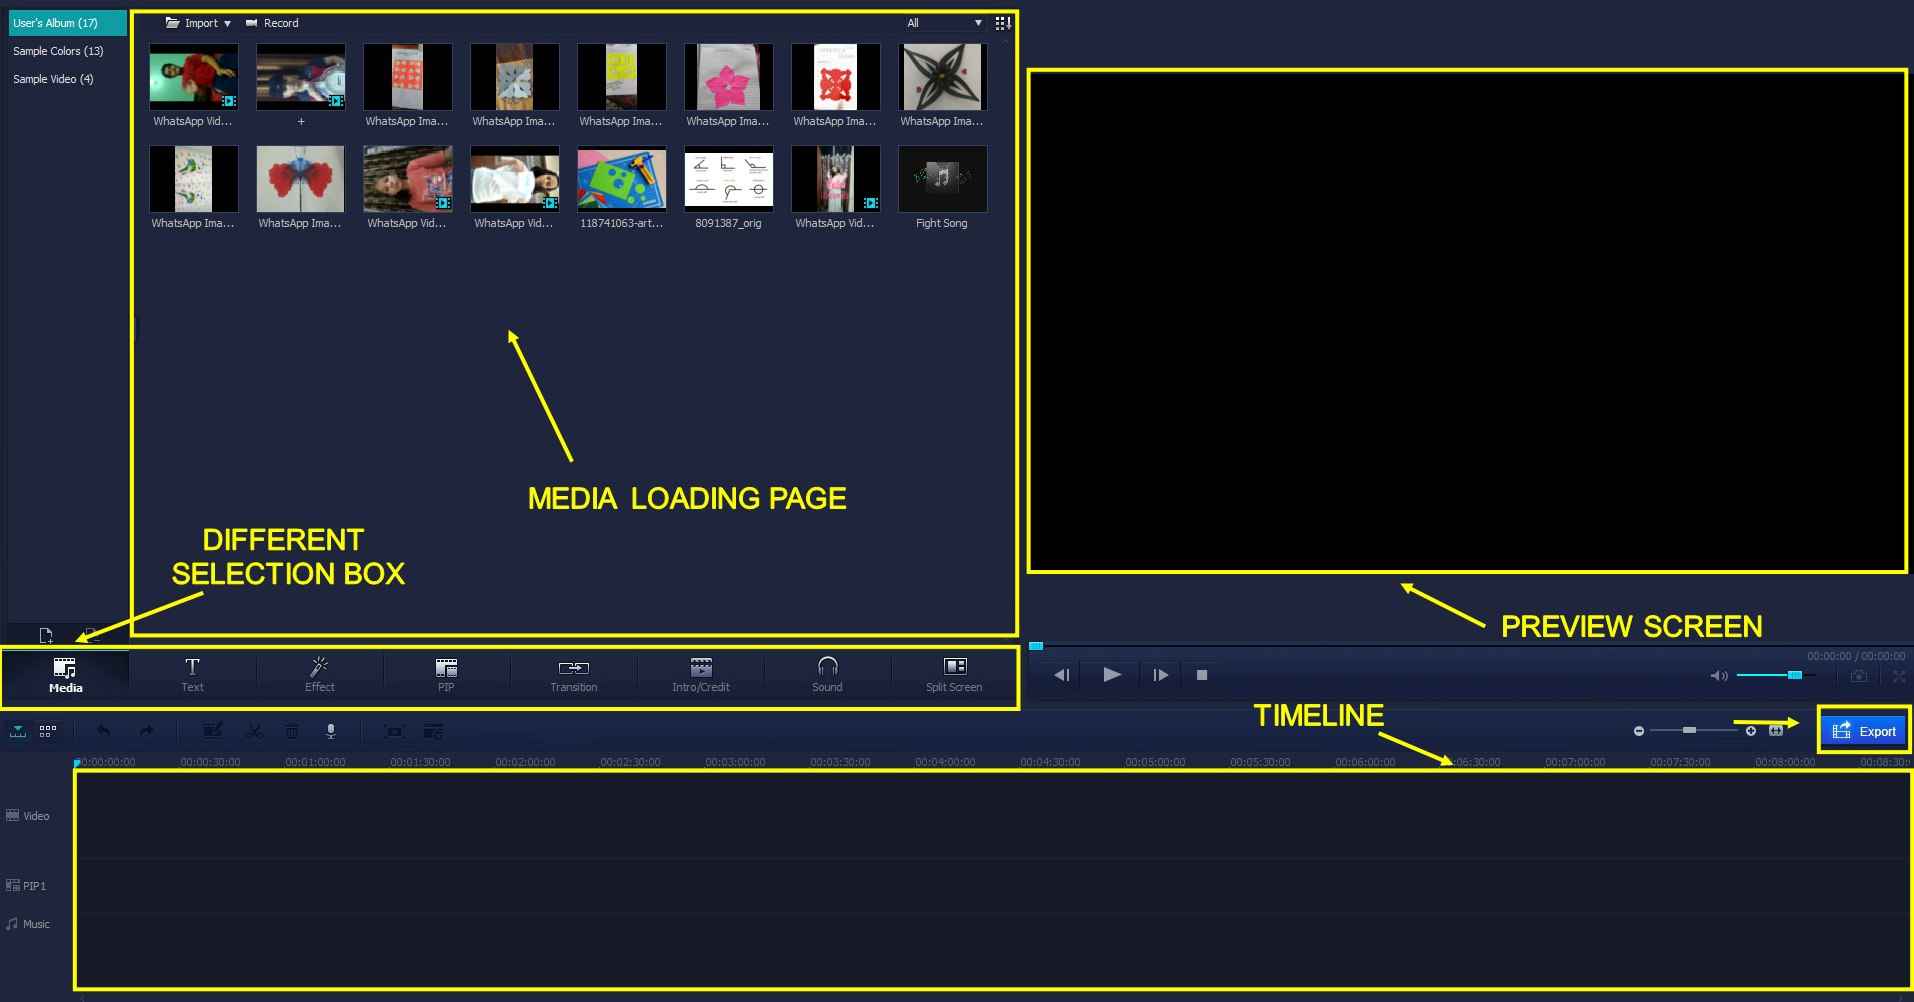
* Above image is of my site which i made on MkDocks, As I am not from the Programming background so intitially I prefer MkDocks , it is great way to creat and update your site ,but i miss lots of
thing which were restricted in mkdocks , start it is very comfortable and easy to manage, but it is very basic sight which lacks many complex operations and command and we are very restricted
in whatwe do
so after lot of experimenting with mkdocks i decided to switch to HTML
2. By using HTML based template
Hypertext Markup Language (HTML) is the standard markup language for documents designed to be displayed in a web browser. It can be assisted by technologies such as Cascading Style Sheets and scripting languages such as JavaScript
Similarly You need to learn HTML language for designing and working on you Webpage
W3Schools

Through this You will be guided to the official page of W3 SCHOOL and it is the best way to learn HTML and it have various tutorial's and you can try every different command on there page
IMPORTANT NOTE : It is highly recommended that you should go through variouse tutorials given there and also if needed to search any particular HTML command in future seach on this site , it is highly
                                                            usefull site
How to Select and apply HTML template based template for your site
There are basically 2 different way by which you can select your template
1. Search different online site for free HTML based template's and download them
2. Search sites of previously year students and select the template which most impresses you or suites to you
For second case there is a chance that you will not able to get name of that template or original files for that template so follow these stepsIn my case for start 7 weeks i was not happy with the Mkdocks based website , it is easy to use but it didnt support lot of functionality and i have tried everything and i was not able to do much and around 8 th week i stumble on this
website which i am working on ,this was made a student from Kochi Fablab named akhil joseph , but the problem with his website was he also didnt have the template for the website so he mirrored that website using the above software and i
also requrired to do so in my case .
There was a backdrop to this idea , you are going to mirror his whole website i.e , text files , downloadable , images ,videos and in simple words you install the persons whole repository so sometimes if you dont have knowledge of how to work on HTML you will not able to do much
HT track Website Copier
HTTrack is a free and open-source Web crawler and offline browser, developed by Xavier Roche and licensed under the GNU General Public License Version 3. HTTrack allows users to download World Wide Web sites from the Internet to a local computer. By default, HTTrack arranges the downloaded site by the original site's relative link-structure. The downloaded (or "mirrored") website can be browsed by opening a page of the site in a browser.
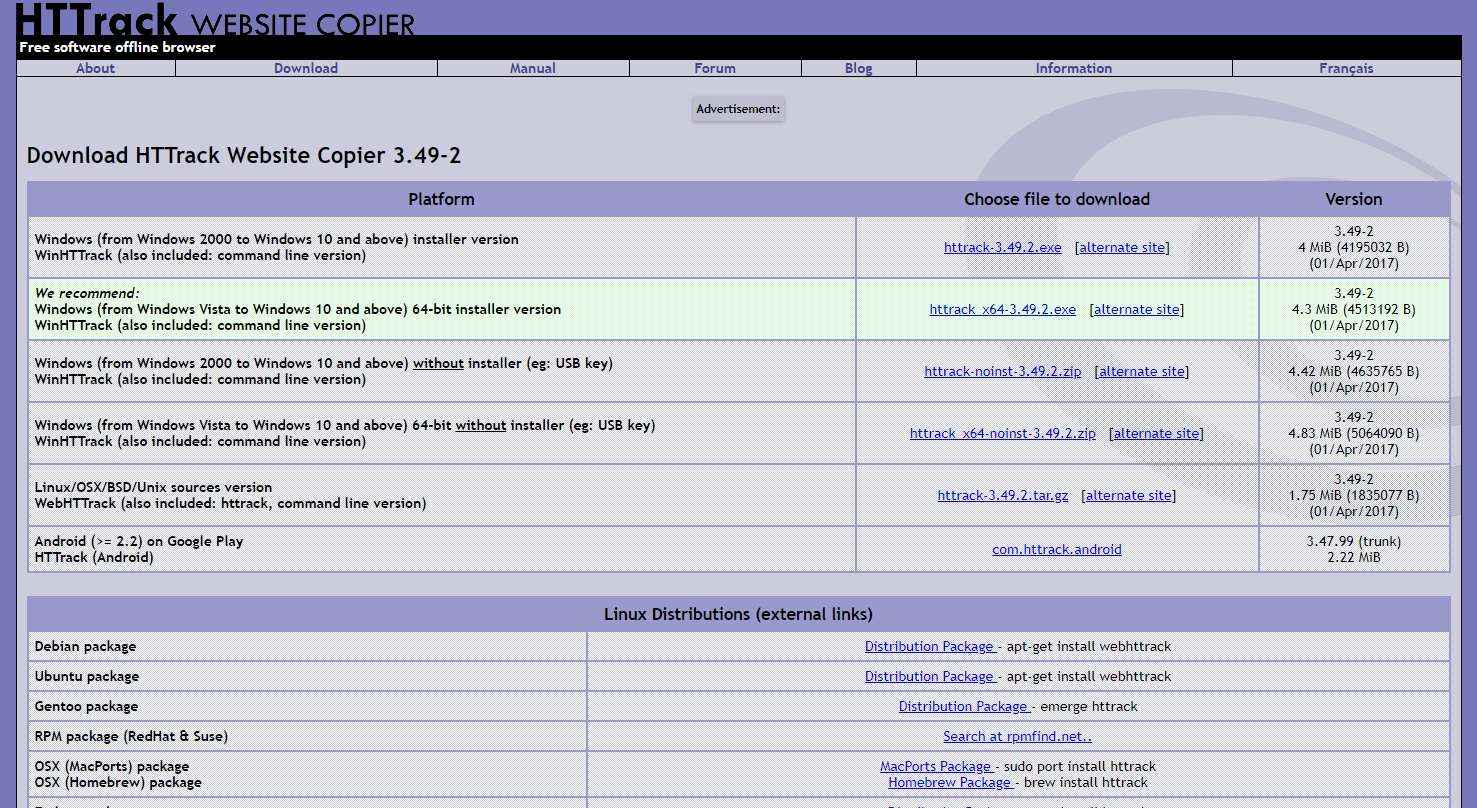
# Steps for mirroring someone's siteThrough this You will be guided to the official page of HT track website copier and can download the software according to your system requirement.
STEP 1: Go to the Official site of HTtrack Website copier through the the link given above
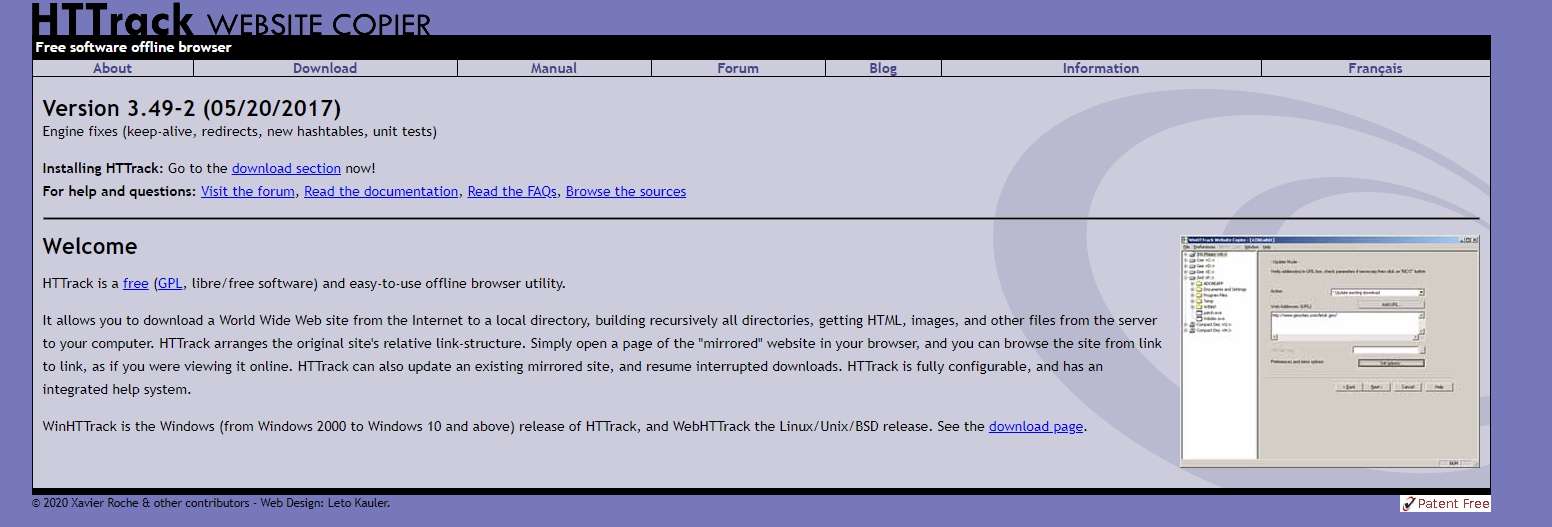
STEP 2: Download the software according to your system configuration
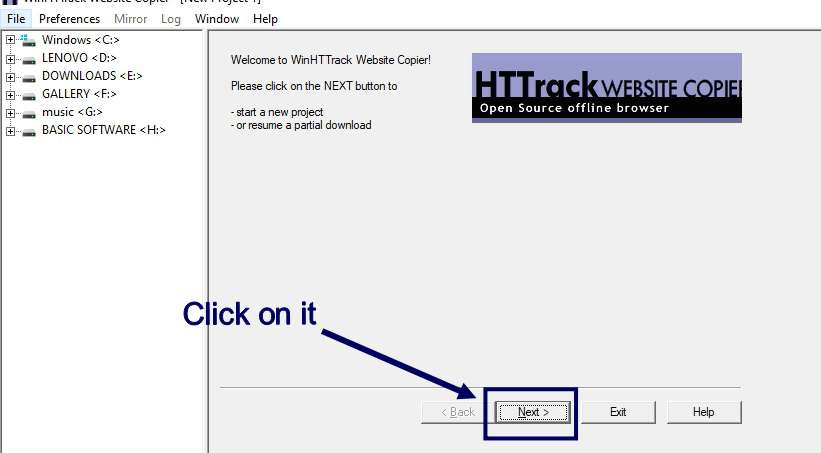
STEP 3: After the Downloading of software is completed, open it and click to the"NEXT" button
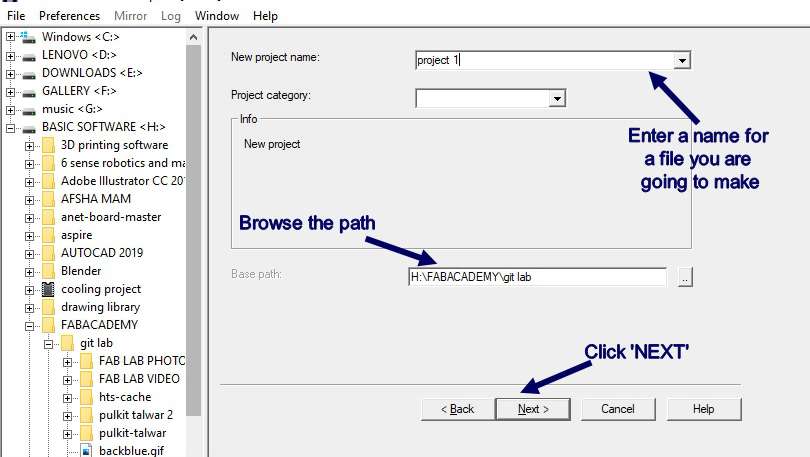
STEP 4:
1. Provide a new name to the project
2. Browse the path where you want to save the project
3. The again click "NEXT"
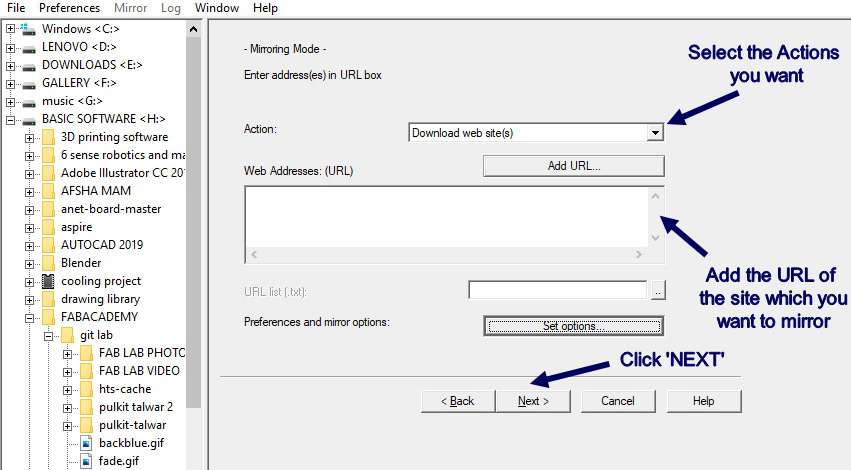
STEP 5:
1. Choose the Action you want to take
2. Copy-paste theURL of the page you want to mirror
3. The again click "NEXT"
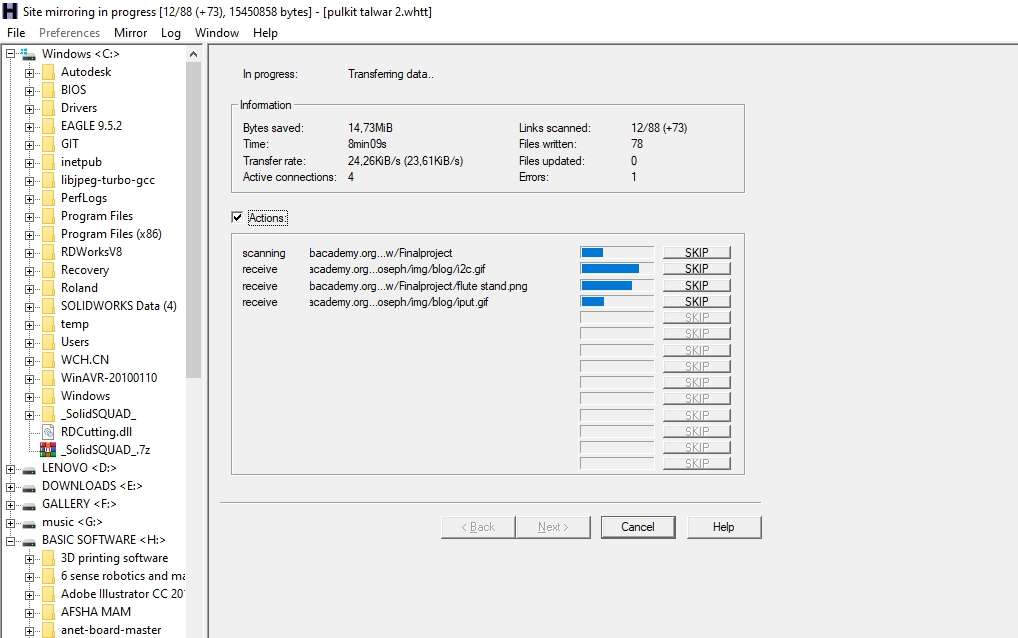
STEP 6: Mirroring of the site starts , you need to wait until all the data get transferred
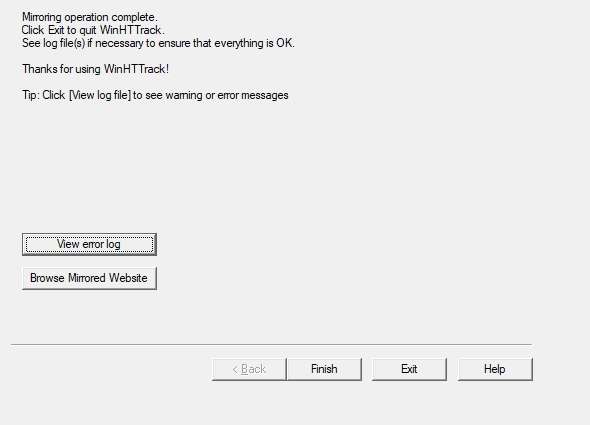
STEP 7: Click on "FINISH" after whole process completed
 * My recommendations are that if you are not from Programming background you should initially give MkDocks a try , because it Basically
                                                        works on the simple langauge like MARKDOWN and it is far easier than Html and Documentation work will become very easy.
* But once your hand is set on it you can switch to HTML based programming because no doubt MkDocks can make a great static website but it lack in many things and if you want to make your website look different
                                                or you can say unique you must switch to HTML based programming
Tools for proper Documentation
You require these tools for proper documentation ,
The pupose of my listing these tools here is that these tools are very important whenever you document and knowing about these tools in start will save a lot of time in future and make your work a lot easy , the tools i am listing here are very powerfull and easy to operate , me and my team uses these tools uses most of these tools every time
1. Photo compressing Tool
: This is one of the most important tool you will be going to use throughout your 20 weeks course and after that also
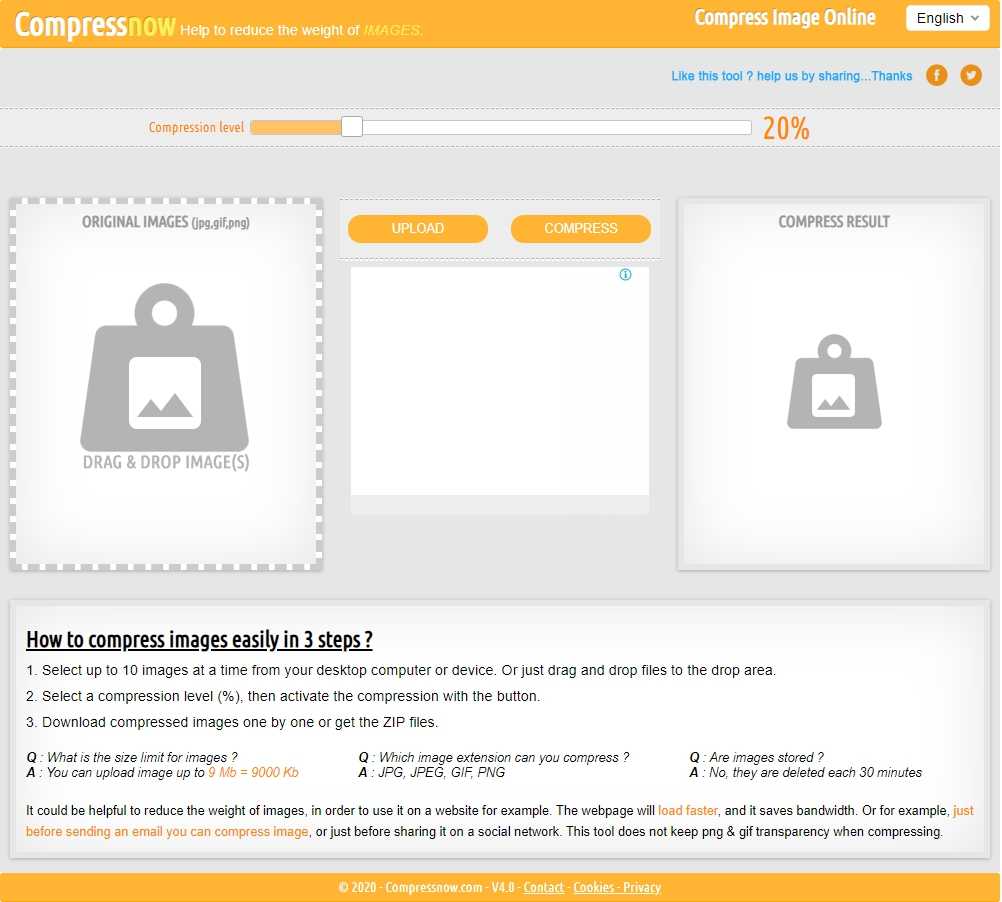
I uses "Comprees now" online image compressor for compressing as well converting image format / extension as i prefer to keep extension of all the image same i.e. JPG format ,because it helps in documentation and it is also adviced by meto everyone to try to use only 1 type of image format
Through this You will be guided to the official page of "Compress now" website and easily compress your image
IMPORTANT NOTE: I prefer this software as it can compress 10 images at once and we can easily adjust the compression rate and watch what quality of image we are going to get , but pls try to keep
                                                        compression rate below 55% because higher compression rate can degrade the quality of image to the extent of destroying every detail
2. Video Editing and Compressor Tool
: Similarly you require a powerfull tool for editing and compressing video 's as they meant to acquire a lot of size
* I used filmora wondershare for video editing , video compressing and converting images into video , this is an very easy to use software and you can edit create videos to an expert level with less time investment
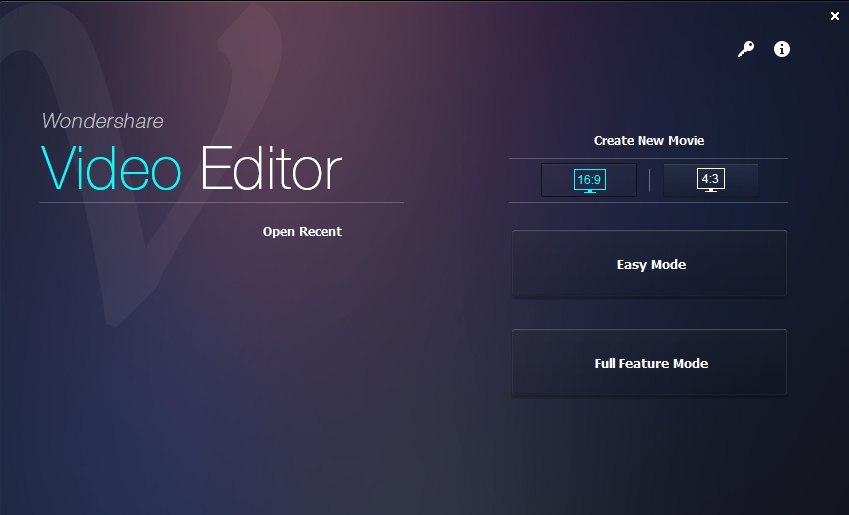
Through this You will be guided a page from where you can easily download the latest version of "Filmora Wondershare"

3. Screen Recording as well as Screenshot taking Tool
: Most important tool which will be used throughout your whole cousre , because you need to record every part of your work and documente it properly , so you require to take photos and require video 's to be recorded properly
* I prefer to use "Movavi Screen Capture Pro 10" it is one the best software in the market to record the the screen as well taking screenshot , it has variouse feature's like editing the images , adding
text in image , adding arrows and border to the image ,plus you can choose in which format you want your your image in and set that format as default.
* Similarly it provides us an option of choosing how much part of screen we want to take screenshot rather taking full screenshot.
Through this You will be guided a page from where you can easily download the latest version of Movavi Screen Capture Pro 10"
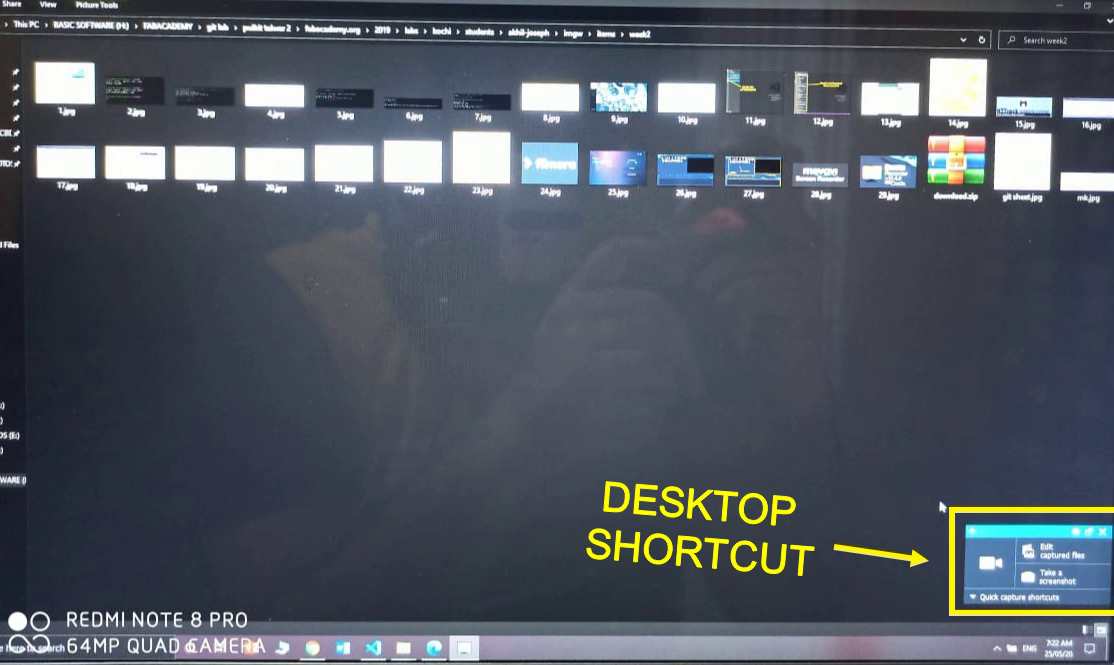
* After downloading and opening the Software you can see there is a tab open which can be used for taking screen shot or record video as you please in the corner which can be minimize , and this will help you to document while working, taking screen shots everytime and at every step , this can be very help full and can decreasse your overall documentation time.
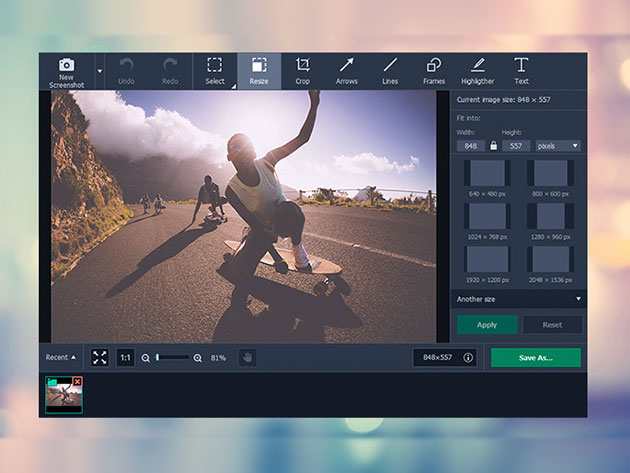
After taking screen shots , you can easily those image at the same time , so editing them after saving will be made easy
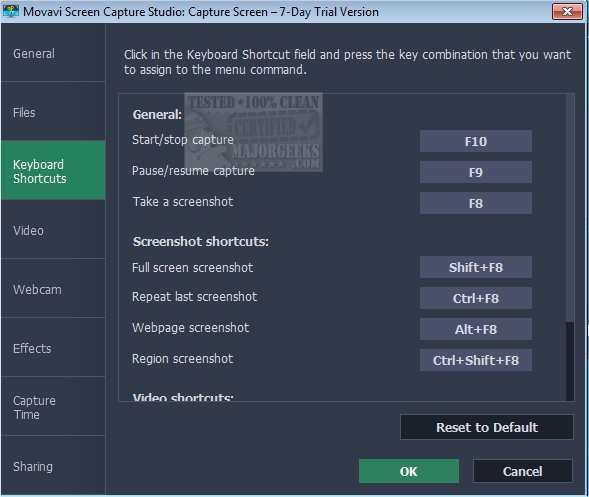
* These are some of the shortcut keys which can be used for faster working and they can be customize also according to your system and hand moments on you keyboard