CAD
Assignment List
- Computer-aided Design ☑
- Model Raster ☑
- Model Vector ☑
- Using Video ☑
- Model 3D ☑
- Embed 3D in html ☑
- Model Render ☑
- ... of a possible final project, and post it on your class page. ☑
- Learning Outcomes ☑
- Evaluate and select 2D and 3D Software ☑
- Demonstrate and describe processes used in modeling with 2D and 3D Software ☑
- Have you? ☑
- Modeled experimental objects/parts of a possible ☑
- Shown how you did it with words/images/screenshots ☑
- Include your original design files ☑
- To Conclude & Reflect
Model Raster

I downloaded GIMP and decided to use a couple of images for the principles and particles to combine and make an image to show in the index page. In this case, it was principles and particles
In the next image you will find me editing the 1st picture. It turned into something slower than I expected as a result of my knowledge of other commands in photoshop. It was very easy however once surfing in the web, in order to figure out how to transform the image, find the layers and everything. Part of a success of a software is its accordance to self-learn it though manuals or other mediums. Possibly I would use GIMP as an alternative software.
Batch Edition
Later on, I decided to test out the batch editing feature gimp has to offer. It comes as a result of a more complex process that photoshop offers: the record tool. One where you can use to batch edit elements, yet the process of it so has not changed in a while and I for one have not used it as well to the point I've had problems using it.
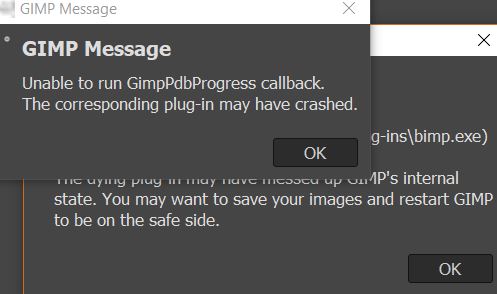
I had ups and downs in the process, but it did help me out mostly to reduce the phone images from 2000+ pixels to around half. In the same manner, using the manner with pixel the image size reduces as well. In this case all the images weight about 6 Mb, reduces to less than 2 Mb. Settings I'll most certainly use again, especially after the large video I just uploaded, to save room in the server and not use much more than strictly necessary.
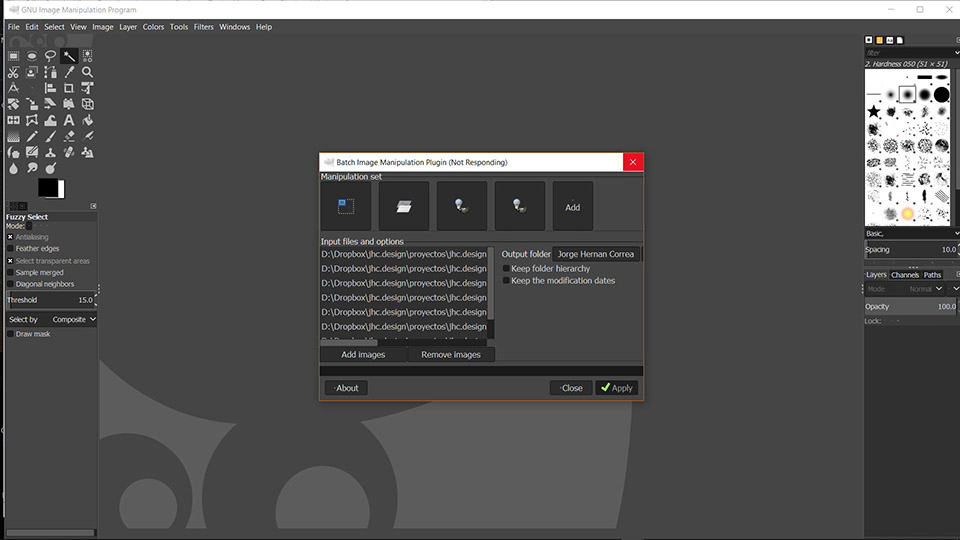

I have improvements for Gimp
- Adding too many batch editions (8 images >>5 procedures) crashed the software, even in small number of images in a image size(6.70MB = TOTAL / 1.996 KB = largest image), quality (2448x3264 px) and quantity not exaggerated in amy way. Making me question its robustness.
- Brightness and colour correction was case specific, that works well in one edit situations. Batch renders on the other hand require automatic corrections. Adding any value to all images will certainly create more harm than good.
- Watermark addition is an spectacular feature that gimp batch offered. It did however kept on crashing, making it really regret my decision to try this feature out. Conception is "flashing stars" great, but execution needs a some more work unfortunately.
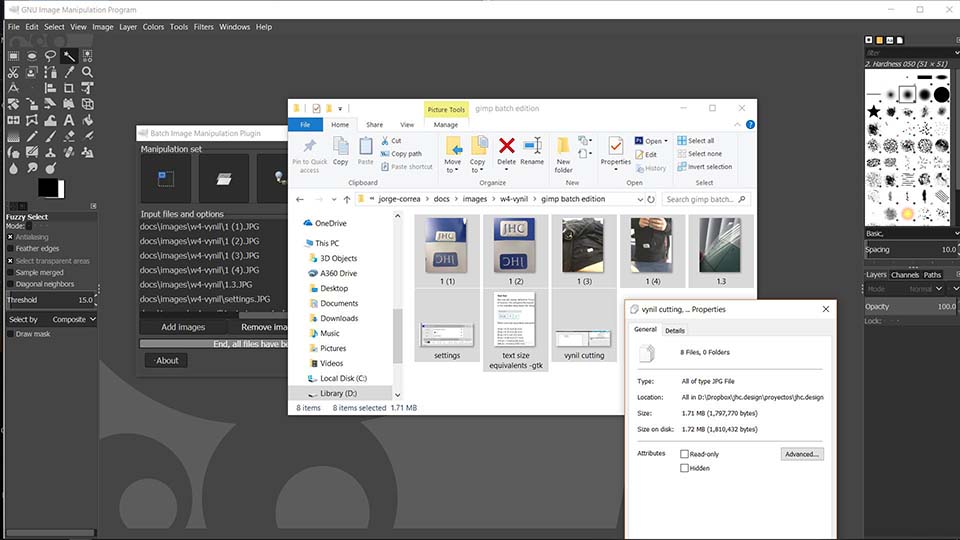
Model Vector
In this case, I decided to download Inkscape to try out. As a vector it seems to become another Illustrator. It looks a bit more basic. And found that their pen-tool not as complete as Illustrator might have.
I found it as an opportunity to keep on improving my index page and add to the fascade of my webpage.
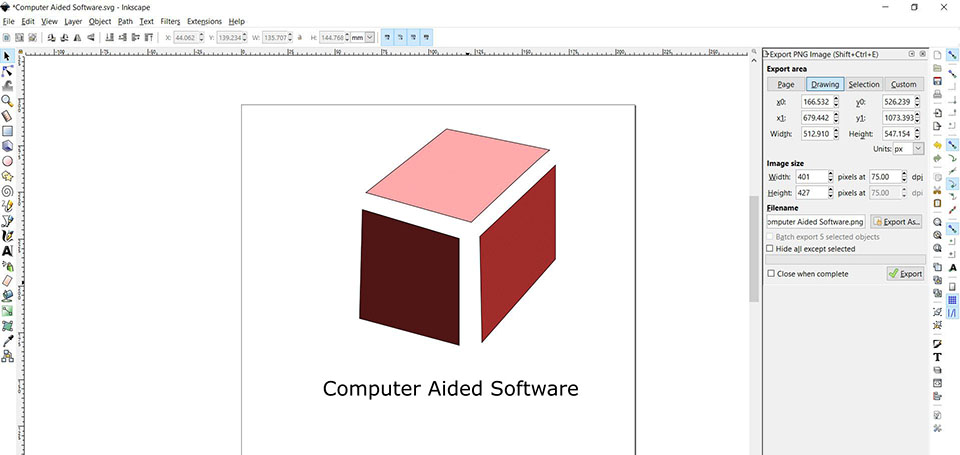
It always takes less time to search how to get to point b from point a, instead of finding the road youself (when there is that option). In this case i looked into how to export an image. Used this tutorial.
Image Trace
The image trace feature is always intretsing. It was probably one of the most aluding features in photoshop when I first learned, and so became when trying out inskcape. I suspect because used properly can save massive amounts of time by tracing something that would be next to impossible otherwise.
The following is myself tracing my self with inkscape. I used a tutorial led by Aaron Nieze. You can find it here.
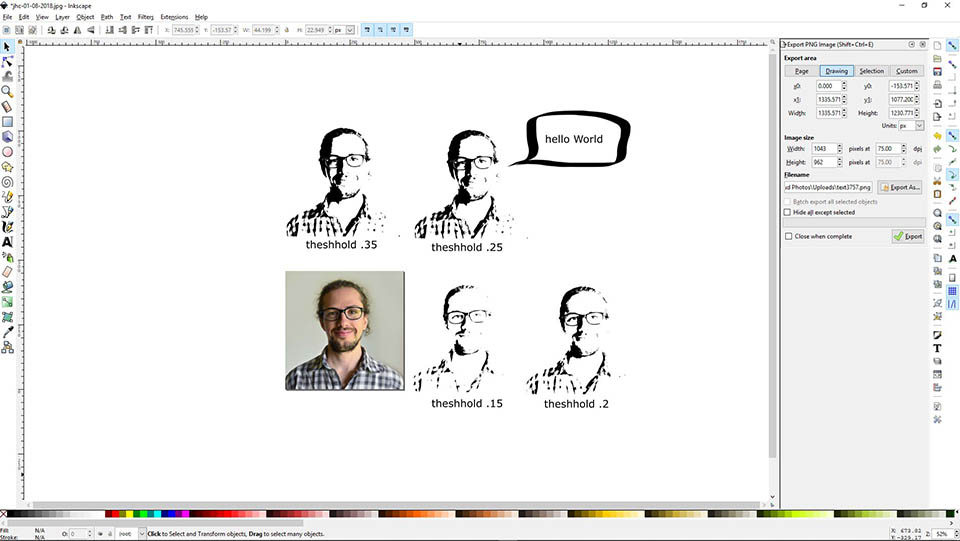
Here is the following final Image trace of myself .

Using Video
Created a video about Onshape - 1r long while drawing a chair.
The following video requires to be edited, because it became hevy. Besides a super-fast cropped edition of the cad drawing would be great as it becomes built.
- It must be that there is not enough how to guides, or just a general overviwe of how ti all works. Not ment for windows?
- So many versions, so little info about them. I was not even sure what to downlaod having ti in front of me! Is it for linux is or apple or windows? How do I know before waiting 30 min to download it?
- Once i got it working, No easy access to a manual, or how to use it. If I pick up movie maker, I'm well aware of what im doing. Not here.
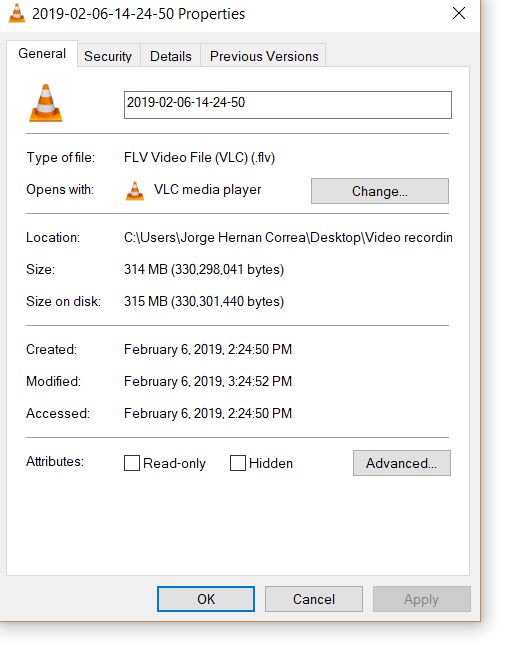
- T rimed the 1 hr long movie instead of shorting it, later found the x2000 (max cap) and was not able to bring the video down to 1 min, but a tad more.
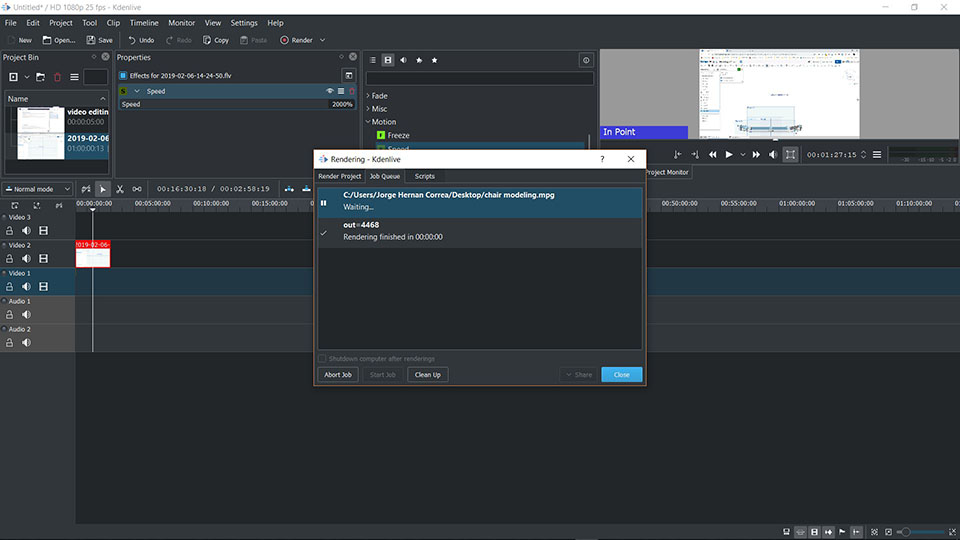
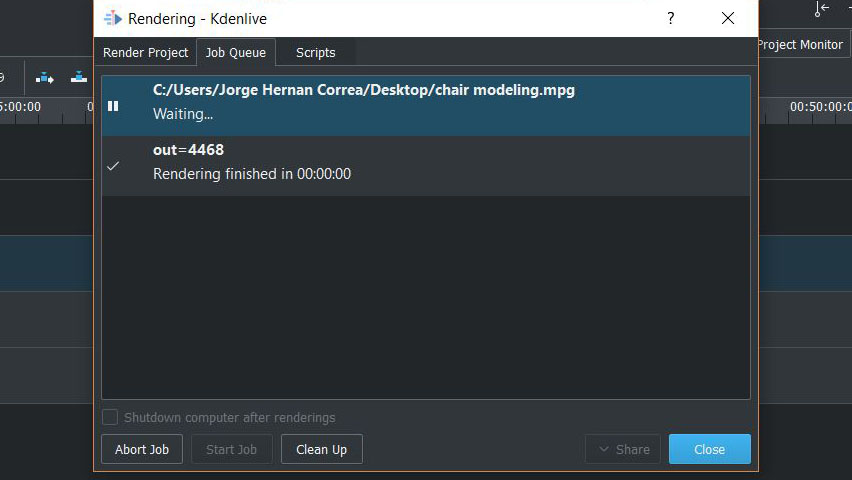
- I finally ready to export this, and the render would not load, yet tell me that the video is done!!!!
- Look for Problem:"out=4468" It does NOT exist in the web. Apparently I'm the only loon having this issue.
- looking for possible issues on their page, little description and find out I should have the ffmpeg-4.1 codec. As it mentioned it to be required to work on windows.
- Again download this codec, find little reference to how to install it. Manually copy the library into the source file. Finding as a result to get the same 4468 error.
- Look for the beta version. Maybe kdenlive has not updated much of this year´s operating system. Bug infected program wont even open properly. The program didn't get to show a word before it totally crashed on me.
- What's most frustrating is the fact that an open source software as this would be incredible useful. Vlc player (as an example) is far preferred than any itunes, windows player, Zune player or any other (except maybe win amp) because is not affiliated. Yet I have such a big issues and little support to fix it that its hard to think not to sticking into a paid software or a basic one to edit video. Especially thinking how strong video has become as a result of instagram and youtube taking over.
- I'm going back to an earlier version (17.08.2) but its heavy enough that im inclined to go to movie maker windows. And thats saying something.(didn't work either)
- In a miraculous turn of events, I did a quick search for best open source software for video editing, and found Open Shot video editor. After downloading it, and trying it out it worked like a charm!. User friendly interface, indicating what was what and where the main components the software had. It was also lighter to run. Like a leather glove to my video-editing hungry hands.
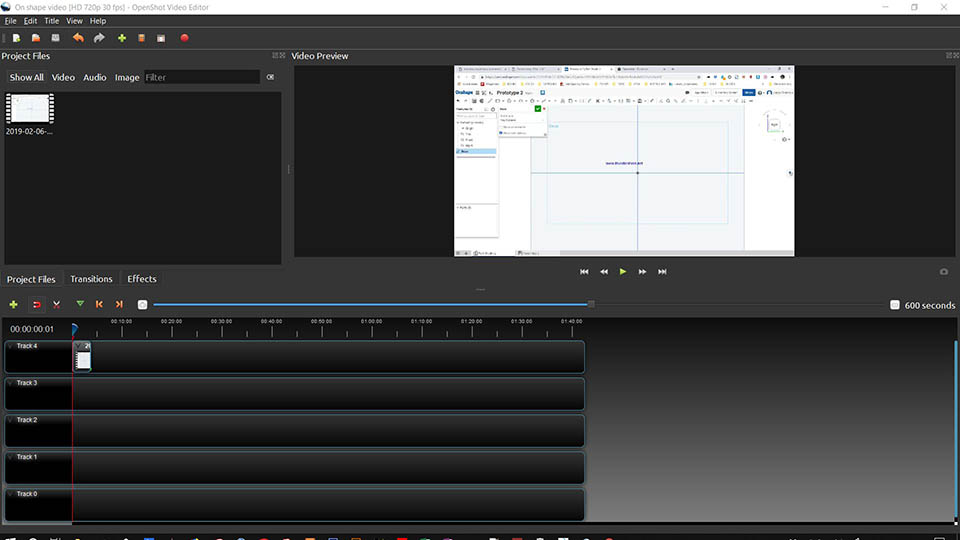
ALELUYA!! I was able to edit the video, even though in the future ill use smaller formats. Today I'm showing the complete process self hosted of me trying out On shape while drawing this counter-lever chair concept, two week late but done!
attempt to upload a video on flv format failed. I later used convertfiles.com here. That didn't manage to uplaod the video either way.
The chicken dinner of this story was when I used one shot video editor as you will see next.
The embed code is taken from: w3school
Model Cad #1 (Solidworks)
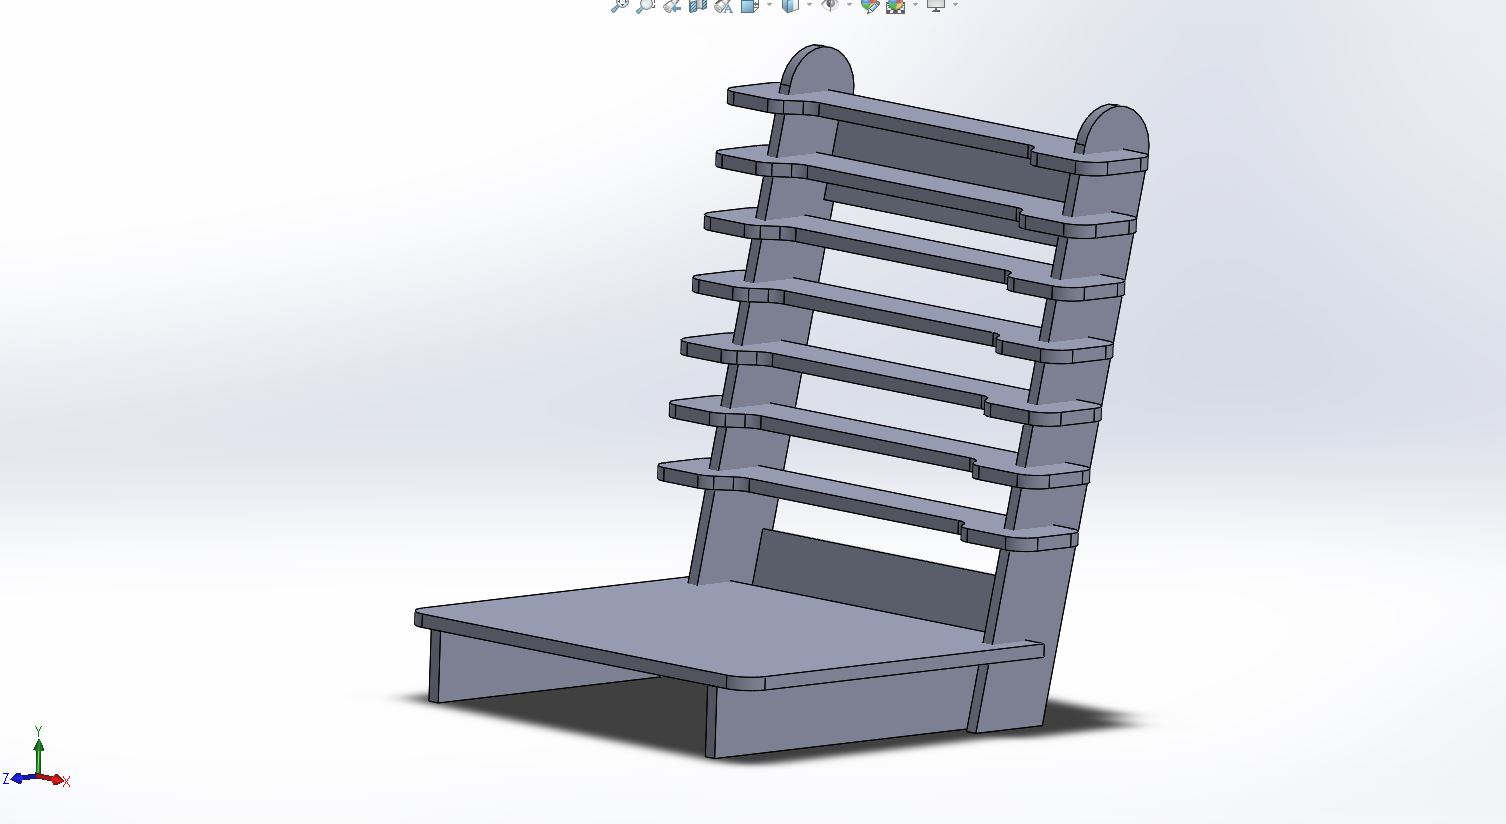
This week I decided to start by working off my sketches. Creating a cad drawing, inspired in the ikea style flat pack concept construction. A construction made easy by CNC fabrication on plywood. You will find the initial sketch made a seat and a initial backrest concept. The main goal of the sketch was to land the concept in a concrete way. Proving it might be able to be done.
Model Cad #2(OnShape)
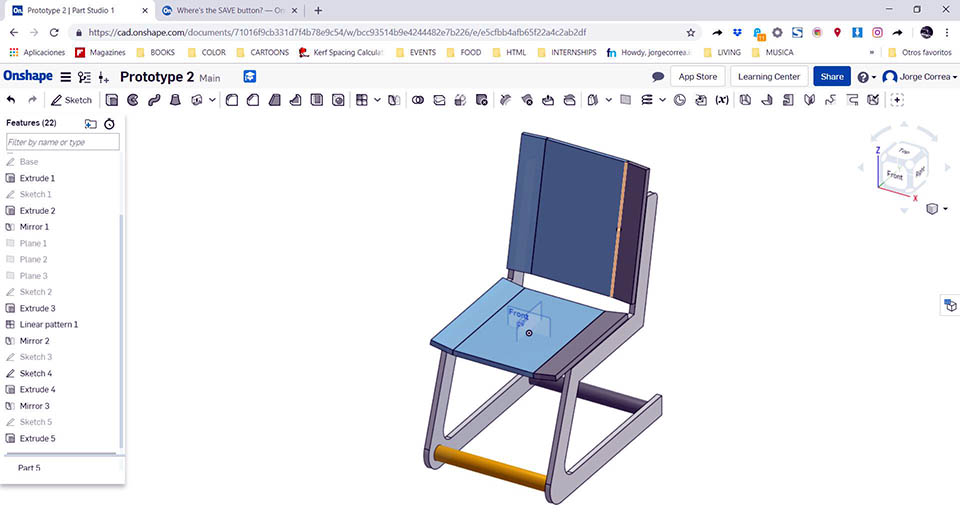
The following week I played around with OnScape, a software done in the web-browser alone. It became an interesting experience, as it was similar in work flow as solid works and most of the icons for the features where extremely intuitive. It was a next generation experience, yet the chrome did require large amounts of resources to process. I have to question if without the know-how of what to expect in the features it would have been as easy. It feels that the Onshape still needs to have a faster feedback response. As in the line trimming, extending, and projecting features in the sketch section it became difficult to figure out when the I had the geometry or not.
As part of this exploration I recorder the full process of myself Cad this counter leaver chair cut out of 18mm ply (in theory). This was done with Free screen recorder 8.3.0
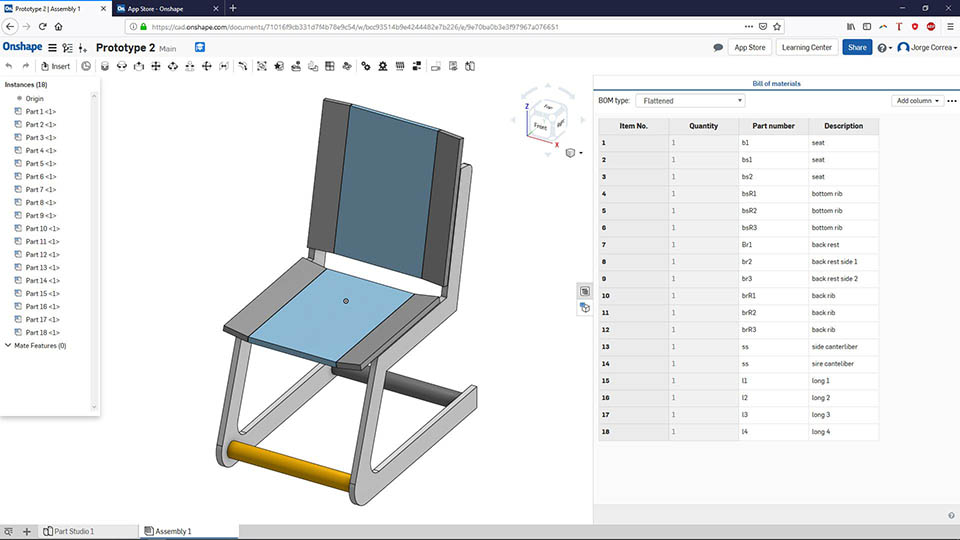
As i was playing around with on-shape, i found i could create and connect the software with a google doc and create a bill of materials. I was also expecting the final cut dimensions that never actually showed up as other softwares would offer. Like turbocad or in some instances solidworks.
I did find that integration possibility super interesting and would consider onshape as a future alternative software. All the plug-ins that are offered, the assembly mode and all the process tree is super useful while still being light for pc use. Rendering might me another issue.
Embed 3D in HTML
- I started attempting to embed cad file in 3d in this html by reading here but it turns out it was outdated, from what i found. Grab-cad does not show the embed link i was hoping for.
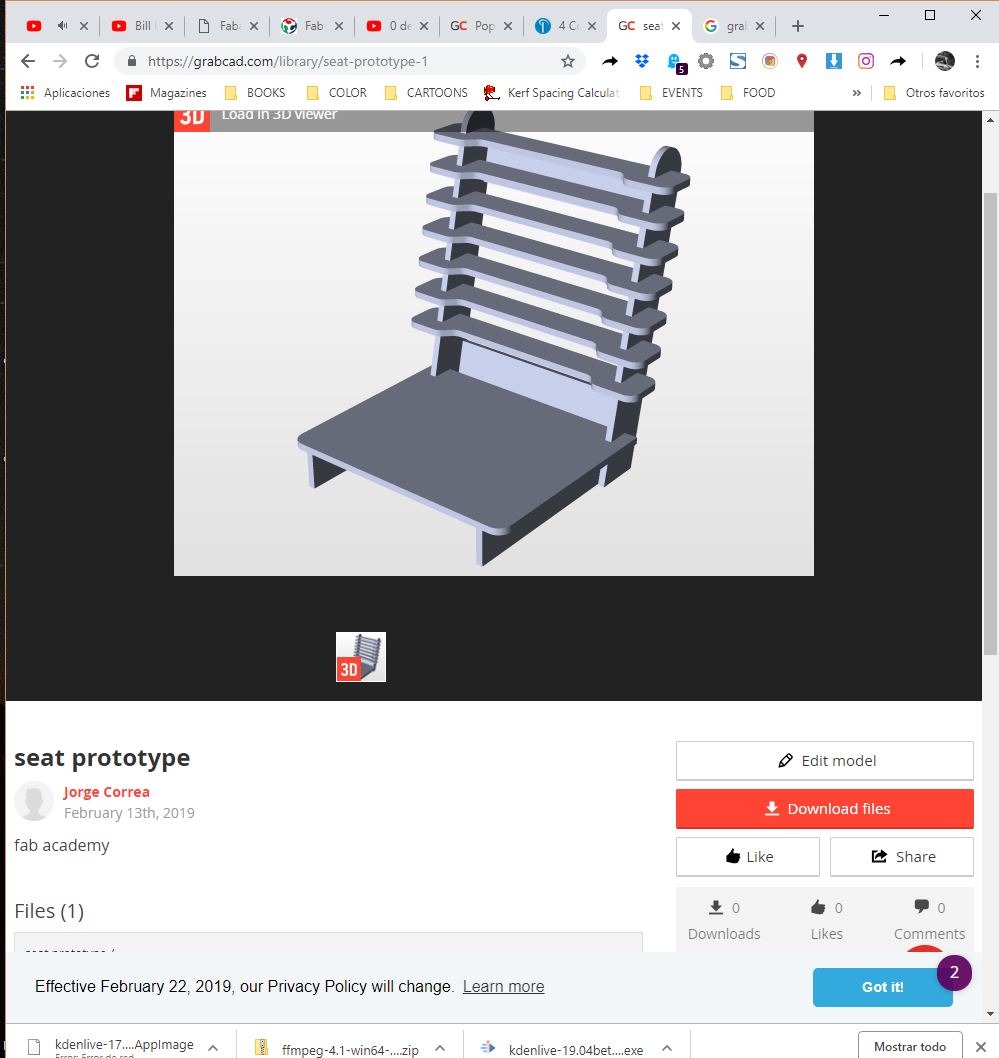
- following the tutorial found in modelo.ioI acquired the later code to embed a simple model of my 1st chair prototype.
- rabcad was considered option at the beginning but did not find the share button most tutorials talked about after my part was uploaded to their server. As a reflection from the video experience I quickly moved on to something else.
1st prototypeBy Jorge CorreaModelo »
render
I installed and opened blender. It seems like a super complete and incredibly complex (maya like) software.
To import the geometry into the software, it was required to save as stl. (as modelo.io asked too).
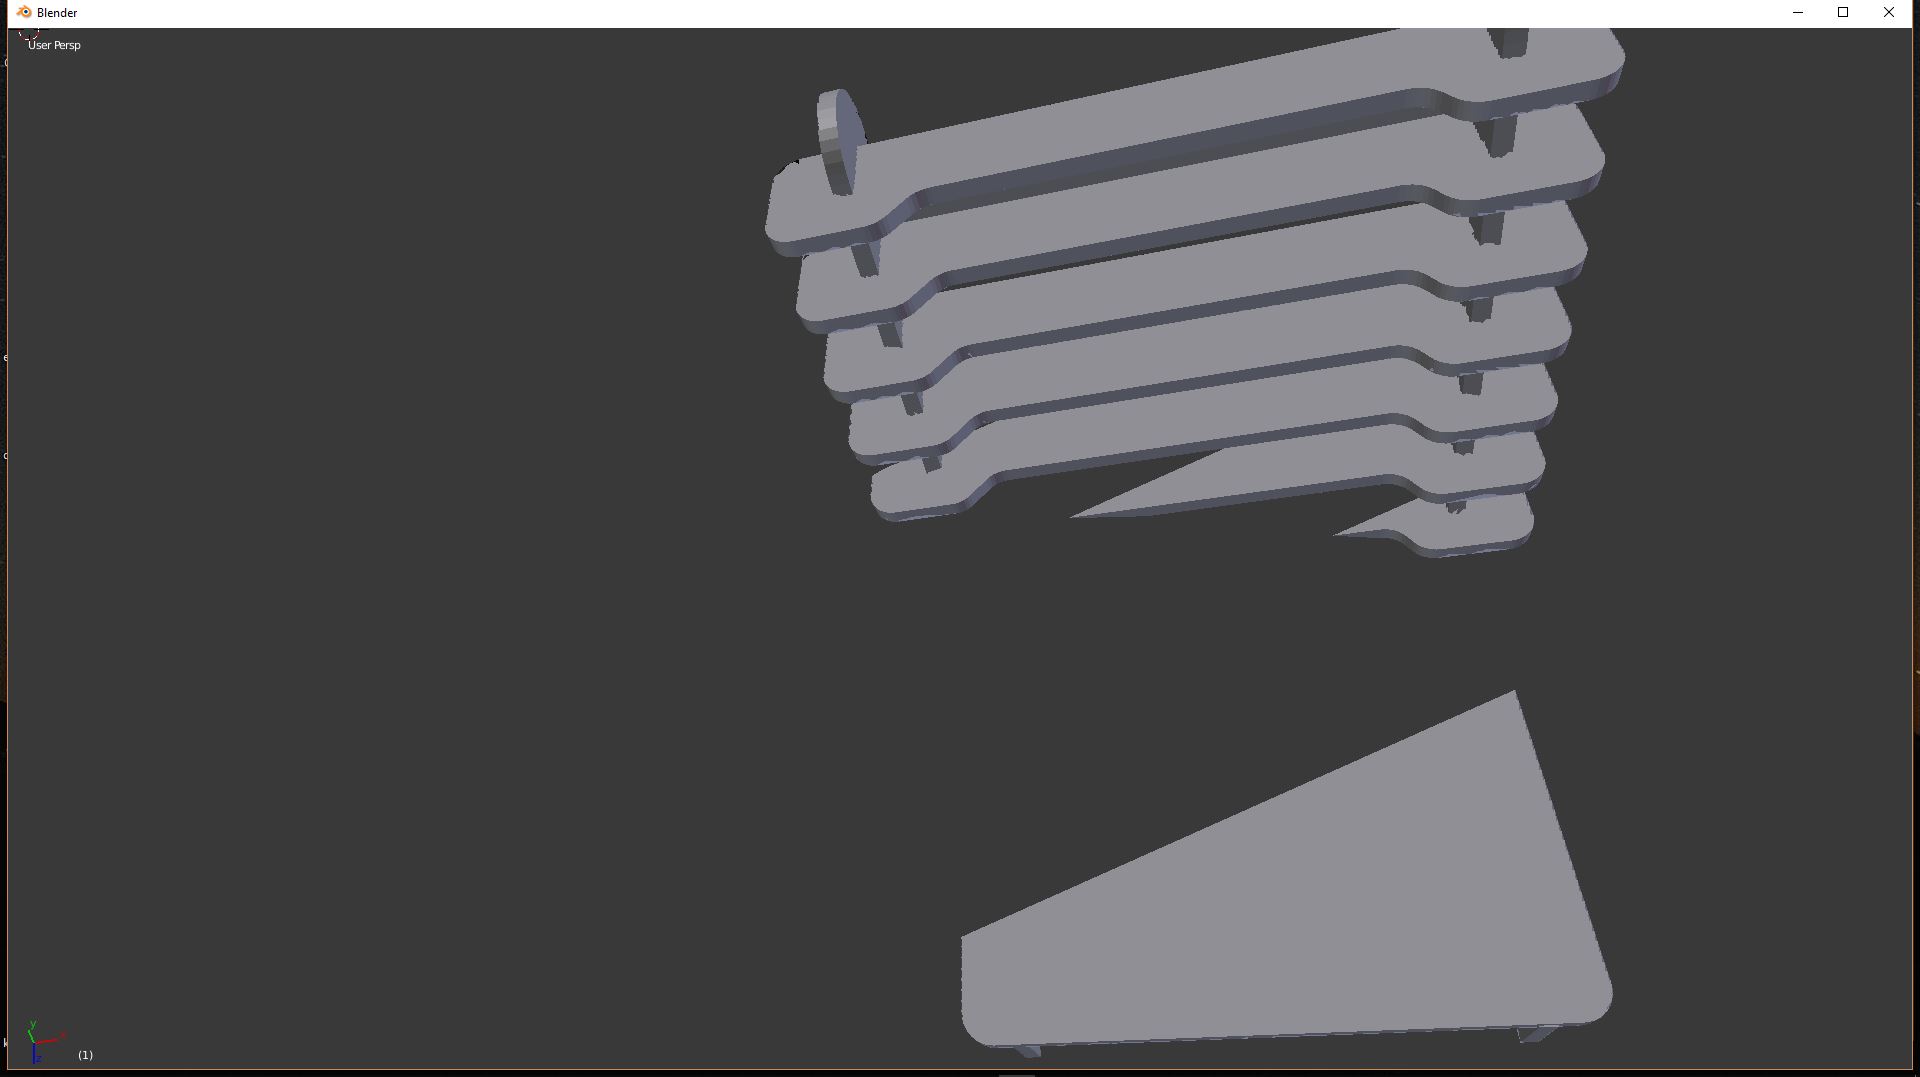
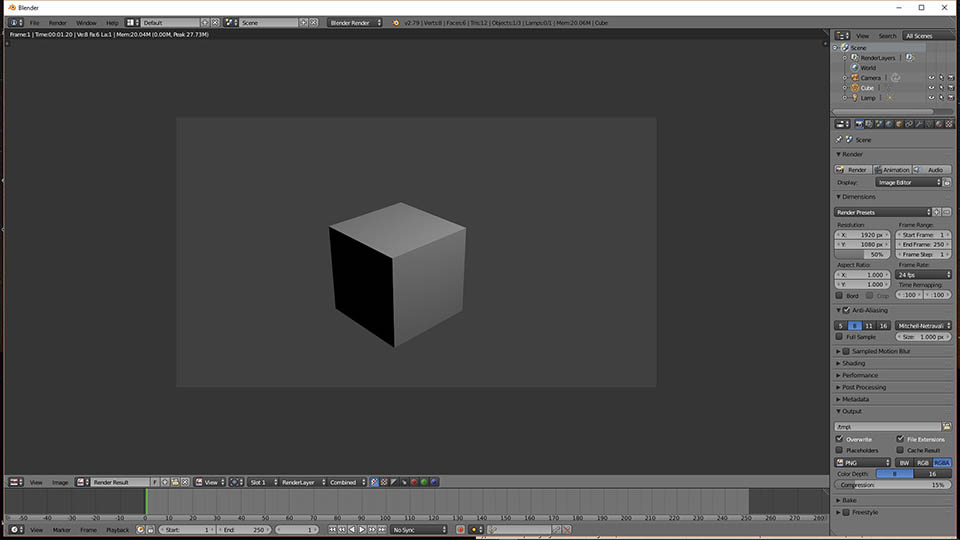
The scene was too small in order to be modified and render anything in blender. Or my format too big in relation. The default geometry still rendered basically as ill show next.
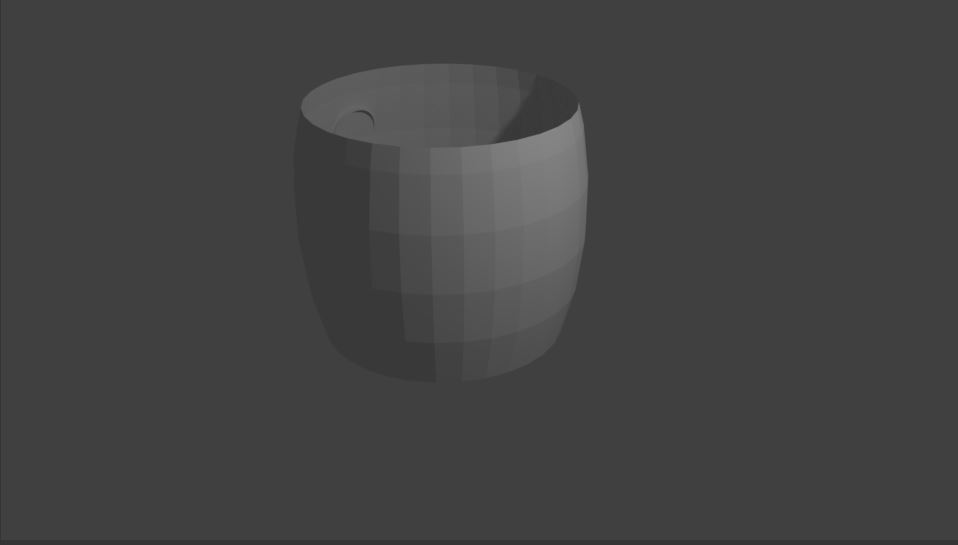
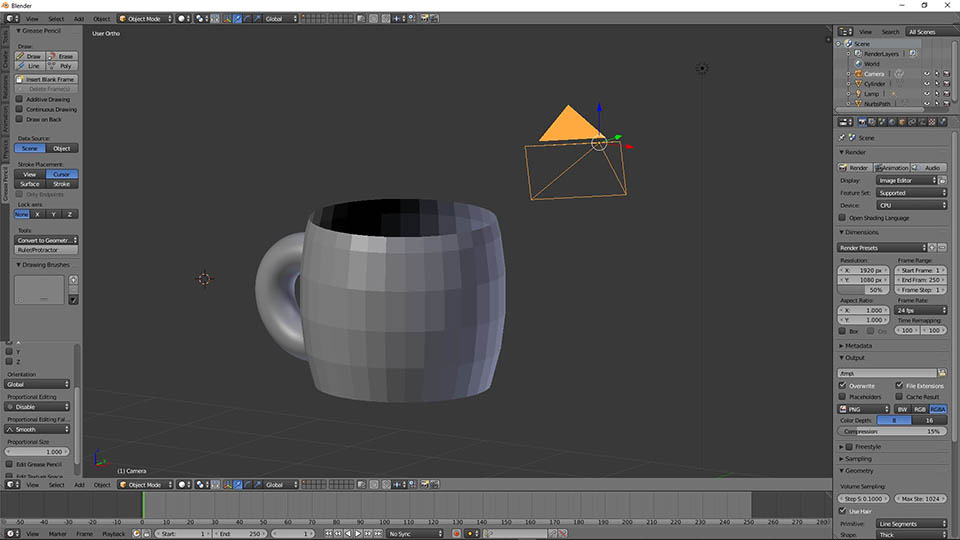
In all honesty, learning blender might be a great outcome in the long run. It however takes an initial amount of time to grasp.
In the above case, following a 15 min tutorial By tutor4u I learned the basics of 1 shape and basic interface usage to this particular tool. Making this as a basic reference to estimate the amount of time it would take to have a literate knowledge of this program
- Say you need to learn 4 other basic shapes to process blender as should. Every 15 min video takes 30 minues to learn and digest. 30 min x 4 = 2 hrs
- Say know you need in order to output a proper render use that same amount of time learning 4 basic points for rendering in blender as might be: Moving and editing the camera, Lighting, Scenery and texture editing in the object. Requiring 4 extra hours.
- Lets later say you decide to import a file from another program as so only to use belnder as a free rendering output because of its strong potential. Use 30 min to learn format conversion and proper tessellation.
- This then becomes the case to add up all the time and speculate that adding blender as an amateur part of my work flow would require to use it for about 4.5 hours or equivalent of half a day.
- Its greatest appeal is its philosophy. Open source, and a high performance render and animation performance. Its downfall is to achieve a advanced level of proficiency probably requires closer to 100 hrs as opposed to 5 hrs. So making that investment leap is a something im yet not willing.
- The interface was something entirely new to me, and as a result It makes me think twice to go in depth to this software. Regardless of how much other people have recommended it to me.
- Most of my time in this section was spend fixing video, one where i considered a higher priority for my future of this class than rendering which i have experience on already.
To Conclude
Honestly, all this section is something to glaze at. Reading much information before actually trying out software is probably the best way to save time.
Issues like the ones I{m having with Kdenline is only understood with experience. All this is also glossing about many in depth features of any software because it takes years to properly learn any of the softwares mentioned.
It seems to be a week to acquire new and compare other tools. I´m really grounded on a certain process of cad and render. On-shape was an amazing discovery and would like to expand it further. Especially with integrating of other software that back it up. Aside from that, Blender seems advantageous, yet it also looks like something that takes time to learn and rendering is an art form by its self. (not to mention pc build and money to spend)
Learning outcomes
Don't use video. Apparently what im trying to achieve is not easy. As a result create simple, easy to embed light videos that youtube´s length limits are not compromised.
2d will still be used photoshop, going my to basics. And 2D parametric will be used solidworks as its never about 2d but about what comes later. 3d.
I will consciously upload the large video to show the process of modeling with onshape. Cool stuff, it even shows me looking for how to do things, part of the process i thought was nice. It was very unfortunate that editing video is not my forte and striking to the free alternative kdenlive was detrimental. Render software is also a complex thing to just wing up, when not knowing the software.
Later found this article by Mike Pell - Lead Design for Microsoft Garage that had some great points ill incorporate.Fast Design Where he talks about creating based on 3 points: Essence, Personality and Speed. Basically: have a clear and simple idea to be explained. With some jazz and iterate often.