What you will find on this page:
-
Lasercutting (in general)
Getting to know the lasercutter
Velleman toolbox (individual project)
Parametric Straw connectors (individual project
Vinyl Cutting (in general)
Vinyl cutting with children
Vinyl cutting electronics
Vinyl cutting and electronics
Reflection on this week
Manuals and design files
Lasercutting
Getting to know the lasercutter (group project)
The lasers
In the Lab in Ghent we have 3 lasercutters (updated 11 may). When we started about 8 years ago we bought a Full Spectrum lasercutter. We're several years later, and by now we've added a new Full Spectrum Gen5 lasercutter. The old one is rented out to schools now. And as we give a lot of workshops and produce everything within the lab, we recently added a MetaQuip laser for bigger plates and or own production of workshop materials.
 Our oldest Full spectrum Laser
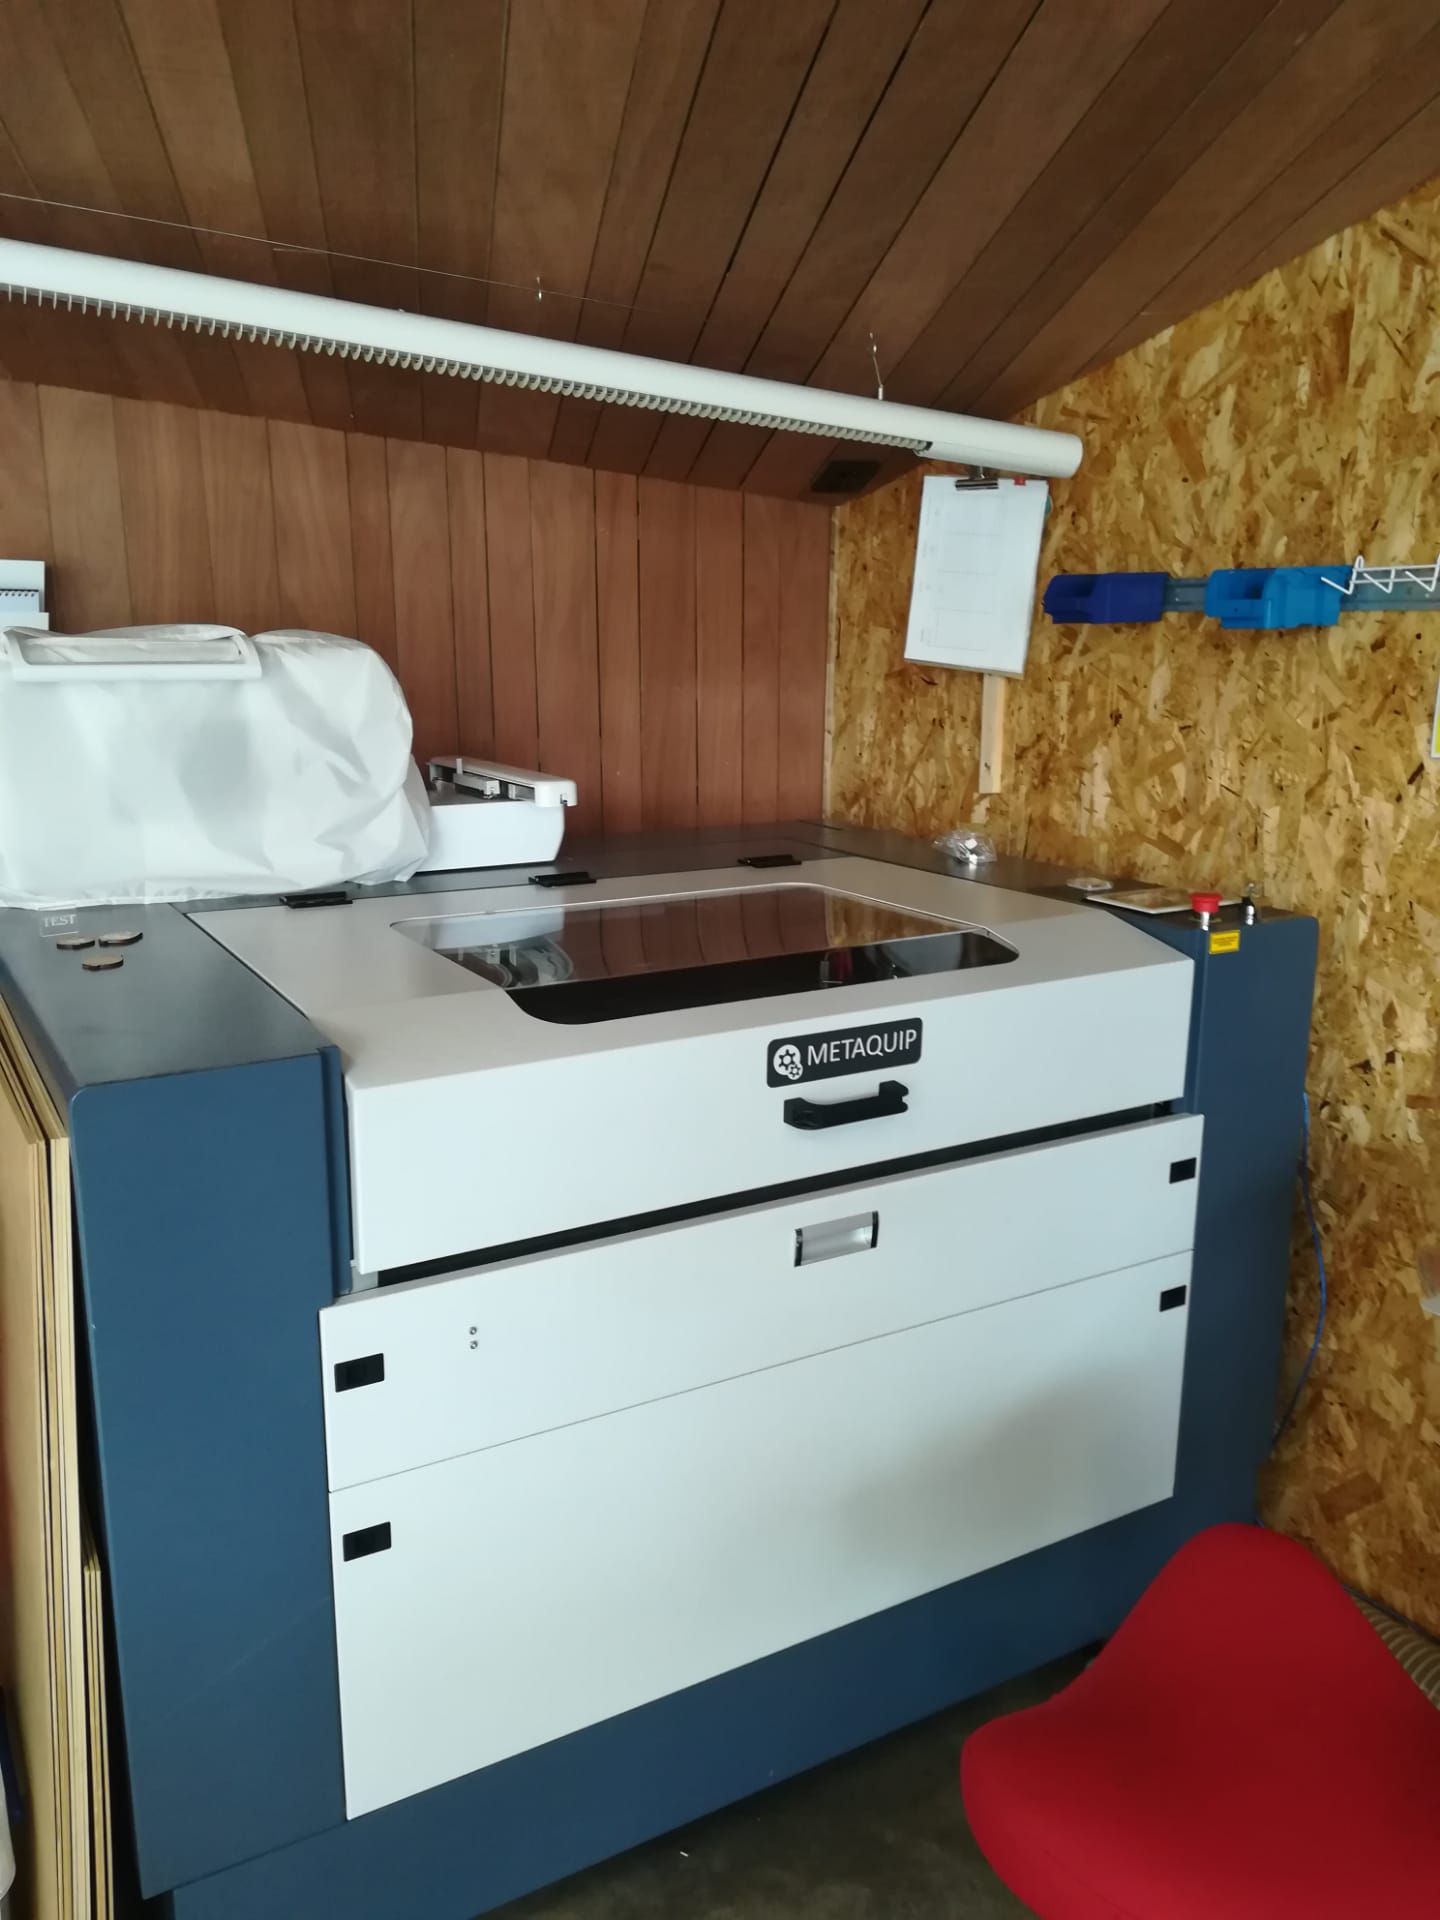 The MetaQuip laser
Safety
We can say a lot about safety of the machines, knowing that they are all manufactured in China. One of the reasons that we went for a MetaQuip laser, was for the papers that we get with
it. Those lasers are certified to European standards, and as we mainly work with children, the change of an inspection if much higher.
Other things that we do to guarantee safety for the people using the machines is to not put them on moving surfaces (if the are, like the MetaQuip, we block the wheels). Specifically for
the us, the team doing the maintenance, we have a chart next to the lasers where we can see when and who cleaned the machine.
For the guests that come to our lab, we have a Safety Instruction Chart (SIC) hanging next to the laser with the do's and don'ts and the dangers. We also never let them work alone with the laser unless we are completely sure that they know what to do if it goes wrong (read: adults that have worked on the machine for a trustworthy amount of time). For new visitors we always explain the machine to them, stand next to them the first times they use the machines and during open labs (when everyone can make use of the machines), there are always 2 volunteers monitoring all the machines in the lab and helping out where needed.
During our training for new visitors we explain what a laser exactly is (lenses and focus), how to focus and operate the machine, where the emergency button is, fire extinguisher and which one to use on the machine and which one not. And ofcourse the standard things like: don't look at the burning point to long, stay with the machine, how to operate the machine, settings ( we have a list of standard settings), what to do when it didn't cut through (ask for help, maybe the lenses need a clean, bad settings, bad material...)
What we have done:
- Press fit: using two combs with different teeth width
- Power and speed parameters
- Kerf
As I'm a continuing student in the ULB FabLab, I'm not spending all my time there. Lucky enough for me I work in a FabLab and have acces to all of the machines. In the Ingegno MakerSpace/ De Creatieve STEM lab we have a Full Spectrum Gen 5 Lasercutter. It's a CO2 45W machine with a usefull surface of 50 cm x 30 cm. My available materials during the test were 3mm MDF and 3mm poplar.
Press fit
Just as my colleagues at ULB I used the same kind of file to measure out the lasercutter. The main difference is that I made it in Inkscape as the Full Spectrum (FS) can't load in .dxf files I redrew the file with the same parameters as they used at ULB.
- Plate width: 3mm
- 11 variable slots sizes varying from with-0.25mm to width+0.25mm, by step of 0.05mm (aliases: test1 to test 11 variables)
- depth of the teeth: 5mm
- overall depth of comb : 20mm
- distance between teeth (gap): 7mm
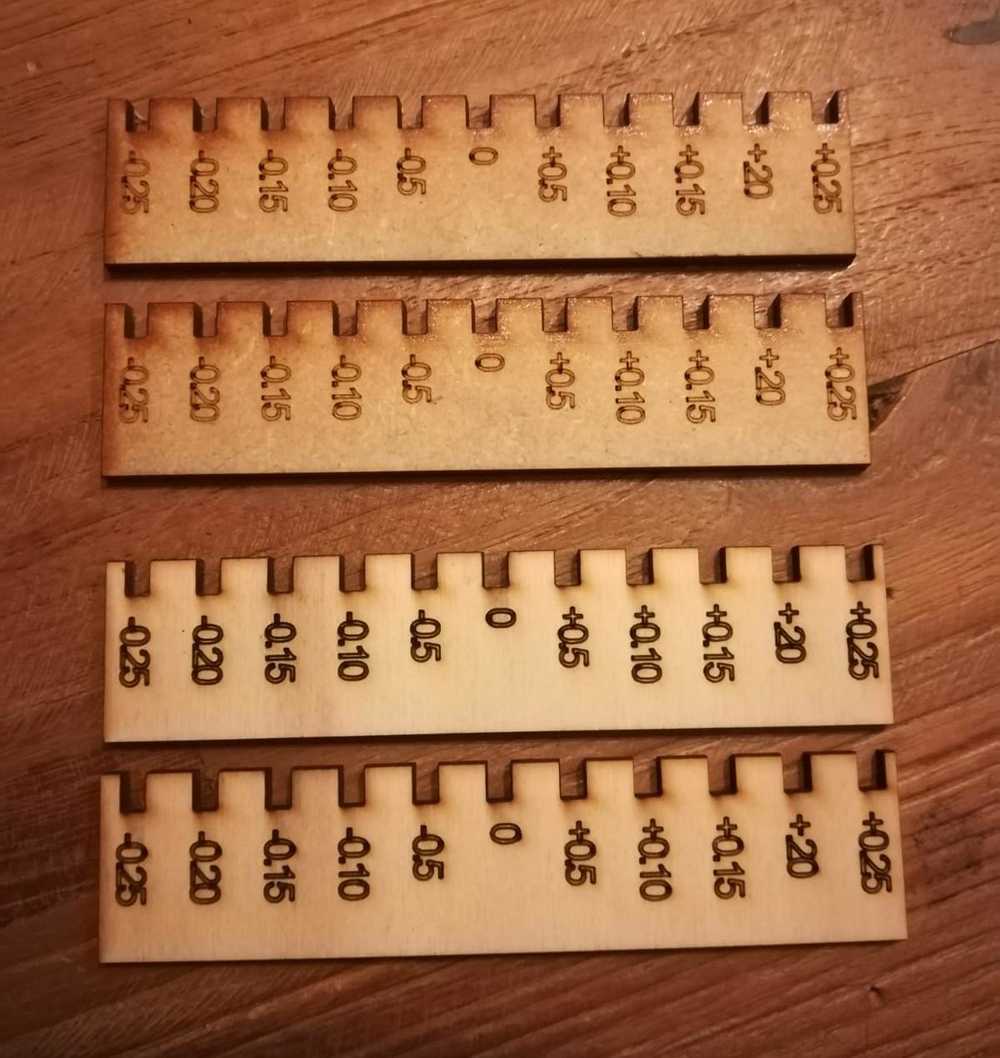
For poplar there was no difference within the 0 or -/+ 25. all slots were to lose. This can both be because of the laser, but also because
of the material. Poplar is know for it's not-consistent thickness. Though it is the most used material in our lab.
MDF was better on this point, though all slots were really press fit and you could see the triangle from the laser, where it cut.
We keep the kerf around 0.2 for this machine.
Comb file in .svg format can be found here
Power and speed parameters
Settings for Poplar:
- speed: 60
- power: 98 (you are never supposed to put your power on 100)
Settings for MDF
- speed: 45
- power: 98
Other settings:
- Lines to be cut need to be defined as red lines (RGB 255, 0 , 0), with variable thickness. Mostly we take 0.1mm
- Lines to be engraved do have the same thickness as red lines but in blue (RGB 0, 0, 255)
- Rastering (e.g. pictures, text…) don’t have a thickness and are defined in black (RGB 0,0,0)
- These settings are added in inkscape files.
Printer setup:
- Push on the button that says 'laser' on the wall
- Wait unitl the laser is completely booted before doing anything else. This can take up to a few minutes.
- Place the MDF wood plate on the honeycomb support in the printer Caution: do not hit the lens with the plate
- Focus the laser with the right tool (black clinder)
- Open the Retina Engraver, home the machine and load in your file. If the machine does not want to make connection: shut everything down, machine and Retina, and connect to the internet or computer.
- Add the right settings
- Start lasering.
Kerf
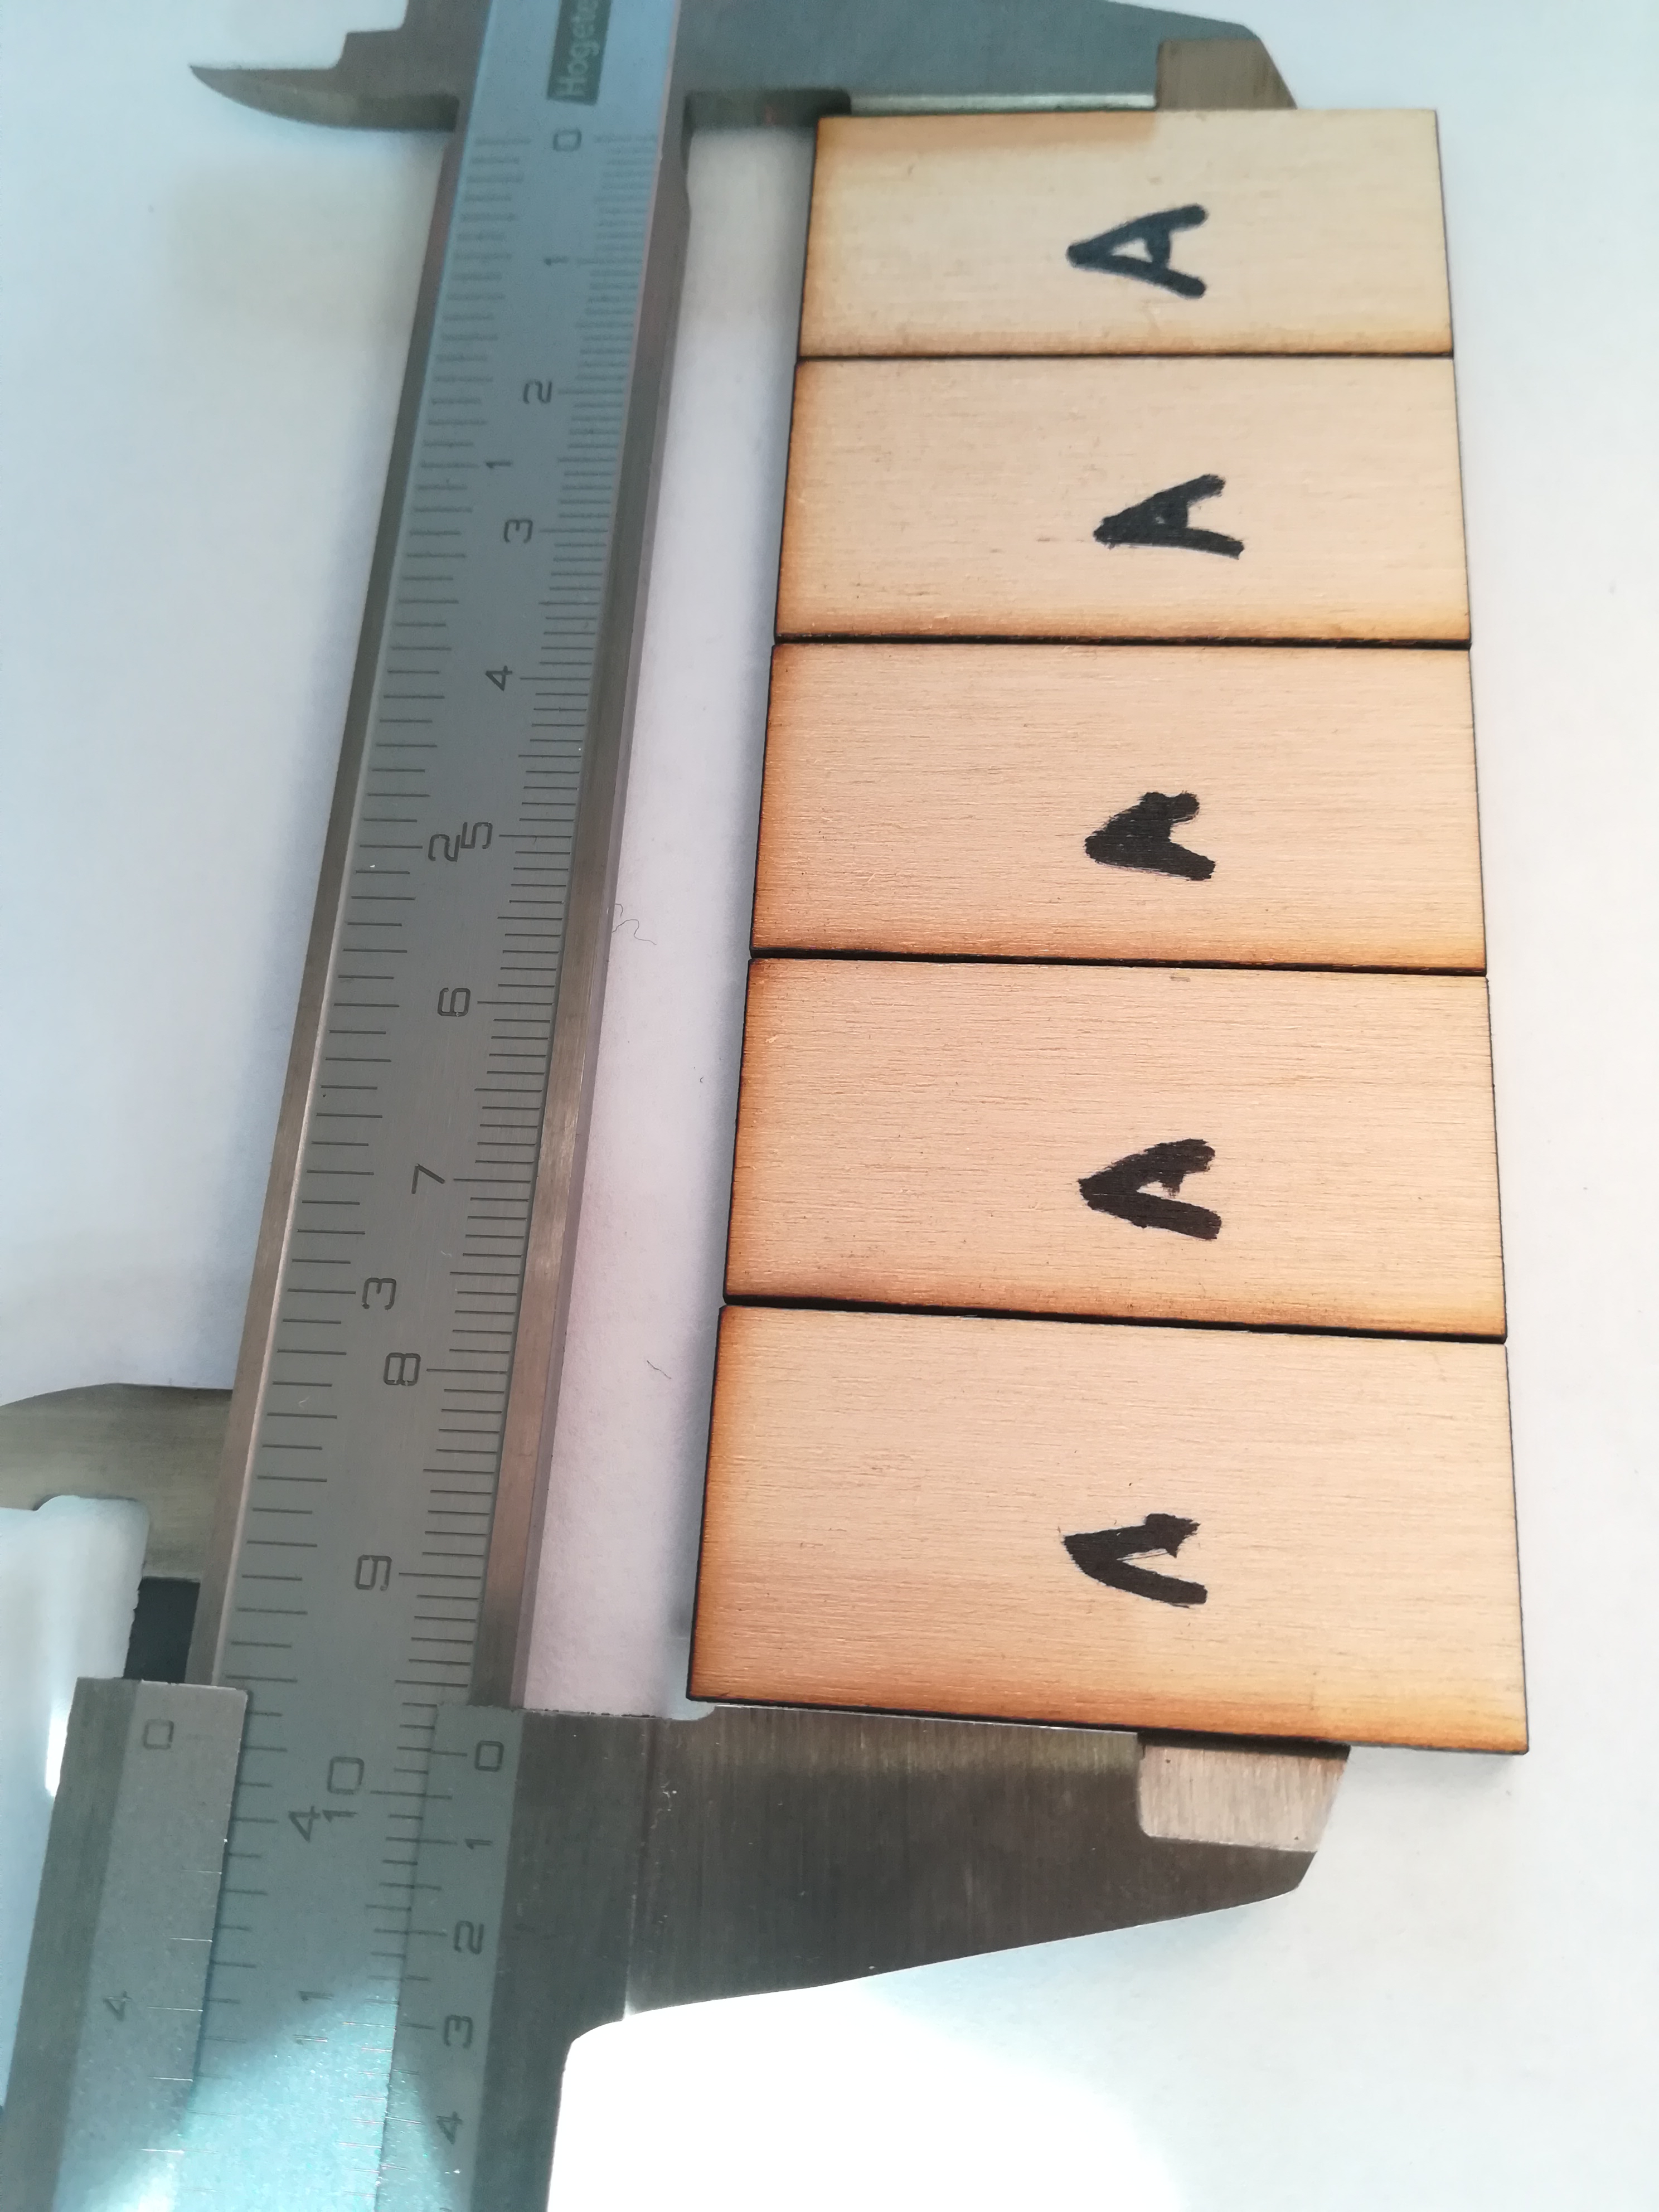
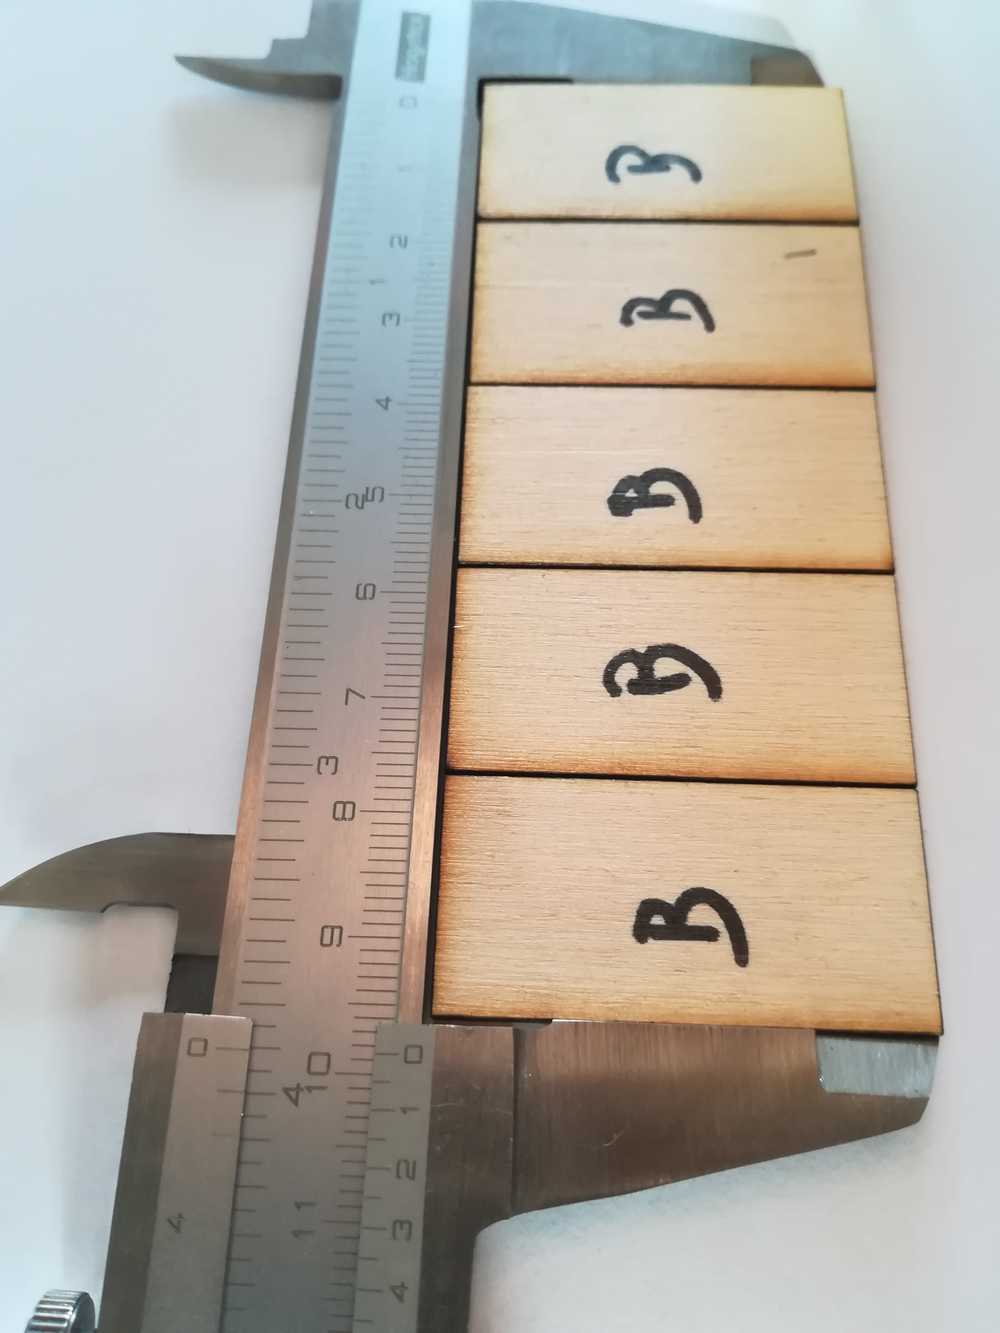
Actually, kerf got already declared in the first part and is around 0.20mm. But there is also a huge loss of material.
If I cut out 5 pieces of 2 by 4 cm, instead of 10 cm in the end, I get 9,80 cm. I did the test with laser optimization and took out all double lines. This resulted that a piece of 5x2cm would become
9.85 cm of width instead of 10cm.
To top
Velleman toolbox (individual project)
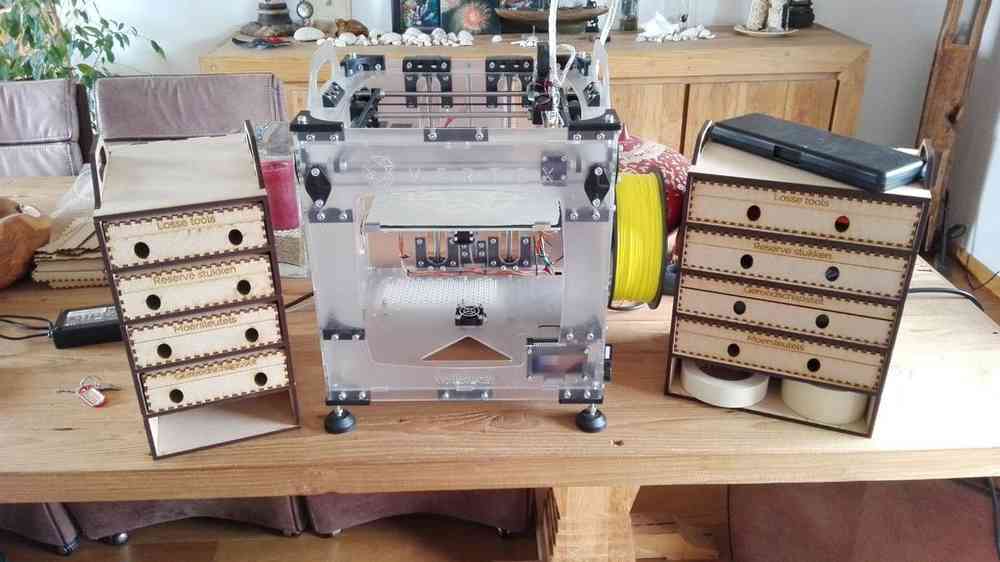
As described last week I found it annoying to have all the tools from my Velleman Toolbox not having a fixed place. Therefore I made a box that can hold all of those. Files and instructables can be found here.
Parametric Straw Connectors (individual project)
Problem description
On of the holidaymaker-camps that we give at 'De Creatieve Stem' are camps that have '3D' as a theme. We learn the kids the basics of 3D printing, drawing in Tinkercad, working with or even building their own 3D pen and much more. One of the activities that we do with them to give the kids some insight in 3D thinking is letting them make 3D objecs with straws.
We sometimes connect challenges to it: we limit time or the connectors. E.g. the children start with straws and tile spacers. After 10 minutes we add papertape. After another 10 minutes we add elastics...
What we've noticed is that tile spacers are nice connectors, but the children are often limited by them. Therefore we've been adding 'straw connectors' to our TO DO.
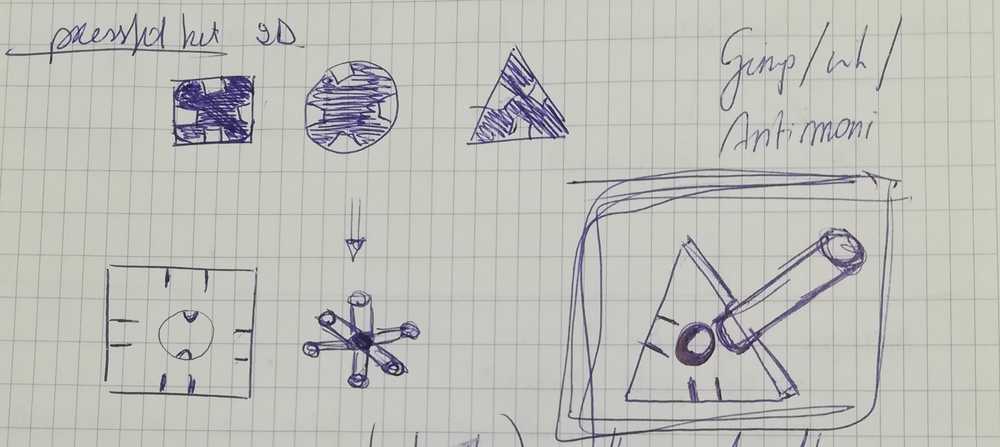
Our first idea was to 3D print the connectors, but during the class of computer-aided design it struck me that, maybe we can just work in 2D and that will be less material and time consuming.
Who has done what before?
- Strawbees
- Howest Industrial production design
- Commercial solutions
- DIY
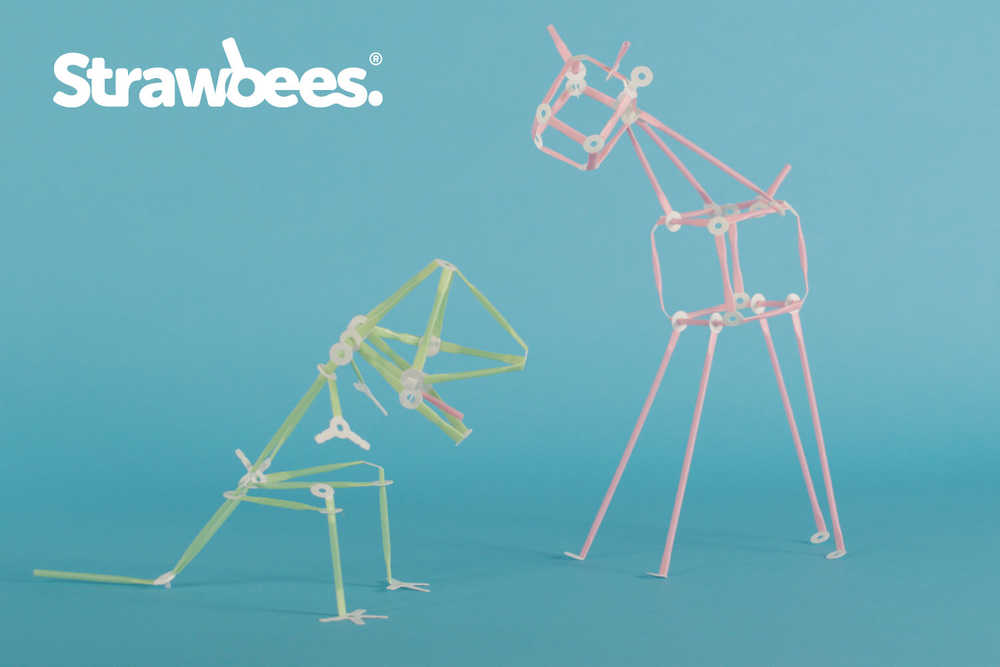
Strawbees is the company my team-leader always refers to when talking about the connectors. Ideal, she would like something like this, but produced in our own FabLab.
What we like about those parts is that they are 2D and easy in use. Their next advantage is that it's flexible. A child that wants to make a dog can have hanging ears now.
What we don't like is that of-course it's commercial and not reproducible in the lab.
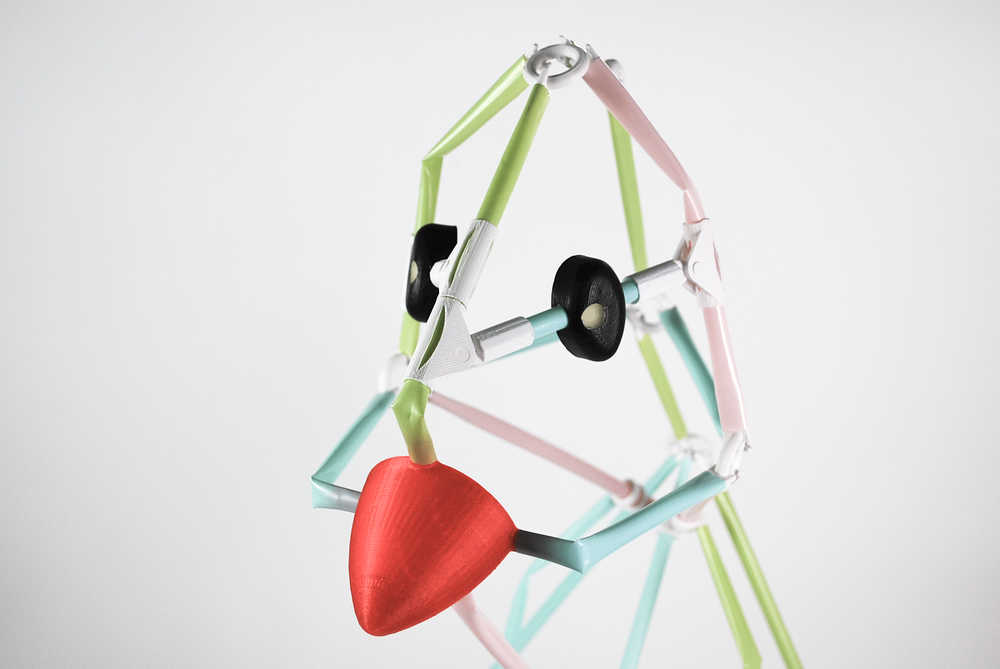
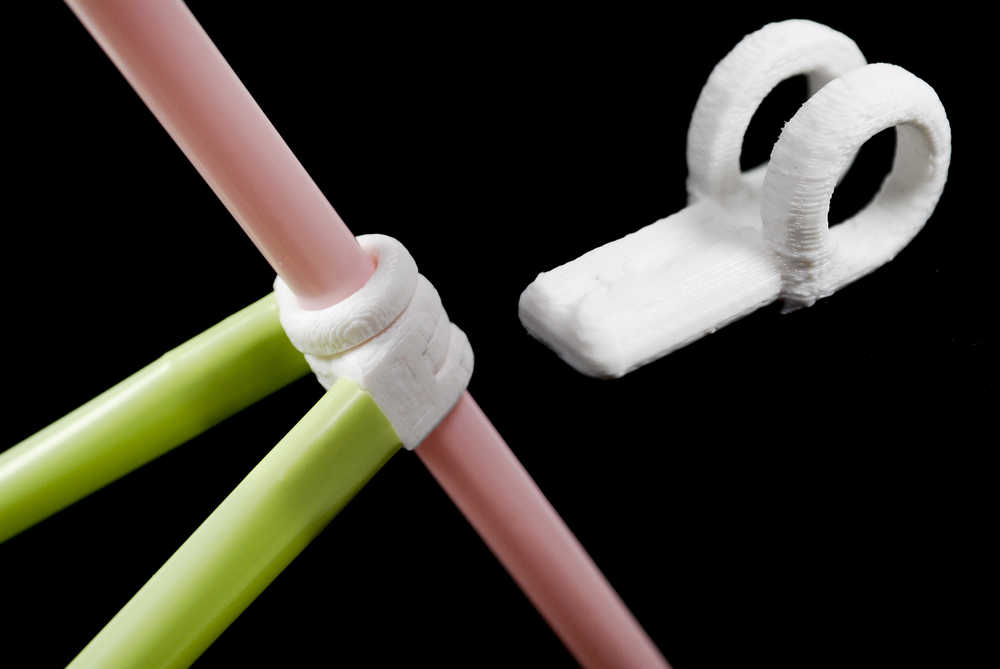
One of the assignments that the 2nd year students from Industrial production design (IPD), get in during the course of 'modern production', is to develop connectors
for straws and make an animal with it. Later in the semester they learn how to move on from 3D printed parts to actual injection molded parts and how they have to change the design to do this.
We were very interested in the project as we saw good use for it in our lab. Sadly, the rights belong to HoWest and as we have good connections we could take pictures of the connectors, and
take one animal home, but we don't have access to the files.
Pictures belong to Larissa Vervaeke, who was one of the students that had to make this assignment.
Next to that there are lot's of other websites and companies that cell connectors, for example: Roylco connectors, funsational finds, AliExpress, Vat19.
3D printing also made it's introduction to the connectors: Meshcloud has 3D printed parts to make domes with straws, but the files are not available. Another important creative source are teachers like Sycamore stirrings. They will always find you budget solutions. Source are Instructables. Member Amandaghassaei has made several connectors that are 3D print-able.
Sketches/doodles
Solutions
First prototype
My first step was to find out what straws we would use. In the lab we have 3 kinds of straws and I decided to go with the thick and medium straws. These are the easiest to find and most used. The physical properties of the straws would define the cutting lines within my design.
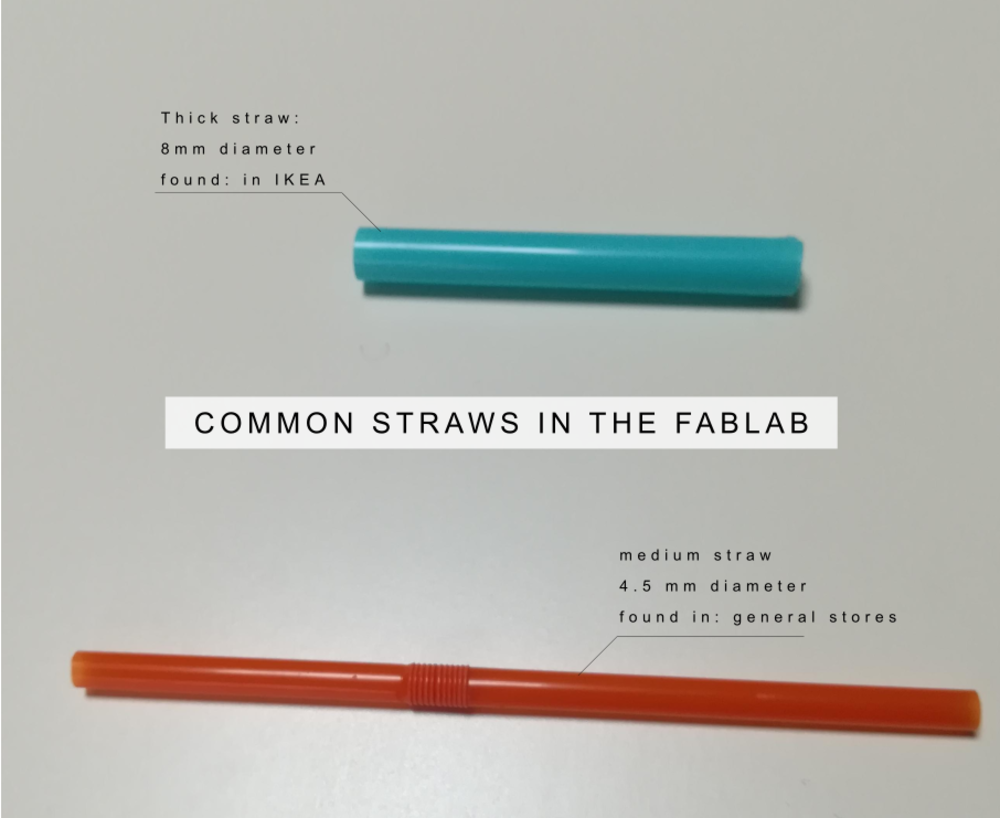
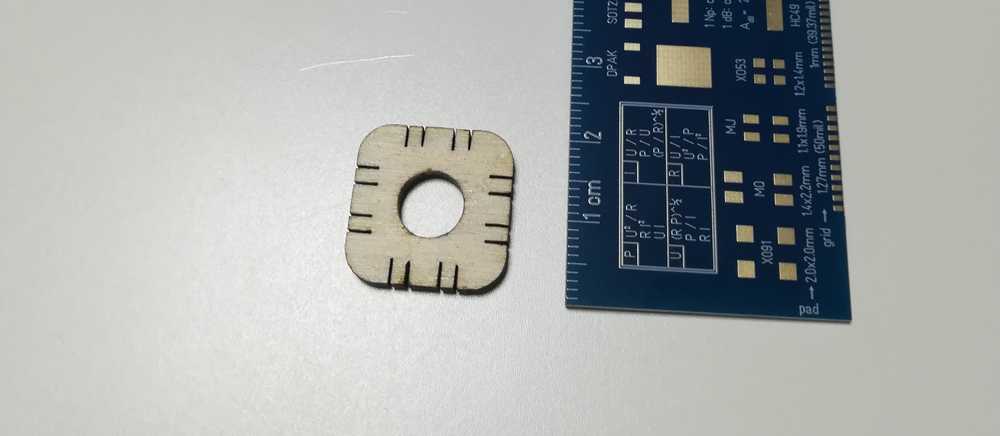
After measuring out the size of the straws and making my drawing in Inkscape, it was time to cut out our fist piece.
The wood I used for this was 3mm multiplex poplar wood. As I wanted to start small I used some of our leftovers.
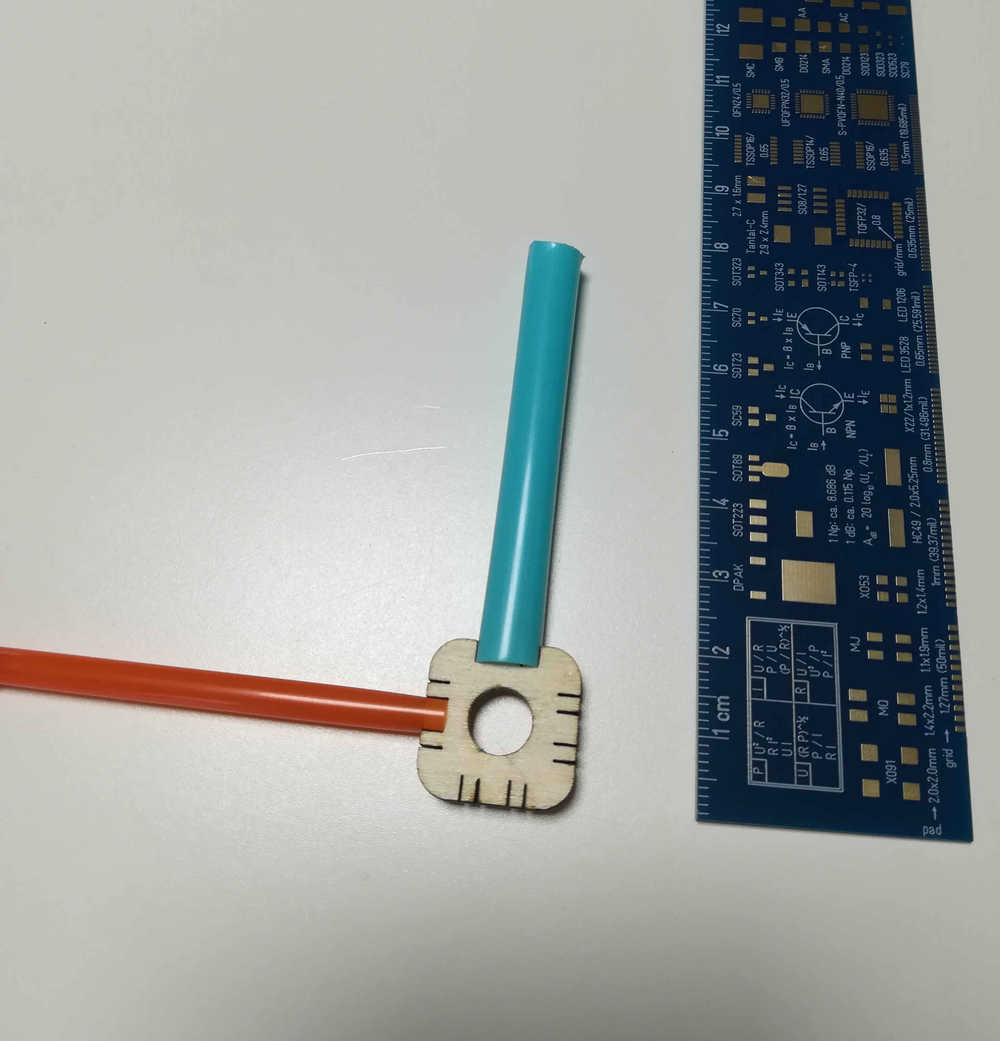
What went good was that the kerf of the machine (about 0.5mm on our machine), was exactly the right size for our straws to go into the cuts. The straws, once connected
actually stayed in place while we were adding new ones to the piece. What we didn't like was that the part was to small. Time for prototype 2!
 Next (wooden) prototypes
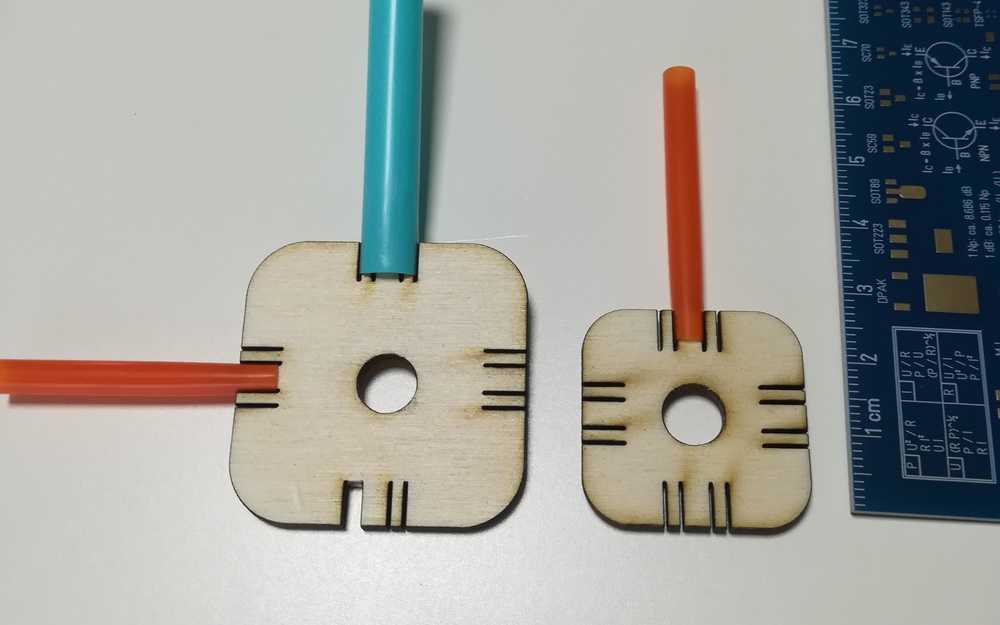
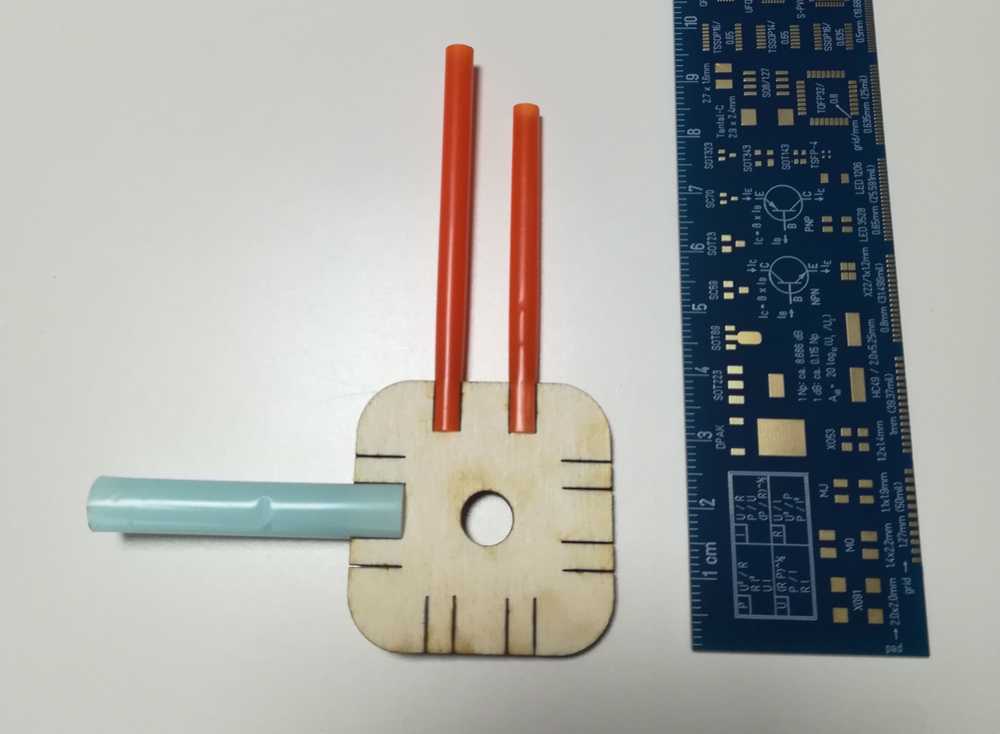
After my first test I made new ones sized 3cm and 4 cm. The cuts for the straws stayed the same. This resulted in better parts and more options with the pieces.
Another thing that I changed here was the dept of the cuts for the straws. In the 2mm piece the straws couldn't go very deep into the part.
Another mistake that I made was to re-size in Inkscape but taking all the parts, including the cuts, and not just the square. It led to fault piece, that in its own way was also perfect.
 Change of material
Before I completely changed from material, I made the mistake to use a 4mm poplar plate instead of a 3mm plate. This resulted in the straws still fitting, but even more tight. I went back to the 3mm material after that because the fact that we are working with kids and they would not have the patience to push the straws on the connection pieces that hard.
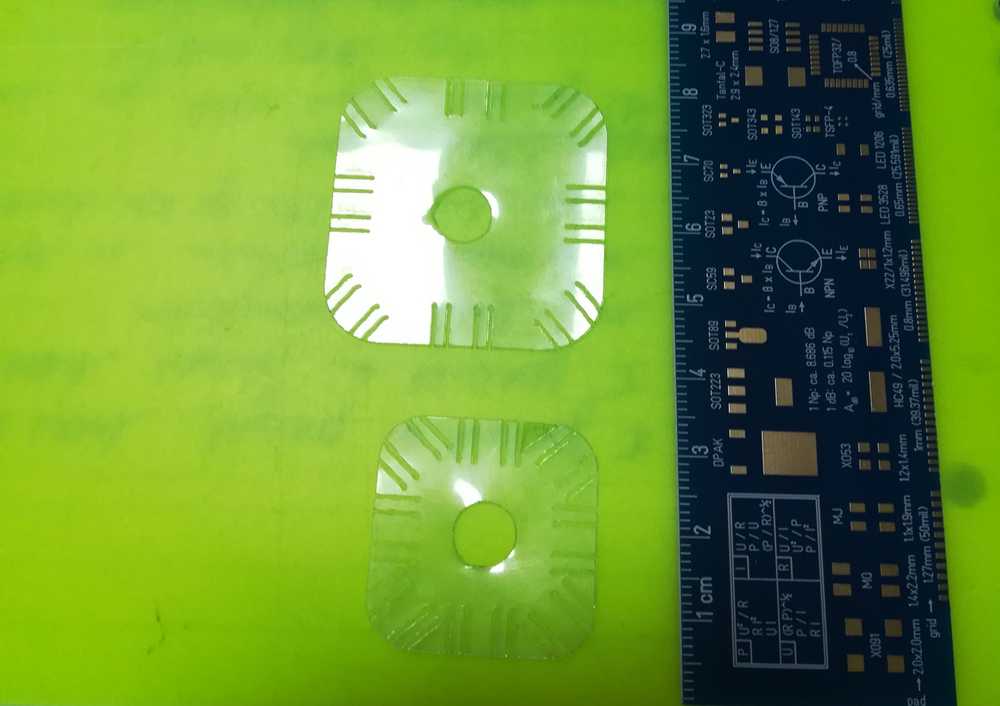
My actual material change existed out of going flexible. We all know the laminating paper to laminate paper or pictures. The paper we have is ABS so I heated up the plastic without paper
in-between and put it in the lasercutter. I took the same drawing as I used on the wood but different settings. As the materials defers, the piece also looks different.
The kerf of the machine now is to big for the material that we used as it simply melts away. To counter this, the cutlines will be put a fraction of a millimeter more out bound of each other.
Next to that, you can also beautifully see how the laser moves on the pulleys as the line is not completely straight in the corners.
 Change of shape
Having squares is fun, but what with other forms like circles and triangles? I started playing with circles and got to the same results. Everything that a circle can do, can also be done by
a square... As the design fitted, I decided not to change anything anymore. As the circles were okay, I started playing with small inserts on the cut line to keep the straw more in place, but
this turned out millimeter work.
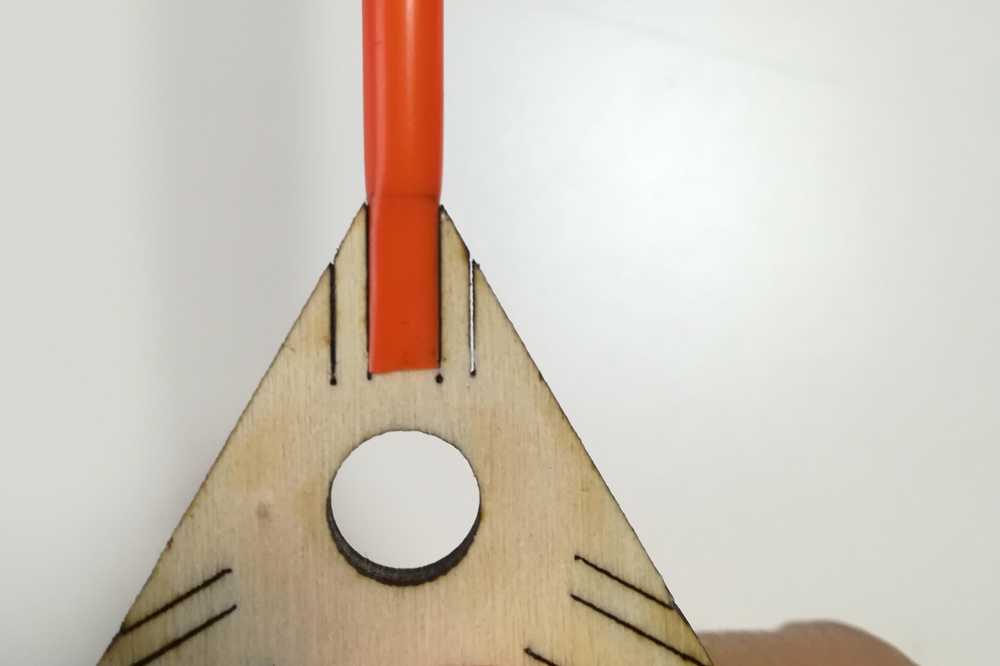
 On the triangle side there was more work to do. Corners were cut of, cutting lines lengthened. But most important we found out that we had problems with the guidance of the straws when using
triangles. Therefore we decided to take out some corners so that the guidance would change.

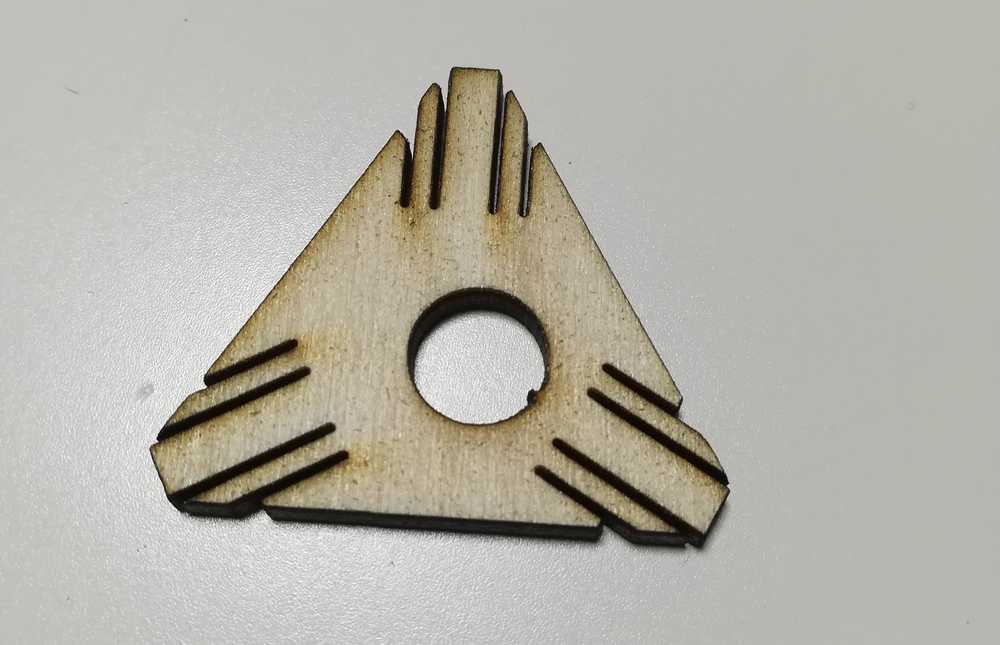 Final parts
The parts got tested by 2 kids of around 10 years old that came into the lab within the context of a job-internship. They had to observe what we do as a job, ask us some questions and shadow us for about 2 days. As they were learning about 3D printing, the perfect moment to let them use the parts and test out the prototype. The fun part? Even the colleagues wanted to play with the parts and started testing them out afterwards.


How did I create the parts?
The first tests were made in Inkscape. I drew a square, rounded the corners and added the cuttinglines to the square. Next to that I rotated everthing so that I would have cutting lines on the 4 sides of my square. Not that hard.
The last prototypes were made in Onshape. The thickness of the wood stayed the same (extrusion) but here you can find my declared parameters:
- #dimension: width/length of the piece
- #distance_thick_straw: thickest straw in the lab
- #distance_thin_straw: thinnest straw in the lab
- #hole: hole for straws in the middle, with notch
- #cut: length of the cutting lines for the laser/straw
After this I converted my 'Part Studio' file into a drawing and exported as .dxf and .pfd.
Both formats have the problem that they resize my object to double the size. Not what I wanted. To solve this, I open my file in Inkscape, delete all the content I don't want to have, edit the scaling and adjust he line colors for our laser. Last but not least, I duplicate the piece that I want to lasercut so that I can make a full plate (49 x 29 cm) of connector pieces.
To top
Vinyl cutting
Vinyl cutting with children
One of the workshops that we offer is plotting. The most common use of it: vinyl cutting. It's only the last year that we started using the plotting machines intensively during workshops as I was given time to develop workshops around this topic. I'm not going to talk to much about it, as this is a part of my daily job and not really usefull to the FabAcademy. We basically split up the vinyl cutting workshops into several parts, depending on the language level of my students (I often teach teenager that have just arrived in Belgium and don't speak Dutch yet) and the age.
Safety
On the contrary to the lasercutter, we don't focus to much on instructions safety when working with the vinylcutter. We encourage people to think logically when operating the machine: be careful for wristbands, for the knife, check the settings list, don't put your fingers in the machine when it's working... We'll mention all those things during the first explanation so that they know but won't stress it as often as with the lasercutter. But also this machine has a safety instruction card that's packed with the machine and people need to prove that they know how to operate the machine before they fly solo.
Vinyl cutting electronics
As I've been teaching vinyl cutting to children for about 6 years now, I wanted to test my machines in another level and learn something myself. I decided to follow the footsteps of a lot of FabAcademy students before me and test out the vinyl cutter on copper tape. You might wonder, why? Everyone has done that before. Yes, maybe, but it is new for our lab and no one here has experience with it. So I happily used the FabAcademy as an excuse to start playing around with it.
The Silhouette Cameo 3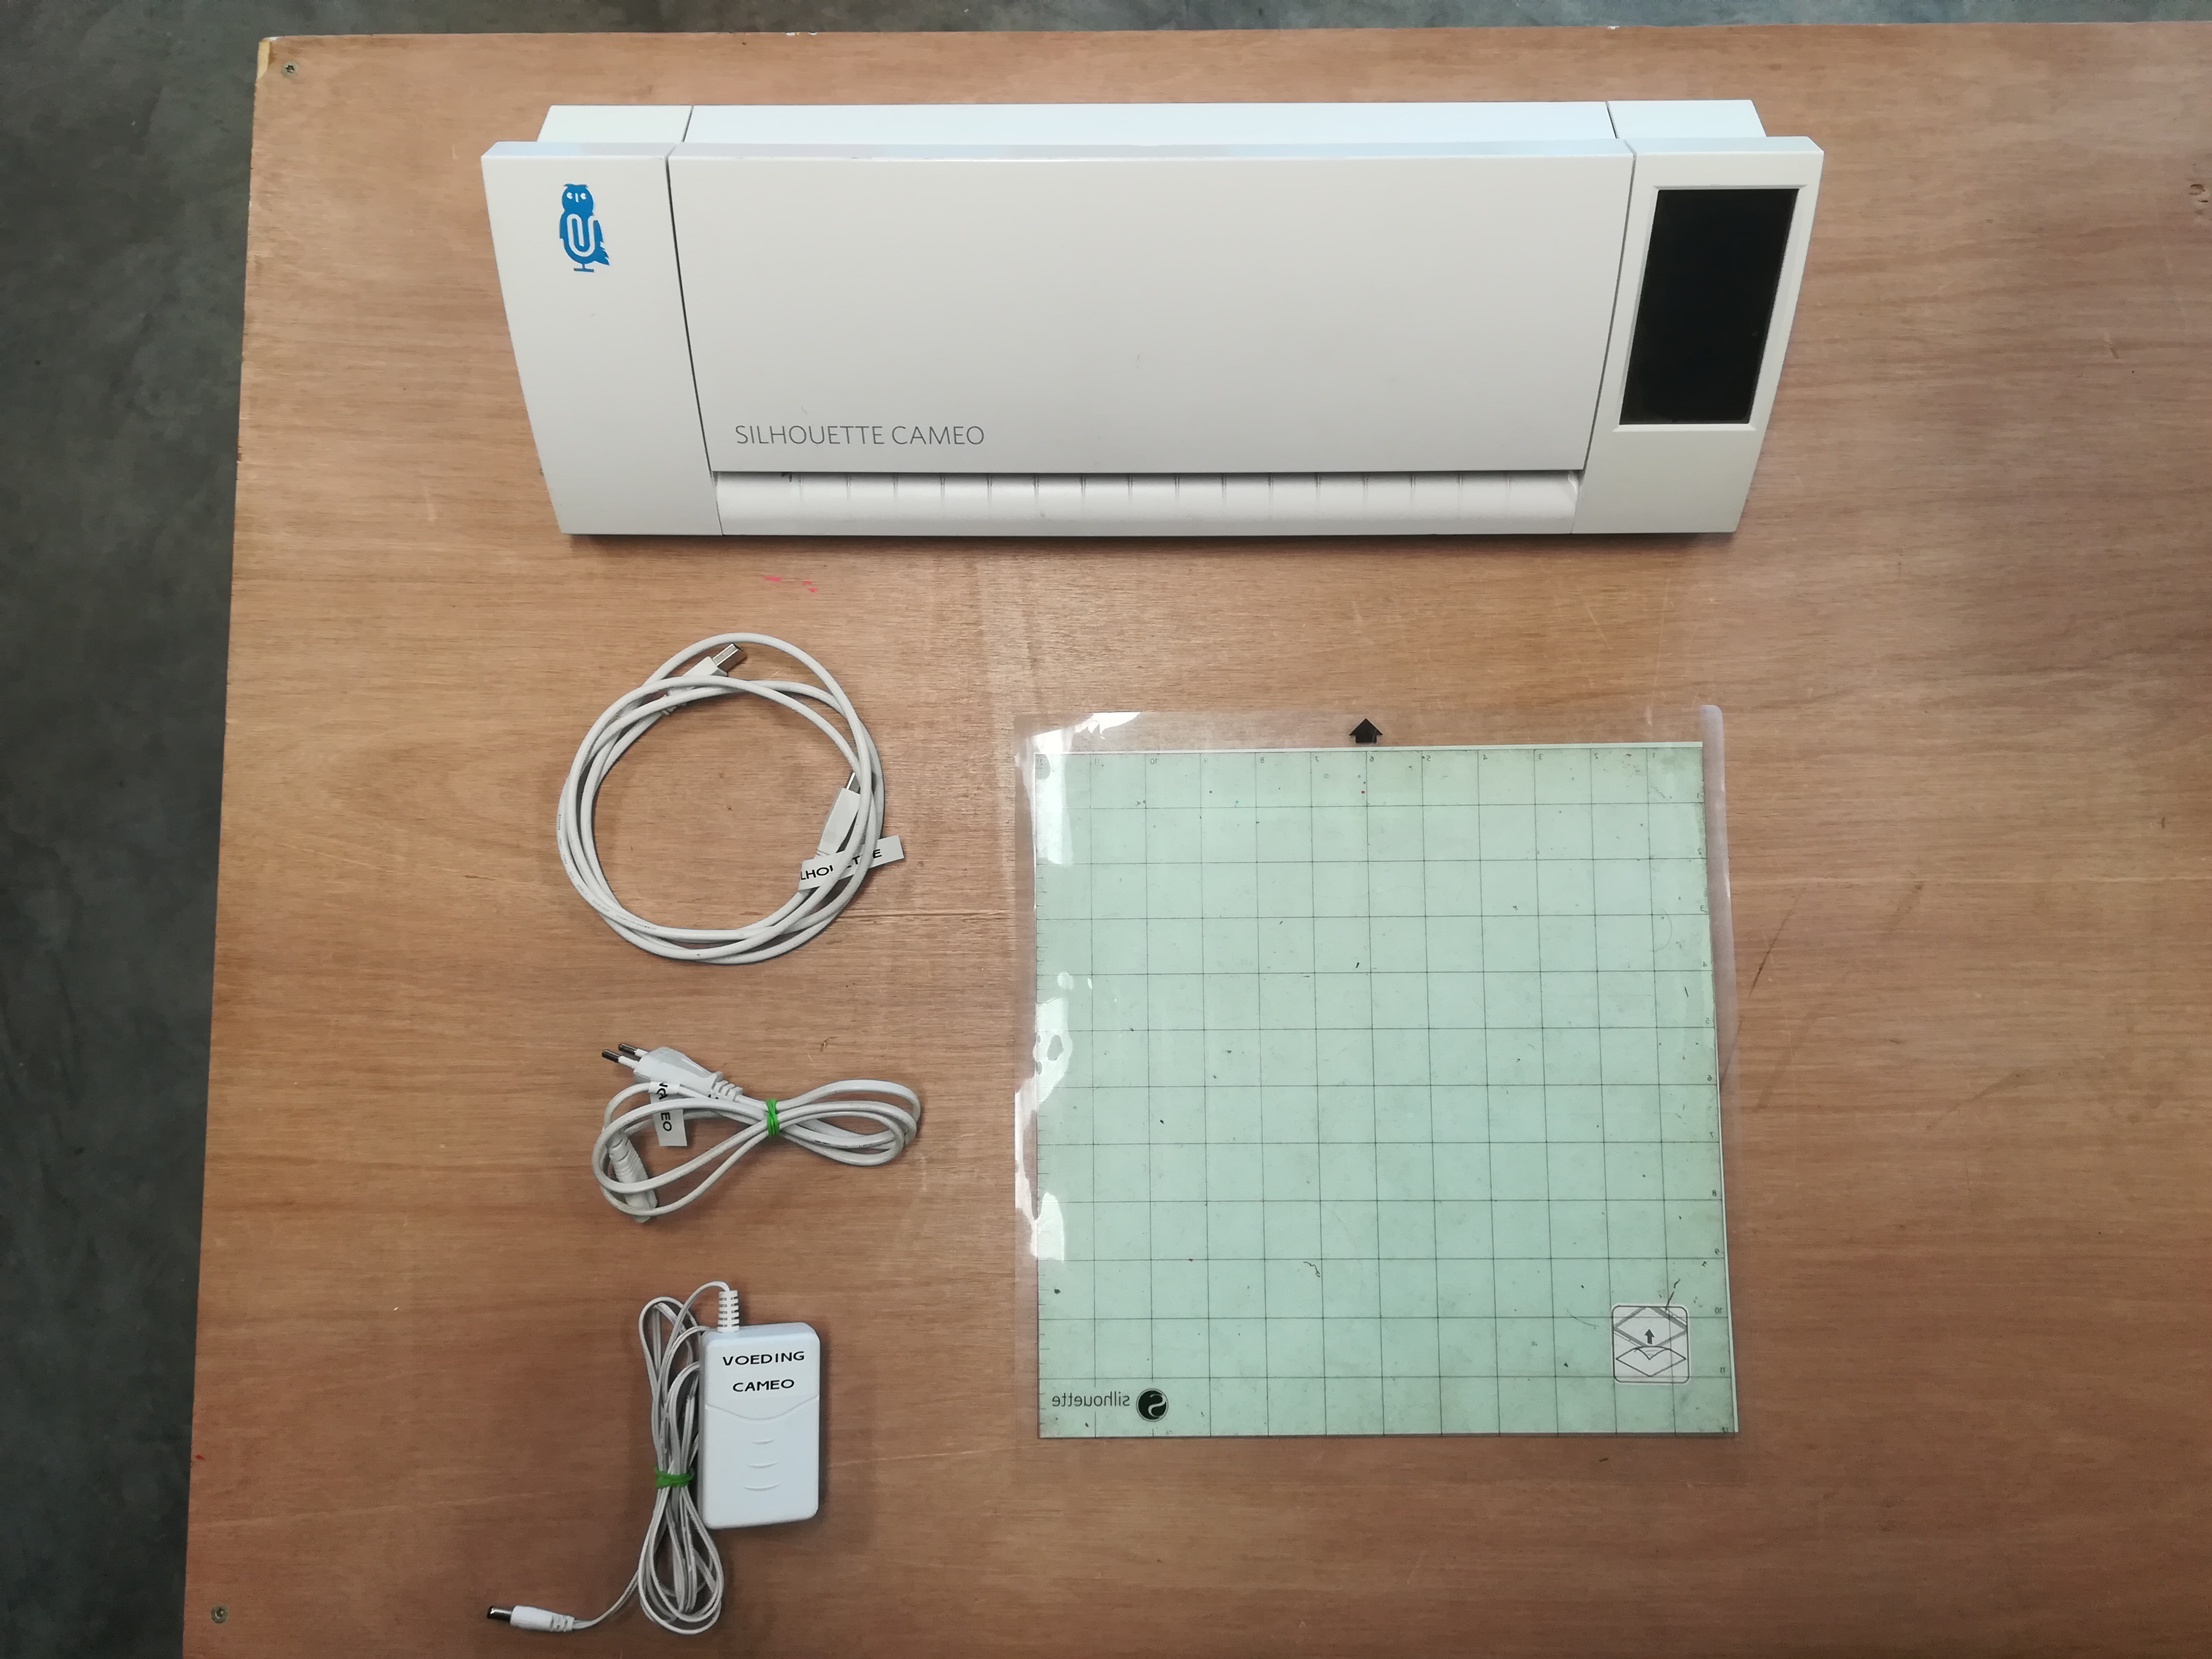 Our cameo vinylcutter
As I was preparing our Silhouette Cameo 3 to be rented out to a school, I saw my opportunity to add some materials to their material list. One of them being copper tape. I'm adding the settings that I used below. For normal drawings this worked fine, but not for the pcb design that I used. A problem both the silhouette and the Brother have is resizing objects when importing.
| knife | speed | pressure | passes |
| 3 | 4 | 13 | 1 |
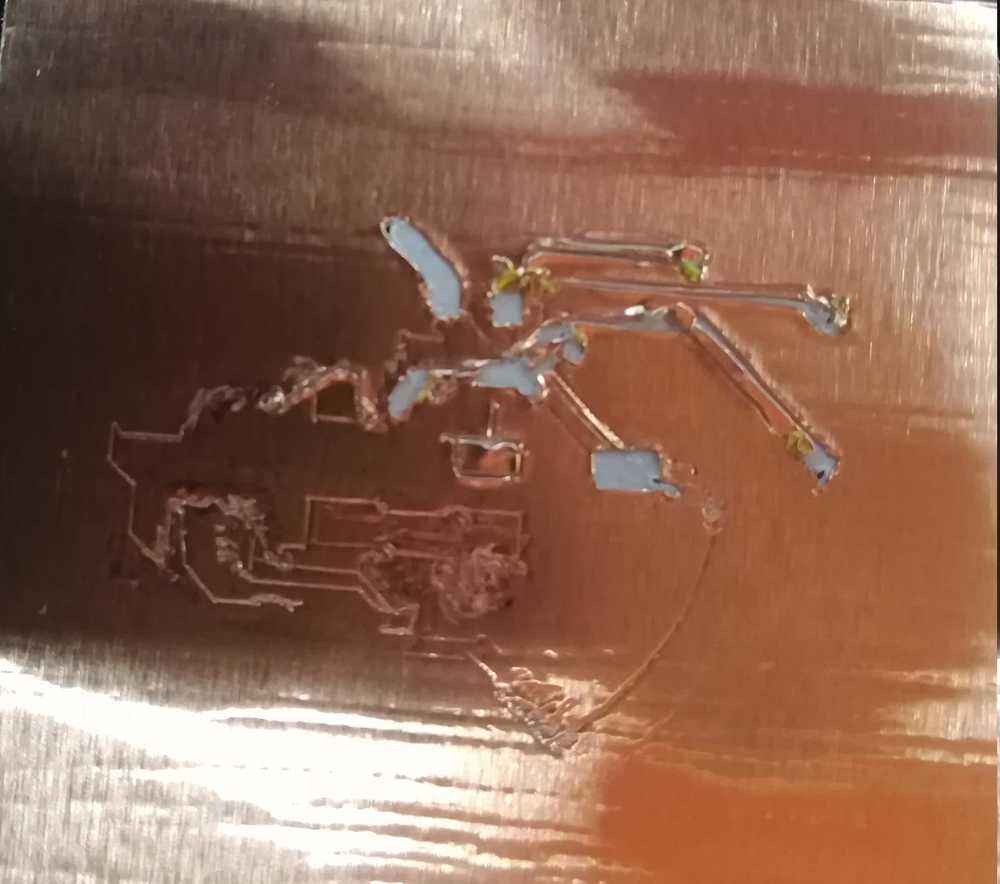 The brother Scan'n Cut DX1200
 Our brother DX1200 vinylcutter
Time to try with a modern machine. Since last year we're having the Brother Scan 'n Cut 900 and DX1200 in the lab. Next to the awesome scanfunction, the latter also automatically sets it's correct settings. In this case I only had to send the machine the right pcb file and off we went. In my first try I was a bit distracted by everything that was happening around me, so I resized the board to 4 inches instead of 4cm. The good thing was that the Brother Scan 'n Cut DX1200 can perfectly handle copper tape on auto settings.
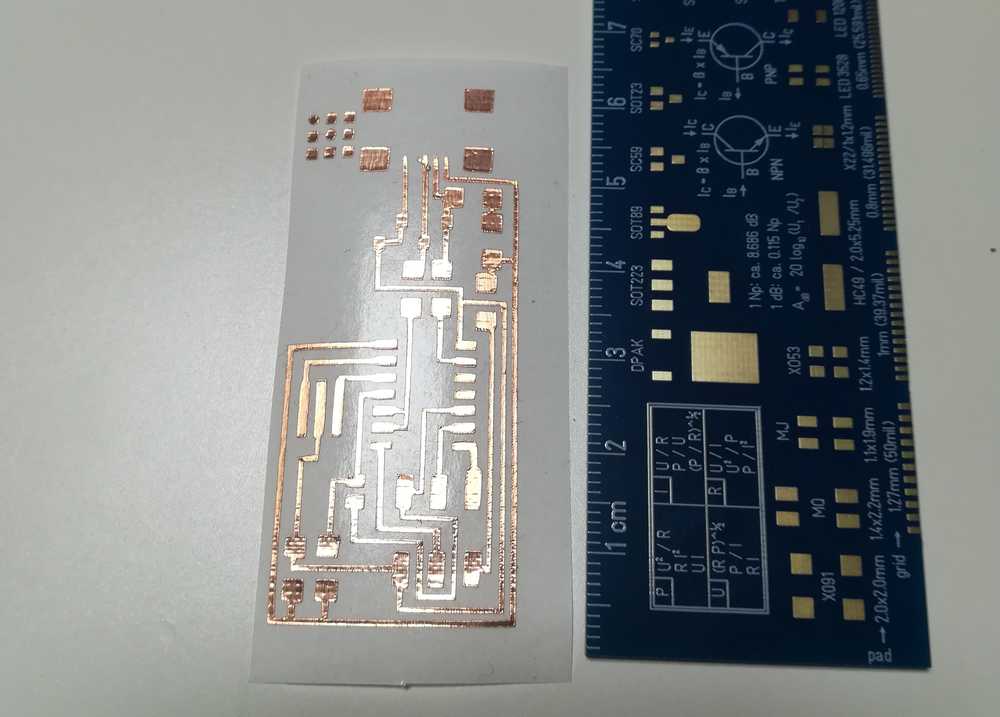
In my second try I went looking back at a picture that I took of my ISP back in 2013 when I was enrolled in the FabAcademy then. To give people an idea on how big it was, I put a ruller next to it. Still useful until today! But it wasn't a success eighter.
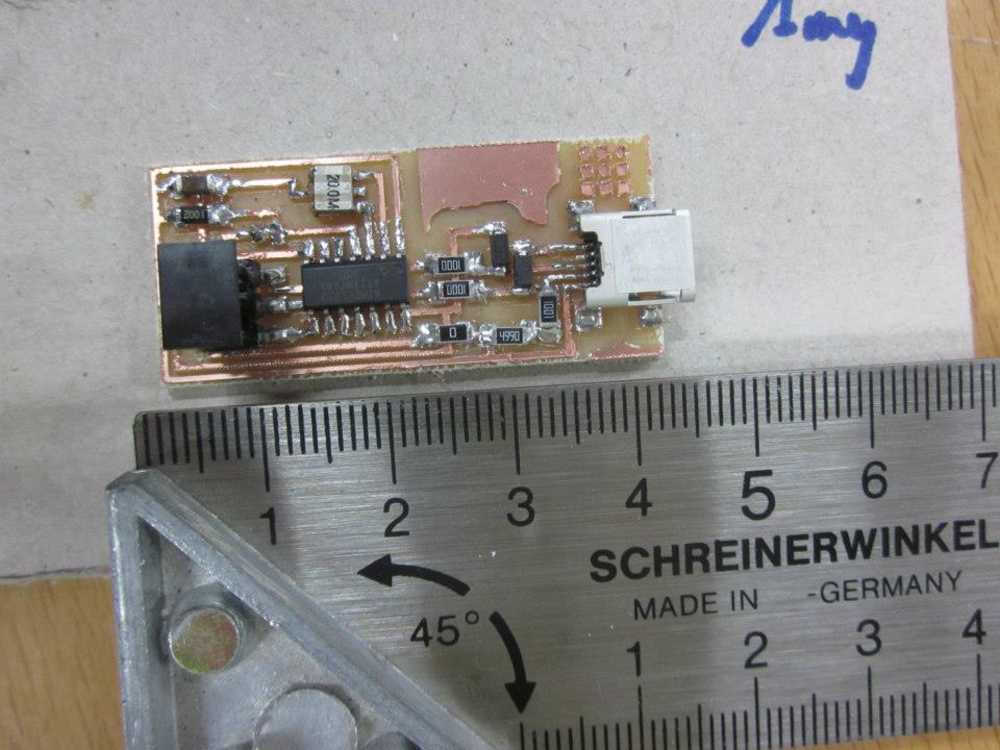
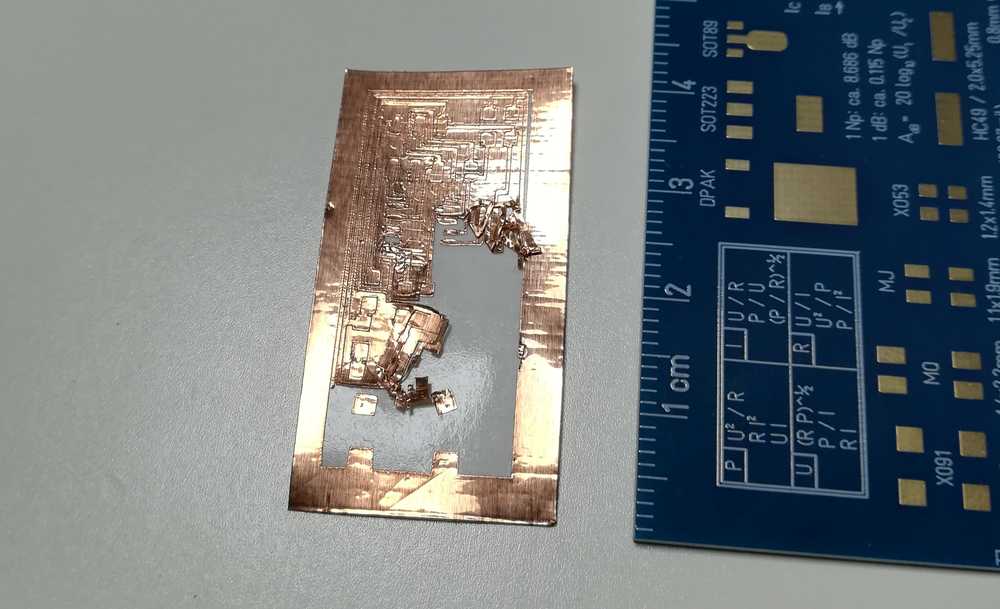
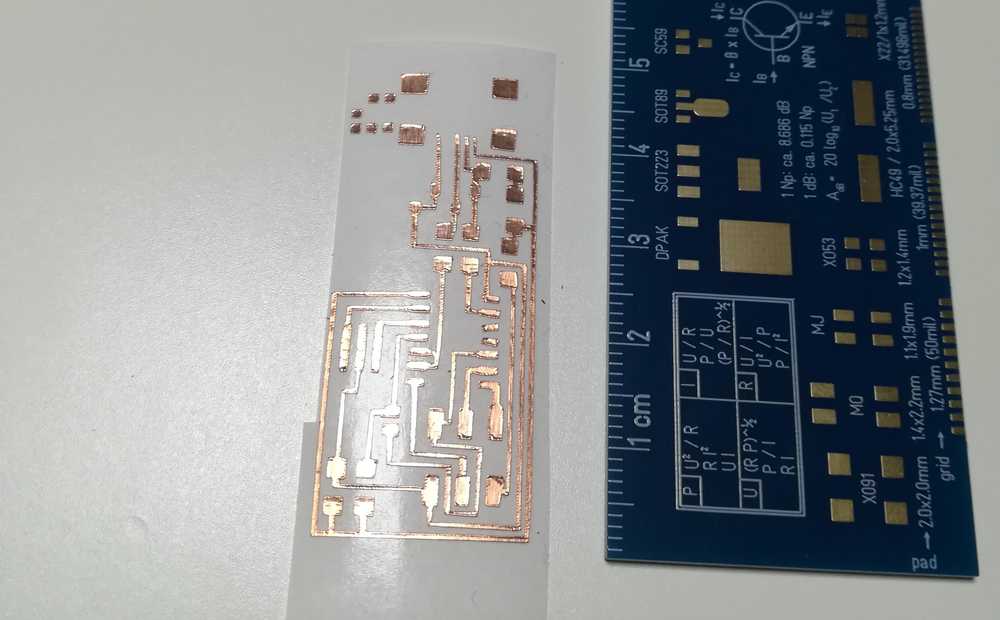
The evening evolved into trying out how small I could go with the cutter to have an ok result that is peel- and solderable.

As last step I tried to solder the components to the copper vinyl. Only to find out that my guessing during the vinyl cutting was off by half a millimeter. The parts don't fit.
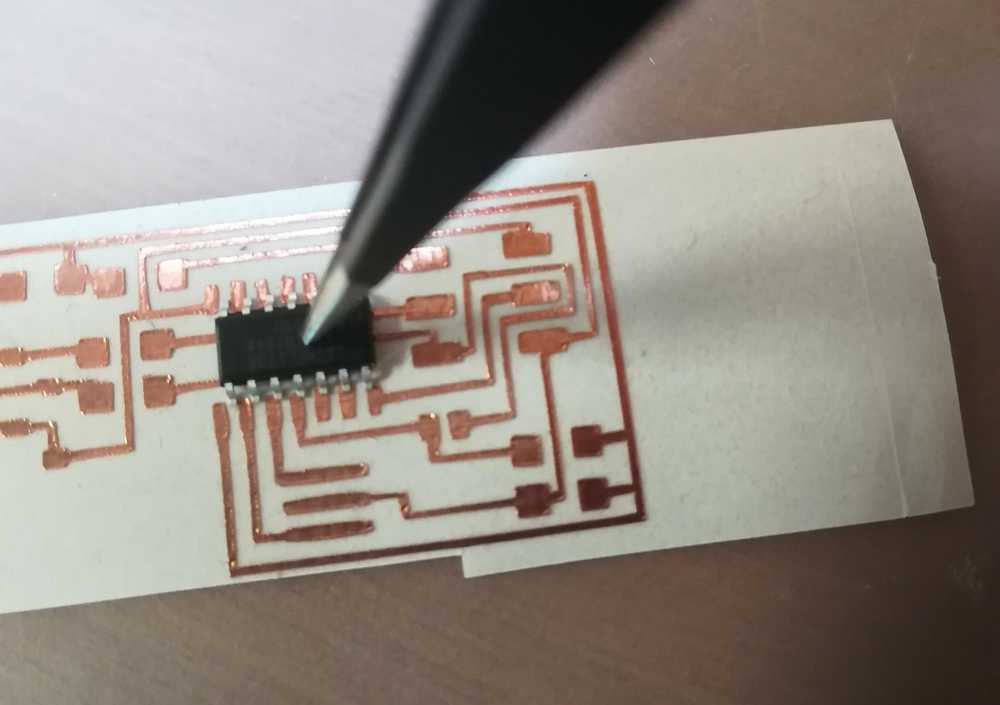
Conclusion: for peeling I liked 4cm and everything bigger than that the best. It now depends of the smd components if they fit on it. And I do really enjoy working on the Brother Scan ', Cut DX1200.
To top
Vinyl cutting and electronics
There was one more thing that I wanted to try for this week, and it's connected to my final project development . One of the ideas there is to use textile and conductive materials to make a giant breadboard for children. There has been a whole process of ups and downs with al lot of trying. Most of it you'll find back in the final project development page. As for now, I'll tell you how I made the first prototype.
- Step 1: Find a good drawing online or draw one yourself
- Step 2: Edit in Inkscape
- Step 3: Send it to the vinyl cutter
- Step 4: Cut out your drawing
- Step 5: put your sticker on the textile (DO NOT USE THE HEATH PRESS!)
- Step 6: make your electronic circuit
- Step 7: heath press the vinyl on your textile
- Step 8: fit the electronics on you textile
- Step 9: signal morse codes!
As time is limited (and I can't draw very well) I chose the option of finding a drawing online. I did my usual steps by using the google tools in my search (images -> tools -> black and white and line drawing), and my subject was a lighthouse this time.
The second step is to take the picture and open it in your vector program. For me that's Inkscape. I used the trace bitmap in order to have a vector to work with and edited some lines.
This is the main reason why there are not files of this project: the vinyl cutters that we use in the lab have the tendencies to resize the drawing to what they see fit. I can scale the vector in Inkscape to 10cm x 15cm. But once imported in the Brother or Cameo software, it will be bigger/smaller. Also, this ain't hard, use your creativity for once!
I have pictures of this, but well, as we all know by now, cutting lines are very thin, so not really visible on pictures.
In this step we're going to map out where our light will be coming. Therefore, just use a cutter knife to make a small hole through the textile and plastic. The reason why I'm telling you
not to use the heath press just yet is because if you need to sew, it's going to leave scars in the vinyl. The plan originally was also to have conductive paint under the vinyl etc... documentation
on this step can be found in the.... final project development week.
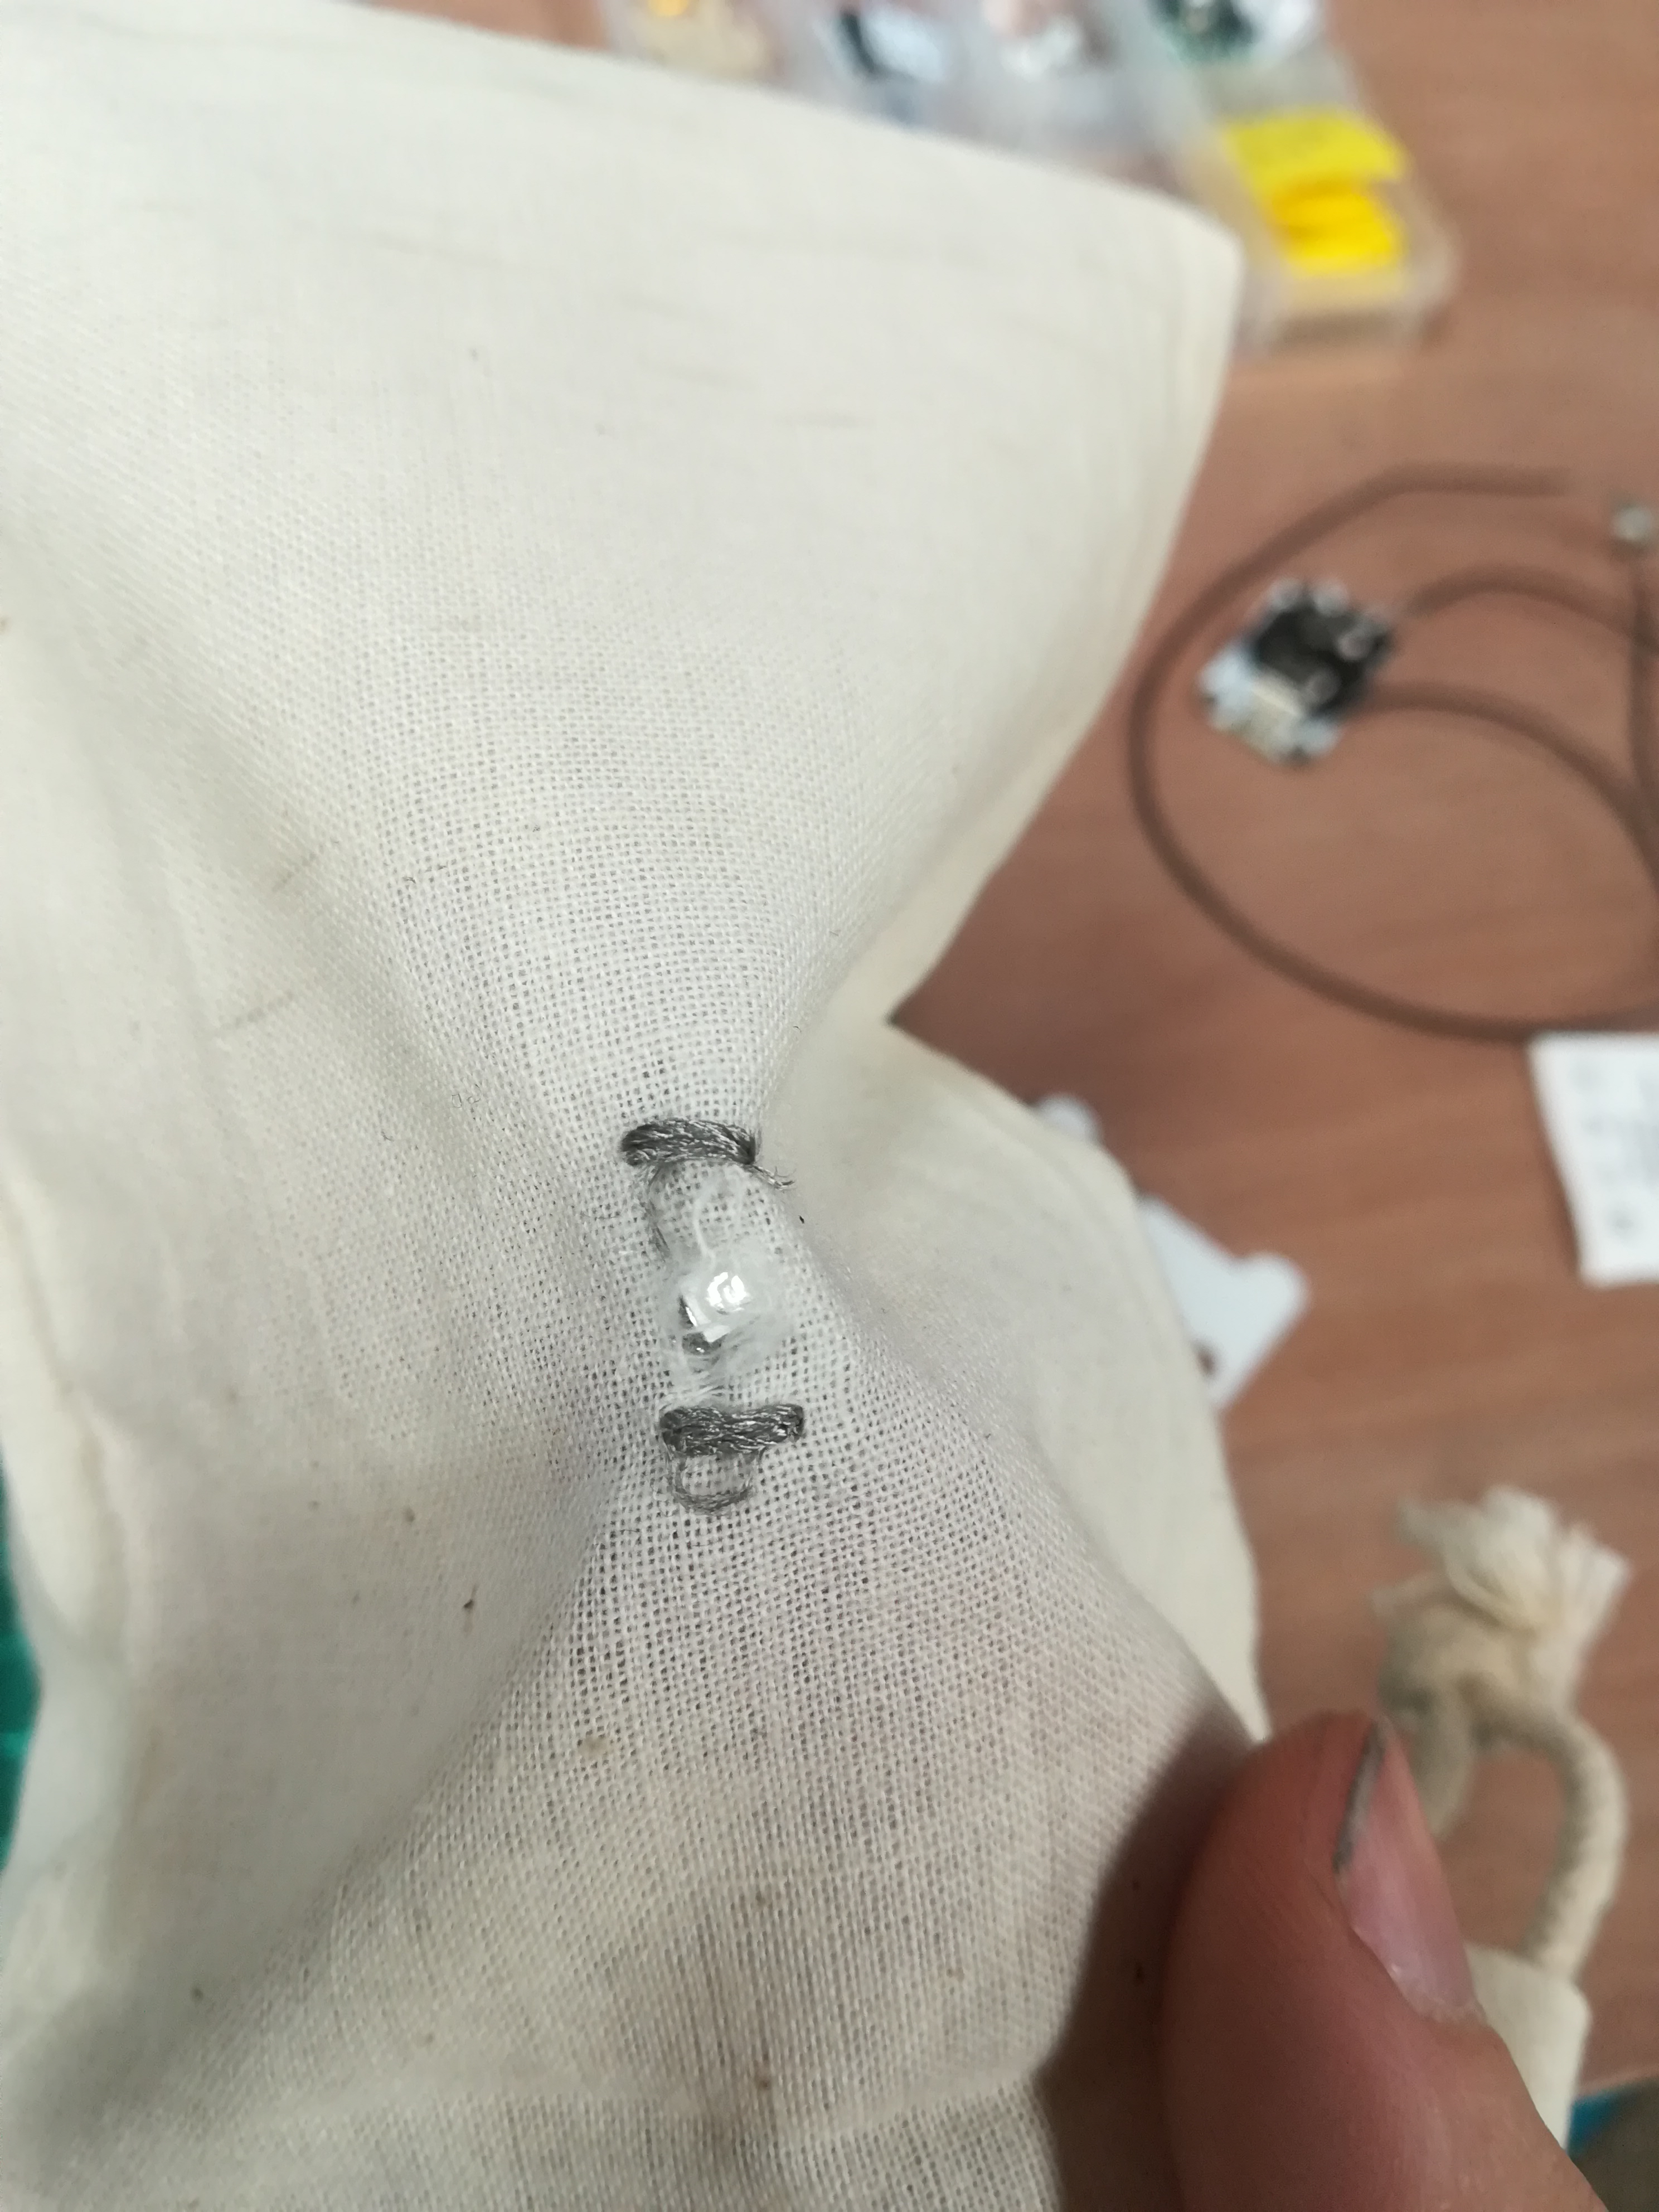
We're starting with the basics: so a push button, coin cell battery and a LED. Also, all my textile components come from Kitronik.
This does not need a lot of explanation. Use an ironer or heath press to press the vinyl on your textile.
I used a small bag in which I dropped all the electronics, but the original plan was to use Bekaert thread (conductive thread) and put the electronics in the sews. It will be for next time For now I just used normal electronics cables (I might have killed some crocodile clamps for it) and hacked it that way.
This could be an assignment for children during one of our workshops, we already have on about morse code, so adding textile could give it an extra digital dimension. For now
I'm just having a lot of fun with it.


To top
Reflection on this week
During this week I pushed my limits further by adding more then just vinyl to it. I already knew vinyl cutting and laser cutting and was happy to finally have some time to finish up some of the projects that I've always wanted to do. The electronics, textile... The Academy gets me into a certain drive to finish and try out wish list projects but also pushing my limits by doing so. It's triggering a lot of ideas and paths to follow, unto the point that I keep flowcharts in my (paper) notebook to see what works and what doesn't. But also to keep track of ideas. It's empowering and I feel that I'm becoming a better mentor because of it. Always telling the same story to your students gets boring after a while, and though I already know more about some subjects than my peers and colleagues within the FabLab world and product designing world, It's nice to add knowledge to my own brain again. It's refreshing, sparks the creativity.
Lasercutter
-
Comb for testing laser
Single and double lines
Solidworks file from lasercut straw connector
Lasercut straw connectors 3mm poplar
Link to Velleman toolkit
Vinyl cutter
