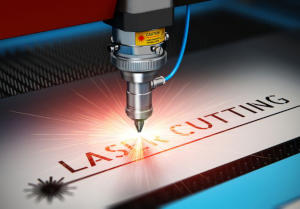
COMPUTER CONTROLLED CUTTING
In this week we use different forms of cutting machines and materials (vinyl and wood). In the same way we perform group, for the calibration of union of pieces type press fit.
1. Group Assignment
characterize your lasercutter's focus, power, speed, rate, kerf, and joint clearance
1.1 Laser Cutter Characterization
Carlos Nina. - Ivan Callupe.
Eduardo Tejada.
Team Group
1.1.1 TROTEC Speedy 400/h6
The first objective is find the parameters to get a clean cut. The second step is measure the kerf of the machine. The last test is about tolerances. We need to find the tolerances to get a good press fit.
An important information is the Machine engraving area 1000 x 610 mm (39 x 24 in), (
Important considerations before cutting:
- "Focus the lens": Basically it is ensure the right distance between the piece and the lens. This procedure require put a special tool over the lens and up the table, until the tool fall, due to the contact with the material surface. This procedure must be done before each cut job. The irregular height of the material surface, can affect the cut and leave zones uncut.
- "Turn on the air extractor": In this machine, the air assistance can be configured from the software to each cut job.
- "Clean lens": We notice, the lens on this machine can get dirty much faster than the epilog. So, keep the lens clean is an important consideration.
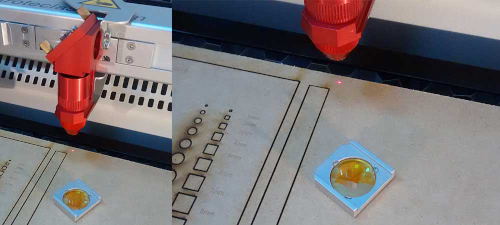
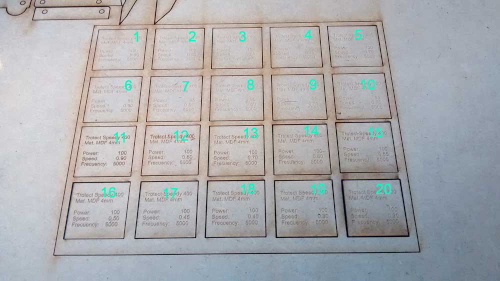
we create small squares too. (The first 10 squares was made before clean the lens of machine, so we did it again).
_
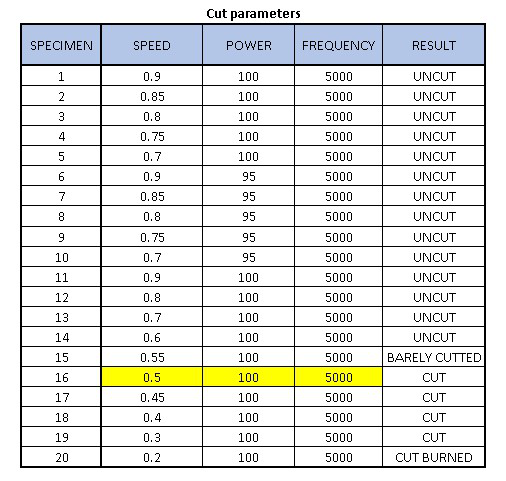
The result of the test is:
_
The best paratemeters to make a good quality cut are speed: 0.5, power:100 and frequency:5000, to 4mm MDF.
To calculate the kerf of machine, we need to measure the outer borders and the inner borders of the cut, then divide this rest by 2.
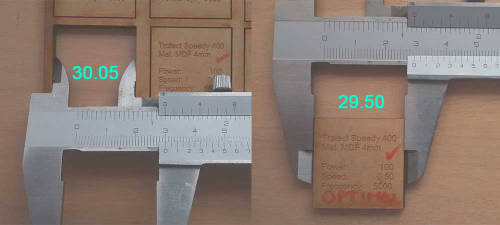
_
In this machine, we test the fit too. So, these are the results:
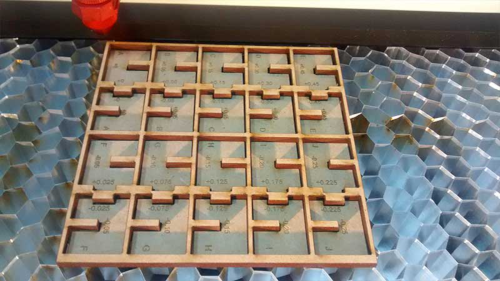
_
Interference fit on C joint is:
In this machine, we test the fit too. So, these are the results:
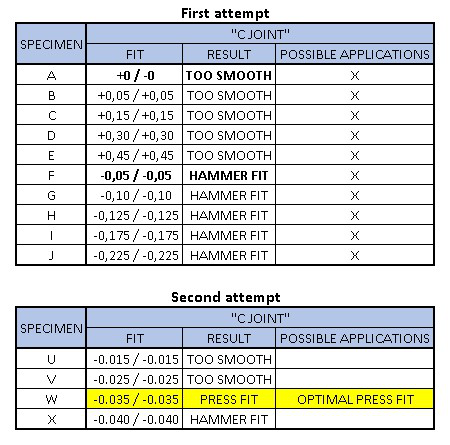
_

_
So, the optimal press fit is -0.035mm to a "C Joint"
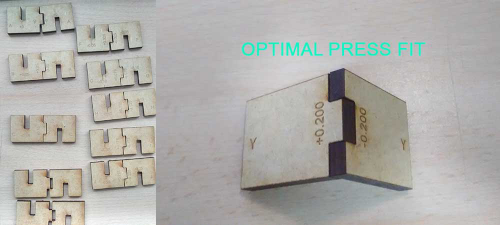
_
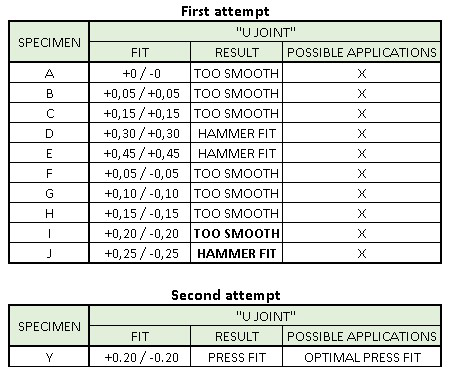
So, the optimal press fit is +/-0.2mm to a "U Joint"
2. Individual Assignment
Cut something on the vinylcutter design, lasercut, and document a parametric press-fit construction kit, accounting for the lasercutter kerf, which can be assembled in multiple ways, and for extra credit include elements that aren't flat
2.1 Vinil Cutting
2.1.1 CHOICE OF DESIGN
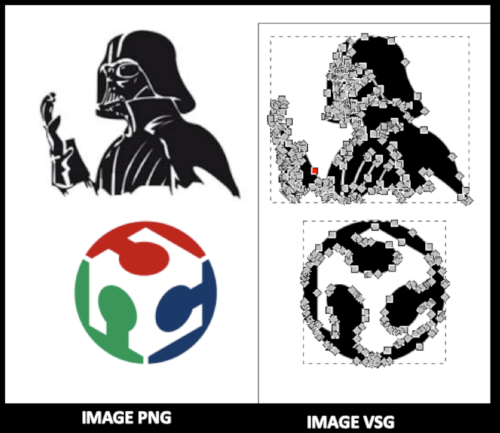
From the internet I chose two images, which I wanted to include in my design. It was easy to find the images and keep them in .PNG format.
- FabaAcademy logo.
Darth Daver design.
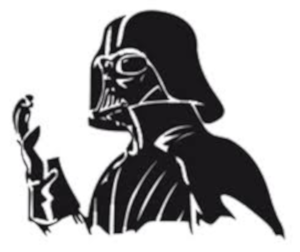

This is the look I made when cutting vinyl.

_
2.1.2 Vector layout design
The images must be changed to a vector line format (.svg). There are several ways to edit the designs. I started the design in
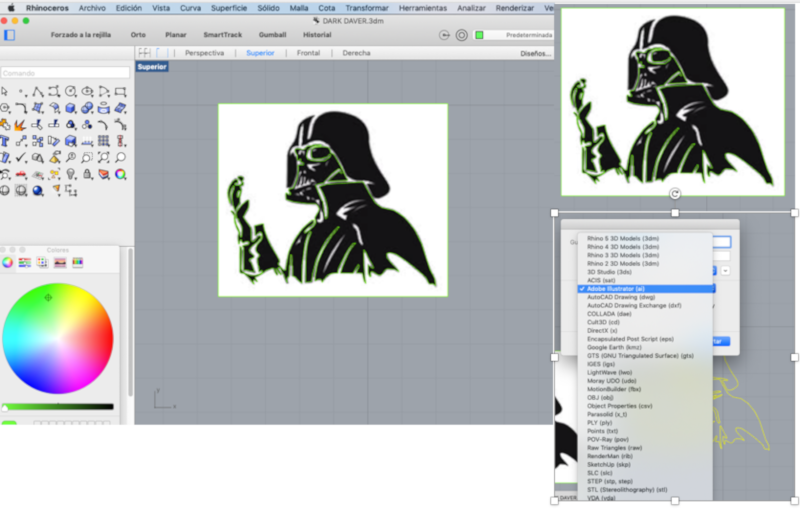
Inkscape is an open source software for vector design.
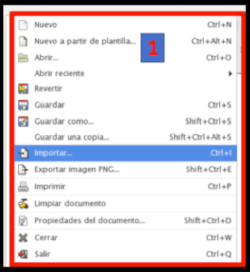
(1) You have to import the image you want to make the line drawing.
_
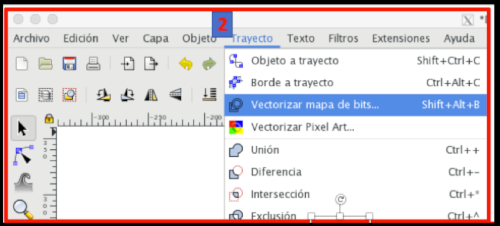
(2) By selecting the image, the bitmap vectorization option is chosen.
_
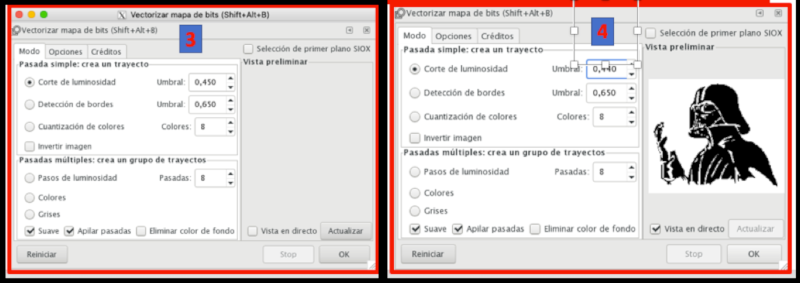
(3) and (4) the brightness cut is chosen.
_
The use of inkscape is simple and fast. The plot option is automatic. Only a few modifications are made to improve the design. The time to make the design took approximately 5 to 10 minutes
_
2.1.3 The Vinyl Cutting
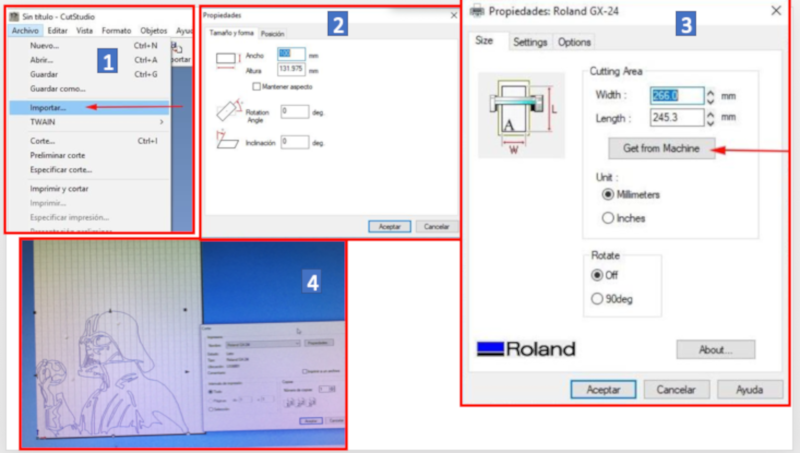
The Cutstudio is a software, from the Roland cutter. (
(1) The file designed in SVG format (rhinocero, inkscape, etc) is imported. (2) In properties we choose the size of the design we want to cut. (3) Place the image in coordinate point (0,0). (4) In print properties specify the cut (get from machine). Then accept to start the cut.
_
The machine performs the vinyl cutting of our design. Then we made the paste of the design on any surface we want. The vinyl sticks with care and with patience.
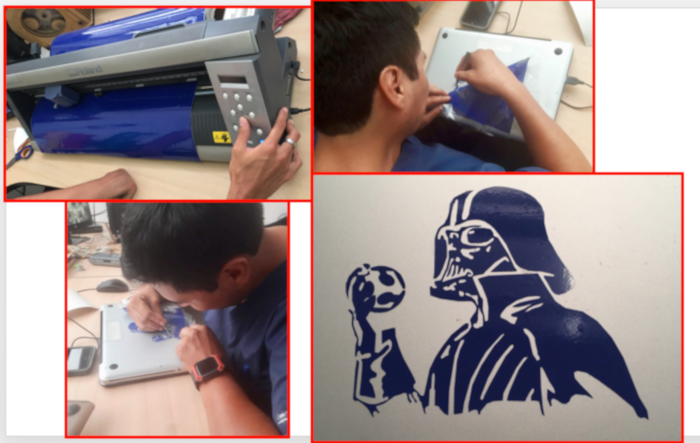
_
2.1 Laser Cutting
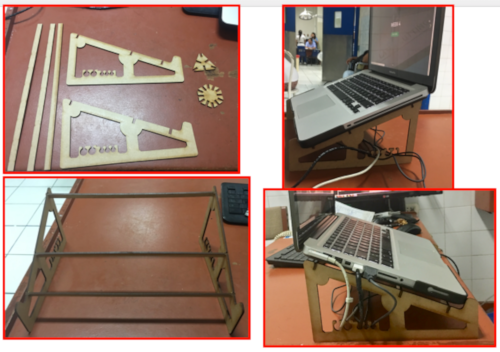
With the cutting laser, make two designs. The first design was to make a porta porta laptop. And the second design, pieces in the form of hexagon and triangle that allows union pressfit to create different forms.
2.2.1 Creation of design
The design of the laptop stand and the pieces (triangle and hexagon) was made in FUSION 360, in 2D.
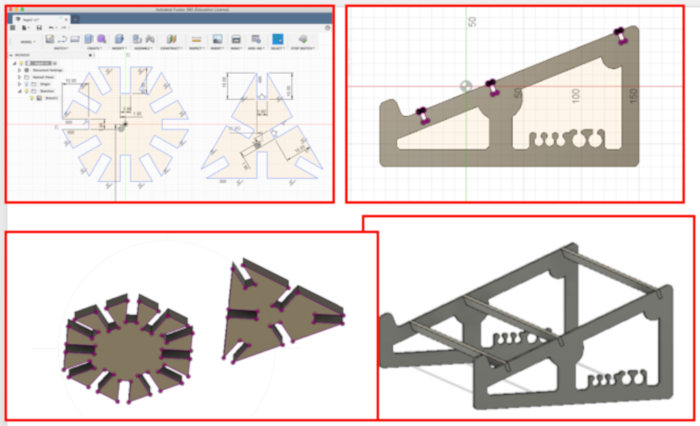
In FUSION 360, the file is saved in DXF format. Then this file opens in LIBRECAD (free software edition of lines). In the LIBRECAD we edit the lines and export it as SVG. Now we will have our file in SVG to be able to edit it in INKSCAPE.

_
In INKSCAPE, you have to edit the fills and borders of all the lines. Remember; The red lines = cut, Black lines = delineated letters.
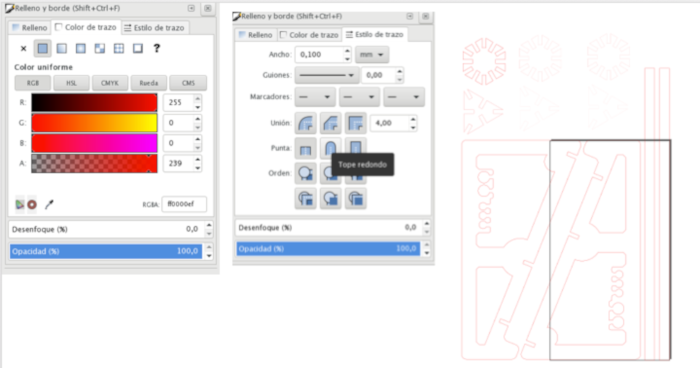
_
2.2.2 Laser Cutting of design
With the SVG file of the design, we load it into the laser cutting machine to make the design. The dimensions of the wood, the thickness of the wood and the distance of the laser tip to the surface of the wood must be taken into account. To make the coter use the
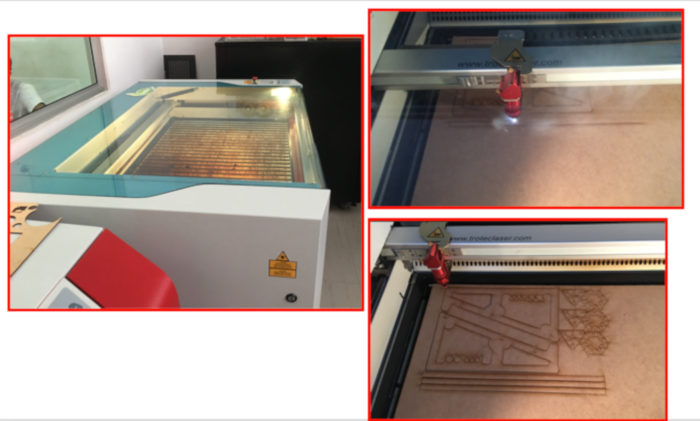
_
The assembly and use of the design. In addition the individual pieces (triangle and hexagon).
SELF EVALUATION
WHAT WORKED:
- The cut was made in vinyl and MDF (Medium-density fiberboard).
- I learned to calibrate and use the machine for the vinyl cuts and the laser cutting machine.
- I learned the parameters to get press fit couplings.
WHAT DID NOT WORK:
- In the laser cutting machine, you can not make cuts with other types of materials.
THINGS TO IMPROVE:
- Learn to control my time better
Contact Me
Feel free to contact me via email or phone.
 FabAcademy 2019