Week 6: 3D Printing
Assignment
BRAINSTORMING
Softwares
 Skanect - To use with microsoft Kinnect to 3D scan
 Meshmixer - Audesk software for quick and easy 3D edit
 Cura - Free software to set up a file to use with your 3D printers.
**3D printing is different from the other digital fabrication machines that we use in that it builds on layers, not cut out in layers. Machines like laser cutters and cnc machines are done subtractively, cutting away from solid. 3D printing does it additively and can do convexity as well as concavity unlike the other machines.**
Characterizing your Machine
For group assignment we were to characterize our machine.
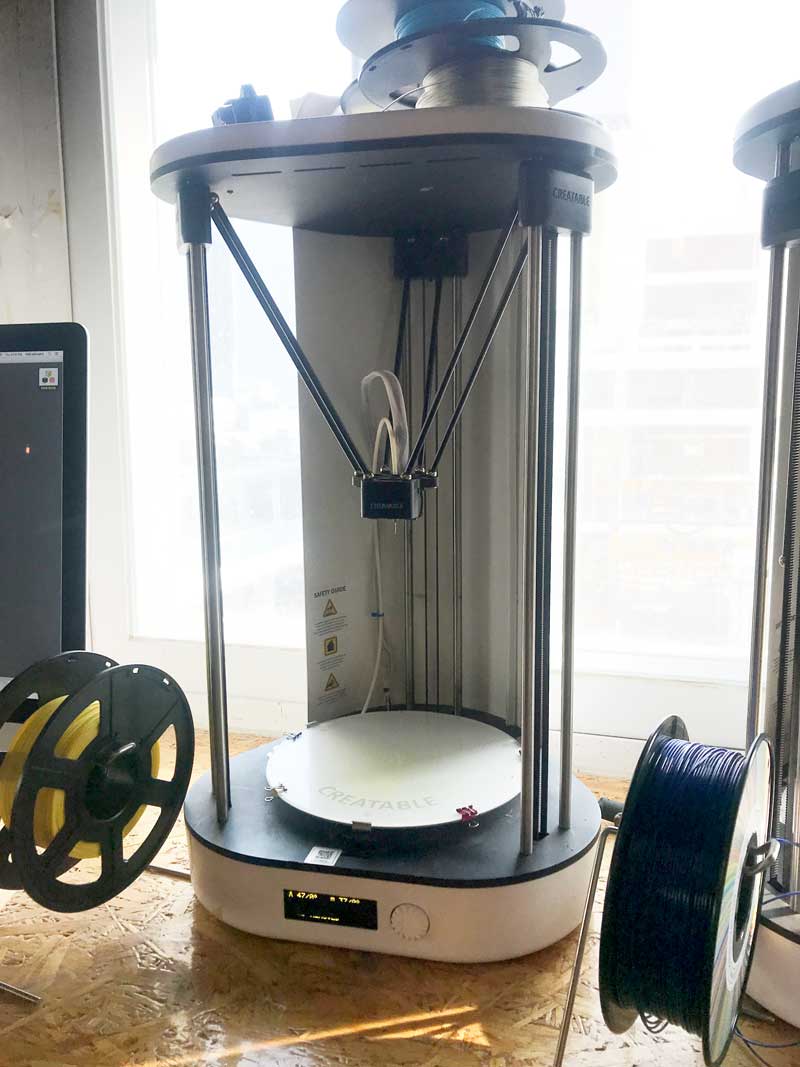
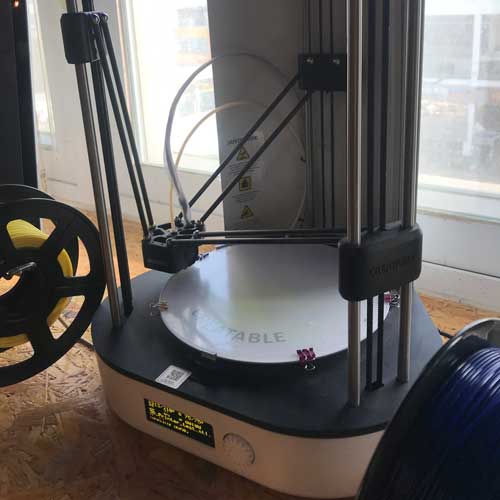
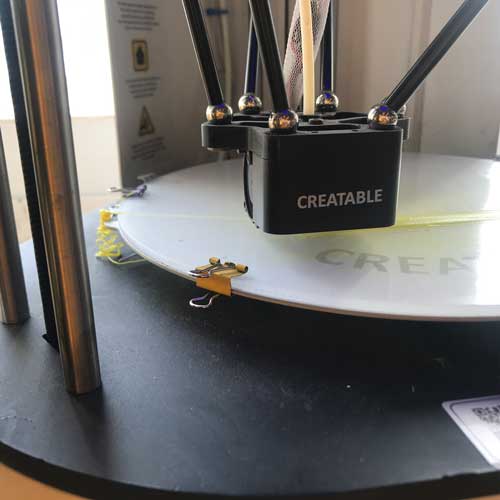
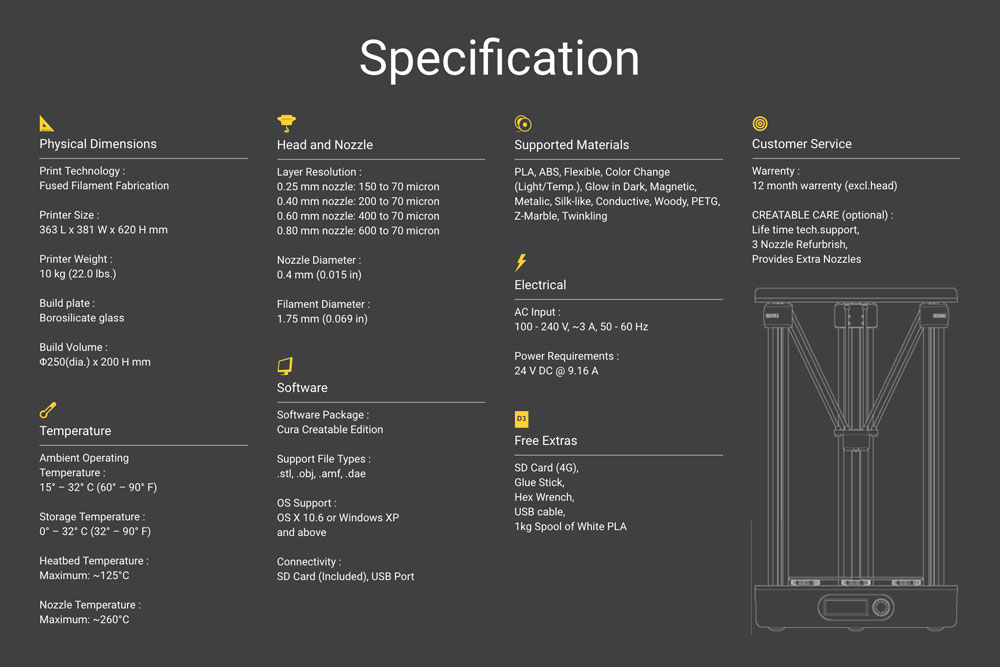 The machine we have at Fab Lab Seoul are Creatable D3 from Creatable Labs in Korea. we have about 12 of these machines. It uses SD card input. ** One thing that I found out later from messing with the machine was that the nozzle is held in place with magnetic ball bearings, so it is easy to assemble and disassemble. which was pretty cool.
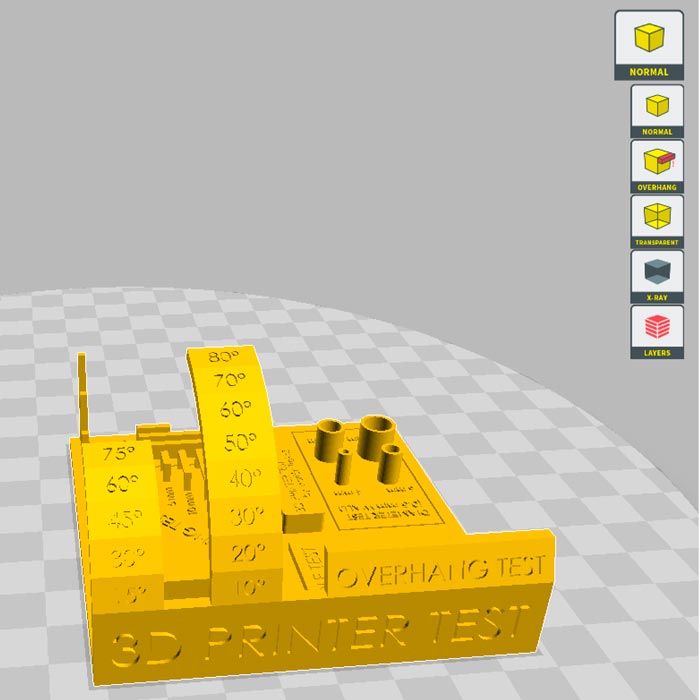
 I downloaded a 3d print test .stl file from thingiverse (link on the side bar).
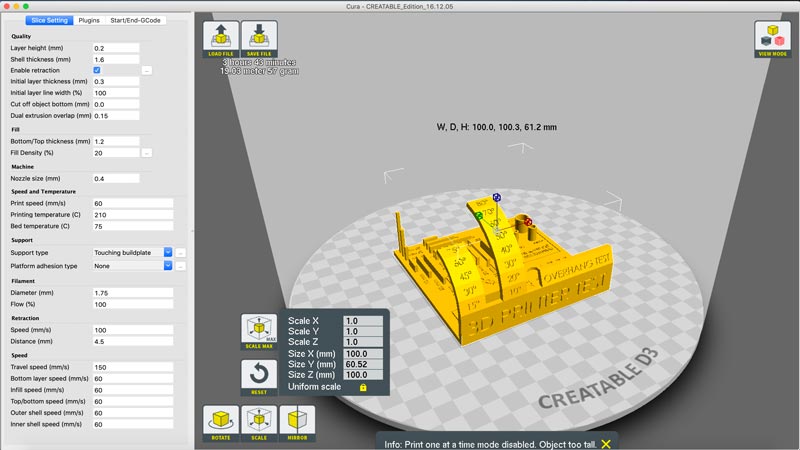
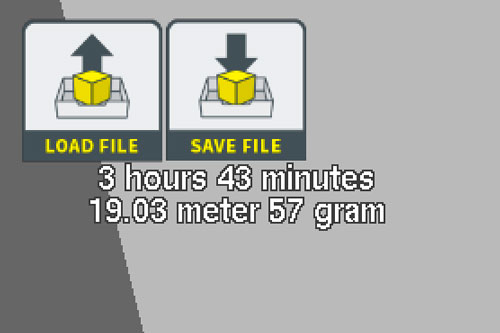 and loaded it up on CURA by clicking the load file on the interface, or opening by dragging the file. once loaded, it will show you how long the print will take as well as the length of the filament needed.
 On the bottom side of the interface, are your file adjustments.
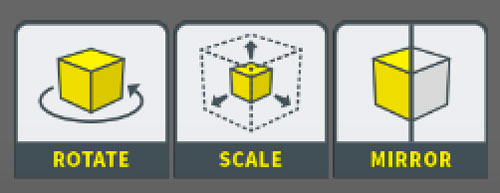
 If you happen to want to make changes to the object, you can do
the rotation orientation as well as size and mirror.
The size changes in scale.
 the box on the right side of the interface helps you check your print in different settings
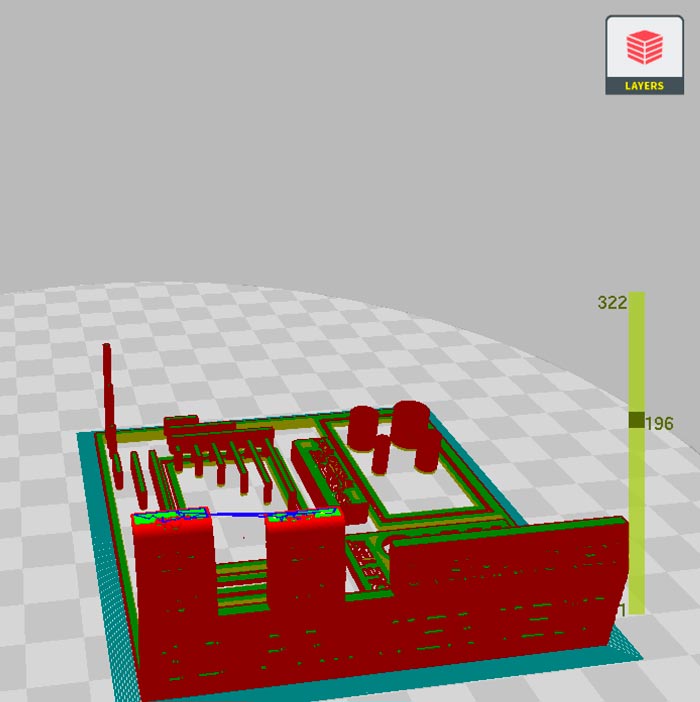 Check your layers by moving the cursor up and down to see how the it is laid out in each layer.
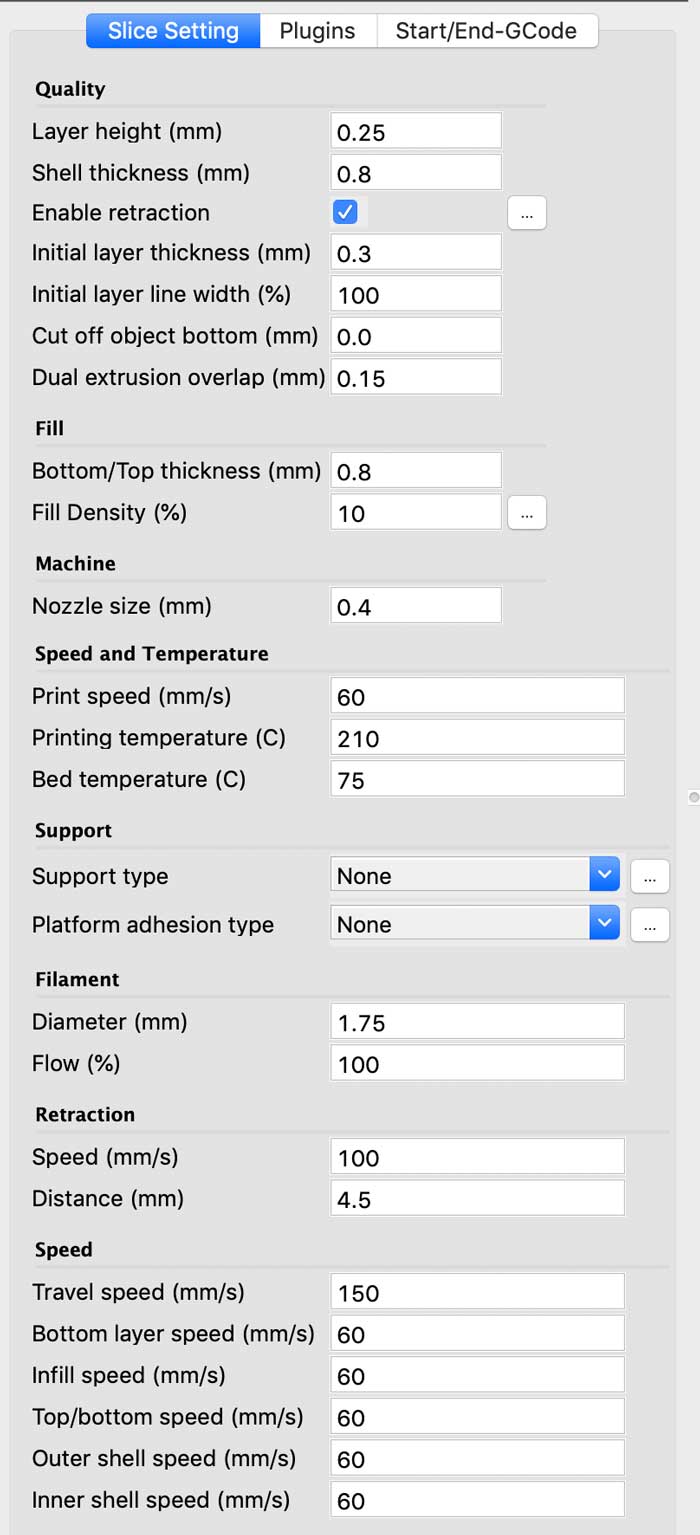 on the left side are the changes you can make to your printing setting
Quality
The layer height is how high each layer is, the height affects how smooth your surface is.
Shell thickness is the thickness of the outer walls of the print.
This depends on the size of your nozzle. so make the number an exponent of the nozzle size
Fill
Bottom/Top thickness is the thickness of the bottom and top outer walls.
Fill density is how solid the print will be on the inside.
(we rarely make it fully solid)
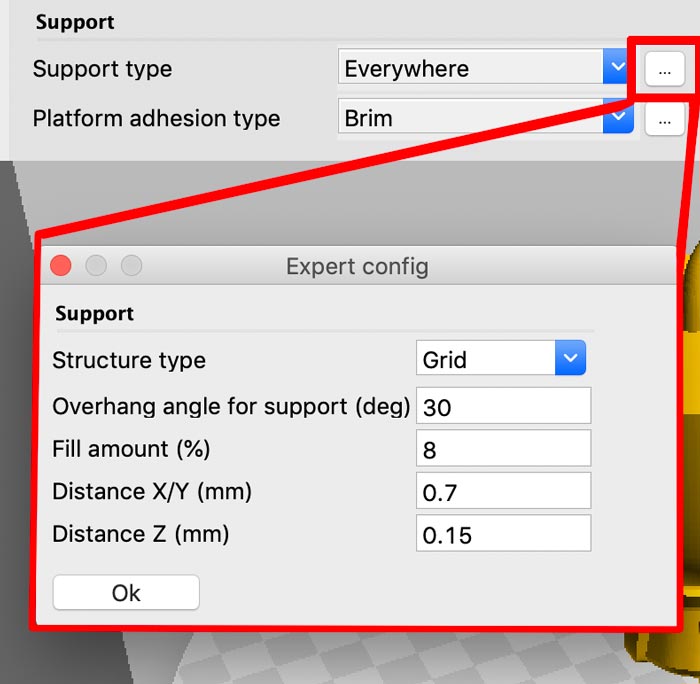
Support
This one is only if you need them. For the Sample print, I didn't need one, but for some prints with big overhang or specific orientation, you need to have supports to make sure they come out. You can change the specification by clicking the three dot button on the side.
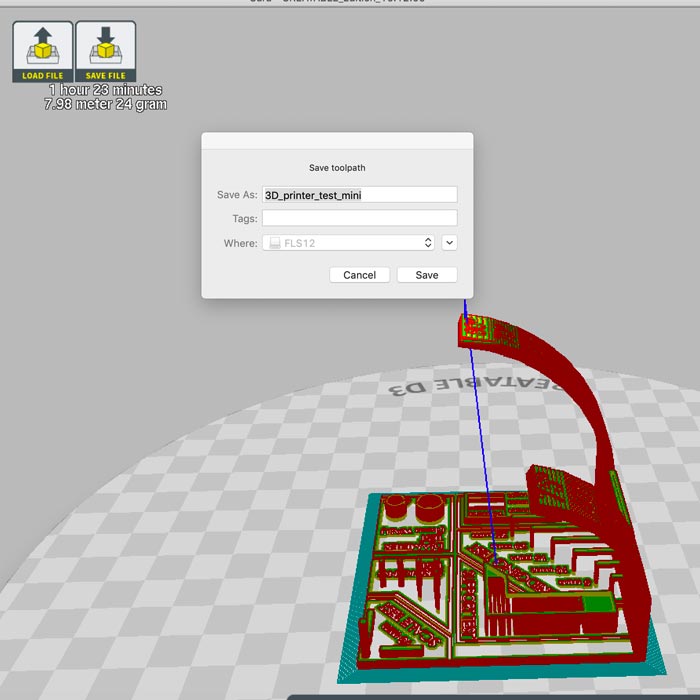
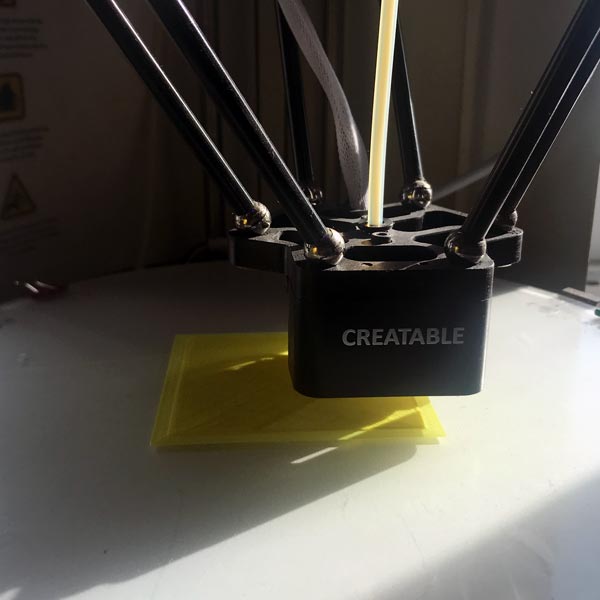
Once you are done and checked all the settings, click on the "save file" button and save it to your SD card.
Once you start printing, the bed and the nozzle will start to heat up. When it gets to the right temperature, it will go to the side to poop out a little bit of the filament to get it running and start your print.
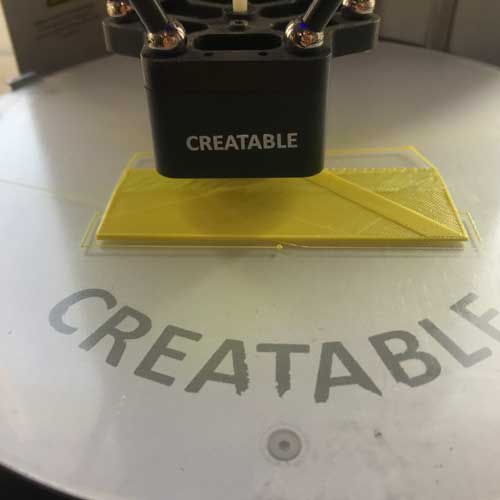

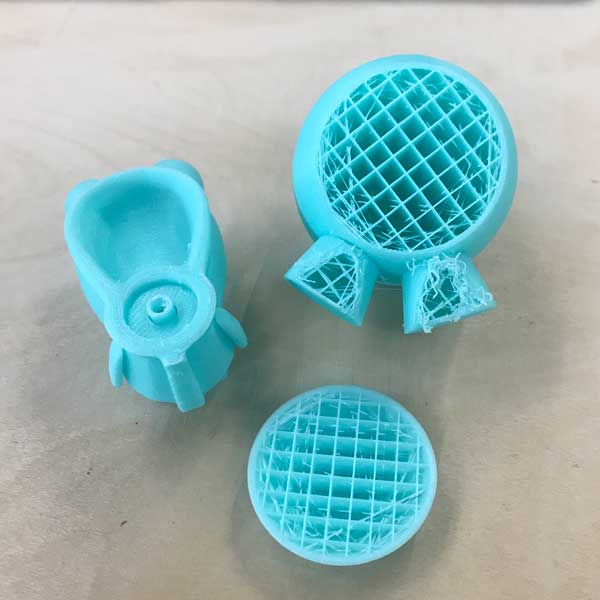
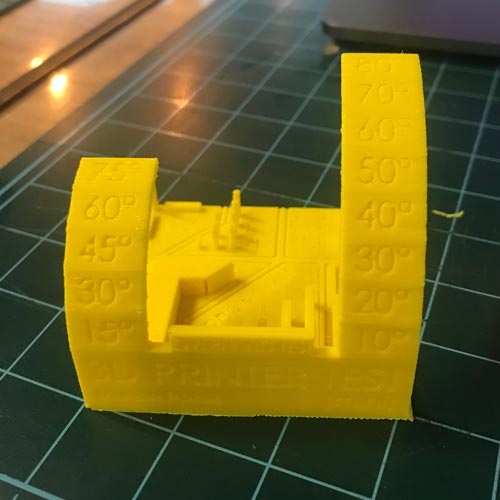
We were advised to stay watch the printing process for the first 10 minutes to check that it was going correctly. The first sign of a problem can be seen when the brim and initial layer is made. Like in the photo above, I knew that my print was going to be wrong because the design has a flat square bottom, but the initial layer and brim was not. (I went on with it anyways just to see)

While the print finished well, we can see that the bottom is not flat, therefore unstable, and so the entire print was a little bit off.
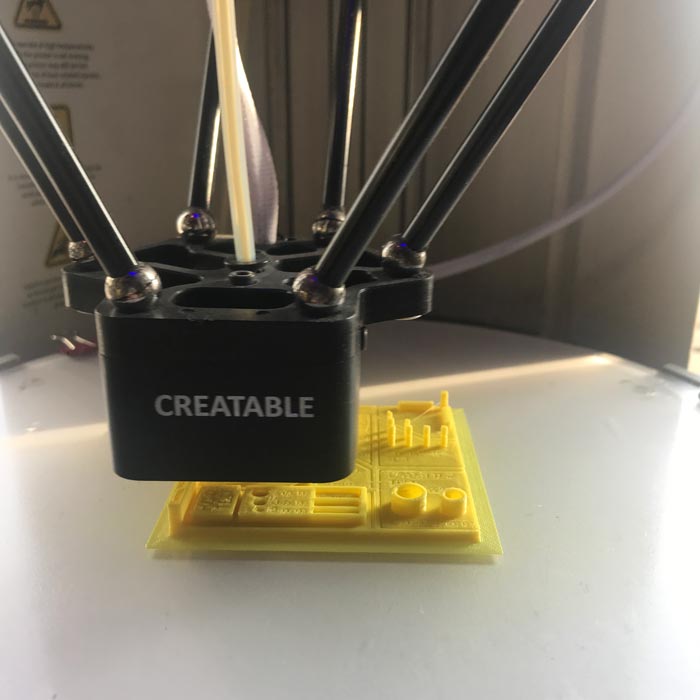
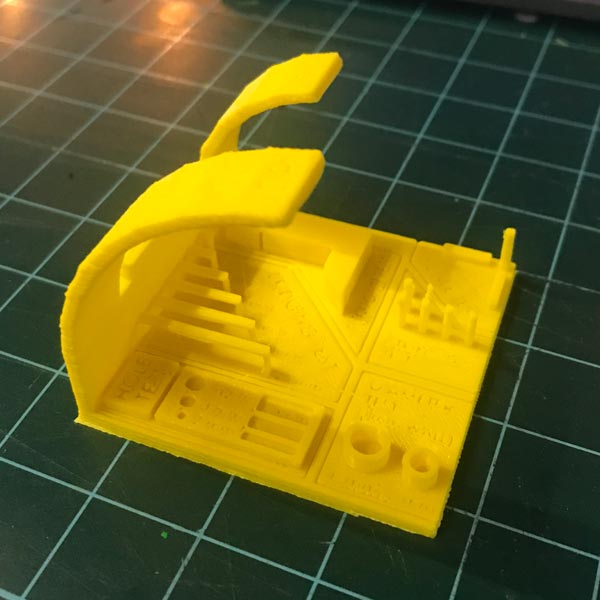
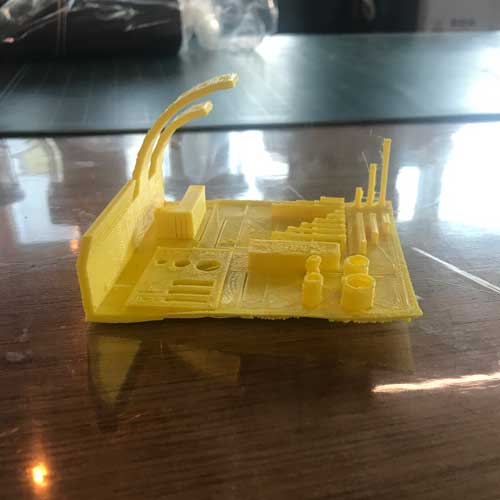
With the 3D printer test, I could check:
Scan Yourself
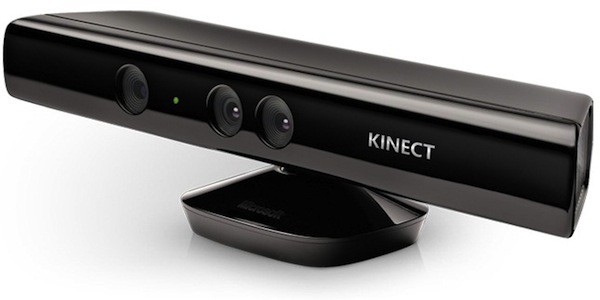
Kinnect uses infrared laser light with speckled pattern to first map out the depth
and then analizes the pattern (structured light) using depth from focus (astigmatic lens)
and depth from stereo (parallax).
Check the links on the left "links" bar for more detailed explanation on how Kinnect works.
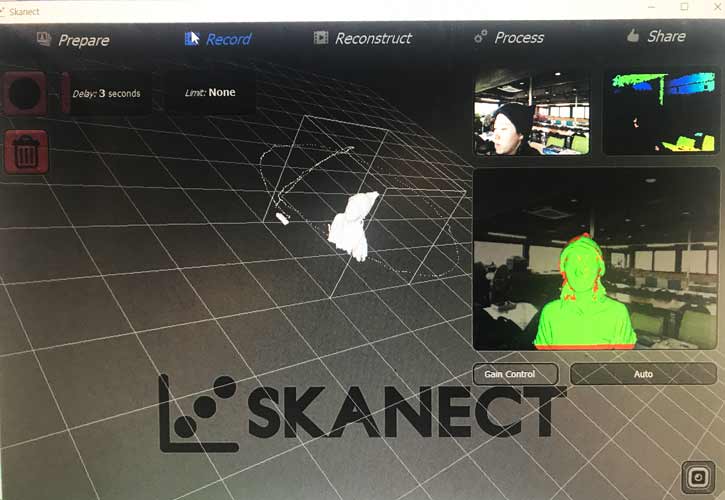
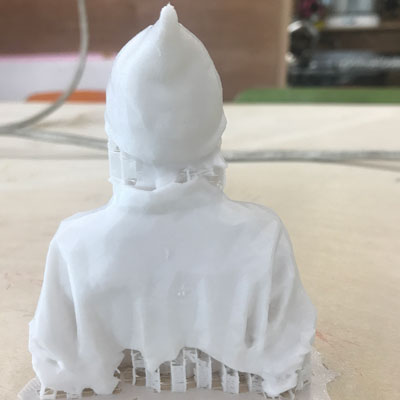
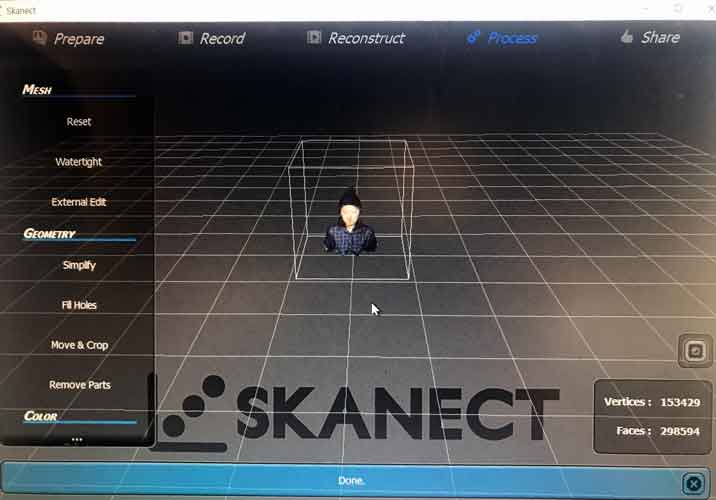 I was in the lab by myself, so I had to scan by myself by slowly spinning in place while the scanner was on. Skanect had different rendering functions in itself and even projected the picture onto the 3D scan.
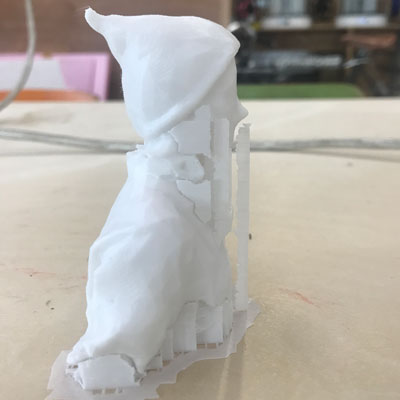
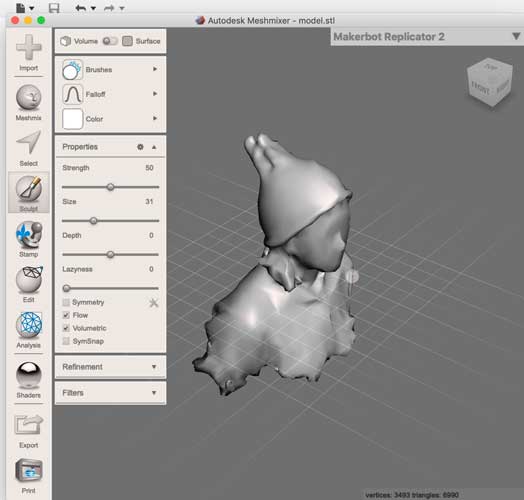 Then I loaded the saved file on Autodesk Meshmixer.
 For me, there weren't any holes (that comes from bad scanning) like some people did,
but I had extra parts on my head from not moving evenly enough, and my nose was off center.
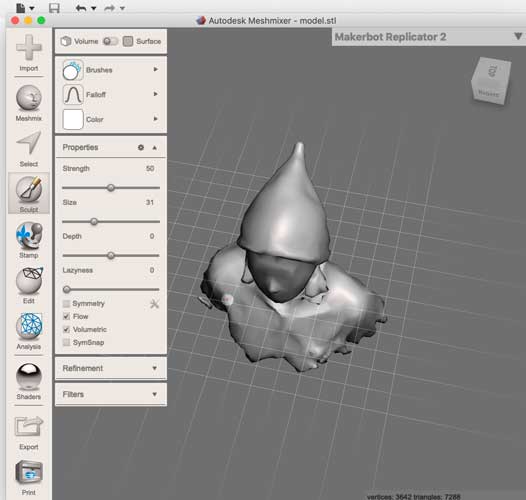
 "Sculpt" tools are used to smoothen, pull, inflate and deflate parts using brushes.
Using these, I was able to fix the weird parts, make the edges of the hat around my head
more apparent and fixed my nose.
You can adjust the size and strength of the tool from the tool bar for easy use.
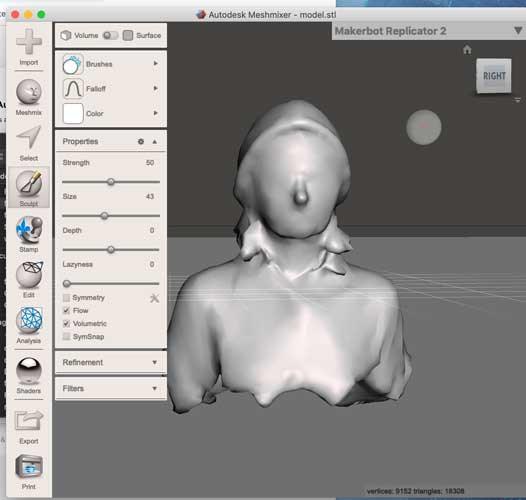
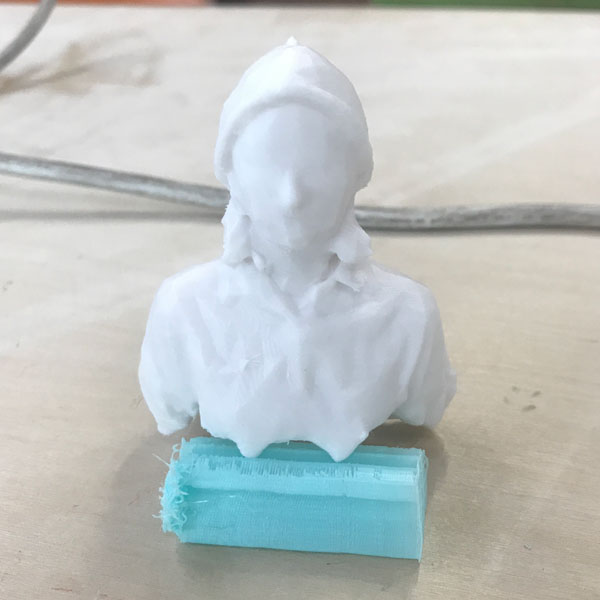
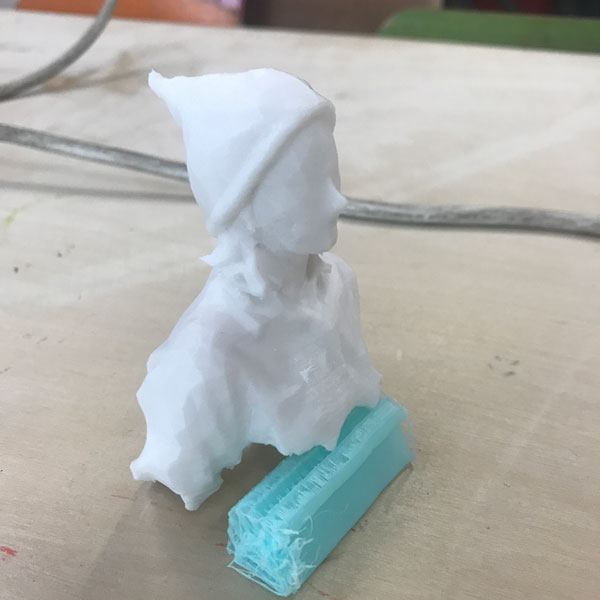
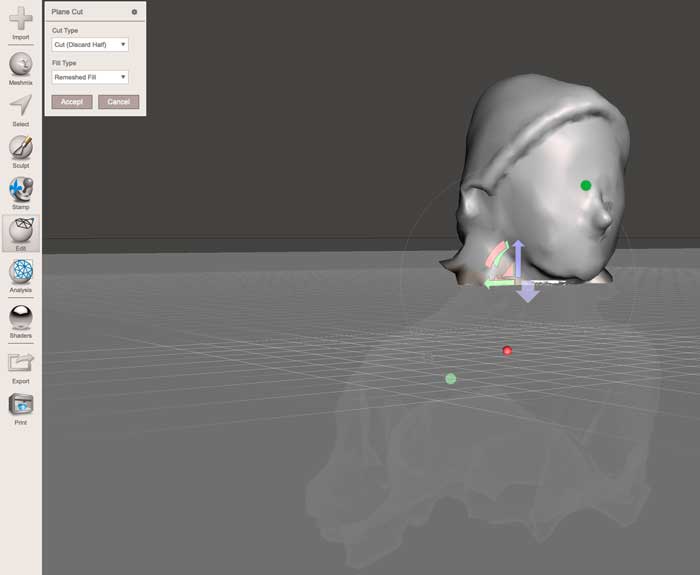 In "Edit" option, the tool I found useful was the plane cut which you can use to make flat bottoms evenly.
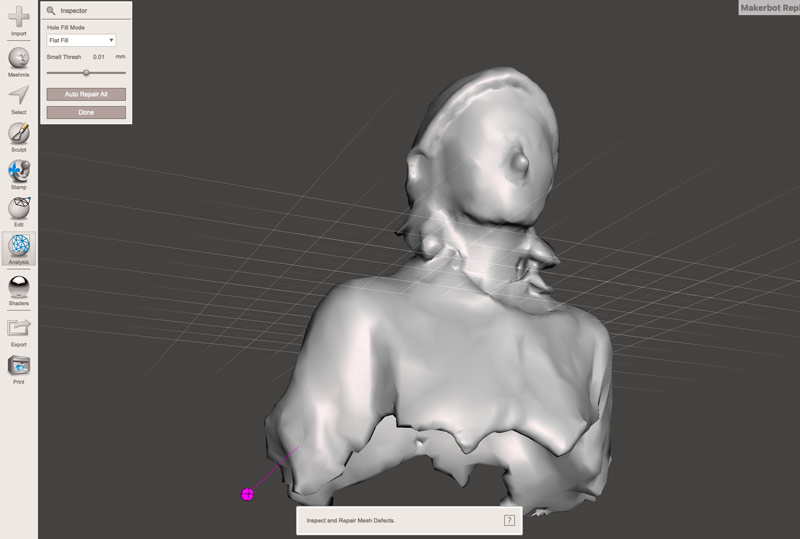 With "Analyze" option you can use inspector tool to fill any holes you might have,
 and delete any extra mesh that might have accidentally made it to your scan.
 Finally, I use cura to and started printing. I kept the uneven bottom to make it look like a bust.
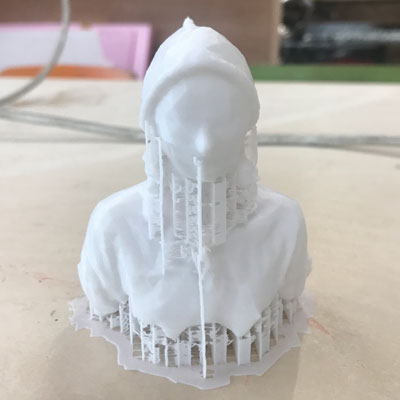
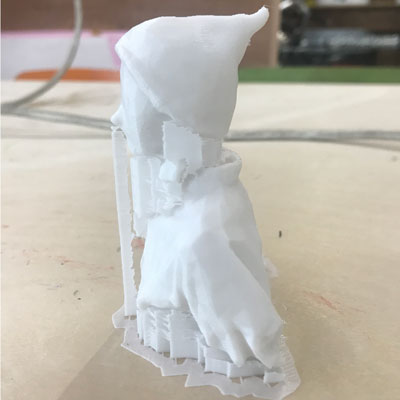
 In restrospect, I don't think I needed the support everywhere. I could have just done the support for the parts that build from the bed. but it printed quite nicely, so no complaints here.
3D Print other things
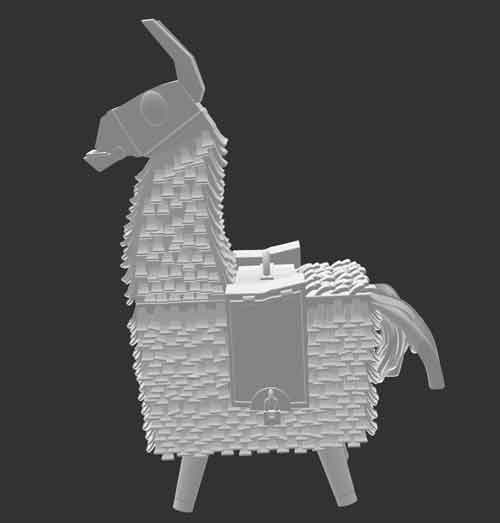
My first 3d print practice was to print something with a bit of texture on the surface.
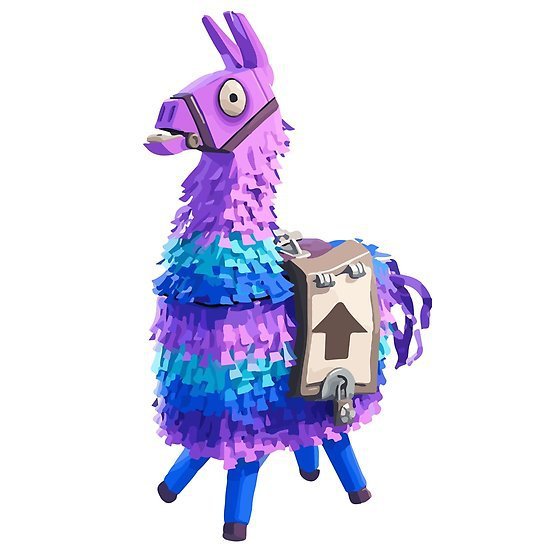
So I chose the piñata loot llama from the game Fortnite.
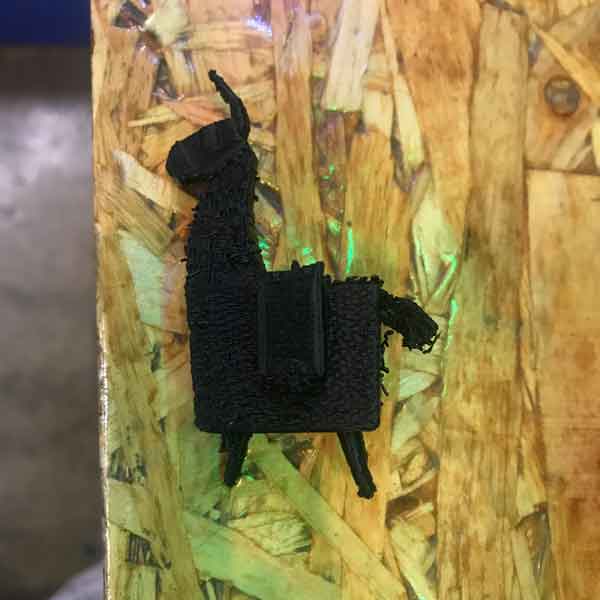
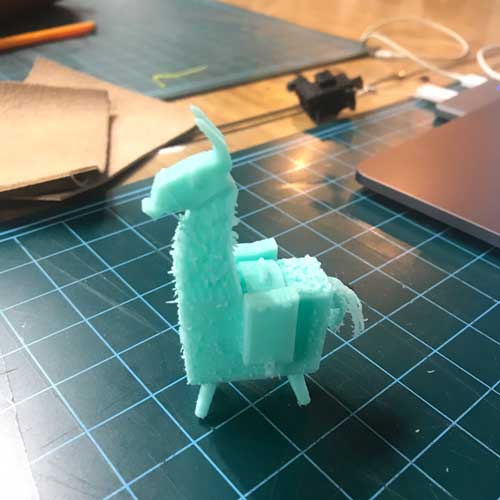 The first print done with support setting for 'touching buildplate'. so a lot of the fuzz was lost along with the supports. The second print was better with support for "everywhere"
NEXT, I wanted to make a 3D print with joints so that it moves without assembly.
Because 3D printing is an additive way of computer controlled manufacturing that lets me do convexity and concavity at the same time, I can print two objects connected with joints by using supports that can later be removed.
The first print done with support setting for 'touching buildplate'. so a lot of the fuzz was lost along with the supports. The second print was better with support for "everywhere"
NEXT, I wanted to make a 3D print with joints so that it moves without assembly.
Because 3D printing is an additive way of computer controlled manufacturing that lets me do convexity and concavity at the same time, I can print two objects connected with joints by using supports that can later be removed.
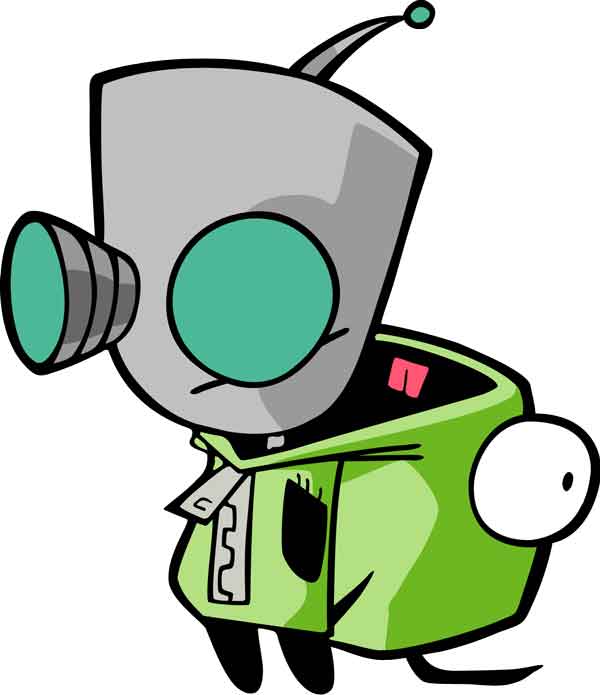 I wanted to make robot "Gir" from cartoon "Invader Zim"
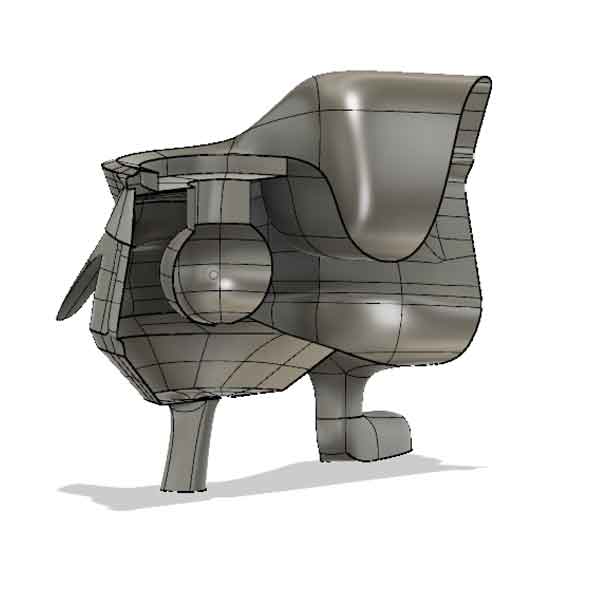
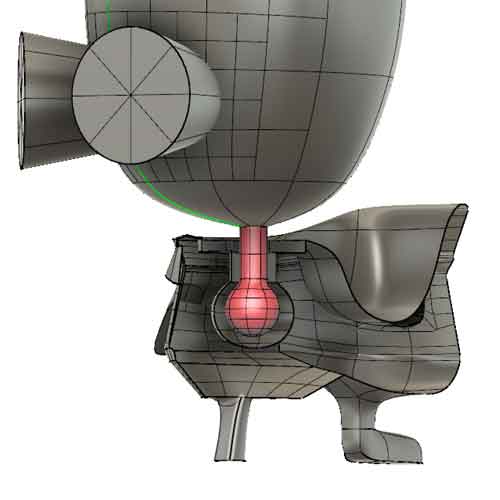 One important thing about my design is that it can only be made by 3D printing.
 joints like this can be created by additive printing method.
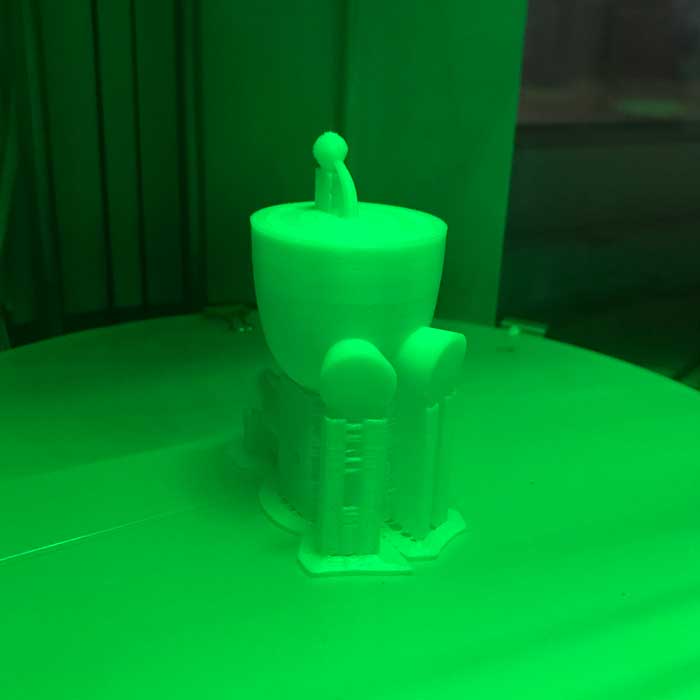
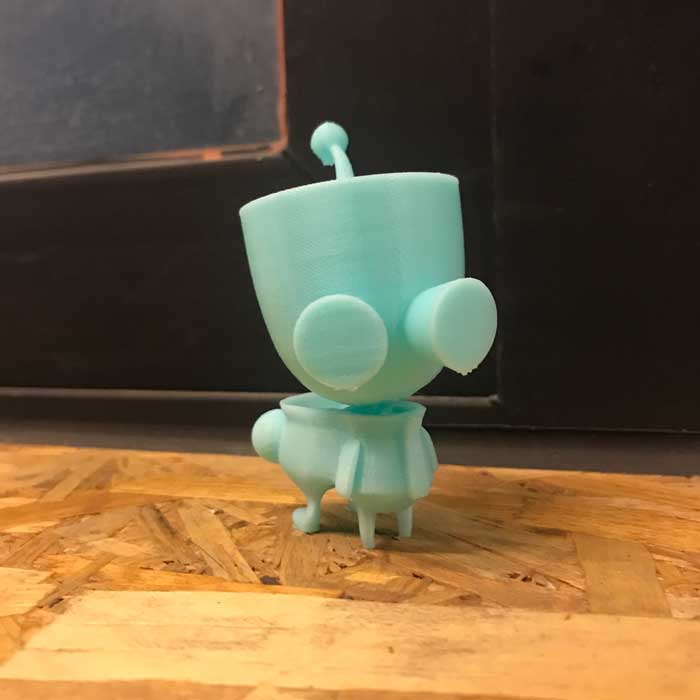 I was able to make it just fine from Fusion360 and it printed well. Next I wanted to make it bigger. But that takes some time, so we'll see.