Quentorresaurus
A character-driven PCB inspired by Quentin's dinosaur concept, adapted as a custom board page following the KiCAT project format.
Fabrication Files
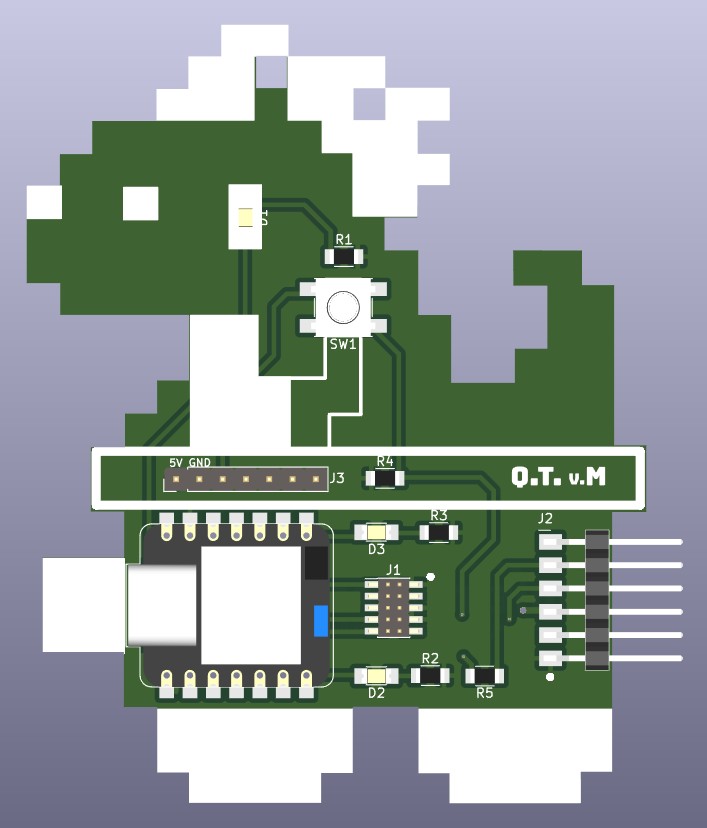
Board Overview
Trace Export (pending)
Cutout Export (pending)
Bill of Materials (BOM)
Core components used for the Quentorresaurus board build.
| Item # | Ref. | Component | Description | Package |
|---|---|---|---|---|
| 1 | M1 | XIAO microcontroller | Main MCU for board logic and input/output handling | XIAO module |
| 2 | R* | Resistors | Pull-up and input conditioning as required by pads/signals | 1206 |
| 3 | C* | Capacitors | Decoupling and power stabilization for the board | 1206 |
Assembly
Start by cleaning the milled PCB and verifying continuity between traces. Solder low-profile components first (resistors and capacitors), then place connectors and the microcontroller module.
Before powering the board, inspect for solder bridges around fine-pitch pads and confirm ground/power rails are not shorted.
Programming Process
The board can be programmed with MicroPython or Arduino workflow depending on the selected XIAO variant. Flash the firmware in bootloader mode, upload required libraries, then save your application code as the startup script.
This page keeps the same documentation flow as KiCAT: hardware build, firmware setup, and behavior test in one place.
Project Demo

Test Code Snippet
void setup() {
  pinMode(LED_BUILTIN, OUTPUT);
}

void loop() {
  digitalWrite(LED_BUILTIN, HIGH);
  delay(300);
  digitalWrite(LED_BUILTIN, LOW);
  delay(300);
}