
The individual assignment of this week is to write an application that interfaces a user with an input &/or output device that you made.
I decided to create an application that can help me to read and interpret the data coming from the temperature sensor (BME280 ) connected in my final project (neonatal infant incubator) remotely. additionally, it will facilitate nurses and doctors to monitor baby incubator remotely and getting data from sensors in real time.
To implement my hardware, I used ESP8266, which has an integrated Wi-Fi MAC/BB/RF/PA/LNA, on-board antenna. The module supports standard IEEE802.11 b/g/n agreement, complete TCP/IP protocol stack. Users can use the add modules to an existing device networking, or building a separate network controller. ESP8266 is high integration wireless SOCs, designed for space and power constrained mobile platform designers. It provides unsurpassed ability to embed Wi-Fi capabilities within other systems, or to function as a standalone application, with the lowest cost, and minimal space requirement.
ESP8266EX is among the most integrated WiFi chip in the industry; it integrates the antenna switches, RF balun, power amplifier, low noise receive amplifier, filters, power management modules, it requires minimal external circuitry, and the entire solution, including front-end module, is designed to occupy minimal PCB area.
Features
According to the datasheet these are network and communication features:
- 802.11 b/g/n
- Built in Client-Server Mode
- 400 Meters Working Distance in Open Area (100 Meters Indoors)
- On Board 2.4 Ghz PCB Antenna
- Wi-Fi 2.4 GHz, support WPA/WPA2
- SHT11: Pin 11 (Data), Pin 10 (SCK)
- +20dBm output power in 802.11b mode
- Integrated TR switch, balun, LNA, power amplifier and matching network
- Integrated TCP/IP protocol stack
- FCC, CE, and ROSH certified
- Support STA/AP/STA+AP operation modes
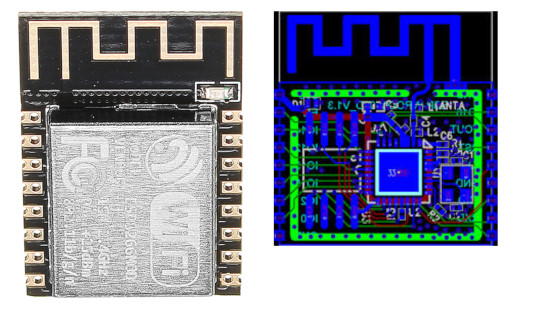
ESP8266 Board with PCB antenna
System Architecture
I created a local web server with ESP12E, it will connect to Local Wifi network (I used Huawei mobile router), then I can read the data from BME280 sensor (temperature and Humidity) through my laptop.
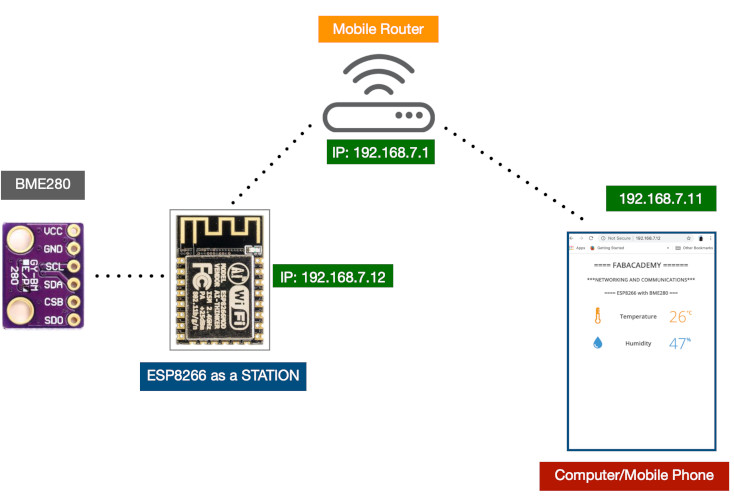
NodeMCU as TCP Server using Wi-Fi STA mode
NodeMCU has Station (STA) mode using which it can connect to existing wi-fi network and act as TCP server with IP address assigned by that network. NodeMCU gets IP address from Wi-Fi router to which it is connected. With this IP address, it can act as a TCP server to which any wi-fi device can connect within that network.
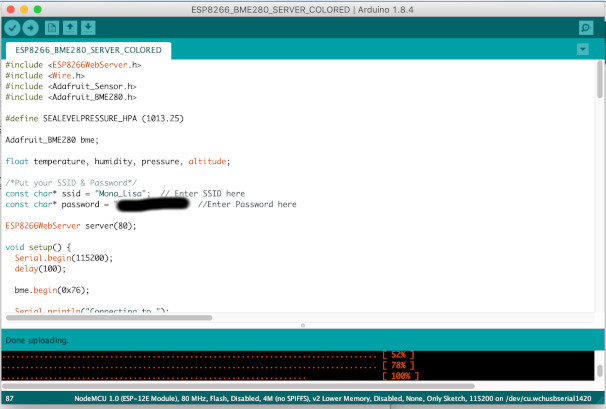
ESP8266 Web Server with Arduino IDE
This ESP8266 Web Server is mobile responsive and it can be accessed with any device that as a browser in your local network.
The Transmission Control Protocol (TCP) is standard transport layer internet protocol which used in establishing and maintaining communication in between server and client. NodeMCU has TCP/IP APIs available using which we can implement TCP Server/Client protocol on it. NodeMCU has Wi-Fi functionality available on board. With this Wi-Fi functionality NodeMCU can connect to any wi-fi network as client or it can create a network to which other wi-fi enabled devices can connect.
Installing ESP8266 Board in Arduino IDE
The ESP8266 community created an add-on for the Arduino IDE that allows you to program the ESP8266 using the Arduino IDE and its programming language. more details.
ESP8266 as HTTP Server using WiFi Station (STA) mode
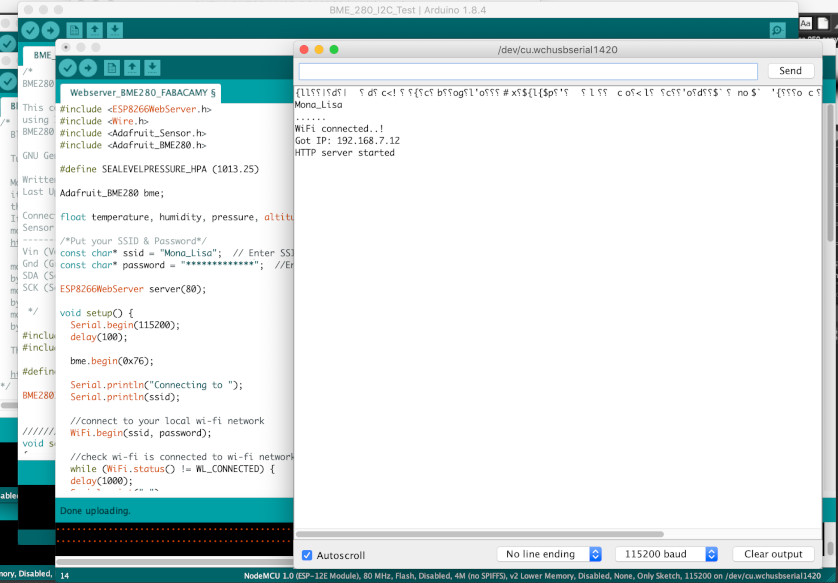
Before I head for uploading the sketch, I made some changes to make it work for me. I modified the SSID and the password variables with my network credentials, so that ESP8266 can establish a connection with my existing network.
Accessing the Web Server in STA mode
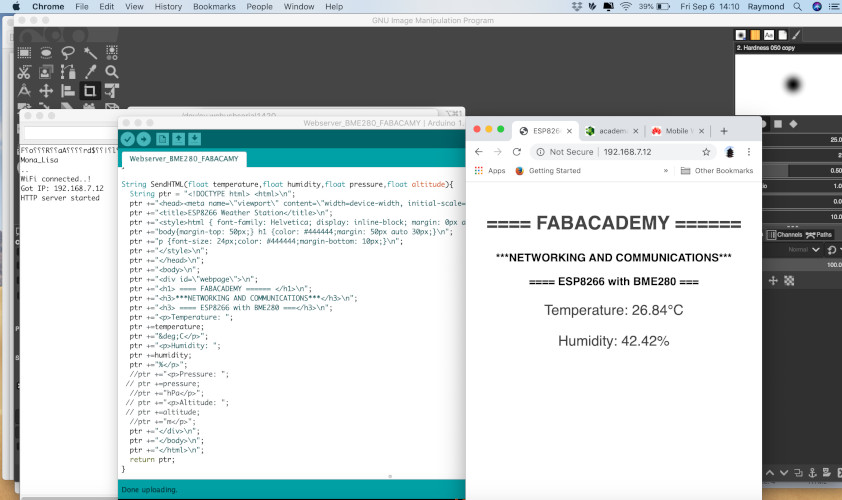
After uploading the sketch, open the Serial Monitor at a baud rate of 115200. And press the RESET button on ESP8266. If everything is OK, it will output the dynamic IP address obtained from your router and show HTTP server started message, this case is 192.68.7.12
Reading data from BME 280 sensor
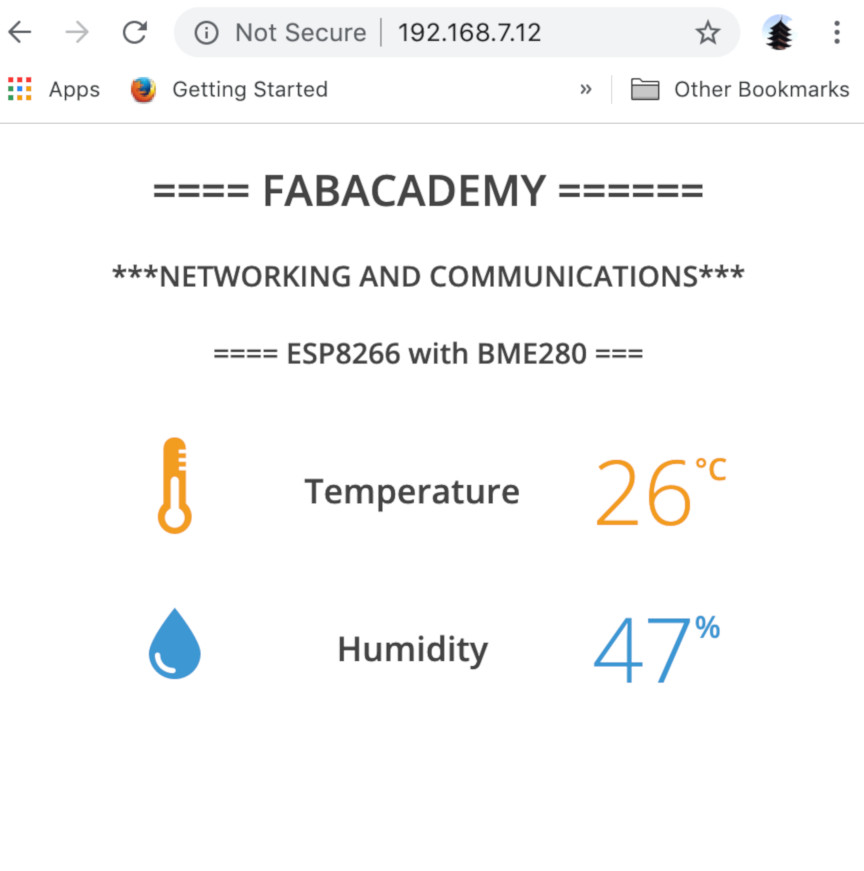
Using Laptop (connected to wifi), type IP address 192.168.7.12 to Web browsers. It will show local web server of ESP12E, from this, you can read the data (Temperature and Humidity) connected on ESP12E .
By adding the icons used to display temperature, humidity with the help of the Scalable Vector Graphics changed the look of the web and now it looks more vibrant
Challenge
My board is working continuously for some time now and I see no issues. The problem with this set up is the data is transferred at a good speed, but while receiving the data is very slow. It takes quite a while to receive the data at the station side.
Schematic and circuit board
I used the same ESP8266 board designed for the input assignment for the Arduino IDE that allows you to program the ESP8266 using the Arduino IDE and its programming language. more details.